
TII FB with FC Subframe and rack & pinion.


Thread Starter
Junior Member
Joined: Mar 2011
Posts: 24
Likes: 0
From: Brighton UK
TII FB with FC Subframe and rack & pinion.
Howdy guys, I thought I would post up my project that I have been working on for almost a year now - but with a 7 month gap in the middle of next to nothing being done for various reasons. Summer is back here again (almost) so its time to crack on and get this baby done!
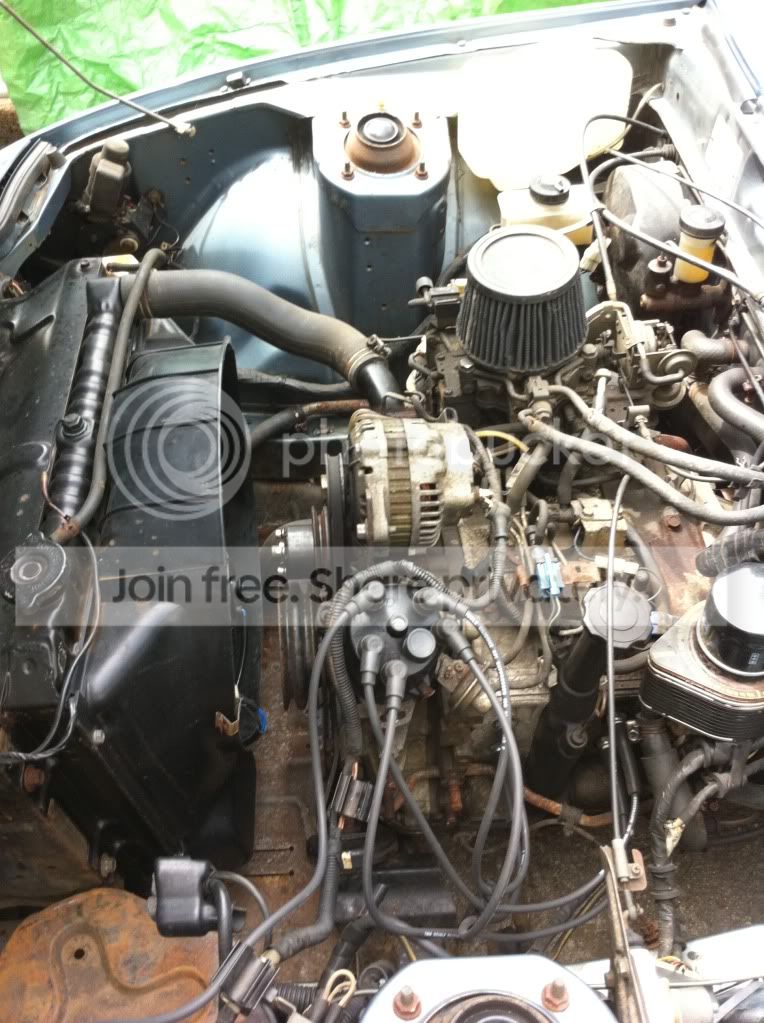
This is how she started:
Original engine bay

Bye bye 12a - sweet little runner
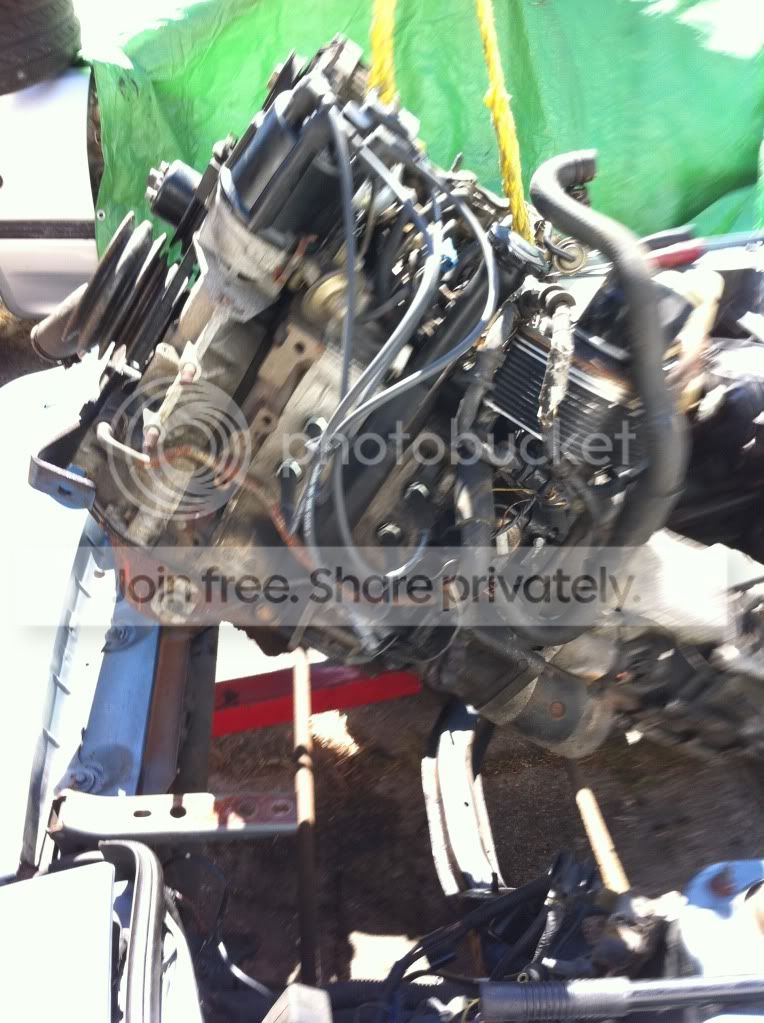
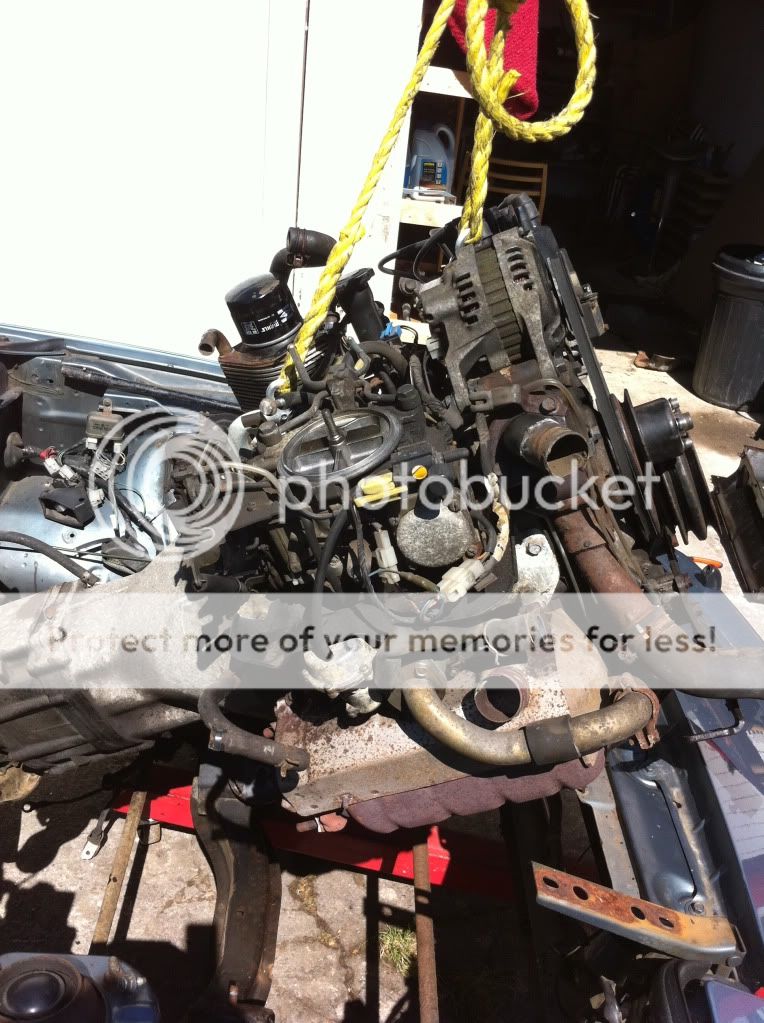
Lots of work to end up with this:

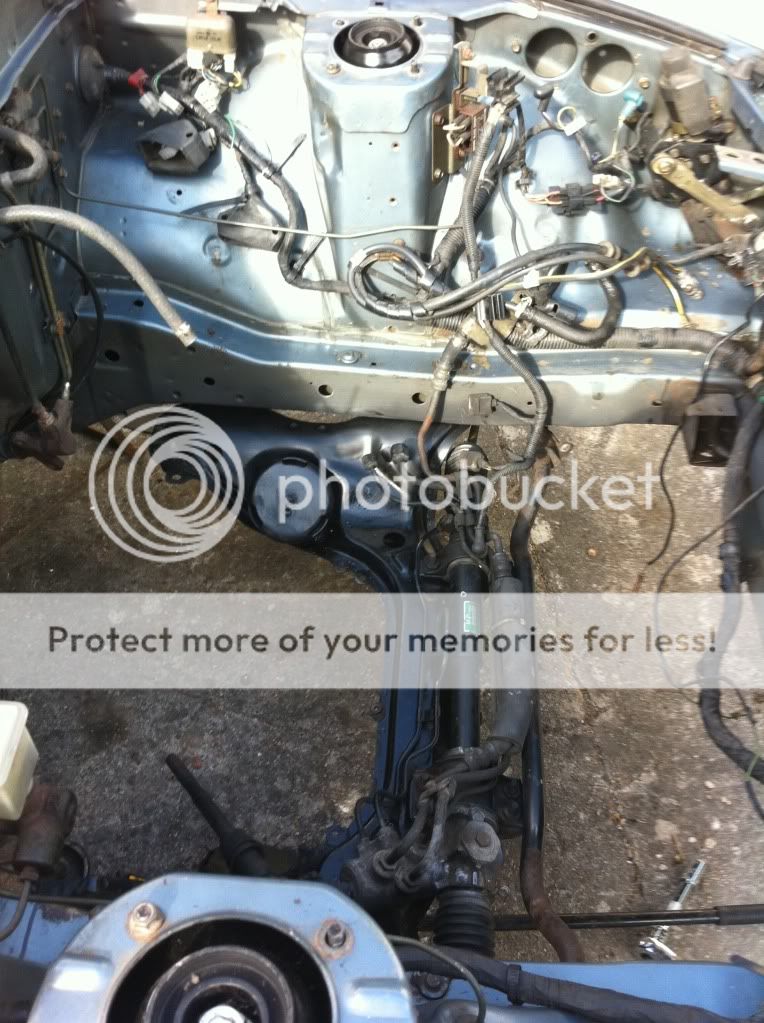
Result:


However - the above engine bay photos are only with the engine perched in there, I have a small problem - External 'gate fouls on the f'n steering box... (It is an FC kit so should have figured)
So I had 3 choices:
Get some headers and run it NA
Get a new manifold or get something customed.
Swap in FC subframe which has a powered rack and therefore more clearance, but loads more work.
This is how she started:
Original engine bay
Bye bye 12a - sweet little runner
Lots of work to end up with this:
Result:
However - the above engine bay photos are only with the engine perched in there, I have a small problem - External 'gate fouls on the f'n steering box... (It is an FC kit so should have figured)
So I had 3 choices:
Get some headers and run it NA
Get a new manifold or get something customed.
Swap in FC subframe which has a powered rack and therefore more clearance, but loads more work.
Thread Starter
Junior Member
Joined: Mar 2011
Posts: 24
Likes: 0
From: Brighton UK
So the title will tell you which option I went for.....
I had a dead S4 FC anyways and I got curious. It had the big 4 pot brakes and PS and since mine was a bit sloppy and hard to turn the wheel at parking speeds I thought I would crack it in for a laugh.


As you can see, the rim/tyre combo is too large and being so far forward, wont turn in the arch properly- this weekend should fix this little prob...
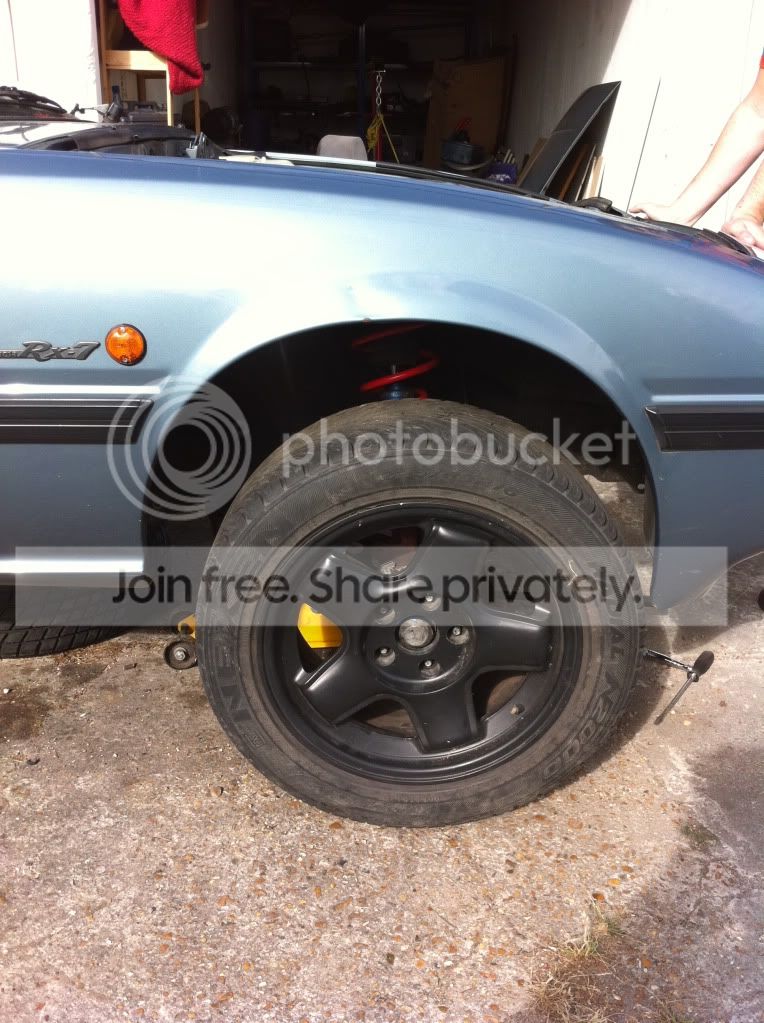
And clearly the offset is all wrong... and DEAD FC in the background.

I had a dead S4 FC anyways and I got curious. It had the big 4 pot brakes and PS and since mine was a bit sloppy and hard to turn the wheel at parking speeds I thought I would crack it in for a laugh.
As you can see, the rim/tyre combo is too large and being so far forward, wont turn in the arch properly- this weekend should fix this little prob...
And clearly the offset is all wrong... and DEAD FC in the background.
Thread Starter
Junior Member
Joined: Mar 2011
Posts: 24
Likes: 0
From: Brighton UK
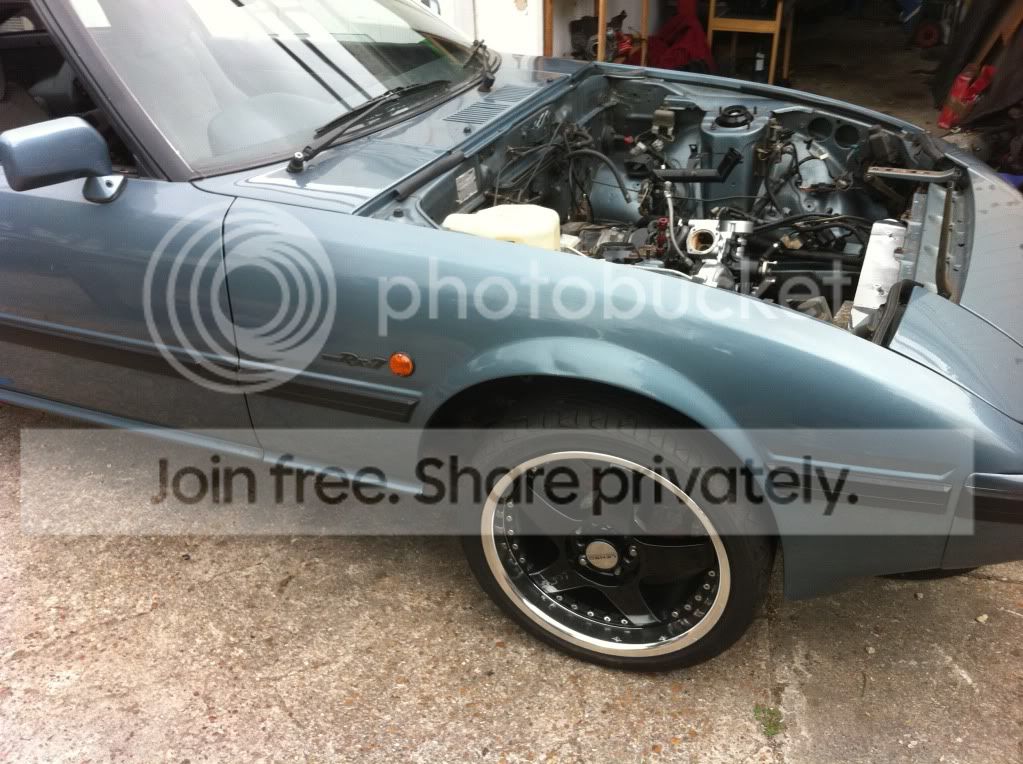
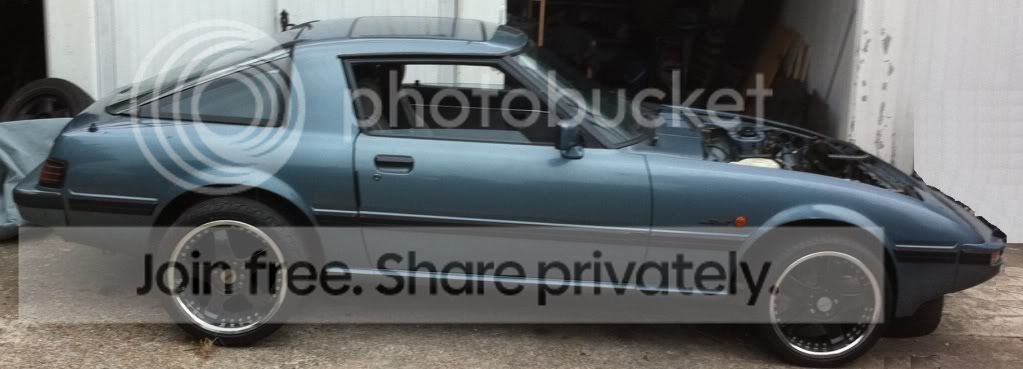
I got the rims off the (16x8) S4 FC, and the offset was just wacky, so I dropped in some Lenso RS5's and they fit a treat in a sensible 17x7
Still to come down a couple inches of course and the guards will be rolled, but I like the look straight away.
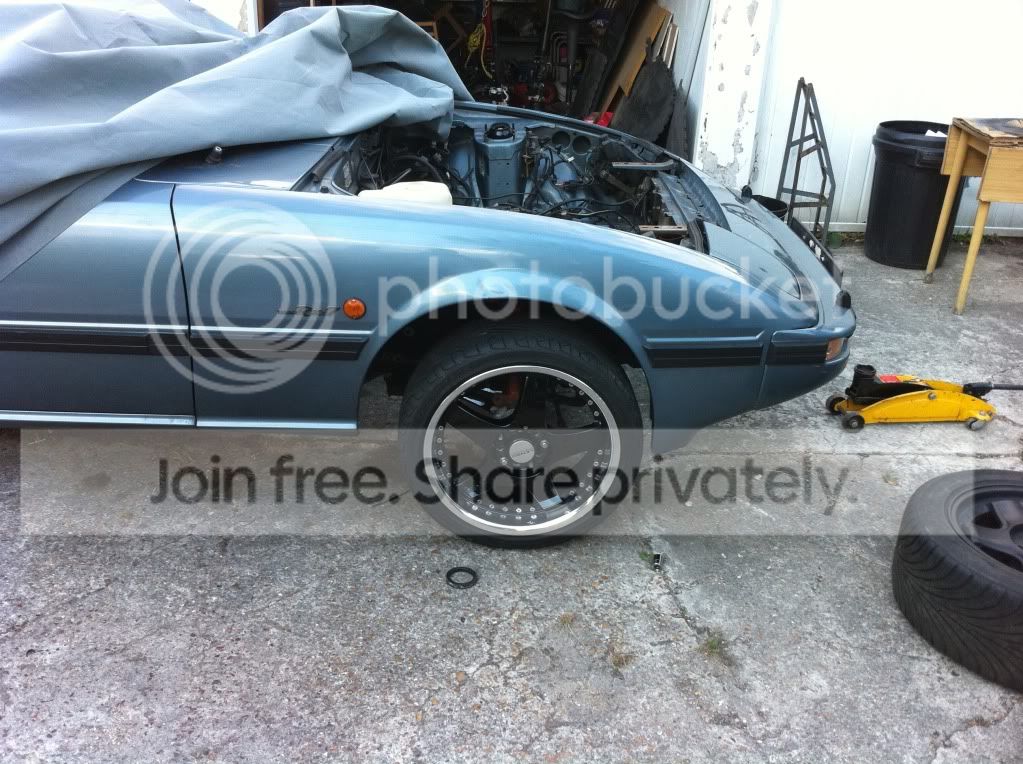

Still to come down a couple inches of course and the guards will be rolled, but I like the look straight away.
Thread Starter
Junior Member
Joined: Mar 2011
Posts: 24
Likes: 0
From: Brighton UK
I stripped the top half of the engine off (Wacky japanese fuel system) and mocked it all up at this point.
I had to swap the sump and front cover back to the S5/FC versions which was annoying... but it does mean that if the motor pops, a standard FC engine will drop straight in.
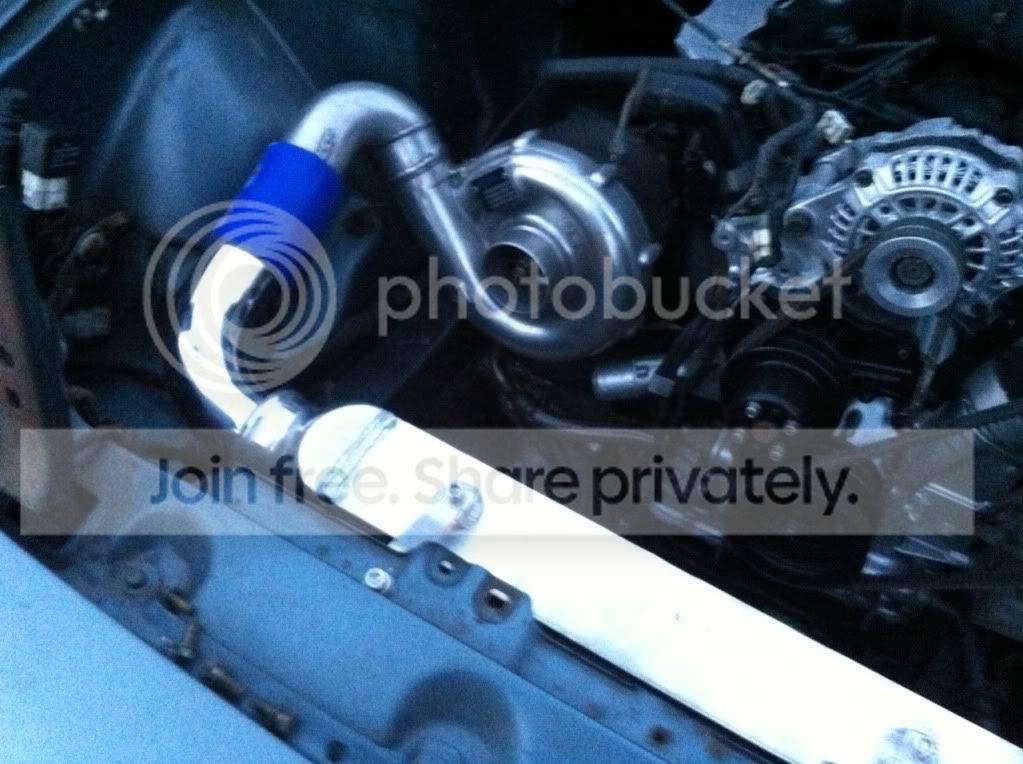
The turbo now fits well too:
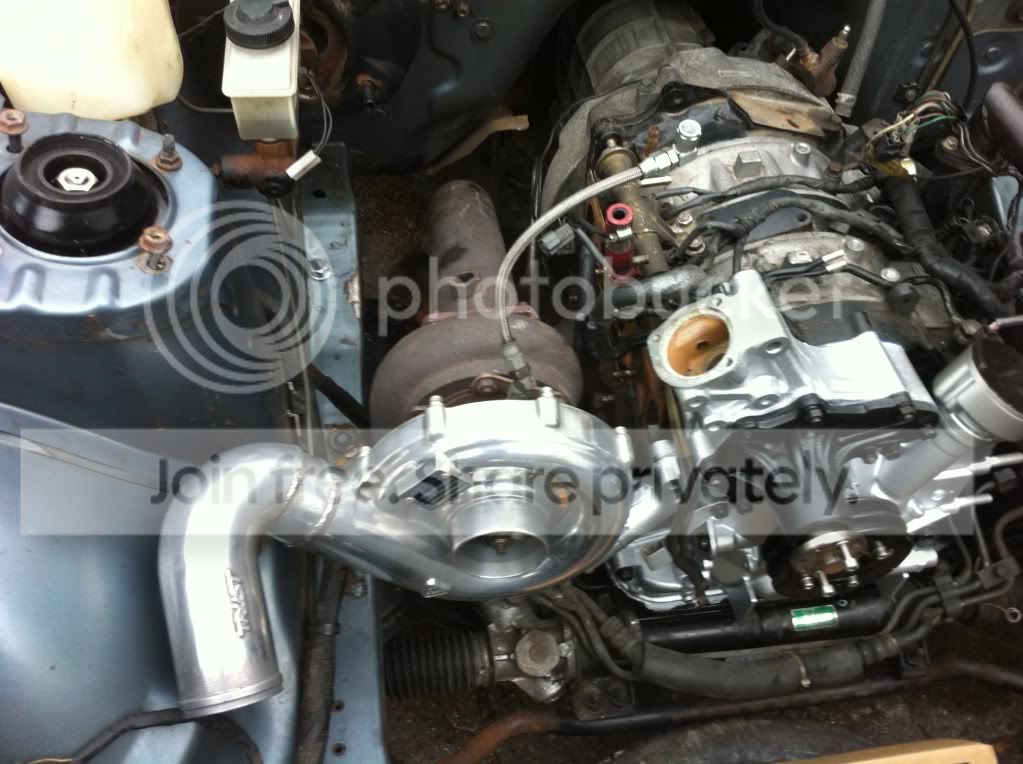
More importantly the external wastegate and screamer pipe all fit in nicely and the FC dump fits quite nicely as well.

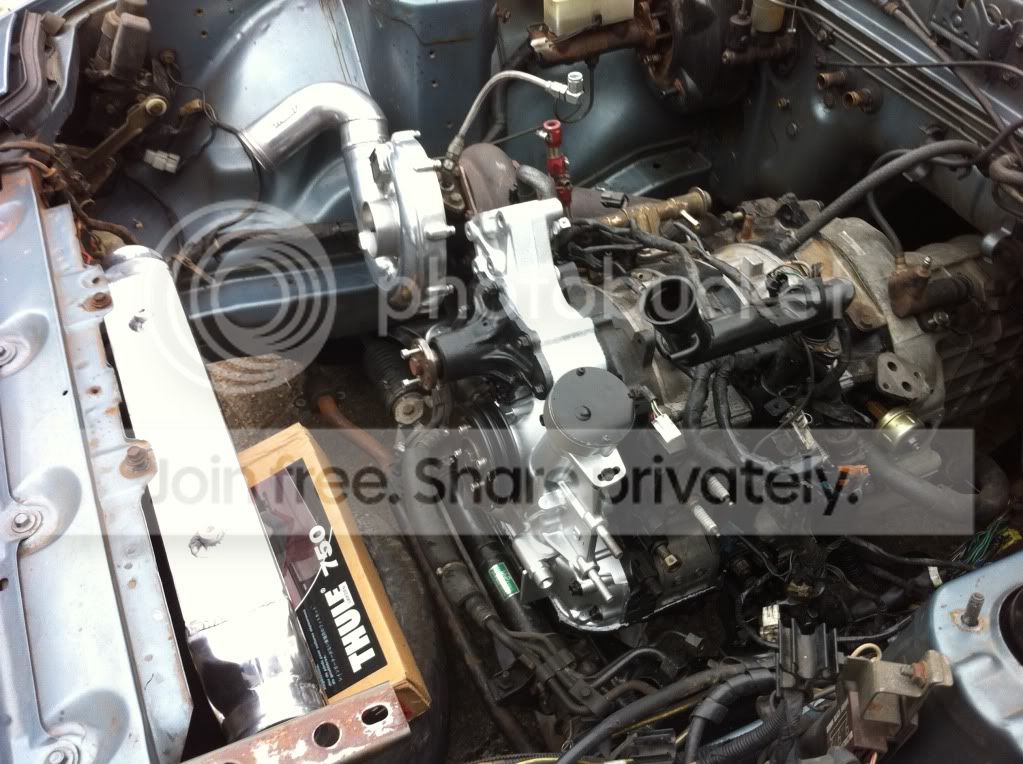
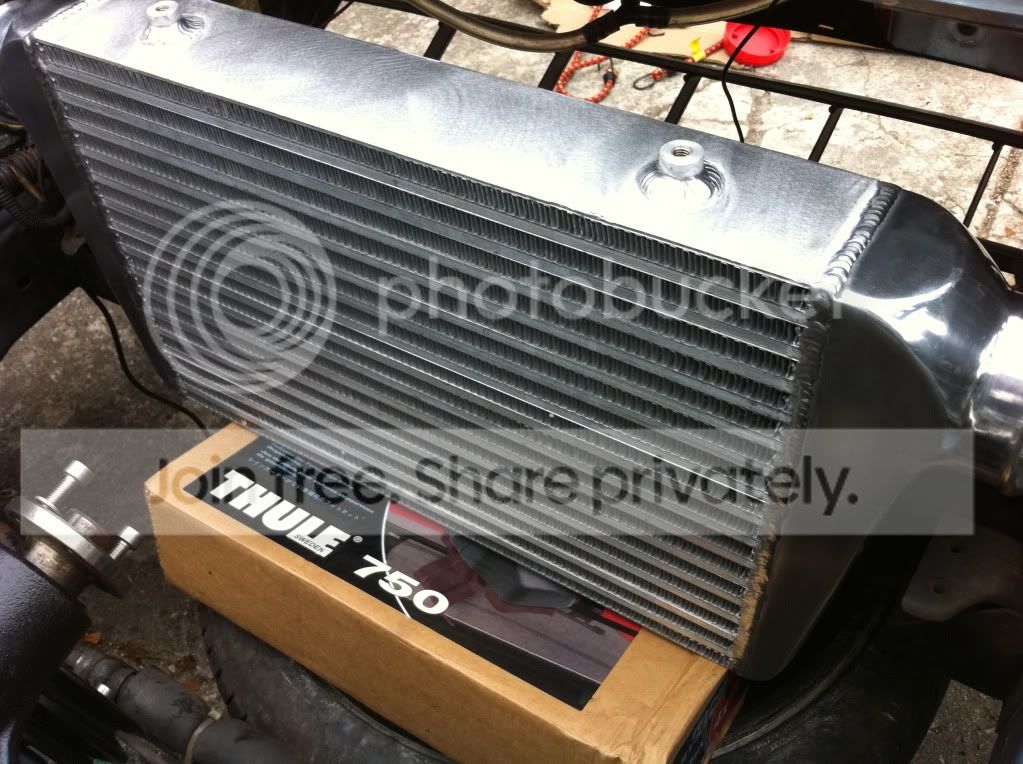
Having the engine sitting in allows me to try out the intercooler placement. Plenty of room for the 450x300x75mm core plus tanks.
Extra weight is def helping the stance - another 50kg to go with fluids/manifold/bonnet etc.. so should drop a bit more.
Using the existing front subframe mounts means the gearbox shifter needs no modification to fit - not tried it yet, but the FC gearbox mount looks like it will line up perfectly too.

I rolled the rear wheel in front of the original and cleaned up the picture a bit to see what it would look like with the new rims.
I had to swap the sump and front cover back to the S5/FC versions which was annoying... but it does mean that if the motor pops, a standard FC engine will drop straight in.
The turbo now fits well too:
More importantly the external wastegate and screamer pipe all fit in nicely and the FC dump fits quite nicely as well.
Having the engine sitting in allows me to try out the intercooler placement. Plenty of room for the 450x300x75mm core plus tanks.
Extra weight is def helping the stance - another 50kg to go with fluids/manifold/bonnet etc.. so should drop a bit more.
Using the existing front subframe mounts means the gearbox shifter needs no modification to fit - not tried it yet, but the FC gearbox mount looks like it will line up perfectly too.
I rolled the rear wheel in front of the original and cleaned up the picture a bit to see what it would look like with the new rims.
Thread Starter
Junior Member
Joined: Mar 2011
Posts: 24
Likes: 0
From: Brighton UK
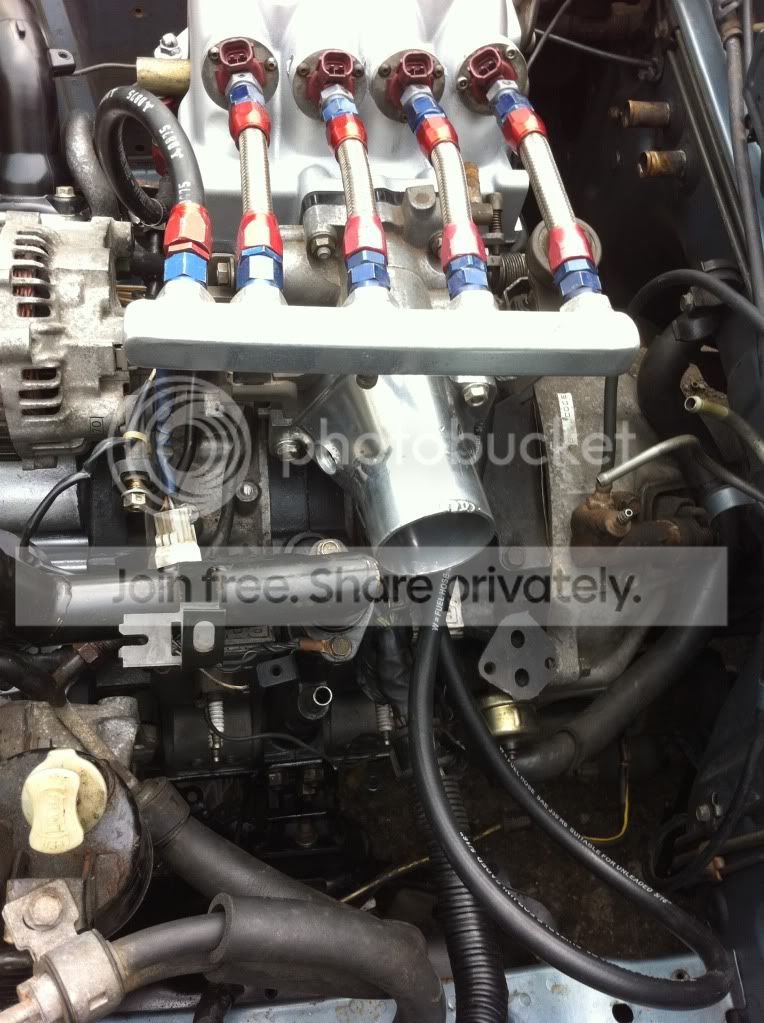
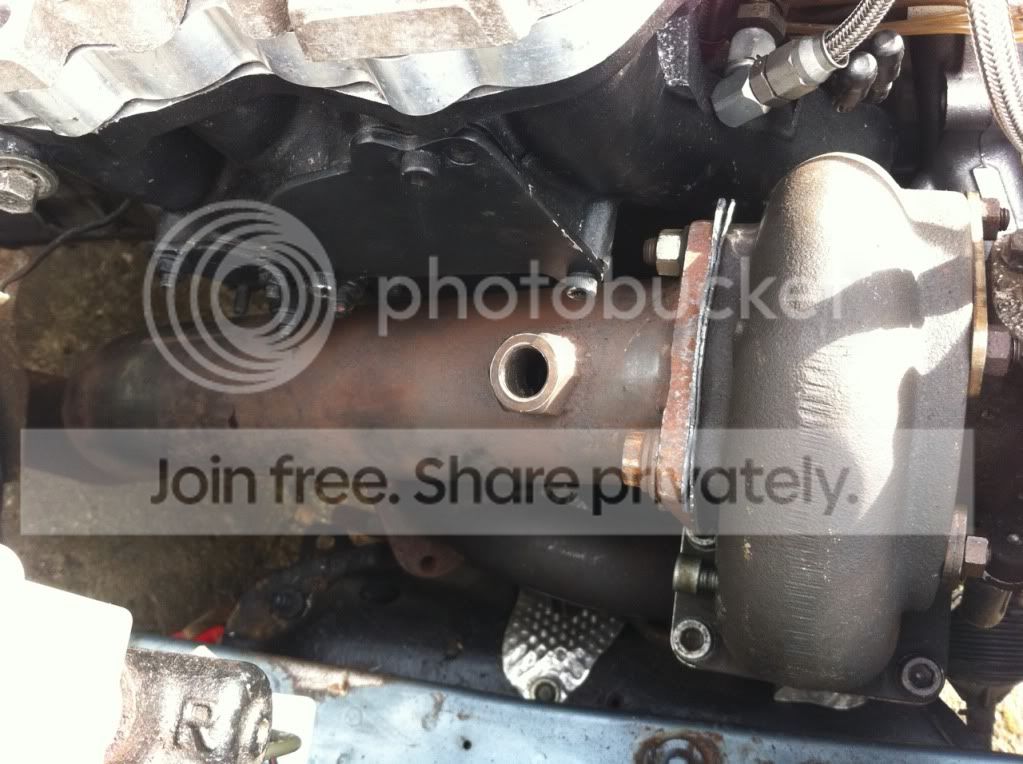
Split and painted inlet manifold, and final fit for turbo manifold. Plently of clearance for ext gate. Note budget heat shield...

Still unsure about the crazy injector arrangement (from Japan) seems like a hell of a lot of effort when 1680cc secondaries flow as much - I guess all in an effort to keep the std computer for emissions...
PS stitting in place to help work out plumbing for cooler - looks like it will slip past.

Alternator on but will come back off to be cleaned - close up of proposed turbo inlet - silicone missing.
�15 Blow off valve

Still unsure about the crazy injector arrangement (from Japan) seems like a hell of a lot of effort when 1680cc secondaries flow as much - I guess all in an effort to keep the std computer for emissions...
PS stitting in place to help work out plumbing for cooler - looks like it will slip past.
Alternator on but will come back off to be cleaned - close up of proposed turbo inlet - silicone missing.
�15 Blow off valve
Thread Starter
Junior Member
Joined: Mar 2011
Posts: 24
Likes: 0
From: Brighton UK
Got the brakes sorted - 4 pot FC calipers and rotors should slow it down better than the originals.
Braided lines to be added but essentially that is the front brakes done.
Due to the differing stud pattern front and rear I had to get some rims for the back - just so happened to find some more 17x7 Lenso's in the 4x4.5 lug pattern at a bargain price.
This is how it will stay until i get my rear hubs redrilled.
Almost think the other colour suits it better..

Oldskool vs. New school

Braided lines to be added but essentially that is the front brakes done.
Due to the differing stud pattern front and rear I had to get some rims for the back - just so happened to find some more 17x7 Lenso's in the 4x4.5 lug pattern at a bargain price.
This is how it will stay until i get my rear hubs redrilled.
Almost think the other colour suits it better..
Oldskool vs. New school
Thread Starter
Junior Member
Joined: Mar 2011
Posts: 24
Likes: 0
From: Brighton UK
Then there is a gap where I did sod all on the car, left in the garage with a million things left to do. Sun came out and I decicded to do a few more bits and make even more work for myself
Why not swap out the FC plenum and swap in the FD one? 1 FEED adaptor plate and it's sitting in place to work out the cooler pipes etc..
Mocked up the FD plenum - not tightened down as I need to modify the adaptor and wiring for the injectors, plus fuel lines etc.. Also discovered I need a new throttle cable as this its too short now.


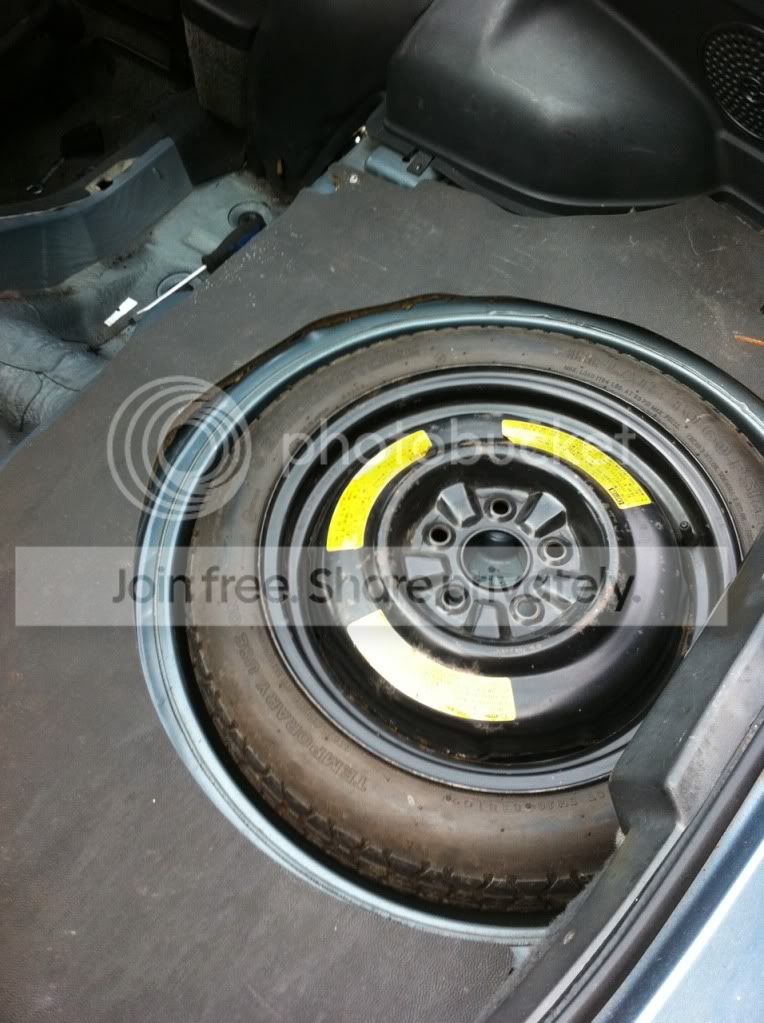
Removed rear seats in preparation for rear-mounting the battery.
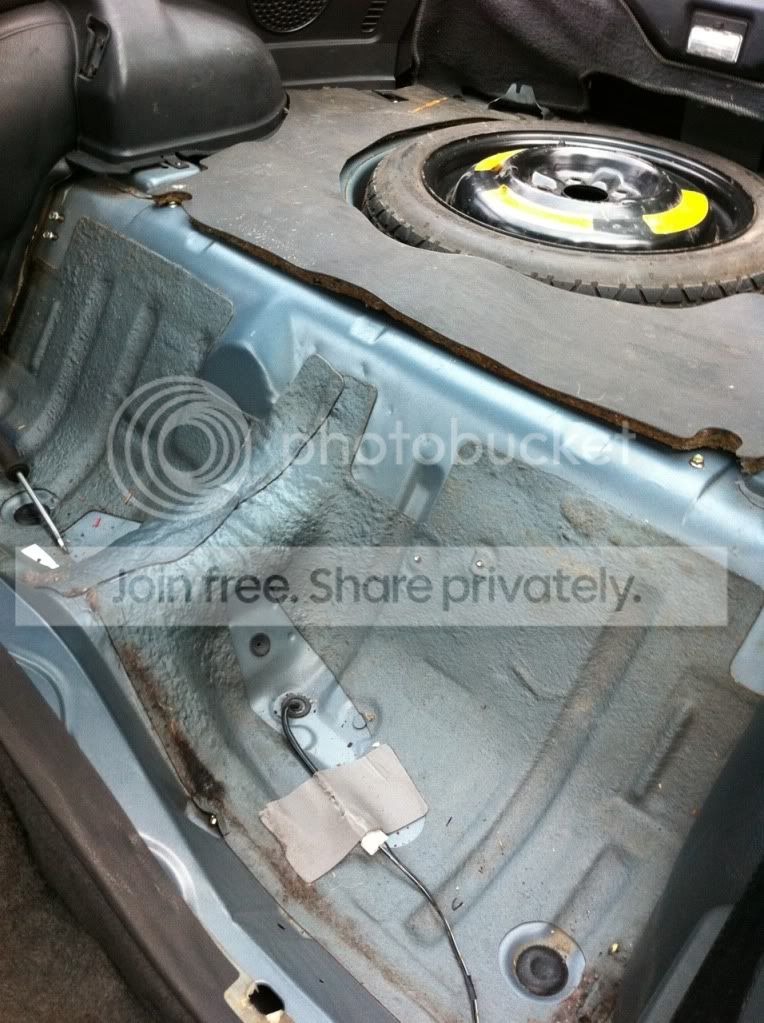
Note space saver: A little bit of extra weight saved and perfect as I was going to throw it away until I realised I could acutally use it!
Fuel pump.

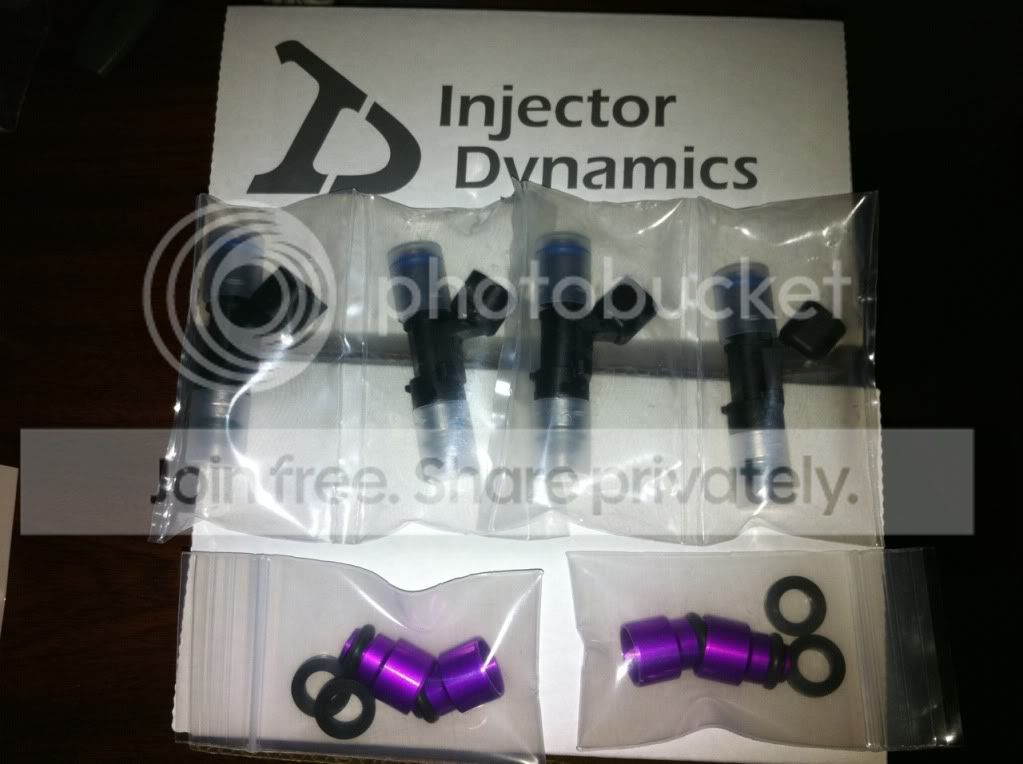
With the turbo and street port engine, I'm going to need some more fuel, so while I was in the US for work recently I picked up some ID1000's. Got them sent directly to my Hotel in lovely Sandy, Utah.
Why not swap out the FC plenum and swap in the FD one? 1 FEED adaptor plate and it's sitting in place to work out the cooler pipes etc..
Mocked up the FD plenum - not tightened down as I need to modify the adaptor and wiring for the injectors, plus fuel lines etc.. Also discovered I need a new throttle cable as this its too short now.
Removed rear seats in preparation for rear-mounting the battery.
Note space saver: A little bit of extra weight saved and perfect as I was going to throw it away until I realised I could acutally use it!
Fuel pump.
With the turbo and street port engine, I'm going to need some more fuel, so while I was in the US for work recently I picked up some ID1000's. Got them sent directly to my Hotel in lovely Sandy, Utah.
Trending Topics
Thread Starter
Junior Member
Joined: Mar 2011
Posts: 24
Likes: 0
From: Brighton UK
Up to present day yesterday:
Managed to get out and stuck into a few things left over from Saturday and re do a couple things that had been bugging me from before:
Driveshaft all properly in there with new nlyoc nuts which should keep any inspectors happy. This has been made from the FC TII and the S3 FB (GSL) shafts.

Gearbox mount, went back to the FB/GSL/S3 mount from the S4 turbo mount as it was far simpler this way with the S4 TII gearbox. Spacers are needed to drop the box about 25mm and I found the polyurethane powerflex bushes from the front tension arms that I no longer need are the absolute bollocks at they space it perfect, provide extra shock absorbtion, still tough and look solid.

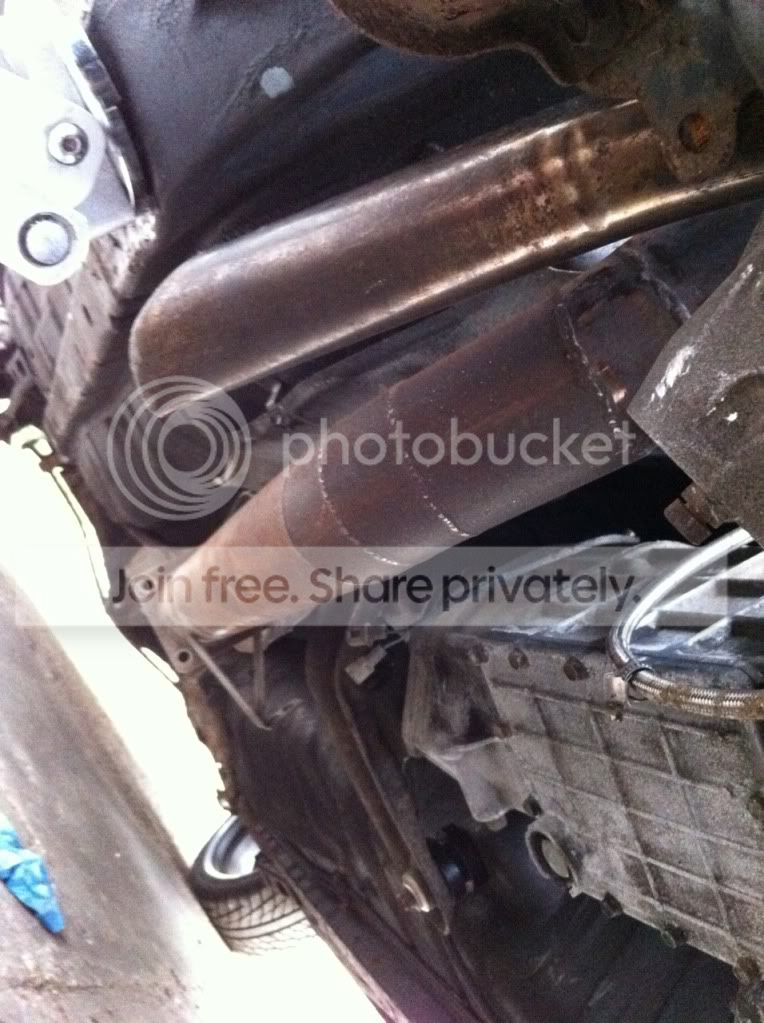
3" Turbo downpipe done:
The downpipe goes to the end of the gearbox, so I just need to add a resonator to this section, then up and over the diff for the rear box.
Didn't take a photo, but also got the brand new clutch master cylinder bled, with the stainless line fitted, gear shifter in and it shifts all the gears good.
Remade the rear front suspension mounts as well, its had the effect of pulling the front wheels back a bit and getting rid of some caster, Ill reduce it further by getting some FC caster bushes for the front wishbones and installing them backwards.
Trial fitted the PS and its clear that the intercooler pipes will need to go body side to clear, but the compression tube wants to point to the centre of the radiator - more though required here.
Started trimming the loom of excess plugs including the redundant front battery cables, but this will be a piecemeal affair as there is a bit to do to splice the looms and convert the fusible links over the S5 fuse rail - which I already have.
Still got plenty to do though:
Make a steering column
Wire ECU into car electrics
Fit intercooler and oil cooler
Fit FD UIM and cooler pipes around PS
Get the rest of the exhaust
..and a whole pile of other little bits to finish off and get her back on the road!
Managed to get out and stuck into a few things left over from Saturday and re do a couple things that had been bugging me from before:
Driveshaft all properly in there with new nlyoc nuts which should keep any inspectors happy. This has been made from the FC TII and the S3 FB (GSL) shafts.
Gearbox mount, went back to the FB/GSL/S3 mount from the S4 turbo mount as it was far simpler this way with the S4 TII gearbox. Spacers are needed to drop the box about 25mm and I found the polyurethane powerflex bushes from the front tension arms that I no longer need are the absolute bollocks at they space it perfect, provide extra shock absorbtion, still tough and look solid.
3" Turbo downpipe done:
The downpipe goes to the end of the gearbox, so I just need to add a resonator to this section, then up and over the diff for the rear box.
Didn't take a photo, but also got the brand new clutch master cylinder bled, with the stainless line fitted, gear shifter in and it shifts all the gears good.
Remade the rear front suspension mounts as well, its had the effect of pulling the front wheels back a bit and getting rid of some caster, Ill reduce it further by getting some FC caster bushes for the front wishbones and installing them backwards.
Trial fitted the PS and its clear that the intercooler pipes will need to go body side to clear, but the compression tube wants to point to the centre of the radiator - more though required here.
Started trimming the loom of excess plugs including the redundant front battery cables, but this will be a piecemeal affair as there is a bit to do to splice the looms and convert the fusible links over the S5 fuse rail - which I already have.
Still got plenty to do though:
Make a steering column
Wire ECU into car electrics
Fit intercooler and oil cooler
Fit FD UIM and cooler pipes around PS
Get the rest of the exhaust
..and a whole pile of other little bits to finish off and get her back on the road!
Thread Starter
Junior Member
Joined: Mar 2011
Posts: 24
Likes: 0
From: Brighton UK
Cheers bud!
I got a Megasquirt from the last time I was the US last year - the DIYPNP N76.
I have built up most of it but I'll be asking some q's over at the megasquirt section as Im a bit confused about the ignition outputs where it connects to the adaptor.
I love the tunerstudio software and the features for the price - bit annoying about not being able to run low impedance injectors without an extra board, but the ID1000's are high so no bother.
I saw a couple guys on here tackle the subframe swap which gave me the idea
awesome build man. It'll look great and go like snot. Nice wheel choice! Make sure your wheels don't hit up front under spring load and max turn-in.
I'm doing this exact front end swap soon too, but will be relocating the front subframe mounting holes.
I'm doing this exact front end swap soon too, but will be relocating the front subframe mounting holes.
Thread Starter
Junior Member
Joined: Mar 2011
Posts: 24
Likes: 0
From: Brighton UK
Yeah, it looks OK static, but I'm sure it will be different in a heavily braked turn.
Bare in mind the wheels are another half inch back from the pics now, and I will add the front lower control arm bushes to reduce the caster even further.
On my mind now is the steering column - shouldn't be too hard to do - I have already split most of it down, and the lower inner FC shaft has the same profile as the FB shaft, so it will slide up inside it. The FC lower outer needs to be cut down to fit - I might just butt them together, or cut it at the point where it starts to reduce in size and make a snug fit from it.
Just got to try to find the time to keep plodding away at it!


Looks very good! I recently did a FC subframe on my T2 FB and I love it! I did however relocate the subframe back 1inch to center the wheels in the wheel wells.
Good luck with the project.
Good luck with the project.
I'm not running power steering in mine. It's a 15:1 rack that I disassembled, and depowered.
Thread Starter
Junior Member
Joined: Mar 2011
Posts: 24
Likes: 0
From: Brighton UK
I took quite a few during the install with plans to post a thread about it with details etc but shortly after the car developed a rain leak which I spent quite a bit of time chasing (but have since fixed thankfully), plus i have other projects that have been taking up my time. So I just haven't gotton around to sorting through the pics. I still plan to make a thread at some point soon but in the meantime do you have anthing specific you want pics of?
I'm not running power steering in mine. It's a 15:1 rack that I disassembled, and depowered.
I'm not running power steering in mine. It's a 15:1 rack that I disassembled, and depowered.
I think I am going to leave my rack powered, I'll bring the intercooler pipes past the strut tower and there should be enough room to play with - I like the idea of real easy parking, especially compared to how it was before. Im not going to plug in any of the electrical stuff for the pump, so that should leave it on the heavier setting anyway to give better feel at speed - or at least I hope its that way around and not just always light.
Hows the manualised power rack for weight?
Steering is actually quite easy with the depowered rack, I took out all seals, welded up the quill on the pinion shaft and plugged all the holes. Personally I wouldn't want power steering on a FB, but to each their own!
I was curious how you were going to do the steering column, mine is a hybrid of the two, its FB top and FC bottom basically. Take both steering columns and shafts apart and you'll see that with a little grinding the lower half of the FC shaft will slide into the upper half of the FB shaft. It's up to you if you want to keep it collapsable or not, for strength and simplicity I chose to weld them together. Then you need the lower part of an FC steering column tube, which has a bearing in it to weld onto the FB column, this supports the bottom of the steering shaft. I have a few pics of this on my home computer, if I can post them tonight I will do that.
Between my dished steering wheel, collapsable momo hub, and the intermediate u-joint shaft off the FC rack I decided I had enough safety built into the column to not go crazy making the whole thing collapse. I'm sure some will argue this but I'm happy with the result.
I'll see what kind of pics I have of the frame itself. I did not like the idea of drilling a ton of holes in the FB frame but wanted to located it 1" back so the wheels lined up in the wheel wells and everything else I already had there (I/C piping etc) lined up again as well. So what I did was drill a new hole in the FC subframe 1" forward, this was right up toward the very edge of the subframe, then basically reinforced the whole tab with a new tab made out of 1/4" steel on top, and some 1/8" steel on the bottom. End result is basically a small extension on the front of the subframe to reinforce the whole area and move it 1" back. Probably sounds confusing but it was pretty simple, also allowed me to make sure everything was in just the right spot with the subframe on my bench, so when I started working on the actual car all I did was remove the two stock rear studs, then it just bolted right in to the front studs, drill a few holes for the FC rear studs, reinforce (with a piece of tubing through the frame and 1/8" plate on top) and done! <---- I'll see if I can get pics if I dont have any already
The engine is basically stock, although it does have a knightsports hybrid turbo on there (T04B comprssor I'm told, came with my JDM engine) running stock ECU, with 3" dp, through a 3" cat and back to a RB muffler. Never dyno'd or raced it so I have no solid numbers though.
Thread Starter
Junior Member
Joined: Mar 2011
Posts: 24
Likes: 0
From: Brighton UK
I had exactly the same idea for the column.
Ill try the power steer - if i dont like it, ill track down a manual rack and put that in.
It would be great to see photo's of your set up
Ill try the power steer - if i dont like it, ill track down a manual rack and put that in.
It would be great to see photo's of your set up
If I like the 17s look... lol
An old rotary guy around Winnipeg here has the mold for this air dam, but I believe it's very similar to the Mariah Motorports ITS/ITA air dam.
I had to shorten it to get it to bolt up the way I have it instead of fit over the stock bumper.
Thread Starter
Junior Member
Joined: Mar 2011
Posts: 24
Likes: 0
From: Brighton UK
Another decent day tunin'
I wacked the upper manifold off to fit the injectors and found the top hats that come with them are wrongm- they should be 11mm to fit into the rail and they are 13.5mm which is a pisser. Not to be put off, I cracked into the easy stuff that has been hanging around.
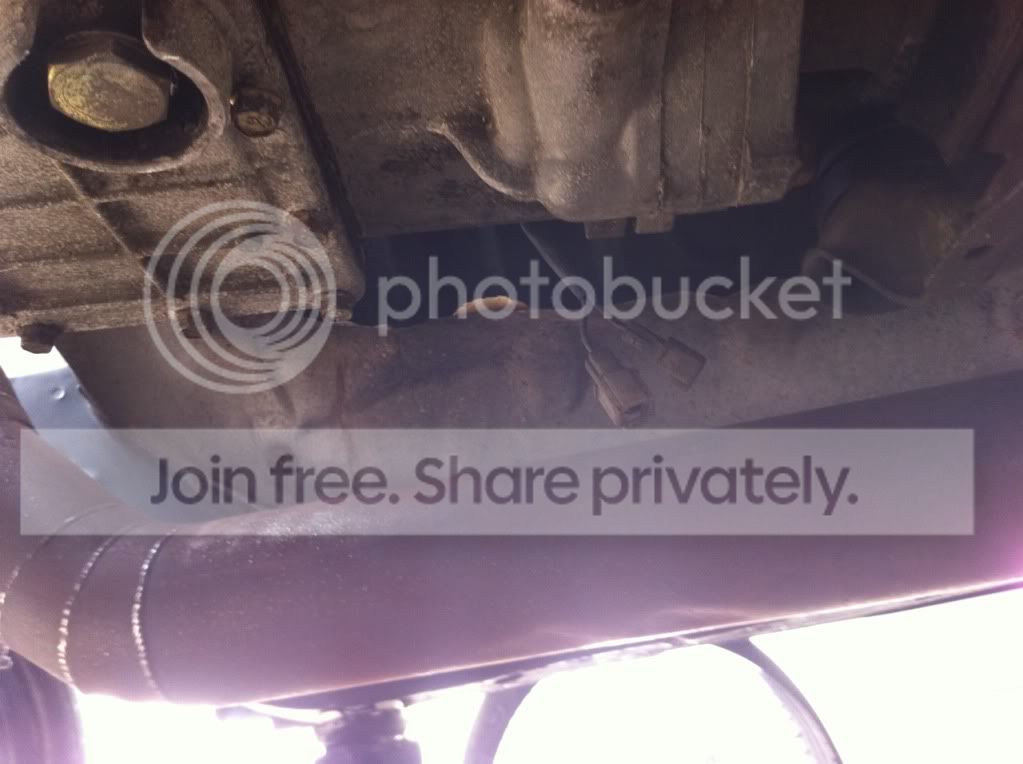
Wastegate done:
46mm SIGMA with obligatory screamer pipe:

Power steering done:

Oil cooler fitted and clamped properly. 2 inch exhaust clamps off the front brace bar.
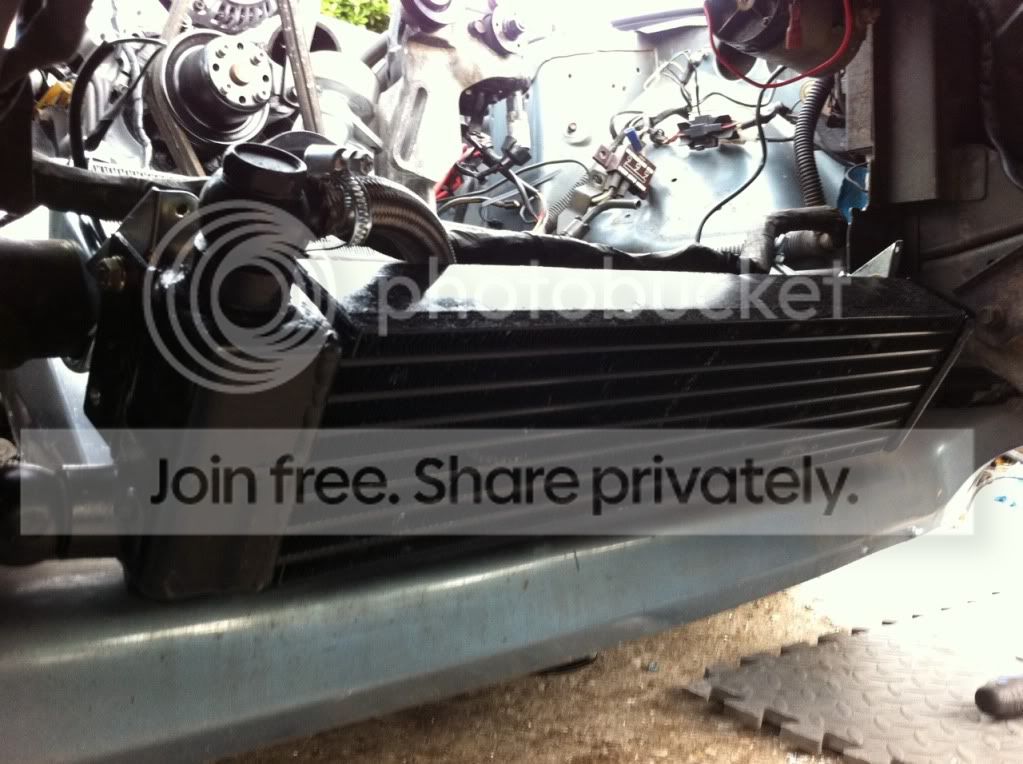
Intercooler done: Braced off the top and and also the bottom by using more exhaust clamps.

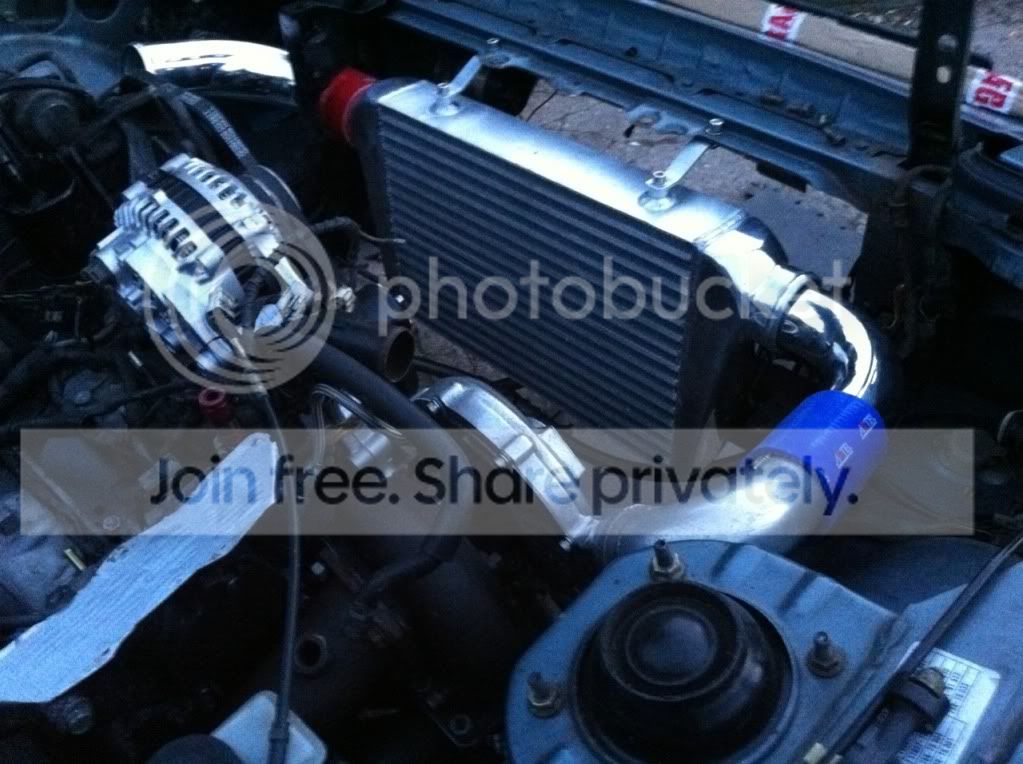
Now that the intercooler is in a fixed position, I can work out the pipes:
Then I got to grips with the column and fixed that all up - now she turns the wheels when I turn the steering wheel - novel, but a good thing since it has been about 9 months.

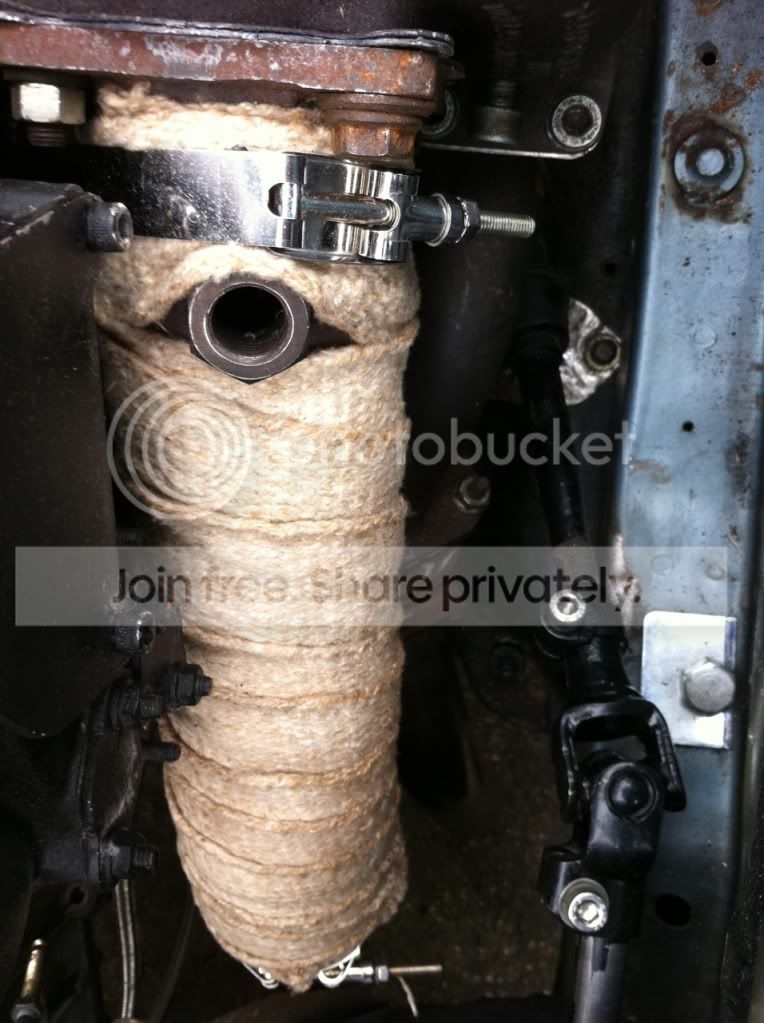
Exhaust was pretty close to the inlet manifold, so a dose of thermal wrap was in order. Good for 2000F or so they reckon - lets see...

No other photos to show, apart from one little 'in progress' shot

happy days
I wacked the upper manifold off to fit the injectors and found the top hats that come with them are wrongm- they should be 11mm to fit into the rail and they are 13.5mm which is a pisser. Not to be put off, I cracked into the easy stuff that has been hanging around.
Wastegate done:
46mm SIGMA with obligatory screamer pipe:
Power steering done:
Oil cooler fitted and clamped properly. 2 inch exhaust clamps off the front brace bar.
Intercooler done: Braced off the top and and also the bottom by using more exhaust clamps.
Now that the intercooler is in a fixed position, I can work out the pipes:
Then I got to grips with the column and fixed that all up - now she turns the wheels when I turn the steering wheel - novel, but a good thing since it has been about 9 months.
Exhaust was pretty close to the inlet manifold, so a dose of thermal wrap was in order. Good for 2000F or so they reckon - lets see...
No other photos to show, apart from one little 'in progress' shot
happy days

Thread
Thread Starter
Forum
Replies
Last Post
MidnightOwl
2nd Generation Specific (1986-1992)
1
Sep 25, 2015 10:24 PM