
Megaupdate thread: How to fix curbed panasports and more...

Thread Starter
I hate drum brakes
Joined: Oct 2006
Posts: 638
Likes: 0
From: West Palm Beach, Florida
Megaupdate thread: How to fix curbed panasports and more...
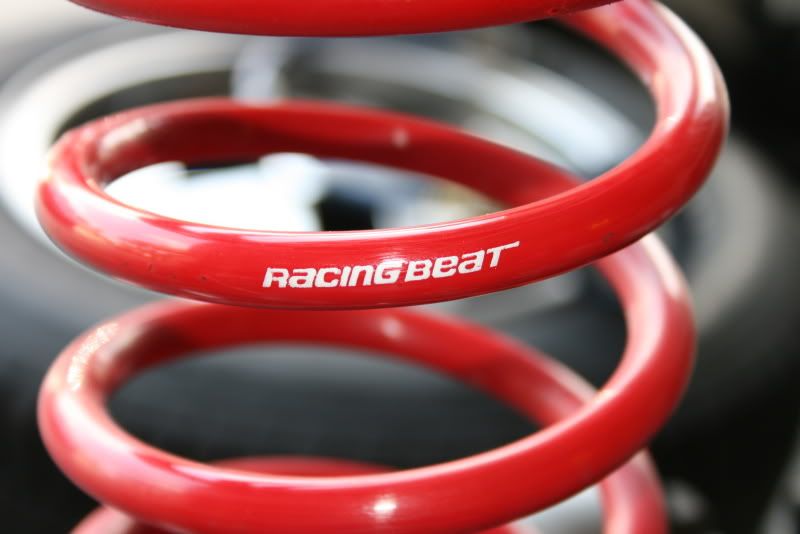
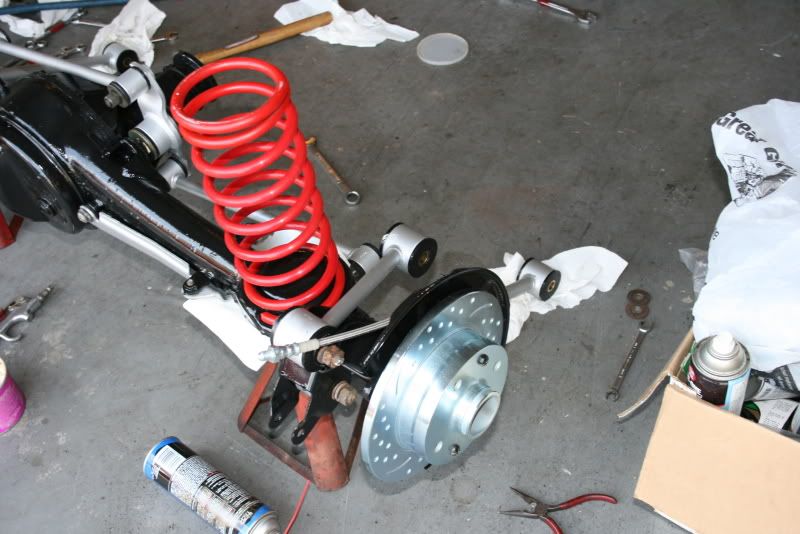
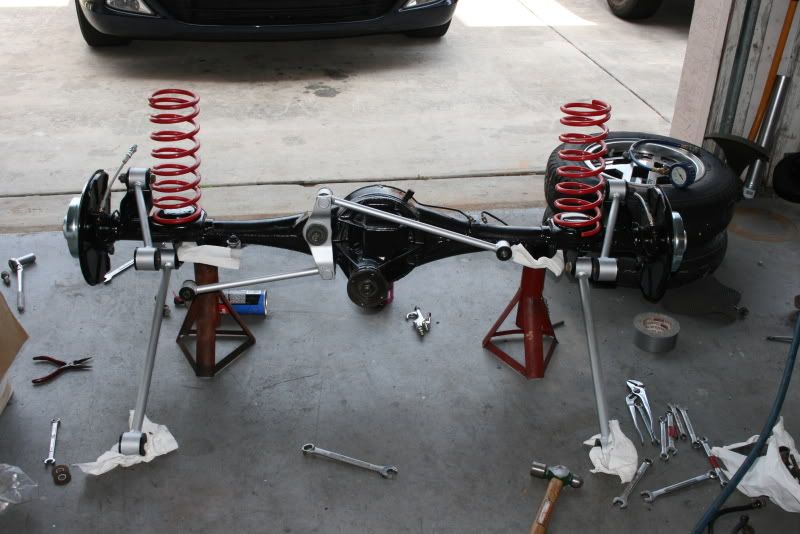
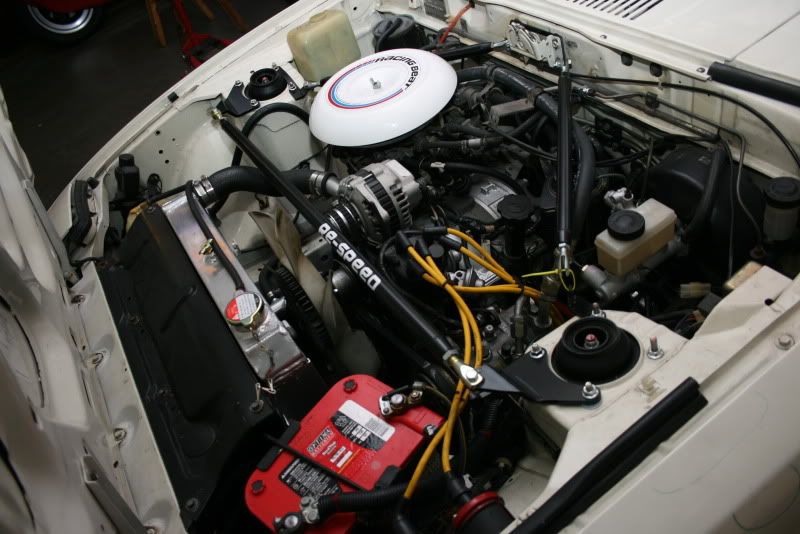
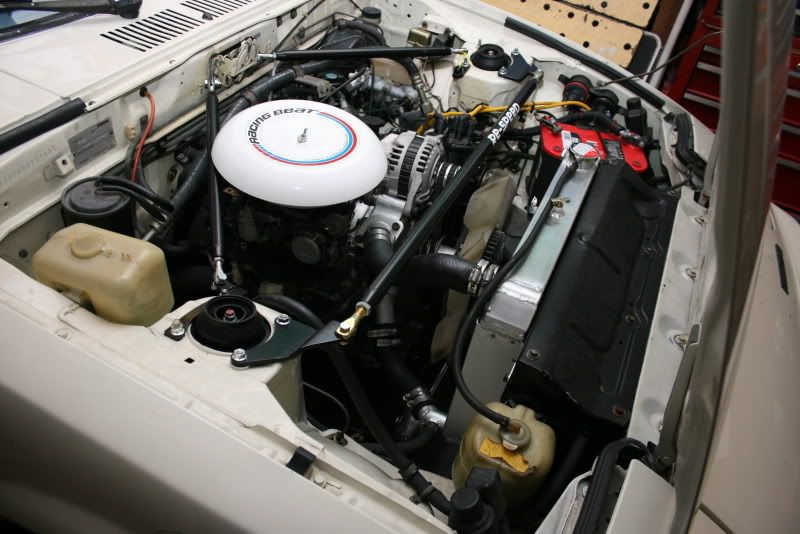
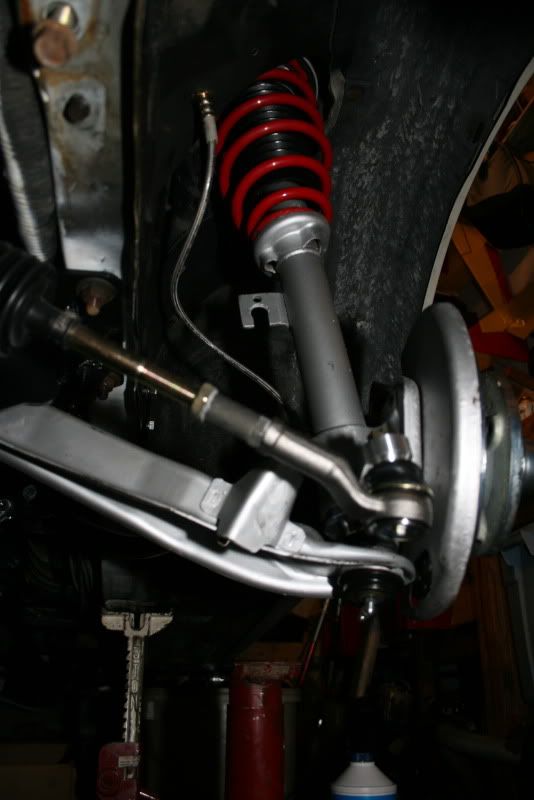
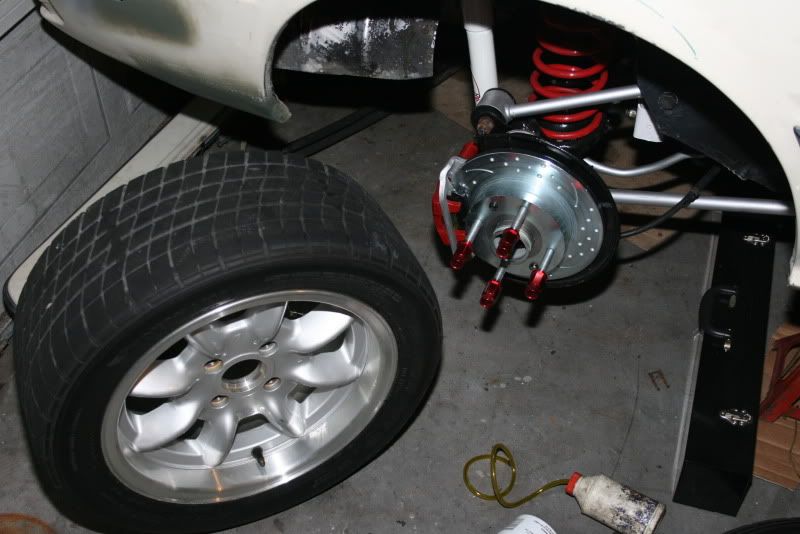
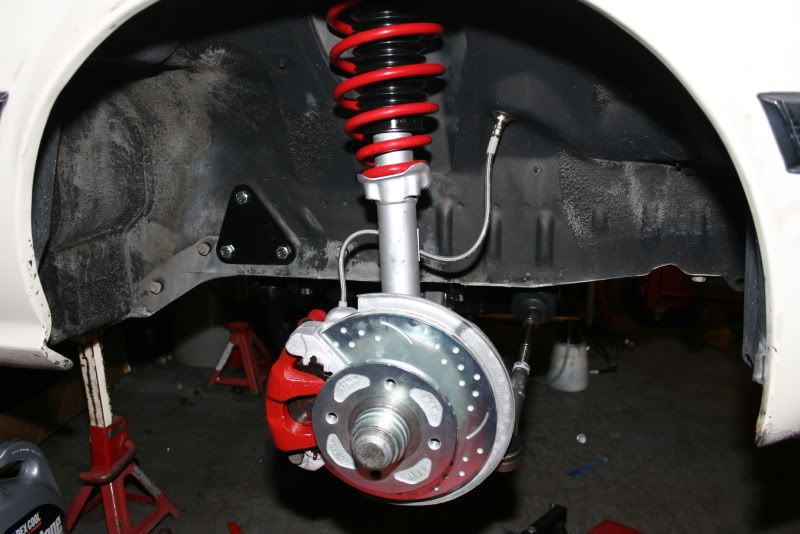
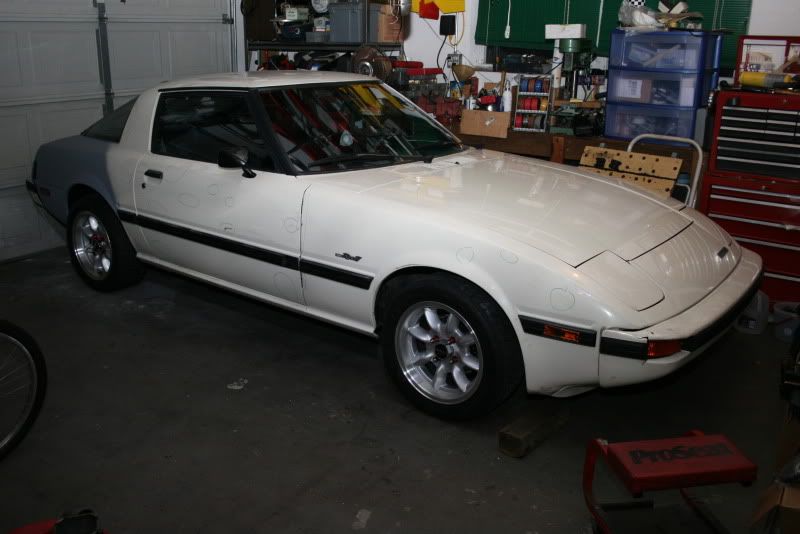
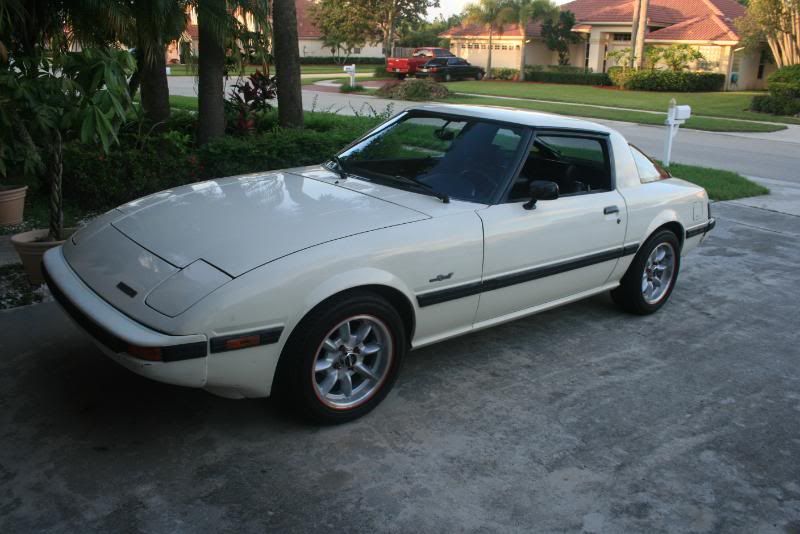
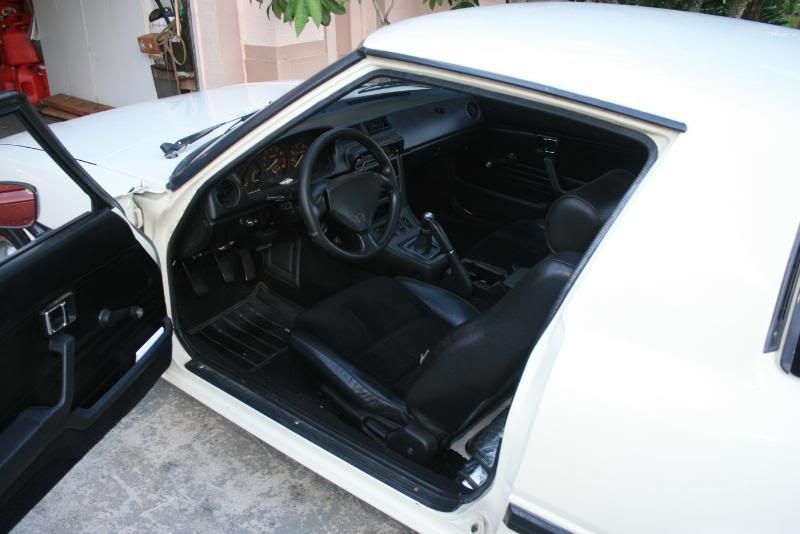
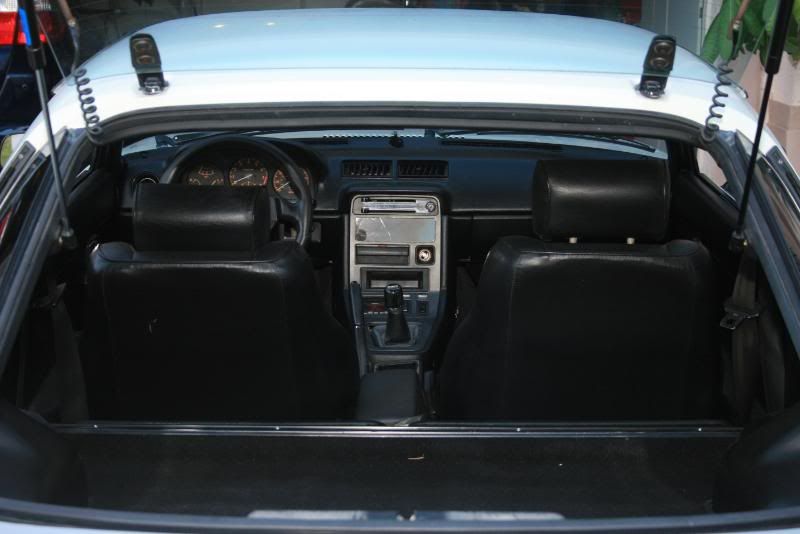
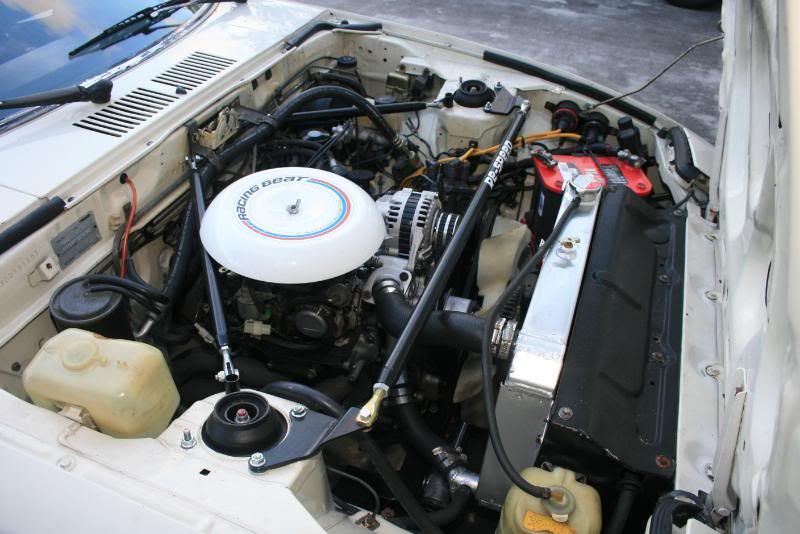
Some of you may remember my car, and the whole being hit by a stupid woman in a lexus SUV debacle, but I finally (after waaaaay too long) got around to repairing my Panasports... Also in that timespan, I've installed a Re-Speed rack/pinion kit, Tokico Illuminas, full polyurethane bushings (still can't see why that is bad, more on that later) GSL rear end, and much, much more.
Previous threads can be found here:
https://www.rx7club.com/1st-generation-specific-1979-1985-18/just-got-my-7-new-community-592204/
https://www.rx7club.com/1st-generation-specific-1979-1985-18/pettit-12a-meets-my-rx7-%2Aeven-dsl-might-have-trouble%2A-682681/
https://www.rx7club.com/1st-generation-specific-1979-1985-18/mini-update-rising-ashes-rust-flakes-760453/
I'll try and shut up and let the unorganized, scattered pictures do the talking (I really should take better and more organized pictures)...
Thread Starter
I hate drum brakes
Joined: Oct 2006
Posts: 638
Likes: 0
From: West Palm Beach, Florida
...
I apologize for all of the out of order pictures, they're all over the place in my photobucket account, and being slightly inebriated doesn't help much right now, lol.
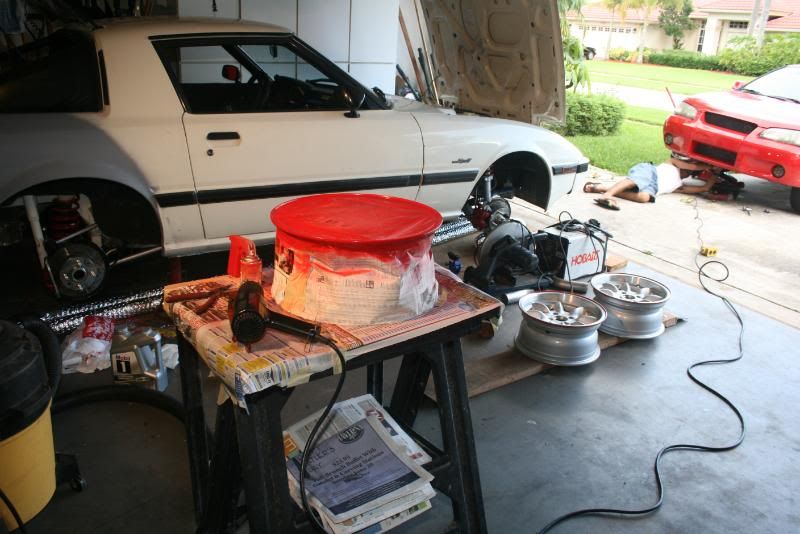
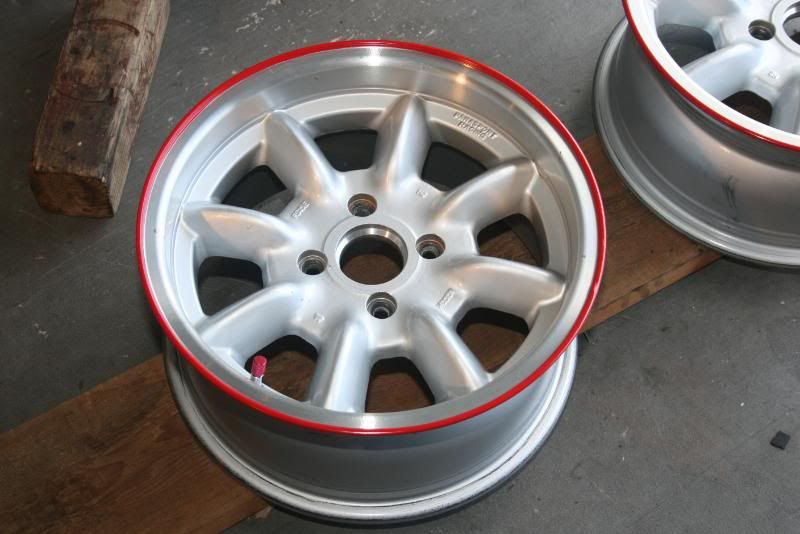
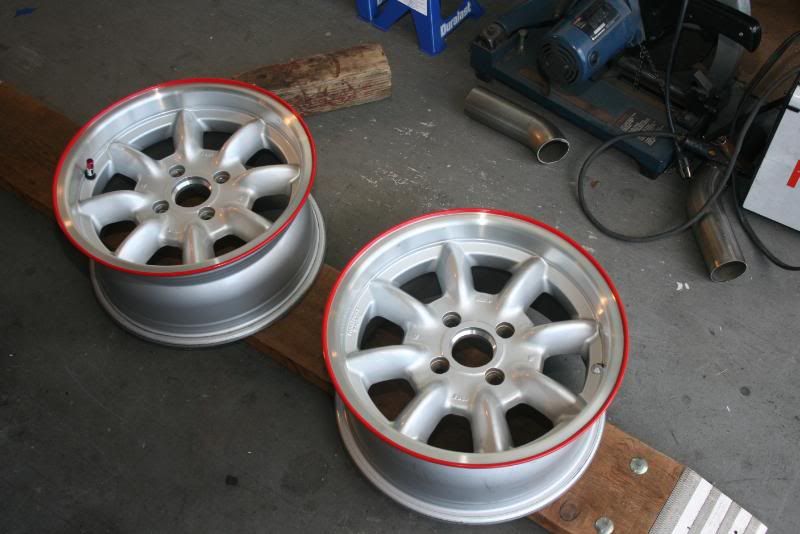
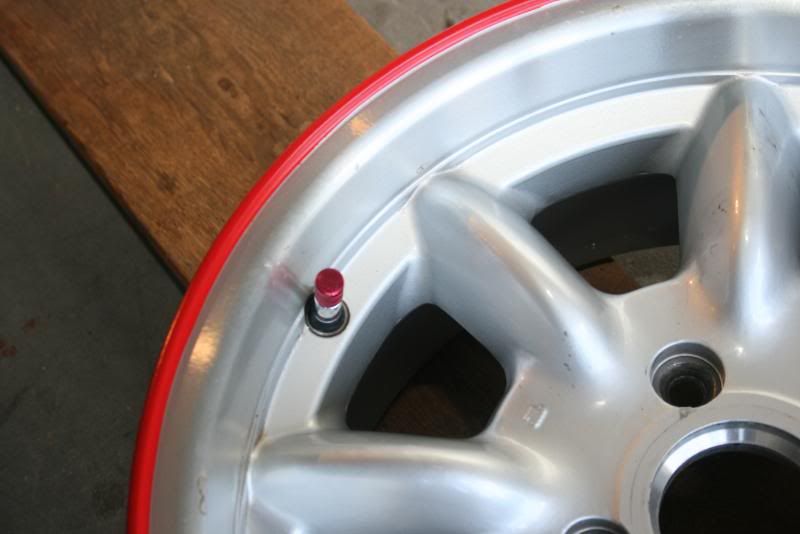
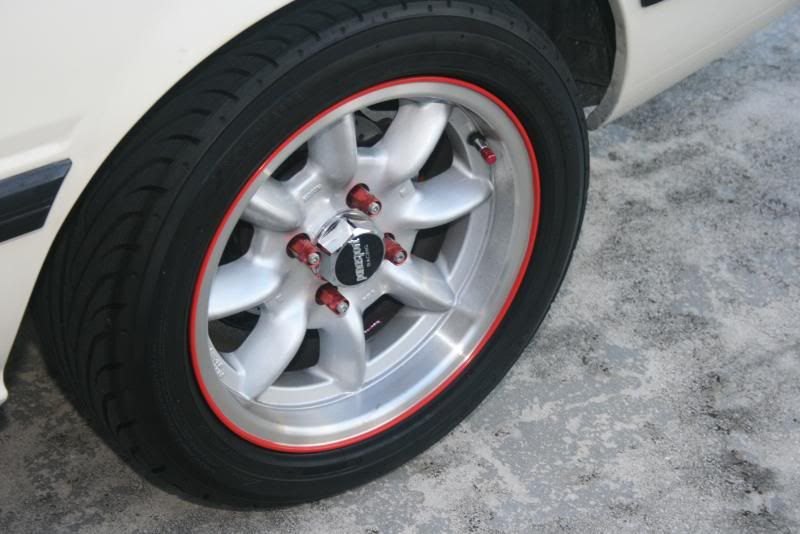
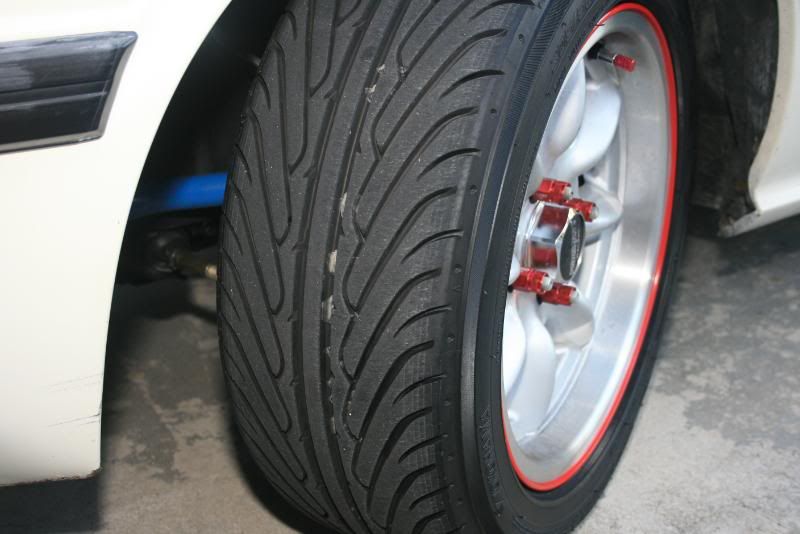
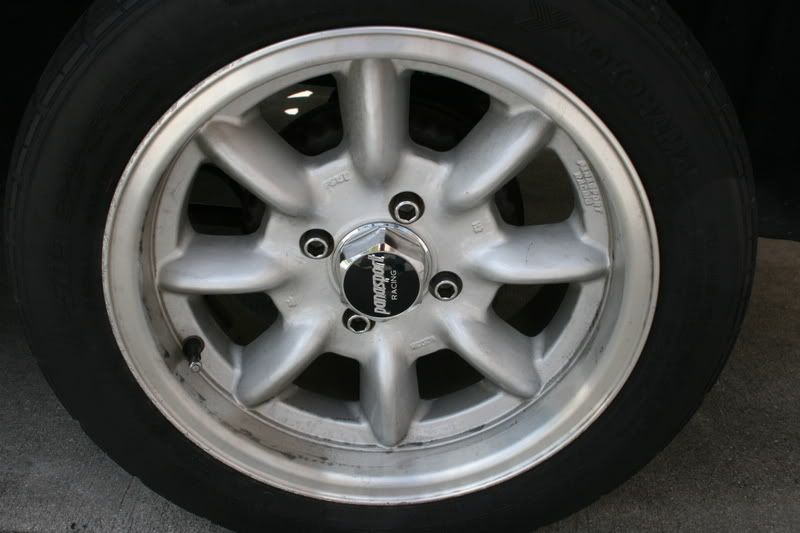
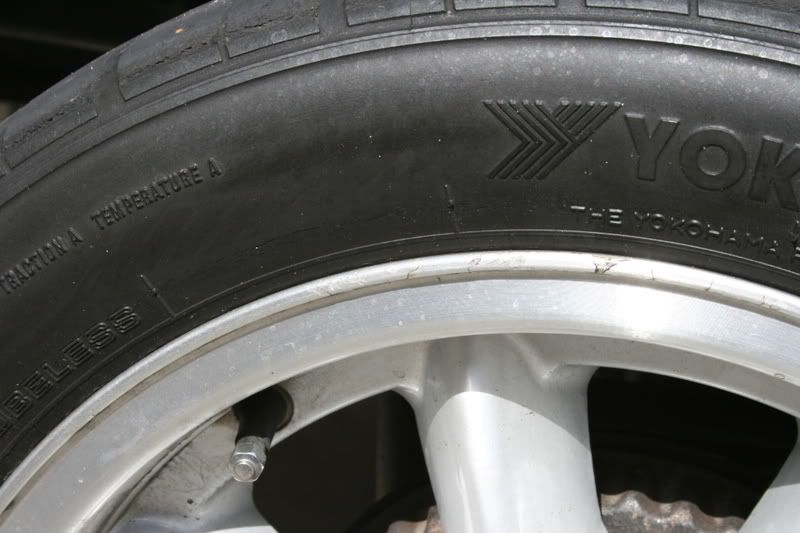
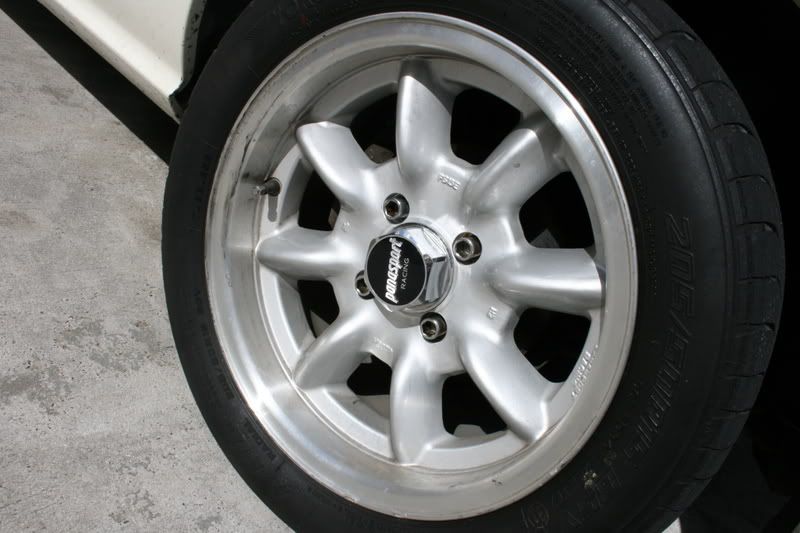
Now with all the old, outdated images out of the way, I present, my latest accomplishment, taking metal files to spinning Panasports and painting them. Basically what I did was turn the *** end of my car into a lathe, and to the best of my abilities, true the lips of the wheels. I used a regular ol' set of files from Harbor Freight, but brushed the chips out of the teeth of the file in between cuts, to create a clean cut every time and not pack aluminum shavings into my expensive wheels. After I got the lips nice and curb rash free, I opted to paint a red pinstripe on them rather than leave them be, or clear coat them, because no matter how good a machinist I am, I cant match the CNC finish of the OEM finish with a file... By hand. Now I couldn't get too many pictures of the process due to snitchy old homeowners association loving, ******* neighbors (I still wasn't doing anything wrong, but they still decided to take pics of my house while I was working anyway) But I did manage to get pics of the painting process and the results.
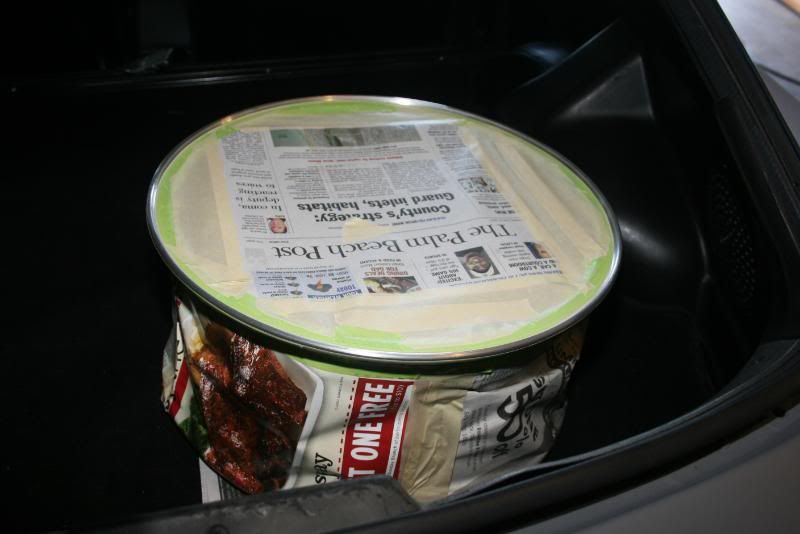
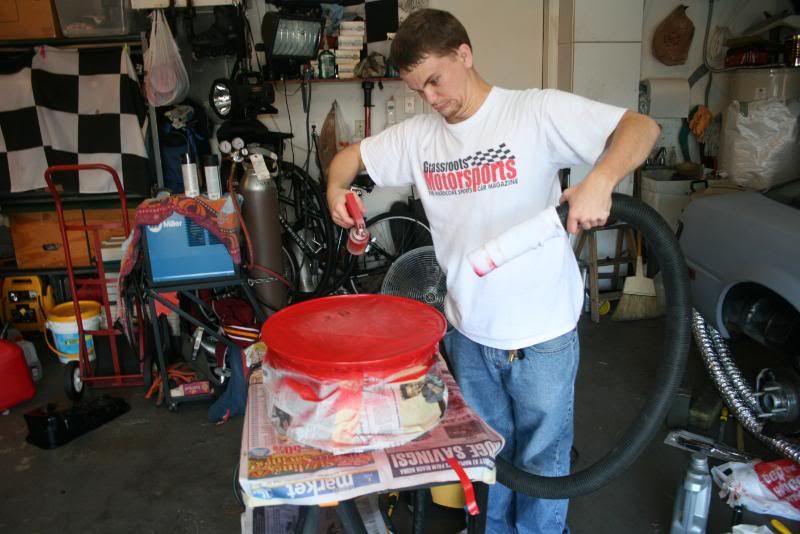
The improvised wheel lathe setup looked something like this. (note the ducts to remove asphyxiating exhaust gasses from my garage) Nice and simple...

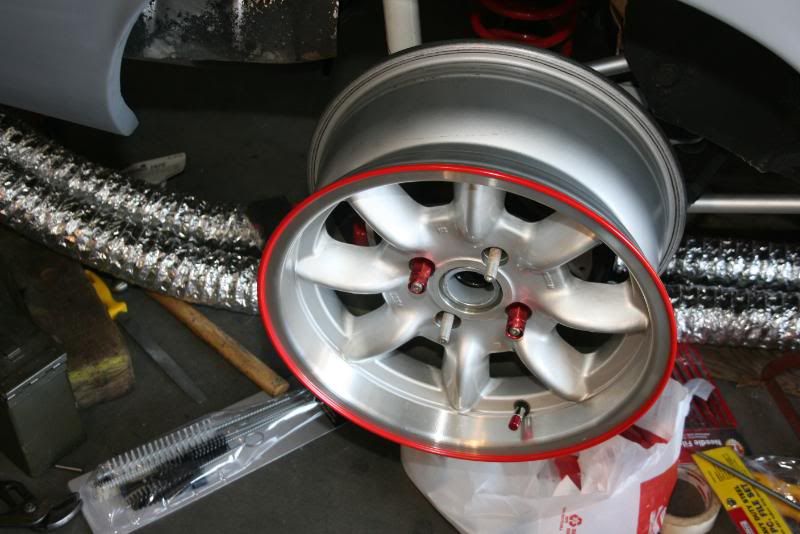
After viciously attacking the offending curb rash with cheap Chinese files, the wheels were masked off and painted in a controlled environment.

I apologize for all of the out of order pictures, they're all over the place in my photobucket account, and being slightly inebriated doesn't help much right now, lol.
Now with all the old, outdated images out of the way, I present, my latest accomplishment, taking metal files to spinning Panasports and painting them. Basically what I did was turn the *** end of my car into a lathe, and to the best of my abilities, true the lips of the wheels. I used a regular ol' set of files from Harbor Freight, but brushed the chips out of the teeth of the file in between cuts, to create a clean cut every time and not pack aluminum shavings into my expensive wheels. After I got the lips nice and curb rash free, I opted to paint a red pinstripe on them rather than leave them be, or clear coat them, because no matter how good a machinist I am, I cant match the CNC finish of the OEM finish with a file... By hand.
Now I couldn't get too many pictures of the process due to snitchy old homeowners association loving, ******* neighbors (I still wasn't doing anything wrong, but they still decided to take pics of my house while I was working anyway) But I did manage to get pics of the painting process and the results.The improvised wheel lathe setup looked something like this. (note the ducts to remove asphyxiating exhaust gasses from my garage) Nice and simple...
After viciously attacking the offending curb rash with cheap Chinese files, the wheels were masked off and painted in a controlled environment.


Thread Starter
I hate drum brakes
Joined: Oct 2006
Posts: 638
Likes: 0
From: West Palm Beach, Florida
... Continued (My fingers are getting really tired now...)
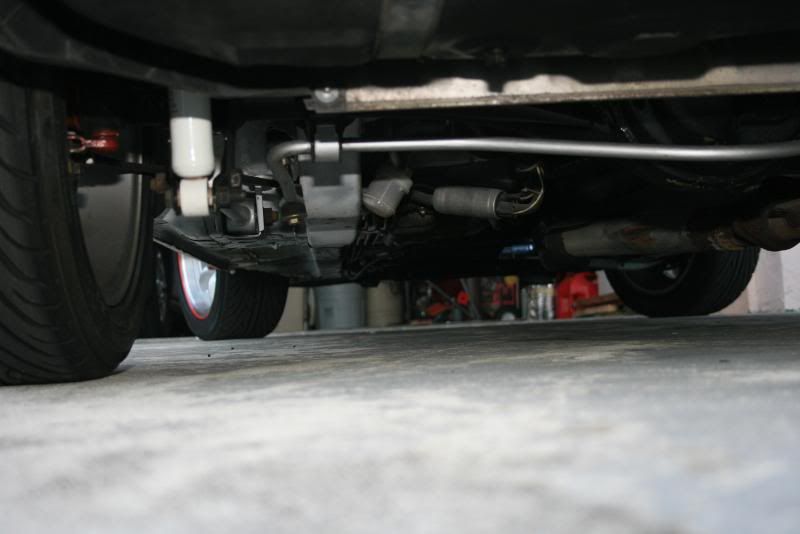
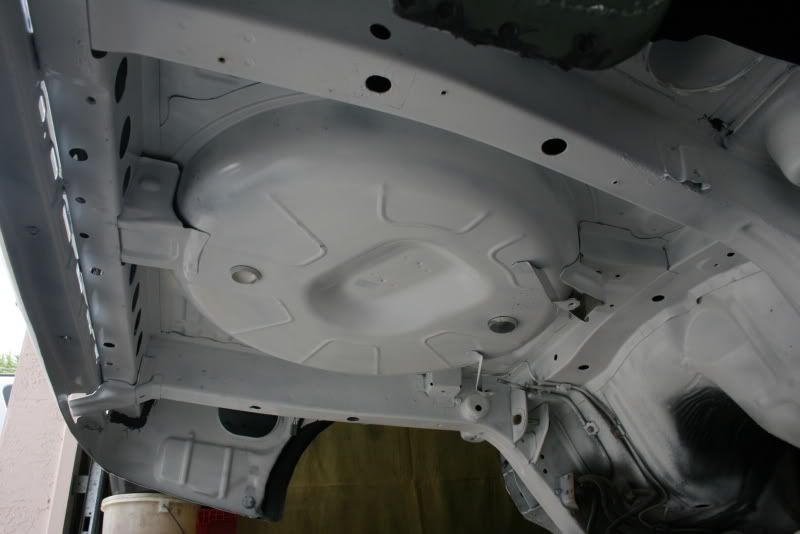
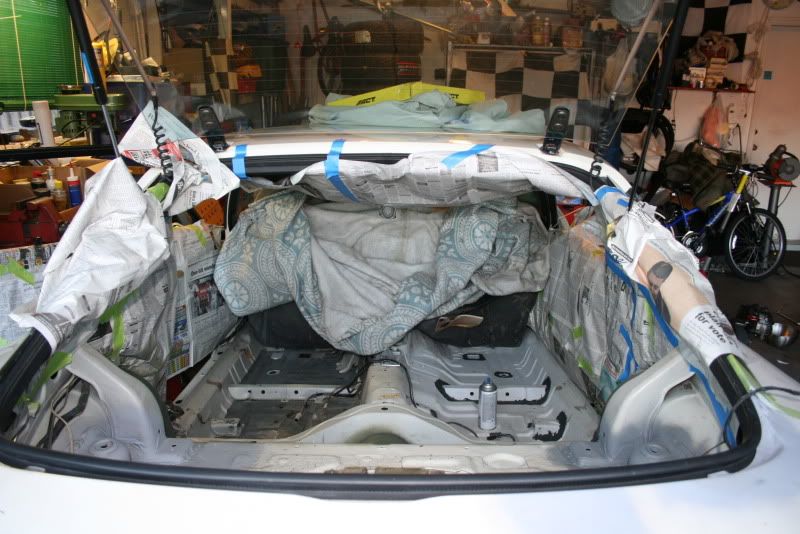
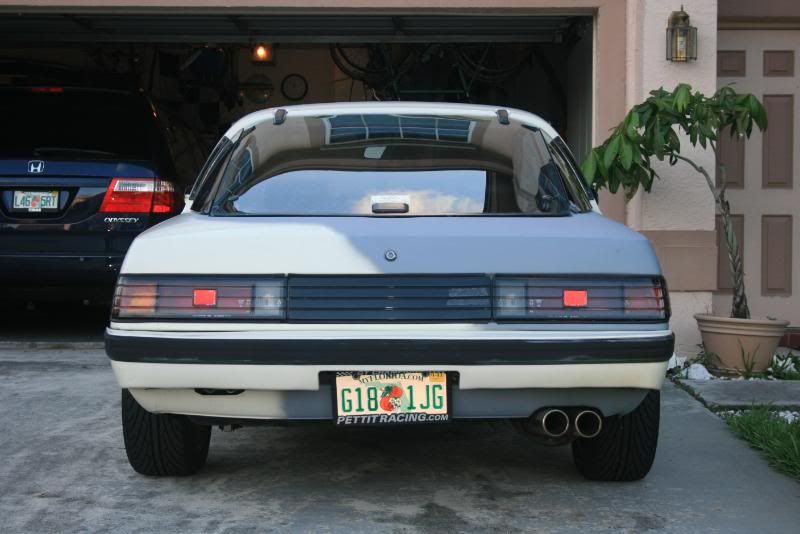
I wish I had more pictures of the underbody, I infuriated my 240sx owning friend when he saw how spotless the bottom of my car was, lol.
Of course, none of this would have been possible without my painting face....
And my partener in crime...

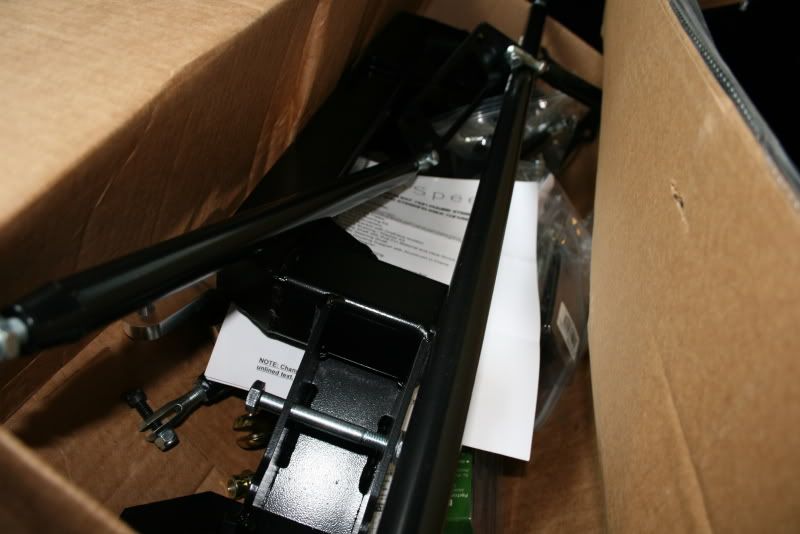
Next in the list of never ending things to do is Megasquirt, pieced together TII intake manifold (most of it made of sheet metal with a single throttle body and 13B to 12A adapter plate), TII transmission (when the 12A trans eats **** inevitably) and a large turbo with water to air intercooler.
Oh, and more paint.
I wish I had more pictures of the underbody, I infuriated my 240sx owning friend when he saw how spotless the bottom of my car was, lol.
Of course, none of this would have been possible without my painting face....
And my partener in crime...
Next in the list of never ending things to do is Megasquirt, pieced together TII intake manifold (most of it made of sheet metal with a single throttle body and 13B to 12A adapter plate), TII transmission (when the 12A trans eats **** inevitably) and a large turbo with water to air intercooler.
Oh, and more paint.
Thread Starter
I hate drum brakes
Joined: Oct 2006
Posts: 638
Likes: 0
From: West Palm Beach, Florida
Just kind of realized that I didn't have any "before" pictures... Here's a few ancient ones from right after the Lexus SUV incident.

I think that's all I took pictures of.
I think that's all I took pictures of.
Trending Topics

Thread Starter
I hate drum brakes
Joined: Oct 2006
Posts: 638
Likes: 0
From: West Palm Beach, Florida
Thanks everyone.
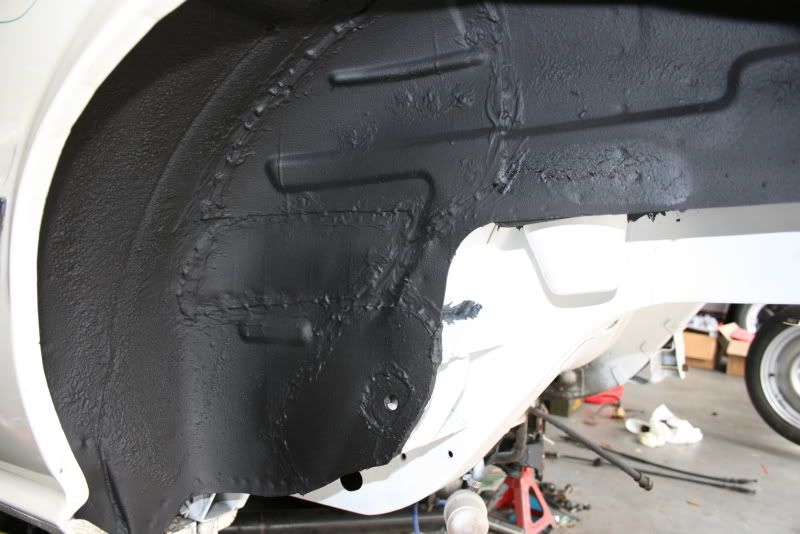
That is seam sealer. Comes in a can, good for sealing out moisture and shutting up resonating rattles. I got mine in a can from Eastwood, don't think I'll order from them again though because once you order from them they spam the **** out of you with ads in the mail. 
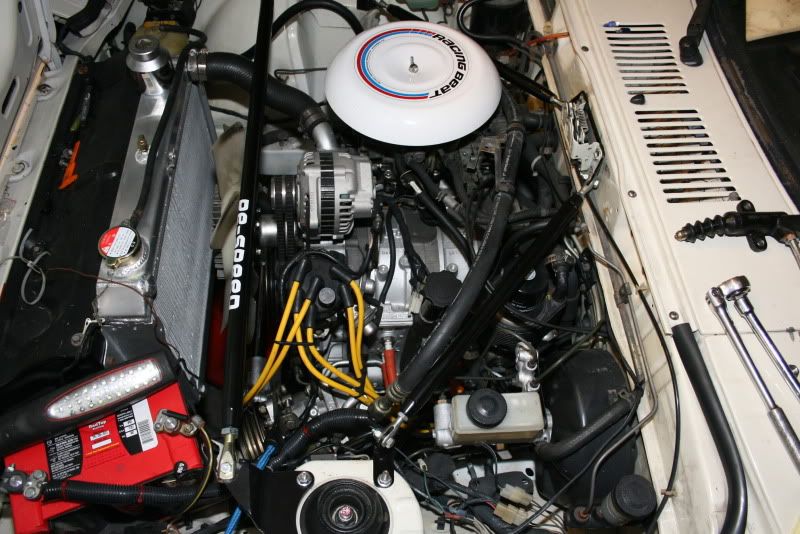
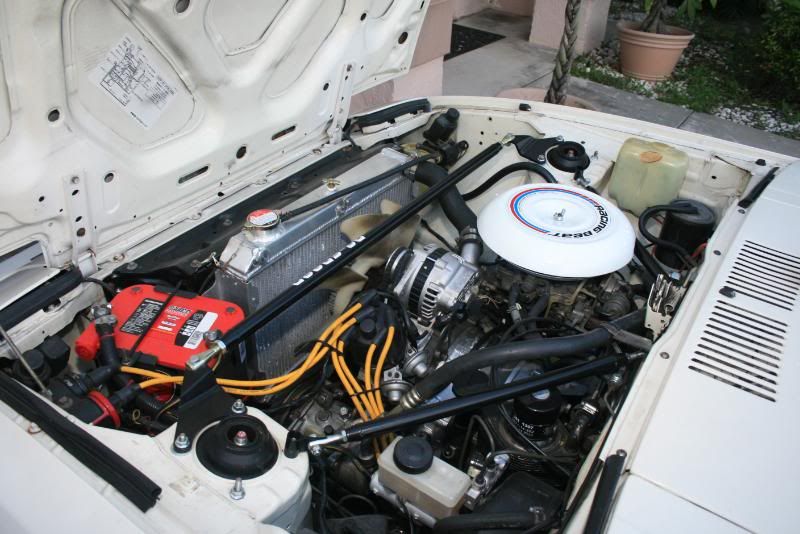
That is an Ebay radiator. ~$220, and it cools better than the stock rad (which was a new one, but wouldn't fit with the steering rack) and combined with my ported FC water pump the car is nearly un-overheatable.
what kind of aluminum radiator is that? how does it perform and where did you get it? i am looking to upgrade mine to an aluminum radiator. thanks.
hoang
hoang
1st gen rx 7 lover
Joined: Jan 2010
Posts: 25
Likes: 0
From: New York
Wow, thats all i have to say. I have the same rot problem yu did, how did you fix it, patchin or fabricate most of it over again? sorry really can't tell from the pics. And i second kentetsu, the whole rearend looks beautiful. hopefully i'll get a real job soon so i can take my gsl-se off the road for the winter and do the same thing to my car, my baby needs it 109,000 on the odo still goin strong, but needs afreshen up. great work
Thread Starter
I hate drum brakes
Joined: Oct 2006
Posts: 638
Likes: 0
From: West Palm Beach, Florida
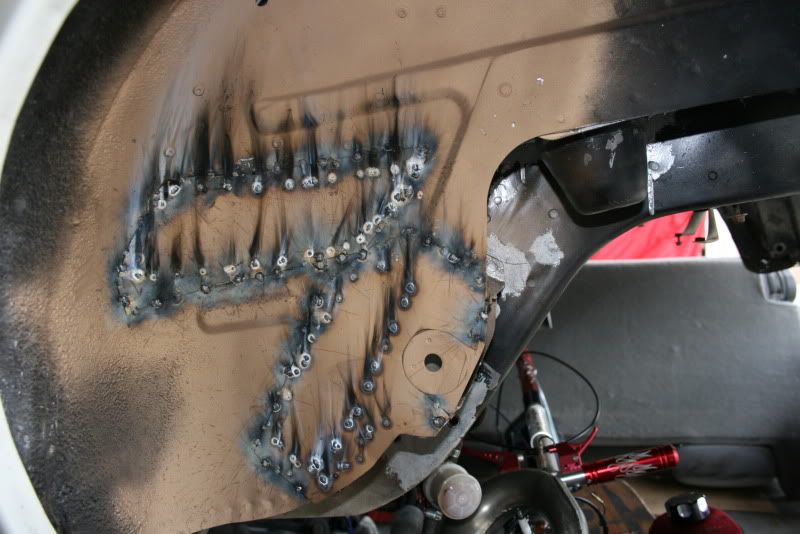
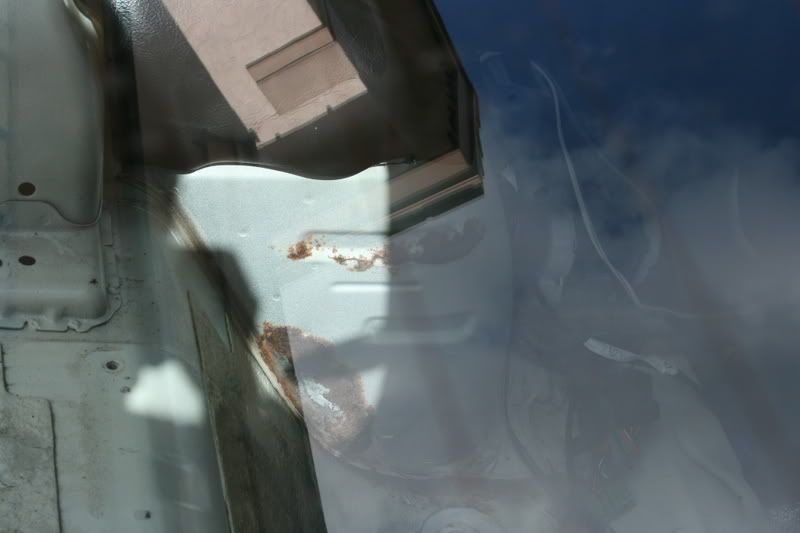
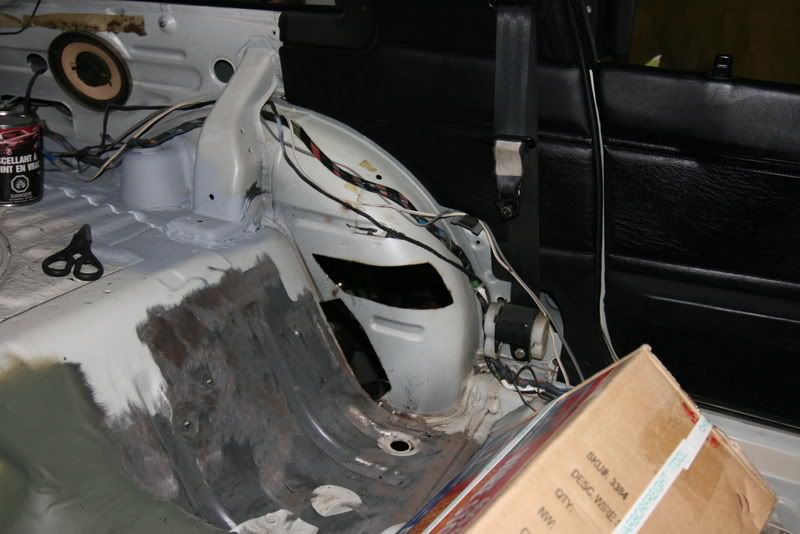
I cut out the rusted areas and made sheet metal patches that followed the general shape of the original components, lots of spot weld drilling, cutting and beating on sheet metal with hammers and anvils.
As you can see, it was rusting from in between the layers of sheet metal, by the time I found it the metal underneath was a total loss.
So I drilled out the spot welds with a spot weld drill bit, removed the external reinforcement panels, cut out the rusty metal of the fender well in easy to recreate shapes, and trimmed the rusted sections off of the stock reinforcement panels (upper ones, the stock lower ones were a lost cause.)
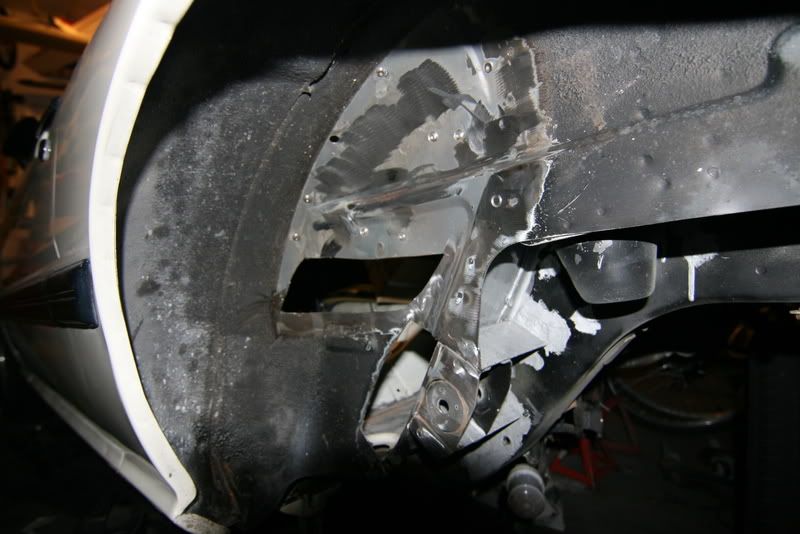
After that I got myself some 20ga. and 16ga. sheet metal and went to work. I made templates out of cereal box cardboard and traced it onto the sheet metal before I cut it out with the pneumatic nibbler. Once I had the 2d pieces cut out, I formed them by hand with a hammer, sprayed the mating faces of metal with weldable primer, and welded them in. I also made new lower reinforcement panels out of the thicker 16 ga. steel, as well as upper link reinforcement beams from thick 10ga. and squarestock kind of like the convenience box area reinforcements on the SA22 chassis.

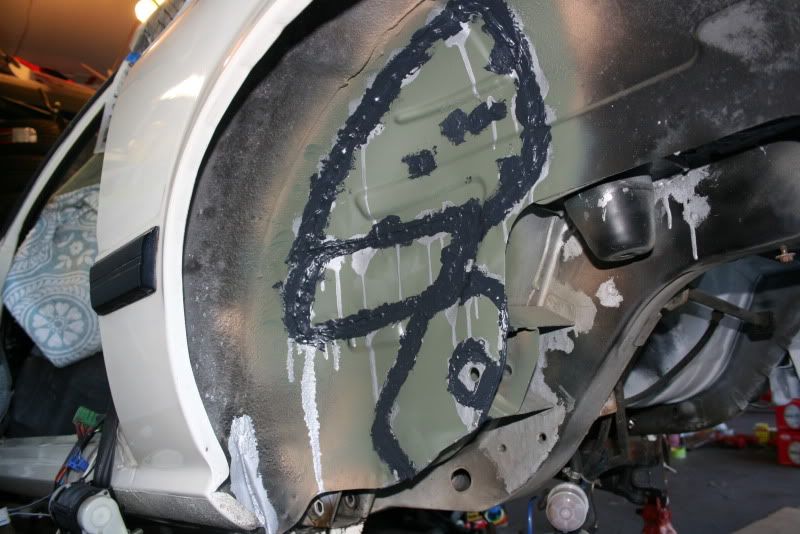
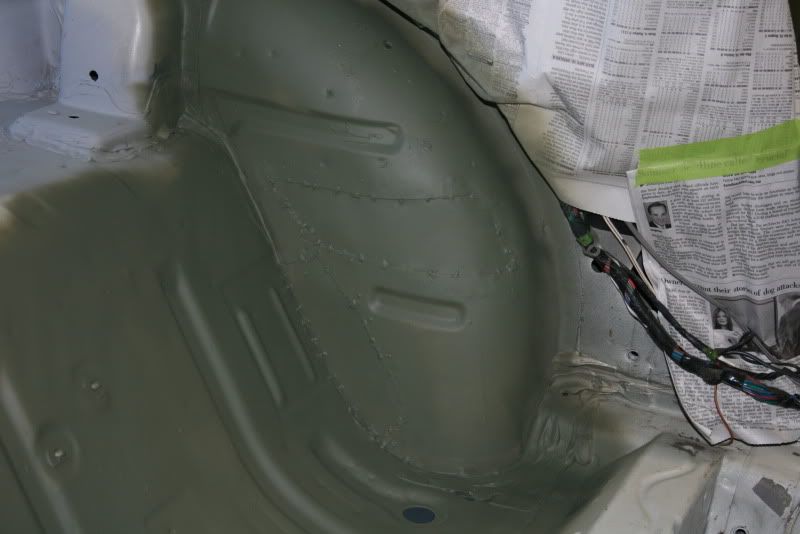
Once I had the patches welded in, I hit them with zinc self etching primer, and brush on seam sealer. After that, a coating of gloss white rustoleum on the inside, and a healthy dose of rustoleum and underbody coating on the outside.
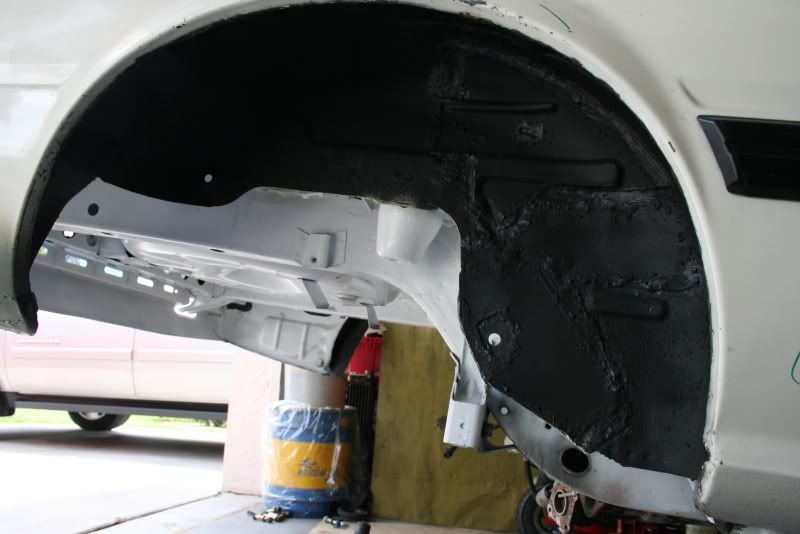
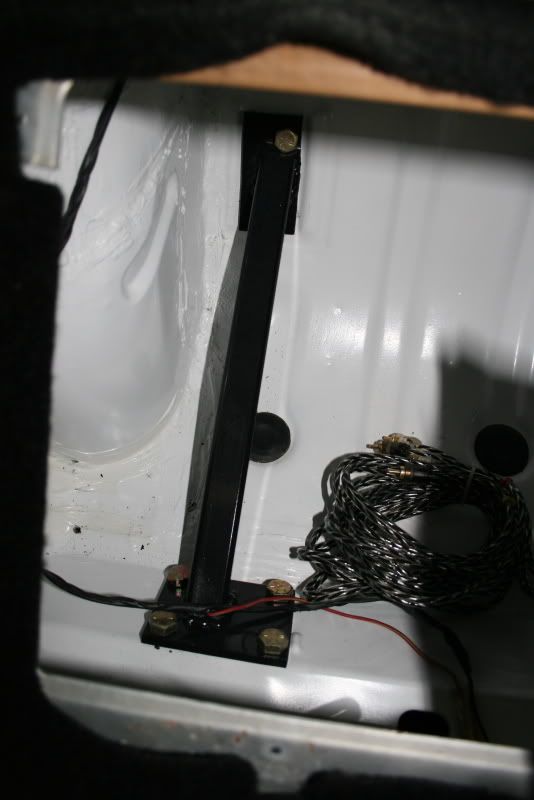
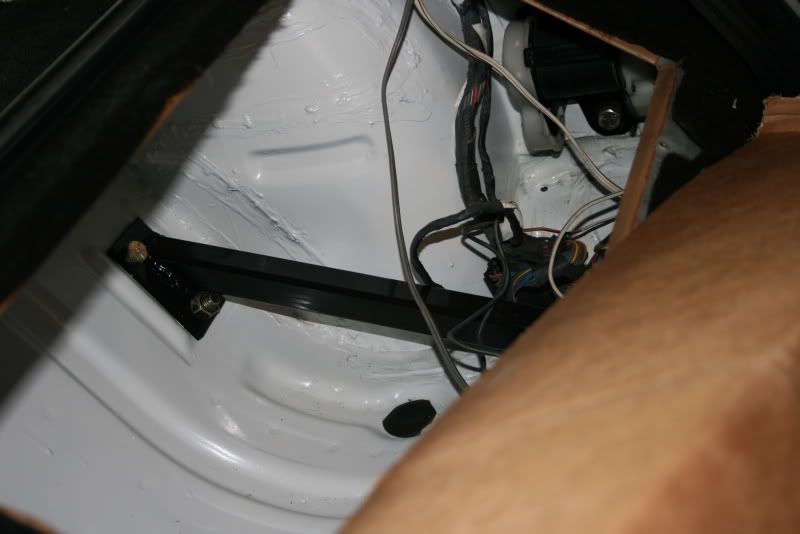
Those beams I was talking about...
Also, I didn't get any pictures of it, but it was rusting out where the floor boards come together in the trunk towards the rear right above the frame rail. That area received a similar treatment and won't be giving me anymore problems any time soon. Hope that helps.
As you can see, it was rusting from in between the layers of sheet metal, by the time I found it the metal underneath was a total loss.
So I drilled out the spot welds with a spot weld drill bit, removed the external reinforcement panels, cut out the rusty metal of the fender well in easy to recreate shapes, and trimmed the rusted sections off of the stock reinforcement panels (upper ones, the stock lower ones were a lost cause.)
After that I got myself some 20ga. and 16ga. sheet metal and went to work. I made templates out of cereal box cardboard and traced it onto the sheet metal before I cut it out with the pneumatic nibbler. Once I had the 2d pieces cut out, I formed them by hand with a hammer, sprayed the mating faces of metal with weldable primer, and welded them in. I also made new lower reinforcement panels out of the thicker 16 ga. steel, as well as upper link reinforcement beams from thick 10ga. and squarestock kind of like the convenience box area reinforcements on the SA22 chassis.
Once I had the patches welded in, I hit them with zinc self etching primer, and brush on seam sealer. After that, a coating of gloss white rustoleum on the inside, and a healthy dose of rustoleum and underbody coating on the outside.
Those beams I was talking about...
Also, I didn't get any pictures of it, but it was rusting out where the floor boards come together in the trunk towards the rear right above the frame rail. That area received a similar treatment and won't be giving me anymore problems any time soon. Hope that helps.


