
Installing Carter pump - tips for little nuts on top?

Thread Starter
No pistons baby
Joined: Feb 2011
Posts: 171
Likes: 0
From: Edmonton, Alberta, Canada
Installing Carter pump - tips for little nuts on top?
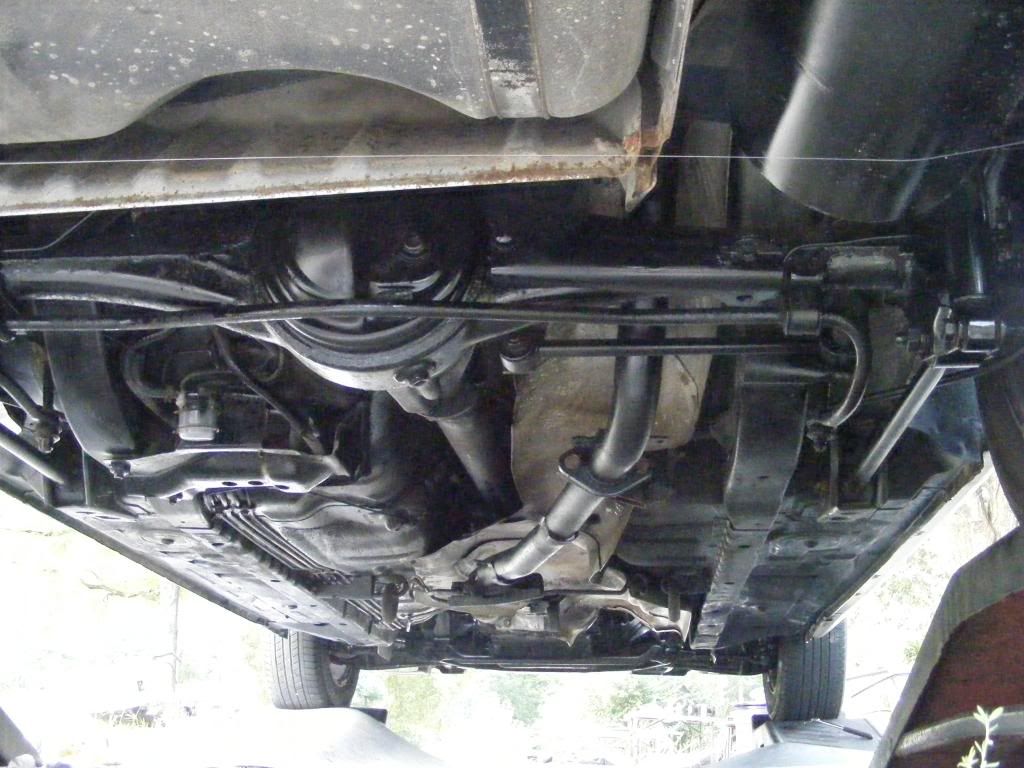
I've secured the bracket for my Carter pump on to the frame rail and I'm trying to follow everything in this thread (https://www.rx7club.com/1st-gen-archive-71/fuel-how-install-carter-fuel-pump-holley-fpr-529605/).
Now to screw on the three tiny nuts holding the pump on to the bracket. I've been scraping my fingers and trying to get a wrench in there for an hour. Is there a trick to getting those screws on?
Now to screw on the three tiny nuts holding the pump on to the bracket. I've been scraping my fingers and trying to get a wrench in there for an hour. Is there a trick to getting those screws on?

That's how I did it too, into the stock bracket and onto the rail in the same place as the stock pump, using the same mounting hardware as the stock pump. The carter pump is a little smaller in diameter so I added some kind of metal band around the carter pump so that the clamp on the bracket fit tightly.

I don't know about everyone else but I used the bracket that came with the Carter
fuel pump and had to drill some holes in the frame as it goes up over the rear axle.
I then mounted the bracket using the self tapping bolts from the kit. Then I had
to mount the pump to the bracket using those little nuts on the top.
Watch out tightening down those nuts, the threaded posts they go on strips
easily. One of mine got a bit stripped last time I had it off. I double secured it
using some large zip ties just in case. Also, put a good 1/2 inch of medium denisty
rubber between the bracket and your frame rail. It will help deaden the vibration
and noise. Some folks use pieces of old flip flops or mouse pads.
Thread Starter
No pistons baby
Joined: Feb 2011
Posts: 171
Likes: 0
From: Edmonton, Alberta, Canada
Kentetsu & Ray Green, I know you guys know your stuff, so you must know some real tricks to bolt on that bracket when the pump is hanging there in front of the screw holes in the bracket! I'm putting mine up like Kentetsu did in the photos but when the pump is hanging on the bracket it blocks access to screw anything through the bracket.
Ray Green, maybe you have a different kind of pump? I've got a Carter 4070 and there's no way to use the stock pump parts for my Carter.
Thanks for the replies, I'm going to crawl back under and keep looking and thinking...
EDIT: Kentetsu, looking at those pics again it seems like your pump isn't quite perfectly vertical. Is that ok? Then I could get it a little higher.
Last edited by Alex84GSL; Aug 16, 2011 at 07:03 PM. Reason: New thought
Here's some photos of the stock 12A cradle, if that helps, from an 84/85 GSL. It's mounted on four rubber grommets, to keep the vibrations down. The pump bolts down to it.
When I put the carter in I just adapted it to that cradle, adding a metal band to make it fit the stock tie down band. I had to adjust the plumbing a little, but not much.
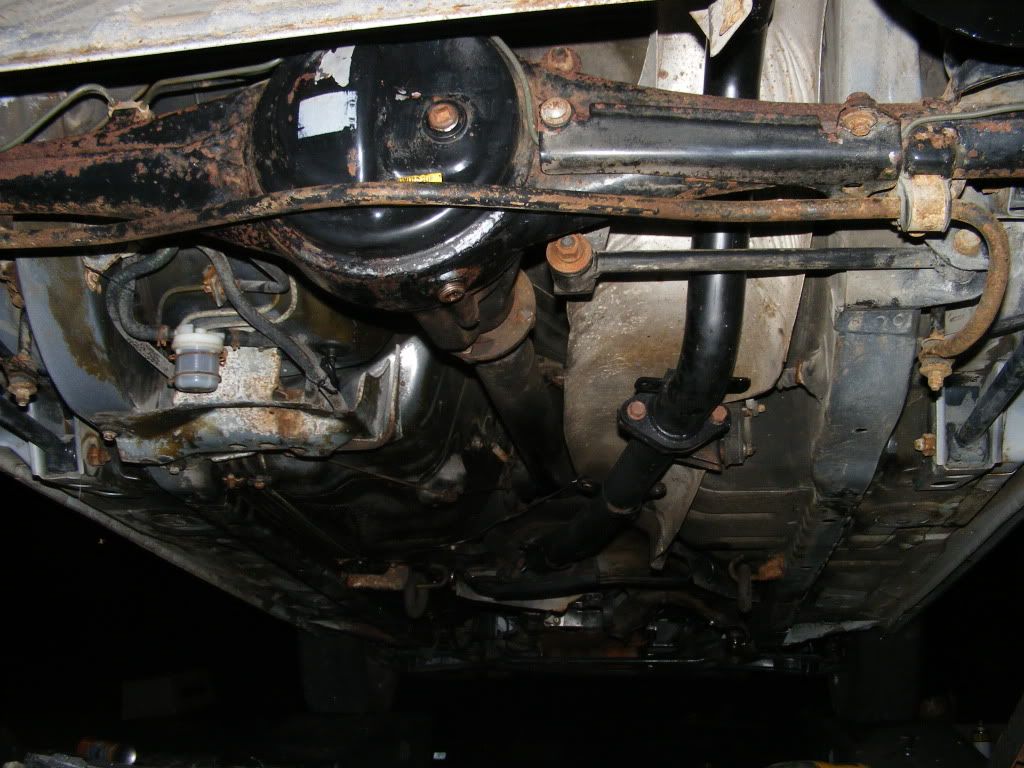
When I put the carter in I just adapted it to that cradle, adding a metal band to make it fit the stock tie down band. I had to adjust the plumbing a little, but not much.
Thread Starter
No pistons baby
Joined: Feb 2011
Posts: 171
Likes: 0
From: Edmonton, Alberta, Canada
Thanks Ray Green, I know that area well, I've been crawling under it for a week! But I'm sure you must be talking about a stock-type replacement. The 4070 I have will definitely not fit on the stock bracket. Although I'm using the rubber grommets again to help deaden sound on my new mounted bracket.
Trending Topics
Whoops, my error, I just went back and looked at Mark's tutorial, I can see that a Carter 4070 is not the same Carter pump I put in, which was a low pressure stock replacement with inlet and outlet on opposite ends and a bit smaller in diameter than the stock pump. It is a tight fit in that stock cradle, I can see why you're having to get creative.
I was able to get mine to be pretty close to vertical but I only used 2 bolts instead
of the 3 they supplied. The 3 bolts to hold that pump are overkill anyway. Using just
2 bolts you can get it pretty close to true vertical.


Thread
Thread Starter
Forum
Replies
Last Post
trickster
2nd Generation Specific (1986-1992)
25
Jul 1, 2023 04:40 PM