
DIY Ebay HID retrofit write-up

Thread Starter
Joined: Jun 2006
Posts: 4,815
Likes: 24
From: Columbia, Tennessee
DIY Ebay HID retrofit write-up
Here is part 1 of my cheapo ebay HID retrofit. Basically this is how to install the kit. Part 2 will involve opening up the sealed beam 6024's and installing proper HID projectors lenses.
Things you will need for part 1...
-Ebay HID bulb and ballast (cost me $30) I chose 35 watt 5000k
-Ebay HID relay harness (cost me $5)
-Ebay H4 glass housings (cost me $20)
Install time is about 1 hour if you do it properly and clean.
Things you will need for part 1...
-Ebay HID bulb and ballast (cost me $30) I chose 35 watt 5000k
-Ebay HID relay harness (cost me $5)
-Ebay H4 glass housings (cost me $20)
Install time is about 1 hour if you do it properly and clean.
Thread Starter
Joined: Jun 2006
Posts: 4,815
Likes: 24
From: Columbia, Tennessee
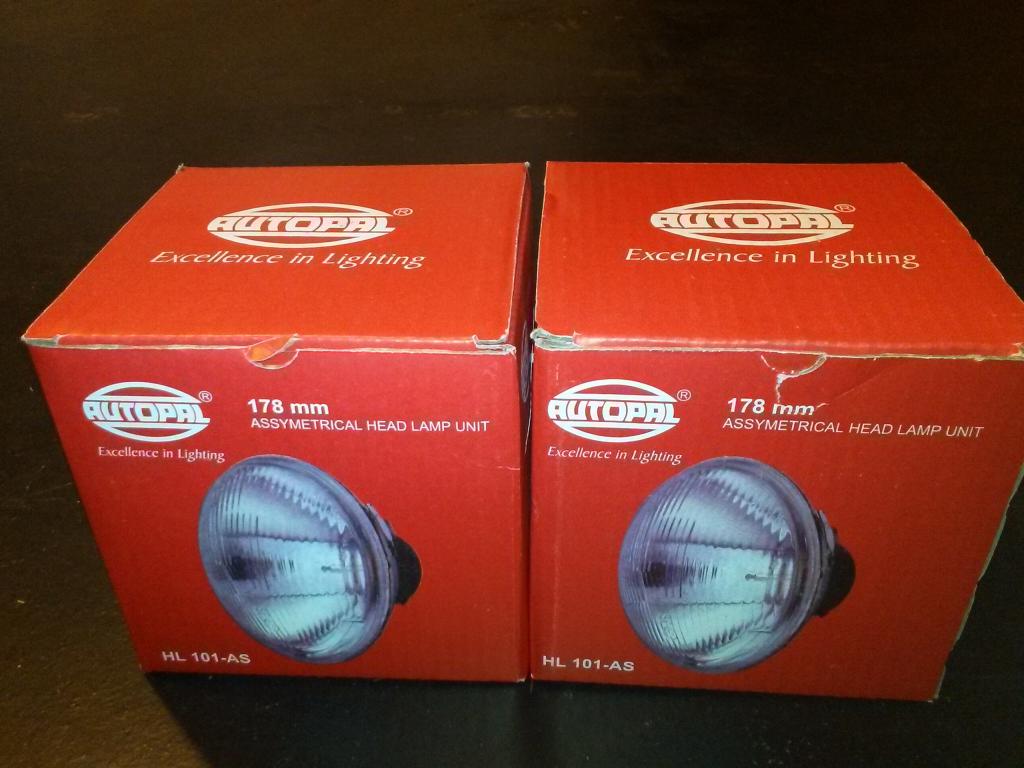
The gear...
I chose Xentec 5000k and glass AutoPal H4 housings. You must use a relay harness or you will get poor light operation and possibly burn fuses and wiring / headlight switch out.


I chose Xentec 5000k and glass AutoPal H4 housings. You must use a relay harness or you will get poor light operation and possibly burn fuses and wiring / headlight switch out.


Thread Starter
Joined: Jun 2006
Posts: 4,815
Likes: 24
From: Columbia, Tennessee
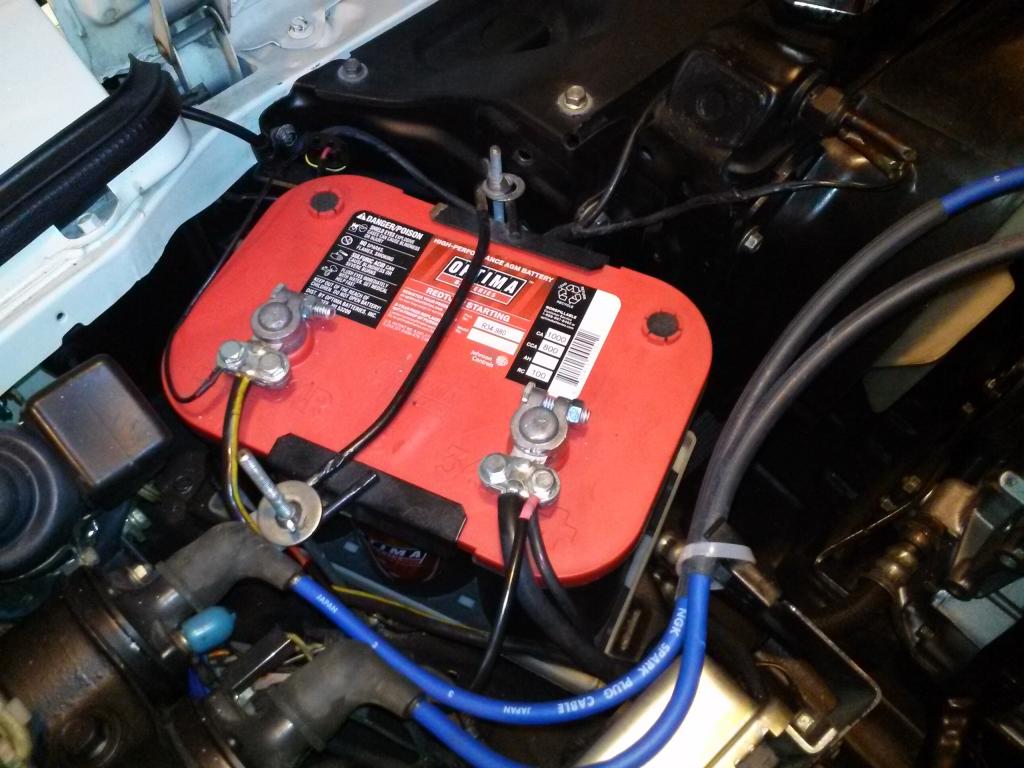
-Remove the battery...
It helps gain access for mounting and loom feeding. Also, safety first.
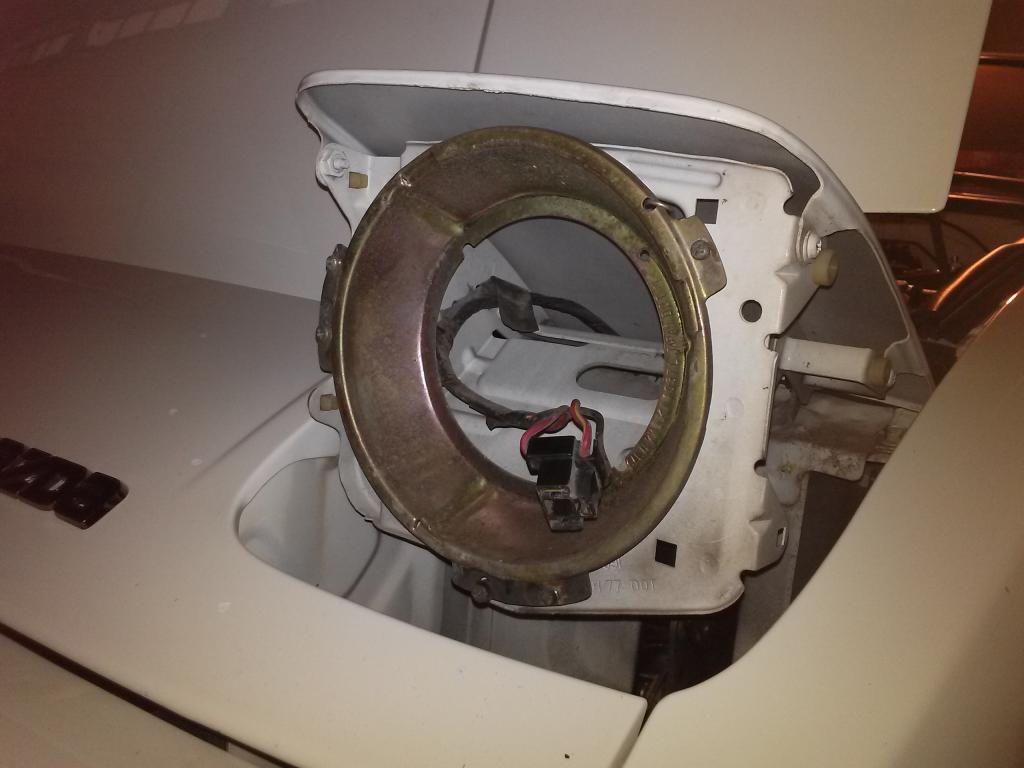
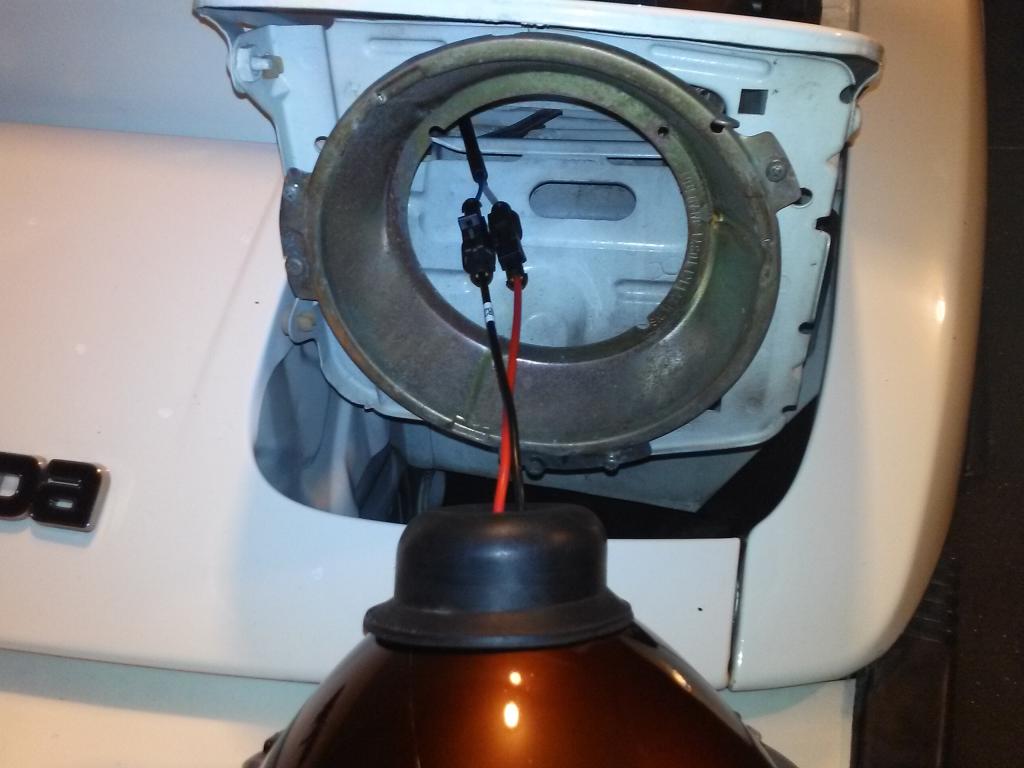
-Remove the headlight trim and housings...
You will need to unclip the stock H4 plug and harness to feed it into the engine bay. You will need to manually raise and lower the headlight motor to gain clearance while feeding wires in and out.
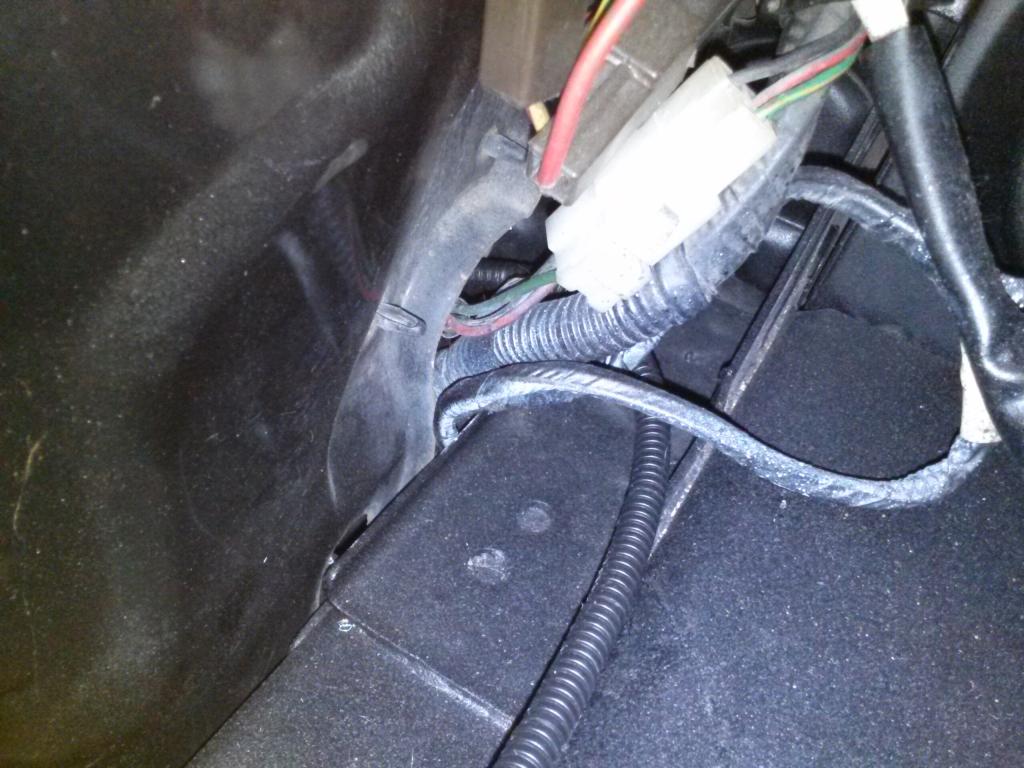
-Install the relay harness. I chose this factory stamped hole for a screw to fix the relay here. Then, you just feed the passenger side bit through the rubber flappy grommet and across the round beam under the bumper and radiator assembly. Fasten it with a couple of the zip ties included.

Thread Starter
Joined: Jun 2006
Posts: 4,815
Likes: 24
From: Columbia, Tennessee
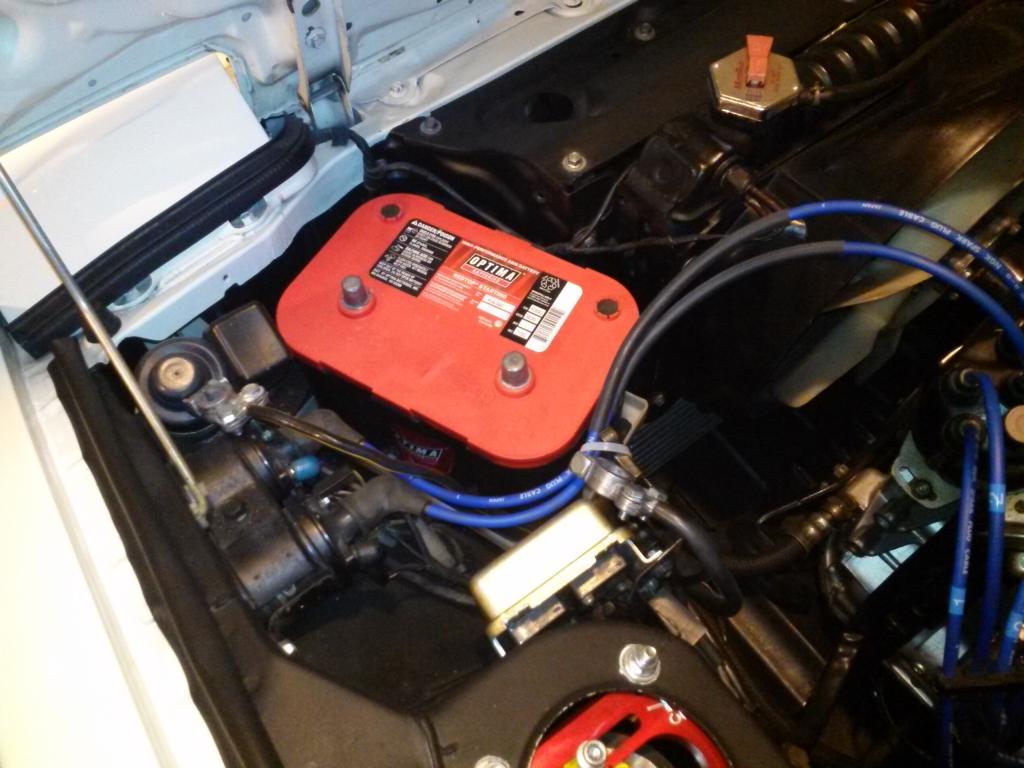
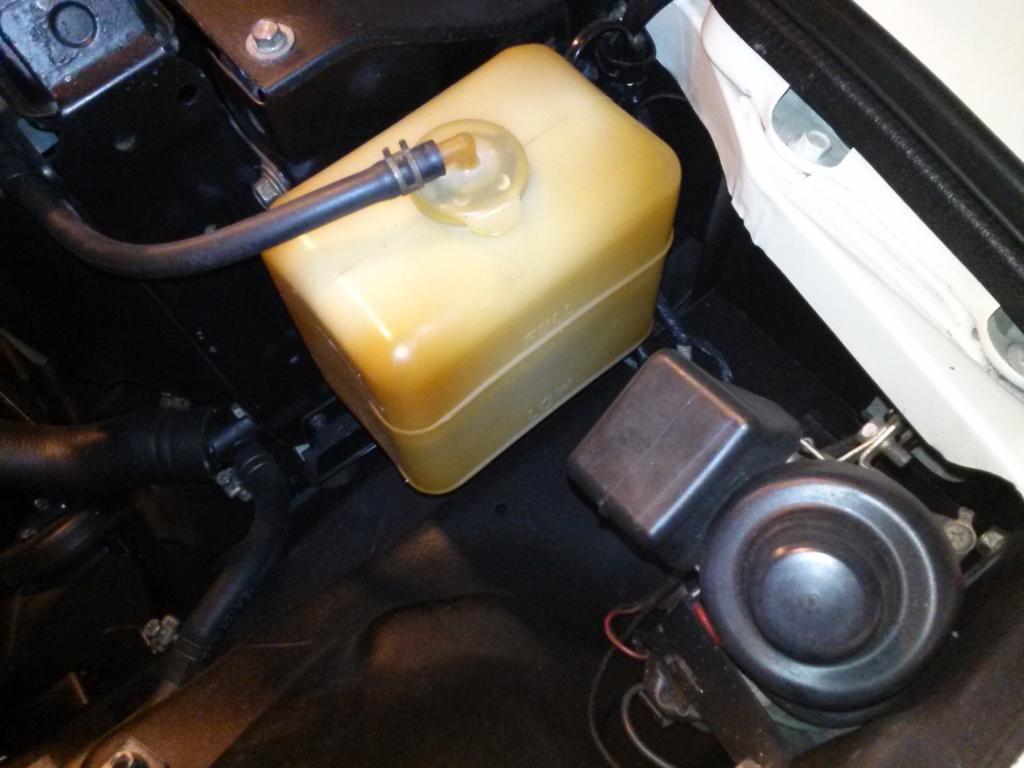
-Slip the radiator overflow out of the way. I chose one of the 10mm bolts on the radiator overflow bracket as my ground for the harness because it was in a convenient spot, clean, and free of rust. I just made sure to rub it down with some steel wool for a good contact.

-Now feed the harness through the flappy rubber grommet.
-Mount the ballast. I chose to just use the OEM metal loom hook that holds the headlight harness on both sides. Clean, simple, and easily removable.


-Now feed the harness through the flappy rubber grommet.

-Mount the ballast. I chose to just use the OEM metal loom hook that holds the headlight harness on both sides. Clean, simple, and easily removable.

Thread Starter
Joined: Jun 2006
Posts: 4,815
Likes: 24
From: Columbia, Tennessee
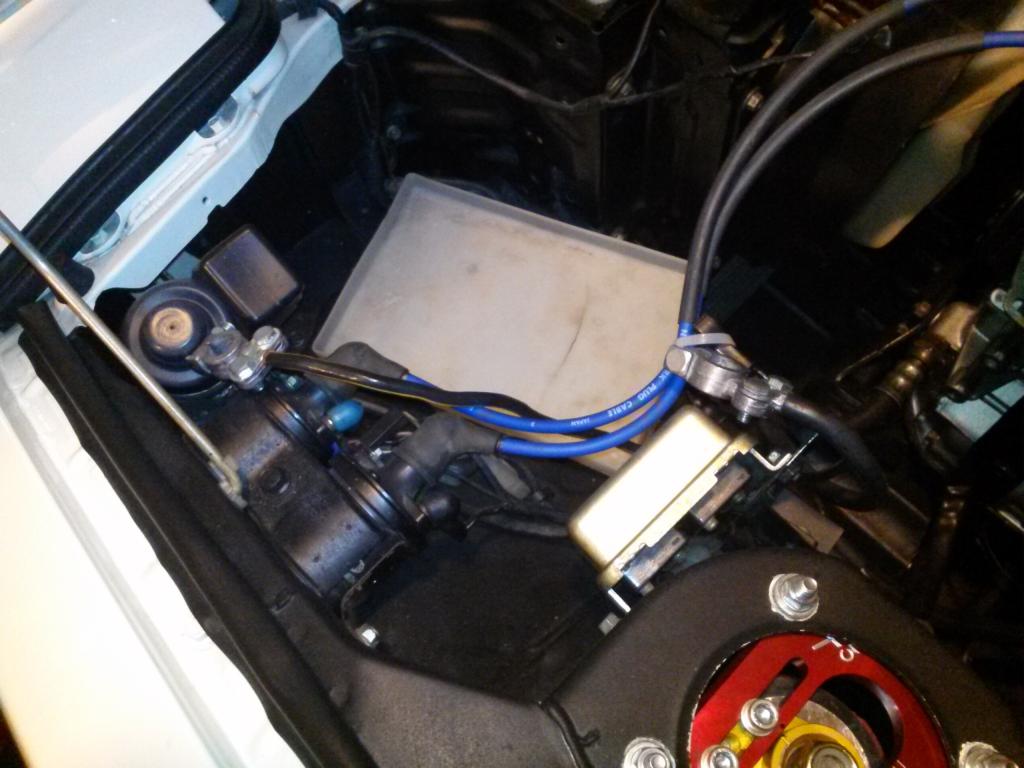
-Reinstall the overflow tank and you will end up with this...
Can't even tell its there.
-Run the ballast wires through the bucket and zip tie them in place. You dont want them moving around and rubbing against sharp edges. Make sure they have at least a couple inches of slack.
-Install the battery...
Connect the positive ring terminal to your positive post, negative to negative.
Can't even tell its there.

-Run the ballast wires through the bucket and zip tie them in place. You dont want them moving around and rubbing against sharp edges. Make sure they have at least a couple inches of slack.

-Install the battery...
Connect the positive ring terminal to your positive post, negative to negative.

Thread Starter
Joined: Jun 2006
Posts: 4,815
Likes: 24
From: Columbia, Tennessee
-Install the trim pieces, and double check your wiring. Check for headlight motor operation with the up / down switch. Make sure you have good operation and the harness has enough slack for motion.
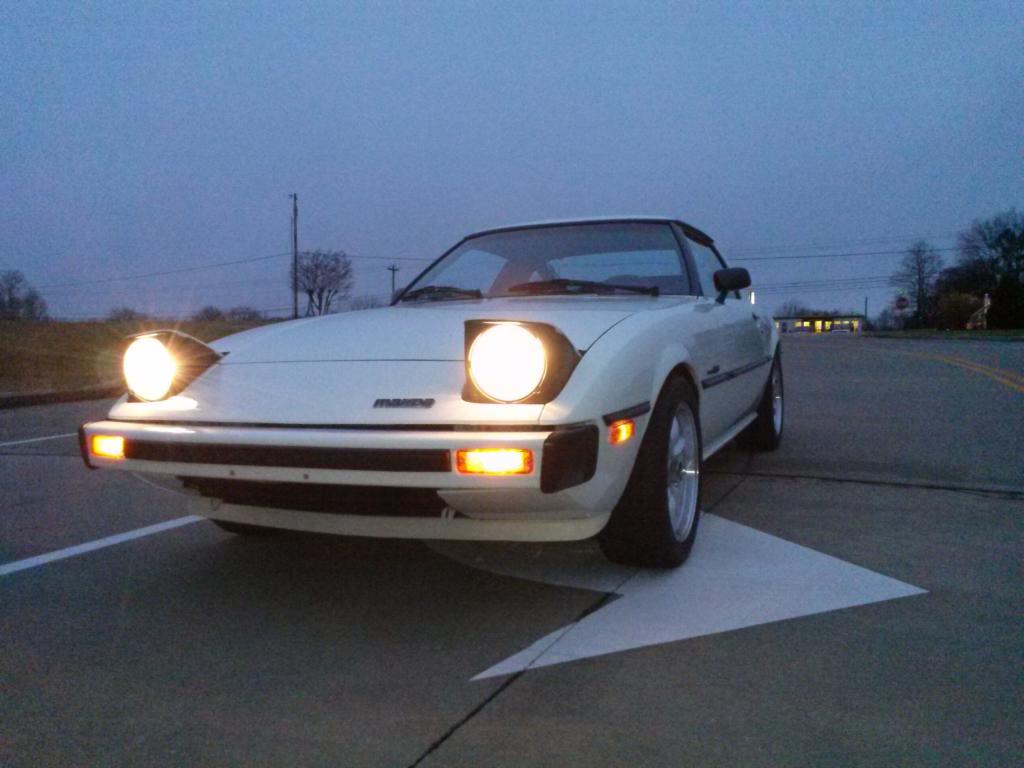
You will end up with this as your final product...
$55 total invested so far.
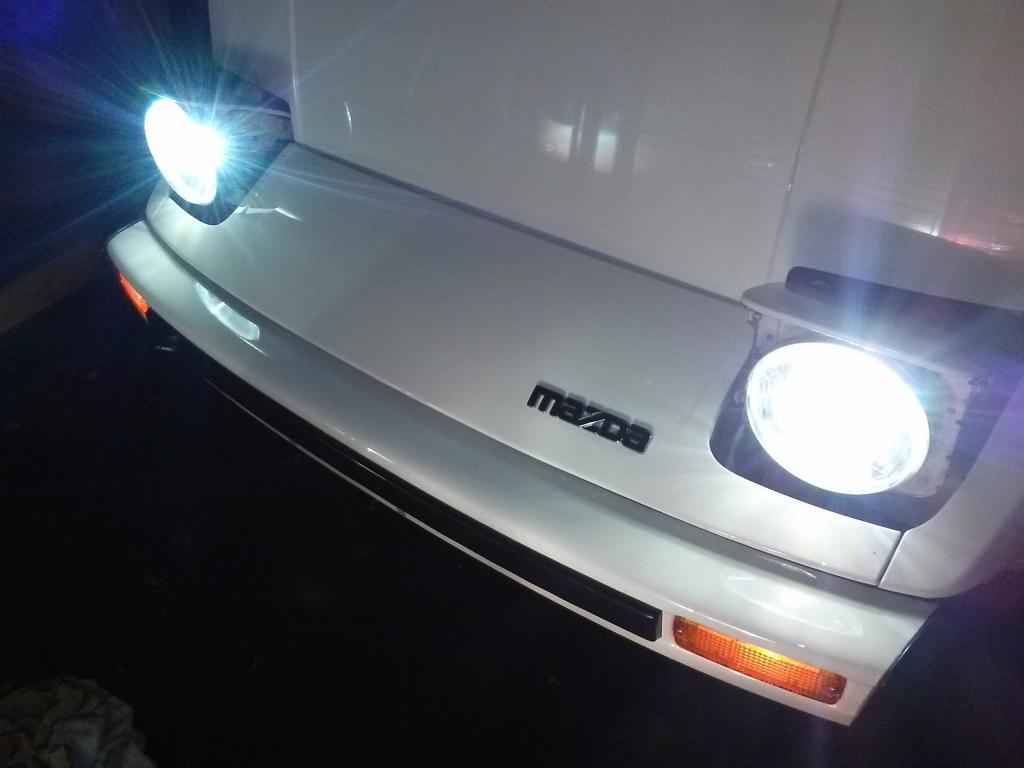
Now, I say this is part 1 of the install because quite frankly this is not the proper way of doing this...yet...
As of now you have very bright, great looking light! ...thats being reflected through housings designed for halogens! So the actual light reflecting on the road looks like rubbish. You will probably blind oncoming motorists and possibly get pulled over. But, that might be your thing so if your happy with the light out put as is by all means, blind on.
SO... As of now I decided to put some Silverstar ZXE bulbs in, and disconnect the harness at the battery and tuck it away so its not live.
Part 2 will be my actual projector retro fit. Since I love the light out put of my RX8s factory HID, I will probably try to find a pair of trash RX8 housings. I will gut them and steal the projector beams. Take a heat gun and open up these AutoPal housings and mount the RX8 projectors inside them. Well see how it goes from there.
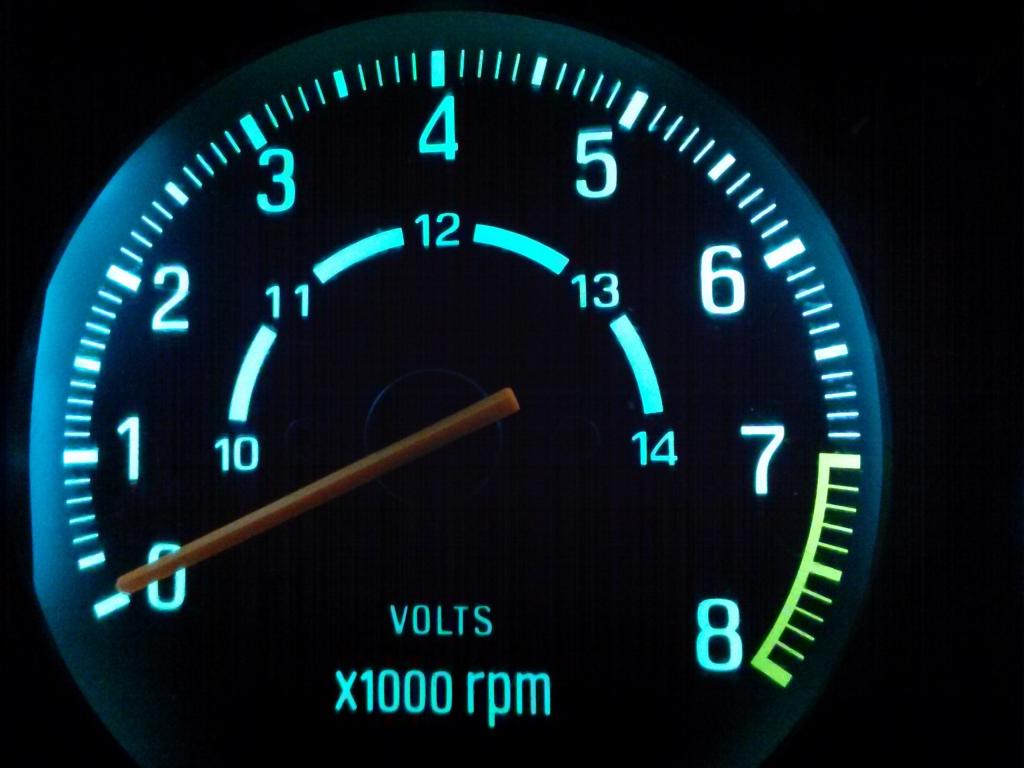
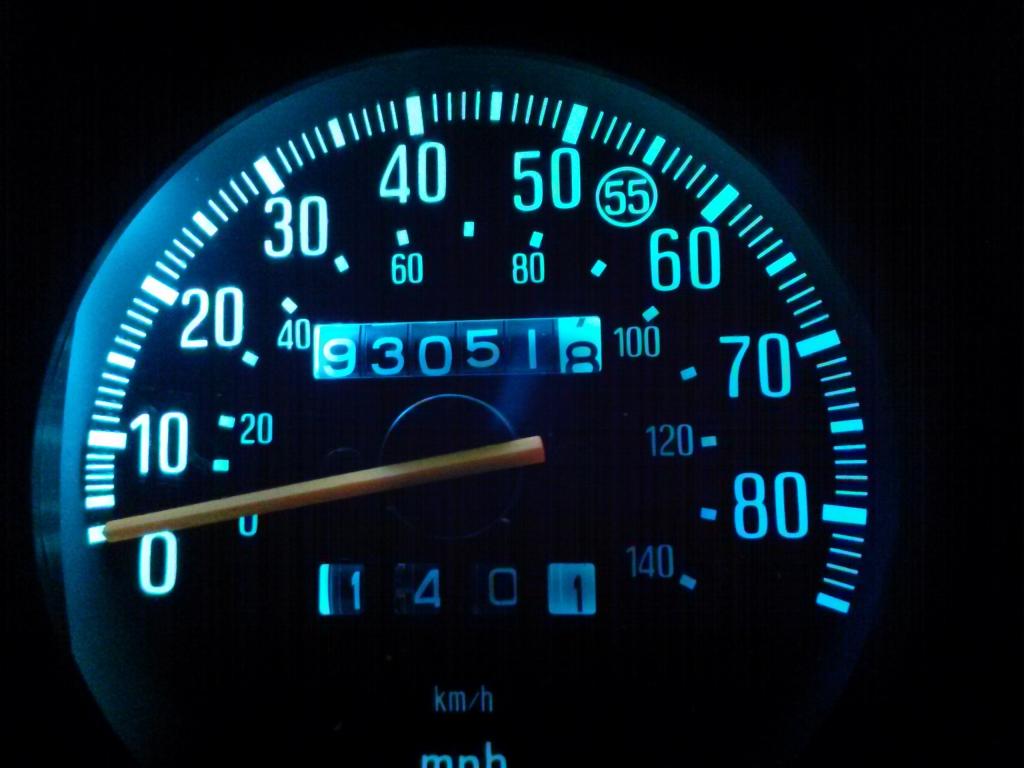
Also, my LED instrument cluster upgrade...
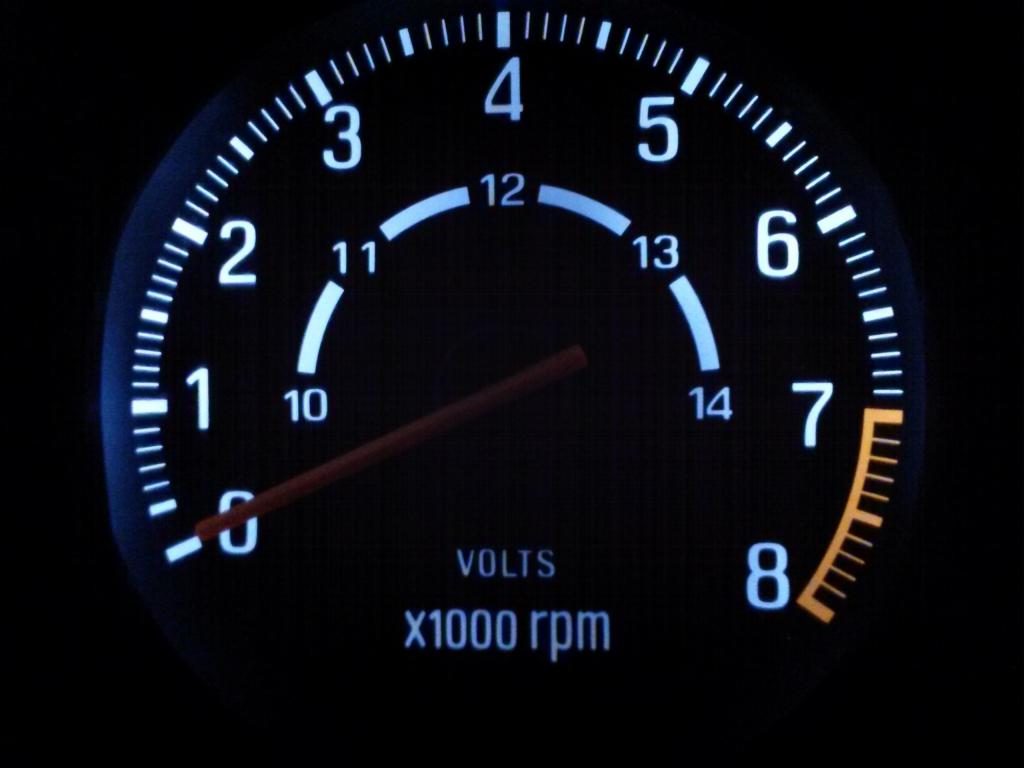
Tired of squinting to read how fast your going at night? Just open up the cluster, remove the blue reflectors and the white diffusers. Install four quality LEDs of your color choice and this is what you end up with. Probably 3-4 times brighter. There are a couple low spots and hot spots in the light pattern, but you have so much more light its worth it, and you wont even notice.
You will end up with this as your final product...
$55 total invested so far.

Now, I say this is part 1 of the install because quite frankly this is not the proper way of doing this...yet...
As of now you have very bright, great looking light! ...thats being reflected through housings designed for halogens! So the actual light reflecting on the road looks like rubbish. You will probably blind oncoming motorists and possibly get pulled over. But, that might be your thing so if your happy with the light out put as is by all means, blind on.
SO... As of now I decided to put some Silverstar ZXE bulbs in, and disconnect the harness at the battery and tuck it away so its not live.

Part 2 will be my actual projector retro fit. Since I love the light out put of my RX8s factory HID, I will probably try to find a pair of trash RX8 housings. I will gut them and steal the projector beams. Take a heat gun and open up these AutoPal housings and mount the RX8 projectors inside them. Well see how it goes from there.
Also, my LED instrument cluster upgrade...

Tired of squinting to read how fast your going at night? Just open up the cluster, remove the blue reflectors and the white diffusers. Install four quality LEDs of your color choice and this is what you end up with. Probably 3-4 times brighter. There are a couple low spots and hot spots in the light pattern, but you have so much more light its worth it, and you wont even notice.
Lol yeah those are pretty well like giving someone the finger as the go by using those housings. 
Nice work on the kit, pretty cheap, and seems to be decent quality with the weather pack type connectors.
Nice work on the kit, pretty cheap, and seems to be decent quality with the weather pack type connectors.
Trending Topics
Thread Starter
Joined: Jun 2006
Posts: 4,815
Likes: 24
From: Columbia, Tennessee
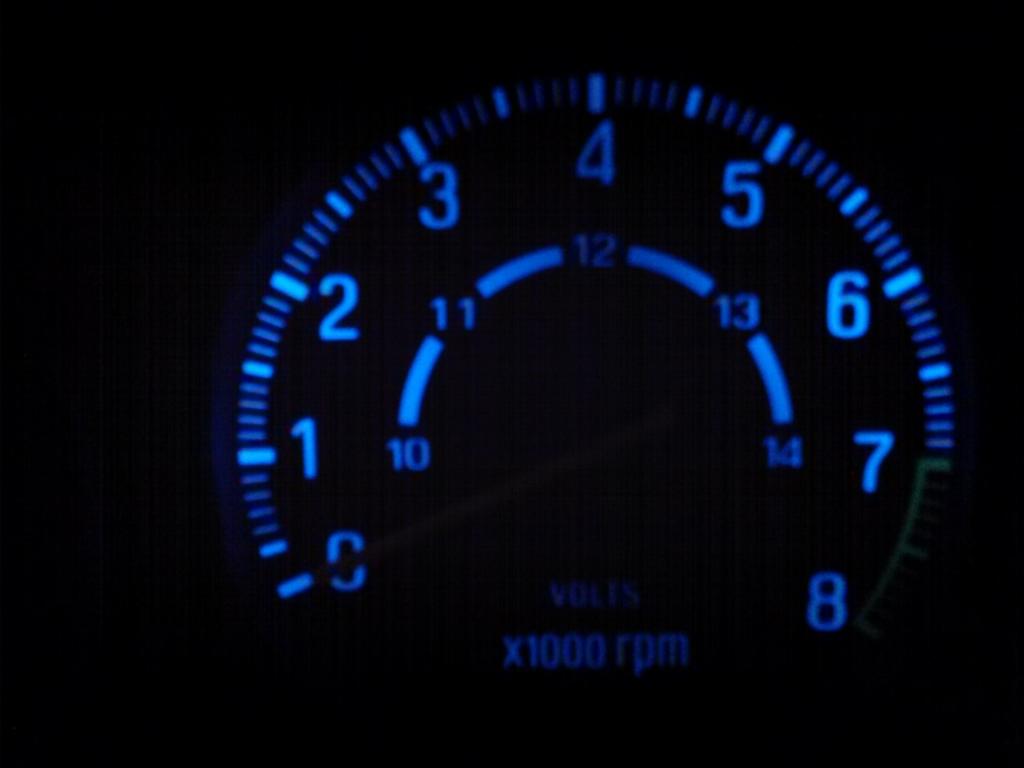
They are Sylvania 194 LEDs in bright white from AAP. The cluster is 3-4x brighter and sharper than before with the old 168 stockers. I bypassed the dimmer switch for extra oomph. There are some light hot spots, but I may play with difusers. The white pieces inside the cluster definitely muffler the light pattern. I mayb try to reinstall the blue pieces and see how that looks.
Thread Starter
Joined: Jun 2006
Posts: 4,815
Likes: 24
From: Columbia, Tennessee
Installed the clear blue difusers again. Changed to a 6000k Pilot brand bulb I had on the two middle tach area sockets. The left and right sockets are still the bright white Sylvania LEDs. I may change them to the Pilot 6000k someday when I have an extra $10 to blow on more bulbs.
Now it matches the color of the HVAC controls and Clarion radio. I will expiriment with a 194 LED retrofit there too. Seems that uses a uber tiny bulb, not 168/194. Ill have to wire in a 194 socket.
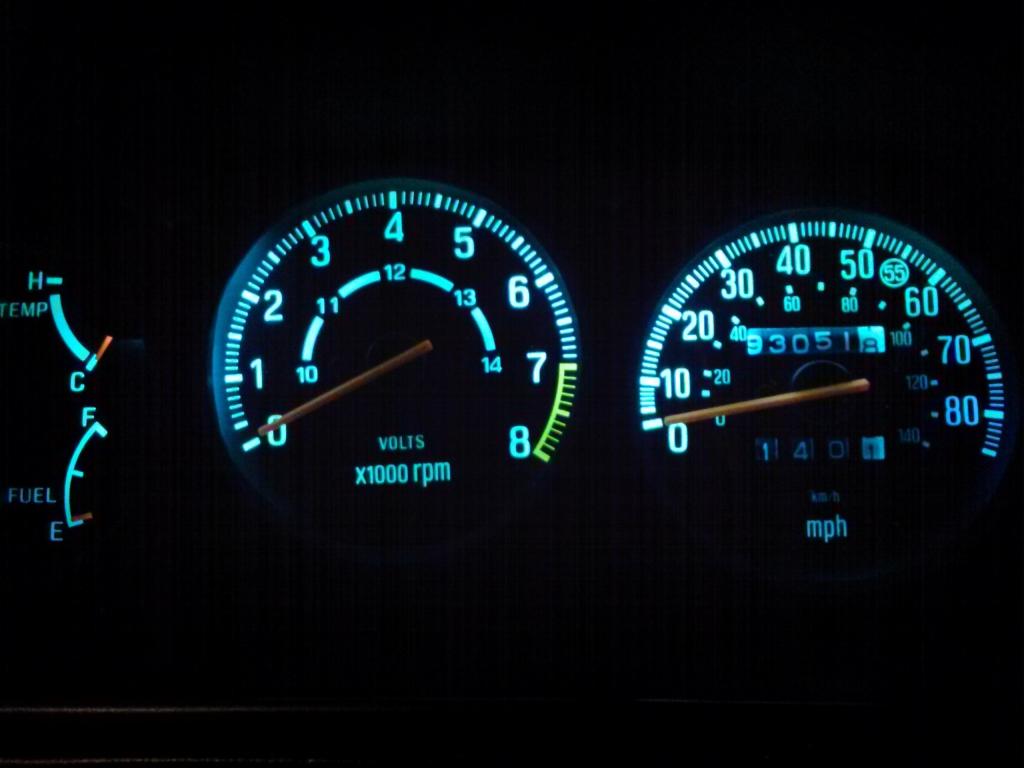
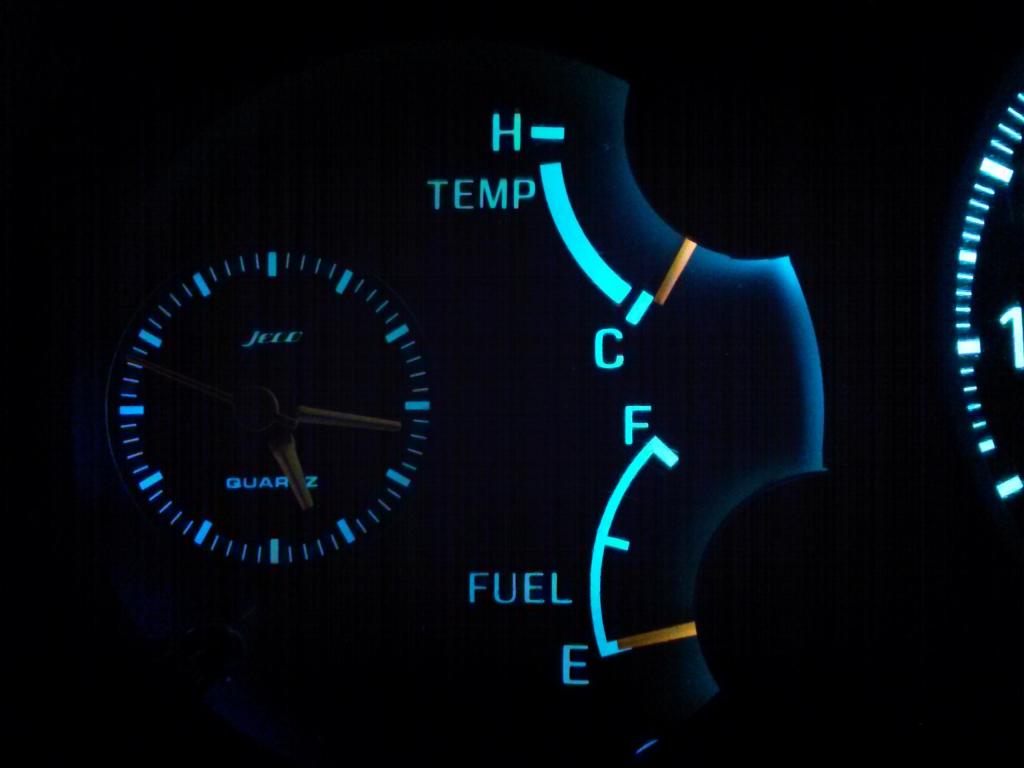
I still wish the needles were a brighter red...
Just for reference, the Sylvania LEDs with blue difusers... Too blue.


Full Member
Joined: Aug 2013
Posts: 178
Likes: 0
From: Trinidad & Tobago
Love the mods. Will be doing the dash lights and look forward to the rest of the hid mods to follow those as well!
Keep up the great clean work and detailed tutorials. Much appreciated.
Bez
Keep up the great clean work and detailed tutorials. Much appreciated.
Bez
Joined: Aug 2011
Posts: 3,078
Likes: 42
From: Cambridge, Minnesota
I made custom LED marker lights for my first FB with 8 LEDs in each housing - that was pretty cool I thought. Someday I'll get around to actually making custom LED tail lights similar to what you see in FD's and S5 FC's...someday...
Looking forward to the projector install, that's the main thing I'd want to do with mine is go projectors with HIDs. But the easiest way to do that is to go aftermarket lights that don't flip up anymore and that's no fun.
Looking forward to the projector install, that's the main thing I'd want to do with mine is go projectors with HIDs. But the easiest way to do that is to go aftermarket lights that don't flip up anymore and that's no fun.
They are Sylvania 194 LEDs in bright white from AAP. The cluster is 3-4x brighter and sharper than before with the old 168 stockers. I bypassed the dimmer switch for extra oomph. There are some light hot spots, but I may play with difusers. The white pieces inside the cluster definitely muffler the light pattern. I mayb try to reinstall the blue pieces and see how that looks.
Thread Starter
Joined: Jun 2006
Posts: 4,815
Likes: 24
From: Columbia, Tennessee
Thread Starter
Joined: Jun 2006
Posts: 4,815
Likes: 24
From: Columbia, Tennessee
Not sure how those housings on BD would fair with HIDs. The little reflector in the front would be great for halogens, but I imagine bad for HID cut off.

Thread
Thread Starter
Forum
Replies
Last Post