When you click on links to various merchants on this site and make a purchase, this can result in this site earning a commission. Affiliate programs and affiliations include, but are not limited to, the eBay Partner Network.
^^^I don't know about all that^^^ , but today I ..
*Centered the rear end
*Installed the rear swaybar
*Bled the new brakes one more time to be sure
*Drained the gas tank/ refilled 16 gallons plus 16oz premix and 16oz seafoam /purged the line from tank to carb
*Checked oil and coolant and....
*Started it up for the first time in a year and a half. Started right up, idled smooth at 800 after 5 or 10 minutes. My son and I took it to the carwash and then drove it hard around town for about an hour. It's just as noisy and slow as I remember, but the new tires and brakes make me feel a little better. And it looks sharp.
The original 12a revs smooth and doesn't have any stumbles or hiccups, but it's pretty gutless. With the new 225 width Toyo R1R's and Torsen diff it can't spin the tires anymore. I've been through this with other vehicles... some more power and the grippy rear will start to shine. As soon as my new tranny shows up I'll get that and the new motor in, at which point I'll have --
100% new powertrain, suspension, cooling and brakes in this old bucket.
The new springs are 300# front / 200# rear, which is almost triple the stockers, and the rebuilt GSL-SE front and rear brakes are larger, but it really feels just like the old car. Granted, it's been a while since I drove it, and the brake pads need to wear-in a little, but I'm underwhelmed with the upgrades. Hopefully the new motor pulls strong and this guy can run as good as it looks again.
You did a bunch of work to the steering linkage, did you see improvement?
Im not sure yet, I need to get it properly aligned. I adjusted the tension rods to center the wheels in the fender but I don't know what the caster actually is right now. Similarly, I adjusted the camber plates until the "bubble level app" on my phone showed -1.5*, but all this was just to get it drivable. My son and I set the toe to 0 with some 1x8's and a couple of tape measures, and it seems to track straight and doesn't feel "weird", but I need to get a real alignment. Going for-
Toe: 0*
Caster: +5*
Camber: -1.5* (I can easily adjust it at the plates if I want to try AutoX, then easily set it back for the drive home)
Up front I've replaced the:
Control Arms
Tension Rods
Sway bar
Coilovers w/ camber plates
Tie rods (inner and outer)
Idler arm
I have a new pitman arm but I'm going to have the alignment shop replace that. I got a NOS Three 5 (555) from a forum member in Greece. It's made in Japan and supposedly fits much better than the Moog part.
But to answer your question, now that every ball joint and tie rod has been replaced, it feels just like it did with the 36yo parts. I really feel no difference. Still has the same amount of dead zone in the steering wheel. But, I have the knowledge that it's all good, fresh parts.
I just need to get a proper alignment and let the brakes seat-in, and then I can start pushing it in the corners. Everything I'm "beefing up" in the chassis is to support the stronger motor I have on the stand, so until I put that in I might not be able to appreciate it all.
Like I alluded to in the last post, I've been through this same thing with a V8 muscle truck. Truck ran pretty good with a mild 350 but kept doing 1-wheel burnouts at every light. "I know, I'll put a locker and fatter tires on it". Yeah right, then it couldn't do a burnout and the extra traction just dogged down the motor. Swapped that motor for a lumpy cammed 377 stroker with a 3200-stall converter and LOOK OUT! That truck would hook when I wanted, or do endless burnouts when I wanted.
The chassis mods I've done to this FB are over-built for the tired 12a. But I built it like this because I knew I'm putting a new stronger motor in soon, and if I turbo it down the road, then I'll be ready for that too.
a jackass neighbor hit my car, I offered to settle for $100. ended up taking him to small claims for $480 (auto body shop estimate) plus court costs of $400. I spent $50 on a tail light assembly, bondo, and paint. And maybe 4 leisurely hours of work total. He had his friend attack me at a traffic light, I recorded it on a flip video, the glorious madison police dept wouldn't do anything.
this is the same police dept where it took 3 cops to cripple a 100 pound 65 year old indian man. unfortunately the indian man's son was a big shot surgeon. it went to trial, and the cops were found not guilty. chief of police was later accused of witness tampering and had to resign. and some say that the south isn't retarded.
Is there a part number for the rear springs? I'm looking for something stiffer than Racing Beat, but not as stiff as 200lb/in.
The next time I take the rear wheels off I'll look for a part #. They're Eibachs from GroundControl. When I got them 2 years ago 200# was all GC offered, and they said that was what they found was best for a street/strip 1st gen. They recommended 300# fronts to match for my needs (I got the front Coilovers from T3 though).
I think the rear spring dimensions are a common part, as in Summit sells them in whatever strengt&length you need, but I have no experience with that. Others here, like Mustanghammer, Carl or peejay can probably give you good advice on that. These GC Eibachs have dead-coils at the top so I can cut them shorter if I want to later. The RB springs don't have dead coils (I have a new set but decided to go coilovers, so, never used them).
I only have about 3/8 tank of gas on this setup (1 hour at 7000rpm last night) but they definitely didn't feel too stiff.
Another thing that happened this week was I removed all the carpet, padding and plastic trim in the rear of the car. It reeeeeeeeeeks of rat ****, so it's rolled up in the corner now. On top of the tin I found a billion chocolate sprinkles and dried brown pee pee in every groove and gully. Yuck.
I think I'm going to remove the bin structure, put down new sound deadening material everywhere, and have custom carpet made at an auto upholstery shop near me. They can use my old carpet as a template for the main area but will need to custom cut something for the "rear seat" area. I don't plan to put the battery there, but it will make a great area for grocery bags, small boxes of spare parts, backpack, whatever. I never liked the bins.
Be careful with those HF jack stands. They recently had a big safety recall. If they meet the part numbers, they will refund your money. Not receipt needed.
Last edited by KansasCityREPU; 05-22-21 at 03:26 PM.
Well that's scary. I'll look it up, thanks KC. Oh and thanks again for powder coating those parts for me... here's one of the sway bar link brackets...
Im not sure yet, I need to get it properly aligned. I adjusted the tension rods to center the wheels in the fender but I don't know what the caster actually is right now. Similarly, I adjusted the camber plates until the "bubble level app" on my phone showed -1.5*, but all this was just to get it drivable. My son and I set the toe to 0 with some 1x8's and a couple of tape measures, and it seems to track straight and doesn't feel "weird", but I need to get a real alignment. Going for-
Toe: 0*
Caster: +5*
Camber: -1.5* (I can easily adjust it at the plates if I want to try AutoX, then easily set it back for the drive home)
Up front I've replaced the:
Control Arms
Tension Rods
Sway bar
Coilovers w/ camber plates
Tie rods (inner and outer)
Idler arm
I have a new pitman arm but I'm going to have the alignment shop replace that. I got a NOS Three 5 (555) from a forum member in Greece. It's made in Japan and supposedly fits much better than the Moog part.
But to answer your question, now that every ball joint and tie rod has been replaced, it feels just like it did with the 36yo parts. I really feel no difference. Still has the same amount of dead zone in the steering wheel. But, I have the knowledge that it's all good, fresh parts.
I just need to get a proper alignment and let the brakes seat-in, and then I can start pushing it in the corners. Everything I'm "beefing up" in the chassis is to support the stronger motor I have on the stand, so until I put that in I might not be able to appreciate it all.
Like I alluded to in the last post, I've been through this same thing with a V8 muscle truck. Truck ran pretty good with a mild 350 but kept doing 1-wheel burnouts at every light. "I know, I'll put a locker and fatter tires on it". Yeah right, then it couldn't do a burnout and the extra traction just dogged down the motor. Swapped that motor for a lumpy cammed 377 stroker with a 3200-stall converter and LOOK OUT! That truck would hook when I wanted, or do endless burnouts when I wanted.
The chassis mods I've done to this FB are over-built for the tired 12a. But I built it like this because I knew I'm putting a new stronger motor in soon, and if I turbo it down the road, then I'll be ready for that too.
You're doing it right. Build the chassis to stop and turn first, *then* add the "go!"
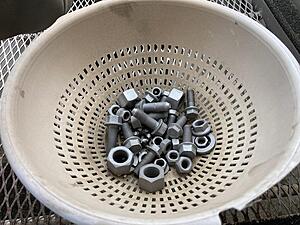
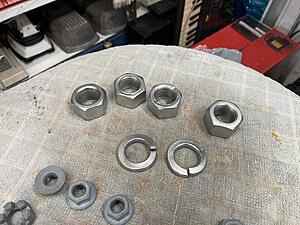
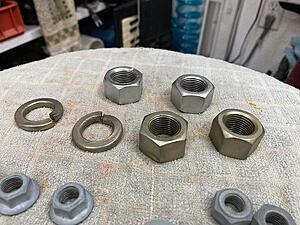
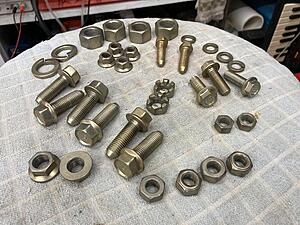
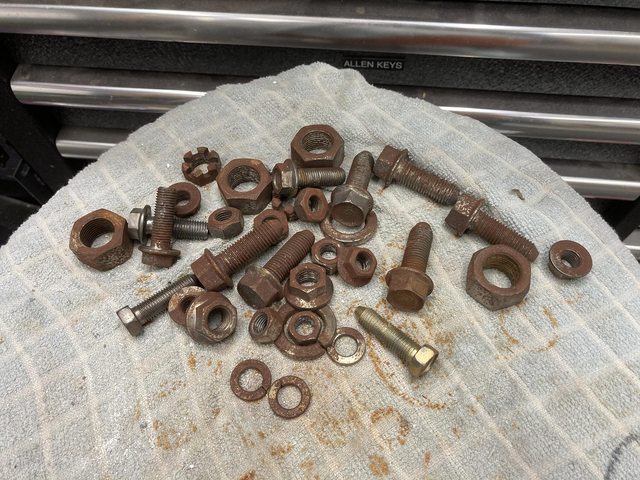
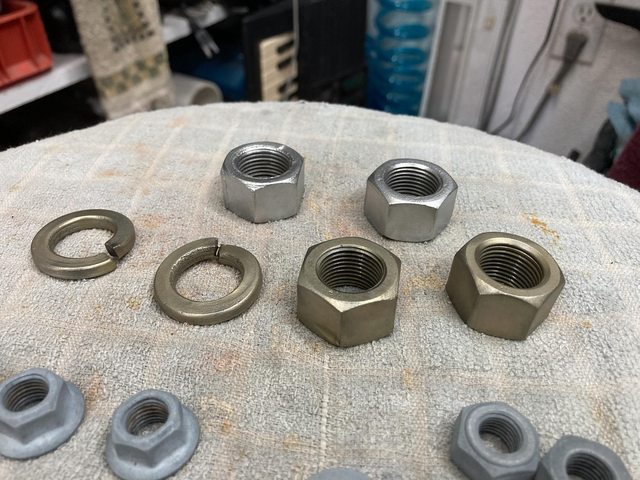
After having some some issues with my plating setup, I finally plated and chromated the fasteners for the front crossmember (which I media blasted and painted a month or so ago):
Start:
The hardware developed some nice patina since they were dunked in water, basically, in the previous plating attempt.
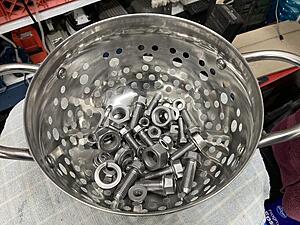
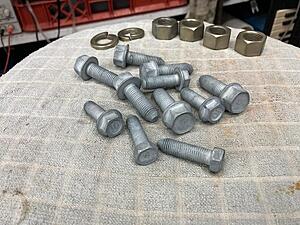
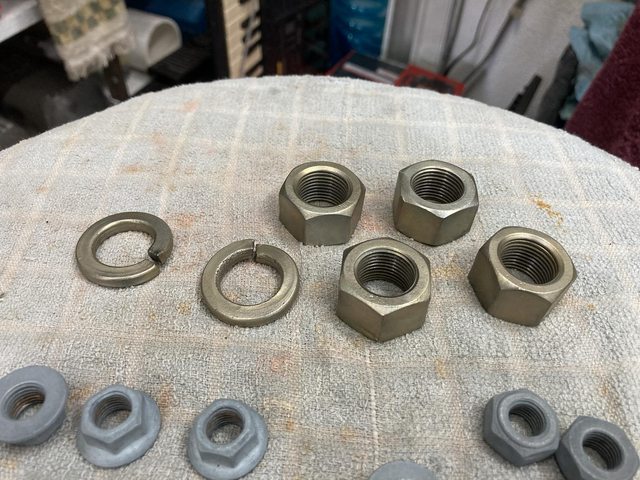
Another trip through the media blaster. Easier this time, since it was just light surface rust.
And then a quick trip to the wire brush wheel:
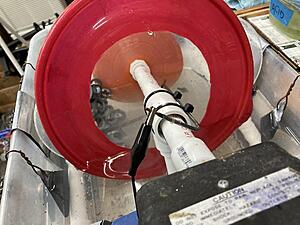
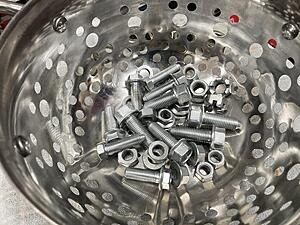
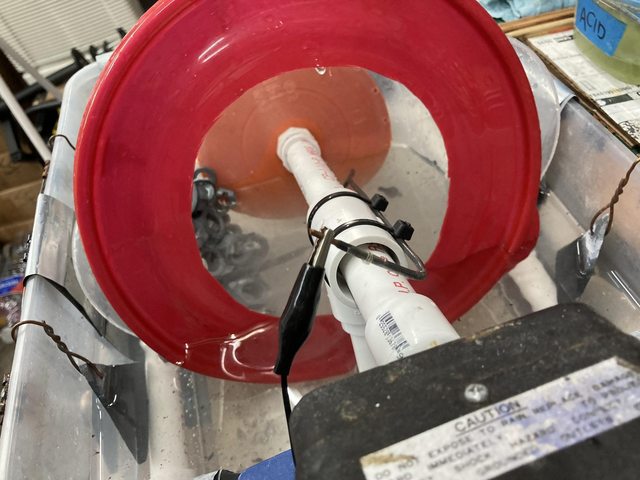
In progress:
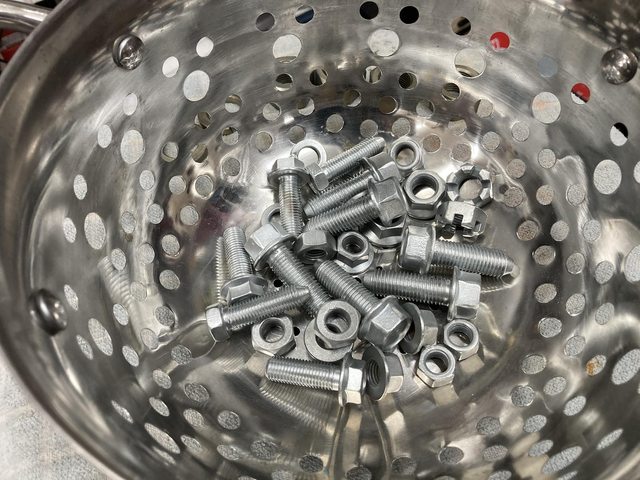
If you look close, you can see the "fizzing" that indicates something good is happening.
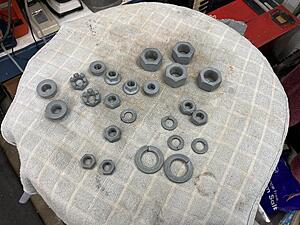
Fresh out of the barrel and wiped down:
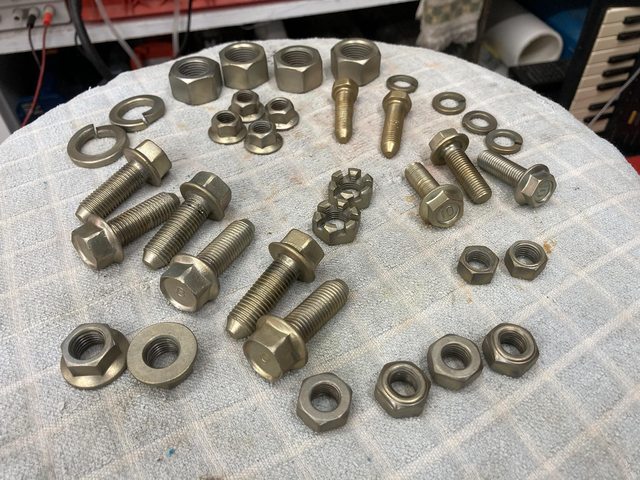
Starting the brush polishing:
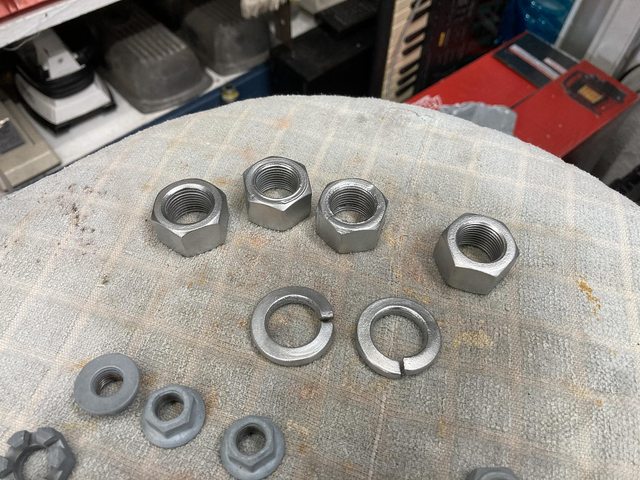
First chromated items looks good!
Yeeessss:
Polished:
Chromate:
I am beyond stoked. Those came out absolutely fantastic!
Those look great! Hopefully some day I can figure out the process. I kept all fasteners, but have replaced with SS since it rains salt here all year long.
What's the deal with rear diff...what's the info on it?
If you dont mi d sharing it....
Thank you raven. It's a Ford 8.8, out of a Crown Vic I think. I had Granny's build it for me a couple years ago when I was planning a V8 swap. They build it to GSL-SE specs, with brackets for all our stock links, Watts, -SE brakes, swaybar, etc.. I had this one built with 3.90 gears and a Torsen diff. 3.90 is plenty steep for a GM th350 trans and matches the stock rotary setup so, I figured I'd be okay with either drive train. After I put the new tranny in , if it's still sluggish, I think I'll put a 4.30 gear set in it.
Thank you raven. It's a Ford 8.8, out of a Crown Vic I think. I had Granny's build it for me a couple years ago when I was planning a V8 swap. They build it to GSL-SE specs, with brackets for all our stock links, Watts, -SE brakes, swaybar, etc.. I had this one built with 3.90 gears and a Torsen diff. 3.90 is plenty steep for a GM th350 trans and matches the stock rotary setup so, I figured I'd be okay with either drive train. After I put the new tranny in , if it's still sluggish, I think I'll put a 4.30 gear set in it.
@Maxwedge I rebuilt the entire front end of the car in hopes of curing the wooley steering. I ended up having to replace the steering gearbox from Mazdatrix. Probably one of the last available in the wild...this was in 2012 or 13. That took care of it.
Out with the old and in with the new! Yanked out my old crusty stock radiator for a new Koyorad. Might have dinged it up a bit getting it installed, but it's in now and I can use the AC without causing the car to overheat, which is greatly appreciated now that it is summertime lol.
Be careful with those HF jack stands. They recently had a big safety recall. If they meet the part numbers, they will refund your money. Not receipt needed.
KC thanks for the info. Mine ARE on that list (PN 61196) and I've been crawling under the car for over a year. My wife got me the stands for Christmas. Hmmm, better keep my eye on her.
Those look great! Hopefully some day I can figure out the process. I kept all fasteners, but have replaced with SS since it rains salt here all year long.
Thanks! I'm in TX, so rust not such an issue, not *real* rust, anyway. The process is pretty simple at its core - several very good basic YT videos out there. The solution is literally mostly distilled water, some white vinegar, and some washing soda. Zinc is available in 3" wide rolls for preventing staining at roof edges (though I also have zinc chunks from reclaimed boat anodes). Small items can be plated with a ~1A 9-12V wall wart, though an actual adjustable power supply is very useful. There's a lot more detail on my setup in my thread, should be, and I can answer questions there if anyone likes, so we don't clutter up this thread.
I do intend to use some stainless fasteners with the "tuner" machined aluminum washers under the hood for cosmetics, I think, but these would look nice, too. I have a "blue" chromate that produces a bluish-silver finish rather than the gold that I may use there, as well.
Drove it around for about 30 miles on a few test drives.
After the first drive, I popped the turn signal switch out so I could determine why the turn signals and hazards did not work. I could jumper the power in to the switch to the power in from the CPU and get the lights to light up, so I knew it wasn't a dirty turn signal switch. Darn.
Popped the CPU out (heh, make it sound so easy) and it was just dirty contacts on the onboard relay.
Also, WTF Mazda, LOTS of way overengineered circuitry where anyone else just uses a quarter-sized flasher module.
This weekend I (finally) upgraded my power window circuit with relays. I'd cleaned/refurbed the switches a couple of times and the contacts still were arcing and building up carbon. Once you clean them they seem more vulnerable.
and hid the relays under the carpet along the trans tunnel, sort of plug and play using discrete connectors in/out of the factory stuff...I didn't want to cut any factory wiring. Damn, those old Mazda Molex connectors are chunky. Super pleased with the results in that, they still work :P No apparent speed up in the up/down, but they were plenty fast to begin with.
Hey, I wrote that! :P
You were able to find matching Molex connectors, or were you able to just plug standard quick-connects into the Mazda connectors? Is that what you mean by "discrete connectors"? I actually never thought of that!
I'm glad someone else found that page useful. That's from my old site, when I was piggybacking off of wankel.net - the live page is here, now: Relays for your Power Windows (wright-here.net)
I'll be adding power windows, and relays, to my '79 when I've got it operable again. The blue car in the pictures on the page is a GSL-SE I'm using for parts to improve the '79 - and have been for like a decade...
That page and everything else I've documented is available in the link in my sig, below. Please feel free to peruse and use - the info's there because I want to share what knowledge I've come across working on these things for the last almost 30 years (I bought the '79, my first RX-7, in '94.)
Ha! That's excellent. Thanks tons for the detailed write up. I've read that page so many times and finally got around to doing the mod. I got so tired of suddenly having no way to raise the window as I'm taking the on ramp :P
What I meant by discrete connectors was individually crimped male and female spade connectors inserted into the big-*** Molex style factory blocks. A man in the middle attack, of sorts. I'm comfortable that the connections are stable but I also don't think it's ideal. I'd love to get compatible locking connectors and swap them in eventually. It is crowded under that switch escutcheon. Doing it again, I would start with what's going to fit under there and then move outward to where the relays can go.
 05-21-21, 09:31 PM