What did you do to your FB today?

 01-07-15, 08:22 AM
#5504
Waffles - hmmm good
iTrader: (1)
So I would get one of those new fangled infrared thermometers and aim it at the oil cooler
to see if its bypassing. Do the same with the radiator. Something is cooling to much at this
point. I know you said the clutch fan is fine.
to see if its bypassing. Do the same with the radiator. Something is cooling to much at this
point. I know you said the clutch fan is fine.
01-07-15, 11:58 AM
#5505
Moderator
iTrader: (3)
Join Date: Mar 2001
Location: https://www2.mazda.com/en/100th/
Posts: 30,819
Received 2,590 Likes
on
1,839 Posts
the other thing to check, is the sender and gauge. the gauge is very easy, i think 80c = 50ohms (its in the FSM). we actually have the temp to resistance chart, so you could calibrate the gauge. the other bit is the temp sender, a little harder, as you need to measure resistance at temperature.
01-07-15, 12:35 PM
#5506
Fan clutch seems to operate properly; feels the same it always has when hand-rotated, and no "cessna take-off" sound effects at higher revs. I don't have a strobe tach so I can't actually check it's speed, and I'm not into the "stick your finger in it" test.
01-07-15, 12:40 PM
#5507
Waffles - hmmm good
iTrader: (1)
Done this - IR temp readings at the water neck and the oil filter base (where my oil temp sensor is mounted) matches what the gauges are indicating.
Fan clutch seems to operate properly; feels the same it always has when hand-rotated, and no "cessna take-off" sound effects at higher revs. I don't have a strobe tach so I can't actually check it's speed, and I'm not into the "stick your finger in it" test.
Fan clutch seems to operate properly; feels the same it always has when hand-rotated, and no "cessna take-off" sound effects at higher revs. I don't have a strobe tach so I can't actually check it's speed, and I'm not into the "stick your finger in it" test.
up indicating that the internal thermal bypass is working or not in the oil cooler. If
the thremal bypass is stuck open it would keep things cool.
It also could be the guage itself I guess.
 01-08-15, 04:20 AM
#5509
Original Blackfuries Plyr
Got a $134 Exhaust Defective by WSP this morning.
Good Lord this is getting down right annoying.
I have a long primary clone exhaust and missed a shift from third to fourth.
I don't know about Seattle, WA state as far as I know is 25 years and older and the can't say anything as long as it is not too loud. Any tips for defeating the ticket??
Gonna get some presilencers installed Saturday if I can...
Oh well I guess I earned my first of three noise awards lol..
01-09-15, 10:46 PM
#5510
I spent all day yesterday and today out in the garage working on this beast to try to make some sort of a resemblance of progress.
After being super frustrated with the timing I checked it using Jeff20b's method with the spark plug wire - that showed I was correct. The timing marks on the pulley lined up - so that was correct. The flexplate counterweight was in the correct spot - one more confirmation. So that's 3 confirmations that timing on the engine is correct.
So after getting my pride ready to be hurt, I pulled the distributor and lined up the spline to the leading coil pickup. Put my thumb on the X shaped part and dropped it down in. And wouldn't you know it - I was one tooth off before! So now I'm sure that timing is correct on this beast and I don't have to worry about that anymore. I saw some pictures of the tree-plasticy-thingy that rotates in the rotor cap and sends spark down the wires and the one in the Haynes manual is much different looking than the one I have. The Haynes one has teeth and appears to be a longer duration on the point to send spark compared to the one I have, I'll take some pictures tomorrow if I remember.
Well I went and put the spark plugs on the driver's side shock tower, trailing first and cranked the car. Good spark at the trailing plugs! Did the same check with the leading plugs and they're working too, so it's not a dead ignitor.
So after finding this out I went and tried to start her up. Well after maybe 10 slow "chug..chug....chug........chug................chu g's [you get the idea, imagine a battery dying while trying to start a car]" there was some smoke coming from the car and it sounded like it tried to fire! So I'm betting that the timing was initially correct, and it really needs a new battery.
So timing is correct, it's getting fuel, it's turning over, it's getting air - what more could it want?!?!
Cranking speed...it's cranking extremely slowly right now.
The battery in this thing is God-only-knows how old and in who-knows what condition as far as CCA's left. Luckily, we have a spare vehicle that's sitting around right now awaiting it's fate that had a newer battery in it. I pulled that and it's sitting on the charger now - will find out if it helps start the vehicle tomorrow, I sure hope so!
I went underneath the car to look at the wiring on the transmission and to try and wire in a remote starter (trigger-thing for one-person cranking ability). Well, I found this super nasty looking wire going to the starter solenoid and it practically fell apart as soon as I touched it. Also, while attempting to remove the nut on the side of the solenoid in order to fix the wiring I snapped of half of the post on the solenoid - GREAT!
So then a whole side trip down wiring lane happened tonight.
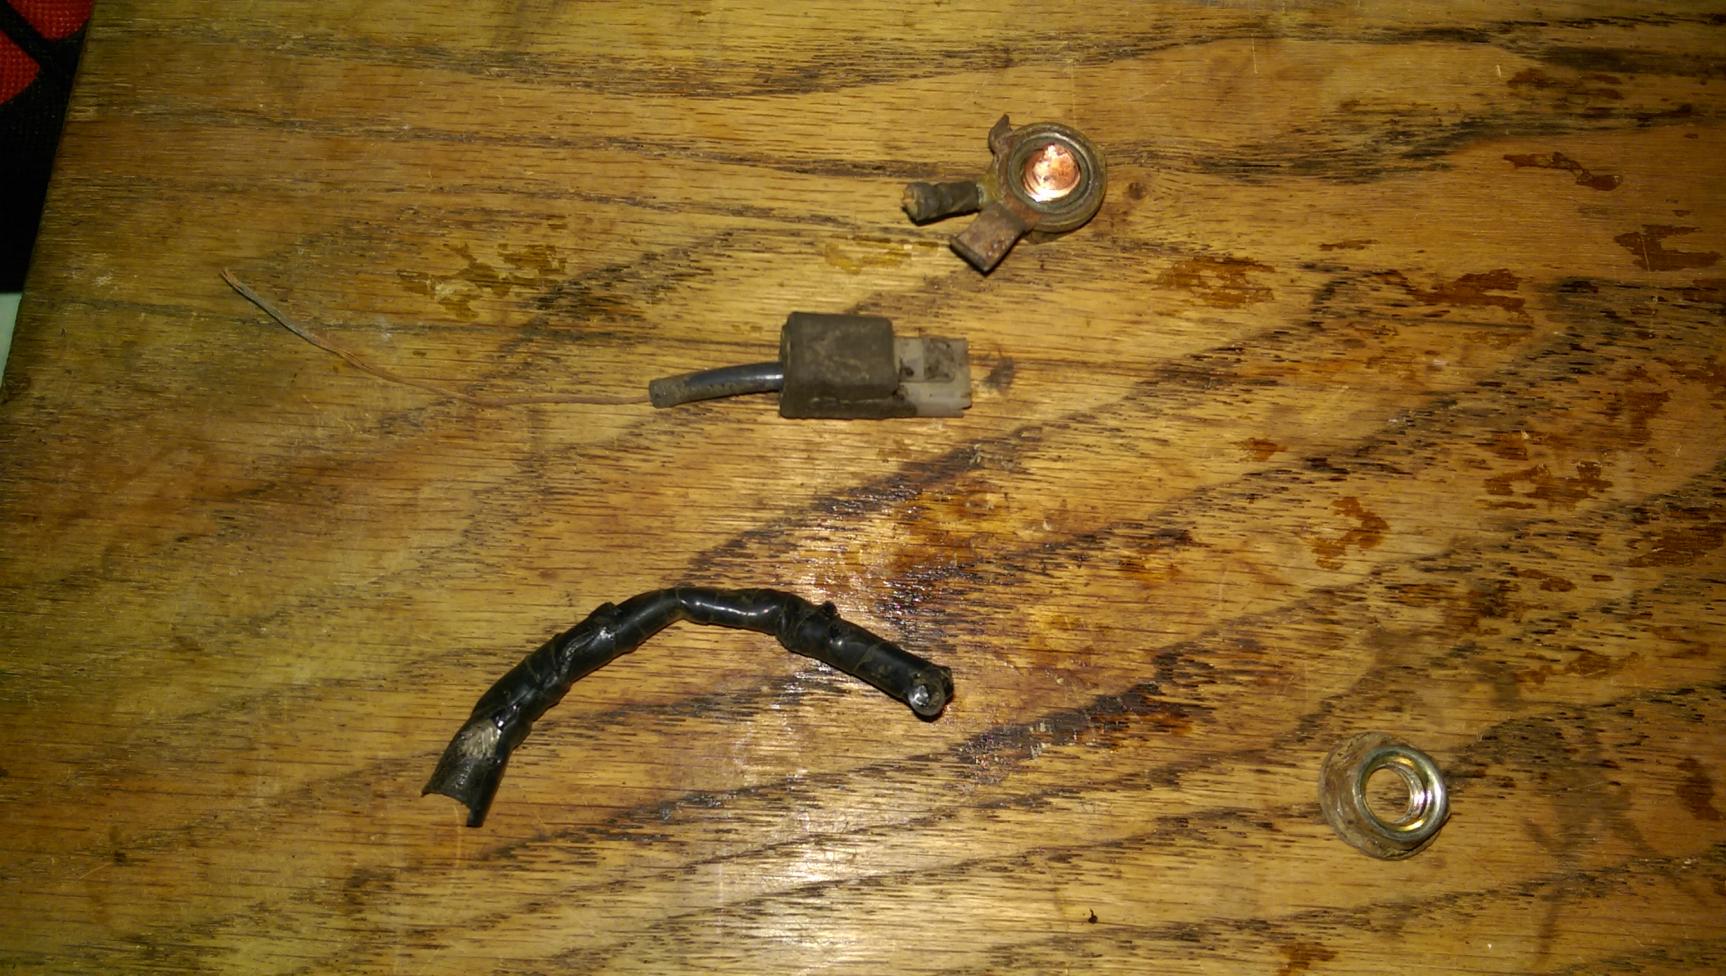
Here's the wire in question that runs from the fuseable link block to the solenoid. How in the world someone thought this was OK to do is beyond me. Also, notice the broken stud in the nut at the top of the picture.
My rewired solution to the jumper cable that's supposed to be there, using the connections that were already there. It's 12ga and I couldn't even fit all of the wiring strand inside the plug end of the jumper but I know that it's getting all of the power it possibly can now.
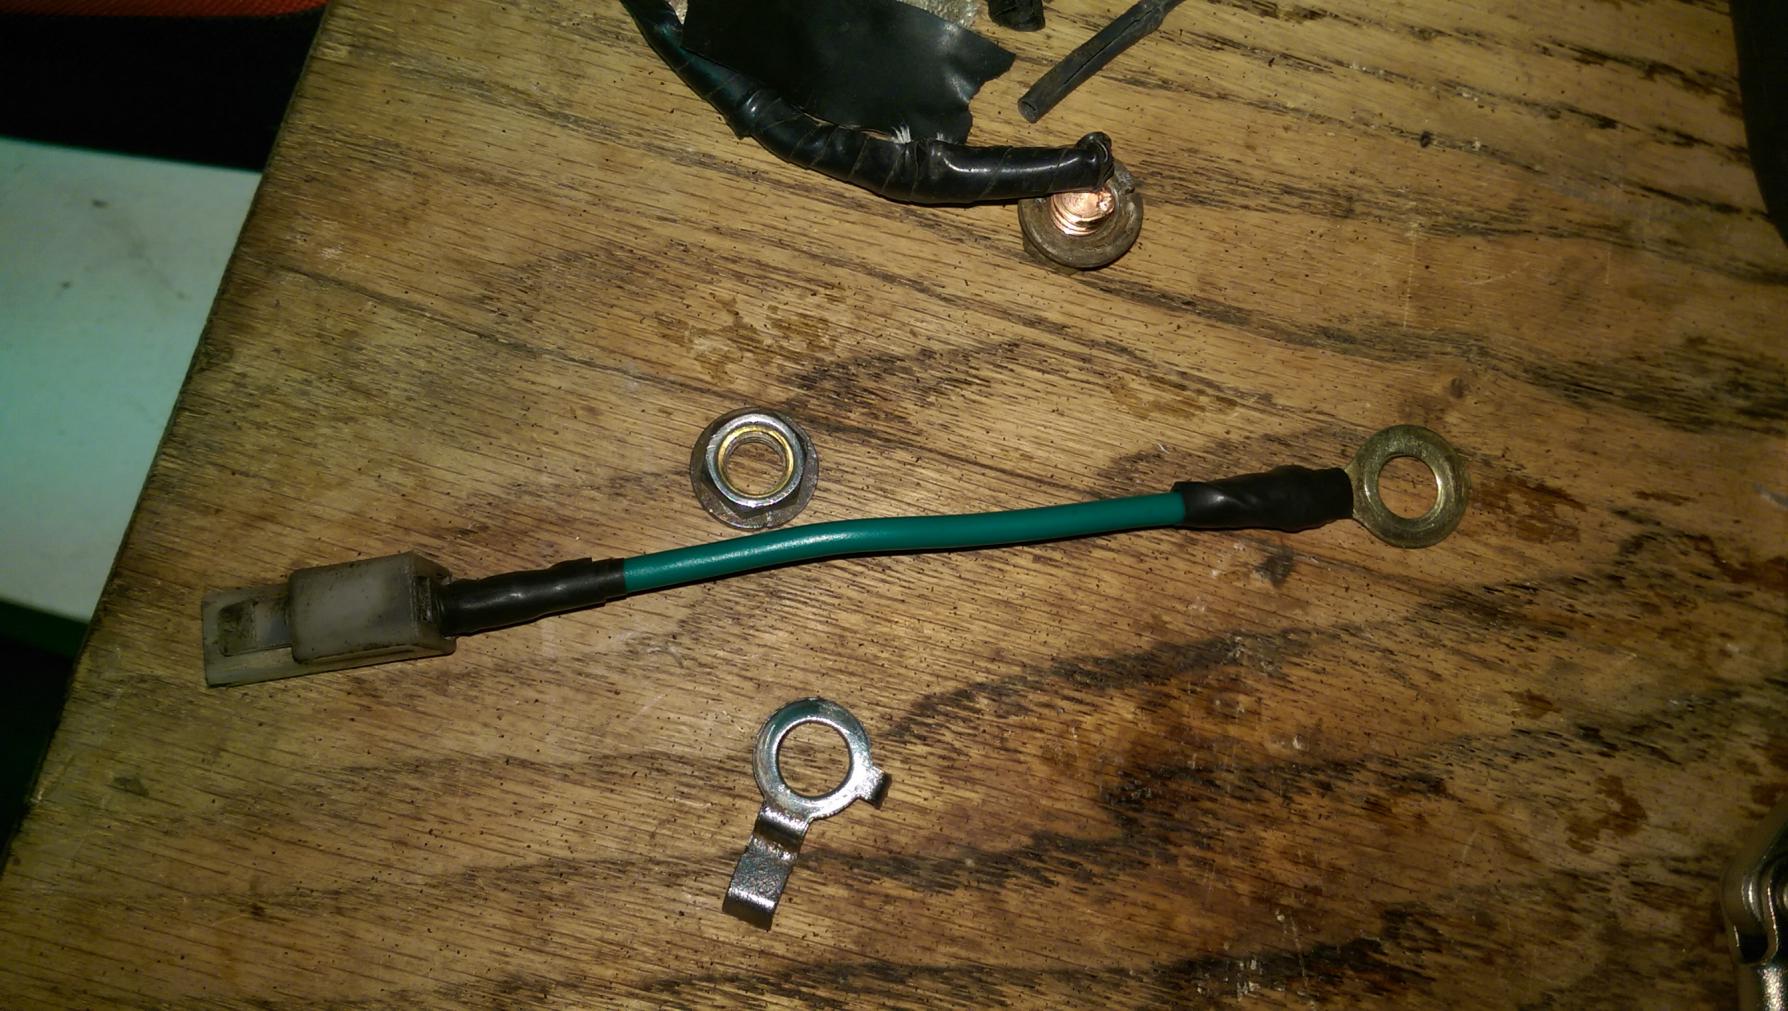
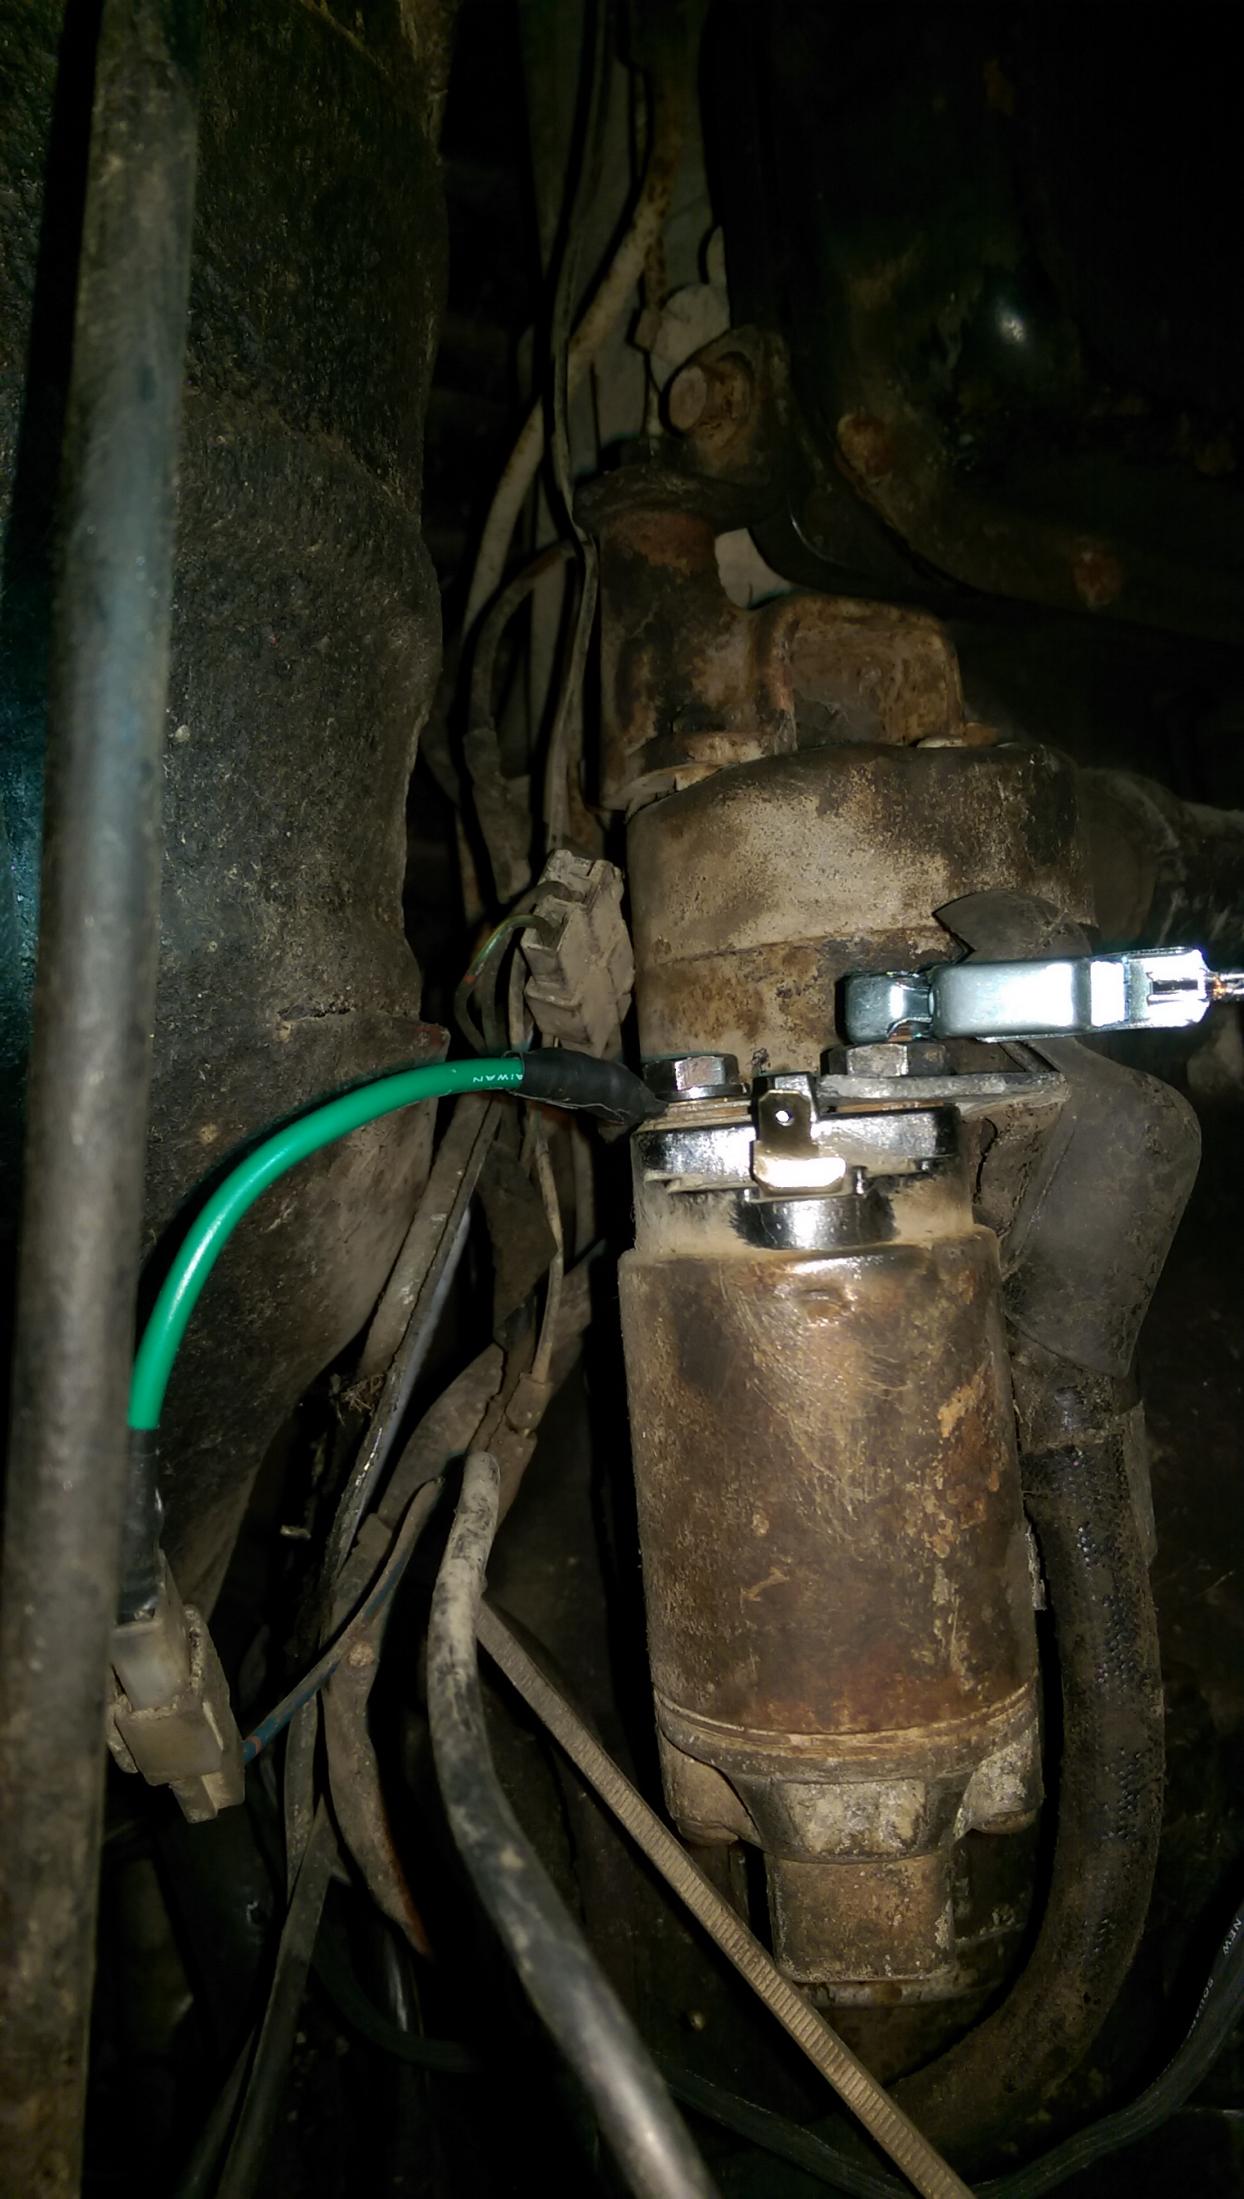
Cleaned all of the terminals on the starter with a wire brush on a drill and reattached everything. The jumper is on the left side terminal, the male plug comes from Ignition+ when the key is in the "Start" position. I got lucky and there was enough stud left to make a solid connection with the ring terminal on the jumper - can't complain about that!
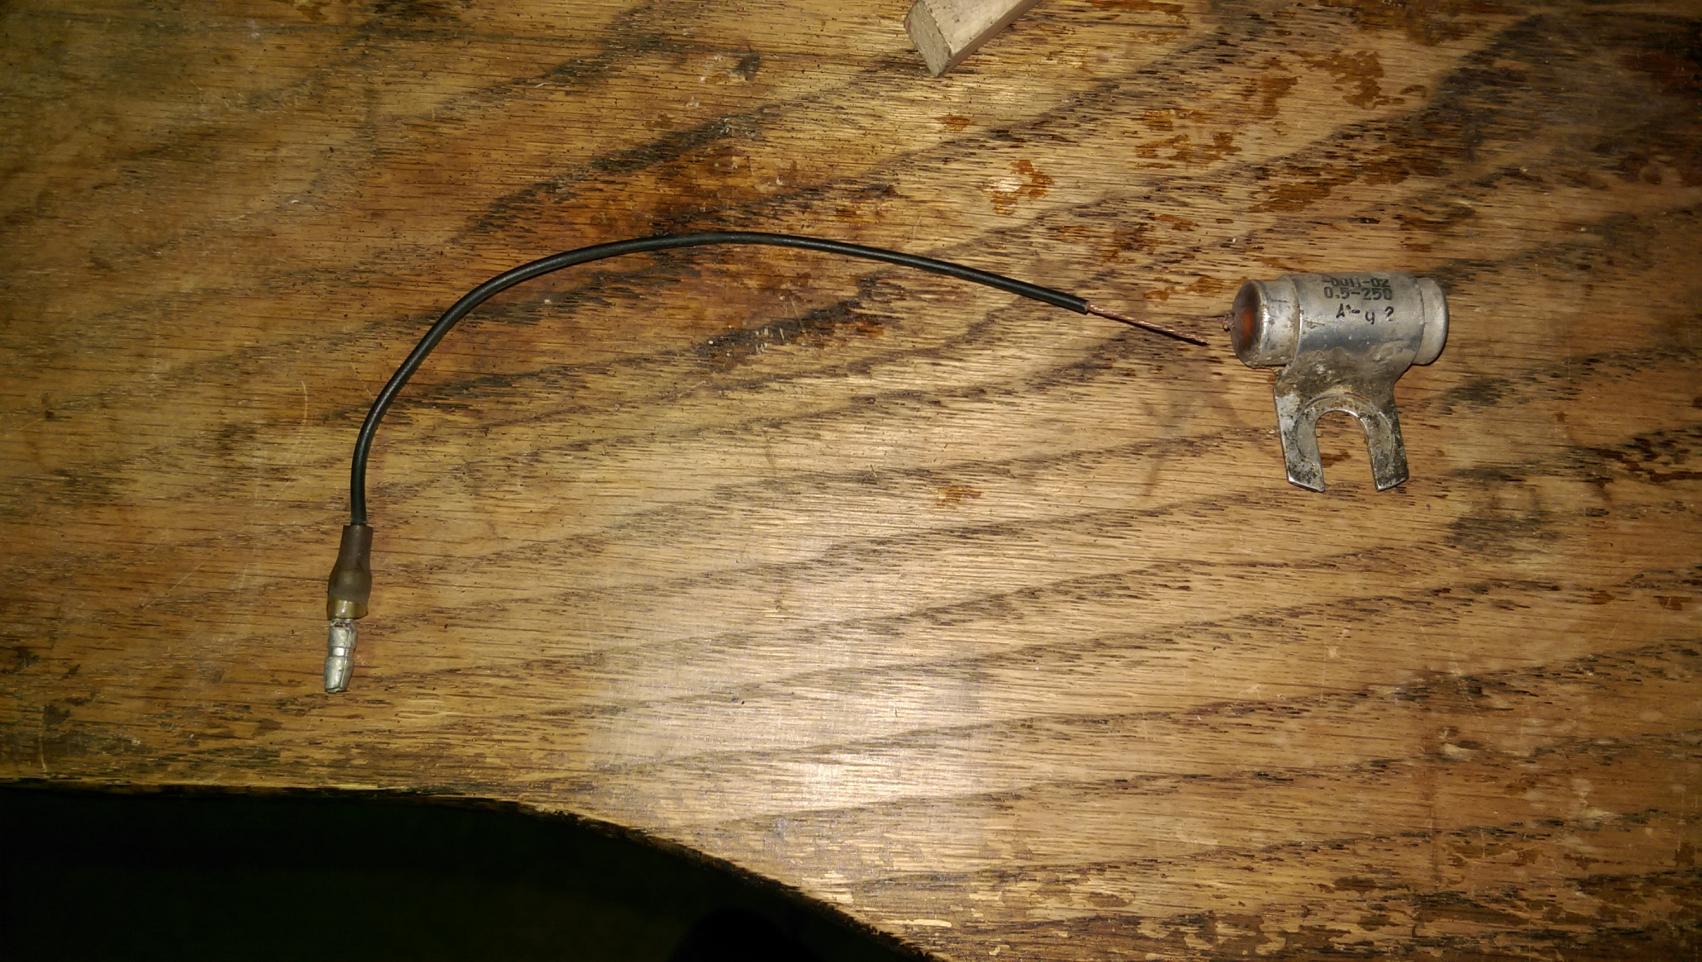
I also busted this condensor off on accident a while back when trying to set the timing - it's the one that grounds right next to the rat's nest right near the firewall, on one of the bolts for the flywheel/transmission view plate. Anyone have one laying around for me??
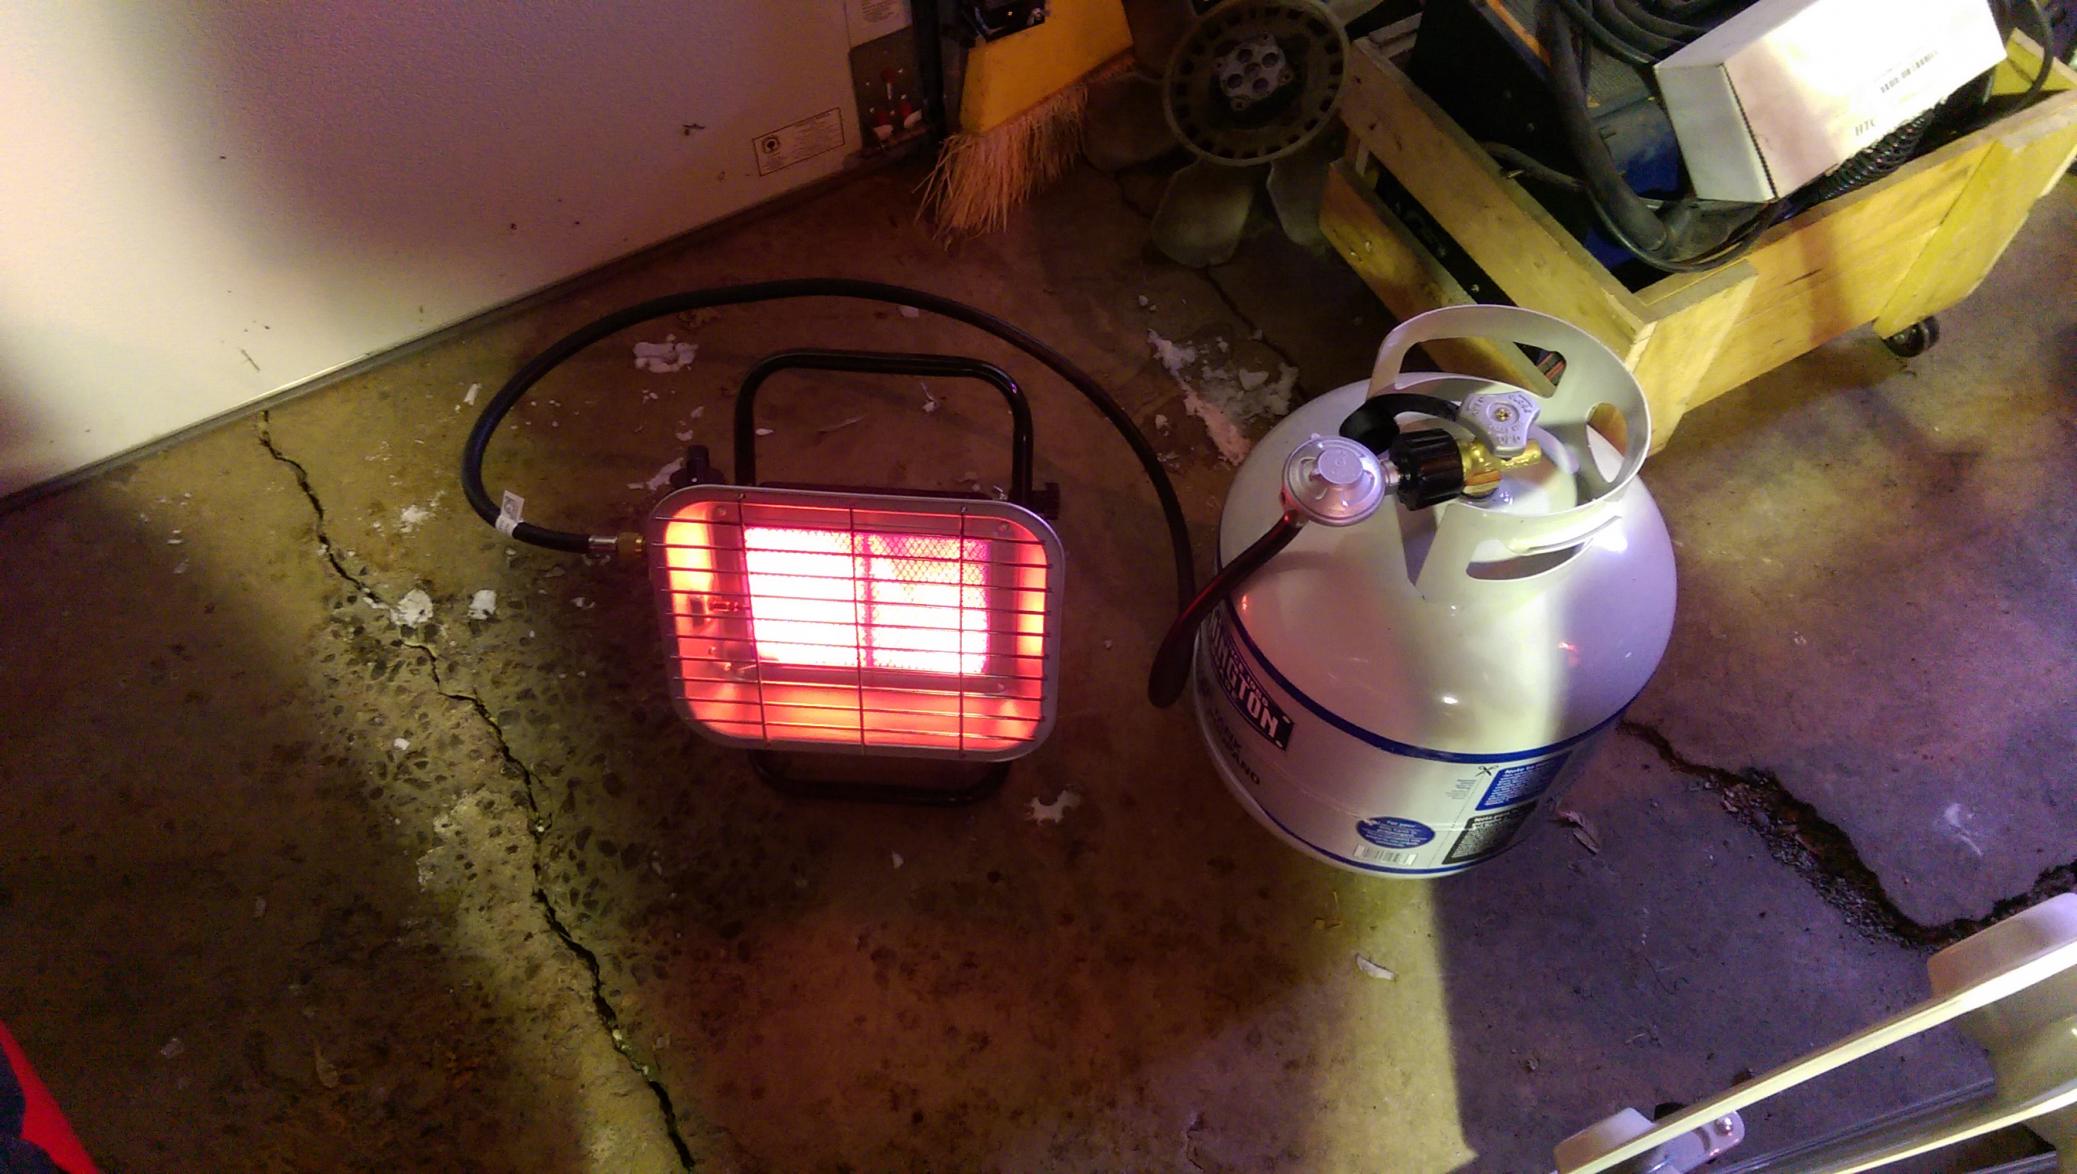
Got a new propane heater from Northern Tool! Love this thing so far, couldn't ask for any more in a heater. It's working great for what I need, can't wait to use it some more for a few more months since it'll be so fricken cold...[laced with heavy sarcasm]...
After being super frustrated with the timing I checked it using Jeff20b's method with the spark plug wire - that showed I was correct. The timing marks on the pulley lined up - so that was correct. The flexplate counterweight was in the correct spot - one more confirmation. So that's 3 confirmations that timing on the engine is correct.
So after getting my pride ready to be hurt, I pulled the distributor and lined up the spline to the leading coil pickup. Put my thumb on the X shaped part and dropped it down in. And wouldn't you know it - I was one tooth off before! So now I'm sure that timing is correct on this beast and I don't have to worry about that anymore. I saw some pictures of the tree-plasticy-thingy that rotates in the rotor cap and sends spark down the wires and the one in the Haynes manual is much different looking than the one I have. The Haynes one has teeth and appears to be a longer duration on the point to send spark compared to the one I have, I'll take some pictures tomorrow if I remember.
Well I went and put the spark plugs on the driver's side shock tower, trailing first and cranked the car. Good spark at the trailing plugs! Did the same check with the leading plugs and they're working too, so it's not a dead ignitor.
So after finding this out I went and tried to start her up. Well after maybe 10 slow "chug..chug....chug........chug................chu g's [you get the idea, imagine a battery dying while trying to start a car]" there was some smoke coming from the car and it sounded like it tried to fire! So I'm betting that the timing was initially correct, and it really needs a new battery.
So timing is correct, it's getting fuel, it's turning over, it's getting air - what more could it want?!?!
Cranking speed...it's cranking extremely slowly right now.
The battery in this thing is God-only-knows how old and in who-knows what condition as far as CCA's left. Luckily, we have a spare vehicle that's sitting around right now awaiting it's fate that had a newer battery in it. I pulled that and it's sitting on the charger now - will find out if it helps start the vehicle tomorrow, I sure hope so!
I went underneath the car to look at the wiring on the transmission and to try and wire in a remote starter (trigger-thing for one-person cranking ability). Well, I found this super nasty looking wire going to the starter solenoid and it practically fell apart as soon as I touched it. Also, while attempting to remove the nut on the side of the solenoid in order to fix the wiring I snapped of half of the post on the solenoid - GREAT!
So then a whole side trip down wiring lane happened tonight.
Here's the wire in question that runs from the fuseable link block to the solenoid. How in the world someone thought this was OK to do is beyond me. Also, notice the broken stud in the nut at the top of the picture.
My rewired solution to the jumper cable that's supposed to be there, using the connections that were already there. It's 12ga and I couldn't even fit all of the wiring strand inside the plug end of the jumper but I know that it's getting all of the power it possibly can now.
Cleaned all of the terminals on the starter with a wire brush on a drill and reattached everything. The jumper is on the left side terminal, the male plug comes from Ignition+ when the key is in the "Start" position. I got lucky and there was enough stud left to make a solid connection with the ring terminal on the jumper - can't complain about that!
I also busted this condensor off on accident a while back when trying to set the timing - it's the one that grounds right next to the rat's nest right near the firewall, on one of the bolts for the flywheel/transmission view plate. Anyone have one laying around for me??
Got a new propane heater from Northern Tool! Love this thing so far, couldn't ask for any more in a heater. It's working great for what I need, can't wait to use it some more for a few more months since it'll be so fricken cold...[laced with heavy sarcasm]...
01-09-15, 10:46 PM
#5511
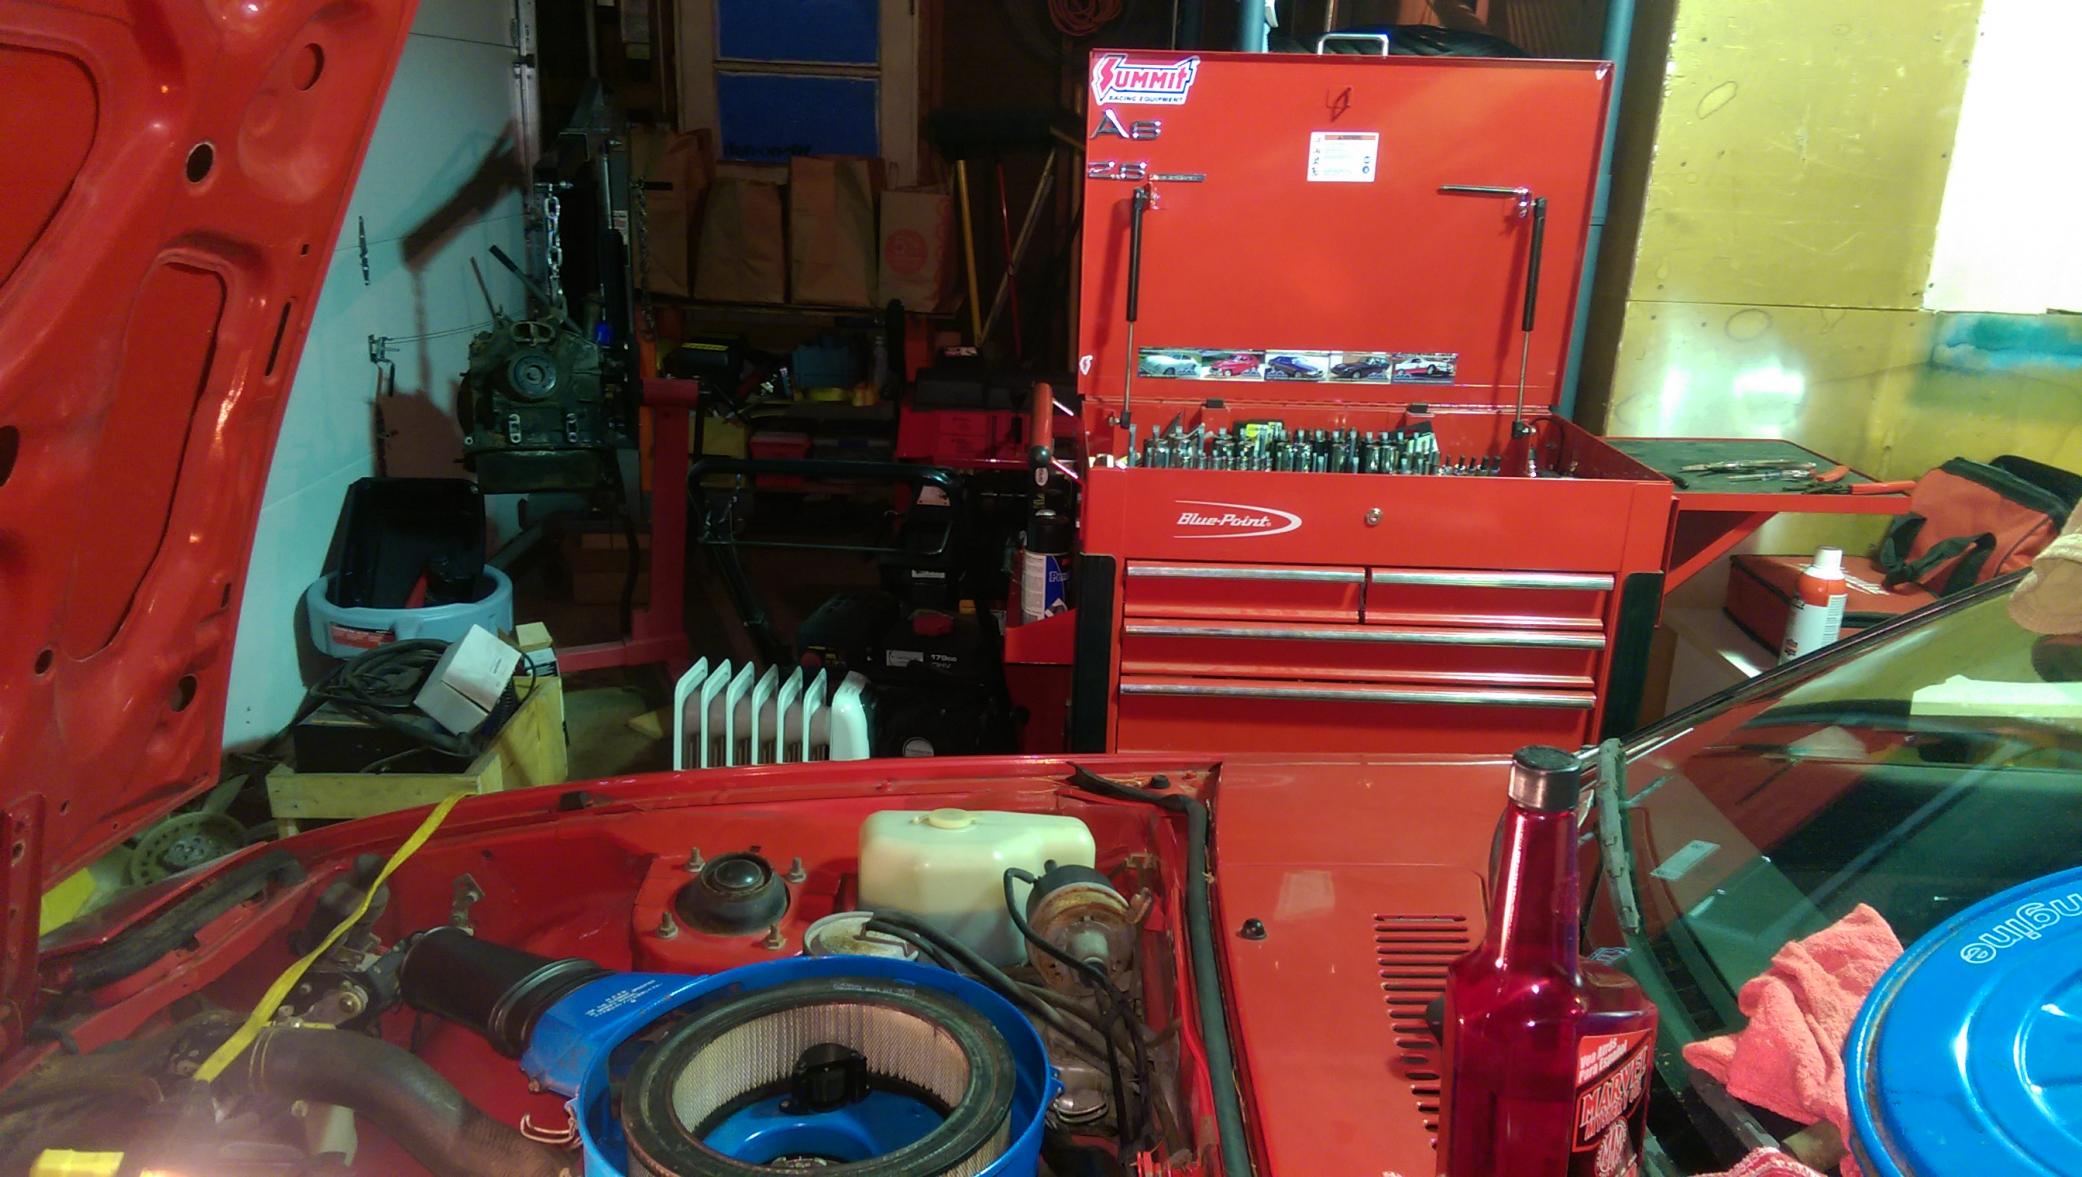
View of the garage from the one wall looking at the largest parts of the space. Weird room in the one stall, I really wish that wasn't there.
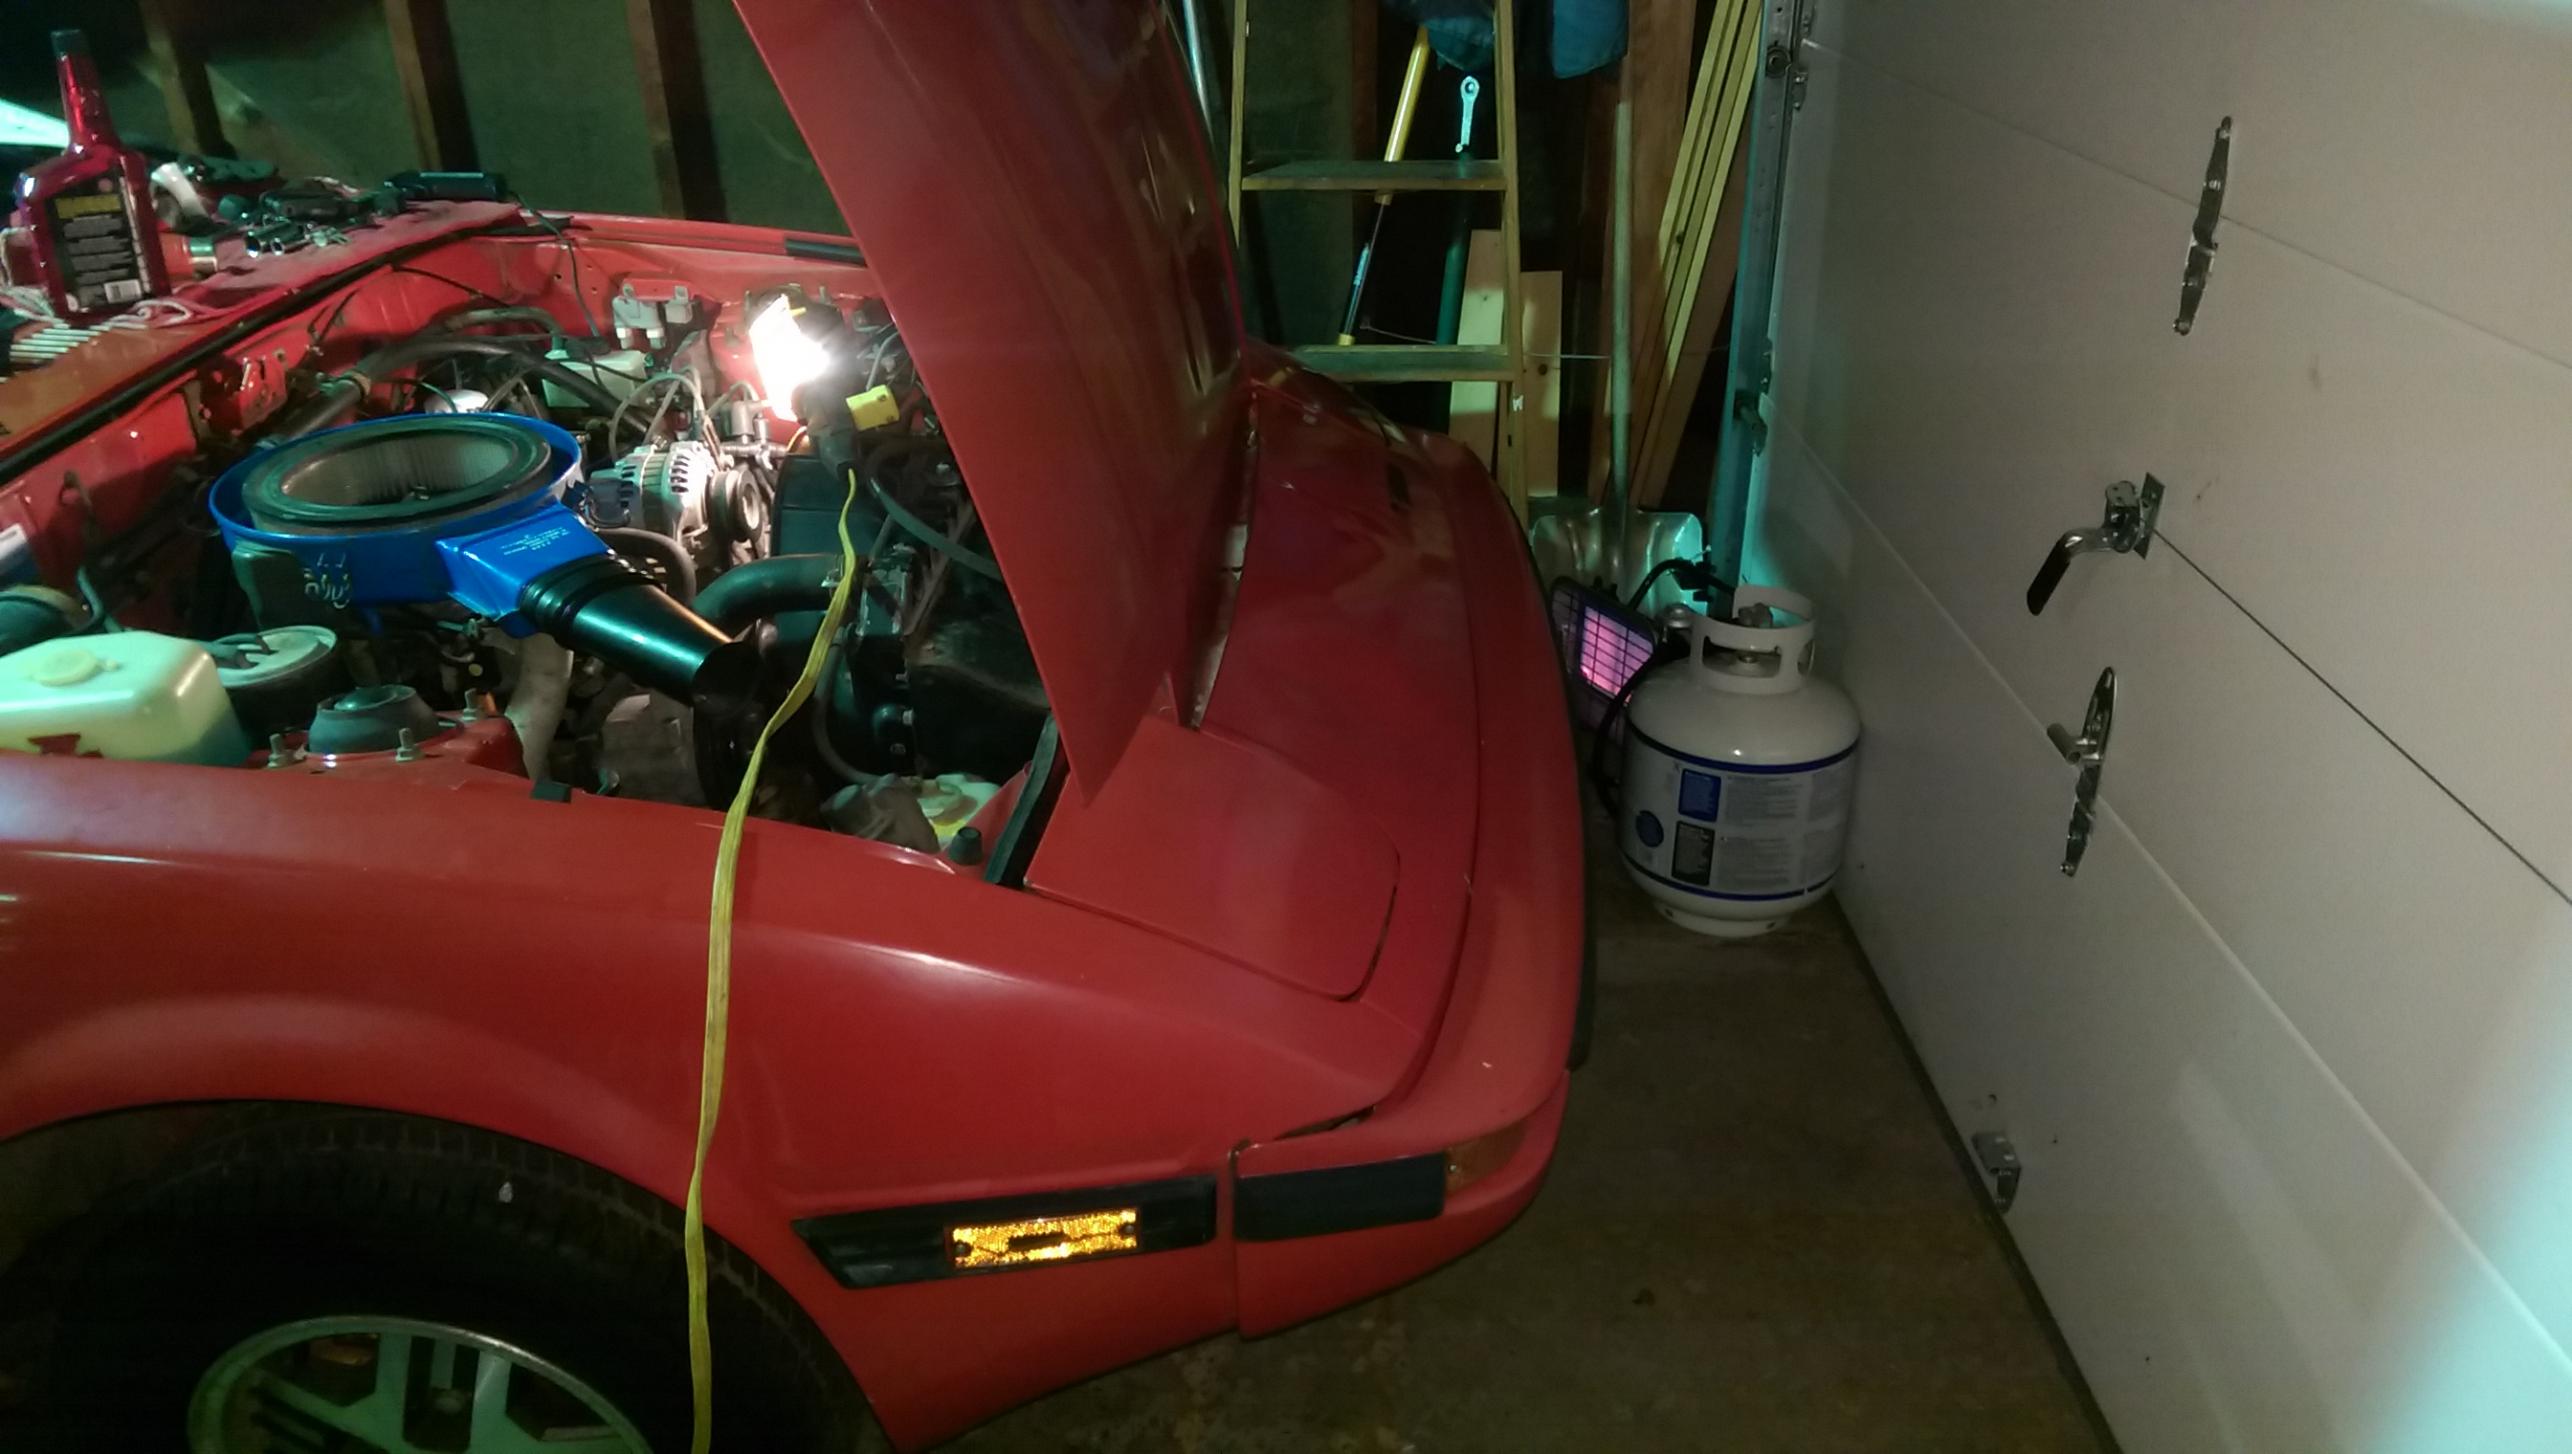
New heater next to the spot in the garage where there's a 1 1/2in gap in the seal that's supposed to close around the outside part of the door...snow gets in there the gap is so huge...not funny. That's getting fixed tomorrow hopefully.
So my goals tomorrow are as follows:
1. Insulate the upper portion of the garage. It's a pyramid-shaped roof that's used partially for storage, but not necessary for being heated.
2. Plastic wrap the walls. I'm too lazy to run insulation between the studs and plastic wrap should help insulate it well enough for what I need to do in there.
3. Make a door out of insulation pieces to seal the back room. It's also unnecessary for being heated, no use in wasting BTU's!
4. Free up the door into the garage so I don't let out tons of heat every time I need to get out by opening the whole garage door.
5. Do a bunch of odds-and-ends cleaning to make it easier to work around the car in there.
This should make it much more enjoyable for me to go out there and work on the car. I'm also counting the days until I get another RX7 here and that one will probably take up this garage space, since it's got a lot of fiberglass and is much cooler...

 01-10-15, 07:41 PM
#5515
Sin City Rotary
a lot of manufacturers had fusable links at the stater ... also you can buy lengths of wire to repair
Dorman� 85766 - Universal 12 Gauge 10? Fusible Link Wire Spool
link just for example
Dorman� 85766 - Universal 12 Gauge 10? Fusible Link Wire Spool
link just for example
01-10-15, 10:31 PM
#5516
a lot of manufacturers had fusable links at the stater ... also you can buy lengths of wire to repair
Dorman� 85766 - Universal 12 Gauge 10? Fusible Link Wire Spool
link just for example
Dorman� 85766 - Universal 12 Gauge 10? Fusible Link Wire Spool
link just for example
01-10-15, 10:41 PM
#5517
Sin City Rotary
I believe its the PAL style fuse that will plug right in where the 3 fuseable links on the d/s strut tower ... I also believe the wire is available in as little as 6 ft
01-10-15, 11:12 PM
#5518
On a car-related note, here's a video I took tonight with the GoPro that I think may be useful. I'm wondering if the car is cranking much too slowly which isn't letting it start.
Battery - not even a year old with plenty of CCA's and fully charged
Fuel - fresh enough and getting to the carb from the fuel pump
Air - there isn't an obstruction in the intake or the carb that I'm aware of
Spark - checked leading and trailing spark and both are strong
Timing - I set the timing using Jeff20b's spark plug wire method and double checked this with the rear automatic counterweight location and triple checked it with the front pulley timing mark indicator
Compression - I added a cap full of MMO to the intake to help aid compression if it was low
Last thing in my mind is to do a real compression test and see if I have a stuck side seal or blown apex seal in the engine.
At 42 seconds in the video there's one "burp" where it actually sounds like it's trying to fire - it's the first time I've heard that in all my time messing with this car. I'm wondering if I'll have to yank this motor out and give it a refresh or full rebuild...compression test will tell me that.
If anyone else has any helpful insight I'd greatly appreciate it!
01-11-15, 03:43 AM
#5519
DIR-
whats the age of the battery _cables_?? These can be notorious power-sappers due to internal corrosion, even when they look OK on the outside! All sorts of electrical gremlins can disappear with a new set. If you don't know when/if these have ever been changed, now may be the time…
Stu Aull
80GS
Alaska
01-12-15, 04:14 PM
#5520
DIR, re-reading your dizzy stab notes I think you may have missed the right spot...
"I pulled the distributor and lined up the spline to the leading coil pickup. Put my thumb on the X shaped part and dropped it down in."
The star wheel (reluctor) doesn't line up with the pickup until AFTER you stab it, due to the helical cut gears.
Proper proc is to line up the drilled dimple on the dizzy gear with the raised 'pointer' cast into the bottom edge of dizzy housing, then stab it.
If it's stabbed right, the leading pickup coil then lines up with the star wheel edge. It has to rotate as you stab it in because the gears are cut in a spiral.
Also (because I made this mistake once and it gave the same symptoms you are having, and I didn't 'see' it for two days) make sure the T1/T2 plug wires are going to the front rotor.
Good luck!
01-12-15, 10:42 PM
#5521
DIR-
whats the age of the battery _cables_?? These can be notorious power-sappers due to internal corrosion, even when they look OK on the outside! All sorts of electrical gremlins can disappear with a new set. If you don't know when/if these have ever been changed, now may be the time�
Stu Aull
80GS
Alaska
The battery cables are original to the car - so they're over 30 and 1/2 years old at this time. I will be buying new battery clamps for it soon because the ground cable clamp is a pretty terrible design. DD actually set me onto that, I had an issue with it the first day. But after cleaning it up and rewiring it I haven't had an issue since. The cables will get changed after the clamps do, in order to solve that issue as well.
DIR, re-reading your dizzy stab notes I think you may have missed the right spot...
"I pulled the distributor and lined up the spline to the leading coil pickup. Put my thumb on the X shaped part and dropped it down in."
The star wheel (reluctor) doesn't line up with the pickup until AFTER you stab it, due to the helical cut gears.
Proper proc is to line up the drilled dimple on the dizzy gear with the raised 'pointer' cast into the bottom edge of dizzy housing, then stab it.
If it's stabbed right, the leading pickup coil then lines up with the star wheel edge. It has to rotate as you stab it in because the gears are cut in a spiral.
Also (because I made this mistake once and it gave the same symptoms you are having, and I didn't 'see' it for two days) make sure the T1/T2 plug wires are going to the front rotor.
Good luck!
"I pulled the distributor and lined up the spline to the leading coil pickup. Put my thumb on the X shaped part and dropped it down in."
The star wheel (reluctor) doesn't line up with the pickup until AFTER you stab it, due to the helical cut gears.
Proper proc is to line up the drilled dimple on the dizzy gear with the raised 'pointer' cast into the bottom edge of dizzy housing, then stab it.
If it's stabbed right, the leading pickup coil then lines up with the star wheel edge. It has to rotate as you stab it in because the gears are cut in a spiral.
Also (because I made this mistake once and it gave the same symptoms you are having, and I didn't 'see' it for two days) make sure the T1/T2 plug wires are going to the front rotor.
Good luck!
So if I'm going to stab the distributor I should first line up the dimple on the gear with the raised cast aluminum pointer on the dizzy housing and then stab it. While stabbing it the teeth will rotate and line up in the helical gears beneath the front cover of the engine. I've been doing that every other time and it rotates too much or not enough on those helical cut gears because of the distributor housing not clearing the A/C bracket on the side of the front iron. Just to be sure, the reluctor should line up with the leading pickup (which is the one facing the very front of the engine?) after I stab it at TDC? I'll try to change the distributor timing again based on your similar experience - thanks for sharing it with me. To be clear, did you mean the L1/T1 wires are going to the front rotor? And L2/T2 to the rear rotor?
Thanks a lot, I appreciate the help.
01-13-15, 10:05 AM
#5522
So if I'm going to stab the distributor I should first line up the dimple on the gear with the raised cast aluminum pointer on the dizzy housing and then stab it. While stabbing it the teeth will rotate and line up in the helical gears beneath the front cover of the engine. I've been doing that every other time and it rotates too much or not enough on those helical cut gears because of the distributor housing not clearing the A/C bracket on the side of the front iron. Just to be sure, the reluctor should line up with the leading pickup (which is the one facing the very front of the engine?) after I stab it at TDC? I'll try to change the distributor timing again based on your similar experience - thanks for sharing it with me.
- Set e-shaft to LEADING timing mark (which is TDC)
- Set dizzy so gear dimple aligns with raised indicator boss ('aligning the tally marks')
- Stab dizzy (making sure stud on housing lines up with slot on dizzy bracket.)
- Install but do not tighten locknut
- Rotate dizzy so reluctor peak aligns with lead pickup coil core.
- Snug the locknut in preparation to using timing light to fine down the setting.
To be clear, did you mean the L1/T1 wires are going to the front rotor? And L2/T2 to the rear rotor?
Symptom was good compression, good cranking, but failure to light off - - but it sounded like it 'wanted to,' if you know what I mean. 180 degrees out of phase on ignition. Swapped the wires around and vroom.
 01-14-15, 12:45 AM
#5524
Update on the car for the day:
I went out and made sure the engine was at TDC again. The motor was at the correct timing on the front pulley and rear counterweight.
I pull the distributor cap off and what do I see - the timing is all screwed up. I'm thinking huh , that's weird. I could have sworn I dropped it down in at TDC right...I knew something was off because this is definitely not how the reluctor should line up.
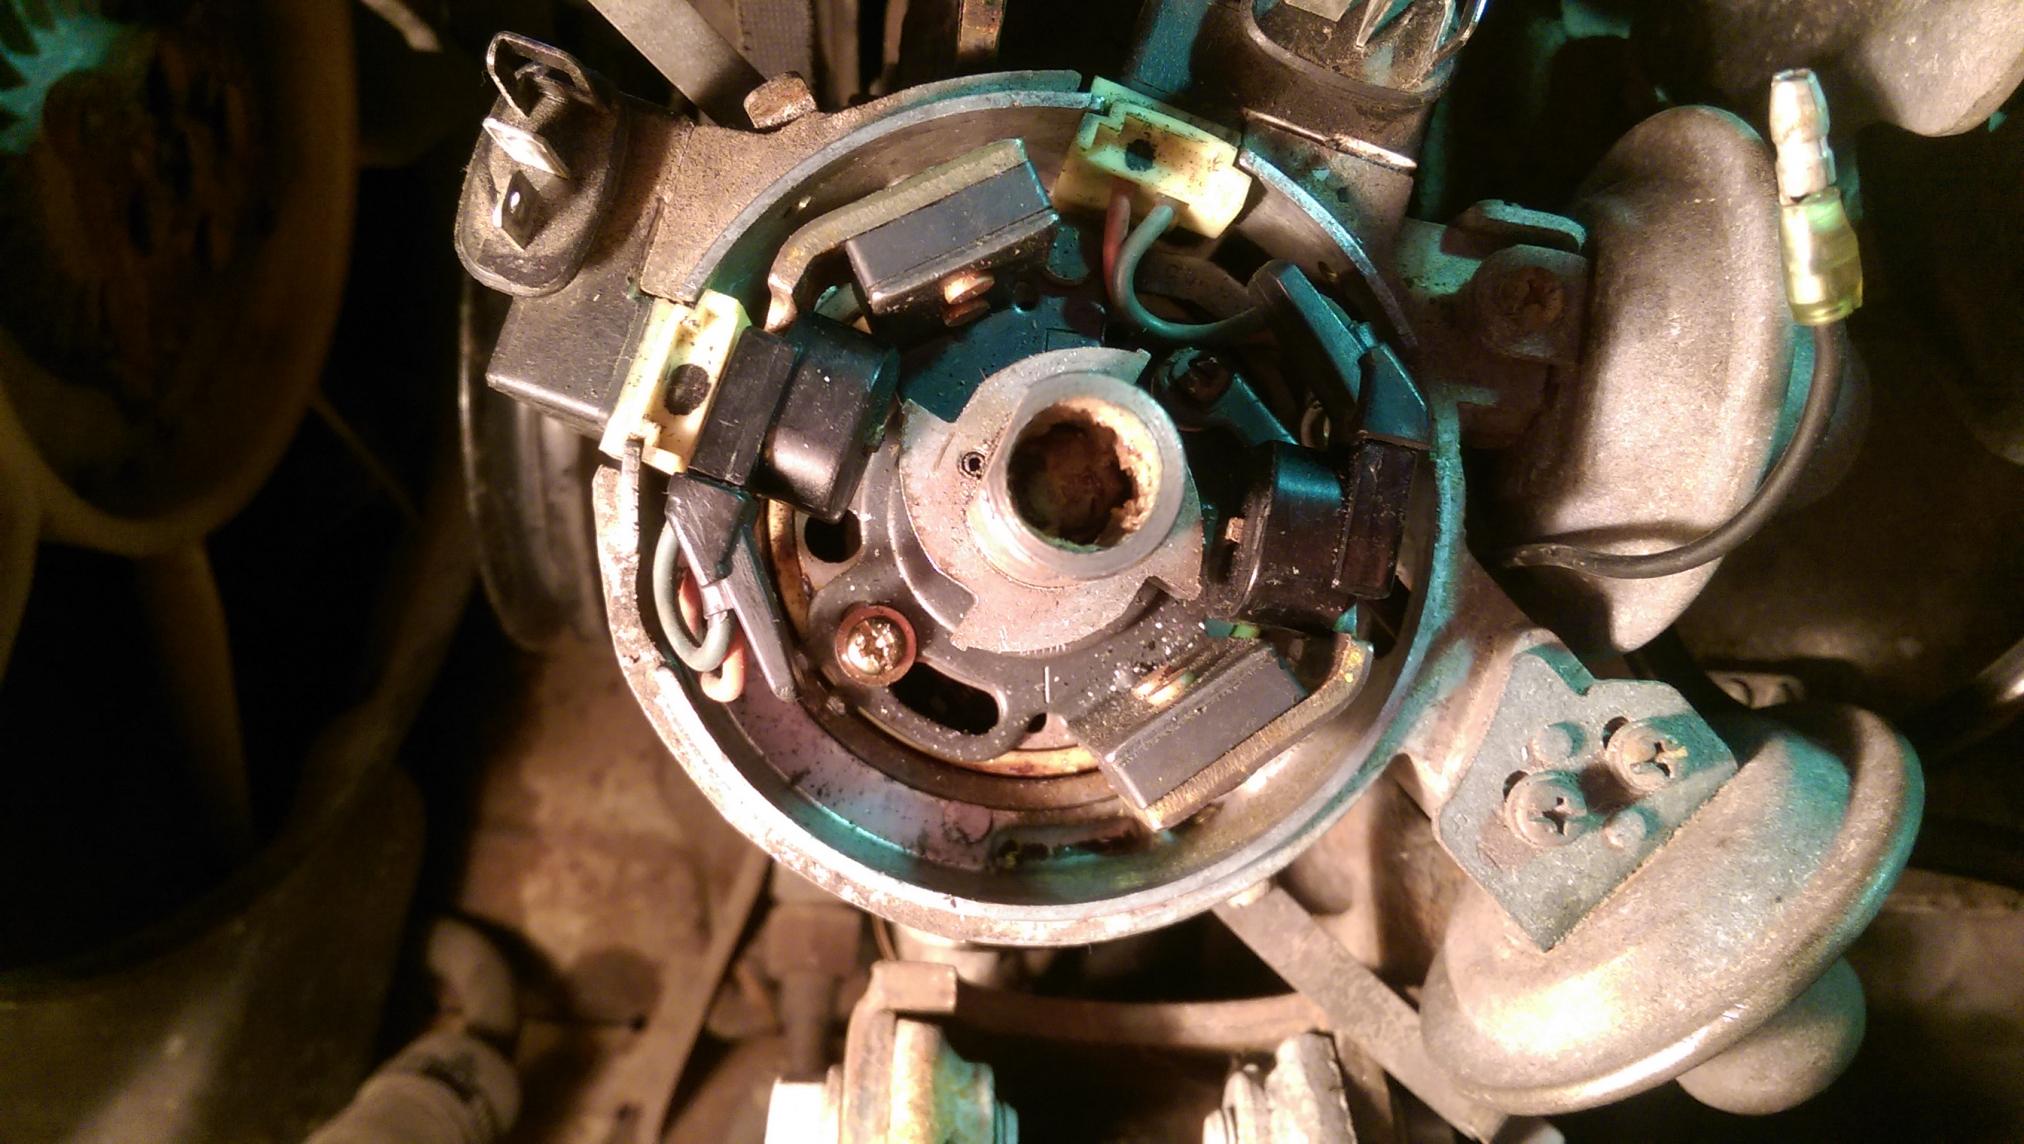
So I pull the distributor while keeping it all in, as close to, the same alignment it was when it was in the car. Sure enough, I dropped it down in at 180 degrees off of where it should have been. The dimple was on the opposite side of the distributor housing from the cast raised pointer.
I flipped the dimple around to the correct spot, where it should be lined up when you drop it in at TDC.
This is what the distributor reluctor alignment looks like when that dimple is aligned with the raised cast pointer on the distributor housing.
So I think I'm all awesome and I throw it back in the car.
But it's not as simple as it seems...
I went out and made sure the engine was at TDC again. The motor was at the correct timing on the front pulley and rear counterweight.
I pull the distributor cap off and what do I see - the timing is all screwed up. I'm thinking huh
, that's weird. I could have sworn I dropped it down in at TDC right...I knew something was off because this is definitely not how the reluctor should line up.So I pull the distributor while keeping it all in, as close to, the same alignment it was when it was in the car. Sure enough, I dropped it down in at 180 degrees off of where it should have been. The dimple was on the opposite side of the distributor housing from the cast raised pointer.
I flipped the dimple around to the correct spot, where it should be lined up when you drop it in at TDC.
This is what the distributor reluctor alignment looks like when that dimple is aligned with the raised cast pointer on the distributor housing.
So I think I'm all awesome and I throw it back in the car.
But it's not as simple as it seems...
01-14-15, 12:45 AM
#5525
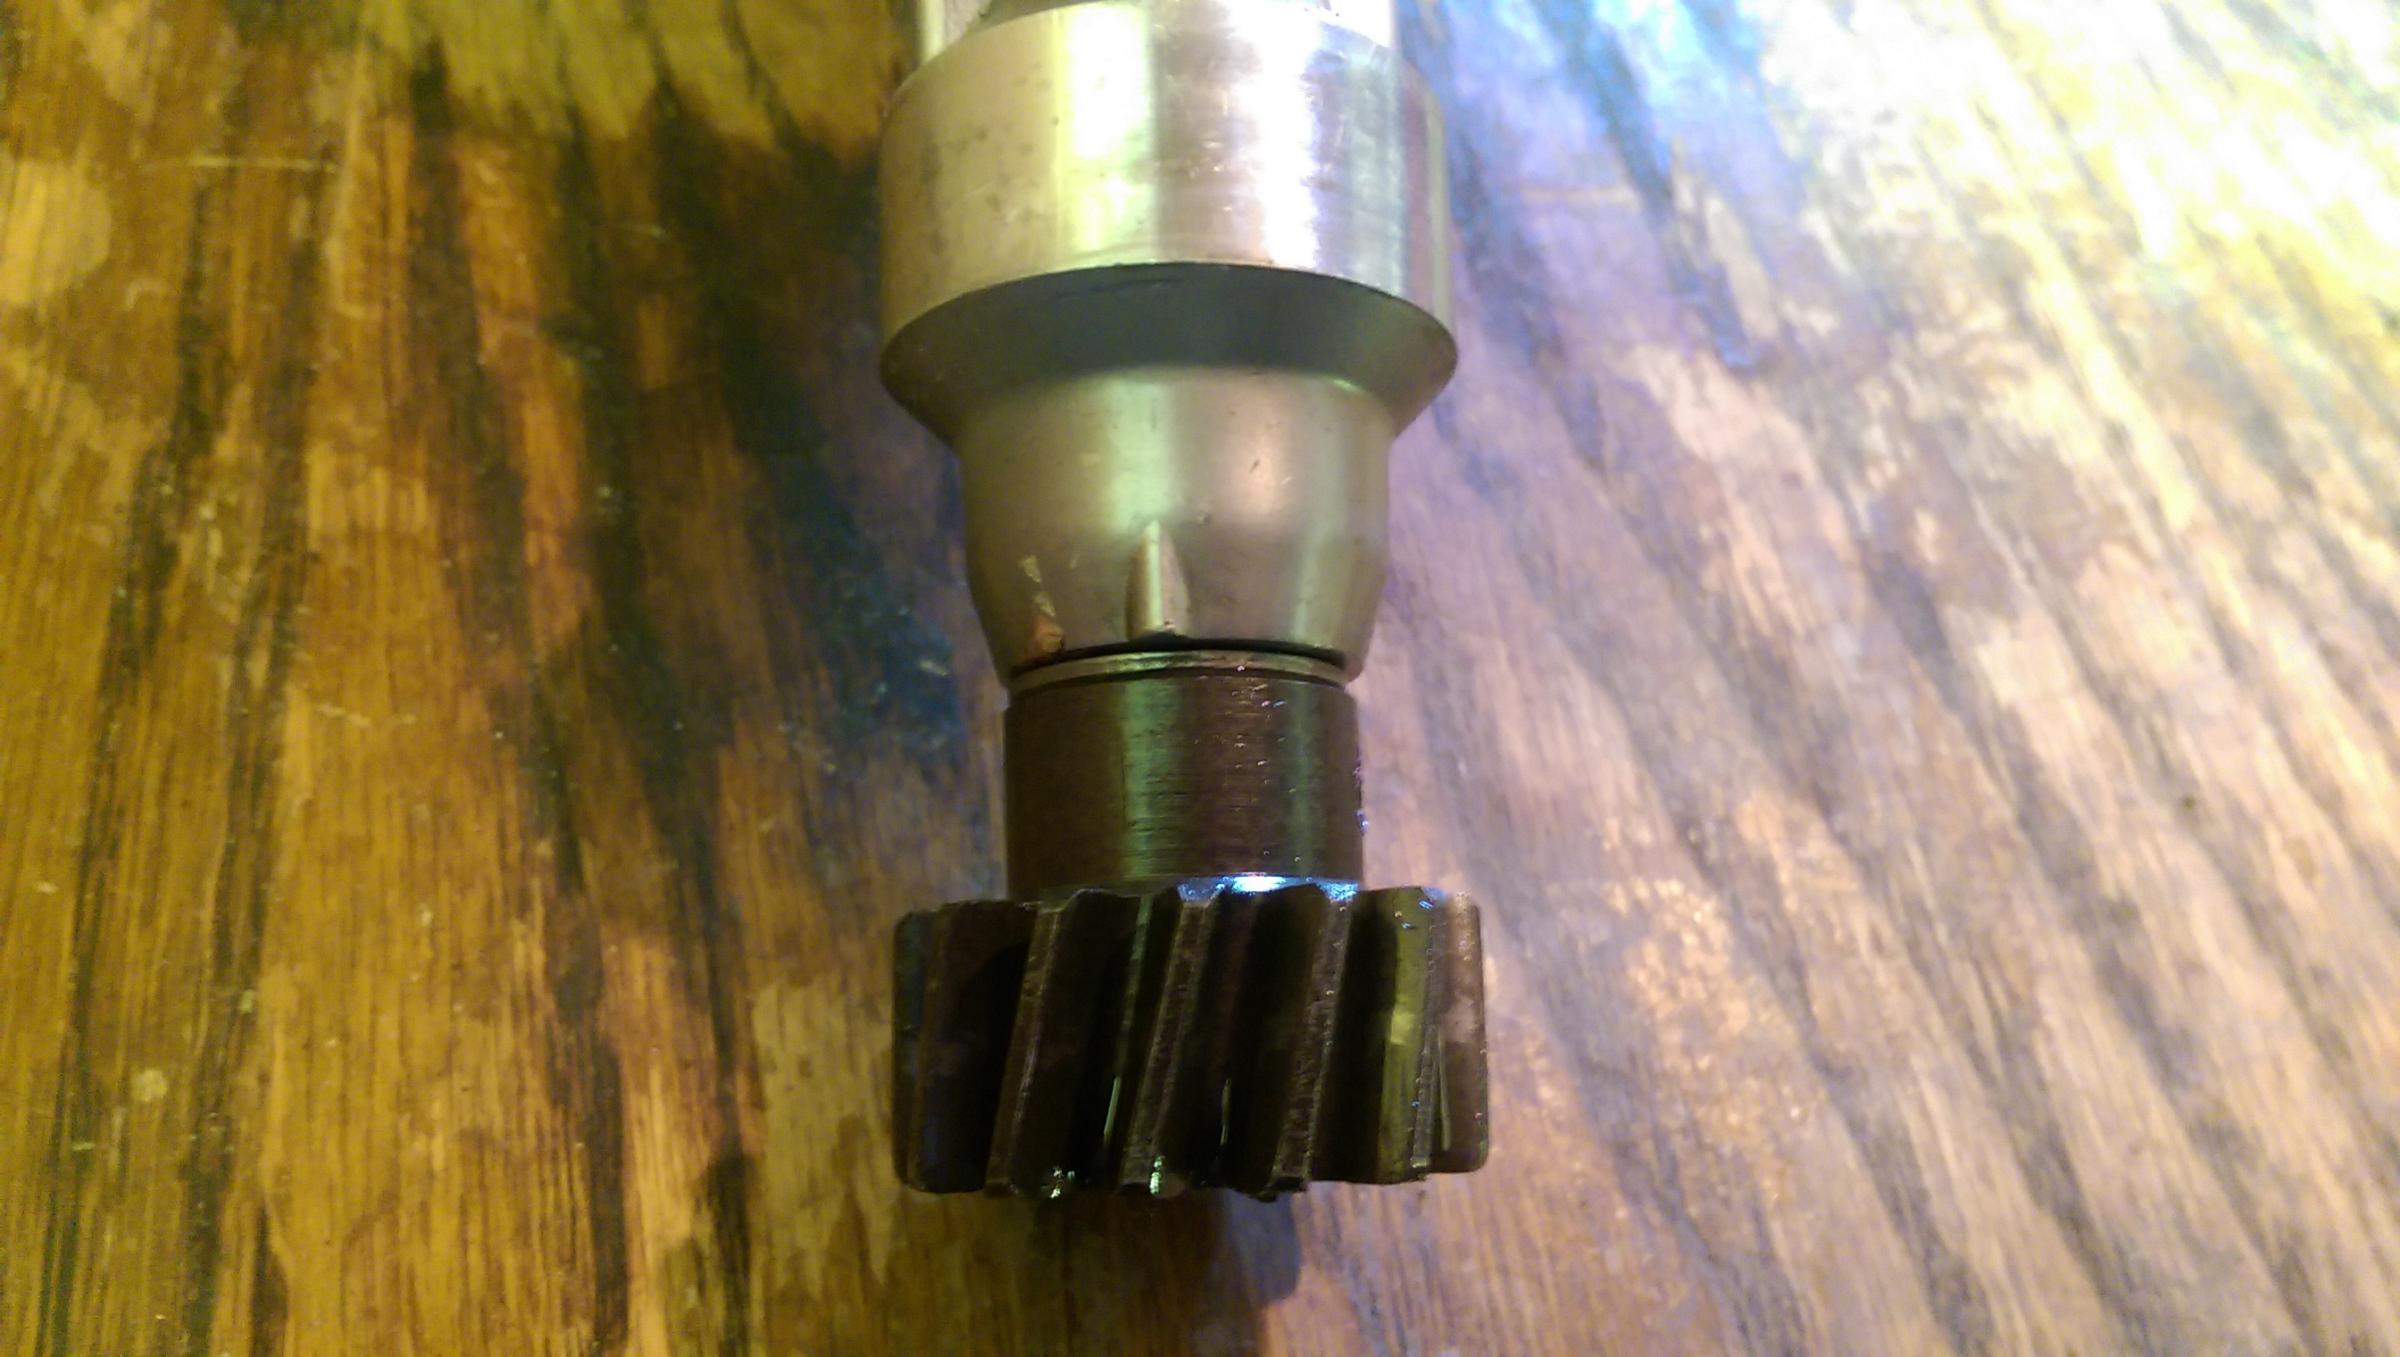
Well, dropping the distributor down into the front cover yields some interesting results for me. The helical cut gears that drive the distributor spline with it and force the assembly to rotate when it's about 1/2in from bottoming out on the front cover. They rotate the reluctor (from the gear on the bottom that I lined the dimple up on) in a clockwise direction when you're pressing it down home to where it should be sitting. Well the dimple being lined up allotted for two options for the distributor to sit at the center of its adjustment after the clockwise rotation of the reluctor.
Option 1:
This was the closest alignment to what the distributor looked like outside of the car on the bench, so I assumed that this was correct.
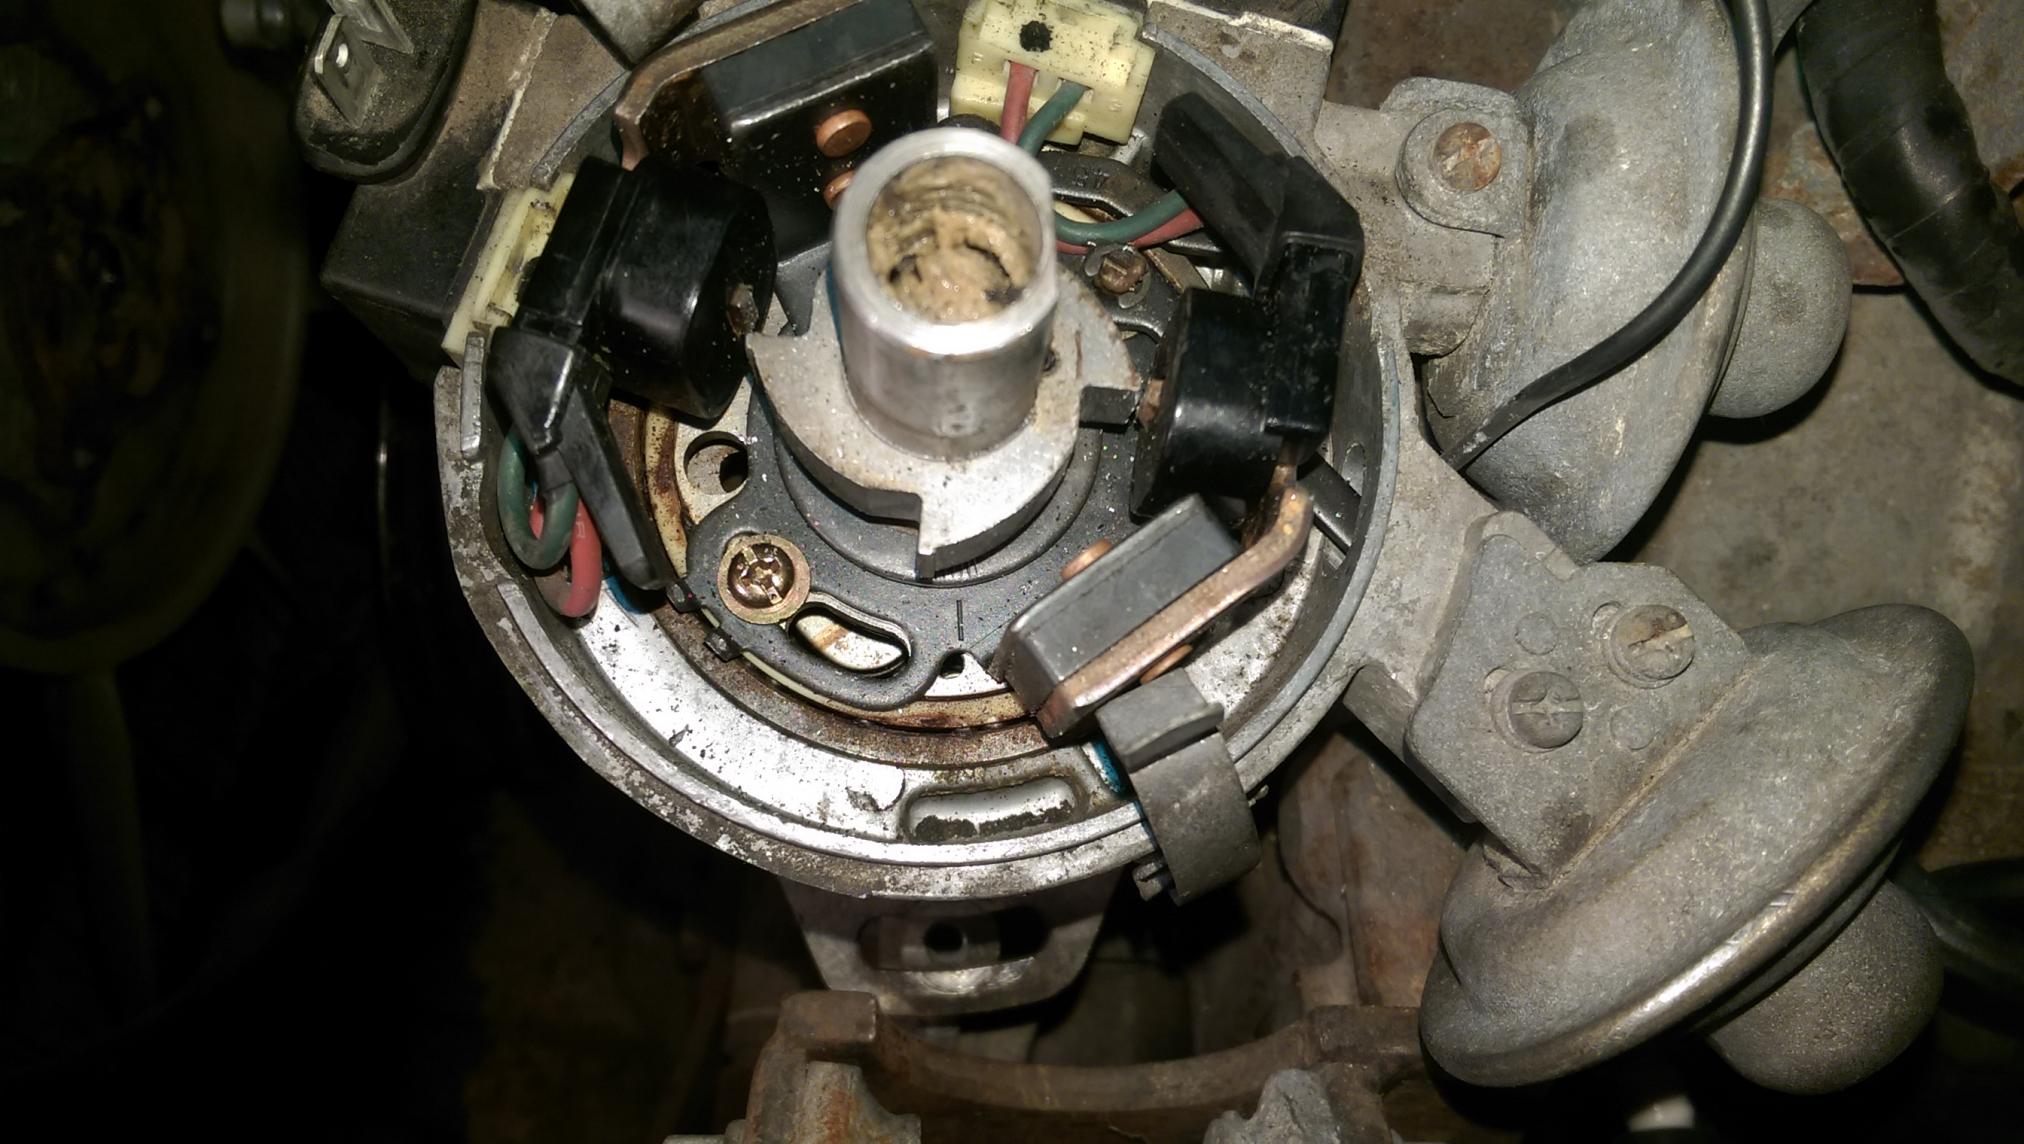
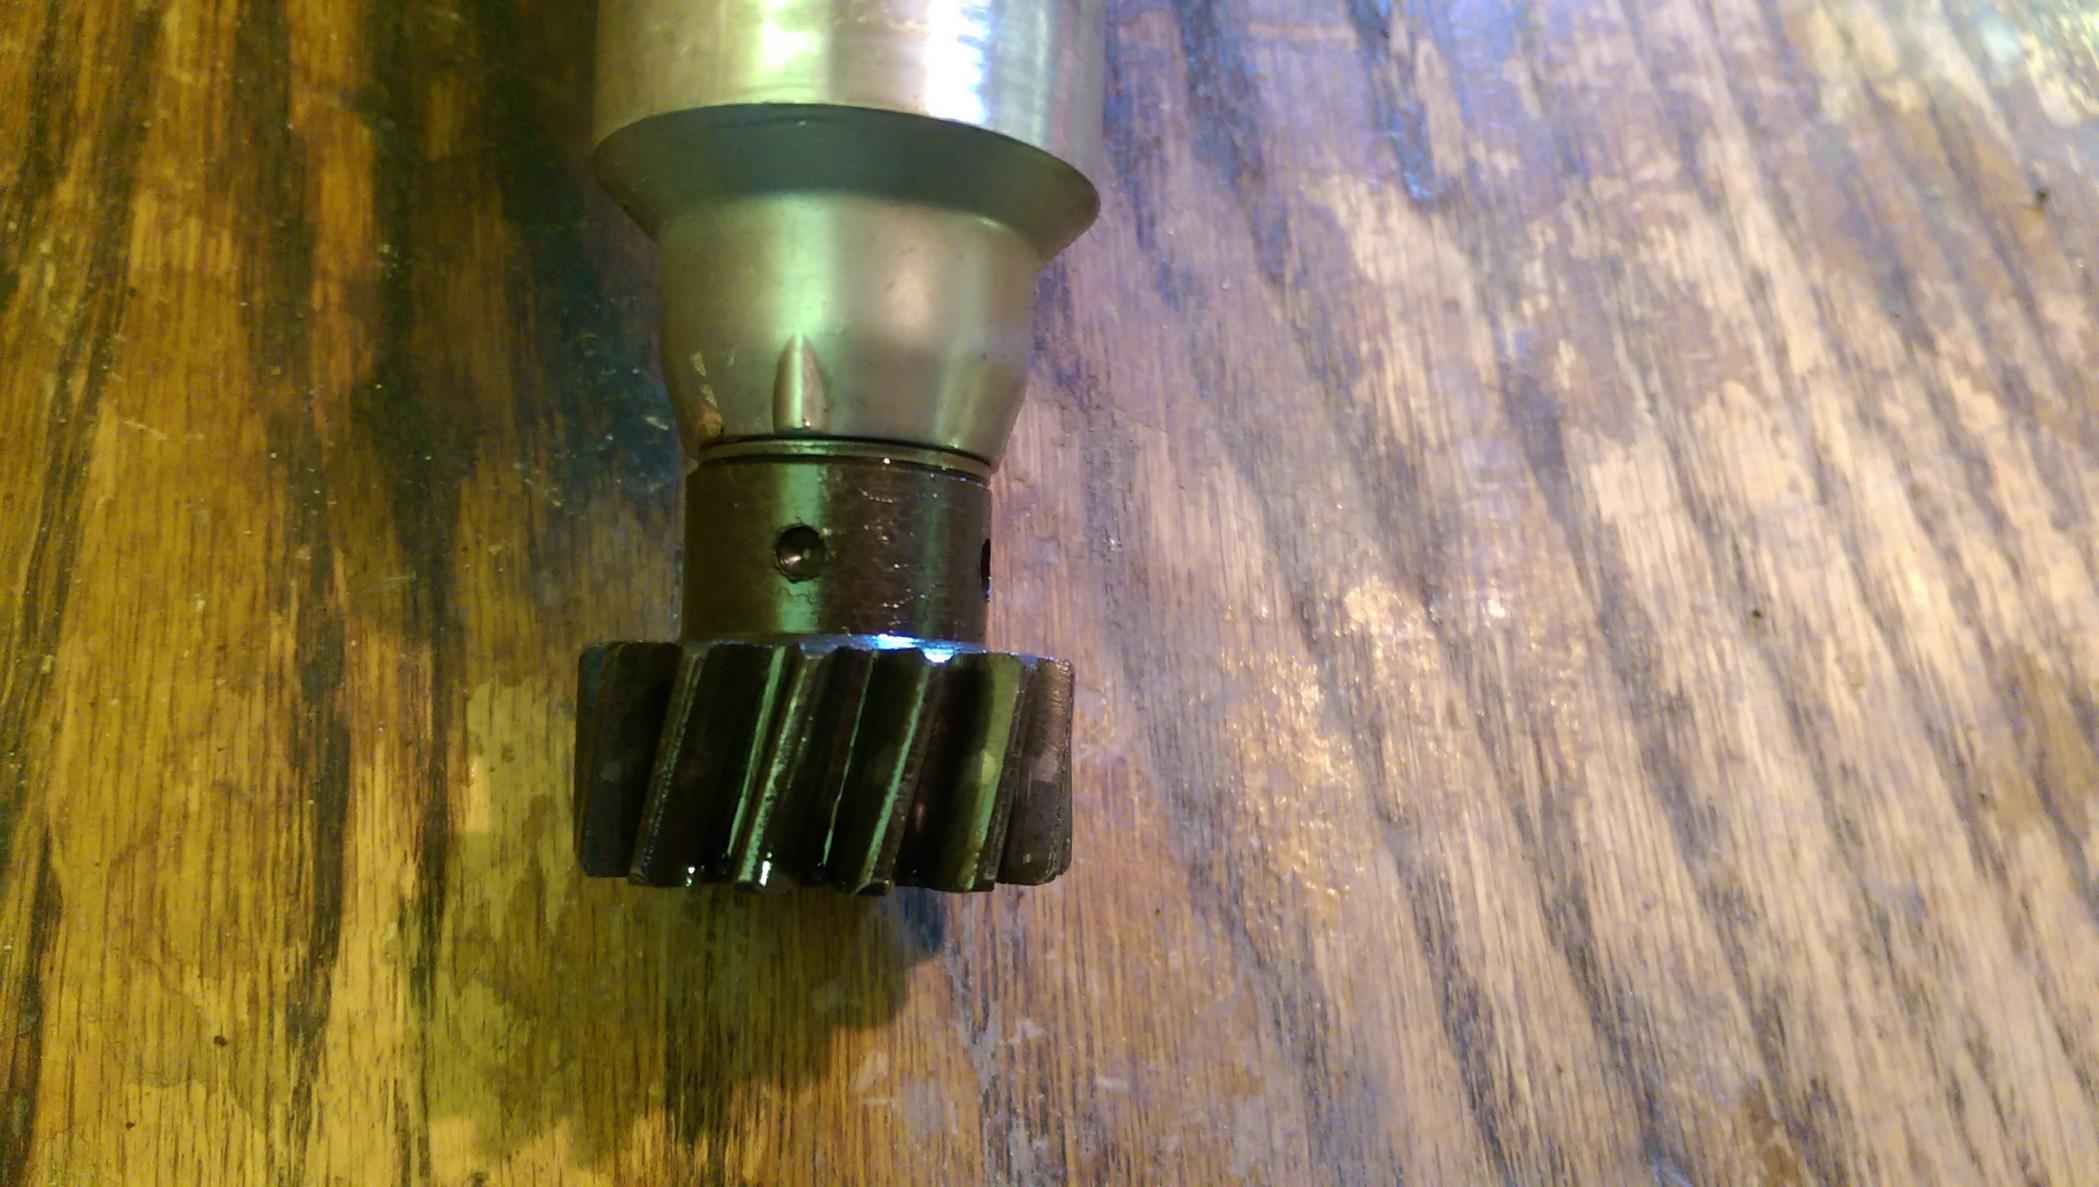
Option 2:
This was me moving the teeth one movement clockwise compared to the first option. Mind you, the dimple still appeared to line up with the raised cast part - it was a close toss up either way. But I don't believe this to be correct because it's not at either pickup at TDC.
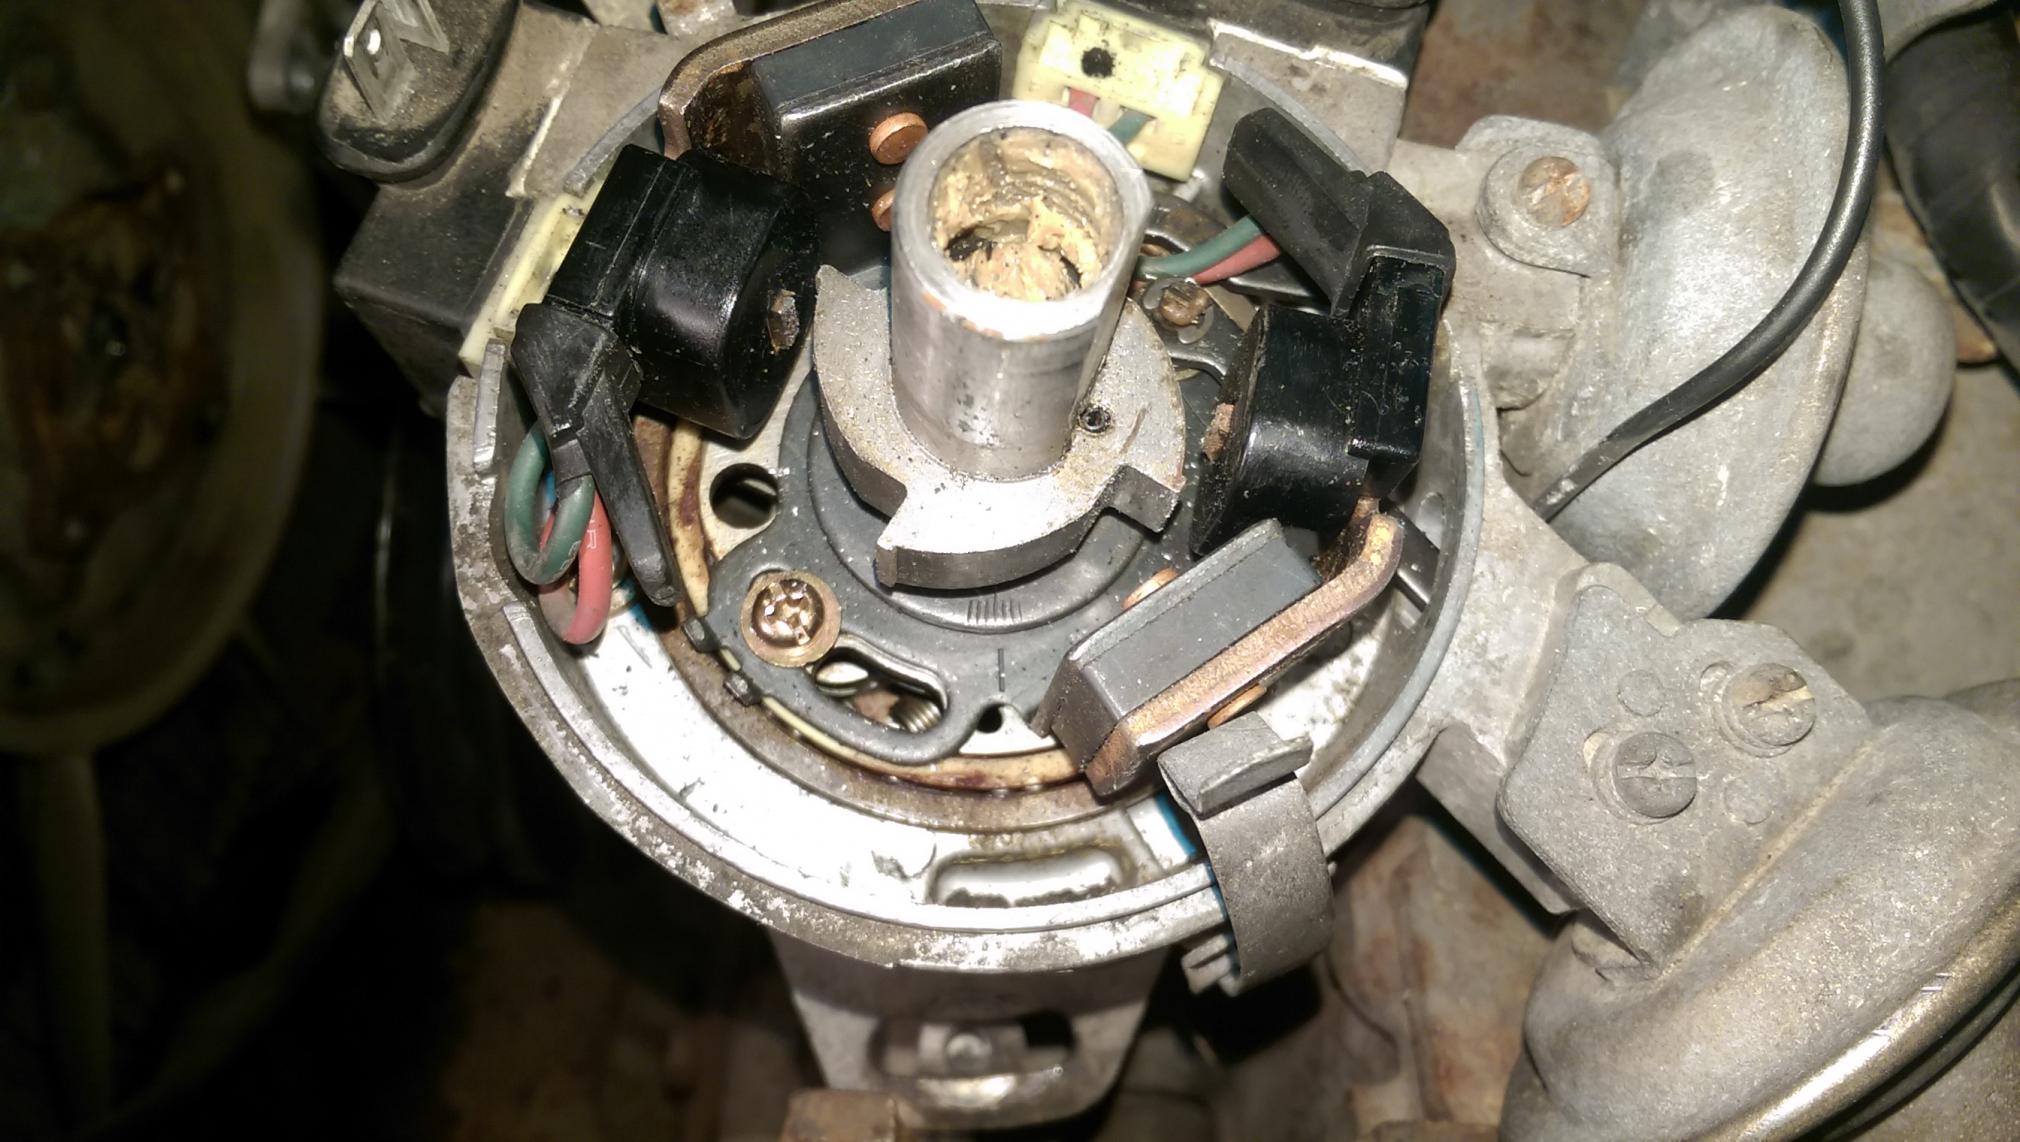
Take note that the distributor housing is lined up in the middle of it's adjustment on the front cover in both cases.
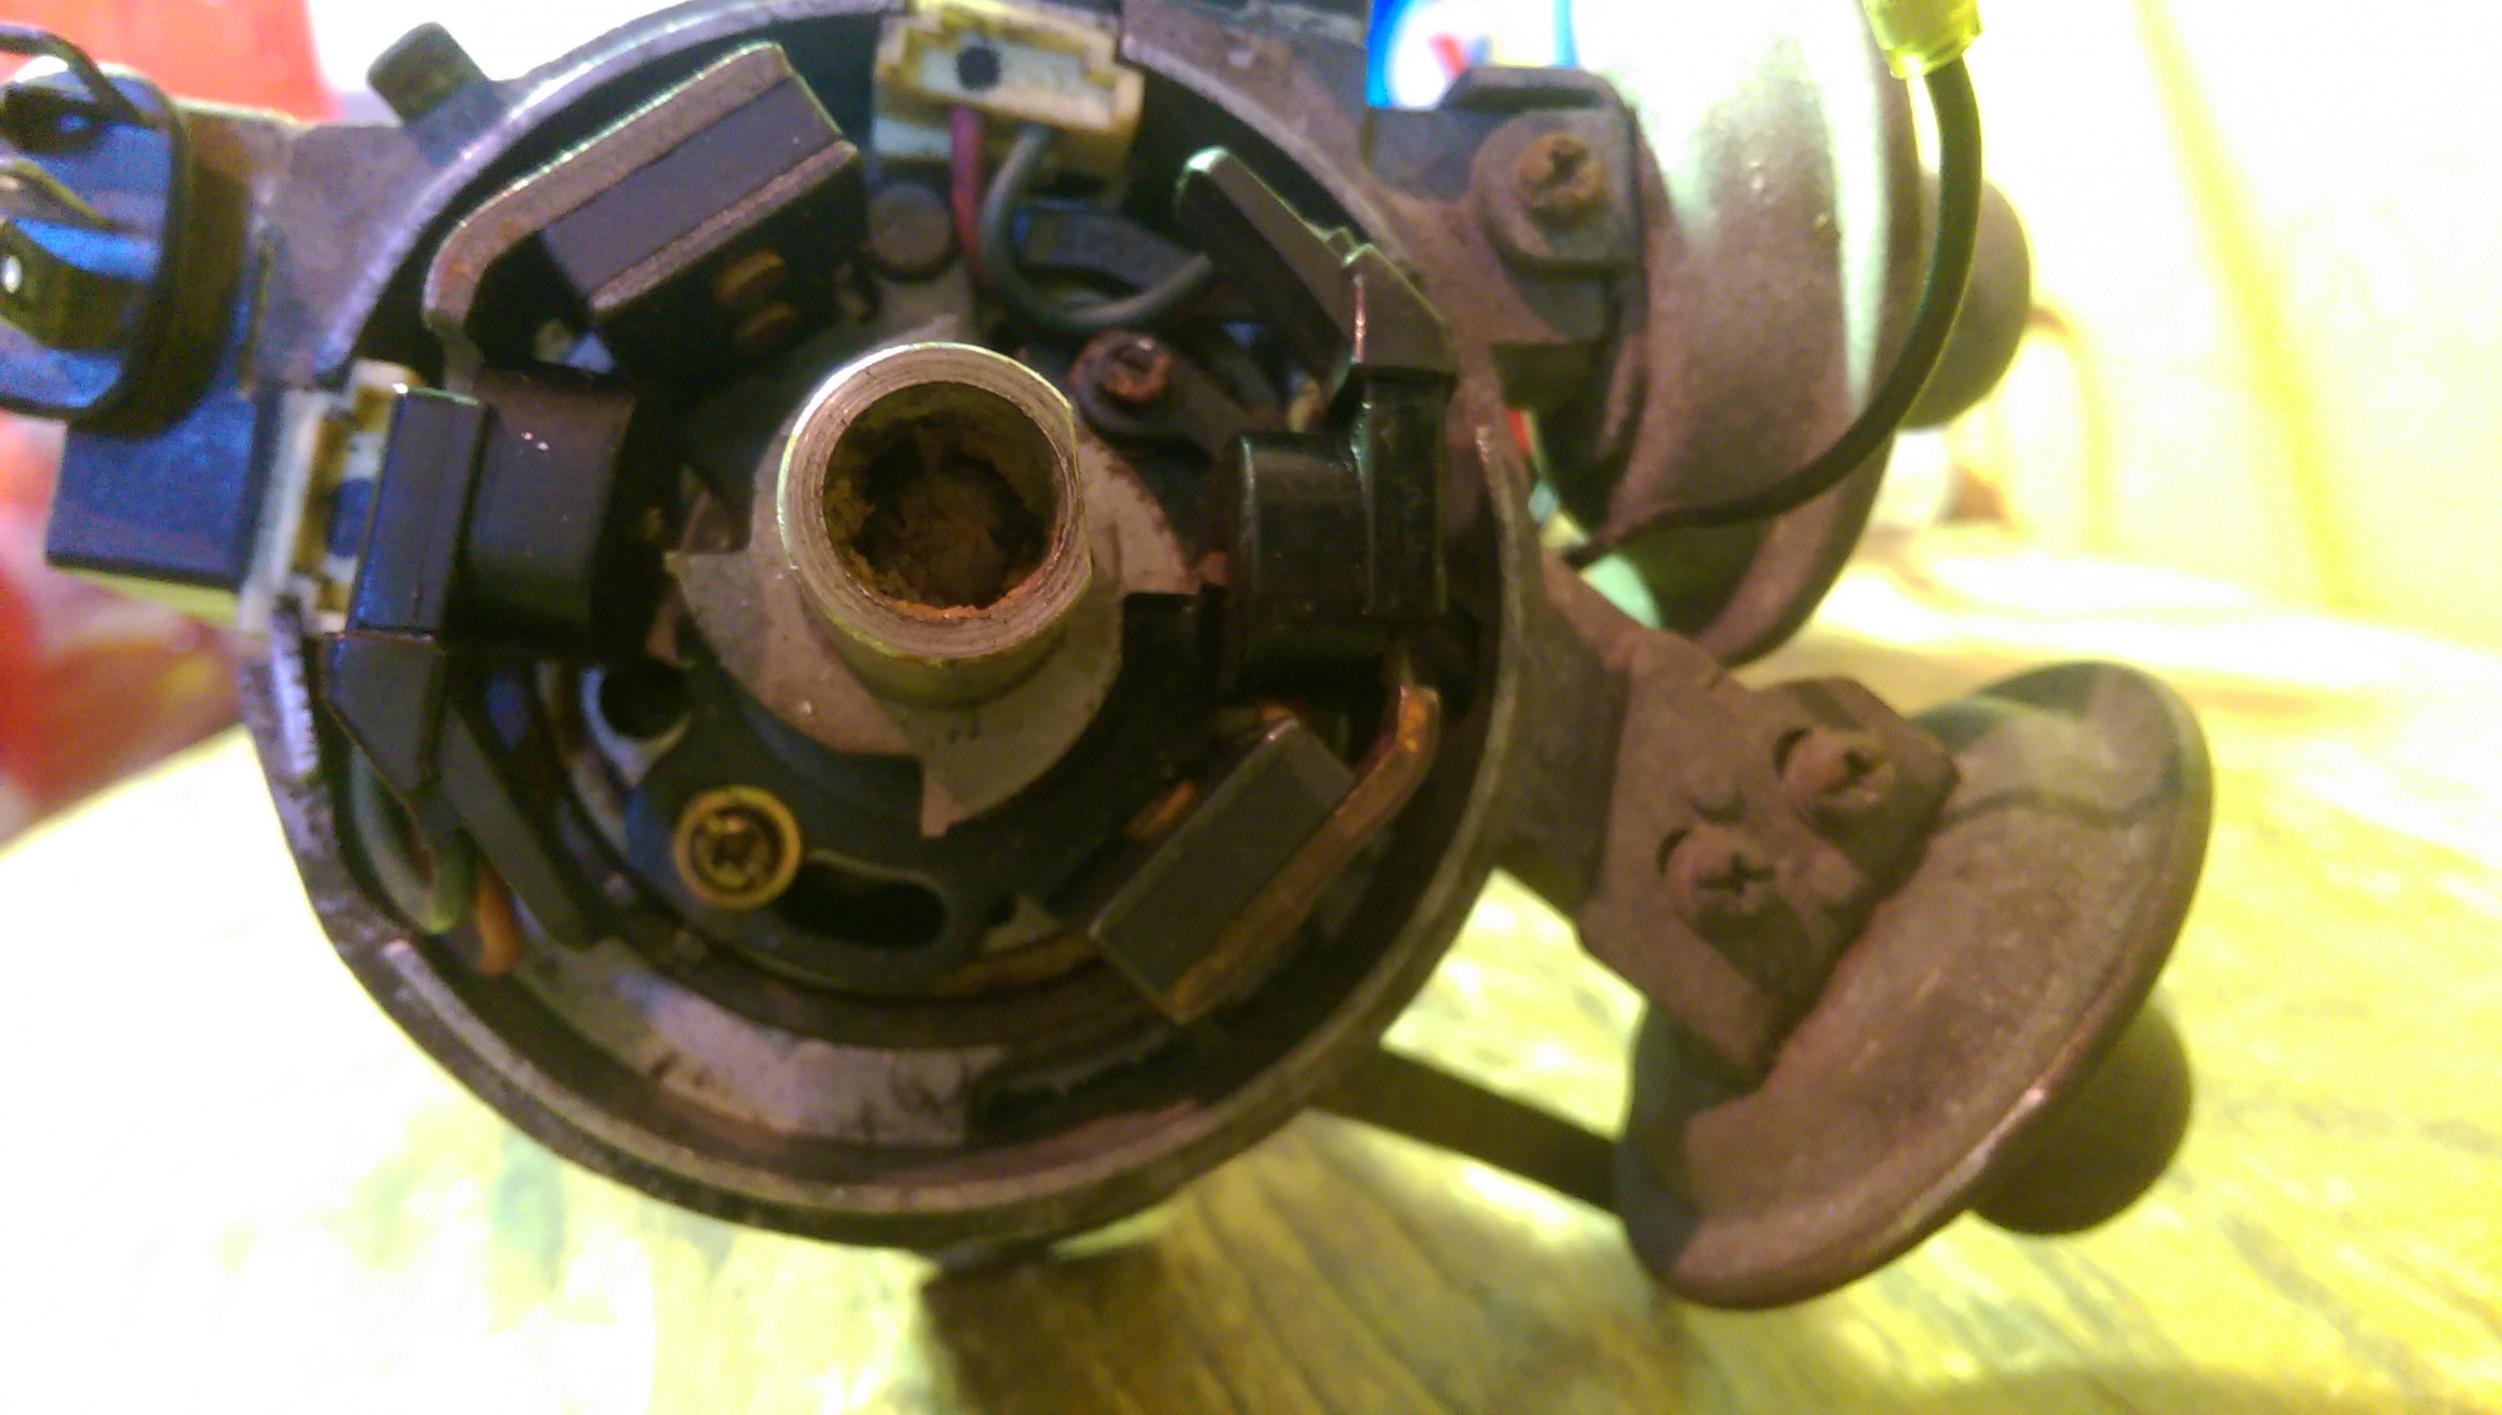
Well, then I noticed something else peculiar going on and it was the amount of play in the rotor tree (not sure on the technical name, looks like a tree so why not). The flat spot where it should line up on the distributor shaft was too small so it allowed for at least 15 degrees of deflection in either direction from where it should be lined up.
Spun out as far as it could go in the counterclockwise direction:
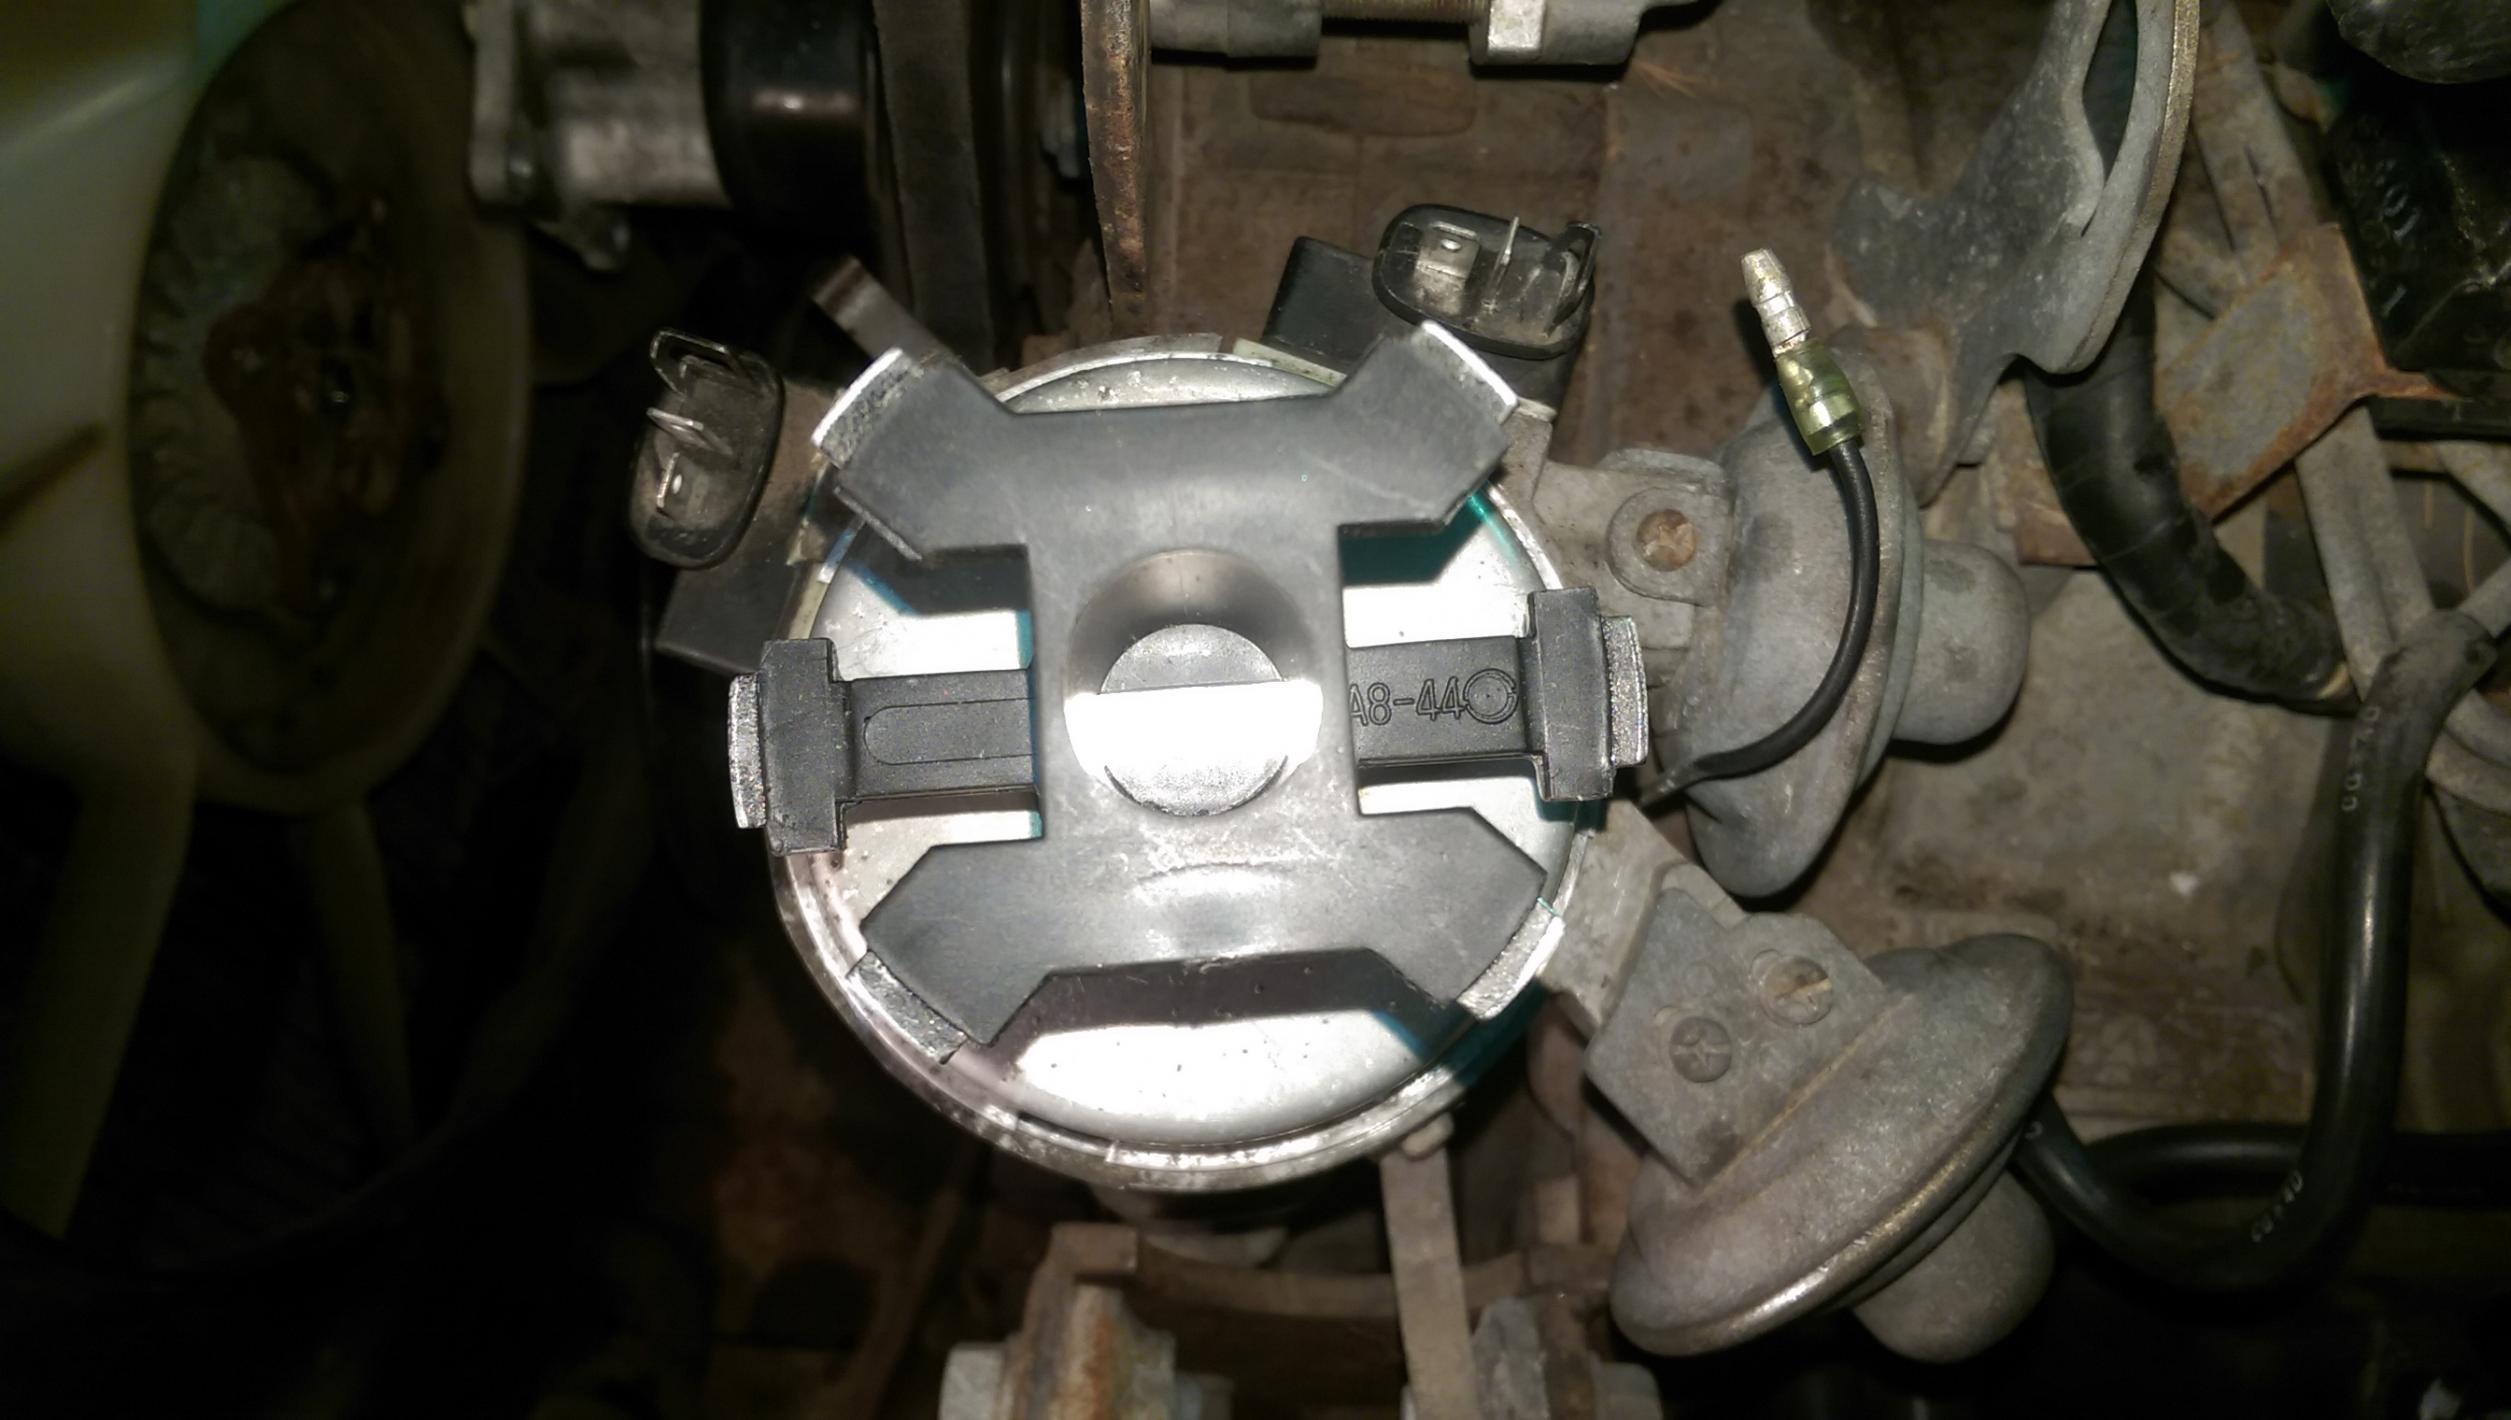
Spun out as far as it could go in the clockwise direction:

The too-small flat spot on the rotor tree:

Well, while doing all of this the starter got stuck out against the flywheel. So to fix that I dropped the starter and bench tested it. The solenoid works and pushes the gear out quickly and strongly, as well as spinning the motor at a decent enough seeming rate. I still think the cranking speed is too slow but maybe I'm just not used to the rotary cranking speed any more.
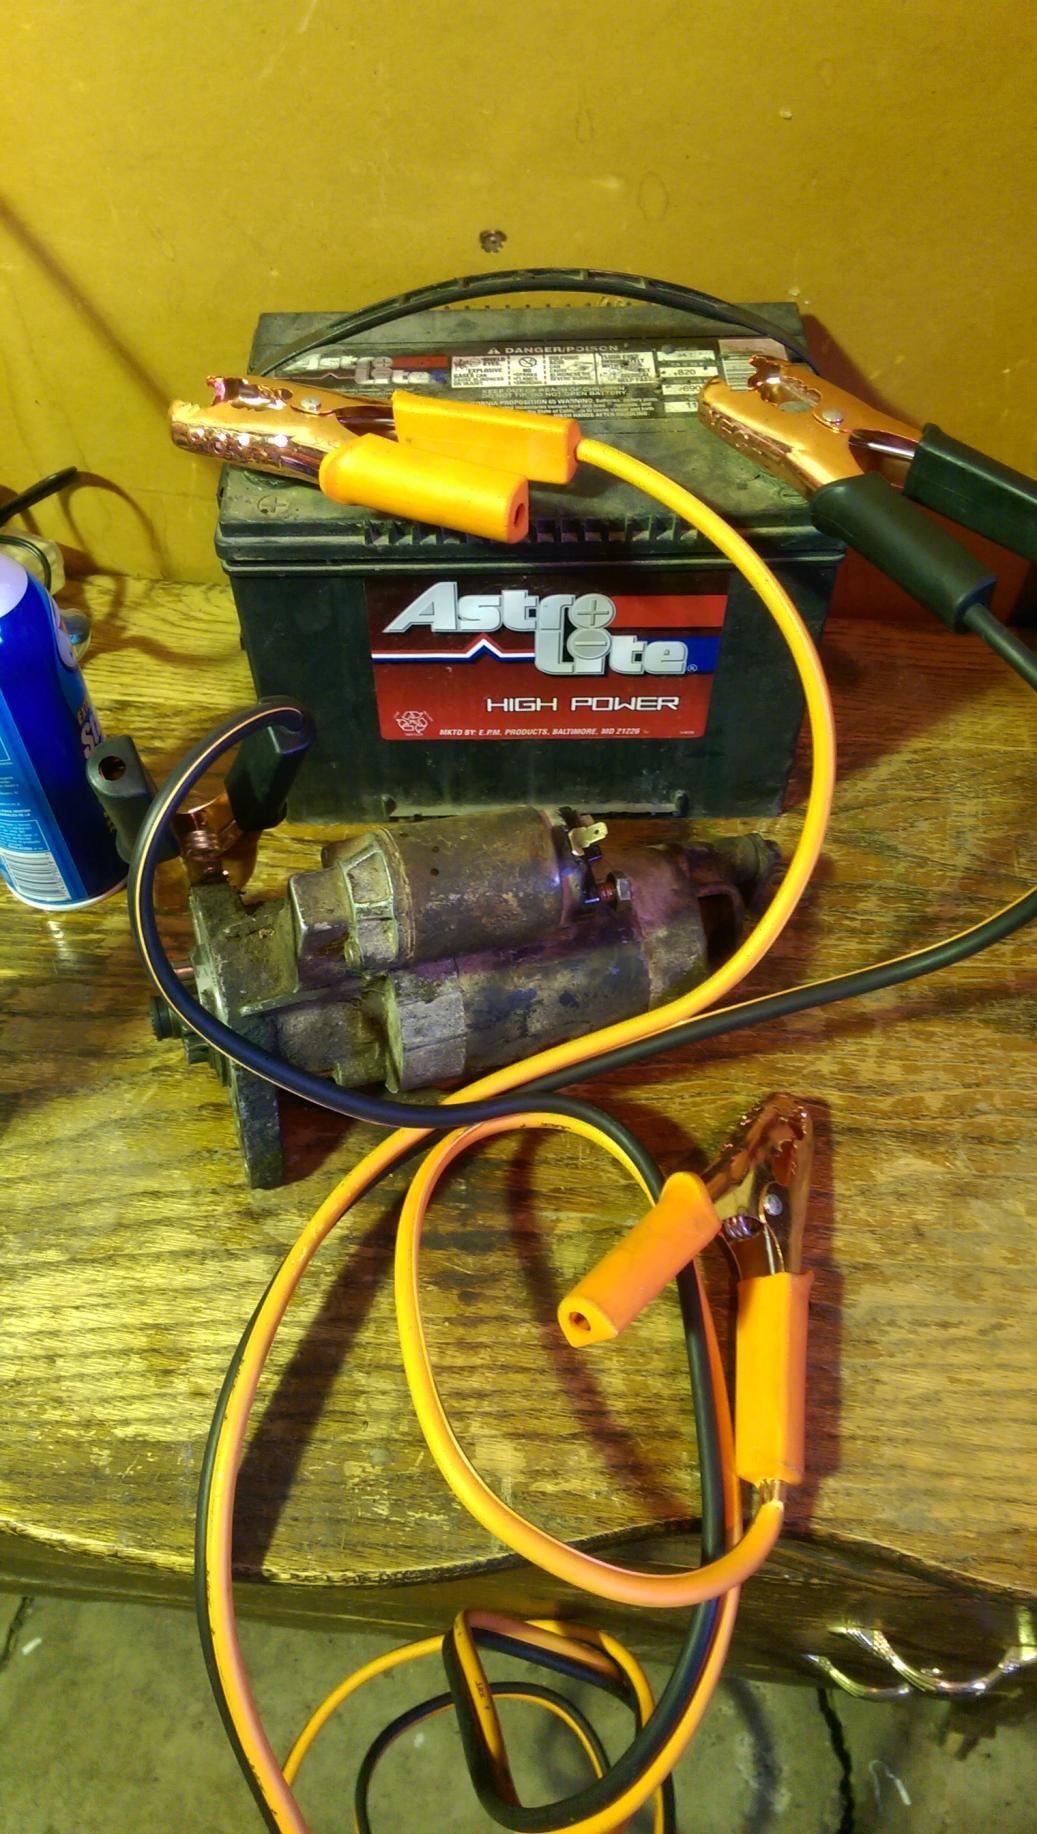
So I got the starter thrown back in thinking it would all be ok now, she'd fire up and I'd have no more problems.
Yeah right, in my dreams...(get it, DreamInRotary)...
 ...
... I'm tired.
She didn't fire. Didn't even hint at firing. So I knew that the worst had come to pass and I'd need to do what I should have done in the first place...
Option 1:
This was the closest alignment to what the distributor looked like outside of the car on the bench, so I assumed that this was correct.
Option 2:
This was me moving the teeth one movement clockwise compared to the first option. Mind you, the dimple still appeared to line up with the raised cast part - it was a close toss up either way. But I don't believe this to be correct because it's not at either pickup at TDC.
Take note that the distributor housing is lined up in the middle of it's adjustment on the front cover in both cases.
Well, then I noticed something else peculiar going on and it was the amount of play in the rotor tree (not sure on the technical name, looks like a tree so why not). The flat spot where it should line up on the distributor shaft was too small so it allowed for at least 15 degrees of deflection in either direction from where it should be lined up.
Spun out as far as it could go in the counterclockwise direction:
Spun out as far as it could go in the clockwise direction:
The too-small flat spot on the rotor tree:
Well, while doing all of this the starter got stuck out against the flywheel. So to fix that I dropped the starter and bench tested it. The solenoid works and pushes the gear out quickly and strongly, as well as spinning the motor at a decent enough seeming rate. I still think the cranking speed is too slow but maybe I'm just not used to the rotary cranking speed any more.
So I got the starter thrown back in thinking it would all be ok now, she'd fire up and I'd have no more problems.
Yeah right, in my dreams...(get it, DreamInRotary)...
... I'm tired.She didn't fire. Didn't even hint at firing. So I knew that the worst had come to pass and I'd need to do what I should have done in the first place...