What did you do to your FB today?
 04-26-14, 12:33 AM
#4651
stripped and painted the seat rails, stripped all the rust off the caps on the door panels MsDIY sent me & shot them with Rust Converter, and got most of the way through my pattern sketches. One tricky bit of sewing that I'm not 100% sure how I'll do yet, will probably work it out tomorrow.
Along the way, I found the keys to my old 73 Plymouth Satellite, 'StarBird.' which is kind of odd since I sold that car in about 1988 or so.
Along the way, I found the keys to my old 73 Plymouth Satellite, 'StarBird.' which is kind of odd since I sold that car in about 1988 or so.

 04-26-14, 02:36 PM
#4654
Car's for sale on Craigslist locally, ad is here:
FB rx7 Turbo 2 swap Minneapolis/St.Paul
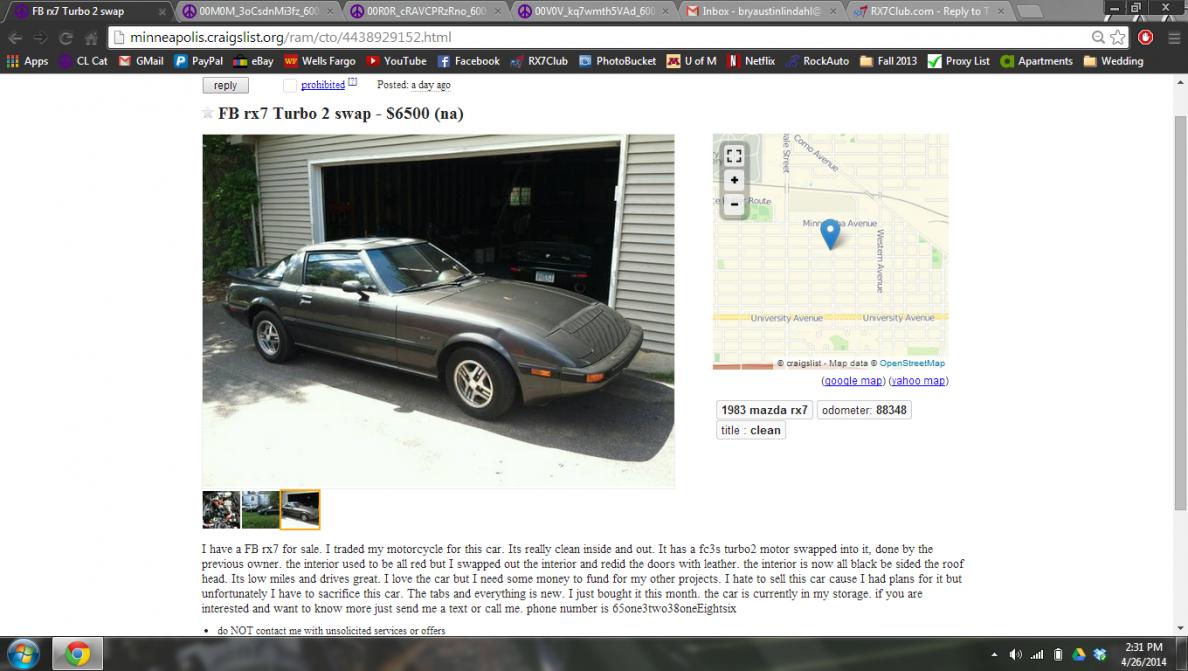


Just looking to help out the seller and see if anyone would like to pick it up. I don't have the money right now and wish I did with all my heart. Would like to see it go to a collector or enthusiast versus some drifter kid who'll smash it into a wall.
Thanks for all the support guys,
Austin
FB rx7 Turbo 2 swap Minneapolis/St.Paul
Just looking to help out the seller and see if anyone would like to pick it up. I don't have the money right now and wish I did with all my heart. Would like to see it go to a collector or enthusiast versus some drifter kid who'll smash it into a wall.
Thanks for all the support guys,
Austin
04-26-14, 06:06 PM
#4655
Car's for sale on Craigslist locally, ad is here:
FB rx7 Turbo 2 swap Minneapolis/St.Paul
Just looking to help out the seller and see if anyone would like to pick it up. I don't have the money right now and wish I did with all my heart. Would like to see it go to a collector or enthusiast versus some drifter kid who'll smash it into a wall.
Thanks for all the support guys,
Austin
He should change the location from N/A to "Turboville Population THIS car!!"
 04-26-14, 07:27 PM
#4656
No sir, they were black. Except where they were rusted.
Today, I performed an emergency rear brake job on a 2005 Buick. Less than four hours from getting the "Honey, my brakes are grinding really bad" cell call to finished, bedded, and tools cleaned.
Those of you who don't think this is something I did for my SA today, are clearly not married.
Today, I performed an emergency rear brake job on a 2005 Buick. Less than four hours from getting the "Honey, my brakes are grinding really bad" cell call to finished, bedded, and tools cleaned.
Those of you who don't think this is something I did for my SA today, are clearly not married.
04-27-14, 08:30 PM
#4659
Say What?
Join Date: Jun 2007
Location: Oak Harbor,WA and Santa Maria, CA
Posts: 1,239
Likes: 0
Received 0 Likes
on
0 Posts
Changed the oil and also noticed that I have a leaking coolant level sensor and possibly a small leak on my oil pressure sensor, I can prolly wait a while to fix the oil pressure sensor bc it's not in the easiest location.
04-28-14, 08:35 AM
#4660
rat's nest delete and clutch hydro system redo. ordered oil cooler lines and interior handle trim. hope to get to the DMV this week or next and make it MINE and legal. oil leak chasing to ensue!
04-28-14, 01:41 PM
#4661
I was changing my cone hot-air-intake back to a stock airbox with a K&N drop in, and I noticed the hose that goes from the split air pipe to the back of the intake manifold was rubbing against the headers and it had burned a hole through the hose. Interesting. I replaced the hose and what do you know, having the aux ports working is pretty rad!
04-28-14, 04:05 PM
#4662
down, but not out
iTrader: (4)
Join Date: Apr 2011
Location: Santa Barbara, California
Posts: 318
Likes: 0
Received 1 Like
on
1 Post
Put mine up on jackstands a couple days ago, it's probably going to be there for a while...
Need to get a new steering box ordered, lock down some new wheels, get the rear end swapped, and a few other things..
Not to mention I recently purchased another distraction, 73 Datsun 620
Need to get a new steering box ordered, lock down some new wheels, get the rear end swapped, and a few other things..
Not to mention I recently purchased another distraction, 73 Datsun 620
04-28-14, 04:50 PM
#4663
"garage"=Natural Habitat
iTrader: (1)
Join Date: Dec 2010
Location: Hamilton ohio
Posts: 133
Likes: 0
Received 0 Likes
on
0 Posts
Put mine up on jackstands a couple days ago, it's probably going to be there for a while...
Need to get a new steering box ordered, lock down some new wheels, get the rear end swapped, and a few other things..
Not to mention I recently purchased another distraction, 73 Datsun 620
Need to get a new steering box ordered, lock down some new wheels, get the rear end swapped, and a few other things..
Not to mention I recently purchased another distraction, 73 Datsun 620
Sent from my LG-LS980 using RX7Club
04-28-14, 05:41 PM
#4664
JKM - NICE FIX! Gotta love free horsepower 
RxTex - LOVE the Datsun. I've wanted one of those, a REPU, or a Chevy Luv since the dawn of time. Enjoy!
~~~
Had to take a break for a minute, finances, work, life. It's frustrating leaving a project like this in a 2/3's done state!
Yesterday I got my new ebay special radiator in - this one actually is the right size! wow! I was getting ready to do some custom paint on it before bolting it in, and when I was masking it in, the masking tape pulled off the chintzy spray that they put on from the factory. Its like chrome polished aluminum underneath - why the hell would they cover it up with a crappy rattle can job!? So, I've got some cleaning to do before that goes in.
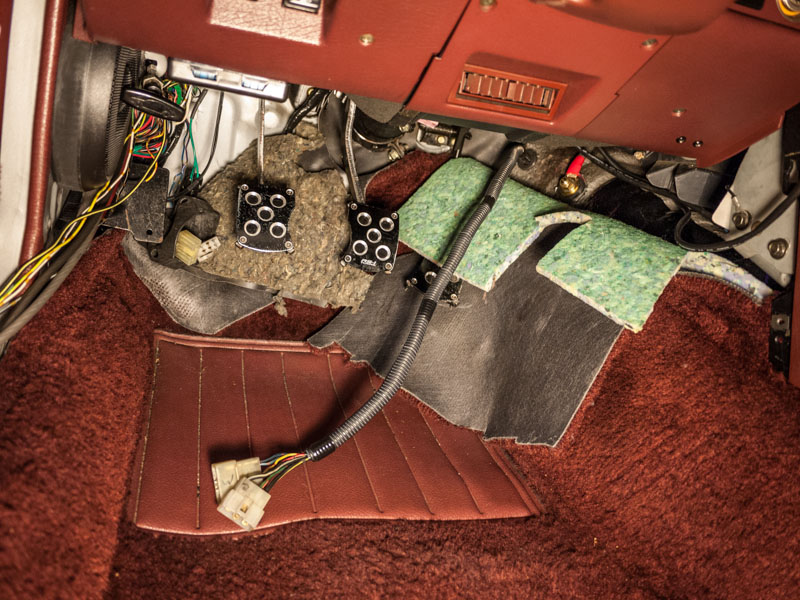
Only 2 more cuts before the entirety of the wire tuck is done! Last night I finished up the driver's side tuck down to the transmission tunnel harness. This includes factory water temp gauge, oil pressure gauge, starter motor stuff, and transmission stuff.
The only wires I ended up having to extend for this tuck was the water temp sensor and oil pressure sensor wires.
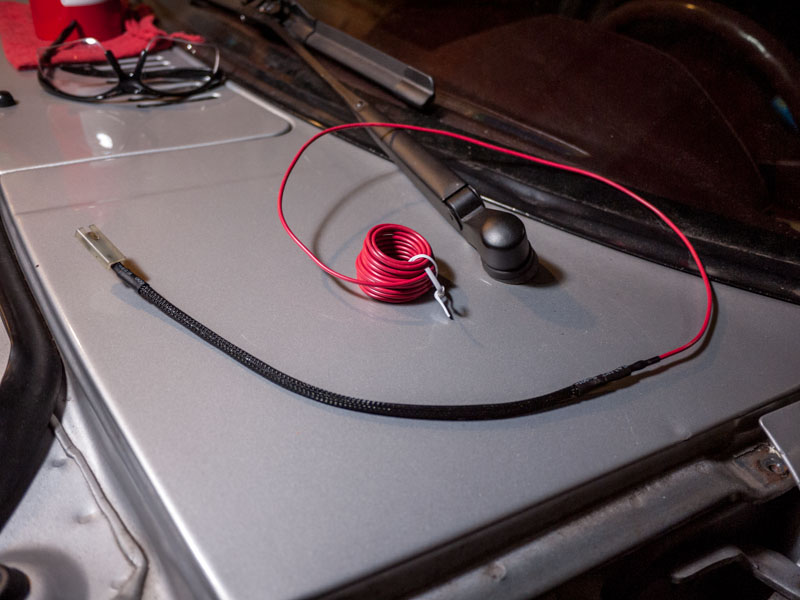
1" hole for the harness. Here you can see the battery positive passthrough as well as fusible links attached to the steering column.
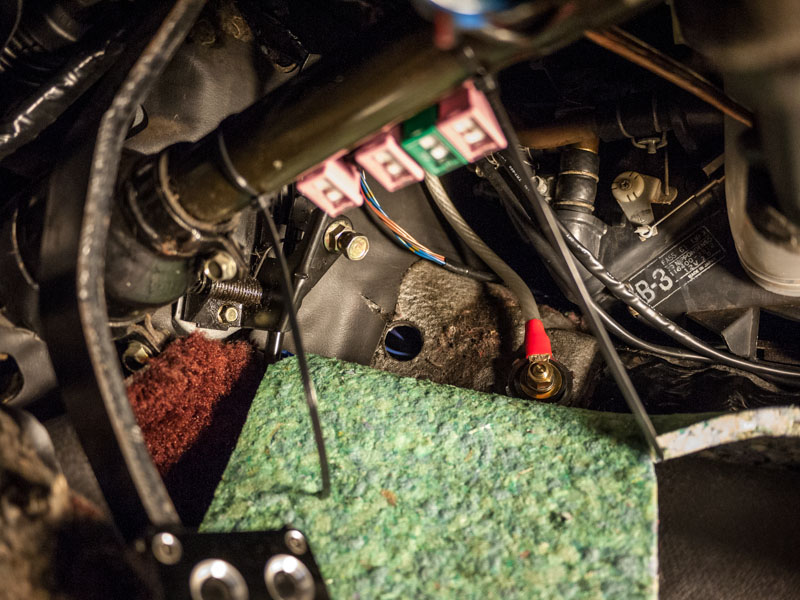
I de-pinned the two harness plugs and pulled the wires through, and as it turns out, the entire harness is long enough to route above the steering column and over to the rest of the tucked harness (visible above the clutch pedal).
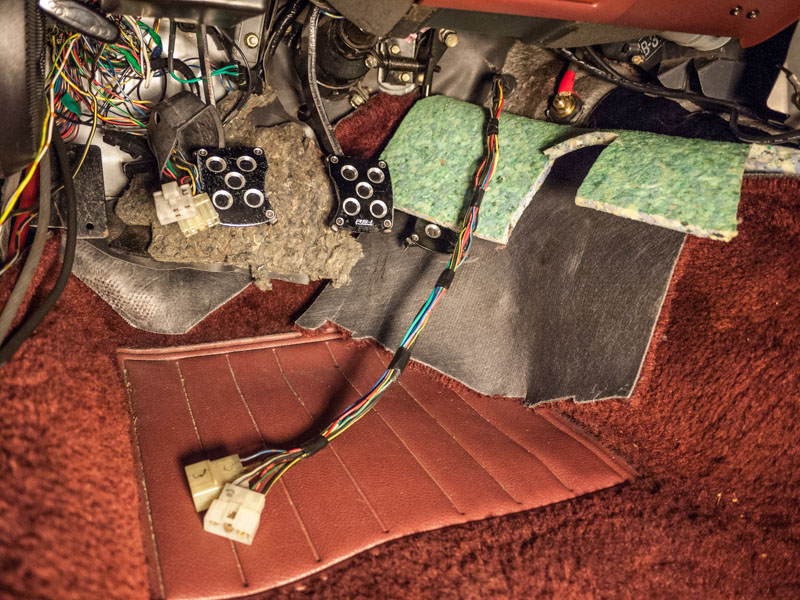
All tidied up and ready to route:
RxTex - LOVE the Datsun. I've wanted one of those, a REPU, or a Chevy Luv since the dawn of time. Enjoy!
~~~
Had to take a break for a minute, finances, work, life. It's frustrating leaving a project like this in a 2/3's done state!
Yesterday I got my new ebay special radiator in - this one actually is the right size! wow! I was getting ready to do some custom paint on it before bolting it in, and when I was masking it in, the masking tape pulled off the chintzy spray that they put on from the factory. Its like chrome polished aluminum underneath - why the hell would they cover it up with a crappy rattle can job!? So, I've got some cleaning to do before that goes in.
Only 2 more cuts before the entirety of the wire tuck is done! Last night I finished up the driver's side tuck down to the transmission tunnel harness. This includes factory water temp gauge, oil pressure gauge, starter motor stuff, and transmission stuff.
The only wires I ended up having to extend for this tuck was the water temp sensor and oil pressure sensor wires.
1" hole for the harness. Here you can see the battery positive passthrough as well as fusible links attached to the steering column.
I de-pinned the two harness plugs and pulled the wires through, and as it turns out, the entire harness is long enough to route above the steering column and over to the rest of the tucked harness (visible above the clutch pedal).
All tidied up and ready to route:
04-29-14, 09:39 AM
#4665
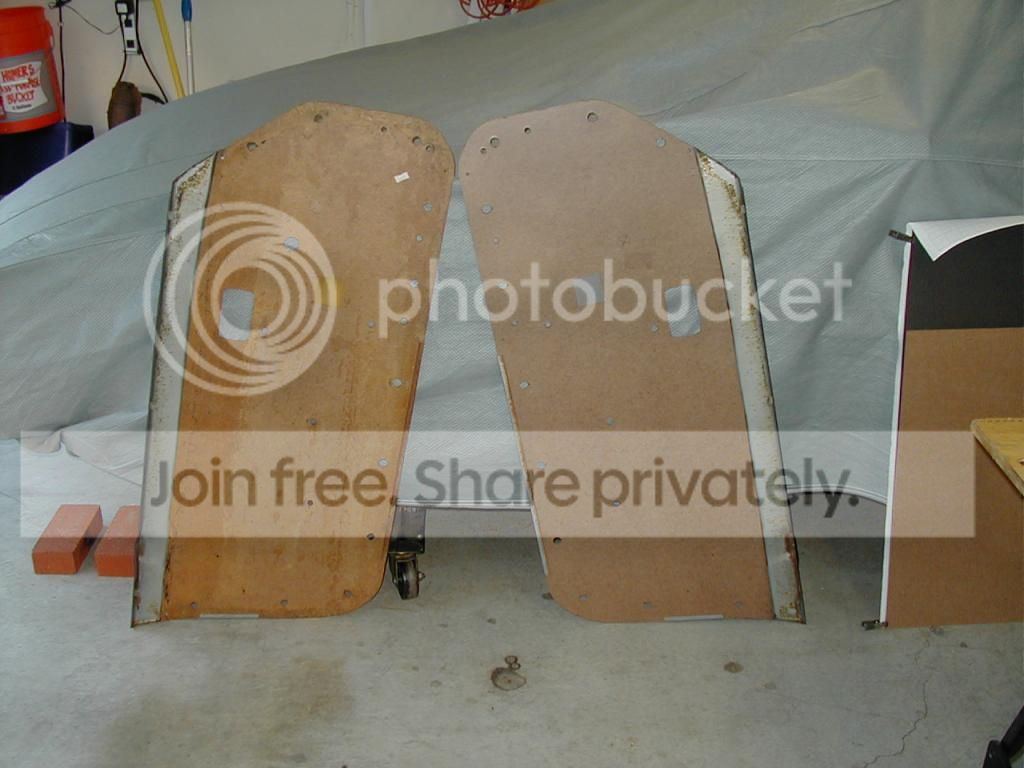
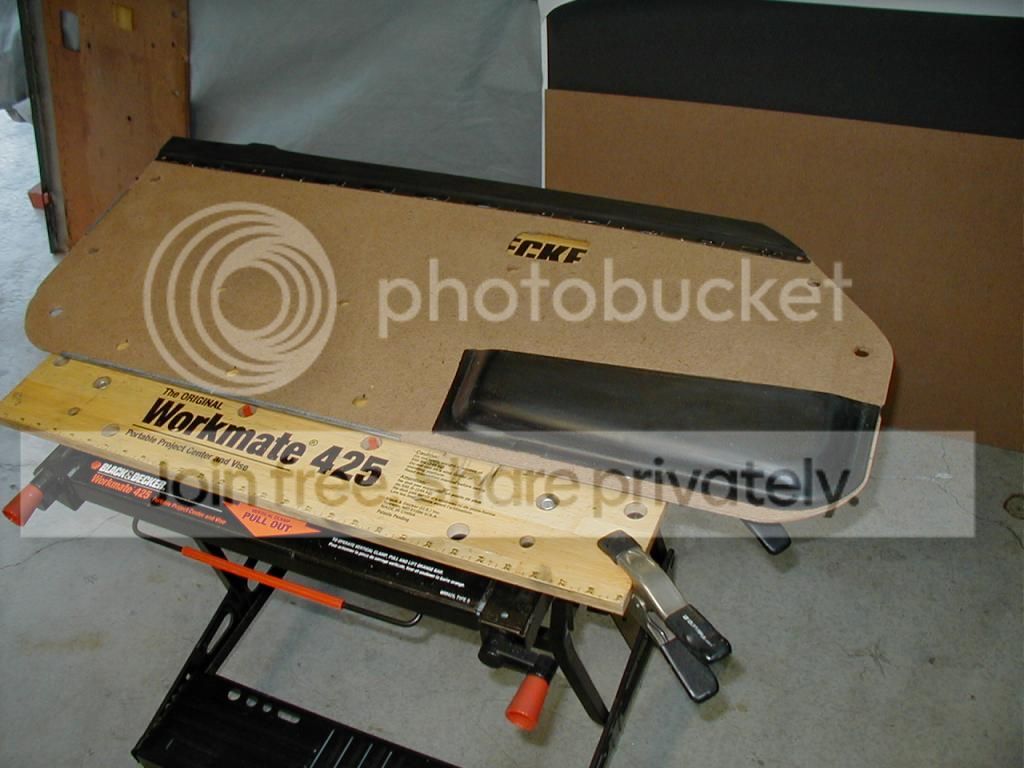
I made a trip to Staples for some illustration board to replace the pasteboard reinforcement that goes along the top of the carpeted section of the door panels; the original pasteboard disintegrated while handling it.
I also cut a new driver's side door panel from tempered hardboard - the passenger side is sound enough to use, but the driver's side had several attachment clip points that had ripped out & it was badly water-damaged.
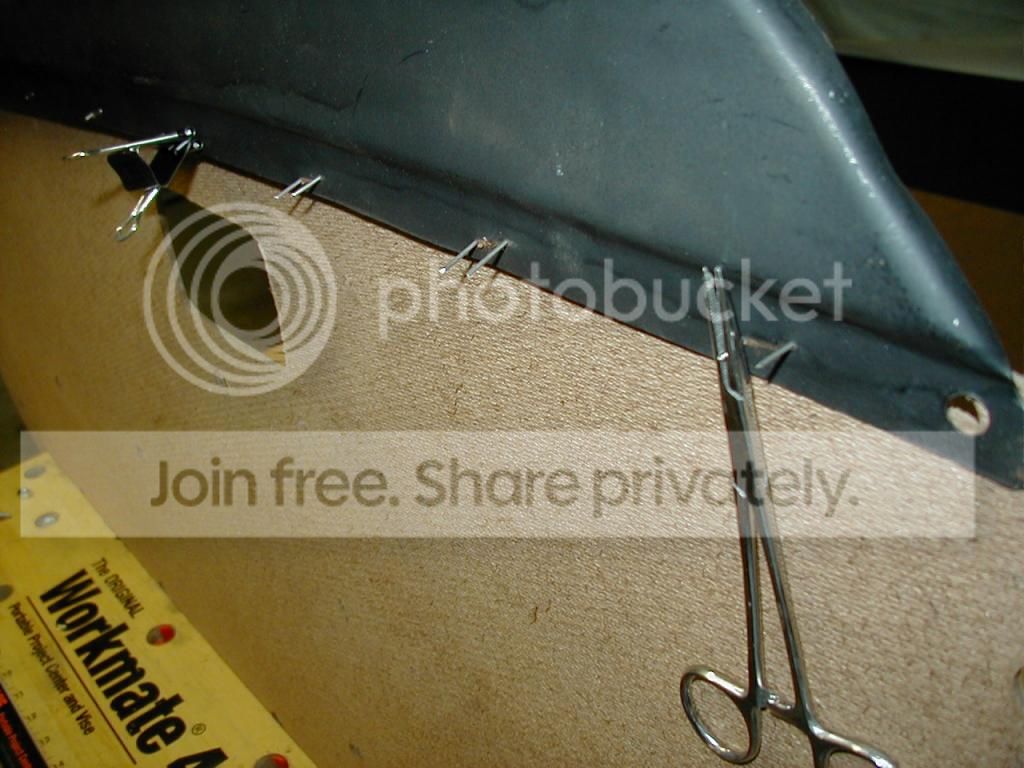
Only tricky bit in this is that the original attachment of the fiberboard to the metal cap strip was via some seriously heavy-duty staples - - imagine having a stapler that will punch 16-ga steel wire staples through mid-gauge sheet metal! - - & that method's not open for reattachment. I may drill and re-wire the original staple holes by hand, as I have some stainless wire that would work. Pop rivets would be a nice option but they are too thick.
I also cut a new driver's side door panel from tempered hardboard - the passenger side is sound enough to use, but the driver's side had several attachment clip points that had ripped out & it was badly water-damaged.
Only tricky bit in this is that the original attachment of the fiberboard to the metal cap strip was via some seriously heavy-duty staples - - imagine having a stapler that will punch 16-ga steel wire staples through mid-gauge sheet metal! - - & that method's not open for reattachment. I may drill and re-wire the original staple holes by hand, as I have some stainless wire that would work. Pop rivets would be a nice option but they are too thick.
04-30-14, 05:15 AM
#4666
Started cutting the hole for O2 sensor tuck, wasn't paying close attention and tried to be clever , chose a spot with two layers of thick *** sheet metal with 1/8" gap between them. I'm 3/4 the way through, and both drills I have access to are battery powered with batteries that only give about 5-10 minutes of work. will pick back up tomorrow.
While I was waiting for batteries to charge I started at my replacement intake manifolds with the brass wire brush. Looks gorgeous!!
Have only done the right side:
While I was waiting for batteries to charge I started at my replacement intake manifolds with the brass wire brush. Looks gorgeous!!
Have only done the right side:
 04-30-14, 01:54 PM
#4668
Finished my black interior swap (started it last August). The last piece was the headliner. I think a black vinyl, non-sunroof headliner is unubtanium now. So after 8 months of searching I painted my Wine headliner Duplicolor vinyl paint fat black. It came out very good! I applied 7-8 very light coats from every angle. It dried fast and was reinstalled within one hour of painting. The biggest challenge was installing it straight so no wrinkles popped up. I had to stretch, and realign everything a few times until it was just right. I used the rest of the can of paint to touch up the hard plastics and map pocket carpet.
Now I just need one of those custom "RX-7" rear cargo mats, and a Nardi steering wheel, and the interior is done! (I'd like to try a custom rear storage bin install though)
Now I just need one of those custom "RX-7" rear cargo mats, and a Nardi steering wheel, and the interior is done! (I'd like to try a custom rear storage bin install though)
04-30-14, 05:01 PM
#4669
Noob and trying to learn

Drop the fuel tank, cleaned the fuel lines replaced decaying lines, cleaned tank, and fuel pump, then finished with installing new fuel filters. WOT not a problem.
But now extremely hard to start! Any thoughts?
But now extremely hard to start! Any thoughts?
04-30-14, 10:05 PM
#4670
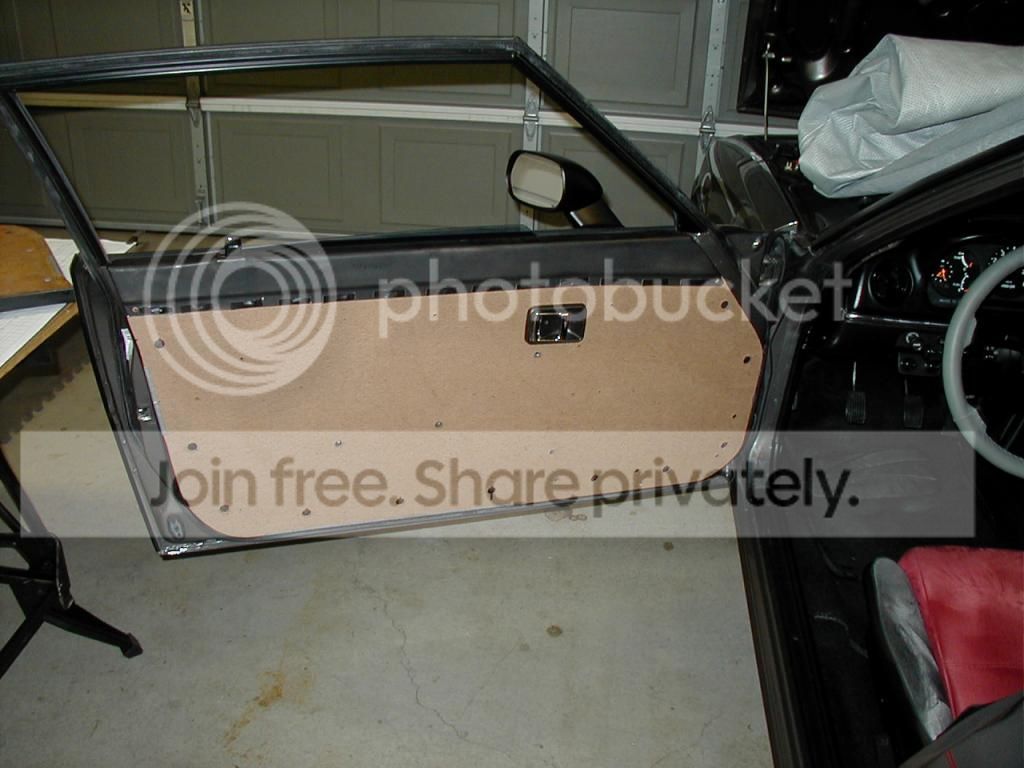
Finished hand-stapling (as in bend'em yourself) the new driver's-side door card, all drilled, cleaned, & old glue removed from original metal cap and map pocket.
JUST about ready to be making me some new door covers from scratch. One last procedure to work out in my head, and the stitching & gluing begins.
JUST about ready to be making me some new door covers from scratch. One last procedure to work out in my head, and the stitching & gluing begins.
05-01-14, 01:22 AM
#4671
Jacked her rear end up on jack stands and swapped out the 155lb springs for 175 lb springs. They were about 2" longer (uncompressed) than my old springs, so no more rubbing of tires. Once I put the 13s on, I'll probably want to cut one or two dead coils off the springs, but for now I'm fine.
fm
fm
05-01-14, 10:56 AM
#4672
Moderator
iTrader: (3)
Join Date: Mar 2001
Location: https://www2.mazda.com/en/100th/
Posts: 30,841
Received 2,605 Likes
on
1,848 Posts
i traded places with the FC and the FB, so i drove them back to back. the P port is quieter, has a lighter clutch, its more responsive, smoother, and starts faster cold.

 05-03-14, 01:08 PM
#4675
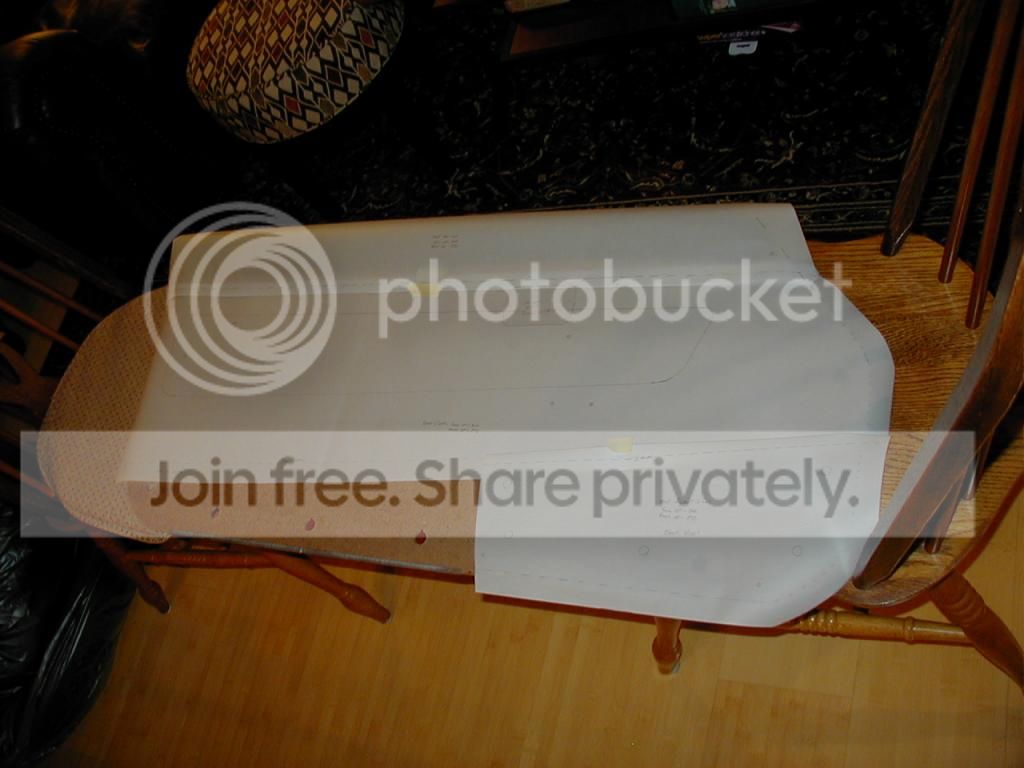
Spent the evening doing a tune up and lube job on the sewing machine, running some test seams to see about adjustments, doinga small mockup of one part of the assembly to test layers and attaching schemes, and cut my first piece of "actual" cloth.
This short-nap velour is tough stuff to work with. It cuts OK, but it's murder to drive a pin through (it's thin but VERY dense), and working in the finish side the nap makes things "creep" every time they get compressed. Alignment is a biatch. Vinyl is 100x easier.
Today is a 'retail' day helping the wife at her store. Got my yard work and such done this AM.
Tomorrow is major project push day. One weekend after this remains before WHIV.