
Making old parts look new again :)

Thread Starter
Joined: Nov 2006
Posts: 8,482
Likes: 31
From: Huntsville AL
Making old parts look new again :)
So I had an old dizzy laying around here:


And got bored, took a brass wheel to it:


It came out surprisingly well! Too bad I won't be needing the dizzy...
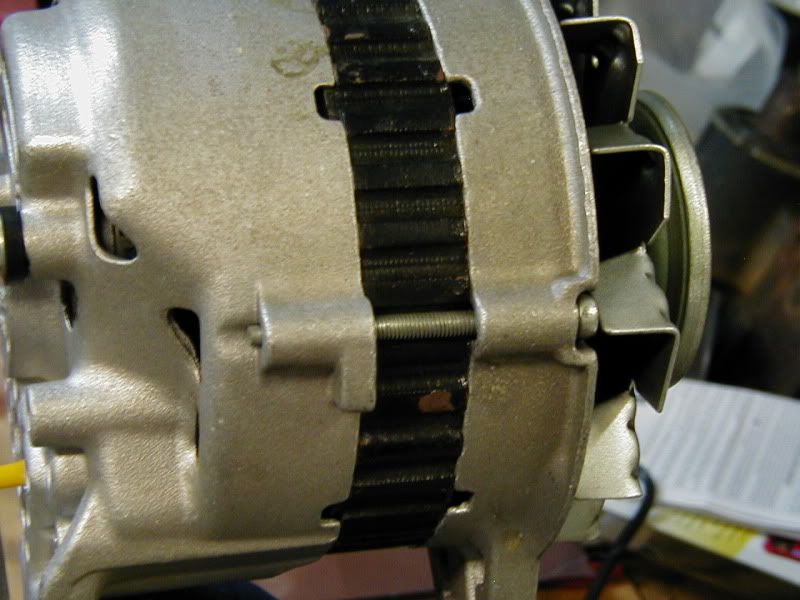
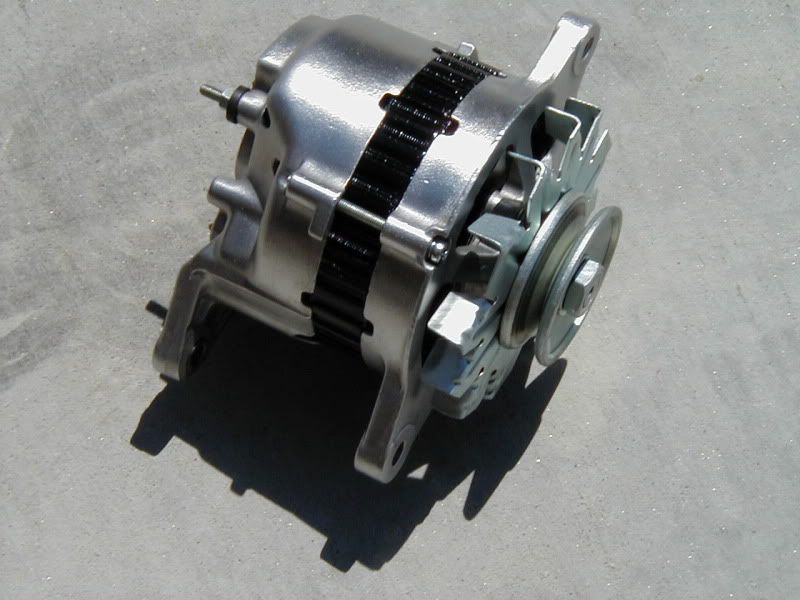
So I took off my alternator :
:


So what have you guys made new looking?
And got bored, took a brass wheel to it:
It came out surprisingly well! Too bad I won't be needing the dizzy...
So I took off my alternator
:So what have you guys made new looking?
damn they look good! not bad for a brass wheel the high shine lasts for a while and after about a year or so it starts to dull but it takes longer for for it to get back to the way it was.
Joined: Jun 2008
Posts: 8,376
Likes: 28
From: Chino Hills, CA
The brass wheel looks like the way to go with the SA alts... they're way too bumpy to be worth trying for full-polish. An FD alt with it's smooth-cast case would be a different story.

If you clear it, make sure it's a good quality new can of clear (unless you're a painter, too and have some nice HLVP guns and the right type of clear). I made the mistake of using some old hi-temp clear on my oil filter pedestal and it made it look worse.
Great job on the parts! I need to pull out my old model car paint brushes, brass-wheel my S5 alt, and paint the center strip to match my dizzy. After I get a full-face shield, safety glasses aren't cutting it when I've been cleaning parts or polishing. I might actually finish polishing my SE 13b front cover after I do my alt...
Your parts are inspiring, keep up the great work, Stu...
Stu -
hope that ol' dizzy can be swapped into the car
Looks gorgeous - but, yeah, clear it or you'll be at it again in a year....
My Make-'em-New efforts:
powdercoat is my weapon-of-choice:
-various brackets, battery tray, headlit motors detailed
-waterpump and engine mount
hope that ol' dizzy can be swapped into the car
Looks gorgeous - but, yeah, clear it or you'll be at it again in a year....
My Make-'em-New efforts:
powdercoat is my weapon-of-choice:
-various brackets, battery tray, headlit motors detailed
-waterpump and engine mount

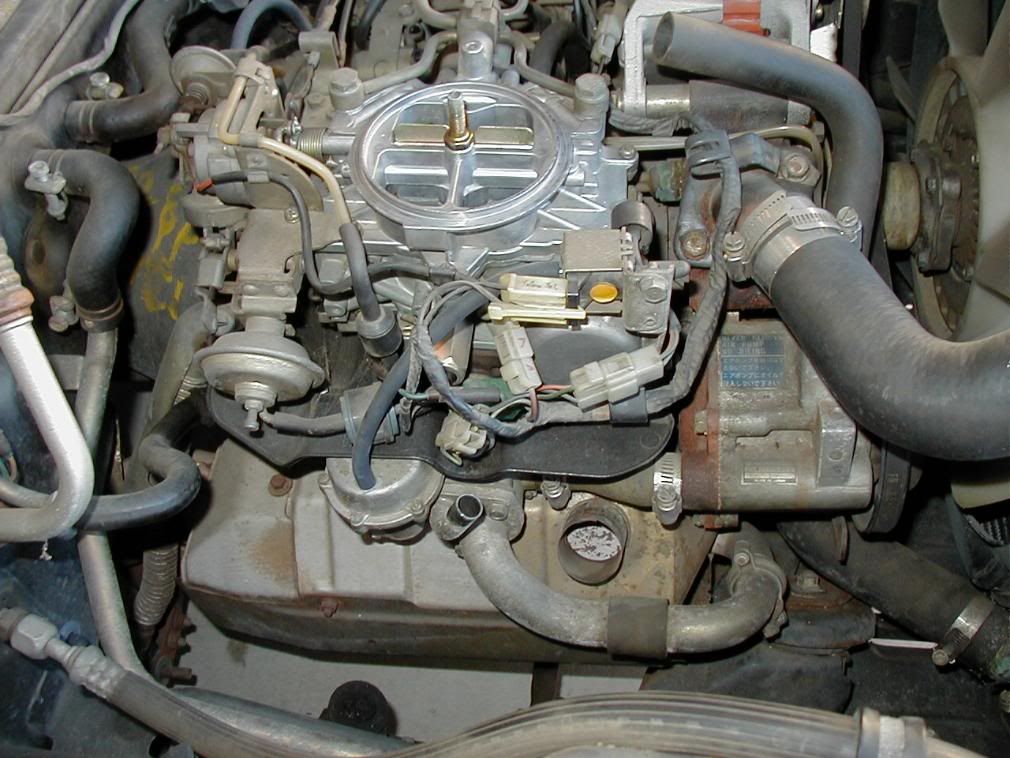
Nice Stu, I need to get one of those brass wheels, I'll bet they hold up better than the steel wire ones. Here's my alternator that I did several years ago with the steel wire wheel, I took the video to show the timing check but it shows the alternator nicely:
Like Michael says, spray with clear coat to preserve the shine and keep the aluminum from oxidizing again. This one was done that way at least four years ago. I used Krylon crystal clear, not a heat paint but holds up well and unlike some automotive clear coats I've tried it really does produce a durable crystal clear coating.
Here's what that alternator and some other things I hit with the wheel looked like when I first did them

And here's the steel wire wheel

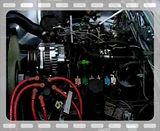
Nothing spiffs up an engine bay like a shiny "new" alternator!
Like Michael says, spray with clear coat to preserve the shine and keep the aluminum from oxidizing again. This one was done that way at least four years ago. I used Krylon crystal clear, not a heat paint but holds up well and unlike some automotive clear coats I've tried it really does produce a durable crystal clear coating.
Here's what that alternator and some other things I hit with the wheel looked like when I first did them
And here's the steel wire wheel
Nothing spiffs up an engine bay like a shiny "new" alternator!
Trending Topics
Thread Starter
Joined: Nov 2006
Posts: 8,482
Likes: 31
From: Huntsville AL
Parts are all looking good guys, I was thinking of doing some powercoating as well.
Thread Starter
Joined: Nov 2006
Posts: 8,482
Likes: 31
From: Huntsville AL
Stu -
hope that ol' dizzy can be swapped into the car
Looks gorgeous - but, yeah, clear it or you'll be at it again in a year....
My Make-'em-New efforts:
powdercoat is my weapon-of-choice:
-various brackets, battery tray, headlit motors detailed
-waterpump and engine mount
hope that ol' dizzy can be swapped into the car
Looks gorgeous - but, yeah, clear it or you'll be at it again in a year....
My Make-'em-New efforts:
powdercoat is my weapon-of-choice:
-various brackets, battery tray, headlit motors detailed
-waterpump and engine mount
Thread Starter
Joined: Nov 2006
Posts: 8,482
Likes: 31
From: Huntsville AL
Nice Stu, I need to get one of those brass wheels, I'll bet they hold up better than the steel wire ones. Here's my alternator that I did several years ago with the steel wire wheel, I took the video to show the timing check but it shows the alternator nicely:
Like Michael says, spray with clear coat to preserve the shine and keep the aluminum from oxidizing again. This one was done that way at least four years ago. I used Krylon crystal clear, not a heat paint but holds up well and unlike some automotive clear coats I've tried it really does produce a durable crystal clear coating.
Here's what that alternator and some other things I hit with the wheel looked like when I first did them
And here's the steel wire wheel
Nothing spiffs up an engine bay like a shiny "new" alternator!
 It is softer on the metals as well. Parts look great Ray! Going to go clear the alternator now.
Joined: Jun 2008
Posts: 8,376
Likes: 28
From: Chino Hills, CA
 But... it's what I DO! I'm to cheap to buy new stuff...
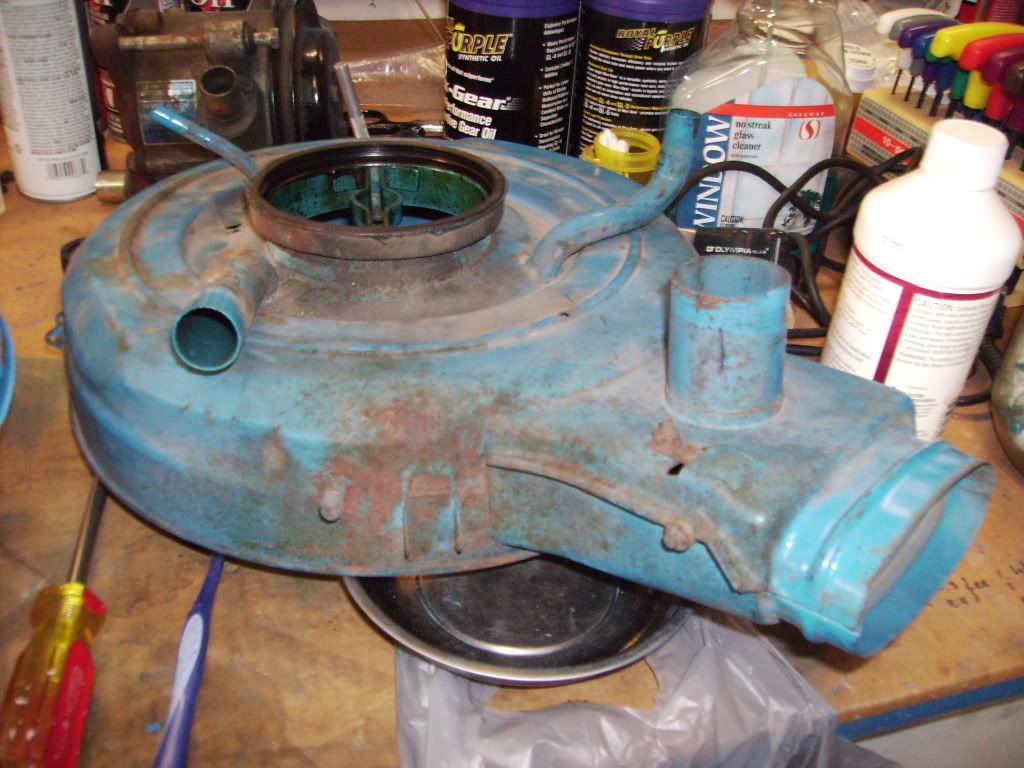

That clear looks like it should work better than the old hight-temp stuff I used. How did it turn out after it dried? I'll have to pick some up and try it out, it looks great in the pic above!
OMG-it looks like you've cleaned, coated, and dressed everything in that entire engine bay! How long that that take to complete? What tools were you using; did you have access to an acid bath for your parts? I couldn't imagine cleaning everything in the engine compartment by hand with a drill and grinder...
looking good rxforspeed. stu, clamp that drill in a vise, but not too tight or u'll crack the housing. works great. did this for yrs before i had an old bench grinder follow me home one day from a place i worked at yrs ago.
You can get a good bench grinder for $30 at homedepot, I don't know how you guys live without one.
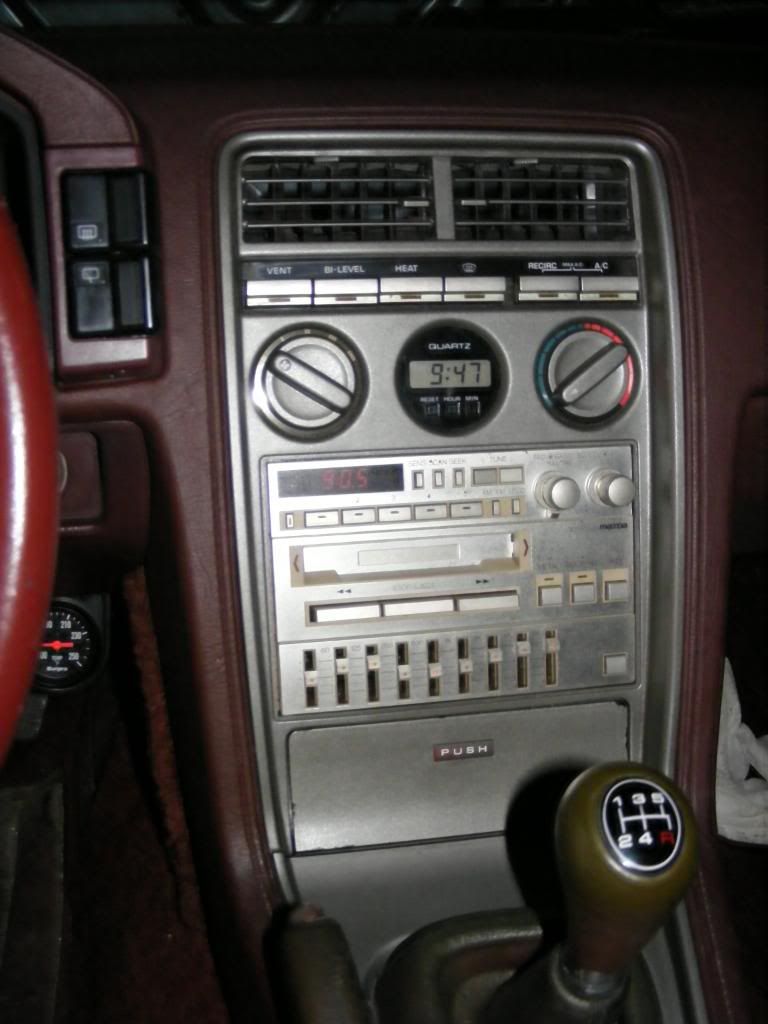
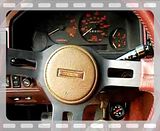
Check out this trick. You know how your old stock Clarion sound system starts to get a few too many fingerprints on it? ***** turning green, clear coat peeling, I think I'm gonna' paint that sucker condition?
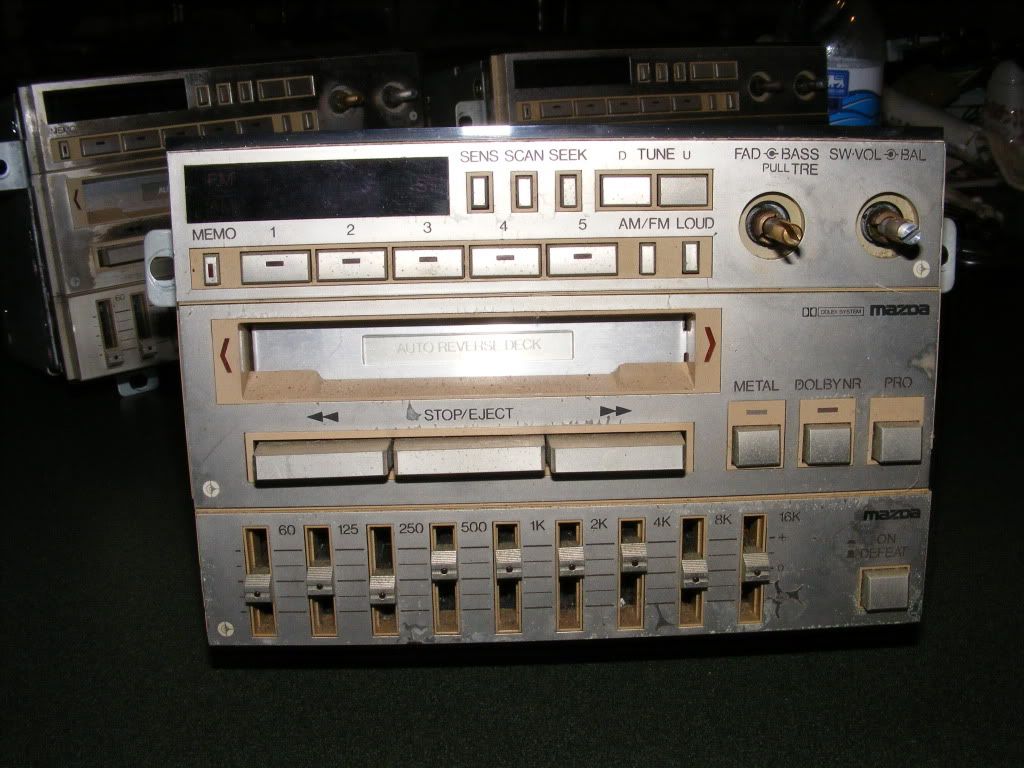
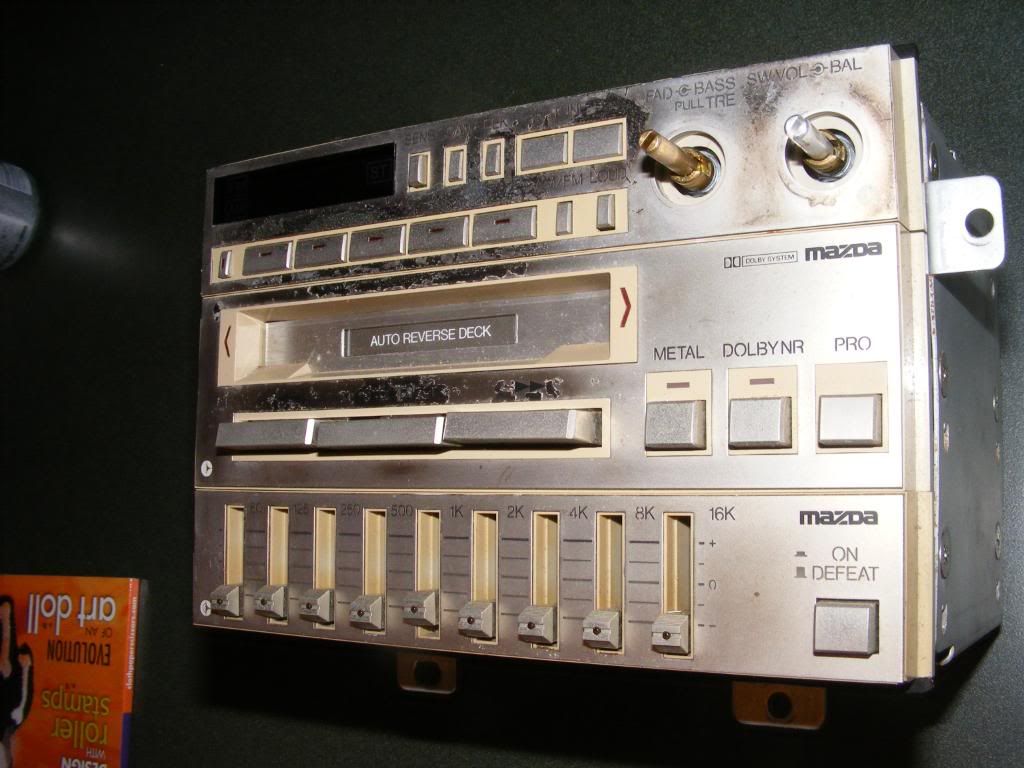
Well I discovered that if you get yourself some 95% ethanol and a soft cloth you can rub all the crud off and get back to that beautiful off-gold metallic finish:
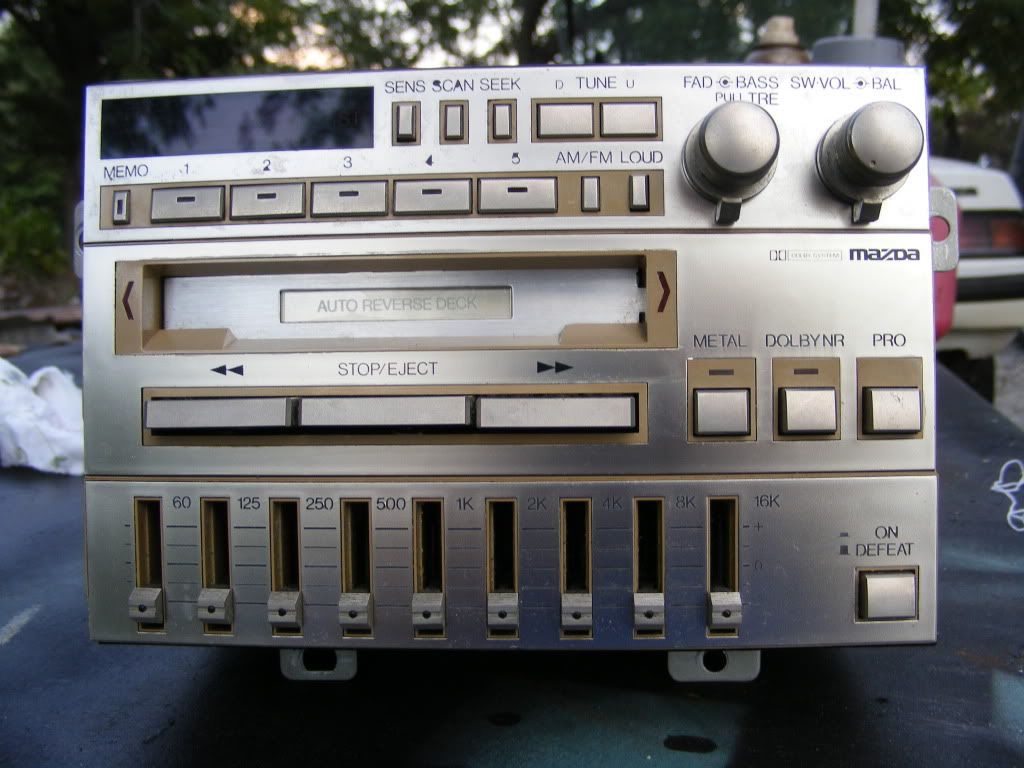
You can clear coat it if you like but next time I'm going with the Krylon crystal clear instead of automotive clear coat, it's much cleaner

Check out this trick. You know how your old stock Clarion sound system starts to get a few too many fingerprints on it? ***** turning green, clear coat peeling, I think I'm gonna' paint that sucker condition?
Well I discovered that if you get yourself some 95% ethanol and a soft cloth you can rub all the crud off and get back to that beautiful off-gold metallic finish:
You can clear coat it if you like but next time I'm going with the Krylon crystal clear instead of automotive clear coat, it's much cleaner
Joined: Jun 2008
Posts: 8,376
Likes: 28
From: Chino Hills, CA
OMG-it looks like you've cleaned, coated, and dressed everything in that entire engine bay! How long that that take to complete? What tools were you using; did you have access to an acid bath for your parts? I couldn't imagine cleaning everything in the engine compartment by hand with a drill and grinder...
Pretty much all the same parts, except for the alt.
Drill, dremel, hand-sanding, lots of brake cleaner, Aircraft stripper... lots of rubbing.. and lots of rattlecan practice. No acid bath, no sandblasting... I probably used up about a hundred of those little spongy buffer wheels for the dremel, though.
Actual time involved is probably about 2 1/2 years of occasional nights and weekends, spread across the last 8 years.


Wrkn Toyota, Rootn Wankel
Joined: Sep 2007
Posts: 1,642
Likes: 1
From: "Haystack" Hayward, CA
I love how a simple wire wheelin' can make an old part look so much nicer!
Here's my rebuild thread so far and its got pictures of all the parts I cleaned up and made nice lookin' again.
Hopefully I will be posting an update on the progress soon!
https://www.rx7club.com/build-threads-293/rising-ashes-pics-warned-812400/
Here's my rebuild thread so far and its got pictures of all the parts I cleaned up and made nice lookin' again.
Hopefully I will be posting an update on the progress soon!
https://www.rx7club.com/build-threads-293/rising-ashes-pics-warned-812400/
Thread Starter
Joined: Nov 2006
Posts: 8,482
Likes: 31
From: Huntsville AL

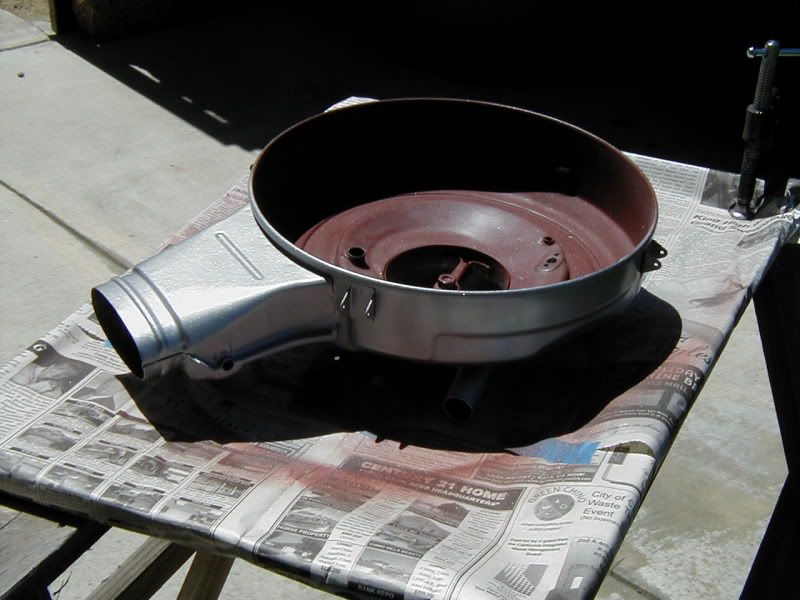
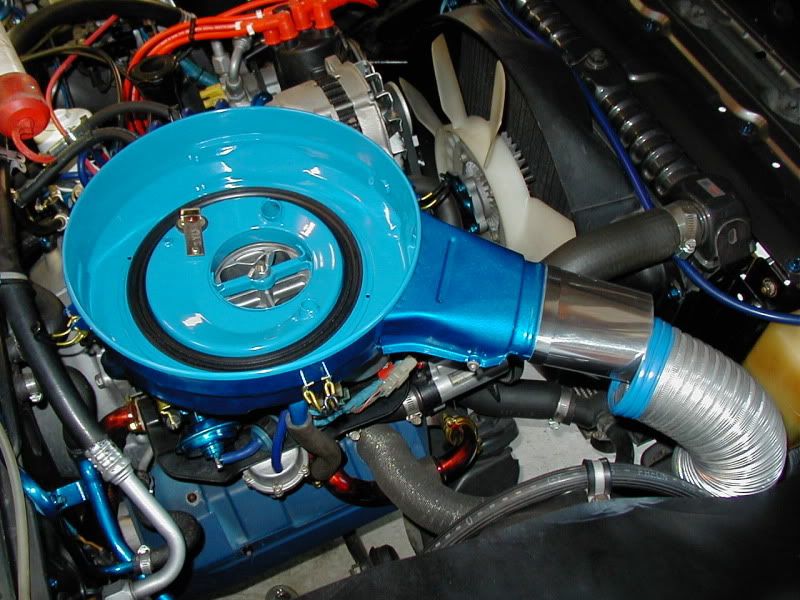
And my next part:

I am going to yoink off the carb to get the housings real good. Might do the back inspection plate as well!
Thread Starter
Joined: Nov 2006
Posts: 8,482
Likes: 31
From: Huntsville AL
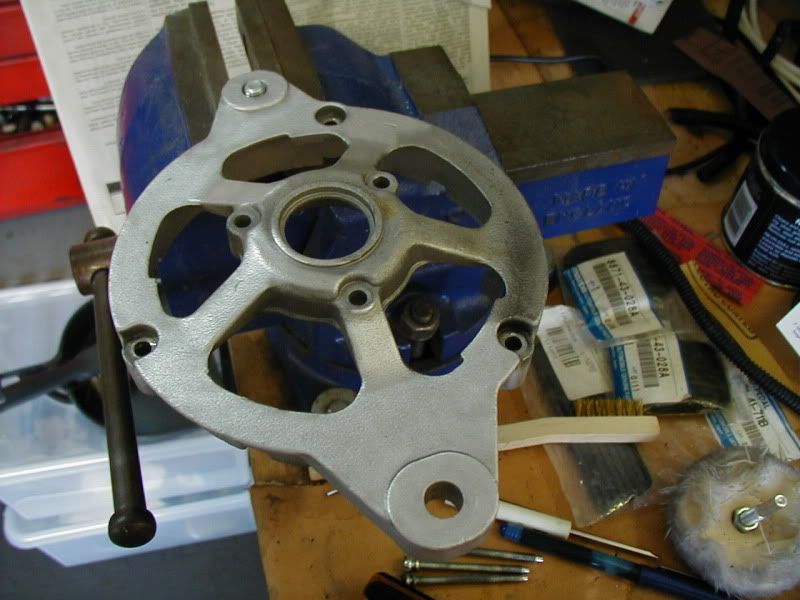
Ok, so after numerous battles with mosquitoes, I only got the inspection plate done before the swarm came in.
The plate is a little bent up at one end. Oh well, when I get the engine out I will get a better inspection plate. This took me all of 10 minutes to do.


It looks better in person. The dark spot was a bend in the metal. I tried moving the plate around so I could get a better picture of it, but the rotor gods are against me today

Got a few scratches on it pulling it back out . Oh well, buffed it a little again. Got one bolt cleaned up, and went to clean up another bolt when the brush snagged it and flung it across the garage! I have no clue where it went, and I searched for quite a bit!

Looks good though.
The plate is a little bent up at one end. Oh well, when I get the engine out I will get a better inspection plate. This took me all of 10 minutes to do.
It looks better in person. The dark spot was a bend in the metal. I tried moving the plate around so I could get a better picture of it, but the rotor gods are against me today
Got a few scratches on it pulling it back out
. Oh well, buffed it a little again. Got one bolt cleaned up, and went to clean up another bolt when the brush snagged it and flung it across the garage! I have no clue where it went, and I searched for quite a bit!Looks good though.