
NorCal Community Chat Thread v. 3.0- 2010


Joined: Jun 2005
Posts: 1,487
Likes: 0
From: Vacaville, California
haha, havent had time to check it, I was at Thunder Hill today running my bro-in-laws volvo cause the FD dumped 
It over heated on my way home from school about 5 miles out and I tried to rush home... as soon as I let the gas off on the off ramp the engine quit and wouldnt start up. the coolant over flow tank dumped a bunch of water and once I towed it home I added more water and cranked it and the coolant hose on the ast blew off, assuming it's getting pressure from the combustion chamber into the coolant system causing excess pressure and blowing off, then it lost a ton of oil from god knows where, so I drained all the fluids, and have been reviewing the rotary aviation removal dvd... I probably shouldnt check the compression with no oil in it right?
It over heated on my way home from school about 5 miles out and I tried to rush home... as soon as I let the gas off on the off ramp the engine quit and wouldnt start up. the coolant over flow tank dumped a bunch of water and once I towed it home I added more water and cranked it and the coolant hose on the ast blew off, assuming it's getting pressure from the combustion chamber into the coolant system causing excess pressure and blowing off, then it lost a ton of oil from god knows where, so I drained all the fluids, and have been reviewing the rotary aviation removal dvd... I probably shouldnt check the compression with no oil in it right?


Joined: Jun 2005
Posts: 1,487
Likes: 0
From: Vacaville, California
Thread Starter
Joined: Jun 2003
Posts: 832
Likes: 11
From: Northern California
Preston it's pretty easy to pull the engine, just make sure everything is disconnected/drained. There are debates on whether it is easier to pull with our without the transmission, personally I have never pulled an engine without the trans but that's because I always wanted the trans out too.
Joined: Jun 2005
Posts: 1,487
Likes: 0
From: Vacaville, California
OK Thanks Jake, never done one before... I might pull it with just because my trans has been notchy feeling through 2nd and 5th gears so i might replace it with a jdm unit cause they are cheaper than a rebuild. Like I said I have the removal dvd from RA so shouldnt be to hard...
Anyways here are som pics from my track day in the silver bullet!
http://gotbluemilk.com/web110305/23/index.html
Anyways here are som pics from my track day in the silver bullet!
http://gotbluemilk.com/web110305/23/index.html
Its really not that bad pulling out the engine. Drop the drive shaft remove the torque arm, the two motor mount bolts and the exhaust and you are pretty much done under the car. Once you get all the intercooler stuff out of the way there starts to be a lot of room in the engine bay. I normally pull the radiator but you don't have to, remove the harness's, throttle cable, fuel lines and your good to go. A load leveler will help a lot.
Joined: Jun 2005
Posts: 1,487
Likes: 0
From: Vacaville, California
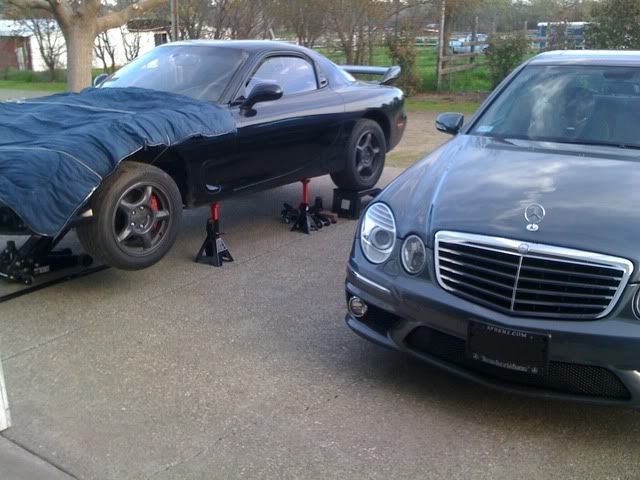
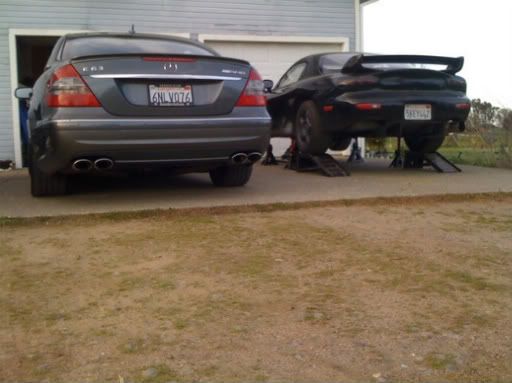
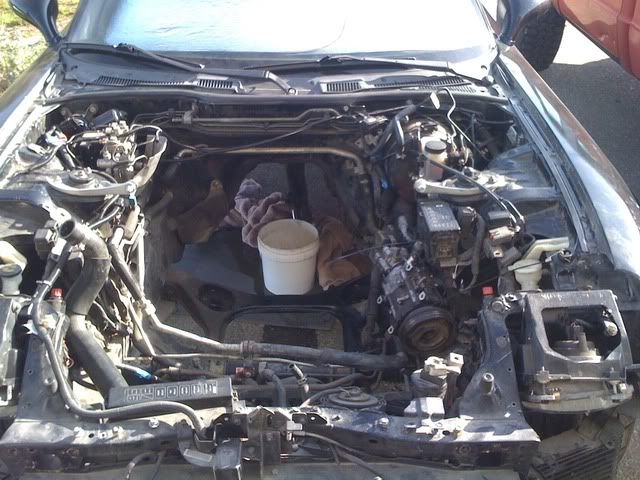
Cool Thank you Casey! Ill be putting some pictures up once I start making some progress, so far ive pretty much removed all the plastic stuff up front (intake, intercooler, battery...) and the hood
Thread Starter
Joined: Jun 2003
Posts: 832
Likes: 11
From: Northern California
Selling my Chevy HHR if anyone (I doubt) is interested.
http://modesto.craigslist.org/cto/2250482794.html
http://modesto.craigslist.org/cto/2250482794.html
Joined: Jun 2005
Posts: 1,487
Likes: 0
From: Vacaville, California
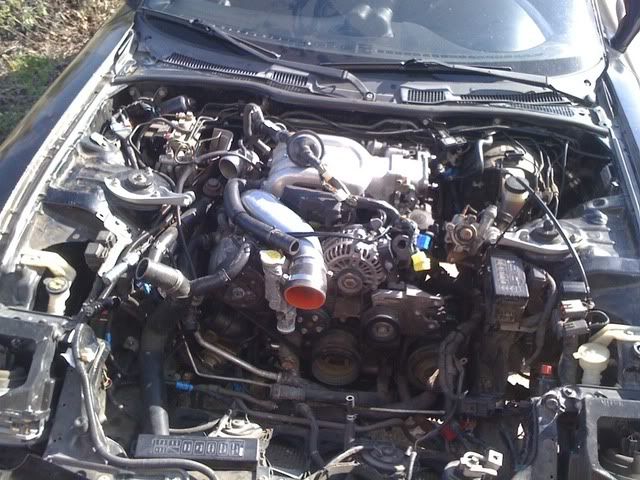
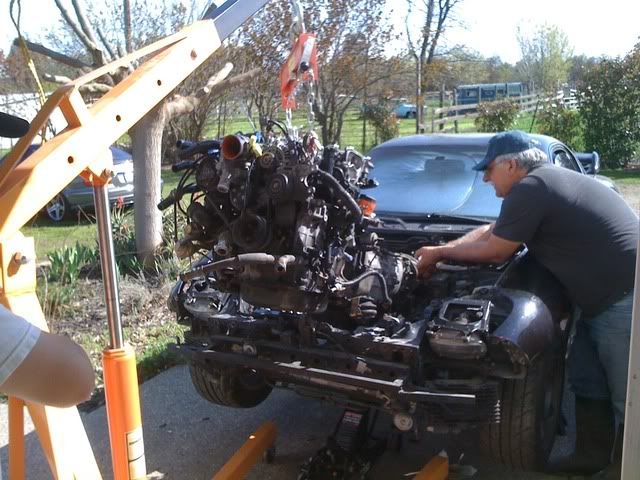
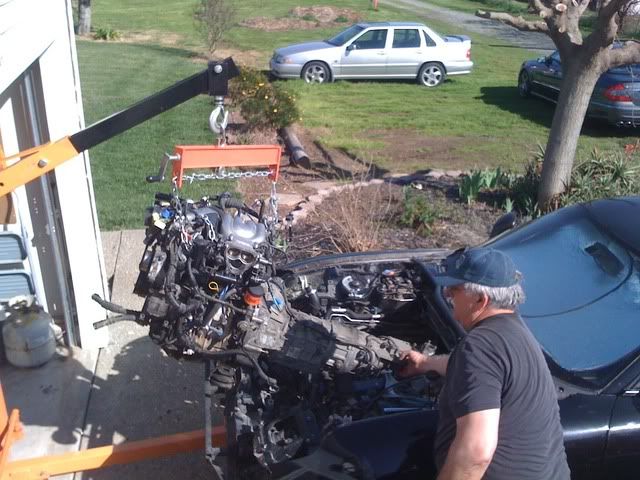
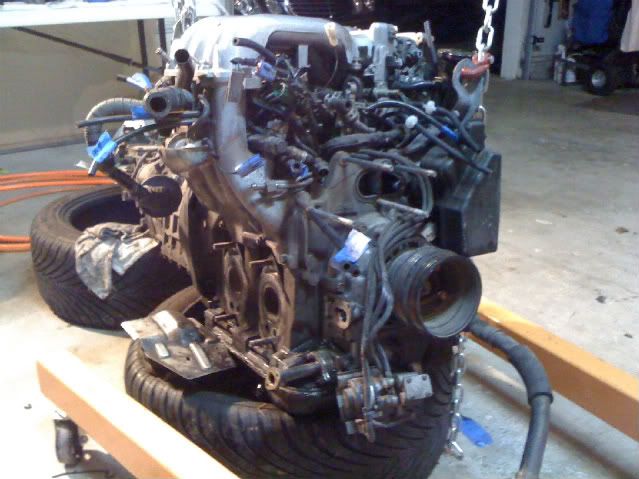
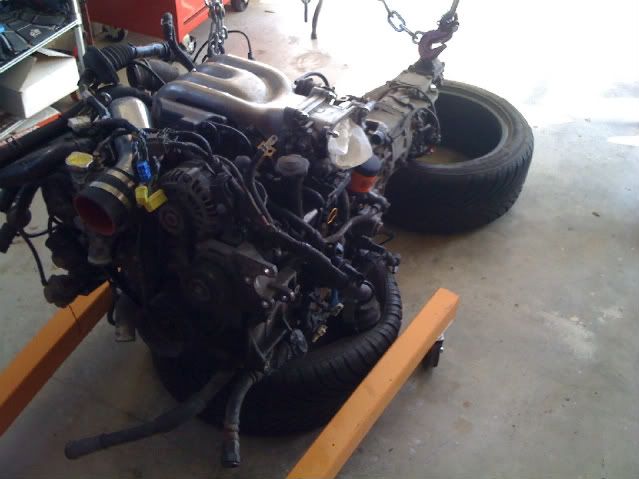
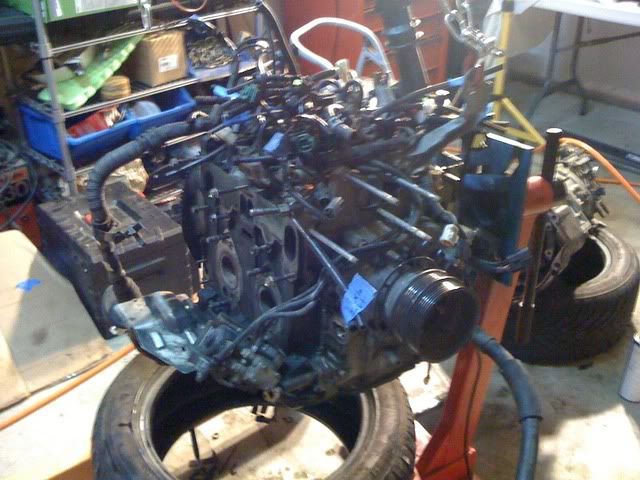
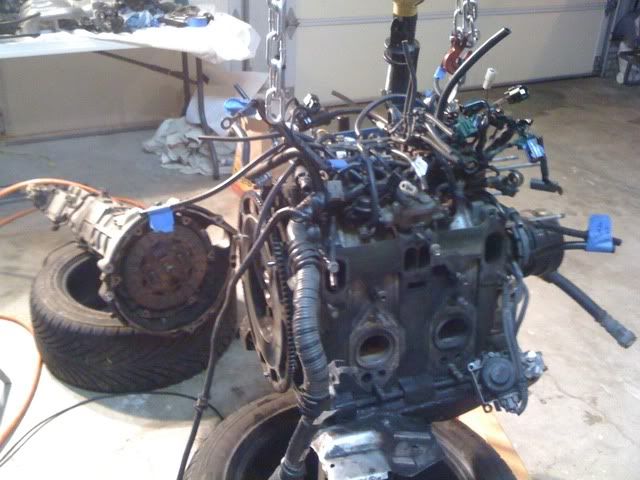
Soooo Engine is out today and a 1/4 of the way disassembled totaling in 8 hours plus about 3 hours yesterday. It was unbelievable how much water came out of the spark plug holes when I cranked the engine by hand at least 3 cups total in both housings... waiting for a friends engine stand to mount it to.
that sucks, hopefully the irons managed to survive. they really don't like severe overheating.
let me know if you need any tips on the teardown and buildup.
make sure to test the cooling fans before putting the new engine in, they are probably the issue why it overheated.
let me know if you need any tips on the teardown and buildup.
make sure to test the cooling fans before putting the new engine in, they are probably the issue why it overheated.
Joined: Jun 2005
Posts: 1,487
Likes: 0
From: Vacaville, California
Thanks Ben, I hope they survived also! cant really afford to be replacing housings or irons... can I ask what if any overhaul kits you use when building? I would like to retain the stock apex seals but Im sure you have much more insight.
you can pick up a generic s4 n/a 13B engine overhaul gasket kit from atkins for about $125, which includes mazda OEM coolant seals, dowel pin o-rings, front gover gasket(trim around the LF front timing cover upper bolt or buy a steel front cover 13B-REW front cover gasket). it basically has everything you need to reseal the shell of the short block.
atkins has the viton oil control o-rings for $40 a set, OEM corner seal springs $30, front and rear main seals $15/pair, side seal springs $17, OEM apex seal spring set $55 then just choose which apex seals you want to run. atkins are ok for lower horsepower applications and for a safety margin if there is a detonation cycle they usually chip the seal without fragging the rotor and housing but they don't take much abuse.
mazda OEMs can take slightly more detonation before breaking and last a good long while wear wise but when they break, they usually take a rotor and housing with them. i am now giving goopy seals a trial in juan's motor as they are supposed to be one of the most durable seals for handling detonation but they will warp if run too lean or detonated on hard enough, still they will save the rotor and housing but i have his motor pinned to try and keep everything solid if there is any hiccups in the tune over a period of time. OEM and the goopy seals run about $350, OEM is good for around 350WHP and good wear characteristics, goopy seals should be good for well over 400whp but it will take time to get an idea of their wear characteristics, but it is a safety buffer for high horsepower.
the other gaskets on the engine should be all steel and reusable if they look ok, i just make sure they are flat, clean and apply some spray on ultra copper gasket sealant. it may also be a good idea to pick up a FD oil pan gasket or put that money towards a banzai/garfinkle pan brace to keep the pan from leaking(very common and a pita if you make a mistake while sealing the pain at the mount areas. it requires dropping the front subframe or pulling the motor back out to reseal the oil pan so you want to do it right the first time).
Last edited by RotaryEvolution; Mar 14, 2011 at 03:00 PM.
Joined: Jun 2005
Posts: 1,487
Likes: 0
From: Vacaville, California
Awesome Ben, Thanks! is it possible, when Im ready to order the seals and such from you?
Just for reference Im looking the make around 350whp in the future and plan on running water injection. so Im hoping to stick with oem apex seals just because they are proven.
on the day of the incident, some oil leaked from around the driver side motor mount and I cant really see from where so maybe the oil pan is already leaking?