
How To: Fix Corroded Or Pitted Wheels


Thread Starter
Senior Member
Joined: Jun 2007
Posts: 346
Likes: 2
From: BC
How To: Fix Corroded Or Pitted Wheels
So, you pulled your wheels out of storage for the winter, and find pitting or corrosion on the aluminum surfaces. Don't worry, its actually pretty easy to save them.
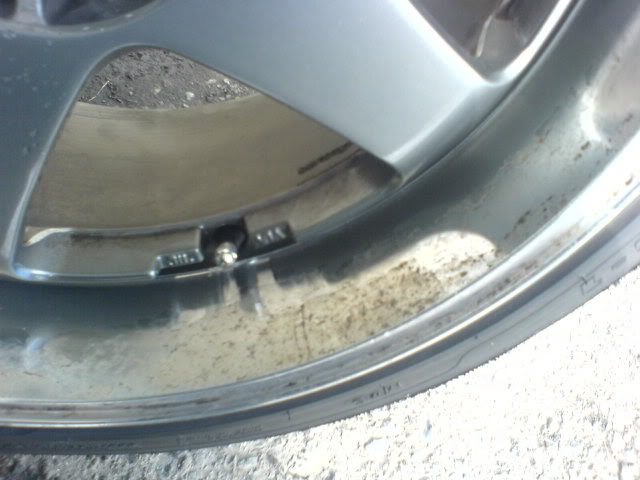
They'll probably start by looking something like this:
Step 1: Wash wheels with Warm soapy water
Step 2: Dry wheels off
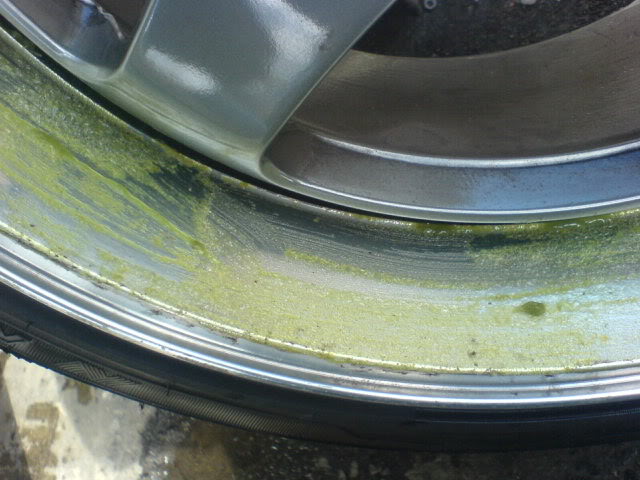
Step 3: Apply aircraft paint stripper to the damaged surfaces. I used a toothbrush to apply it, you can get it at most auto stores. This will strip the clearcoat off. Be careful not to get it on any painted surfaces. It works almost on contact, but let it sit for a few minutes before going to the next step.
Step 4: Clean the wheel again. The stripper should come off by just blasting the wheel with a hose. It will probably look quite a bit better without the clearcoat, but don't stop here, you can make them look much better!
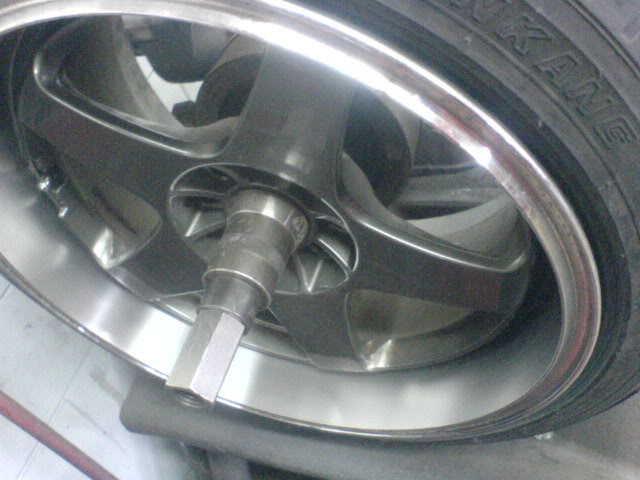
Step 5. Once the wheel is dry, you can begin sanding. I started with a 400 grit, then went to 1000, then 1500. You could go to 2000 or higher if you wanted. Sand in only one direction, to prevent scratching, until the pits are no longer visible. It would take quite a while to sand by hand. I mounted the wheel up on the brake lathe so I could just hold the paper against the lip as the wheel spun.
Here it is after 400 grit:
Here it is after 1000 grit:
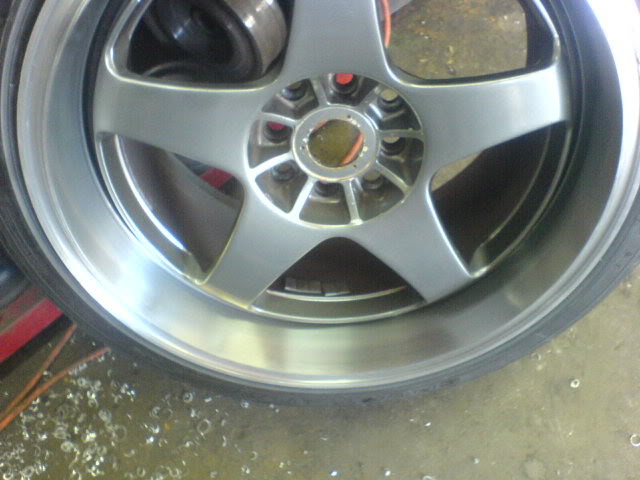
Here it is after 1500 grit:
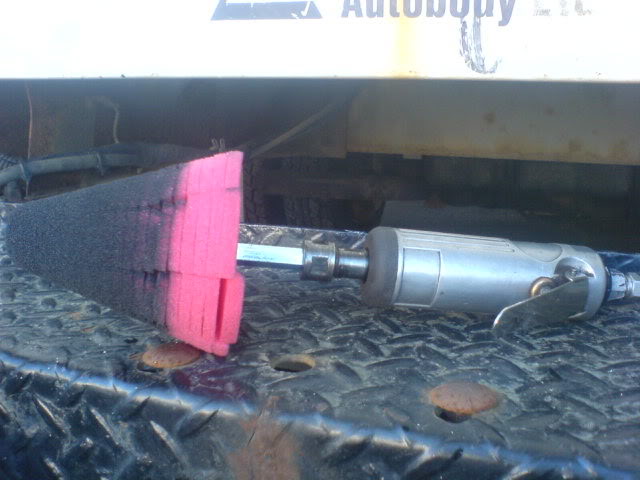
For hard to reach spaces, you can use a Scotch Brite pad. I used one to get to the little valley on the outside of my lips:

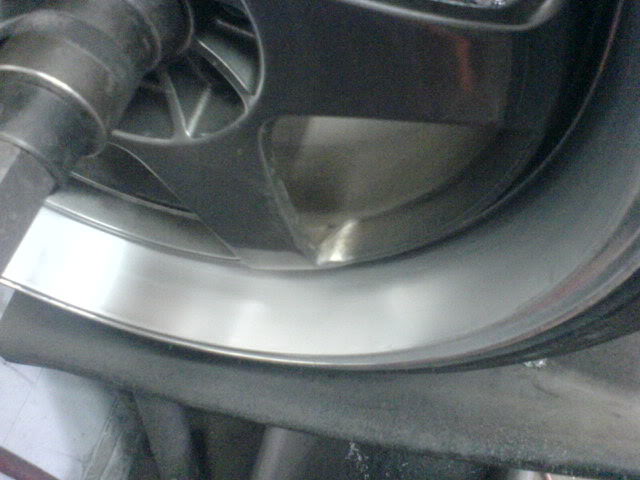
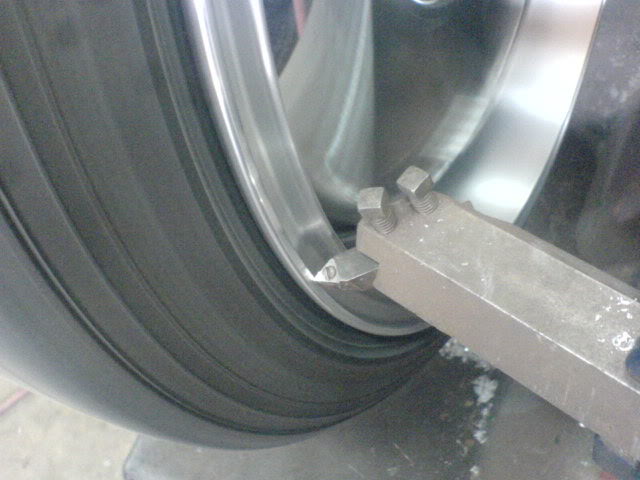
If your lips have been curbed, and you have access to a lathe, this can be fixed as well Whoever drove on these wheels before me was attracted to curbs. I used the cutters on the brake lathe to cut down the lips just enough to get rid of the curbage:
Step 6: Clean the wheels again.
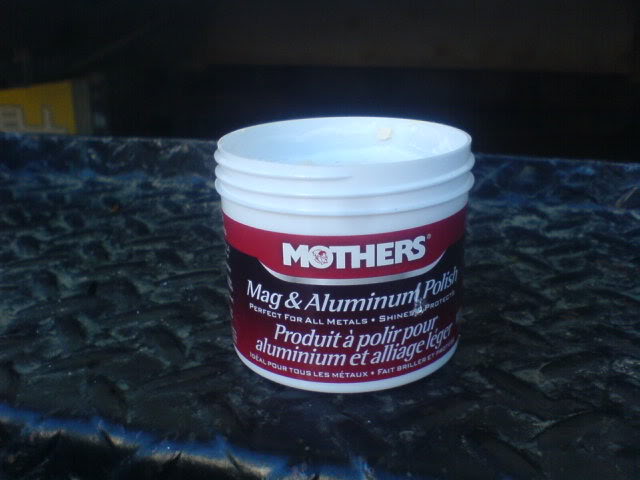
Step 7: Once the wheels are dry, you can polish the surface you just finished sanding. I used Mothers Mag and Aluminum Polish, great product. You could polish them by hand, or use a polishing attachment in a drill. Apply the polish by hand to the surface of the wheel, and then begin polishing by rubbing in or using the drill attachemnt. You don't have to rub hard. Keep going until the polish turns black. Use a clean rag to get most of the polish off of the surface.
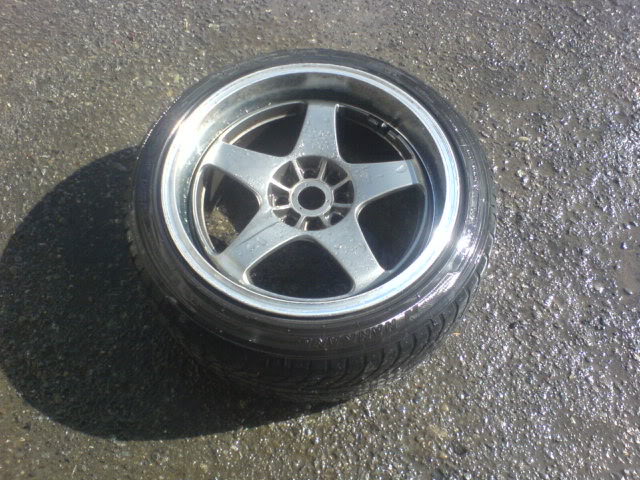
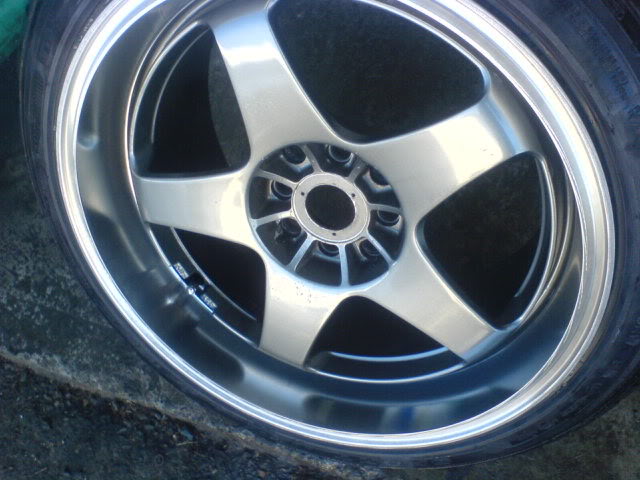
Step 8: Clean the wheels for one last time, stand back and admire your work!
They'll probably start by looking something like this:
Step 1: Wash wheels with Warm soapy water
Step 2: Dry wheels off
Step 3: Apply aircraft paint stripper to the damaged surfaces. I used a toothbrush to apply it, you can get it at most auto stores. This will strip the clearcoat off. Be careful not to get it on any painted surfaces. It works almost on contact, but let it sit for a few minutes before going to the next step.
Step 4: Clean the wheel again. The stripper should come off by just blasting the wheel with a hose. It will probably look quite a bit better without the clearcoat, but don't stop here, you can make them look much better!
Step 5. Once the wheel is dry, you can begin sanding. I started with a 400 grit, then went to 1000, then 1500. You could go to 2000 or higher if you wanted. Sand in only one direction, to prevent scratching, until the pits are no longer visible. It would take quite a while to sand by hand. I mounted the wheel up on the brake lathe so I could just hold the paper against the lip as the wheel spun.
Here it is after 400 grit:
Here it is after 1000 grit:
Here it is after 1500 grit:
For hard to reach spaces, you can use a Scotch Brite pad. I used one to get to the little valley on the outside of my lips:
If your lips have been curbed, and you have access to a lathe, this can be fixed as well
Whoever drove on these wheels before me was attracted to curbs. I used the cutters on the brake lathe to cut down the lips just enough to get rid of the curbage:Step 6: Clean the wheels again.
Step 7: Once the wheels are dry, you can polish the surface you just finished sanding. I used Mothers Mag and Aluminum Polish, great product. You could polish them by hand, or use a polishing attachment in a drill. Apply the polish by hand to the surface of the wheel, and then begin polishing by rubbing in or using the drill attachemnt. You don't have to rub hard. Keep going until the polish turns black. Use a clean rag to get most of the polish off of the surface.
Step 8: Clean the wheels for one last time, stand back and admire your work!


The wheels look great though. One extra step that I did was use brown rouge with a buffing wheel and then white rouge, then rubbing compound to take of the extra rouge before using the mother's mag.
Just out of curiosity, are you planning on clear coating them again or just going to keep them polished up?

to get a much better finish wetsand all the way up to 2k it will look like a mirror yours looks a little hazy it might be the pics though...also if you don't repolish the wheels like every week it will get dull quick. clearcoating them would be the best solution.
Good write up. i didnt have acess to any of those wheel spins and stuff... But heres my Results. I also used 400 grit and went up from there, just took way more elbow grease, haha.
https://www.rx7club.com/suspension-wheels-tires-brakes-20/diy-ms-01-refinishing-894501/
https://www.rx7club.com/suspension-wheels-tires-brakes-20/diy-ms-01-refinishing-894501/
Trending Topics

Thread
Thread Starter
Forum
Replies
Last Post
thecody59
1st Generation Specific (1979-1985)
14
Jan 23, 2016 11:52 AM