
Yet another GT42/Halfbridge...

Thread Starter
Joined: May 2003
Posts: 1,428
Likes: 0
From: Marion, Ohio
Yet another GT42/Halfbridge...
Seems like everyones got a GT42 hanging off their bridgeported motor nowadays, but I never get tired of seeing them, so here's another. This build has been on a pretty tight budget, since college likes to buttseckz my bank account. I did splurge a bit however and finally bought me a TIG welder, a little Miller EconoTIG, and here are the results.
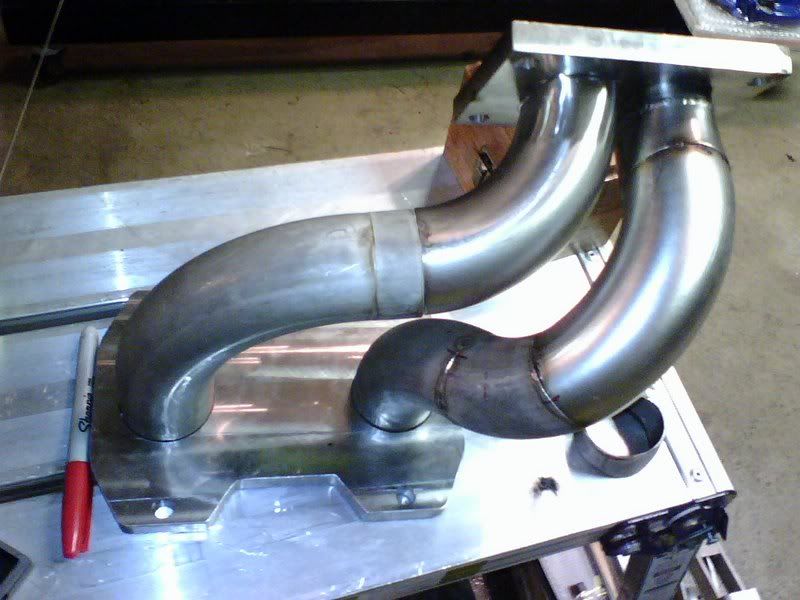
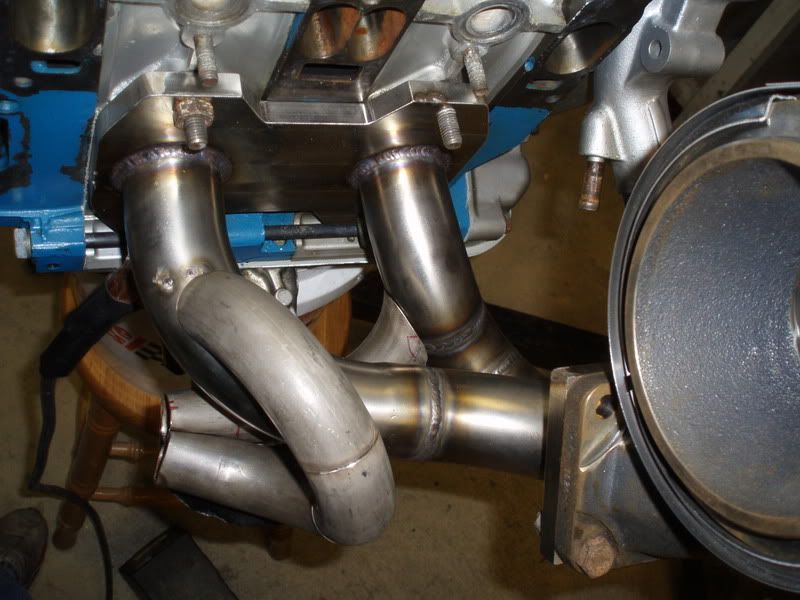
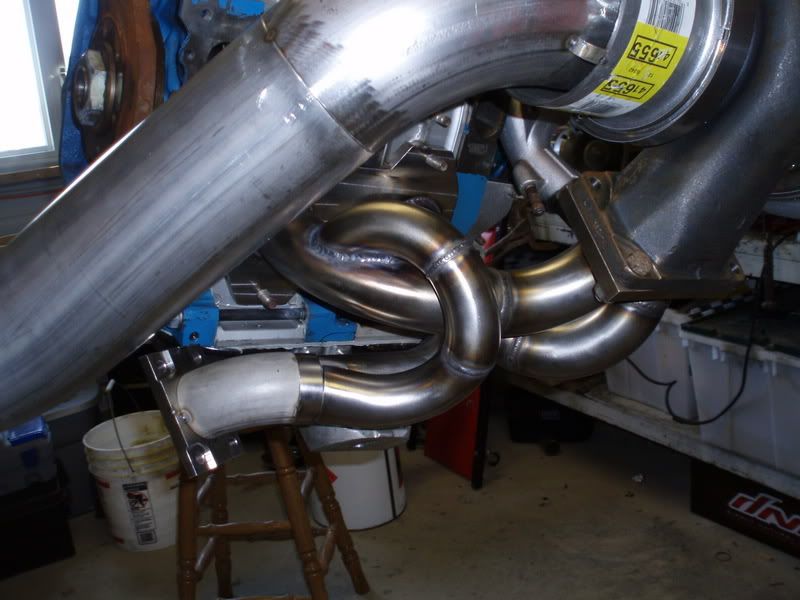
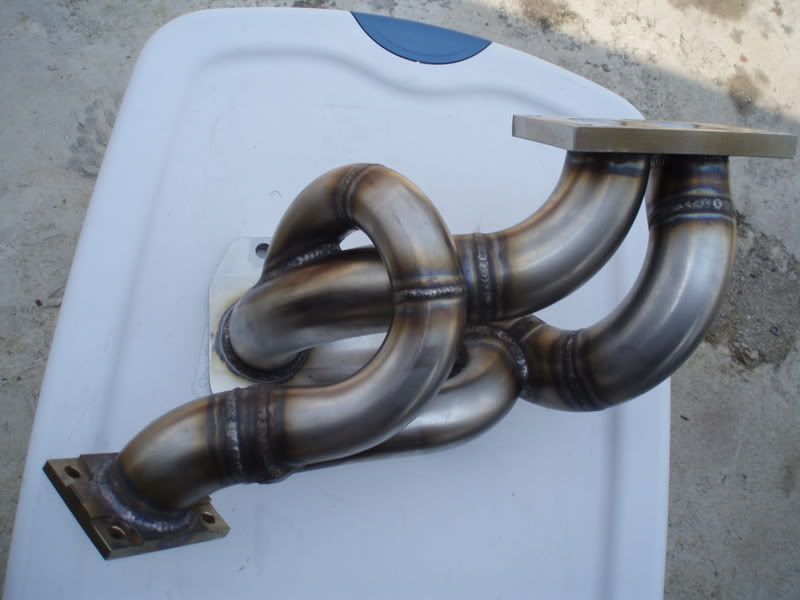
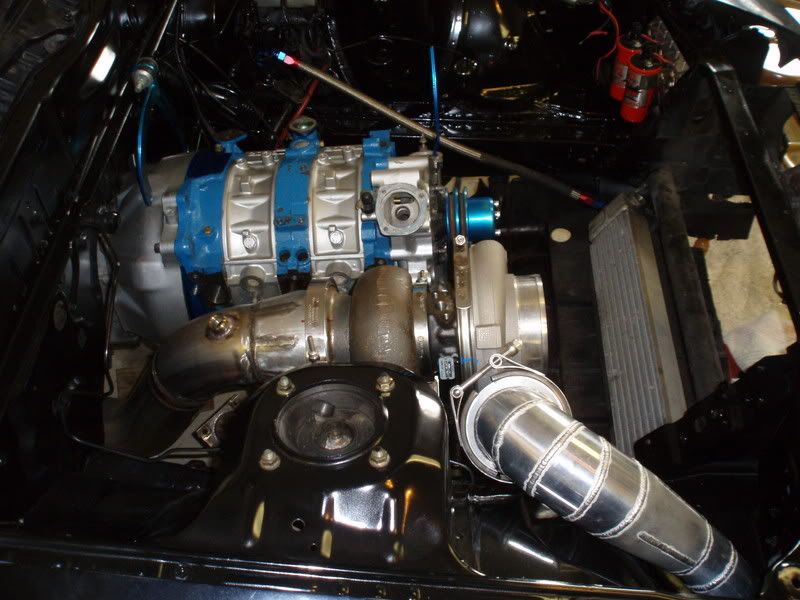
These are some pics of my 321SS equal-length divided turbo manifold(as equal length as I could get with my limited tools). The flanges I machined at the place I work and are 304 stainless. Runners are 13" long from flange face to face. The welds turned out pretty crappy on the manifold, as this was my first stainless project and I didn't think I had time to practice, so I just started welding. The welds actually look better on the inside due to the heavy backpurge.

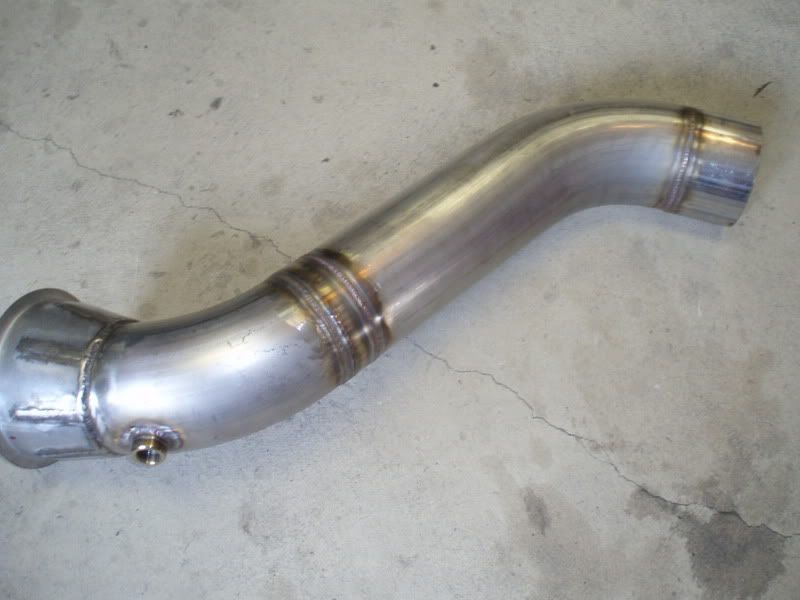
Charge pipe: 3.5"->2.75", couldn't find a tight enough bend, so I had to stovepipe it and make a taper. Piping and turbo still needs polished.

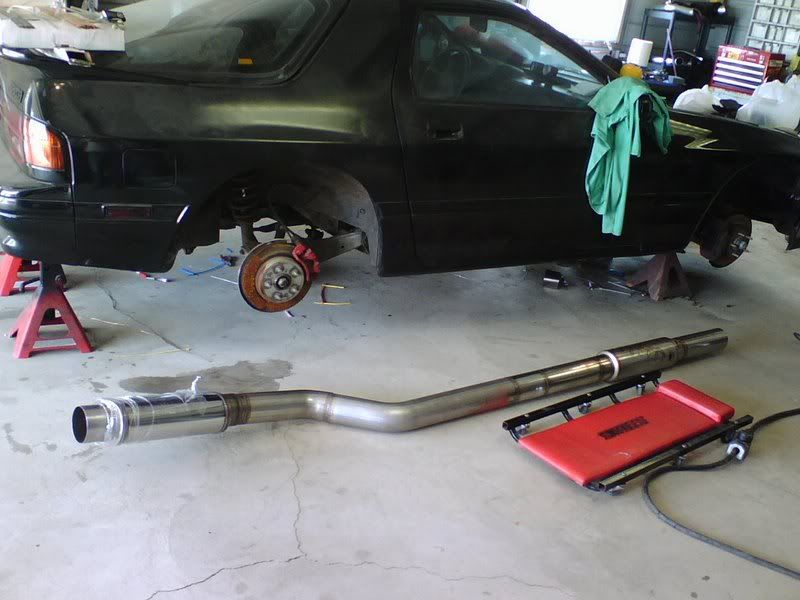
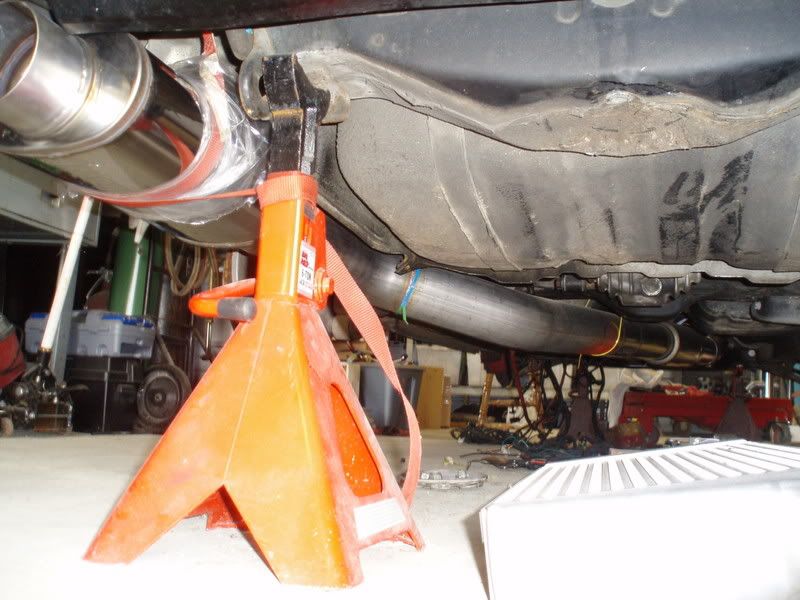
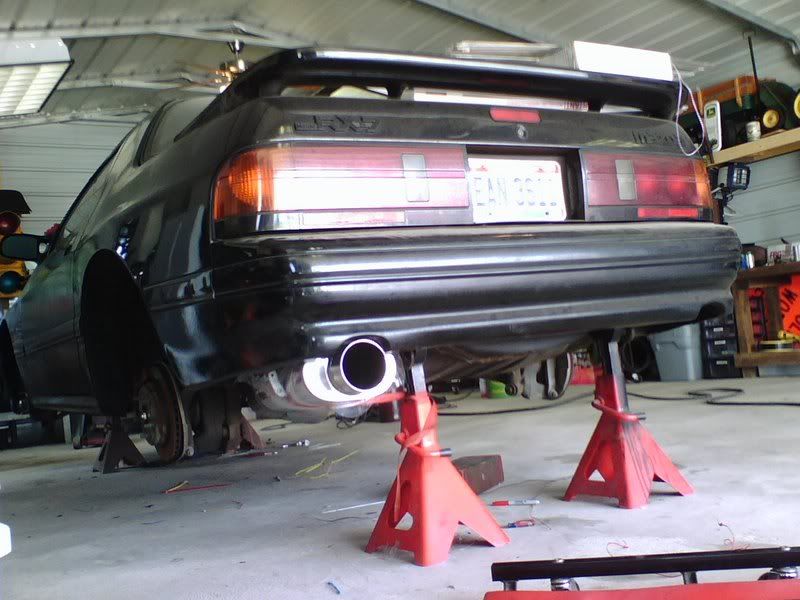
The exhaust is 4"dia 304 stainless, with a DNA presilencer and Magnaflow muffler-thingy. I'm still looking for some SS rod for hangers, the zipties arn't permanent.
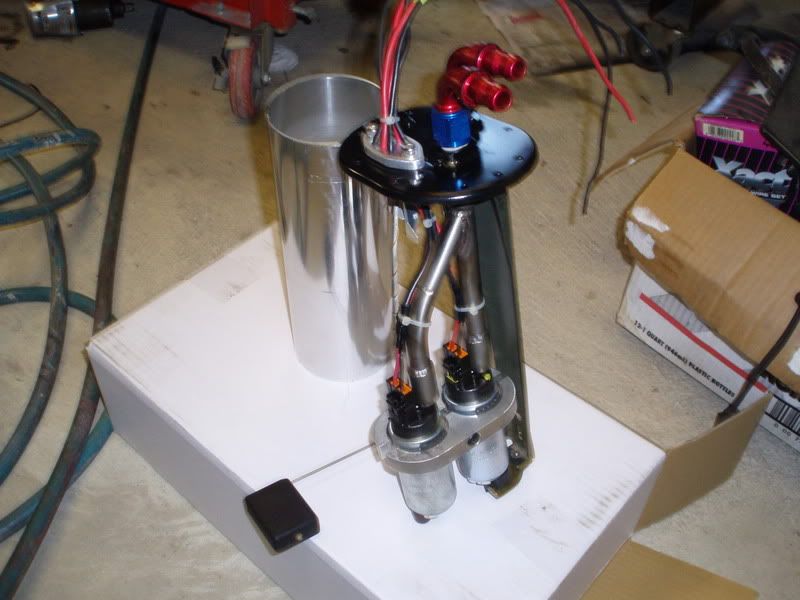
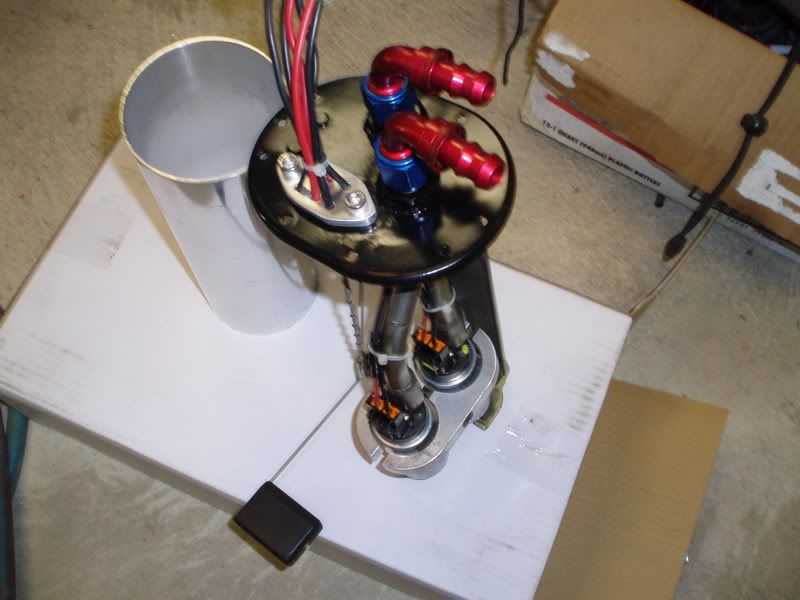
I didn't have the money for a fuel cell and big inline pump, so I just added another Walbro for now. Stainless hardlines with -8 AN feed/return.
Thats it fer now, next up is a turbo brace, cage, and some other ****.
These are some pics of my 321SS equal-length divided turbo manifold(as equal length as I could get with my limited tools). The flanges I machined at the place I work and are 304 stainless. Runners are 13" long from flange face to face. The welds turned out pretty crappy on the manifold, as this was my first stainless project and I didn't think I had time to practice, so I just started welding. The welds actually look better on the inside due to the heavy backpurge.
Charge pipe: 3.5"->2.75", couldn't find a tight enough bend, so I had to stovepipe it and make a taper. Piping and turbo still needs polished.
The exhaust is 4"dia 304 stainless, with a DNA presilencer and Magnaflow muffler-thingy. I'm still looking for some SS rod for hangers, the zipties arn't permanent.
I didn't have the money for a fuel cell and big inline pump, so I just added another Walbro for now. Stainless hardlines with -8 AN feed/return.
Thats it fer now, next up is a turbo brace, cage, and some other ****.
Joined: Apr 2002
Posts: 4,232
Likes: 0
From: Rotaryland, New Hampshire
Very nice, i envy ur welder i cannot wait to upgrade from my lincon electric 110 mig job
Also glad to see the nice integration of the waste gate runners at a nice shallow angle as apposed to the 90* bends so many people seem to use
Also glad to see the nice integration of the waste gate runners at a nice shallow angle as apposed to the 90* bends so many people seem to use

Trending Topics

Thread Starter
Joined: May 2003
Posts: 1,428
Likes: 0
From: Marion, Ohio
A smooth wastegate runner transition was one of my primary goals on this manifold. As for the welding, I mostly just have experience with aluminum, very little stainless steel before now.


Joined: Feb 2001
Posts: 29,798
Likes: 128
From: London, Ontario, Canada
That's great work! The fuel pump setup is probably the best dual Walbro installation I've seen. So many people half-*** it with rubber hose and zipties. 
Wish I had backpurged my stainless manifold...Did you just run another gas bottle with a 2nd regulator?
Wish I had backpurged my stainless manifold...Did you just run another gas bottle with a 2nd regulator?


Your fabrication is very very nice however you may encounter some slight boost control issues with the location of the rear wastegate runner entry. You currently have it at a 90 degree angle in relation to the air path. Idealy for wastgates to be most effective, the runner should be more in-line with the air path. Look at your wastegate runner for the front rotor. That's how it should be for best response.
Thread Starter
Joined: May 2003
Posts: 1,428
Likes: 0
From: Marion, Ohio
Your fabrication is very very nice however you may encounter some slight boost control issues with the location of the rear wastegate runner entry. You currently have it at a 90 degree angle in relation to the air path. Idealy for wastgates to be most effective, the runner should be more in-line with the air path. Look at your wastegate runner for the front rotor. That's how it should be for best response.
