GT35R Here I come! :D
 03-19-05, 08:15 PM
#1
Rotary Enthusiast
Thread Starter

GT35R Here I come! :D
Hello everyone!
Well I finally got off my lazy bum and I'm finally moving on the project. (Thank you my little K)!
I've pulled the original 110K engine and have torn it down. I found that I broke the corner off one of the rear apex seals, and I could tell it was idling rough way more than usual.
The internals looked pretty good, overall. I was surprised to see that I didin't have a lot of carbon buildup. Everything looks good for using Mobil 15/50 for 90K.
Now for the fun stuff!
I'm building my own streetported engine, and waiting for the GT35R kit.
Here's a quick list of the setup:
Streetport built by me
A-Spec GT35R Kit with ceramic coating
Custom built V-mount setup built by me
Metallit Main Catalytic
PowerFC (hoping to have everything together for next month when Steve Kan comes for tuning sessions, otherwise I will have to tune it myself )
)
HKS TP Ignition
720cc primaries and 1680cc secondaries - KG Parts rails - SS lines
TechEdge 2.0b Wideband
Custom gauge setup - EGT, Oil Pressure, Fuel Pressure, Coolant Temp, and of course Boost
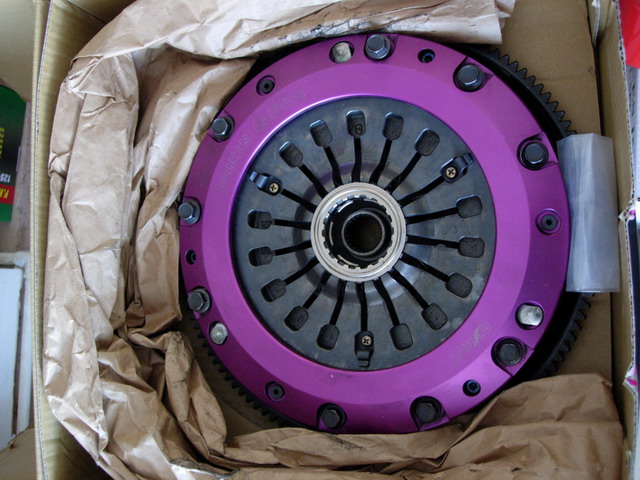
SR Motorsports lightened flywheel, ACT Street/Strip - hopefully these will hold up to the power
No A/C
Converted Manual Steering Rack - Maval Gear
Relocated Battery
etc...
I decided to remove the A/C as I rarely ever use it when it's hot here. I may put it back on, but I had to remove it anyways for the custom V-mount I'm building.
More...
Well I finally got off my lazy bum and I'm finally moving on the project. (Thank you my little K)!
I've pulled the original 110K engine and have torn it down. I found that I broke the corner off one of the rear apex seals, and I could tell it was idling rough way more than usual.
The internals looked pretty good, overall. I was surprised to see that I didin't have a lot of carbon buildup. Everything looks good for using Mobil 15/50 for 90K.
Now for the fun stuff!
I'm building my own streetported engine, and waiting for the GT35R kit.
Here's a quick list of the setup:
Streetport built by me
A-Spec GT35R Kit with ceramic coating
Custom built V-mount setup built by me
Metallit Main Catalytic
PowerFC (hoping to have everything together for next month when Steve Kan comes for tuning sessions, otherwise I will have to tune it myself
)HKS TP Ignition
720cc primaries and 1680cc secondaries - KG Parts rails - SS lines
TechEdge 2.0b Wideband
Custom gauge setup - EGT, Oil Pressure, Fuel Pressure, Coolant Temp, and of course Boost
SR Motorsports lightened flywheel, ACT Street/Strip - hopefully these will hold up to the power
No A/C
Converted Manual Steering Rack - Maval Gear
Relocated Battery
etc...
I decided to remove the A/C as I rarely ever use it when it's hot here. I may put it back on, but I had to remove it anyways for the custom V-mount I'm building.
More...
 03-19-05, 08:16 PM
#2
Rotary Enthusiast
Thread Starter
Here's the start of my custom V-mount; it consists of a Blitz FMIC and a Koyo Radiator.
Here's the Koyo in its new home:
Here is the Blitz FMIC in its new home:
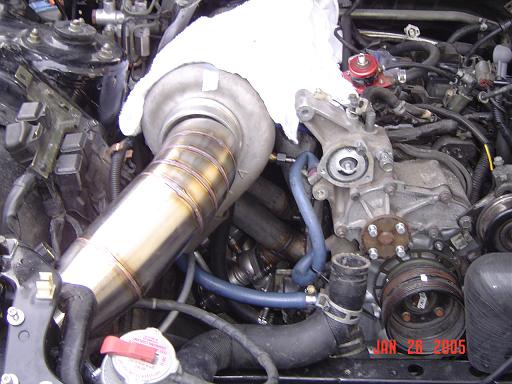
From what I can tell about A-Specs kit, I think that I will have a very good fit with the outlet on the turbo and the inlet on the IC. I will have to figure out some ducting for fresh air to the turbo, but it shouldn't be too hard. The outlet on the IC is in a great place since I don't think I'll have the A/C, so I will just cut it and weld it so the outlet points straight up and pipe it to the Greddy elbow.
I have some room to move the radiator forward more if I need more room for an air filter. However, the A-Spec kit sits really far back. We'll see!
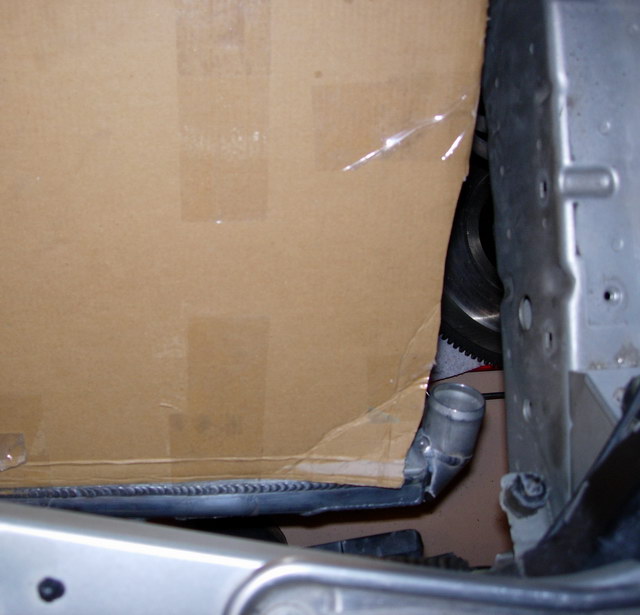
Here's the angle in-between the two. There's plent-o room! I will put in a splitter and block off all openings.
A shot from the front: (I will rewire and move the relays to the drivers side).
Lastly here's a pic of the radiator from below.
I don't like how the return on the radiator stick out below, so I am cutting it off, welding it closed, and moving it to come out the drivers side and up. (I'll take some pics when its done)
I will also move the drain to the other side, so I can actually drain the radiator! :P
I will post progress pics, and if you have any questions or constructive comments / suggestions, they are all welcome! This is a learning experience for me.
A lot of the knowledge / help I've received from many great forum members.
Thanks!
Attila
Here's the Koyo in its new home:
Here is the Blitz FMIC in its new home:
From what I can tell about A-Specs kit, I think that I will have a very good fit with the outlet on the turbo and the inlet on the IC. I will have to figure out some ducting for fresh air to the turbo, but it shouldn't be too hard. The outlet on the IC is in a great place since I don't think I'll have the A/C, so I will just cut it and weld it so the outlet points straight up and pipe it to the Greddy elbow.
I have some room to move the radiator forward more if I need more room for an air filter. However, the A-Spec kit sits really far back. We'll see!
Here's the angle in-between the two. There's plent-o room! I will put in a splitter and block off all openings.
A shot from the front: (I will rewire and move the relays to the drivers side).
Lastly here's a pic of the radiator from below.
I don't like how the return on the radiator stick out below, so I am cutting it off, welding it closed, and moving it to come out the drivers side and up. (I'll take some pics when its done)
I will also move the drain to the other side, so I can actually drain the radiator! :P
I will post progress pics, and if you have any questions or constructive comments / suggestions, they are all welcome! This is a learning experience for me.
A lot of the knowledge / help I've received from many great forum members.
Thanks!
Attila
Last edited by atihun; 03-19-05 at 08:21 PM.

 03-20-05, 06:41 PM
#6
Senior Member

Join Date: Apr 2001
Location: salt lake, utah, usa
Posts: 454
Likes: 0
Received 0 Likes
on
0 Posts
holy crap, that's my car!!!!!!!!! haha you have almost the exact same set-up(I'm still waiting on the turbo). however if you don't want to have to cut up your new radiator, you can spin it around so the top inlet is on the bottom them you get an angle that points straight back instead of down. you can e-mail me if you like and i can send you some pics of how i did mine.
Trending Topics
03-20-05, 08:02 PM
#9
Senior Member
Join Date: Apr 2001
Location: salt lake, utah, usa
Posts: 454
Likes: 0
Received 0 Likes
on
0 Posts
I just realized i took a pic of the ic before i sent it in to get the endtanks welded on. So here is that pic:

and here is a close up of the endtanks, you can see i just used 1/8th inch aluminum.

and here is a close up of the endtanks, you can see i just used 1/8th inch aluminum.
03-20-05, 08:04 PM
#10
Senior Member
Join Date: Apr 2001
Location: salt lake, utah, usa
Posts: 454
Likes: 0
Received 0 Likes
on
0 Posts
Originally Posted by yodaddy
I just realized i took a pic of the ic before i sent it in to get the endtanks welded on. So here is that pic:
and here is a close up of the endtanks, you can see i just used 1/8th inch aluminum.
and here is a close up of the endtanks, you can see i just used 1/8th inch aluminum.
i will just go ahead and post pics of the radiator in here when i take them.
(whoops, wrong button).
sorry atihun, didn't mean to hijack your thread.
Last edited by yodaddy; 03-20-05 at 08:09 PM.
03-22-05, 07:53 PM
#13
Rotary Enthusiast
Thread Starter
Originally Posted by 1FooknTiteFD
lets see pics of that Aspec kit!
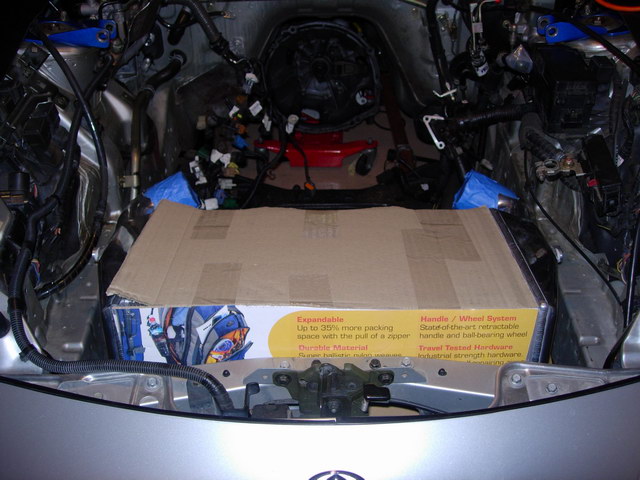
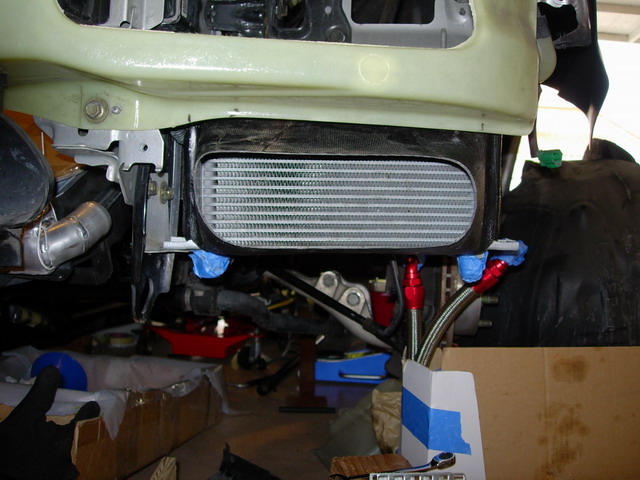
The radiator is done. I hope that the welds are good
, as I haven't pressure tested it to see if I need to do any patching.Here's the modifications:
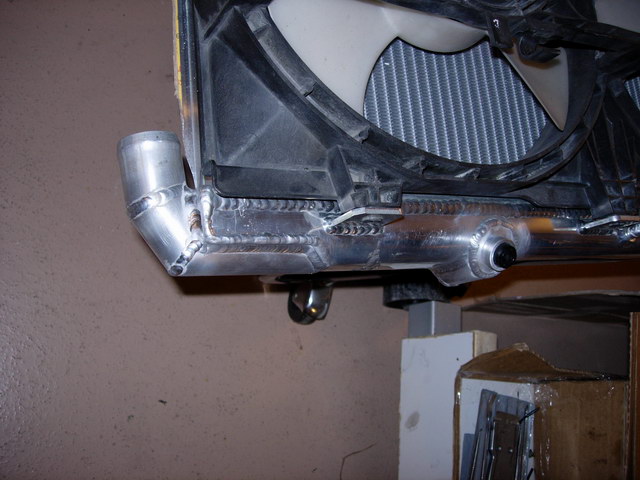
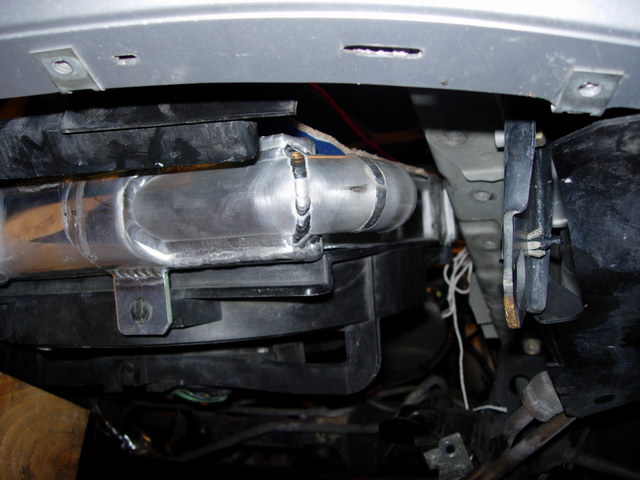
You can see the outlet is on the drivers side now, and the drain will drain.
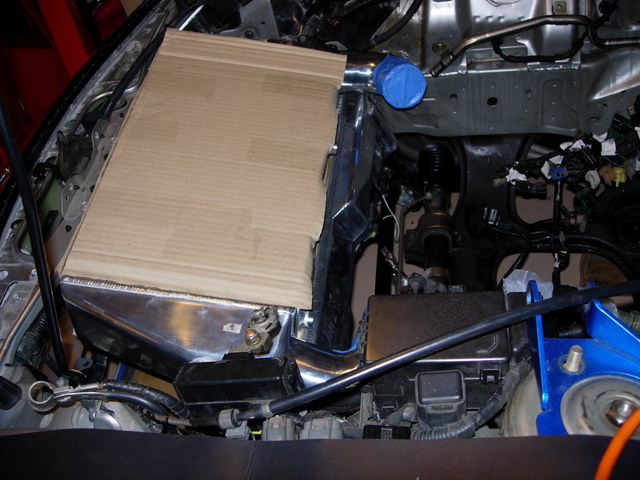
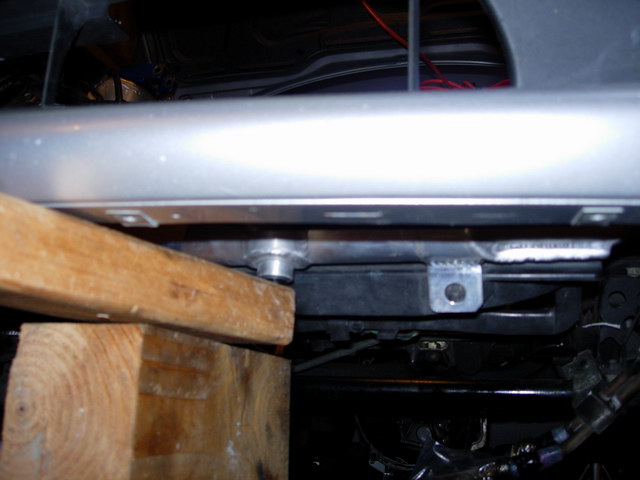
Here's a pic from the top, there's plenty of room to put the hose on and run it to the engine.
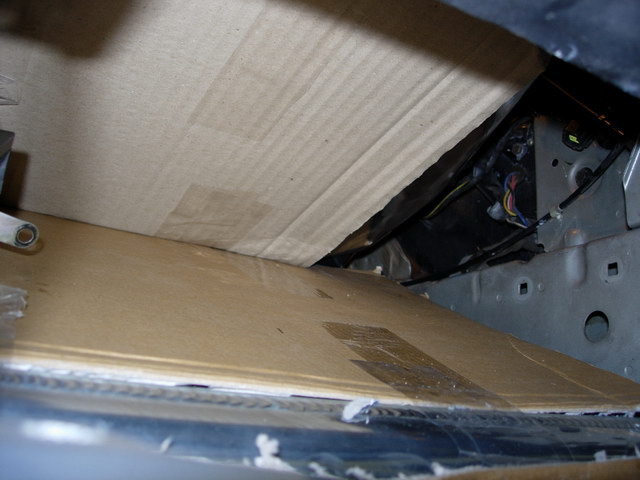
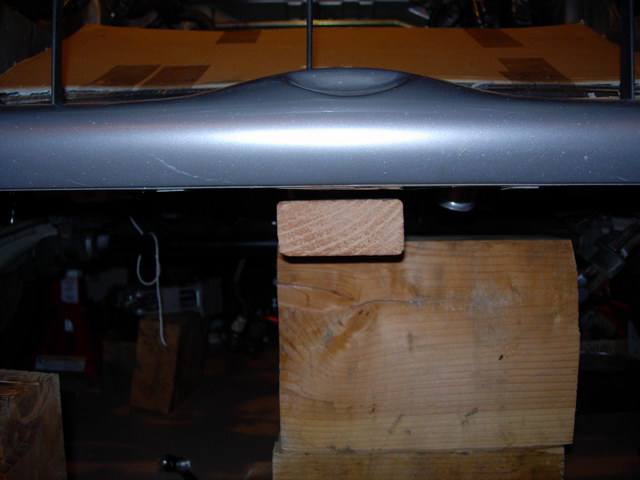
Here's a pic from below, you can see that the drain is in a good spot, and is actually higher than the tow hooks; a good thing. I plan on putting a "L" bar in front of it just incase.
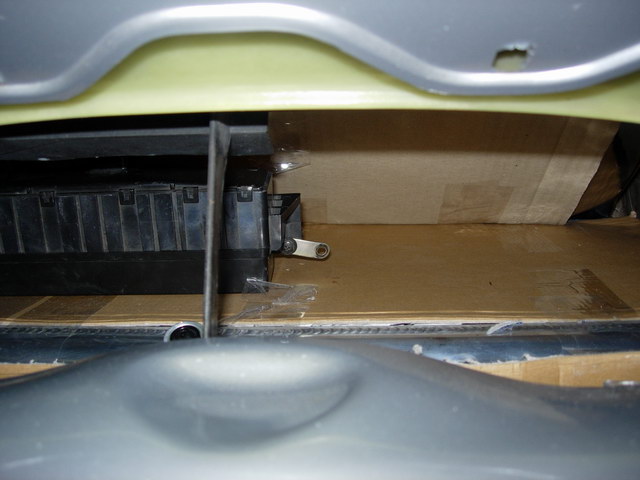
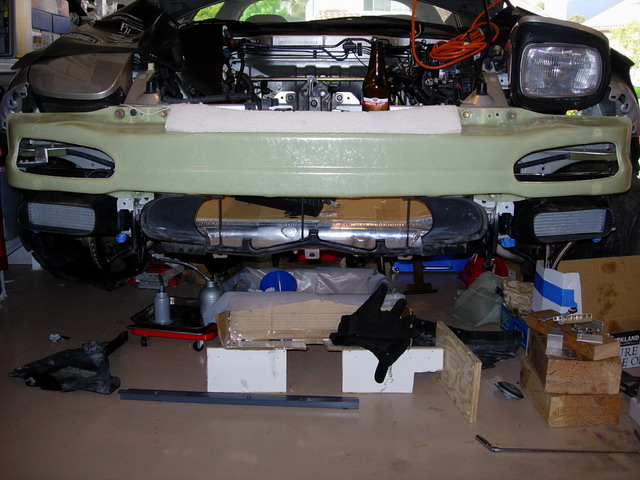
Here's a head on shot of the bumper and the radiator.
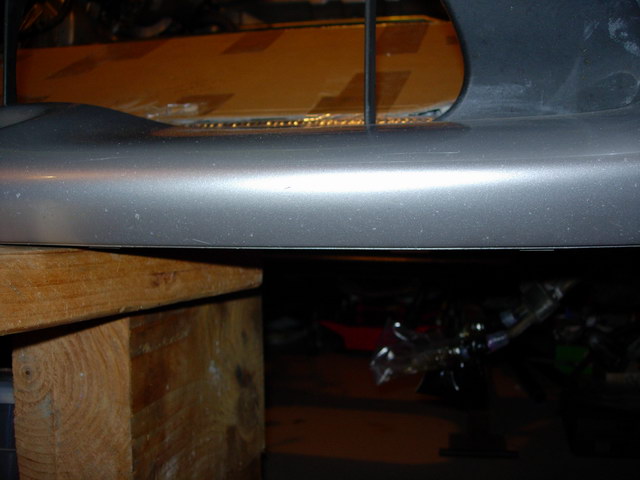
The radiator outlet from undert the car.
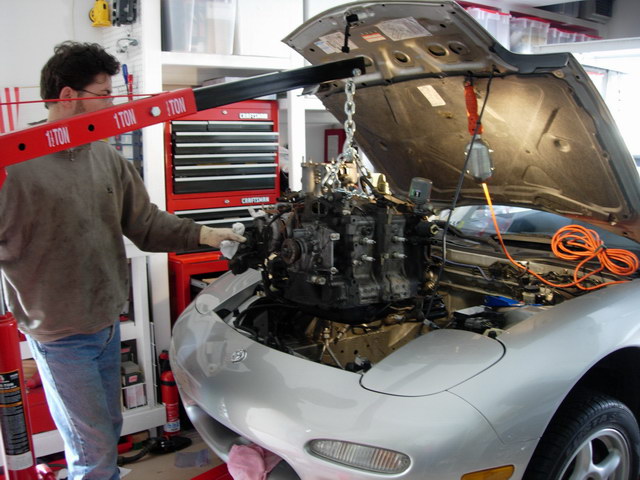
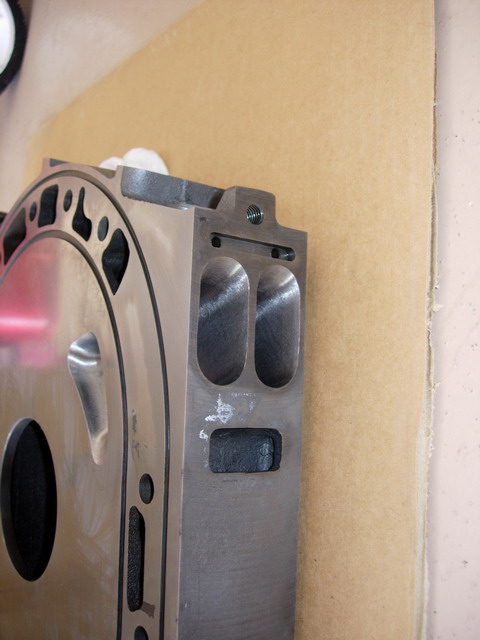
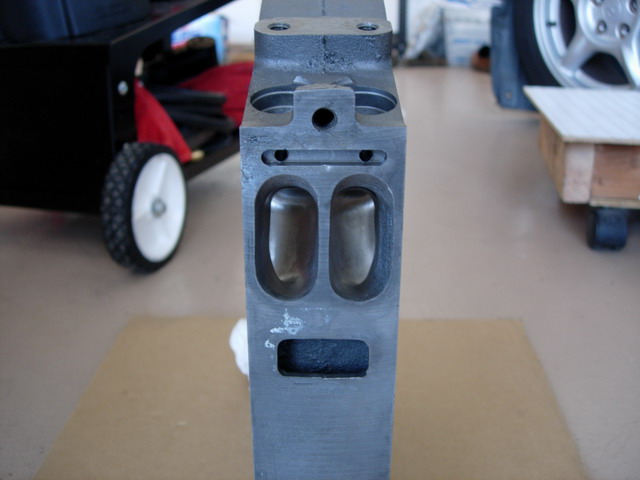
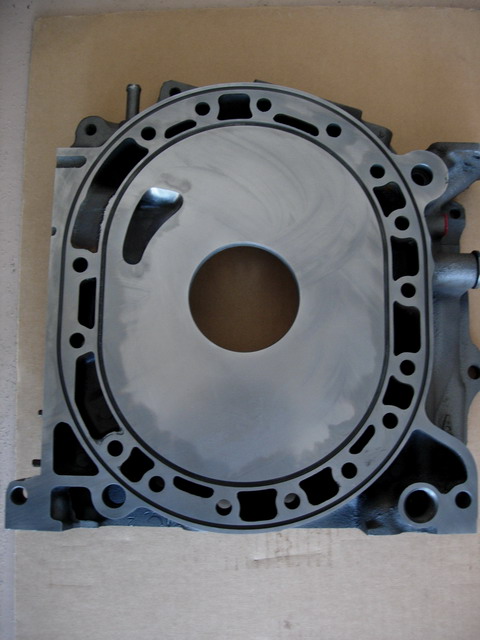
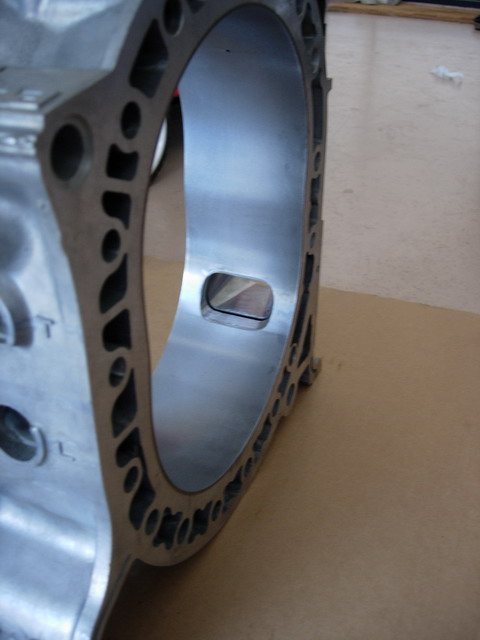
More soon! I'm building the engine right now. The reman I took apart for parts had new housings, and new rotors! YAY! The endplates and e-shaft were in excellent shape.
Last edited by atihun; 03-22-05 at 08:09 PM.
03-23-05, 08:20 AM
#14
I wish I had seen your thread earlier before you were already committed to your configuration.
I have a little experience that I would have liked to pass along.
start thinking about ducting and how it can be incorporated into your design. I think that is where this configuration really starts to shine.
Thanks again for the use of your pic---->


I have a little experience that I would have liked to pass along.
start thinking about ducting and how it can be incorporated into your design. I think that is where this configuration really starts to shine.
Thanks again for the use of your pic---->
Last edited by rotarypower101; 03-23-05 at 08:23 AM.
03-23-05, 09:37 AM
#15
Rotary Enthusiast
Thread Starter
Originally Posted by rotarypower101
I wish I had seen your thread earlier before you were already committed to your configuration.
I have a little experience that I would have liked to pass along.
start thinking about ducting and how it can be incorporated into your design. I think that is where this configuration really starts to shine.
Thanks again for the use of your pic---->
I have a little experience that I would have liked to pass along.
start thinking about ducting and how it can be incorporated into your design. I think that is where this configuration really starts to shine.
Thanks again for the use of your pic---->
The duct will be split into two, one for the IC and one for the radiator. The sides will be fully enclosed as well as arount the bumper opening. So any air coming into the opening will have to go one way or the other.
The only thing that is still up in the air is the air filter for the GT35R. The good thing is that A-Specs kit will sit further back than other turbos. That should give me some room to work with. I have 2 or 3 options depending on exact turbo location as to what I will do for fresh air ducting.
1. Formed tube from the turbo inlet that will run on the passanger side of the IC to the bumper opening.
2. Formed tube from the opening that is routed to a shroud around the air filter.
3. I don't know yet
.The nice thing about the V-mount will be that the heated air from the radiator will be pushed out the bottom of the car, not into the engine bay. I will also make some duct on the backside of the radiator to ensure the air is directed to the bottom of the car.
03-23-05, 04:40 PM
#17
Senior Member
iTrader: (2)

Join Date: Oct 2003
Location: Washington/BC
Posts: 511
Likes: 0
Received 0 Likes
on
0 Posts
try this intake for the turbo https://www.rx7club.com/3rd-generation-specific-1993-2002-16/hows-cold-air-389766/
03-23-05, 09:16 PM
#18
Guy with the questions...
Join Date: Apr 2002
Location: Ohio
Posts: 48
Likes: 0
Received 0 Likes
on
0 Posts
Looks Good!
Why are you worried about putting a splitter in between the rad and I/C? With the fans pulling air through the bottom, I seriously doubt that you would have any problems with Heat soak. Not to mention, once you get moving, the air velocity will probably exceed the velocity that the fans can provide. The thought that I have is how the air is moving into the intake for the radiator and I/C. If the flow of air is going straight in, then the splitter might add some benefit. But if the flow is not straight in, it might create a small amount of turbulence and decrease the efficiency of the setup. At speed, the air is going to try and find the easiest way through. If everything is sealed up well on the sides it can only go through the radiator and I/C, and not spill around the sides (Which is probably very common on many front mount designs). I'm not trying to throw stones, I really like the idea. If I had a little more liquid cash right now in the bank account, I'd be trying it myself, but you all know how it goes......
Why are you worried about putting a splitter in between the rad and I/C? With the fans pulling air through the bottom, I seriously doubt that you would have any problems with Heat soak. Not to mention, once you get moving, the air velocity will probably exceed the velocity that the fans can provide. The thought that I have is how the air is moving into the intake for the radiator and I/C. If the flow of air is going straight in, then the splitter might add some benefit. But if the flow is not straight in, it might create a small amount of turbulence and decrease the efficiency of the setup. At speed, the air is going to try and find the easiest way through. If everything is sealed up well on the sides it can only go through the radiator and I/C, and not spill around the sides (Which is probably very common on many front mount designs). I'm not trying to throw stones, I really like the idea. If I had a little more liquid cash right now in the bank account, I'd be trying it myself, but you all know how it goes......
03-23-05, 09:44 PM
#19
Rotary Enthusiast
Thread Starter
My main concern is getting air from the bumper to the intake at this point. I won't know for sure until I have the turbo installed; bolo_fd, that's what I was thinking (except with a filter at the end). Thanks!
The way the IC and radiator sit it will be easy to close off all the sides and force air through each.
As for the splitter, I wanted to ensure that air gets into the intercooler also. I guess I can try it with and without. You're right though, once I'm moving at higher speeds, it should be plenty for both.
03-24-05, 12:36 AM
#20
Senior Member
iTrader: (2)
Join Date: Oct 2003
Location: Washington/BC
Posts: 511
Likes: 0
Received 0 Likes
on
0 Posts
please no more pics i dont want to spend even more money then i already have on my car. j/k
question can u install a intake pipe like that with stock headlights? thanks
question can u install a intake pipe like that with stock headlights? thanks
04-17-05, 09:00 PM
#21
Rotary Enthusiast
Thread Starter
Finally got something to update!
I got back my iron plates from being lapped, so the engine is ready to go together. But I loaned 'someone' my engine stand...
I got an email from A-Spec and my kit is on the way! YAY!
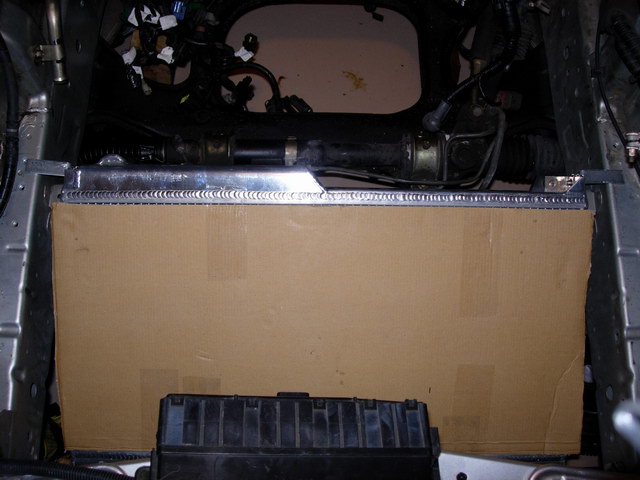
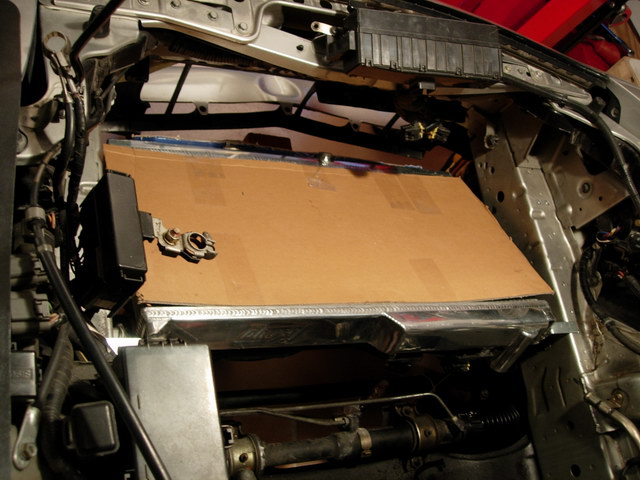
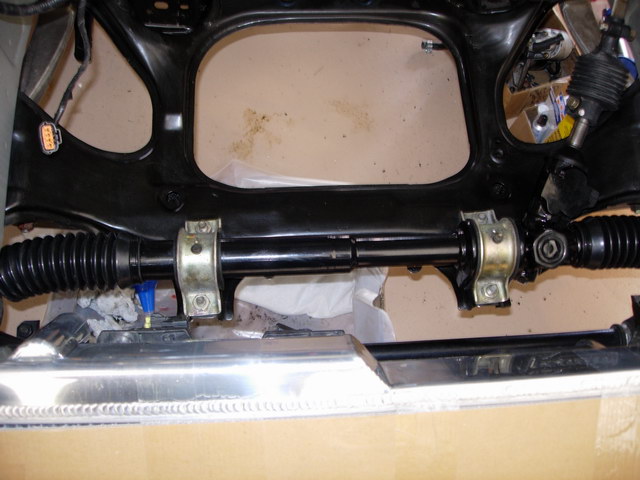
I've installed the manual rack and am working on the dual oil cooler setup right now.
Here's some pics:
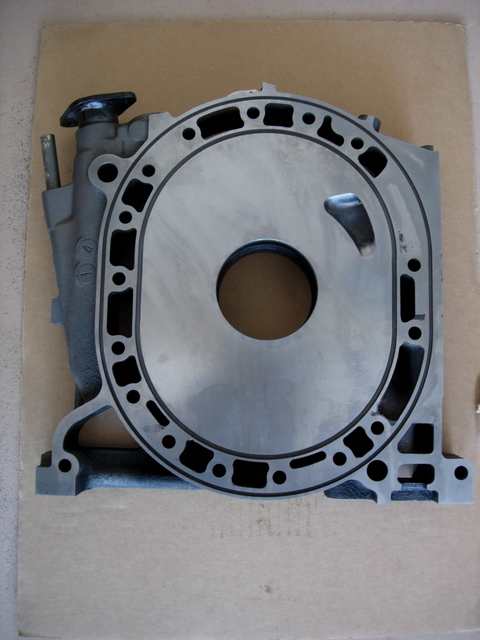

I got back my iron plates from being lapped, so the engine is ready to go together. But I loaned 'someone' my engine stand...
I got an email from A-Spec and my kit is on the way! YAY!
I've installed the manual rack and am working on the dual oil cooler setup right now.
Here's some pics:
06-01-05, 08:30 PM
#22
Rotary Enthusiast
Thread Starter
Some new updates:
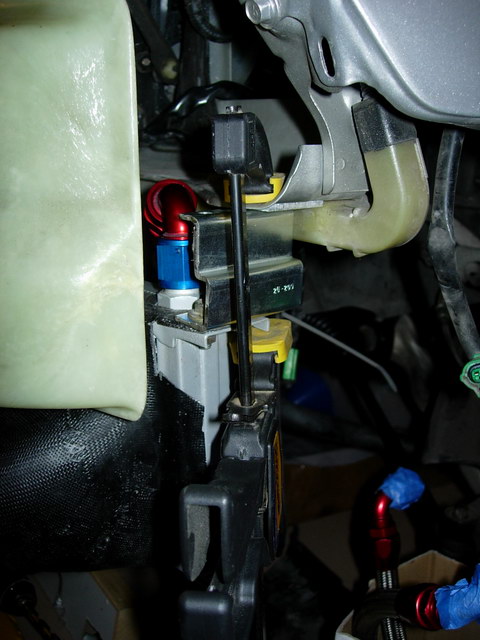
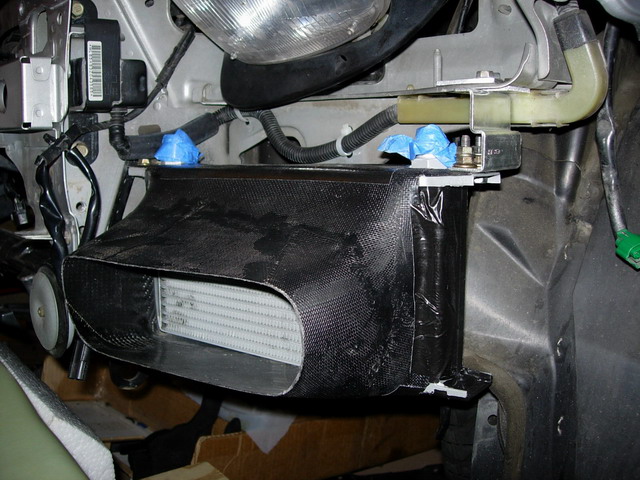
Here are a couple of pictures the oil coolers and duct fitting:
I changed my mind and didn't want the hoses on the bottom for safety reasons, so I flipped them:
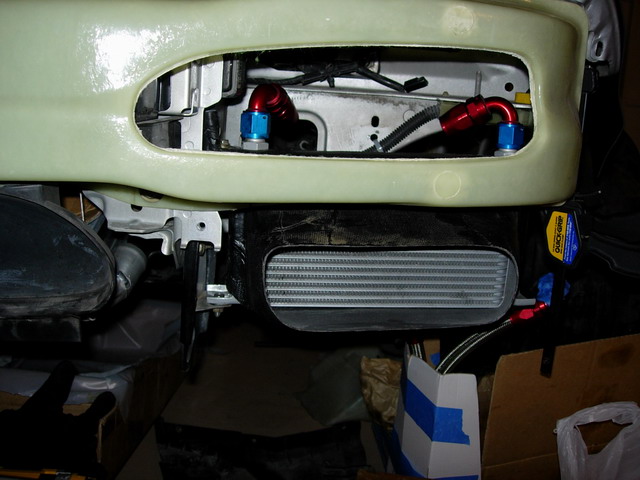
I made some stronger brackets for the outside and added a small "L" bracket on the inside; these don't move one bit:
Here are a couple of pictures the oil coolers and duct fitting:
I changed my mind and didn't want the hoses on the bottom for safety reasons, so I flipped them:
I made some stronger brackets for the outside and added a small "L" bracket on the inside; these don't move one bit:
06-01-05, 08:35 PM
#23
Rotary Enthusiast
Thread Starter
Here's the work on the dash gauges:
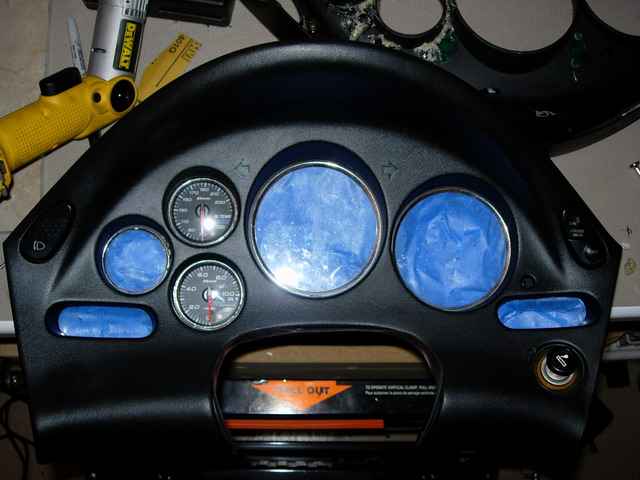
After trying to figure out for a week or two on how to mount the new Defi Gauges in the stock locations, I found the solution:
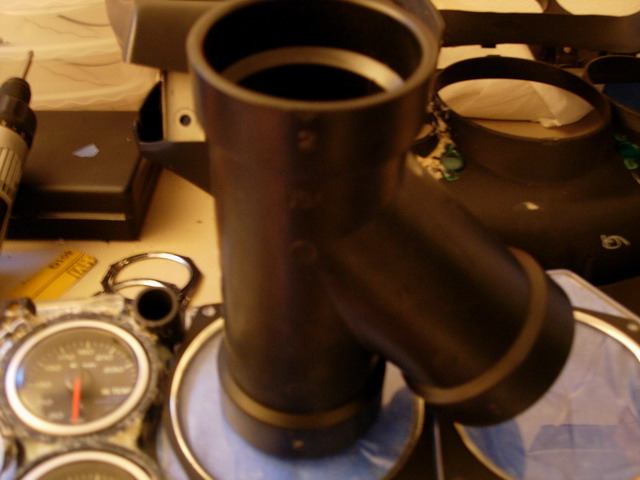
The gauges fit perfect, no movement, and they provide support for the lip because of the flange. Yes, that is ABS sewer piping from BLOWES.
Here's how I epoxied them in:
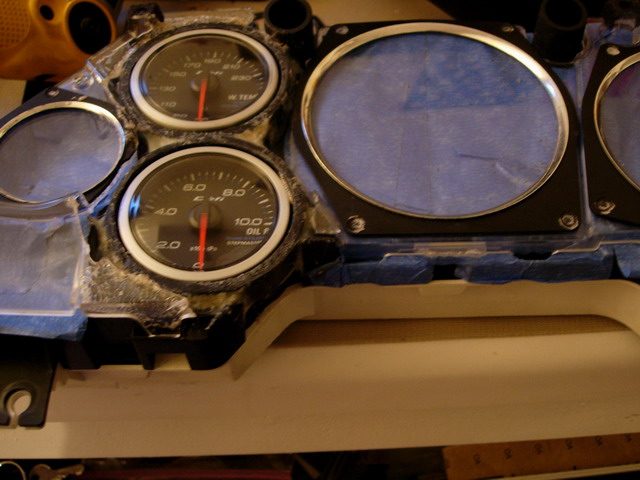
I will be using this same method to install two other gauges where the A/C controls go.
I'm also finishing up covering the gauge dome with leather. I hope to cover all the plastice around the driver with leather; mmmm..... feels nice!
After trying to figure out for a week or two on how to mount the new Defi Gauges in the stock locations, I found the solution:
The gauges fit perfect, no movement, and they provide support for the lip because of the flange. Yes, that is ABS sewer piping from BLOWES.
Here's how I epoxied them in:
I will be using this same method to install two other gauges where the A/C controls go.
I'm also finishing up covering the gauge dome with leather. I hope to cover all the plastice around the driver with leather; mmmm..... feels nice!