
The RE Amemiya Style "Street" Diffuser


Joined: Jun 2005
Posts: 1,487
Likes: 0
From: Vacaville, California
haha damn Greeks they're always trying to get more money lol (im Greek) one time a taxi driver wanted 50 euro ($65) to drive me from the center of athens to the airport it is like a 20 min drive tryin to rip me off. lol
Got it!Finally paid 160$  ...they didn't know what it was so they were charging anything they wanted and they thought it was plastic...Ken stop doing such a great job it took me ages to convince them that this was fiberglass
  ...
...
...they didn't know what it was so they were charging anything they wanted and they thought it was plastic...Ken stop doing such a great job it took me ages to convince them that this was fiberglass ...

Registered User
iTrader: (11)
Joined: Oct 2005
Posts: 2,840
Likes: 11
From: Rancho Cucamonga , California
I never understood how customs came up with their fees. I always try to lower the value as much as I see fit to not raise a red flag.
In case any of you guys didn't know, the group buy is already closed. The price is now $350 + shipping. I think that's a fair price and fair for the initial participants.
Ken
In case any of you guys didn't know, the group buy is already closed. The price is now $350 + shipping. I think that's a fair price and fair for the initial participants.
Ken


Resident Retard
Joined: Apr 2001
Posts: 1,918
Likes: 0
From: Cockaigne
thanks for the reply Phil. I think I'll go this route as well.
Alternative to Rhino Liner
I wanted to share with those of you considering the Rhino Liner coating that there is a nice alternative at the auto parts store. Dupli-Colors Truck bed Coating TR-250 ($8) and Dupli-Colors Adhesion Promoter CP199 ($5).
1. Used Dawn to wash off release agents.
2. Then I lightly used 600grit to prep the surface for the adhesion promoter. Rewash or wipe down.
3. Follow the recommendation on the adhesion promoter applying 2-3 thin coats allowing 2-3 minutes between each coat.
4. Now for the Truck bed liner coat. Shake well. Apply this with in 10 minutes of your last coat of adhesion promoter. Spray 8-10 inches away from the surface. I tested my technique out on the rear section that is hidden from view.
5. I then covered the entire surface, focusing on what would be seen most or probably meet with some curbing. I particularily coated both piecs that wrap around the fender really well. You don't want to lay it on to heavy that it begins to look glossy or puddled.
6. I also coated the edges that would be seen on the fenders.
When the Truck Bed Coating starts reaching the end of the can it will start spitting out larger particles. STOP using it. Always keep the can as close to upright as possible. And you can never shake the can to much during use.
I used all of one can. I probably laid down two coats total over the entire surface and five to six coats total on the places I thought would see the most traffic.
Also if you're worried about losing the marks for the mounting holes then pre-drill through the center or completely drill them out prior to washing and prepping. I drilled them out after I was done painting. I used an x-acto knife to find the center and spun the blade back and forth creating a divot and then I slowly worked my way up with different sized bits. Definitely pre-drill with at least an 1/8 inch bit and then finish with one that matches the size of the mark.
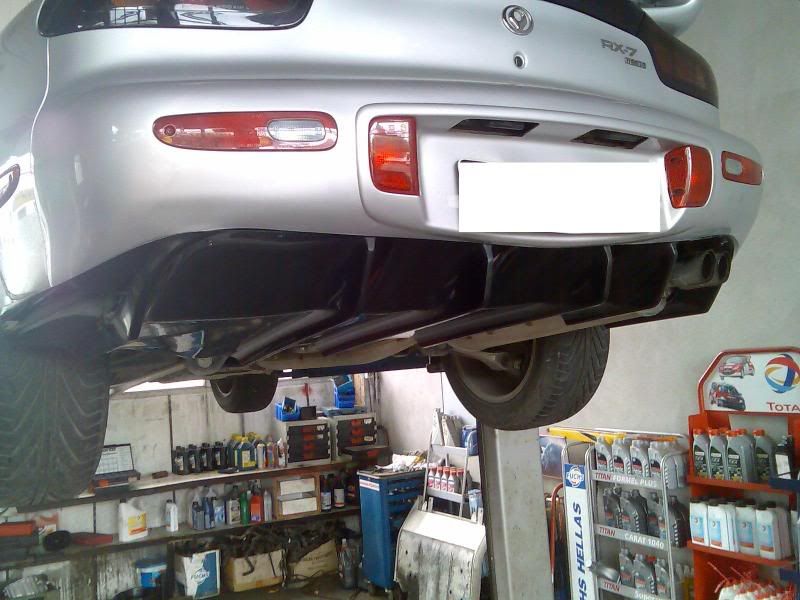
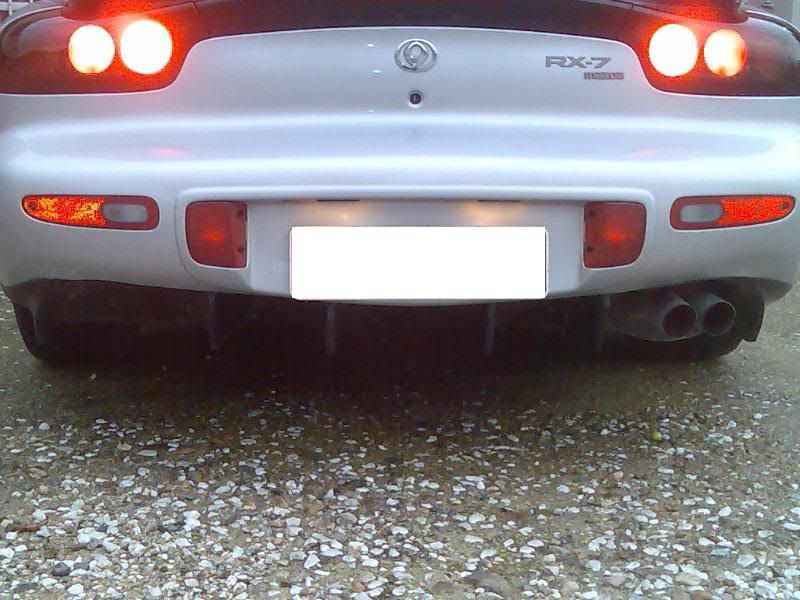
Below are a few pics that show how uniform the texture is. The best part is should it ever get damaged or scratched touch up is easy. Also I test sprayed armor all on it and it looks great. (Use a spray or sponge, not cloth.)
Thanks to Ken and his crew for producing some of the best parts out there for our cars.
1. Used Dawn to wash off release agents.
2. Then I lightly used 600grit to prep the surface for the adhesion promoter. Rewash or wipe down.
3. Follow the recommendation on the adhesion promoter applying 2-3 thin coats allowing 2-3 minutes between each coat.
4. Now for the Truck bed liner coat. Shake well. Apply this with in 10 minutes of your last coat of adhesion promoter. Spray 8-10 inches away from the surface. I tested my technique out on the rear section that is hidden from view.
5. I then covered the entire surface, focusing on what would be seen most or probably meet with some curbing. I particularily coated both piecs that wrap around the fender really well. You don't want to lay it on to heavy that it begins to look glossy or puddled.
6. I also coated the edges that would be seen on the fenders.
When the Truck Bed Coating starts reaching the end of the can it will start spitting out larger particles. STOP using it. Always keep the can as close to upright as possible. And you can never shake the can to much during use.
I used all of one can. I probably laid down two coats total over the entire surface and five to six coats total on the places I thought would see the most traffic.
Also if you're worried about losing the marks for the mounting holes then pre-drill through the center or completely drill them out prior to washing and prepping. I drilled them out after I was done painting. I used an x-acto knife to find the center and spun the blade back and forth creating a divot and then I slowly worked my way up with different sized bits. Definitely pre-drill with at least an 1/8 inch bit and then finish with one that matches the size of the mark.
Below are a few pics that show how uniform the texture is. The best part is should it ever get damaged or scratched touch up is easy. Also I test sprayed armor all on it and it looks great. (Use a spray or sponge, not cloth.)
Thanks to Ken and his crew for producing some of the best parts out there for our cars.


 (im #31)