
Arca's RX-8 Time Attack Build Thread (13b-REW Swap)

Arca's RX-8 Time Attack Build Thread (13b-REW Swap)
So, long story short, I've had this build going on for quite awhile and have a build thread over on RX8Club, but after running some numbers I found out that if I bailed on my N/A Renesis build and sold all the engine parts and performance parts I have stock piled for it, I could swap in an REW for not a whole lot more... the Renesis is a dead end and my long term goal has always been 400+WHP. I figured my time, effort, and money would be better spent starting the swap now instead of years down the road.
This was a very recent decision to do an REW swap, so there won't be a whole lot of REW content to begin with. When I settled on this swap I figured it would be useful to post the build here to get input from people that are more experienced with this engine and would be able to give me valuable input as I go along.
With that being said, post overload incoming. Here is my story...
Well, here it is. Finally decided to start a build thread to try and help chronicle the progression of my car and share experiences at the track and also get feedback to help make the car faster.
Long term goals for the build:
Compete in Global Time Attack in the Limited RWD class.
Secondary goal is to try to stay competitive in NASA Time Trials and the UMS Tuning Time Attack Series, but eventually it will only be going to larger scale time attack events.
400+WHP Either N/A 20b or 13b-REW
Faceplated T56
Cobra Rear Diff
I've learned a lot from this place (RX8Club.com) over the years and had some trial and error with the car, feel free to laugh at stupid mods or mistakes or miscellaneous rice-tastic happenings with the car.
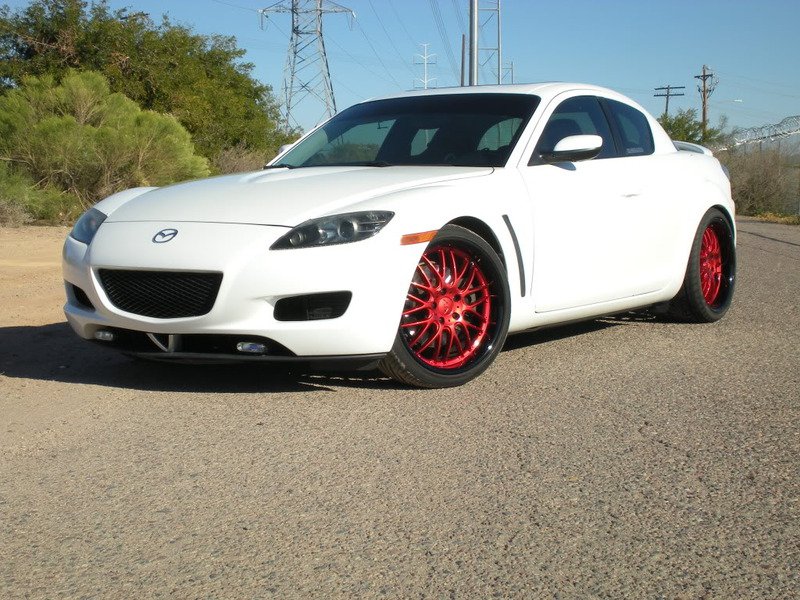
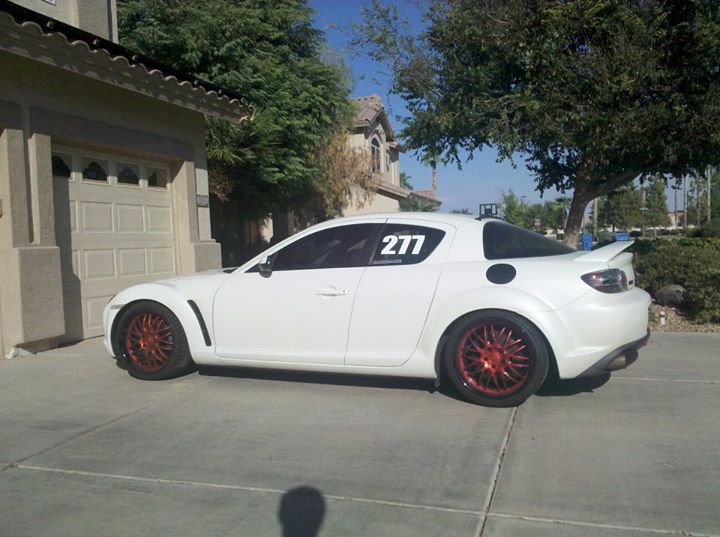
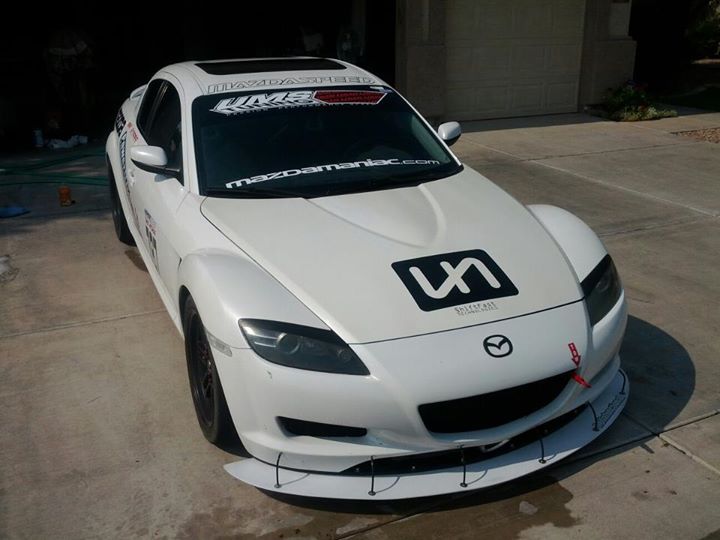
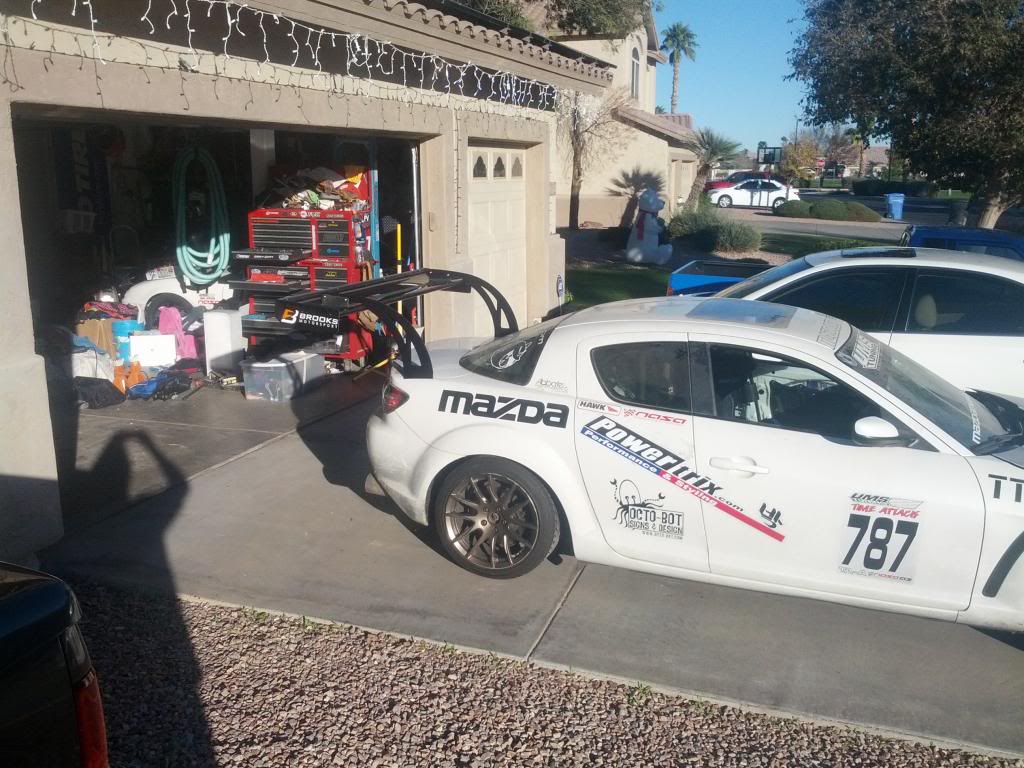
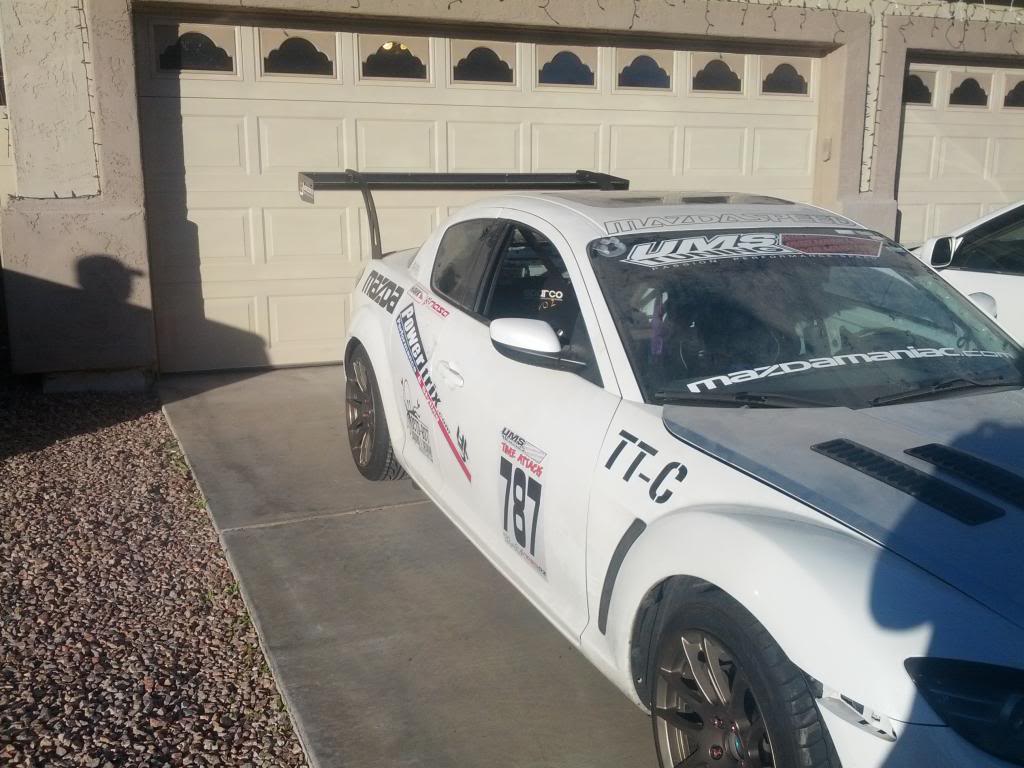
The following pictures show two of the photos from the Craigslist ad when I bought the car in May of 2011 and how it sits as of November 2013. I'll do a recap of the build up to this point in the following posts, and then start with what I'm doing on the car right now. It's been on jackstands for almost a year while I've been gathering parts and funds and motivation to work on it, which has been hard since my main distraction has been a 1994 Miata R Package that my dad purchased and I've been helping him build that up and co-driving it at events as well.
May 2011:
2005 RX-8 Touring, Whitewater Pearl, 6-Speed Manual, approx 75k miles.
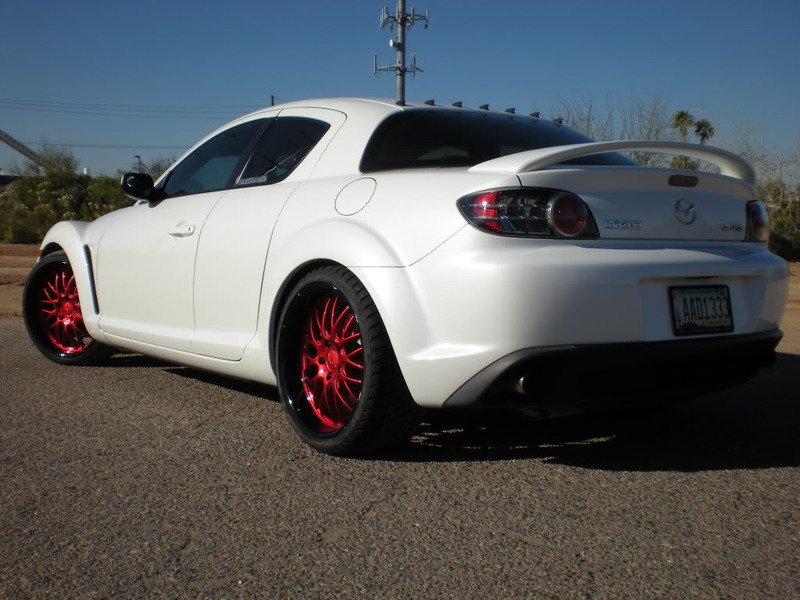
November 2013:
Long term goals for the build:
Compete in Global Time Attack in the Limited RWD class.
Secondary goal is to try to stay competitive in NASA Time Trials and the UMS Tuning Time Attack Series, but eventually it will only be going to larger scale time attack events.
400+WHP Either N/A 20b or 13b-REW
Faceplated T56
Cobra Rear Diff
I've learned a lot from this place (RX8Club.com) over the years and had some trial and error with the car, feel free to laugh at stupid mods or mistakes or miscellaneous rice-tastic happenings with the car.
The following pictures show two of the photos from the Craigslist ad when I bought the car in May of 2011 and how it sits as of November 2013. I'll do a recap of the build up to this point in the following posts, and then start with what I'm doing on the car right now. It's been on jackstands for almost a year while I've been gathering parts and funds and motivation to work on it, which has been hard since my main distraction has been a 1994 Miata R Package that my dad purchased and I've been helping him build that up and co-driving it at events as well.
May 2011:
2005 RX-8 Touring, Whitewater Pearl, 6-Speed Manual, approx 75k miles.
November 2013:
So this car was my first car and daily driver. I had never needed a car but for my Junior year of college I had moved back to the parents house (rent was way cheaper there LOL) and needed transportation. Bought this car on an impulse knowing almost nothing about rotary engines besides the very basics of the internal workings. After I brought it home I began pouring over thread after thread just taking in as much information as I could.
The mods on the car when I got it were:
Ricer autozone fog lights
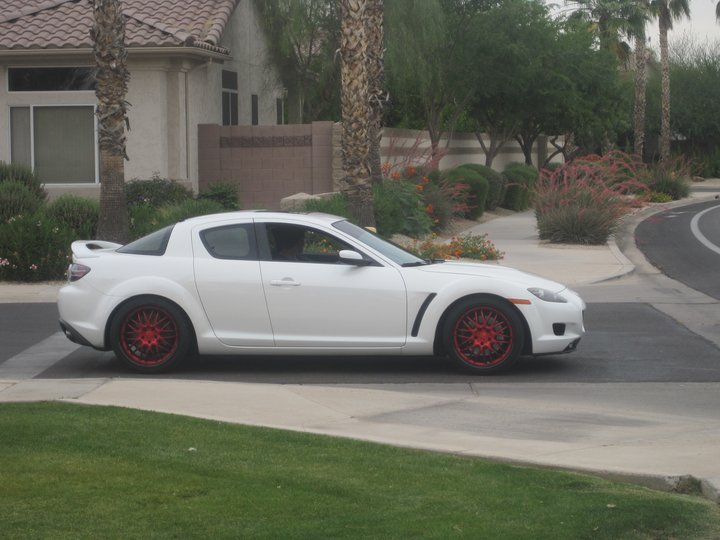
19x8.5 front and 19x9.5 rear XIX X05 wheels that were painted gloss black on the lips and candy apple red metallic faces.
Shitty chinese tires.
K&N Typhoon V2 Hot Air Intake
Eibach Lowering Springs
Blown out original shocks
Mad tyte vortex generators
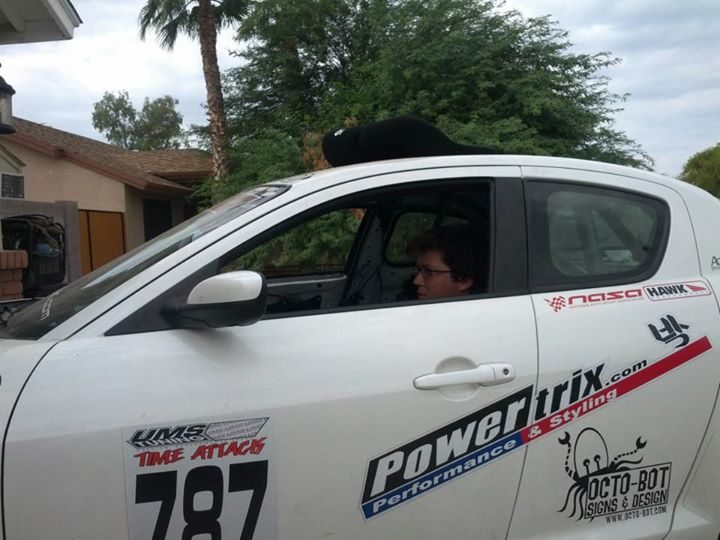
Here's a picture of me driving the car for the first time. Was my first time driving a manual car as well but I picked it up quickly. Never stalled it and to this day the original clutch and trans is still fine to my surprise.
Fast forward a couple months to August 2011. I had done some basic things like an Axial Flow short shifter and JDM clear corners. Here I am at my first NASA Arizona event at Firebird International Raceway West Track. My new friends that I had just made in the Arizona Mazda Club kept insisting that I come out to a track event, so I signed up and was pumped. I had never really known that road course type events even existed at an amateur level that anybody could participate in so the whole experience was mind blowing to me.
I had no idea at the time but this was the initial push down a very slippery slope. After seeing all the cars out there and making some awesome new friends, I was hooked.

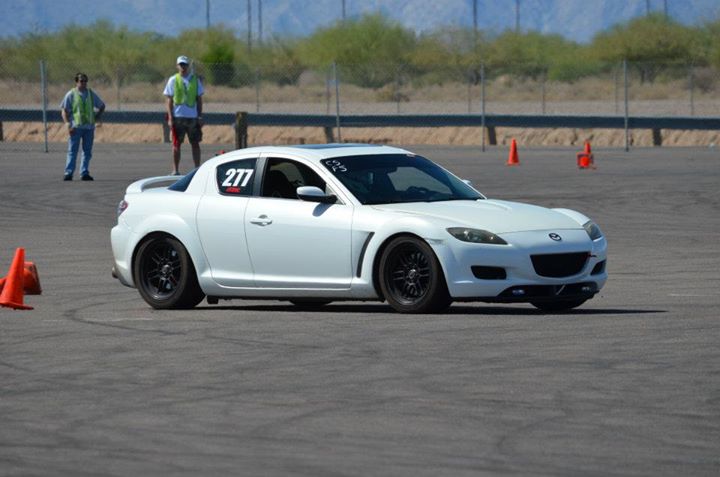
Here's me out at Firebird again on their skidpad participating in my first SCCA Solo autocross event. It was fun but left me craving more track time (runs were only about 45 seconds), the amount of seat time compared to a normal road course event is almost nothing, but it was fun and good practice. I only participated in one more autocross a bit later after this and then went to driving pretty much only road course.

The mods on the car when I got it were:
Ricer autozone fog lights
19x8.5 front and 19x9.5 rear XIX X05 wheels that were painted gloss black on the lips and candy apple red metallic faces.
Shitty chinese tires.
K&N Typhoon V2 Hot Air Intake
Eibach Lowering Springs
Blown out original shocks
Mad tyte vortex generators
Here's a picture of me driving the car for the first time. Was my first time driving a manual car as well but I picked it up quickly. Never stalled it and to this day the original clutch and trans is still fine to my surprise.
Fast forward a couple months to August 2011. I had done some basic things like an Axial Flow short shifter and JDM clear corners. Here I am at my first NASA Arizona event at Firebird International Raceway West Track. My new friends that I had just made in the Arizona Mazda Club kept insisting that I come out to a track event, so I signed up and was pumped. I had never really known that road course type events even existed at an amateur level that anybody could participate in so the whole experience was mind blowing to me.
I had no idea at the time but this was the initial push down a very slippery slope. After seeing all the cars out there and making some awesome new friends, I was hooked.
Here's me out at Firebird again on their skidpad participating in my first SCCA Solo autocross event. It was fun but left me craving more track time (runs were only about 45 seconds), the amount of seat time compared to a normal road course event is almost nothing, but it was fun and good practice. I only participated in one more autocross a bit later after this and then went to driving pretty much only road course.
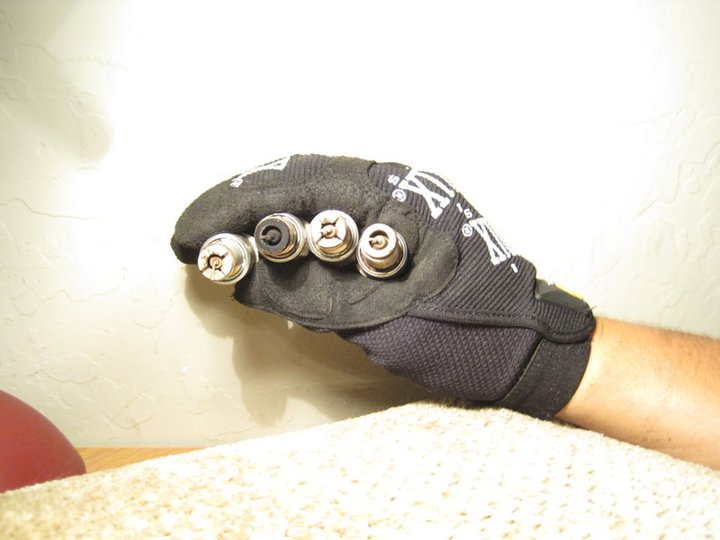
Some of the first modifications to the car were BHR Ignition Kit (Yukon D585 Coils), New Plugs, and Agency Power Dual Resonated Midpipe.
One of the stock coils was going bad and causing the car to run a bit rough, but since I'm super dooper smart now from reading all these awesome threads on 8Club, I knew that coils plugs and wires needed to be replaced since the previous owner had no idea when they were last serviced.
I also got the midpipe because I was scared of the life expectancy of the catalytic converter since the ignition had been in less than stellar shape. I pulled it off and put it aside to use for emissions just in case, and thankfully it looked like it was in OK shape.
Plugs that I pulled out with unknown mileage:
Next up was the first "big" round of upgrades.
The tires and brake pads on the car barely made it through my first track event... the chinese tires were chunking to pieces and the brake pads were pretty much down to the backing plates. Also the blown shocks and slamming off the bump stops the whole time and body roll needed to be addressed as well.
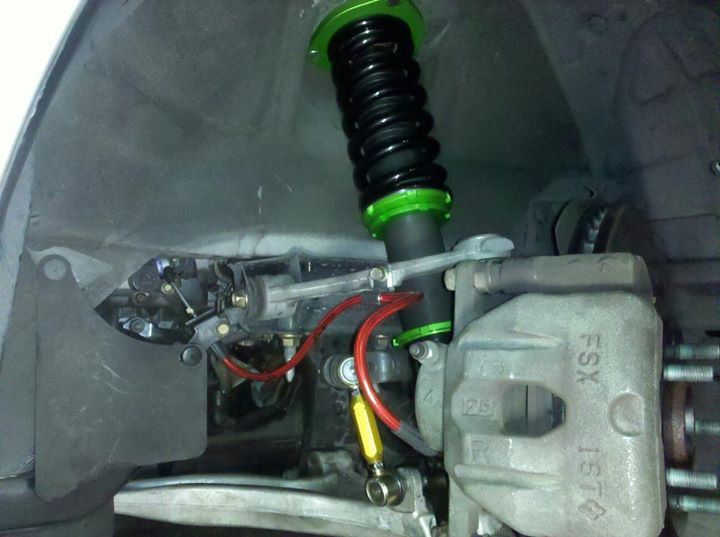
I purchased some Powertrix Coilovers that orignally came with a requested 10k/7k spring rate, I love these things as a super budget friendly coilover setup that is track capable, but in the future will be considering switching out to something that is more of a "track only" setup.
I also purchased Progress Tech sway bars and whiteline spherical endlinks from a local 8Club forum member and installed those after the brakes and coilovers. Awesome upgrade.
And for a track set of wheels/tires I got some 17x9" +45 Enkei RPF1's with Dunlop Direzza Star Specs with almost all the tread left from another for sale thread in the 8Club classifieds.
Pictured:
Powertrix Coilovers (10k/7k Spring Rates)
Hawk HP+ Brake Pads
O'Reilly's Brand Blank Rotors
Agency Power Stainless Braided Clutch and Brake lines
ATE Super Blue Brake Fluid
You'll soon learn that I am excellent at rationalizing additional upgrades with the "While I'm doing this, I might as well do this too" line of thinking.

Installed:
New ride height that was initially too low:
Now it was time to hit the track. I had advanced quickly from HPDE1 to HPDE2 in my first event, then the next event I advanced again from HPDE2 to HPDE3. I was learning quickly and had great instruction on track from close friends that helped me a lot.
This is my second and last official autocross event. Fun stuff but just not for me, always left me starving for more seat time. And it didn't help that my favorite part of driving on track is sketchy high speed sweepers. At our local autocross I was never able to get out of 2nd gear.
The tires and brake pads on the car barely made it through my first track event... the chinese tires were chunking to pieces and the brake pads were pretty much down to the backing plates. Also the blown shocks and slamming off the bump stops the whole time and body roll needed to be addressed as well.
I purchased some Powertrix Coilovers that orignally came with a requested 10k/7k spring rate, I love these things as a super budget friendly coilover setup that is track capable, but in the future will be considering switching out to something that is more of a "track only" setup.
I also purchased Progress Tech sway bars and whiteline spherical endlinks from a local 8Club forum member and installed those after the brakes and coilovers. Awesome upgrade.
And for a track set of wheels/tires I got some 17x9" +45 Enkei RPF1's with Dunlop Direzza Star Specs with almost all the tread left from another for sale thread in the 8Club classifieds.
Pictured:
Powertrix Coilovers (10k/7k Spring Rates)
Hawk HP+ Brake Pads
O'Reilly's Brand Blank Rotors
Agency Power Stainless Braided Clutch and Brake lines
ATE Super Blue Brake Fluid
You'll soon learn that I am excellent at rationalizing additional upgrades with the "While I'm doing this, I might as well do this too" line of thinking.
Installed:
New ride height that was initially too low:
Now it was time to hit the track. I had advanced quickly from HPDE1 to HPDE2 in my first event, then the next event I advanced again from HPDE2 to HPDE3. I was learning quickly and had great instruction on track from close friends that helped me a lot.
This is my second and last official autocross event. Fun stuff but just not for me, always left me starving for more seat time. And it didn't help that my favorite part of driving on track is sketchy high speed sweepers. At our local autocross I was never able to get out of 2nd gear.
Started modding the car a tiny bit more, and started getting more serious about the track. My good friend Todd (Flashwing on 8Club) gave me his old Espelir JGT500 catback exhaust and I did a couple other small odds and ends.
So after this I went in to get a Dyno to get classed for the UMS Tuning Time Attack Series. Power mods were:
BHR Ignition
K&N Typhoon V2 Hot Air Intake
Agency Power Midpipe
Espilir Catback
Here is the dyno sheet, very disappointing to say the least.

But oh well, I was having a good time. Next steps were taking some weight out and of course adding stickers to try and make up for that lost horsepower.
On the way to Sevenstock 13 I believe it was:
Firebawlz back at Firebird West Course again:
Putting on some new 11k/8k springs that Powertrix hooked me up with when I was able to meet Charles at Sevenstock:
Next tried to regain some power...
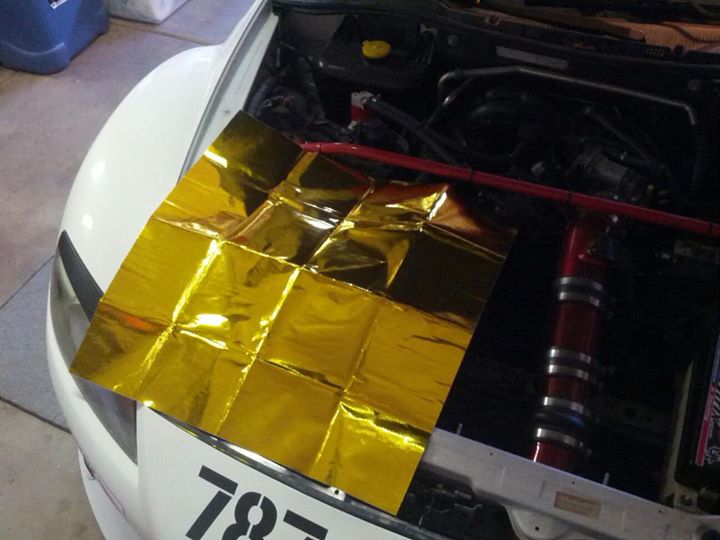
Went to BHR Midpipe, AEM Intake wrapped in DEI Gold Reflect (which actually dropped intake temps 6 degrees closer to ambient. Intake air is now only 5 degrees above ambient when moving instead of 11), and got an Accessport with tuning from Jeff at Mazdamaniac.
Also, cheap e-bay catch can just in case.
Brake master cylinder brace (really helps with pedal feel while threshold braking).

So after this I went in to get a Dyno to get classed for the UMS Tuning Time Attack Series. Power mods were:
BHR Ignition
K&N Typhoon V2 Hot Air Intake
Agency Power Midpipe
Espilir Catback
Here is the dyno sheet, very disappointing to say the least.
But oh well, I was having a good time. Next steps were taking some weight out and of course adding stickers to try and make up for that lost horsepower.
On the way to Sevenstock 13 I believe it was:
Firebawlz back at Firebird West Course again:
Putting on some new 11k/8k springs that Powertrix hooked me up with when I was able to meet Charles at Sevenstock:
Next tried to regain some power...
Went to BHR Midpipe, AEM Intake wrapped in DEI Gold Reflect (which actually dropped intake temps 6 degrees closer to ambient. Intake air is now only 5 degrees above ambient when moving instead of 11), and got an Accessport with tuning from Jeff at Mazdamaniac.
Also, cheap e-bay catch can just in case.
Brake master cylinder brace (really helps with pedal feel while threshold braking).
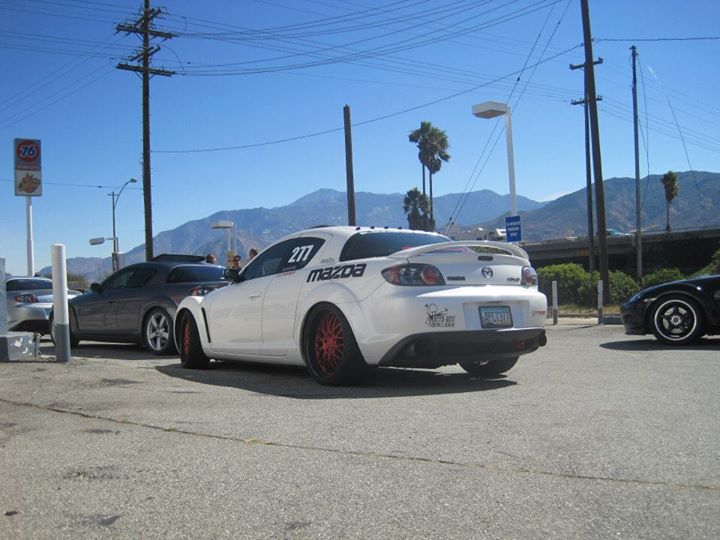
I then sold the hideous red wheels that weighed 23508972385907 pounds, and got some stockers off of an Evo 8 that actually fit pretty decent. 17x8 +38 and even the hub bore matched the RX-8. Good wheels for daily driving and going to from the track.
Also more stickers because I needed more HP.
Then comes the splitter build. This worked way better than I thought it would but over time the Arizona sun has taken its toll on the ABS plastic that I used.
Car apart to measure up and make a splitter.
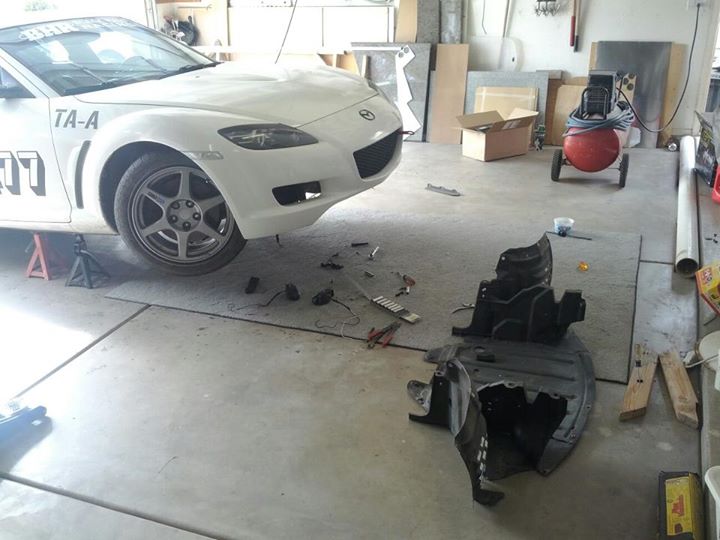
Rough shape cut out of the splitter. It also replaces the undertray. Used 1/4" ABS plastic that I found sitting in my garage.

Just sitting in place being held up by some wood blocks.
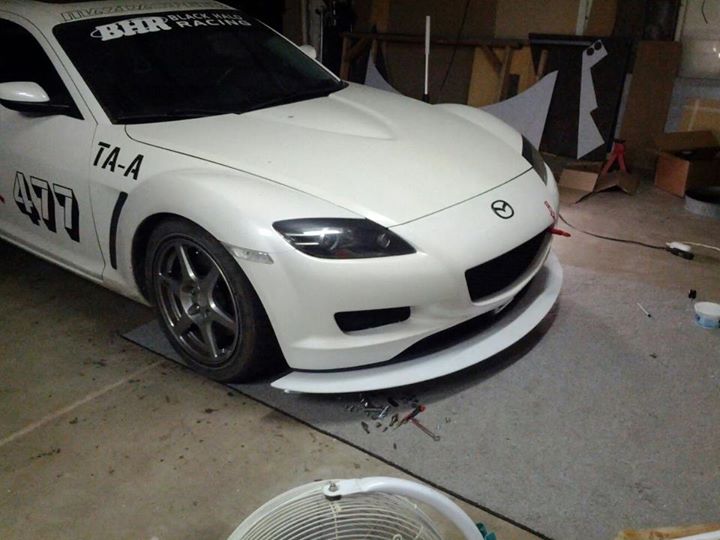
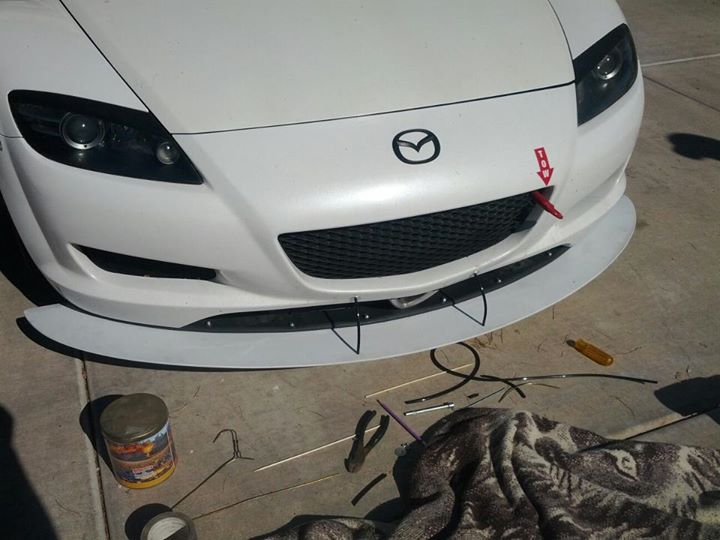
Started working on supports. The splitter is attached to the lower bumper lip with bolts, and then I used threaded rod and fender washers/nuts to secure it. I bent the threaded rod around a coffee can and then covered them with plastic sheathing.
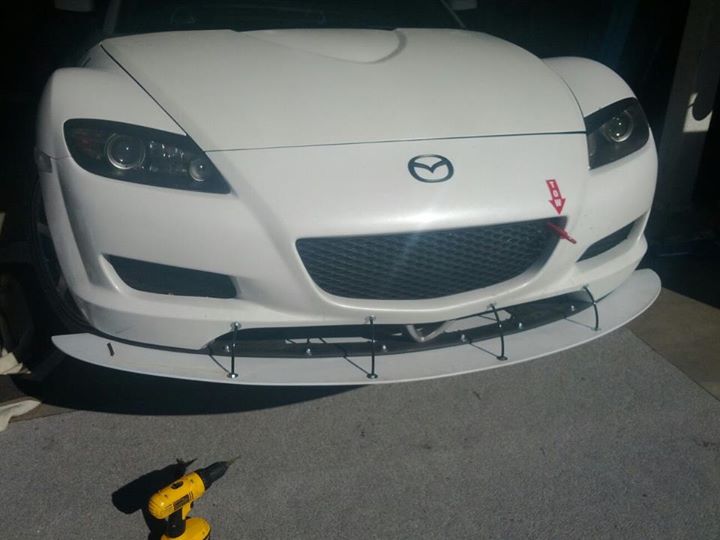
Done.

As you can see over time it has gotten warped. One thing on my to do list is to build a new one out of Alumalite and to also make it bigger.
Also, the first time I had this out was actually at Arroyo Seco. Everyone made bets as to how long until it ripped off the car since it is only attached to the bumper and to the two undertray bolts towards the back of the splitter. I even had a big off at almost 70MPH that day and mowed down a considerable amount of shrubbery. No apparent damage LOL. It has taken some pretty serious impacts and offroad excursions and has seen speeds up to about 130MPH and it has never shown any signs of failure.
The next revision of the splitter will be supported by the front crash bar though since it should be producing much more downforce. This one is 4.5" beyond the bumper lip and the new one will be about 8" beyond the bumper lip.
Also more stickers because I needed more HP.
Then comes the splitter build. This worked way better than I thought it would but over time the Arizona sun has taken its toll on the ABS plastic that I used.
Car apart to measure up and make a splitter.
Rough shape cut out of the splitter. It also replaces the undertray. Used 1/4" ABS plastic that I found sitting in my garage.
Just sitting in place being held up by some wood blocks.
Started working on supports. The splitter is attached to the lower bumper lip with bolts, and then I used threaded rod and fender washers/nuts to secure it. I bent the threaded rod around a coffee can and then covered them with plastic sheathing.
Done.
As you can see over time it has gotten warped. One thing on my to do list is to build a new one out of Alumalite and to also make it bigger.
Also, the first time I had this out was actually at Arroyo Seco. Everyone made bets as to how long until it ripped off the car since it is only attached to the bumper and to the two undertray bolts towards the back of the splitter. I even had a big off at almost 70MPH that day and mowed down a considerable amount of shrubbery. No apparent damage LOL. It has taken some pretty serious impacts and offroad excursions and has seen speeds up to about 130MPH and it has never shown any signs of failure.
The next revision of the splitter will be supported by the front crash bar though since it should be producing much more downforce. This one is 4.5" beyond the bumper lip and the new one will be about 8" beyond the bumper lip.
Trending Topics
At this point for the sake of keeping some sense of time it's about the first or second quarter of 2012.
So after I switched to the BHR midpipe it changed the angle of my exhaust tips a little bit, I figured it was fine since BHR fitment usually has an excellent reputation but after my first track event with it on this happened and I have just left them off ever since.
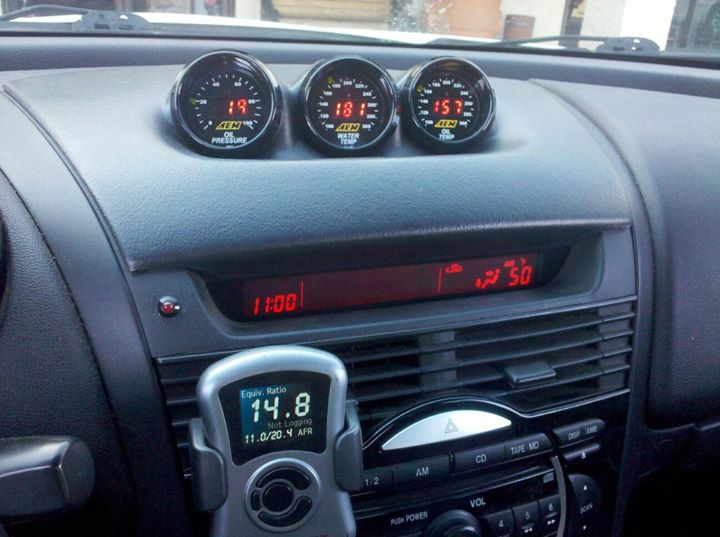
Added some gauges. AEM digital. These are okay gauges, I wouldn't buy them again. The LED indicators around the ring of the gauge that sweep as the number changes are going out. There is 2 or 3 of them burnt out in each gauge now. I don't know if it's the Arizona sun doing its thing or what the hell the problem is but oh well. It still displays the numbers just fine. I'll use these until I eventually just use a RacePak dash or something similar.
Also deleted the air pump for a little weight reduction.
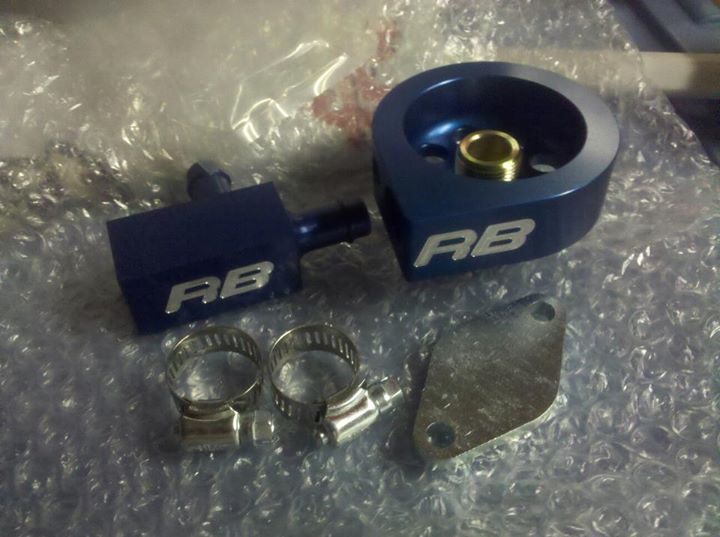
Racing Beat adapters:
AEM Gauges and Lotek gauge pod.
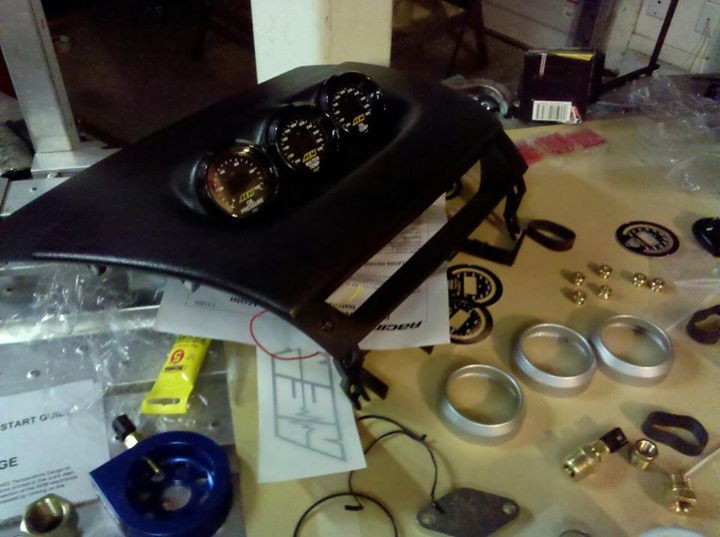
Installed:
After this there was a local dyno day coming up. Seafoamed the car for good measure the week before.
Mods for this dyno:
AEM Cold Air Intake
Agency Power Pulley
BHR Ignition
Throttle body coolant bypass
BHR Midpipe
Espelir Catback
Accessport and tune by Mazdamaniac
It dyno'd 1HP higher and 5TQ higher... I started to suspect the APV's were not opening (for those not familiar with RX-8's, the motor has 6 intake runners and the APV - Auxiliary Port Valves are supposed to open at 7250RPM which open up the 5th and 6th intake runners to the motor) and that maybe the engine was not in the best of shape (losing compression, classic rotary!) even after the new round of mods. I know these cars don't really stand to gain any power N/A but ONE HORSEPOWER? C'mon...
Started planning for a preventative rebuild before I lost the motor. Also at the time it had begun leaking oil but I couldn't tell from where.
So after I switched to the BHR midpipe it changed the angle of my exhaust tips a little bit, I figured it was fine since BHR fitment usually has an excellent reputation but after my first track event with it on this happened and I have just left them off ever since.
Added some gauges. AEM digital. These are okay gauges, I wouldn't buy them again. The LED indicators around the ring of the gauge that sweep as the number changes are going out. There is 2 or 3 of them burnt out in each gauge now. I don't know if it's the Arizona sun doing its thing or what the hell the problem is but oh well. It still displays the numbers just fine. I'll use these until I eventually just use a RacePak dash or something similar.
Also deleted the air pump for a little weight reduction.
Racing Beat adapters:
AEM Gauges and Lotek gauge pod.
Installed:
After this there was a local dyno day coming up. Seafoamed the car for good measure the week before.
Mods for this dyno:
AEM Cold Air Intake
Agency Power Pulley
BHR Ignition
Throttle body coolant bypass
BHR Midpipe
Espelir Catback
Accessport and tune by Mazdamaniac
It dyno'd 1HP higher and 5TQ higher... I started to suspect the APV's were not opening (for those not familiar with RX-8's, the motor has 6 intake runners and the APV - Auxiliary Port Valves are supposed to open at 7250RPM which open up the 5th and 6th intake runners to the motor) and that maybe the engine was not in the best of shape (losing compression, classic rotary!) even after the new round of mods. I know these cars don't really stand to gain any power N/A but ONE HORSEPOWER? C'mon...
Started planning for a preventative rebuild before I lost the motor. Also at the time it had begun leaking oil but I couldn't tell from where.
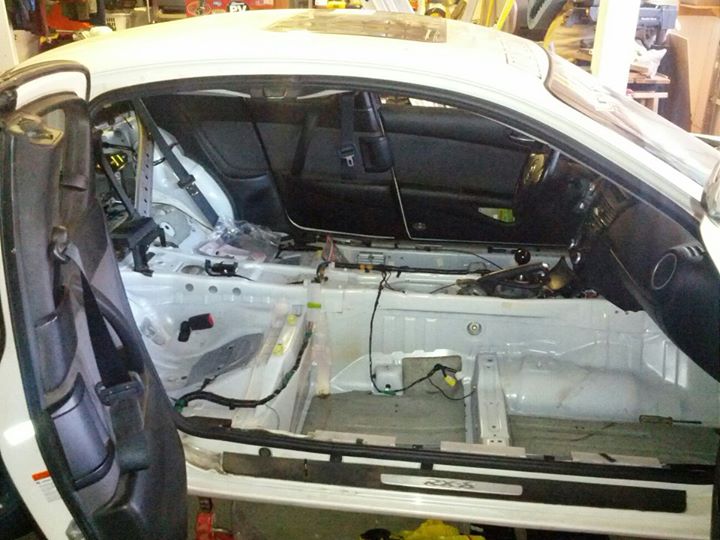
After figuring out that power mods were pretty much a total waste of money, the only way I was going to make this thing faster was to start taking weight out... and this is where the slippery slope got REALLY steep. I was just going to take out the sound dampening stereo and a couple other things but you can see that I got carried away, and before I knew it there wasn't a whole lot left in the car.
This was basically the turning point where the realization set in that I will pretty much never be able to sell this car and that it would one day be a dedicated track only vehicle.
Race Car Funds!
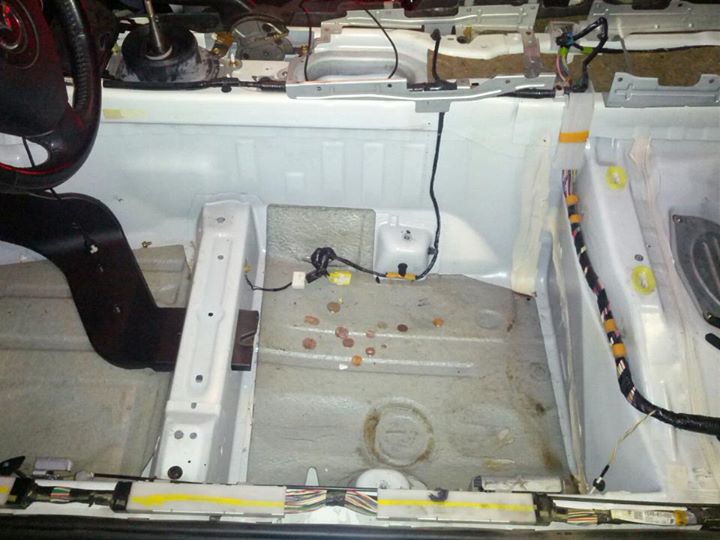
Getting a little bare in there...
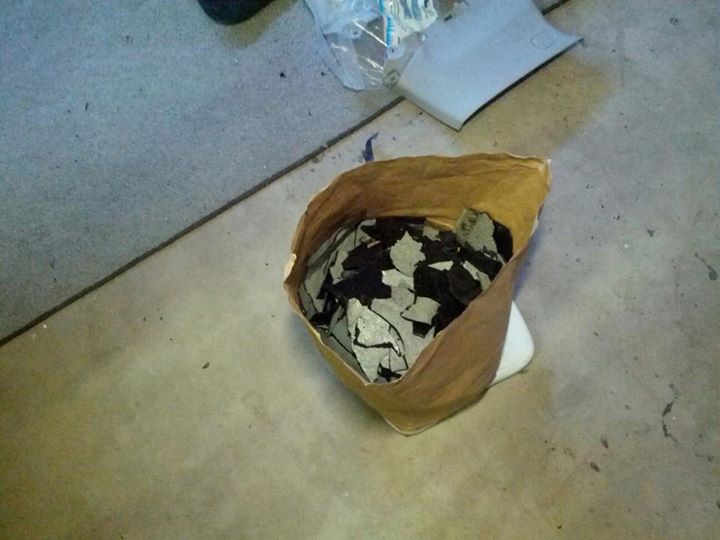
Removing sound deadening with dry ice. The best way to do this is to crush up the dried ice in a thick NON SEALED plastic bag and then spread it over the area. The smaller the chunks the better.
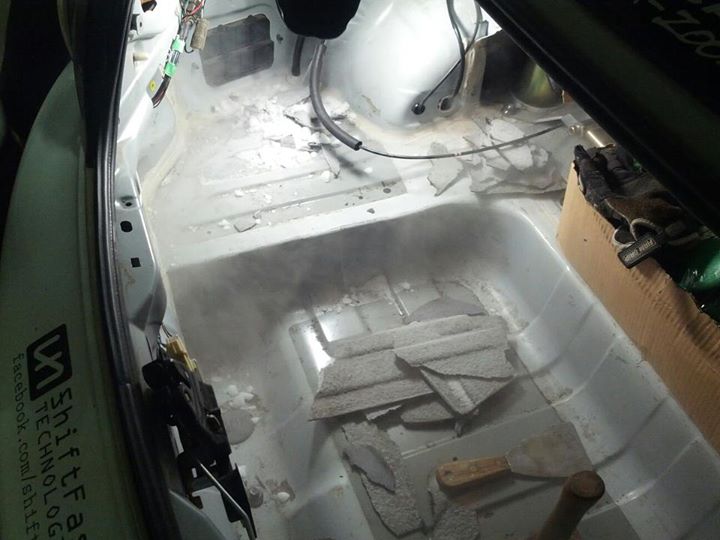
18lbs of sound deadening removed.
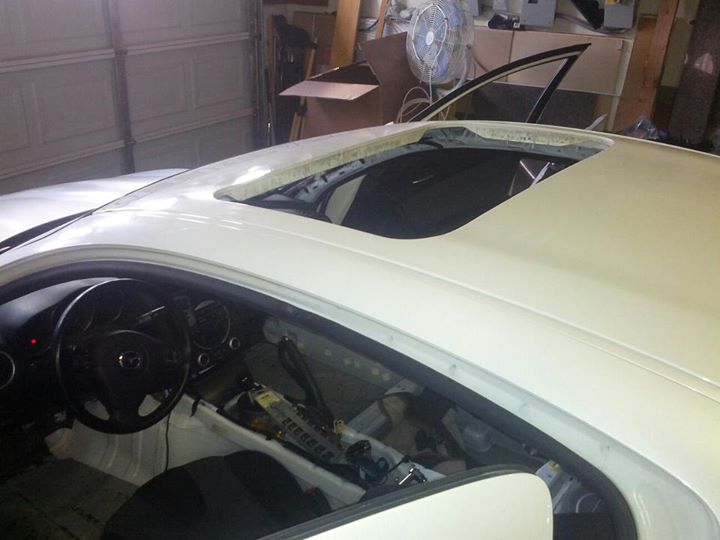
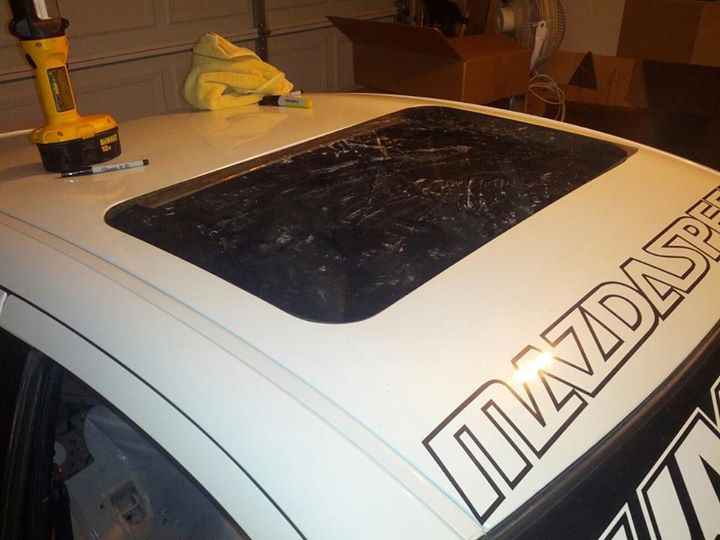
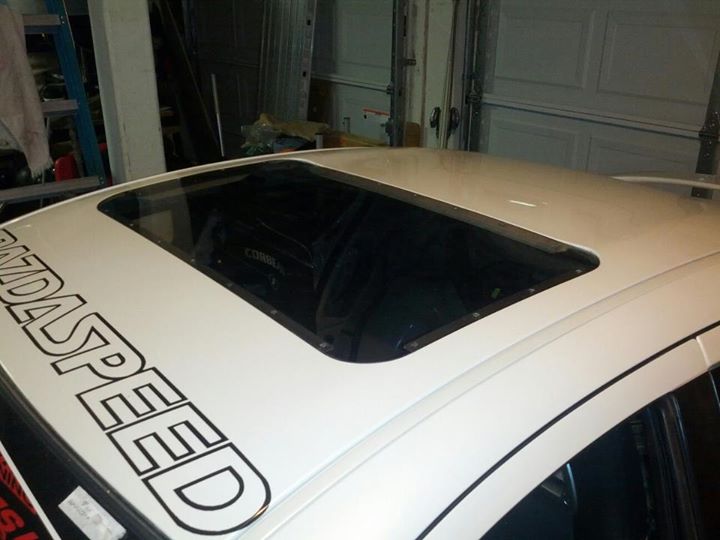
Sun roof unit was heavy, so I took it out and replaced it with a plexiglass insert. I cut it out of some smoked plexi that I had laying around in the garage and secured it with aluminum angle irons, flat head machine screws that I countersunk and then sealed it up with some flowable silicone.
This was basically the turning point where the realization set in that I will pretty much never be able to sell this car and that it would one day be a dedicated track only vehicle.
Race Car Funds!
Getting a little bare in there...
Removing sound deadening with dry ice. The best way to do this is to crush up the dried ice in a thick NON SEALED plastic bag and then spread it over the area. The smaller the chunks the better.
18lbs of sound deadening removed.
Sun roof unit was heavy, so I took it out and replaced it with a plexiglass insert. I cut it out of some smoked plexi that I had laying around in the garage and secured it with aluminum angle irons, flat head machine screws that I countersunk and then sealed it up with some flowable silicone.
So at this point, probably around the middle of 2012, my driving is starting to improve very rapidly. I was now driving in the advanced group, HPDE4, and started participating in the UMS Tuning Time Attack Series, the class in which I was in is limited to 15.0lbs/HP power to weight ratio or greater, DOT approved tires and those are just about the only major constraining rules.
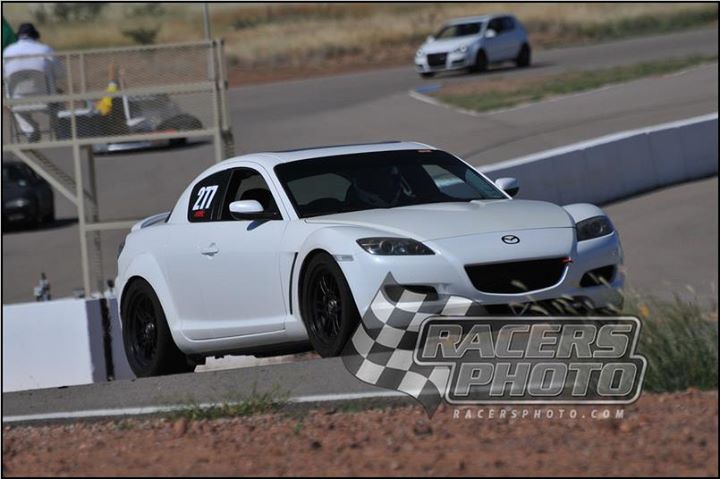
Track event at Firebird International Raceway Main Course:
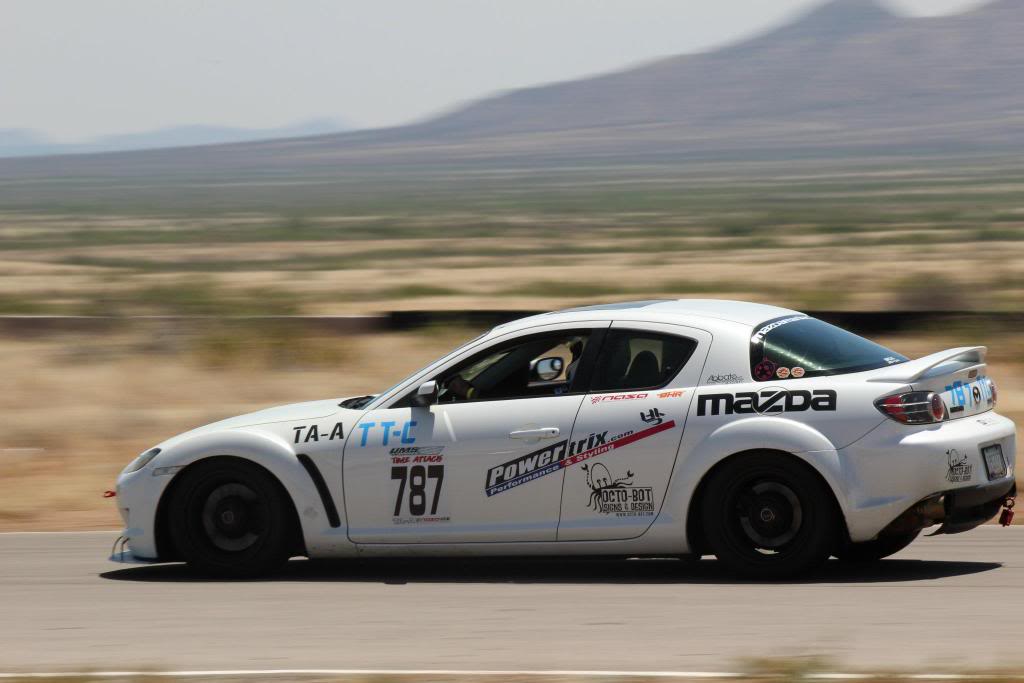
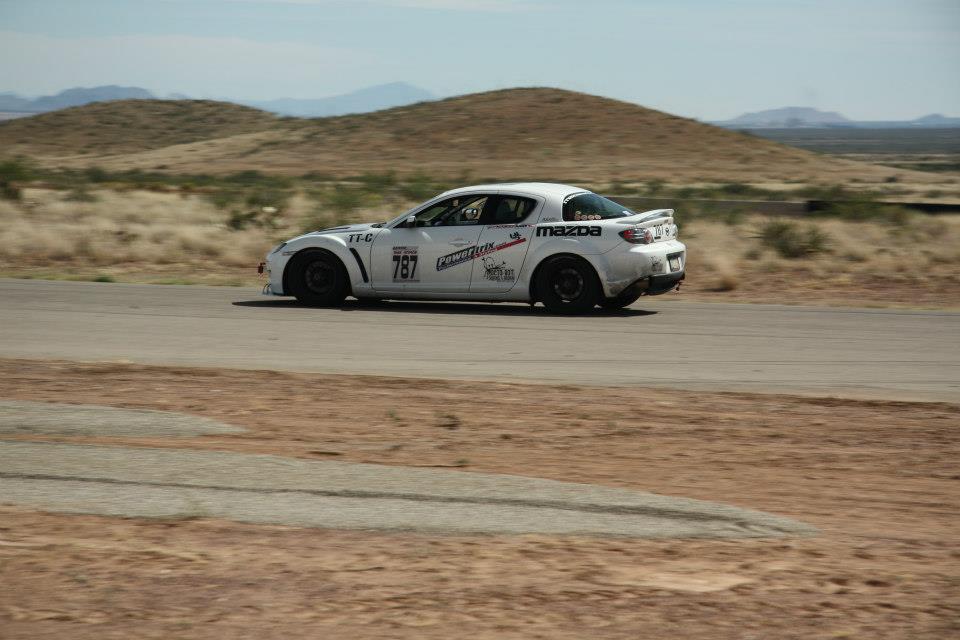
I also moved up into NASA Time Trials after earning my TT License, and was competing in TT-C. There was only one other competitor in TT-C the weekend that I "tried out" during the last session, but I edged him out by a couple tenths of a second and since it was a new configuration for our region, I set a track record. The track was Inde Motorsports Ranch in Wilcox, AZ.
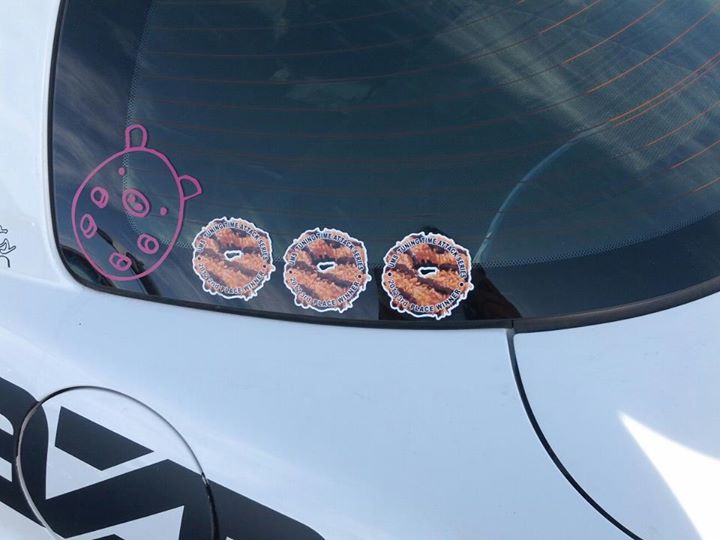
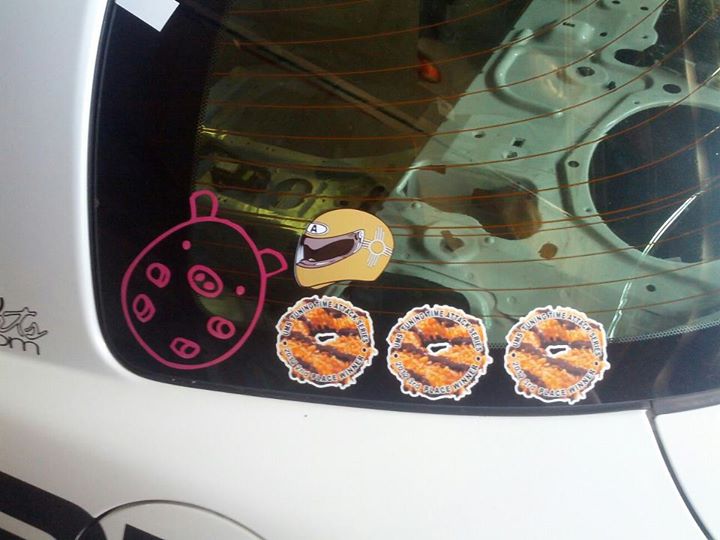
And hey, look at that, I was starting to get some podium finishes in my Time Attack Class. When you podium you get a "cookie" as the prize lol. The pink piggy is unrelated if anyone was wondering.
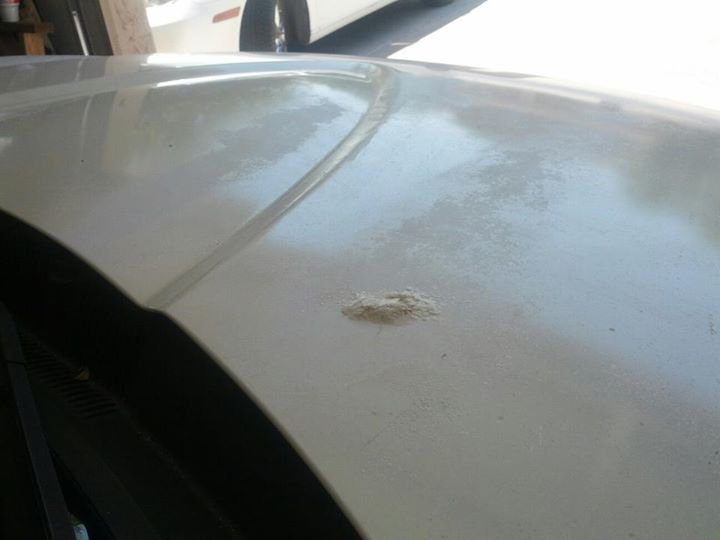
It was smoldering hot outside and I was seeing super high temps on track. Coolant was always 235+ and oil was 250+. I decided some hood vents could help and was not afraid of cutting up my stock hood since the paint was in terrible shape. The clear was flaking off and the color had started yellowing, I suspect the car had some sort of minor damage to the hood and the previous owner bought a new one and had it sprayed on the cheap since there are no accidents on the cars record.
Flaky Crap:
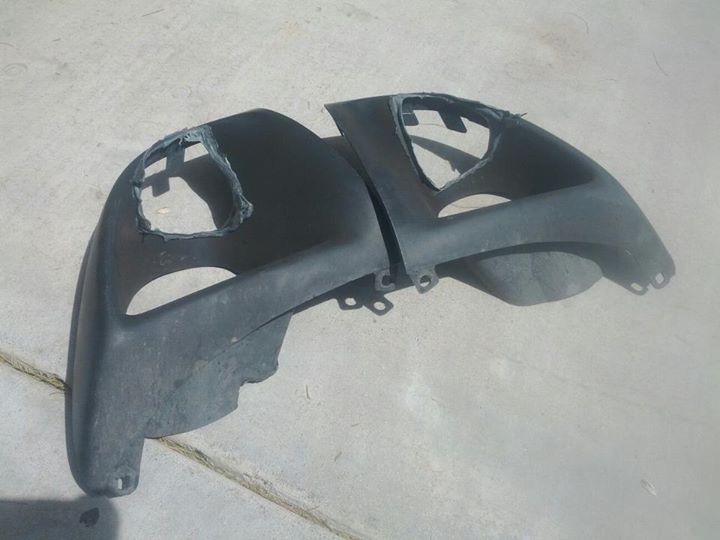
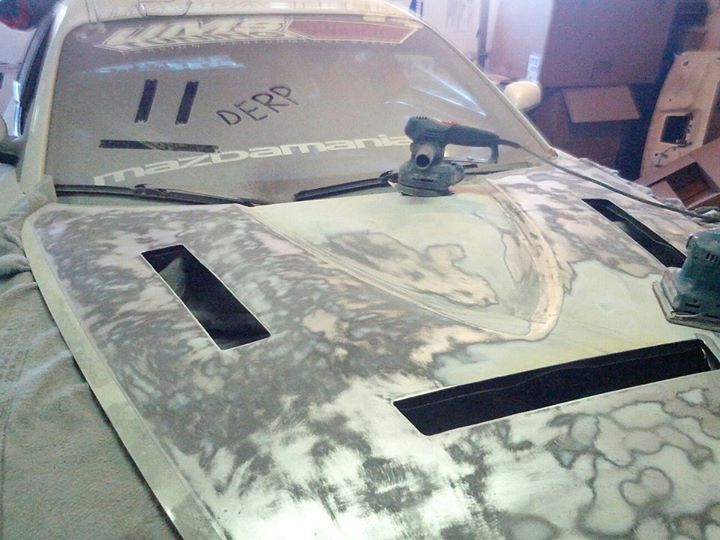
So I sanded everything down and ordered a louver kit from Gen Right Offroad, these are normally meant for Jeeps but they are very versatile, just cut and rivet them on. I was afraid of the hood losing structural integrity and when I cut the holes it got really flimsy but as soon as I riveted the louvers on it was just as strong as stock once again.
Traced and ready to cut:
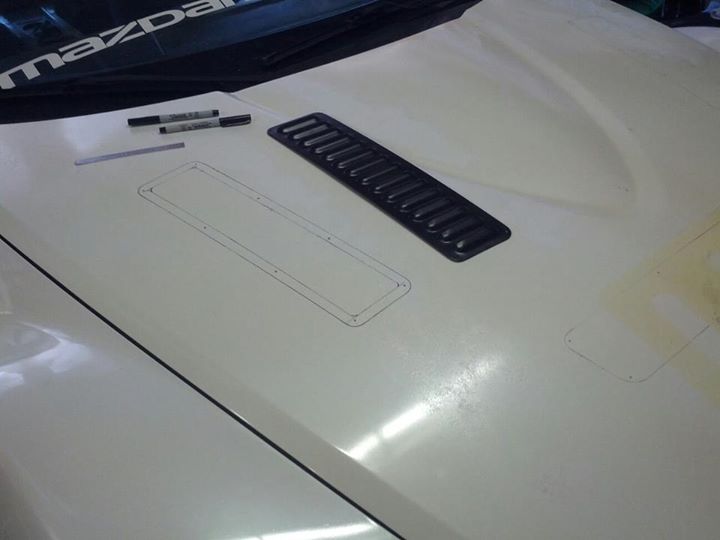
Holes cut and sanding off all the crappy paint:
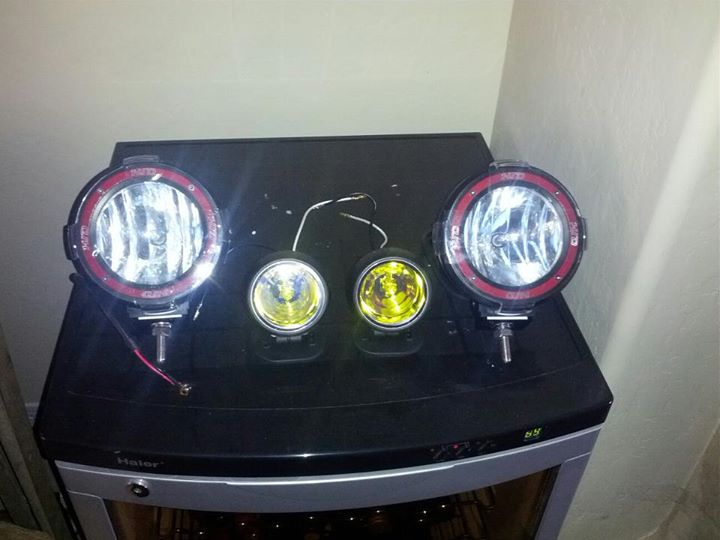
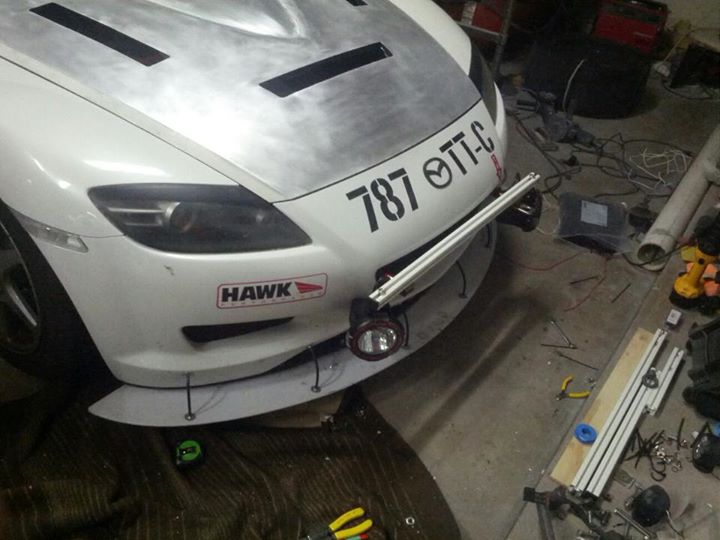
I also fabbed up an HID light rig that attaches to the tow hooks for an upcoming night event and also added some cheapo foglights since I had taken the original Walmart specials out that the previous owner had fitted. The track I was heading to (Arroyo Seco Raceway in Deming, NM) is in the middle of nowhere, and only has a couple light bulbs near start finish. The rest is absolutely pitch black. More about this later.
Track event at Firebird International Raceway Main Course:
I also moved up into NASA Time Trials after earning my TT License, and was competing in TT-C. There was only one other competitor in TT-C the weekend that I "tried out" during the last session, but I edged him out by a couple tenths of a second and since it was a new configuration for our region, I set a track record. The track was Inde Motorsports Ranch in Wilcox, AZ.
And hey, look at that, I was starting to get some podium finishes in my Time Attack Class. When you podium you get a "cookie" as the prize lol. The pink piggy is unrelated if anyone was wondering.
It was smoldering hot outside and I was seeing super high temps on track. Coolant was always 235+ and oil was 250+. I decided some hood vents could help and was not afraid of cutting up my stock hood since the paint was in terrible shape. The clear was flaking off and the color had started yellowing, I suspect the car had some sort of minor damage to the hood and the previous owner bought a new one and had it sprayed on the cheap since there are no accidents on the cars record.
Flaky Crap:
So I sanded everything down and ordered a louver kit from Gen Right Offroad, these are normally meant for Jeeps but they are very versatile, just cut and rivet them on. I was afraid of the hood losing structural integrity and when I cut the holes it got really flimsy but as soon as I riveted the louvers on it was just as strong as stock once again.
Traced and ready to cut:
Holes cut and sanding off all the crappy paint:
I also fabbed up an HID light rig that attaches to the tow hooks for an upcoming night event and also added some cheapo foglights since I had taken the original Walmart specials out that the previous owner had fitted. The track I was heading to (Arroyo Seco Raceway in Deming, NM) is in the middle of nowhere, and only has a couple light bulbs near start finish. The rest is absolutely pitch black. More about this later.
So, new mods are done. Meet up with some buddies and it's off to Arroyo Seco Raceway (ASR) in Deming, NM. A 5 hour drive from Phoenix, AZ.
I'm going there to participate in the Night Attack event which is part of the ASR Super Lap Series of time attack events that are held there. The ruleset is the same as the UMS Tuning Time Attack series I am already participating in and the car was sitting at 17.8lbs/hp which was a little outgunned (the limit being 15.0lbs/hp) but I was hoping my extra lighting would allow me to go just as fast during the night as I was during the day.
So I loaded up my wheels and my buddy's wheels:
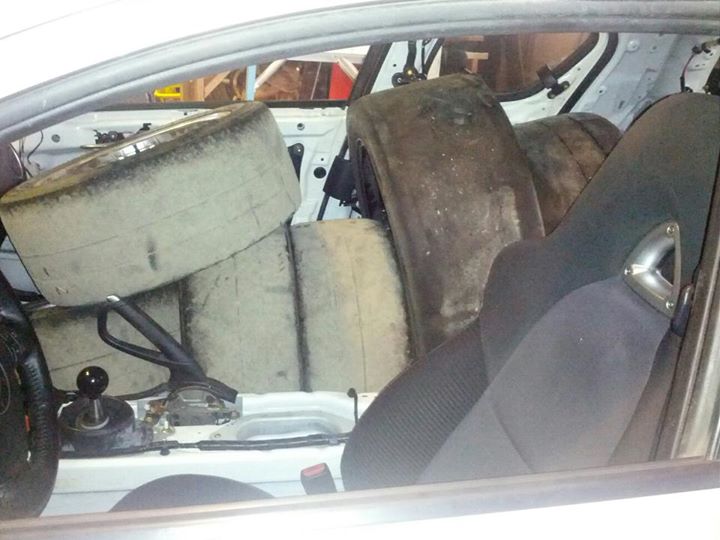
Met up with my buddies for the 5 hour drive:
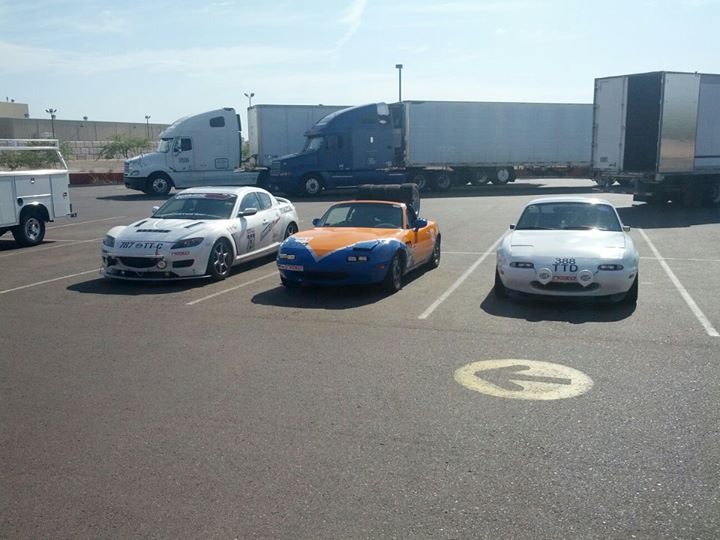
And then promptly got stuck in grid lock traffic IN THE MIDDLE OF NOWHERE, adding about 2 hours onto our already miserable drive time while we all sat cooking in race cars.
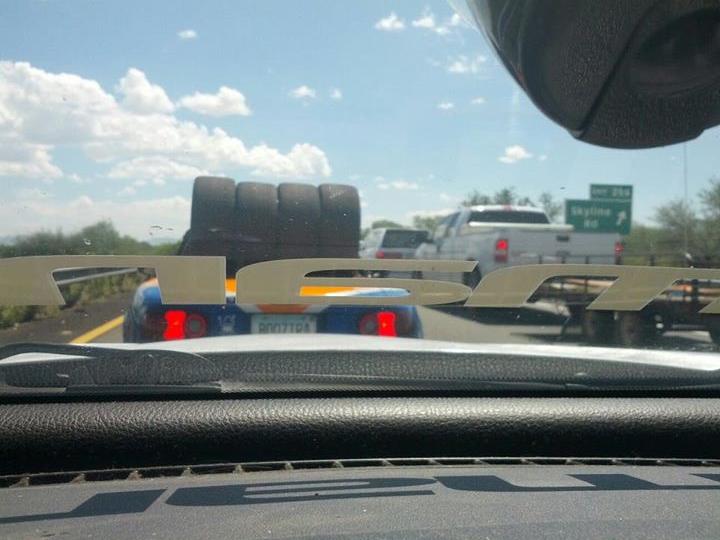
I finally made it out there and this is where the picture that has been in my (RX8Club) signature for awhile was taken, during one of the practice sessions right as the sun was setting.

Now the fun part was coming. To give you guys an idea of how unbelievably dark it was out there, here is a video of my friend Tim who is one of the officials of the ASR Super Lap series and knows the track like the back of his hand. He has a WICKED fast Evo 9 that he dominates unlimited class with.
Also keep in mind, that the traffic on that highway is moving at 80MPH and he's blowing past it like it's standing still.
If you are interested in seeing another awesome racecar build thread, you can find the story of "Project Grey Bush" here: CrucesStreets.com - View topic - Kidloco's project Grey Bush
To my surprise, the lights paid off. Driving that track in the dead of night was still absolutely terrifying and I went almost 2 seconds slower than during the day, but the guys that were beating me that couldn't see into the corners very well at night slowed down a bit more than I did and I barely scraped by with a win, the competition was close.
This was my first win at a Time Attack competition, and instead of just a sticker, I got a sticker AND A SWEET MUG!

Yeah buddy!
I'm going there to participate in the Night Attack event which is part of the ASR Super Lap Series of time attack events that are held there. The ruleset is the same as the UMS Tuning Time Attack series I am already participating in and the car was sitting at 17.8lbs/hp which was a little outgunned (the limit being 15.0lbs/hp) but I was hoping my extra lighting would allow me to go just as fast during the night as I was during the day.
So I loaded up my wheels and my buddy's wheels:
Met up with my buddies for the 5 hour drive:
And then promptly got stuck in grid lock traffic IN THE MIDDLE OF NOWHERE, adding about 2 hours onto our already miserable drive time while we all sat cooking in race cars.
I finally made it out there and this is where the picture that has been in my (RX8Club) signature for awhile was taken, during one of the practice sessions right as the sun was setting.
Now the fun part was coming. To give you guys an idea of how unbelievably dark it was out there, here is a video of my friend Tim who is one of the officials of the ASR Super Lap series and knows the track like the back of his hand. He has a WICKED fast Evo 9 that he dominates unlimited class with.
Also keep in mind, that the traffic on that highway is moving at 80MPH and he's blowing past it like it's standing still.
If you are interested in seeing another awesome racecar build thread, you can find the story of "Project Grey Bush" here: CrucesStreets.com - View topic - Kidloco's project Grey Bush
To my surprise, the lights paid off. Driving that track in the dead of night was still absolutely terrifying and I went almost 2 seconds slower than during the day, but the guys that were beating me that couldn't see into the corners very well at night slowed down a bit more than I did and I barely scraped by with a win, the competition was close.
This was my first win at a Time Attack competition, and instead of just a sticker, I got a sticker AND A SWEET MUG!
Yeah buddy!
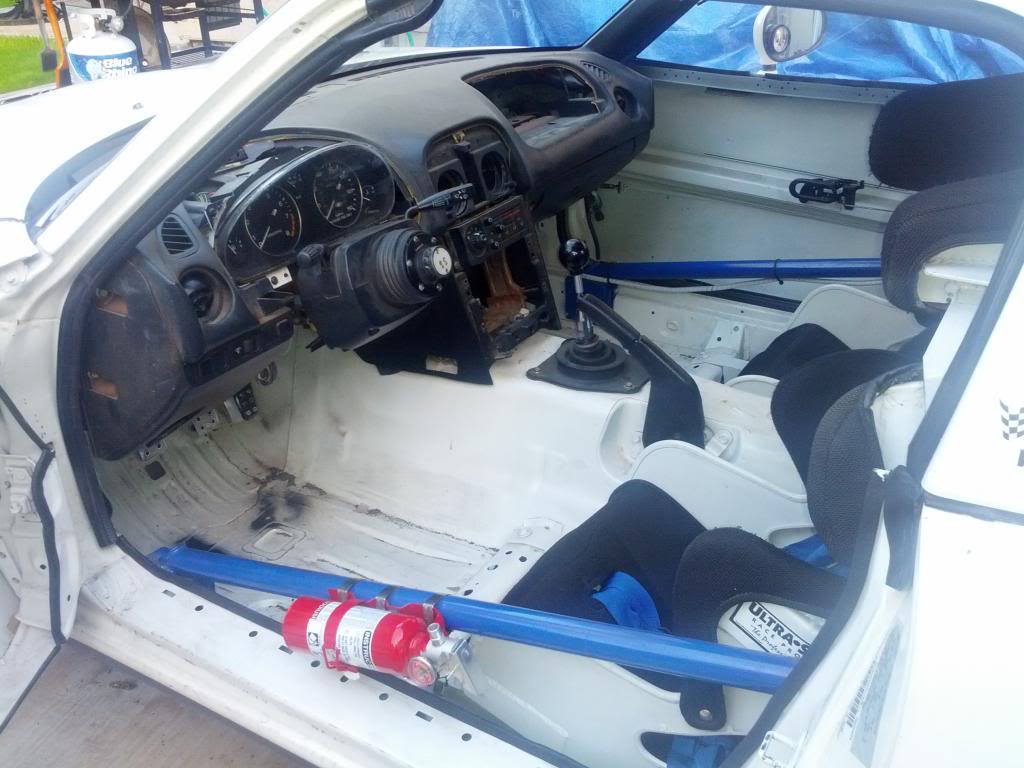
So after Arroyo Seco I had the car down for a bit for some safety and driver comfort upgrades since I was starting to get faster and faster. I was absolutely sick of practically falling out the stock seat now that I was on R compound tires that produce considerable lateral grip. Also was sick of banging my head off the roof all the time since I'm so damn tall.
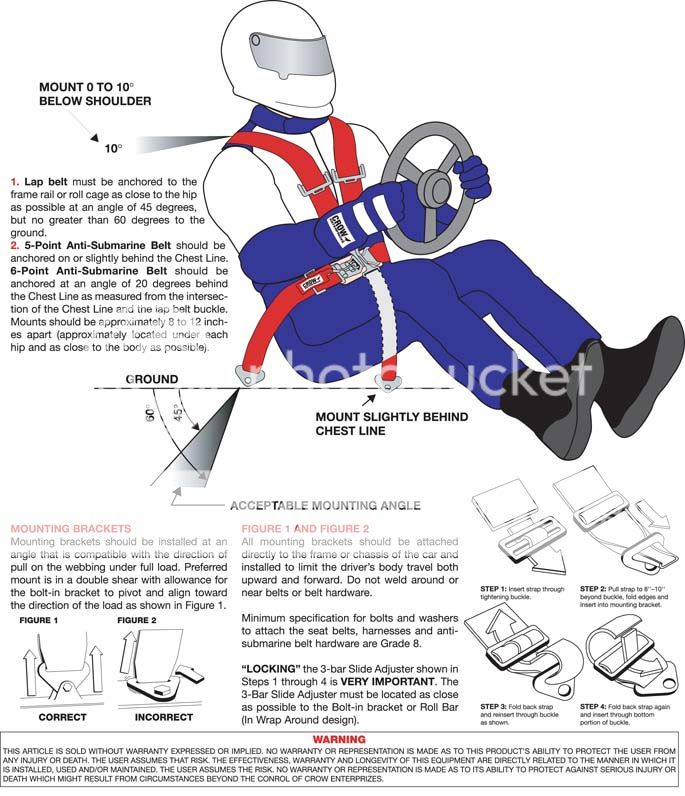
In order to be safe with fixed back seats, I needed to have a roll bar since in the event of a rollover, the stock seats can recline backwards but in a fixed back you can be crushed, as well as needing a place to attach a 6 point harness. (If you're considering a 5 point, buy a 6 point instead and your family jewels will thank you later.)
Now, I always get asked questions about harnesses, how they should be mounted, what kind to get, and I also see a ton of extremely unsafe setups that are being used with organizations that don't care about safety and have laughable "tech inspections". Which brings me to my next segment:
Safety Tips for Harnesses and Harness Mounting:
DO NOT USE A 4 POINT HARNESS UNLESS IT HAS AN ANTI-SUBMARINE FEATURE. The only companies that I am aware of that have Anti-Submarine 4-point belts are Takata, and Scroth. Now before you Takata guys are like "sweet, I'm safe and ready to roll then", their Anti-Submarine version is relatively new and is clearly labeled. If yours does not have the label, you are at risk of serious injury or death in the event of a front end collision.
See this video for reference:
Also, here is a diagram of how to properly mount your harnesses courtesy of Crow Enterprizes, who also happens to sell some excellent safety equipment with killer prices.
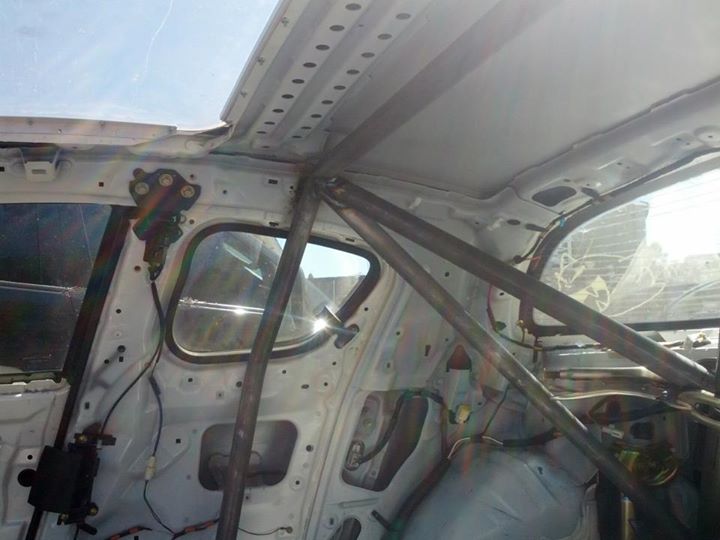
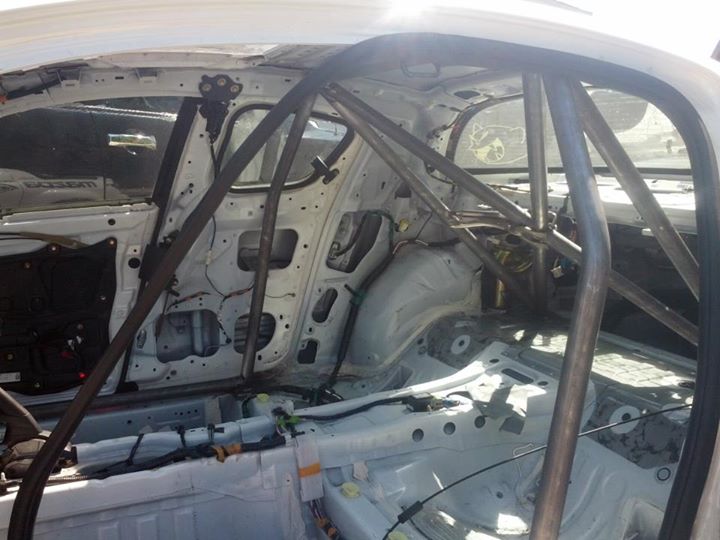
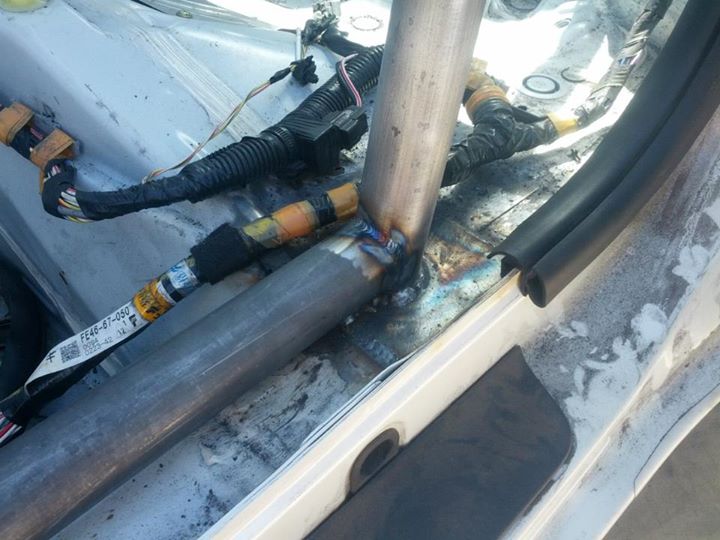
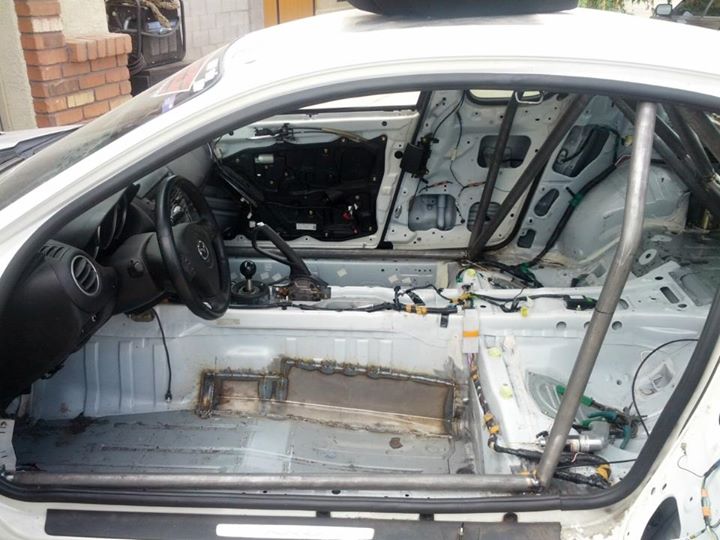
I took the car to my buddy Junior at Fathead Fabrications here in Arizona to fab up a 6 point time trials legal roll bar. I will probably later expand this into a full cage if I get going much faster... but for what I'm doing with the car a full cage is not required.

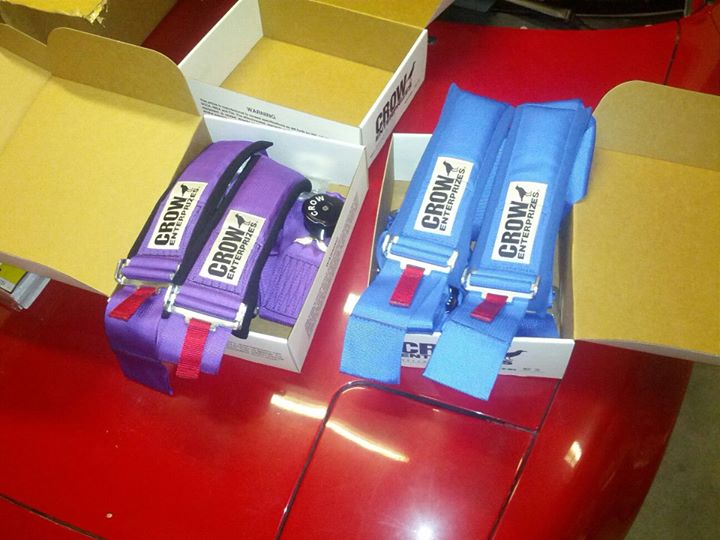
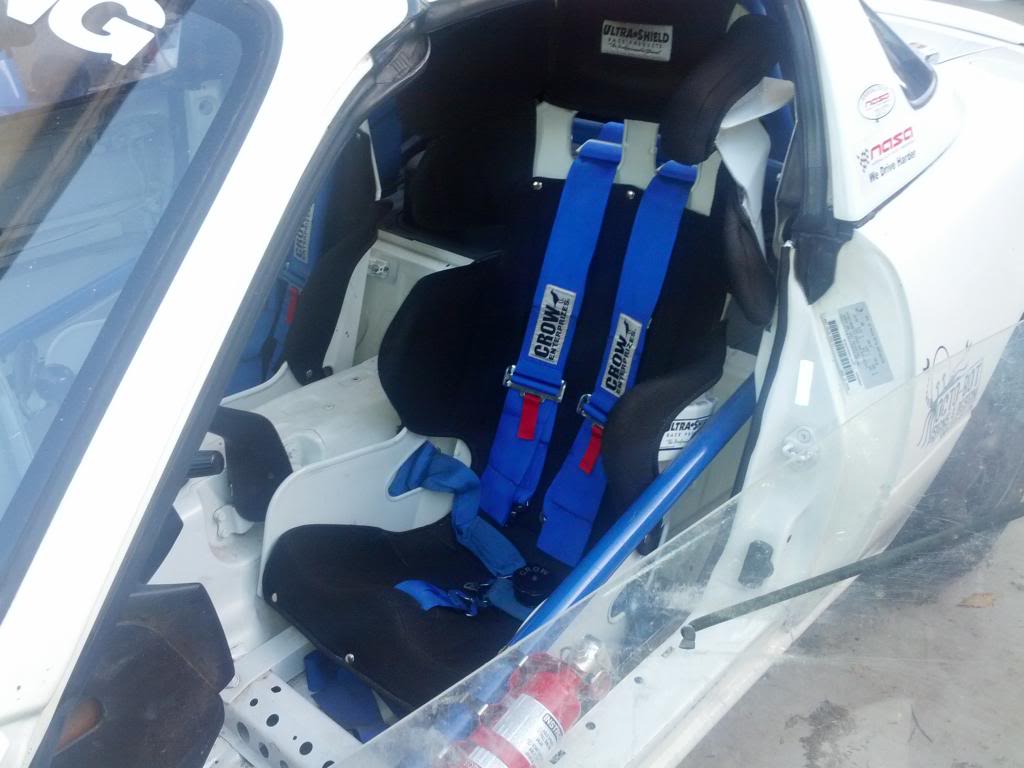
Anyways. I got some Crow Enterprizes 6 point harnesses with sewn in shoulder pads. Purple is for the RX-8 and blue ones are for the Miata.
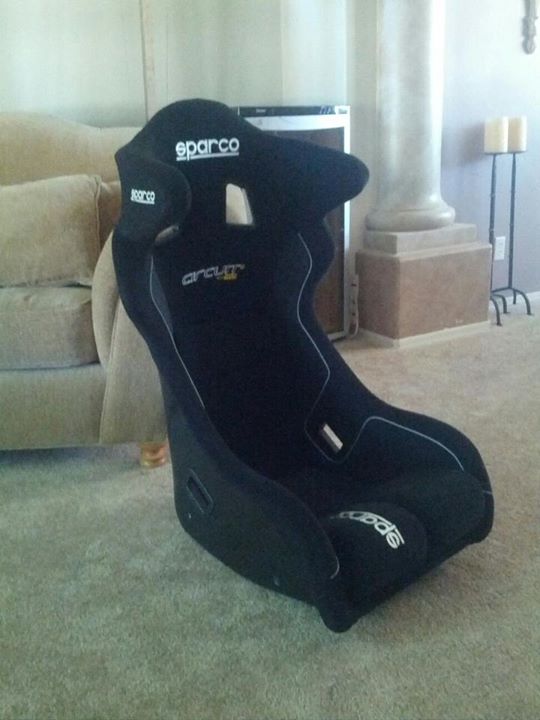
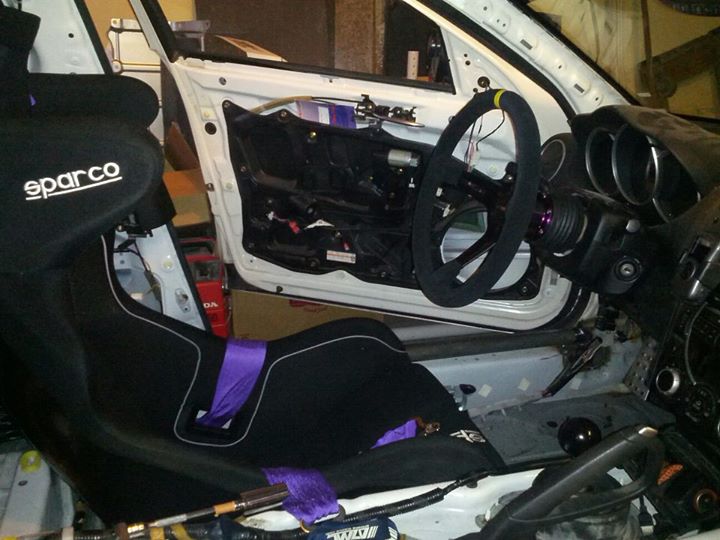
Sparco Circuit II seat with Halo head restraints, for the big and tall driver...
Seat installed, it's just bolted on a set of two plates of metal that were welded in, attached to standard side mount seat bracket and that's it. As low as you can get in this car. Steering wheel setup needs to be adjusted but I can still push the clutch down all the way. Great for weight distribution when you're practically driving from the back seat lol.
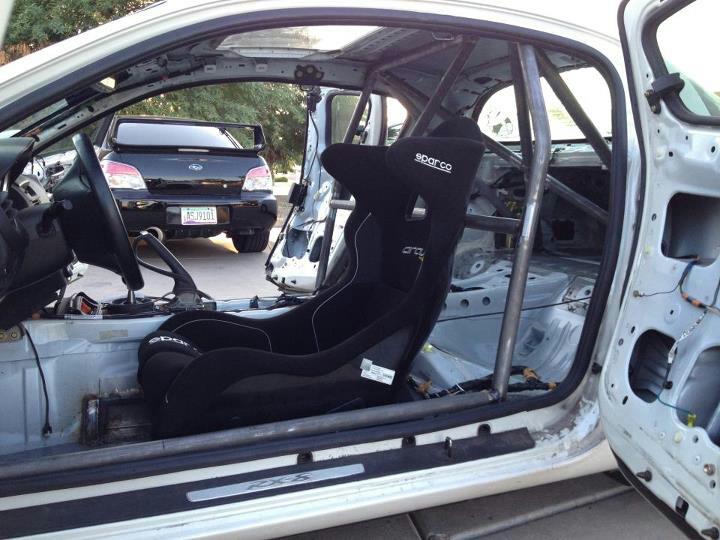
New seating position. I am 6'5" and 250lbs... I can now barely see over the dash or out the side windows. AWESOME!
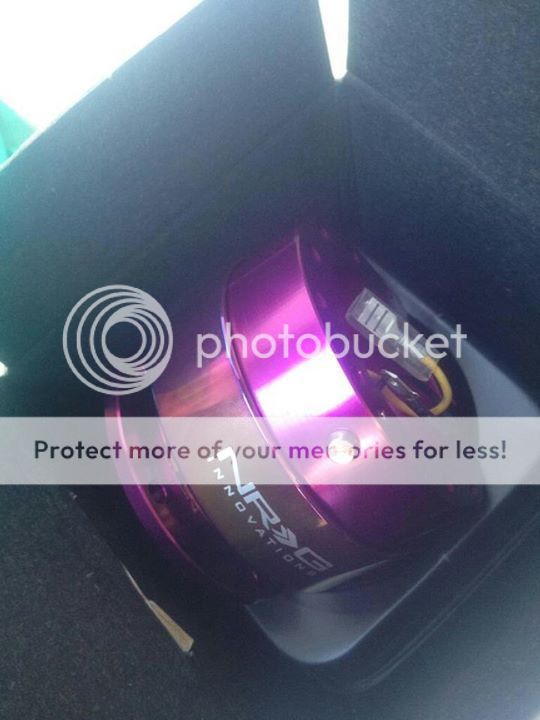
NRG Gen 2.0 Quick Release, it's the tallest one they have to move the steering wheel closer. Purple and Neo-Chrome for extra mad tyte JDM ricer points. Also ordered up a Momo Hub Adapter and Momo Mod.08 Suede wheel which has a 90mm dish and 330mm diameter if I remember correctly. I am going to also have to add another like 1" or 2" spacer to move the wheel even closer as well as putting spacers on the steering column to move the wheel downwards more.
Installed:
In order to be safe with fixed back seats, I needed to have a roll bar since in the event of a rollover, the stock seats can recline backwards but in a fixed back you can be crushed, as well as needing a place to attach a 6 point harness. (If you're considering a 5 point, buy a 6 point instead and your family jewels will thank you later.)
Now, I always get asked questions about harnesses, how they should be mounted, what kind to get, and I also see a ton of extremely unsafe setups that are being used with organizations that don't care about safety and have laughable "tech inspections". Which brings me to my next segment:
Safety Tips for Harnesses and Harness Mounting:
DO NOT USE A 4 POINT HARNESS UNLESS IT HAS AN ANTI-SUBMARINE FEATURE. The only companies that I am aware of that have Anti-Submarine 4-point belts are Takata, and Scroth. Now before you Takata guys are like "sweet, I'm safe and ready to roll then", their Anti-Submarine version is relatively new and is clearly labeled. If yours does not have the label, you are at risk of serious injury or death in the event of a front end collision.
See this video for reference:
Also, here is a diagram of how to properly mount your harnesses courtesy of Crow Enterprizes, who also happens to sell some excellent safety equipment with killer prices.
I took the car to my buddy Junior at Fathead Fabrications here in Arizona to fab up a 6 point time trials legal roll bar. I will probably later expand this into a full cage if I get going much faster... but for what I'm doing with the car a full cage is not required.
Anyways. I got some Crow Enterprizes 6 point harnesses with sewn in shoulder pads. Purple is for the RX-8 and blue ones are for the Miata.
Sparco Circuit II seat with Halo head restraints, for the big and tall driver...
Seat installed, it's just bolted on a set of two plates of metal that were welded in, attached to standard side mount seat bracket and that's it. As low as you can get in this car. Steering wheel setup needs to be adjusted but I can still push the clutch down all the way. Great for weight distribution when you're practically driving from the back seat lol.
New seating position. I am 6'5" and 250lbs... I can now barely see over the dash or out the side windows. AWESOME!
NRG Gen 2.0 Quick Release, it's the tallest one they have to move the steering wheel closer. Purple and Neo-Chrome for extra mad tyte JDM ricer points. Also ordered up a Momo Hub Adapter and Momo Mod.08 Suede wheel which has a 90mm dish and 330mm diameter if I remember correctly. I am going to also have to add another like 1" or 2" spacer to move the wheel even closer as well as putting spacers on the steering column to move the wheel downwards more.
Installed:
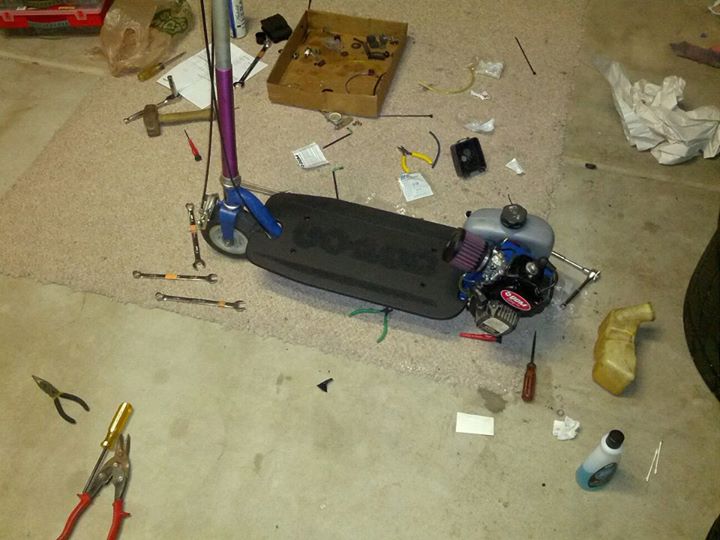
Kind of a little side adventure here, but getting around at the track in the pits was getting annoying just being on foot all the time, especially at larger tracks. I would see everyone zipping past me on small pit bikes and gopeds and bicycles etc, so I picked up a non-running GoPed Sport that is very portable and easy to use for 80 bucks from a friend. After putting about 160 bucks into it (I got a little carried away) it was set to go. All you have to do to start it is jump on and push since it is a direct drive spindle driven type, if the motor is running the wheels are turning.
Also makes for great entertainment during drunken pit vehicle races and burnout competitions at the away tracks while camping/partying at night.
Also it has been proven that this thing is no match for Tim's Honda.
This thing is from 1992, still has the original motor and still runs like a champ. The only grief it gives me is at higher elevation tracks where it runs too rich, the jets in the carb are just too big even after messing with the adjustment needles. Maybe needs some new exhaust or something... LOL.
Stuff I bought/Modded:
New HP Carb
Velocity Stack
K&N Filter
Sprayed Deck with Truck Bed Liner
Black Magic 0.650 Extended Spindle
DDM 3rd Bearing Support
New Gas Tank and Lines
New Spark Plug
DDM Sticker for Extra HP
Before:
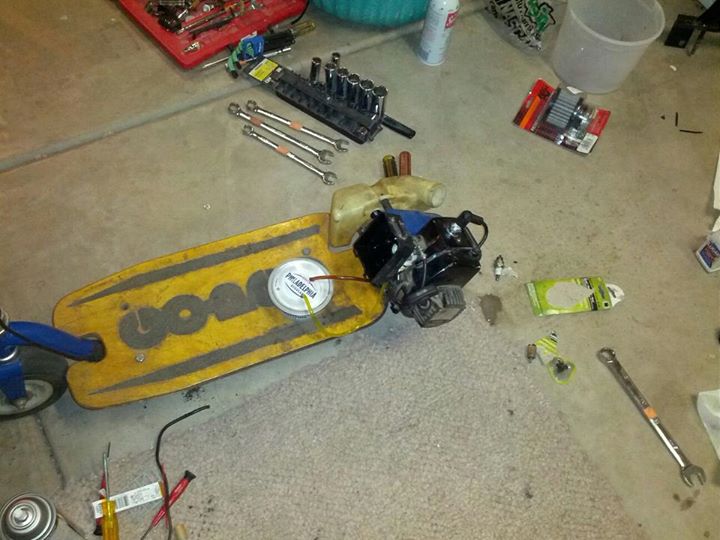
After:
Also makes for great entertainment during drunken pit vehicle races and burnout competitions at the away tracks while camping/partying at night.
Also it has been proven that this thing is no match for Tim's Honda.
This thing is from 1992, still has the original motor and still runs like a champ. The only grief it gives me is at higher elevation tracks where it runs too rich, the jets in the carb are just too big even after messing with the adjustment needles. Maybe needs some new exhaust or something... LOL.
Stuff I bought/Modded:
New HP Carb
Velocity Stack
K&N Filter
Sprayed Deck with Truck Bed Liner
Black Magic 0.650 Extended Spindle
DDM 3rd Bearing Support
New Gas Tank and Lines
New Spark Plug
DDM Sticker for Extra HP
Before:
After:
So anyways, I've got all these new mods in, can't wait to try them out. Next track day is set. October, 2012 at Inde Motorsports Ranch.
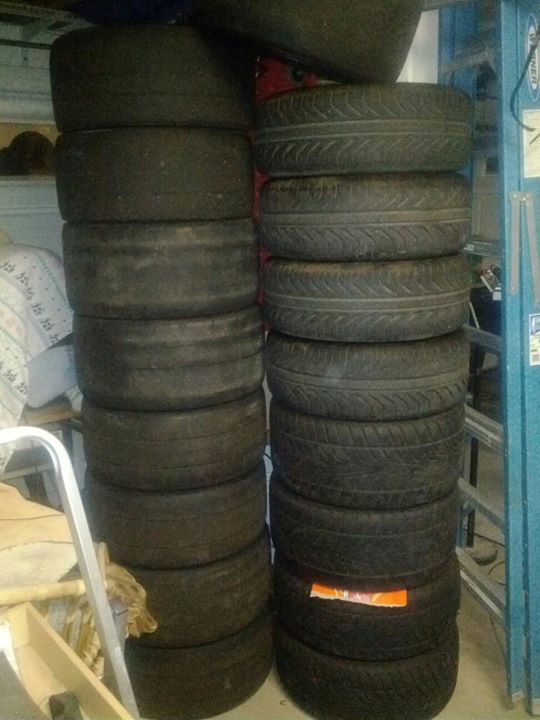
I've been running on second hand tires for awhile now at this point, anything I could get my hands on. I finally decided to treat myself to some new meats for what was shaping up to be another glorious track weekend. Got everything set to go, got the new seat and harness to try out, the new steering wheel setup, brand spankin' new tires, and new pimped out pit transportation. I was ready to slay TA-A class in the UMS Tuning Time Attack, I've never gotten a first place before and the competition was going to be fierce.
What I was used to:
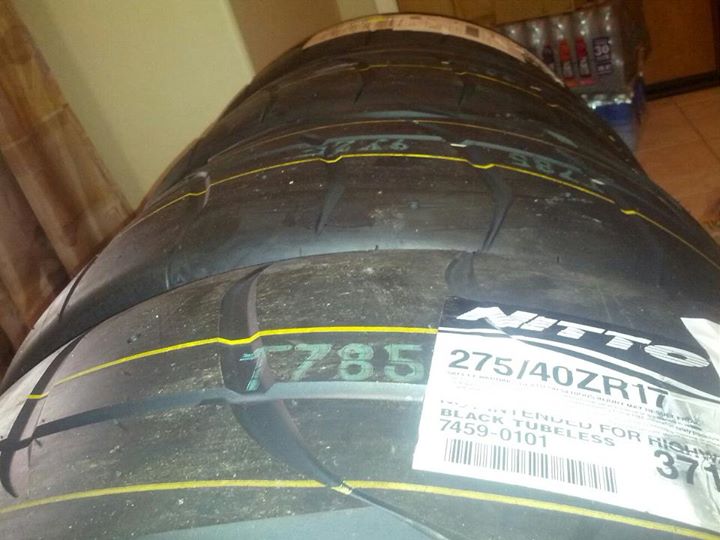
New meats, NT01 goodness, SIZE BIG.
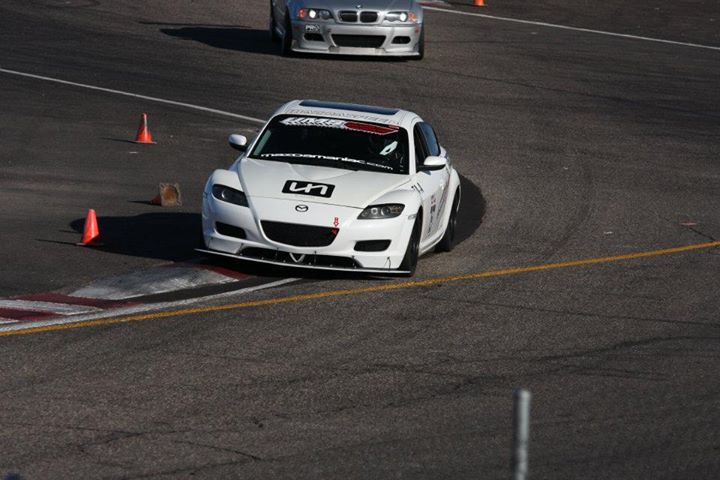
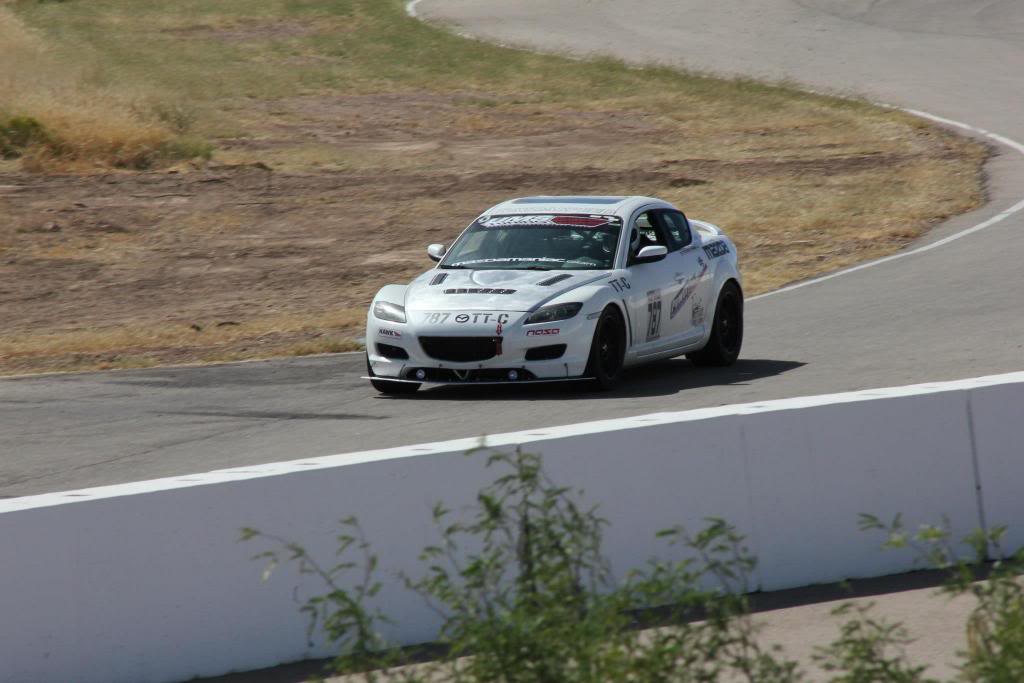
Out on track. Driving with the new seat and harness was amazeballs. After a track weekend my arms and shoulders and sides would all be sore from hanging off the wheel all weekend but driving was now effortless. The biggest difference was how much better I could feel the car. I could drive right up at the limit with confidence now and know exactly when I pushed the car too far and could feel everything that the car was doing. The rollbar also helped stiffen up the car and was very noticeable.
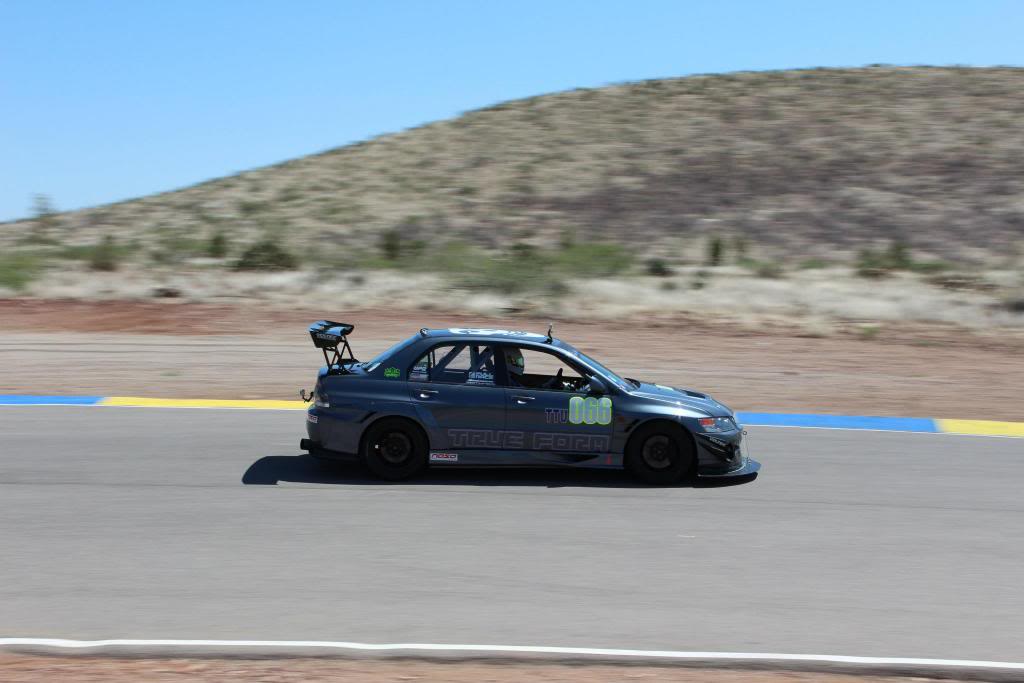
Look who else made it out there! Tim from NM with "Project Grey Bush".
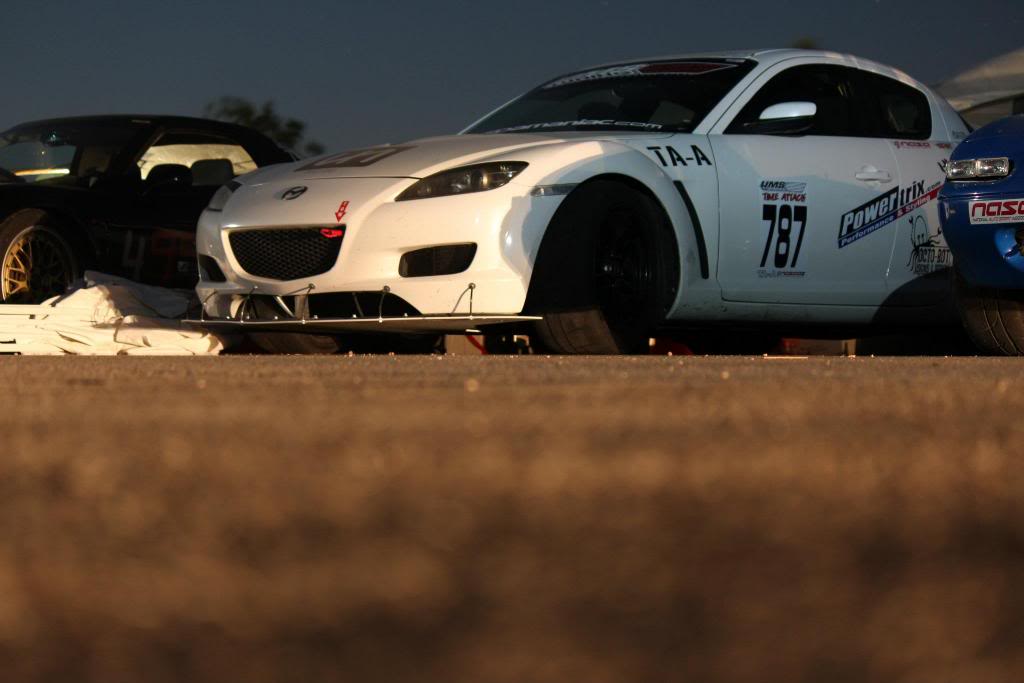
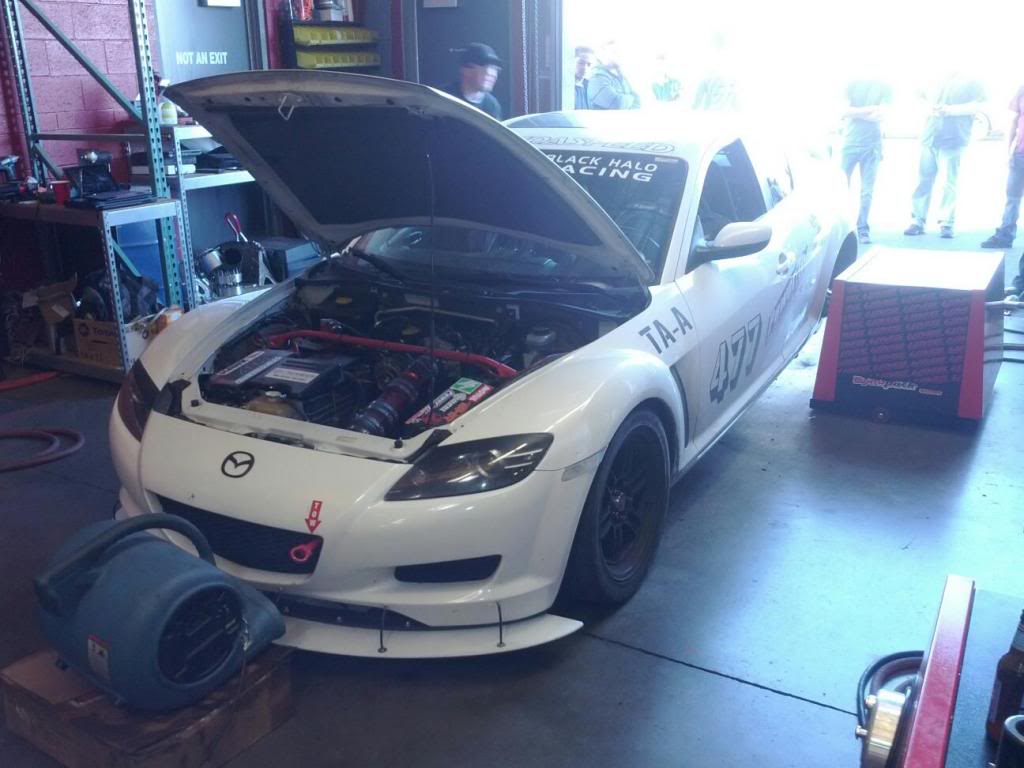
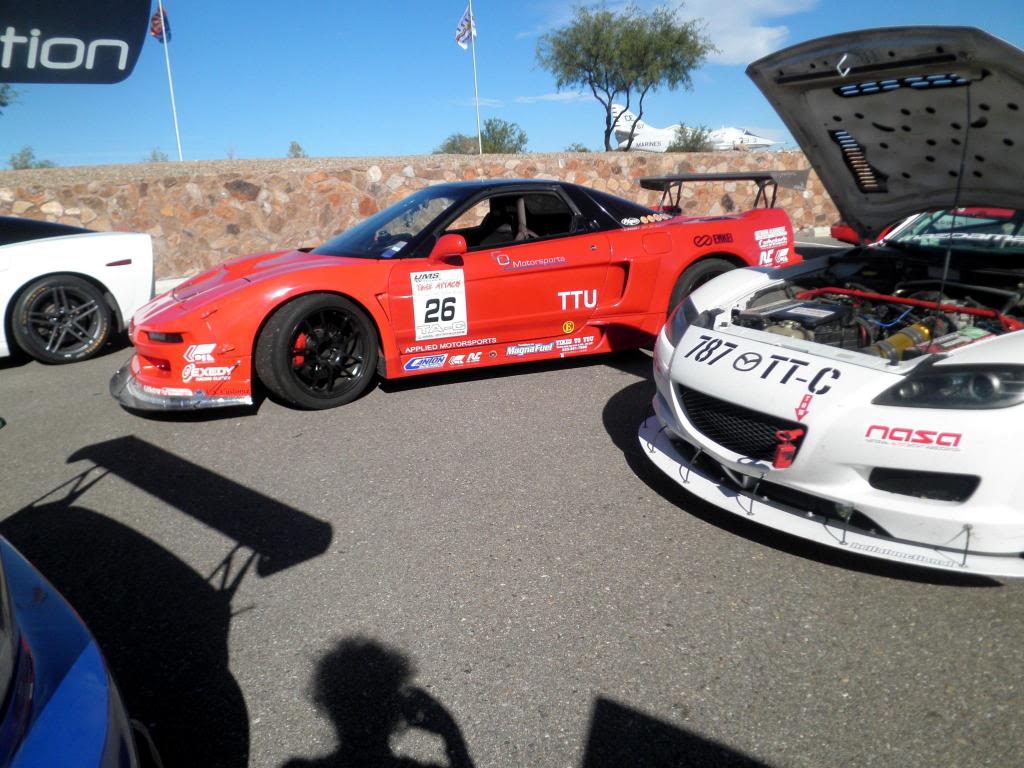
And here is my car in the Time Attack impound while everyone anxiously awaits results. The NSX there in the picture is an unlimited competitor and is packing some heat. It puts out over 600 to the ground.
Reading the results they start from last place and work their way to first, and we had made it all the way to third place and I still hadn't heard my name. When they announced the second place winner, it still wasn't me and I knew I had gotten my first win in the UMS Tuning Time Attack Series.
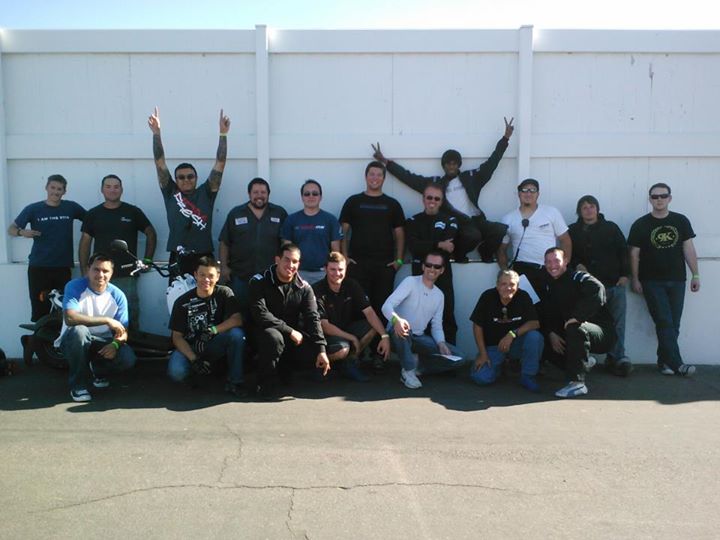
Some of the time attack family from an event a ways back. I'm the tall guy in the middle haha.
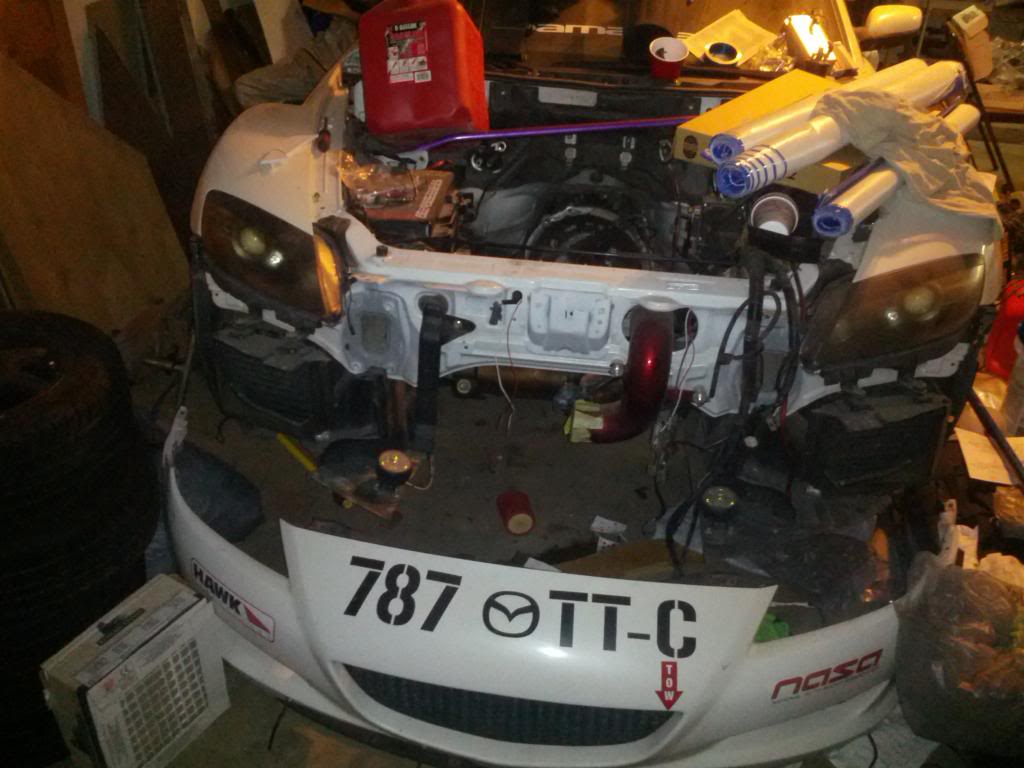
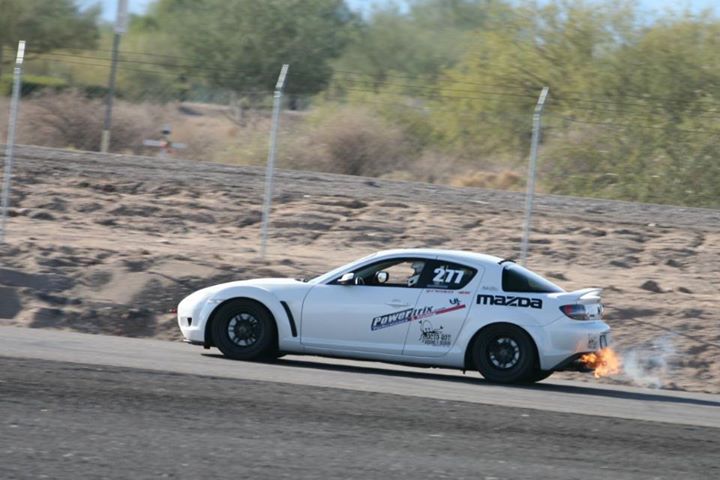
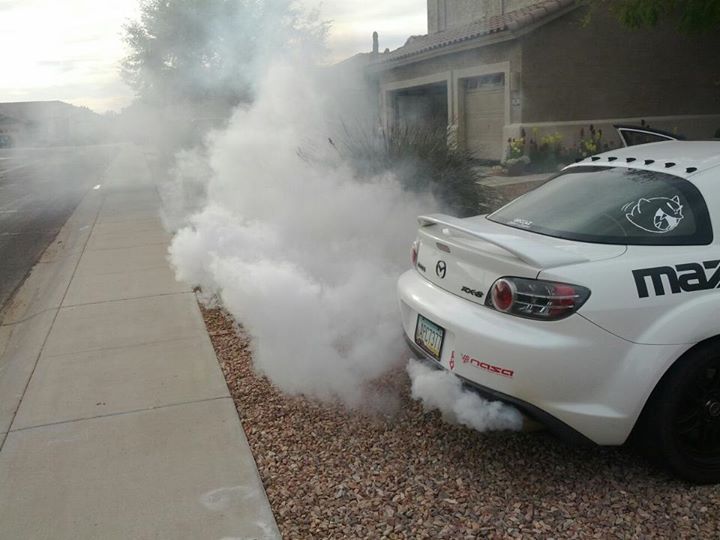
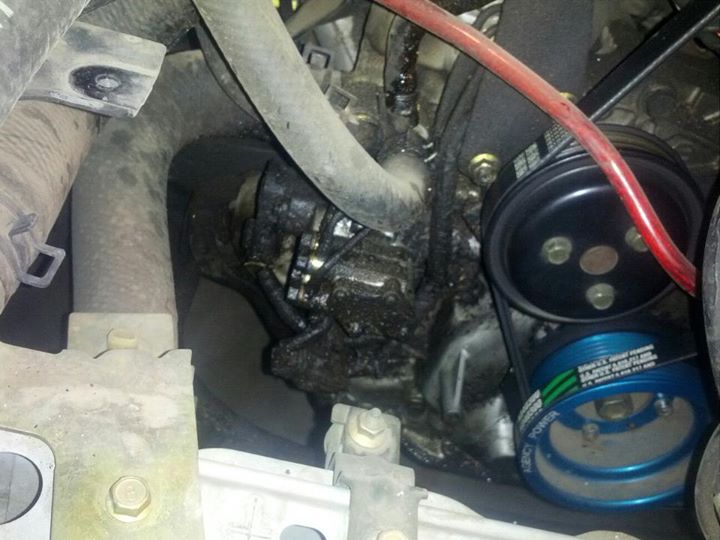
Now for the bad news. The reason I posted that picture above with the hood open. You see that faint line about halfway up the hood on the inside? It's kind of tough to see, but that's oil. Oil was everywhere, splattered all over the engine bay. When I had come off track there was a decent amount of smoke coming out of my passenger side hood vent and it was oil smoking off of the header heat shield. I later found out that the front main seal would leak oil like mad if you took it over 6000RPM and the e-shaft pulley and position gear would fling it everywhere. This is when I knew the engine had to come out. I wanted to do a preventative rebuild and try to regain some of my power back with a fresh build so I could be more competitive.
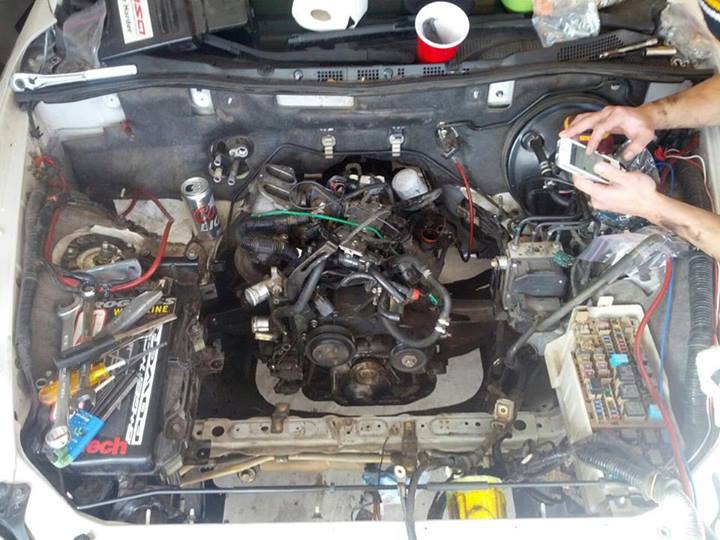
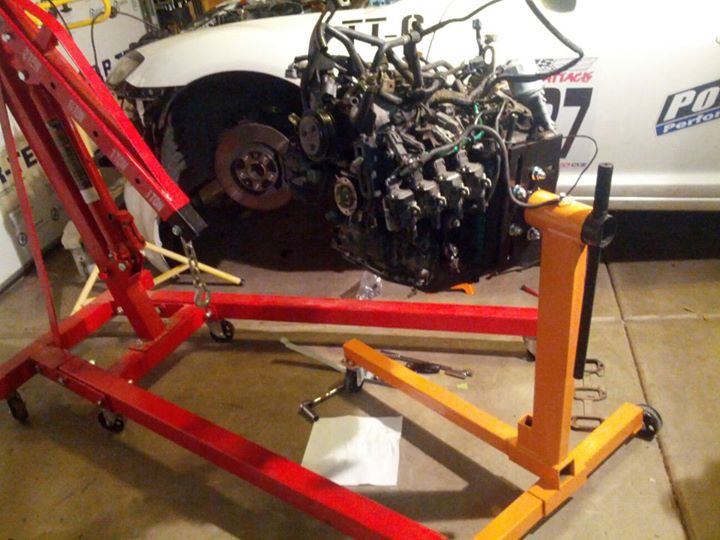
Fast forward a couple months and we have this:

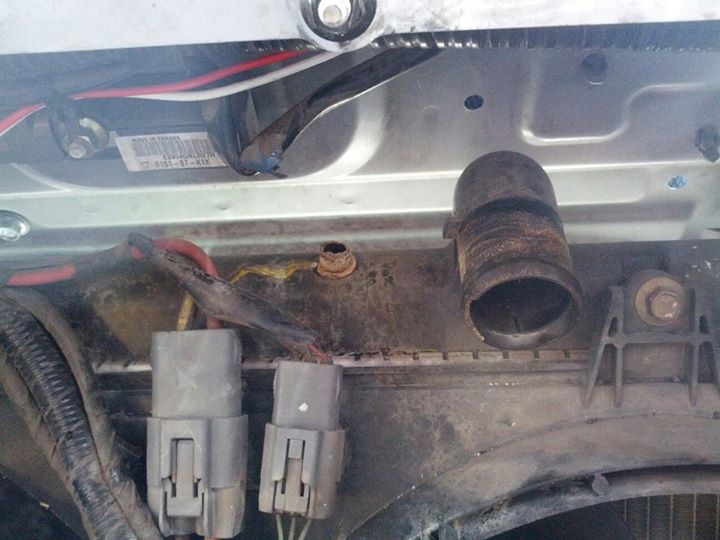
Also I broke the god damn nipple on the radiator that everyone breaks. It seriously disintegrated when I moved the hose just a tiny bit. Whatever, I wanted a new radiator anyways.
Unfortunately this is also where the story basically grinds to a halt for one year. Life, work, lack of funds, lack of motivation and the fact that I could drive my dad's Miata at the track now all contributed to me letting the car sit in its depressing state in the garage.
But the good news is, I've finally amassed all the parts I wanted so the RX-8 can hopefully make an epic comeback to the track. So the next posts will be outlining some plans and then we are pretty much caught up to present time.
By present time I mean about December 2013 since I'm copy pasting all this stuff.
I've been running on second hand tires for awhile now at this point, anything I could get my hands on. I finally decided to treat myself to some new meats for what was shaping up to be another glorious track weekend. Got everything set to go, got the new seat and harness to try out, the new steering wheel setup, brand spankin' new tires, and new pimped out pit transportation. I was ready to slay TA-A class in the UMS Tuning Time Attack, I've never gotten a first place before and the competition was going to be fierce.
What I was used to:
New meats, NT01 goodness, SIZE BIG.
Out on track. Driving with the new seat and harness was amazeballs. After a track weekend my arms and shoulders and sides would all be sore from hanging off the wheel all weekend but driving was now effortless. The biggest difference was how much better I could feel the car. I could drive right up at the limit with confidence now and know exactly when I pushed the car too far and could feel everything that the car was doing. The rollbar also helped stiffen up the car and was very noticeable.
Look who else made it out there! Tim from NM with "Project Grey Bush".
And here is my car in the Time Attack impound while everyone anxiously awaits results. The NSX there in the picture is an unlimited competitor and is packing some heat. It puts out over 600 to the ground.
Reading the results they start from last place and work their way to first, and we had made it all the way to third place and I still hadn't heard my name. When they announced the second place winner, it still wasn't me and I knew I had gotten my first win in the UMS Tuning Time Attack Series.
Some of the time attack family from an event a ways back. I'm the tall guy in the middle haha.
Now for the bad news. The reason I posted that picture above with the hood open. You see that faint line about halfway up the hood on the inside? It's kind of tough to see, but that's oil. Oil was everywhere, splattered all over the engine bay. When I had come off track there was a decent amount of smoke coming out of my passenger side hood vent and it was oil smoking off of the header heat shield. I later found out that the front main seal would leak oil like mad if you took it over 6000RPM and the e-shaft pulley and position gear would fling it everywhere. This is when I knew the engine had to come out. I wanted to do a preventative rebuild and try to regain some of my power back with a fresh build so I could be more competitive.
Fast forward a couple months and we have this:
Also I broke the god damn nipple on the radiator that everyone breaks. It seriously disintegrated when I moved the hose just a tiny bit. Whatever, I wanted a new radiator anyways.
Unfortunately this is also where the story basically grinds to a halt for one year. Life, work, lack of funds, lack of motivation and the fact that I could drive my dad's Miata at the track now all contributed to me letting the car sit in its depressing state in the garage.
But the good news is, I've finally amassed all the parts I wanted so the RX-8 can hopefully make an epic comeback to the track. So the next posts will be outlining some plans and then we are pretty much caught up to present time.
By present time I mean about December 2013 since I'm copy pasting all this stuff.
For this post I figured I would share with you guys my main distraction during the downtime of the RX-8.
It has its own build thread here: http://clubroadster.net/vb_forum/89-...ack-build.html
My dad had come to the track with me a couple times to check things out and he got a ride out on track in a Miata from one of my good friends. He was hooked after that and he soon hit craigslist, a short while later he purchased this:
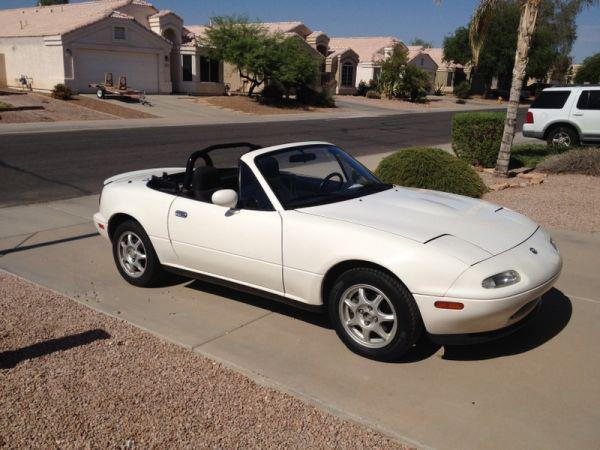
A 1994 Mazda Miata R Package with 104k miles on the clock, bone stock except they had added in power windows and an aftermarket head unit.
The R-Package comes with front and rear lip, rear spoiler, upgraded shocks/springs/sway bars from the factory and also has factory LSD and no power steering. Only about 1,200 were made in 1994.
It had previously been a summer only car in Colorado and used to belong to the guys mom. Here's the best part about this car... SHE HAD IT SERVICED EVERY 5,000 MILES AT FLYIN' MIATA... so the car was in impeccable mechanical shape, it didn't even have the famous Miata HLA tick so we snatched it up only 8 hours after it had been posted on craigslist. The guy got 4 other offers over the phone while we were there checking it out for more than asking price ($3500) but thankfully he was a stand up guy and took the asking price which we had offered over the phone only an hour before.
Now you may be thinking, "Hey Arca, you're a pretty big dude... how the hell do you fit in there? And isn't your dad too big for it as well?!"
The answer is with patience, a big ******* hammer and thin aluminum seats that are bolted straight to the floor and rest against the rear firewall. My dad is 6'2" and fits a little better in there than me, but I can still drive it comfortably.
It makes 130RWHP @ 7,200RPM and 104RWTQ @ 4,600RPM on a Dynojet.
It weighs 2100lbs even with 1/2 tank of fuel.
Those power numbers are with the timing at 16*BTDC, we backed it off to 12*BTDC so that it knocked it down to 125RWHP so that we could stay under our HP cap of 128RWHP for competition in NASA TT-E class. It is also eligible for Time Attack A Class since with driver it has around 18.8lbs/HP.
Here are the modifications:
Weight Reduction:
Removed interior
Removed A/C
Removed side windows
Removed Charcoal Canister and EGR System
Removed Headlight assemblies
Removed airbags, sensors, module.
Gutted Doors
Gutted Rear Deck
Sound Deadening removed
Engine/Intake/Exhaust:
Exhintake Cam Mod (Use another exhaust cam on the intake side)
New NB Purple Injectors (265cc @ 3bar)
5xRacing Adjustable Fuel Pressure Regulator
5xRacing In-Line Fuel Pressure Gauge
Custom made cold air intake with velocity stack (CAI was +7WHP on mustang dyno, and another +2WHP after adding velocity stack)
Racing Beat 4-1 Header (Ceramic Coated Black Inside and Out)
Racing Beat 2.25" ID Test Pipe (Ceramic Coated Black Inside and Out)
Roadstersport 3 2.25" ID Exhaust System (Connecting Pipe Ceramic Coated Black Inside and Out)
Gates Racing Timing Belt
Gates T-Belt Idler/Tensioner
Gates Racing Water Pump/Alternator Belt
Nissan Pump Co. Water Pump (made in Japan) with 3D Cast Impeller
New Front/Rear Main, Cam and Valve Cover Seals
NGK Copper Plugs
NGK Blue Plug Wires
Rotella T6 5w-40 Synthetic Diesel Oil (No HLA tick at all)
Drivetrain:
Fidanza 7.0lbs Flywheel for 1.6L (Converted to 1.6L Clutch/Flywheel. Smaller and lighter)
Exedy Stage 2 Clutch (3 Puck Thick Disk NON-HD) for 1.6L
TechnaFit Stainless Braided Clutch Line
MiataRoadster Tall/Bootless Short Throw Shifter
Garage Star Nylon Shift ****
Mazdaspeed Motorsports Aluminum Shifter Bushing
AmsOil 75w-90 GL4 Trans Fluid
AmsOil 75w-90 GL5 Rear Diff Fluid
Cooling:
Mishimoto 55mm Radiator
NRG Air Diversion Panel
Samco Blue Silicone Radiator and Ancillary Hose Kit
Secondary Radiator Fan Removed
Stant 16PSI Radiator Cap
Stant SuperStat 180* Thermostat with jiggle pin drilled out
Suspension/Brakes/Wheels/Chassis:
Replaced stock manual steering rack with de-powered power steering rack (quicker ratio)
Flyin Miata VMaxx Track Pack Coilovers
Flyin Miata Front and Rear Sway Bars
949 Racing SuperMiata Adjustable Endlinks
Energy Suspension Poly Control Arm Bushings Front and Rear
Energy Suspension Poly Diff Bushings
GarageStar Brake Master Cylinder Brace
949 Racing Poly Motor Mounts (Get the softest ones, we did medium and it's too harsh even for a track car)
Hawk HT-10 Pads
Cheapo O'Reilly's Rotors
949 Racing 6UL Wheels 15x8"
TR Motorsports C3M Wheels 15x9"
Advanti S1 Racing Wheels 15x9"
Stock 14" Hollow Spokes for the Street
6 Point Custom Roll Bar by Fathead Fabrications
All New Wheel Hubs and Bearings
GoodRidge Stainless Braided Brake Lines
Interior/Exterior/Electronics:
OEM Mazda Non-Defroster Hard Top
Ultrashield VS Halo Aluminum Seat 17" (Driver)
Ultrashield Spec Miata Aluminum Seat 17" (Passenger)
Crow Enterprizes 6 Point Harnesses (Blue)
Small Fire Extinguisher
Painted Interior White
Painted Seats White
Painted Rear Deck Area/Trunk Matte Black
Painted Roll Bar Blue
Momo Hub Adapter
NRG Gen 2.0 Quick Release (Black)
Momo Mod.78 Leather Steering Wheel (Flat, 330mm)
Radiator Protective Mesh Mounted Inside Bumper
Driving Lights Mounted In Bumper Opening
And that's all I can think of for now...
Mods on deck are some Prosport Gauges, Oil relocation, and Mishimoto Oil Cooler with thermostatic sandwich plate.
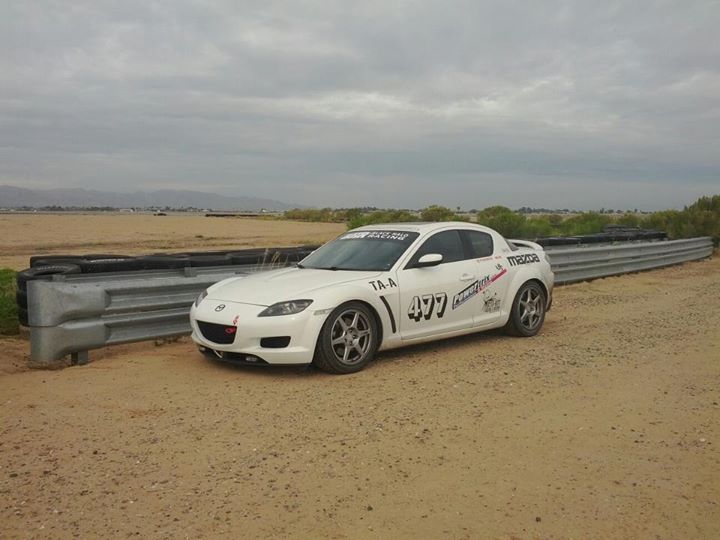
Anyways here's some pictures of how it sits now.
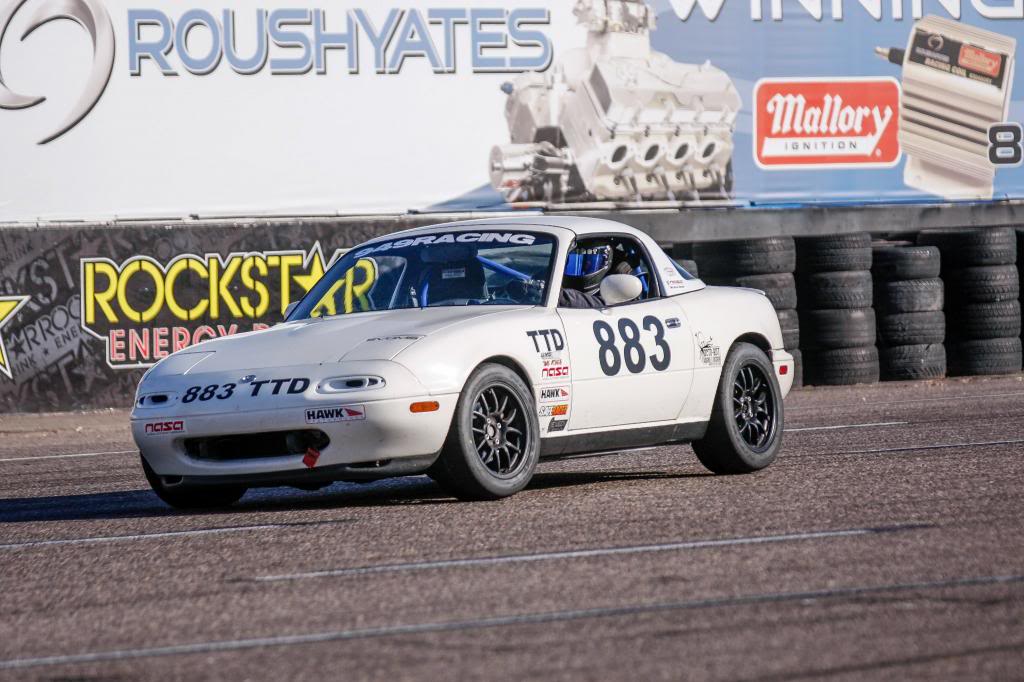
Getting a little sideways in Tower Turn at Firebird Main Course:
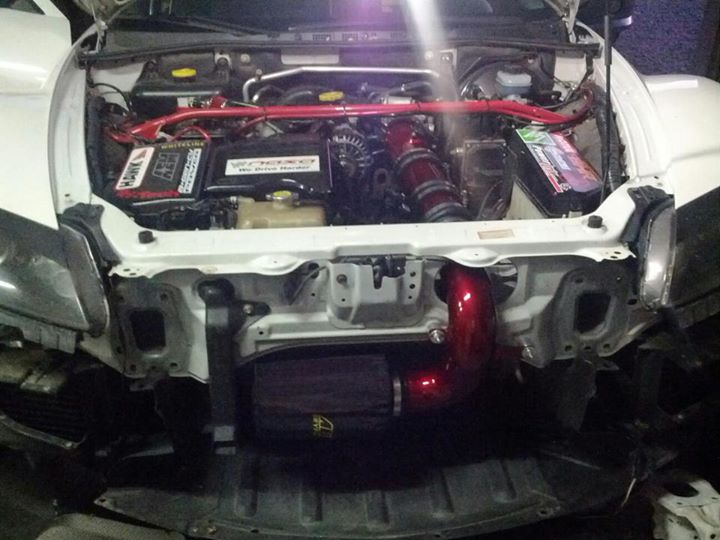
Here is an uncovered old shot of the intake and how it is routed, it gets air from the turn signal air scoop and is sealed off from the engine bay:
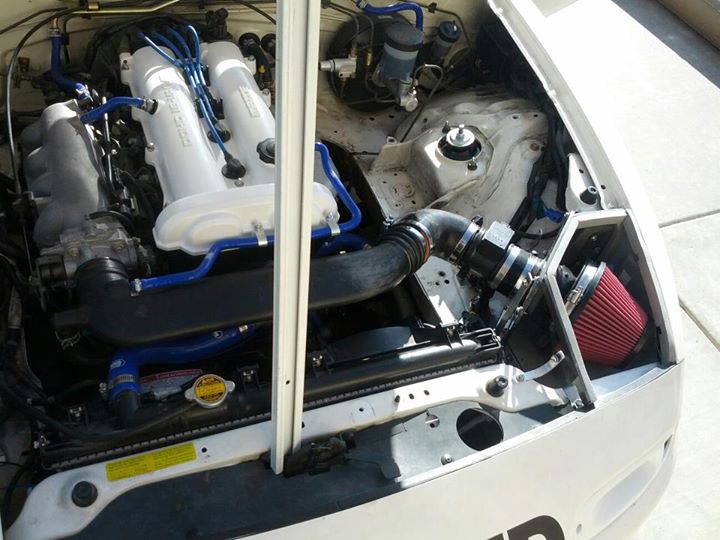
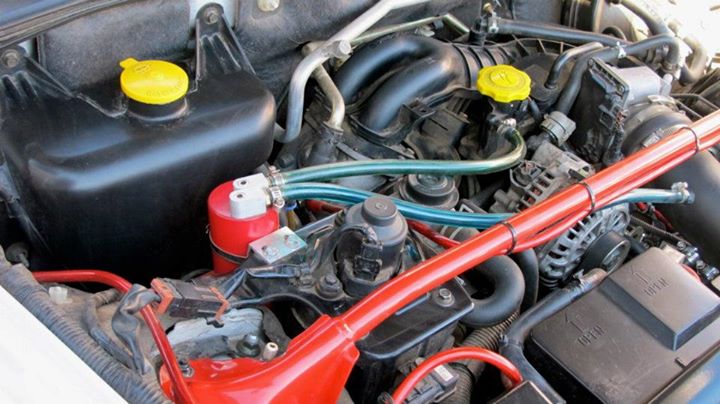
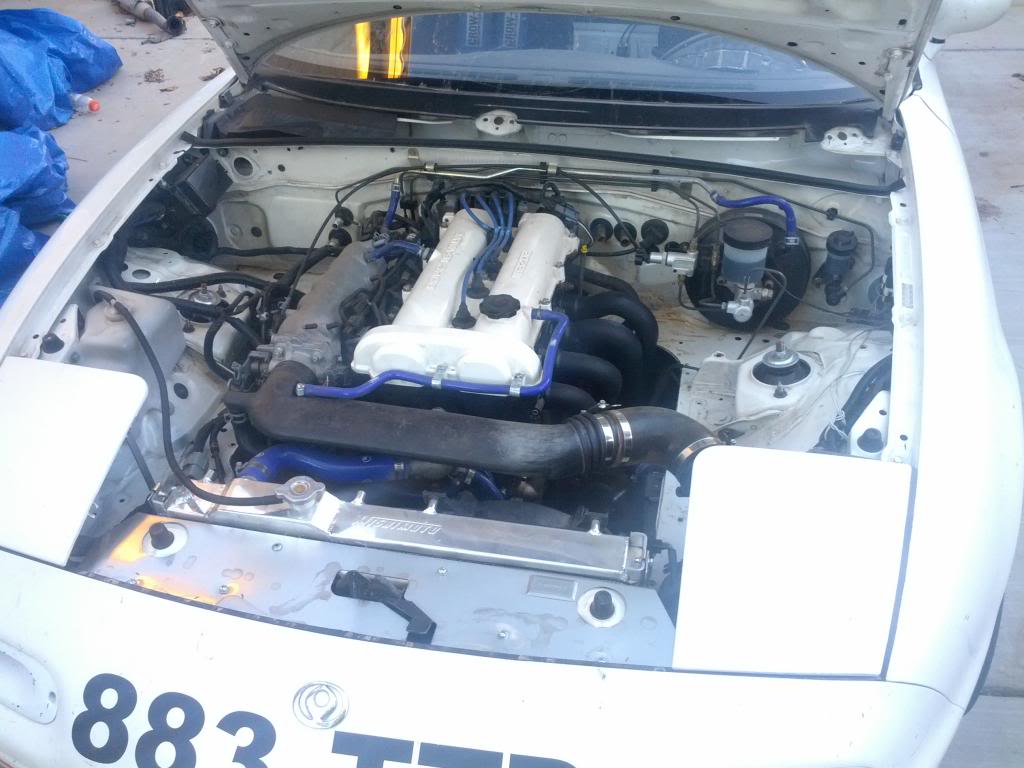
Engine bay now:
Some Interior Shots:
Also here's a video from a recent event. I was exactly 1 second off of the TT-E track record. I was on 225 NT01's but the way my classing sheet is done I can be on 225 Hoosier R6's, which are coincidentally worth about 1 to 2 seconds depending on the track...
Another even more recent event from Firebird East. Only 0.5 seconds off the track record, again on 225/45R15 NT01's.
It has its own build thread here: http://clubroadster.net/vb_forum/89-...ack-build.html
My dad had come to the track with me a couple times to check things out and he got a ride out on track in a Miata from one of my good friends. He was hooked after that and he soon hit craigslist, a short while later he purchased this:
A 1994 Mazda Miata R Package with 104k miles on the clock, bone stock except they had added in power windows and an aftermarket head unit.
The R-Package comes with front and rear lip, rear spoiler, upgraded shocks/springs/sway bars from the factory and also has factory LSD and no power steering. Only about 1,200 were made in 1994.
It had previously been a summer only car in Colorado and used to belong to the guys mom. Here's the best part about this car... SHE HAD IT SERVICED EVERY 5,000 MILES AT FLYIN' MIATA... so the car was in impeccable mechanical shape, it didn't even have the famous Miata HLA tick so we snatched it up only 8 hours after it had been posted on craigslist. The guy got 4 other offers over the phone while we were there checking it out for more than asking price ($3500) but thankfully he was a stand up guy and took the asking price which we had offered over the phone only an hour before.
Now you may be thinking, "Hey Arca, you're a pretty big dude... how the hell do you fit in there? And isn't your dad too big for it as well?!"
The answer is with patience, a big ******* hammer and thin aluminum seats that are bolted straight to the floor and rest against the rear firewall. My dad is 6'2" and fits a little better in there than me, but I can still drive it comfortably.
It makes 130RWHP @ 7,200RPM and 104RWTQ @ 4,600RPM on a Dynojet.
It weighs 2100lbs even with 1/2 tank of fuel.
Those power numbers are with the timing at 16*BTDC, we backed it off to 12*BTDC so that it knocked it down to 125RWHP so that we could stay under our HP cap of 128RWHP for competition in NASA TT-E class. It is also eligible for Time Attack A Class since with driver it has around 18.8lbs/HP.
Here are the modifications:
Weight Reduction:
Removed interior
Removed A/C
Removed side windows
Removed Charcoal Canister and EGR System
Removed Headlight assemblies
Removed airbags, sensors, module.
Gutted Doors
Gutted Rear Deck
Sound Deadening removed
Engine/Intake/Exhaust:
Exhintake Cam Mod (Use another exhaust cam on the intake side)
New NB Purple Injectors (265cc @ 3bar)
5xRacing Adjustable Fuel Pressure Regulator
5xRacing In-Line Fuel Pressure Gauge
Custom made cold air intake with velocity stack (CAI was +7WHP on mustang dyno, and another +2WHP after adding velocity stack)
Racing Beat 4-1 Header (Ceramic Coated Black Inside and Out)
Racing Beat 2.25" ID Test Pipe (Ceramic Coated Black Inside and Out)
Roadstersport 3 2.25" ID Exhaust System (Connecting Pipe Ceramic Coated Black Inside and Out)
Gates Racing Timing Belt
Gates T-Belt Idler/Tensioner
Gates Racing Water Pump/Alternator Belt
Nissan Pump Co. Water Pump (made in Japan) with 3D Cast Impeller
New Front/Rear Main, Cam and Valve Cover Seals
NGK Copper Plugs
NGK Blue Plug Wires
Rotella T6 5w-40 Synthetic Diesel Oil (No HLA tick at all)
Drivetrain:
Fidanza 7.0lbs Flywheel for 1.6L (Converted to 1.6L Clutch/Flywheel. Smaller and lighter)
Exedy Stage 2 Clutch (3 Puck Thick Disk NON-HD) for 1.6L
TechnaFit Stainless Braided Clutch Line
MiataRoadster Tall/Bootless Short Throw Shifter
Garage Star Nylon Shift ****
Mazdaspeed Motorsports Aluminum Shifter Bushing
AmsOil 75w-90 GL4 Trans Fluid
AmsOil 75w-90 GL5 Rear Diff Fluid
Cooling:
Mishimoto 55mm Radiator
NRG Air Diversion Panel
Samco Blue Silicone Radiator and Ancillary Hose Kit
Secondary Radiator Fan Removed
Stant 16PSI Radiator Cap
Stant SuperStat 180* Thermostat with jiggle pin drilled out
Suspension/Brakes/Wheels/Chassis:
Replaced stock manual steering rack with de-powered power steering rack (quicker ratio)
Flyin Miata VMaxx Track Pack Coilovers
Flyin Miata Front and Rear Sway Bars
949 Racing SuperMiata Adjustable Endlinks
Energy Suspension Poly Control Arm Bushings Front and Rear
Energy Suspension Poly Diff Bushings
GarageStar Brake Master Cylinder Brace
949 Racing Poly Motor Mounts (Get the softest ones, we did medium and it's too harsh even for a track car)
Hawk HT-10 Pads
Cheapo O'Reilly's Rotors
949 Racing 6UL Wheels 15x8"
TR Motorsports C3M Wheels 15x9"
Advanti S1 Racing Wheels 15x9"
Stock 14" Hollow Spokes for the Street
6 Point Custom Roll Bar by Fathead Fabrications
All New Wheel Hubs and Bearings
GoodRidge Stainless Braided Brake Lines
Interior/Exterior/Electronics:
OEM Mazda Non-Defroster Hard Top
Ultrashield VS Halo Aluminum Seat 17" (Driver)
Ultrashield Spec Miata Aluminum Seat 17" (Passenger)
Crow Enterprizes 6 Point Harnesses (Blue)
Small Fire Extinguisher
Painted Interior White
Painted Seats White
Painted Rear Deck Area/Trunk Matte Black
Painted Roll Bar Blue
Momo Hub Adapter
NRG Gen 2.0 Quick Release (Black)
Momo Mod.78 Leather Steering Wheel (Flat, 330mm)
Radiator Protective Mesh Mounted Inside Bumper
Driving Lights Mounted In Bumper Opening
And that's all I can think of for now...
Mods on deck are some Prosport Gauges, Oil relocation, and Mishimoto Oil Cooler with thermostatic sandwich plate.
Anyways here's some pictures of how it sits now.
Getting a little sideways in Tower Turn at Firebird Main Course:
Here is an uncovered old shot of the intake and how it is routed, it gets air from the turn signal air scoop and is sealed off from the engine bay:
Engine bay now:
Some Interior Shots:
Also here's a video from a recent event. I was exactly 1 second off of the TT-E track record. I was on 225 NT01's but the way my classing sheet is done I can be on 225 Hoosier R6's, which are coincidentally worth about 1 to 2 seconds depending on the track...
Another even more recent event from Firebird East. Only 0.5 seconds off the track record, again on 225/45R15 NT01's.
So now that we're all caught up (to January 2014), here's a run down of how the car sits, and then a run down of all the parts and modifications going into this iteration of the ongoing Time Attack Build, as well as a couple of pictures of some of the more interesting parts that I've amassed.
As it stands:
Engine and Exhaust:
AEM Cold Air Intake Wrapped in DEI Gold Reflect
BHR Midpipe
Espelir JGT500 Catback Exhaust (2.25" after split)
Agency Power E-Shaft Underdrive Pulley
Black Halo Racing Ignition Kit
Oil Catch Can
Z-Enterprise Grounding Kit
Air Pump Delete
Throttle Body Coolant Bypass
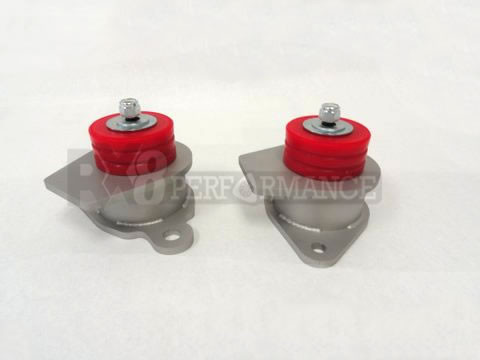
RX8Performance Poly Motor Mounts
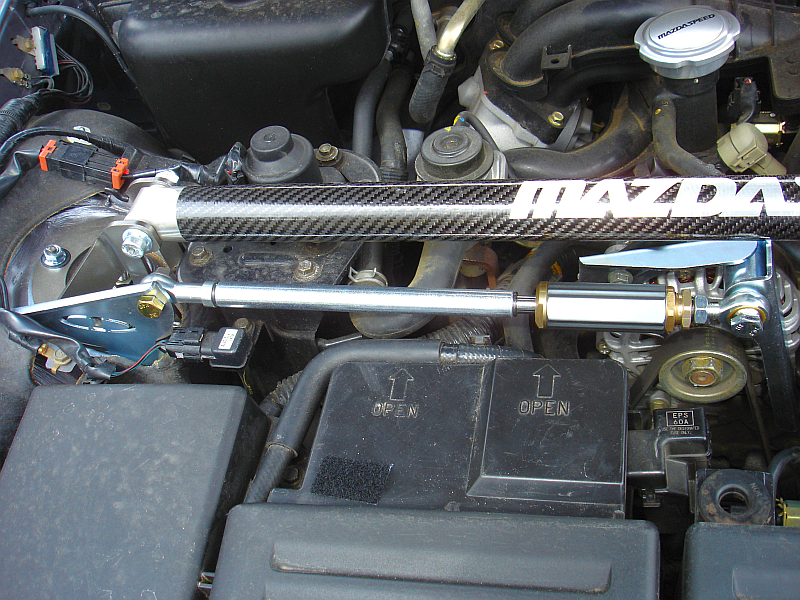
Ingalls Torque Dampener
Fuel System and Engine Management:
Idemitsu Premix
Cobb AccessPort
Tuned by MazdaManiac
Suspension, Wheels, Tires and Brakes:
PowerTrix Race Coilovers Custom Spring Rates
Progress Technology Sway Bars
Whiteline Adjustable Spherical Endlinks
Hawk HT-10 Brake Pads
Cheap Blank Rotors
ATE Super Blue Brake Fluid
Agency Power Stainless Braided Brake Lines
Agency Power Stainless Braided Clutch Line
Axial Flow Brake Master Cylinder Brace
17x9" +37 5Zigen ZR+520 (Street)
17x9" +45 Enkei RPF1's (Track)
Interior, Exterior and Electronics:
Interior/Stereo Completely Stripped for Weight Reduction
Custom Plexi Sunroof Insert
Sparco Circuit Plus Driver Seat
Crow Enterprizes 6 Point Harnesses
Momo Mod.08 Steering Wheel
Momo Steering Wheel Hub Adapter
NRG Gen 2.0 Quick Release
Fathead Fabrications Custom 6-Point Roll Cage
AEM Digital Gauges (Water Temp, Oil Temp, Oil Pres.)
Racing Beat Oil Plate and Water Line Adapters
Lotek Triple Gauge Pod
Custom Oil Cooler Grilles
GenRight Hood Louvers
Custom 4" ABS Functional Front Air Splitter
JDM Clear Corners w/ Stealth Bulbs
Removable Light Assembly (HID Angled, LED Bar Center) For Night Events
Mad Stickers Yo
Drivetrain:
Axial Flow Engineering Short Throw Shifter
8-Ball Style Weighted Shift **** (Neo-Chrome)
2" Shift **** Extender
Synchro Saver Plate
Modifications on deck:
Engine and Exhaust:
Rebuild with all OEM Mazda Parts
New Oil Pump
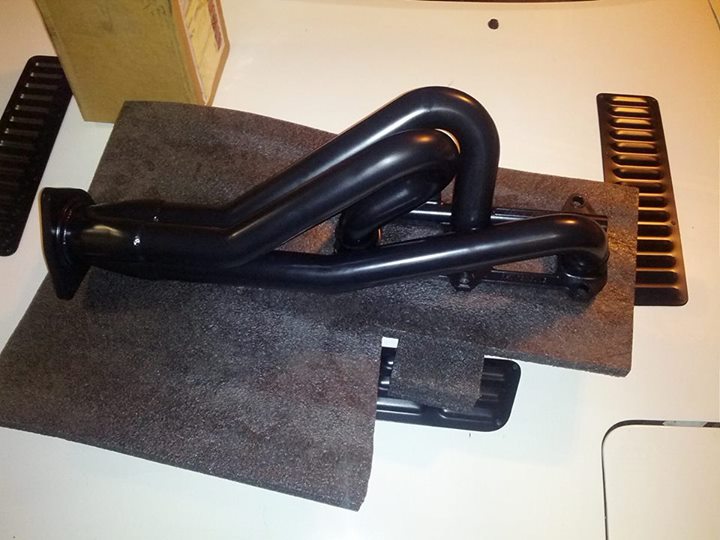
Racing Beat Header (Ceramic Coated)
Racing Beat Non-Resonated Midpipe (Ceramic Coated) 3" Piping
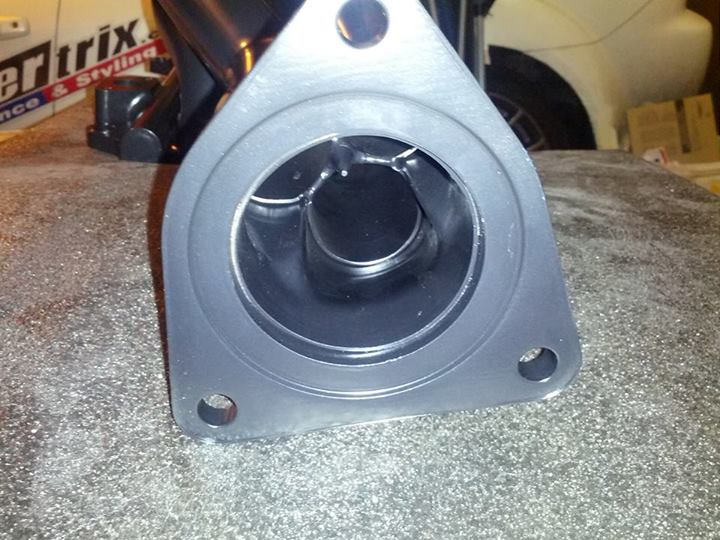
HKS Hi-Power Single Exit 3" Piping
A/C Belt Lip Milled Off of Agency Power E-Shaft Underdrive Pulley
RotaryFX Lightweight WP+ALT Pullies
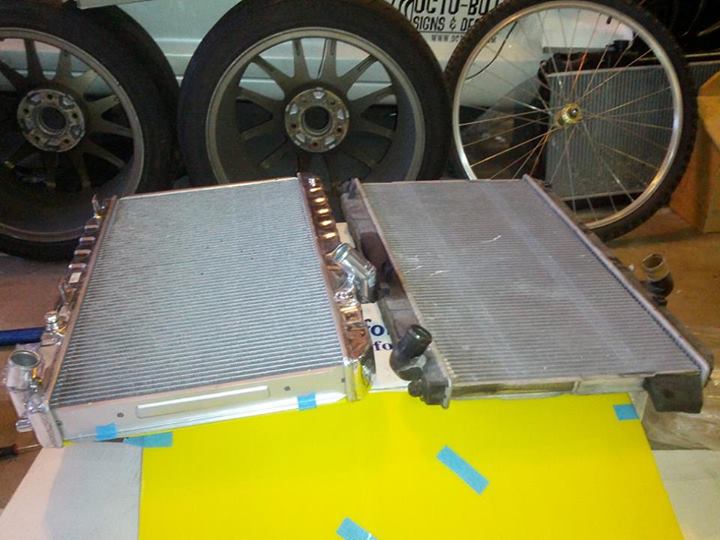
CSF Racing Aluminum 52mm Radiator
Racing Beat Radiator Screen
SAMCO Silicone Hose Kit (White)
Racing Beat Street Port
Mazmart Oil Pressure Regulator
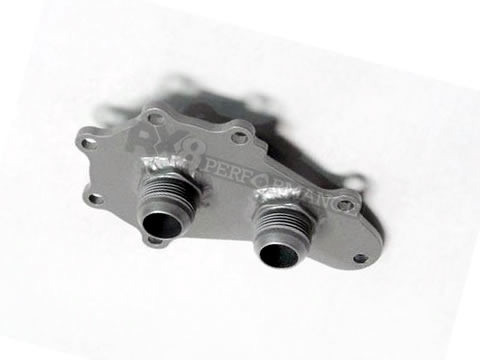
RX8Performance Electric Water Pump Adapter Plate
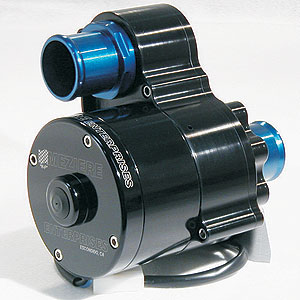
Meziere 55GPM Electric Water Pump
Mishimoto 169F Race Thermostat
SOHN Adapter
Fuel System and Engine Management:
Dyno Tune by Jeff @ MazdaManiac (Will have two tunes, max power for Time Trials B Class and a Time Attack A Class Kill tune with a completely flat horsepower curve for hopefully the entire power band via closing the drive by wire throttle body based on RPM.)
Suspension, Wheels, Tires and Brakes:
17x10" +38 Enkei RPF1's, need some more of these.
Interior, Exterior and Electronics:
More weight reduction, gutting doors, cutting out rear speaker deck, etc.
Sparco Evo 2 Passenger Seat
Works Bell Steering Wheel Extension (Not sure on size yet)
GenRight Fender Louvers
Custom 8" Alumalite Functional Front Air Splitter With New Chassis Mounting Design
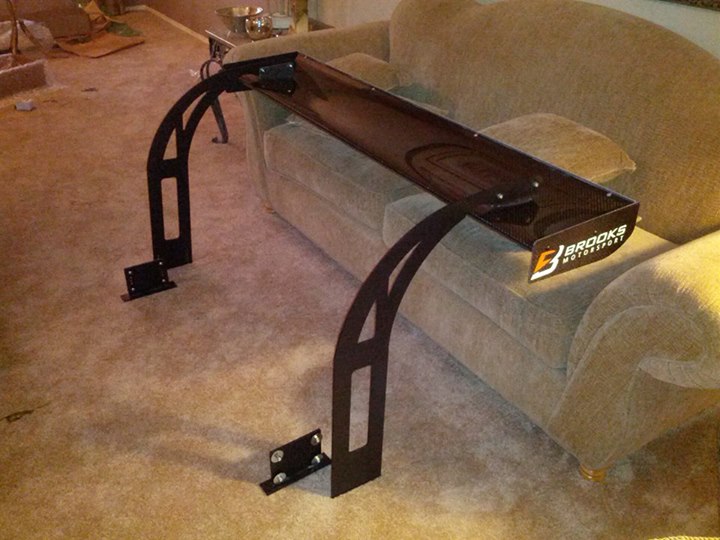
Brooks Motorsport Composites Swan Neck Mount Wing (68" Span, 13.5" Chord)
Even More Mad Stickers Yo
Drivetrain:
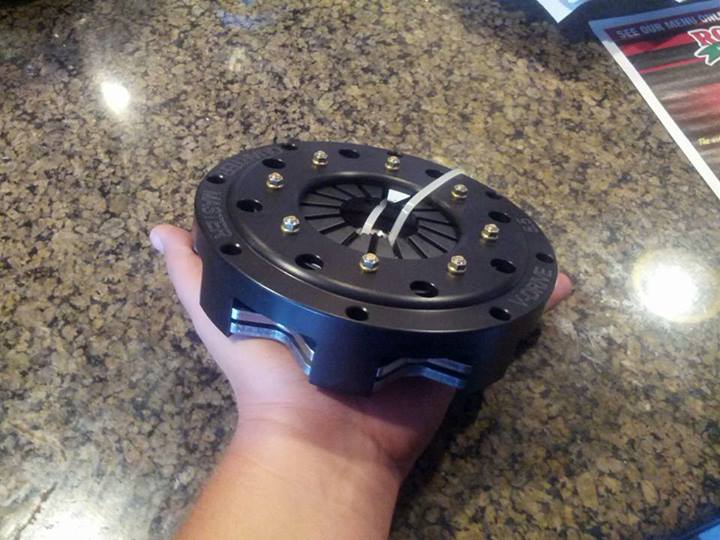
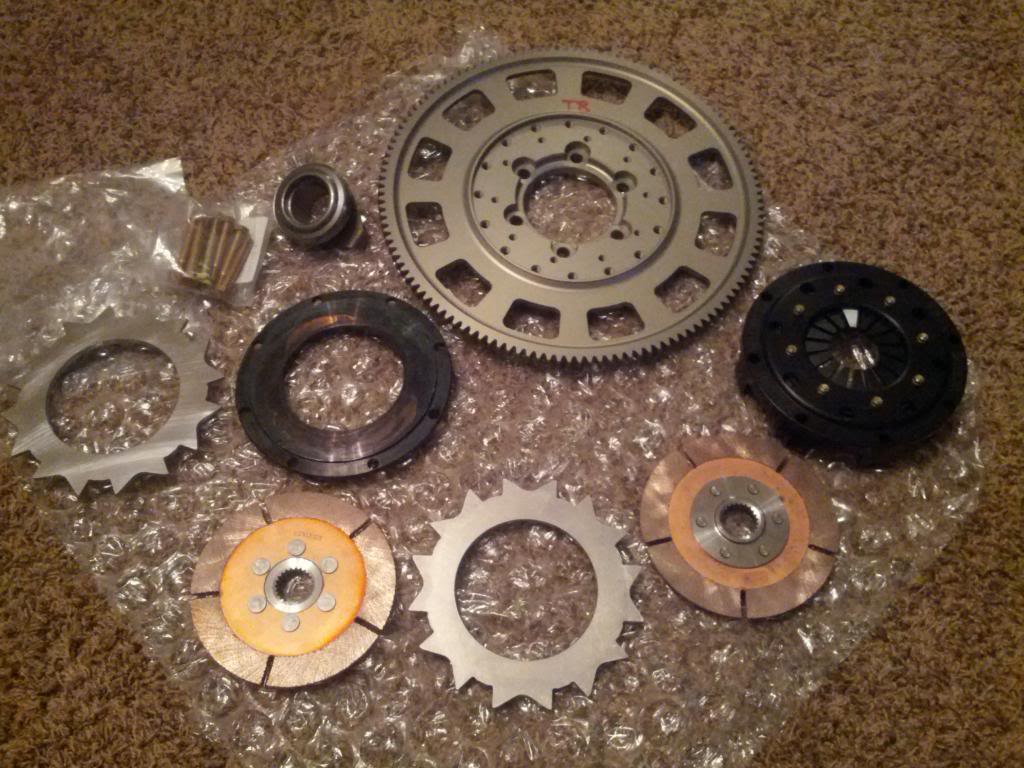
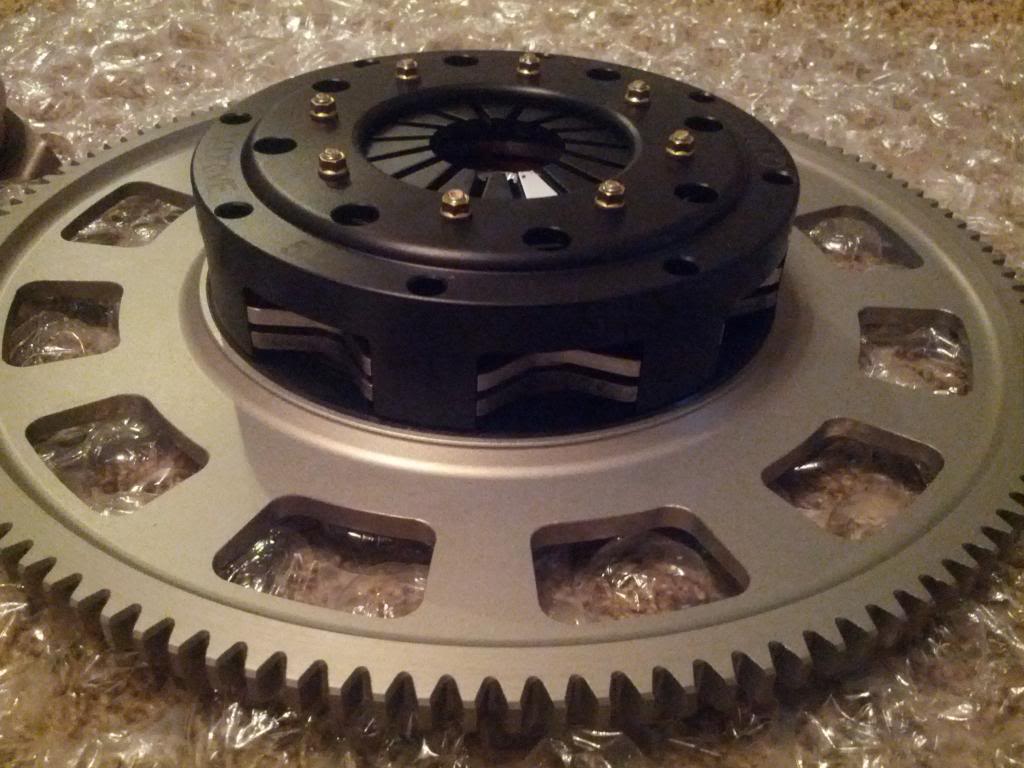
Quartermaster 5.5" Twin Iron Disk Clutch (5.6lbs)
Mazdatrix Race Flywheel (4.75lbs)
Mazda Automatic Transmission Counterweight
Mazdaspeed 5.12 Rear End Gears
The big ****. Most of the mount will be inside the car, it bolts directly to the chassis inside the trunk area. It will go through the rear quarter panels.
Also that is not a love seat, it's actually larger than a full size couch...
Here is the midpipe coated, ignore the parts on the top, those are Miata exhaust parts.

Header coated. Will probably extend the runners later.
Mad Tyte JDM:
CSF Radiator vs. Stock. Almost twice the thickness. Dual row single pass.
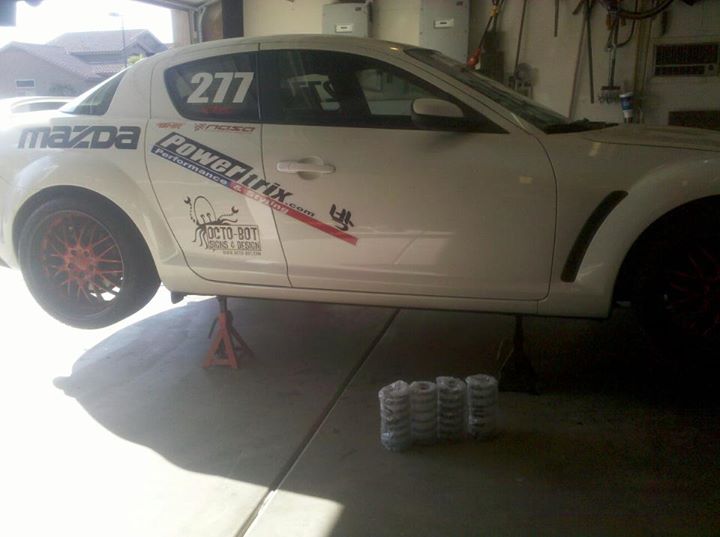
Quartermaster 5.5" Twin Disk Clutch, weighs 5.6lbs and holds 600ft/lbs torque.
Flywheel and assorted hardware as well as the clutch unstacked. Entire clutch and flywheel assembly together is 10.35lbs.
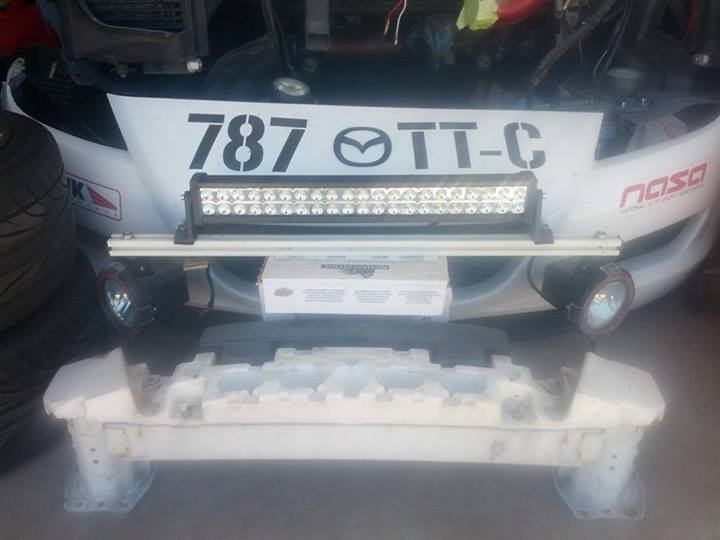
New addition to the light bar for night races. This thing is retarded bright...
As it stands:
Engine and Exhaust:
AEM Cold Air Intake Wrapped in DEI Gold Reflect
BHR Midpipe
Espelir JGT500 Catback Exhaust (2.25" after split)
Agency Power E-Shaft Underdrive Pulley
Black Halo Racing Ignition Kit
Oil Catch Can
Z-Enterprise Grounding Kit
Air Pump Delete
Throttle Body Coolant Bypass
RX8Performance Poly Motor Mounts
Ingalls Torque Dampener
Fuel System and Engine Management:
Idemitsu Premix
Cobb AccessPort
Tuned by MazdaManiac
Suspension, Wheels, Tires and Brakes:
PowerTrix Race Coilovers Custom Spring Rates
Progress Technology Sway Bars
Whiteline Adjustable Spherical Endlinks
Hawk HT-10 Brake Pads
Cheap Blank Rotors
ATE Super Blue Brake Fluid
Agency Power Stainless Braided Brake Lines
Agency Power Stainless Braided Clutch Line
Axial Flow Brake Master Cylinder Brace
17x9" +37 5Zigen ZR+520 (Street)
17x9" +45 Enkei RPF1's (Track)
Interior, Exterior and Electronics:
Interior/Stereo Completely Stripped for Weight Reduction
Custom Plexi Sunroof Insert
Sparco Circuit Plus Driver Seat
Crow Enterprizes 6 Point Harnesses
Momo Mod.08 Steering Wheel
Momo Steering Wheel Hub Adapter
NRG Gen 2.0 Quick Release
Fathead Fabrications Custom 6-Point Roll Cage
AEM Digital Gauges (Water Temp, Oil Temp, Oil Pres.)
Racing Beat Oil Plate and Water Line Adapters
Lotek Triple Gauge Pod
Custom Oil Cooler Grilles
GenRight Hood Louvers
Custom 4" ABS Functional Front Air Splitter
JDM Clear Corners w/ Stealth Bulbs
Removable Light Assembly (HID Angled, LED Bar Center) For Night Events
Mad Stickers Yo
Drivetrain:
Axial Flow Engineering Short Throw Shifter
8-Ball Style Weighted Shift **** (Neo-Chrome)
2" Shift **** Extender
Synchro Saver Plate
Modifications on deck:
Engine and Exhaust:
Rebuild with all OEM Mazda Parts
New Oil Pump
Racing Beat Header (Ceramic Coated)
Racing Beat Non-Resonated Midpipe (Ceramic Coated) 3" Piping
HKS Hi-Power Single Exit 3" Piping
A/C Belt Lip Milled Off of Agency Power E-Shaft Underdrive Pulley
RotaryFX Lightweight WP+ALT Pullies
CSF Racing Aluminum 52mm Radiator
Racing Beat Radiator Screen
SAMCO Silicone Hose Kit (White)
Racing Beat Street Port
Mazmart Oil Pressure Regulator
RX8Performance Electric Water Pump Adapter Plate
Meziere 55GPM Electric Water Pump
Mishimoto 169F Race Thermostat
SOHN Adapter
Fuel System and Engine Management:
Dyno Tune by Jeff @ MazdaManiac (Will have two tunes, max power for Time Trials B Class and a Time Attack A Class Kill tune with a completely flat horsepower curve for hopefully the entire power band via closing the drive by wire throttle body based on RPM.)
Suspension, Wheels, Tires and Brakes:
17x10" +38 Enkei RPF1's, need some more of these.
Interior, Exterior and Electronics:
More weight reduction, gutting doors, cutting out rear speaker deck, etc.
Sparco Evo 2 Passenger Seat
Works Bell Steering Wheel Extension (Not sure on size yet)
GenRight Fender Louvers
Custom 8" Alumalite Functional Front Air Splitter With New Chassis Mounting Design
Brooks Motorsport Composites Swan Neck Mount Wing (68" Span, 13.5" Chord)
Even More Mad Stickers Yo
Drivetrain:
Quartermaster 5.5" Twin Iron Disk Clutch (5.6lbs)
Mazdatrix Race Flywheel (4.75lbs)
Mazda Automatic Transmission Counterweight
Mazdaspeed 5.12 Rear End Gears
The big ****. Most of the mount will be inside the car, it bolts directly to the chassis inside the trunk area. It will go through the rear quarter panels.
Also that is not a love seat, it's actually larger than a full size couch...
Here is the midpipe coated, ignore the parts on the top, those are Miata exhaust parts.
Header coated. Will probably extend the runners later.
Mad Tyte JDM:
CSF Radiator vs. Stock. Almost twice the thickness. Dual row single pass.
Quartermaster 5.5" Twin Disk Clutch, weighs 5.6lbs and holds 600ft/lbs torque.
Flywheel and assorted hardware as well as the clutch unstacked. Entire clutch and flywheel assembly together is 10.35lbs.
New addition to the light bar for night races. This thing is retarded bright...
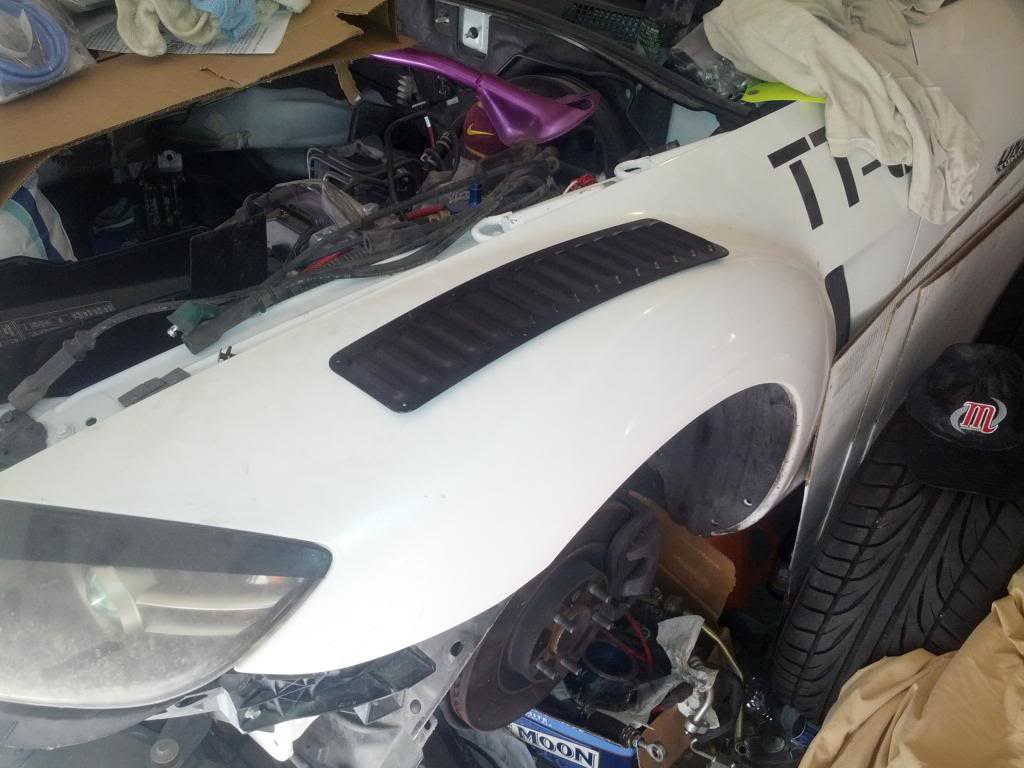
Got some more louvers from GenRight.com for the fenders. They're pretty pliable so I'll be able to bend them in order to get a good contour. These are the same type as on my hood. I was also thinking of adding more to the hood as well.
Here's a picture of one sitting on the fender.
Here's a picture of one sitting on the fender.
So a couple of mods that I forgot to mention that I like a lot are the RX8Performance motor mounts and the Ingalls Torque Dampener. I got the motor mounts first and it made the car feel a lot more solid, shifting got better because the shifter wasn't leaning over or flopping around when cornering, and I don't have to worry about them breaking apart like OEM ones and getting all terrible. Solid product.
Also after that I added the Ingalls Torque Dampener, this made everything even more rigid since it adds a third anchor point for the motor. I'm sure a lot of people would complain about the NVH that the combo of these mounts and the dampener produce but I like a car that feels solid as a rock. Next step is when I have the diff out, I'll do polyurethane mounts on that as well so the entire power plant frame is attached MUCH more solid than before.
Motor Mounts (not my picture):
Torque Dampener (not my picture):
Now for a small update, after researching a lot I've decided to say screw it and do an electric water pump setup so that my engine bay looks way more awesome when I have the hood popped at car shows... yeah...
I found a used RX8Performance adapter plate for a good price and will be using a Meziere 55GPM rated (their biggest remote pump) electric water pump that will just be on a switch. Now you might be asking how will I tell if there is a sudden failure, well I'm going to have a T on the output hose of the pump and will fit a fuel pressure gauge there. Since the coolant will be trying to force its way back through the engine I'm hoping that the pressure will be a little bit higher than the rest of the system during operation so that if it stops, the fuel pressure gauge will fall to below the cap pressure and a warning will go off. Another idea is to monitor the amount of current that the pump is pulling, but if it seizes it can still be pulling power down even if it's stuck.
Adapter plate (not my picture):
Pump (not my picture):
Alright so I'm back from a nearly 4,000 mile round trip to Ohio and have had some time to work on the car... this is what I helped my friend pick up. A '95 NSX (yes it is a complete car, just in pieces, it will be a caged wheel to wheel car very soon.)

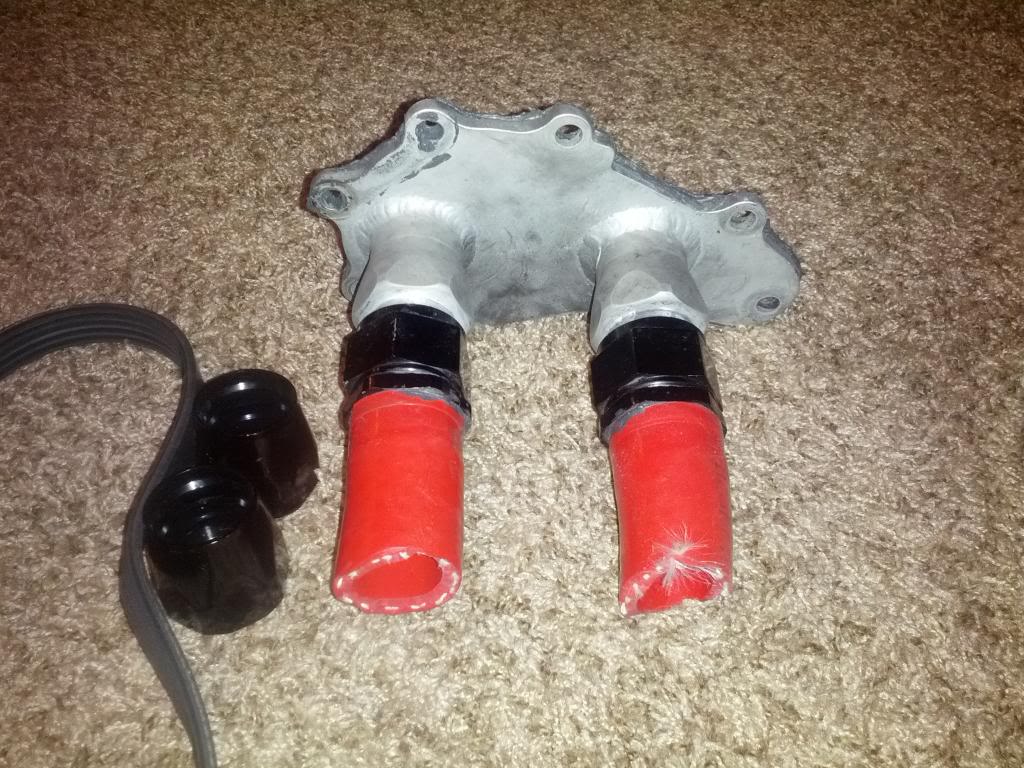
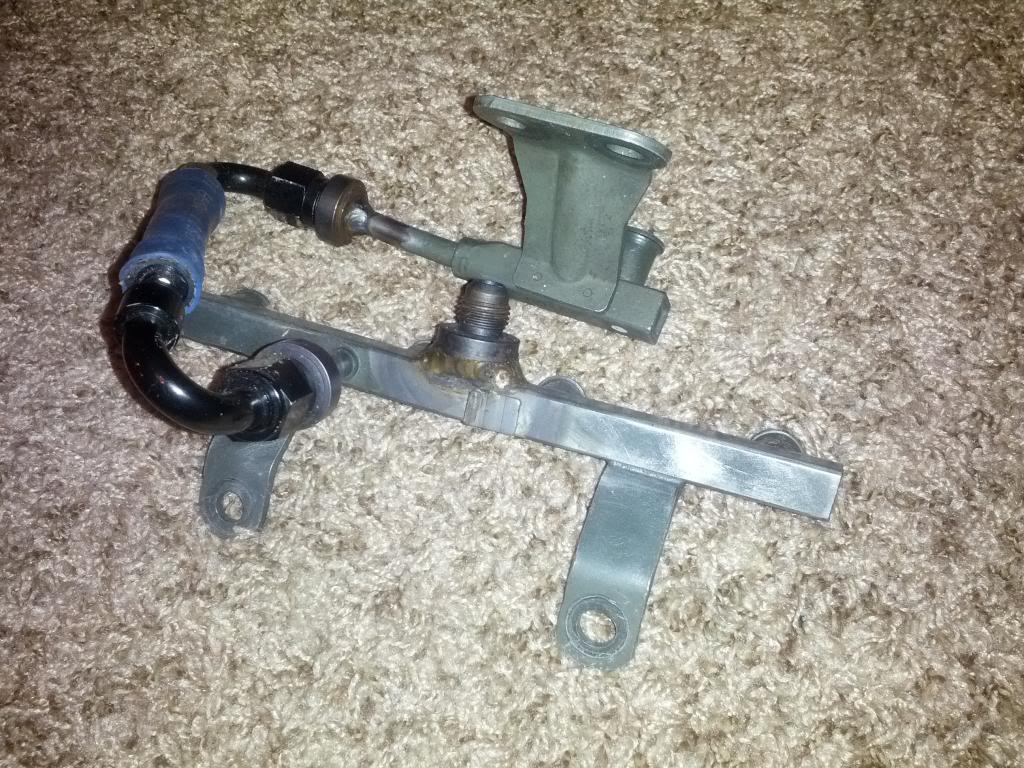
I got the electric water pump plate that I bought from a fellow 8Club member (VICEdOUT) and there was even something extra in the box! I've never gotten bonus parts gifted to me before LOL! It was a set of stock fuel rails that have been modified to use an external regulator and -06 AN fittings. Might be able to put it to good use, we'll see later on down the road.
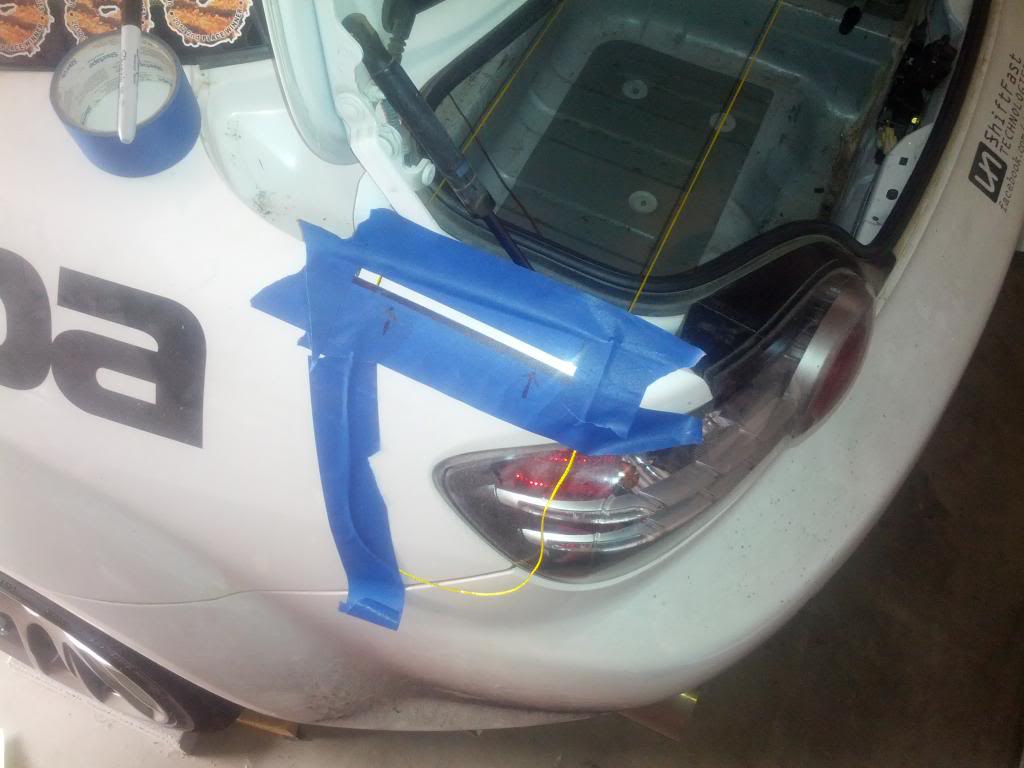
The first thing I did when I was back was install the Brooks Motorsport Composites wing since it was taking up so much damn space in the house.
Taped off the cuts, the paint still chipped but whatever, it's a race car.
Made both sides symmetrical with some strings and stuffs.
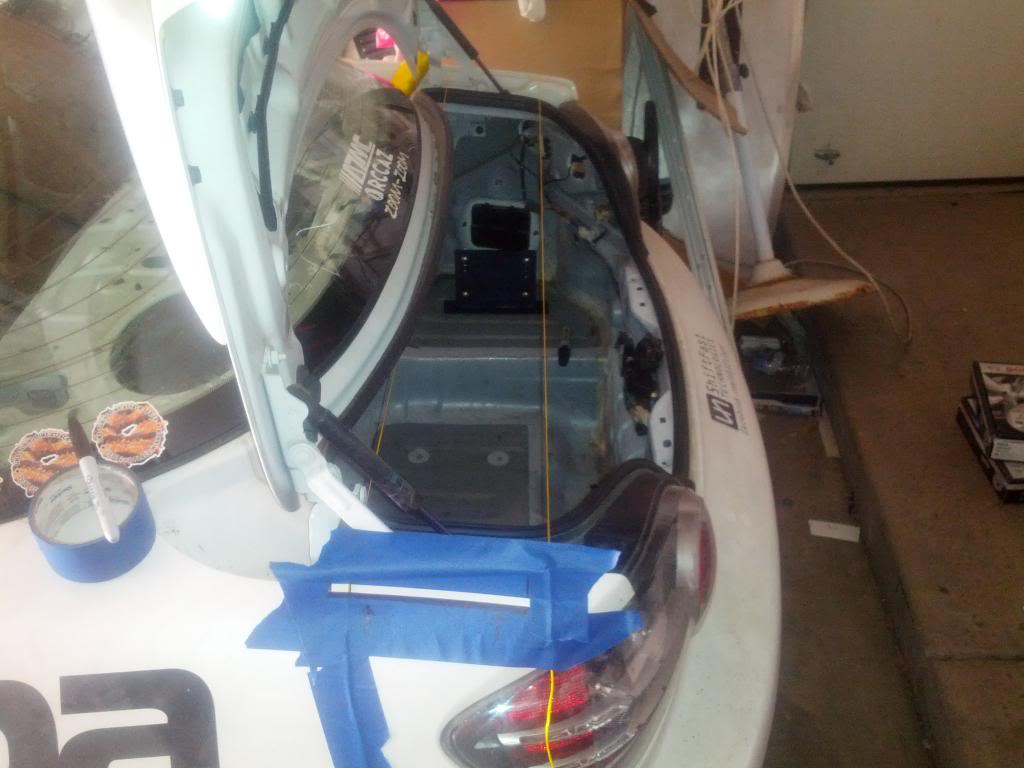
Drill holes, cut in between, then used a file to fine tune it so it fit the upright perfectly.
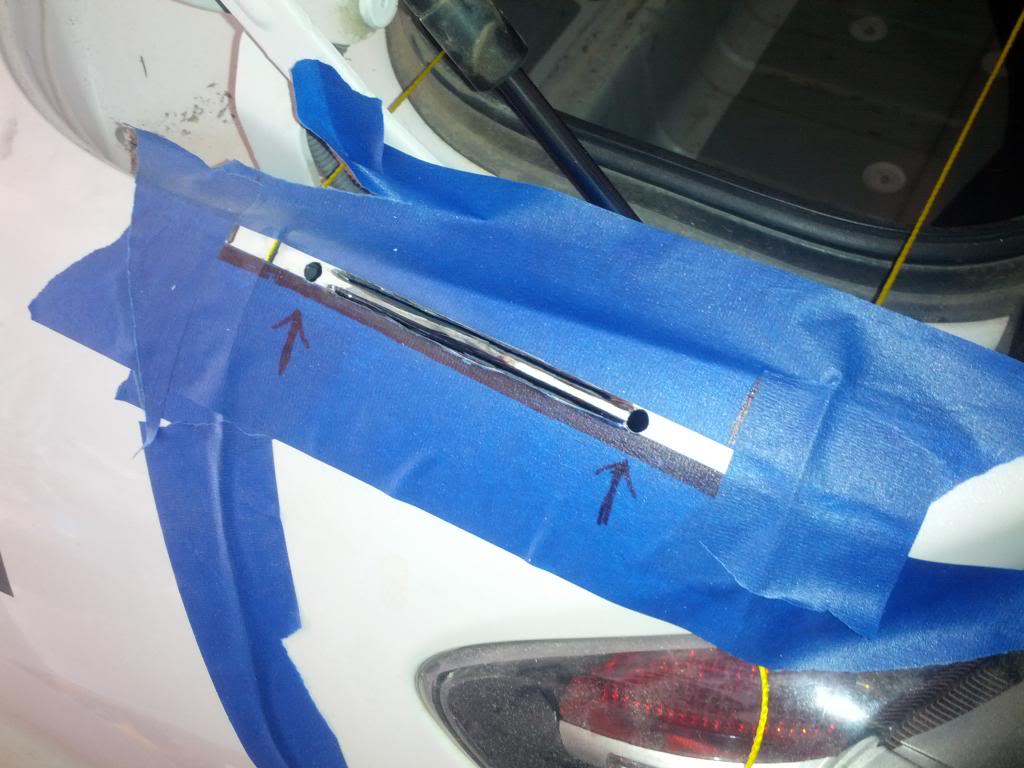
First upright dropped through the slot.
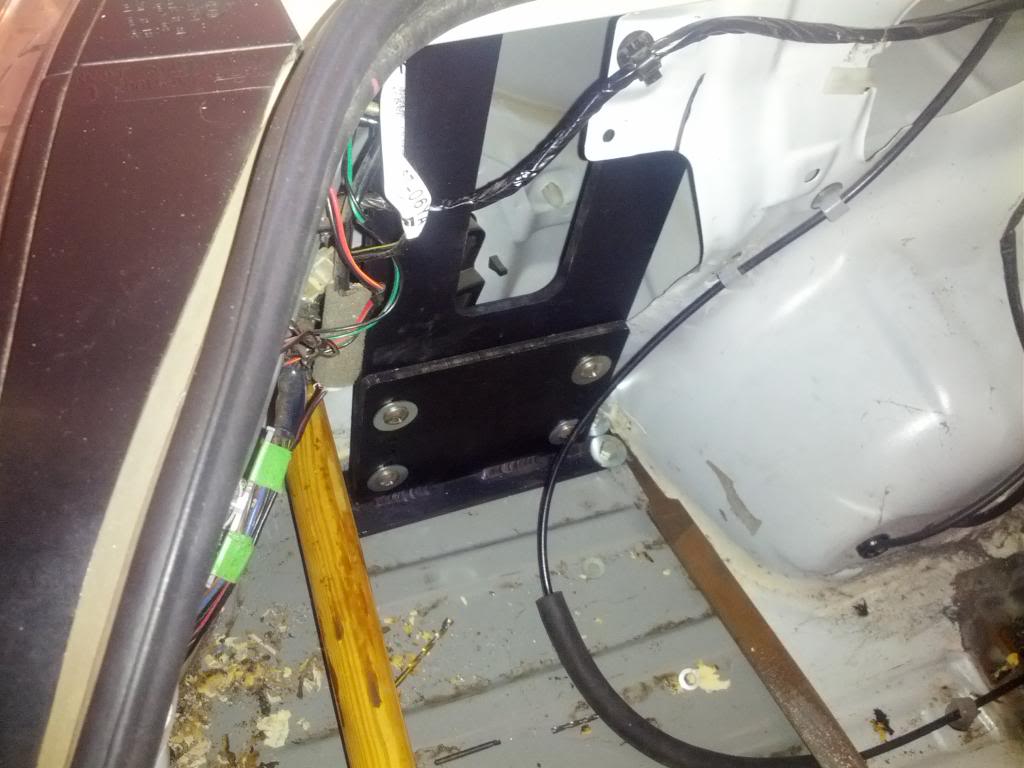
Just bolted into place for now. I'm going to reinforce that trunk area with some aluminum diamond plate I have sitting around so it will be much stronger. I am also going to secure the upright to that vertical metal panel you see in the picture, and possibly a forward tie that goes to the cage.
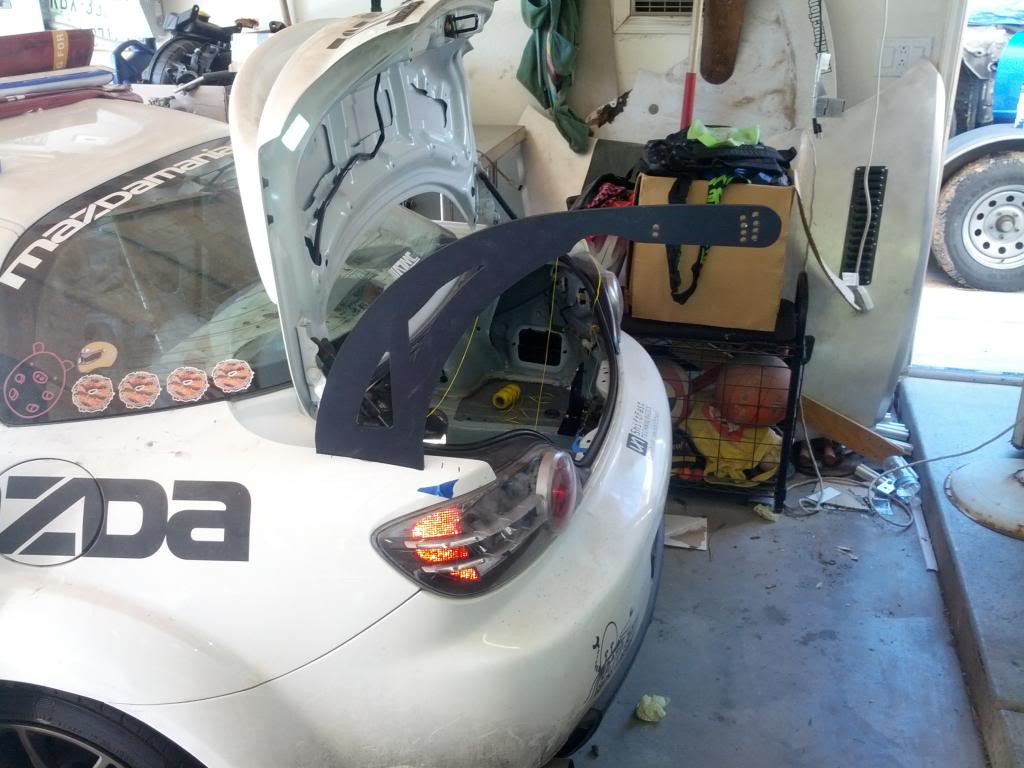
Here it is just sitting in the slots, it's not bolted down or lined up yet in this picture. Also, NSX lurking in the background awaiting final delivery to my buddy's place.
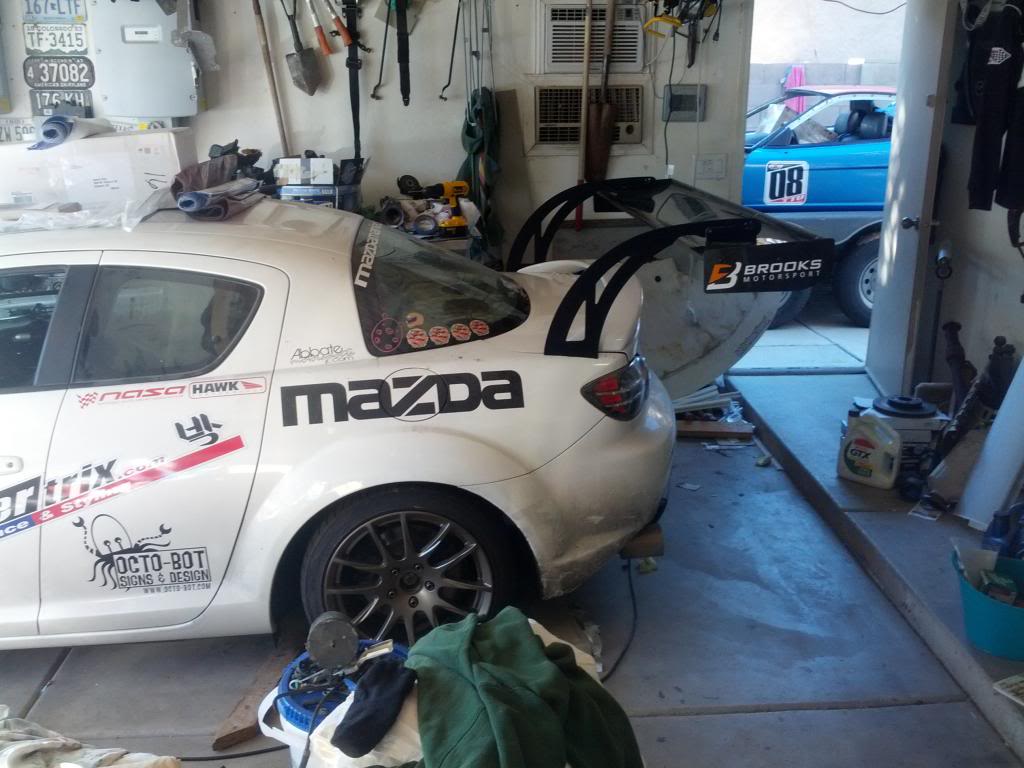
Installed and bolted down. It is SUPER strong vertically but horizontally has a little too side to side flex. I have a solution to strengthen it horizontally, I'll post about it when I try it and if it works. I also took the stock spoiler off, I think it looks much better that way. Also I don't like the way this thing looks in pictures, it's much better in real life and will probably look much better once it's cleaned up and I use a real camera instead of my cell phone.

I got the electric water pump plate that I bought from a fellow 8Club member (VICEdOUT) and there was even something extra in the box! I've never gotten bonus parts gifted to me before LOL! It was a set of stock fuel rails that have been modified to use an external regulator and -06 AN fittings. Might be able to put it to good use, we'll see later on down the road.
The first thing I did when I was back was install the Brooks Motorsport Composites wing since it was taking up so much damn space in the house.
Taped off the cuts, the paint still chipped but whatever, it's a race car.
Made both sides symmetrical with some strings and stuffs.
Drill holes, cut in between, then used a file to fine tune it so it fit the upright perfectly.
First upright dropped through the slot.
Just bolted into place for now. I'm going to reinforce that trunk area with some aluminum diamond plate I have sitting around so it will be much stronger. I am also going to secure the upright to that vertical metal panel you see in the picture, and possibly a forward tie that goes to the cage.
Here it is just sitting in the slots, it's not bolted down or lined up yet in this picture. Also, NSX lurking in the background awaiting final delivery to my buddy's place.
Installed and bolted down. It is SUPER strong vertically but horizontally has a little too side to side flex. I have a solution to strengthen it horizontally, I'll post about it when I try it and if it works. I also took the stock spoiler off, I think it looks much better that way. Also I don't like the way this thing looks in pictures, it's much better in real life and will probably look much better once it's cleaned up and I use a real camera instead of my cell phone.
As for progress on the motor... I tore it down to a shortblock, got the huge flywheel nut off no problem, impact zapped it right off, but I spent ALL OF TODAY fighting with the ******* eccentric shaft bolt. I soaked it with penetrating oil for two hours, tried to impact it off, no dice, soaked for 1 more hour, used propane torch on it for 20 minutes, impact, no dice. Then used propane torch for 15 more minutes, locked the flywheel with an 8 foot piece of unistrut bolted to it (I'm tossing it anyways) and a breaker bar with a 4 foot tube on the end, no dice. Went to the store while the bolt was soaking in penetrating oil more, bought a MAP torch, heated it till it was glowing cherry red hot, sat on it with an impact for like 5 whole minutes, then heated it back up, used the cheater bar setup and I sheared the square 1/2" male socket adapter right off the head of the breaker bar, then I gave up and rolled that piece of **** in back in the garage. Massively frustrated by this. My buddy has a 1" drive impact wrench and a 300PSI nitrogen tank that I am going to borrow, and that ****** is coming off if it's the last thing I do.
Pictures because build thread...
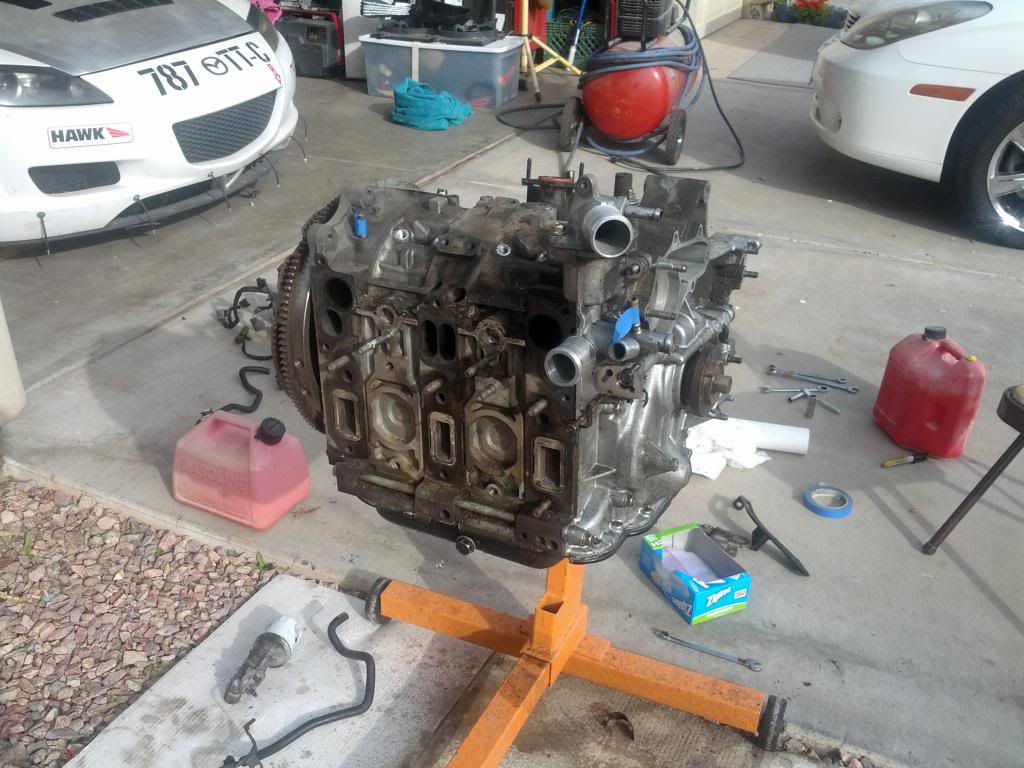
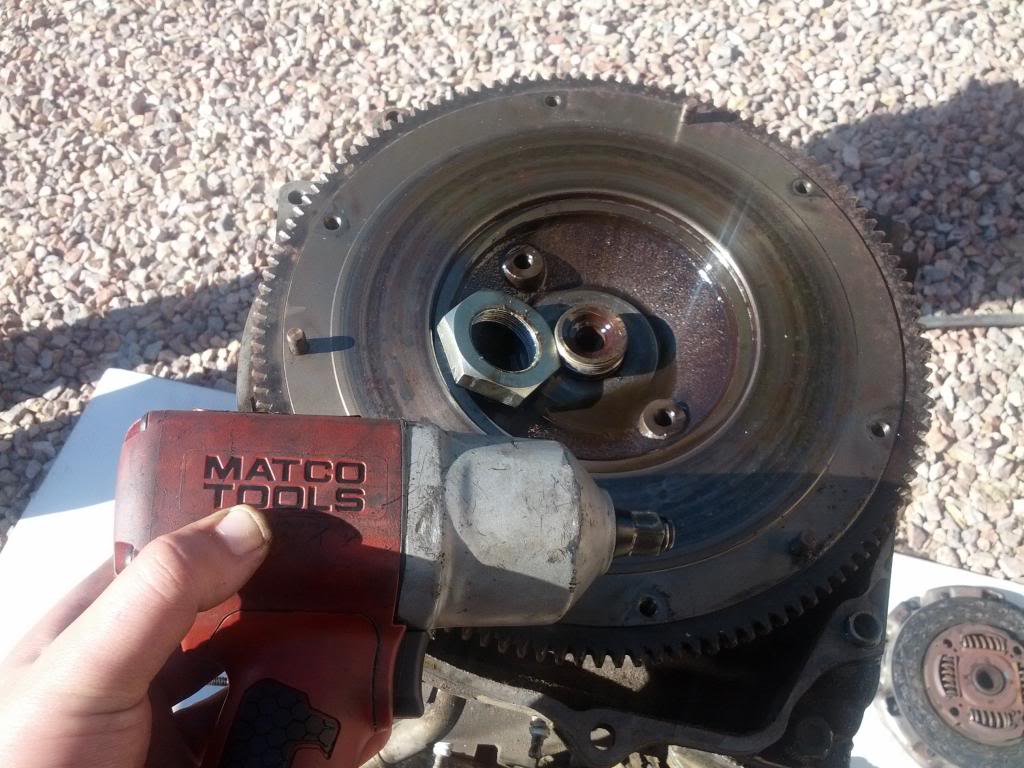
Pictures because build thread...
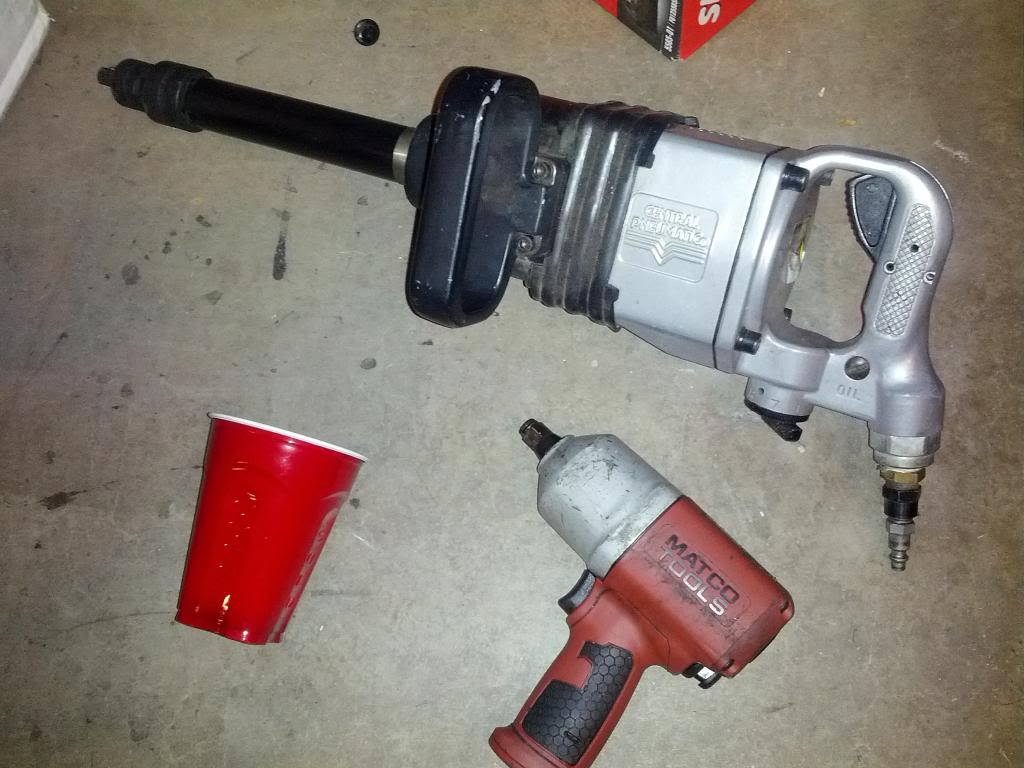
Well I came up with my own technique after the big impact wouldn't do it on its own... 1" Drive Impact Wrench that weighs 40lbs and produces 2,000 ft-lbs peak torque, and a monkey wrench with 3 foot cheater bar after heating the bolt with a MAP torch.
At the same time.
What a nightmare... onwards with the build.
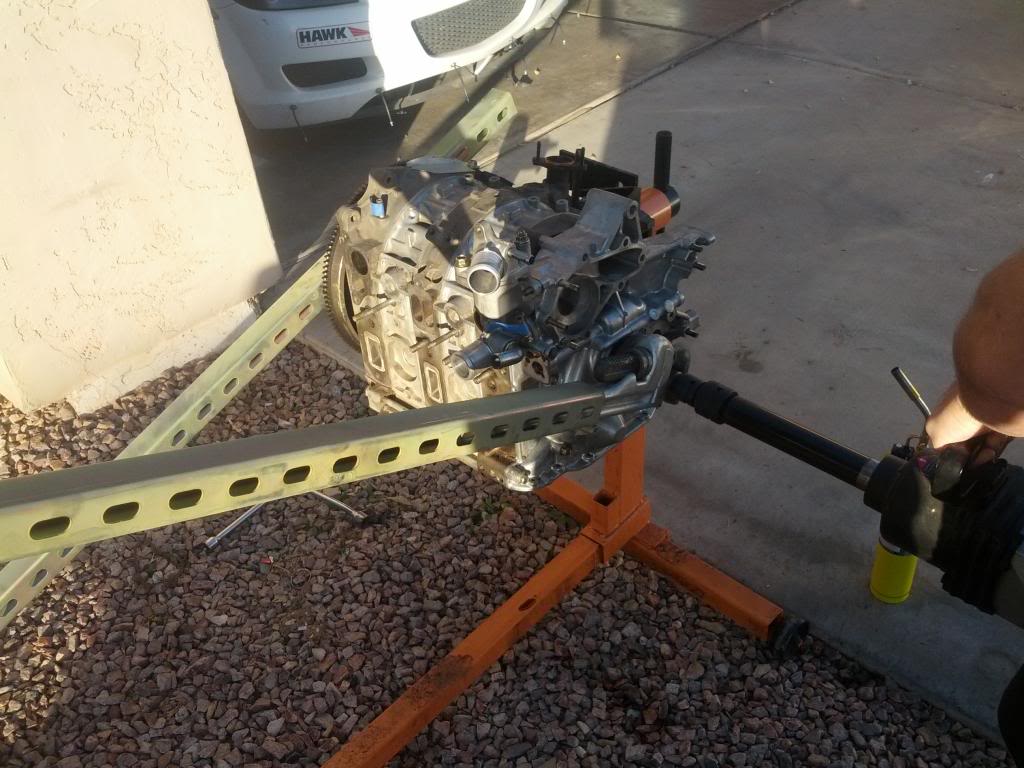
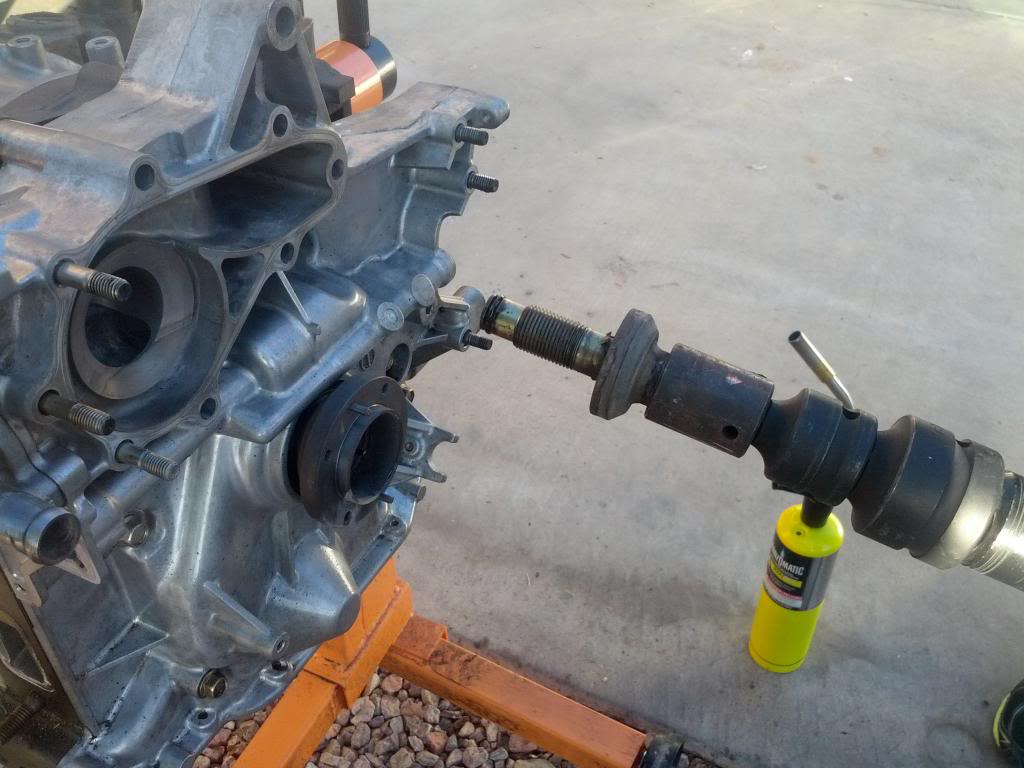
At the same time.
What a nightmare... onwards with the build.
Time is now mid January-ish?
So the lack of updates has been because I've been really sick... hacking up my lungs and feels like my face is about to explode. Hopefully I feel better by this weekend because I'll be at the track. This is the event that I really wanted to have the RX-8 done for but that's definitely not happening. I will be driving my dad's Miata, we finally registered it as a team car for the appropriate class. Team Beer:30 in TT-E. He will be out of town though so it will be just me driving, I'll try to get some video, my dad picked up a new GoPro Hero3+ Black Edition that I've been dying to try out.
In other news, I found a used wired in AMB transponder and picked that up so I don't have to pay for rentals anymore.
Also I just received my award for the 2013 Time Attack Season, a sweet windbreaker that I can parade myself around in at the track lmao. I finished with the most points overall out of any class and in first place for TA-A which is the 15lbs/HP and up division. There were 11 competitors in my class and 43 competitors total across the three different classes. Looking forward to another good season.

Also my 1-piece Sparco Jade firesuit doesn't fit me very well (the torso is just a little too short... tall people problems) so I found this site that sells used NASCAR firesuits and bought a hilarious one. It's a 2-piece Sparco and fits much better. Crown Royal is the drink of choice at the track parties and I like purple. Plus now I can yell Talladega Nights one liners whenever I please.
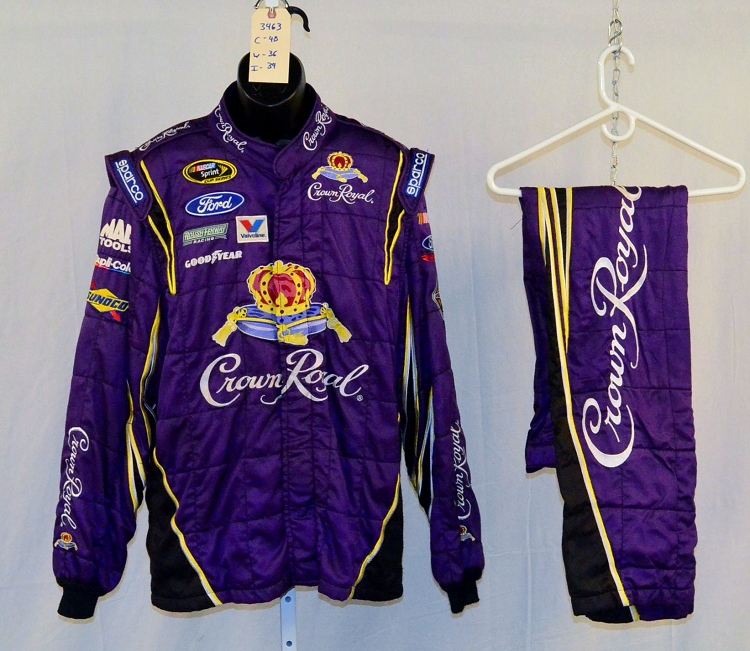
So the lack of updates has been because I've been really sick... hacking up my lungs and feels like my face is about to explode. Hopefully I feel better by this weekend because I'll be at the track. This is the event that I really wanted to have the RX-8 done for but that's definitely not happening. I will be driving my dad's Miata, we finally registered it as a team car for the appropriate class. Team Beer:30 in TT-E. He will be out of town though so it will be just me driving, I'll try to get some video, my dad picked up a new GoPro Hero3+ Black Edition that I've been dying to try out.
In other news, I found a used wired in AMB transponder and picked that up so I don't have to pay for rentals anymore.
Also I just received my award for the 2013 Time Attack Season, a sweet windbreaker that I can parade myself around in at the track lmao. I finished with the most points overall out of any class and in first place for TA-A which is the 15lbs/HP and up division. There were 11 competitors in my class and 43 competitors total across the three different classes. Looking forward to another good season.
Also my 1-piece Sparco Jade firesuit doesn't fit me very well (the torso is just a little too short... tall people problems) so I found this site that sells used NASCAR firesuits and bought a hilarious one. It's a 2-piece Sparco and fits much better. Crown Royal is the drink of choice at the track parties and I like purple. Plus now I can yell Talladega Nights one liners whenever I please.
So I did the event at WHP East Track and Team Beer:30 (my dad and I) were the only ones in TT-E. Got a leg up on the other guys I guess. Also for time attack... I got second place. I my front tires corded during the first hot lap and my time was 2 seconds slower than what I was running all day. 1:07 vs. 1:09. Also no video, didn't get the memory card in time. Totally forgot about that.
The suit was a huge hit... was definitely hilarious walking around the pits. I constantly got compliments about how awesome it was, got asked to take pictures with various people and spectators, and also was asked a handful of times how I got sponsored by Crown Royal hahaha.
Good times.
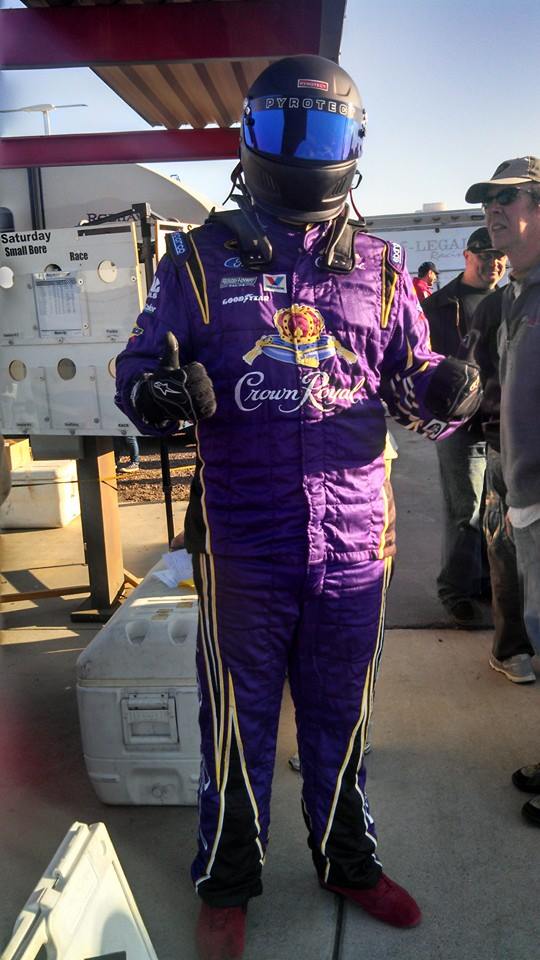
Took a couple nicer photos (non-cellphone lol) of the car rolled out in the driveway. The hood and bumper aren't secured they're just sitting there, and the splitter is not on. Also those are 17x9+38 wheels but I bought them with 235mm tires stretched onto them so they look dumb until I can get some 275/40R17 tires for street duty on there. Also the fender vents are just sitting on the fenders I haven't cut or attached them yet. Just wanted to see how they looked.
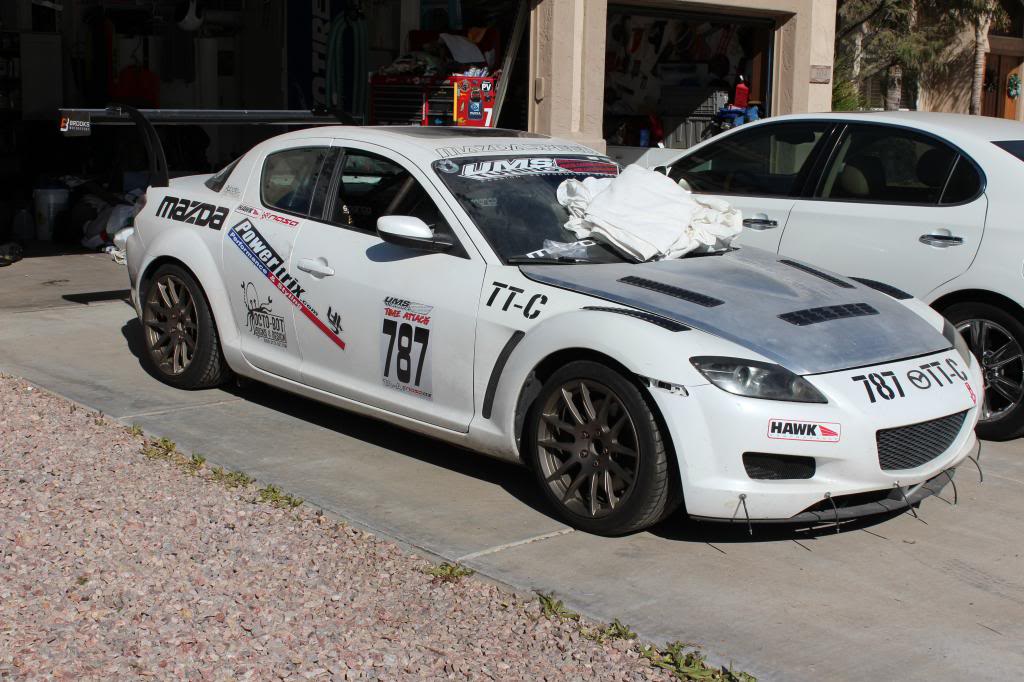
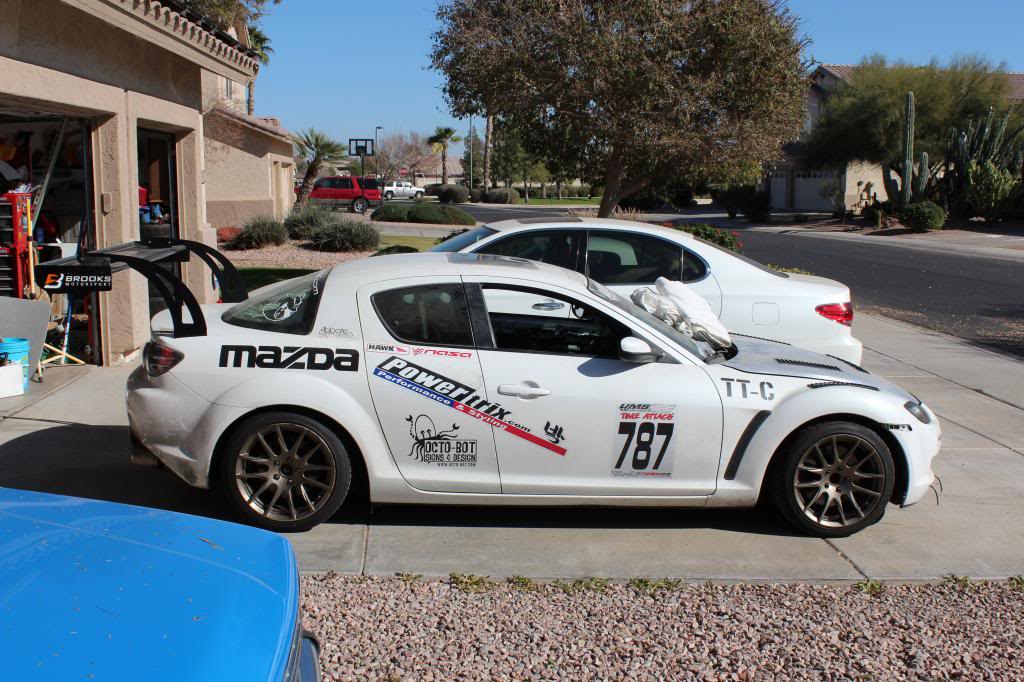
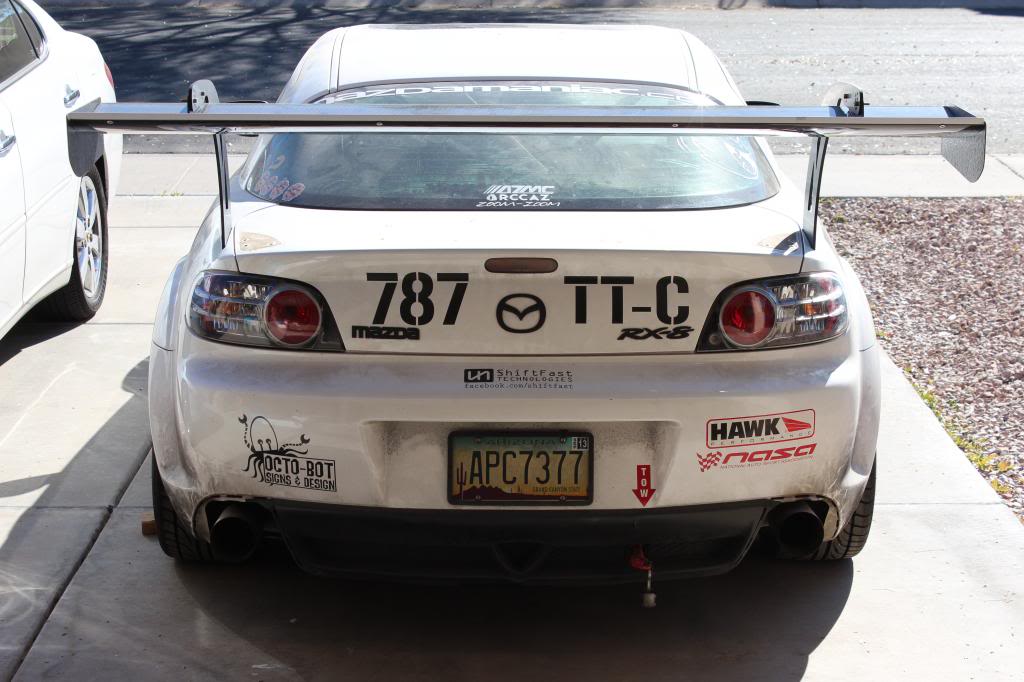
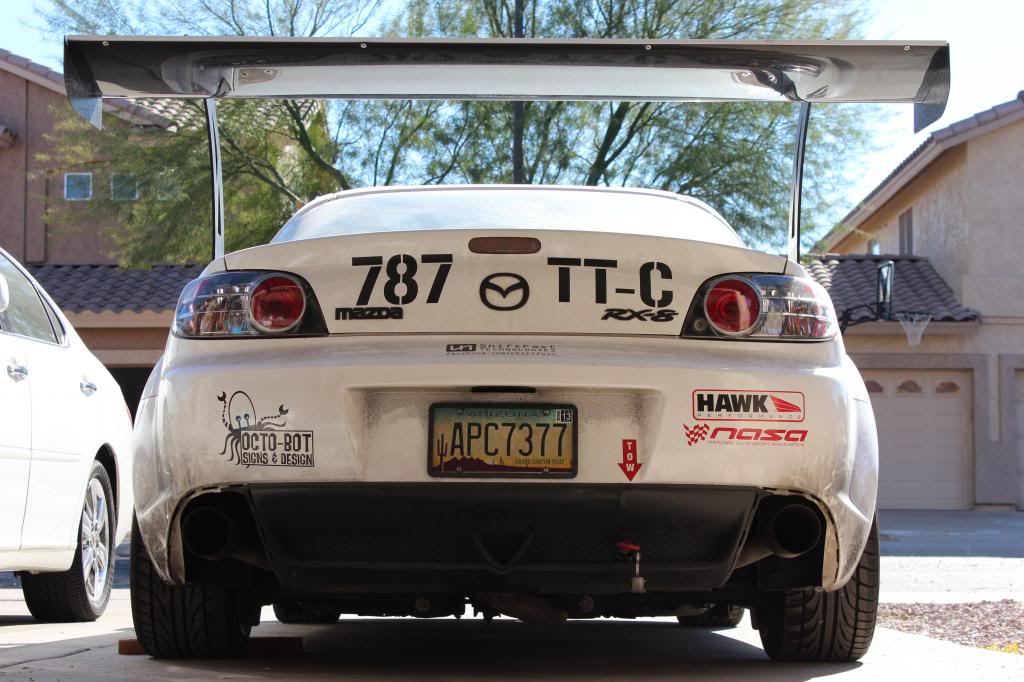
The suit was a huge hit... was definitely hilarious walking around the pits. I constantly got compliments about how awesome it was, got asked to take pictures with various people and spectators, and also was asked a handful of times how I got sponsored by Crown Royal hahaha.
Good times.
Took a couple nicer photos (non-cellphone lol) of the car rolled out in the driveway. The hood and bumper aren't secured they're just sitting there, and the splitter is not on. Also those are 17x9+38 wheels but I bought them with 235mm tires stretched onto them so they look dumb until I can get some 275/40R17 tires for street duty on there. Also the fender vents are just sitting on the fenders I haven't cut or attached them yet. Just wanted to see how they looked.
And now motor tear down time. Looks pretty decent to me, but I have extremely limited experience and would appreciate input. This is my first time tearing apart a motor, so be nice I'm just a kid hahaha. 104k miles on the motor, I acquired the car at 74k, third owner. First two owners didn't even know it consumed oil on purpose so it probably wasn't cared for very well. Was pulled because it lacked top end power and because of a pretty bad front main oil seal leak.
Found that most of the exhaust ports were just PACKED with crud, was probably why it didn't make good power up top, it couldn't breath. Also there was a TON of carbon build up. I used seafoam on this car probably about 4 times and after seeing this, I'm pretty sure it didn't do a whole lot at all... I'm lucky that it didn't chunk off and destroy the housings and irons.
Now it's time to send stuff out for machine work, order the rebuild kit from Mazdaspeed motorsports then when everything is ready, get this thing rebuilt and back in the car.
Also I just wiped down all the surfaces with a paper towel so far, I haven't really cleaned any of them that well. So some of the buildup may look like the hard parts are in tough shape but it's just oil and carbon and crap still on them.
Next step is porting the irons, I have a local place that will be doing the lapping, and the housings will be sent out to Freelance Motorsports for some CNC action, I just have to submit the photos of the housings so they can either approve or deny my work request.
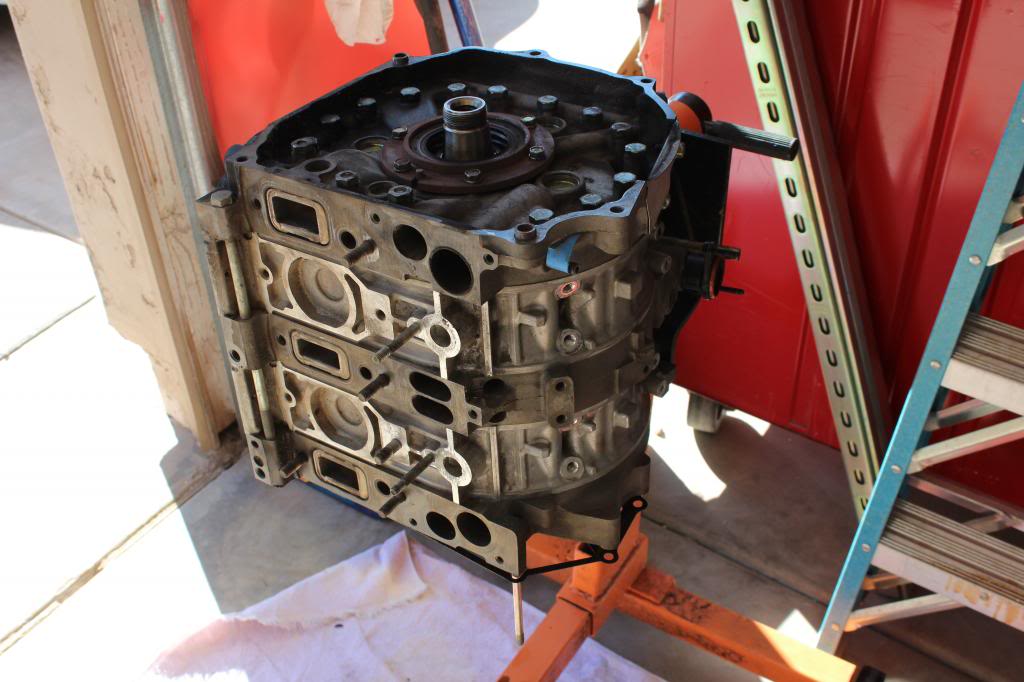
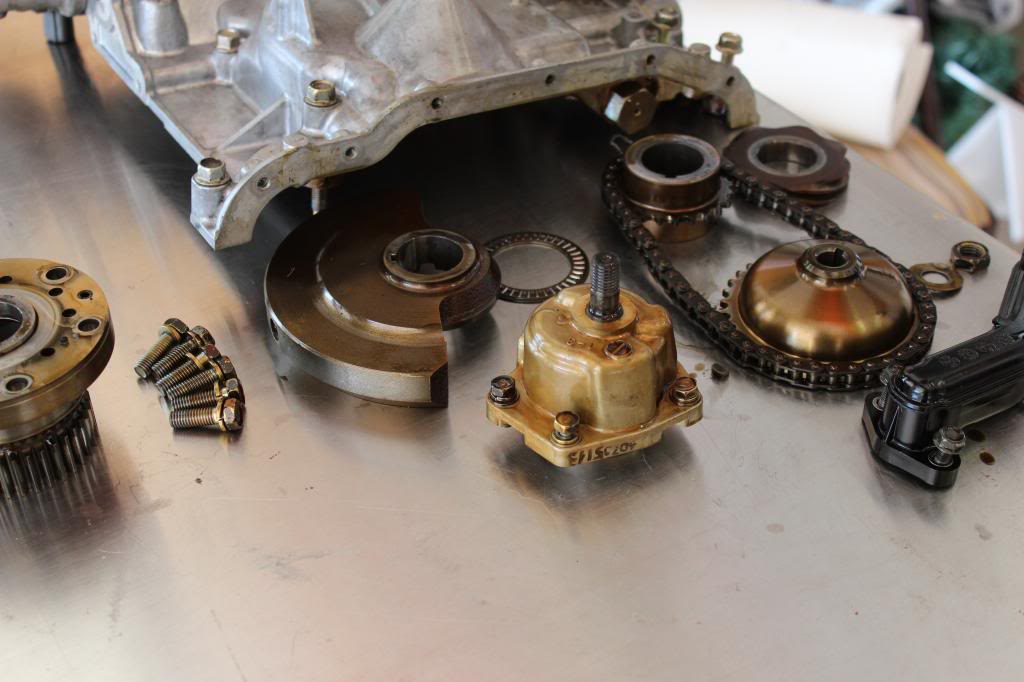
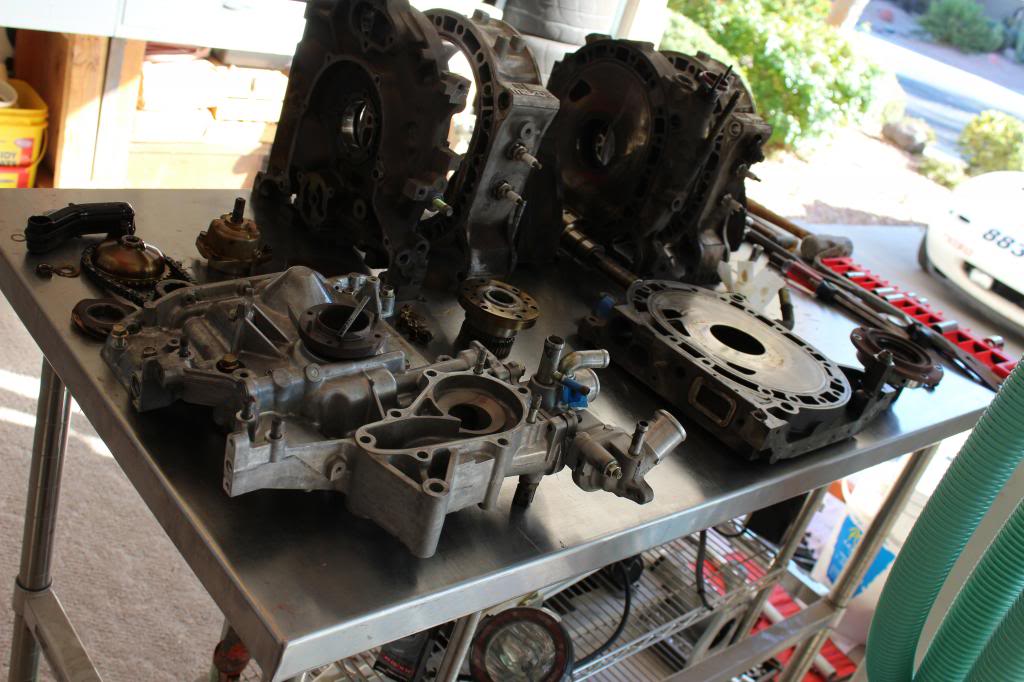
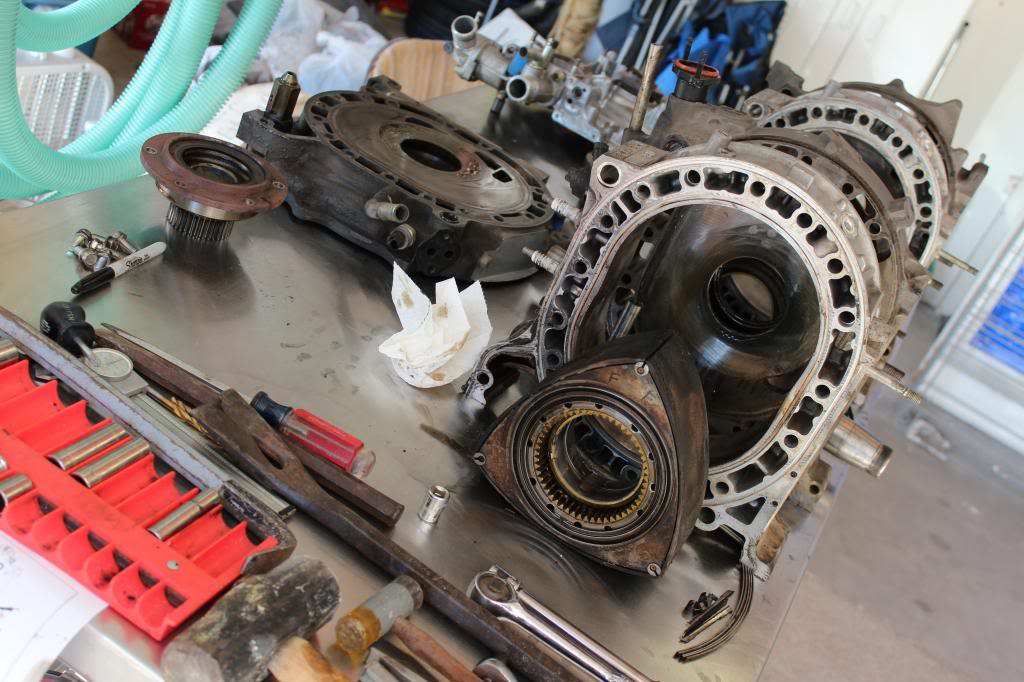
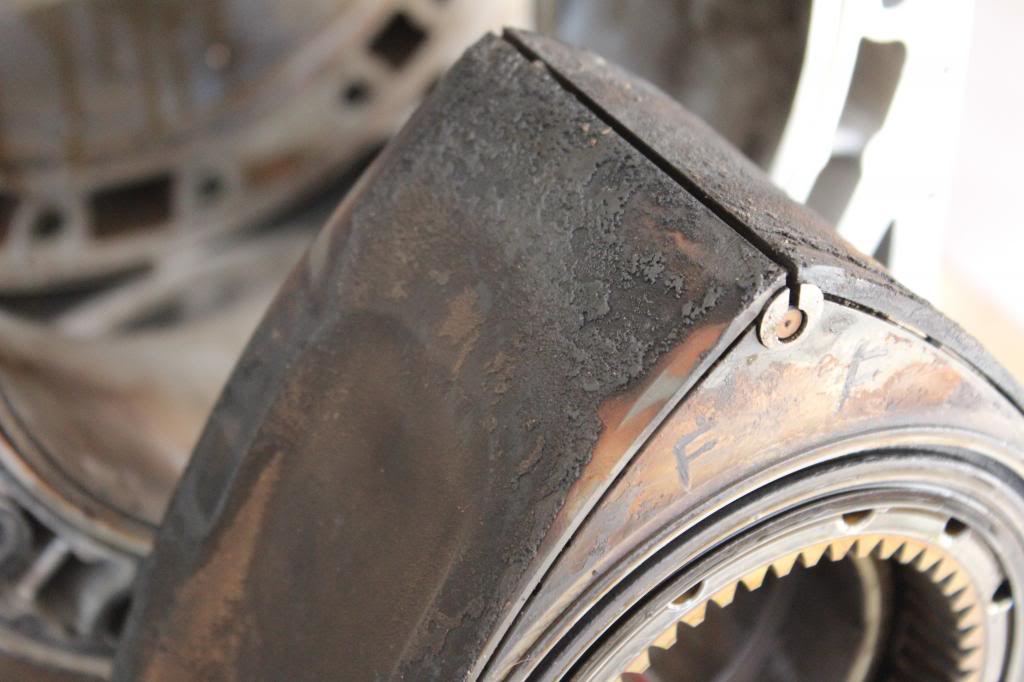
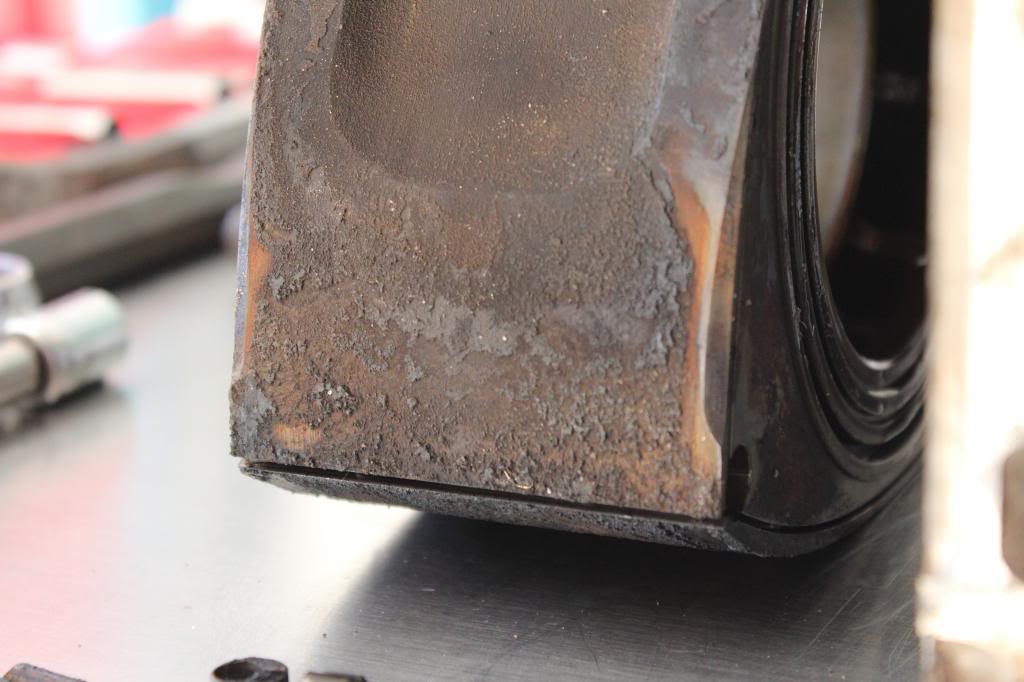
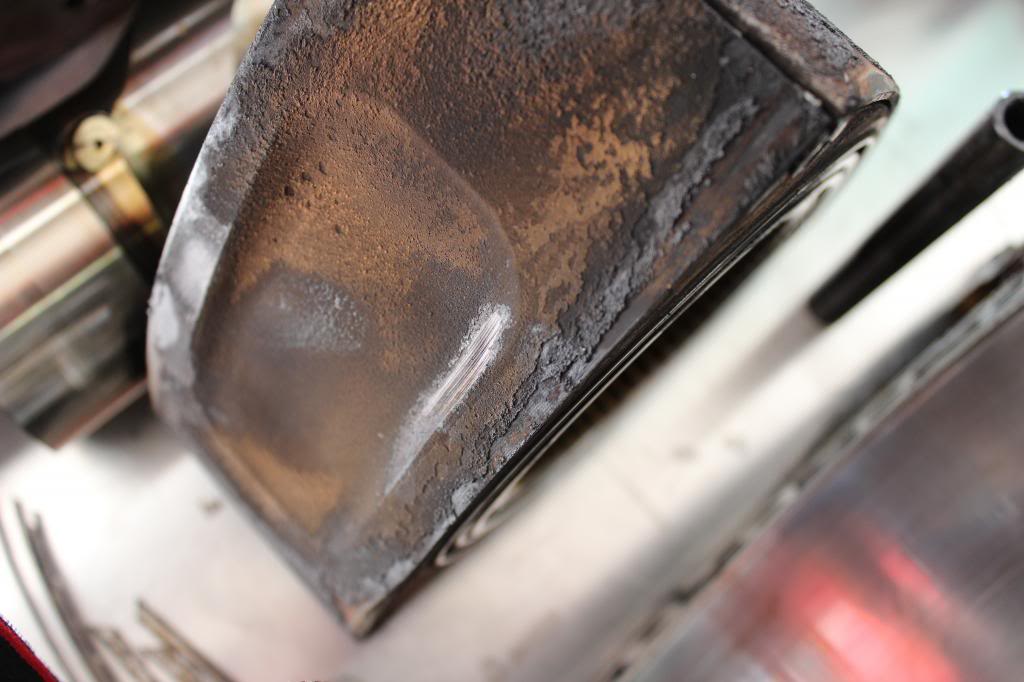
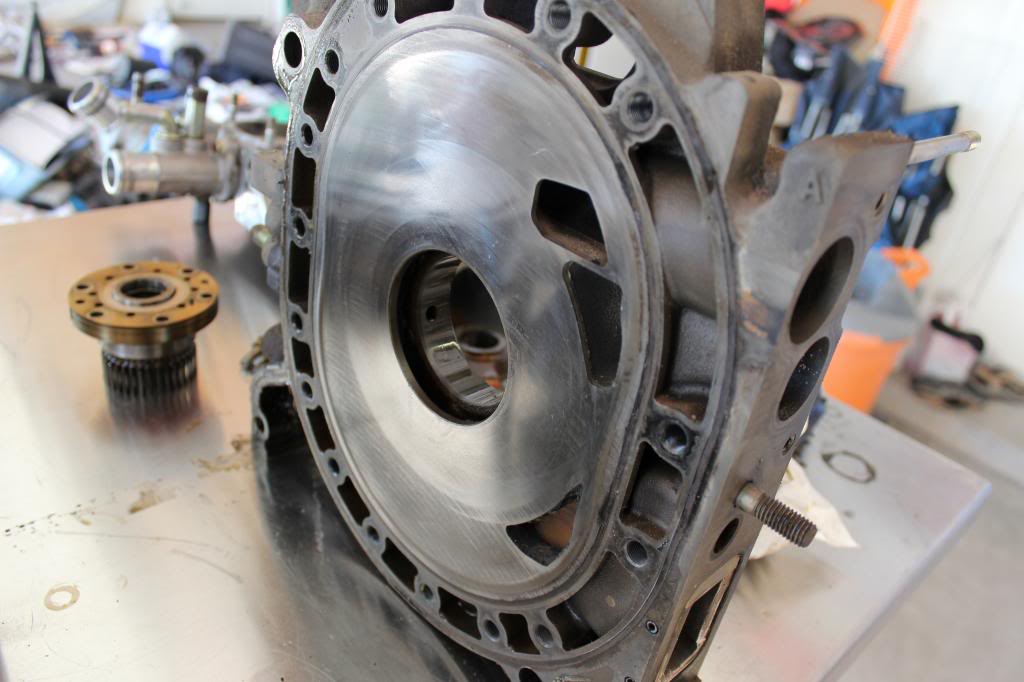
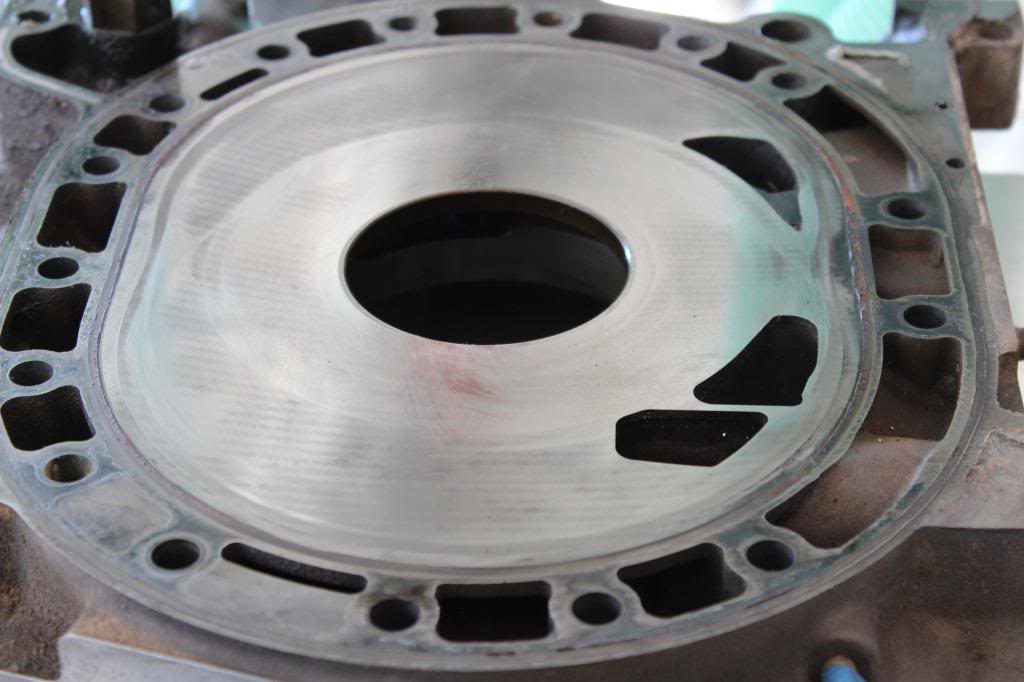
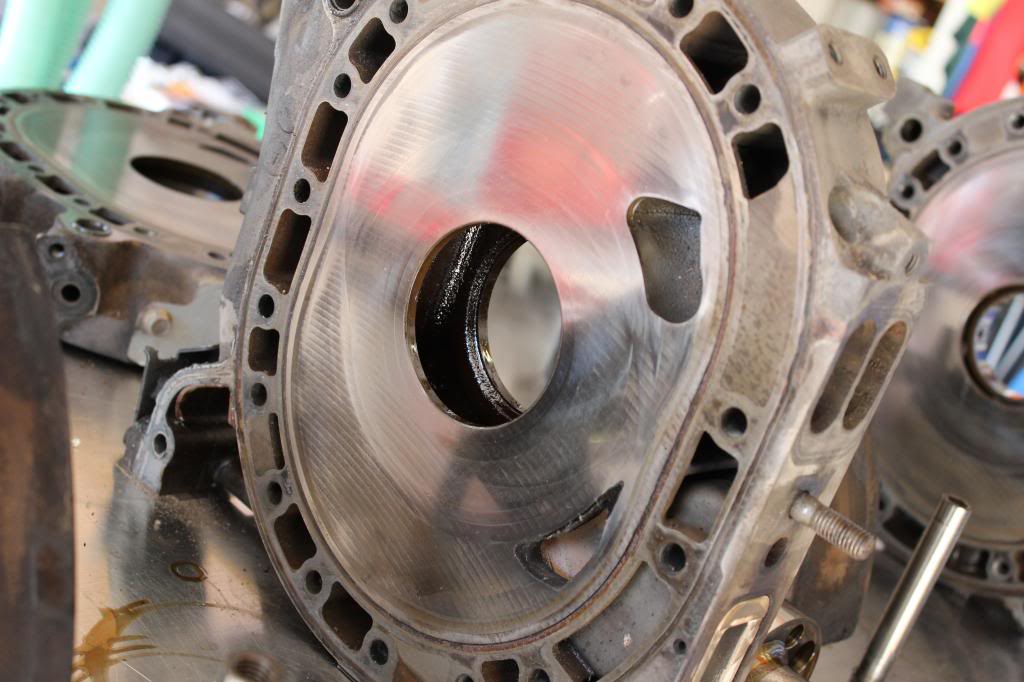