New member from Ireland
 05-30-12, 02:53 PM
#151
Full Member
Thread Starter

Join Date: Nov 2011
Location: Ireland
Posts: 190
Likes: 0
Received 0 Likes
on
0 Posts
After cutting the lines for the front bonnet a bit of sanding going on. All this front section has been made by hand


A bit of filling and sanding on the bonnet

Ok moved the Lambo/MR2 out of the unit for a clean up


Front section getting close to primer

Primed one coat

Underside of the bonnet primed

A bit of filling and sanding on the bonnet
Ok moved the Lambo/MR2 out of the unit for a clean up
Front section getting close to primer
Primed one coat
Underside of the bonnet primed


 06-05-12, 04:09 PM
#153
Full Member
Thread Starter
Join Date: Nov 2011
Location: Ireland
Posts: 190
Likes: 0
Received 0 Likes
on
0 Posts
Two coat of primer on the door and five on the rear quater its coming along now

While the primer was drying i made this

Test Fitted


Primer coat three on the door

Front wing ready for primer

First coat or primer

While the primer was drying i made this
Test Fitted
Primer coat three on the door
Front wing ready for primer
First coat or primer
06-07-12, 01:43 PM
#154
Full Member
Thread Starter
Join Date: Nov 2011
Location: Ireland
Posts: 190
Likes: 0
Received 0 Likes
on
0 Posts
Didnt get much done today as i dropped the roof scoop up to Dublin to get it carbon fibered
A few pin holes filled

My friend daughters car the laquer peeled off so a paint job was aquired


Re-primered

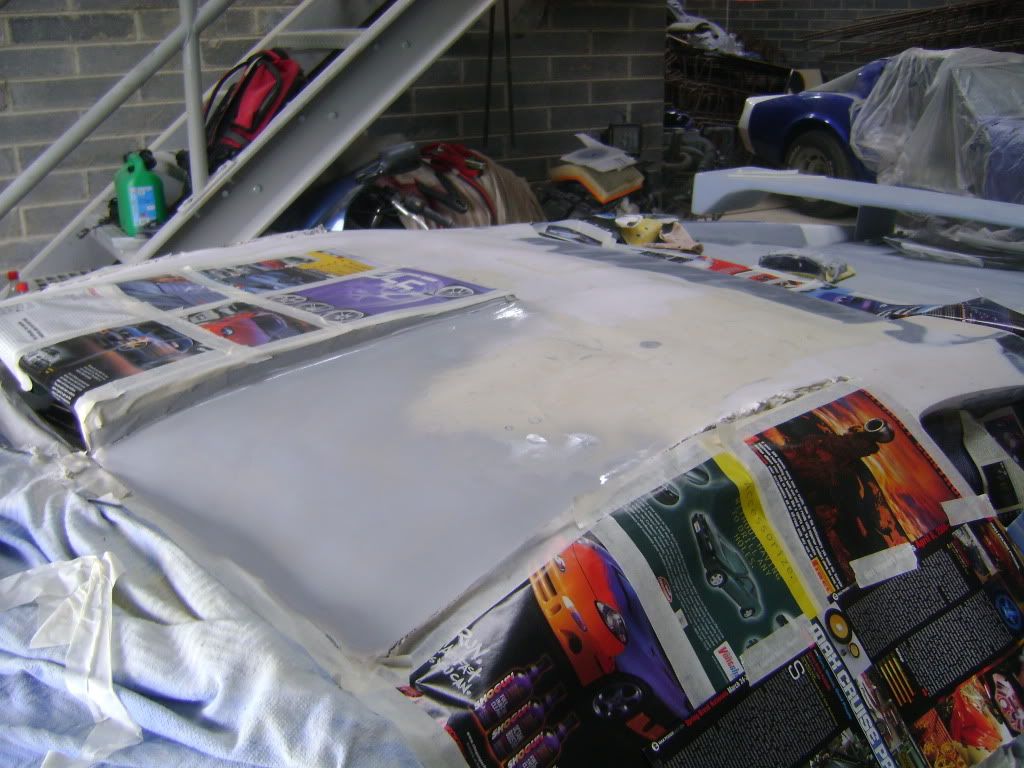
Bonnet first coat of primer

Getting there

Front bumper more crap fiberglass a good bit of work here

A few pin holes filled
My friend daughters car the laquer peeled off so a paint job was aquired
Re-primered
Bonnet first coat of primer
Getting there
Front bumper more crap fiberglass a good bit of work here
06-08-12, 02:11 PM
#155
Full Member
Thread Starter
Join Date: Nov 2011
Location: Ireland
Posts: 190
Likes: 0
Received 0 Likes
on
0 Posts
A bit of sanding going on

Bonnet all wet sanded and sprayed black

Finished

Second coat of primer

Front bumper and passenger side first coat of primer


Primer drying

Front section all masked yp and sprayed black


Bonnet all wet sanded and sprayed black
Finished
Second coat of primer
Front bumper and passenger side first coat of primer
Primer drying
Front section all masked yp and sprayed black
 06-10-12, 06:42 AM
#157
Full Member
Thread Starter
Join Date: Nov 2011
Location: Ireland
Posts: 190
Likes: 0
Received 0 Likes
on
0 Posts
Put the bonnet back on to stop any dust getting on the black paint job

A few pin holes to fill

A bit of sanding on the passenger side

Pin holes all rubbed down

Second coat of primer

A few pin holes to fill
A bit of sanding on the passenger side
Pin holes all rubbed down
Second coat of primer


 06-15-12, 02:37 PM
#162
Full Member
Thread Starter
Join Date: Nov 2011
Location: Ireland
Posts: 190
Likes: 0
Received 0 Likes
on
0 Posts
Cheers guys not enough hours in the day 
Havent been doing much as i have the flu :-)
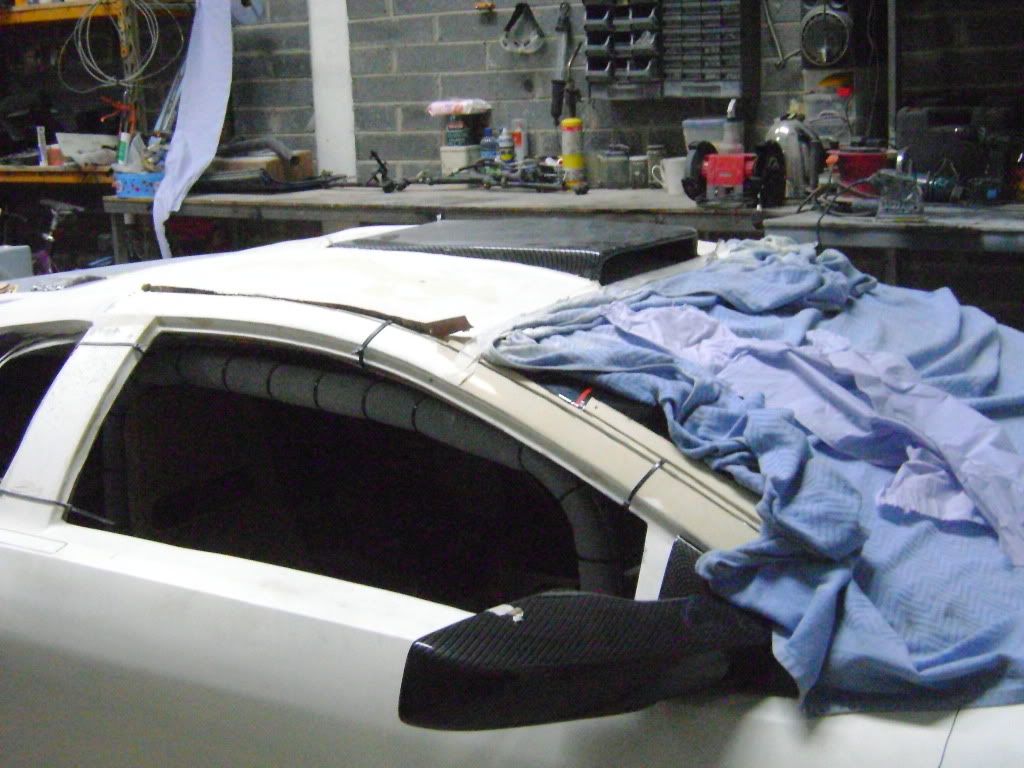
The wing mirror on


Lots of sanding going on as im waiting on primer to arrive


4 Cars in a tight squeeze

Havent been doing much as i have the flu :-)
The wing mirror on
Lots of sanding going on as im waiting on primer to arrive
4 Cars in a tight squeeze

 06-22-12, 01:27 PM
#164
Full Member
Thread Starter
Join Date: Nov 2011
Location: Ireland
Posts: 190
Likes: 0
Received 0 Likes
on
0 Posts
Got stuck into the passenger side of this

Got the sticker on

Got the two grill inserts painted black

Sticker

Got the roof part painted this is where the roof scoop goes

More pin holes

Side indicators there LED's

Bolted the bonnet back on its hinges and put in the bonnet pins and grills


First coat of primer yee haa at last

Got the sticker on
Got the two grill inserts painted black
Sticker
Got the roof part painted this is where the roof scoop goes
More pin holes
Side indicators there LED's
Bolted the bonnet back on its hinges and put in the bonnet pins and grills
First coat of primer yee haa at last


 06-24-12, 10:55 AM
#166
Full Member
Thread Starter
Join Date: Nov 2011
Location: Ireland
Posts: 190
Likes: 0
Received 0 Likes
on
0 Posts
Had 50 odd led's left over from the rear lights as you could only purchase them in bunches of 50's so i am putting them into the roof

Passenger side being wired up

All three rows working

Interior shot of the led's working


Drivers side wired up and working

Interior shot

Second coat of primer

Third coat or primer


Looks like a bomb on the roof of the car :-) i have to raise the roof up 15mm so all the wires will be hidden

Passenger side being wired up
All three rows working
Interior shot of the led's working
Drivers side wired up and working
Interior shot
Second coat of primer
Third coat or primer
Looks like a bomb on the roof of the car :-) i have to raise the roof up 15mm so all the wires will be hidden

 good job!
06-26-12, 01:26 PM
good job!
06-26-12, 01:26 PM
#168
Full Member
Thread Starter
Join Date: Nov 2011
Location: Ireland
Posts: 190
Likes: 0
Received 0 Likes
on
0 Posts
@ nyek7 - Cheers :-)
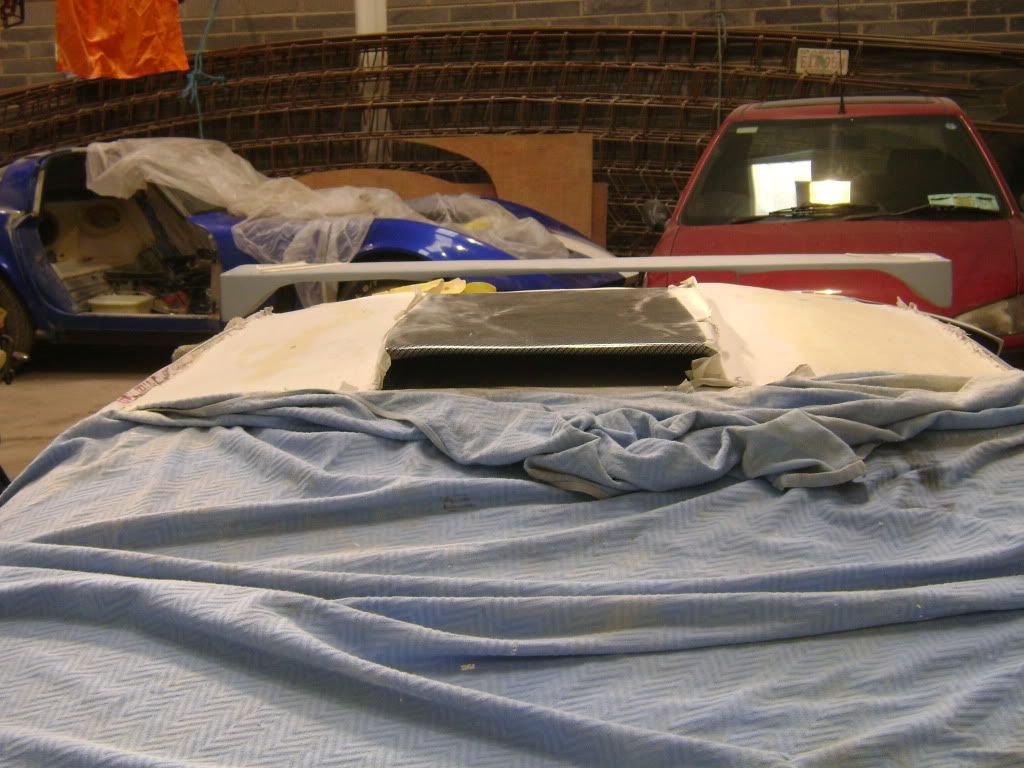
Picked the roof scoop up today

The LED's all fiberglassed down

Second layer of fiberglass this layer will pin down the roof scoop

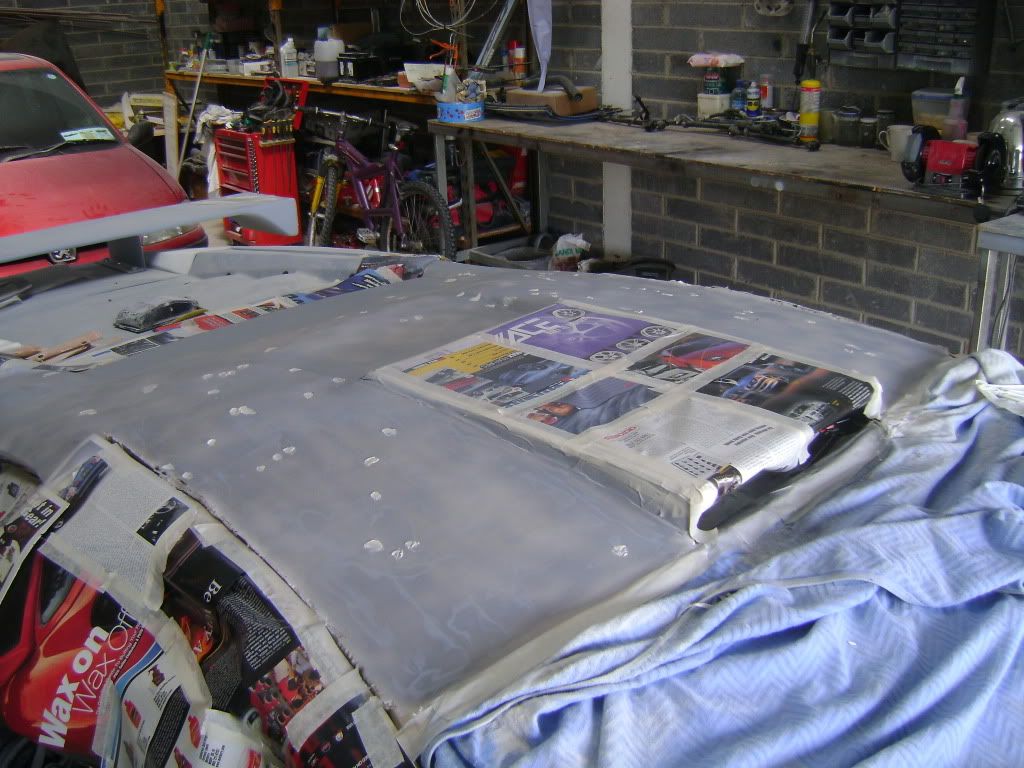
Loads of bumps looks like a gold course :-) these will be sorted


I used filler in the low spots to level the area out then sand this back then re-fiberglass the whole roof

Picked the roof scoop up today
The LED's all fiberglassed down
Second layer of fiberglass this layer will pin down the roof scoop
Loads of bumps looks like a gold course :-) these will be sorted
I used filler in the low spots to level the area out then sand this back then re-fiberglass the whole roof

 06-28-12, 02:00 PM
#171
Full Member
Thread Starter
Join Date: Nov 2011
Location: Ireland
Posts: 190
Likes: 0
Received 0 Likes
on
0 Posts
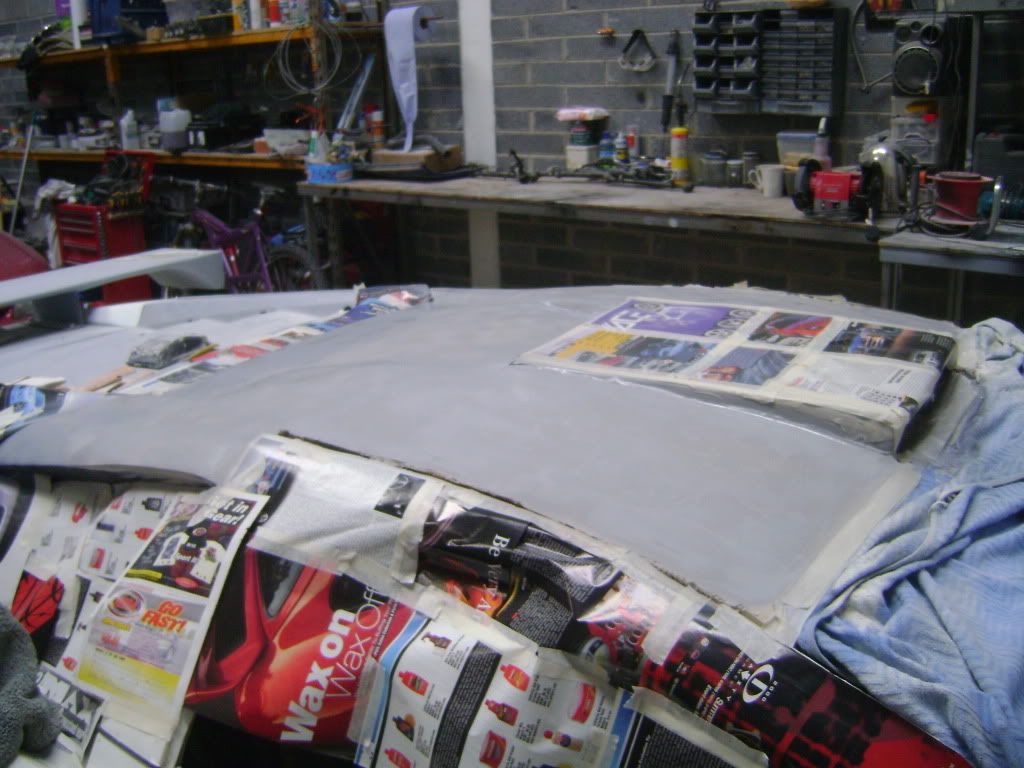
First layer to cover the bumps

Bit of sanding going on

Nearly all flat ready fpr the second layer of fiberglass

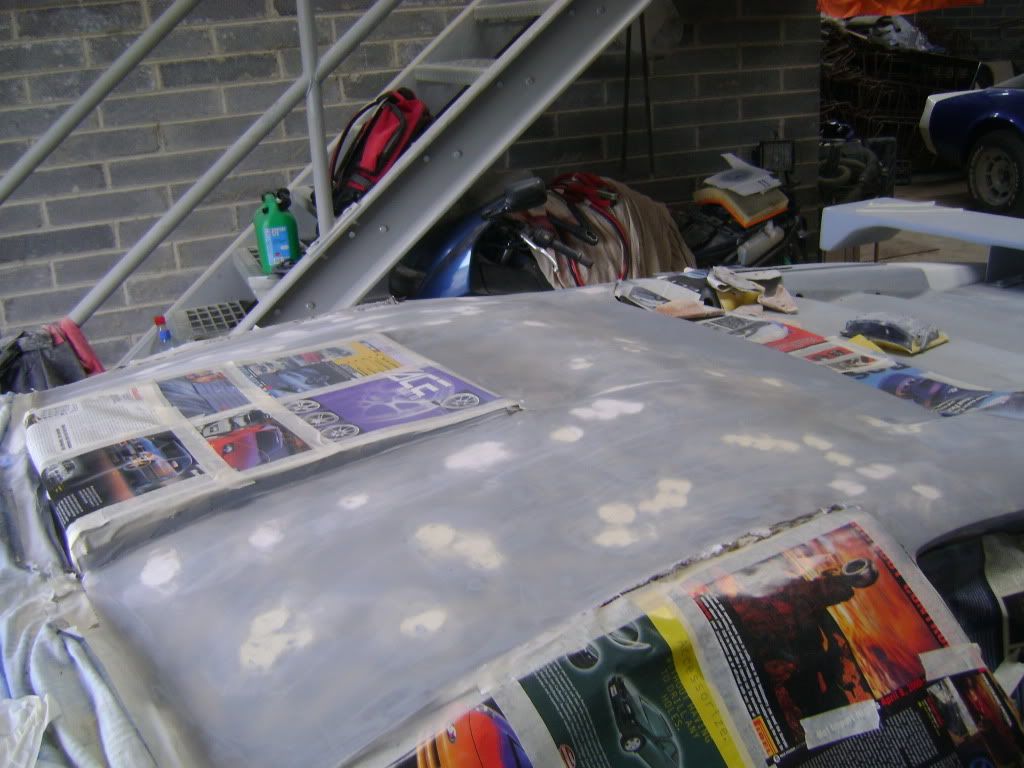
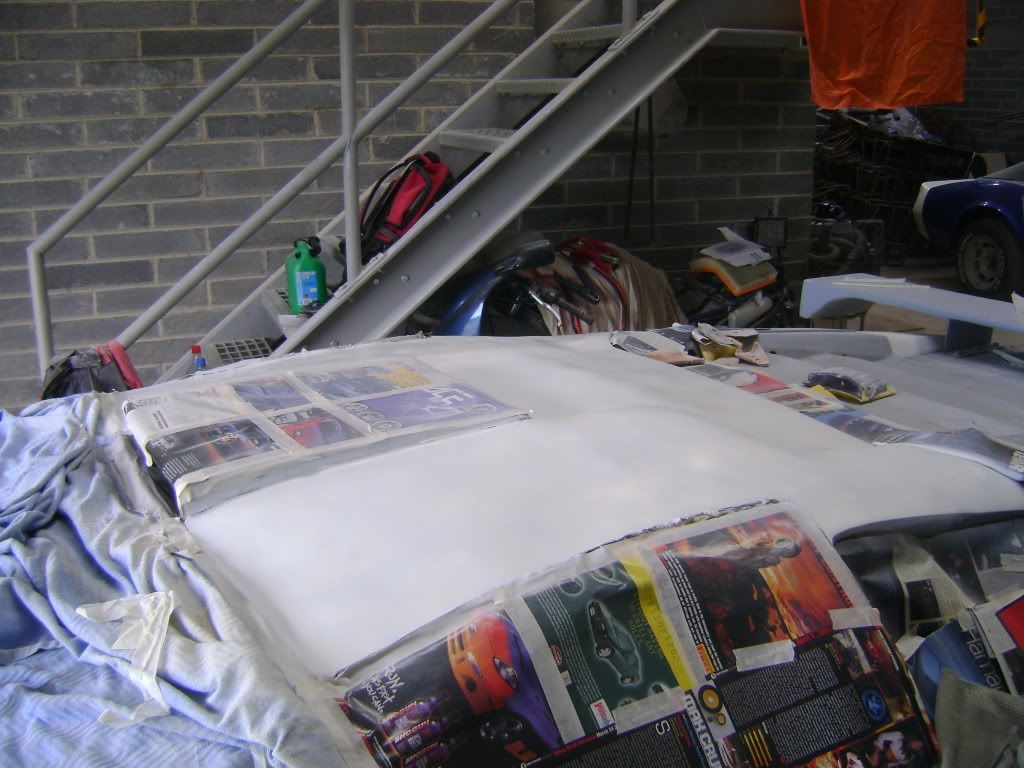
The last skim of filler dont know if you can see from the picture the shape of the roof

Better view

Bit of sanding going on
Nearly all flat ready fpr the second layer of fiberglass
The last skim of filler dont know if you can see from the picture the shape of the roof
Better view
06-30-12, 03:19 PM
#172
Full Member
Thread Starter
Join Date: Nov 2011
Location: Ireland
Posts: 190
Likes: 0
Received 0 Likes
on
0 Posts
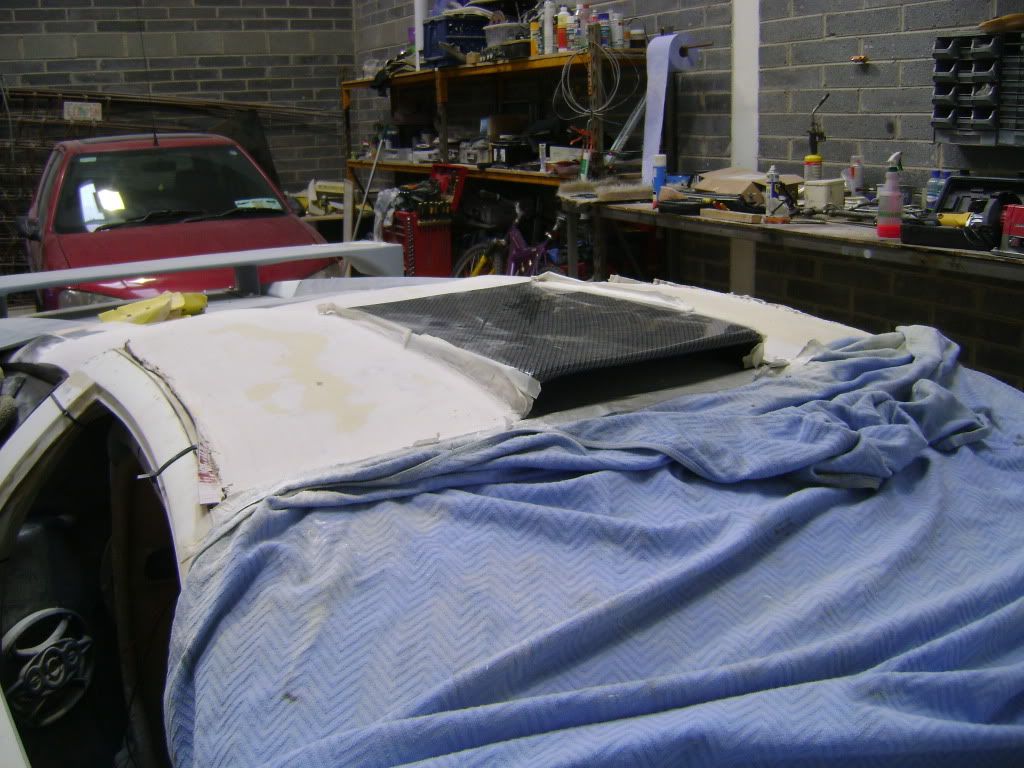
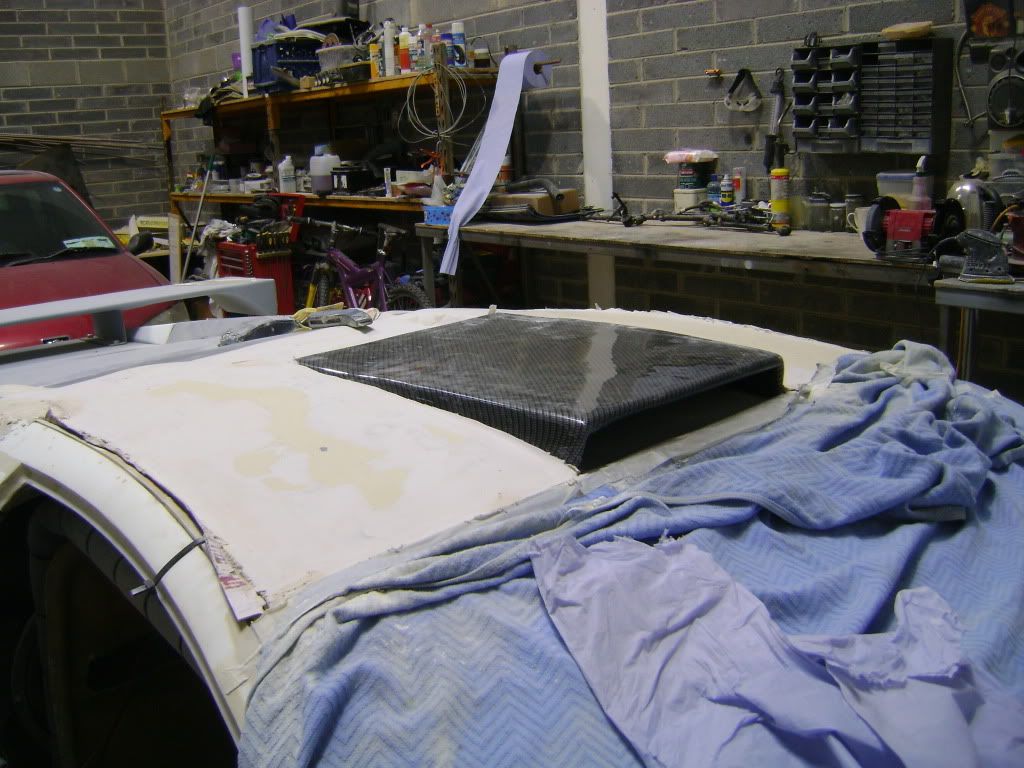
Pulled the lambo replica out today for a clean up of the unit here it is beside the mr2


The roof section still fiberglassing and sanding

This section will direct air over and down toward the engine cover from the scoop

The roof section still fiberglassing and sanding
This section will direct air over and down toward the engine cover from the scoop
07-03-12, 02:54 PM
#173
Full Member
Thread Starter
Join Date: Nov 2011
Location: Ireland
Posts: 190
Likes: 0
Received 0 Likes
on
0 Posts
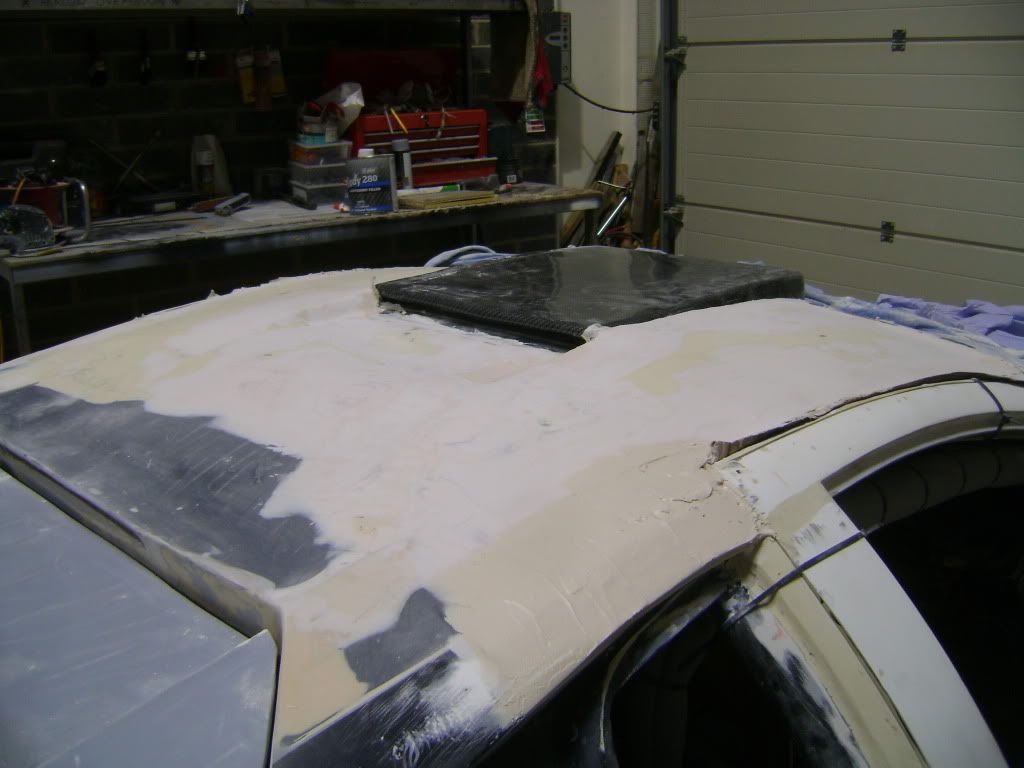
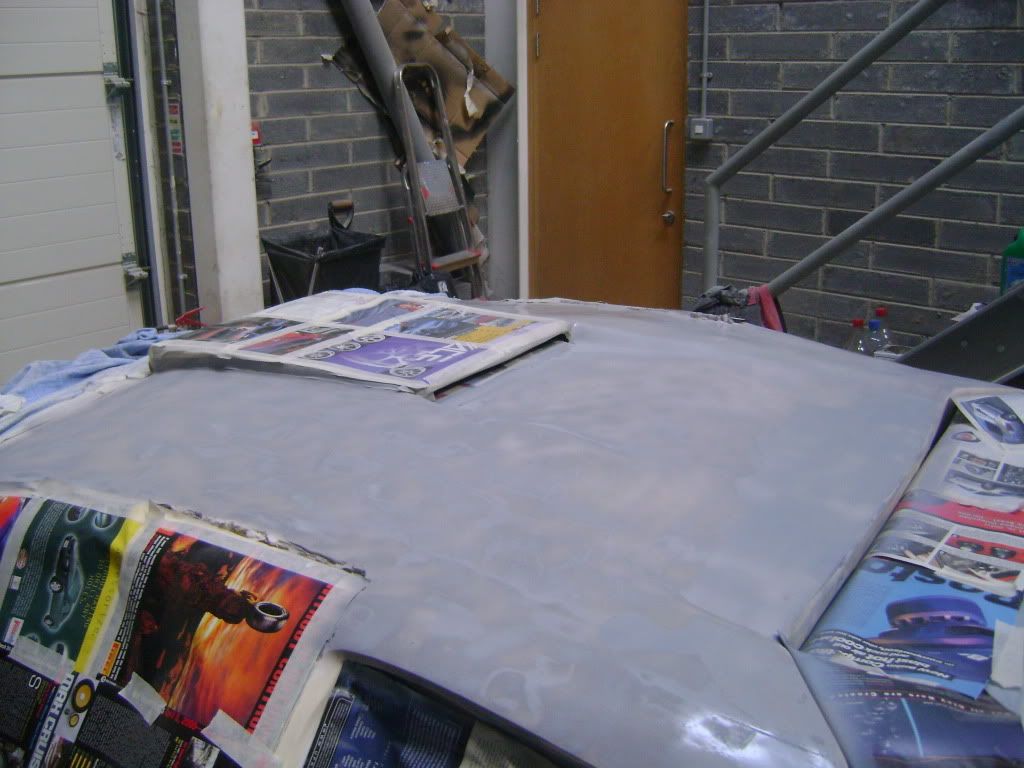
lots of sanding going on
Getting the dip in the roof right
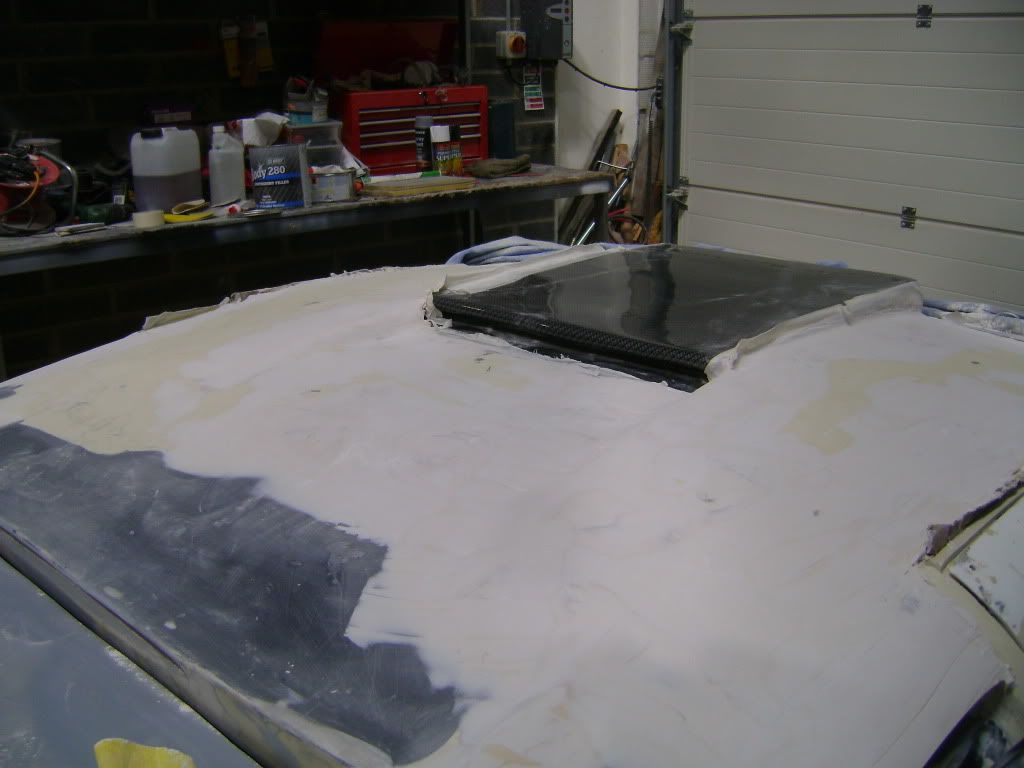
The dip wher the air will travel
Front view
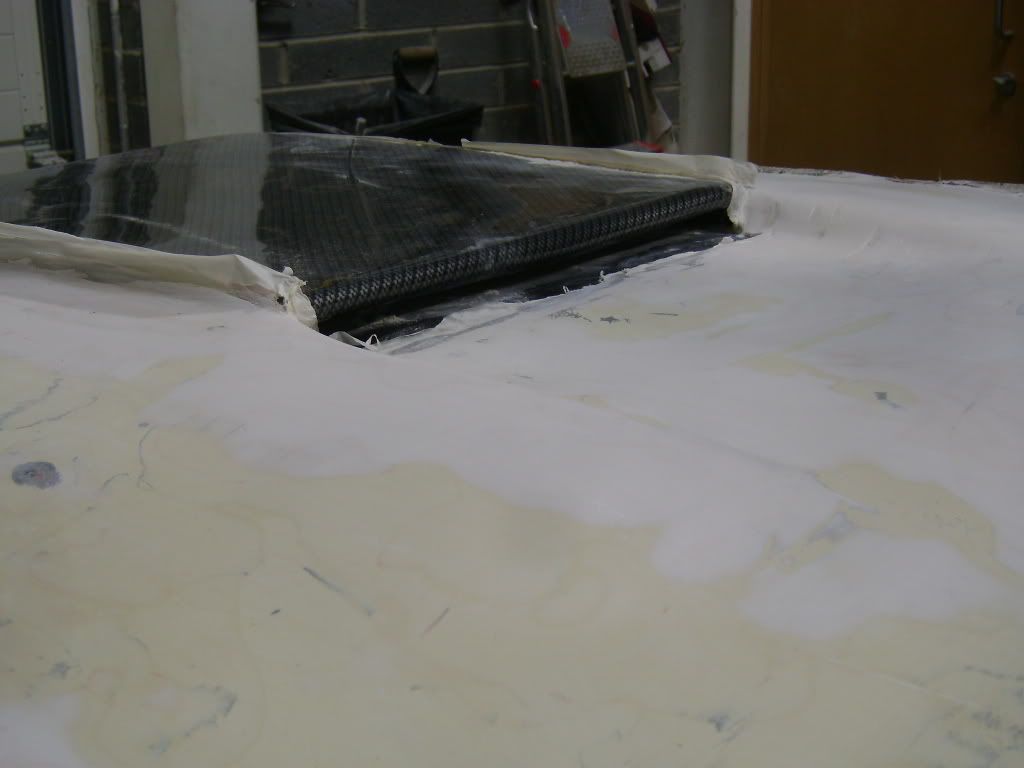
The roof esction built up with the roof scoop built into the roof
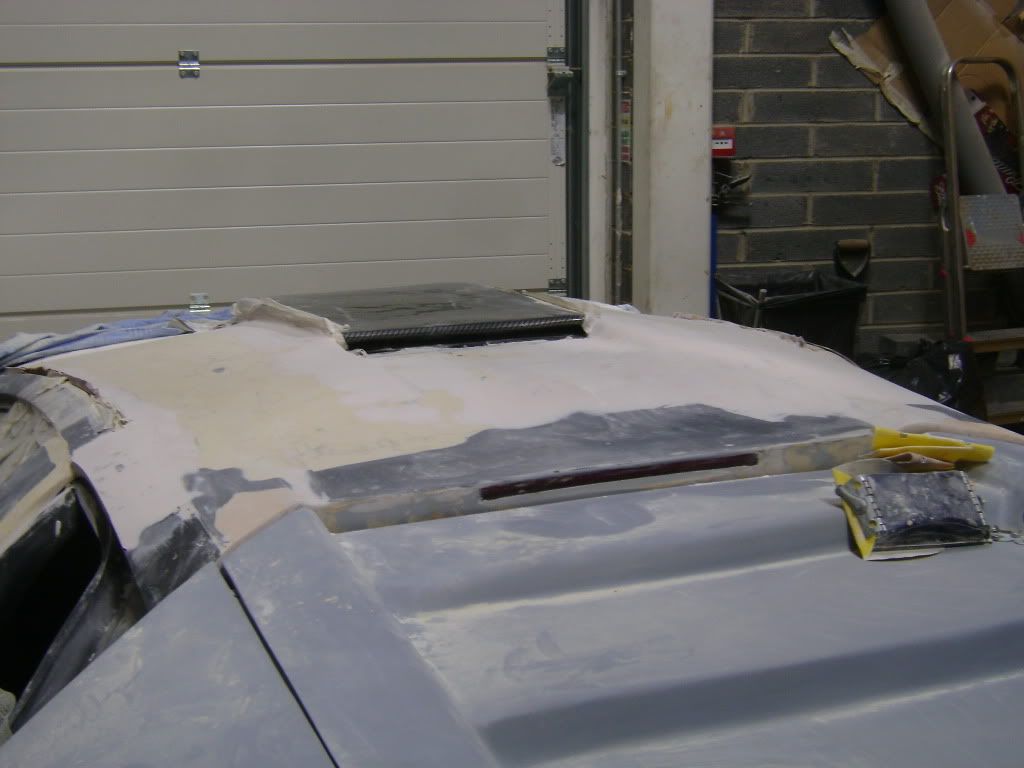
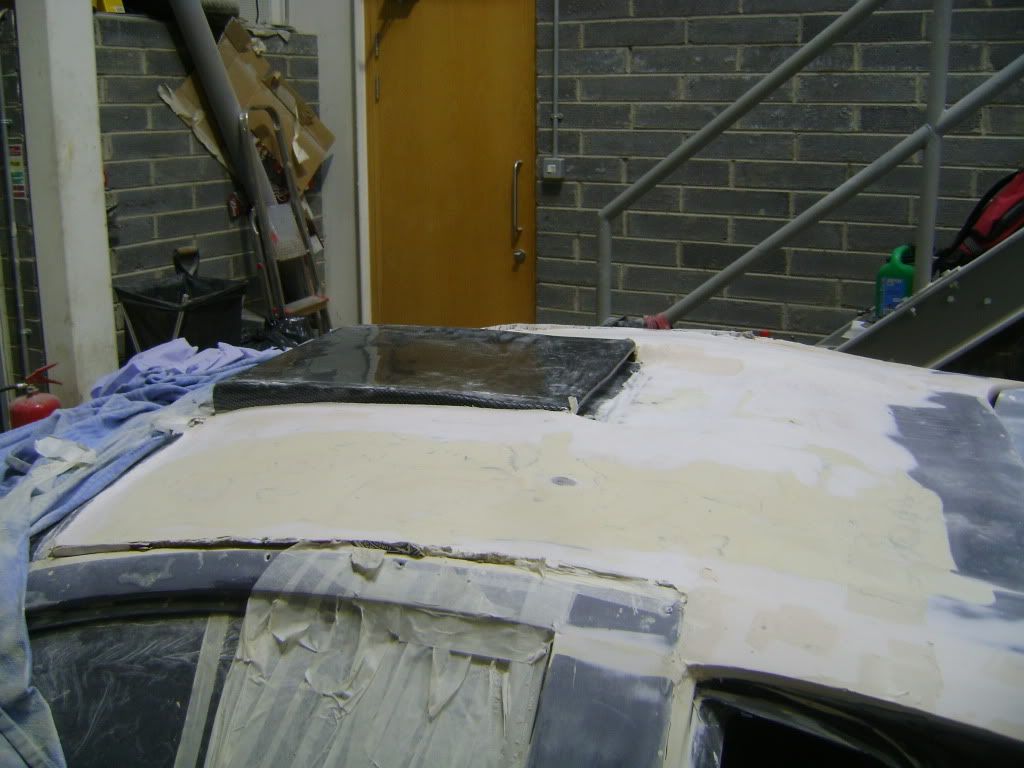
Getting the side section right
Getting there
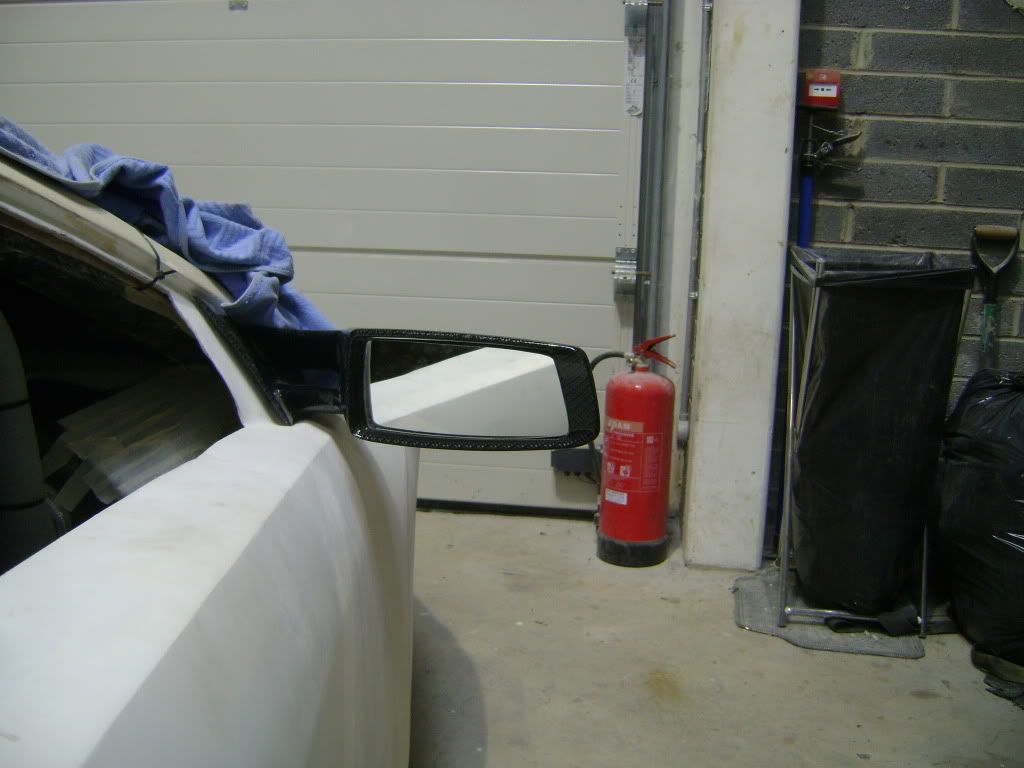
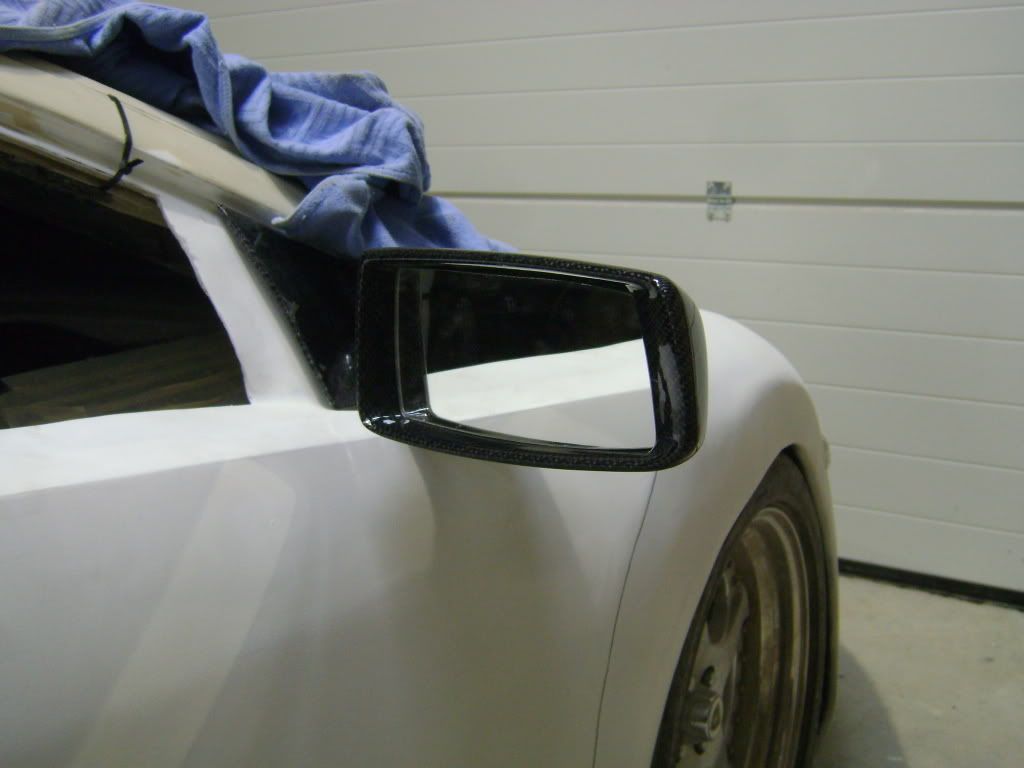
Got the drivers mirror glass put in and set the right angel
The carbon fiber theme coming together
Getting the dip in the roof right
The dip wher the air will travel
Front view
The roof esction built up with the roof scoop built into the roof
Getting the side section right
Getting there
Got the drivers mirror glass put in and set the right angel
The carbon fiber theme coming together
 07-05-12, 01:29 PM
#175
Full Member
Thread Starter
Join Date: Nov 2011
Location: Ireland
Posts: 190
Likes: 0
Received 0 Likes
on
0 Posts
A few pin holes to be done
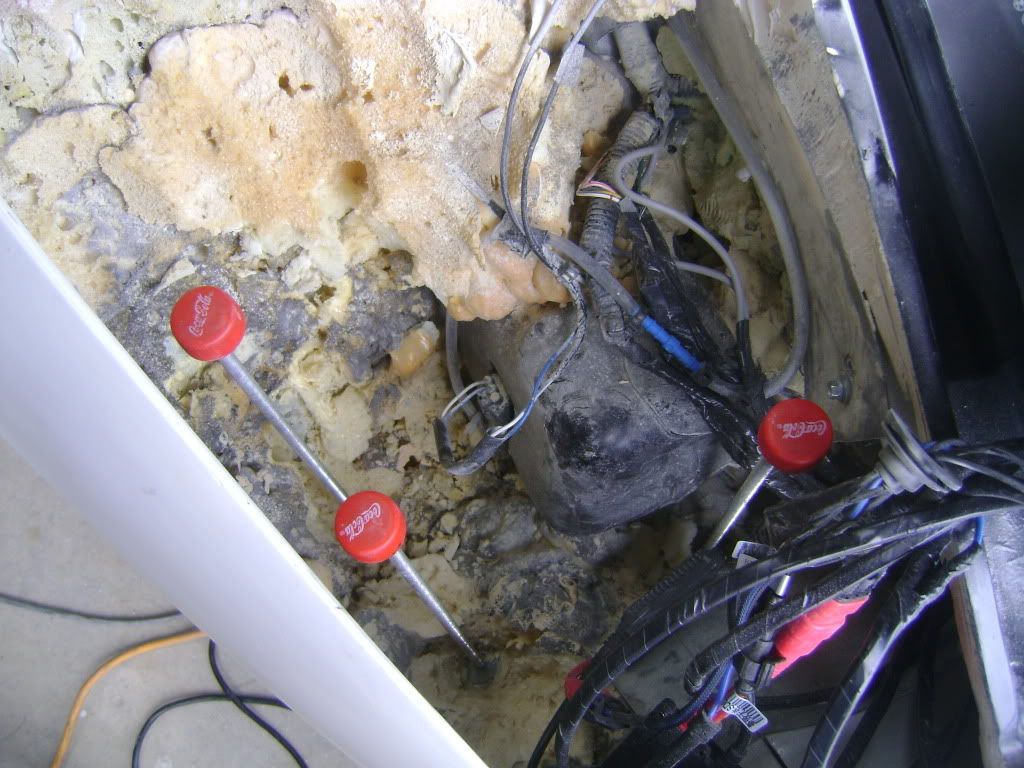
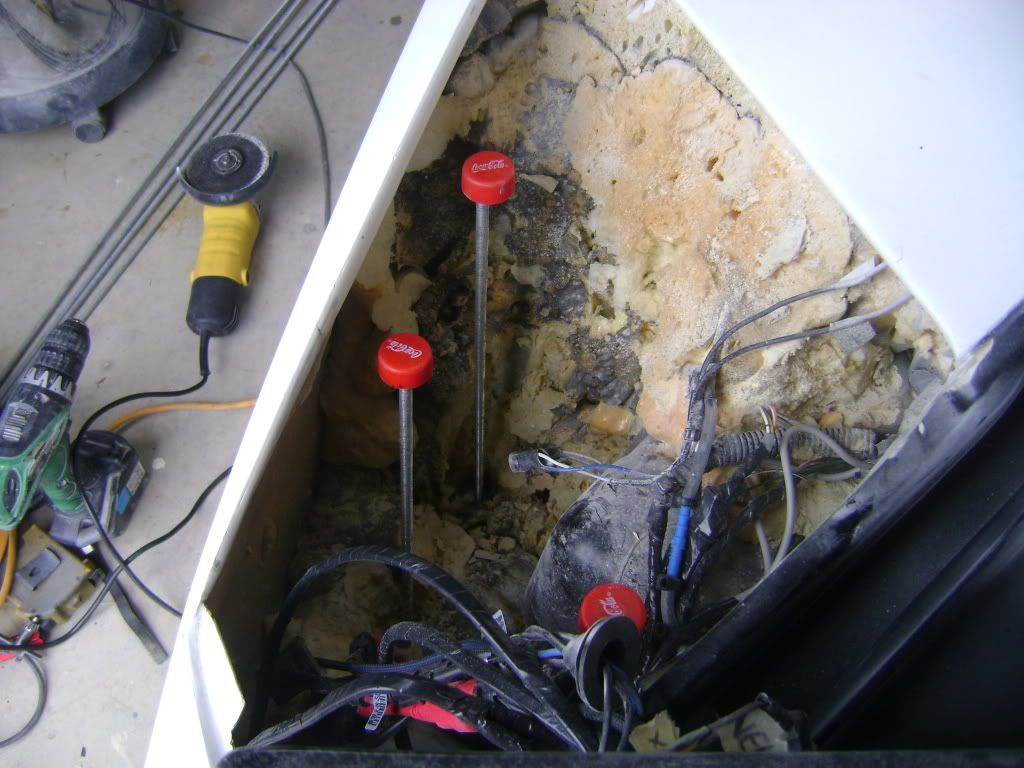
Made headlight brackets and the work perfect :-) the coca-cola tops push the whole headlight up and keep it tight
Headlight all in and lens all cut to shape

All sanded ready for more primer
Re-primered
Made headlight brackets and the work perfect :-) the coca-cola tops push the whole headlight up and keep it tight
Headlight all in and lens all cut to shape
All sanded ready for more primer
Re-primered