
Custom rears??? replacement of bins/seats??

Custom rears??? replacement of bins/seats??
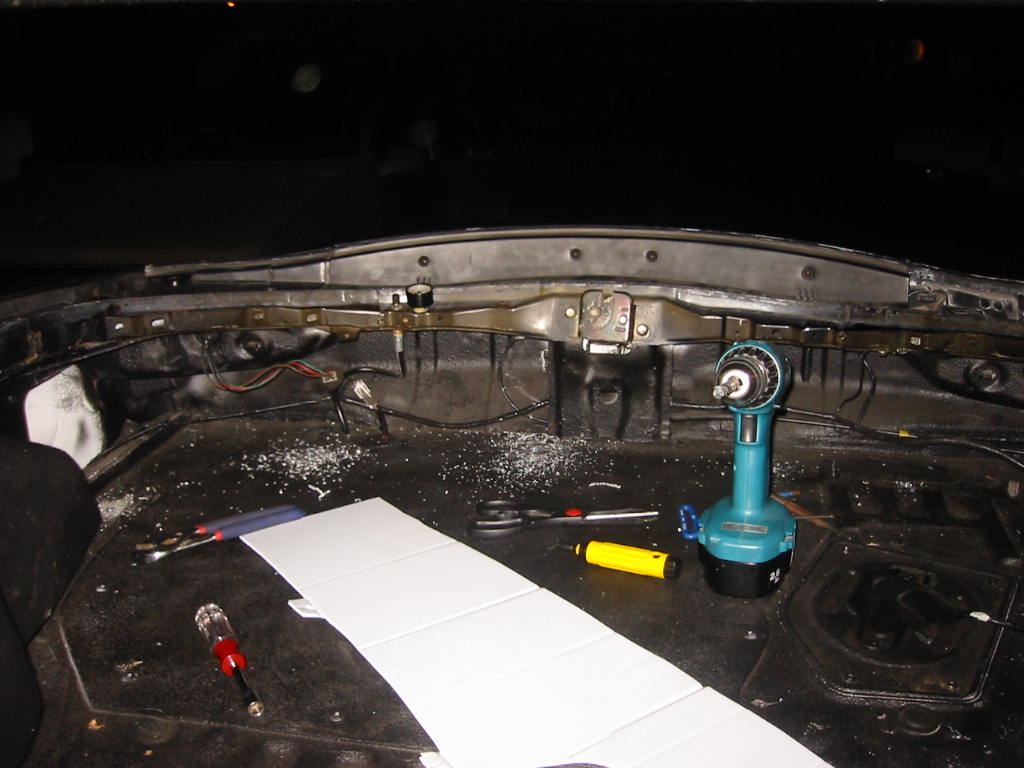
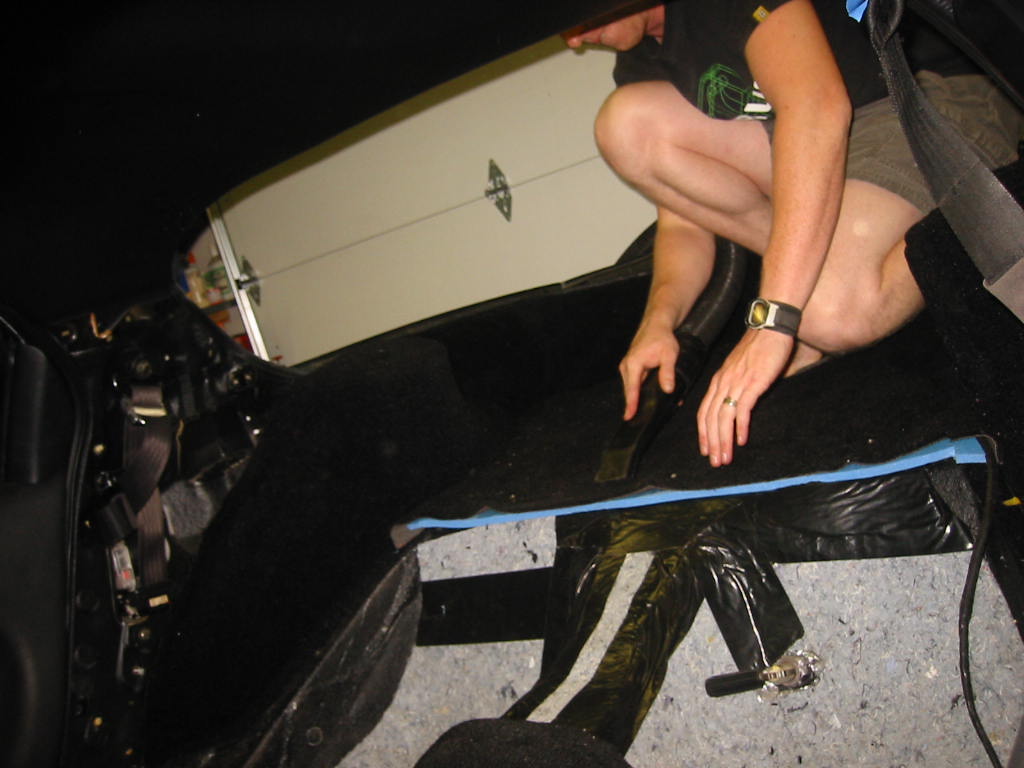
Has anyone done any custom work to remove the bins or the seats (JDM) from the 3rd gens? the bins are cool and all but they are too small compared to how much room there is in that area... i have my battery in the rear bin but its quiet tight (51r) and i feel like there is a lot of wasted space in the "rear bin" design...
i was thinking to make a fiberglass copy but make my own bins with a larger compartment for spare coolant,oil,premix etc....
anyone else thought of this or has anything custom in the bin area?
i was thinking to make a fiberglass copy but make my own bins with a larger compartment for spare coolant,oil,premix etc....
anyone else thought of this or has anything custom in the bin area?

^^ there really is. ive taken the rear bins out numerous times... with the bin opening im pretty much maxing out what i can fit through that opening with a 51R battery. but it the bin was wider and more open i could fit a full size battery in there (not that i want to) but i know its possible. id rather use it for more usefully storage as i barely have a trunk with my crappy big *** sub box (2 12") which will be getting removed soon hopefullly..
only person ive seen custom their rear is... sam? i forgot what country hes from but hes doing that crazy veilside forture kit with custom dash etc etc etc..
only person ive seen custom their rear is... sam? i forgot what country hes from but hes doing that crazy veilside forture kit with custom dash etc etc etc..
I removed my bin and replaced with carpet...
I created a custom solution by removing my entire rear plastics, and then replacing with black carpet panels.
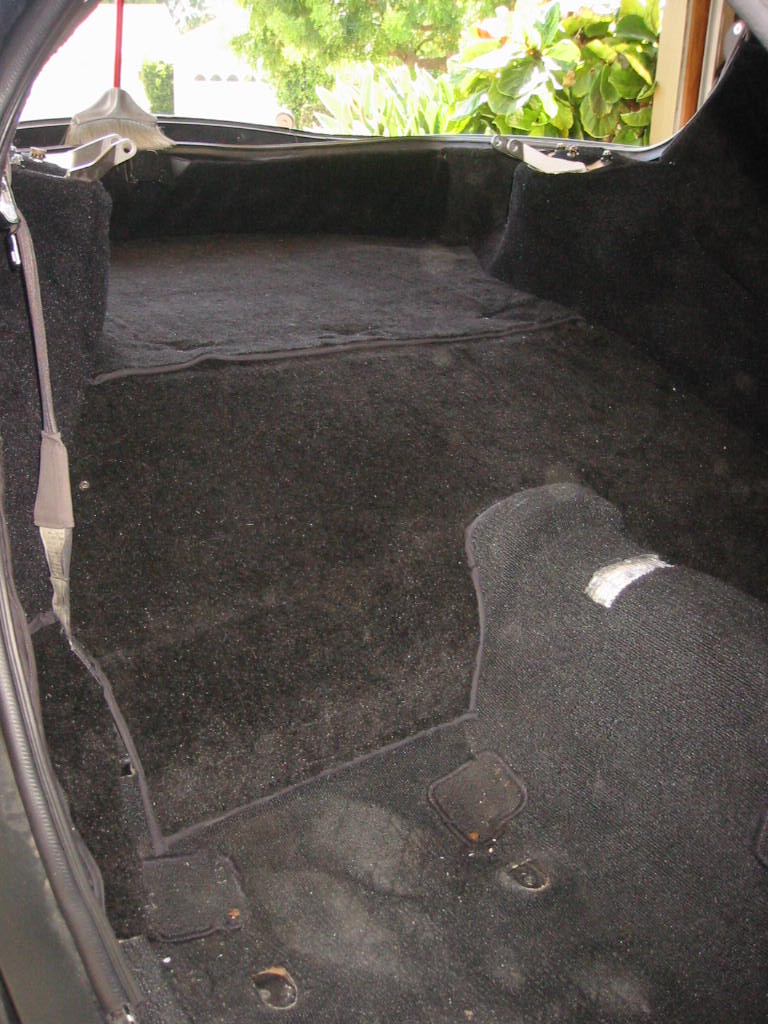
I still have storage by pulling up the lower flaps, and then items can be stowed under there.
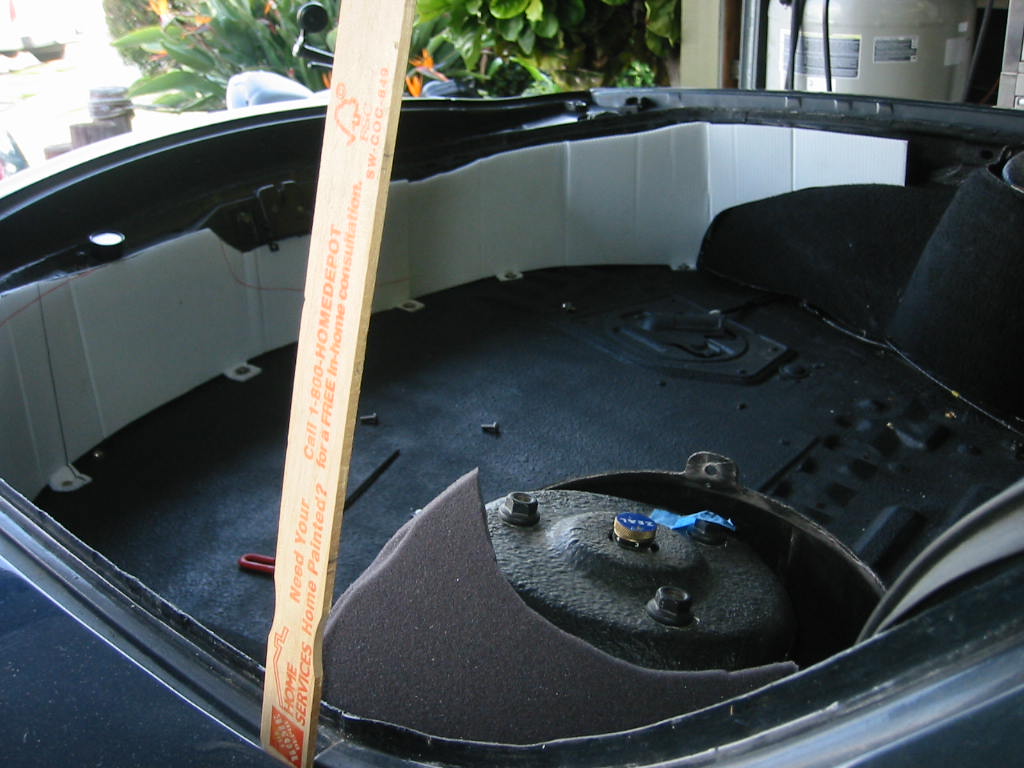
You are correct that there is a ton of room under the stock bins if you just cut out the portion under the lid then you have 3-4 times the space, you just have to be able to fit things through the same size hole.
I still have storage by pulling up the lower flaps, and then items can be stowed under there.
You are correct that there is a ton of room under the stock bins if you just cut out the portion under the lid then you have 3-4 times the space, you just have to be able to fit things through the same size hole.
I did it to drop weight out of the car. I also wanted to reduce the squeaking of the plastics, while improving the sound deadening. It was actually quite a long process that I was planning on having someone else do, but I ended up doing myself with help.
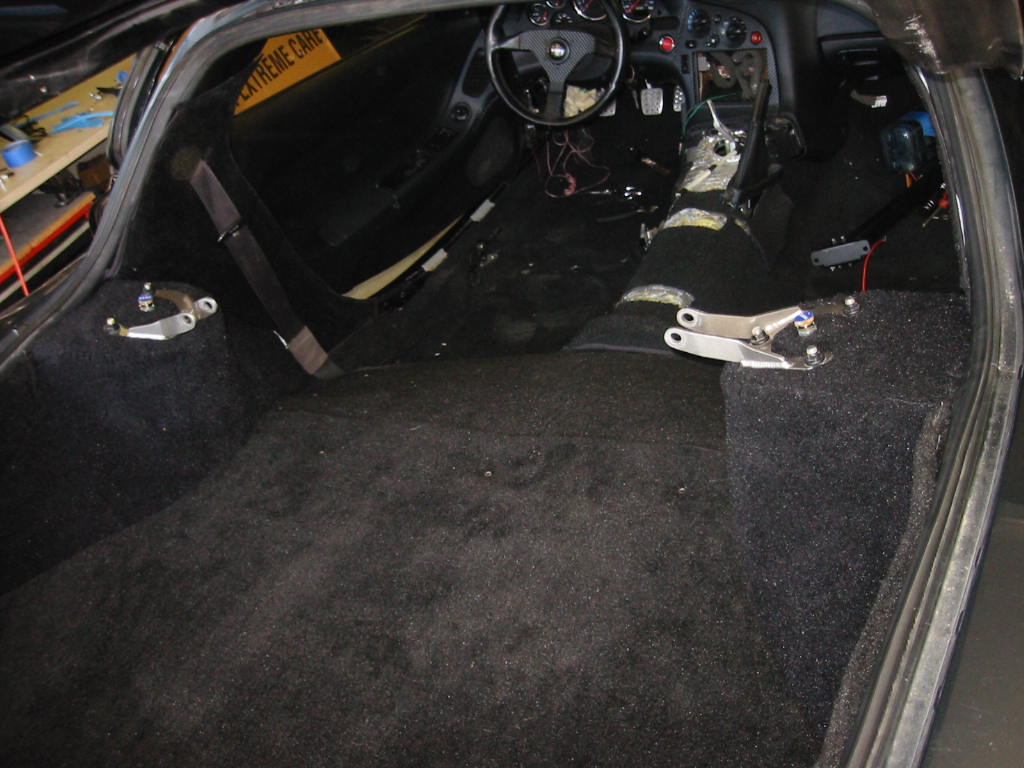
Here is a bunch more info/pix:
Interior panel replacement
We return to our (non)scheduled programming with 65imp tossing all the Mazda interior stuff to save weight, and realizing his car looks like a$$ without anything covering the panels. Sure I can do better than Mazda did from the factory, but I was about to realize how much work that would be.
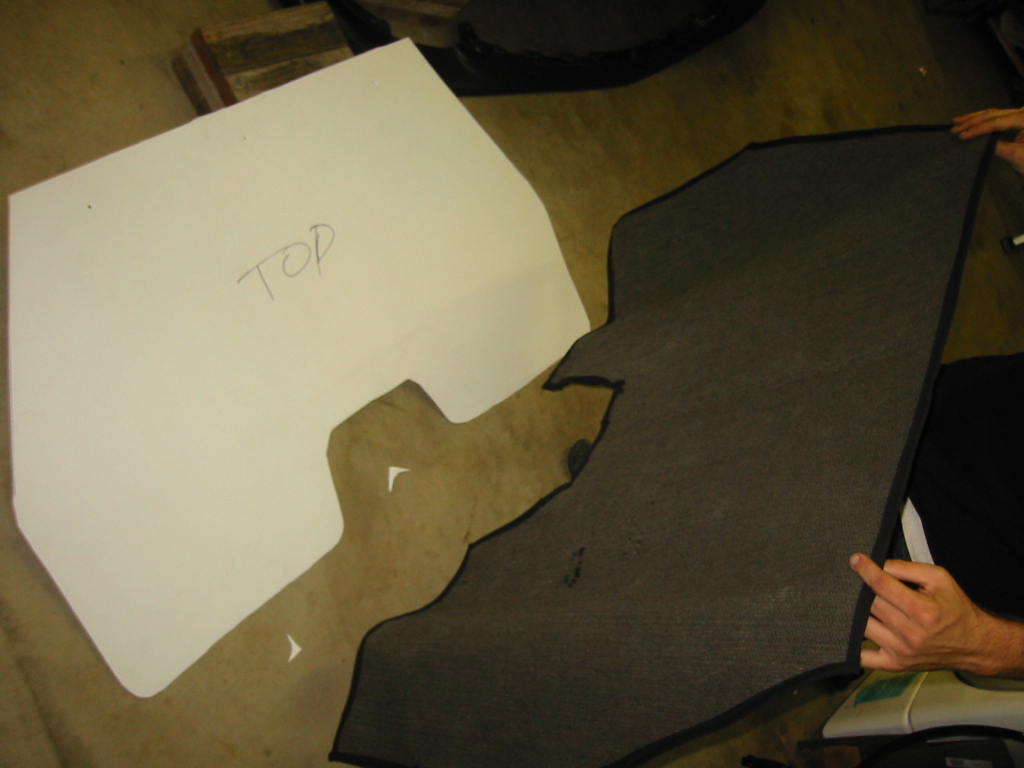
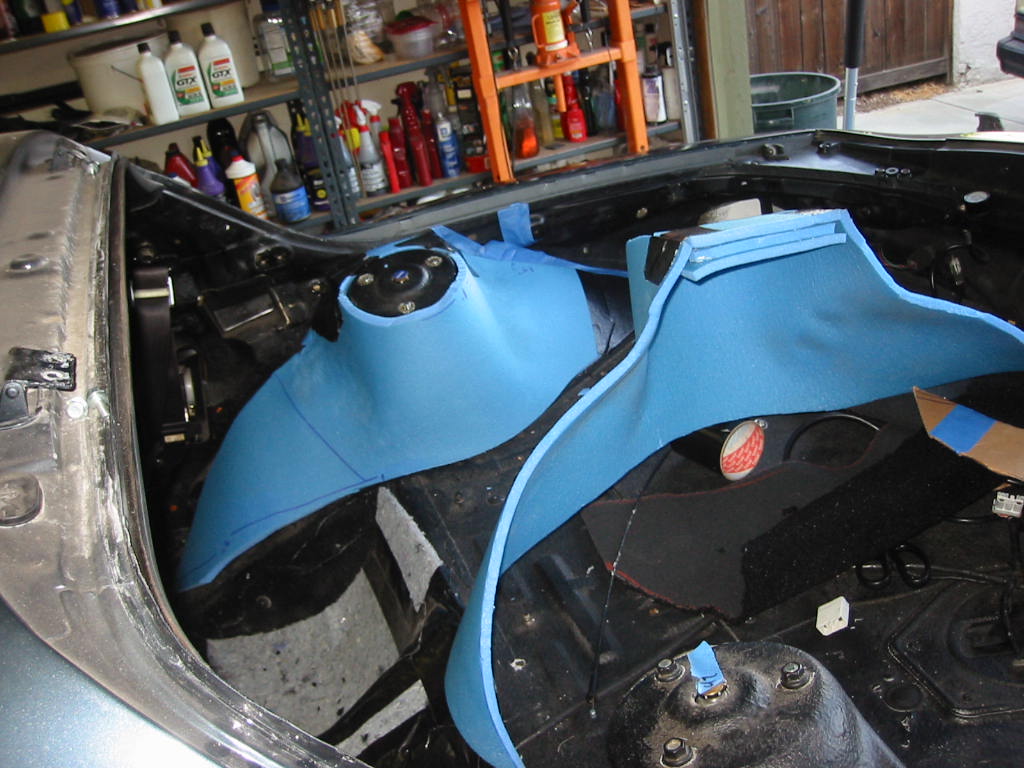
Over a year ago i wanted to get started on this, so I started to work with various types of materials to create forms for the parts I wanted to create for the interior replacement panels. Here are shots of the most straightforward rear floor piece:
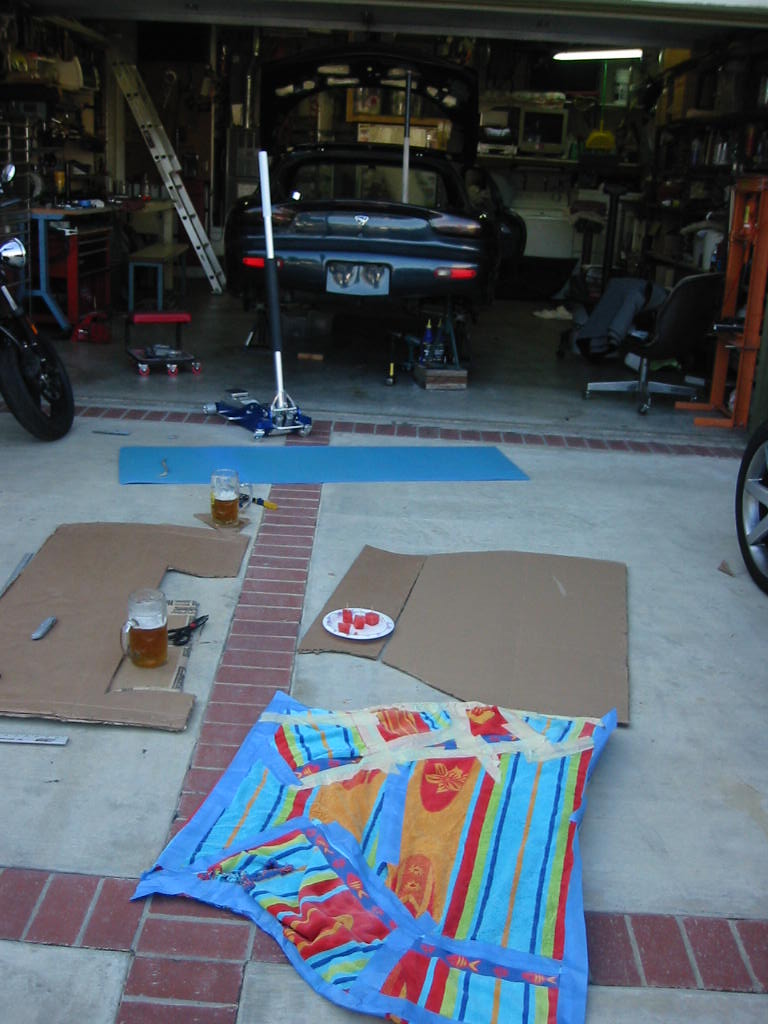
I call this shot "Requisite Refreshment"
No I wasn't having both mugs, Brismo was assisting as per the usual.
I really wanted to supplement the sound abatement of the spray on firewall with an extra barrier to different frequencies, as long as the additional weight was minimal. Several of the guys on the spectrum forum were recommending my old friend closed cell foam as an excellent barrier to be paired with spray on deadening. (of course the 3rd layer recommended is butyl based foil backed stuff, but F-that weight)
To get sheets of closed cell foam you can purchase spectrum product, or get camping mats at Walmart
*record scratching sound effect*
whaaaaaaaa?!?!?!? :o
[incredulous smiley]
Yeah, turns out camping mats are closed cell since the substance is highly effective as an insulator. As you can imagine Walmart sells cheap stuff, so I picked up ~5 closed cell camping mats for about $6 each. My plan was to use these between the body and the cabin in high risk areas of the rear like the floor and wheel wells.
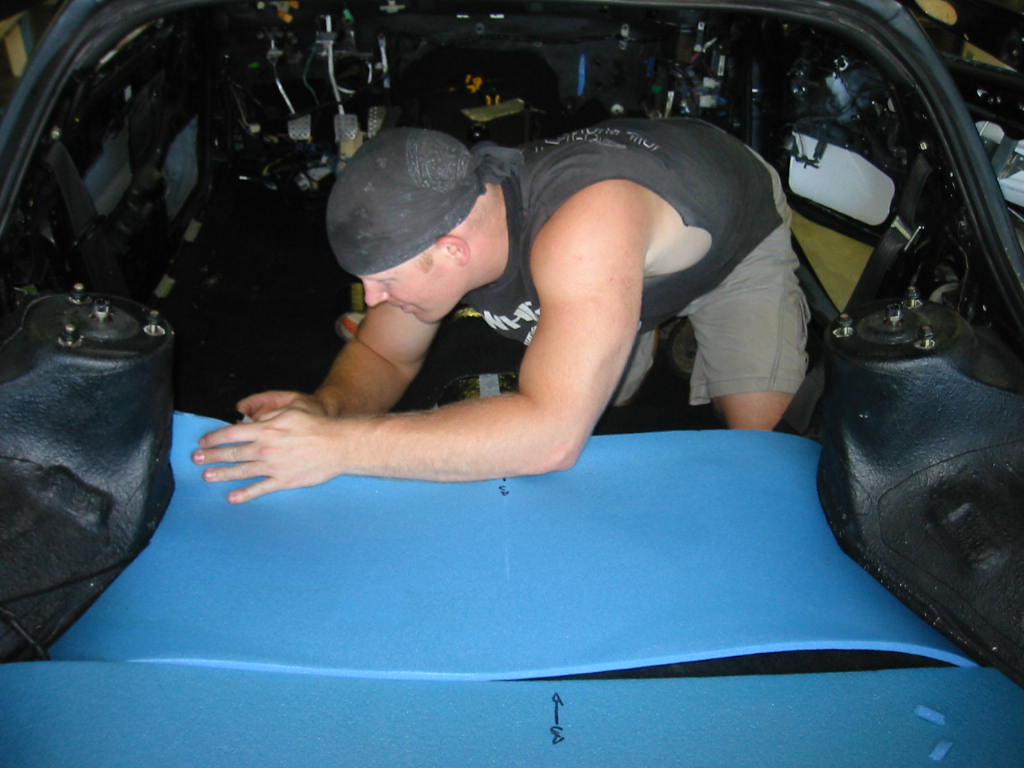
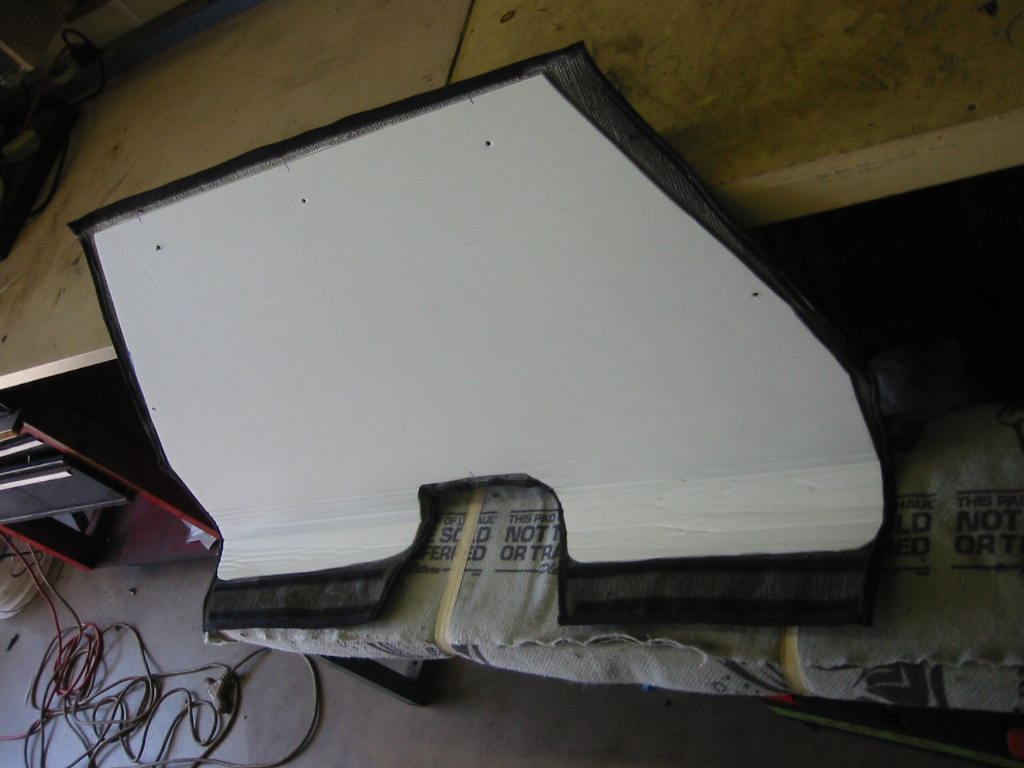
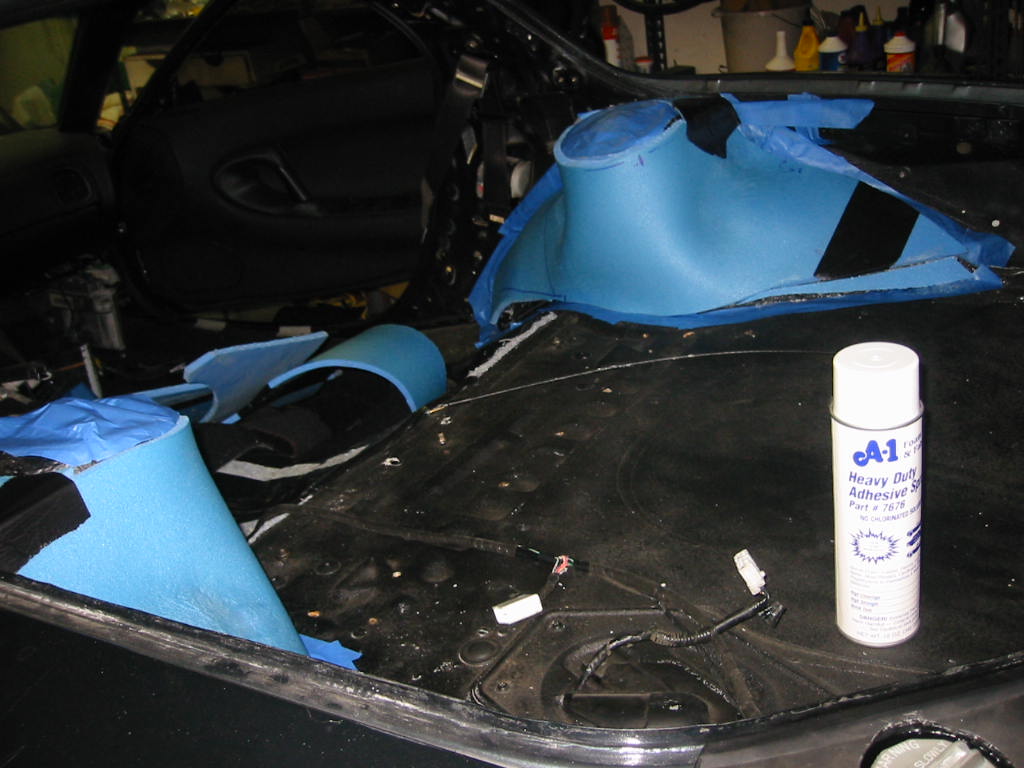
Spray glue adds a layer of black carpet, and I am sitting pretty:
I thought at this point I was mostly done, but turns out I had only done the easiest part, and it would need several revisions. "le sigh"
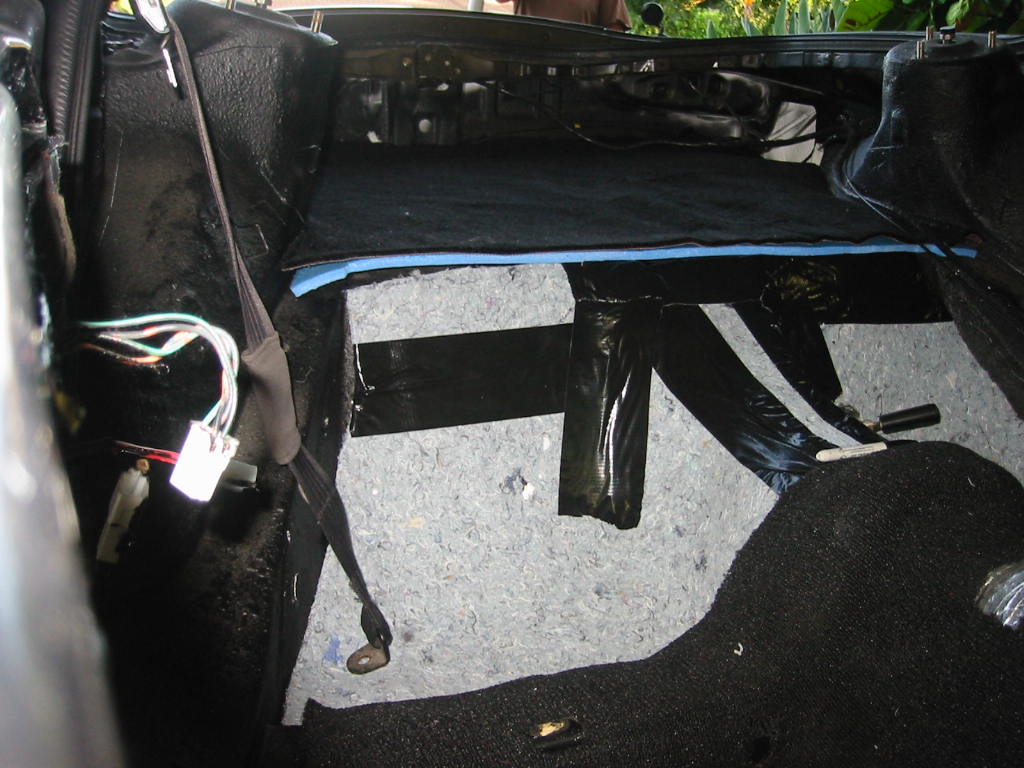
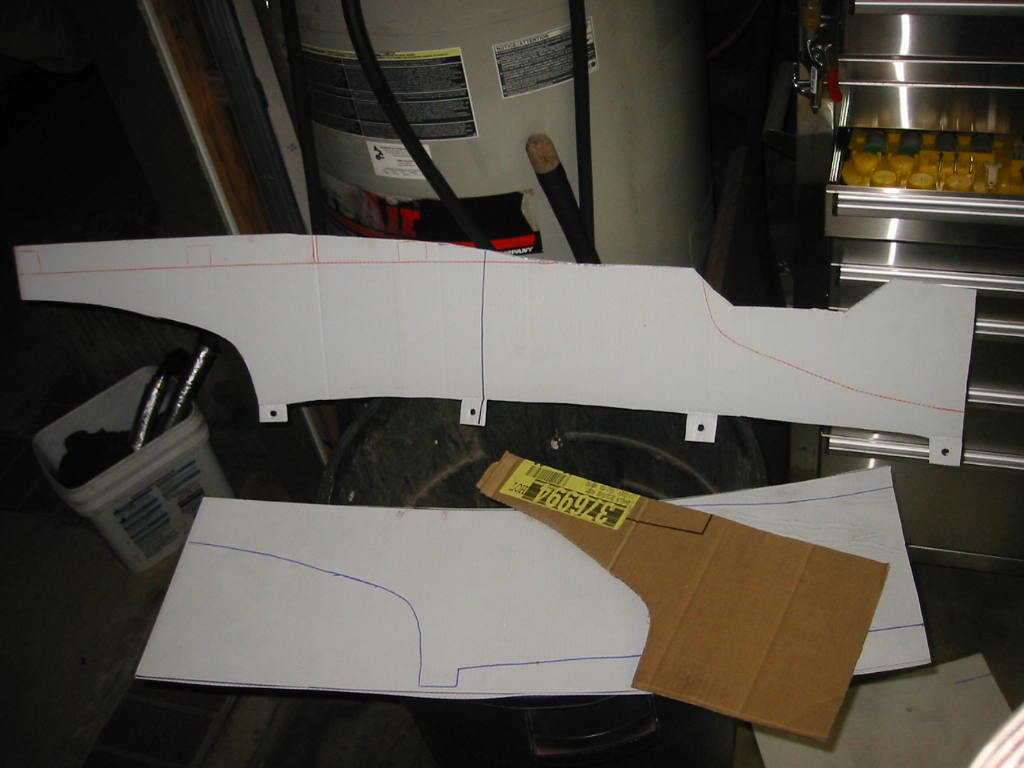
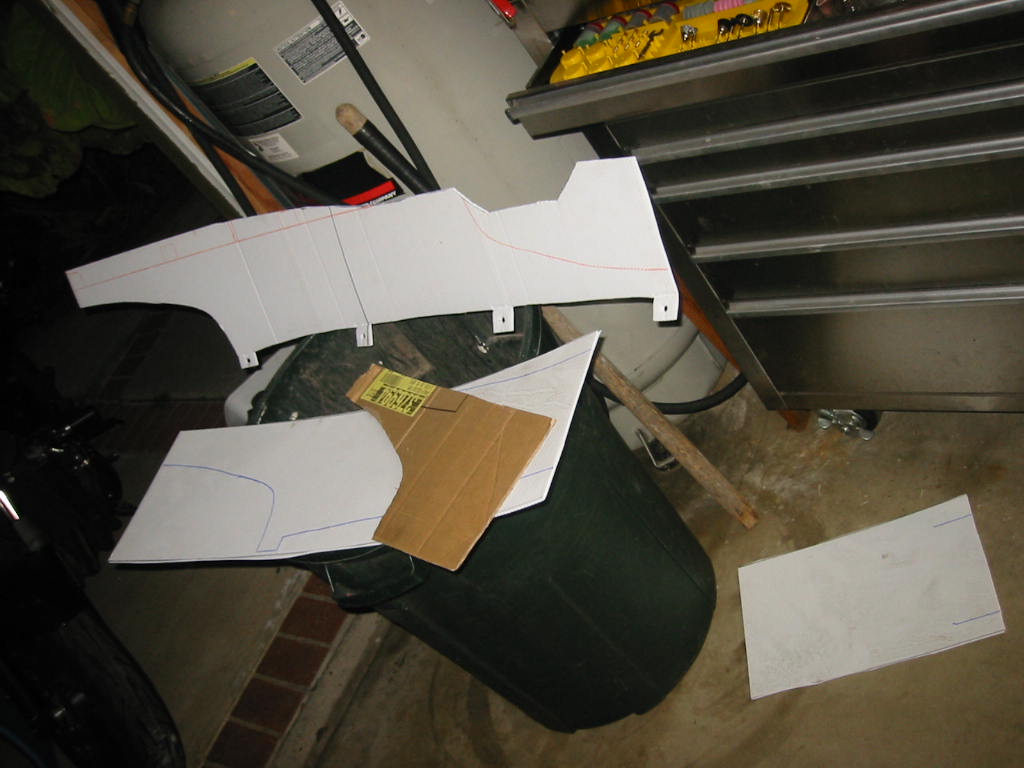
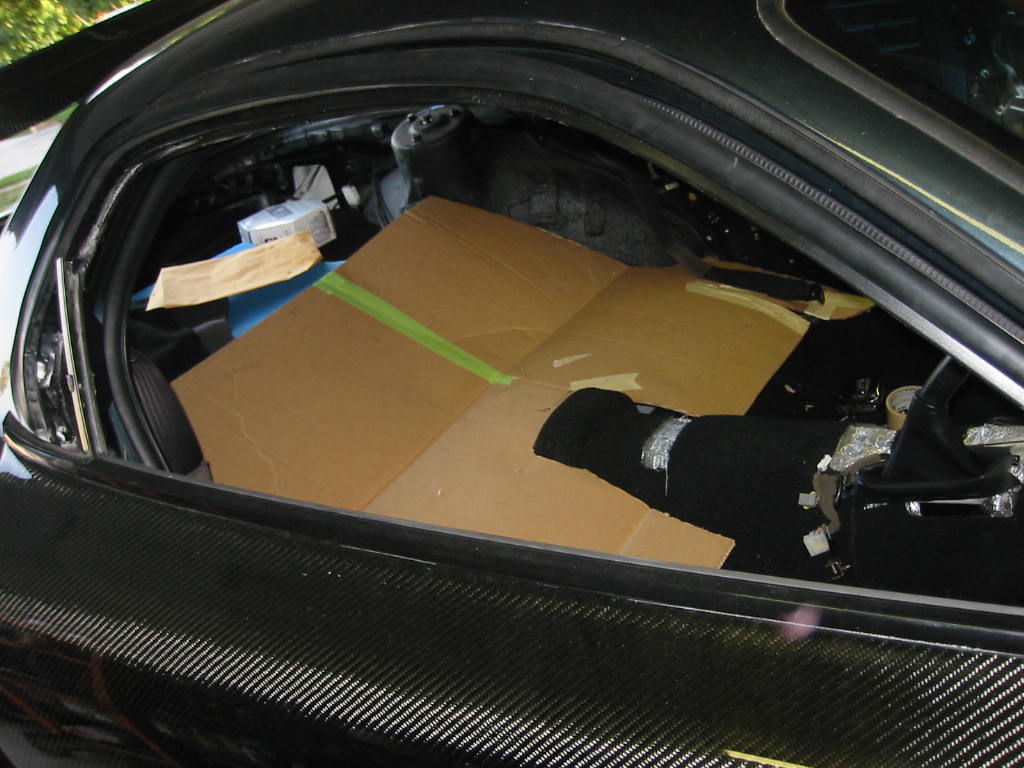
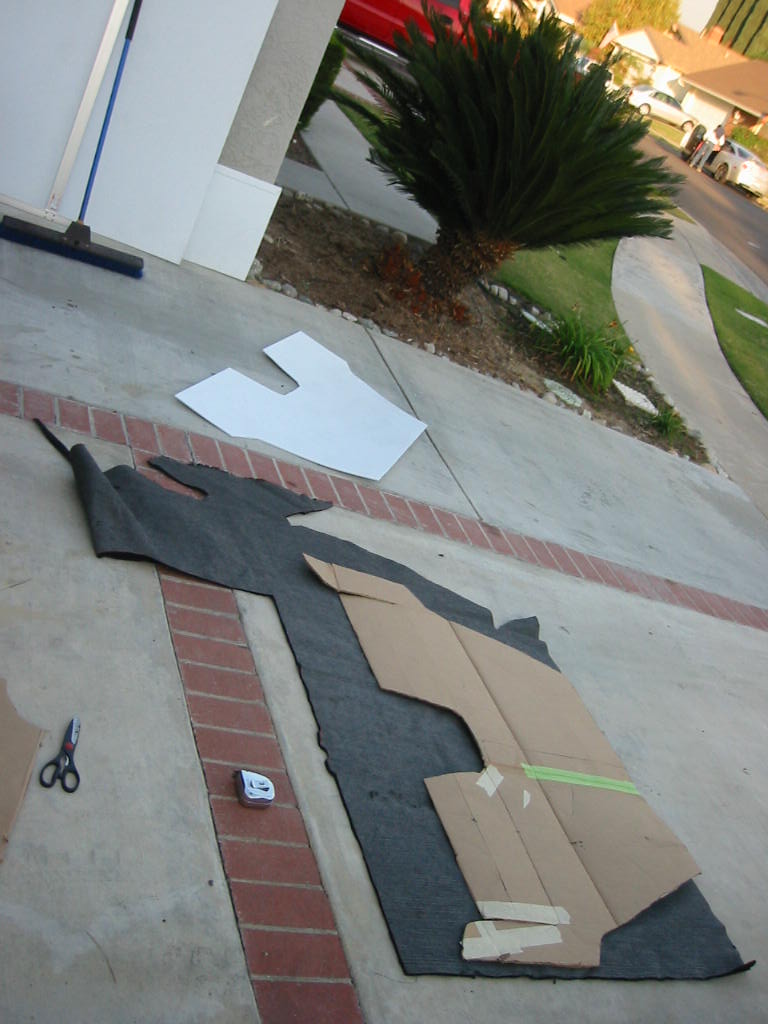
One of the first hurdles was to recreate the rear interior wall, due to it's irregularity. This took a bit of planning and the acquisition of a sheet of coroplast.

This stuff is basically carboard made of a nylon like plastic. It is the same stuff they print disposable outdoor signs with.
I was looking for something with structure that would not rip or tear, but yet be very light, with the potential to bend around curves. Of note this stuff bends much like cardboard, in one dimension, but not well in compound curves. That worked well for my plans but may not for yours.
"yeah but 65imp, how strong is it?" you ask
"ask Danzan's Dentist! I say.
inside joke background
When I was demonstrating for Danzan my plan to use the stuff he proclaimed that I should use expanded metal, and we went back and forth about weight vs. strength.
When I said this coroplast was plenty strong, Danzan calls BS.
*FLAG*
And he followed by saying he could shred it with his teeth.
I countered with a typical gearhead response:
"Go for it"
So he proceeded to take a chunk bite on it like Mogo on Brismo7, and pull for all he is worth.
This is where my brother in law called social services to report elder abuse.
Turns out I was right for once, and when feeling returned to Dan's jaw, along with his dentures he responded:
"huh, that stuff is pretty strong."
So it passed the tooth test, it was going in the car.
The other important acquisition is capturing indentured servitude with MaD TyT3 $3w!ng $killz:
I caught this seamstress with daring wit and an irresistible charm
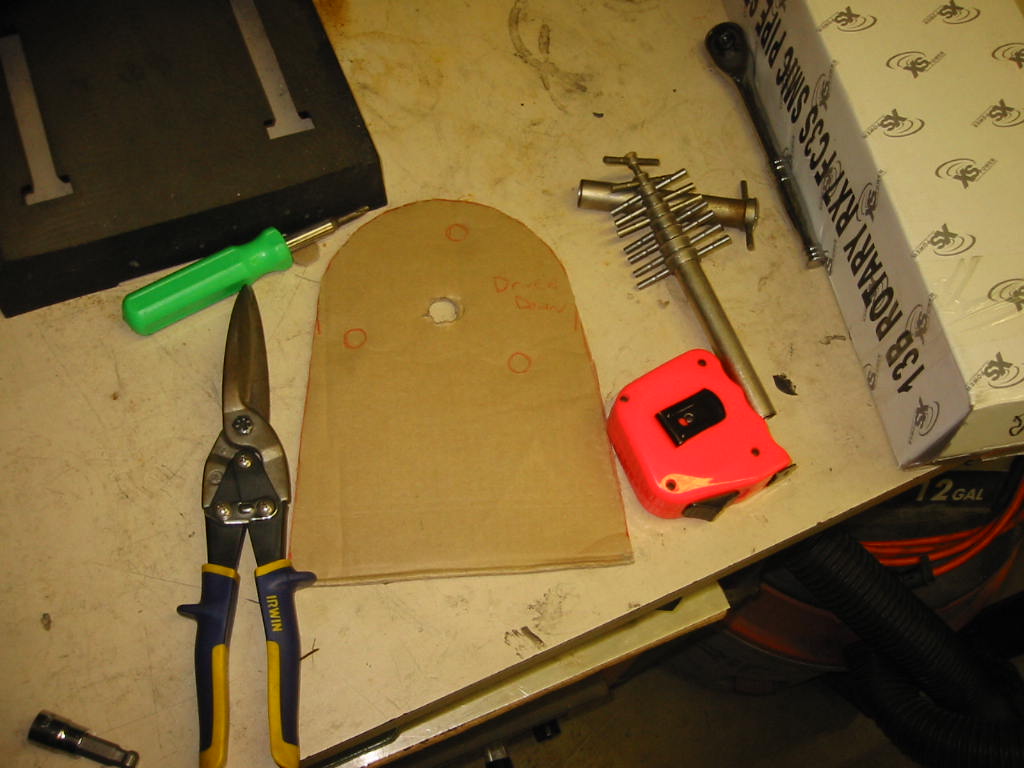
I proceeded to make up some of the support structure for the main carpet pieces I planned to add.
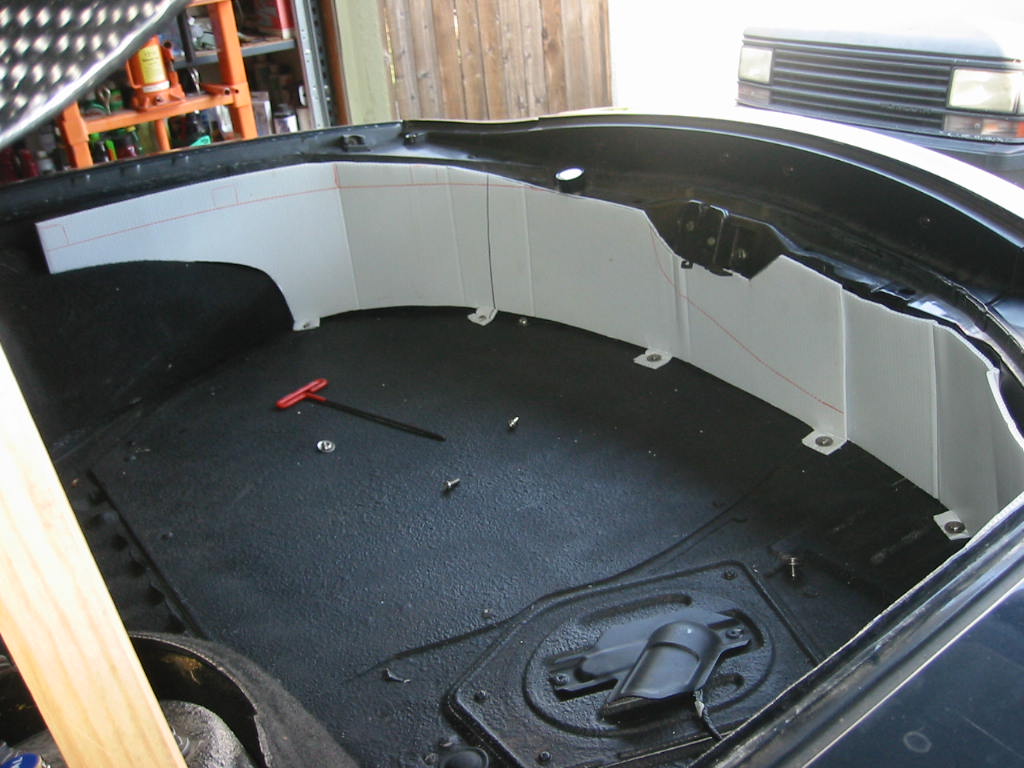
part of the biotch of attaching the piece this way was that it forced me to chop up the rear piece I had already completed in the pix above. (actually about a 6 month span between these events) It is of note, that the final piece only needs the base attached to the floor of the cabin, and the rest holds nicely to the rear interior surround without adhesive.
With a solid rear piece I was free to work my way forward with my structural coroplast for the pieces I wanted to not follow the natural sheetmetal contours:
Here is a bunch more info/pix:
Interior panel replacement
We return to our (non)scheduled programming with 65imp tossing all the Mazda interior stuff to save weight, and realizing his car looks like a$$ without anything covering the panels. Sure I can do better than Mazda did from the factory, but I was about to realize how much work that would be.
Over a year ago i wanted to get started on this, so I started to work with various types of materials to create forms for the parts I wanted to create for the interior replacement panels. Here are shots of the most straightforward rear floor piece:
I call this shot "Requisite Refreshment"
No I wasn't having both mugs, Brismo was assisting as per the usual.
I really wanted to supplement the sound abatement of the spray on firewall with an extra barrier to different frequencies, as long as the additional weight was minimal. Several of the guys on the spectrum forum were recommending my old friend closed cell foam as an excellent barrier to be paired with spray on deadening. (of course the 3rd layer recommended is butyl based foil backed stuff, but F-that weight)
To get sheets of closed cell foam you can purchase spectrum product, or get camping mats at Walmart
*record scratching sound effect*
whaaaaaaaa?!?!?!? :o
[incredulous smiley]
Yeah, turns out camping mats are closed cell since the substance is highly effective as an insulator. As you can imagine Walmart sells cheap stuff, so I picked up ~5 closed cell camping mats for about $6 each. My plan was to use these between the body and the cabin in high risk areas of the rear like the floor and wheel wells.
Spray glue adds a layer of black carpet, and I am sitting pretty:
I thought at this point I was mostly done, but turns out I had only done the easiest part, and it would need several revisions. "le sigh"
One of the first hurdles was to recreate the rear interior wall, due to it's irregularity. This took a bit of planning and the acquisition of a sheet of coroplast.
This stuff is basically carboard made of a nylon like plastic. It is the same stuff they print disposable outdoor signs with.
I was looking for something with structure that would not rip or tear, but yet be very light, with the potential to bend around curves. Of note this stuff bends much like cardboard, in one dimension, but not well in compound curves. That worked well for my plans but may not for yours.
"yeah but 65imp, how strong is it?" you ask
"ask Danzan's Dentist! I say.
inside joke background
When I was demonstrating for Danzan my plan to use the stuff he proclaimed that I should use expanded metal, and we went back and forth about weight vs. strength.
When I said this coroplast was plenty strong, Danzan calls BS.
*FLAG*
And he followed by saying he could shred it with his teeth.
I countered with a typical gearhead response:
"Go for it"
So he proceeded to take a chunk bite on it like Mogo on Brismo7, and pull for all he is worth.
This is where my brother in law called social services to report elder abuse.
Turns out I was right for once, and when feeling returned to Dan's jaw, along with his dentures he responded:
"huh, that stuff is pretty strong."
So it passed the tooth test, it was going in the car.
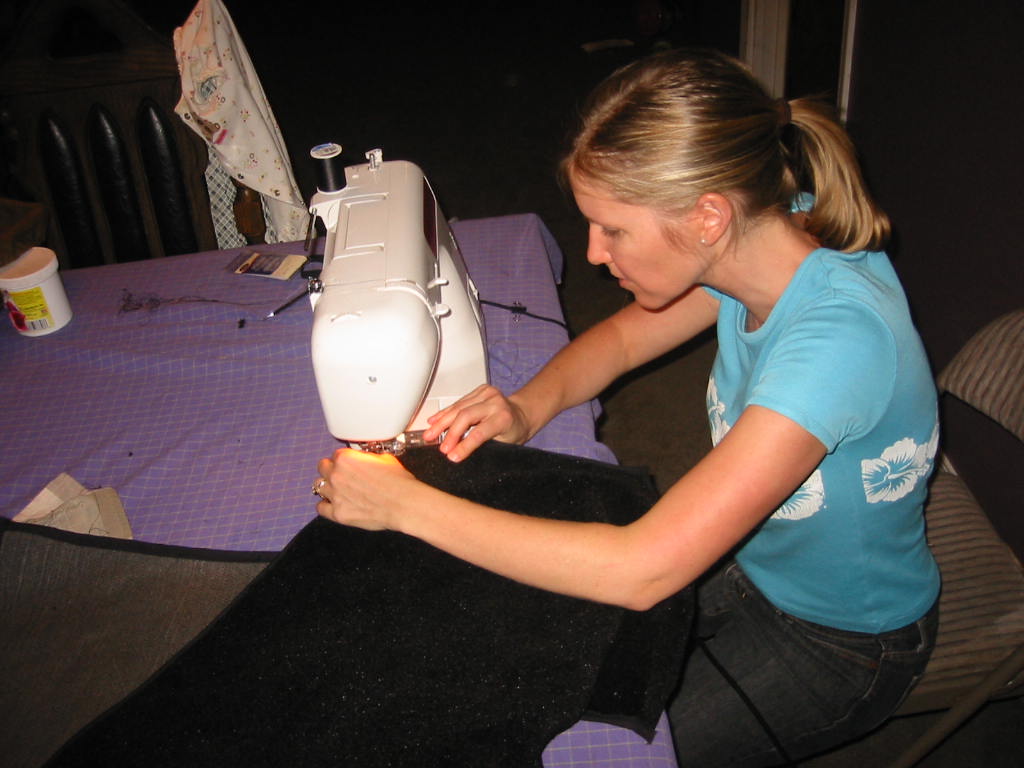
The other important acquisition is capturing indentured servitude with MaD TyT3 $3w!ng $killz:
I caught this seamstress with daring wit and an irresistible charm
I proceeded to make up some of the support structure for the main carpet pieces I planned to add.
part of the biotch of attaching the piece this way was that it forced me to chop up the rear piece I had already completed in the pix above. (actually about a 6 month span between these events) It is of note, that the final piece only needs the base attached to the floor of the cabin, and the rest holds nicely to the rear interior surround without adhesive.
With a solid rear piece I was free to work my way forward with my structural coroplast for the pieces I wanted to not follow the natural sheetmetal contours:
Trending Topics
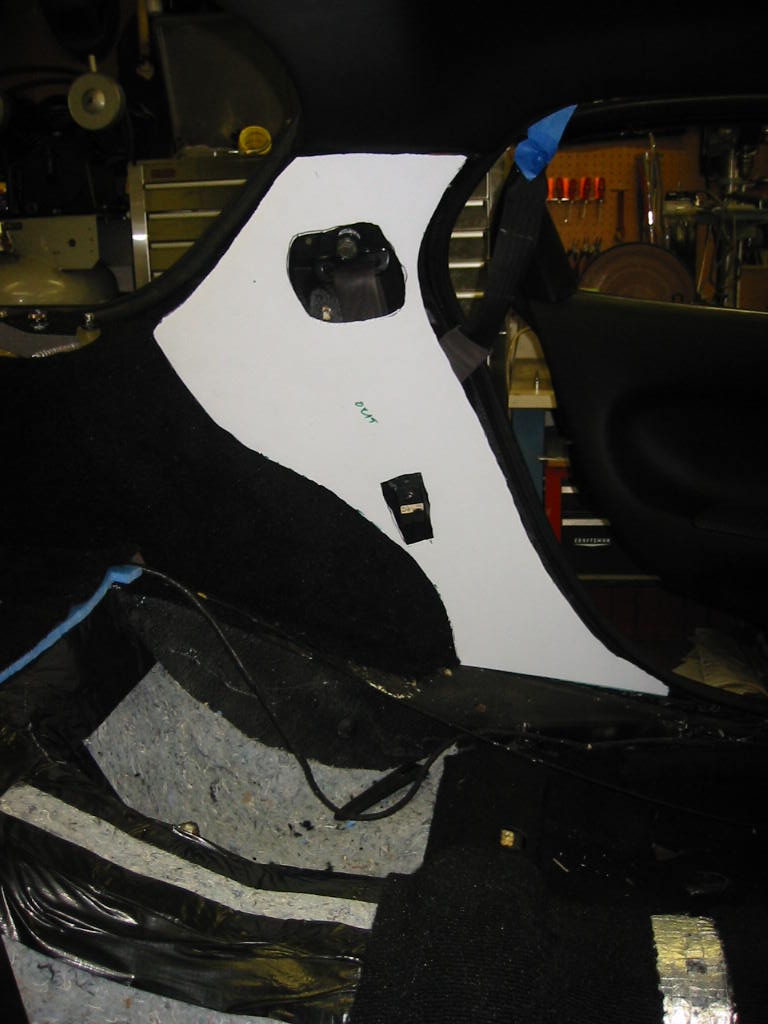
I had the back, and middle portions of the floor covered, the sides in the rear, and sides of the passenger cabin.
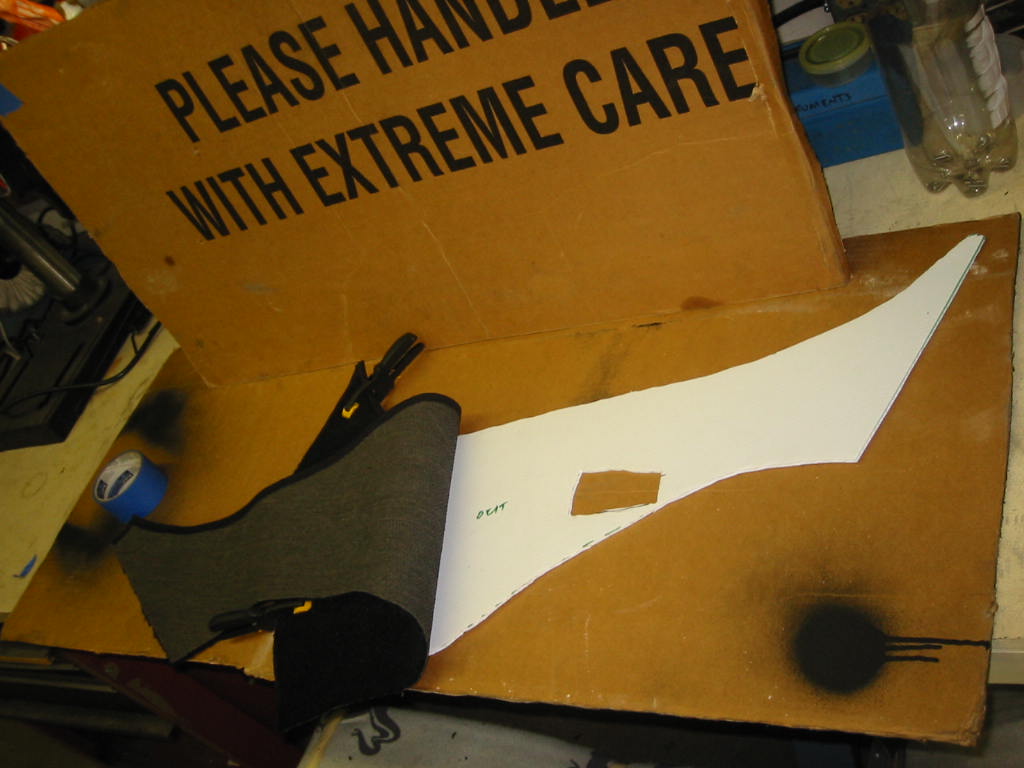
The problem area of around the shock towers and inner wheelwells became more and more glaringly obvious. One way or another it would require 2 pieces stuck together because of the compound curves. Also I REALLY wanted it to have additional sound suppression from the closed cell foam, but how to make it work?
What I found was that you could heat the closed cell mat with a heat gun and get a pretty good semblance of shaping it. Stick it to the top "cap" of foam with duct tape and it was pretty acceptable.
I was not planning to remove this anytime soon, so it got stuck down in place.
For the carpet I started with the easy part:
Then I had to recruit another with talents at freehand stitching:
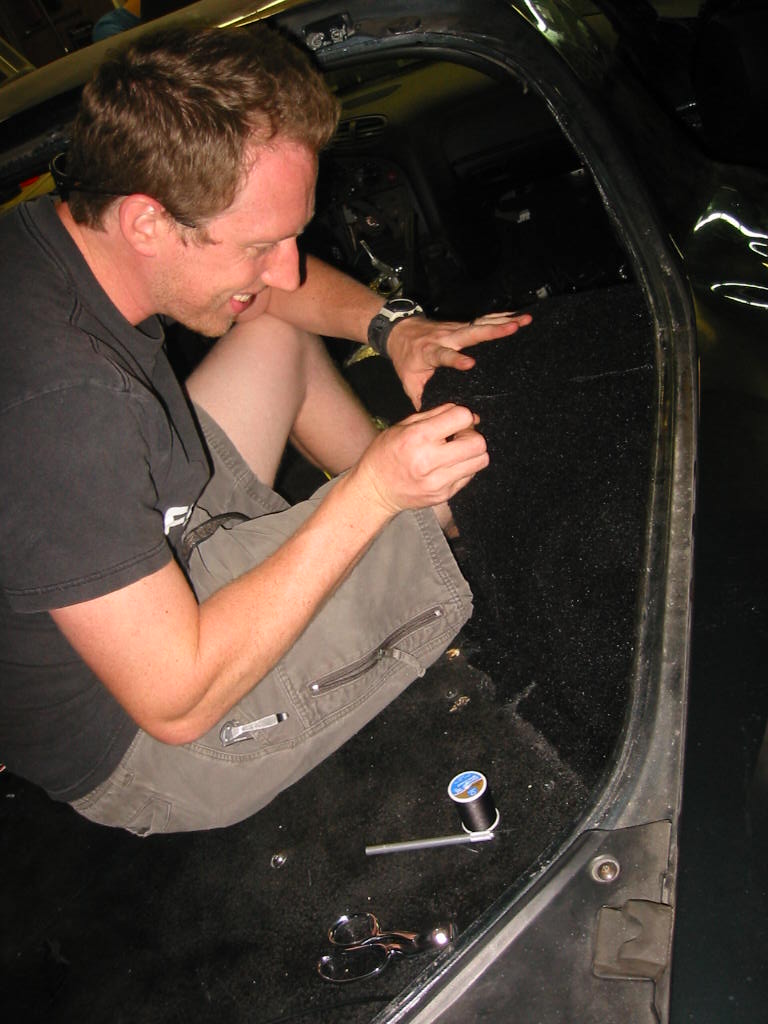
Frijolee is now performing alterations and assorted dry cleaning in the garment district of Los Angeles. If you have frayed material, if no one else can help, and if you can find him, maybe you can hire...
the stichingbean! :yay:
Now I could install the final portions above, with their new carpet installed:

To keep these pieces in place I used about 5 of these unique nylon rivets I found at the "ghetto freight"

Eventually it came together quite nicely
WOW, just WOW I've read some things about you car but have never seen this. The amount of cubic effort in your car is awe inspiring. It's going to be in a magazine some day but I'm not going to read the article. I'm going to wait for the book.
If you want to waste more time reading about my project I have a writeup here:
http://www.norotors.com/index.php/to...7.html#msg3857
http://www.norotors.com/index.php/to...7.html#msg3857


Can't say I like it, but many would say that about my cargo area as well (it's filled with 2 Kicker 10's and a 2000w Alpine amp). One thing I will say is you should have laid Dynamat. You wouldn't believe how much quieter the car is with Dynamat.
Senior Member
Joined: Jun 2008
Posts: 331
Likes: 1
From: WV
Wow, awesome job 65Imp!! my wheelchair would fit in the back of your FD muuuch better than mine.  I wish Mazda had done something similar rather than gave us a bunch of weak, rattly plastic. Given I can't do the labor myself, I might see what a custom shop would charge to do something along the same lines, maybe next year.
I wish Mazda had done something similar rather than gave us a bunch of weak, rattly plastic. Given I can't do the labor myself, I might see what a custom shop would charge to do something along the same lines, maybe next year.