

Need help diagnosing engine internals


Need help diagnosing engine internals
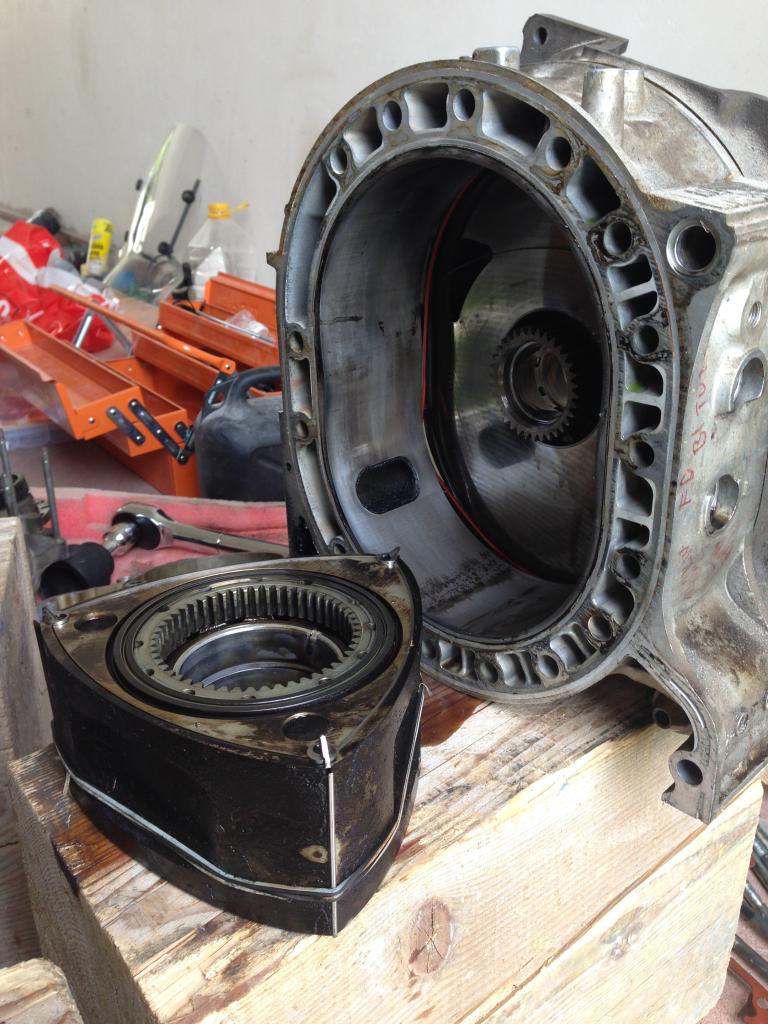
I recently bought a 13b-REW block for dirt cheap; it was sitting in a garage for 10+ years. I took it apart and I need opinions on the condition of the parts.
I�m not an expert, quite the opposite, but from my humble opinion I believe the rotor housings are in ok shape and the irons look ok as well...however the rotors seem like they have seen better days.
Where I live there are no rotor shops so I have to do everything myself�and there is pretty much nobody close by to ask so I need you guys to tell me what�s up.
I still haven�t measured any tolerances on any of the parts�
From this photo you can get an idea how much carbon was on the rotors�decade old carbon in my case
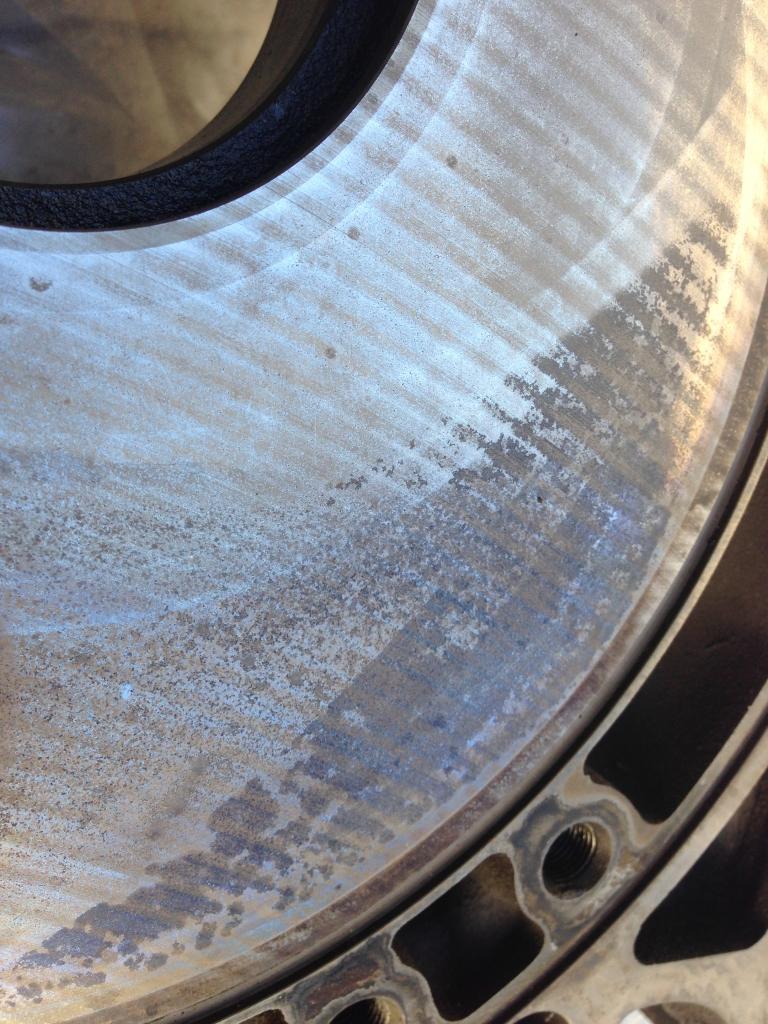
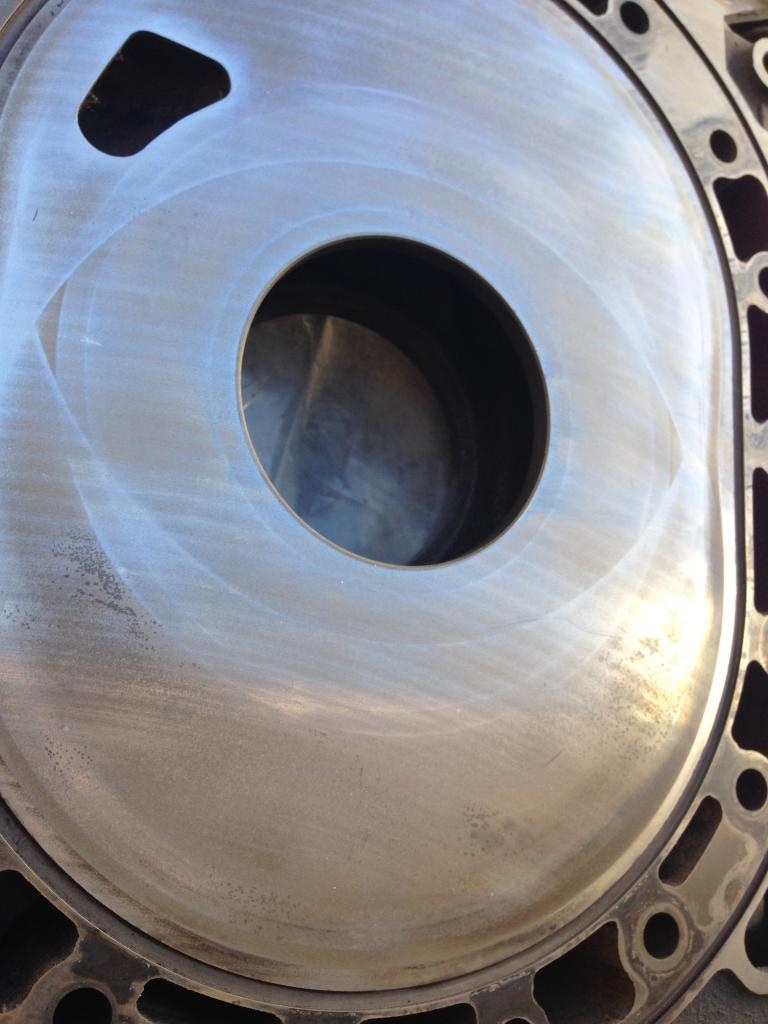
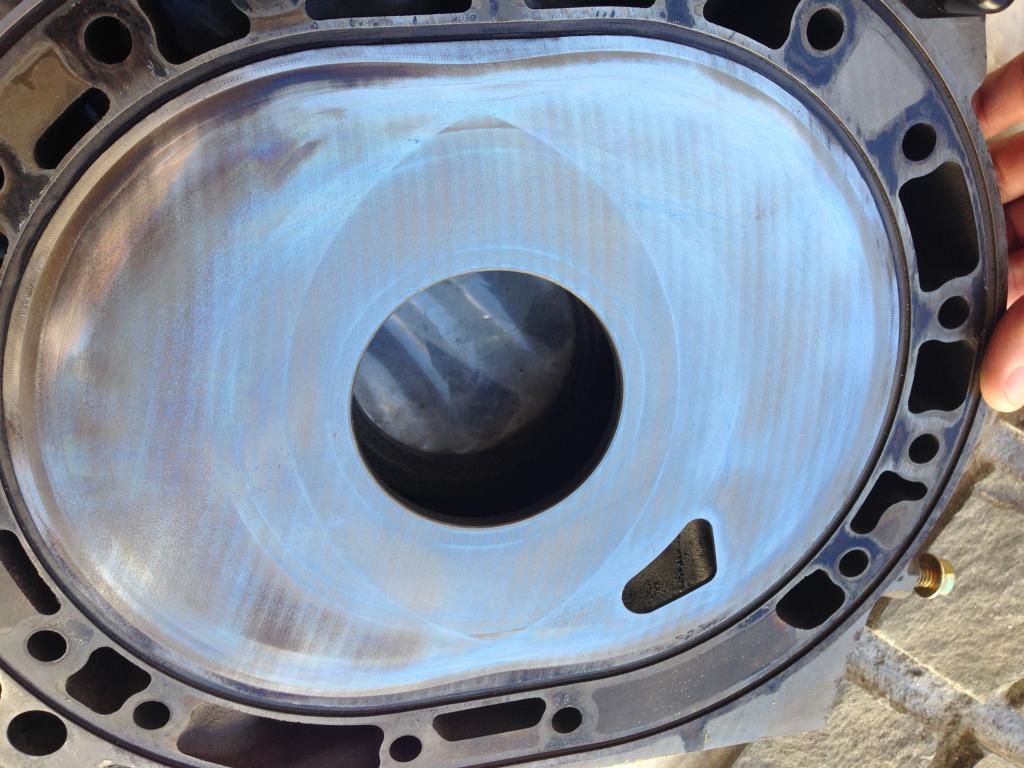
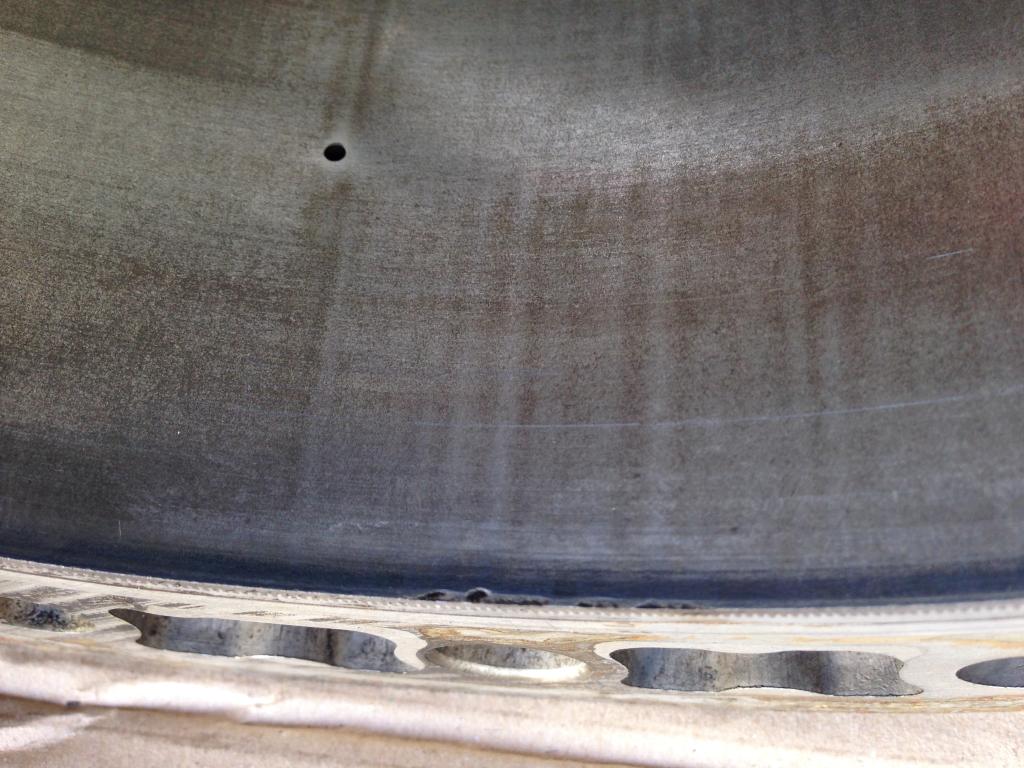
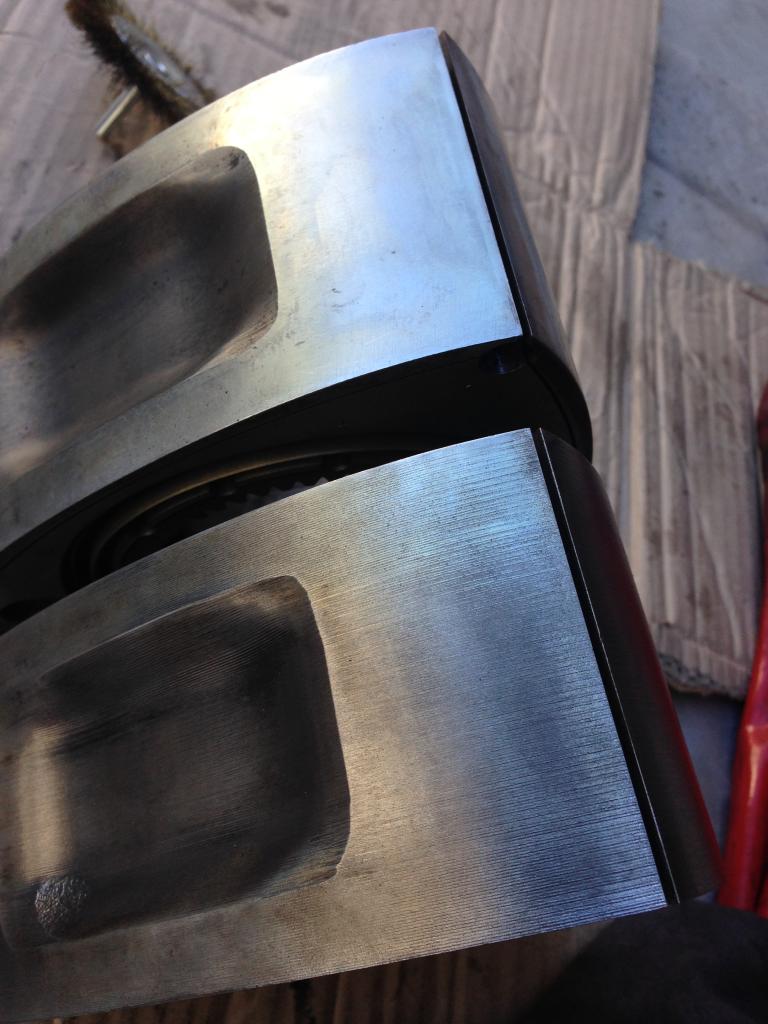
Ok so let�s start with the irons: There are no visible scratches of any kind, the surface is very smooth to the touch, however each iron has some discoloration, mostly on the bottom part where combustion and exhaust occur. Is this common? Or is this discoloration a result of sitting for a long time? Should I get them re-lapped? (There is a shop that can do this for me)
I�m not an expert, quite the opposite, but from my humble opinion I believe the rotor housings are in ok shape and the irons look ok as well...however the rotors seem like they have seen better days.
Where I live there are no rotor shops so I have to do everything myself�and there is pretty much nobody close by to ask so I need you guys to tell me what�s up.
I still haven�t measured any tolerances on any of the parts�
From this photo you can get an idea how much carbon was on the rotors�decade old carbon in my case

Ok so let�s start with the irons: There are no visible scratches of any kind, the surface is very smooth to the touch, however each iron has some discoloration, mostly on the bottom part where combustion and exhaust occur. Is this common? Or is this discoloration a result of sitting for a long time? Should I get them re-lapped? (There is a shop that can do this for me)


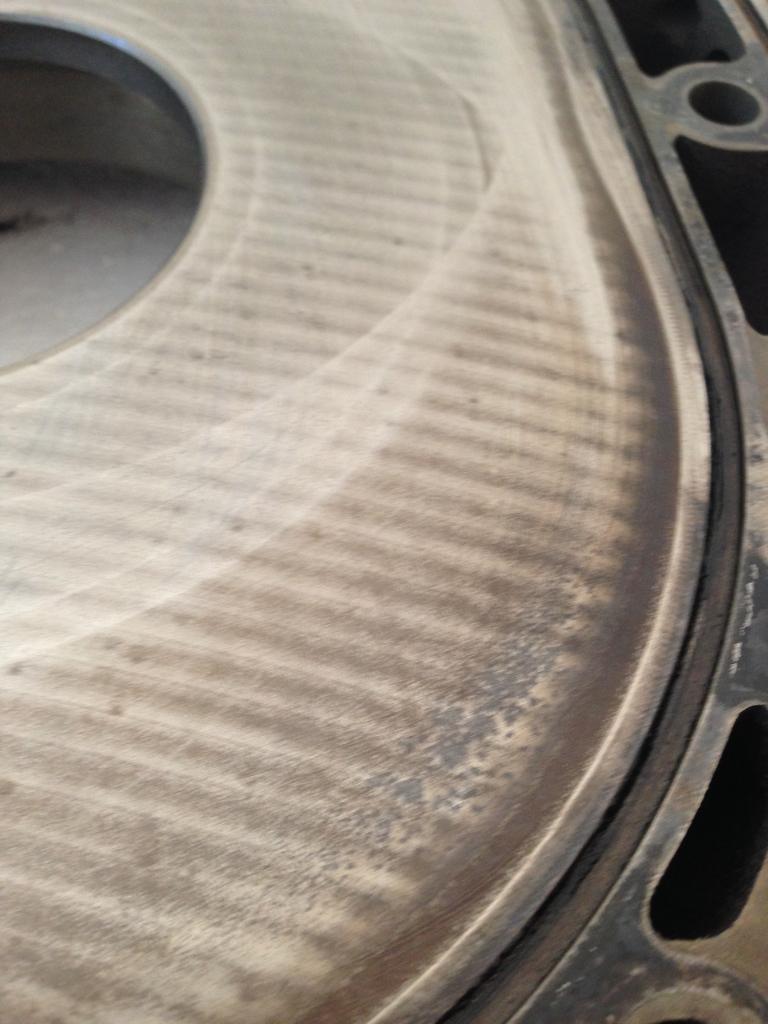
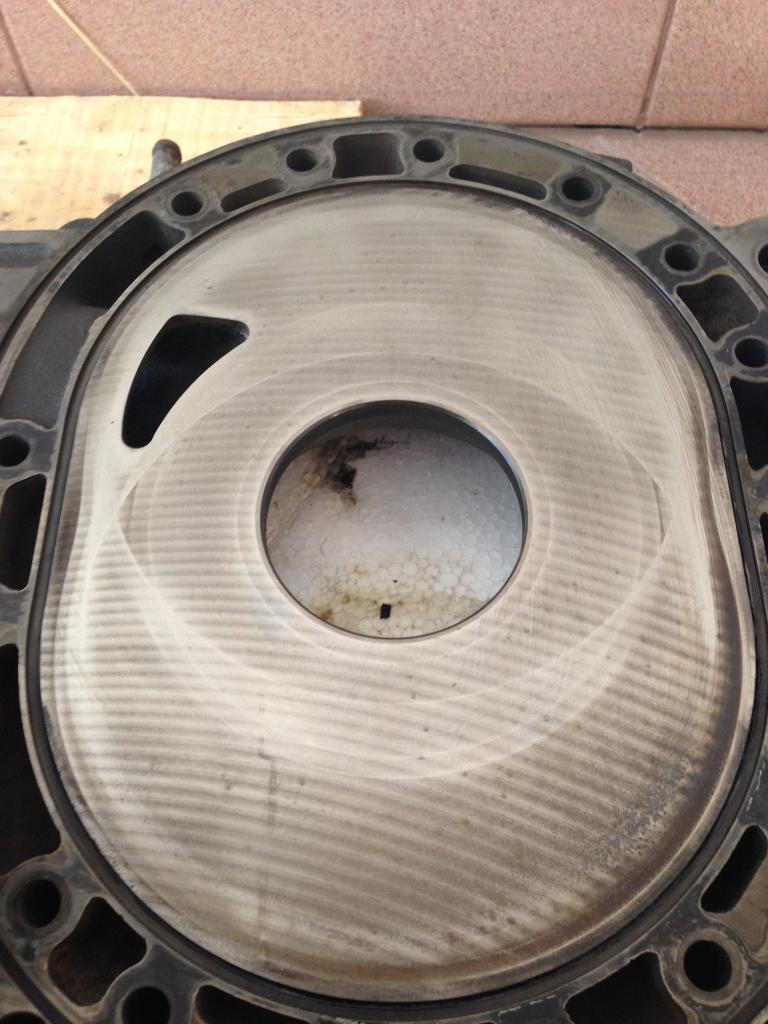
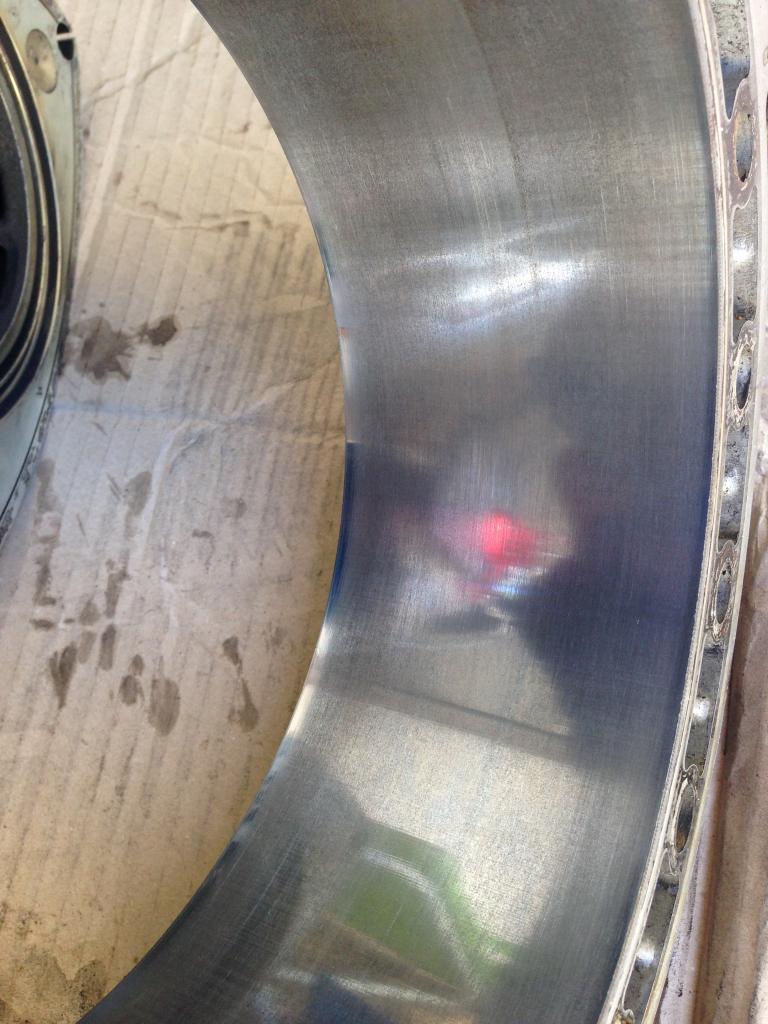
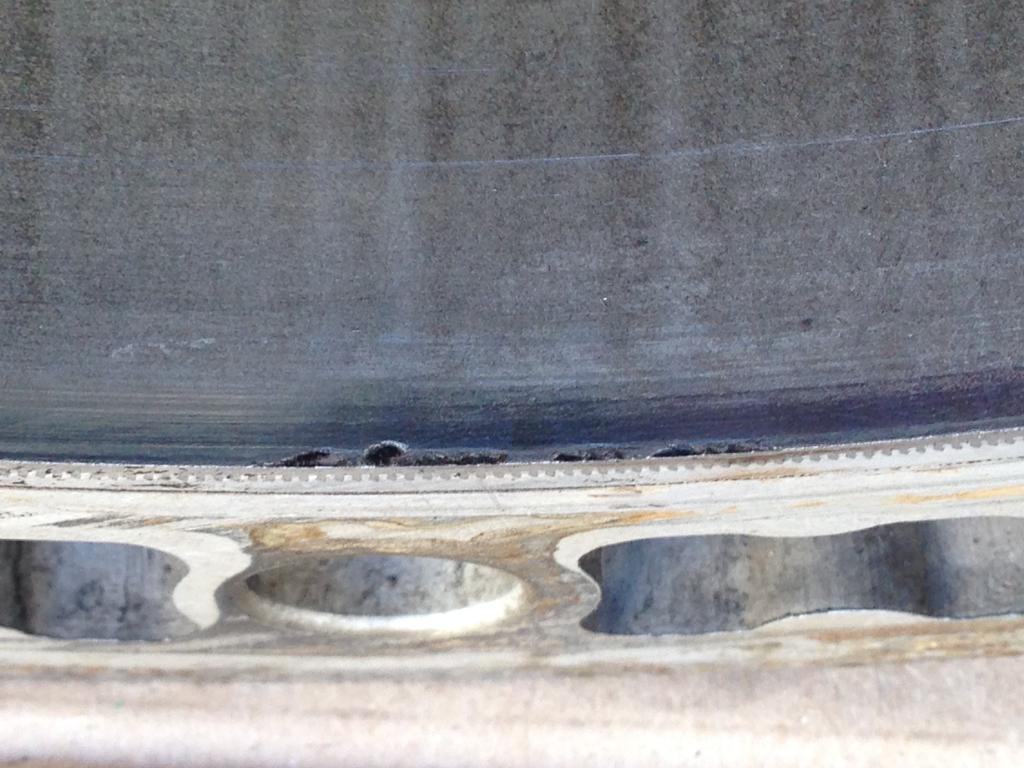
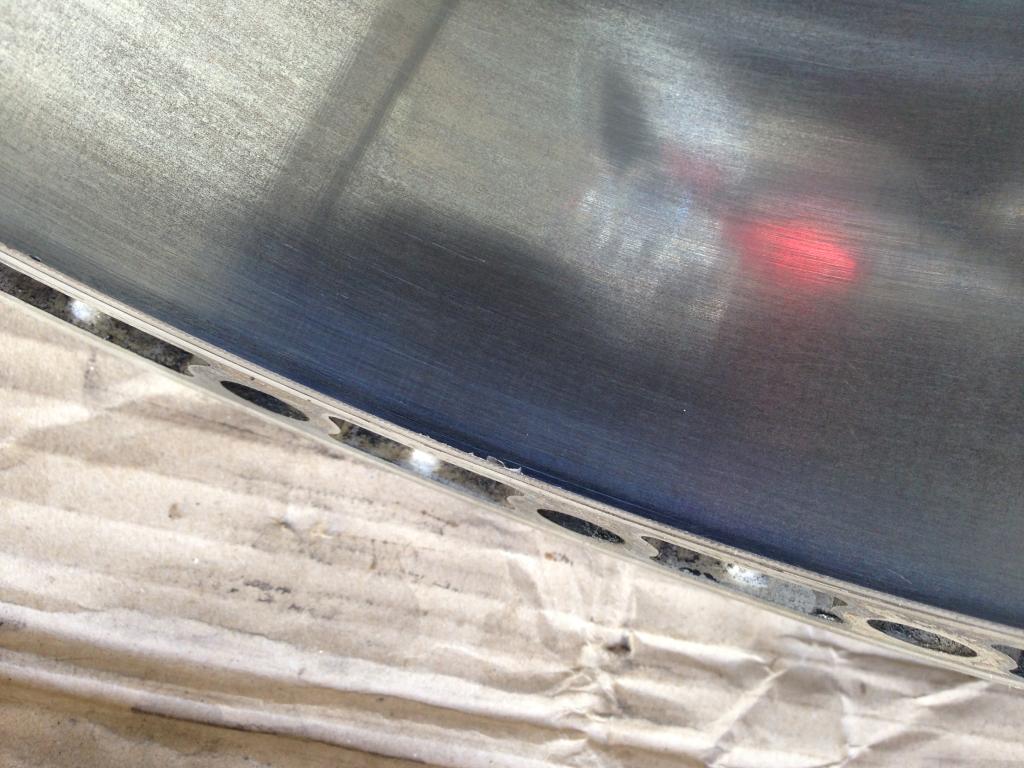
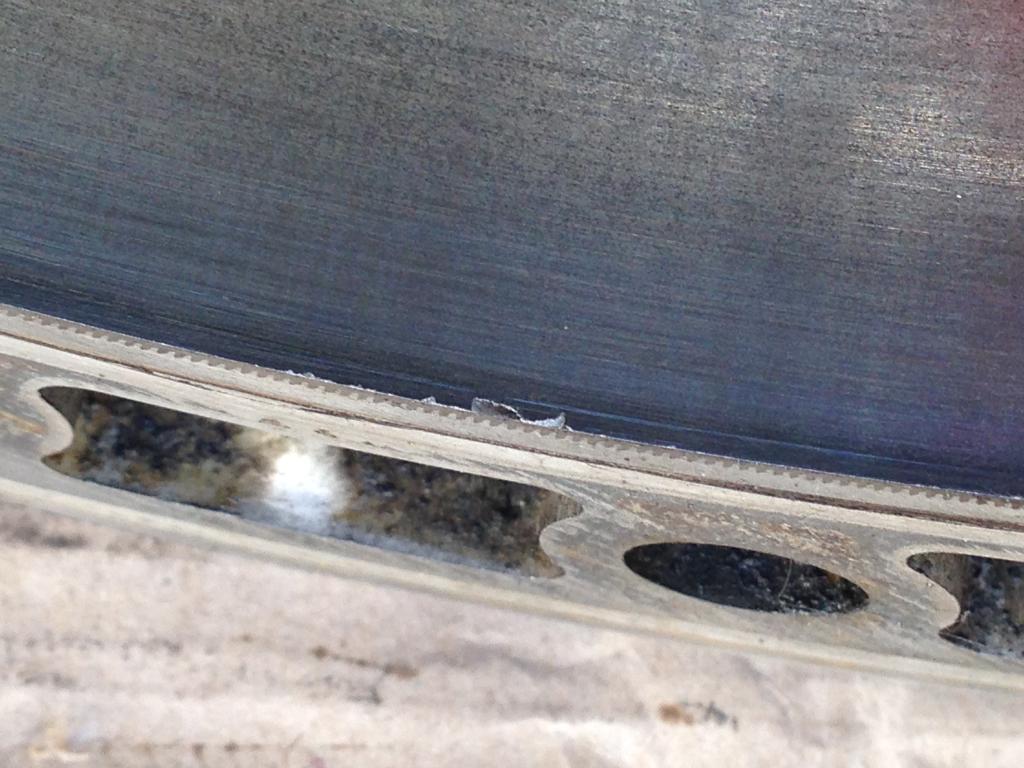
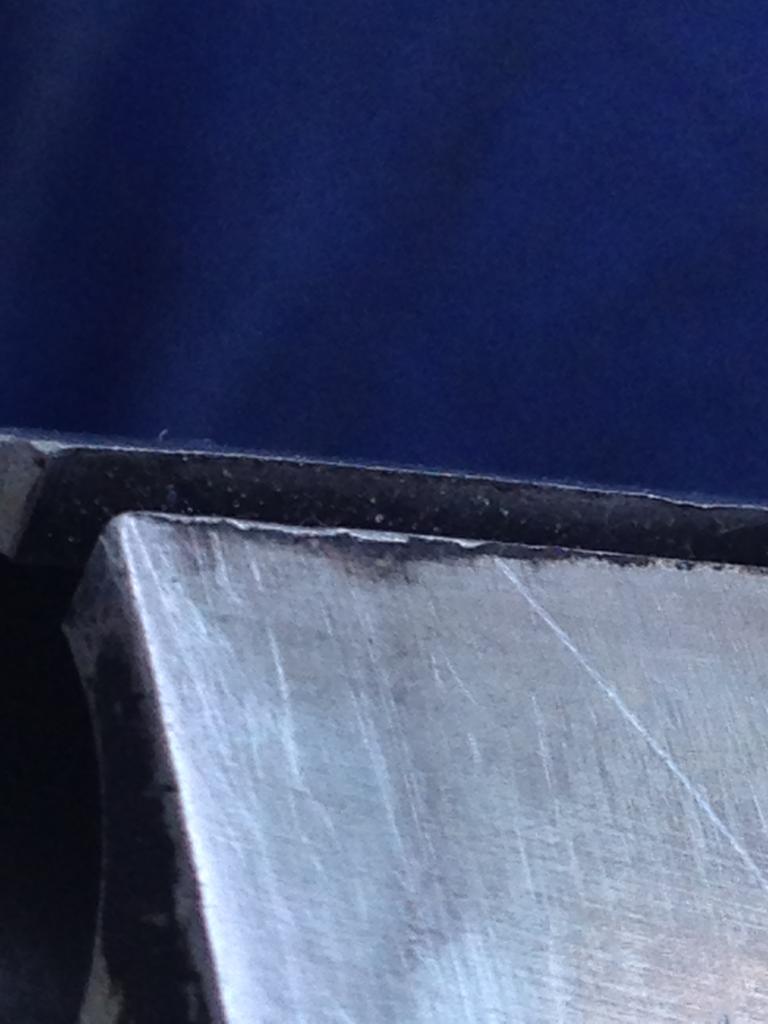
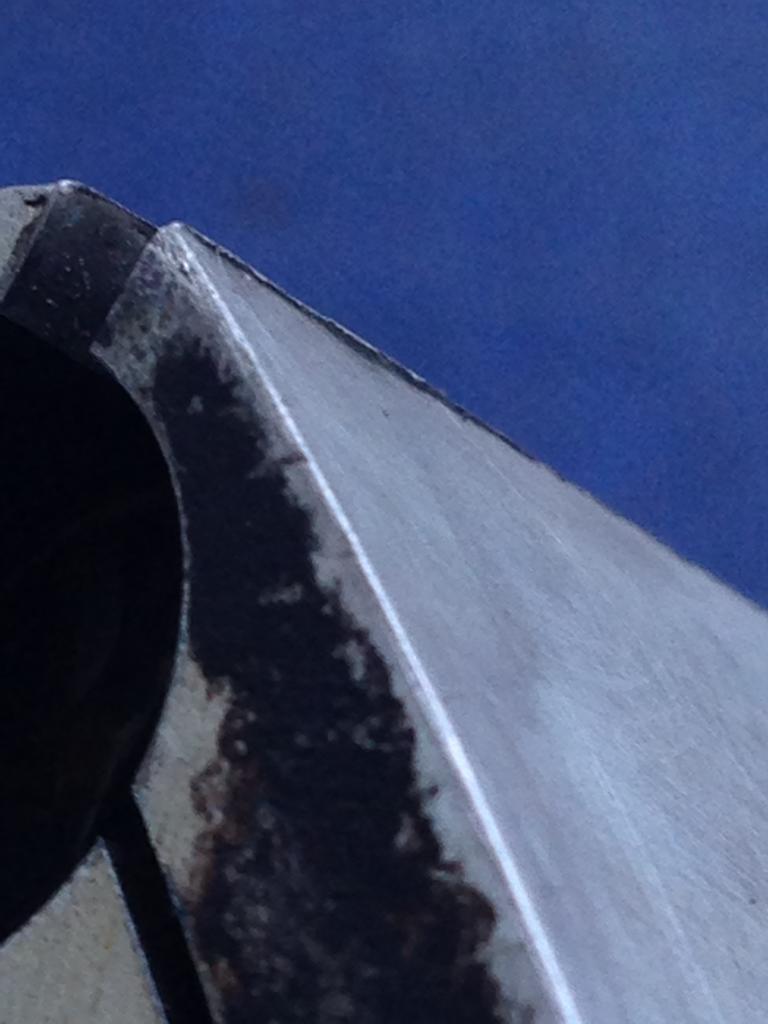
Next up are the housings: There are also no visible scratches, very smooth to the touch. There is almost no flaking on the edges. I took the photos of the only places the edges have some flaking…let me know what you think of the housings.


And now come the rotors. They had serious carbon build up…I bought a circular brass and a circular steel brush to clean the rotor surfaces. I didn’t use the brushes on the rotor sides as I read somewhere that extra caution must be taken when cleaning the rotor sides…
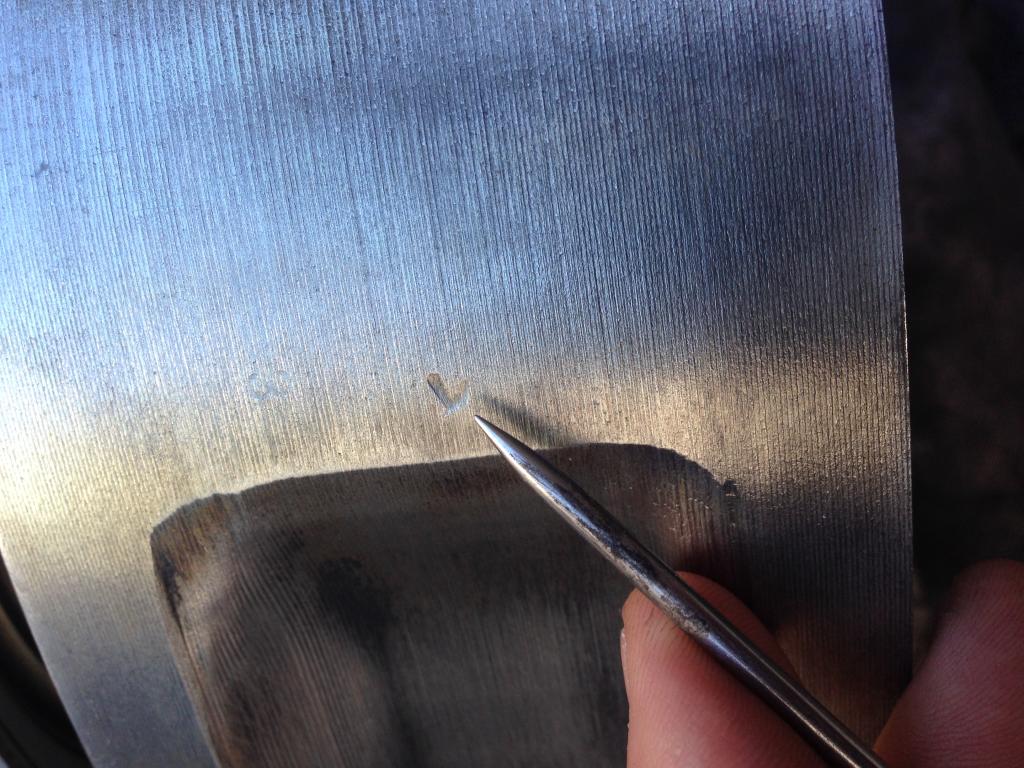
The rear rotor:
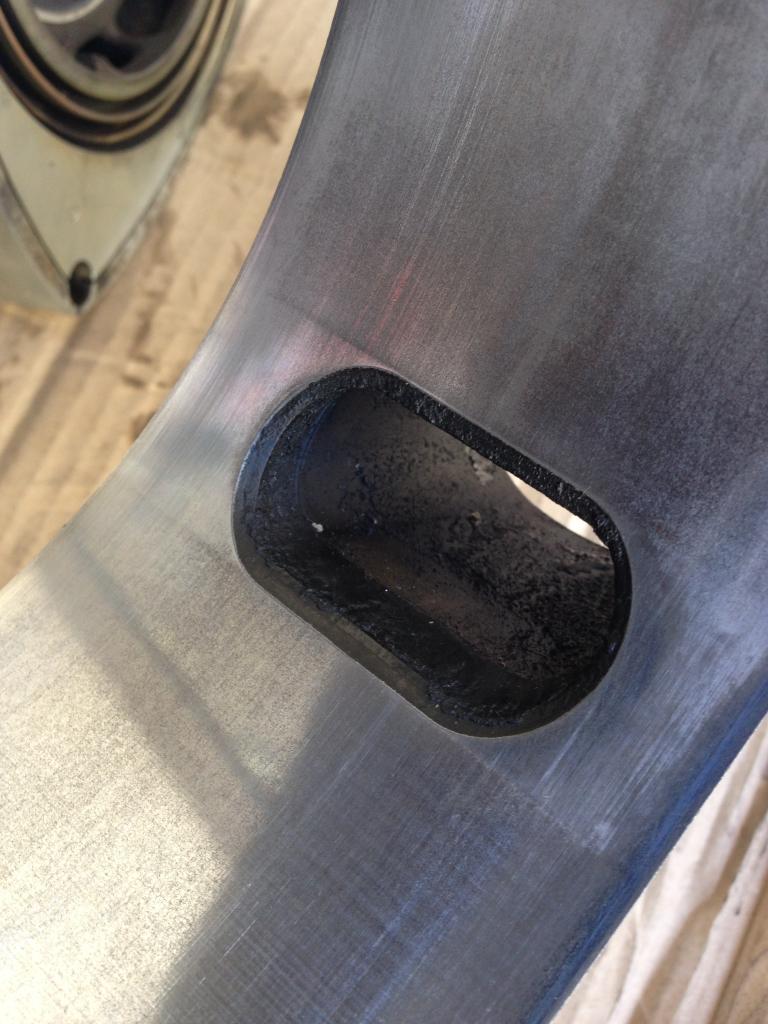
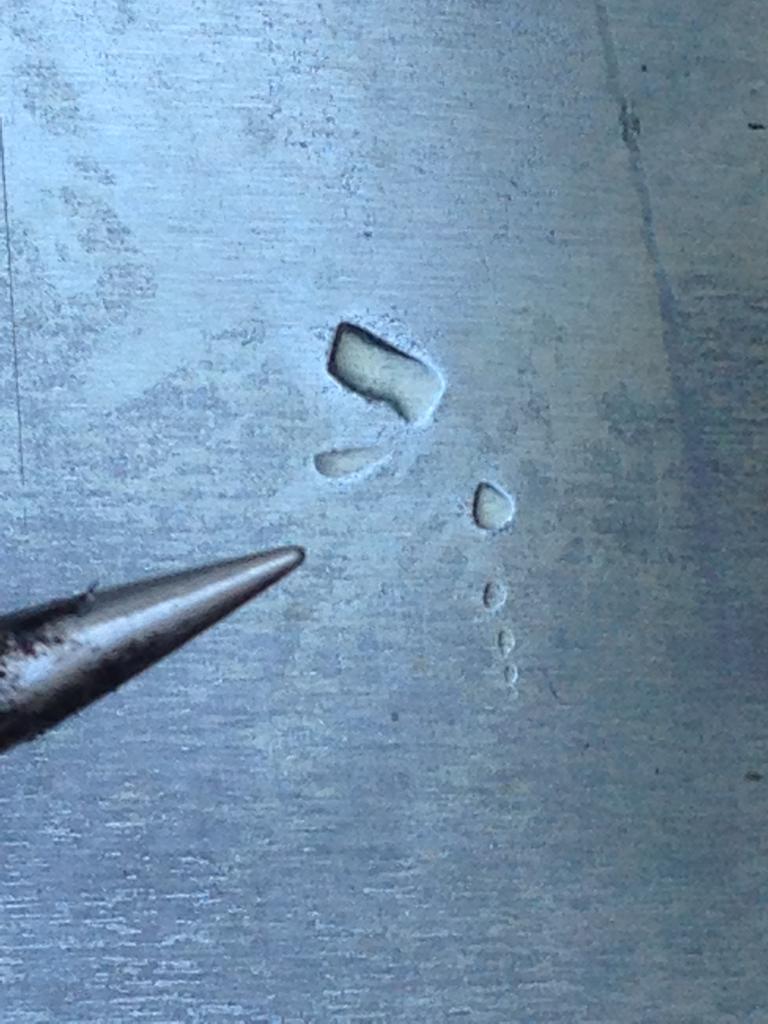
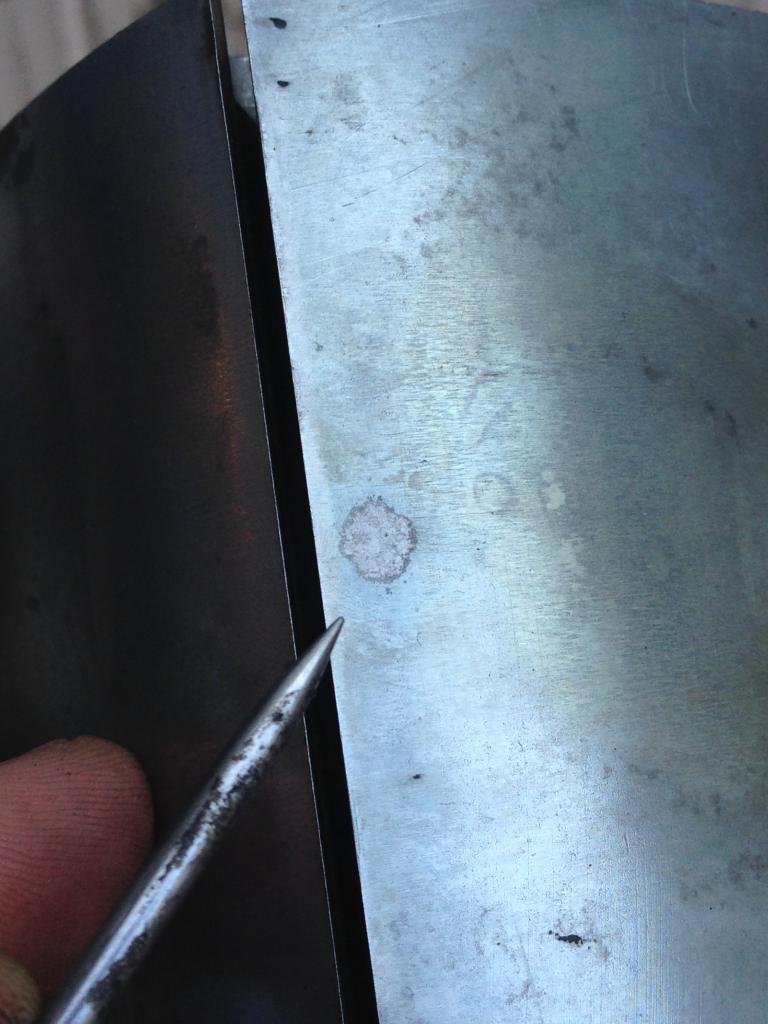
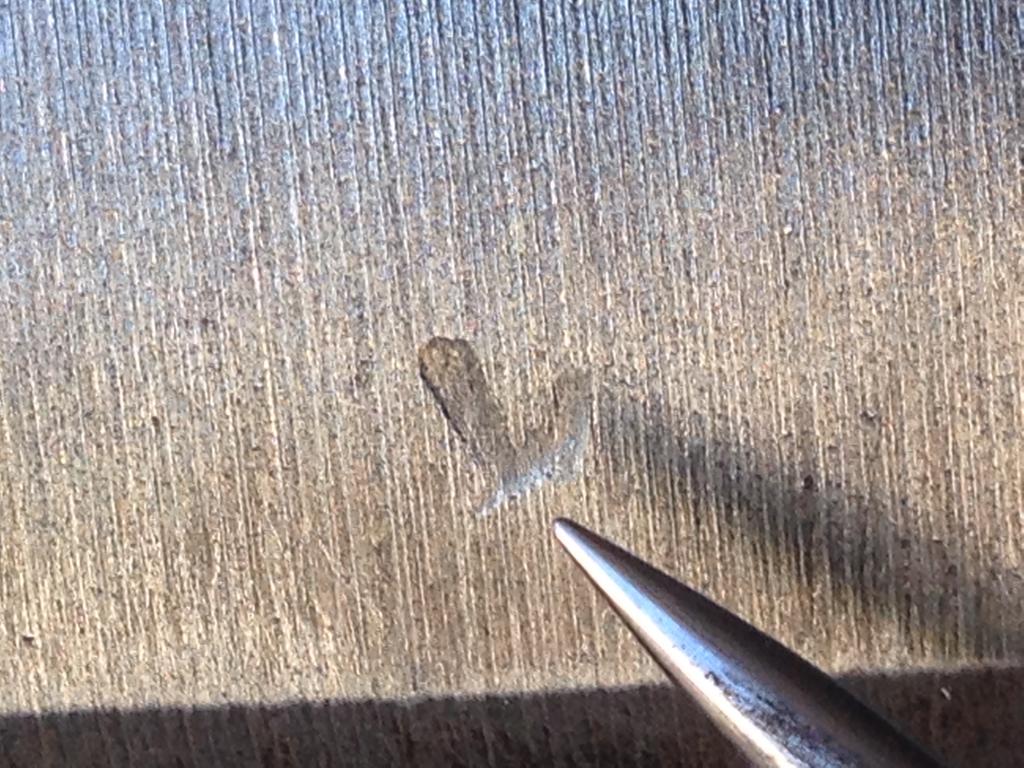
Small indentation, can this be fixed and will it cause a hot spot if left like this?
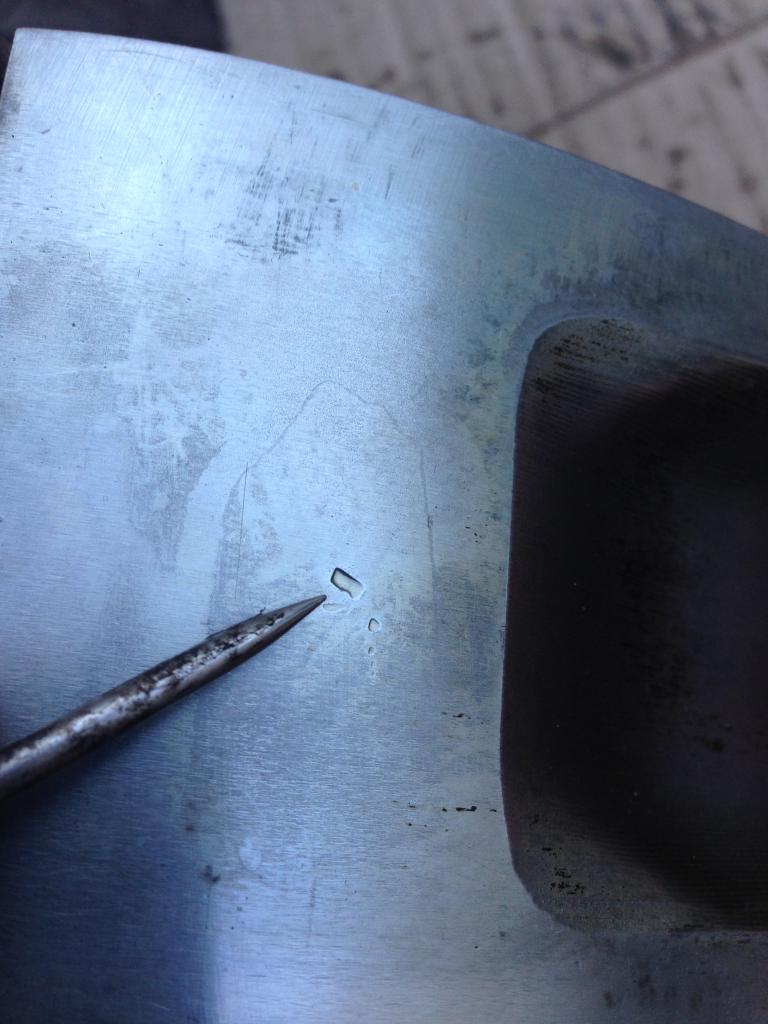
close up:
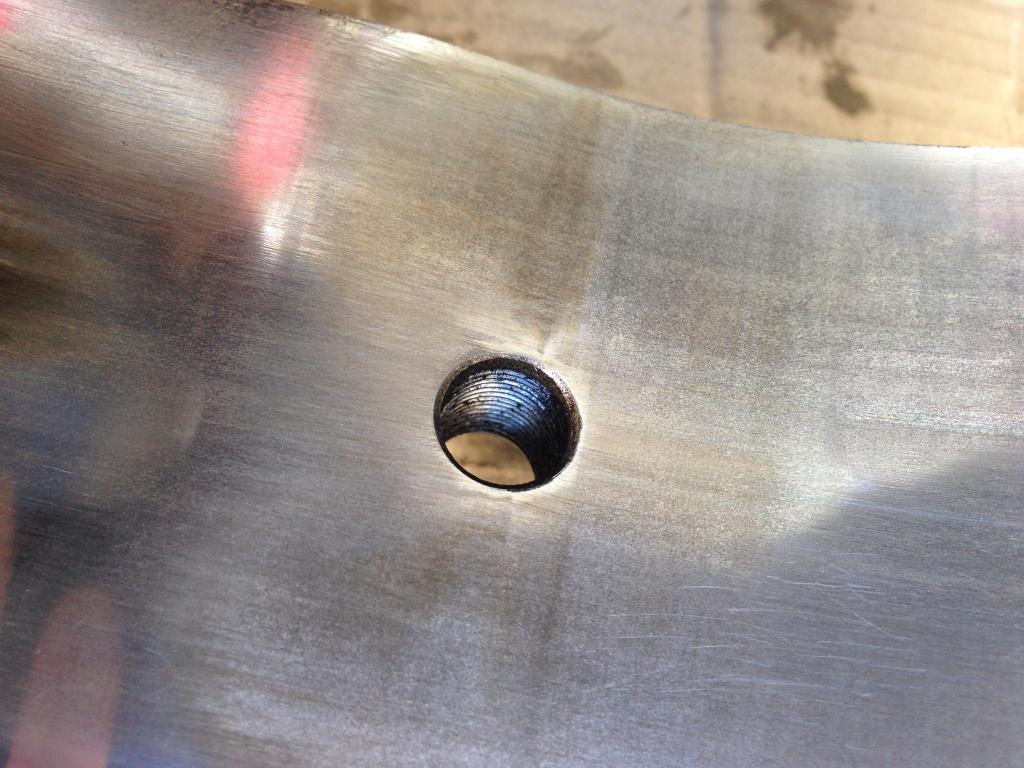
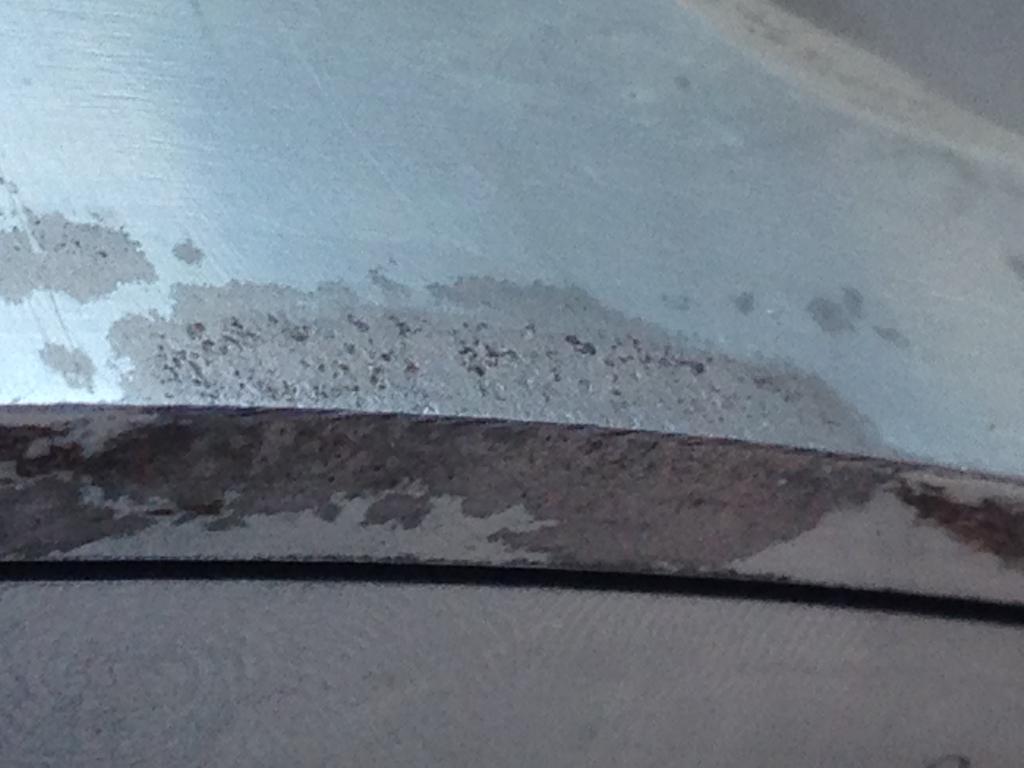
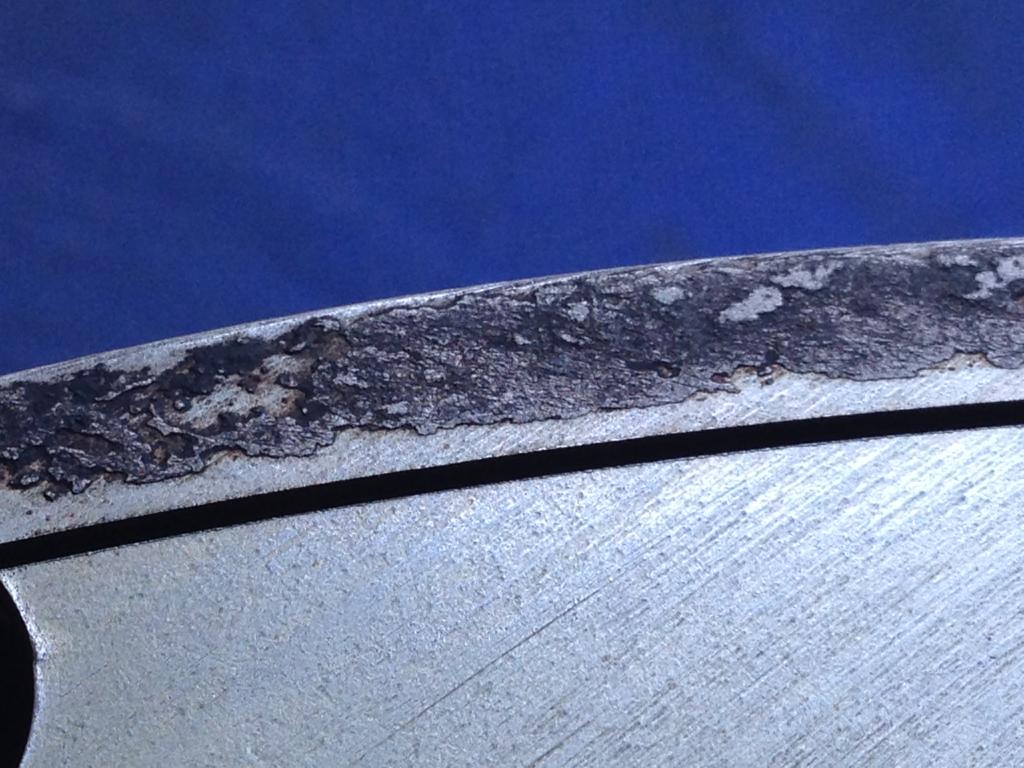
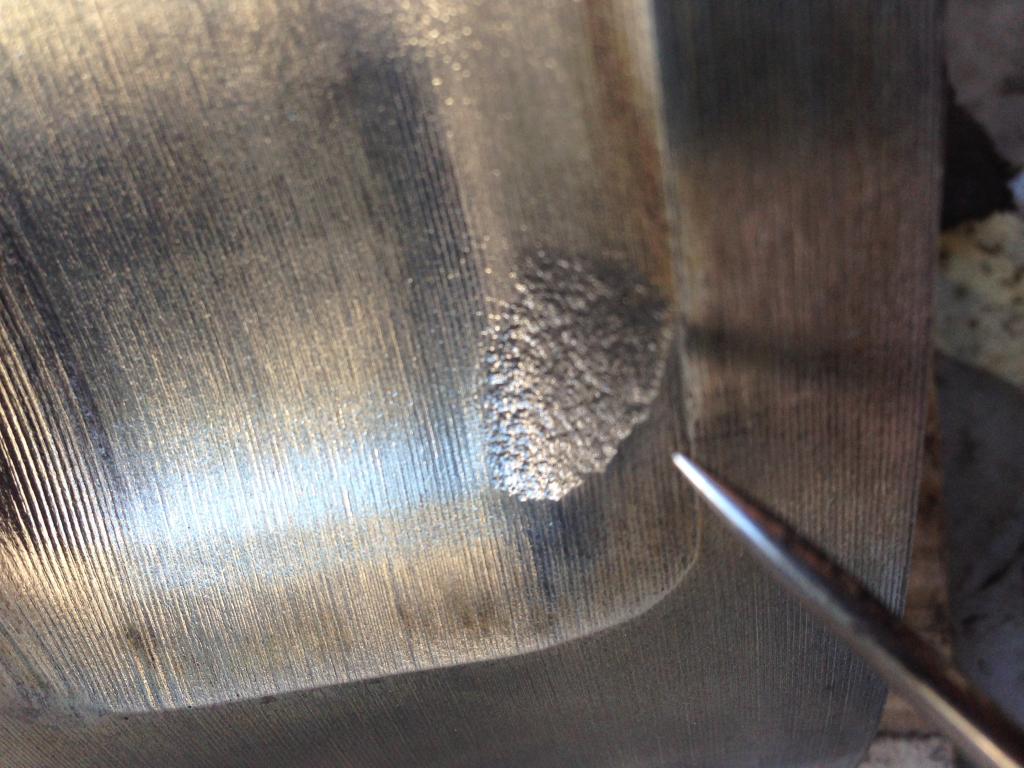
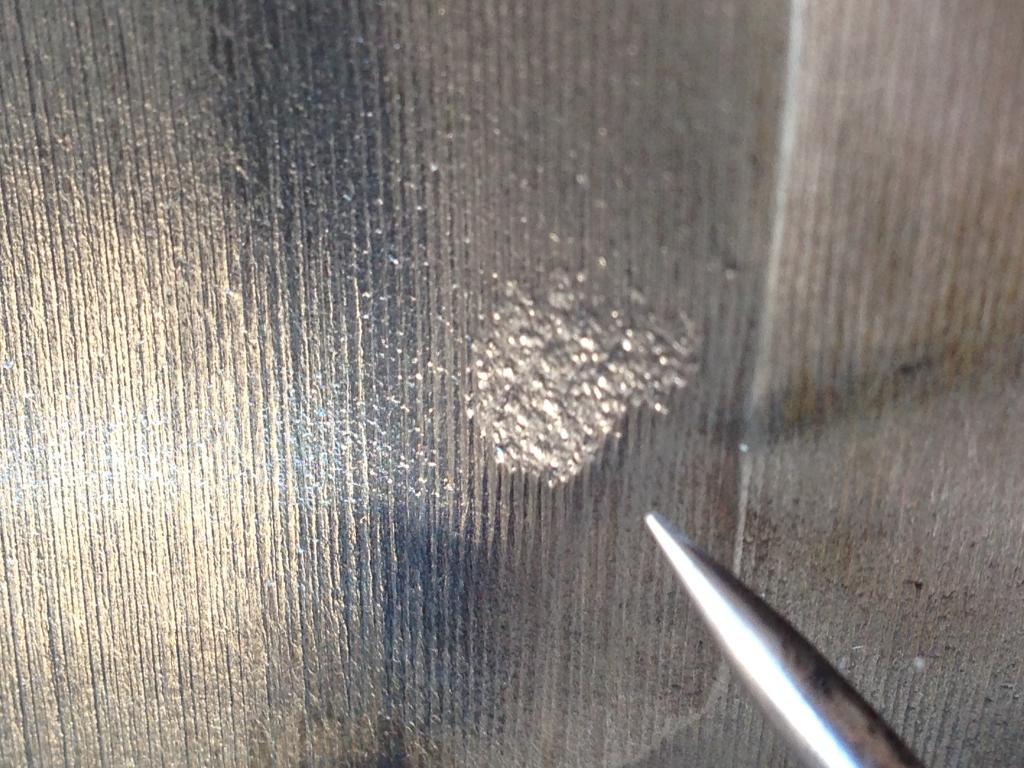
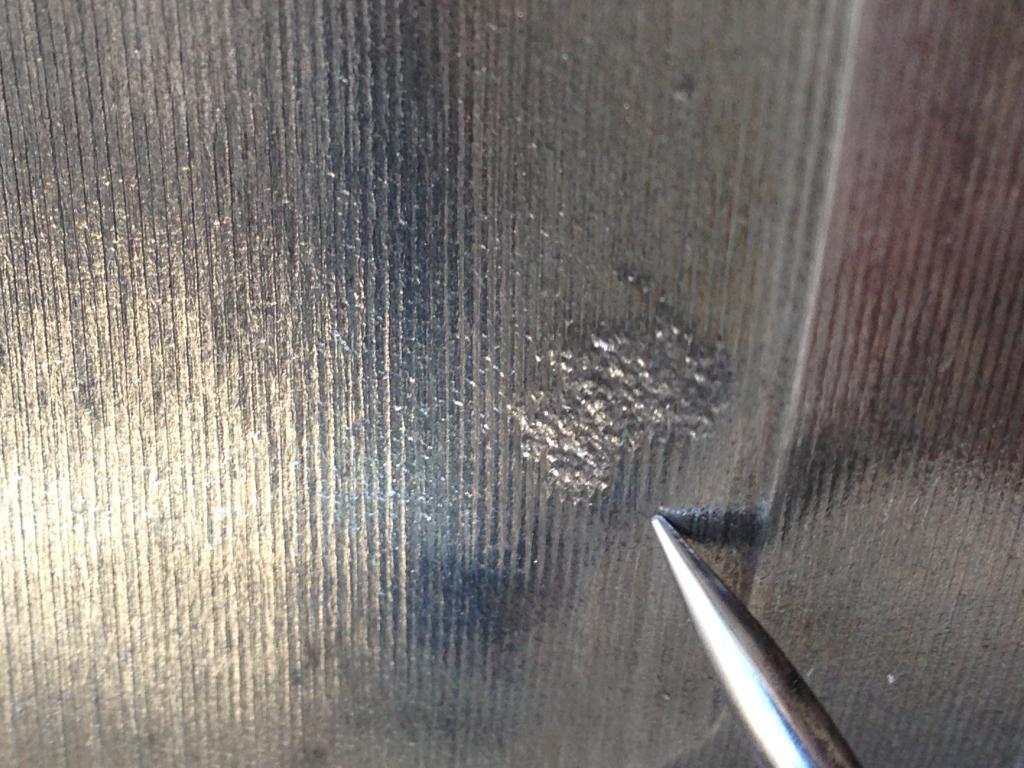
Very weird discoloration and surface on one of the rotor sides, is this the result of sitting for a long time? It appears that something “ate” the rotor on this part:
Some more discoloration on the rotor tip, is this common?
After cleaning the sides gently with a scotch-brite pad and getting rid of the carbon, this remained on all sides of the rotor, some kind up build up…once again is this the result of time, or is it a common occurrence?
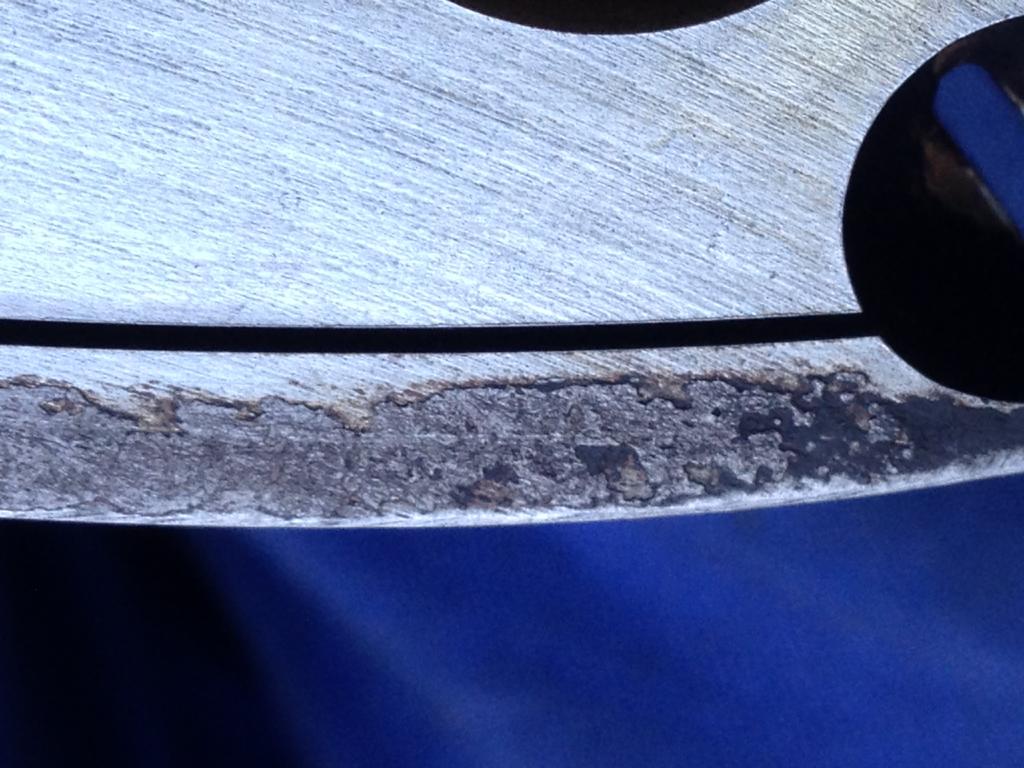
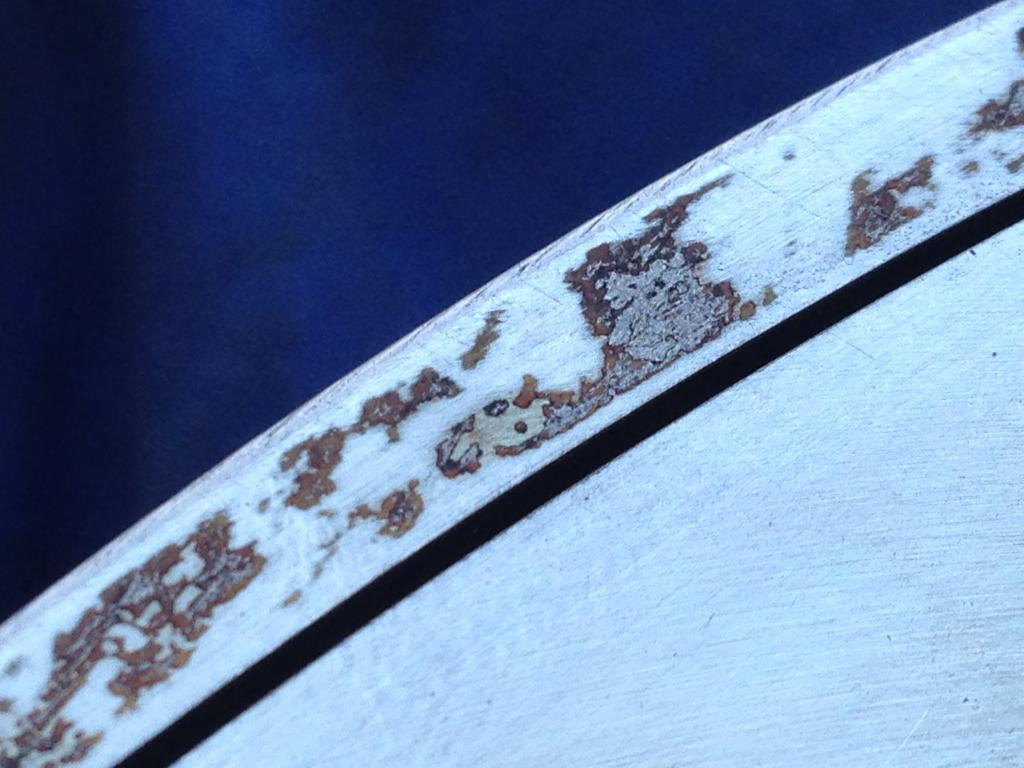
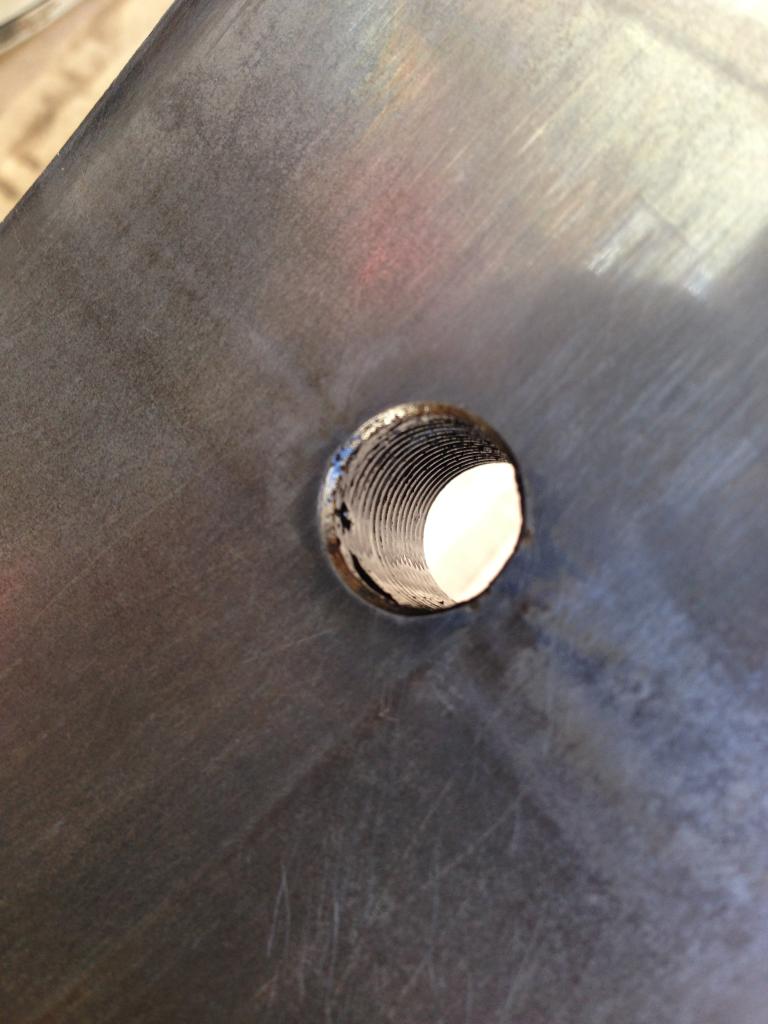
One of the tips on the rear rotor, doesn’t look good…
different angle:
Is there any sense in fixing this rotor? Or is it destined to become a door stop?
The rear rotor:
Small indentation, can this be fixed and will it cause a hot spot if left like this?

close up:

Very weird discoloration and surface on one of the rotor sides, is this the result of sitting for a long time? It appears that something “ate” the rotor on this part:

Some more discoloration on the rotor tip, is this common?

After cleaning the sides gently with a scotch-brite pad and getting rid of the carbon, this remained on all sides of the rotor, some kind up build up…once again is this the result of time, or is it a common occurrence?


One of the tips on the rear rotor, doesn’t look good…

different angle:

Is there any sense in fixing this rotor? Or is it destined to become a door stop?
Front rotor:
Close up:
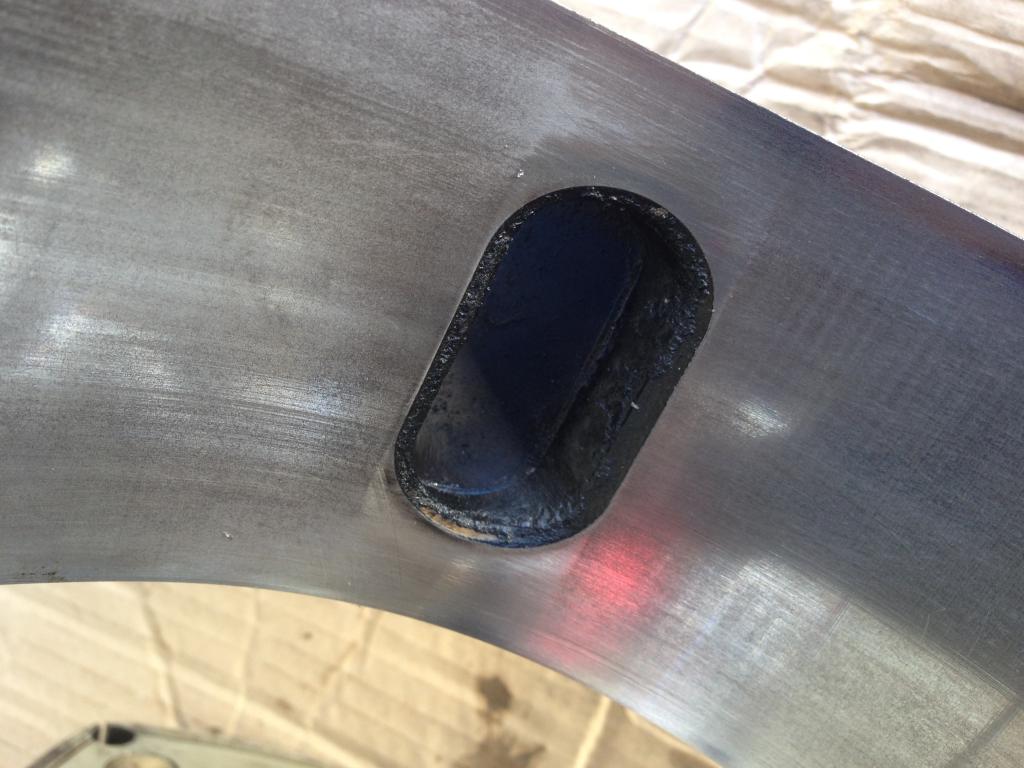
All three side of the rotor have this weird surface patch�on the exact same location on each side�
The front rotor has very asymmetric areas where the rotor recess begins�as opposed to the rear rotor
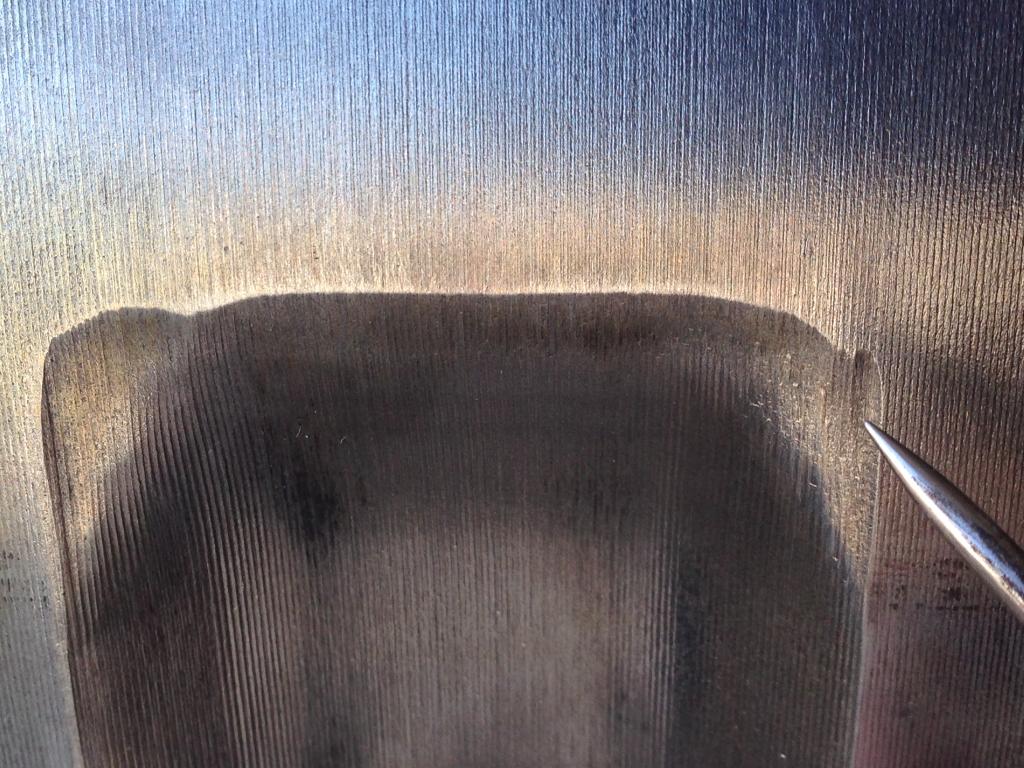
Final thing I noticed, after cleaning both rotors, the rear rotor has a much smoother surface compared to the front rotor, how come? I used the steel brush a bit more on the front rotor, but I doubt this could be the reason for the difference?

Close up:

All three side of the rotor have this weird surface patch�on the exact same location on each side�


The front rotor has very asymmetric areas where the rotor recess begins�as opposed to the rear rotor

Final thing I noticed, after cleaning both rotors, the rear rotor has a much smoother surface compared to the front rotor, how come? I used the steel brush a bit more on the front rotor, but I doubt this could be the reason for the difference?

here's my 2� ...
the little "issues" you've showed with the housings and shaft are negligible. as long as the sealing surface is intact, that's what's important for use. you can have them lapped if you wish, but honestly, you should be fine just going over it with some mid-grade wet sandpaper and something like some thin engine oil or WD40. if the engine truly sat for 10 years, then it may be the cause of the discoloration. that's NOT heat or inappropriate contact discoloration, so i wouldn't worry.
that leaves the rotors ... hmm ... while i wouldn't call those marks normal, i can't bring myself to say abnormal either. again, what's important is function - especially since you've described your situation as not having any local support or readily available replacements. that one apex slot you showed makes me think that slot may be worn, but you'll have to measure everything and see for yourself. the ridge will come off with a file, but if the slot is to wide, then you will have a decision to make - take the chance (engine will probably run fine), oversize seals, or go proper 3 mm?
some of the marks you showed makes me think may there was some debris involved, like maybe the engine ran unfiltered air for a while at some point, but that's just a thought. i've seen rotors and housings with pitting, but this looks a bit different to me. all the stuff on the shoulder (pre- side seal area) should be able to smooth out with some medium sanding.
for what it's worth, those are my thoughts.
Last edited by diabolical1; Jul 5, 2014 at 12:45 PM.
Trending Topics
Thanks for your thought diabolical!
Yeah the engine block did truly sit for more than 10 years.
Thats a good idea to widen the apex seal groves and go 3mm and get rid of the small ridge
Yeah the engine block did truly sit for more than 10 years.
Thats a good idea to widen the apex seal groves and go 3mm and get rid of the small ridge
well, just to be clear ... i included it as an option with no suggestion intended. my personal thought (and obviously, others will disagree - and that's fine, too) is use the 3 mm option as a last resort if everything else on the rotors spec well, but the slot can't be used with a 2 mm seal.

Full Member
Joined: Sep 2012
Posts: 57
Likes: 0
"eaten rotor"
That rotor that appears eaten looks to me as evidence of galvanic corrosion.
I could only wildly speculate what the electrolytic material could have been. Possibly ethanol in the fuel sitting in a flooded engine for a decade. Or water with a high mineral content. Like sea water...
I would closely inspect the coolant seal surfaces for corrosion and pitting as well. Both on the irons and o-ring face on the housings.
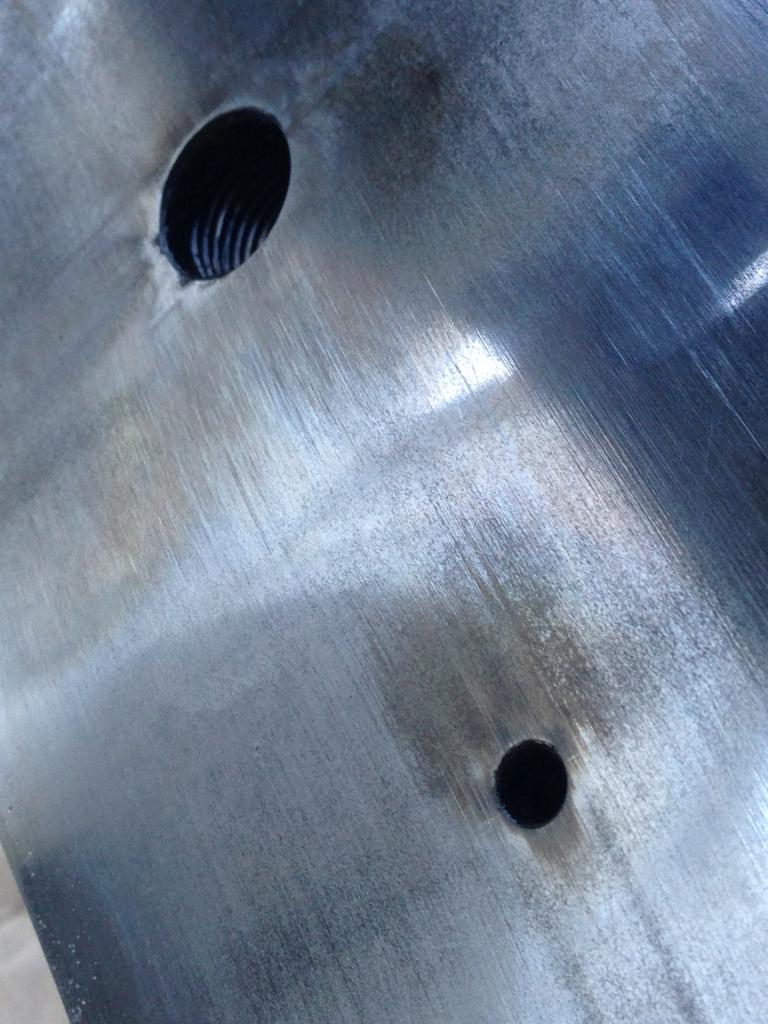
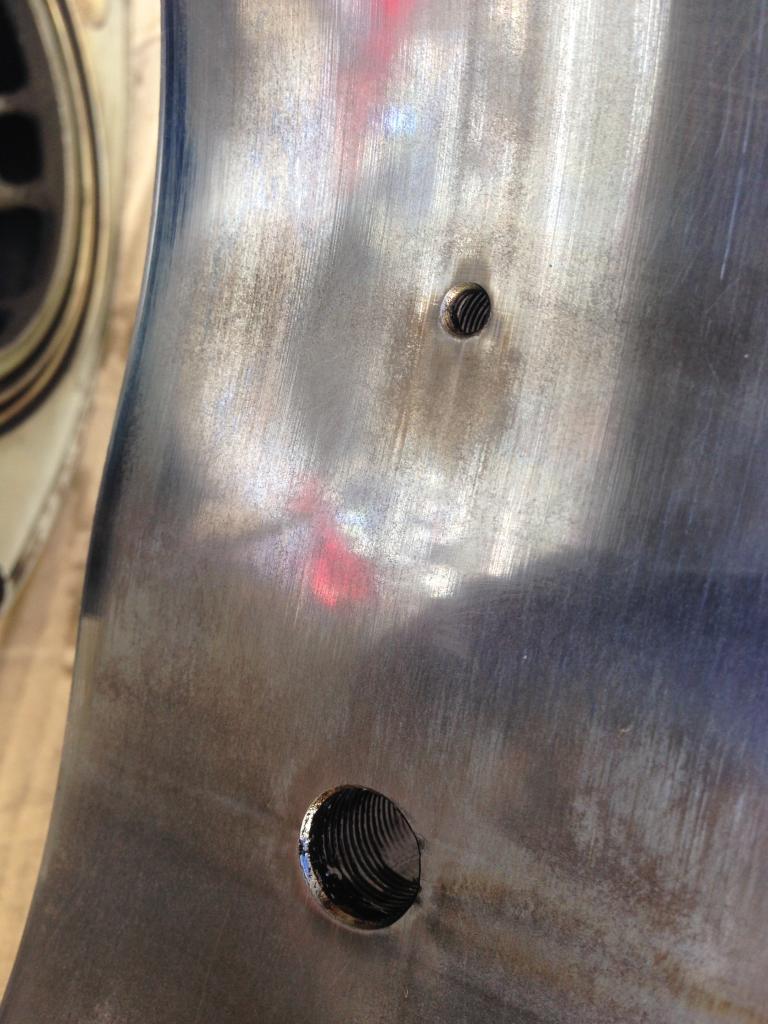
Oh, and the e-shaft discoloration is normal. New e-shafts have them from Mazda.
I could only wildly speculate what the electrolytic material could have been. Possibly ethanol in the fuel sitting in a flooded engine for a decade. Or water with a high mineral content. Like sea water...
I would closely inspect the coolant seal surfaces for corrosion and pitting as well. Both on the irons and o-ring face on the housings.
Oh, and the e-shaft discoloration is normal. New e-shafts have them from Mazda.

As a very seasoned engine builder I will say these
Irons look useable, nothing to be over consurned about, like the above said wet sand 800+ grit sandpaper and lube (oil or something) to clean the surface.
The e-shaft looks like a white paint mark, nothing in that picture to be consurned about.
The rotors, all the marks inside the "dishes" are normal, they came mostly like that from the factory. The faces do show signs of foreign object damage (FOD) but nothing to be worried about. The apex seal groove looks like it possible had some contact with the (FOD) and will need to be checked for the gap at the lease you need to remove the bur ever so gently. The side seal area does look like some sort of corrosion, as long as the side seal groove is ok don't worry about sealing issues, just wire wheel the area good (steel only, don't ever use brass it will leave metal buildup)
Overall besides the one spot on the apex seal groove you are in good shape for a long life rebuild. Get that groove sped'ed out and if it's very bad get them cut to 3mm and go about your day.
Good luck, anyone can build one just take your time
talking head
Joined: Apr 2008
Posts: 2,775
Likes: 15
From: Perth, WA, OZ
looks pretty good . only concern is the one rotor tip , which looks to be superficial at the very lip
clean it up with a file and re-inspect the groove using an apex seal and a feeler gauge
if the tip is badly flaired, buy goopy 2mm oversize seals and file kit
if it is the top 2mm or so whilst the main groove is straight , then ignore the superficail damage and rebuild with apex seals of your choice
That rotor that appears eaten looks to me as evidence of galvanic corrosion.
I could only wildly speculate what the electrolytic material could have been. Possibly ethanol in the fuel sitting in a flooded engine for a decade. Or water with a high mineral content. Like sea water...
I would closely inspect the coolant seal surfaces for corrosion and pitting as well. Both on the irons and o-ring face on the housings.
Oh, and the e-shaft discoloration is normal. New e-shafts have them from Mazda.
The rotors, all the marks inside the "dishes" are normal, they came mostly like that from the factory. The faces do show signs of foreign object damage (FOD) but nothing to be worried about. The apex seal groove looks like it possible had some contact with the (FOD) and will need to be checked for the gap at the lease you need to remove the bur ever so gently. The side seal area does look like some sort of corrosion, as long as the side seal groove is ok don't worry about sealing issues, just wire wheel the area good (steel only, don't ever use brass it will leave metal buildup)
Thanks for the advice Rx7_Nut13B!
looks pretty good . only concern is the one rotor tip , which looks to be superficial at the very lip
clean it up with a file and re-inspect the groove using an apex seal and a feeler gauge
if the tip is badly flaired, buy goopy 2mm oversize seals and file kit
if it is the top 2mm or so whilst the main groove is straight , then ignore the superficail damage and rebuild with apex seals of your choice
clean it up with a file and re-inspect the groove using an apex seal and a feeler gauge
if the tip is badly flaired, buy goopy 2mm oversize seals and file kit
if it is the top 2mm or so whilst the main groove is straight , then ignore the superficail damage and rebuild with apex seals of your choice

Thread
Thread Starter
Forum
Replies
Last Post
Azevedo
Other Engine Conversions - non V-8
26
Mar 1, 2019 09:19 PM
alphawolff
1st Generation Specific (1979-1985)
17
Nov 17, 2015 05:57 PM