
CR garage pirate fc build


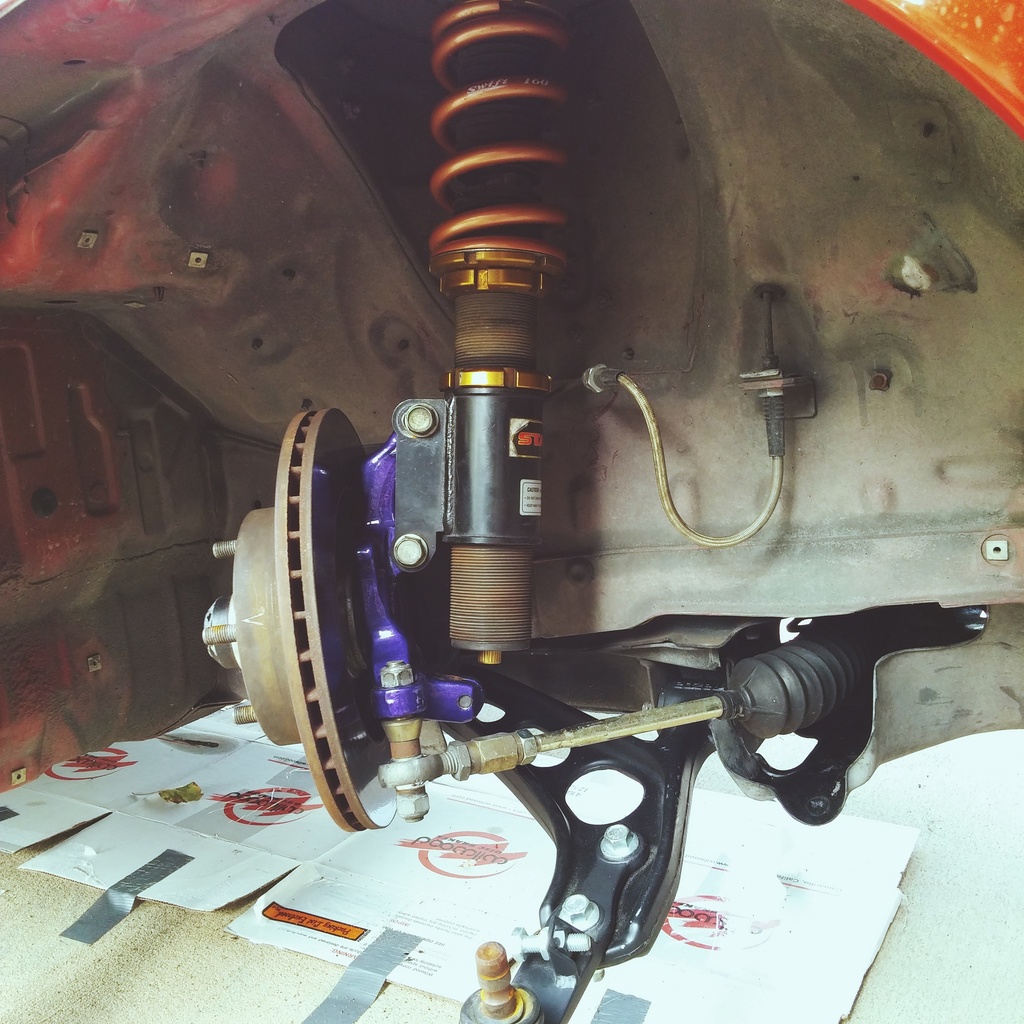
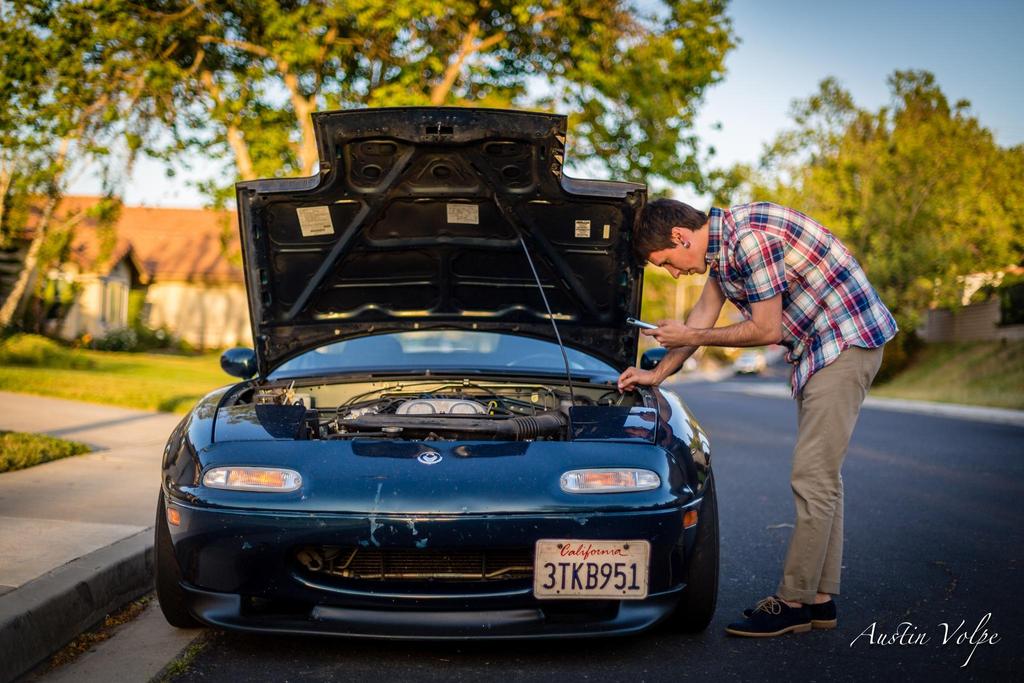
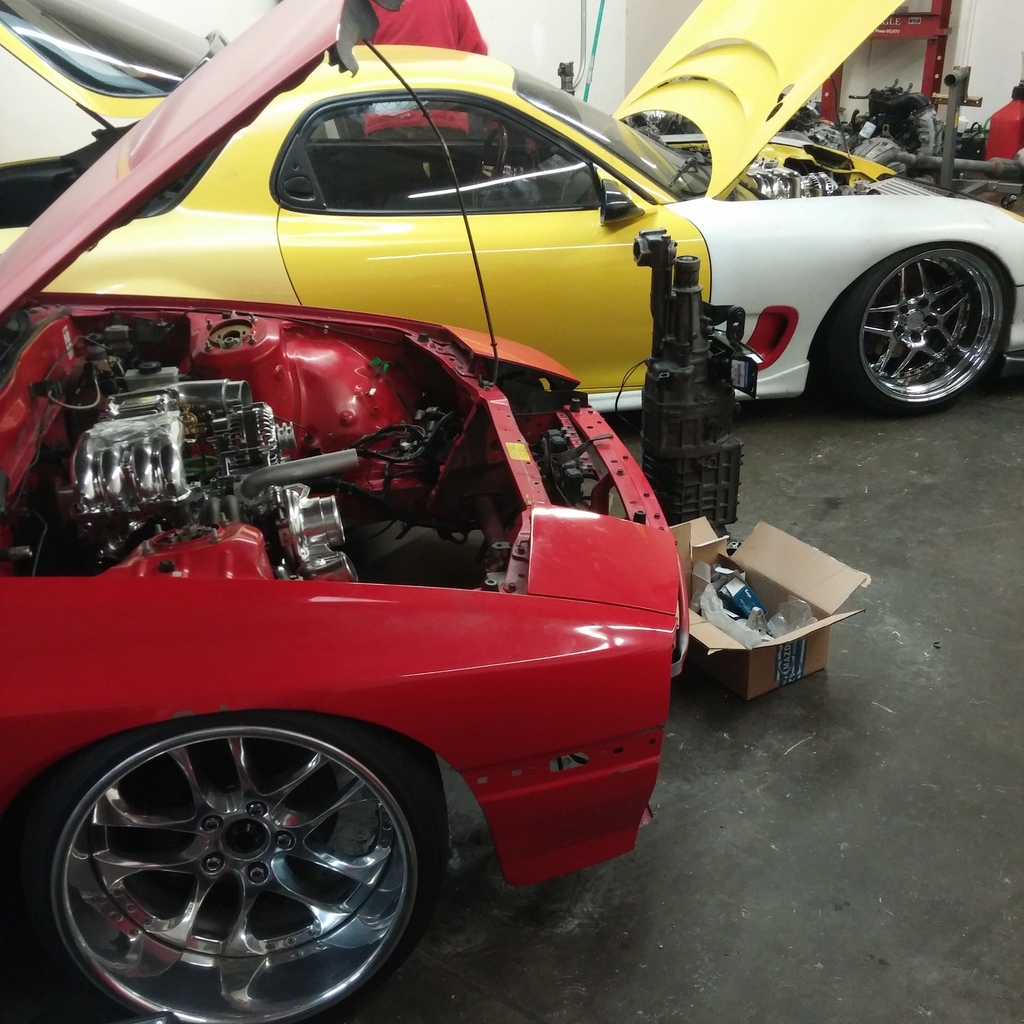
welp i already miss driving my red car a lot and i hate having it just sitting. i swapped the knuckles and control arms over from the other car. i can't run the extended balljoints on stock fenders which sucks cuz i want the camber so I'm on OE balljoints for now
engine rebuild is paid for just waiting on parts to assemble

engine rebuild is paid for just waiting on parts to assemble


kinda lost interest in posting on here but i figured i would because I'm bored at work. anyways-pretty much got boned on my j spec engine and to make a long story short, all 3 irons turned out to be bad after already porting them, and no one should ever buy from JDM of California in Ontario.
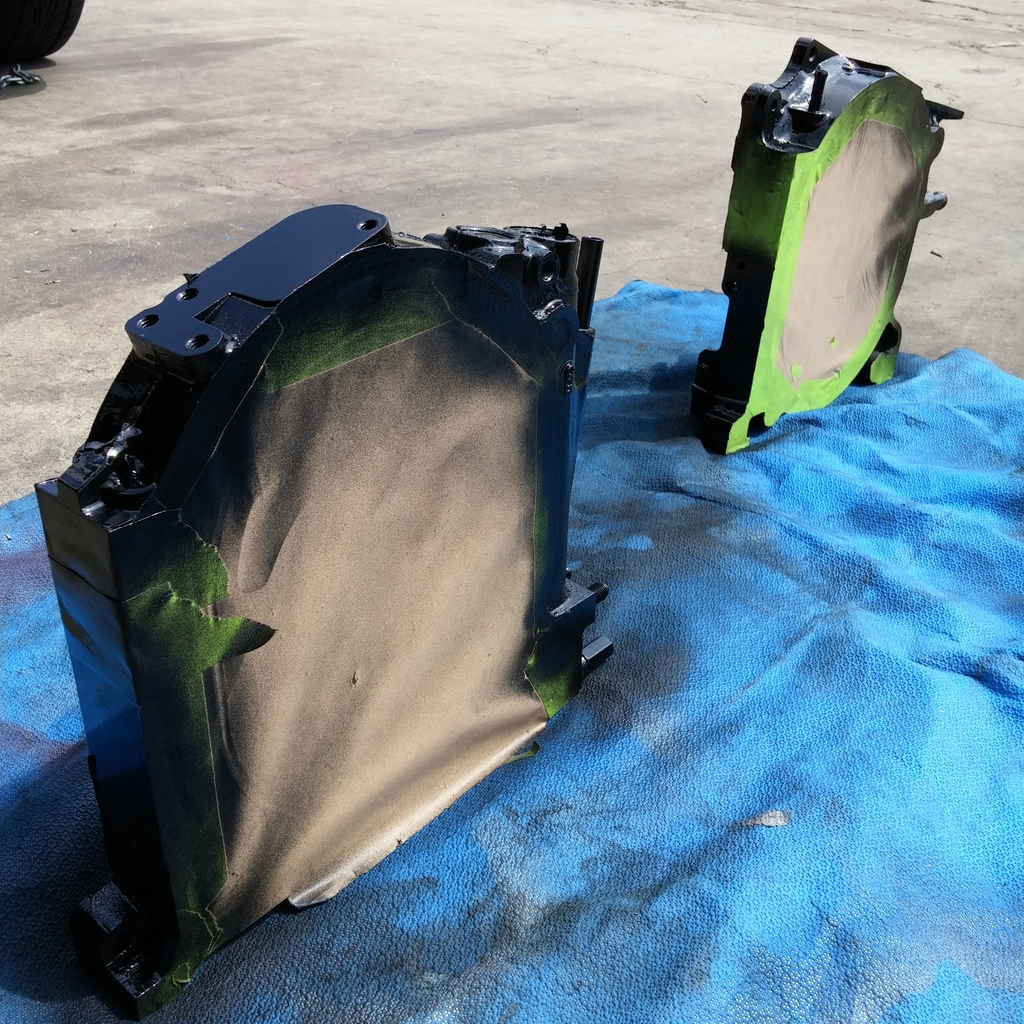
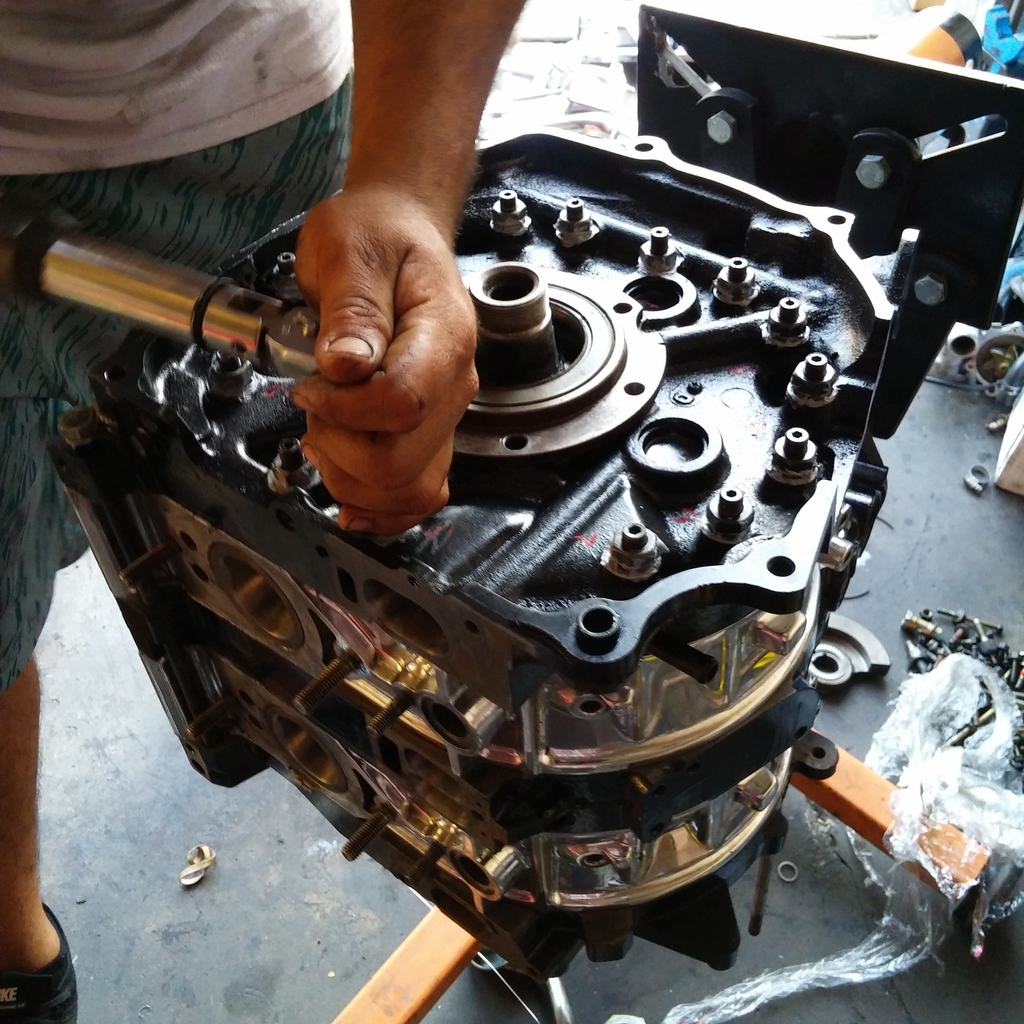
so bought new irons to repaint and port
steampunk glasses in full effect here
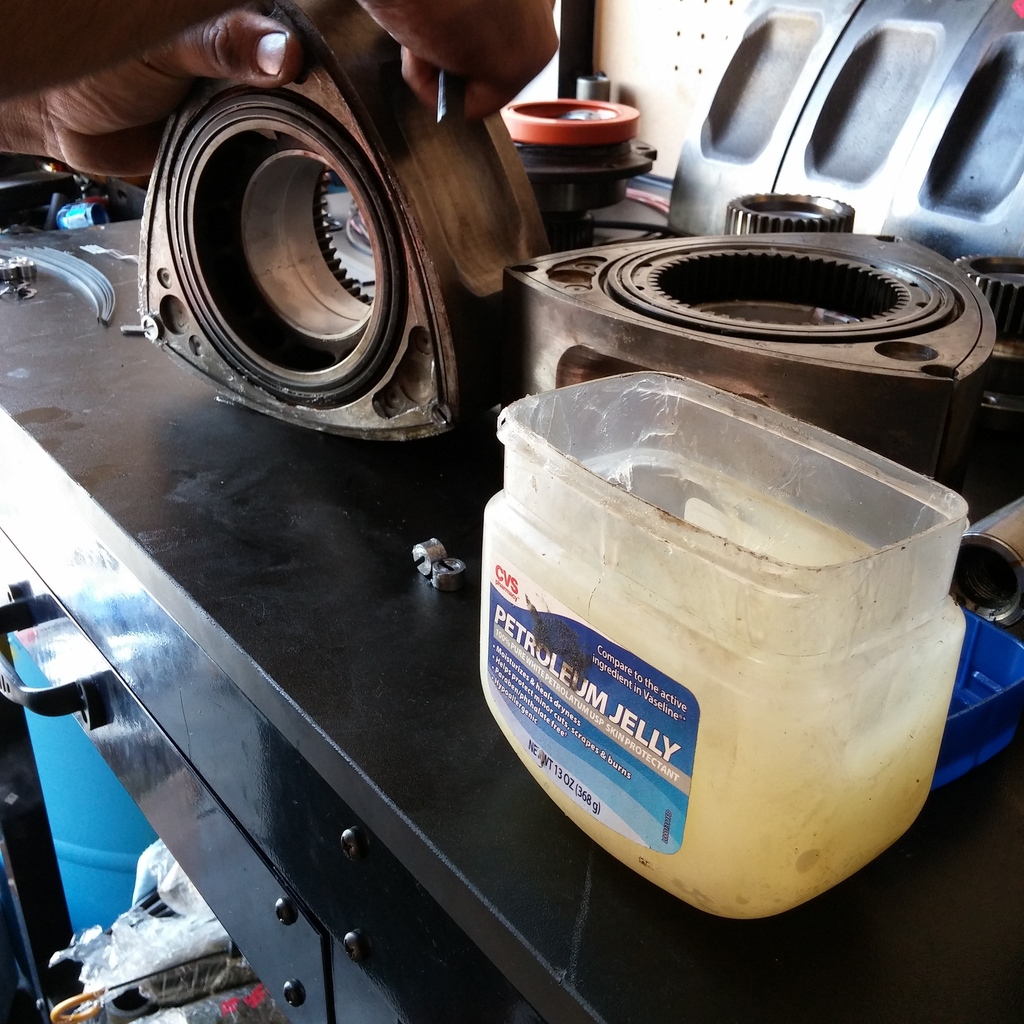
lubing up the goodies
after searching far and wide, i probably got the last Turblown stud kit available in the country, at least for the next 3 months. eliot at Turblown was cool enough to source one from a dealer and send it to me so my build didn't have to wait. definite bro points for that move
BOOM the kegs together. i need to stop polishing things but i have a problem and i can't. everythings gonna look like crap the second it gets dirty :l
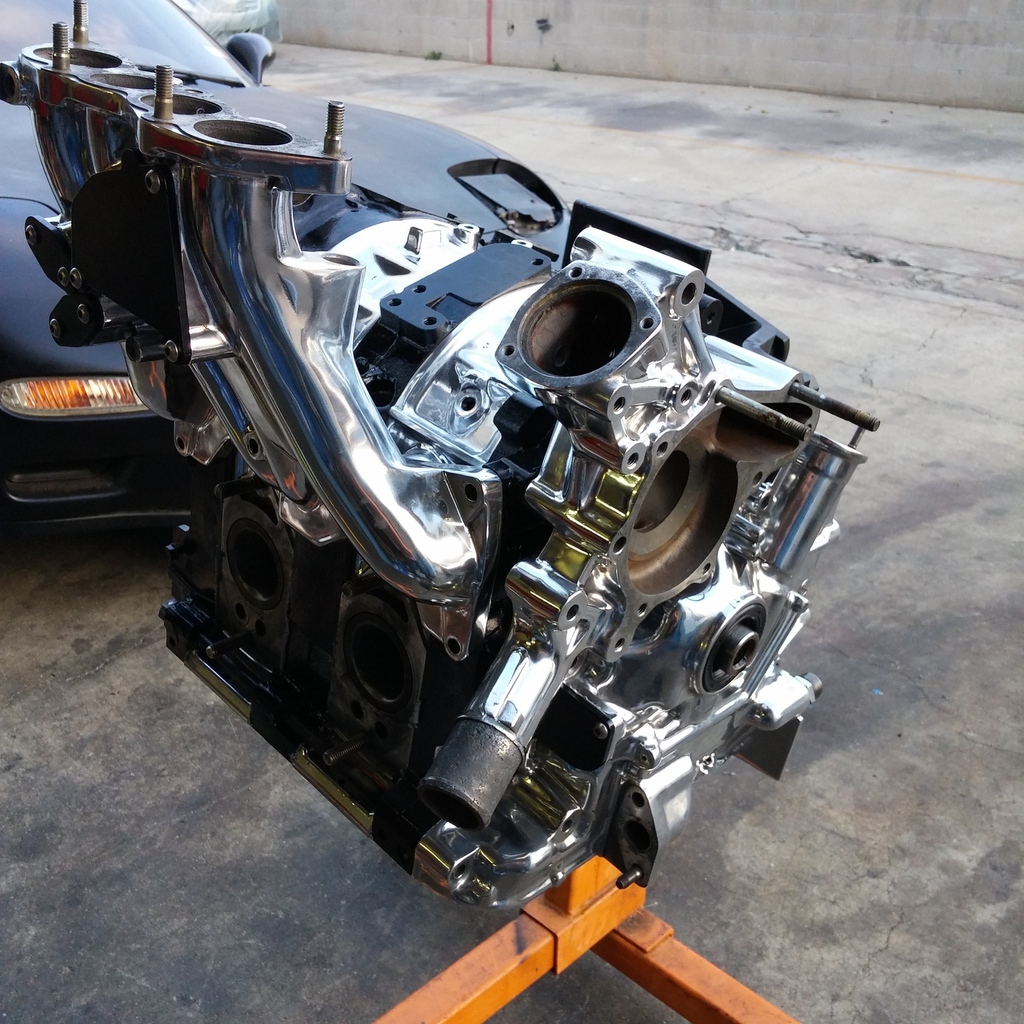
(shiny intensifies)
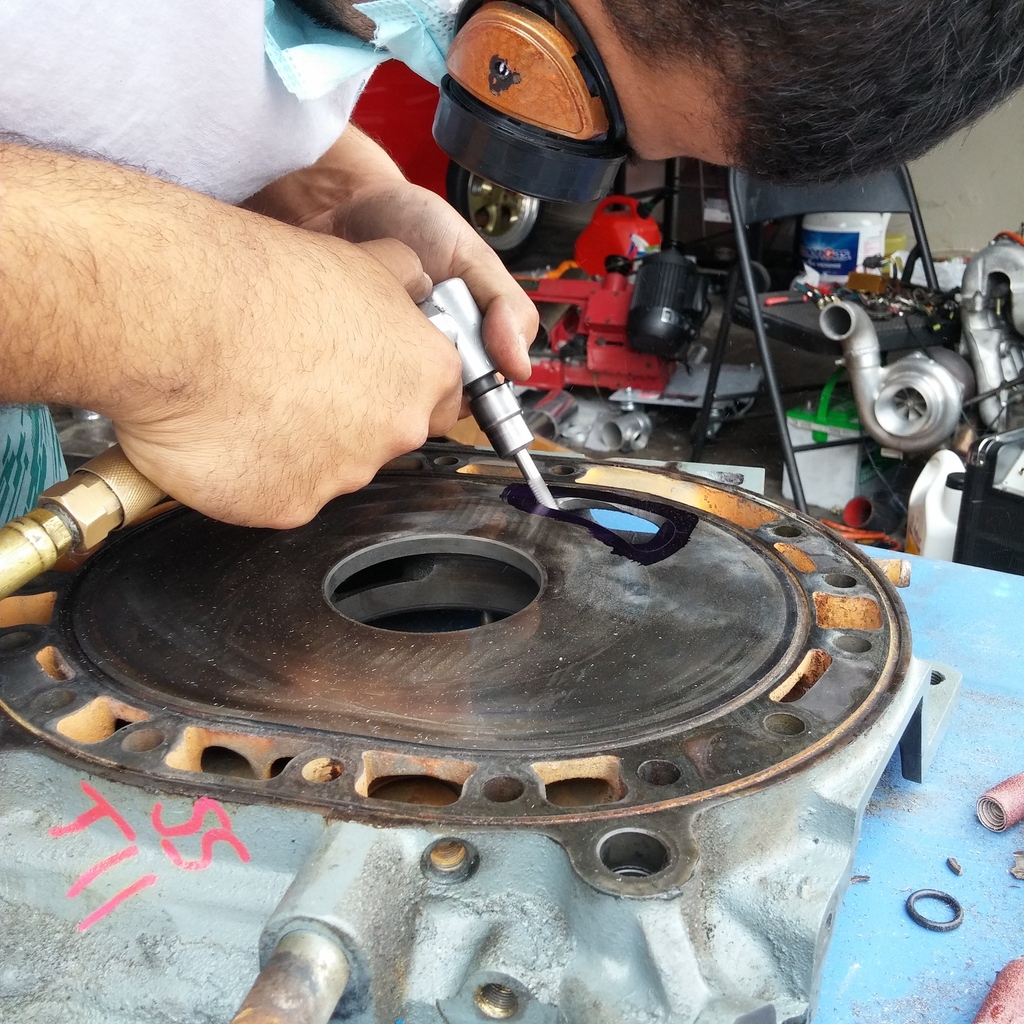
-monster street port
-turblown stud kit
-goopy 2 piece apex seals
-atkins corner seals
-RA soft seals
on the next episode:see if i can get the intake/exhaust mani, turbo, fuel rails, clutch/flywheel all on without killing myself and breaking ****
so bought new irons to repaint and port

steampunk glasses in full effect here

lubing up the goodies

after searching far and wide, i probably got the last Turblown stud kit available in the country, at least for the next 3 months. eliot at Turblown was cool enough to source one from a dealer and send it to me so my build didn't have to wait. definite bro points for that move

BOOM the kegs together. i need to stop polishing things but i have a problem and i can't. everythings gonna look like crap the second it gets dirty :l

(shiny intensifies)

-monster street port
-turblown stud kit
-goopy 2 piece apex seals
-atkins corner seals
-RA soft seals
on the next episode:see if i can get the intake/exhaust mani, turbo, fuel rails, clutch/flywheel all on without killing myself and breaking ****

how much did all that cost if you dont mind? minus labor and maybe stud kit, was thinking of doing something similar except going with pineapple racing rebuild kit with goopy seals with a streetport.
not exactly sure i bought a bunch of other stuff with it. probably like 1200 or so


what money?
Joined: Nov 2013
Posts: 90
Likes: 1
From: Martinsburg, WV


Well figured id post some stuff here half because im bored, half to attempt to dust the figurative cobwebs off the drift section. Really doesnt matter if people pay attention to this build thread anymore and its okay, most of my life is just shouting into the void anyways.
Alots changed since i last updated, but also still the same ****. I have a new position at a public relations firm with automotive aftermarket clients like magnaflow, red line, dinan etc so thats been sweet. My buddy that i was previously building the shell with ended up moving out of state to do his thing shortly after we sold the car. Before i get too ahead of myself i got a backlog of pics to dump so here goes:
*title screen* 6 months ago...
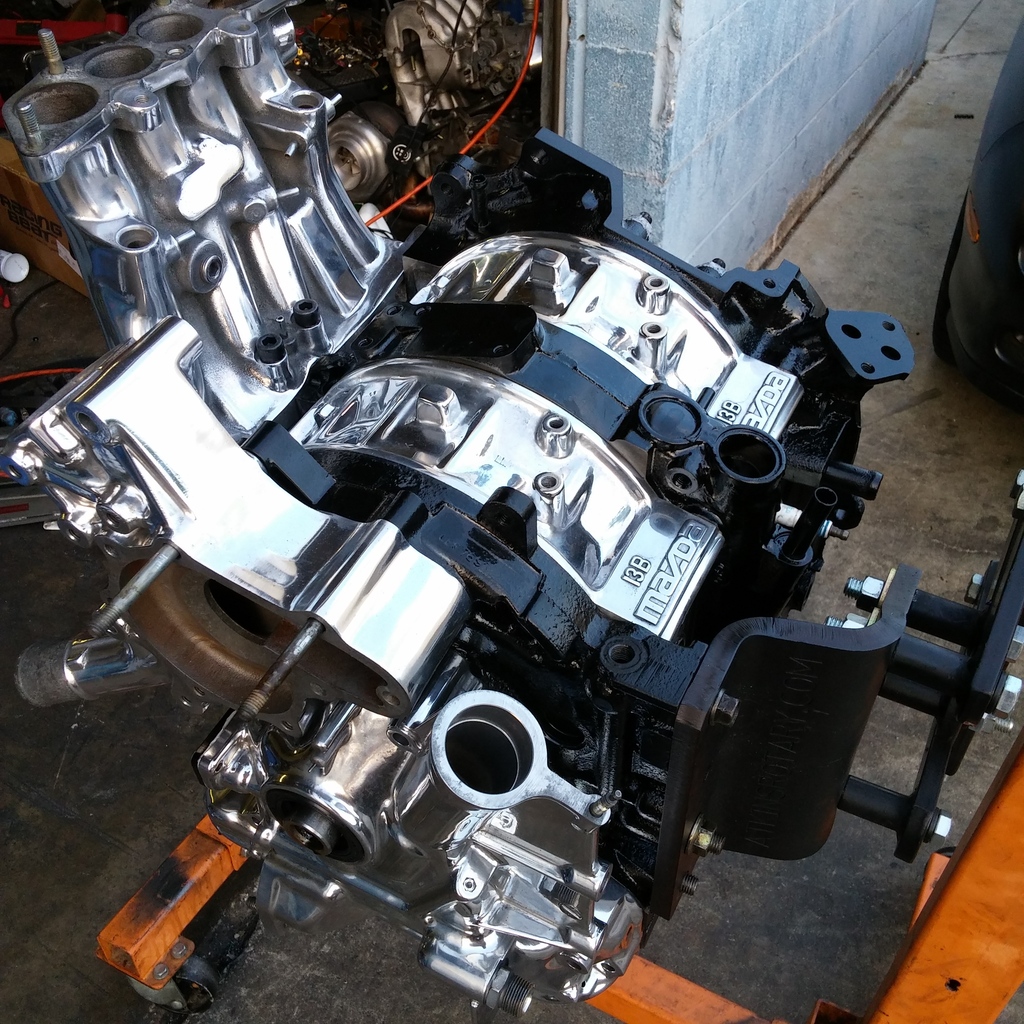
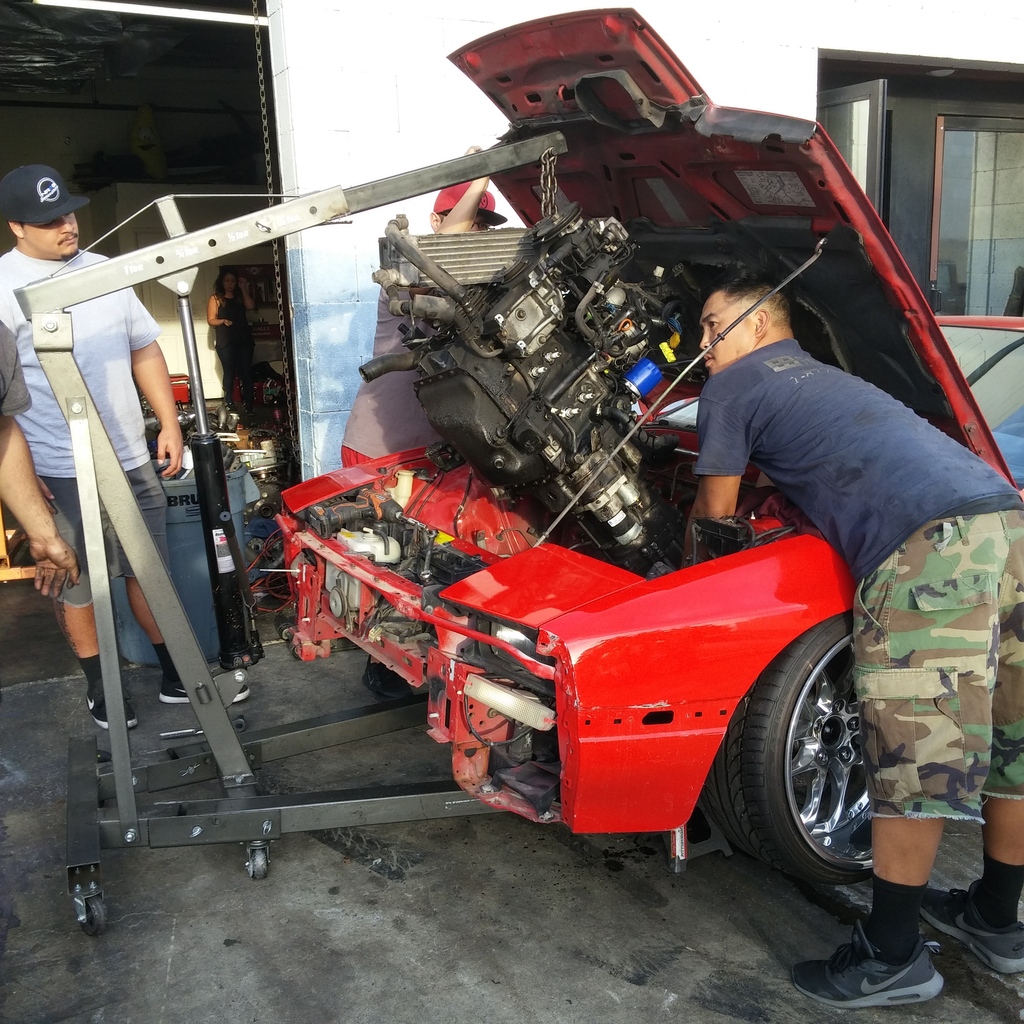
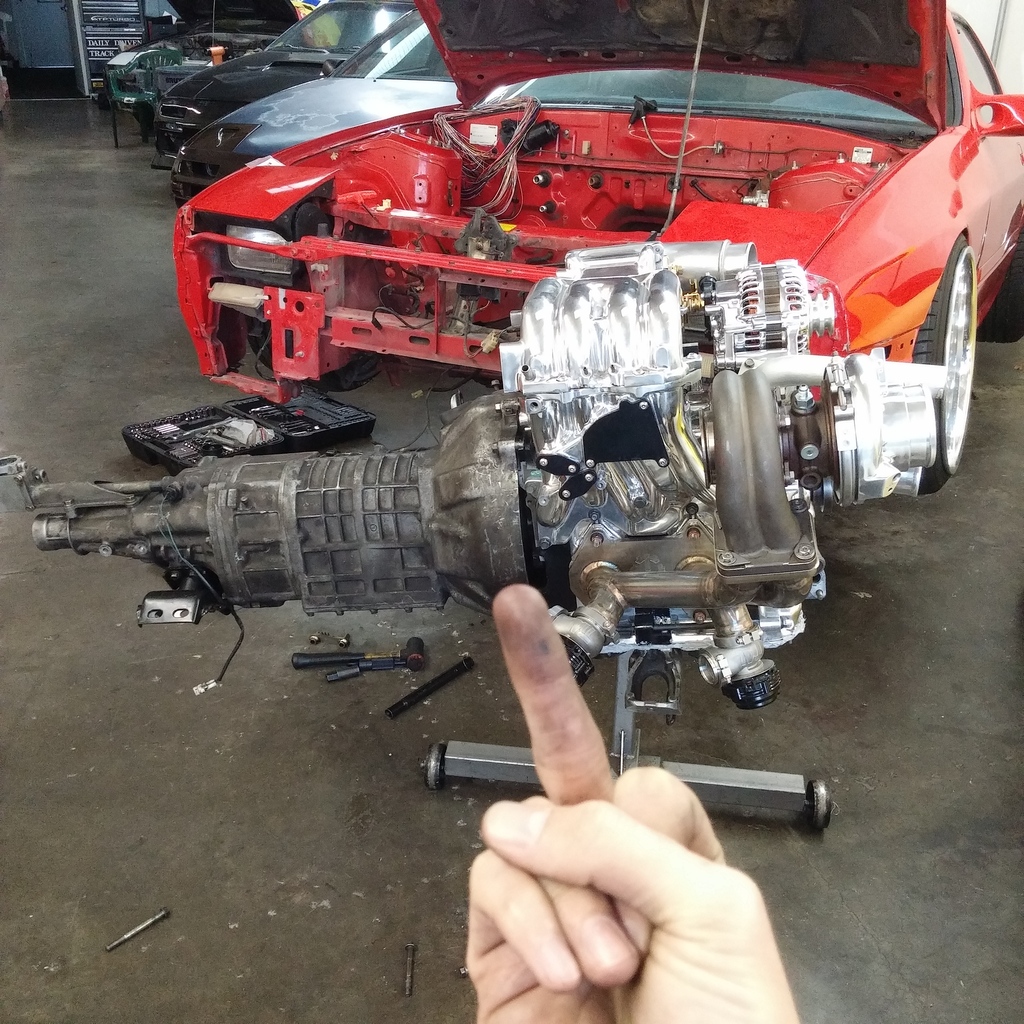
I continued building the motor for the red car at angel motorsports. Block done. Full Jabronie mode.
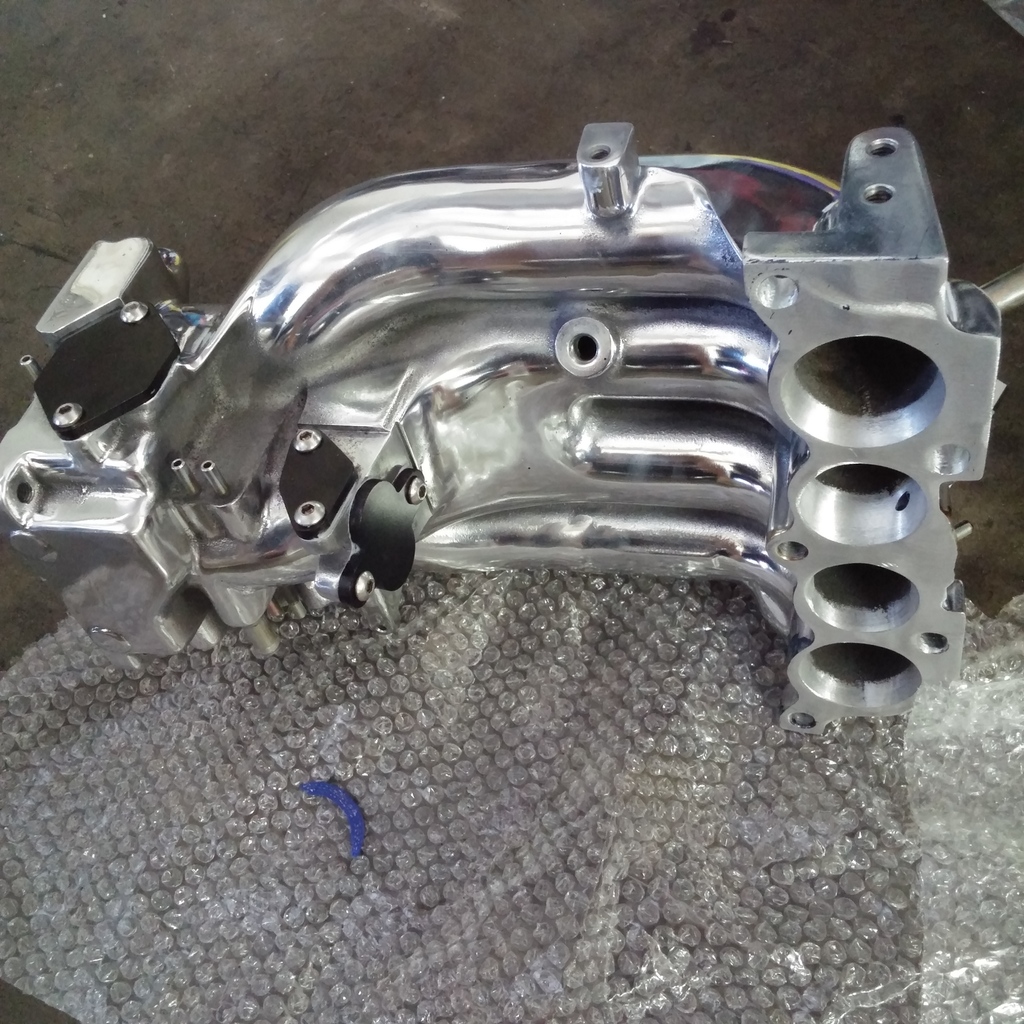
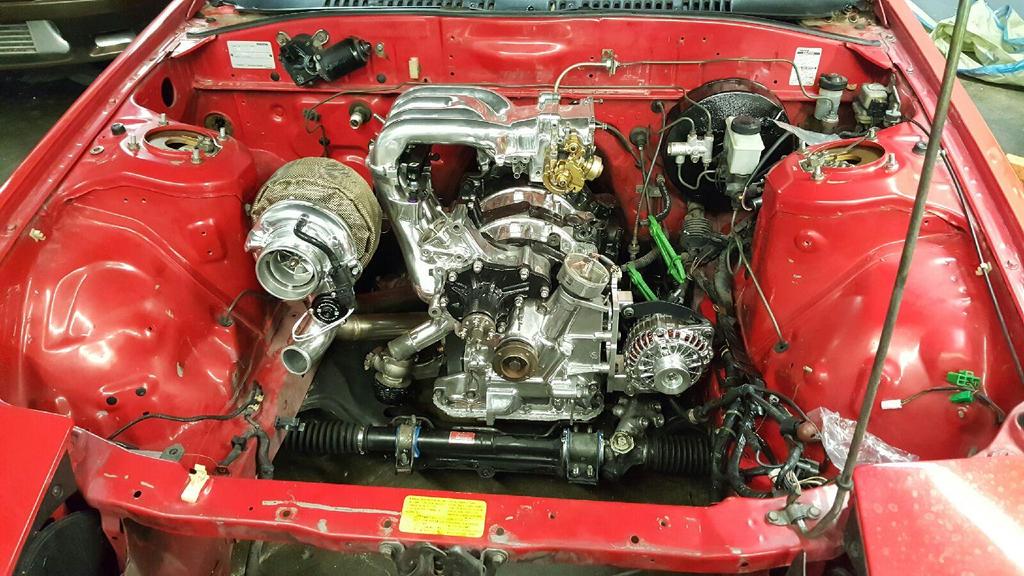
Got all the block-offs in order and the FD upper port matched. I want this engine to be as simple as possible no smog no omp no bs
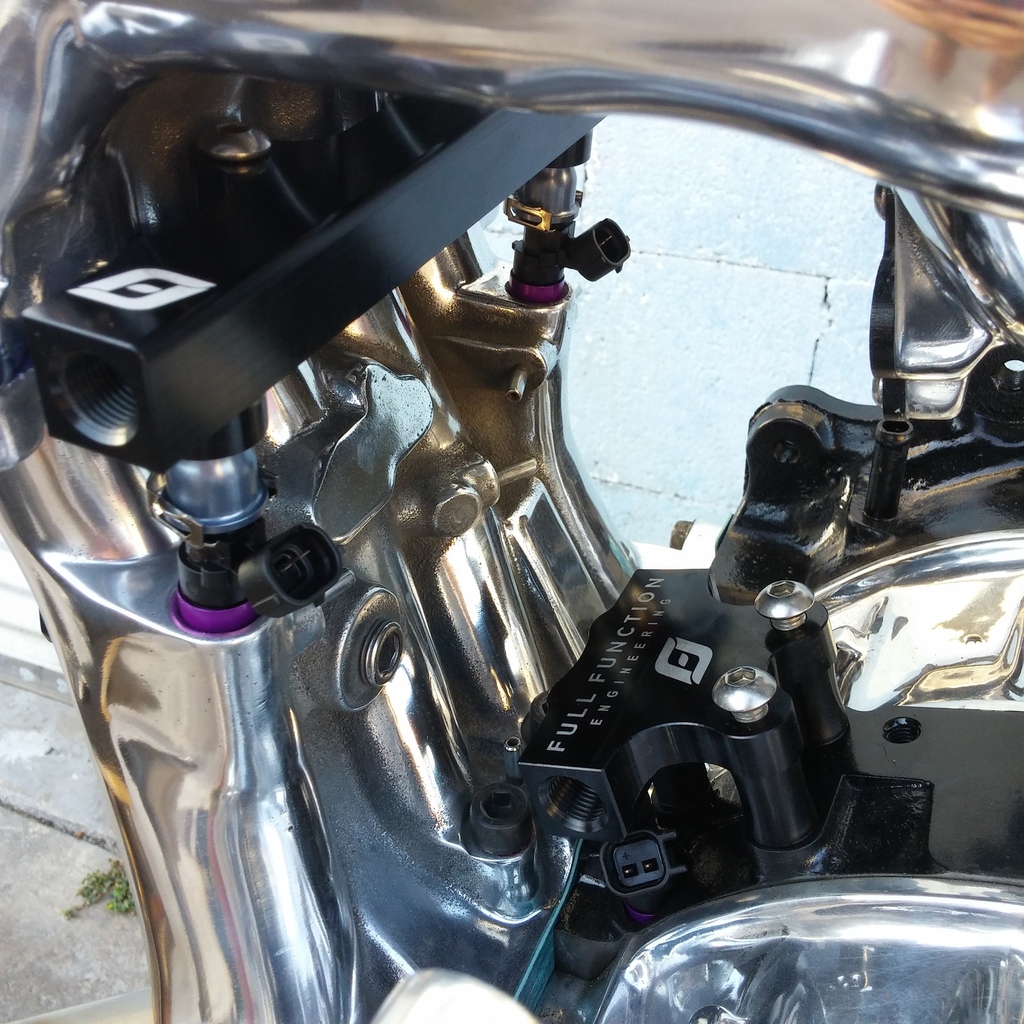
Got the FFE kit on. ID1000 primary, ID2200 secondary. Aint playin those games
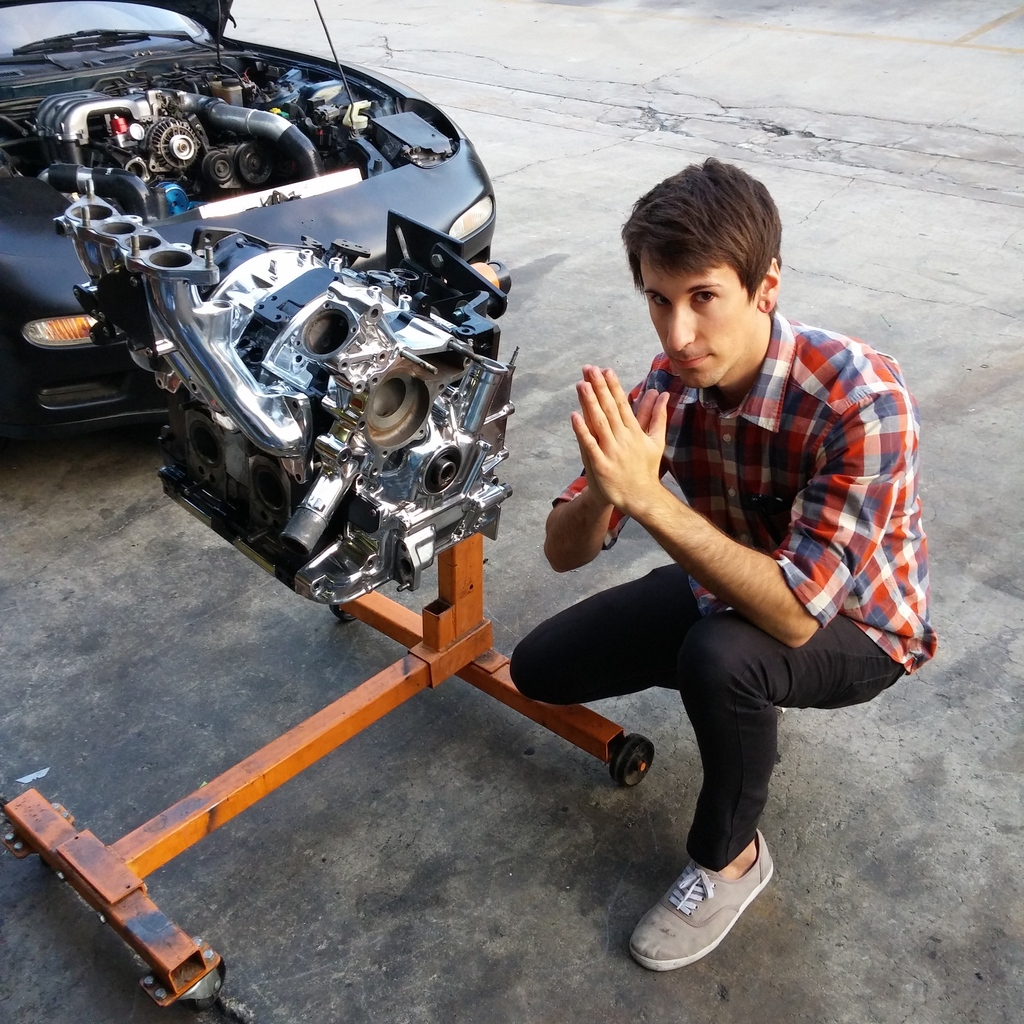
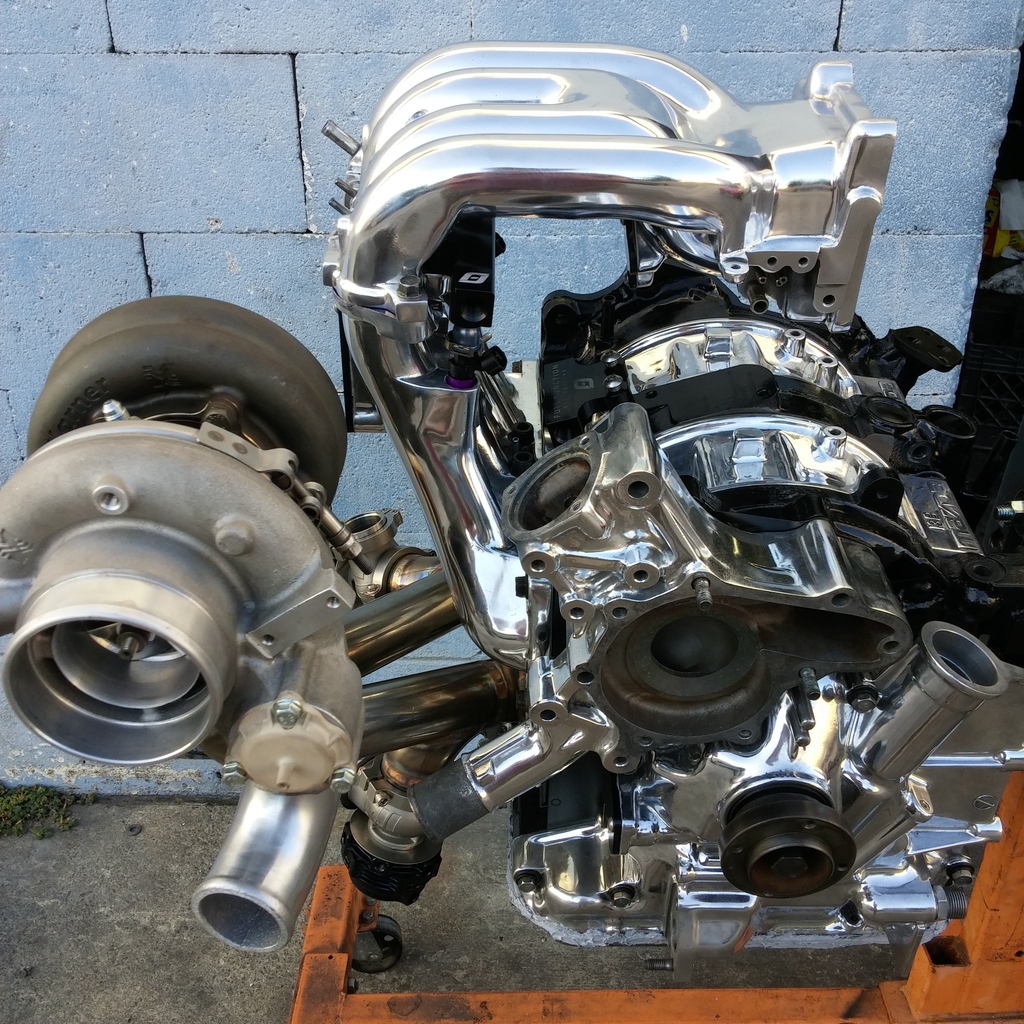
All together. The turbo was killing my vibe, so i had it polished too
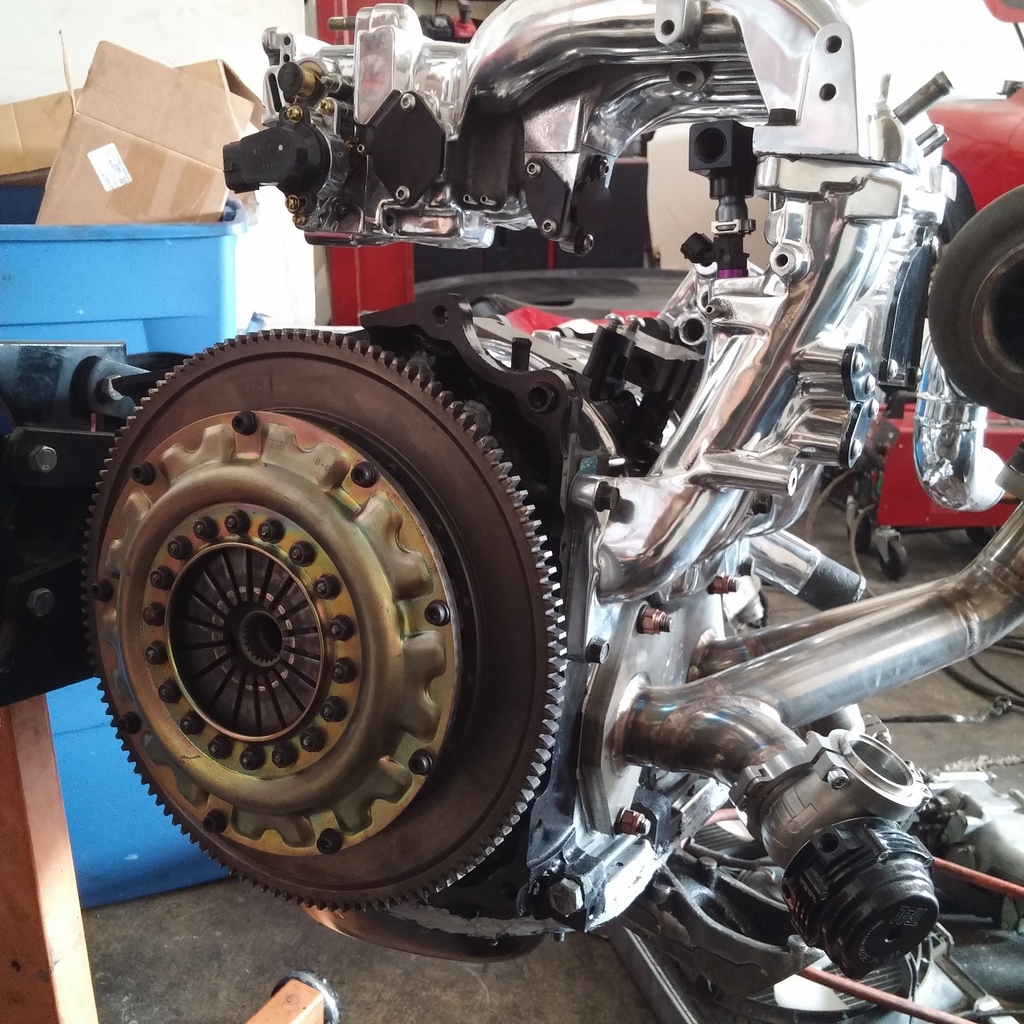
Put the OS giken twin on i had from a while back. Most of the pieces didnt look too worn, so i imported some new friction discs and was good to go.
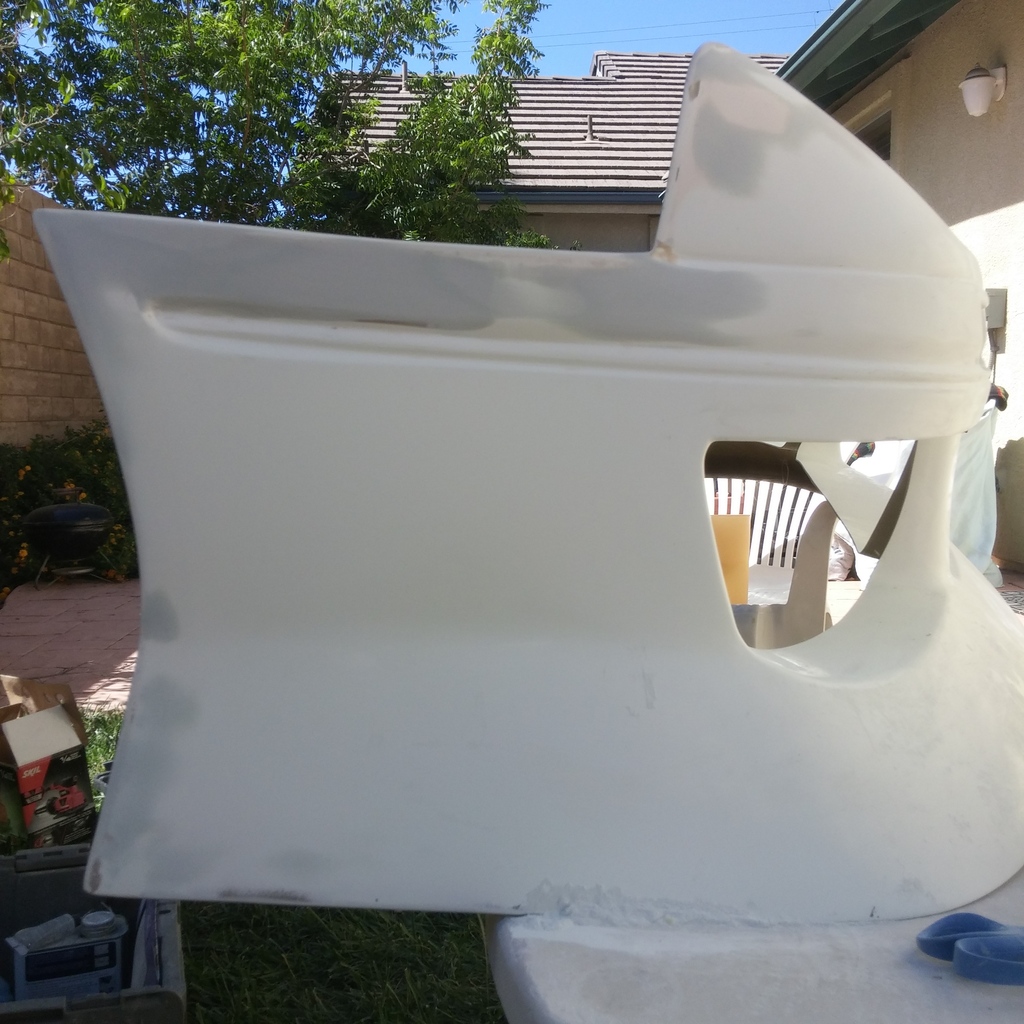
So all this time the car was sitting in my driveway collecting dust (and spiders) so figured id work on the Uras and test fit it. What bugged me about my old bumper and most peoples aero is the big hole for the sidemarker. Instead of just putting the sidemarkers in like any sane person, i shaved them. Aesthetic. Oh and that trim line is a REAL bitch to sand evenly.
mmmmmmmmmmmmmm
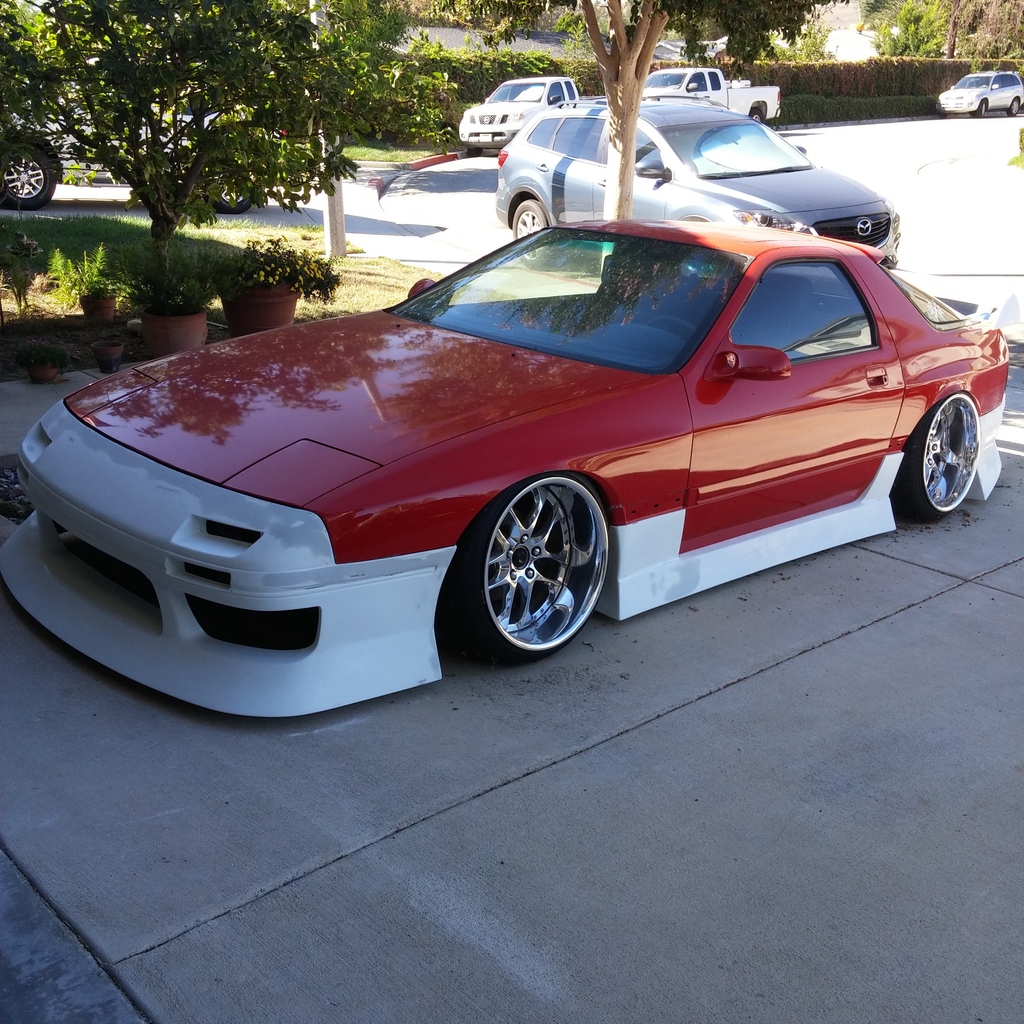
Got my foresight wing finally. Probably would have gone a different direction at the time if i knew every hypeboy in the scene would soon be on the 326 wing bandwagon but meh. Looks cool regardless.
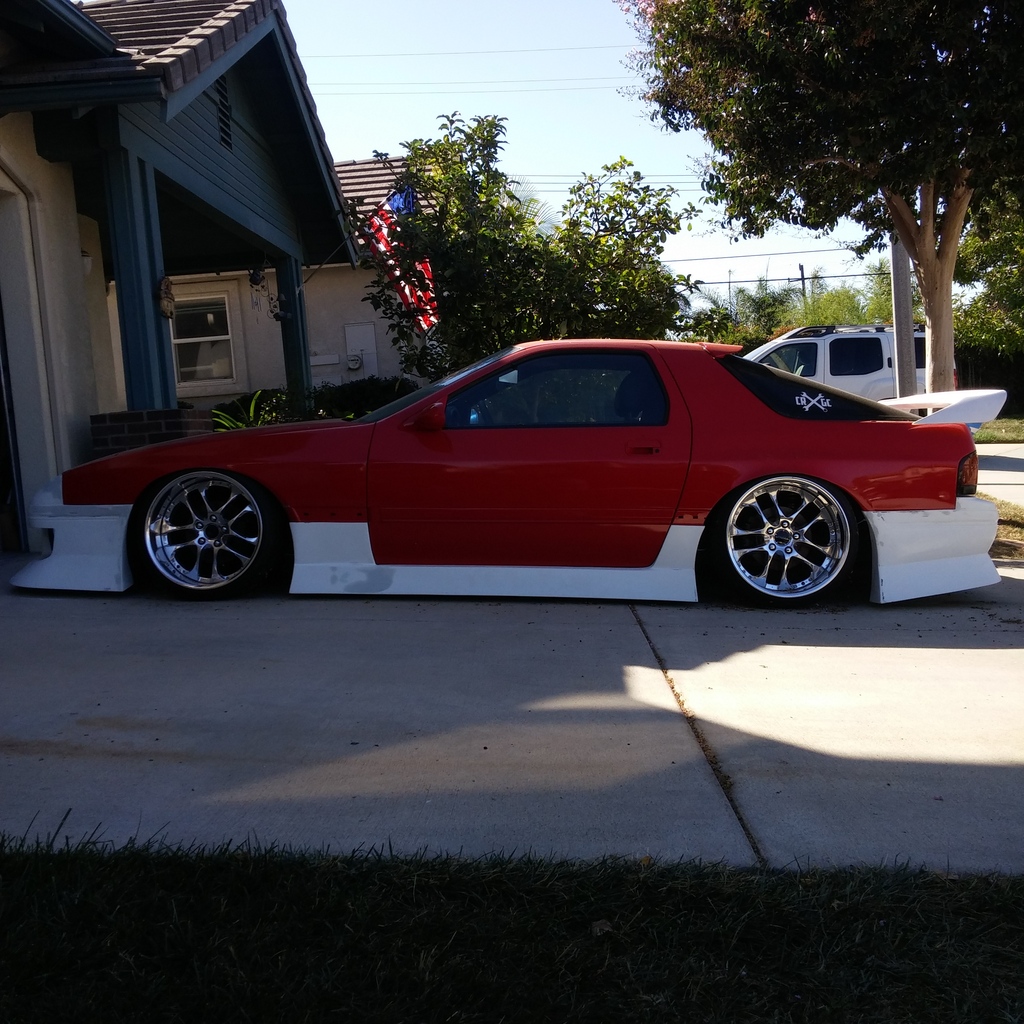
Another thing that bothered me about my last set of aero was having an extra exhaust cutout with nothing in it. Shaved that too. Still needs a couple more passes of filler but ill let the paint shop deal with that. More importantly, this is Andrew, and he keeps it red 100 emojis all the way across.
Unrelated, but heres polio legs: part deux. Probably googling "how 2 fix ur miata"
So now came the part i was dreading: taking the car to the shop. For the record i dont take my car to shops because i dont trust anyone, but it was unavoidable this time. Here you see me making AAA earn that membership
Alots changed since i last updated, but also still the same ****. I have a new position at a public relations firm with automotive aftermarket clients like magnaflow, red line, dinan etc so thats been sweet. My buddy that i was previously building the shell with ended up moving out of state to do his thing shortly after we sold the car. Before i get too ahead of myself i got a backlog of pics to dump so here goes:
*title screen* 6 months ago...
I continued building the motor for the red car at angel motorsports. Block done. Full Jabronie mode.
Got all the block-offs in order and the FD upper port matched. I want this engine to be as simple as possible no smog no omp no bs
Got the FFE kit on. ID1000 primary, ID2200 secondary. Aint playin those games
All together. The turbo was killing my vibe, so i had it polished too
Put the OS giken twin on i had from a while back. Most of the pieces didnt look too worn, so i imported some new friction discs and was good to go.
So all this time the car was sitting in my driveway collecting dust (and spiders) so figured id work on the Uras and test fit it. What bugged me about my old bumper and most peoples aero is the big hole for the sidemarker. Instead of just putting the sidemarkers in like any sane person, i shaved them. Aesthetic. Oh and that trim line is a REAL bitch to sand evenly.
mmmmmmmmmmmmmm
Got my foresight wing finally. Probably would have gone a different direction at the time if i knew every hypeboy in the scene would soon be on the 326 wing bandwagon but meh. Looks cool regardless.
Another thing that bothered me about my last set of aero was having an extra exhaust cutout with nothing in it. Shaved that too. Still needs a couple more passes of filler but ill let the paint shop deal with that. More importantly, this is Andrew, and he keeps it red 100 emojis all the way across.
Unrelated, but heres polio legs: part deux. Probably googling "how 2 fix ur miata"
So now came the part i was dreading: taking the car to the shop. For the record i dont take my car to shops because i dont trust anyone, but it was unavoidable this time. Here you see me making AAA earn that membership
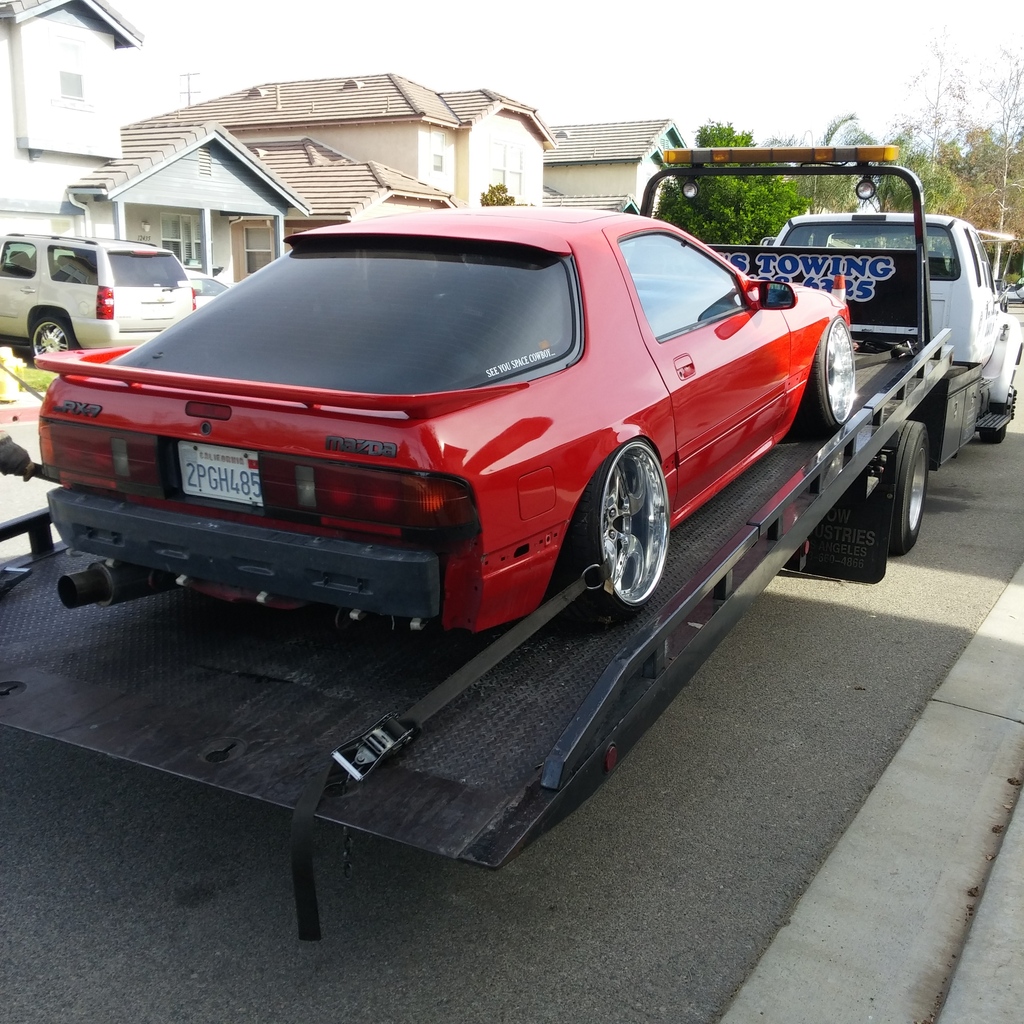
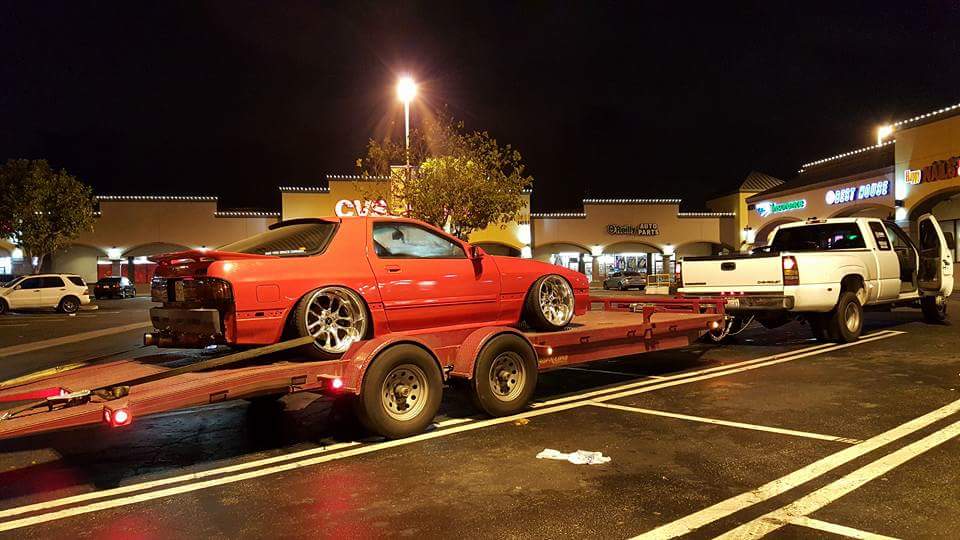
Got the car trailered over to Johns shop, and pulled the engine right away with the help of some buddies. Progress was going well so far, i thought...
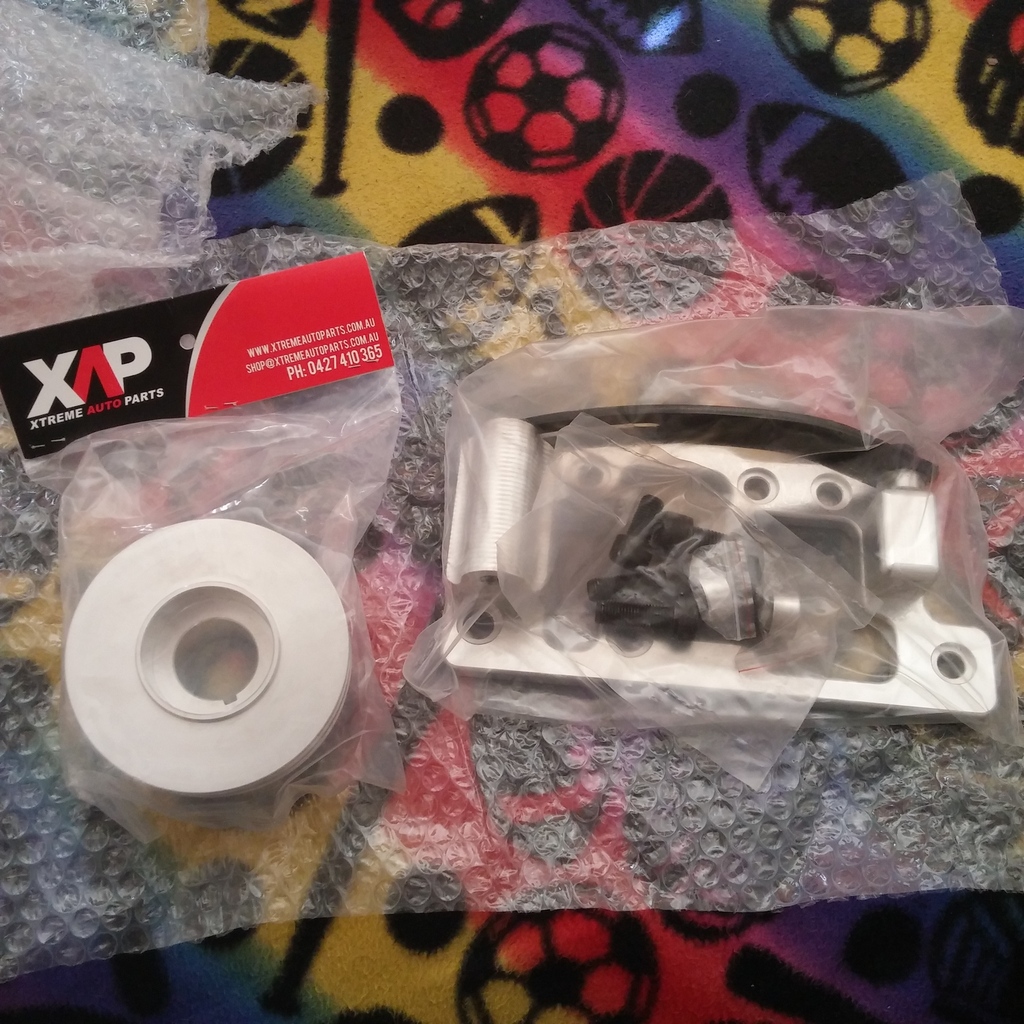
Picked up a sidemount alt kit and shiny crank pulley from xtreme rotary in australia. basically had to buy these same parts twice, since i got boned by a friend i had in AU who was supposed to mail me the first ones, then decided to drop off the map. siqqq
I really would have liked to repaint the engine bay, but at this time i had done so much waiting i wanted to just get the new engine in and be done with it. Here it is
The shop owner John ended up moving locations to Compton are, so back the car went onto a trailer. En route to the CPT, my roof wing decided to have an agenda of its own a fly off on the ride shortly after this pic was taken. I was a little chapped, but its getting replaced with an authentic foresight one now.
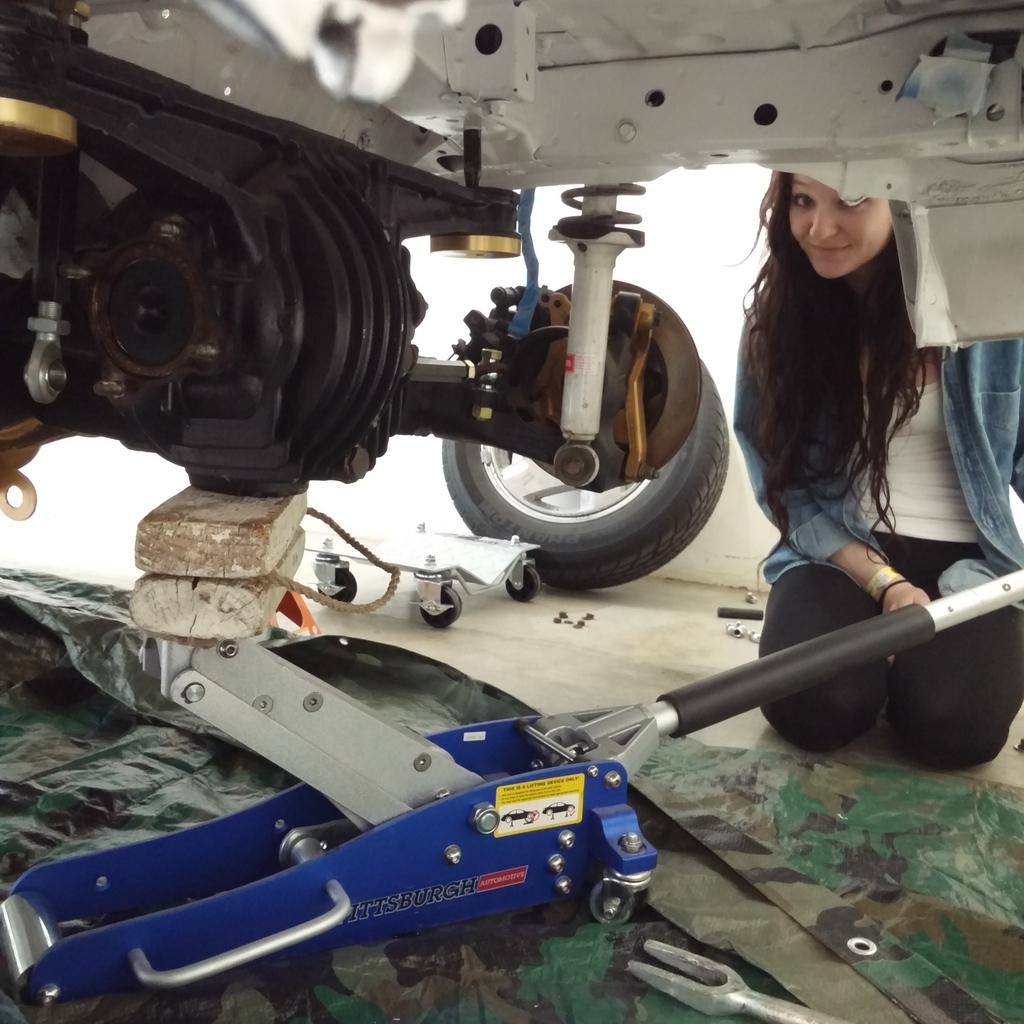
Put my girl to work droppin the diff and rest of the driveline out of the shell (old pic).
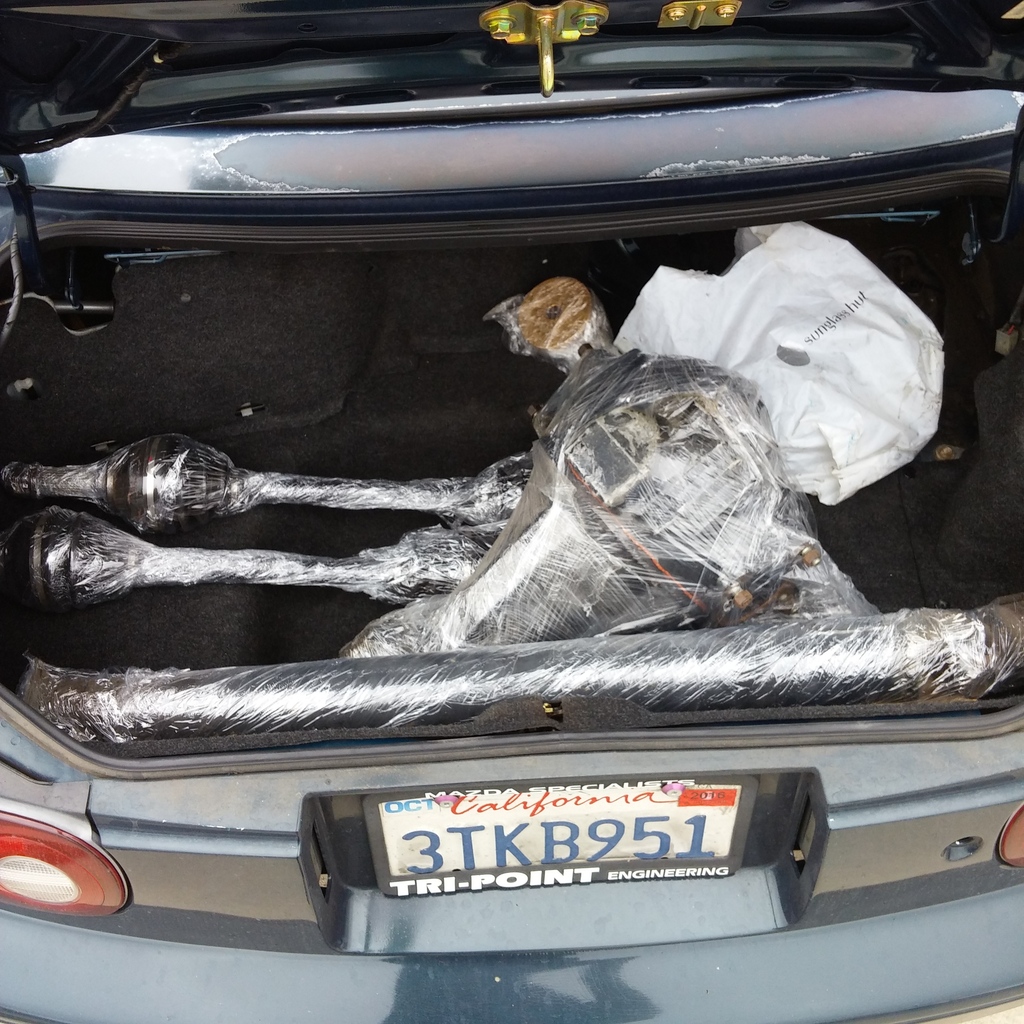
Loaded up the MUV (miata utility vehicle) to bring the pieces down to the shop
Ketchup and mustard
Then the clutch felt like being a pain in my dick and not line up with the input shaft, so out the motor came again to make things easier. Had to unbolt and reposition the friction discs a few times before it went in, but eventually got ***** deep.
Around this time i started to get irritated dealing with the shop owner. Not getting into details, but lack of progress made me decide to take the car back. To minimize the tow trips and amount of AAA drivers comtemplating suicide, i took the car from there to a fab shop close to my area. Fighting the same battle here currently, but at least its somewhat moving along.
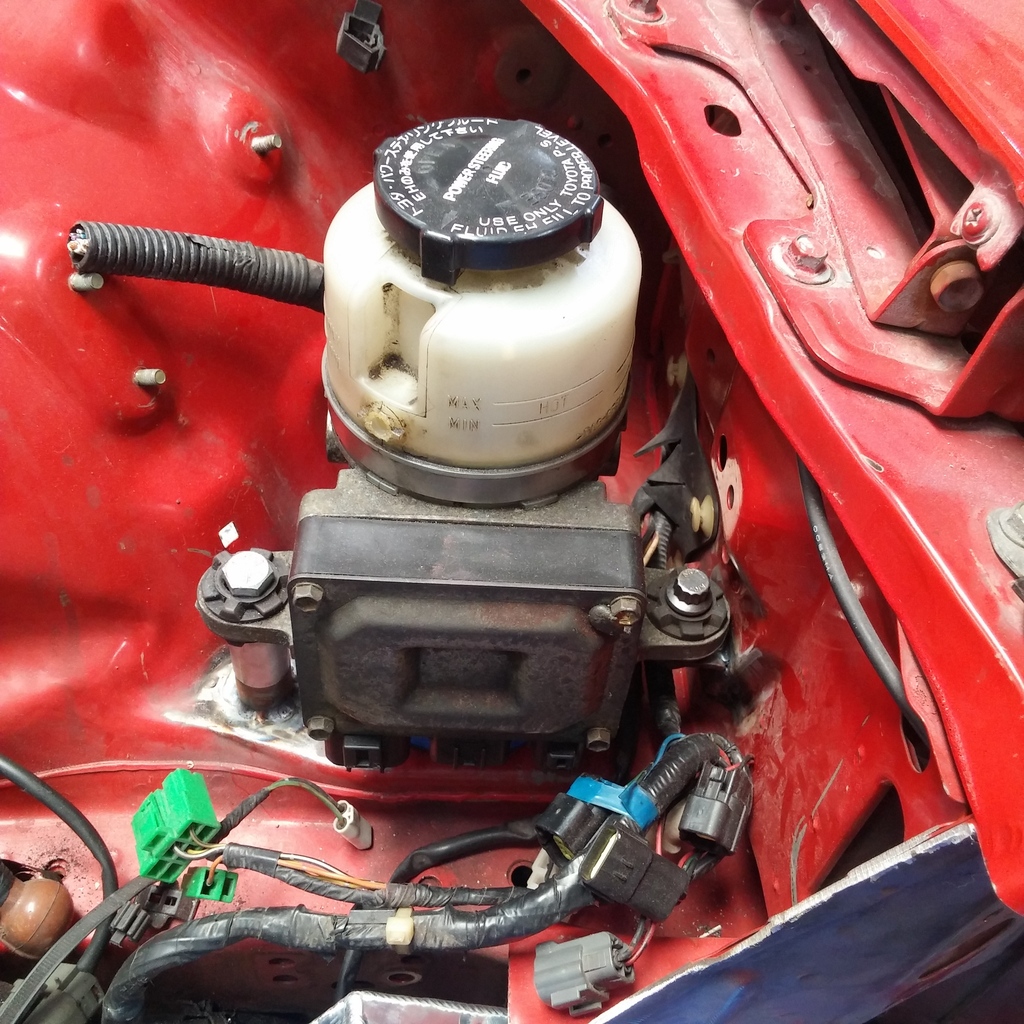
Got the Mr2 ps pump mounted. i wanted it out of sight as much as possible, but close to the steering rack inlets so its tucked right behind the driver side headlight.
Picked up a sidemount alt kit and shiny crank pulley from xtreme rotary in australia. basically had to buy these same parts twice, since i got boned by a friend i had in AU who was supposed to mail me the first ones, then decided to drop off the map. siqqq
I really would have liked to repaint the engine bay, but at this time i had done so much waiting i wanted to just get the new engine in and be done with it. Here it is
The shop owner John ended up moving locations to Compton are, so back the car went onto a trailer. En route to the CPT, my roof wing decided to have an agenda of its own a fly off on the ride shortly after this pic was taken. I was a little chapped, but its getting replaced with an authentic foresight one now.
Put my girl to work droppin the diff and rest of the driveline out of the shell (old pic).
Loaded up the MUV (miata utility vehicle) to bring the pieces down to the shop
Ketchup and mustard
Then the clutch felt like being a pain in my dick and not line up with the input shaft, so out the motor came again to make things easier. Had to unbolt and reposition the friction discs a few times before it went in, but eventually got ***** deep.
Around this time i started to get irritated dealing with the shop owner. Not getting into details, but lack of progress made me decide to take the car back. To minimize the tow trips and amount of AAA drivers comtemplating suicide, i took the car from there to a fab shop close to my area. Fighting the same battle here currently, but at least its somewhat moving along.
Got the Mr2 ps pump mounted. i wanted it out of sight as much as possible, but close to the steering rack inlets so its tucked right behind the driver side headlight.
50-row setrabs on.
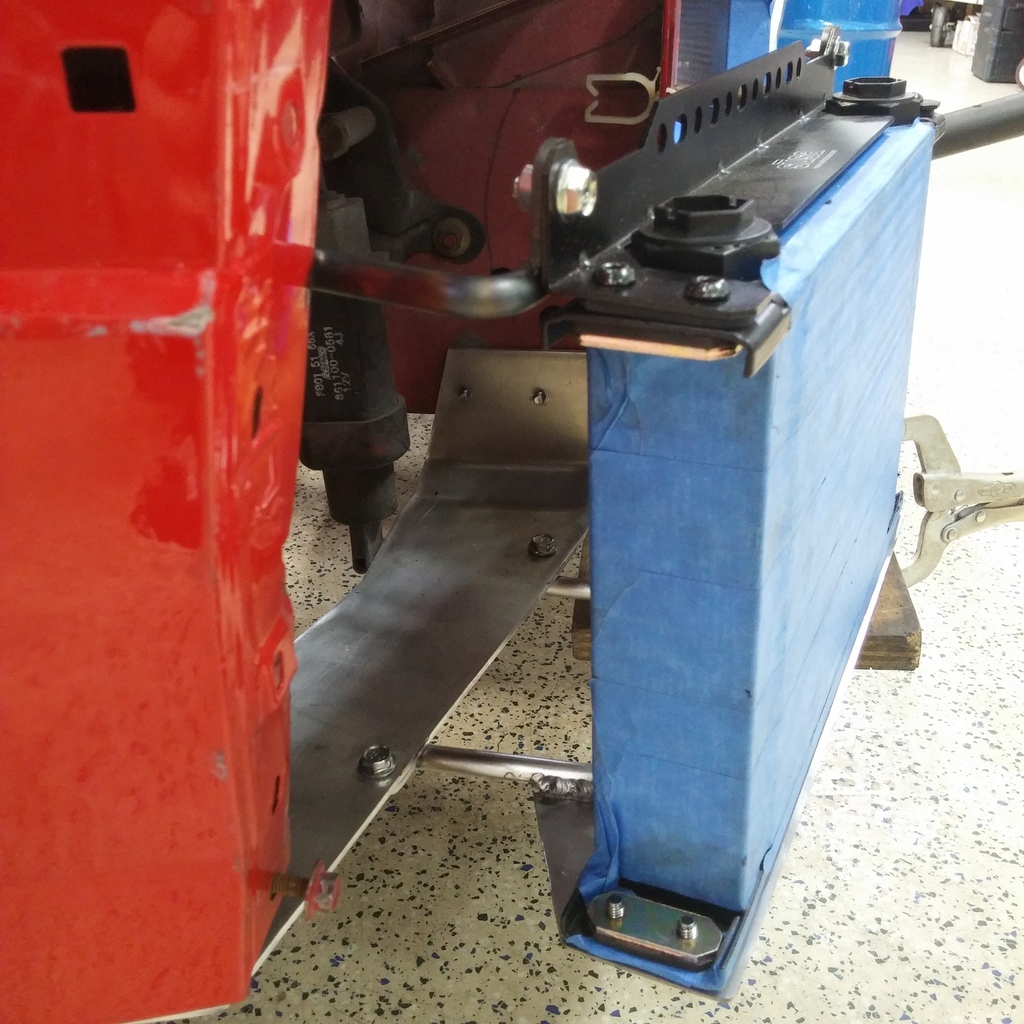
Mocking up the V mount. Figured if im going this far, just do it right. Im using CSF cores and having the end tanks built custom for the best fit. none of this front-mount jimmy rig crap.
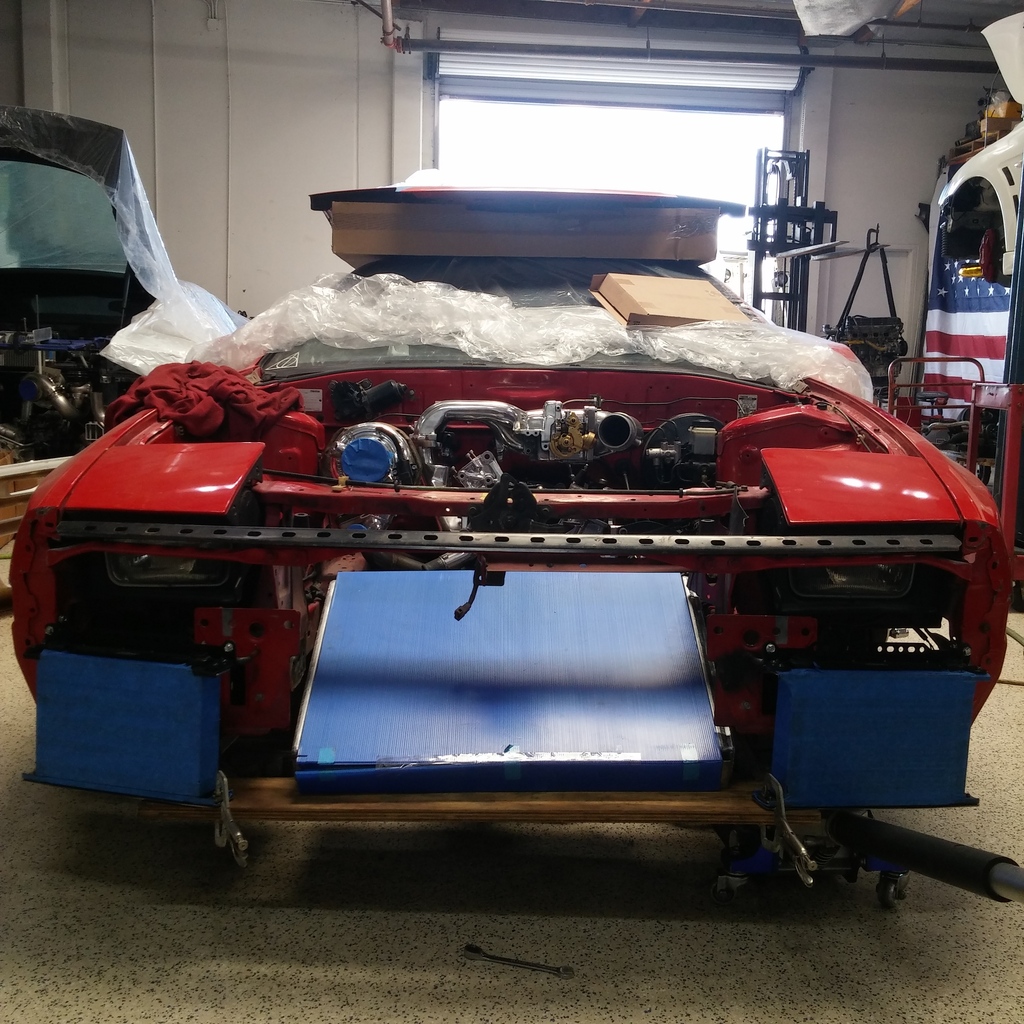
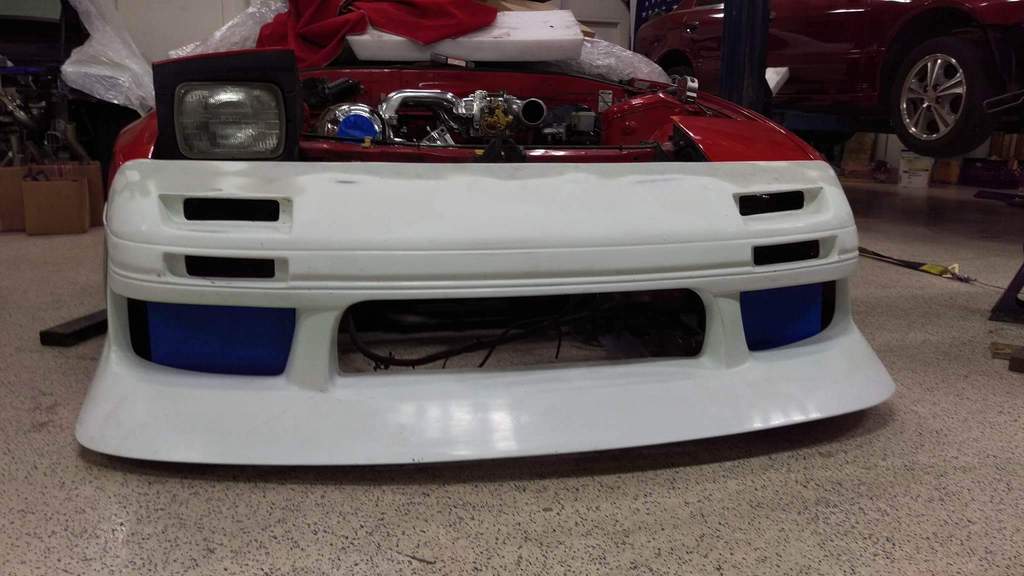
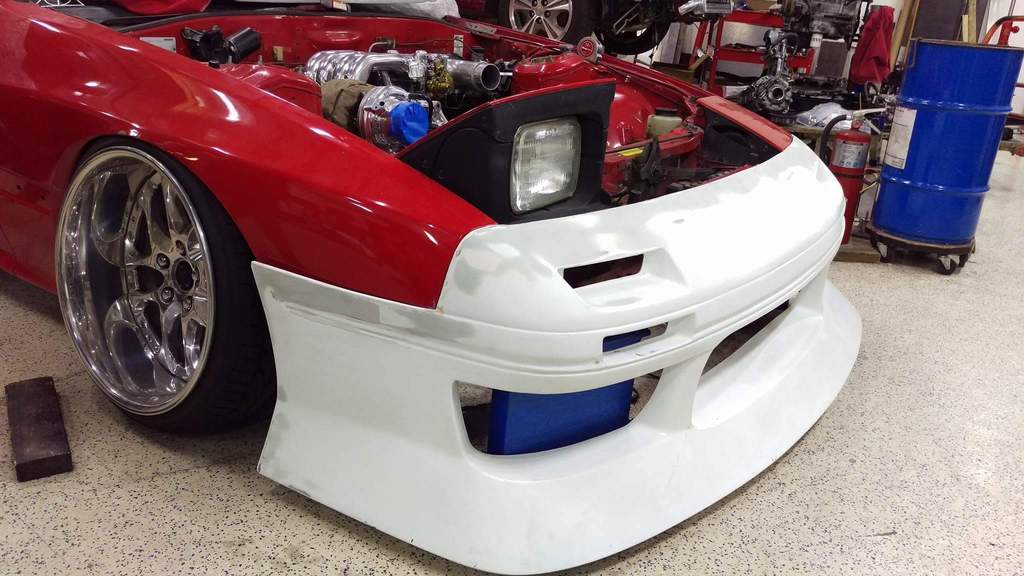
annnnnd the bumper test fit
Moved the battery to the trunk. Miata batterys fit perfectly in the fender space where the factory jack mounts. Not sure why he decided to make the top piece go longways but i like how it came out and figure i can lay some non-conductive material around where the terminals are.

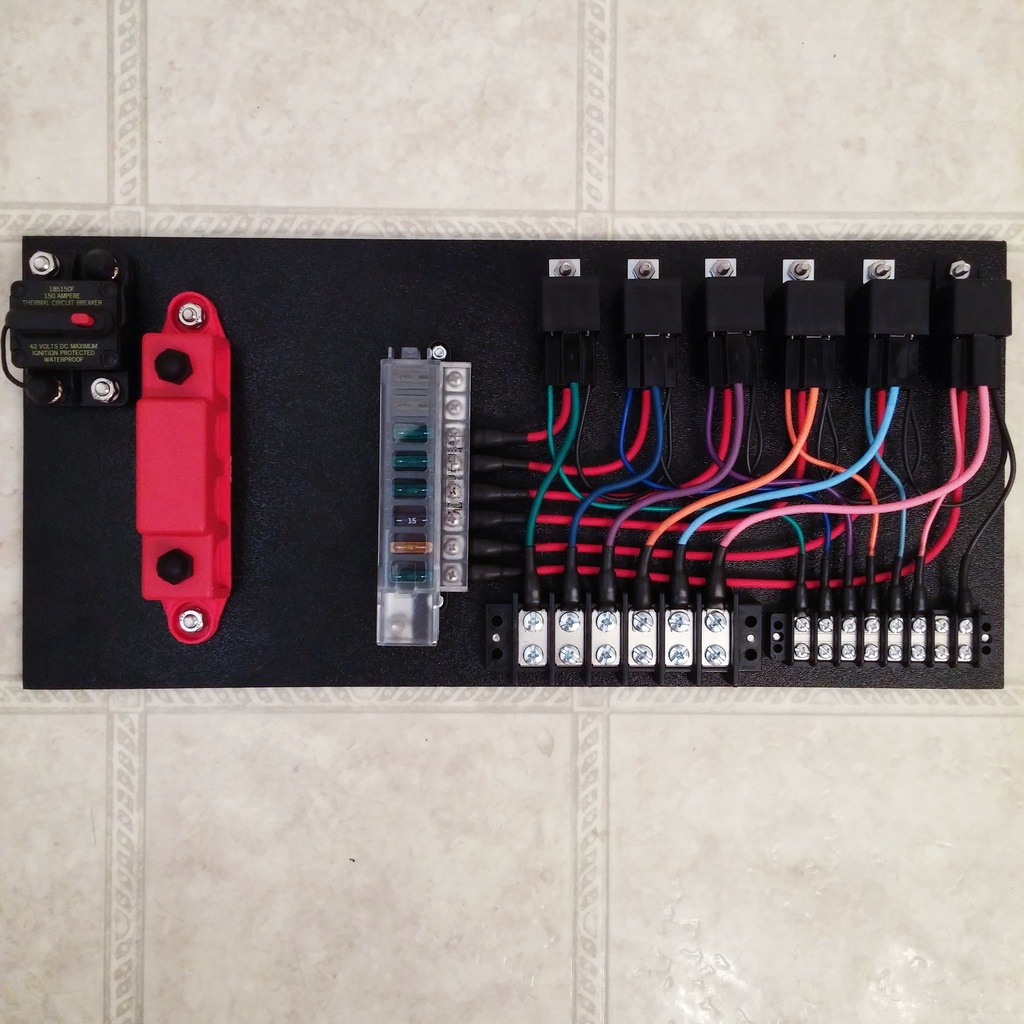
Ive been getting into electrical stuff a bit more and while i was waiting around made a relay panel for the new electronics. It was the first one ive ever attempted so i think it came out okay. Ill be surprised if the car doesnt burn to the ground on the first start, but that expected
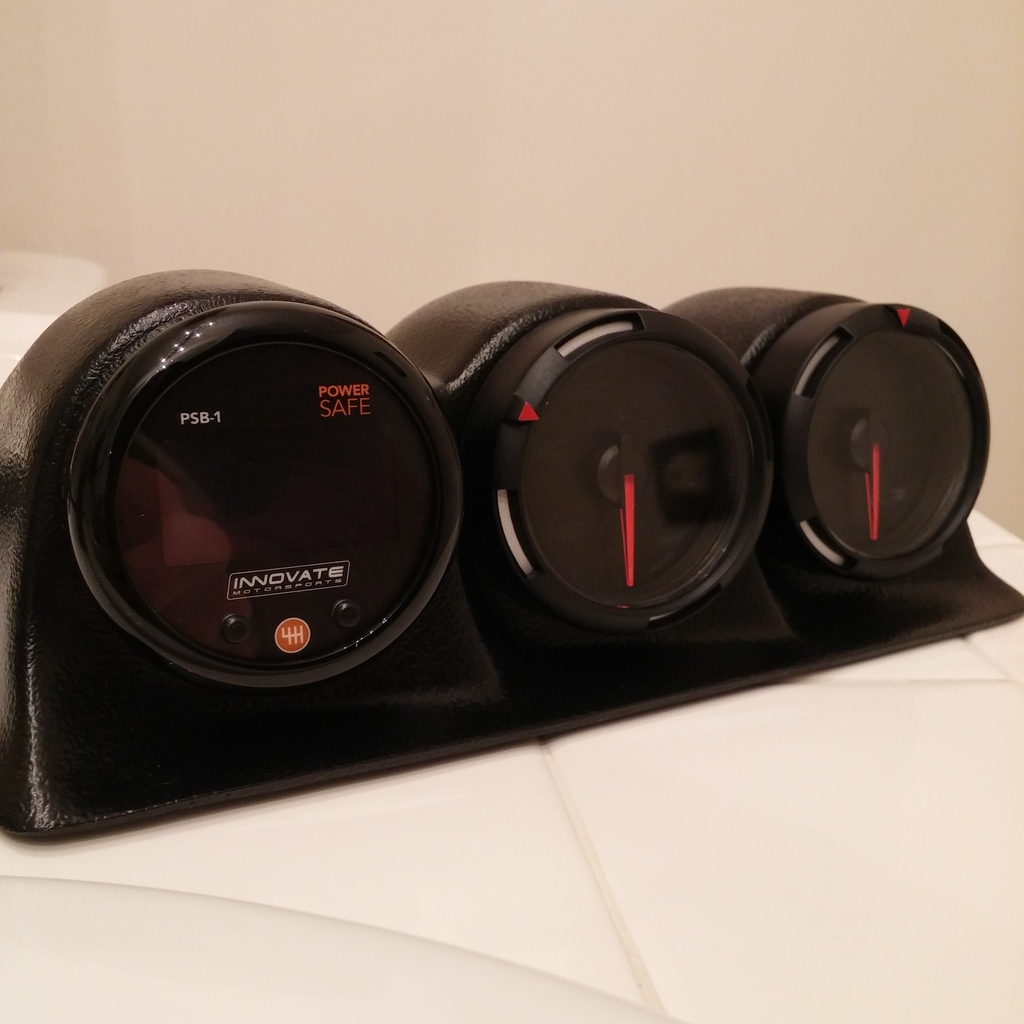
Aside from that, ive just kinda been stockpiling parts. As you can probably tell by this thread, i do stuff really *** backwards. Deal with it. This triple guage pod is going where the idiot cluster is. Innovate PSB-1 and Defi temp x2.
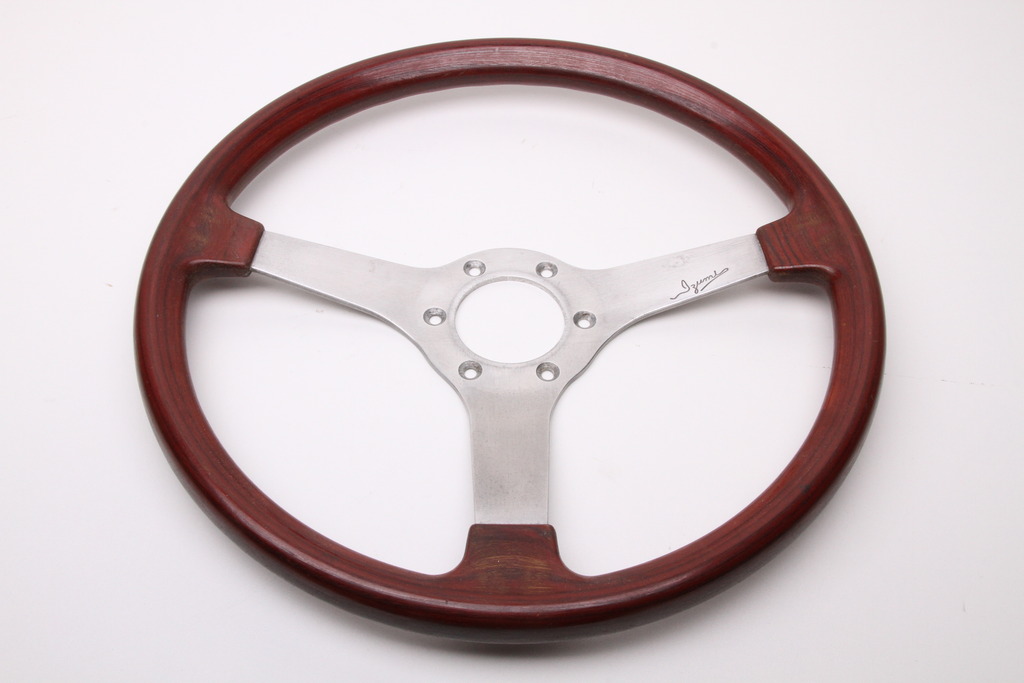
Imported this raw wood izumi wheel with a bunch of other stuff and i really like it. Havent decided if it fits the cars style yet, so i may just buy another Sparco
Well thats all i got for now. Not sure if im ever gonna be bored enough to update this thread, but well see.
Mocking up the V mount. Figured if im going this far, just do it right. Im using CSF cores and having the end tanks built custom for the best fit. none of this front-mount jimmy rig crap.
annnnnd the bumper test fit
Moved the battery to the trunk. Miata batterys fit perfectly in the fender space where the factory jack mounts. Not sure why he decided to make the top piece go longways but i like how it came out and figure i can lay some non-conductive material around where the terminals are.
Ive been getting into electrical stuff a bit more and while i was waiting around made a relay panel for the new electronics. It was the first one ive ever attempted so i think it came out okay. Ill be surprised if the car doesnt burn to the ground on the first start, but that expected
Aside from that, ive just kinda been stockpiling parts. As you can probably tell by this thread, i do stuff really *** backwards. Deal with it. This triple guage pod is going where the idiot cluster is. Innovate PSB-1 and Defi temp x2.
Imported this raw wood izumi wheel with a bunch of other stuff and i really like it. Havent decided if it fits the cars style yet, so i may just buy another Sparco
Well thats all i got for now. Not sure if im ever gonna be bored enough to update this thread, but well see.
*Raises hand*
I still lurk here.
Everything is looking awesome. Do you have part numbers/ links to where to buy those Relay sockets? Very pleasing to see each socket have a unique wire color rather than each socket having all the same "universal colors"... or is that a custom re-pinning of those sockets?
I still lurk here.
Everything is looking awesome. Do you have part numbers/ links to where to buy those Relay sockets? Very pleasing to see each socket have a unique wire color rather than each socket having all the same "universal colors"... or is that a custom re-pinning of those sockets?


awesome build man keep it up. reading these awesome builds helped time go by when i was deployed in Afghanistan. did you get that foresight spoiler shipped from rhdjapan? man i love that fc. wish my **** was as hot.
Looking good!

Thanks 
Yep i got the rear and roof foresight spoiler from RHD. They actually have quite reasonable shipping rates, and dont cost much more than if i were to go through the trouble an import them myself.
Appreciate that, and thanks for going through the trouble to source a stud kit for me when they were out of stock.
Appreciate that, and thanks for going through the trouble to source a stud kit for me when they were out of stock.

Senior Member

Joined: Apr 2009
Posts: 606
Likes: 80
From: netherlands
I am actualy pretty jealous on how nice that front bumper sits. Can't be said about mine..
I'm curious to see your V-mount come together, always nice to compare. And i'm also curious on the PS setup as I'm not yet sure how I feel about my ps delete.
Keep up the good work!
I'm curious to see your V-mount come together, always nice to compare. And i'm also curious on the PS setup as I'm not yet sure how I feel about my ps delete.
Keep up the good work!