All about paint/body.. Kustom paint? Mega Flake? Shaved? post here!!
 08-23-10, 03:19 PM
#76
Formerly widebodyseven
iTrader: (17)

Join Date: Jul 2009
Location: Garage
Posts: 1,799
Likes: 0
Received 0 Likes
on
0 Posts
Thanks, its going to look better once everything is smooth and painted.
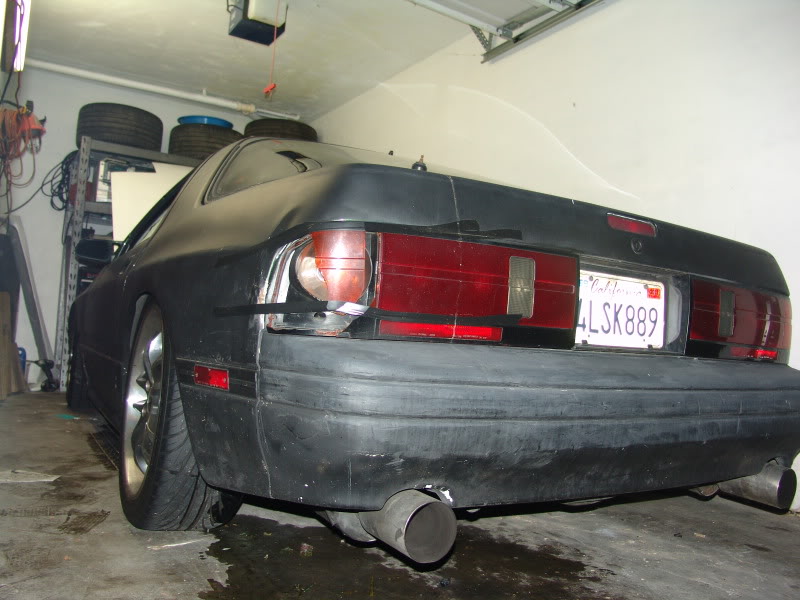
Custom, i'm actually using front fenders from a Evo X for the rear, just a little bending and it fits good.
Custom, i'm actually using front fenders from a Evo X for the rear, just a little bending and it fits good.
 08-23-10, 10:55 PM
#78
I thought those were cj's regas? Did you guys trade up?
Anyway.... Did some fitment work and started shaving the 3rd brake light, emblems and antenna hole.... First layer of cloth got laid and i think i'lll throw a layer of chopped mat on top of the brake/key/antenna holes. I'm planning on building a box in the bin areas out of glass to house a 12" alpine type R sub and dont want the **** to crack. I really need to finish my hood but it was pissing me off so i moved onto some easy **** for now.

Primer is there just to keep areas from flash rusting. I didn't have time to feather edge today and do a full prime/ and partial skim coat where the car needed it so used a can of lame grey ****...


pull came out better this go round. I was gentle and went REALLY SLOW with a jack handle. Kept checking over and over and over again to make sure it was nearly perfect. It's not perfect but i'm satisfied.
I hate being a weekend warrior. There are times i really want to transfer back to a first shift weekend job. 7 days a week, i was able to work on stuff depending on the weather. Now, it's 2 if i'm lucky.
Anyway.... Did some fitment work and started shaving the 3rd brake light, emblems and antenna hole.... First layer of cloth got laid and i think i'lll throw a layer of chopped mat on top of the brake/key/antenna holes. I'm planning on building a box in the bin areas out of glass to house a 12" alpine type R sub and dont want the **** to crack. I really need to finish my hood but it was pissing me off so i moved onto some easy **** for now.
Primer is there just to keep areas from flash rusting. I didn't have time to feather edge today and do a full prime/ and partial skim coat where the car needed it so used a can of lame grey ****...
pull came out better this go round. I was gentle and went REALLY SLOW with a jack handle. Kept checking over and over and over again to make sure it was nearly perfect. It's not perfect but i'm satisfied.
I hate being a weekend warrior. There are times i really want to transfer back to a first shift weekend job. 7 days a week, i was able to work on stuff depending on the weather. Now, it's 2 if i'm lucky.
08-23-10, 11:25 PM
#79
Lol. I hope that happens soon. His fc painted.
The white car (yours) needs less fucked with, more driving. I'm ready to see that gangster as **** ish sliding! Granted you haven't screwed up yet so keep doing what you're doing!
Damn good using fenders from another car to graft onto yours.
When the market doesn't have what you want, improvise! 19's on fc's make me happy. My brain farted when i was posting and forgot to give you props on that awesome work!
The white car (yours) needs less fucked with, more driving. I'm ready to see that gangster as **** ish sliding! Granted you haven't screwed up yet so keep doing what you're doing!
Damn good using fenders from another car to graft onto yours.
When the market doesn't have what you want, improvise! 19's on fc's make me happy.
My brain farted when i was posting and forgot to give you props on that awesome work!
08-23-10, 11:37 PM
#80
Formerly widebodyseven
iTrader: (17)
Join Date: Jul 2009
Location: Garage
Posts: 1,799
Likes: 0
Received 0 Likes
on
0 Posts
Thanks!
The paint store i go to all the time was close today so i couldn't get any supplies so i just started sanding everything so i could fill in all the dents and shave all the moldings.

Goal for this week is to get both rear panels molded on and shave the side molding.
The paint store i go to all the time was close today so i couldn't get any supplies so i just started sanding everything so i could fill in all the dents and shave all the moldings.
Goal for this week is to get both rear panels molded on and shave the side molding.
Last edited by widebodyseven; 08-23-10 at 11:40 PM.
08-24-10, 06:14 PM
#81
Sideways is the only way
iTrader: (2)
Join Date: Nov 2007
Location: Vermont
Posts: 958
Likes: 0
Received 0 Likes
on
0 Posts
S14.3REW-looking forward to seeing the finished product on those. looks good so far, snap a pic from the side and a quarter view from the front when its done please. it's knda hard for me to get the hole picture from the angle you posted last.
08-25-10, 04:28 AM
#84
I did notice that bn skirts tend to be "sunk in" compared to how the front and rear flares but thanks for shedding light. Tape IS the **** and fiberglass is a treat to work with.
Sooooo, considering this is "that" thread, how many drops of hardener are you guys adding to your liquid resin for 1 layer of thin chopped mat or woven fiberglass fabric? Just curious. I still have trouble finding a number that gives me atleast a 5-10 minute window but doesn't take forever to cure....
Tip: LINE YOUR SOLO CUPS WITH ALUMINUM FOIL!!!!!
Acetone will eat through it immediately and resin will eat through it in about 5-10 minutes. I never mix more than i plan on using quickly but because my brain farted from things outside of cars ******* with me, i forgot to line my cups. The result was a mess all over my driveway.
PLEASE FINISH THAT CAR ALREADY! It's soo ******* sweet dood!
08-26-10, 12:18 AM
#86
Formerly widebodyseven
iTrader: (17)
Join Date: Jul 2009
Location: Garage
Posts: 1,799
Likes: 0
Received 0 Likes
on
0 Posts
I filled in the side moldings and fixed the big dent i had in the tail light area. Pounded out as much metal i can, filled with bondo and finish with a glazing putty.
Before
After
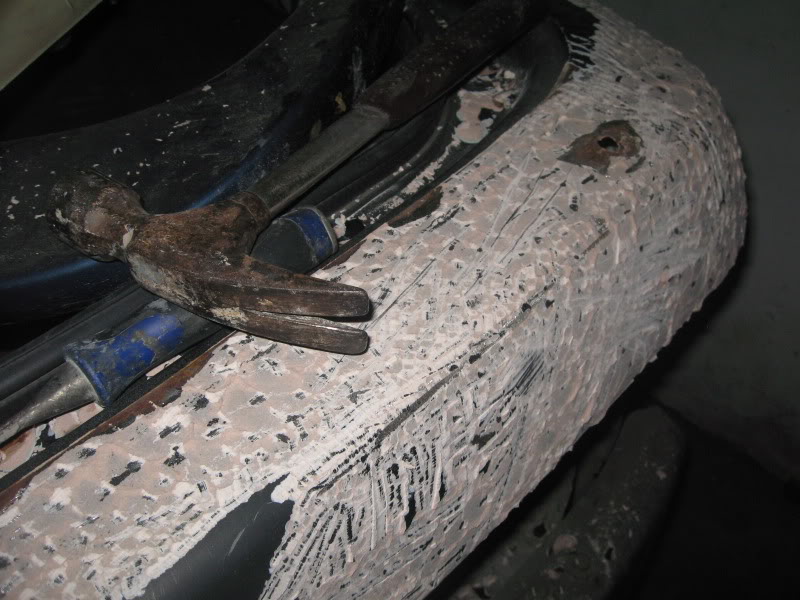
I was removing old paint from the hatch area and found a thick layer of unnecessary bondo. Took me half a day to remove it with a chizzle and hammer.
 08-26-10, 02:56 AM
#87
Formerly widebodyseven
iTrader: (17)
Join Date: Jul 2009
Location: Garage
Posts: 1,799
Likes: 0
Received 0 Likes
on
0 Posts
Last edited by widebodyseven; 08-26-10 at 02:59 AM.
08-29-10, 09:17 PM
#88
Formerly widebodyseven
iTrader: (17)
Join Date: Jul 2009
Location: Garage
Posts: 1,799
Likes: 0
Received 0 Likes
on
0 Posts
I've been busy, so haven't had a lot of time to work on the FC. Still trying to have it finished and painted before sept. 18.
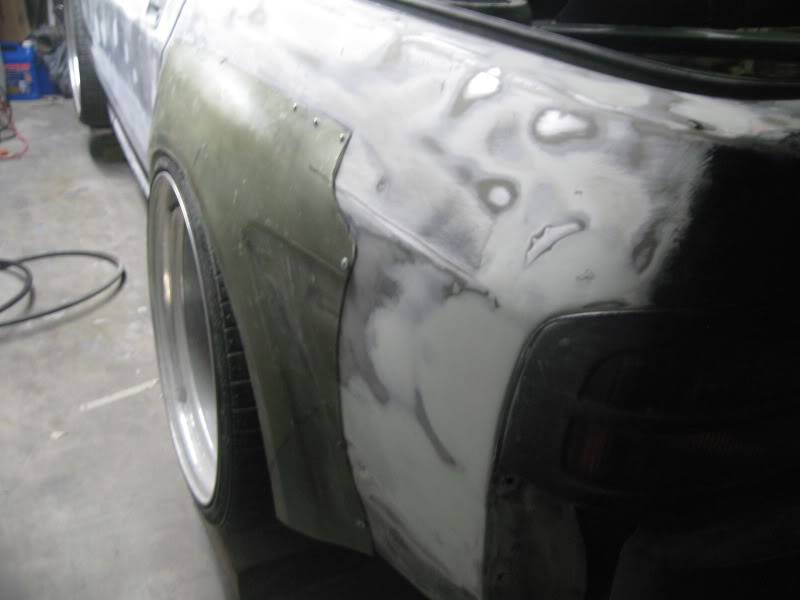
Here's a picture of the front fenders, going to have a little RX8 style to it.
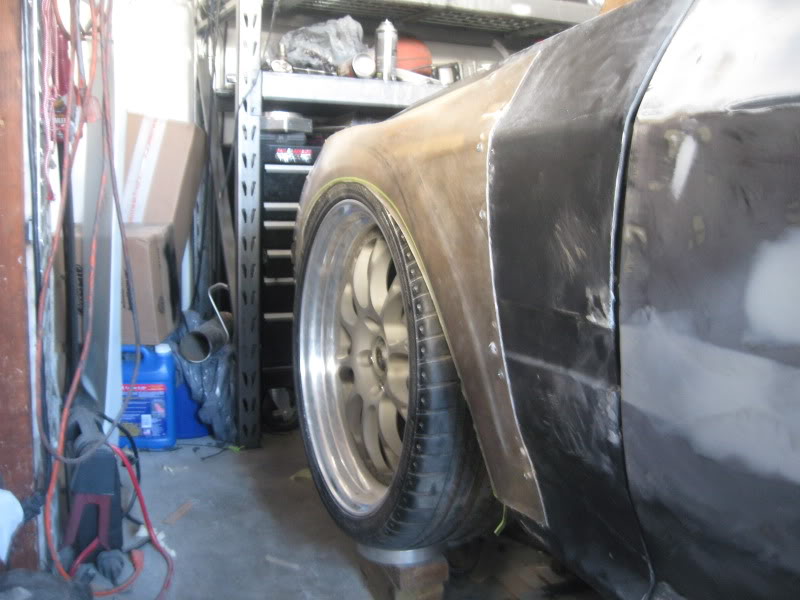
Here's a picture of the front fenders, going to have a little RX8 style to it.
08-30-10, 02:30 AM
#89
Pinky out. Fancy fancy.
Remember how shitty my skirts were because i thought 17's would work with bn?
And then on page one i broke them all to **** being an idiot on the street?
Well, i did some of this ****. I shaved my emblems and third brake light/keyhole but haven't snapped pics yet....


**** right here is stronger than the skirt itself. It's going nowhere...ever. The rest of the skirt will turn to dust before this piece. I can literally STAND on it without it making funky noises.

I removed about 3/4" from the top section of the skirt and **** on both of em, just had em side by side on a level surface and did some measuring. Prolly took about 20 minutes of hacking and glassing on BOTH skirts. I'm getting faster! Oh, and no waste and my resin "dried" in less than an hour. Hypertek and SLidealliance, you guys have been a BIG ******* help with your tips. Thanks.


This is DOABLE. I'm fine with this. You guys can drag your **** on the ground in a straight line. I say "**** that". I can't stand itching like i have body lice or something. The insides have been cut, drilled and repaired in the corners where it was dragging/ripping on the ground. It's thicker, harder, stronger. Like supercock but fiberglassy and resinous.

Any ideas for this? I want to do something different than last time. No doubt it wont break here again unless i run it the **** over. The liquid resin/hardener+chopped mat+fabric is THE ******* ****. There is no substitution! Slidealliance is allowed to punch me in the face for using short strand/jelly **** in the first place..... Um, if you're confused of why i cut the skirt up like that, remember it WAS reverse raked bad. about 3/4" was removed from midway down the skirt to the rear wheel well. Then i brought the sill part down to meet the rest of the skirt, drilled, tied and glassed. I'll hit the sill up with a heat gun so the sill peice sits flat. Where i bent it down, it kinda drags on the door some.
I'm half asleep so excuse the shitty format.... Just look. I did ******* work so i'm posting it. Even if it's not win, it's a contribution. You lurkers (you know who you are because you're on my facebook) need to start posting or else. **** gets better the more you chime in and show your ****.
Remember how shitty my skirts were because i thought 17's would work with bn?
And then on page one i broke them all to **** being an idiot on the street?
Well, i did some of this ****. I shaved my emblems and third brake light/keyhole but haven't snapped pics yet....
**** right here is stronger than the skirt itself. It's going nowhere...ever. The rest of the skirt will turn to dust before this piece. I can literally STAND on it without it making funky noises.
I removed about 3/4" from the top section of the skirt and **** on both of em, just had em side by side on a level surface and did some measuring. Prolly took about 20 minutes of hacking and glassing on BOTH skirts. I'm getting faster! Oh, and no waste and my resin "dried" in less than an hour.
Hypertek and SLidealliance, you guys have been a BIG ******* help with your tips. Thanks.This is DOABLE. I'm fine with this. You guys can drag your **** on the ground in a straight line. I say "**** that". I can't stand itching like i have body lice or something. The insides have been cut, drilled and repaired in the corners where it was dragging/ripping on the ground. It's thicker, harder, stronger. Like supercock but fiberglassy and resinous.
Any ideas for this? I want to do something different than last time. No doubt it wont break here again unless i run it the **** over. The liquid resin/hardener+chopped mat+fabric is THE ******* ****. There is no substitution! Slidealliance is allowed to punch me in the face for using short strand/jelly **** in the first place..... Um, if you're confused of why i cut the skirt up like that, remember it WAS reverse raked bad. about 3/4" was removed from midway down the skirt to the rear wheel well. Then i brought the sill part down to meet the rest of the skirt, drilled, tied and glassed. I'll hit the sill up with a heat gun so the sill peice sits flat. Where i bent it down, it kinda drags on the door some.
I'm half asleep so excuse the shitty format.... Just look. I did ******* work so i'm posting it. Even if it's not win, it's a contribution.
You lurkers (you know who you are because you're on my facebook) need to start posting or else. **** gets better the more you chime in and show your ****.

 08-30-10, 10:19 PM
#93
Yeah. I've been busy doing **** with the suspension and shifting between that and body work. It'll all be primmer black some time this week. I still have to fix a couple dings in the passenger door, scuff the paint, prime, pull the hatch, do the hatch, jambs and ****. I dunno. It's a mess. Justin (my brother) was put to the task of grinding all the resin i slopped all over the hood off....
Hood is gonna be all ratty and fucked until i DONT **** up making my drop vent. Trust me, i want it all the same color, even if it's primmer. I'll be driving this bitch next week. I'm going with plain single stage gloss black soon. Going to get tags and paying my tax on the thing thursday or friday morning. It's already insured. Transmission is going out in the daily and i'm nervous every time it goes out of gear that it's going to strand me so until that situation is fixed, i'm stuck dd'ing this thing and i dont want it multicolored on top of being shitty.
Hood is gonna be all ratty and fucked until i DONT **** up making my drop vent. Trust me, i want it all the same color, even if it's primmer. I'll be driving this bitch next week. I'm going with plain single stage gloss black soon. Going to get tags and paying my tax on the thing thursday or friday morning. It's already insured. Transmission is going out in the daily and i'm nervous every time it goes out of gear that it's going to strand me so until that situation is fixed, i'm stuck dd'ing this thing and i dont want it multicolored on top of being shitty.
08-31-10, 02:49 AM
#94


Last one is not shopped. That's how my camera took it.
I'm VERY tempted to do this to it.....
The shitty thing is, the first time i saw this car, i threw up in my mouth. Now, i actually like it because i understand the point of a drift car. You can have it nice and sexy and whatever. You know? The clean street look. Or, you can just go crazy with it and not care what people think.
You never did throw me a suggestion about glassing those sections of my skirt back together. Got any ideas? I have one but i can't see it turning out good in my head. I'm trying to waste as little material as possible. You work in a body shop so i'm asking....
08-31-10, 06:08 AM
#95
Yea I would jus have it mounted on the car back mask and glas the front then the back side that's how I did mine, I didNt have nearly as big as gap to fill but it will still work, jus make sure to have your pieces of mat pre cut and fill the hole then cover the whole gap with your large pieces last it will be stronger and it will be a smoother finish
08-31-10, 02:26 PM
#96
Alrighty. Well, i already have everything sanded. I'll get to work on it when i have time. Haven't been using gloves either. Just barehanded. Acetone DOES NOT eat this **** off your hands the way i figured it would either. lol.
Thanks for the tips. I'll try it out and see how it goes! It should only take me about 30 minutes start to finish per side. I remember you guys telling me it's OK to mix some bondo with epoxy resin in order to fill imperfections?
Vinyl looks ok. It just depends on how much time you invest in it. From 10 feet or further away, it looks pretty cool.
THis one is kinda bleh. You can see a shitload of seams, especially on the rear lid. Looks poorly done and rushed.
I did see a red s14 on some work emitz that looked almost impossible to distinguish from actual paint. Red sparkle. Looked pro.
09-01-10, 01:39 AM
#98
Sanding should be done in "treesap" stage, correct? You know, hard but still flexible and still putting off alot of heat? I assume 320-400 grit works. I'm not throwing a gelcoat over this ****. I HATE gelcoat. It's super hard and spidercracks and looks like ****.
09-04-10, 02:34 PM
#100
Too Many Questions
Join Date: Jan 2009
Location: Claremore, Oklahoma
Posts: 737
Likes: 0
Received 0 Likes
on
0 Posts
Make sure your plastic filler is sanded down to the extent that it is "straight"(no lumpy spots), so when you apply your glaze coat, you won't be trying to build up the glaze.
To sand glaze(the way I learned) is to first, use a worn out piece of 80 grit, to smooth the edges than when it is "acceptable", use 180 grit to finally smooth it all("it being the area that needs the glaze) out. When you apply primer(after cleaning of course), its gonna come out great.
To help make the process a little faster-
Get bigger sanding blocks and pneumatic straight line sanders and Dual Action sanders(electrical is fine).
Plan ahead.
Keep the area clean, as well as your work.
Multi-task
Hope I helped!