
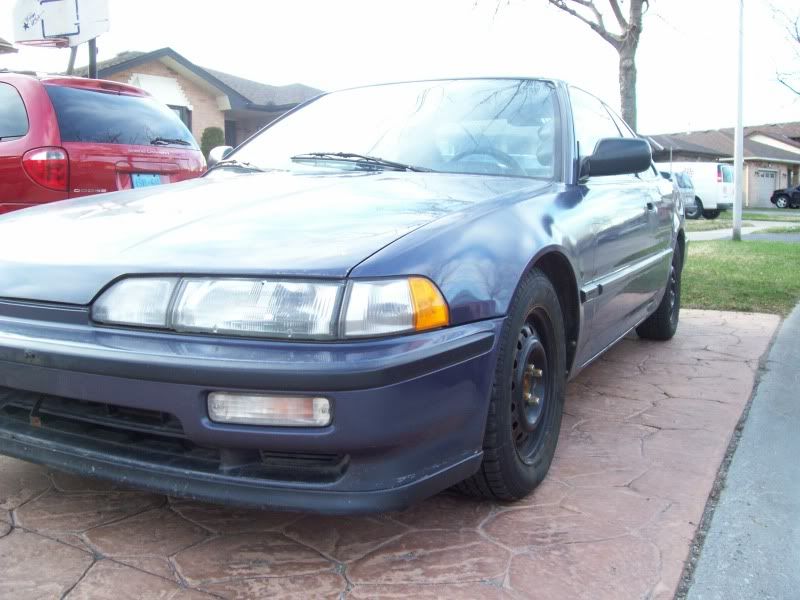
Track car build, not sure if there will be many fans...lol.


Thread Starter
Senior Member
Joined: Jun 2002
Posts: 565
Likes: 1
From: London,ON
Track car build, not sure if there will be many fans...lol.
Hey ladies and gents, not sure if this will tickle anyone's fancy, but I'm sure you'll be able to appreciate the hard work  . This car is pretty much the reason I'm not building an FC, along with a 6-spd CL-S swap we're doing in a TL...lol.
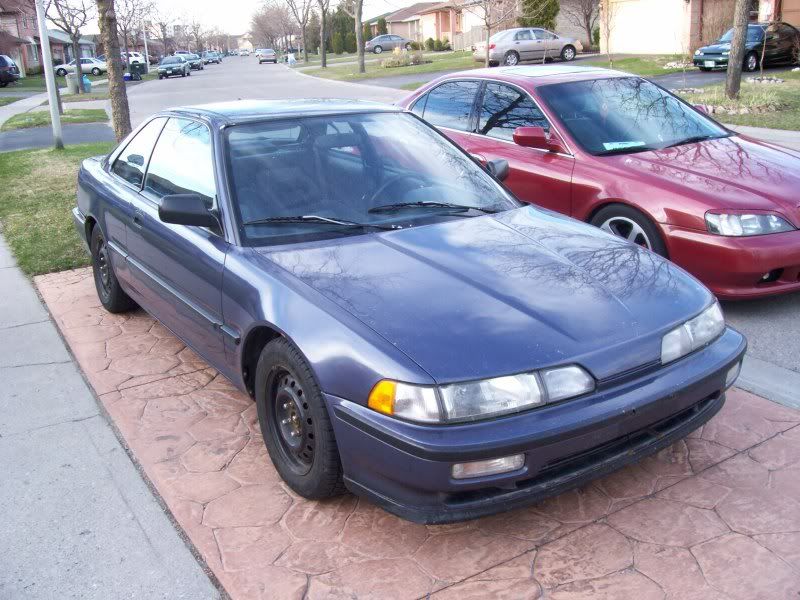
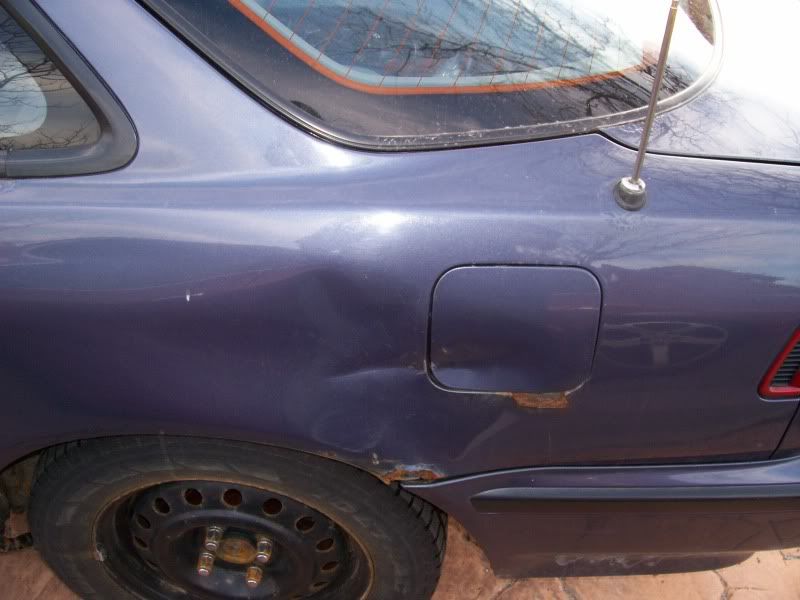
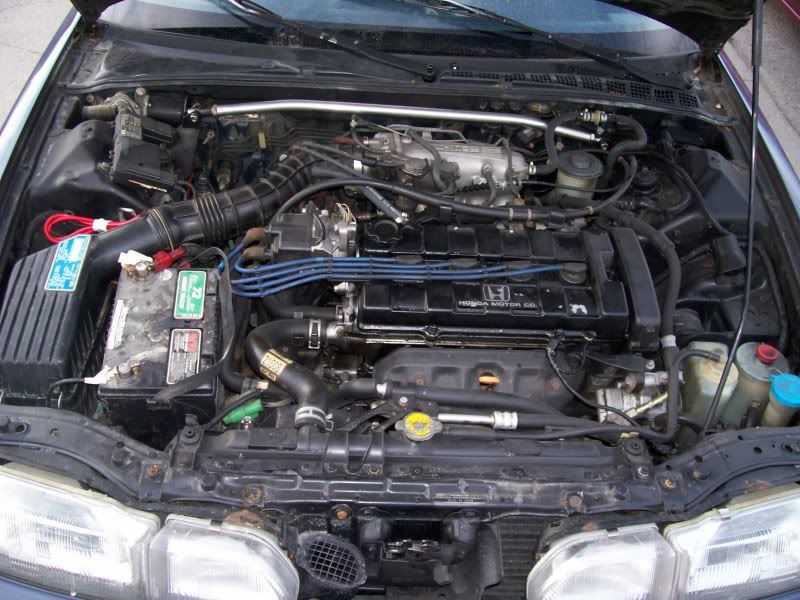
I was going to turn this LS into a track car, but I found a clean RS to build so the LS is now my winter beater.
http://nwp4life.zeroforum.com/zerothread?id=25383
But here is the track car build.
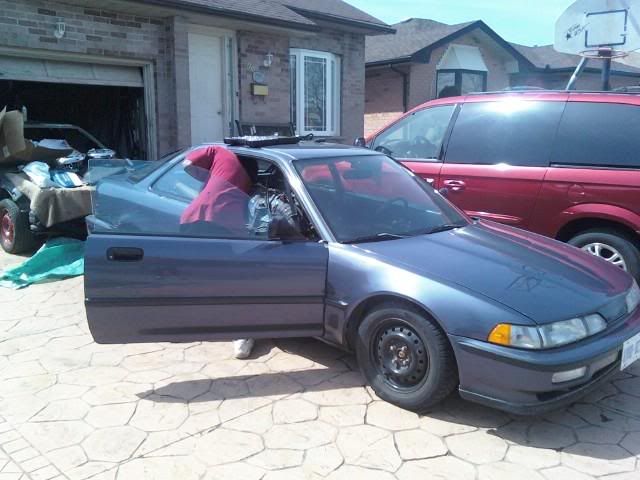
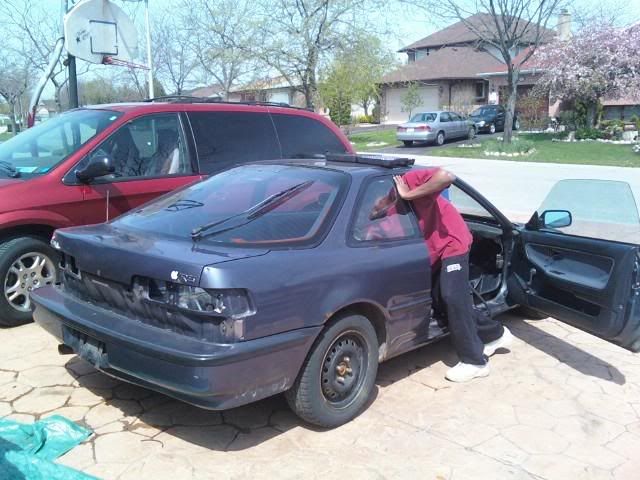
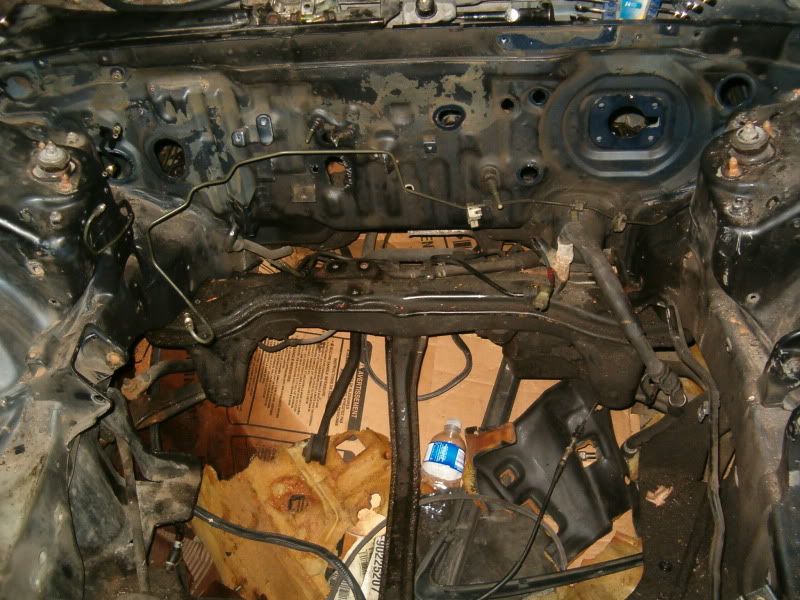
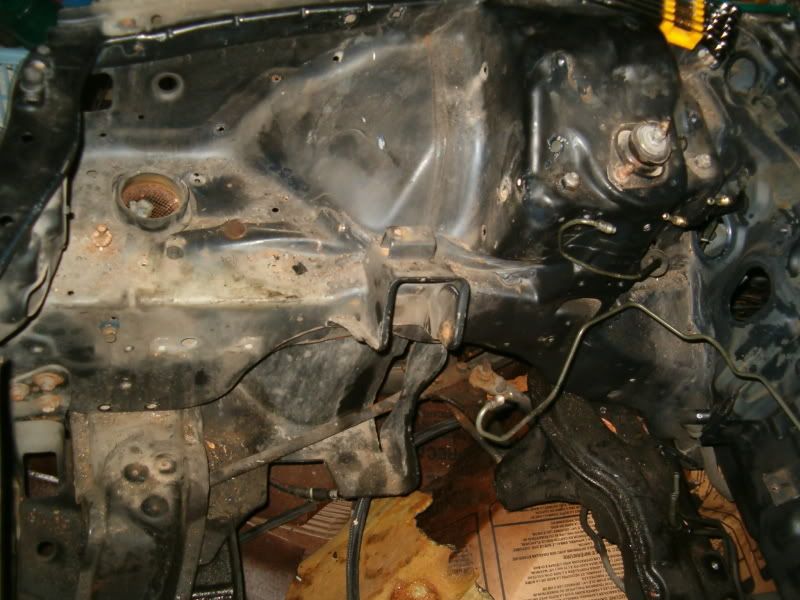
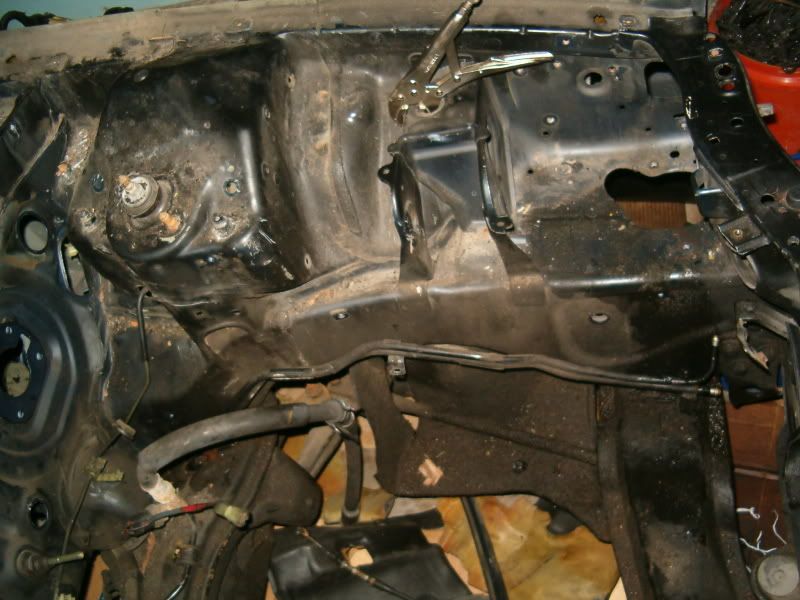
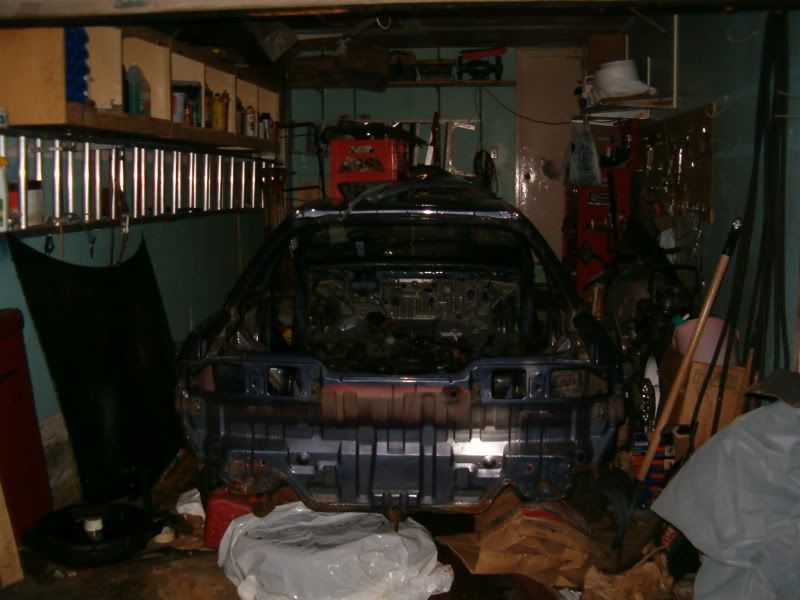
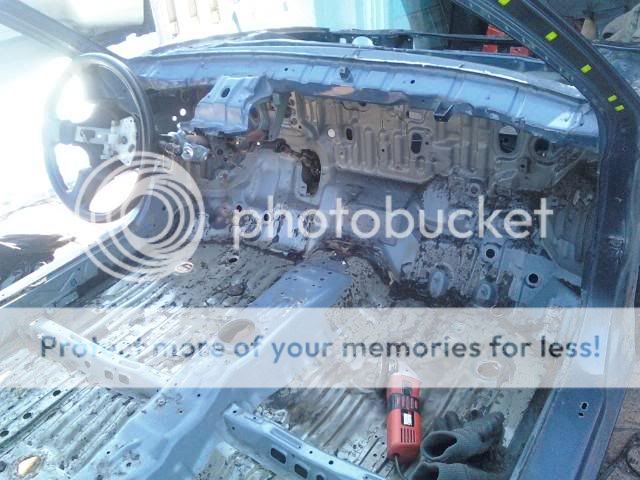
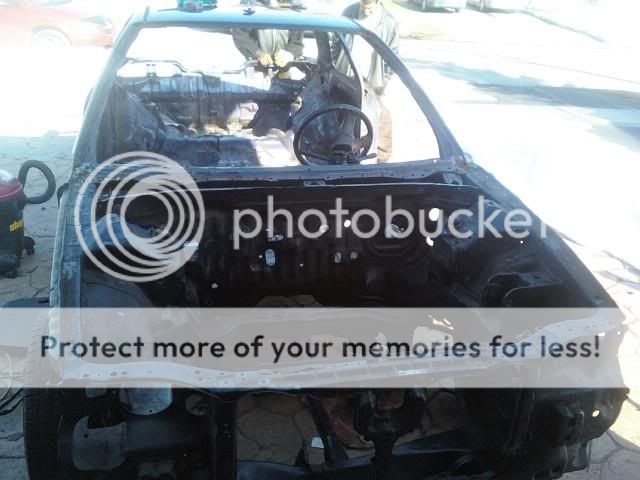
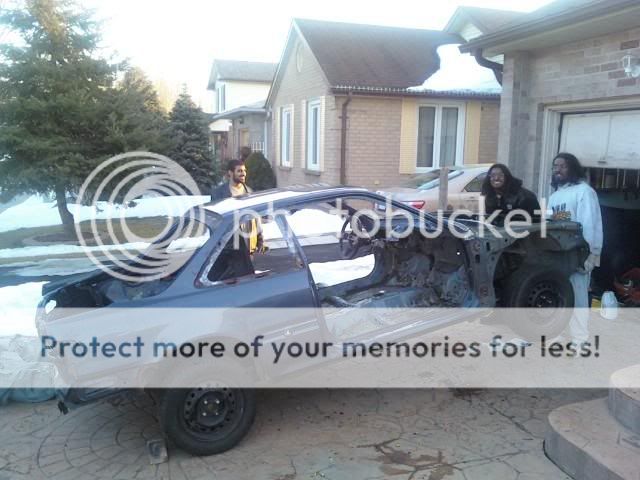
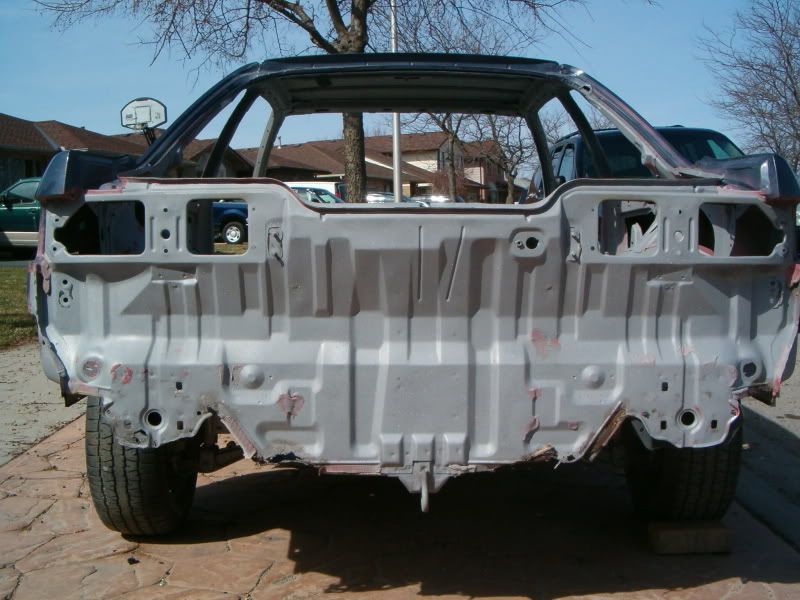
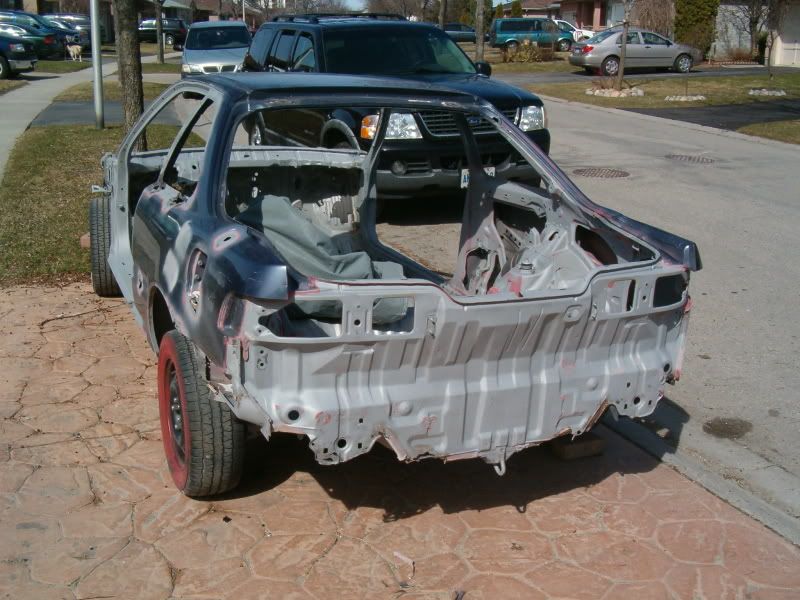
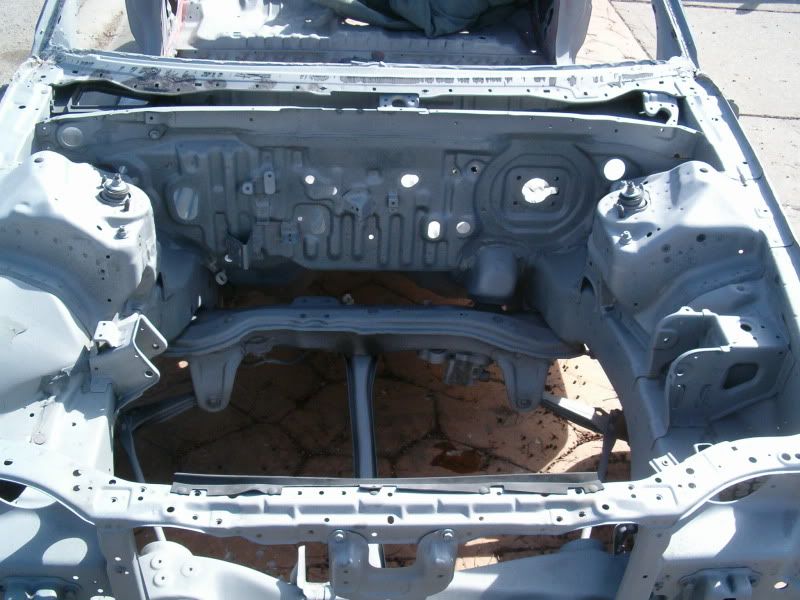
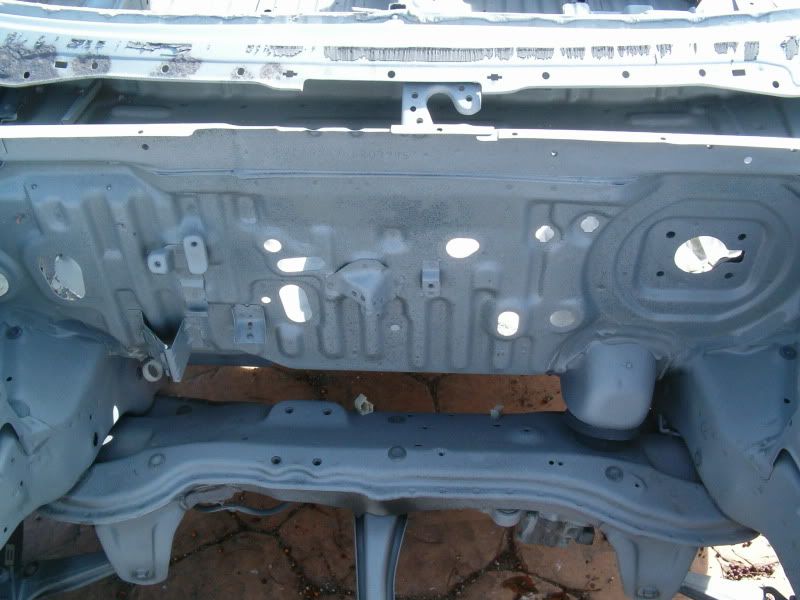
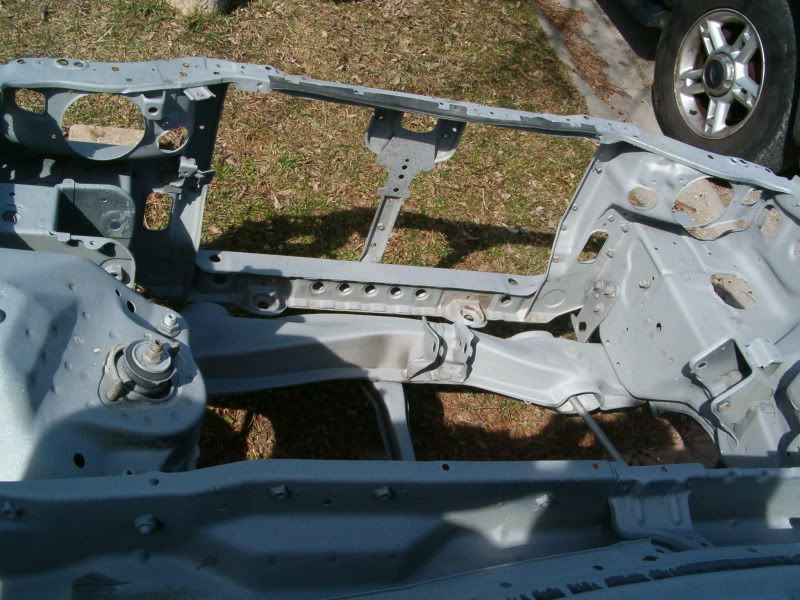
The Shell (completely stripped now)
I will start with a parts list for you guys
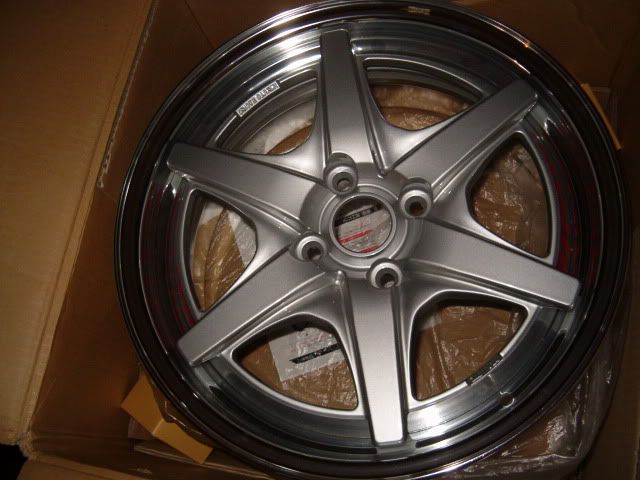
My show rims
The track plate (Know Your Roots)

Hiro Wing
 [/QUOTE]
. This car is pretty much the reason I'm not building an FC, along with a 6-spd CL-S swap we're doing in a TL...lol.I was going to turn this LS into a track car, but I found a clean RS to build so the LS is now my winter beater.
http://nwp4life.zeroforum.com/zerothread?id=25383
But here is the track car build.
The Shell (completely stripped now)
I will start with a parts list for you guys
My show rims
The track plate (Know Your Roots)
Hiro Wing
[/QUOTE]

Thread Starter
Senior Member
Joined: Jun 2002
Posts: 565
Likes: 1
From: London,ON
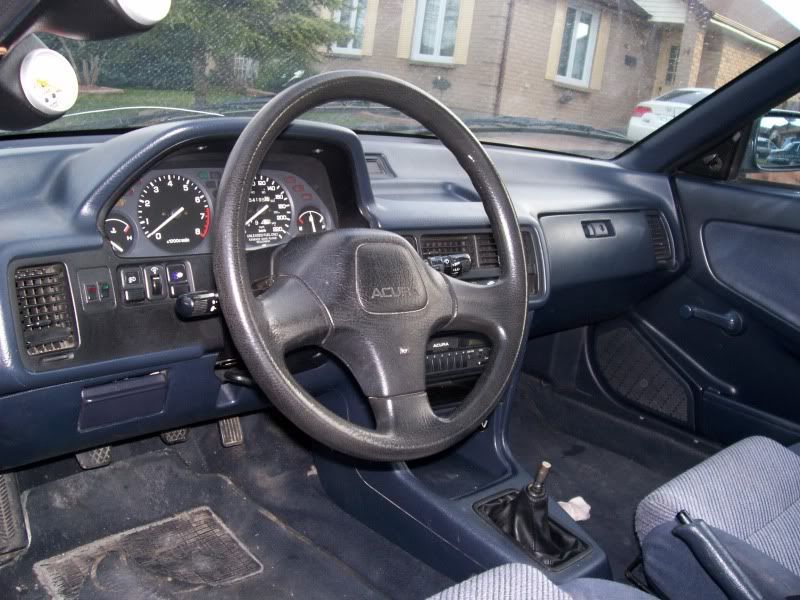
Steering Wheel

 [/QUOTE]
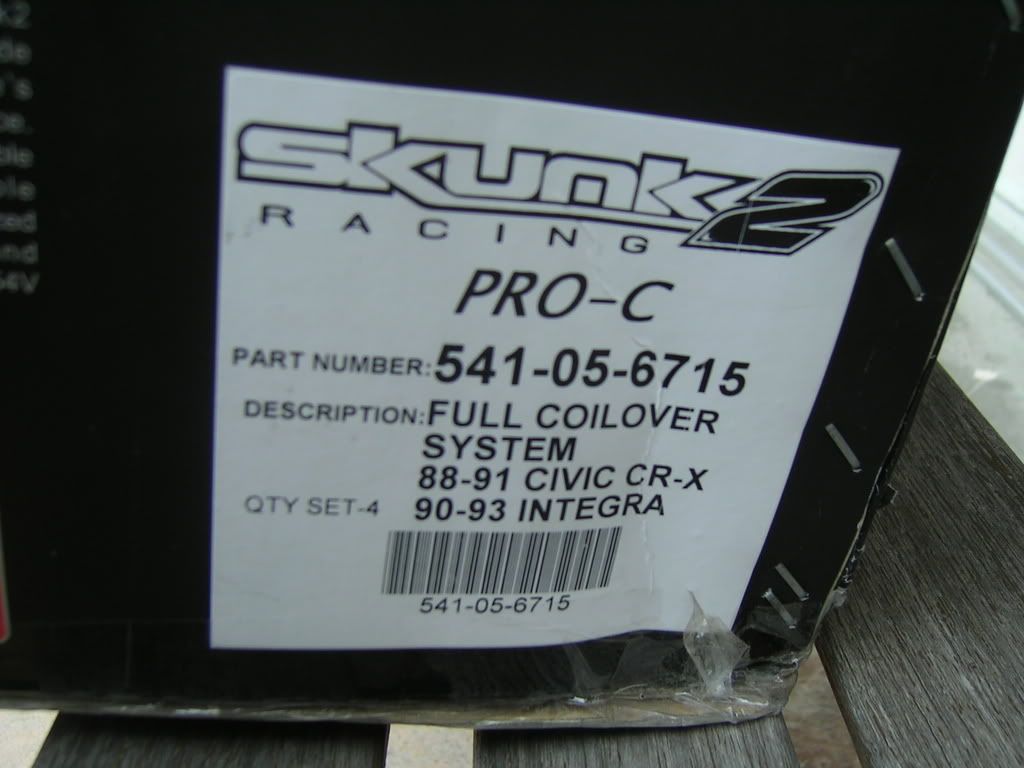
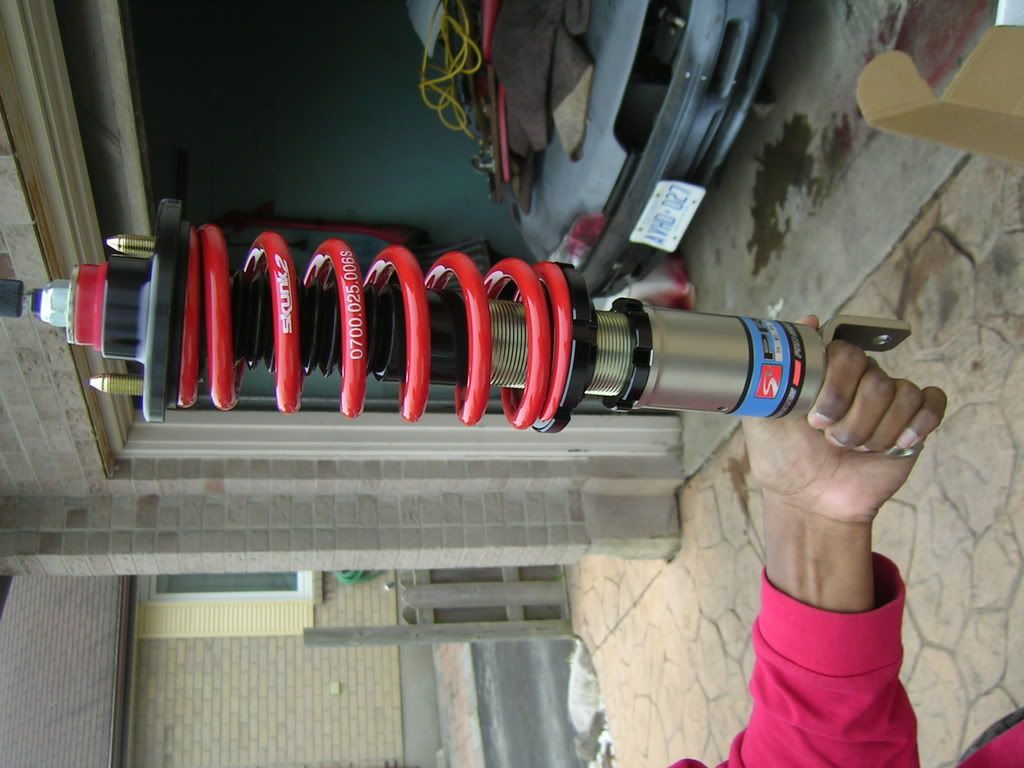
Skunk2 Pro-C Coilovers
My corner of shame... or fame? and yes... those are nunchucks.. and yes I am a Ninja
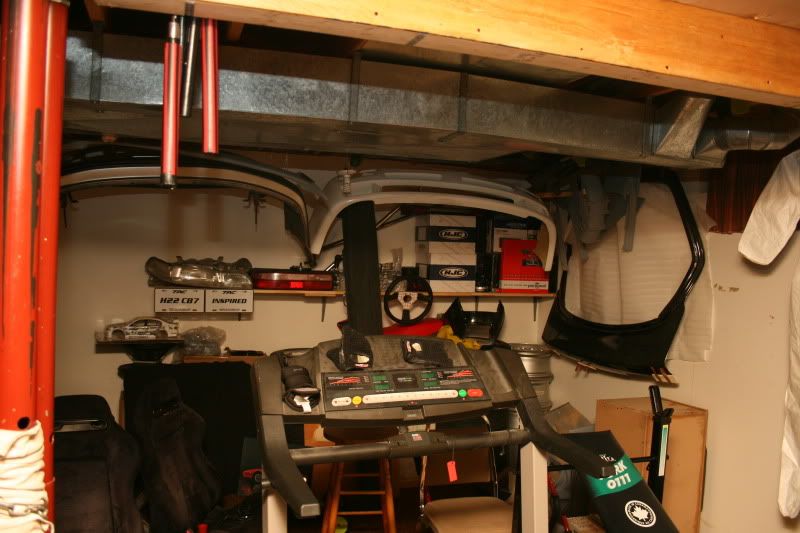
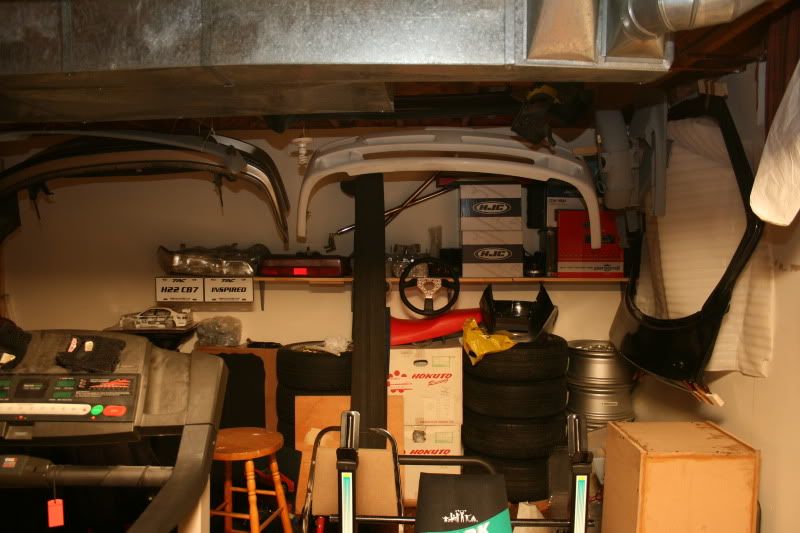
I have a port and polished b18a head sitting in the basement... need to get a 5-angle valve job done on it.
Bunch of other parts I have sitting around, but Im in the middle of moving so I dont have pics of it all.
I will update this thread as often as possible
I would like to sincerely thank all the haters that are motivating me to get this done even sooner than I plan
[/QUOTE]Skunk2 Pro-C Coilovers
My corner of shame... or fame? and yes... those are nunchucks.. and yes I am a Ninja
I have a port and polished b18a head sitting in the basement... need to get a 5-angle valve job done on it.
Bunch of other parts I have sitting around, but Im in the middle of moving so I dont have pics of it all.
I will update this thread as often as possible
I would like to sincerely thank all the haters that are motivating me to get this done even sooner than I plan
Thread Starter
Senior Member
Joined: Jun 2002
Posts: 565
Likes: 1
From: London,ON
Here is the build list
Here is a rough *NOT 100%* build list that I want to do.
Exterior:
---------
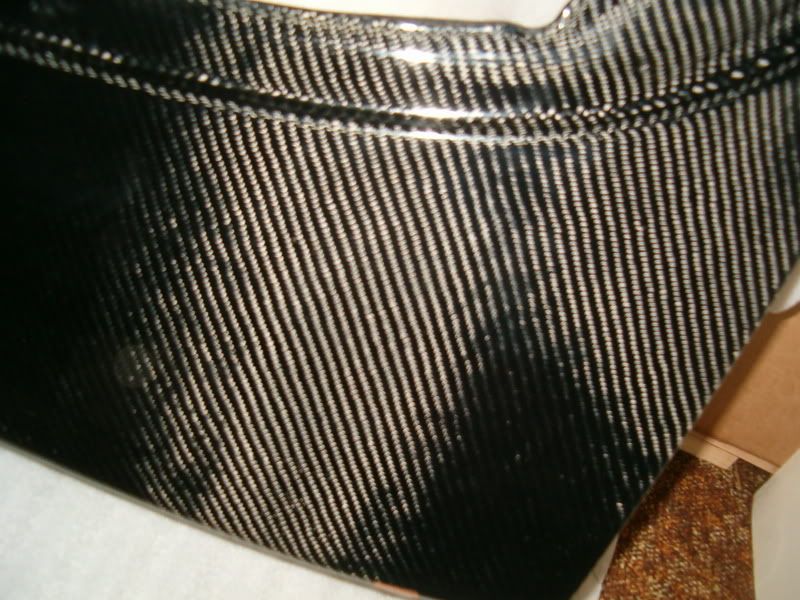
Carbon Fiber/Root Beer Metallic Exterior and Interior
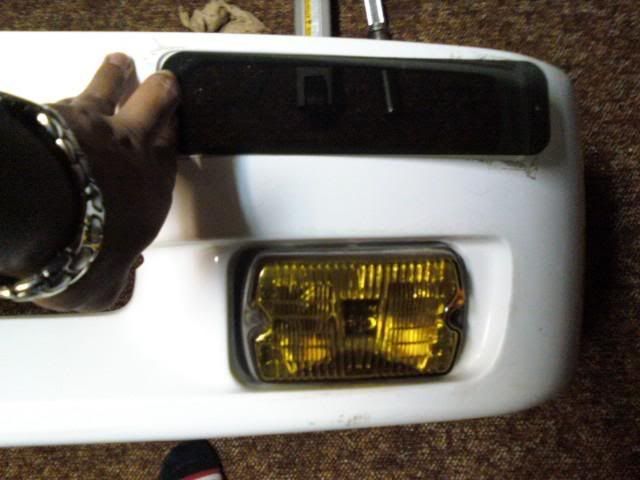
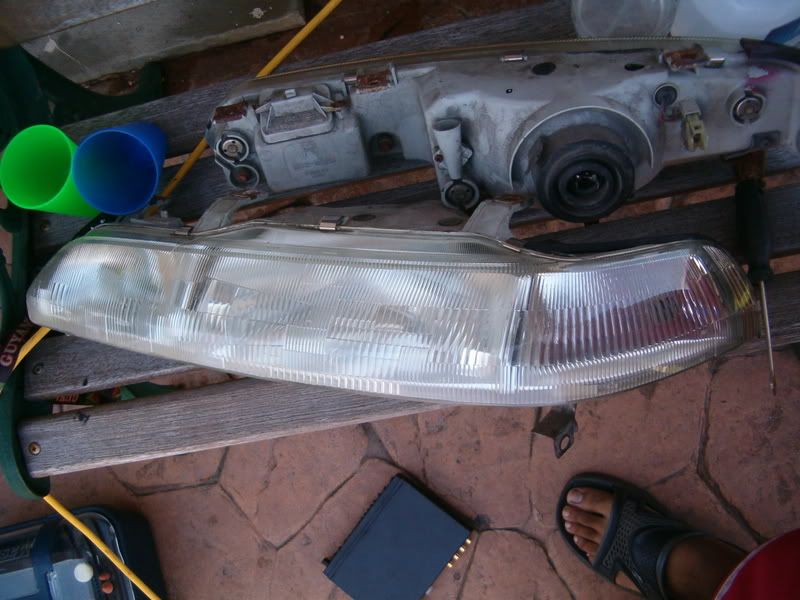
Custom JDM One-Piece Headlights
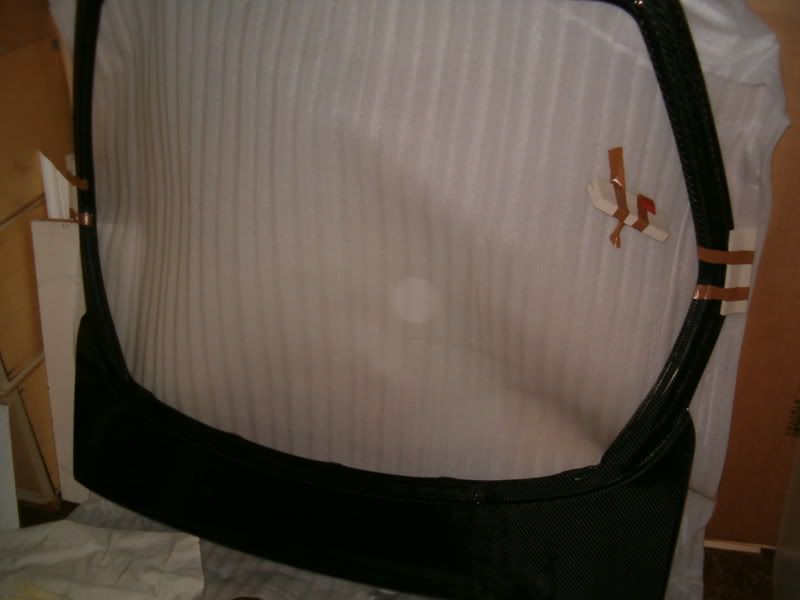
Flex-a-lite Plexiglas Windows
ViS Racing CF EVO hood
ViS Racing CF Hatch
Hiro Wing
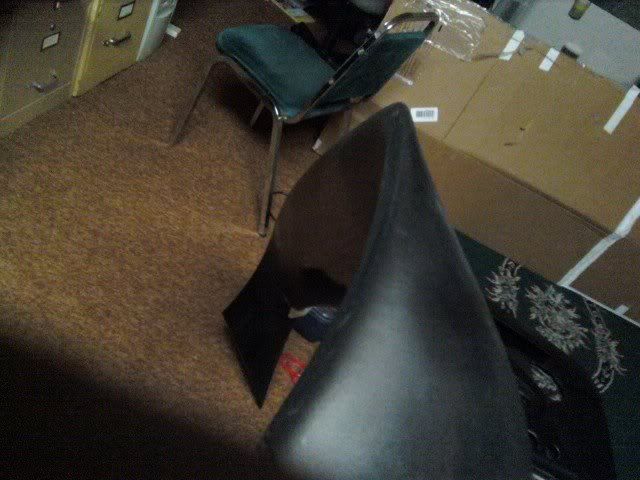
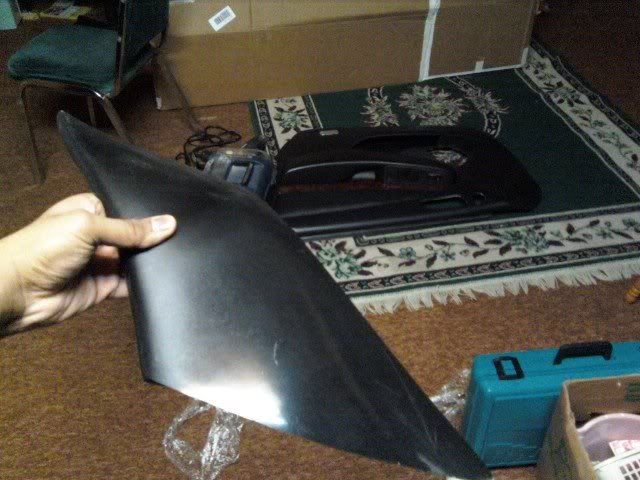
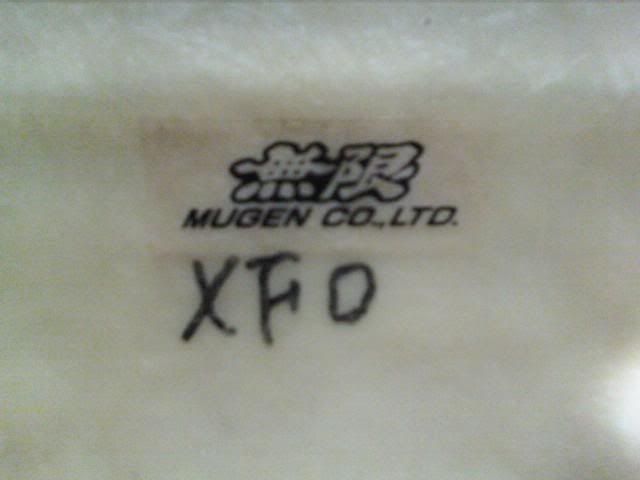
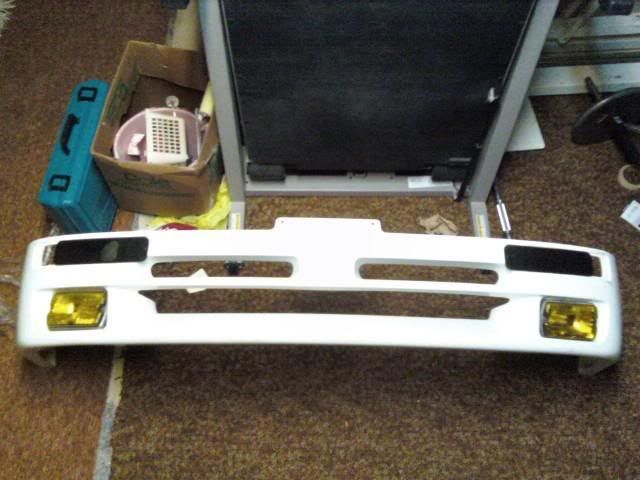
Mugen Front Bumper
RaceOnUSA CF Type-60 Mirrors
Mugen Hood Pins
Mugen Tailgate Fastener
Mugen License Plate Bolts
Wings West Mugen Replica Side Skirts - for now
Wings West Mugen Replica Rear Bumper - for now
CF OEM Fenders
CF Fender Flares - iffy on that one
Wheels:
-------
16" 3-piece Volk AV rims
16" Hokuto Thunder rs05
Suspension:
-----------
Skunk2 Pro-C Coilovers 541-05-5717
Skunk2 Rear Lower Arm Bar 518-05-0790
Skunk2 Pro Series Front Camber Kit 516-05-5660
Skunk2 Rear Camber Kit 516-05-0500
Skunk2 Rear Lower Control Arm 542-05-0105
Skunk2 Front Strut Bar 542-05-0840
Skunk2 Rear Strut Bar 542-05-0850
Mugen Rear Bushing Set
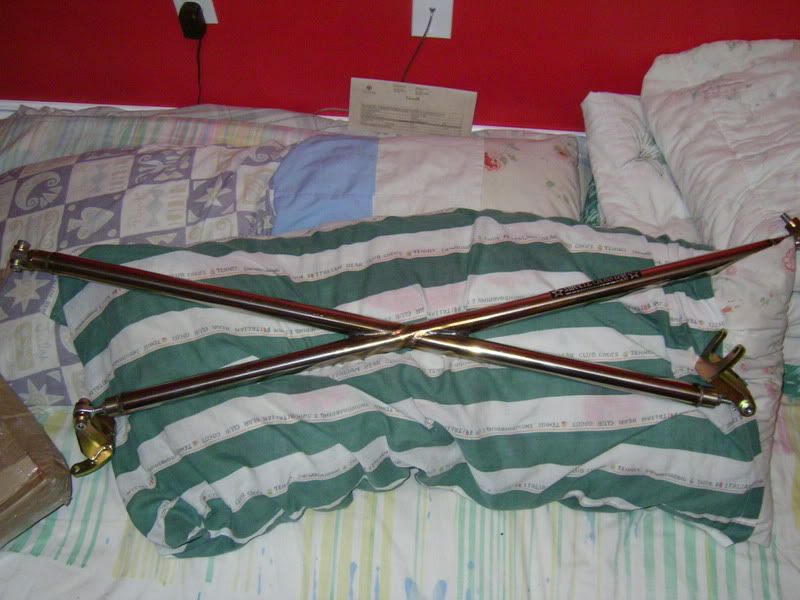
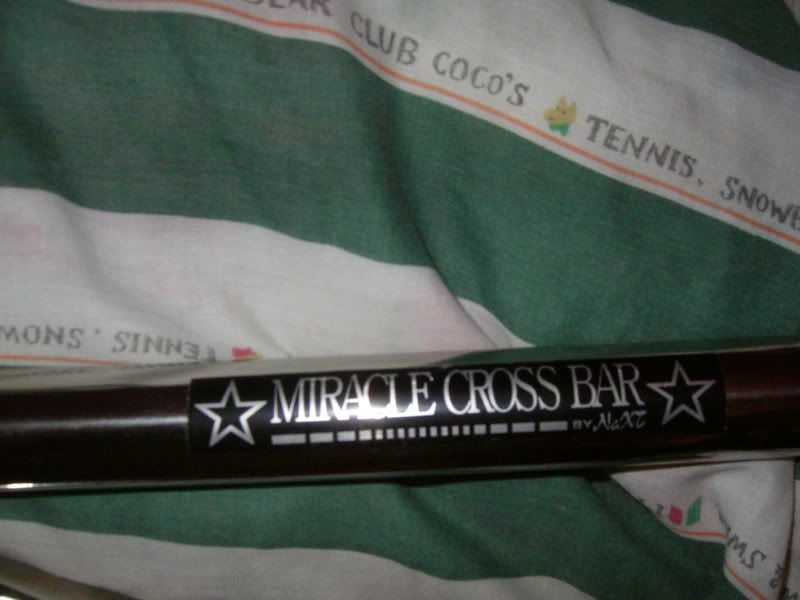
Miracle Trunk Bars
Engine: Hopefully built this year, but regardless wont be swapped in.
-------
Skunk2 Pro Series Cam Gears 304-05-5202
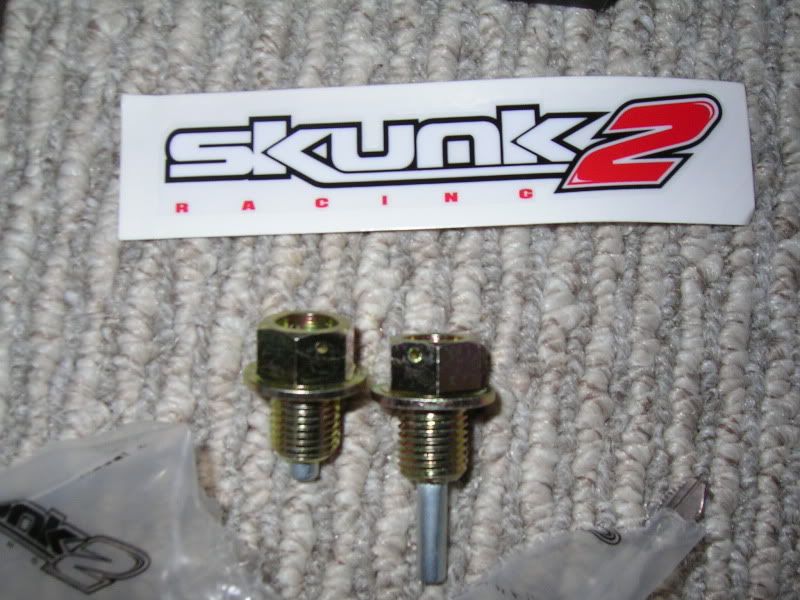
Skunk2 Magnetic Oil Drain Plug
Skunk2 Billet Oil Cap
Skunk2 Radiator Cap (might come with rad)
Skunk2 Cam Seal
Skunk2 Brake Reservoir Cover
Brian Crower Stroker Kit BC0027LW with 9310 Pin upgrade
Brian Crower Stainless Steel Valves BC3022/BC3023
Brian Crower Stage 3 NA Race Cams BC0023
Brian Crower Valve Spring/Titanium Retainer Kit BC0020
Moroso Baffle Oil Pan
Spoon Oil Pump
Spoon Plug Wires
Spoon Racing Plugs
Spoon Racing Thermostat
Spoon Heat Barrier Tape
Mishimoto Slim Fan
Mishimoto Aluminum Radiator
Samco Blue Radiator Hoses
Carbing Reservoir Tank
Carbing Oil Catch Tank
Hondata Intake Manifold Gasket
Innovative Motor Mounts
Engine Torque Damper?
ARP Harmonic Balancer Bolt Kit
ARP Head Studs
ARP Main Studs
Cometic MLS Head Gaskets
Moroso High capacity Oil Pan Pickup
Mugen High Performance Oil Filter
Rich Porter High Performance Distributor
Kinsler ITB's
Fuel System:
------------
Walbro Fuel Pump
AEM High Volume Adjustable FPR
BDL Industries Aluminum Fuel Rail (or S2 composite if can fit)
RC Injectors
AEM Water/Methanol Injection Kit
Fuel Cell?
Electronics:
------------------
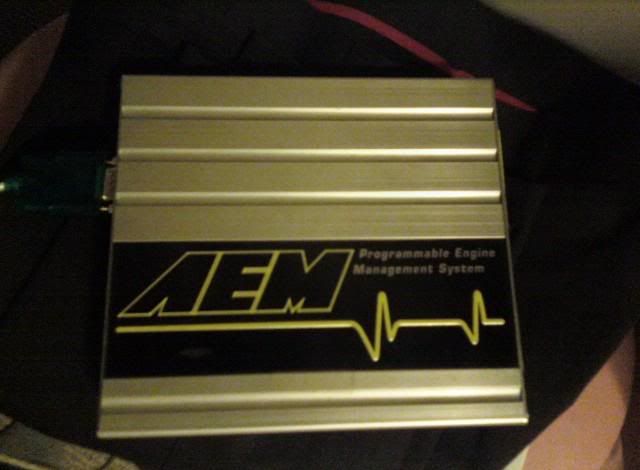
AEM EMS with Wide Band
King Motorsports SBS Racing Battery
Fluids:
-------
Motul RBF 600 Racing Brake Fluid
Mugen MT105 Engine Treatment Oil?
Honda Manual Transmission Fluid
Exhaust:
--------
Skunk2 Mega Power RR Exhaust
Skunk2 Racing Test Pipe
Skunk2 Mega Power Header
Transmission:
-------------
Skunk2 Short Shifter
Spoon Clutch & Flywheel Kit
Spoon or M Factory? Final Drive Gear Set
Spoon Close Gear Set
Mugen LSD
ARP Clutch Cover/Pressure Plate Bolts
Omni Power Titanium Axle Shafts
Running Gear:
-------------
Skunk2 forged lug nuts
Skunk2 Extended wheel studs
Wilwood BBK all around
Techna Fit SS Brake Lines
Interior:
---------
Mugen or S2 Shift ****
Mugen S1R Bucket Seat
Mugen Harnesses
Mugen Pedals
Personal "Teddy Bear" Steering Wheel
Tools:
------
Honda Battery Charger/Tender
Hondabond HT
Hondalock Thread Lock Fluid
Honda Super High Temp Urea Grease
Any suggestions are greatly appreciated!
Thanks for the comments
Here is a rough *NOT 100%* build list that I want to do.
Exterior:
---------
Carbon Fiber/Root Beer Metallic Exterior and Interior
Custom JDM One-Piece Headlights
Flex-a-lite Plexiglas Windows
ViS Racing CF EVO hood
ViS Racing CF Hatch
Hiro Wing
Mugen Front Bumper
RaceOnUSA CF Type-60 Mirrors
Mugen Hood Pins
Mugen Tailgate Fastener
Mugen License Plate Bolts
Wings West Mugen Replica Side Skirts - for now
Wings West Mugen Replica Rear Bumper - for now
CF OEM Fenders
CF Fender Flares - iffy on that one
Wheels:
-------
16" 3-piece Volk AV rims
16" Hokuto Thunder rs05
Suspension:
-----------
Skunk2 Pro-C Coilovers 541-05-5717
Skunk2 Rear Lower Arm Bar 518-05-0790
Skunk2 Pro Series Front Camber Kit 516-05-5660
Skunk2 Rear Camber Kit 516-05-0500
Skunk2 Rear Lower Control Arm 542-05-0105
Skunk2 Front Strut Bar 542-05-0840
Skunk2 Rear Strut Bar 542-05-0850
Mugen Rear Bushing Set
Miracle Trunk Bars
Engine: Hopefully built this year, but regardless wont be swapped in.
-------
Skunk2 Pro Series Cam Gears 304-05-5202
Skunk2 Magnetic Oil Drain Plug
Skunk2 Billet Oil Cap
Skunk2 Radiator Cap (might come with rad)
Skunk2 Cam Seal
Skunk2 Brake Reservoir Cover
Brian Crower Stroker Kit BC0027LW with 9310 Pin upgrade
Brian Crower Stainless Steel Valves BC3022/BC3023
Brian Crower Stage 3 NA Race Cams BC0023
Brian Crower Valve Spring/Titanium Retainer Kit BC0020
Moroso Baffle Oil Pan
Spoon Oil Pump
Spoon Plug Wires
Spoon Racing Plugs
Spoon Racing Thermostat
Spoon Heat Barrier Tape
Mishimoto Slim Fan
Mishimoto Aluminum Radiator
Samco Blue Radiator Hoses
Carbing Reservoir Tank
Carbing Oil Catch Tank
Hondata Intake Manifold Gasket
Innovative Motor Mounts
Engine Torque Damper?
ARP Harmonic Balancer Bolt Kit
ARP Head Studs
ARP Main Studs
Cometic MLS Head Gaskets
Moroso High capacity Oil Pan Pickup
Mugen High Performance Oil Filter
Rich Porter High Performance Distributor
Kinsler ITB's
Fuel System:
------------
Walbro Fuel Pump
AEM High Volume Adjustable FPR
BDL Industries Aluminum Fuel Rail (or S2 composite if can fit)
RC Injectors
AEM Water/Methanol Injection Kit
Fuel Cell?
Electronics:
------------------
AEM EMS with Wide Band
King Motorsports SBS Racing Battery
Fluids:
-------
Motul RBF 600 Racing Brake Fluid
Mugen MT105 Engine Treatment Oil?
Honda Manual Transmission Fluid
Exhaust:
--------
Skunk2 Mega Power RR Exhaust
Skunk2 Racing Test Pipe
Skunk2 Mega Power Header
Transmission:
-------------
Skunk2 Short Shifter
Spoon Clutch & Flywheel Kit
Spoon or M Factory? Final Drive Gear Set
Spoon Close Gear Set
Mugen LSD
ARP Clutch Cover/Pressure Plate Bolts
Omni Power Titanium Axle Shafts
Running Gear:
-------------
Skunk2 forged lug nuts
Skunk2 Extended wheel studs
Wilwood BBK all around
Techna Fit SS Brake Lines
Interior:
---------
Mugen or S2 Shift ****
Mugen S1R Bucket Seat
Mugen Harnesses
Mugen Pedals
Personal "Teddy Bear" Steering Wheel
Tools:
------
Honda Battery Charger/Tender
Hondabond HT
Hondalock Thread Lock Fluid
Honda Super High Temp Urea Grease
Any suggestions are greatly appreciated!
Thanks for the comments
Thread Starter
Senior Member
Joined: Jun 2002
Posts: 565
Likes: 1
From: London,ON
In a couple weeks, the shell will be sent out to Ultimate Sandblasting and Coating in London, ON. It will be getting completely restored, solely because I cant sandblast a car in my garage and coat it in POR-15.
Then the car will be sent to Benchmark (Paint shop to get some work done) in London, ON. Getting the interior and engine bay sprayed in Root Beer Metallic.
After that, the car comes home, and starts getting reassembled
Im praying its done by Spring 2010 so that I can get a full track season in.
I will update often
-------------------------------------------
January 03, 2010
This week I hopefully pull the motor and send the car to Ultimate Sandblasting and Coating for the chassis resto *fingers crossed*
-----------------------------------------------
January 09, 2010
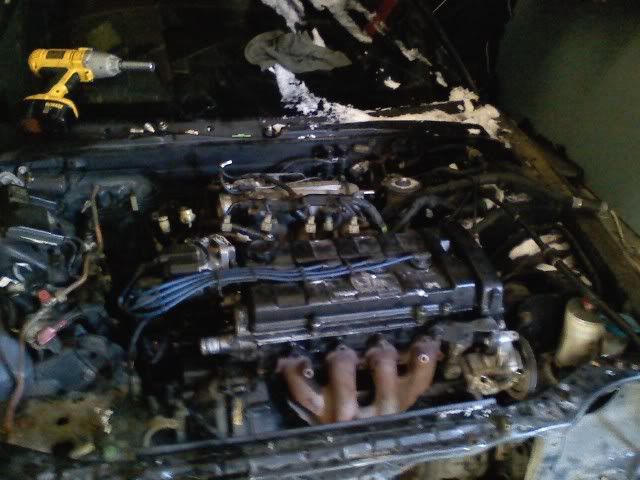
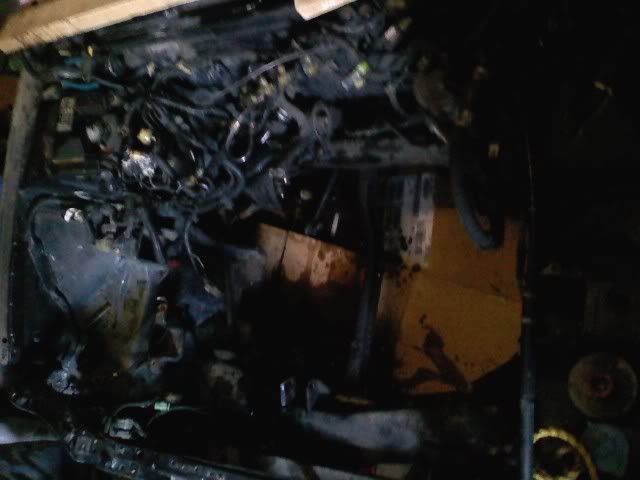
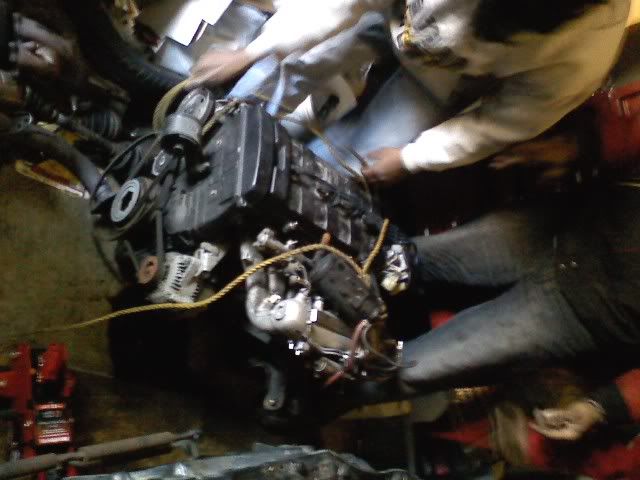
ENGINE IS OUT! Will post pictures tomorrow, and bump the thread
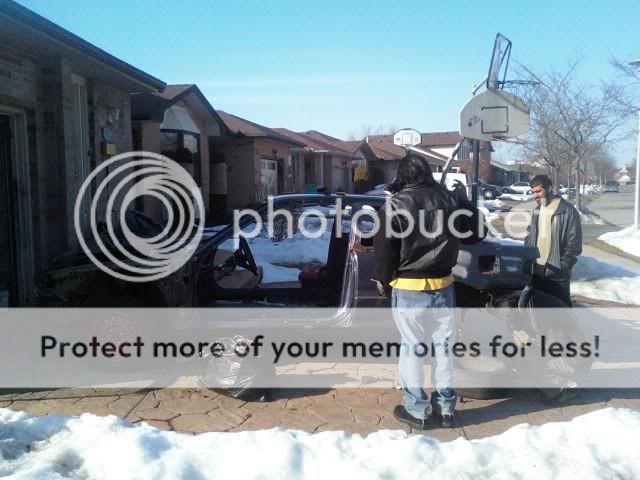
Myself, my 4 brothers, and my cousin pulled this engine out... without an engine hoist (it was buried in snow, and the jack wasnt working anyways), lol.. you will see how
Pictures!
Engine in
Rad removed

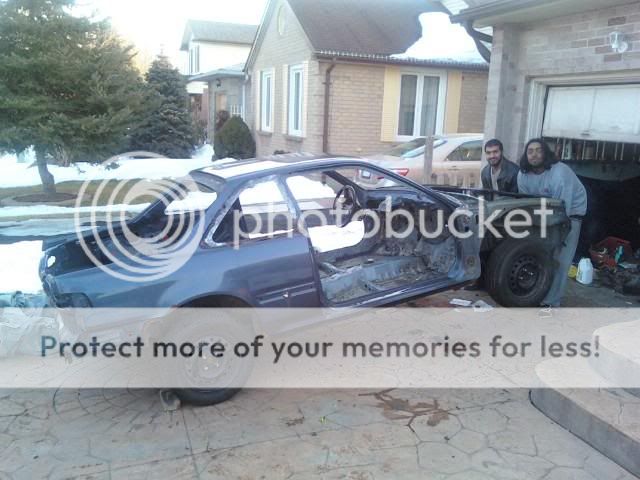
After everything was disconnected and the engine was ready to come out, this is how we decided to take it out, lol.

EMPTY!
Then the car will be sent to Benchmark (Paint shop to get some work done) in London, ON. Getting the interior and engine bay sprayed in Root Beer Metallic
.After that, the car comes home, and starts getting reassembled
Im praying its done by Spring 2010 so that I can get a full track season in.
I will update often
-------------------------------------------
January 03, 2010
This week I hopefully pull the motor and send the car to Ultimate Sandblasting and Coating for the chassis resto
*fingers crossed*-----------------------------------------------
January 09, 2010
ENGINE IS OUT! Will post pictures tomorrow, and bump the thread
Myself, my 4 brothers, and my cousin pulled this engine out... without an engine hoist (it was buried in snow, and the jack wasnt working anyways), lol.. you will see how
Pictures!
Engine in
Rad removed
After everything was disconnected and the engine was ready to come out, this is how we decided to take it out, lol.
EMPTY!
Thread Starter
Senior Member
Joined: Jun 2002
Posts: 565
Likes: 1
From: London,ON
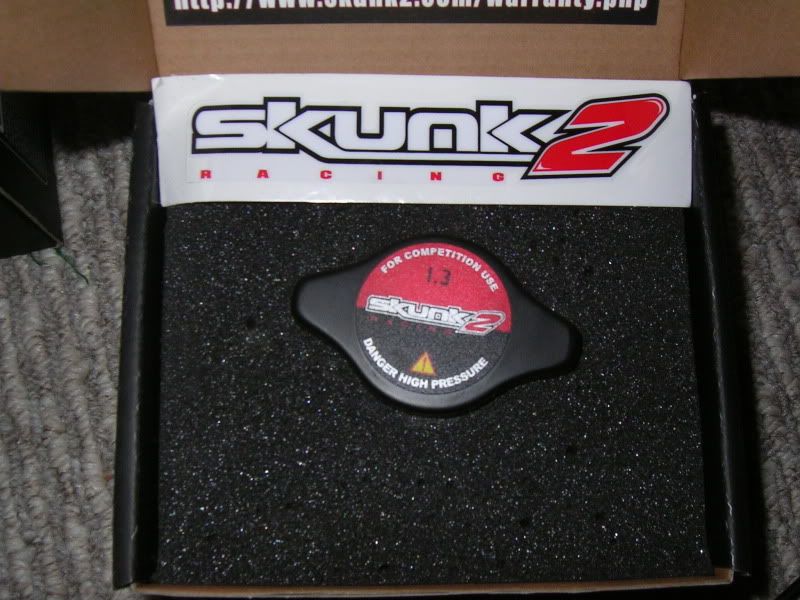
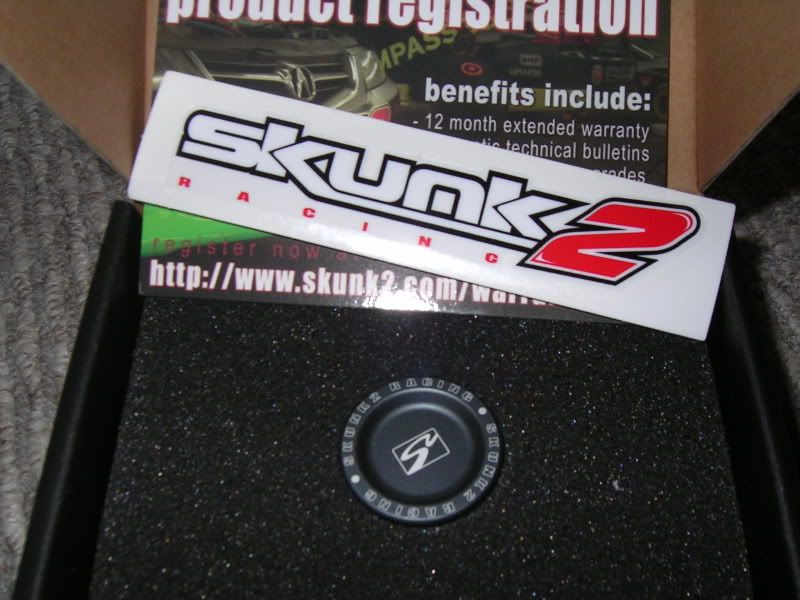
EVERYTHING SKUNK2 ARRIVED! HAPPIEST MAN IN THE WORLD! WOOT WOOT
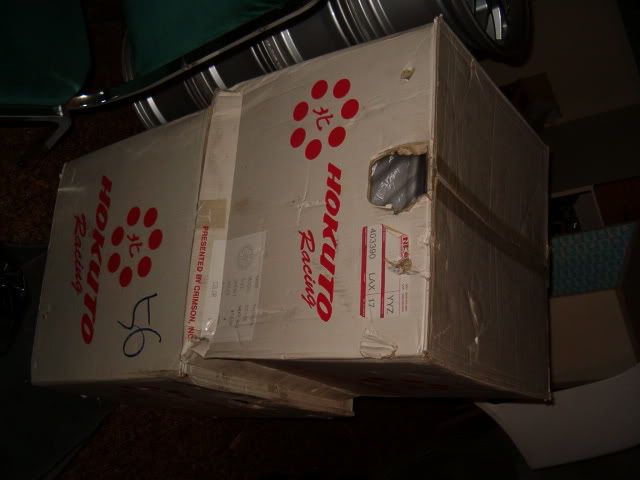
What it came in
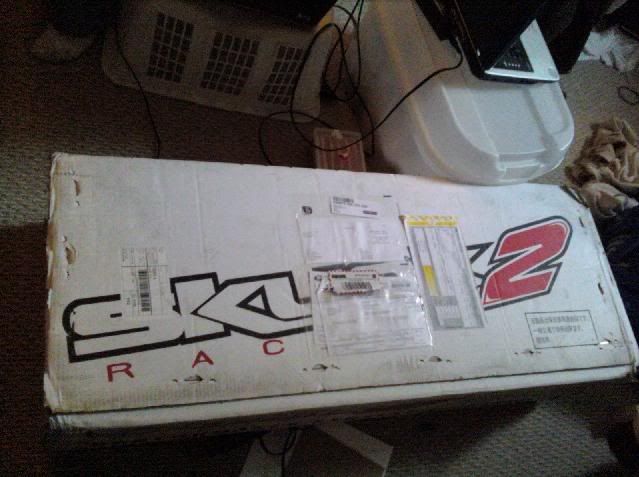
The inside of the box
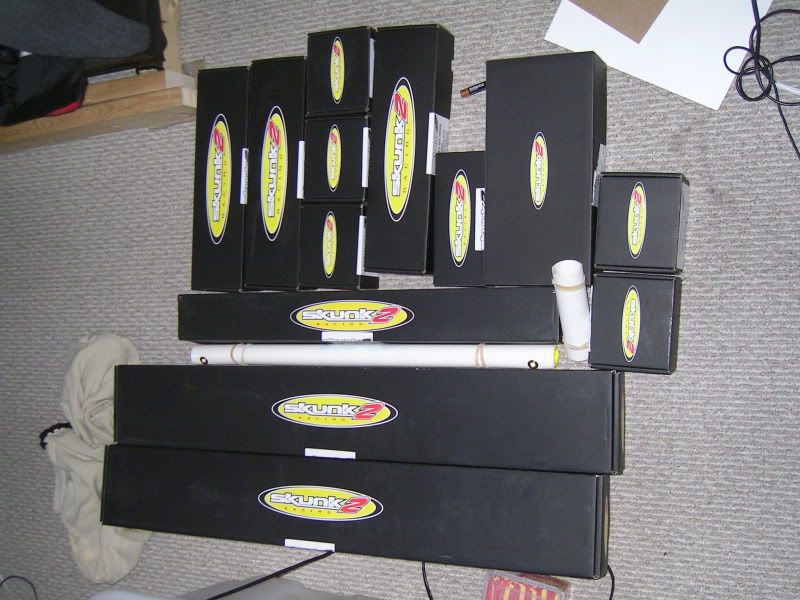
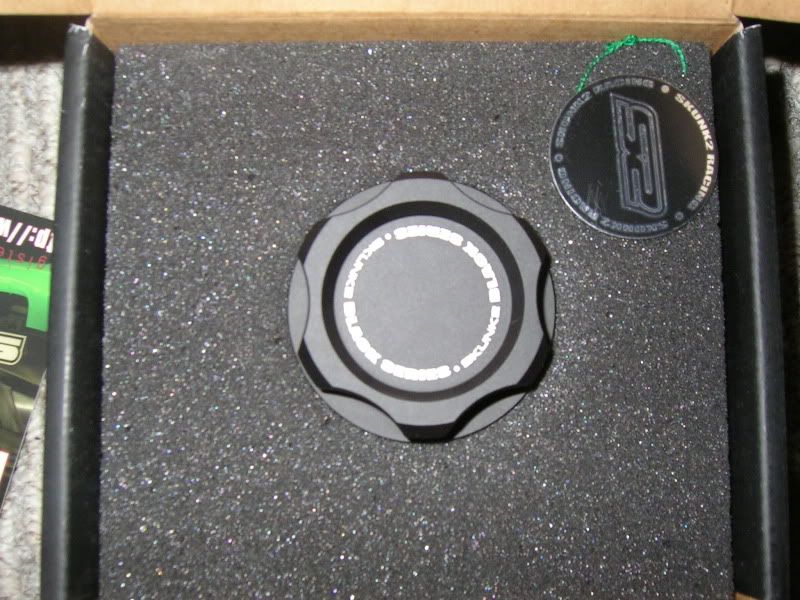
Skunk2 Rad Cap
Skunk2 Black Series Oil Cap
Skunk2 Rear Camber Kit
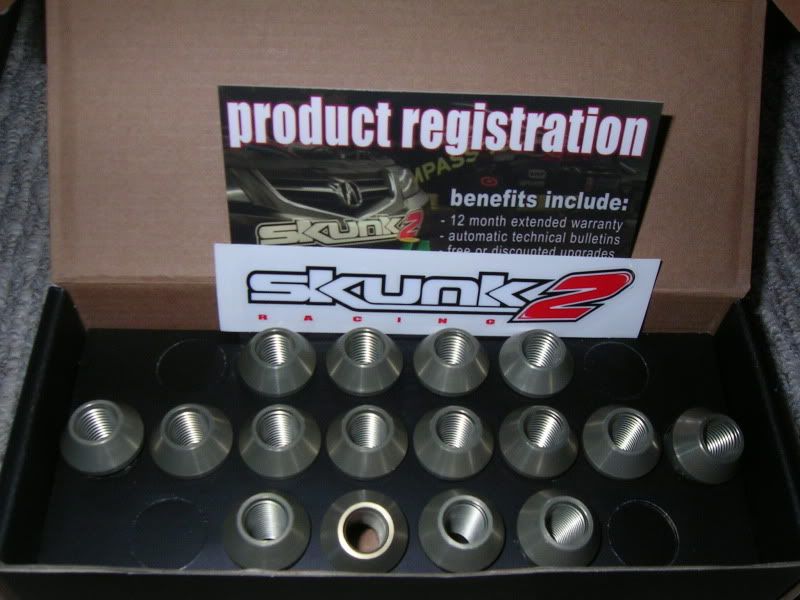
Skunk2 Forged Lug Nuts
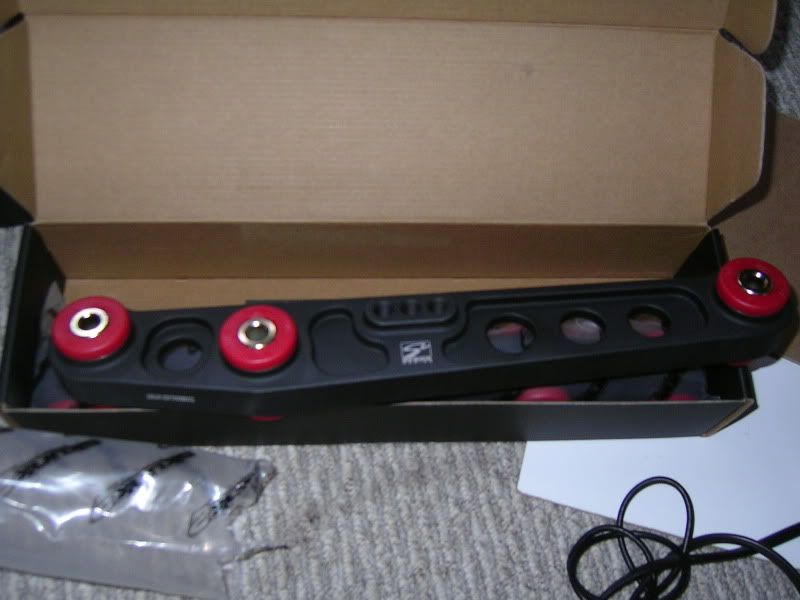
Skunk2 BLACK SERIES Lower Control Arms
Skunk2 Magnetic Drain plug set
Skunk2 Cam seal
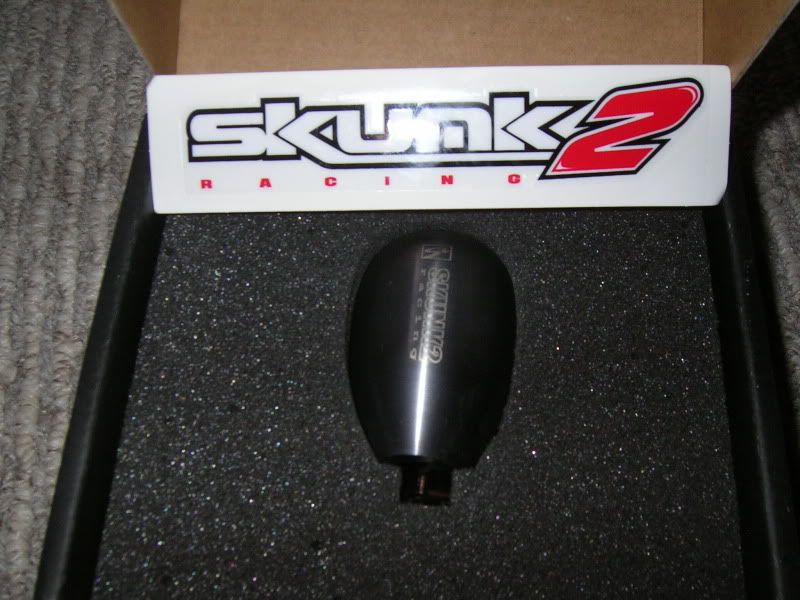
Skunk2 Weighted Shift ****
What it came in
The inside of the box
Skunk2 Rad Cap
Skunk2 Black Series Oil Cap
Skunk2 Rear Camber Kit
Skunk2 Forged Lug Nuts
Skunk2 BLACK SERIES Lower Control Arms
Skunk2 Magnetic Drain plug set
Skunk2 Cam seal
Skunk2 Weighted Shift ****
Thread Starter
Senior Member
Joined: Jun 2002
Posts: 565
Likes: 1
From: London,ON
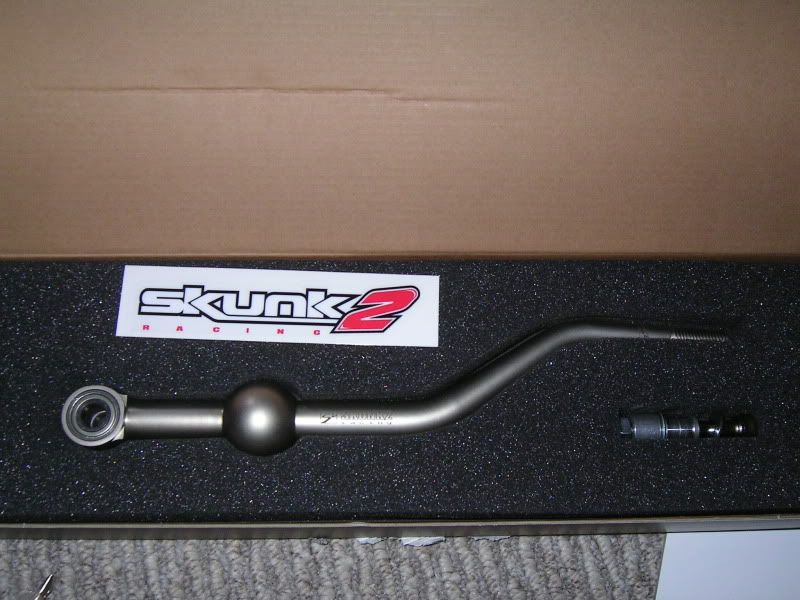
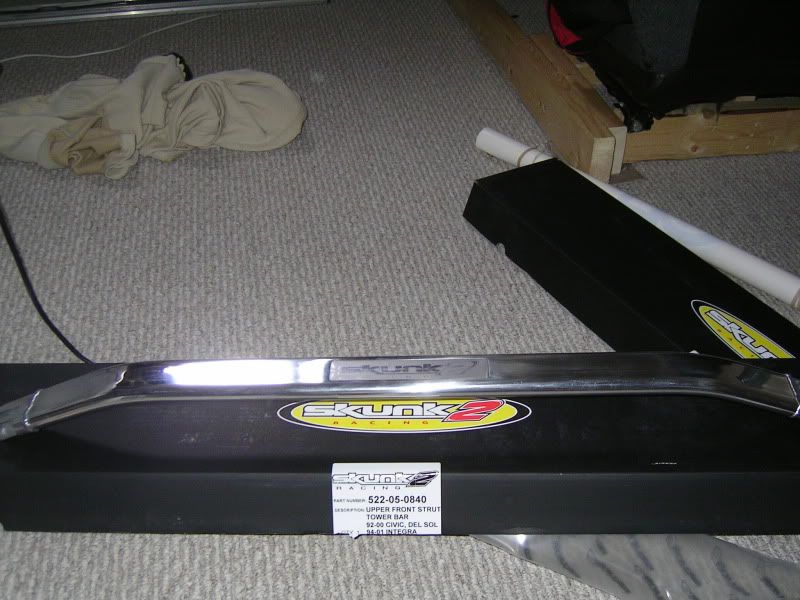
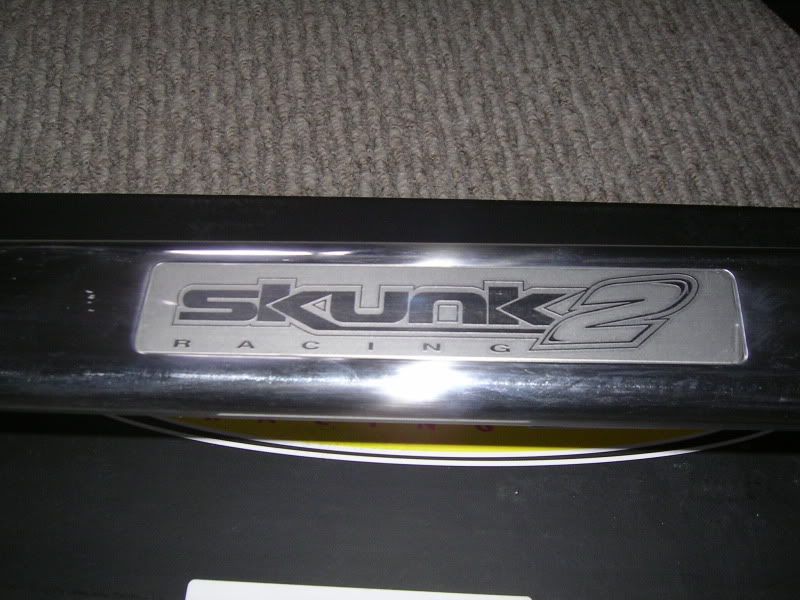
Skunk2 Dual Bend Short Shifter
Skunk2 Composite Fuel Rail
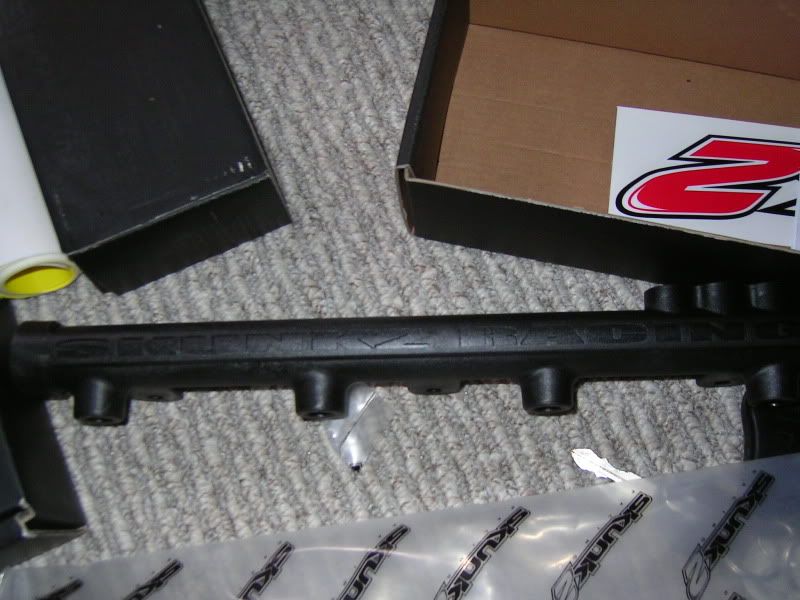
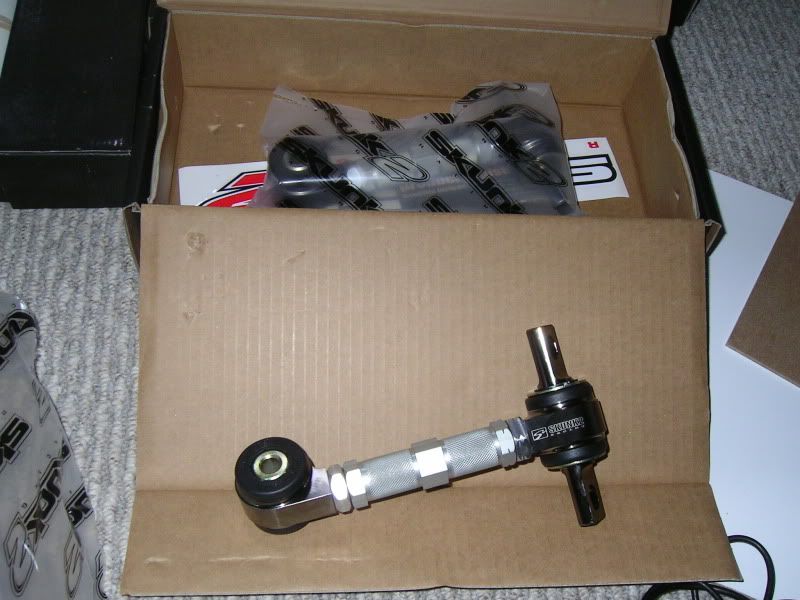
Skunk2 Rear Lower Arm Bar
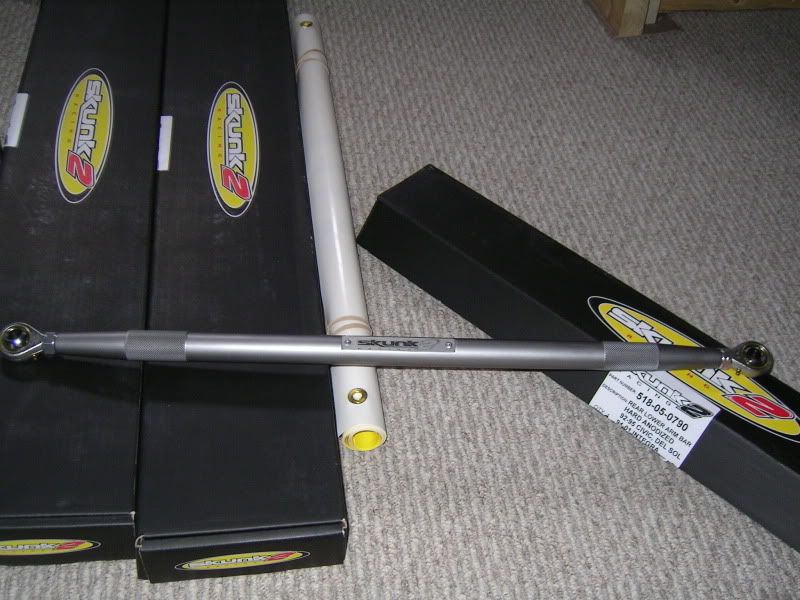
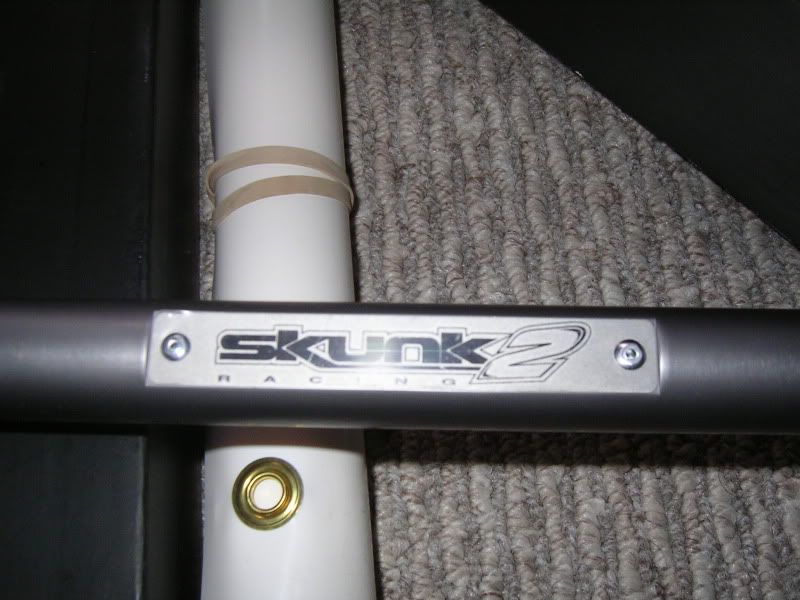
Skunk2 Rear Upper Strut Bar
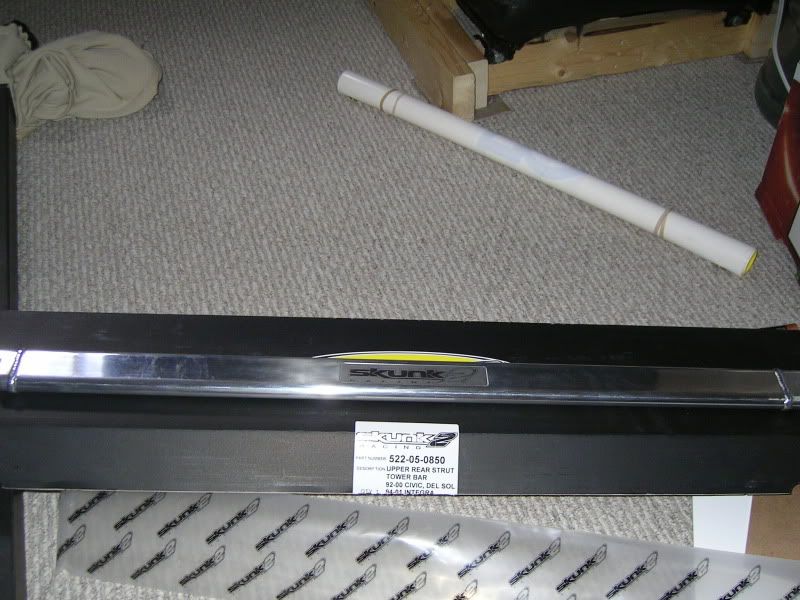
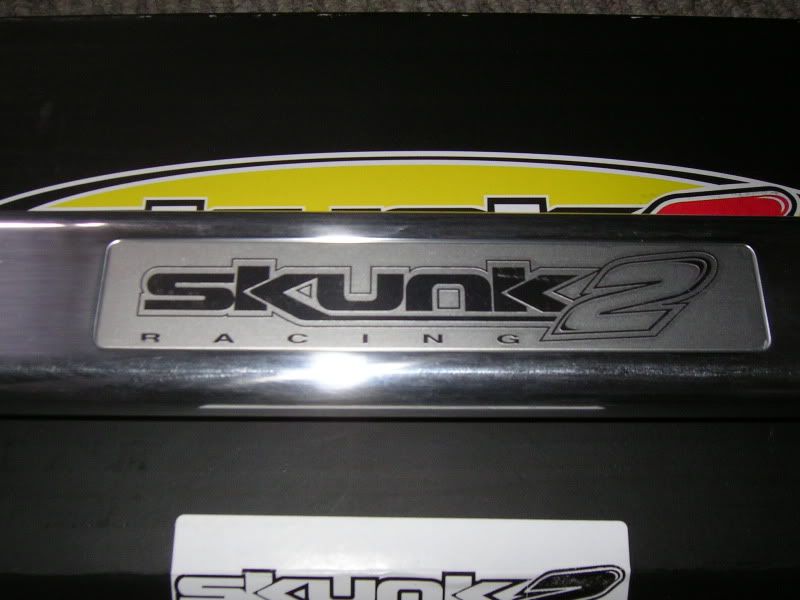
Skunk2 Front Upper Strut Bar
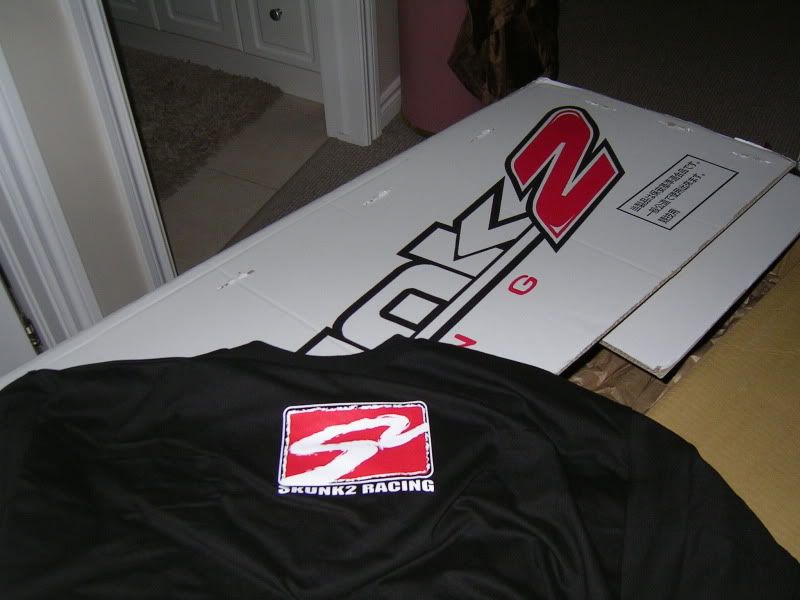
My Skunk2 Tshirt!
I would really like to thank Brian Nichols and Tony Shagday for all their help with everything. Great people to deal with! I really cant express how helpful and understanding they are
Skunk2 Composite Fuel Rail
Skunk2 Rear Lower Arm Bar
Skunk2 Rear Upper Strut Bar
Skunk2 Front Upper Strut Bar
My Skunk2 Tshirt!
I would really like to thank Brian Nichols and Tony Shagday for all their help with everything. Great people to deal with! I really cant express how helpful and understanding they are
Trending Topics
Thread Starter
Senior Member
Joined: Jun 2002
Posts: 565
Likes: 1
From: London,ON
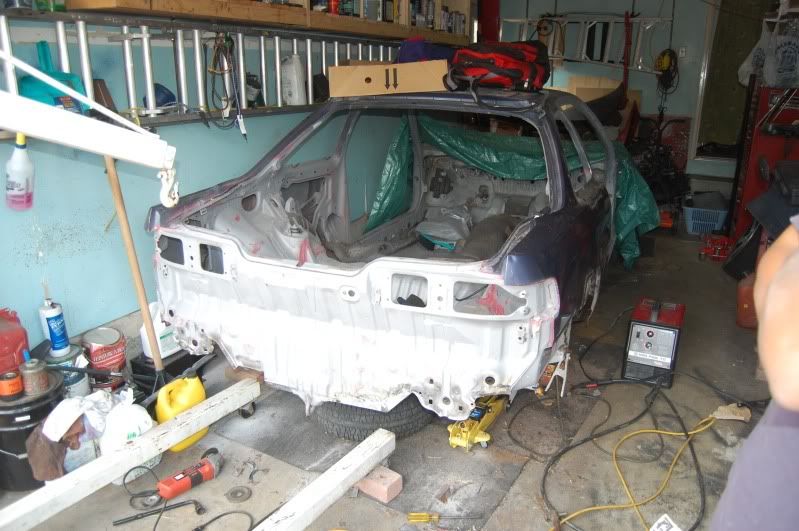
Well, we got a lot of work done. I have been out for like 3 weeks with a lung infection, but I am back now!
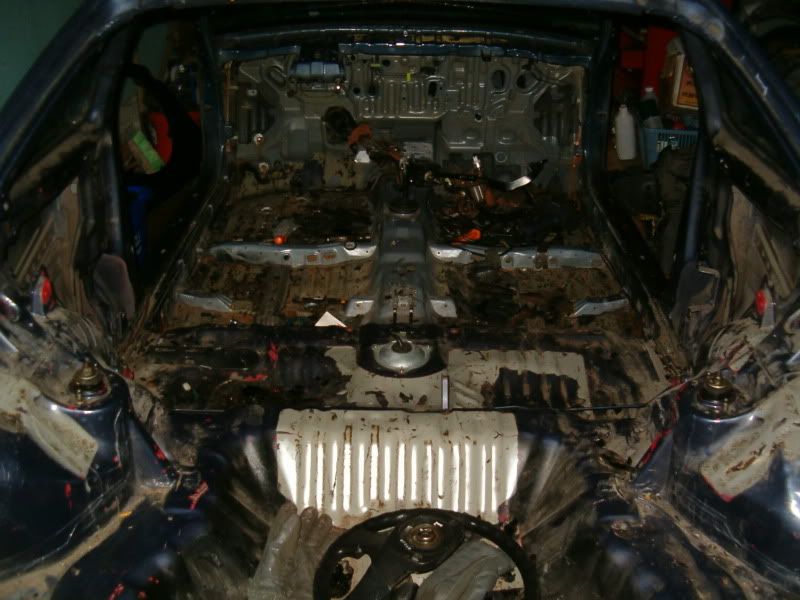
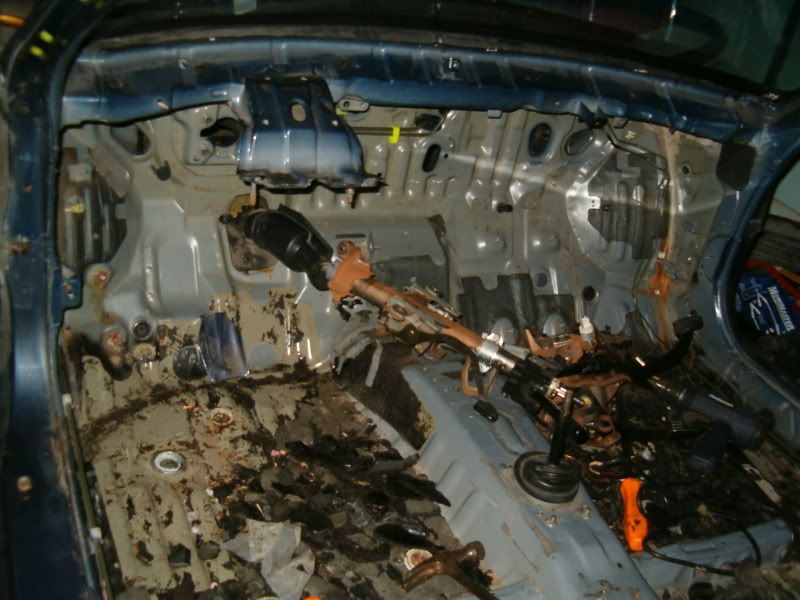
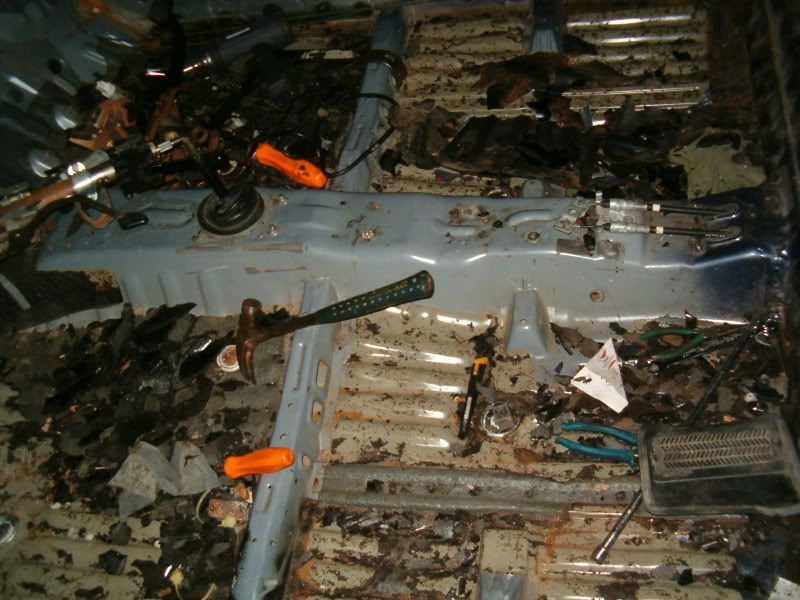
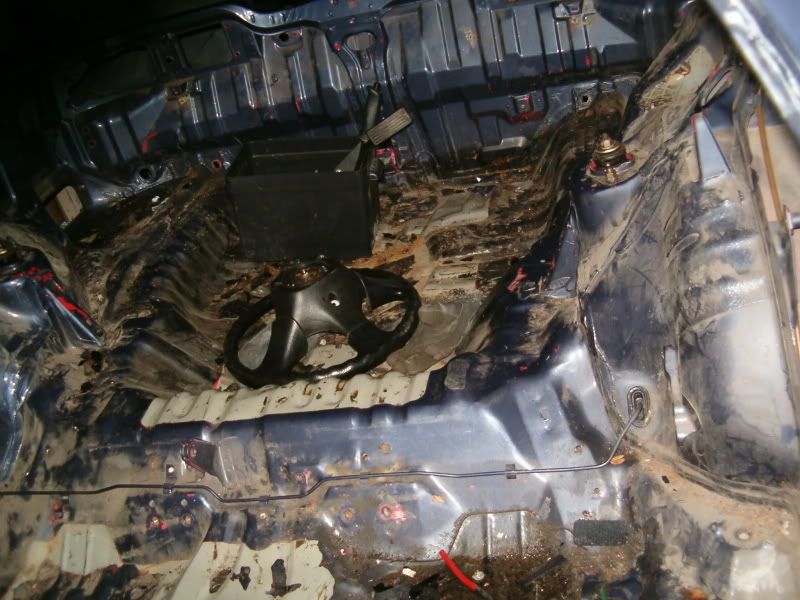
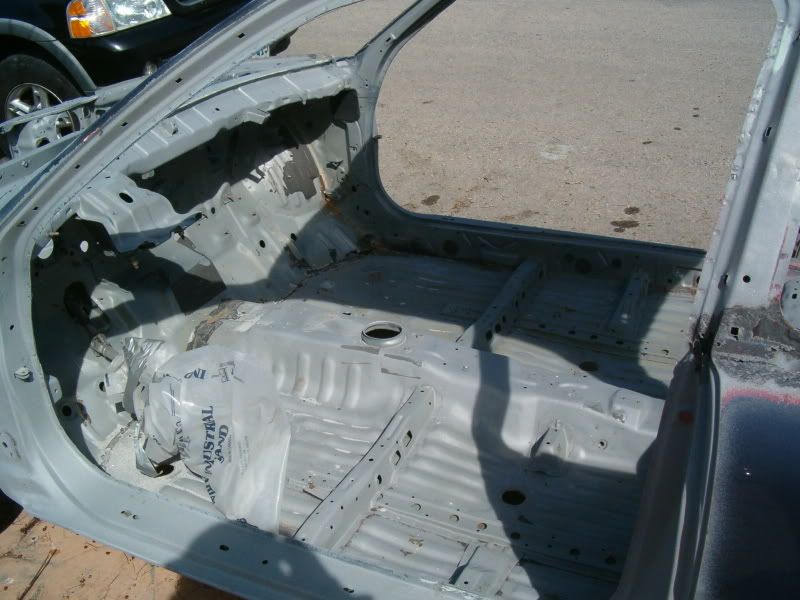
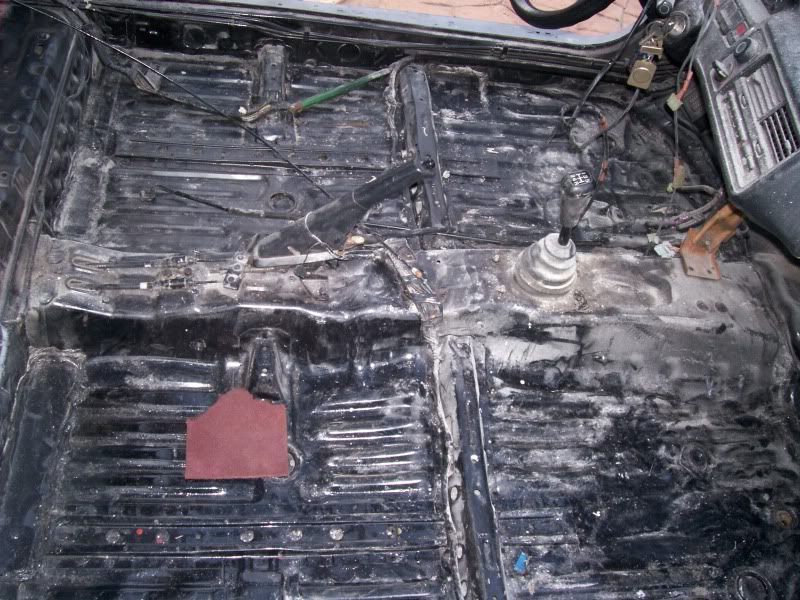
Here are some pictures of the gutting.
Almost all the sound deadening material is gone, all the wiring harnesses are out. Just need to pull the brake lines and gas tank, then its off to get sandblasted. Hopefully tomorrow we get all that out, and then Monday its in the shop.
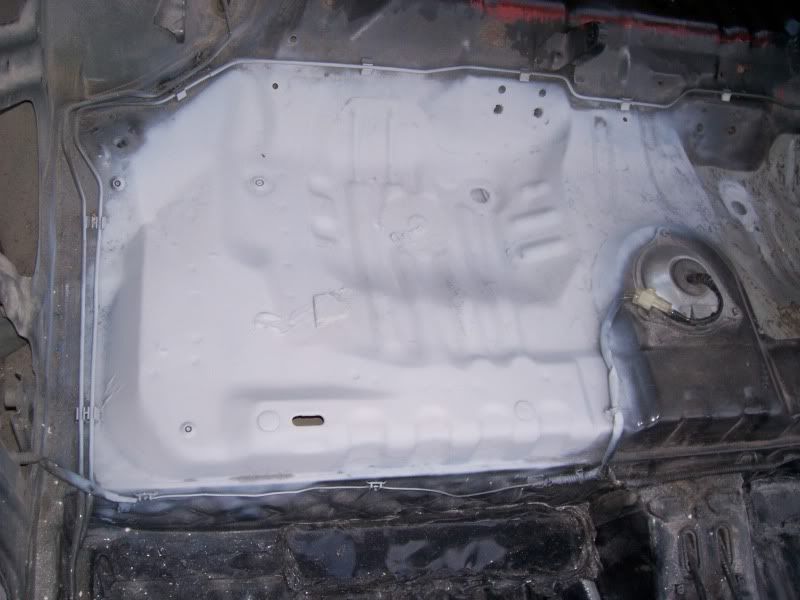
I was super surprised... NO RUST UNDER THE SOUND DEADENING MATERIAL!
On to the pictures!

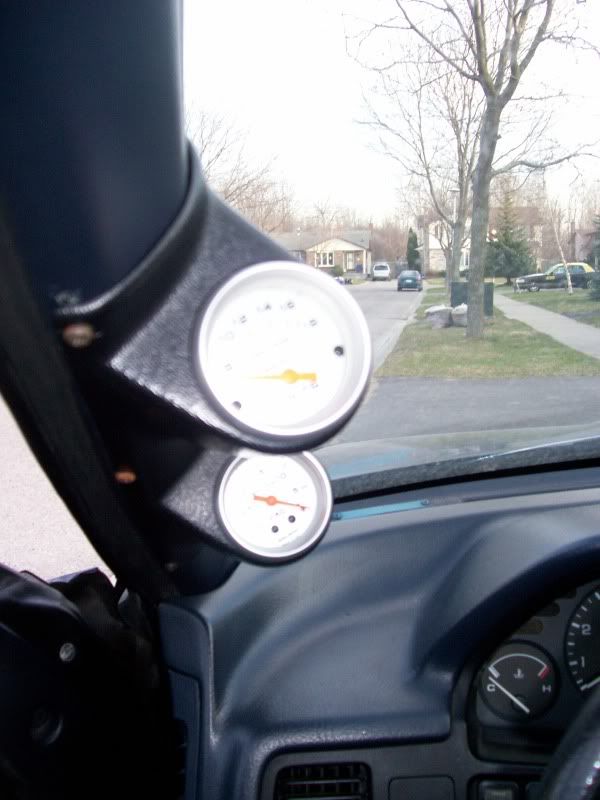
Only thing going back in there, SPA digital cluster and bucket seats and a steering wheel
and in the garage at the end of the night!
Here are some pictures of the gutting.
Almost all the sound deadening material is gone, all the wiring harnesses are out. Just need to pull the brake lines and gas tank, then its off to get sandblasted. Hopefully tomorrow we get all that out, and then Monday its in the shop.
I was super surprised... NO RUST UNDER THE SOUND DEADENING MATERIAL!
On to the pictures!
Only thing going back in there, SPA digital cluster and bucket seats and a steering wheel
and in the garage at the end of the night!
Thread Starter
Senior Member
Joined: Jun 2002
Posts: 565
Likes: 1
From: London,ON
Updates:
Also picked up a JDM rebar... weighs like 20 lbs less than the USDM.
[QUOTE=Nawaaz;125725]March 7th update!
Well.. the car is completely stripped! Time to send it to the shop TOMORROW!
Crappy camera phone pics... i will get better ones tmrw
SOOO CLEANNN Super pleased with this shell, lol

And the boys
Myself and My cousin
My two brothers
Also picked up a JDM rebar... weighs like 20 lbs less than the USDM.
[QUOTE=Nawaaz;125725]March 7th update!
Well.. the car is completely stripped! Time to send it to the shop TOMORROW!
Crappy camera phone pics... i will get better ones tmrw
SOOO CLEANNN
Super pleased with this shell, lolAnd the boys
Myself and My cousin
My two brothers
Thread Starter
Senior Member
Joined: Jun 2002
Posts: 565
Likes: 1
From: London,ON
Oh... and ordered one of these in blue
.JPG)
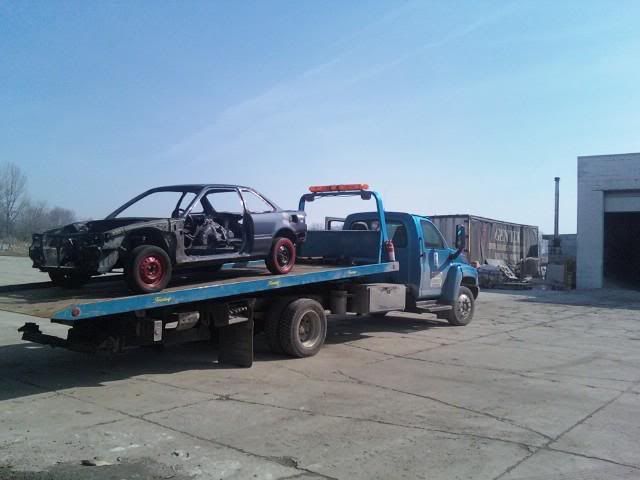
Well... shes gone... and I will let you guys know about my experience with Ultimate. Didn't get a chance to meet Sid, but the other guys there seemed pretty cool.
Getting on the truck
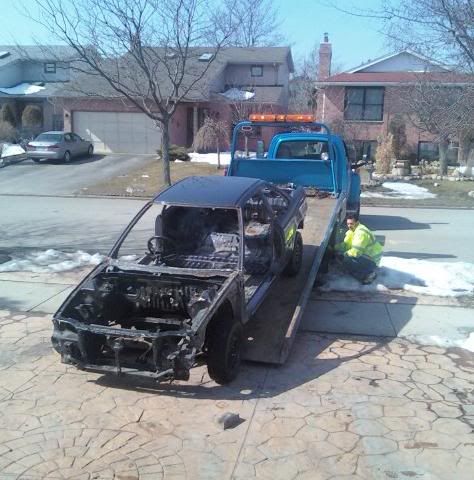
Completely on the truck, ready to head to the shop
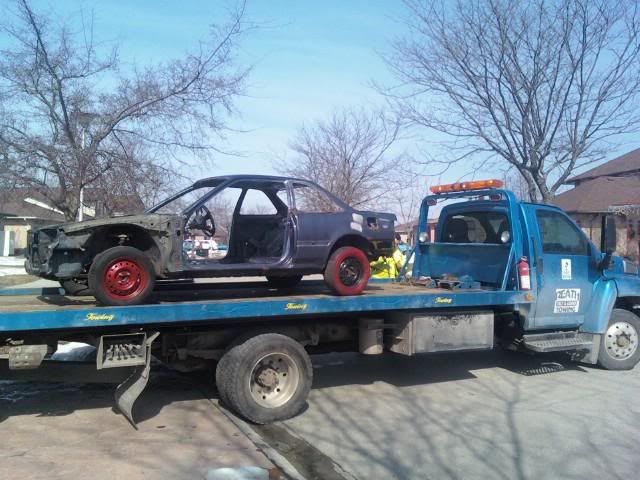
At Ultimate Sandblasting and Coating (Hows that ride height for ya )
Oh, I used Reath's Tilt and Load towing service... great guy to deal with! I will definitely be using him again in the future
Well... shes gone... and I will let you guys know about my experience with Ultimate. Didn't get a chance to meet Sid, but the other guys there seemed pretty cool.
Getting on the truck
Completely on the truck, ready to head to the shop
At Ultimate Sandblasting and Coating (Hows that ride height for ya
)Oh, I used Reath's Tilt and Load towing service... great guy to deal with! I will definitely be using him again in the future
Thread Starter
Senior Member
Joined: Jun 2002
Posts: 565
Likes: 1
From: London,ON
Here's a concept of what it may look somewhat like. We're still playing with the idea of colour. I Love it! What do you guys think?

Going with the factory b18a... and doing a complete NA build.. the list is on the first page.
I want to run the OEM motor... and see what I can squeeze out of a non-vtec motor. Also.. it gets tiring seeing people swap in a K or B18C5R just to go fast... I want to do something that stands out... I was telling a buddy, before you know it... my B18A Integra will be rare as hell, lol.
Here are the pictures after sandblasting

Brother forgot the welder in Toronto.. so patching starts on Monday
Going with the factory b18a... and doing a complete NA build.. the list is on the first page.
I want to run the OEM motor... and see what I can squeeze out of a non-vtec motor. Also.. it gets tiring seeing people swap in a K or B18C5R just to go fast... I want to do something that stands out... I was telling a buddy, before you know it... my B18A Integra will be rare as hell, lol.
Here are the pictures after sandblasting
Brother forgot the welder in Toronto.. so patching starts on Monday
Thread Starter
Senior Member
Joined: Jun 2002
Posts: 565
Likes: 1
From: London,ON
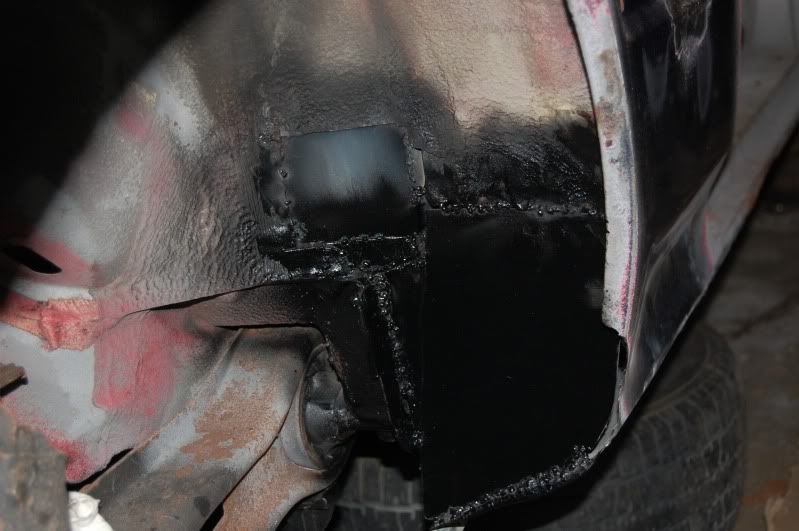
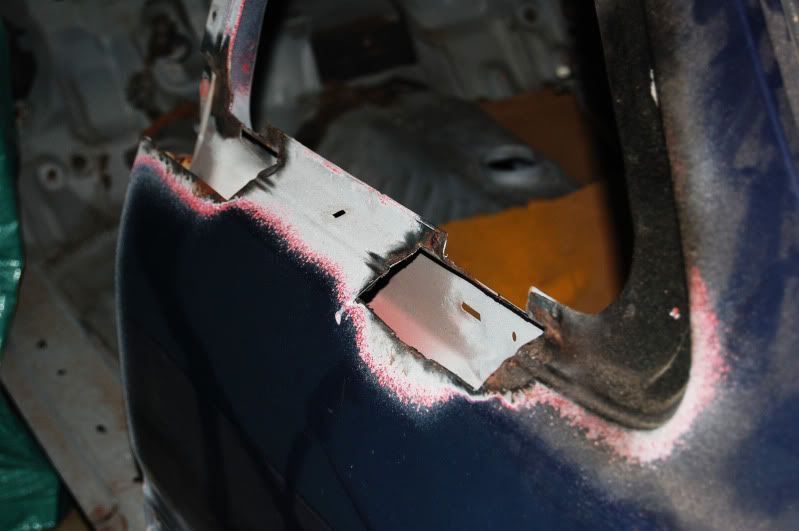
WELL!!! Started the patch work today... here is a little sneak peek... and now I am heading back to my dads place to work on the car
More updates... more patching
The Moulding patch
Grinding down a bit
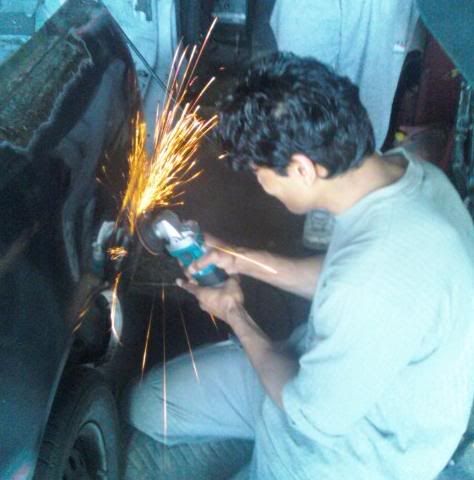
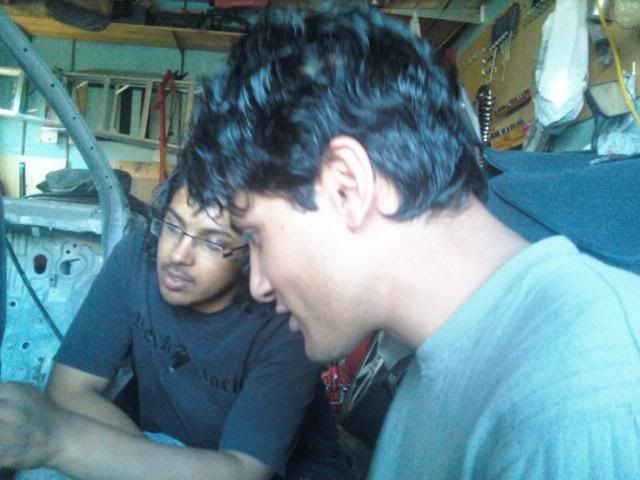
Inspecting the patch (me & one of my bro's)
More updates... more patching
The Moulding patch
Grinding down a bit
Inspecting the patch (me & one of my bro's)
Thread Starter
Senior Member
Joined: Jun 2002
Posts: 565
Likes: 1
From: London,ON
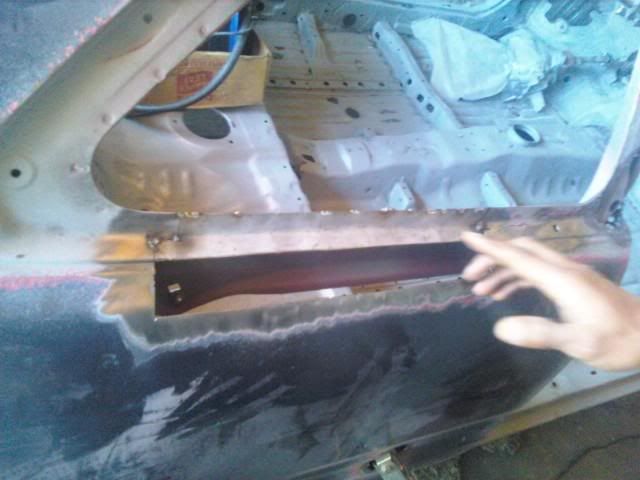
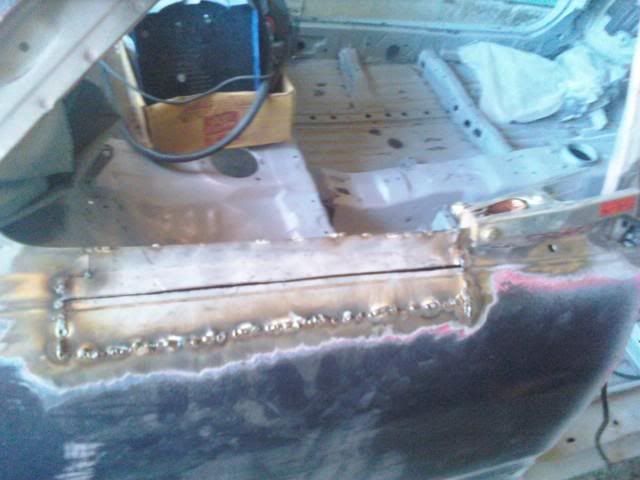
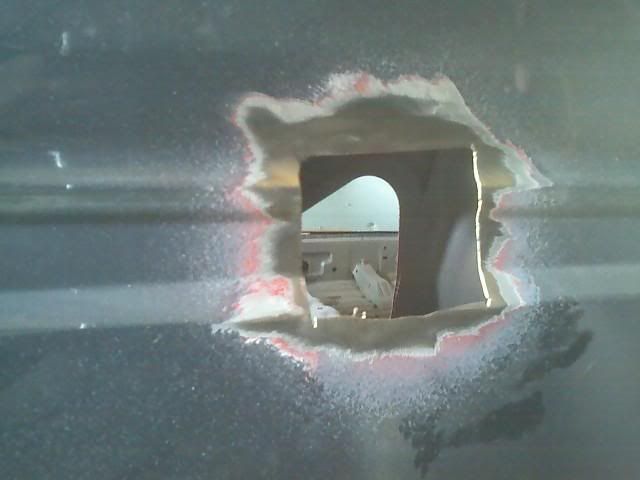
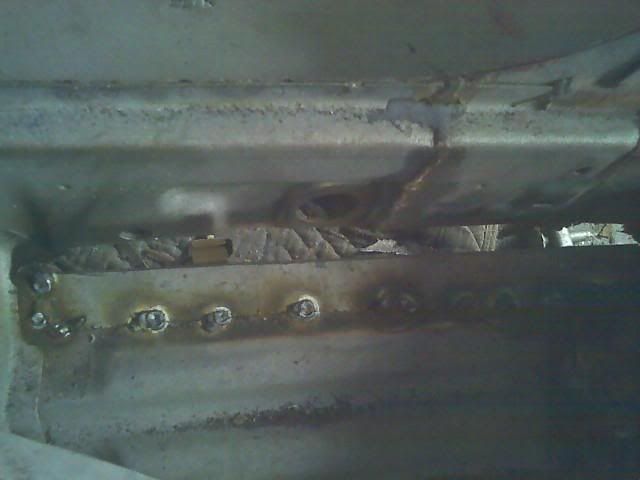
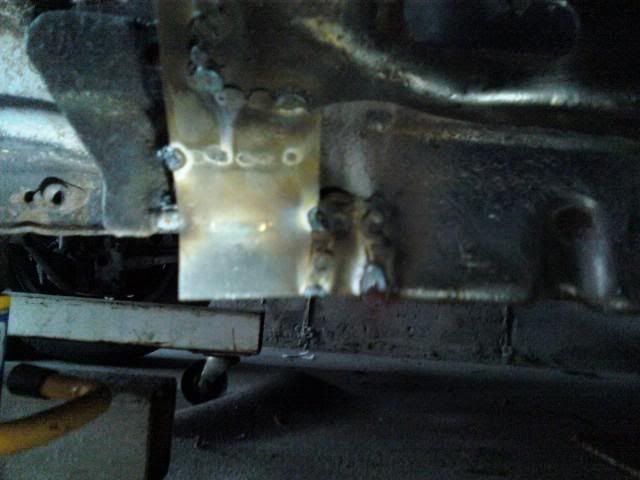
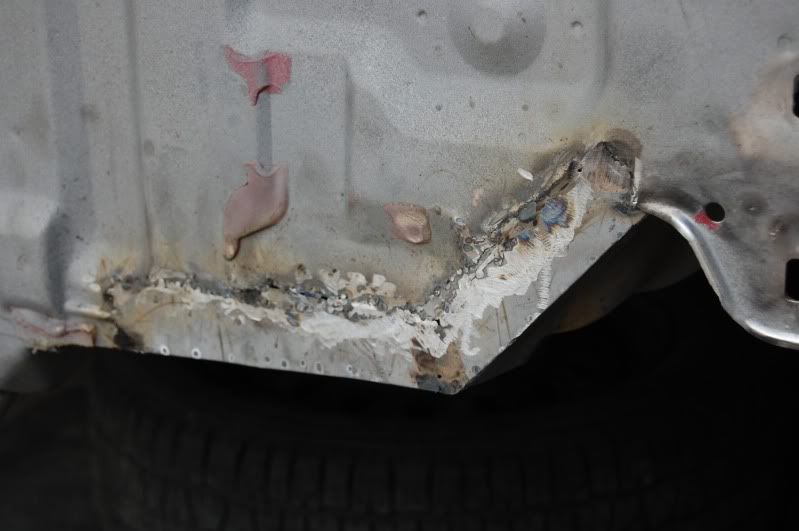
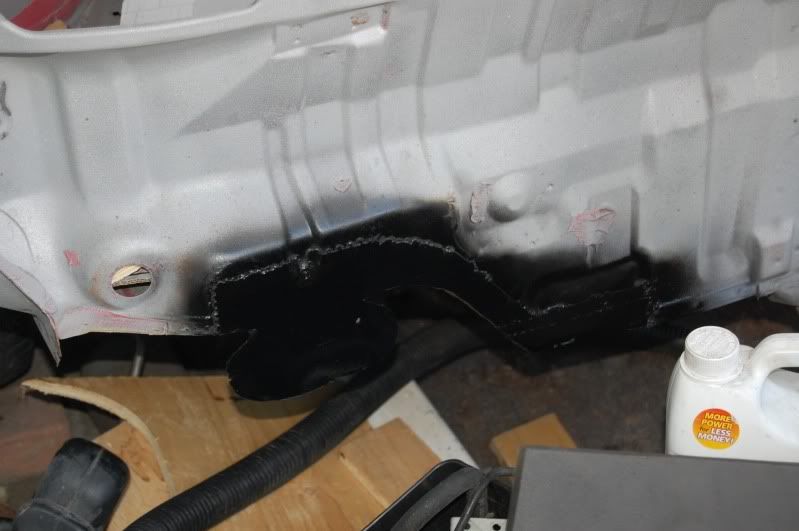
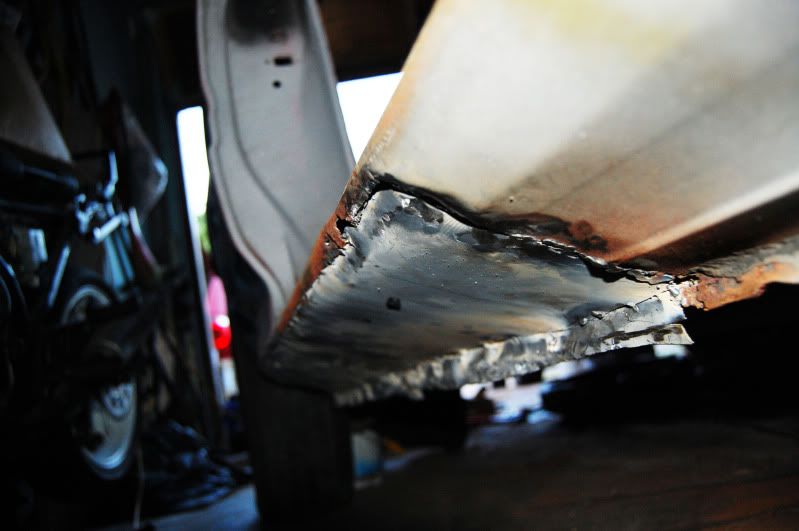
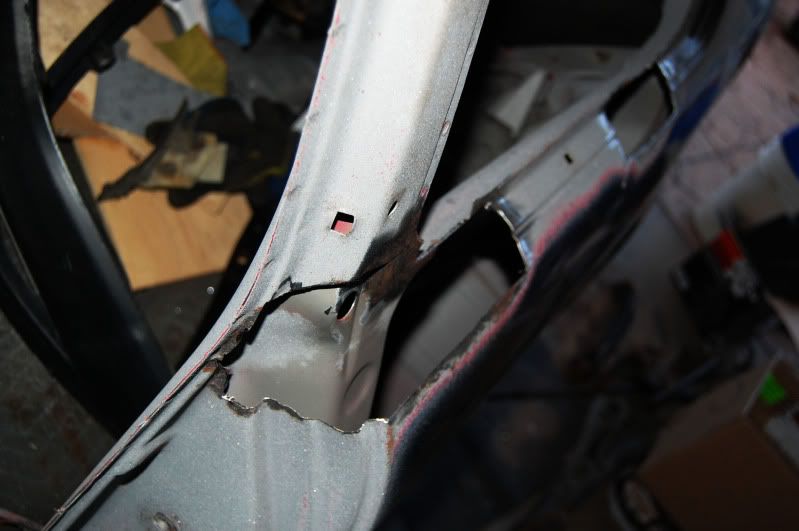
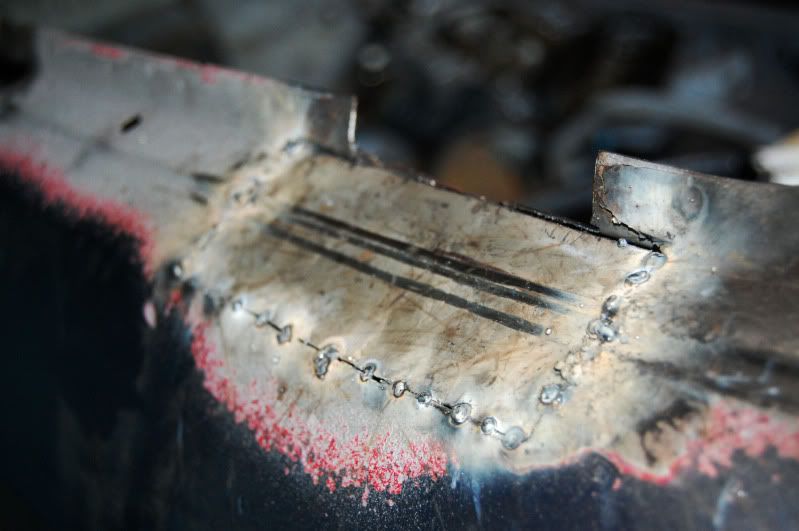
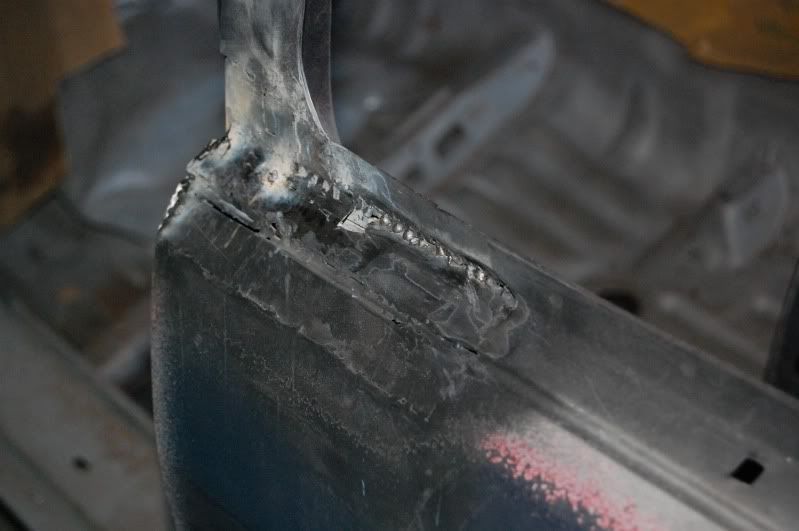
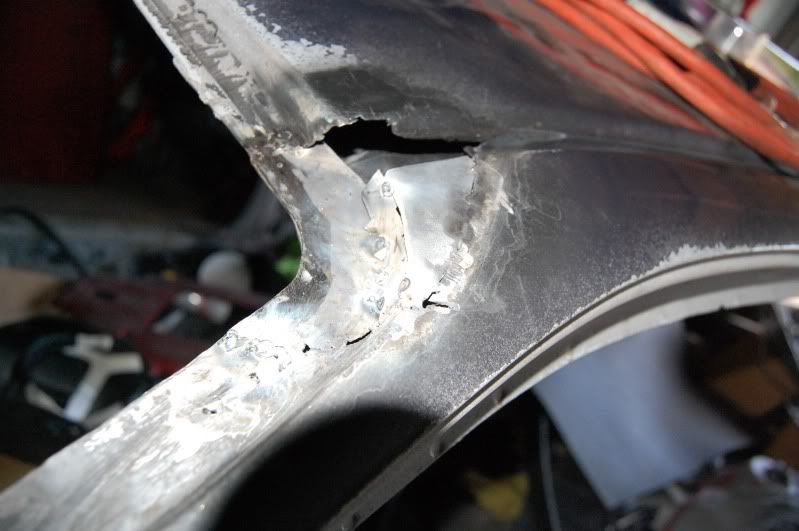
Pillar Patch is in
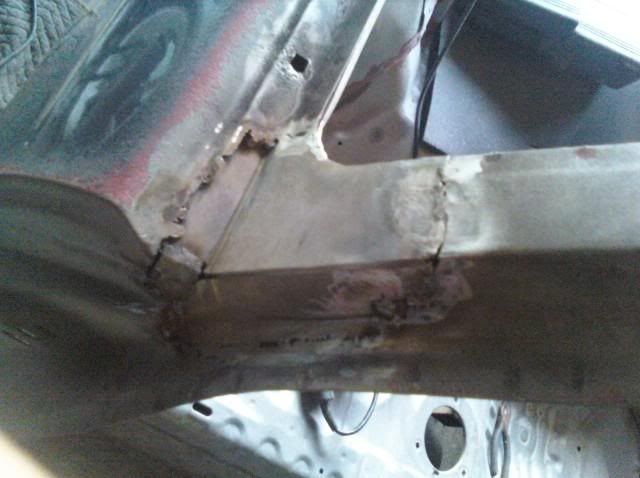
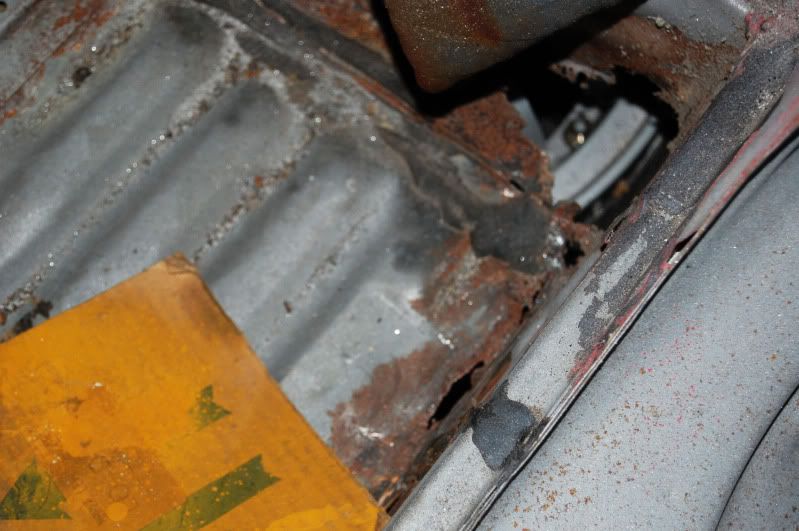
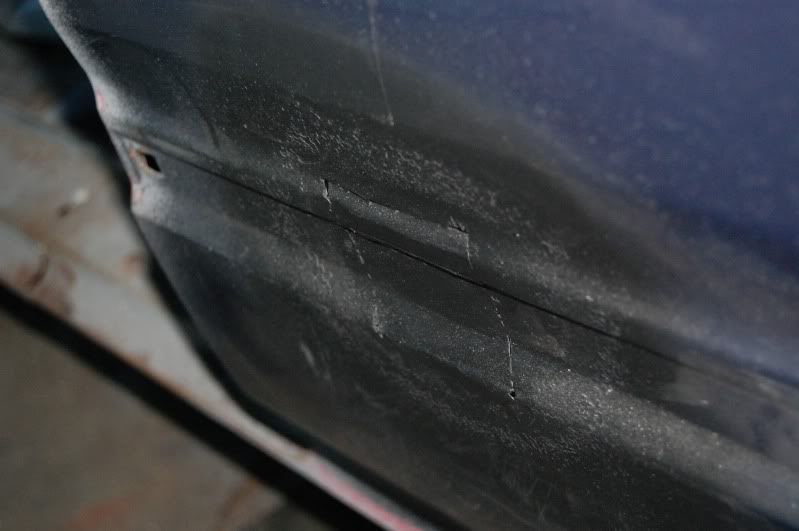
Right side Trunk Rust cut out...

Also got some grinding and wire wheeling done on the rocker panel... hopefully it goes on tmrw.
Knotted Wire Wheels OWN ALL!!!! I do not know if we will go back to normal wire wheels, lol.

Right side Trunk Rust cut out...
Also got some grinding and wire wheeling done on the rocker panel... hopefully it goes on tmrw.
Knotted Wire Wheels OWN ALL!!!! I do not know if we will go back to normal wire wheels, lol.
Thread Starter
Senior Member
Joined: Jun 2002
Posts: 565
Likes: 1
From: London,ON
Well, here we go... I haven't been working on the car lately because of some medical conditions, but my brothers have been doing what they can in the meanwhile. My brothers do pretty much all the patching anyways, I'm not too big on bodywork :P haha.
Just a couple more patches, and then Ultimate Sandblasting and Coating gets their hands back on it, and then RE-ASSEMBLY!!! Hopefully I'm feeling better by then to get to help throw the car back together... this really sucks
But on to the pictures.. just a few right now, my brothers should be coming home with more later tonight.

Thanks for looking! And I will have more pictures up soon.. just give me some time :P
Just a couple more patches, and then Ultimate Sandblasting and Coating gets their hands back on it, and then RE-ASSEMBLY!!! Hopefully I'm feeling better by then to get to help throw the car back together... this really sucks
But on to the pictures.. just a few right now, my brothers should be coming home with more later tonight.
Thanks for looking! And I will have more pictures up soon.. just give me some time :P
Thread Starter
Senior Member
Joined: Jun 2002
Posts: 565
Likes: 1
From: London,ON
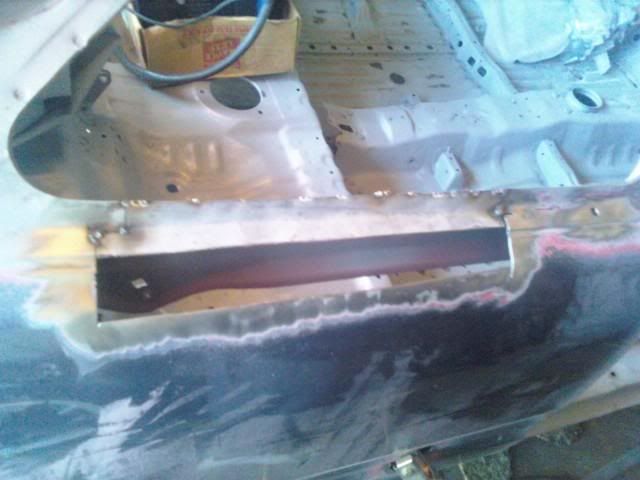
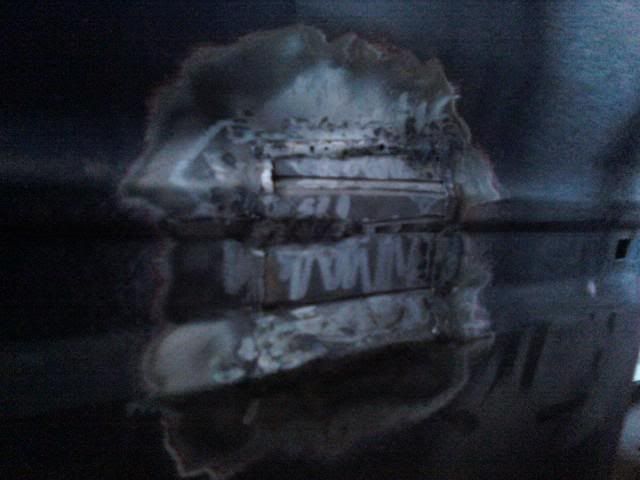
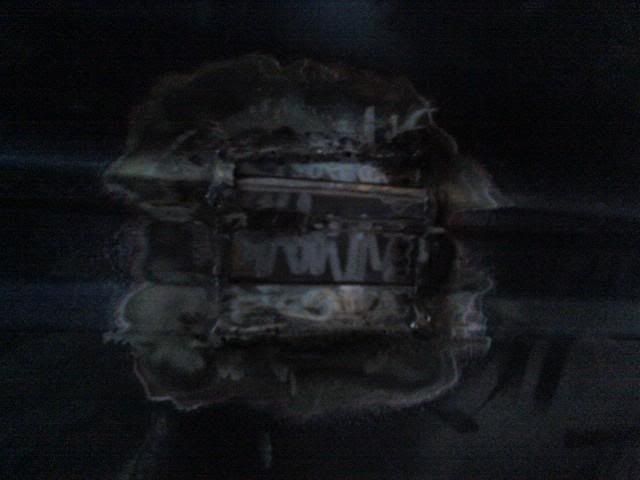
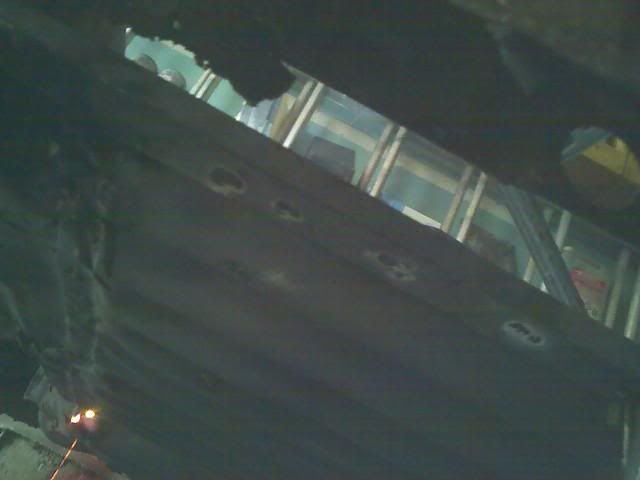
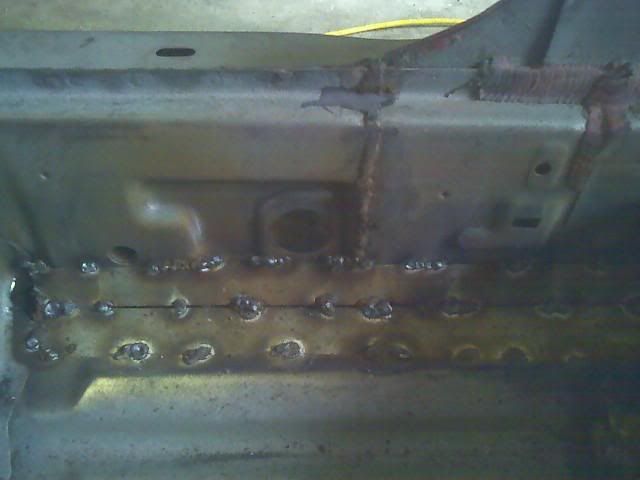
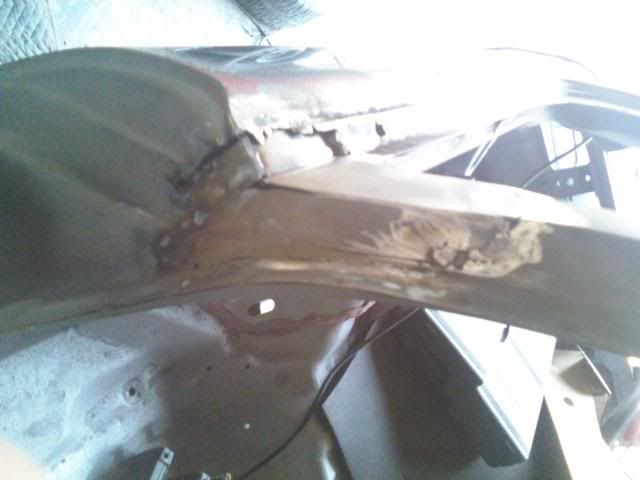
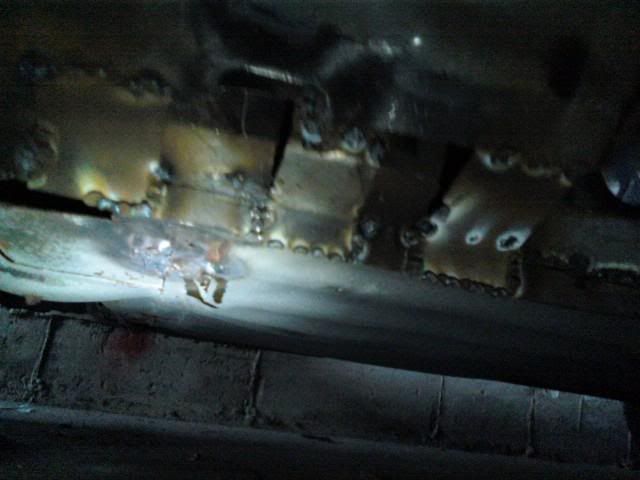
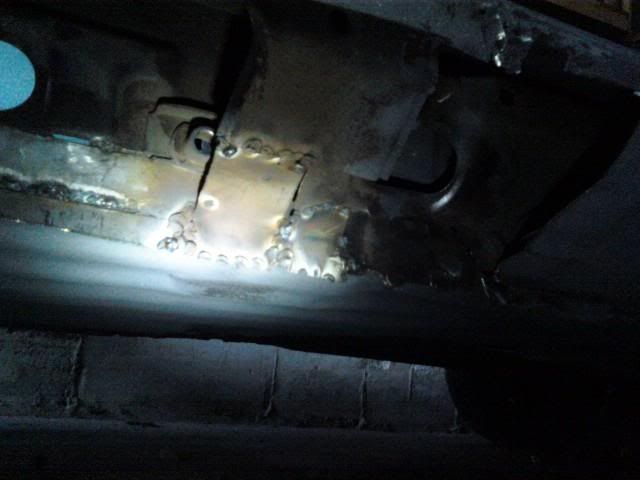
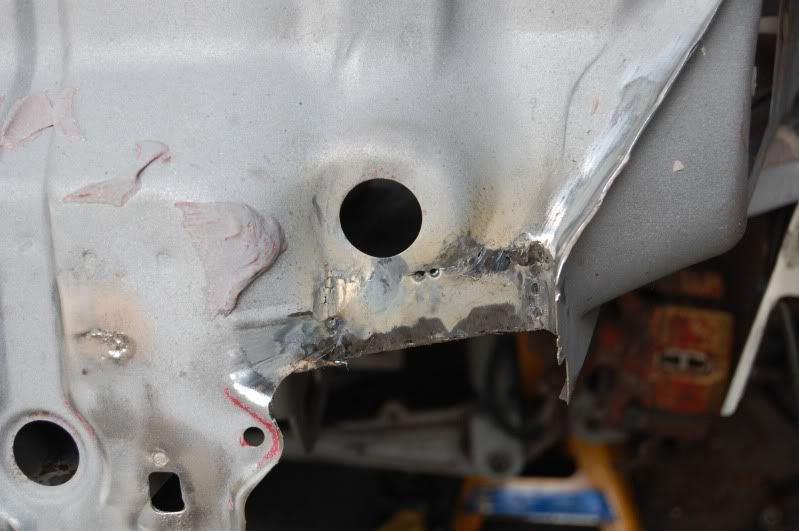
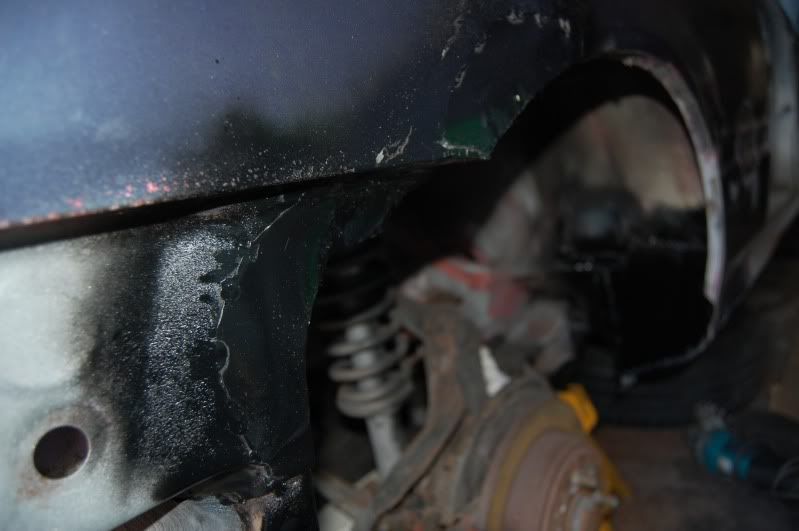
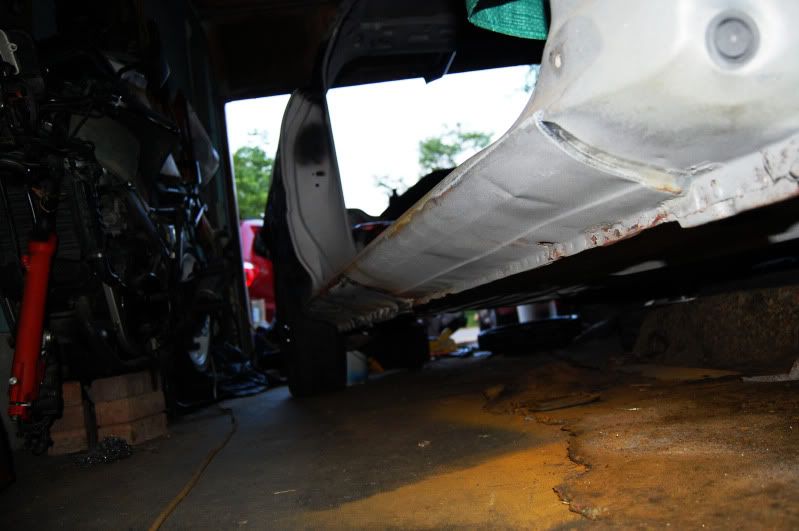
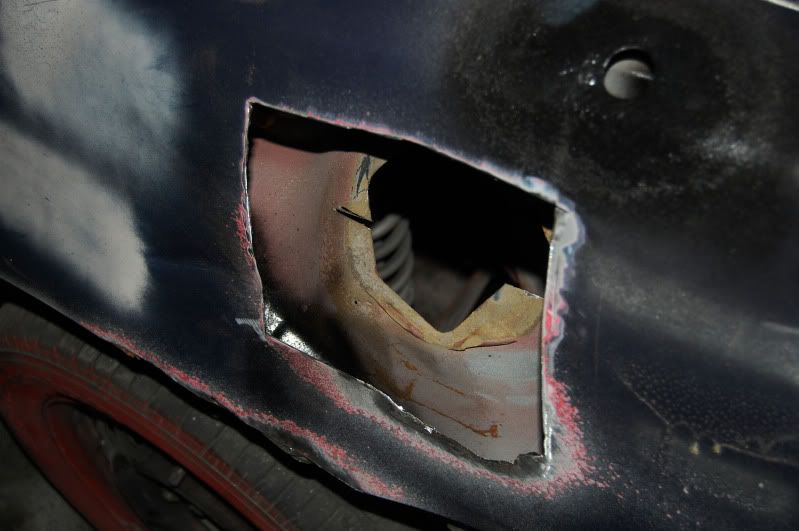
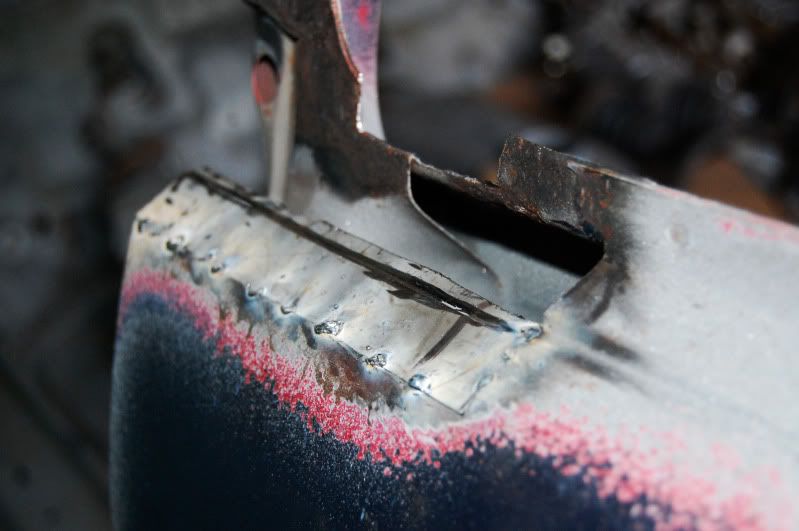
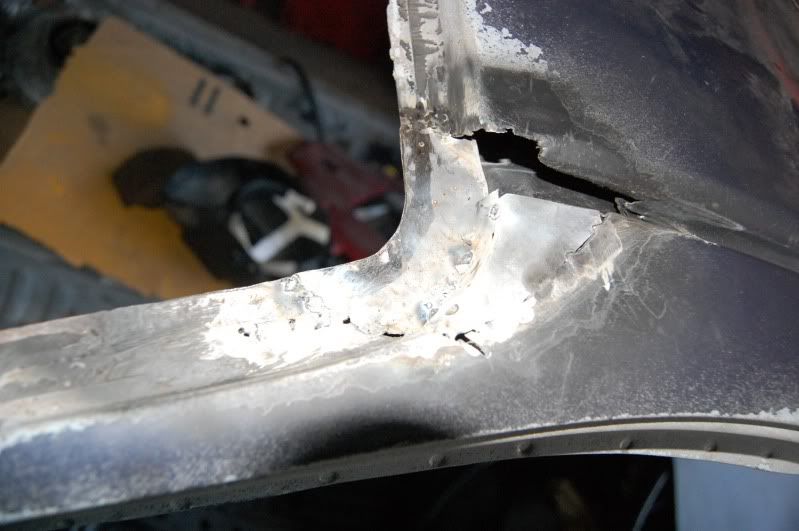
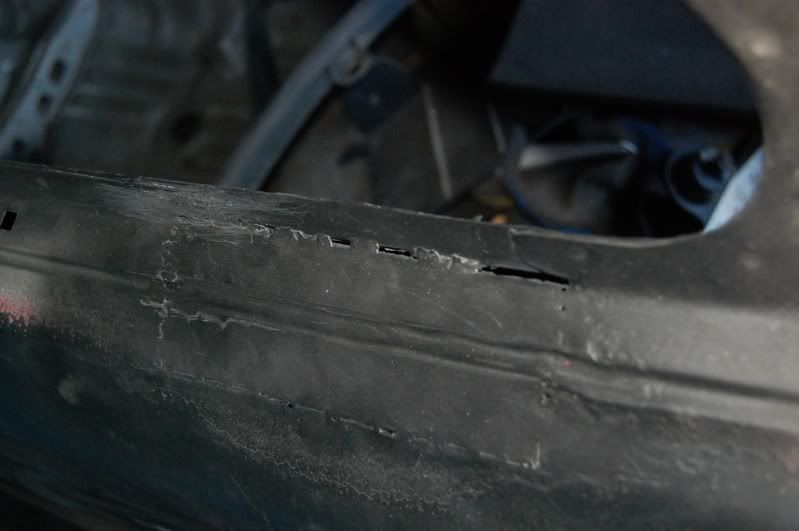
The Passenger Side Rocker
Still needs to be completely welded, then grinded down
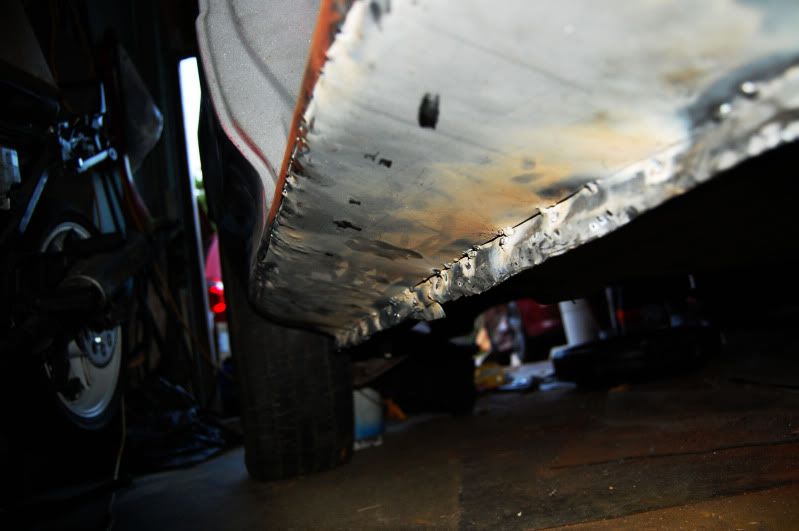
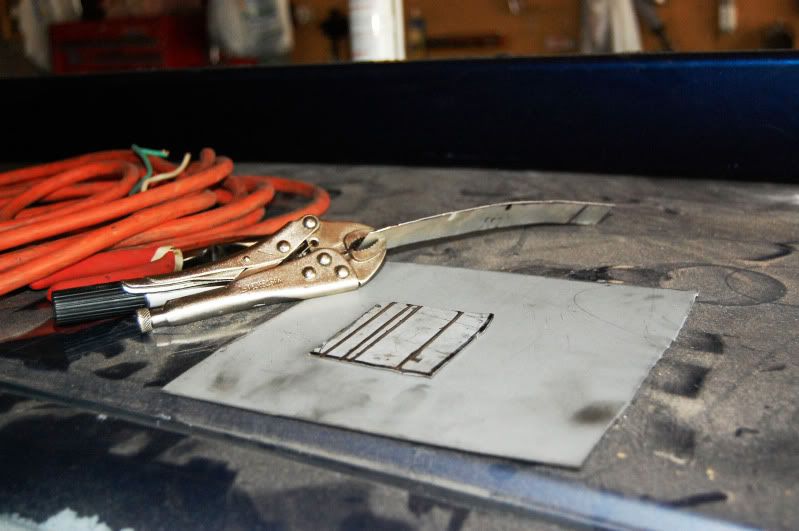
Here are a few pictures of patches that have been cut out... just need to be welded in tomorrow.
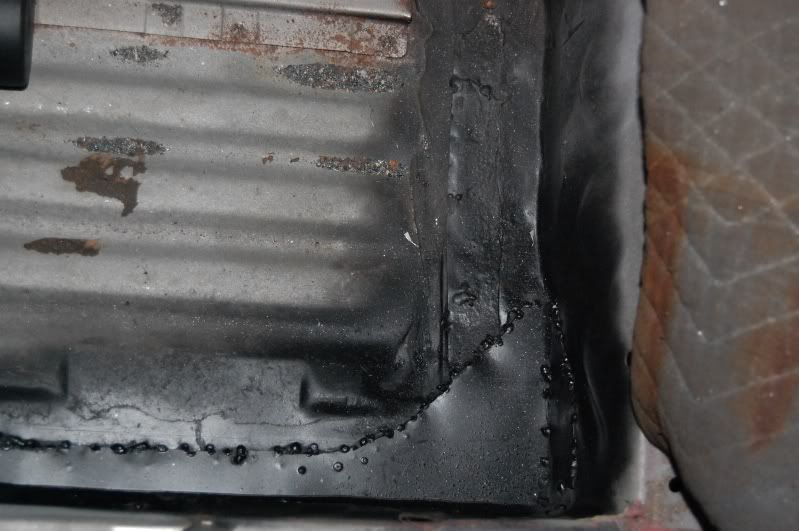
Shaving the gas tank!!!!!! I am a ricer
Still needs to be completely welded, then grinded down
Here are a few pictures of patches that have been cut out... just need to be welded in tomorrow.
Shaving the gas tank!!!!!! I am a ricer
Thread Starter
Senior Member
Joined: Jun 2002
Posts: 565
Likes: 1
From: London,ON
I am glad I can make you happy Rob, lol. I actually have a trunk, so no need for a fire wall . I will just pop the trunk to fill it, easy access with the Mugen trunk latches . I might make the filler tube piece... but I will be nervous cutting the CF, lol.
Thanks for the compliments!
RKS will be making everything custom, from the baffled fuel cell, to the Fuel Rail itself.
---------- Post added at 12:05 AM ---------- Previous post was at 12:02 AM ----------
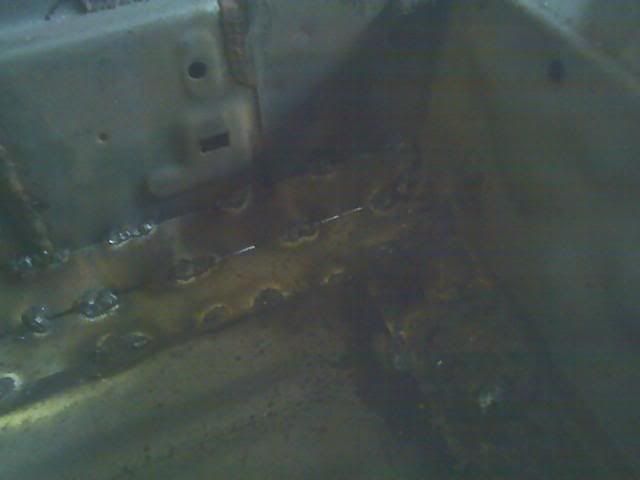
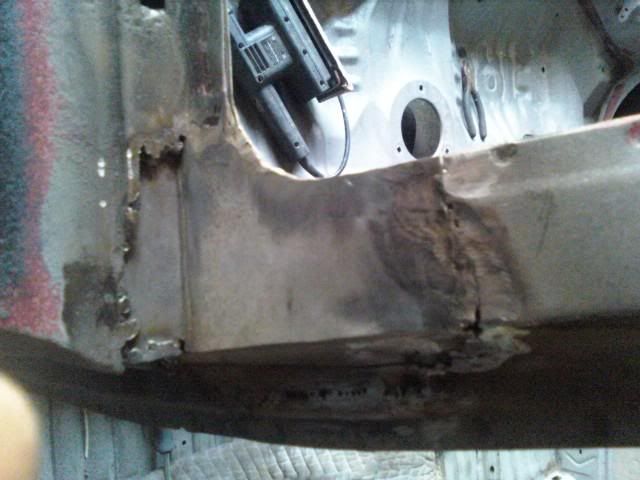
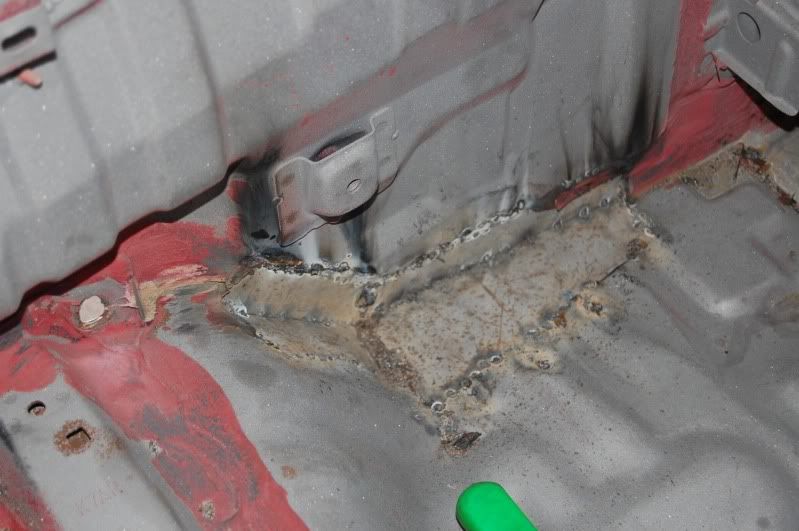
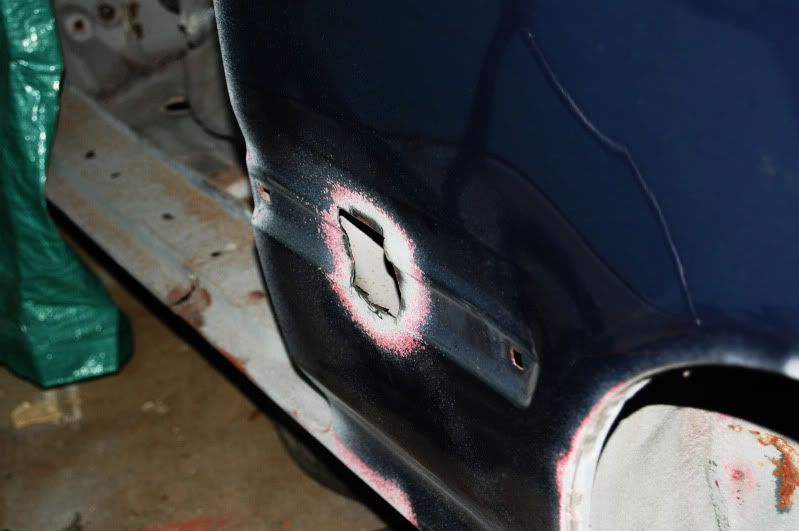
A few patches in there!

Measure 3 times! Cut once!
. I will just pop the trunk to fill it, easy access with the Mugen trunk latches . I might make the filler tube piece... but I will be nervous cutting the CF, lol.Thanks for the compliments!
RKS will be making everything custom, from the baffled fuel cell, to the Fuel Rail itself.
---------- Post added at 12:05 AM ---------- Previous post was at 12:02 AM ----------
A few patches in there!
Measure 3 times! Cut once!
Thread Starter
Senior Member
Joined: Jun 2002
Posts: 565
Likes: 1
From: London,ON
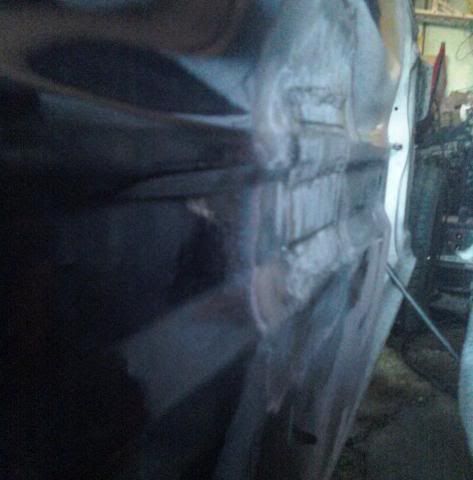
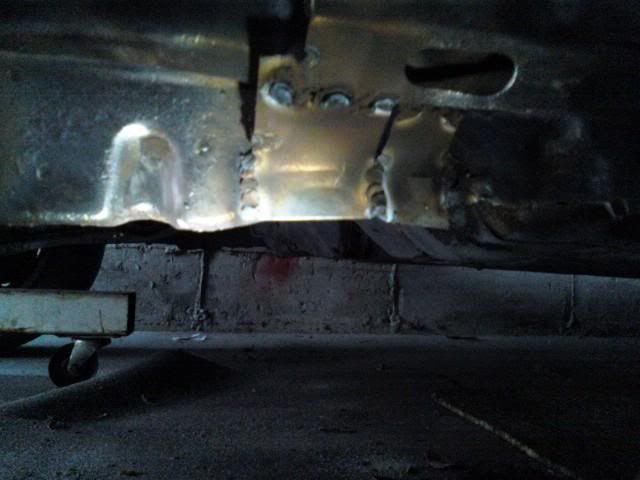
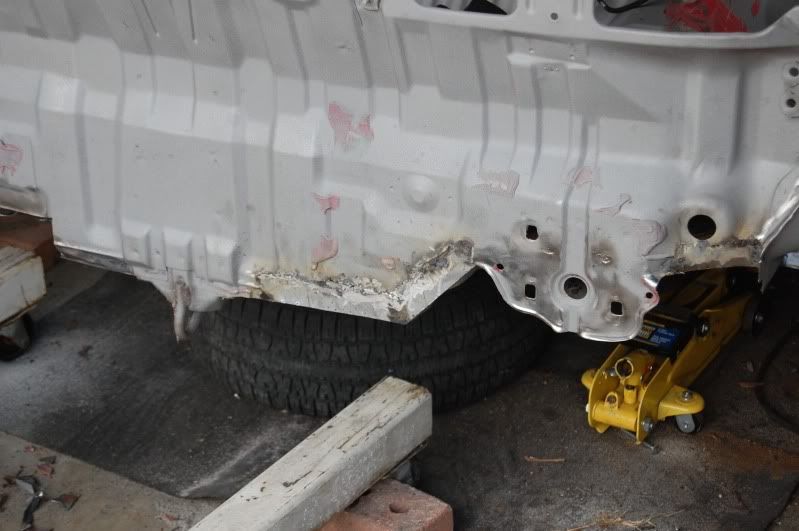
Some more progress. Just a little touch up work, the gas tank & rocker left to do then back for coating she goes

I got a little more done yesterday, but didn't get any pics. Going back for final sand blasting & coating soon
I got a little more done yesterday, but didn't get any pics. Going back for final sand blasting & coating soon
great progress and good work ! ,
Very light shell with a descent power plant will be fun.
I'm all about good budget parts, and the b18a does well there. But even after some P30 pistons and crower 403 or 404 cams you will be in the 150 hp range.
Do what everyone does ( if you want to be competitive ) and use a vtec head on your 18a block . Saves you the cash you would spend on the cams, retainers,springs.
Either way Great project, and do you plan on lapping car ? or competitive series style /?
Rotary Freak
Joined: Jul 2003
Posts: 2,199
Likes: 9
From: Oakville, Ontario
Man, lots of hard hard work there. You are doing everything right in the chassis prep and too few guys spend time on the chassis before they start hanging stuff off it (myself included, shame overwhelms me). Way to go and I look forward to seeing you at the track.
A very nice platform and I raced against a few about 5 years ago and the cars were really quick. Go see "Turtle" (yep thats what he call himself) at Kensai when you want more power. He builds a Frankenstein 2.5 l VTEC'y thing that is just an awesome track motor and reliable.
Eric
A very nice platform and I raced against a few about 5 years ago and the cars were really quick. Go see "Turtle" (yep thats what he call himself) at Kensai when you want more power. He builds a Frankenstein 2.5 l VTEC'y thing that is just an awesome track motor and reliable.
Eric
Looks like a great project! Regardless of the car, it's always nice to see people putting their own time and effort into a car - especially if it will end up being on the track. Enjoy the process!
I can't believe I'm about to say this (I feel so old!) but looking at the pic below: Put on some safety goggles! I've seen what grinding metal can do to unprotected eyes, and it's not pretty.
I can't believe I'm about to say this (I feel so old!) but looking at the pic below: Put on some safety goggles! I've seen what grinding metal can do to unprotected eyes, and it's not pretty.