
Luke's 1990 Rx7 Build


Thread Starter
Joined: Mar 2010
Posts: 235
Likes: 0
From: Canada, Ontario, Kitchener
I noticed that in the first post of my build I said my car had a T4 diesel turbo. I dont know anything about turbos and at the time someone said they thought it might have come off of a diesel truck or something to I just went with it but they have now told me that they dont think that anymore. So I have no fricken clue what it is but im fairly sure its a T4 flange... at least thats what the seller told me it was.
Thread Starter
Joined: Mar 2010
Posts: 235
Likes: 0
From: Canada, Ontario, Kitchener
Ok I will post pictures and numbers early next week when I get a chance. I am assuming I can take those measurements just looking into the front off my turbo? I wasnt planning on taking off the exhaust if I didnt need to so might not have the info for the turbine. ....had to google inducer and exducer but now I know what they are!
Luke
but now I know what they are!Luke
The only way to properly measure it is by taking the housings off. On the compressor the inducer is the smaller diameter and the exuder is the larger diameter, on the turbine its in reverse. You can pretty much identify the turbo with those specs. Or at the very least identify how big it is and what type of power to expect.
thewird
thewird
Thread Starter
Joined: Mar 2010
Posts: 235
Likes: 0
From: Canada, Ontario, Kitchener
Time to get back to work!
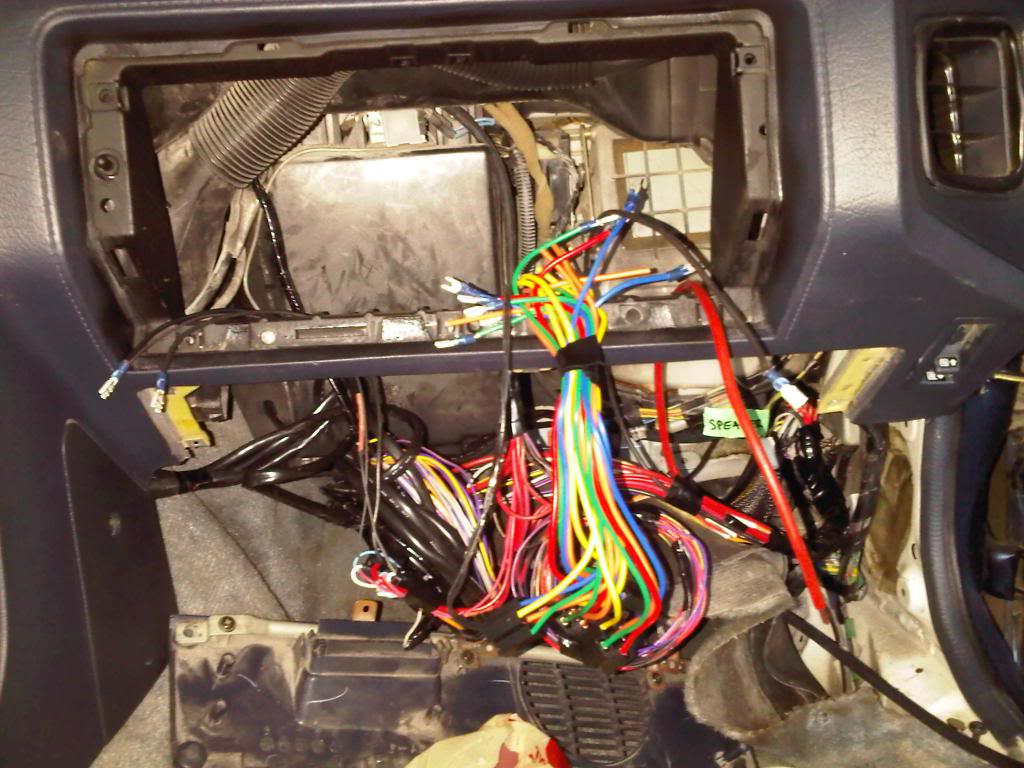
Well it seems that we are finally getting some nicer days! I am finally getting back to work on my build. I have fished all the wires for my gauges and boost controller through the fire wall and through the dash to where I plan to put them. Wideband and water temp are going in the stereo area and boost controller up on the dash on the tray of the warning lights.
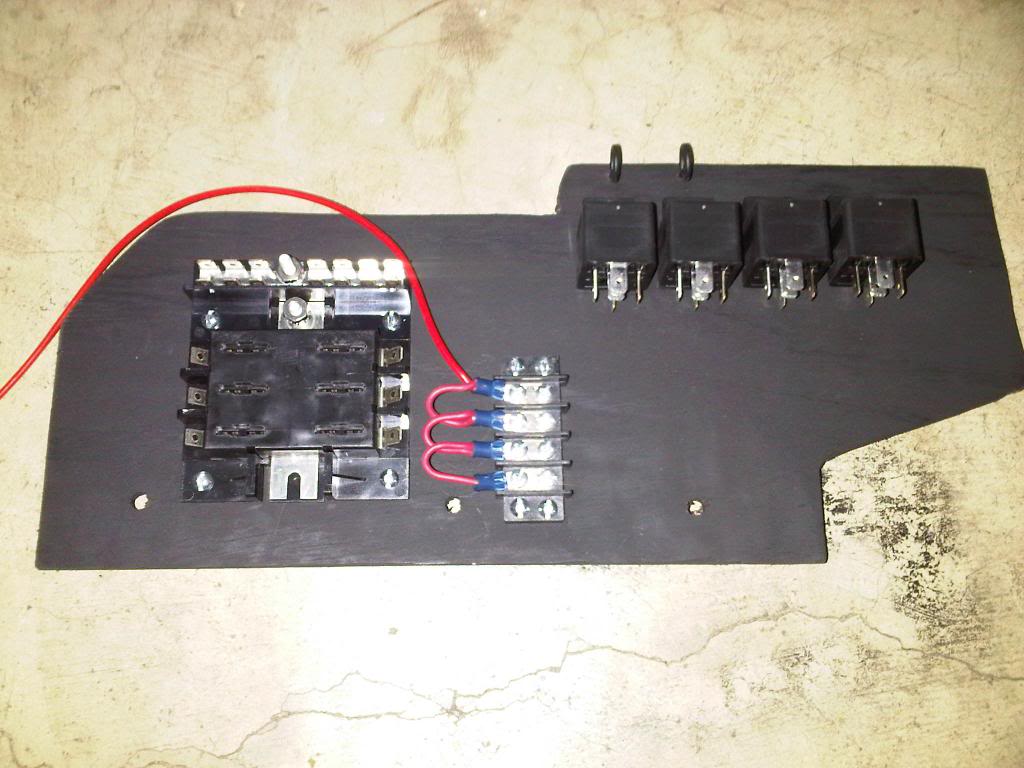
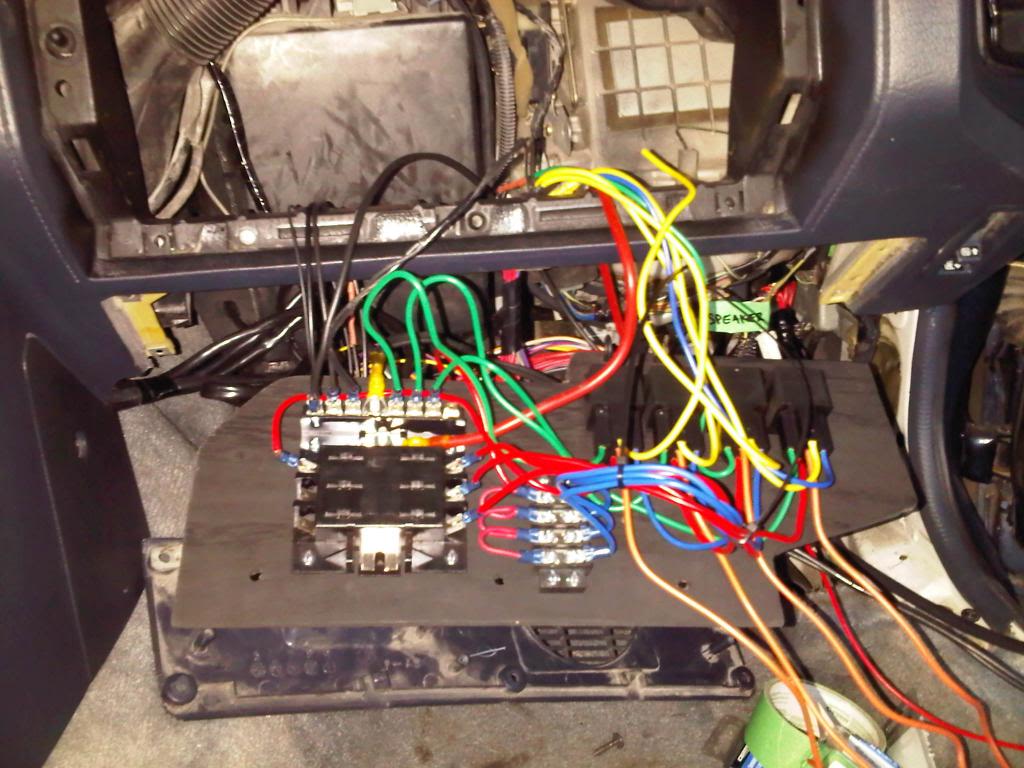
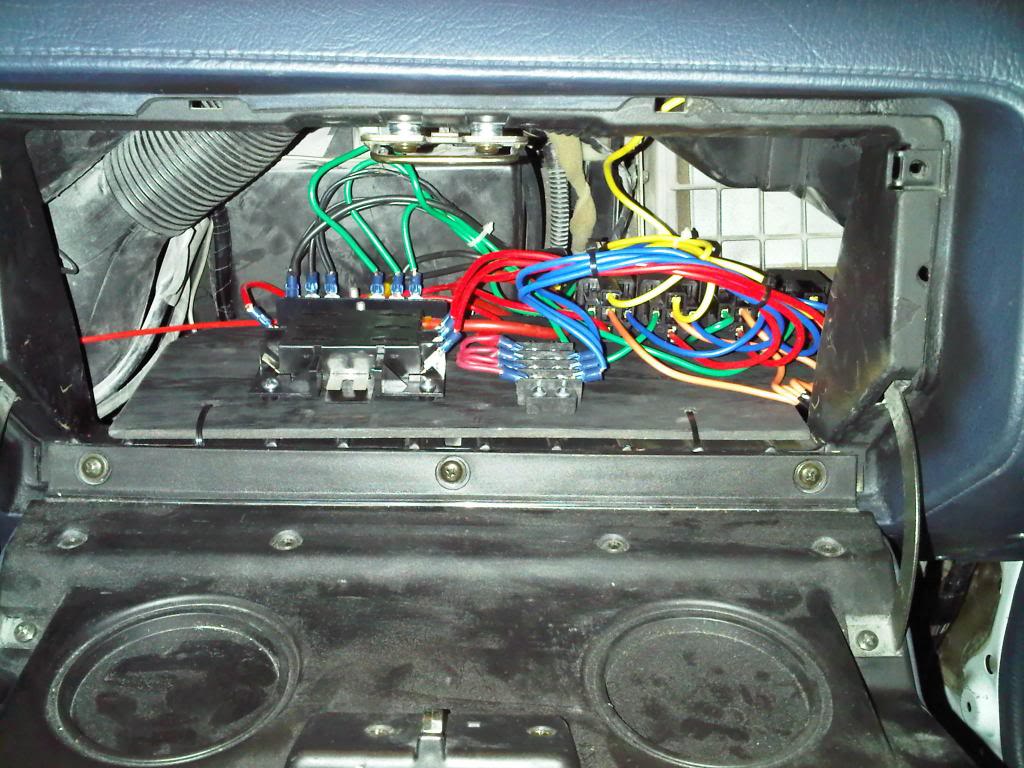
I saw Aaron Cakes mega squirt video and I like how he did the fuse block, relays, terminal strips, and ECU all in the same area so I am going to take inspiration from that and try to do something similar in the glove box.
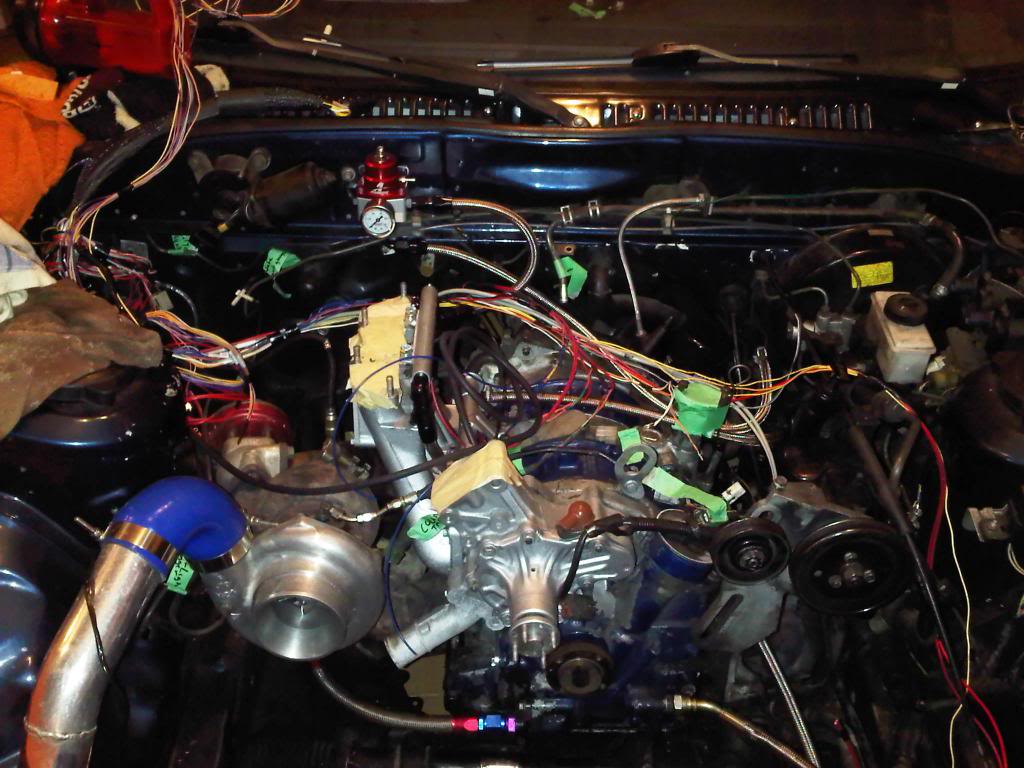
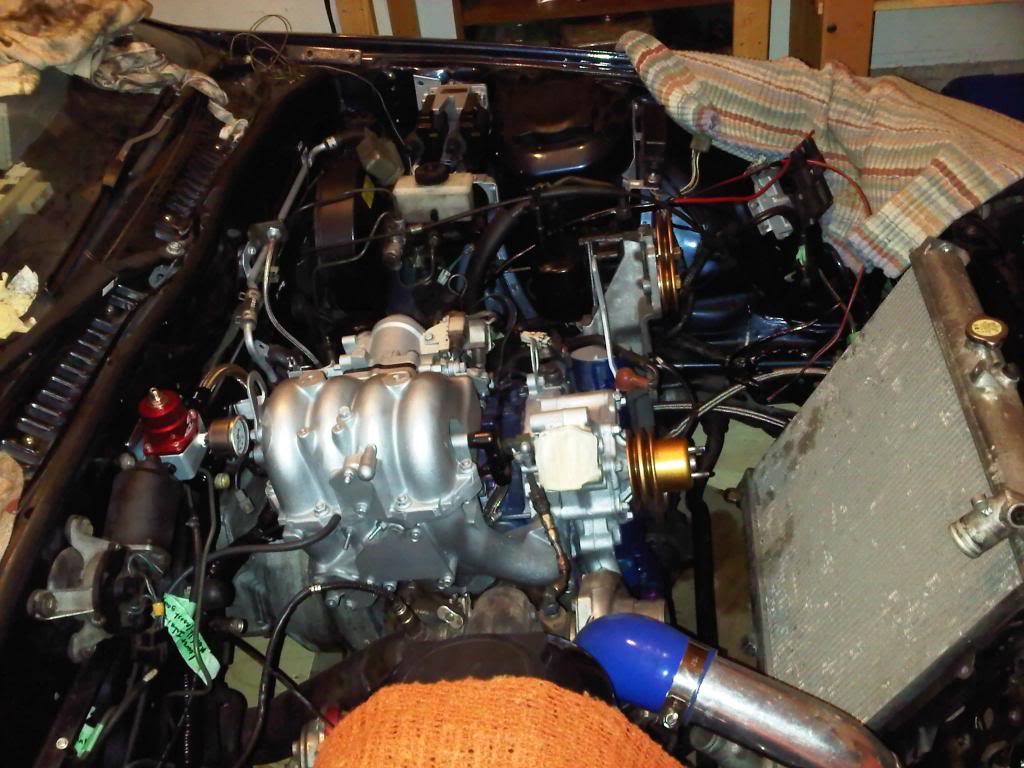
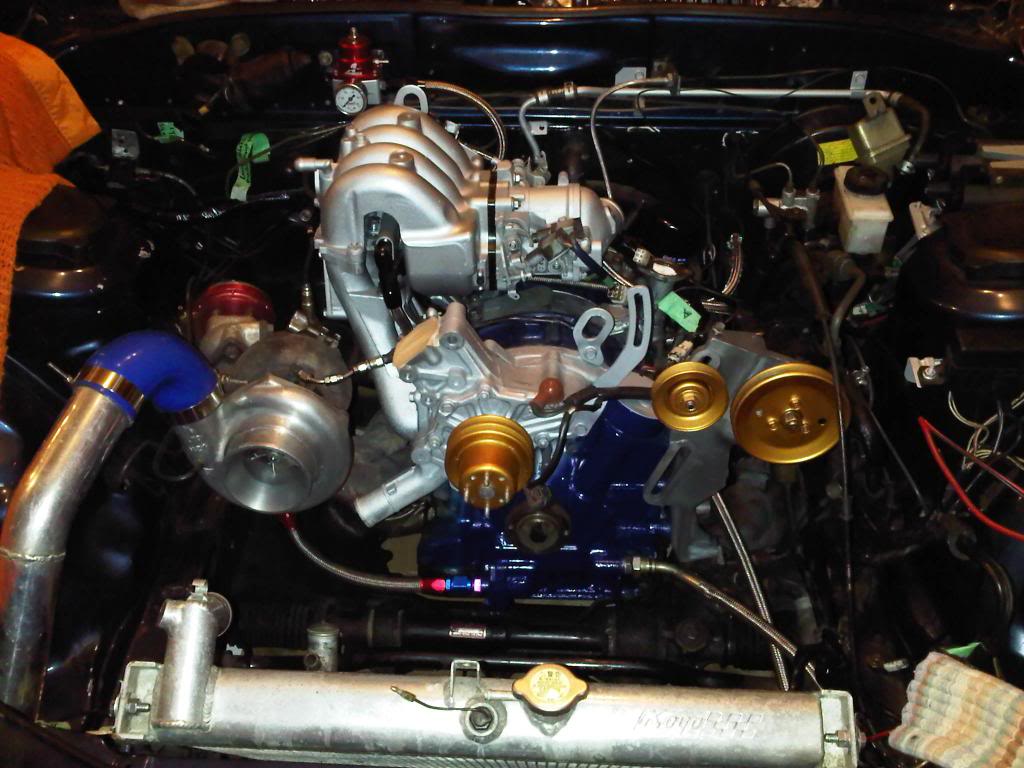
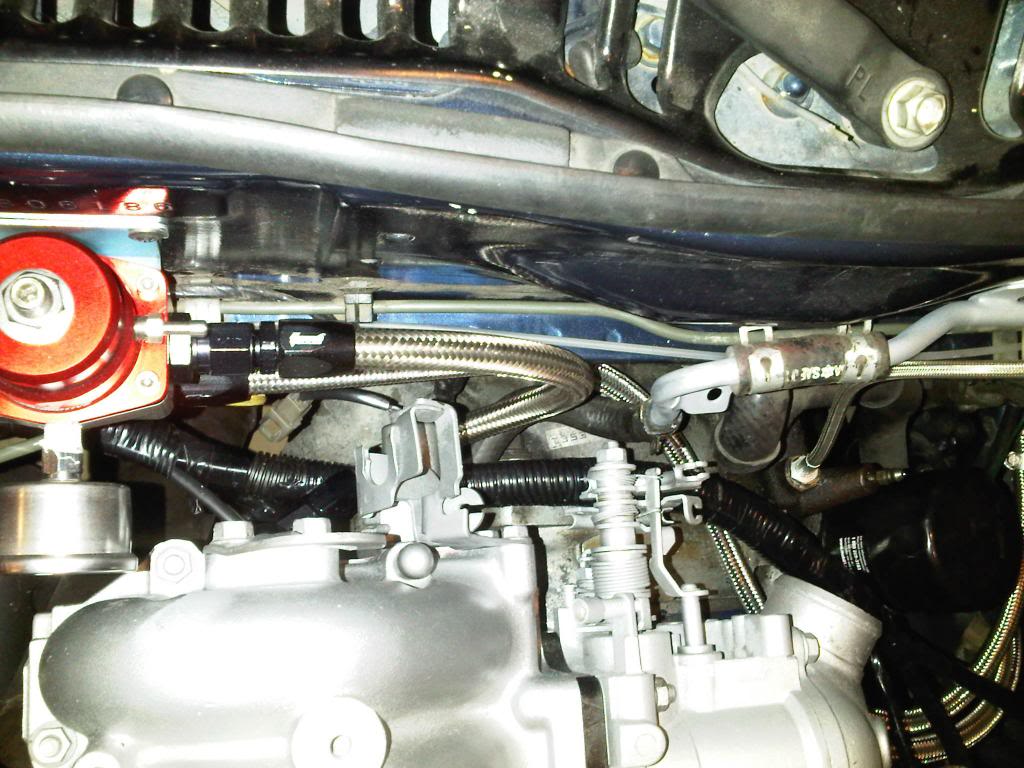
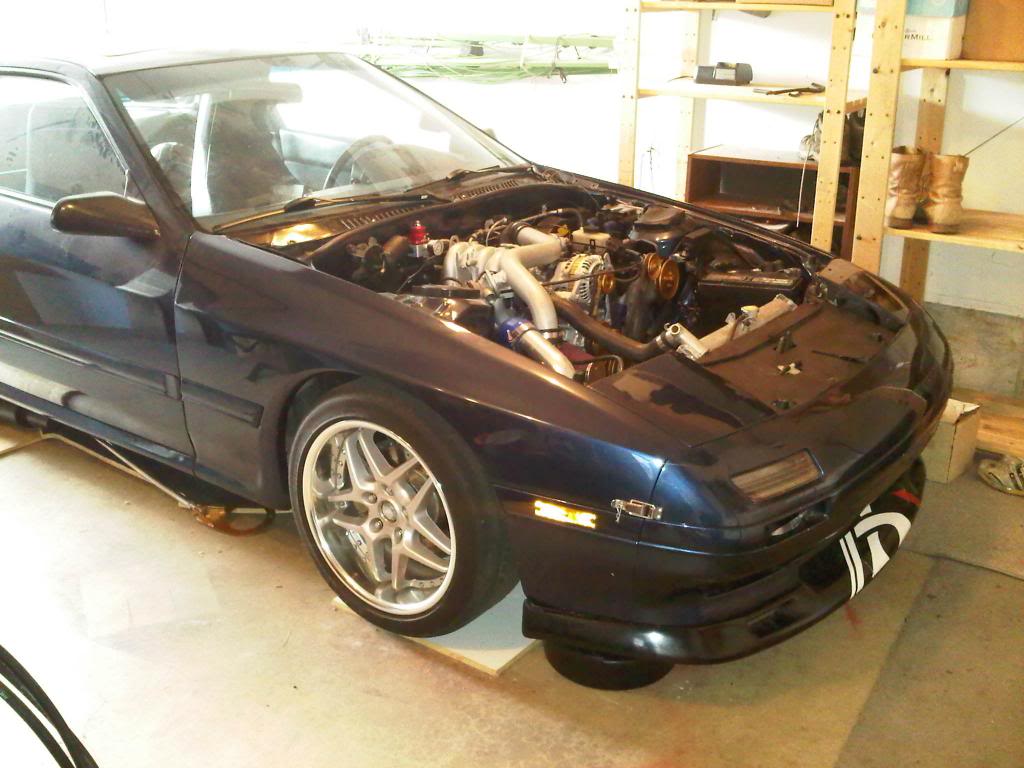
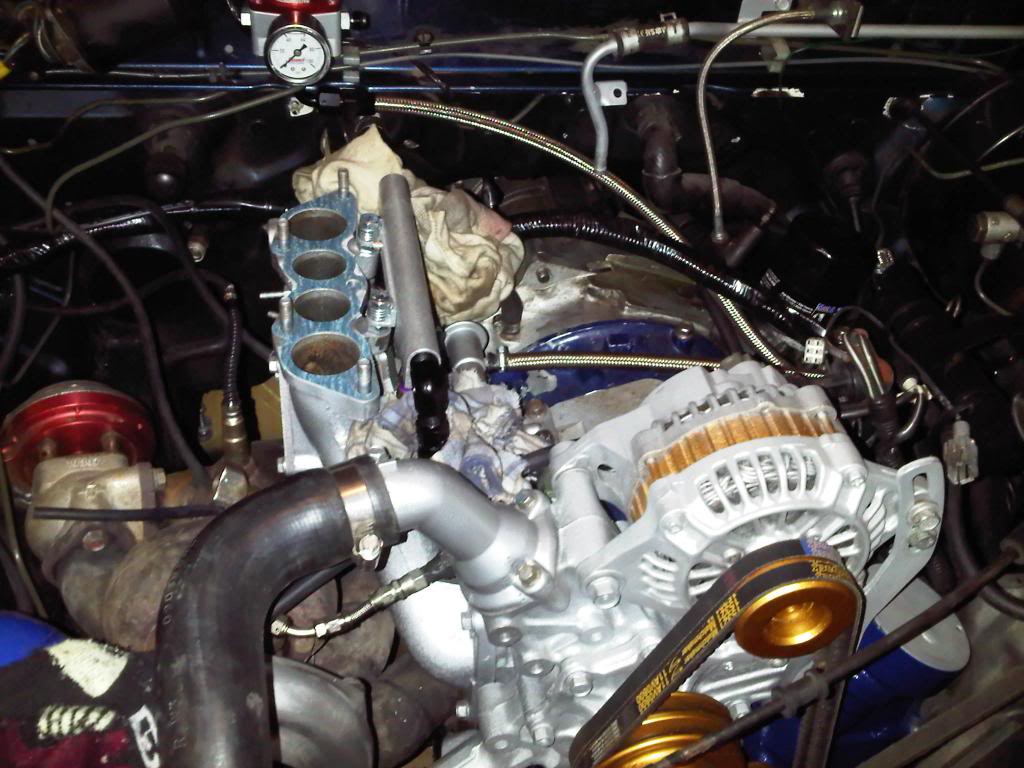
A little work done under the hood. Replaced manual boost controller solenoid with the Greddy electronic solenoid. Reinstalled the lower intake manifold, water pump, and oil cooler(now with braided stainless steel lines)
Question- The warning lights on the top of the dash, are the operated from the stock ecu and now non functional with my Haltech?
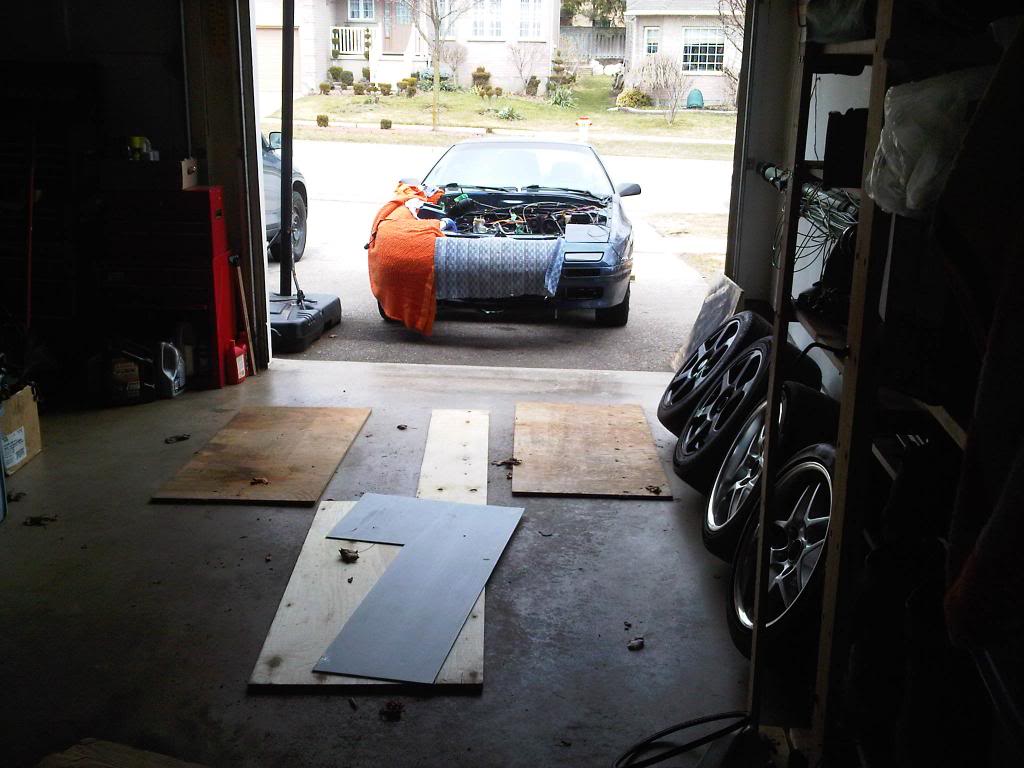
I was happy to be able to roll my car out to the driveway today!!!!

I saw Aaron Cakes mega squirt video and I like how he did the fuse block, relays, terminal strips, and ECU all in the same area so I am going to take inspiration from that and try to do something similar in the glove box.
A little work done under the hood. Replaced manual boost controller solenoid with the Greddy electronic solenoid. Reinstalled the lower intake manifold, water pump, and oil cooler(now with braided stainless steel lines)
Question- The warning lights on the top of the dash, are the operated from the stock ecu and now non functional with my Haltech?
I was happy to be able to roll my car out to the driveway today!!!!
Thread Starter
Joined: Mar 2010
Posts: 235
Likes: 0
From: Canada, Ontario, Kitchener
Been getting lots done! Almost everyday after work Ive been in the garage working away.
What Ive been doing,
-Cleaning and painting parts
-Installed fuel injectors 550 stock primaries and 1000cc ID secondaries, lines, rails, and regulator
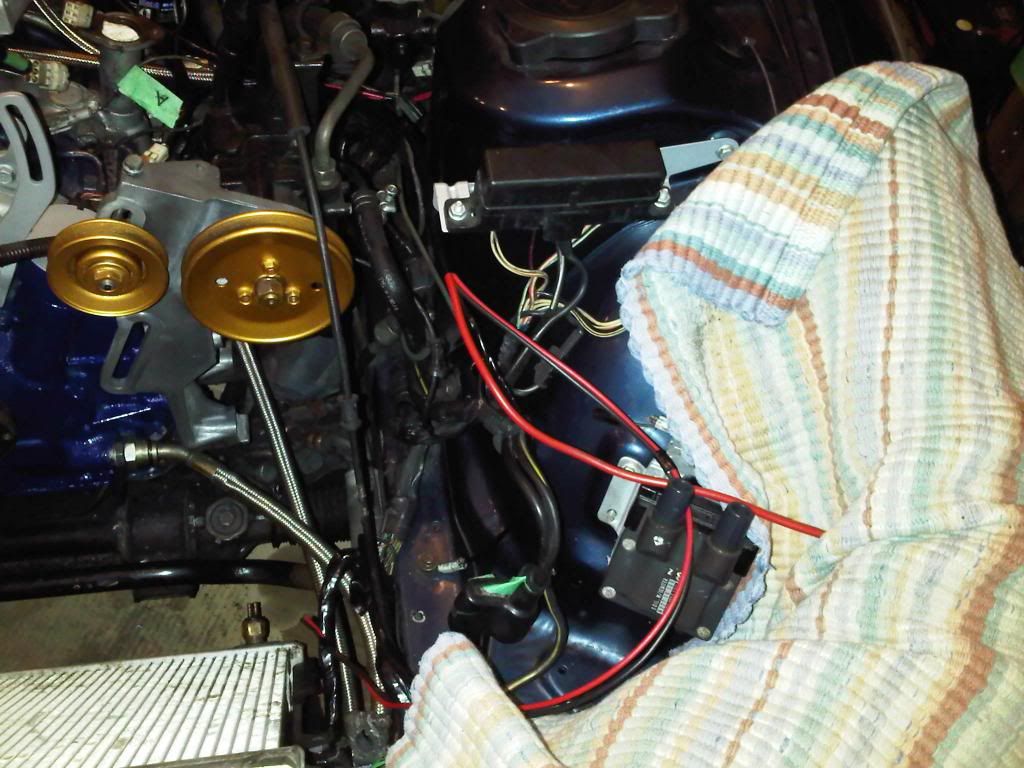
-Wiring Haltech. Soldering connectors, running wires to where they go, fuse block and relay set up and trying to neatly tape everything up
-Reinstalled UIM and TB
Im pumped about my progress so far as this is pretty much my first stab at actually working on a car aside from the little stuff i learned in highschool shop class a few years ago.
Pictures of my work
The rad is just sitting in the car in the pictures but still needs to be mounted. Almost done the wiring i think. Just a few last things I need to still wire in.
Luke
What Ive been doing,
-Cleaning and painting parts
-Installed fuel injectors 550 stock primaries and 1000cc ID secondaries, lines, rails, and regulator
-Wiring Haltech. Soldering connectors, running wires to where they go, fuse block and relay set up and trying to neatly tape everything up
-Reinstalled UIM and TB
Im pumped about my progress so far as this is pretty much my first stab at actually working on a car aside from the little stuff i learned in highschool shop class a few years ago.
Pictures of my work


The rad is just sitting in the car in the pictures but still needs to be mounted. Almost done the wiring i think. Just a few last things I need to still wire in.
Luke
Thread Starter
Joined: Mar 2010
Posts: 235
Likes: 0
From: Canada, Ontario, Kitchener
Thanks. I can be a bit of a neat freak sometimes hence all the cleaning and painting but I figure it will pay off to as it will show well and last longer I hope. Do it right the first time, right?
I feel the exact same way about cleaning and painting things to look good. Presentation is often just as important as build quality and functionality, in my opinion, so nice work!
Thread Starter
Joined: Mar 2010
Posts: 235
Likes: 0
From: Canada, Ontario, Kitchener
Thanks CS13B! I noticed that about your work when looking through your build thread. A number of pictures with the wire brush and parts cleaner and a part that has gone from being black and grimy to looking almost new
I have rewired my fuel pump with all new and thick gauge wire. The only part I am keeping is the stock wire connector to clip into the top of the pump assembly because at this point i dont have the know how or supplies to do custom bulkheads. I searched all over the forum and couldn't find which wires were 12v and ground(I am sure its been covered on here a bunch but it can be difficult to sift through everything and find it). I ohmed it out and came up with this. Hope this might help someone else in the future.
___
_____l__l_____
l Black l Red l
l Grnd l l
l______l______l
l Black l Blue l
l White l l
l_12v__l______l
The red wire and the blue wire are for the fuel gauge and the low fuel dash light but I don't know which is for which as I dont need to modify them and they are staying as is.
This is looking into the connector on the fuel pump assembly.
A little crude of a drawing but maybe it will be helpful to someone.
Thread Starter
Joined: Mar 2010
Posts: 235
Likes: 0
From: Canada, Ontario, Kitchener
More progress.
Rad is in, all pulleys are in, belts are on and tight, intercooler piping done, oil catch can is done, filled the rad with 50 coolant 50 water and water wetter, premixed for the first time, and added a bottle of octane booster since the gas has been sitting in the tank for a year. Bought some crappy reactive pedal covers since i dont have the rubber pads on the pedals and cant afford 100 dollar sparcos right now. Just waiting on fan, tires, and i guess i need to get a tune before i race it.

Just as i am so pleased and thinking that everything is good for start up, i prime the fuel system, then smell fuel COME ON! I look all over and dont see anything wet or dripping but i got some on my hands as i felt around the fittings. Not a lot leaking but still some coming from the fittings on the secondary rail. So time to back track and do some repair work. On a positive all the electrical stuff seems to be working so far, and hopefully the rest will too!
Rad is in, all pulleys are in, belts are on and tight, intercooler piping done, oil catch can is done, filled the rad with 50 coolant 50 water and water wetter, premixed for the first time, and added a bottle of octane booster since the gas has been sitting in the tank for a year. Bought some crappy reactive pedal covers since i dont have the rubber pads on the pedals and cant afford 100 dollar sparcos right now. Just waiting on fan, tires, and i guess i need to get a tune before i race it.


Just as i am so pleased and thinking that everything is good for start up, i prime the fuel system, then smell fuel
COME ON! I look all over and dont see anything wet or dripping but i got some on my hands as i felt around the fittings. Not a lot leaking but still some coming from the fittings on the secondary rail. So time to back track and do some repair work. On a positive all the electrical stuff seems to be working so far, and hopefully the rest will too!
Thread Starter
Joined: Mar 2010
Posts: 235
Likes: 0
From: Canada, Ontario, Kitchener
It Fires Up!!!
It fired the third time i cranked it and stalled a couple seconds later. After another start and stall and a few minuets it started and ran!!!!!!!
So excited and relieved it started! Now lets hope there are no problems at all. A bunch of things to do yet on the car but it is close. Now i need to get it tuned.
Now as far as tuning goes, it wont be on the road so i cant get it street tuned. I know dyno tuning is an option. Is getting it tuned on the track at a Touge or sigma day an option? Are there any other options.
Joined: Dec 2002
Posts: 3,791
Likes: 3
From: Kitchener Ontario Canada
Tuning at the track is a waste of track time and money in my opinion, not to mention a hazard for everyone else at the track that day.
Contact Sasha for tuning, he knows Haltech
Welcome To OnPoint! : OnPoint Dyno
Glad to see your hard work has paid off!!
Contact Sasha for tuning, he knows Haltech
Welcome To OnPoint! : OnPoint Dyno
Glad to see your hard work has paid off!!
Thread Starter
Joined: Mar 2010
Posts: 235
Likes: 0
From: Canada, Ontario, Kitchener
Thanks Joe, also thanks for all the help and advice along the way as it was a huge help. Sasha is my second option, first being Ivan since he is local if he wants to do it.
Tuning at the track is the best place to do it after you have a base tune dialed in. Real conditions are more important then a dyno with a heat soaked engine bay and unrealistic load. Tuning on the dyno and then hitting the track is how get yourself into trouble.
thewird
thewird
Thread Starter
Joined: Mar 2010
Posts: 235
Likes: 0
From: Canada, Ontario, Kitchener
Another video. Car is idling on its own now (i had my foot on the gas a little for start up).
Its a little smoky. I think i was a little rich with the premix as it wasnt a full tank of gas so i just guessed on what the fuel gauge was showing.
Tuning wise... i still have a few things to do before i get tuned but i will probably get a good base tune done on the dyno and then maybe get it tweaked on the track(money allowing) im not a professional driver and wont be beating on the car too hard to start off so maybe the dyno tune will get me by for now. Also hoping to add water injection in the next year so if im not mistaken i would want to have the tune modified with that. So that could be a good opportunity to do the track tune.
Last edited by Lucas FC; May 17, 2013 at 01:14 PM.
Joined: Dec 2002
Posts: 3,791
Likes: 3
From: Kitchener Ontario Canada

