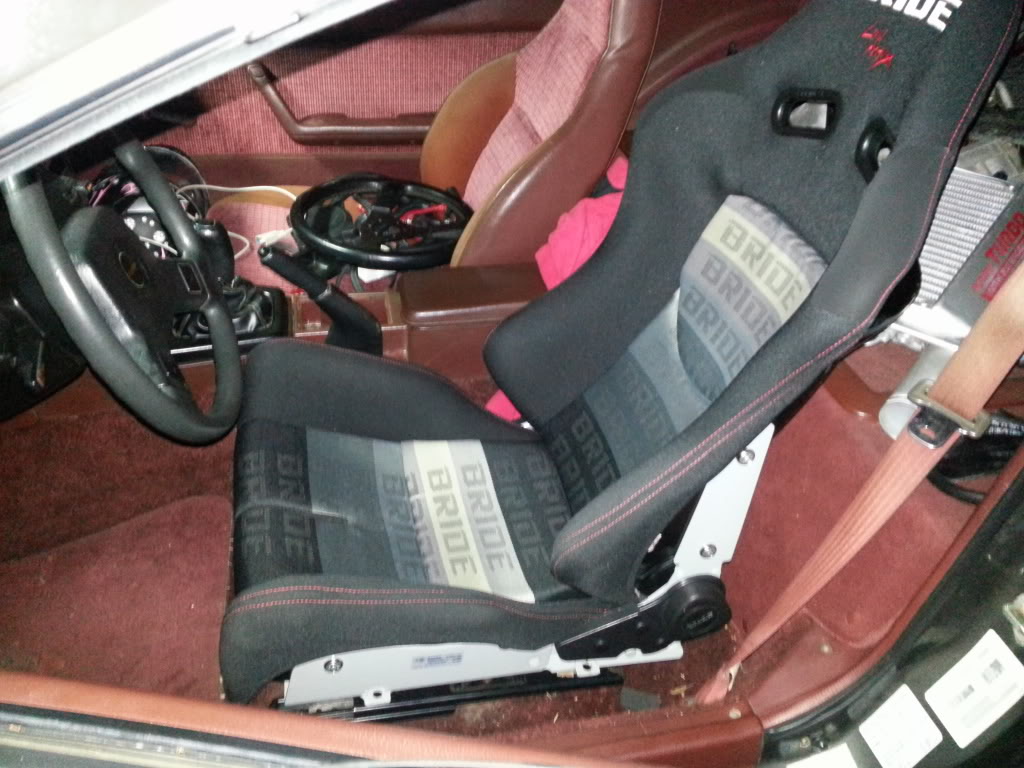
Tornado Silver Time - Now with 100% more REPU and 20b
 01-14-13, 06:27 PM
#201
Full Member
Sucks to get it that far an something as trivial as that make you tear it back apart...that also sucks that your new irons are no good...but gl finding good ones ive been following your thread and am thinking about doing my own 6-port turbo since it seems to be getting a little more common. Keep it up ...love ur car btw lol
 01-15-13, 08:52 PM
#202
I'm not worried about the irons. I'm most worried about assembling the engine properly and porting it properly. I am half tempted to send it to speed1, or have a local builder give me a hand. Kind of afraid to have the local guy help as he likes to cut corners...
Thank you for the kind words. That is the motivation I need right now to keep on moving. Having an empty engine bay is very depressing...
Thank you for the kind words. That is the motivation I need right now to keep on moving. Having an empty engine bay is very depressing...
 motivation!
01-30-13, 04:10 PM
motivation!
01-30-13, 04:10 PM
#204
out with the old...
in with the new!
Those big power wires will go away once I move the battery to the rear bin. Not sure what I'll do to clean up the rest of that area though. clutter is aggravating.
Now to mount the oil cooler, put together my mock engine and work on getting the vmount sorted out while the engine gets sent to Speed1. I think I'm just going to go with a streetport. I dont see the need for a bridgeport even though I'd love to have the sound. I dont see myself going with a turbo large enough to use its abilities.
 02-06-13, 07:59 AM
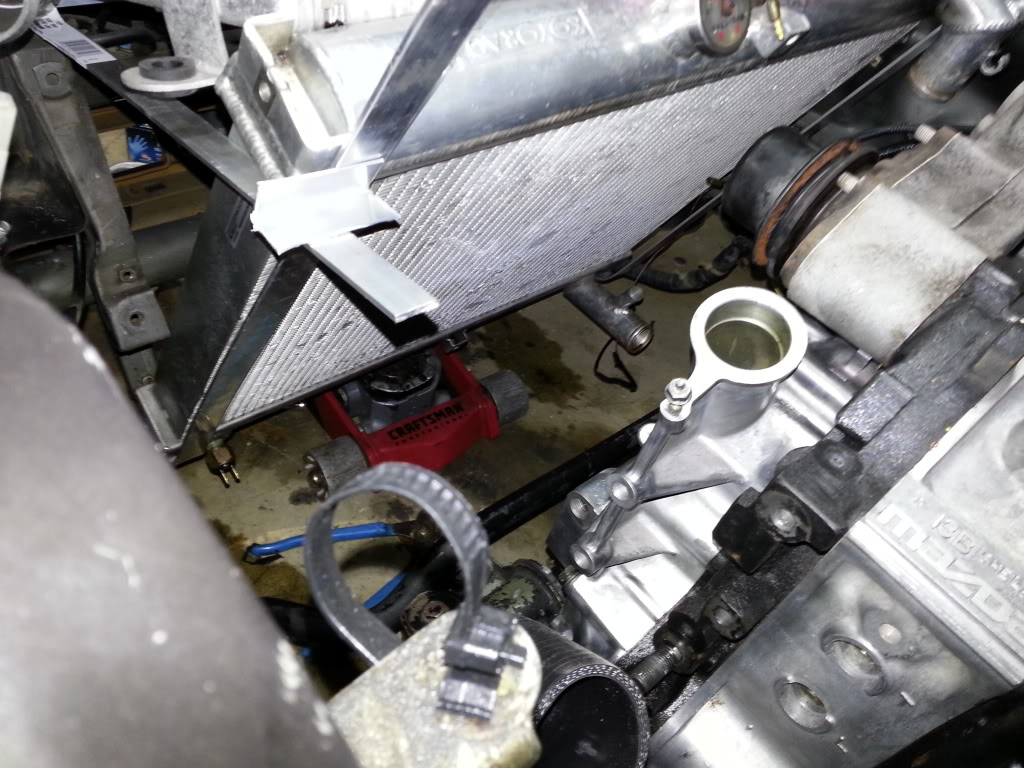
#211
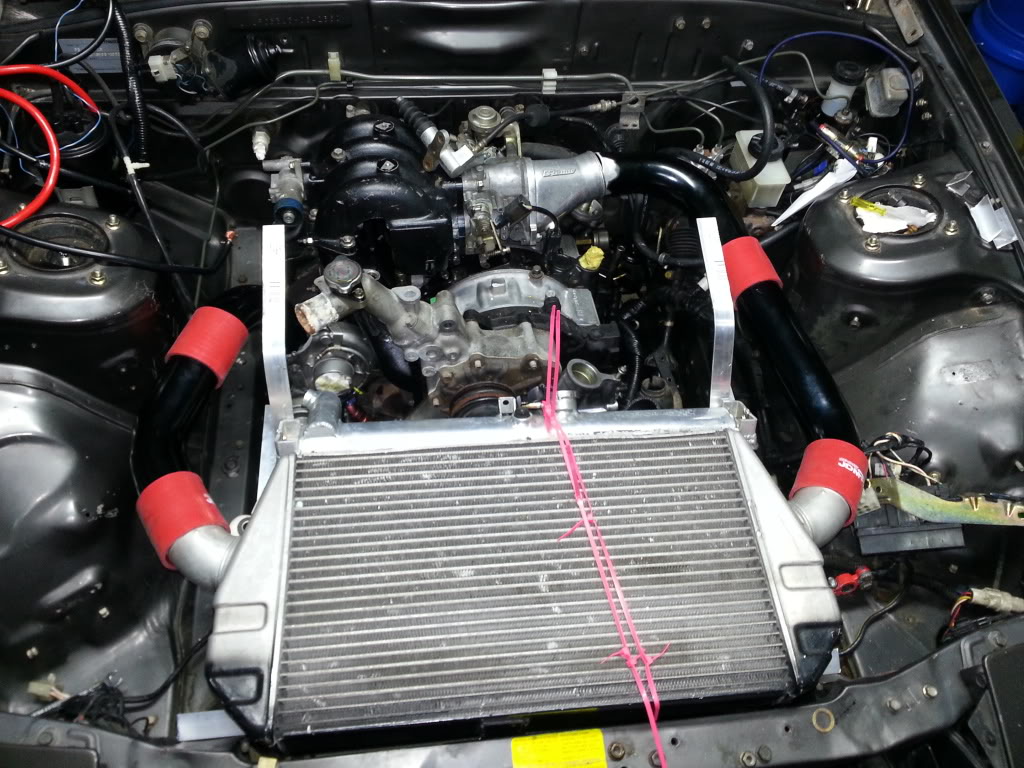
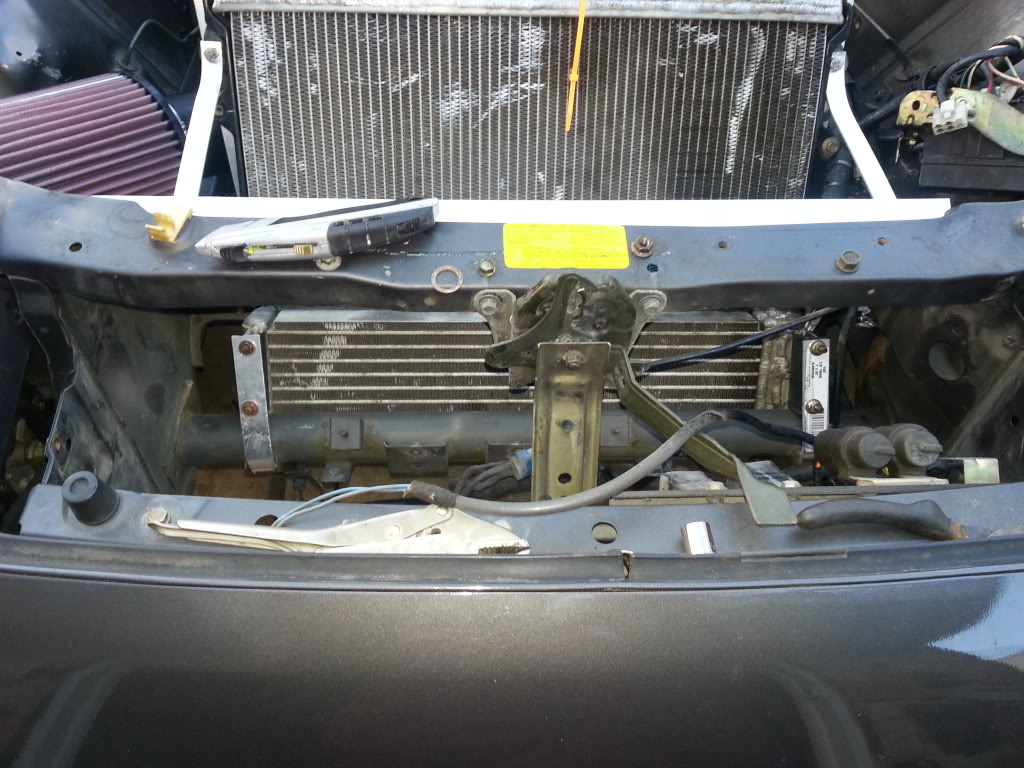
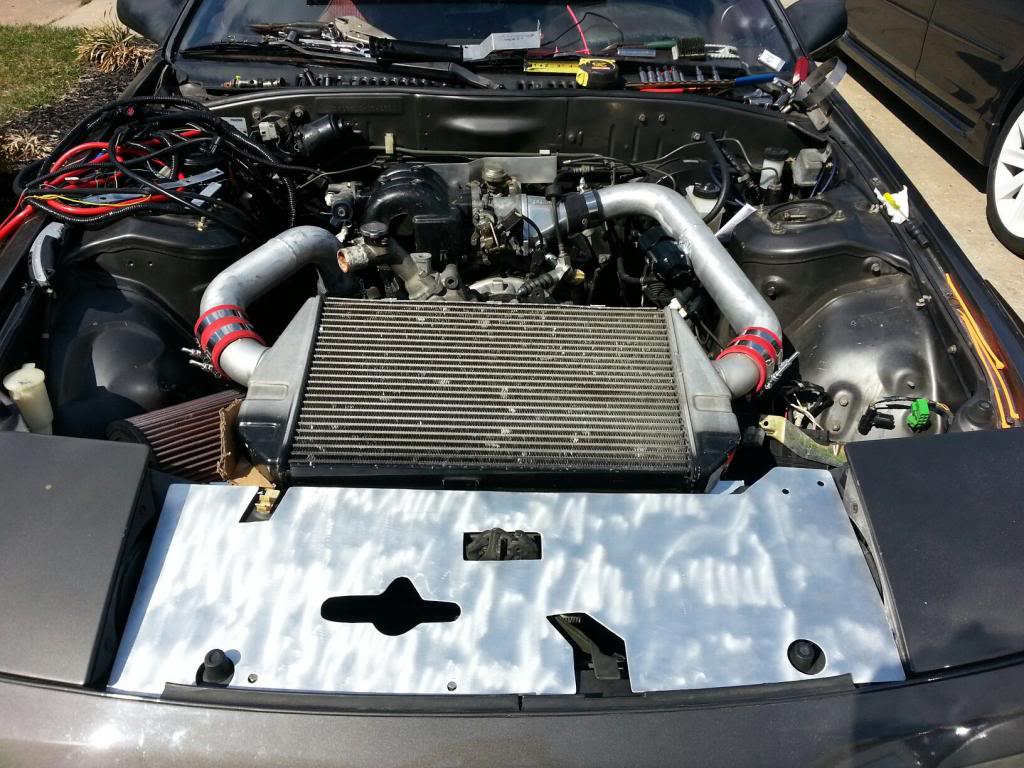
I am quite happy with how simple it was to remount the oil cooler. My issue was the oil cooler was in the way of where I wanted to be able to lay the radiator. the original plan was to turn it around 180* so the fittings are on the opposite side and then mount it on the other side of the bracket. The issue with that was that it sat equal to the height of the subframe and blocked the entire grill meaning little air would make it to the radiator/intercooler. I simply used the stock bracket and extended it upwards to move it out of the way.
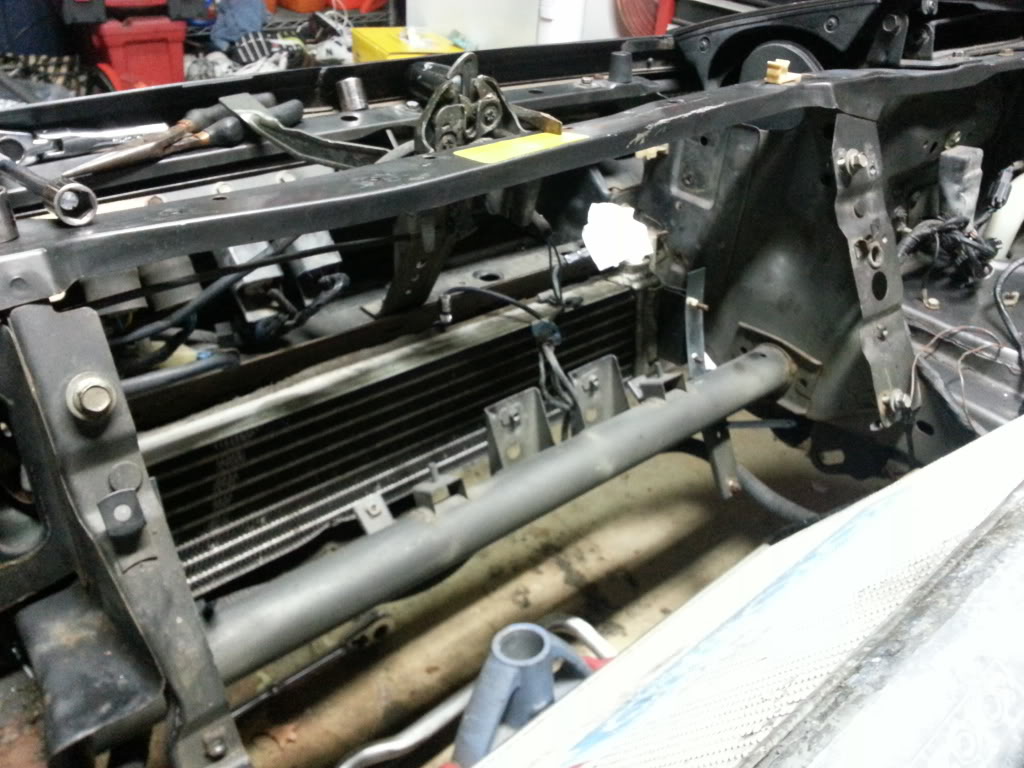
I need to make a cardboard version of the radiator cause it is a pain in the *** to try and manipulate that thing.
I need to make a cardboard version of the radiator cause it is a pain in the *** to try and manipulate that thing.
02-17-13, 05:29 PM
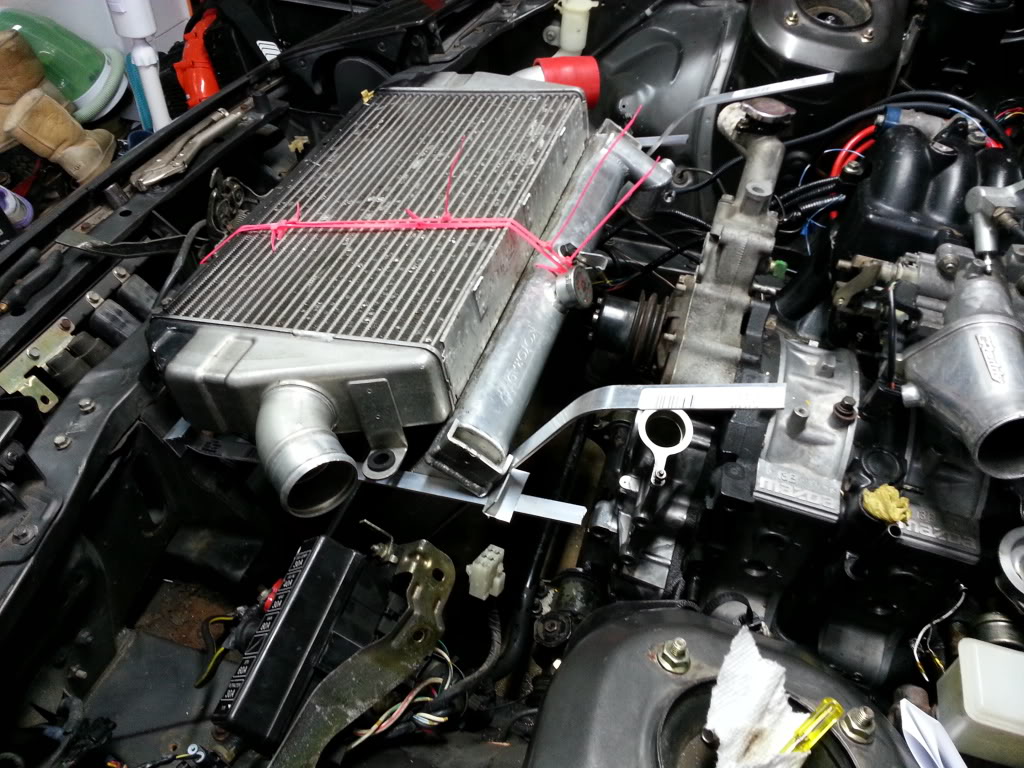
#213
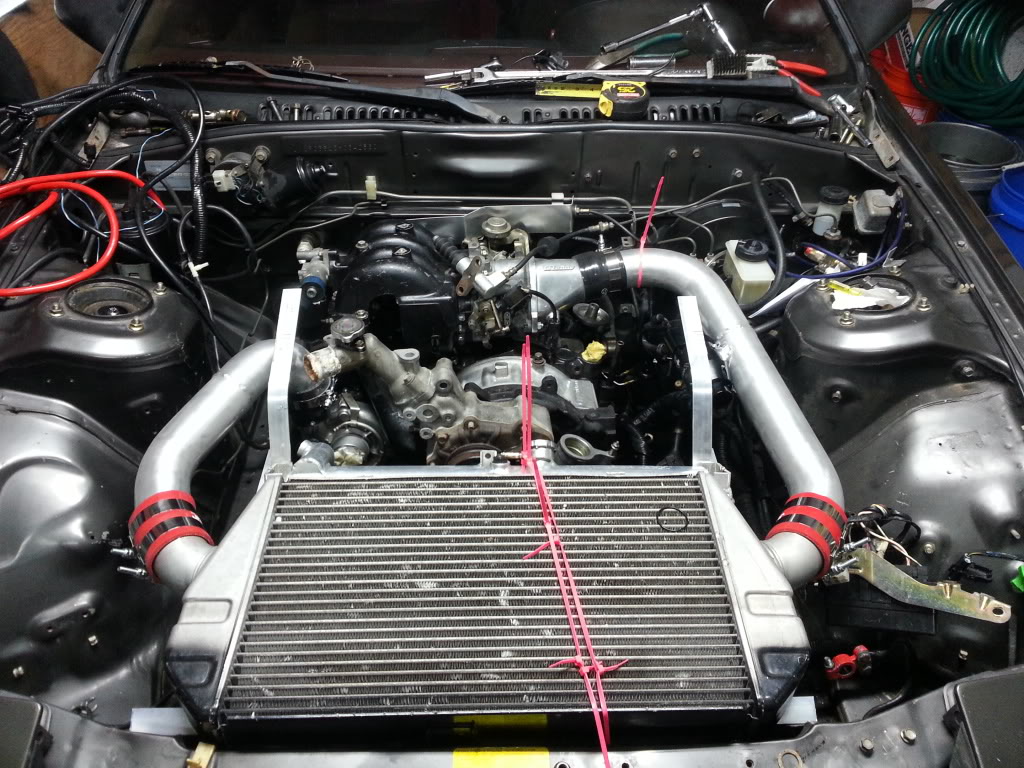
Spent some time studying BlueTII's vmount and designed something similar. I went to home depot and grabbed some flat aluminum stock, and a 90* angled piece as well. Total cost around $23.
I slotted the angled piece and slid it into where the stock radiator screws in. The aluminum isnt super rigid so the small strap will help pull the radiator away from the engine.
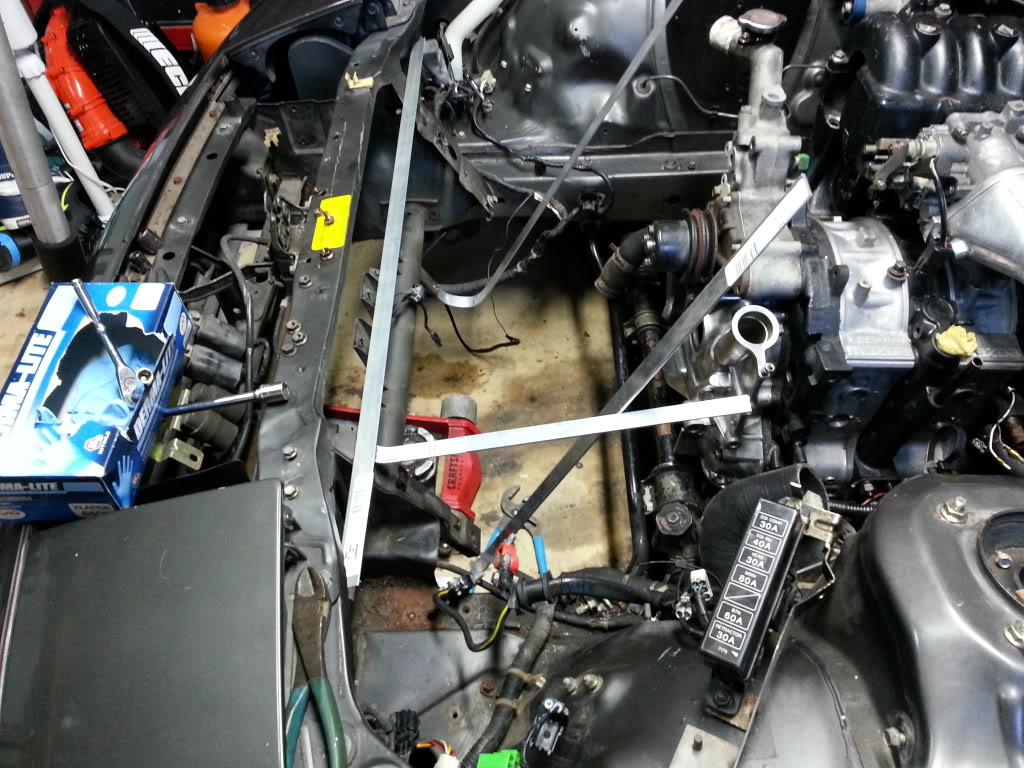
Since I dont have many tools to bend the aluminum I took a small piece of the angled aluminum and bent it to the angle the radiator will sit. It will be simply screwed in.
Feels good to make some decent progress!
I slotted the angled piece and slid it into where the stock radiator screws in. The aluminum isnt super rigid so the small strap will help pull the radiator away from the engine.
Since I dont have many tools to bend the aluminum I took a small piece of the angled aluminum and bent it to the angle the radiator will sit. It will be simply screwed in.
Feels good to make some decent progress!
 02-21-13, 09:14 PM
#215
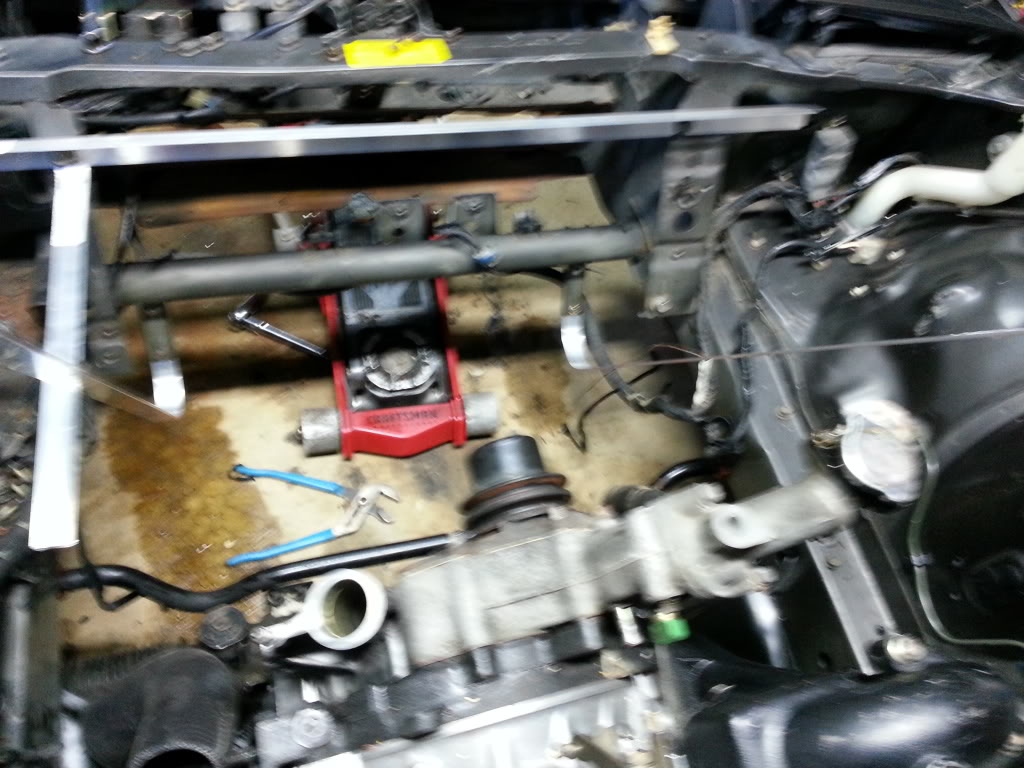
Pipes are welded up! New throttle bracket in place. Needs to be reshaped slightly, but it fits better than the old one.
I also found out the oil cooler is the perfect size for 4x120MM computer fans. I'll grab some Delta server grade fans that can blow 150-250 CFM. It shouldnt be too hard to wire them up and now I think it's safe to sneak the oil cooler behind the vmount. not sure if I should get an oil temp probe or just have them turn on with the coolant fan...
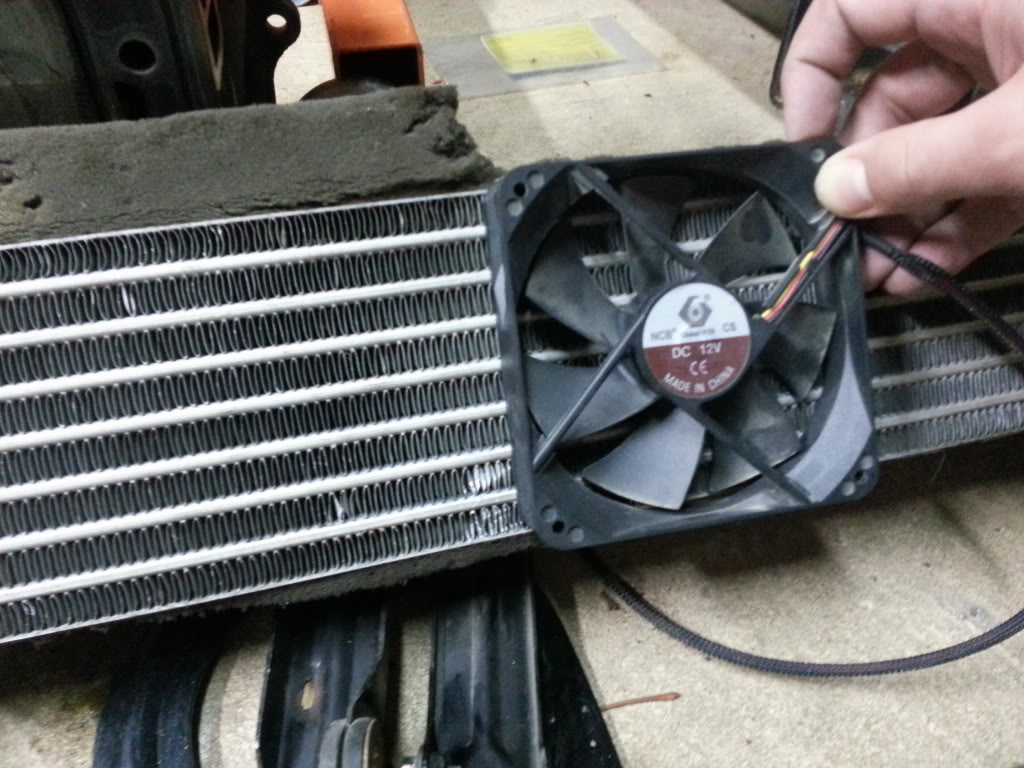
I also found out the oil cooler is the perfect size for 4x120MM computer fans. I'll grab some Delta server grade fans that can blow 150-250 CFM. It shouldnt be too hard to wire them up and now I think it's safe to sneak the oil cooler behind the vmount. not sure if I should get an oil temp probe or just have them turn on with the coolant fan...
02-21-13, 11:13 PM
#216
But I've been wrong before (many times).
That said, I'd concentrate more on ductwork at this point....you'll need it anyway and properly done, it might obviate the need for fans.

 03-25-13, 10:08 AM
#218
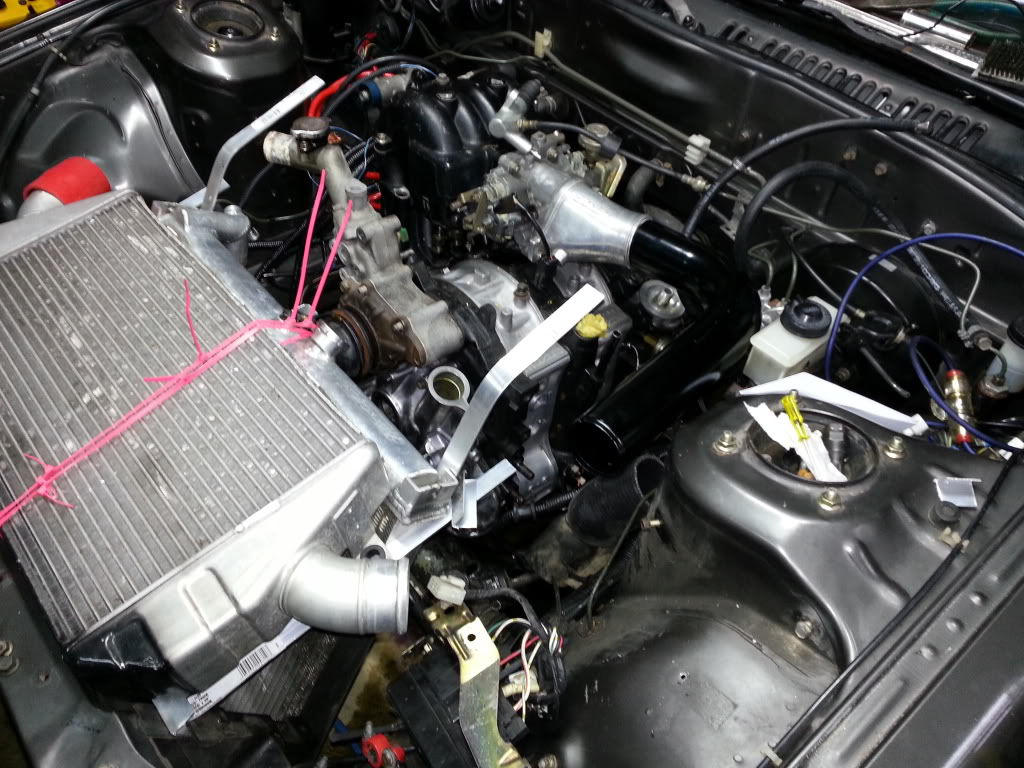
Wow I cant believe its been a month since I've updated this!
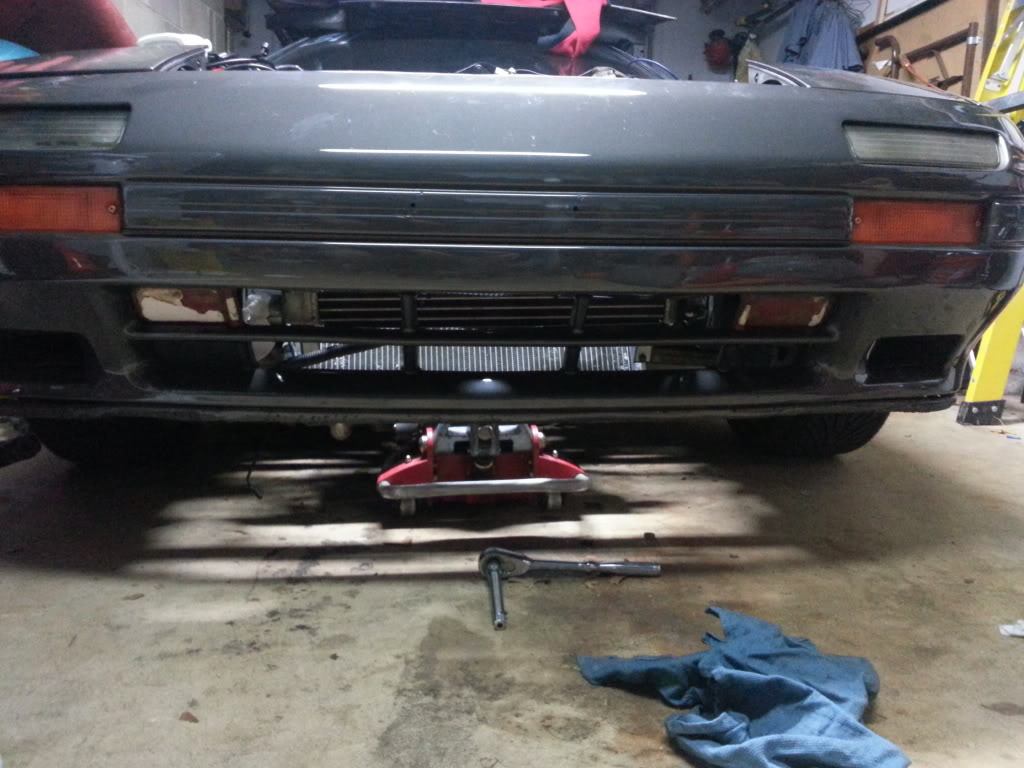
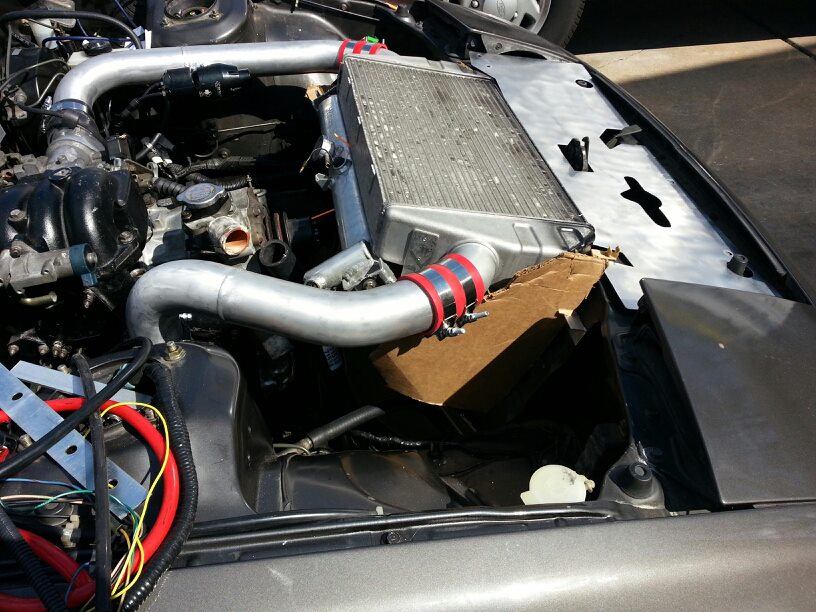
I got the radiator finally mounted after a brief moment of clarity. Now I need to figure out mount the intercooler above it, and where to put the oil cooler. Then mock up some cardboard for ductwork. I have an idea, and I really hope it works. Only factory holes have been used. The brackets on the radiator were slightly modified (grinding) to allow the radiator to fit between the factory mounting points.
p.s. I'm still undecided on the paint scheme...the gray makes it hard to choose an accent color. I'm thinking of doing purple and black. puple intercooler pipes and intake manifold. black engine block with purple rotor housings. What do you think?

 03-27-13, 12:33 AM
#220
Rx Bandit
Join Date: Jul 2008
Location: Fort St John, BC, Canada
Posts: 232
Likes: 0
Received 0 Likes
on
0 Posts
Man, I love coming back to this thread every once in a while to see what new **** you're fabbing up. Keep up the good work, she's going to be a 100% handmade beast
-sean
-sean
04-02-13, 12:49 PM
#221
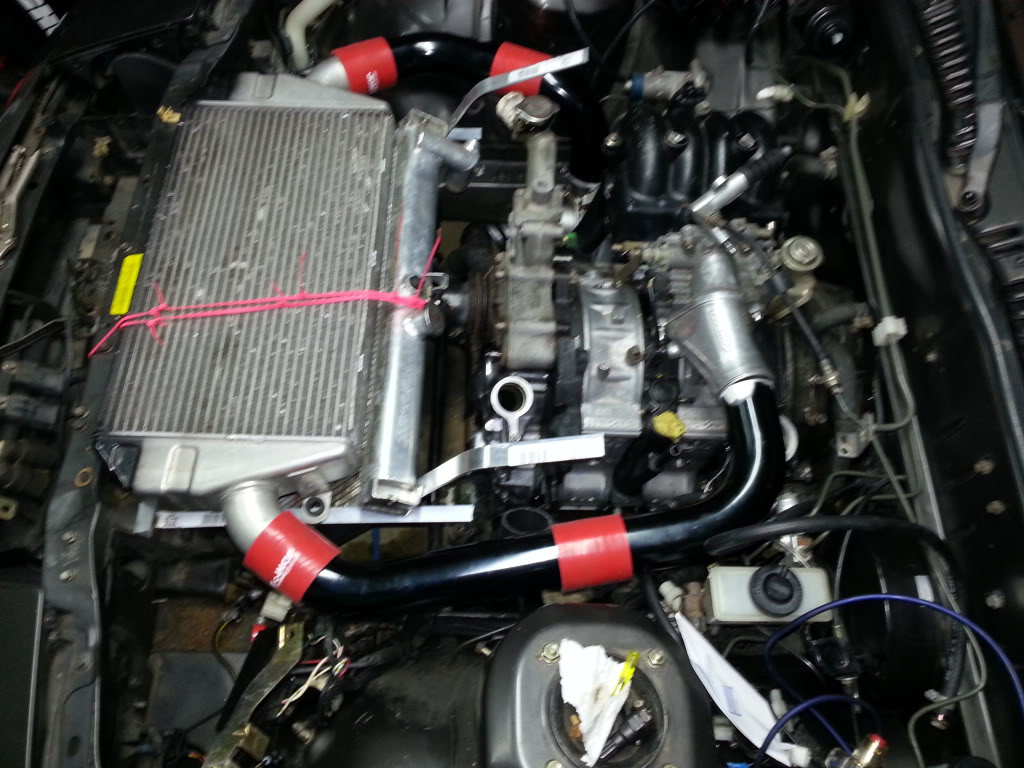
Thanks for the support!
I took a trip to the local pepboys to look at their wall of hoses and found a few that worked pretty well as replacement rad hoses. They all pestered me with "Well what vehicle is it for?" I had to keep reminding them that it was something custom so that would not help. I dont have a picture of the upper rad hose, but that one was a very lucky find and I hope the angles all line up without kinking the hose too much.
Then I took a bit of time and started working on ducting the sides of the v-mount. This isnt goign to be fun. lots of small spots for air to make it's way through. I'll have to find a thick foam to fill the gaps. anyways pictures because they make me happy.
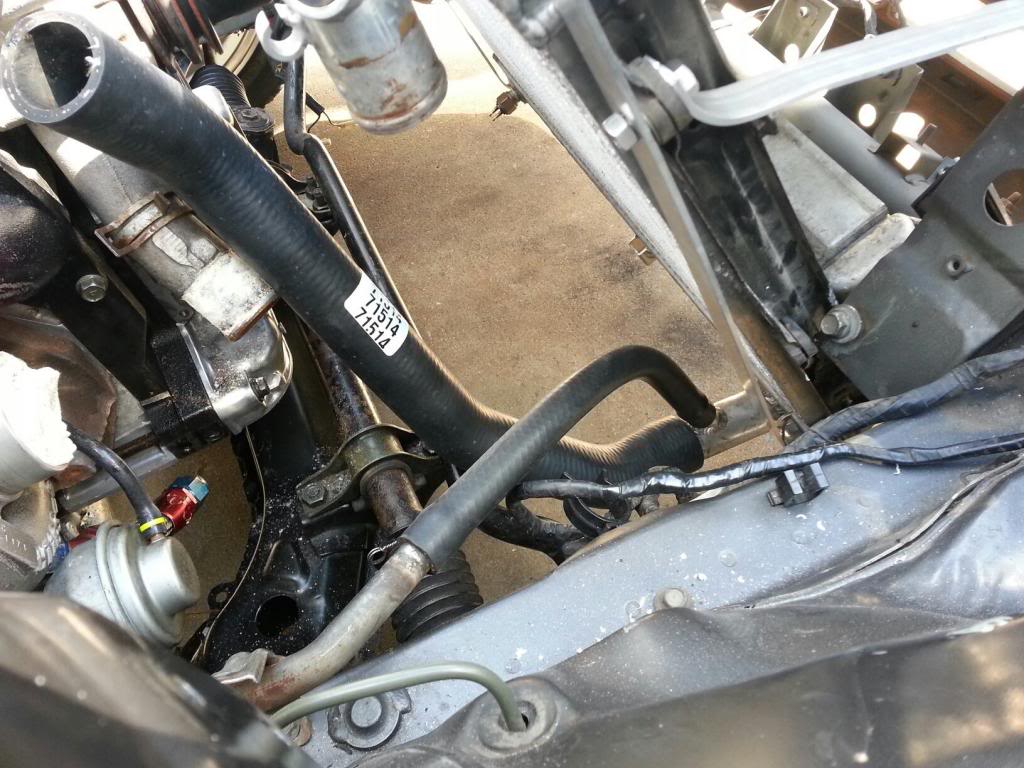
 04-07-13, 09:54 PM
#223
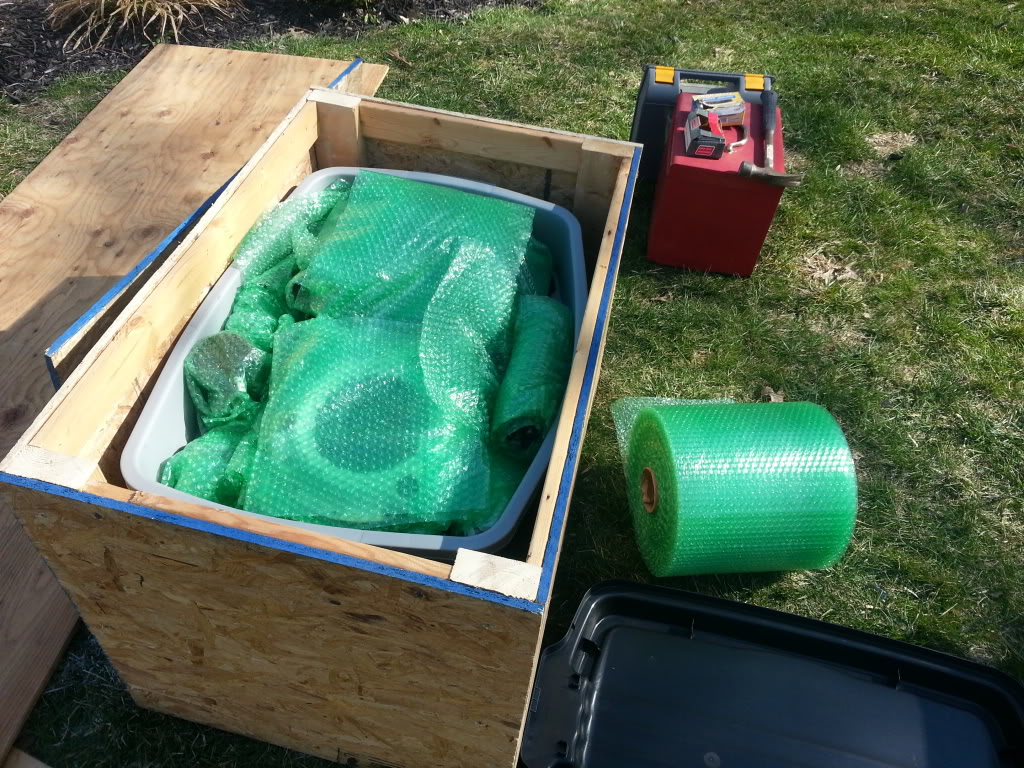
The freight company would not accept the engine on a pallet alone, so I was force to build a crate for the engine. That ate up a good portion of the day. Overall it was pretty successful I'd say! I'm really excited, and almost scared for when the engine gets dropped back in...


04-13-13, 06:57 PM
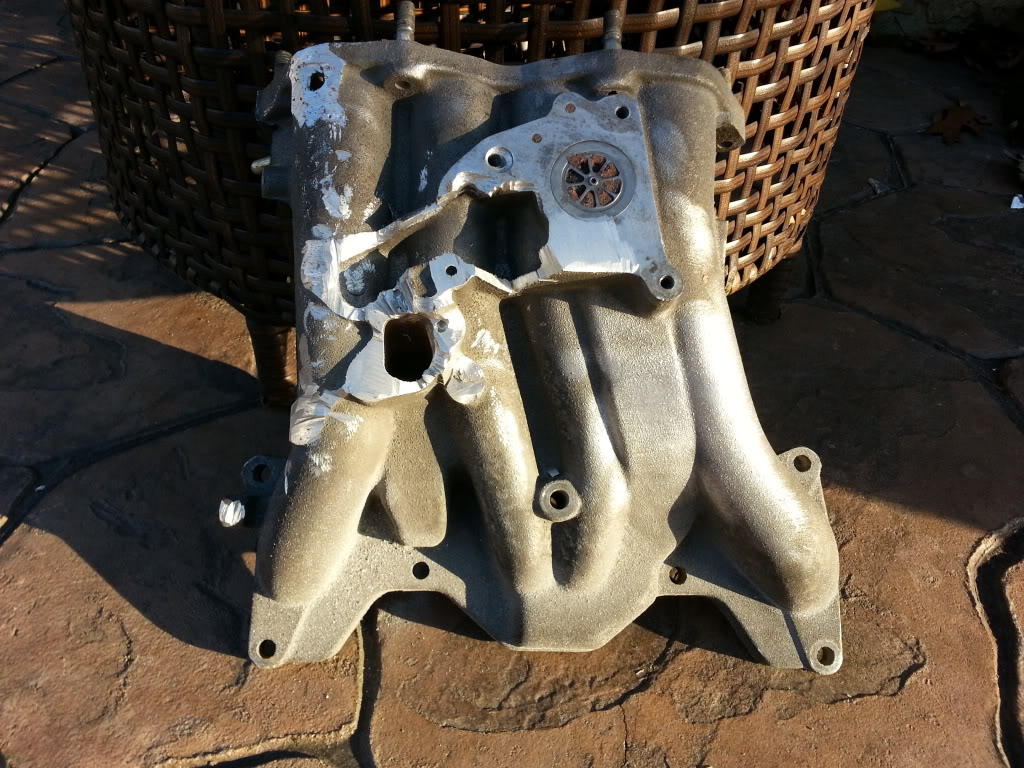
#225
Picked up a new lower intake manifold since the last was modified for the 6 port turbo setup. I'm grinding off all of the emissions items on this one so that it is cleaner and easier to put on some heat wrap. Hope to have it finished up tomorrow.