
Simon's First RX7/ Build

Thread Starter
bcrotary.
Joined: Jul 2010
Posts: 513
Likes: 1
From: Abbotsford, British Columbia
So, the time's finally come. I decided to only post my build a few months into it so I had some substance to put up here first. I decided to separate the build into to categories/ jobs. You'll see what I mean later.
Background Info:
The car was bought in October 2011, from an owner who more or less hacked it up about as bad as anyone can to a car that they received in mint condition. It was the PO's first car so some of these things were inevitable. Fortunately I have every receipt prior to his 3-year ownership so I know what I'm working with. It's a great base car that I intend to make into a very reliable 300whp DD. I know the goals I intend on aren't anything groundbreaking, but I have a motor that has 70,000km's on it and still is very healthy. I am hoping to get to 110/ 120,000 before I rebuild.
All of that being said, this is what I have to tinker with.
- Motor Rebuilt at 170,000 (Currently sits at 255,000) by Adam Heyman @ RX7 Specialties.
- S6 Rotors
- S5 Turbo
- S4 Irons
- 255lph Walbro Fuel Pump
- Blitz Boost Controller @ 10psi
- Apex Recirc. BOV
- Full Racing Beat Rev. 2 Turbo-Back Exhaust
- Defi D-Series EGT/ Boost Gauge(s)
- Apex'i Turbo Timer
Thread Starter
bcrotary.
Joined: Jul 2010
Posts: 513
Likes: 1
From: Abbotsford, British Columbia
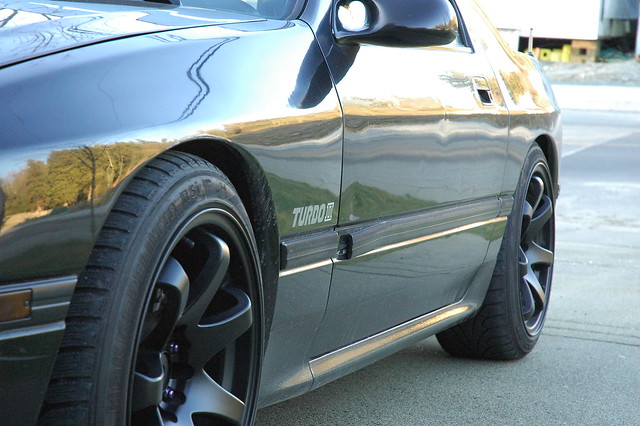
Thanks, umm, I was actually worried someone would ask me that because it's ALWAYS the first thing people point out. I know just about nothing about wheel specs but I do know they're XXR 552's and they're 17x8 I'm pretty sure. I know they're 17's but I'm not 100% about width. They have 235-width tires and they have the slightest amount of stretch. Offset I have absolutely no idea about.
Thread Starter
bcrotary.
Joined: Jul 2010
Posts: 513
Likes: 1
From: Abbotsford, British Columbia
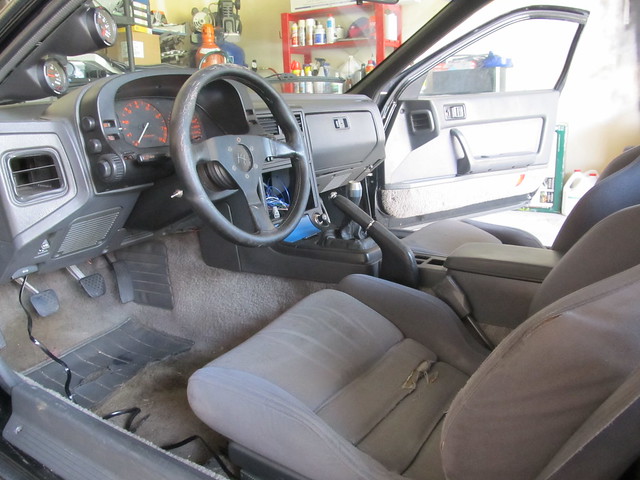
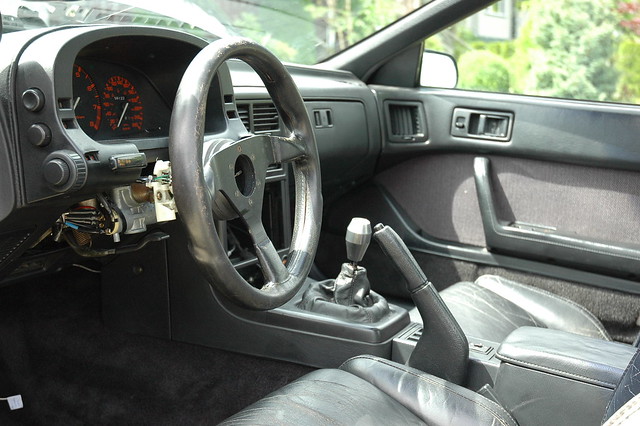
So, the first thing I did upon receiving the car was to restore the interior the best I could. I'm not a big fan of the grey interior on the S4's, so I started by finding a MINT carpet from one of the local rotary guys. It's off a J-Spec car that had to get torn apart but had 50,000 original km's on it. Along with the JDM flootmats, and carpet, I also received the JDM door cards. Everything was in great shape so I was just stoked, even if I did overpay a bit.
Next on the list is a black 10th AE interior that I have waiting for me. It'll complete the conversion/ transformation and it is now a bit more of a frankenstein car of more uncommon/ desireable parts.
Before:
In Progress:

After:


Next on the list is a black 10th AE interior that I have waiting for me. It'll complete the conversion/ transformation and it is now a bit more of a frankenstein car of more uncommon/ desireable parts.
Before:
In Progress:
After:
Last edited by 7speed; Feb 25, 2012 at 12:11 AM. Reason: Spelling.
Trending Topics
Thread Starter
bcrotary.
Joined: Jul 2010
Posts: 513
Likes: 1
From: Abbotsford, British Columbia
I still have some more updates to put up here that I did around Christmas, but next will probably be a new transmission/ clutch. I will unveil my future plans for the car as the build goes.
Thread Starter
bcrotary.
Joined: Jul 2010
Posts: 513
Likes: 1
From: Abbotsford, British Columbia
Ok, so the next thing I did after the interior was get those winter tires. They're Nokian Hakkapeliitta 5's. 235/45/17. They actually suit the car perfectly, and have the slightest amount of stretch. The tires on there before were 215's and were stretched the the max, so because they were bald I decided to get some winters so the car would survive. I got a great deal ($300) for the set and they'd only been used 1 season.
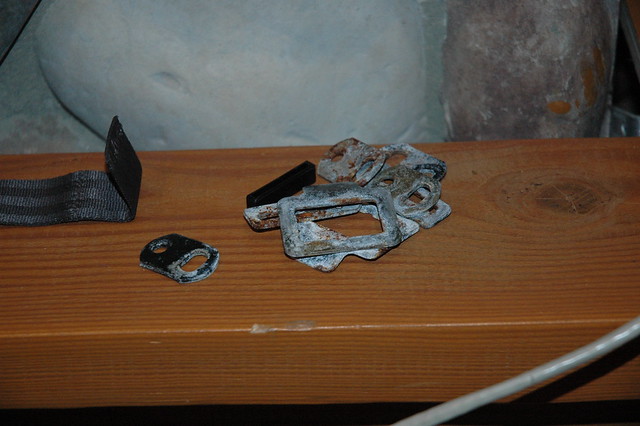
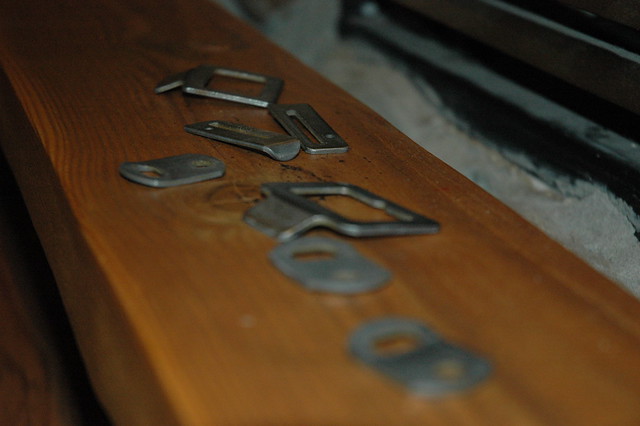
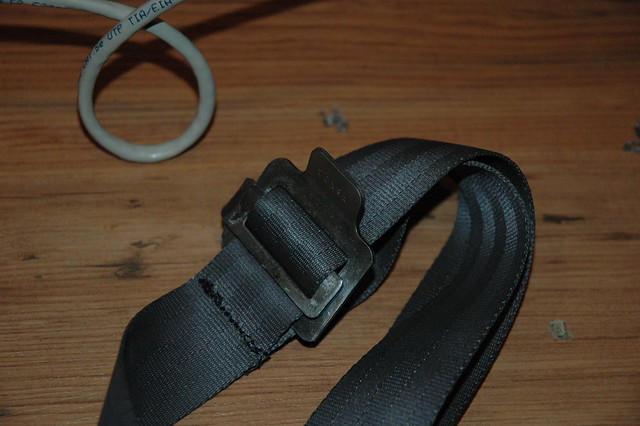
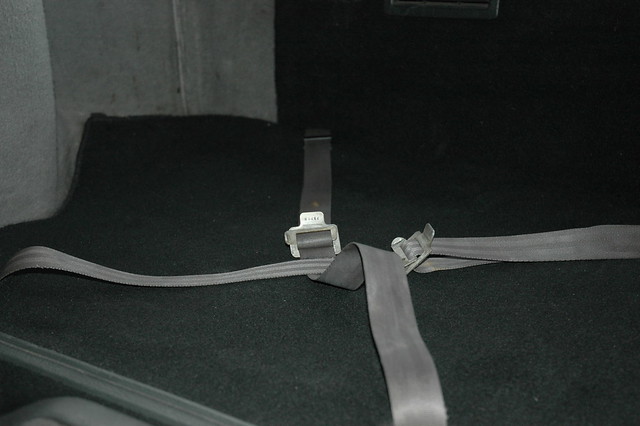
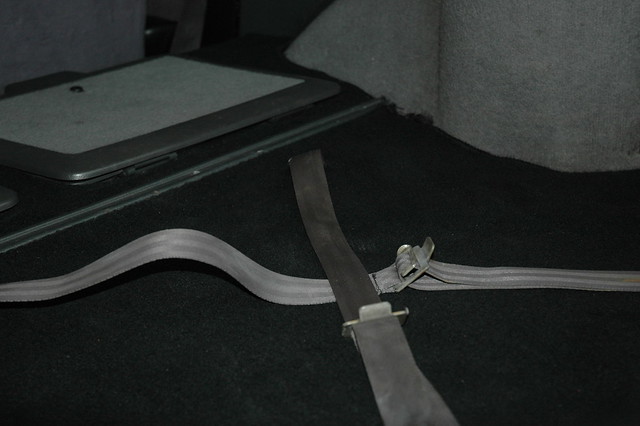
Because build threads aren't much without pictures, after that I decided to get the cargo straps for the rear and bring it back to stock as much as possible on the interior. I went about finding the straps tucked away next to the tire iron.. They were extremely corroded and in overall terrible condition. I had to rip out the seams, sand down the rust and spray a nice clear coat over metal. My mom's sewing skills came in handy also for sewing everything back together.
How I found them:
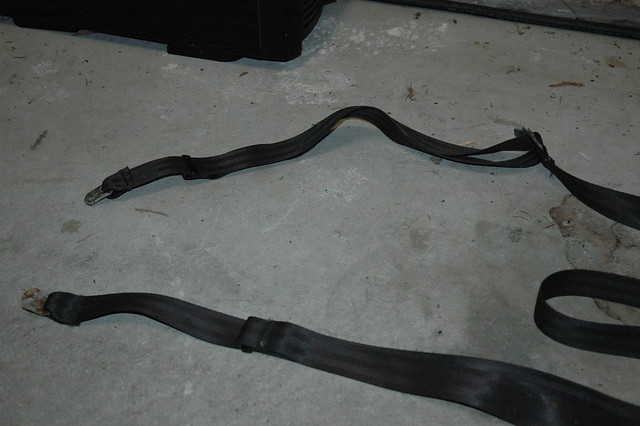
Taken Apart:

Fixed:
Re-Assembled:

I'll get some shots tomorrow of how they look now. I'm very happy with how it all came out. This is also going to be quite a detailed/ budget thread, so if you're just looking for pics of new turbos and 3-rotor swaps, I'm sorry but this isn't going to be one of those types. While it is a budget thread, I don't skimp out on buying cheap eBay stuff either. It just takes time to buy the right stuff the first time, so bear with me.
Because build threads aren't much without pictures, after that I decided to get the cargo straps for the rear and bring it back to stock as much as possible on the interior. I went about finding the straps tucked away next to the tire iron.. They were extremely corroded and in overall terrible condition. I had to rip out the seams, sand down the rust and spray a nice clear coat over metal. My mom's sewing skills came in handy also for sewing everything back together.
How I found them:
Taken Apart:
Fixed:
Re-Assembled:
I'll get some shots tomorrow of how they look now. I'm very happy with how it all came out. This is also going to be quite a detailed/ budget thread, so if you're just looking for pics of new turbos and 3-rotor swaps, I'm sorry but this isn't going to be one of those types. While it is a budget thread, I don't skimp out on buying cheap eBay stuff either. It just takes time to buy the right stuff the first time, so bear with me.
Thread Starter
bcrotary.
Joined: Jul 2010
Posts: 513
Likes: 1
From: Abbotsford, British Columbia
Thanks. The carpet isn't dyed, nor is it the original carpet from the car. It's out of a jspec 'GT-R' model that I was lucky enough to pick off of. I got the floormats too, which I just love.
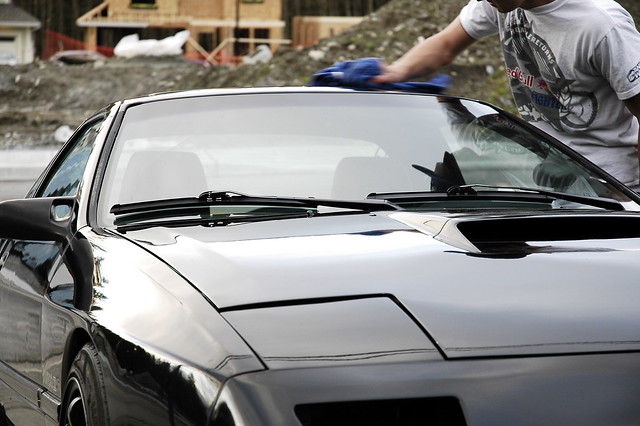
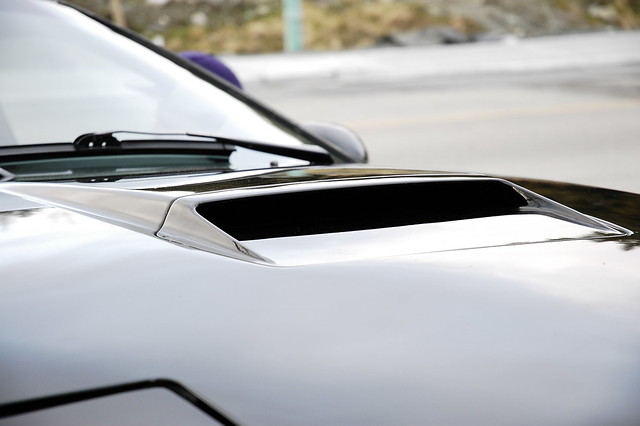
As for an update, I decided to wax the old girl yesterday. It's most likely the first time it's been waxed in a looong time. I couldn't believe the difference that it made. The old man took some good photos as always as well.
Enjoy.

Also, the cargo strap pictures as promised;
As for an update, I decided to wax the old girl yesterday. It's most likely the first time it's been waxed in a looong time. I couldn't believe the difference that it made. The old man took some good photos as always as well.
Enjoy.
Also, the cargo strap pictures as promised;
Last edited by 7speed; Feb 26, 2012 at 05:45 PM. Reason: Spaced Photos.
Thread Starter
bcrotary.
Joined: Jul 2010
Posts: 513
Likes: 1
From: Abbotsford, British Columbia
Ok, so I figured I'd post a small update. I'm waiting to get paid, so I did two smaller things. My sunroof NEVER goes up without a little push, so I got to cleaning and re-greasing the tracks. After about 10 or so cycles, it does everything perfectly! I'm very pleased about that.
After Cleaning:
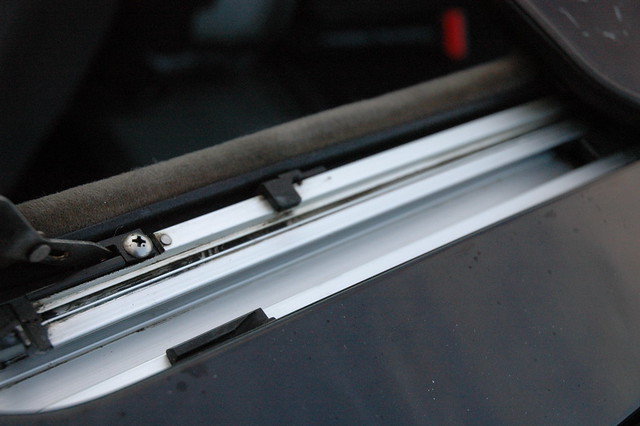
After Greasing:

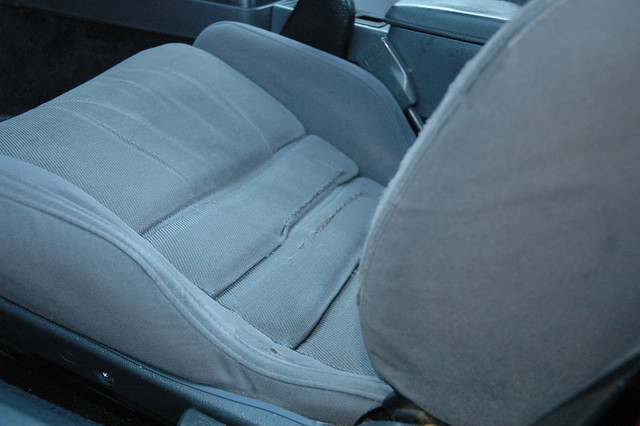
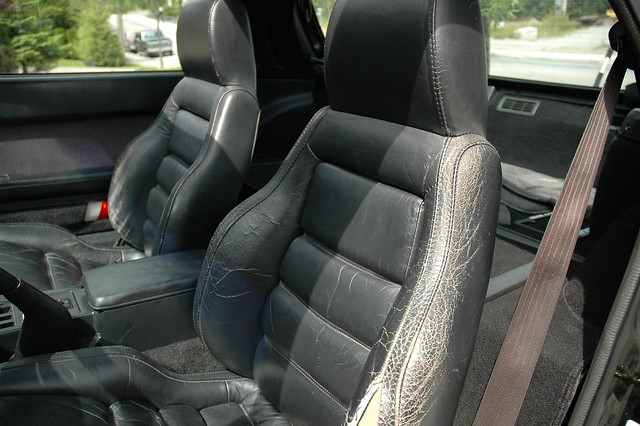
The next thing was the rips in the driver's seat. One on the back right side was a pretty big tear and the other one was on the left side by the arm. They're circled in the before picture. Anyways, as always when I stop into my parents place I put my mom to work and so she sewed the tears up. It came out great, a nice little fix. It's a good patch job at least until I get my Black 10AE Leather's.
Before:
After:

After Cleaning:
After Greasing:
The next thing was the rips in the driver's seat. One on the back right side was a pretty big tear and the other one was on the left side by the arm. They're circled in the before picture. Anyways, as always when I stop into my parents place I put my mom to work and so she sewed the tears up. It came out great, a nice little fix. It's a good patch job at least until I get my Black 10AE Leather's.
Before:
After:

Thread Starter
bcrotary.
Joined: Jul 2010
Posts: 513
Likes: 1
From: Abbotsford, British Columbia
Nice. I'm not a fan of the blue either. A black interior is just timeless, really. It'll never look out of place or odd, unlike the burgundy for example. I'm sure it looked great in the 80's, but it definitely wouldn't be my first choice now.
Joined: Jan 2008
Posts: 75
Likes: 0
From: Why dose it rain so much, Oregon
Also Im having the same issue with my sunroof, I need to take it out and clean/re grease everything. I just dont want to damage anything taking it apart.
Thread Starter
bcrotary.
Joined: Jul 2010
Posts: 513
Likes: 1
From: Abbotsford, British Columbia
Also Im having the same issue with my sunroof, I need to take it out and clean/re grease everything. I just dont want to damage anything taking it apart.
Thread Starter
bcrotary.
Joined: Jul 2010
Posts: 513
Likes: 1
From: Abbotsford, British Columbia
So, it's been ages since I've updated, but plenty has happened.
First off, the car has been uninsured and sitting for about 3 months now. I took it off the road because of the clutch/ transmission issue. The clutch slips like crazy under boost and the transmission grinds into 5th and needs new mounts because it shakes around like crazy. This is how all of the issues started.
Now, I knew there were plenty of things wrong under the hood because the previous owner was very inclined to hack up the car and I knew he did his own personal wire-tuck. So, I decided to explore and fix these things while sourcing a trans. and clutch.
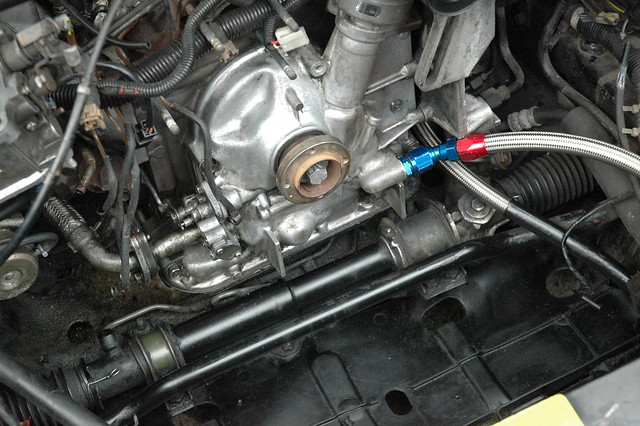
I started with the little things that I knew were wrong. The nipple on the radiator cap housing was snapped off, so coolant was leaking out of there, so I sourced one that was in great shape. So, as I was taking the old radiator housing off, the head of the bolt just snapped off. Great. Now it was time for a new thermostat housing because the rest of the bolt was stuck in the old one. In due time, I sourced a new one. Then, taking that off and installing the new radiator/ thermostat housing, I was fastening the last bolt on and then the end of the water pump housing just snapped off on me. This was a big issue. So, I sourced a new one of those as well (luckily a local guy (Steve Wallace) happened to have one left in his stock).
Doing all of this I managed to clean out a lot of the engine bay because I had to uninstall most of the front-half of the engine bay to get to that housing.
Thermostat Housing/ Radiator Cap Housing/ Water Pump Housing;

Clean(er) Engine Bay;

First off, the car has been uninsured and sitting for about 3 months now. I took it off the road because of the clutch/ transmission issue. The clutch slips like crazy under boost and the transmission grinds into 5th and needs new mounts because it shakes around like crazy. This is how all of the issues started.
Now, I knew there were plenty of things wrong under the hood because the previous owner was very inclined to hack up the car and I knew he did his own personal wire-tuck. So, I decided to explore and fix these things while sourcing a trans. and clutch.
I started with the little things that I knew were wrong. The nipple on the radiator cap housing was snapped off, so coolant was leaking out of there, so I sourced one that was in great shape. So, as I was taking the old radiator housing off, the head of the bolt just snapped off. Great. Now it was time for a new thermostat housing because the rest of the bolt was stuck in the old one. In due time, I sourced a new one. Then, taking that off and installing the new radiator/ thermostat housing, I was fastening the last bolt on and then the end of the water pump housing just snapped off on me. This was a big issue. So, I sourced a new one of those as well (luckily a local guy (Steve Wallace) happened to have one left in his stock).
Doing all of this I managed to clean out a lot of the engine bay because I had to uninstall most of the front-half of the engine bay to get to that housing.
Thermostat Housing/ Radiator Cap Housing/ Water Pump Housing;
Clean(er) Engine Bay;
Thread Starter
bcrotary.
Joined: Jul 2010
Posts: 513
Likes: 1
From: Abbotsford, British Columbia
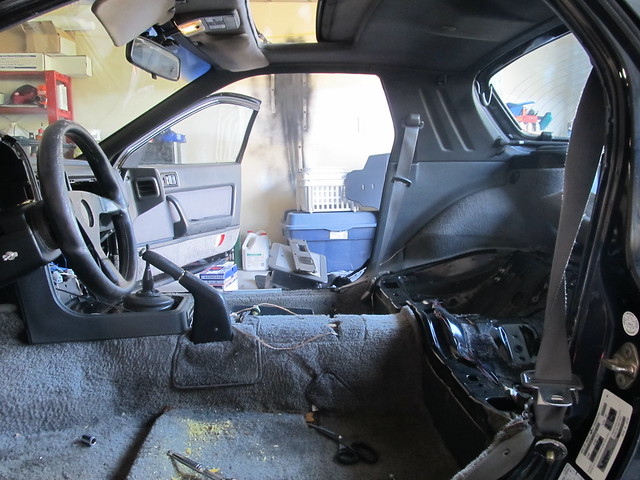
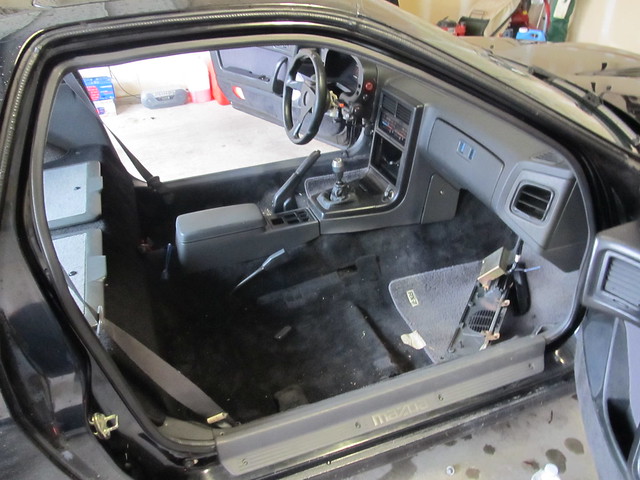
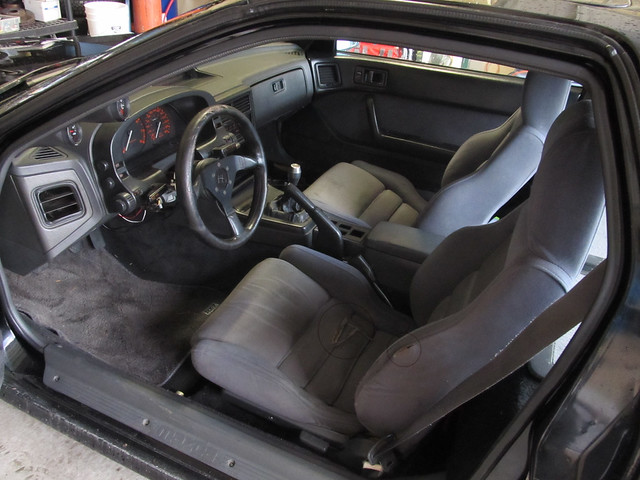
While doing all of this, Steve also had an above average condition interior in his basement from his old 10AE, so I bought that from him. As well as the rear wiper arm that I'd been searching months for. The only real thing that needs attention are the seats, which will be reupholstered in due time. Now I just need a new steering wheel and a stock head unit.
Grey to Black Interior Conversion;
Grey to Black Interior Conversion;
Thread Starter
bcrotary.
Joined: Jul 2010
Posts: 513
Likes: 1
From: Abbotsford, British Columbia
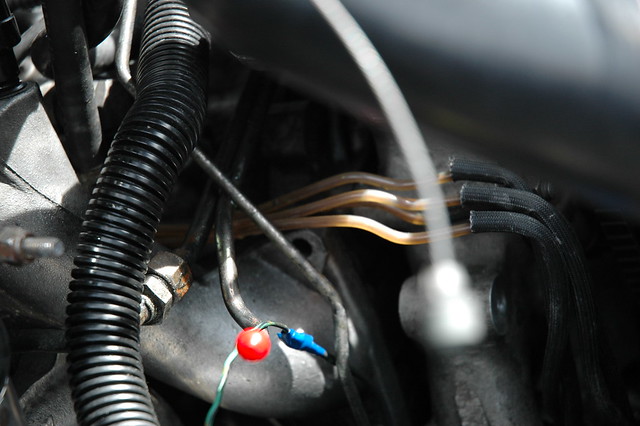
Continuing on with the updates, and back onto the engine bay stuff. While doing the water pump housing replacement, the justifiably brittle, and old OMP lines (well one of them) snapped on me. Soo, off to Steve's again to get new(er) low mileage ones.
Once I did that, because I had to take off the UIM get under there, I figured I'd check the injectors because she floods uncontrollably. Yep. 3 of them are cracked on the tip and are now useless. So, I made the biggest mistake yet and purchased 4 reman. units off eBay. Little did I know that I was sent high impedance injectors, but we'll get to that later. Once I got my new injectors, the old, brittle clips snapped on me while I was taking them off. Yup, back to Steve's to get new ones.
So, now that I had new injector clips and new injectors, the OMP lines were new, gaskets were all good, I go to fire up the car yesterday and she's leaking fuel. Like I mean pissing out fuel. Upon removing everything (again), I fixed the loose hose and now all of a sudden it won't even get a spark. Called up Steve to see what the issue was and he was kind enough to come down and give me a hand. He immediately notices that they're high impedance injectors and what I finally thought was the day I'd get to drive the car, was in fact another day of waiting. My goal was to have the car ready by July 8th, as that's the date for the first bcrotary cruise of the summer. I guess I'll have to miss that now.
Anyways, back on topic. While Steve was over, he noticed that someone had cut the knock sensor wire, and just left it hanging, and the air-temp sensor on the block was just broken off. Thankfully he had some parts on hand to help fix. Without him, the car would be on bricks. A true genius.
New OMP Lines;
Knock Sensor Wire;

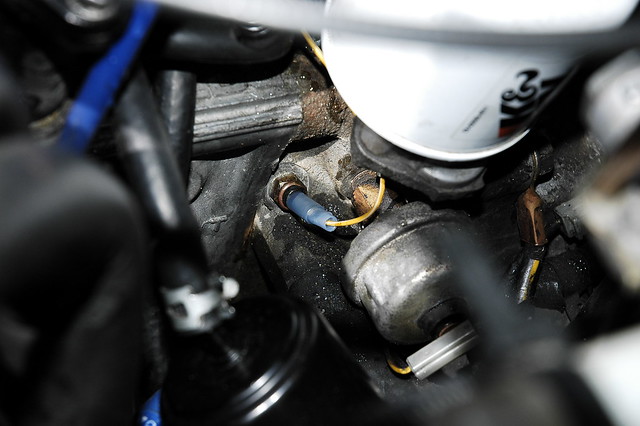
New Injector (1 of 4);
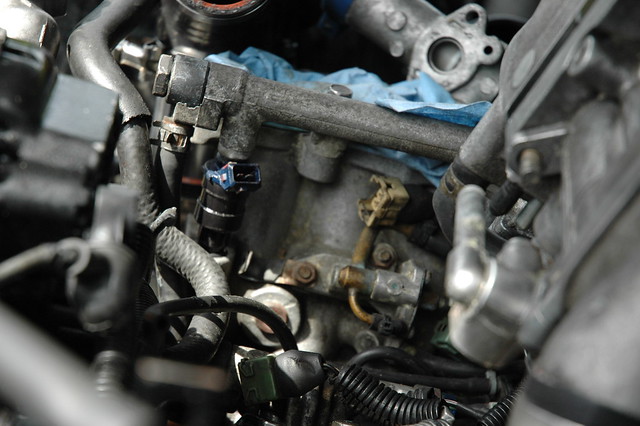
Injector Clip (1 of 4);

Once I did that, because I had to take off the UIM get under there, I figured I'd check the injectors because she floods uncontrollably. Yep. 3 of them are cracked on the tip and are now useless. So, I made the biggest mistake yet and purchased 4 reman. units off eBay. Little did I know that I was sent high impedance injectors, but we'll get to that later. Once I got my new injectors, the old, brittle clips snapped on me while I was taking them off. Yup, back to Steve's to get new ones.
So, now that I had new injector clips and new injectors, the OMP lines were new, gaskets were all good, I go to fire up the car yesterday and she's leaking fuel. Like I mean pissing out fuel. Upon removing everything (again), I fixed the loose hose and now all of a sudden it won't even get a spark. Called up Steve to see what the issue was and he was kind enough to come down and give me a hand. He immediately notices that they're high impedance injectors and what I finally thought was the day I'd get to drive the car, was in fact another day of waiting. My goal was to have the car ready by July 8th, as that's the date for the first bcrotary cruise of the summer. I guess I'll have to miss that now.
Anyways, back on topic. While Steve was over, he noticed that someone had cut the knock sensor wire, and just left it hanging, and the air-temp sensor on the block was just broken off. Thankfully he had some parts on hand to help fix. Without him, the car would be on bricks. A true genius.
New OMP Lines;
Knock Sensor Wire;
New Injector (1 of 4);
Injector Clip (1 of 4);
Last edited by 7speed; Jun 28, 2012 at 02:35 PM. Reason: Spelling.
Thread Starter
bcrotary.
Joined: Jul 2010
Posts: 513
Likes: 1
From: Abbotsford, British Columbia
Upon finding out about all of these issues (leaky injectors, no knock sensor, vacuum leaks everywhere, a mis-wired boost controller), it's a mystery to me how the motor hasn't blown. It's going on 70,000 and has good compression. I guess it's a testament to either RX7 Specialties, or just sheer luck. I was boosting at times 15PSI on the stock turbo as well, and still no issues. I didn't want to, but it was completely uncontrolled, so upon noticing, I stopped the redlining and took it off the road. Now I have to get the right injectors and still find that trans. and clutch, my original mission.
