
Simon's First RX7/ Build


Thread Starter
bcrotary.
Joined: Jul 2010
Posts: 513
Likes: 1
From: Abbotsford, British Columbia
Thanks, I like it much better as well. 99-spec is my goal, it just retains its value well and doesn't come up for sale too often, so I'll have to be patient. I'm not a big fan of aftermarket aero, it just normally fits so poorly. I also think the OEM stuff aesthetically is the nicest anyways so it's a win-win.
Thread Starter
bcrotary.
Joined: Jul 2010
Posts: 513
Likes: 1
From: Abbotsford, British Columbia
So, progress has been a bit slow because of a bit of a tough job transition but nevertheless there is always work to be done on the car.
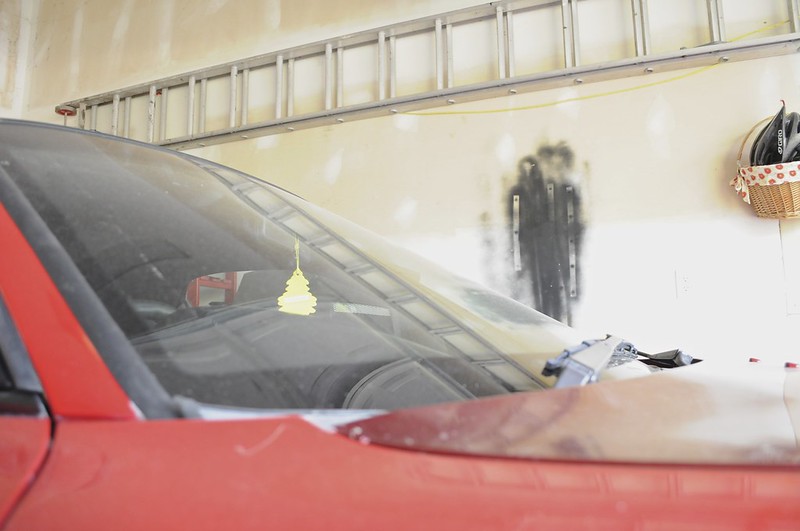
In order to pass the inspection I needed a new windshield so that was priority number one. A friend of mine had a hookup in the windshield game so I got that replaced with a brand new one! My first ever new windshield. It's my first non-cracked windshield in about 4 years and man it's a good feeling as strange as that sounds.
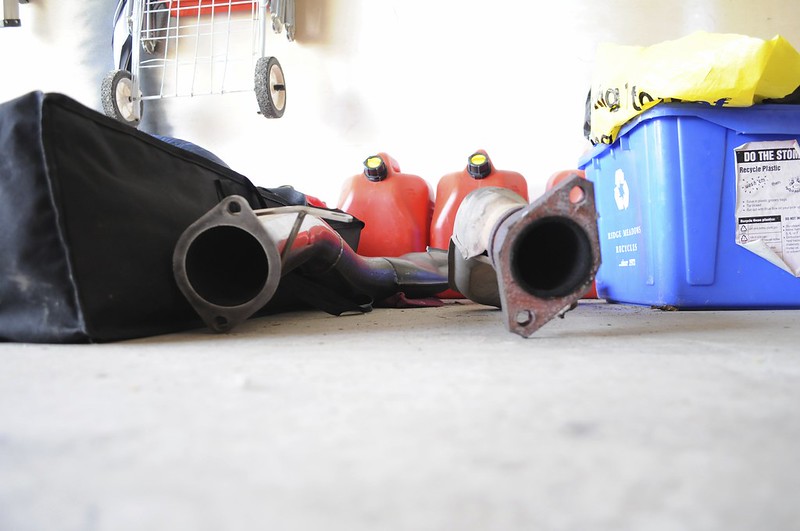
Then I managed to scoop a nice Greddy downpipe off a nice local dude that ended up going single. Hopefully pick up a little bit of power now that it's 3". The j-spec downpipe doesn't have a cat in it, but it is 2.5" so this is a bit of an upgrade. Of course taking the downpipe off I wrecked a couple studs, but those were getting replaced anyways so those are on order from Mazda.

Spent some time cleaning up (doesn't look like it), but it's coming along. Deleted air conditioning and the air pump, so I'll need an under drive pulley and an idler pulley but that'll come in due time. No real rush. Sadly I was short sighted a few weeks ago and those brand new belts I bought will be mantlepieces as they fitted the A/C and A/P. I should've known better but oh well.
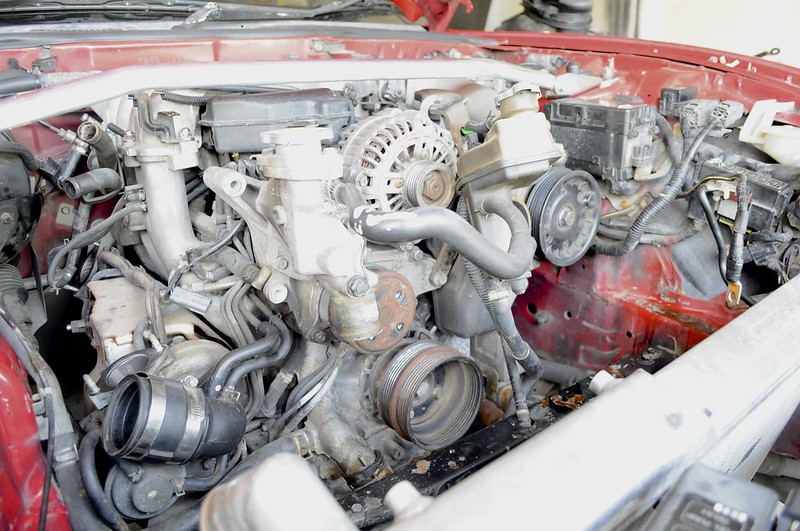
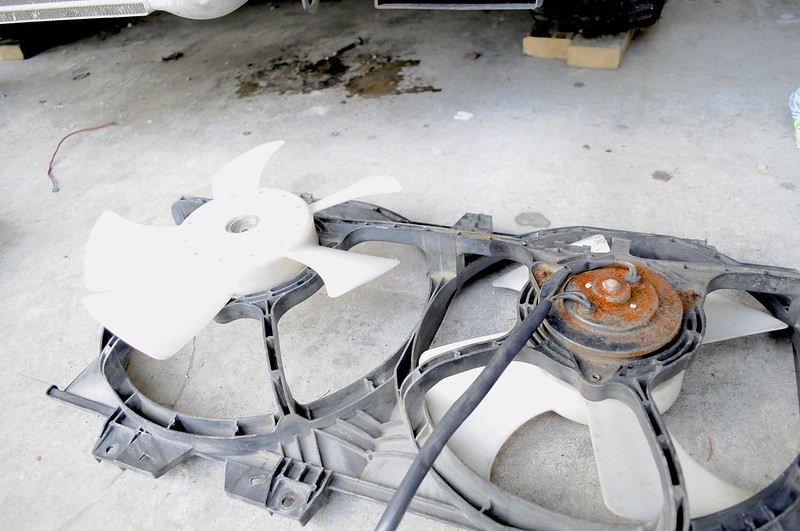
One of the motors in my rad fans was seized. Fortunately Steve has a spare one that'll I'll scoop up this week sometime. Took some 2000 grit to the fans and cleaned all the discolouration off them. I've done this with all my 7s now and it really makes a nice touch when looking into the bay.
In order to pass the inspection I needed a new windshield so that was priority number one. A friend of mine had a hookup in the windshield game so I got that replaced with a brand new one! My first ever new windshield. It's my first non-cracked windshield in about 4 years and man it's a good feeling as strange as that sounds.
Then I managed to scoop a nice Greddy downpipe off a nice local dude that ended up going single. Hopefully pick up a little bit of power now that it's 3". The j-spec downpipe doesn't have a cat in it, but it is 2.5" so this is a bit of an upgrade. Of course taking the downpipe off I wrecked a couple studs, but those were getting replaced anyways so those are on order from Mazda.
Spent some time cleaning up (doesn't look like it), but it's coming along. Deleted air conditioning and the air pump, so I'll need an under drive pulley and an idler pulley but that'll come in due time. No real rush. Sadly I was short sighted a few weeks ago and those brand new belts I bought will be mantlepieces as they fitted the A/C and A/P. I should've known better but oh well.
One of the motors in my rad fans was seized. Fortunately Steve has a spare one that'll I'll scoop up this week sometime. Took some 2000 grit to the fans and cleaned all the discolouration off them. I've done this with all my 7s now and it really makes a nice touch when looking into the bay.


Thread Starter
bcrotary.
Joined: Jul 2010
Posts: 513
Likes: 1
From: Abbotsford, British Columbia
Thanks Nate! I think about it every day. I've daily'ed a couple different cars now since the FC and it just sucks. Nothing gives me that feeling. I'm really hoping that when I can start driving the FD on a daily basis that it comes back. If not.. I don't know.
Thread Starter
bcrotary.
Joined: Jul 2010
Posts: 513
Likes: 1
From: Abbotsford, British Columbia
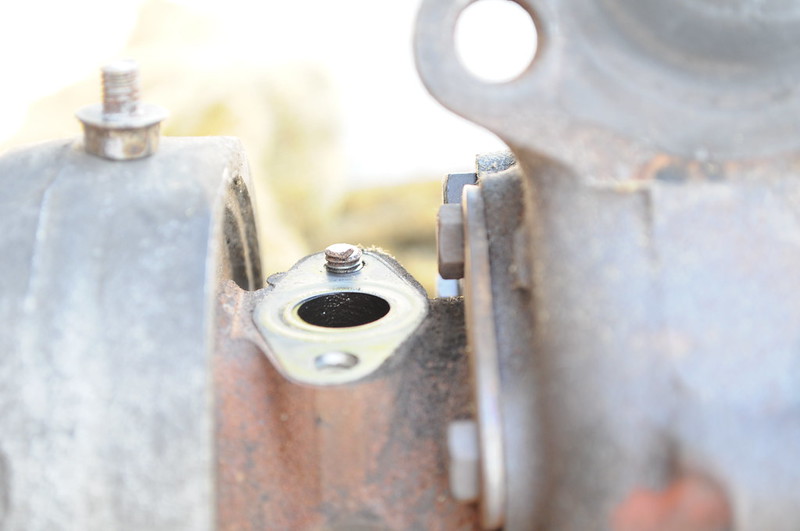
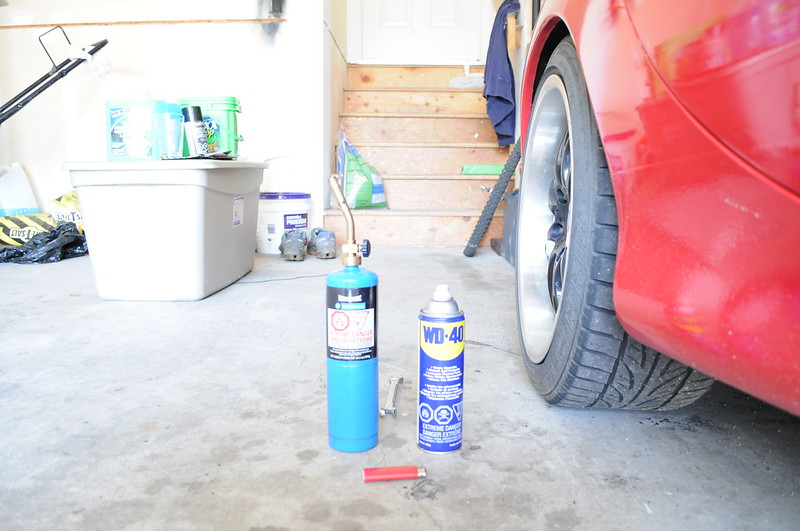
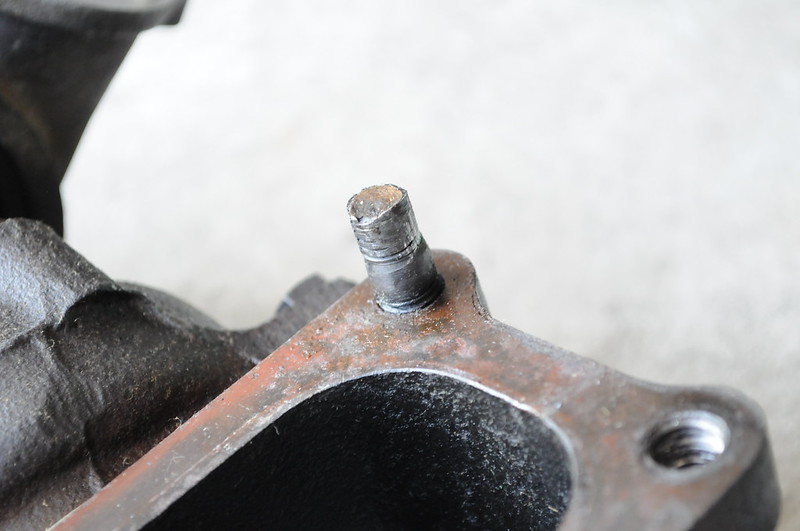
Haha I know right. So, taking the factory downpipe off as I previously mentioned I snapped one stud in half, stripped the threads on two and one of them came out with the nut. Upon an hour or two of completely wasted time with a propane torch, a wet rag and two of my old 14mm nuts from when I did the turbo on that car, I was absolutely nowhere. Those studs are basically welded in there. Steve recommended (insisted) that I just flat out take the twins off. I'm easily convinced when it comes to being able to clean things that I wouldn't normally be able to reach so I dove into it. One more oil line and they're off but I packed up and finished for the night. Will take pictures and post them tomorrow.
Full Member
Joined: Jan 2014
Posts: 75
Likes: 0
From: Parksville, British Columbia
Haha I know right. So, taking the factory downpipe off as I previously mentioned I snapped one stud in half, stripped the threads on two and one of them came out with the nut. Upon an hour or two of completely wasted time with a propane torch, a wet rag and two of my old 14mm nuts from when I did the turbo on that car, I was absolutely nowhere. Those studs are basically welded in there. Steve recommended (insisted) that I just flat out take the twins off. I'm easily convinced when it comes to being able to clean things that I wouldn't normally be able to reach so I dove into it. One more oil line and they're off but I packed up and finished for the night. Will take pictures and post them tomorrow.
Thread Starter
bcrotary.
Joined: Jul 2010
Posts: 513
Likes: 1
From: Abbotsford, British Columbia
Haha agreed. There's always something.
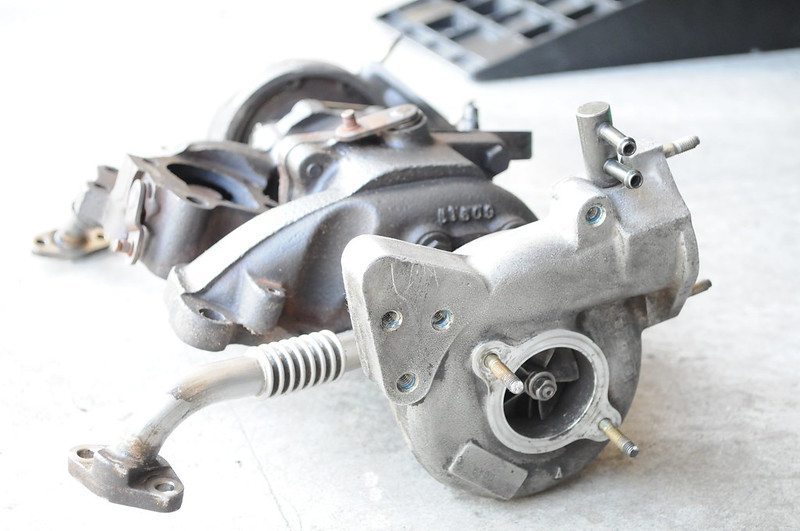
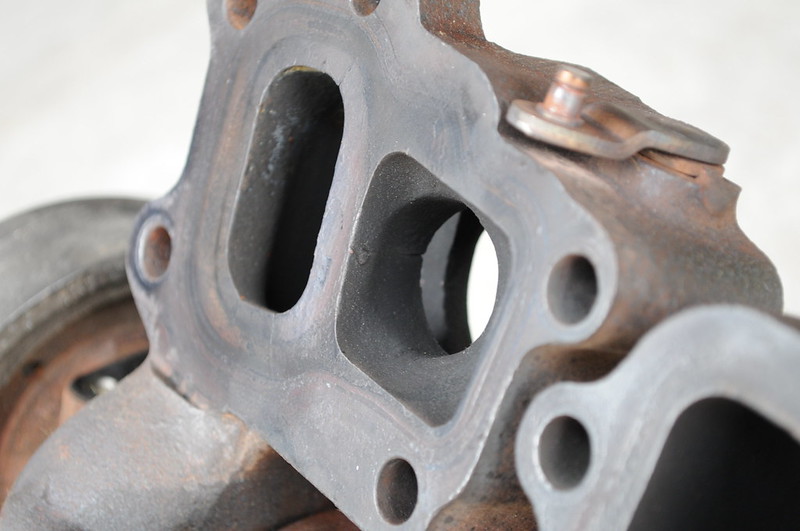
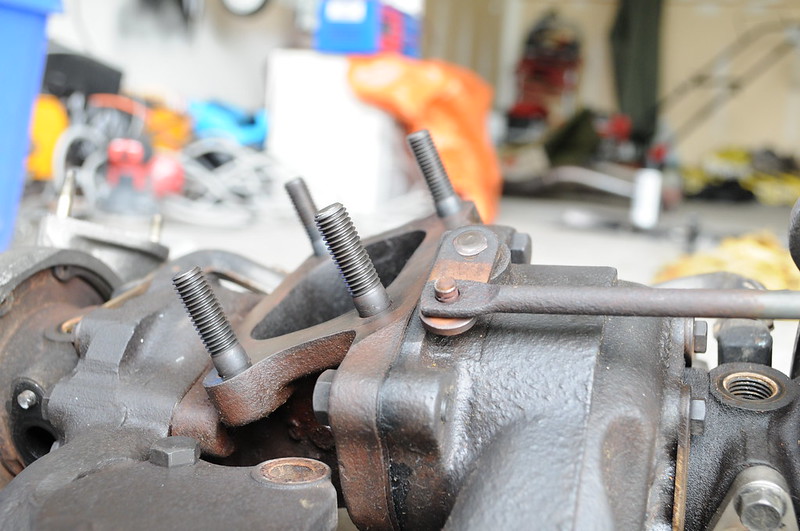
So, used the propane and WD40 extensively. I probably did about 10 heat cycles through the turbos to get the stud out. The threads on the inside are pretty wrecked so I'll take a tap and die to clean them up properly. It may not look like it but a lot of cleaning was done in this area. Snapped another bolt on one of the oil lines. Oh well, I have a reverse thread drill bit so this one will be easy.
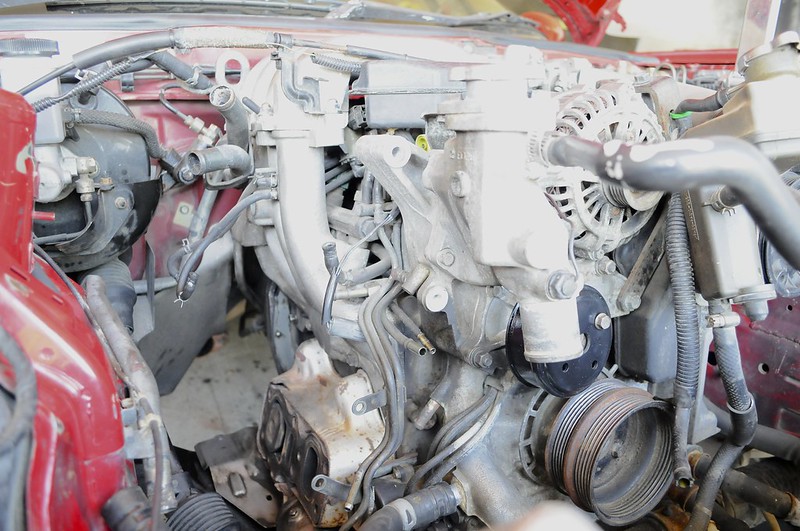
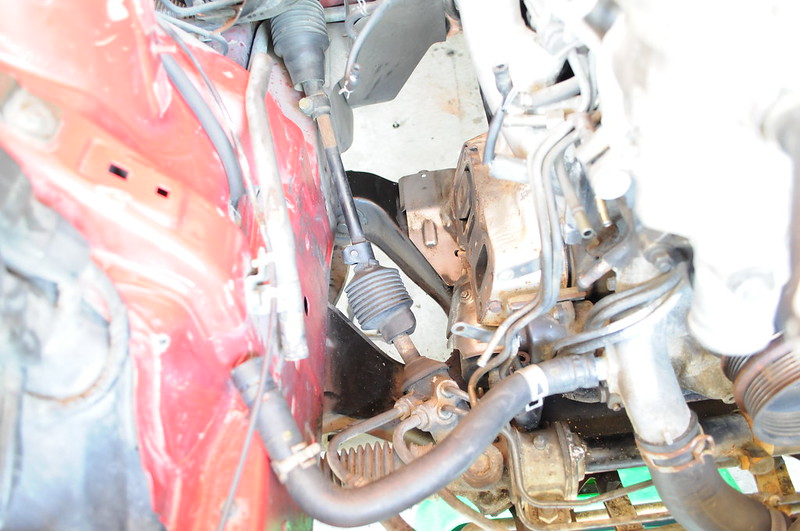
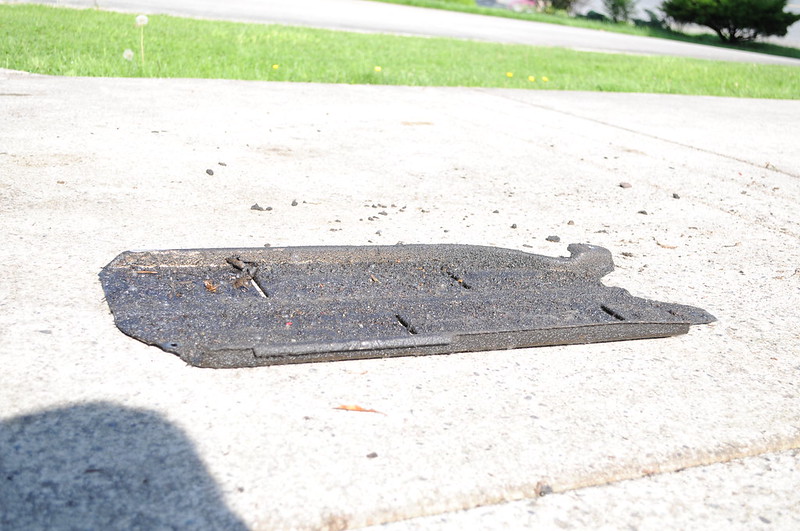
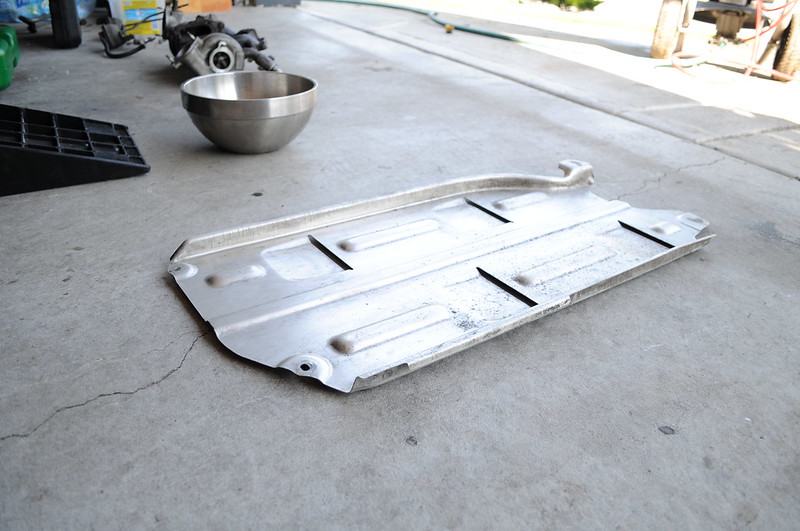
Then I got into the under tray. It was unbelievably dirty. To be honest I've never seen anything so filthy but the pressure washer did some serious damage and tidied it up nicely.
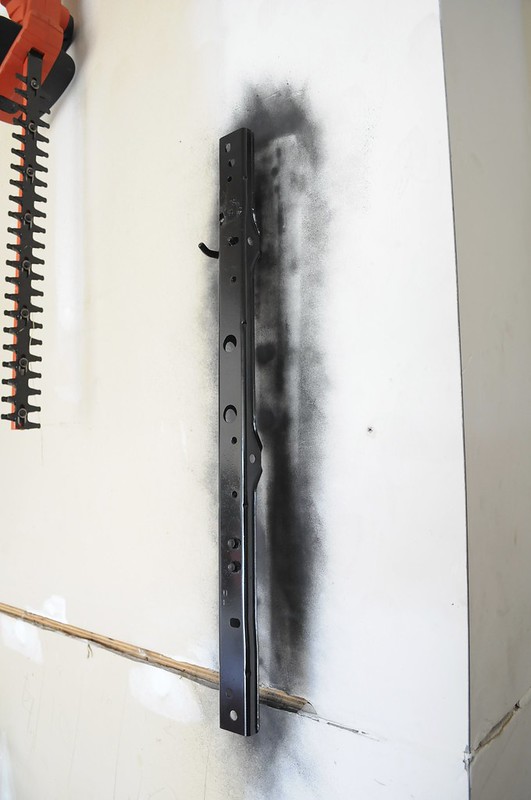
Took off the bar by the radiator, not sure of the technical name for it but whatever. I sanded it down and applied rust paint as primer then did about 3 layers of black on top. Because the Koyo is vertically mounted it makes the bar extremely visible and was definitely an eye sore. The oil line was very rusty as well so that got the clean and spray treatment as well. The parts that I couldn't take off and clean at this point in time I gave a good spray of rust converter. It likely won't do a whole lot but anything is good in my opinion. Makes me feel better about it anyways.

Although it may not seem like a whole lot, I've been working on the car every day which feels nice. Made a list of hoses and things I need to replace from removal. Vaccuum lines will be next. I want to do simplified sequential but at this point it's all about driving the car so I need to get things back together and get this thing inspected and insured. Paint will come in the winter!
So, used the propane and WD40 extensively. I probably did about 10 heat cycles through the turbos to get the stud out. The threads on the inside are pretty wrecked so I'll take a tap and die to clean them up properly. It may not look like it but a lot of cleaning was done in this area. Snapped another bolt on one of the oil lines. Oh well, I have a reverse thread drill bit so this one will be easy.
Then I got into the under tray. It was unbelievably dirty. To be honest I've never seen anything so filthy but the pressure washer did some serious damage and tidied it up nicely.
Took off the bar by the radiator, not sure of the technical name for it but whatever. I sanded it down and applied rust paint as primer then did about 3 layers of black on top. Because the Koyo is vertically mounted it makes the bar extremely visible and was definitely an eye sore. The oil line was very rusty as well so that got the clean and spray treatment as well. The parts that I couldn't take off and clean at this point in time I gave a good spray of rust converter. It likely won't do a whole lot but anything is good in my opinion. Makes me feel better about it anyways.
Although it may not seem like a whole lot, I've been working on the car every day which feels nice. Made a list of hoses and things I need to replace from removal. Vaccuum lines will be next. I want to do simplified sequential but at this point it's all about driving the car so I need to get things back together and get this thing inspected and insured. Paint will come in the winter!
Thread Starter
bcrotary.
Joined: Jul 2010
Posts: 513
Likes: 1
From: Abbotsford, British Columbia
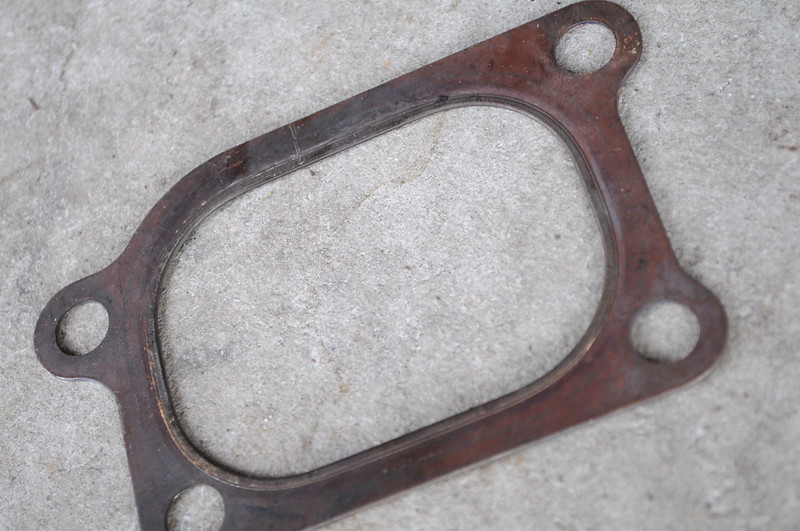
Went to Steve's today. He buzzed the gasket surface for me and retapped the threads. Perfect. Still couldn't get that pesky stuck bolt out. Will work on that tomorrow. Also assembled the turbo entire less the one oil line. Once that's done then I can start putting the car back together. Also had a bit of a gasket blowout on the downpipe side of the turbos so I picked up a much newer one today.
Cleaned
Cleaned
Thread Starter
bcrotary.
Joined: Jul 2010
Posts: 513
Likes: 1
From: Abbotsford, British Columbia
Okay, so where was I? Oh right, the turbos. Installed those to what I thought was the best of my ability. Filled the car up with oil and coolant (so I thought) and took it for a rip up the street with some friends to go get some pictures. This was very short lived. I got up the road and noticed the temps were pinned in the red. BIG no-no. Being that it was an original engine (or so I thought), I was convinced this would be the last straw. The coolant was bubbling in the overflow tank. I then left the car turned off and coasted in neutral down the road all the way home. Shocking to say the least. Everyone laughed and made fun of the poor RX7 but really this was entirely my negligence. The koyo rad that I have doesn't have an air bleed plug on the top like the factory FC radiator I was used to and I was excited so I just filled her up and took off. This was one of the issues. The other problem is that I was using a non-pressurized cap on the thermostat housing/ radiator cap housing. Then the car sat for a few months while I was in school. After this, in a moment of clarity I skipped a day of classes, invited some friends over and we went ham on it. Changed the rad cap, fixed all the little problems and she was good to go again, or so I thought.
In my downtime over the next few weeks I took out the rats nest and redid it entirely. Went simplified sequential, tested the solenoids, and replaced every vacuum line around me. Deleted the vacuum chambers. Found out that the engine had been rebuilt as there were markings on the housings to suggest they were replaced at some point. Great news! Then the car wouldn't start. I had fresh plugs but the car just wouldn't hold idle. Put fresh fuel in it, and just still was scratching my head. Was out of money so I couldn't just blindly replace things like I usually do in hopes of fixing things. Wires were new, I replaced the injector o-rings when I did the rats nest with new ones. So back to the plugs. Couldn't afford to drop another $70 on the NGKs just to have it not work so a friend and I did some research and I knew that Autolite made a plug for the RX7 but Steve vehemently swore to never ever use them. Nick (the guy in the pictures) and I went out and got a set anyways. IT WORKED. The car ran and idled great. So I will still replace them with new NGKs but that'll be down the road, maybe with the next oil change. I don't want to get the spark plug hairline fractures that the single-post Autolites apparently help create.
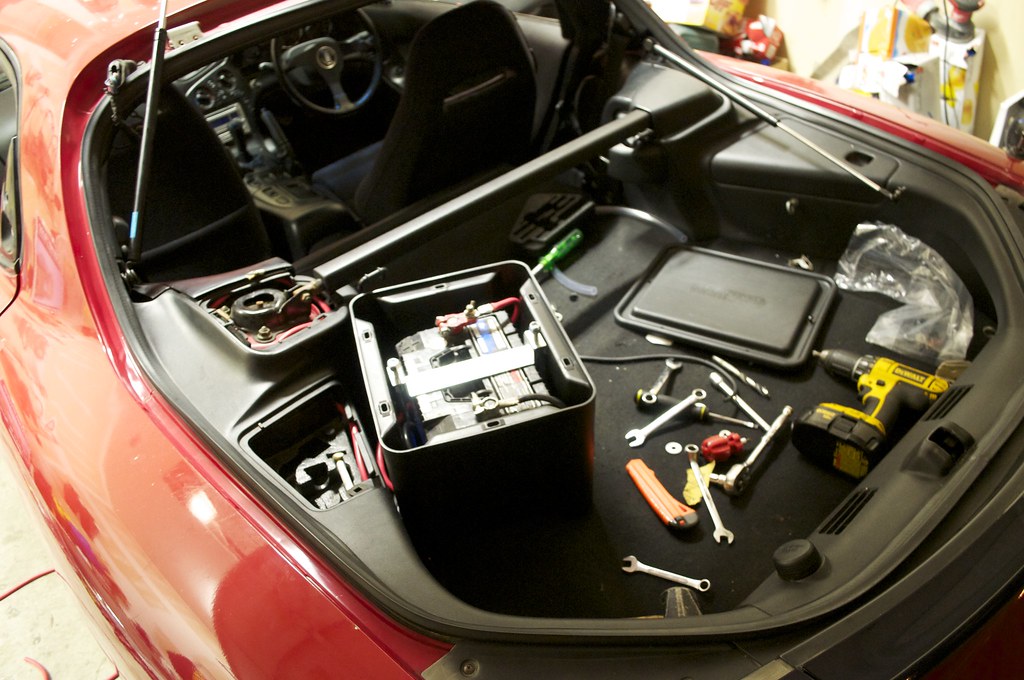
Took the car for another test drive around the block. The car still has a very aggressive 3,000rpm bog. Great. I pull the car in and am happy with the progress but realize there is still more work to do. The next morning pop the hood and look for leaks. Turns out the battery that was very poorly bungee cabled out of the way kissed the pulley and sprayed all over the show. This was on my list to do anyways but now shot to top priority status. I organized a battery from a friend (wet cell I know, and temporary). Then went out and bought a piece that I'd been jonesing over for a few years. The Moroso battery box. We installed that and grounded it to the rear and I taped off the ground in the front. Test drive number 3. The tach is now bouncing like crazy off idle and oil pressure gauge is erratic. Poor ground. So, a week or so went by and I decided to fix the issue. Made a proper ground for the old negative cable. Found a better ground in the rear. Problem solved.
(Old engine bay to illustrate the battery location)
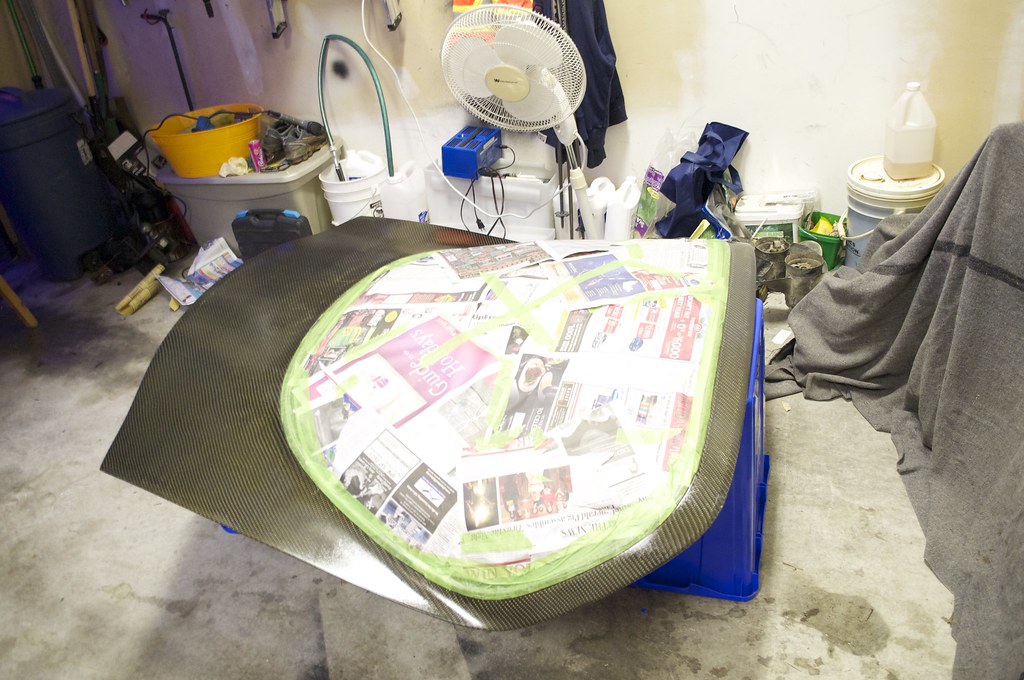
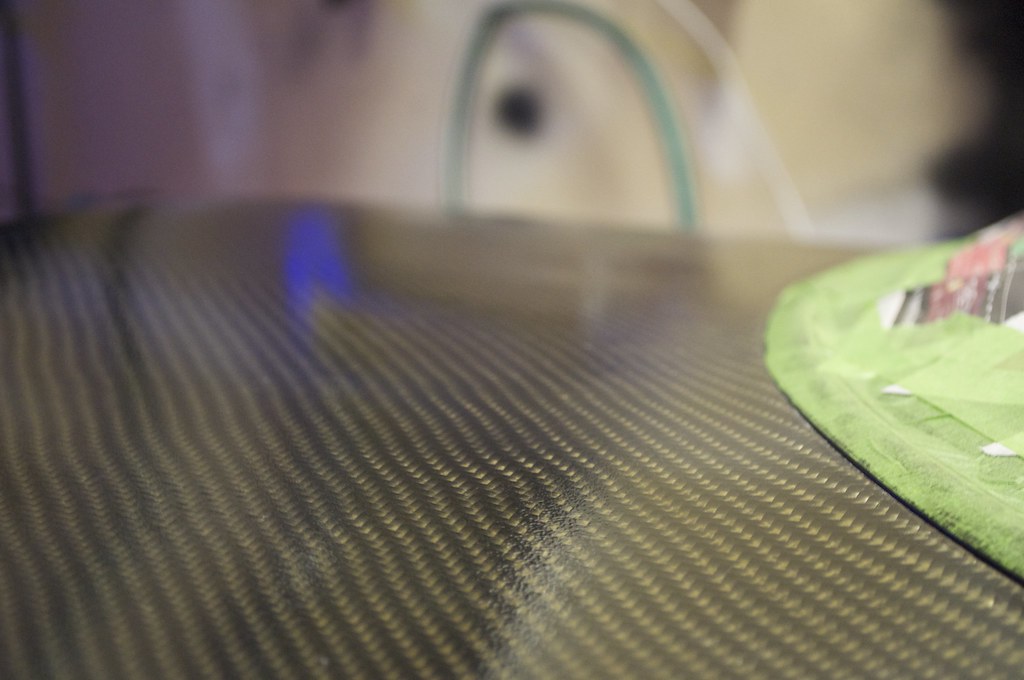
Now one of the things on the to-do list was to refinish the tired carbon hatch. This had been absolutely abused by the sun. Sanded that down and re-cleared it. I should've sanded more but time was of the essence as the big inspection day was near. Re-cleared the hatch to what what I'd consider to be 7/10 status. Worlds better than before, but not a finished job just yet. When I paint the car this will be redone properly. I just needed it to look relatively decent.
This all leads up to today. Inspection day. A friend works at a local dealership so we threw on a demonstration plate and took the car to the shop to get inspected. It passed! Very very pleased with that, however I learned on the rainy drive in that the wiper motor and rear wheel bearings are absolutely pooched. Sounded like the wheel was going to come off the car at 80kph. More thing to put on the list. Oh well. I'm just happy she passed and am one small step away to insurance and daily drivers-ville. This is a never-ending battle and one that I'm not about to give up.
Plans for the nearish future are insurance, PowerFC to fix the hesitation, wiper motor, fan motor, bearings, and a wideband. Thanks for reading if you did, I didn't take nearly as many pictures as I should have but will try to in the coming months to document updates more thoroughly.
Cheers
Simon
In my downtime over the next few weeks I took out the rats nest and redid it entirely. Went simplified sequential, tested the solenoids, and replaced every vacuum line around me. Deleted the vacuum chambers. Found out that the engine had been rebuilt as there were markings on the housings to suggest they were replaced at some point. Great news! Then the car wouldn't start. I had fresh plugs but the car just wouldn't hold idle. Put fresh fuel in it, and just still was scratching my head. Was out of money so I couldn't just blindly replace things like I usually do in hopes of fixing things. Wires were new, I replaced the injector o-rings when I did the rats nest with new ones. So back to the plugs. Couldn't afford to drop another $70 on the NGKs just to have it not work so a friend and I did some research and I knew that Autolite made a plug for the RX7 but Steve vehemently swore to never ever use them. Nick (the guy in the pictures) and I went out and got a set anyways. IT WORKED. The car ran and idled great. So I will still replace them with new NGKs but that'll be down the road, maybe with the next oil change. I don't want to get the spark plug hairline fractures that the single-post Autolites apparently help create.
Took the car for another test drive around the block. The car still has a very aggressive 3,000rpm bog. Great. I pull the car in and am happy with the progress but realize there is still more work to do. The next morning pop the hood and look for leaks. Turns out the battery that was very poorly bungee cabled out of the way kissed the pulley and sprayed all over the show. This was on my list to do anyways but now shot to top priority status. I organized a battery from a friend (wet cell I know, and temporary). Then went out and bought a piece that I'd been jonesing over for a few years. The Moroso battery box. We installed that and grounded it to the rear and I taped off the ground in the front. Test drive number 3. The tach is now bouncing like crazy off idle and oil pressure gauge is erratic. Poor ground. So, a week or so went by and I decided to fix the issue. Made a proper ground for the old negative cable. Found a better ground in the rear. Problem solved.
(Old engine bay to illustrate the battery location)
Now one of the things on the to-do list was to refinish the tired carbon hatch. This had been absolutely abused by the sun. Sanded that down and re-cleared it. I should've sanded more but time was of the essence as the big inspection day was near. Re-cleared the hatch to what what I'd consider to be 7/10 status. Worlds better than before, but not a finished job just yet. When I paint the car this will be redone properly. I just needed it to look relatively decent.
This all leads up to today. Inspection day. A friend works at a local dealership so we threw on a demonstration plate and took the car to the shop to get inspected. It passed! Very very pleased with that, however I learned on the rainy drive in that the wiper motor and rear wheel bearings are absolutely pooched. Sounded like the wheel was going to come off the car at 80kph. More thing to put on the list. Oh well. I'm just happy she passed and am one small step away to insurance and daily drivers-ville. This is a never-ending battle and one that I'm not about to give up.
Plans for the nearish future are insurance, PowerFC to fix the hesitation, wiper motor, fan motor, bearings, and a wideband. Thanks for reading if you did, I didn't take nearly as many pictures as I should have but will try to in the coming months to document updates more thoroughly.
Cheers
Simon
Glad to see that you're making huge strides in your build project Simon! Quick question: is that Moroso battery box sealed or vented to the outside of the car? I'm toying with the idea of relocating my battery to the driver's side storage bin to make room for FMIC piping 
Thread Starter
bcrotary.
Joined: Jul 2010
Posts: 513
Likes: 1
From: Abbotsford, British Columbia
Thanks Darrell! The Moroso box is a sealed unit. It comes with a liner that goes between the lid and the box to seal it perfectly. That being said, I had a friend that drilled a hole in his and vented it outside the car.
Front mount hey, that's fantastic. Did you ever end up finding a 2nd Gen. shell?
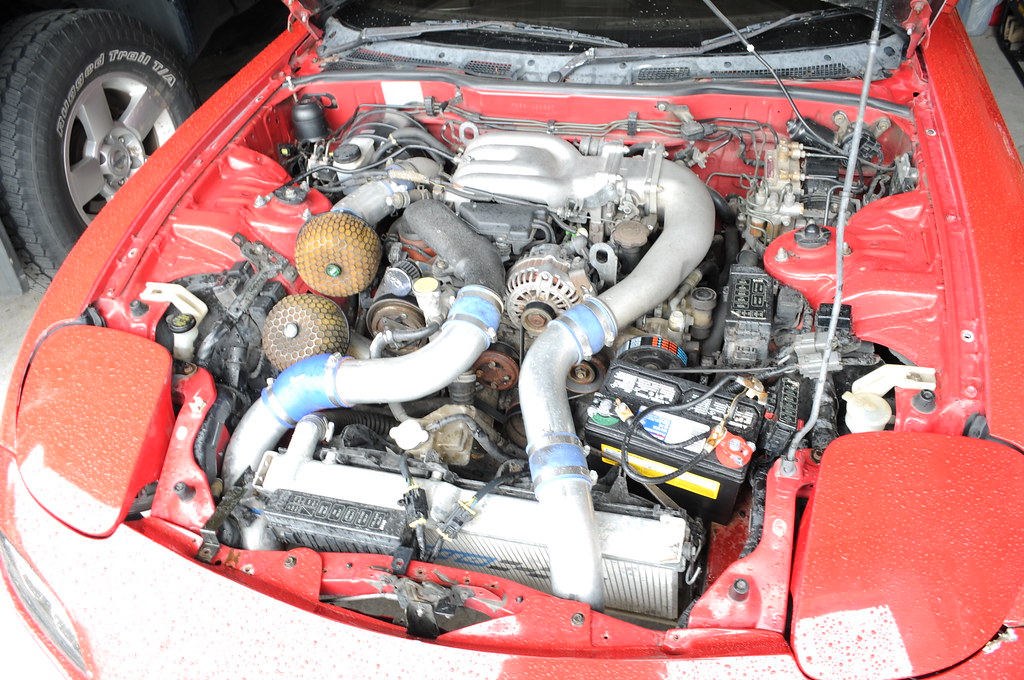
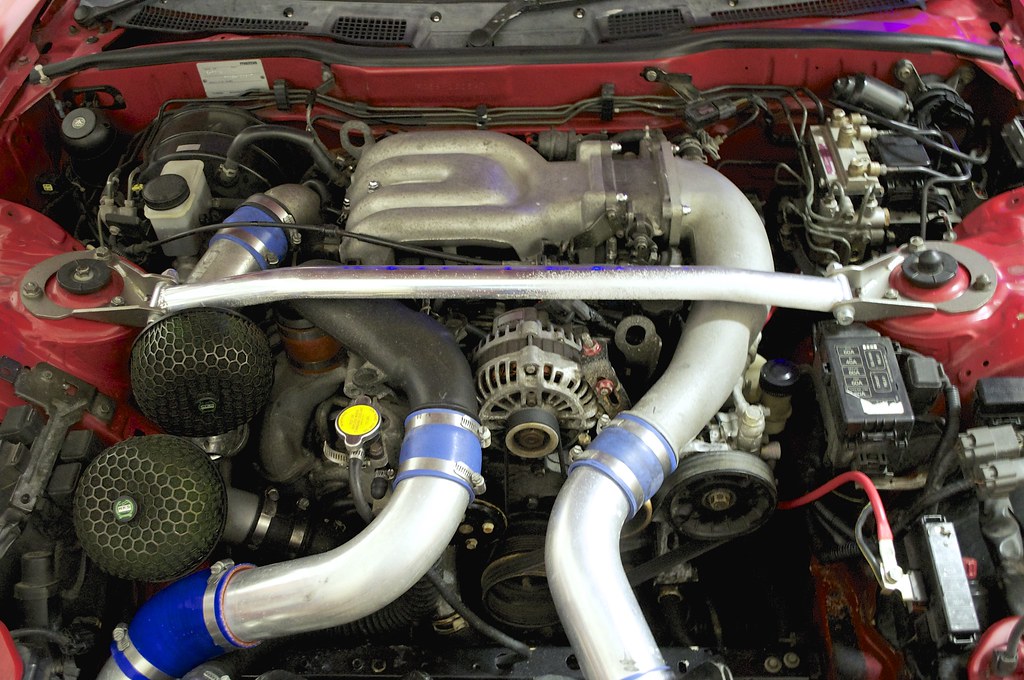
This is what the 'bay looks like now. You can see the splatter of battery acid on the right side of the strut bar. It got all over the pulleys and the alternator as well. Time to sack up and get a wire wheel and clean everything proper. I'm thinking of sand blasting the strut bar or doing a wrinkle black. Something different you know. Just an idea at this point.
Front mount hey, that's fantastic. Did you ever end up finding a 2nd Gen. shell?
This is what the 'bay looks like now. You can see the splatter of battery acid on the right side of the strut bar. It got all over the pulleys and the alternator as well. Time to sack up and get a wire wheel and clean everything proper. I'm thinking of sand blasting the strut bar or doing a wrinkle black. Something different you know. Just an idea at this point.
If you're using a 'wet' cell battery you're going to get vapors being emitted right? If the box is sealed then there's nowhere for the vapors to go and the concentration will build up in the enclosure and that could spell disaster! The box has to be vented to the exterior of the car for safety reasons. If you're using a dry cell battery like the Optima then you don't have to worry about vapors.
I'm still looking for a good FC shell and will be heading to Kamloops this weekend to take a lot at a potential purchase (and it's running too!)
I'm still looking for a good FC shell and will be heading to Kamloops this weekend to take a lot at a potential purchase (and it's running too!)
Thread Starter
bcrotary.
Joined: Jul 2010
Posts: 513
Likes: 1
From: Abbotsford, British Columbia
I know it's quite a serious safety concern. I haven't driven the car, save for the 20kms I put on it today. At night I pop the hatch and open the box up, and don't drive the car. It's just there for temporary use like starting the car up, finding problems and then fixing them. Just on loan from a friend by no means permanent.
Whaat! You'll have to throw up some pictures of it on the new local forum. The other thing I'm confused about is, do you have the turbo motor/ setup in your 1st Gen.? Steve did 2 motors for you if I remember correctly. The other one being the SP 12A?
Whaat! You'll have to throw up some pictures of it on the new local forum. The other thing I'm confused about is, do you have the turbo motor/ setup in your 1st Gen.? Steve did 2 motors for you if I remember correctly. The other one being the SP 12A?
The first engine Steve built is a hybrid 13b using REPU housings and 12a irons (so it's a 4 port) and half bridged. I currently have it in the FB as a daily driver and it's been reliable and rock solid (187 Rwhp). The TII engine that he rebuilt for me (also half bridged) is still sitting in my garage awaiting a suitable chassis for installation (either FC or GSL SE)
Thread Starter
bcrotary.
Joined: Jul 2010
Posts: 513
Likes: 1
From: Abbotsford, British Columbia
There we go, now the memory is coming back. Glad to hear there haven't been problems. How street-friendly do you find the BP? I've always wanted one just for the presence it brings but am concerned about winter cold-starting, even worse fuel economy and a power band that sits in the clouds. I'm more than happy to sacrifice those things, just would like to hear your input.
The BP is remarkably street friendly. I had my fears about it being a bitch to drive in traffic and poor fuel economy but I can say now that I absolutely love it! She averages 325 km per tank (55 liters) and due to the lightened flywheel and nice soft clutch she revs incredibly fast. The signature brap-brap-brap and side to side rocking of the car always generates a million questions and stares from other motorists . Never had cold start issues. She fires up on the first try on mornings. Hot starts were an issue for a while but I had the ignition system serviced and replaced plugs (badly fouled) and now it's a thing of the past.
The weak link in my setup is that I'm using a modified Nikki carb (bored venturies,large air bleeds, mechanical secondaries) that is undersized for a 13b stock application much less for a Bridgeport! She runs out of fuel when I hit 7k rpm.
I have two available options to rectify this : 1) go Holley 650 double pumper. I acquired a re manufactured Holley with 13b specific jetting from Ken the Carburetor Guy out in Chilliwak and it's a beauty! 2) go EFI. I also have in my stockpile of parts, a 4150 4bbl throttle body with 680 cc primaries and 1000cc secondaries (I know it's overkill lol) and a Megasquirt V3.
My lack of wiring or electronic expertise leads me to prefer the Holley route, at least in the near future.
. Never had cold start issues. She fires up on the first try on mornings. Hot starts were an issue for a while but I had the ignition system serviced and replaced plugs (badly fouled) and now it's a thing of the past.The weak link in my setup is that I'm using a modified Nikki carb (bored venturies,large air bleeds, mechanical secondaries) that is undersized for a 13b stock application much less for a Bridgeport! She runs out of fuel when I hit 7k rpm.
I have two available options to rectify this : 1) go Holley 650 double pumper. I acquired a re manufactured Holley with 13b specific jetting from Ken the Carburetor Guy out in Chilliwak and it's a beauty! 2) go EFI. I also have in my stockpile of parts, a 4150 4bbl throttle body with 680 cc primaries and 1000cc secondaries (I know it's overkill lol) and a Megasquirt V3.
My lack of wiring or electronic expertise leads me to prefer the Holley route, at least in the near future.
 Hopefully one day you can have all the different generation rx7s that would be too leka
