
Project: Old School - '88 Convertible (with Turbo!)

Thread Starter
Licensed Zip Tie Mechanic
Joined: May 2004
Posts: 510
Likes: 2
From: Halifax, NS
Project: Old School - '88 Convertible (with Turbo!)
This is the saga of project old school (or "stupid vert" as it's also been called).
About 4 years ago, I came across a 1988 vert (in silver with a blue interior) for sale for like $1000. The body was ok, and the rear rotor was gone in it (the guy couldn't get it to run, but that was mainly because the CAS was unplugged). But, the car had a good top (bad headliner), so I thought, yeah, I can rebuild this. Only had around 150,000 km on it (93,000 miles)
Anyway, it turns out, it was missing a bunch of other stuff too - the seats w/ headrest speakers, the wheels, the vinyl cover for the top, etc.
Fastforward to about 2 years ago - I see another 1988 silver vert with a blue interior for sale. This time, the top is bad (good headliner), but the engine is newly rebuilt, the body is in great shape, and it has the original seats. I pick that one up as well. I figure - hey, now we can make one good car! This one only has 116,000 km on it (72,000 miles).
We discover that the second car also has a lot of good stuff on it, including:
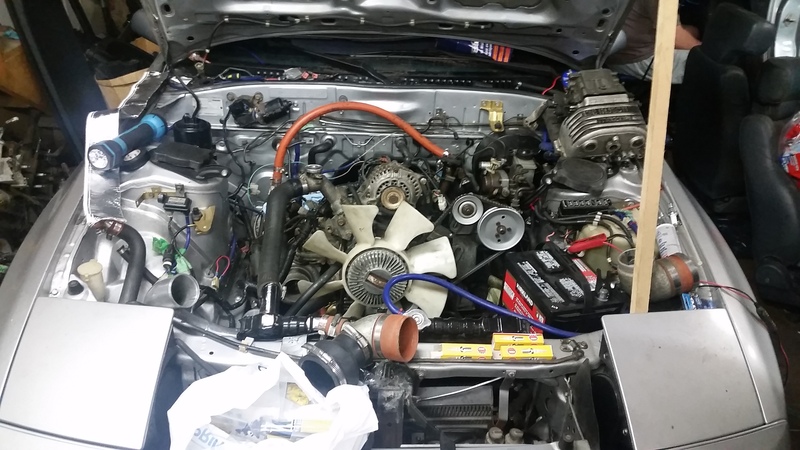
- Cartech FC NA Turbo kit (rare) with Air to Water intercooler, the original rising rate fuel pressure regulator, and lots of other stuff
- A full suite of gauges, including EGT, AFR, and Fuel Pressure - and many more - built into a gauge pod in the ash tray
- The original CD player (!!) and all of the original audio gear and controls
I figure, after doing some research, I can make a truly period correct resto-mod of this car with these components. The principle behind it is that I want to keep it fairly old school while making some subtle modernizations.
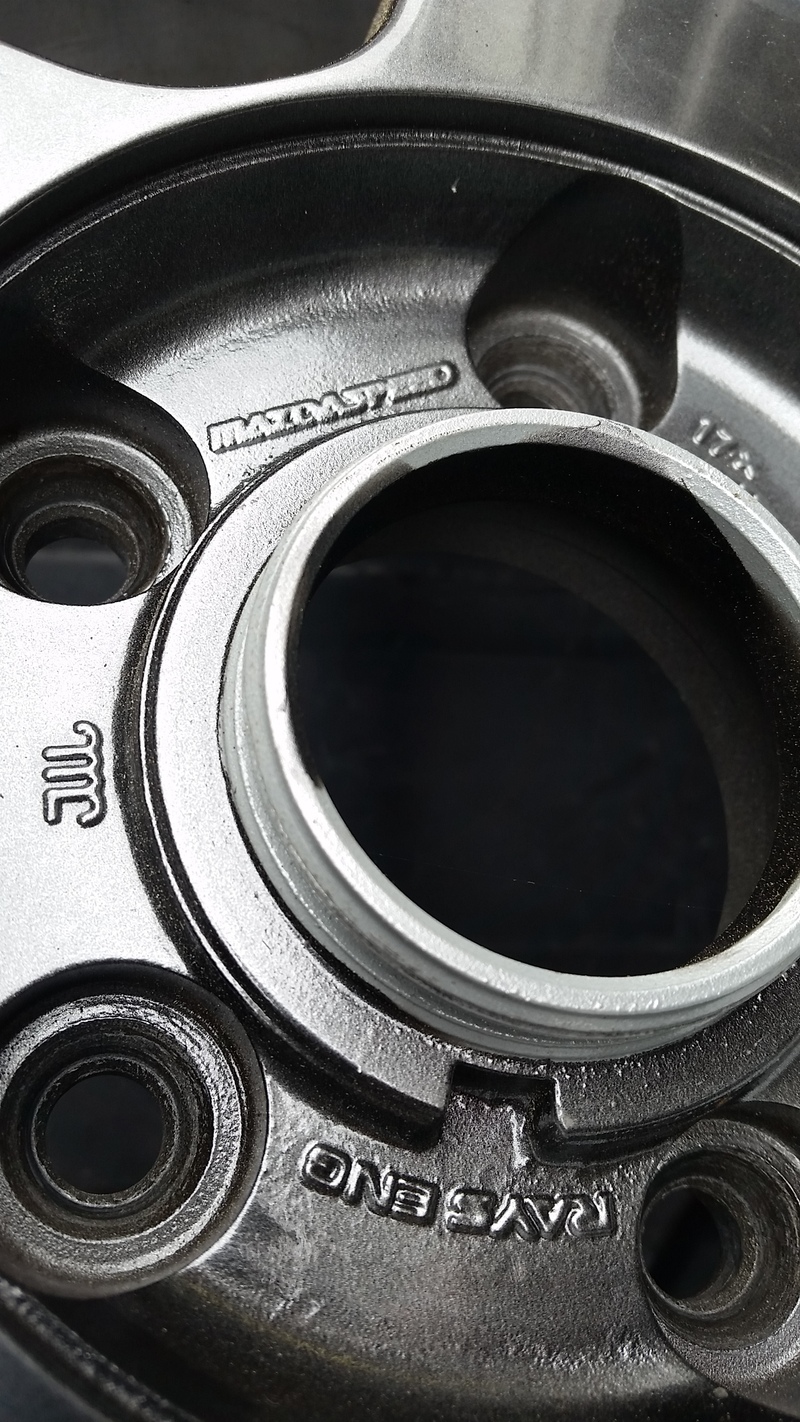
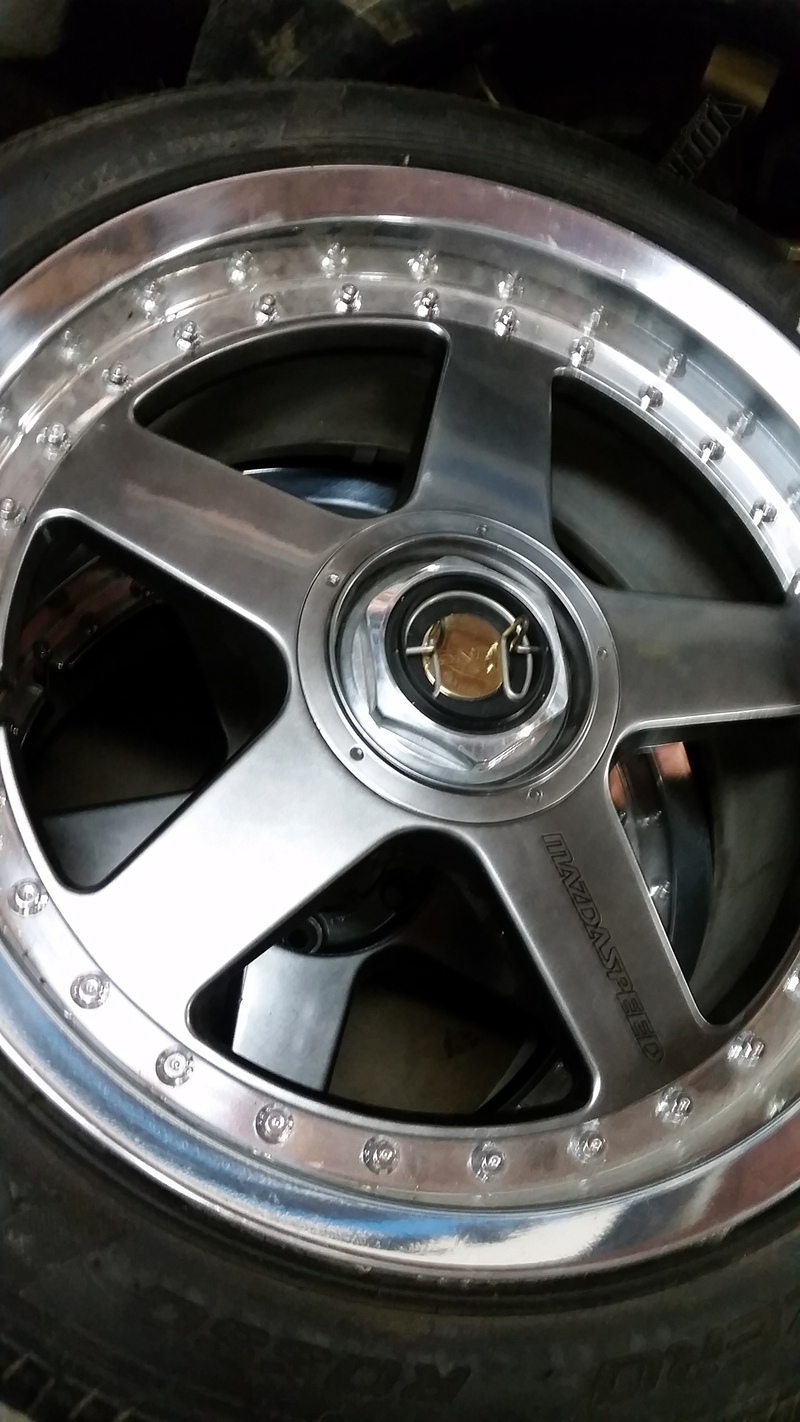
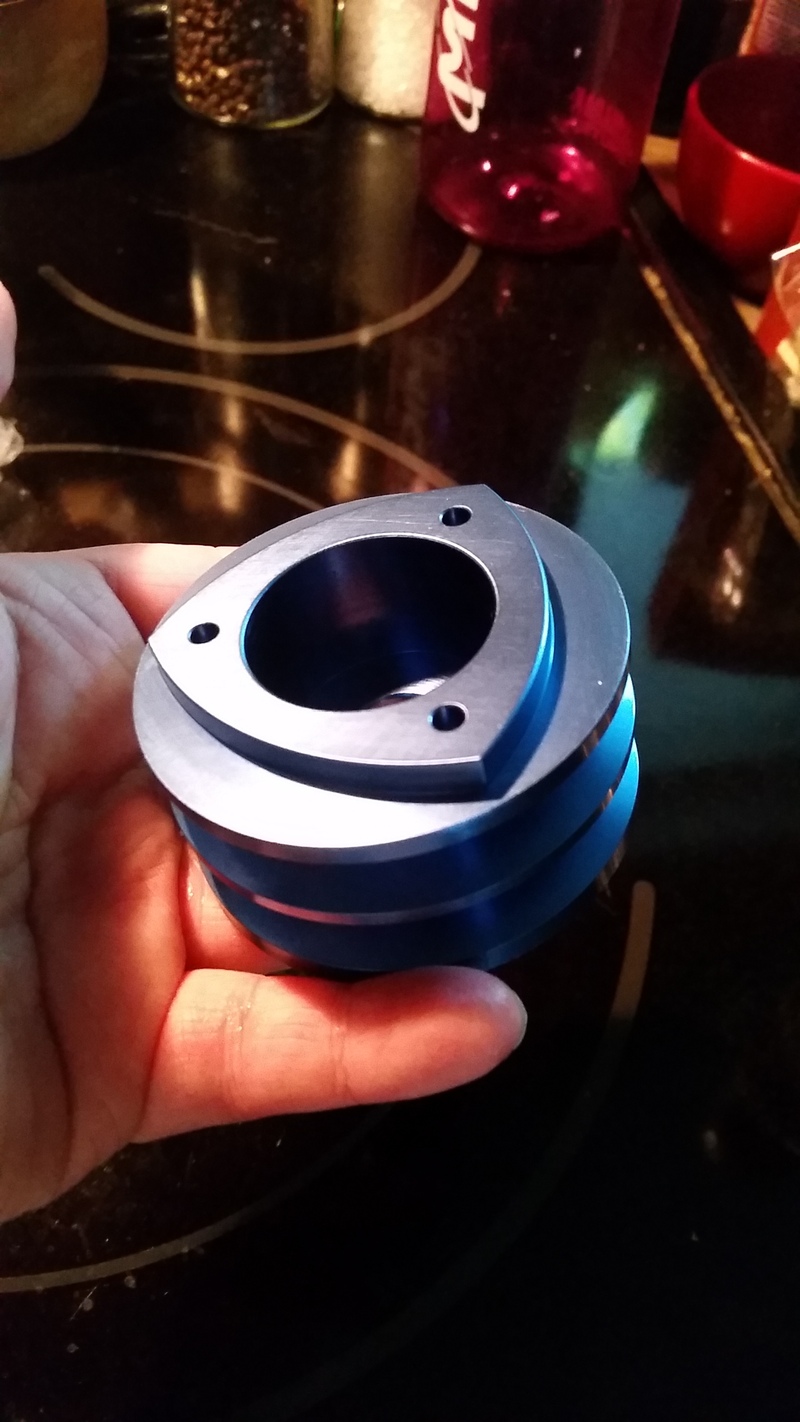
For our 10th anniversary, my husband buys me a set of Mazdaspeed MS01-LM wheels - they're missing the clips, but we had a new set re-manufactured by a local machine shop.
For my birthday, he picks me up an Adaptronic Plug & Play S4 ECU.
We couldn't get the second car to start, so we start taking it apart, and that's where the project really begins......
In the last 3 weeks, we've accomplished the following:
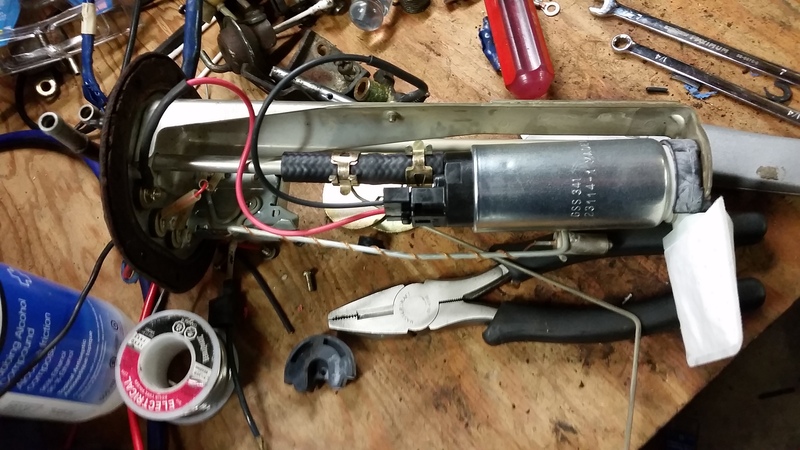
- New Walbro 255 fuel pump with upgraded wiring
- Complete removal of the emissions rats nest
- Removal of EGR, Air pump, ACV
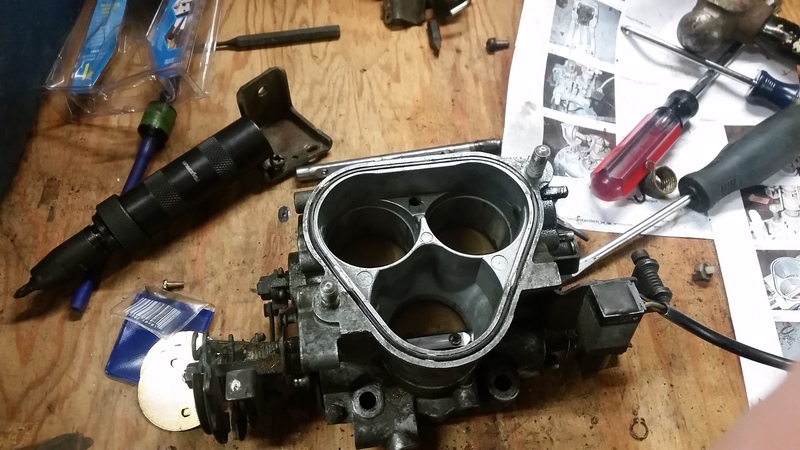
- Modification of Throttle Body to remove BAC valve, secondary plates, thermowax, and cold idle cam.
- Elimination of Fuel Pulsation Dampener
- Full servicing of a set of turbo injectors
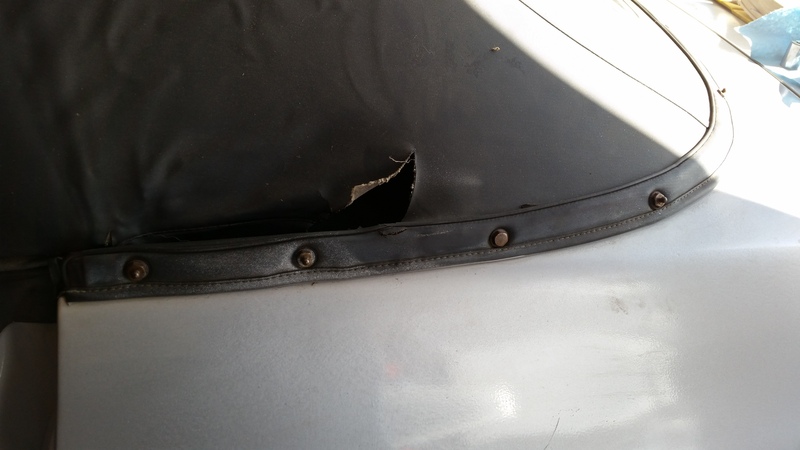
- Removal of the torn top
- Removal of a lot of electrical installed by previous owner ("sleepy eyes" switch, window switches were removed and replaced with toggle switches, fuel pump was wired to just a switch - not the ignition)
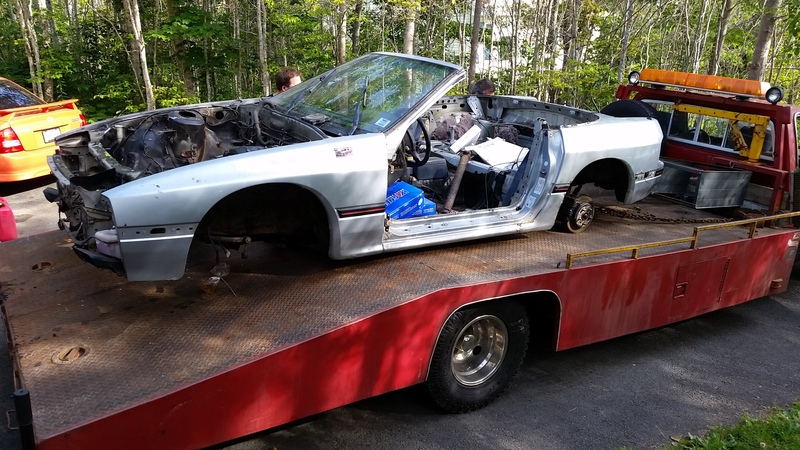
- Complete strip down of the parts donor car (it's ready to tow away today)
- Accumulation of a lot of parts....
To do in the coming 4-5 weeks:
- Pull the engine and check the assembly under the front cover - there was a slight wobble in the main pulley, so we want to check deflection and that the front assembly is correct
- Final installation of block off plates for cold start and BAC Valve
- Fabrication of custom air intake
- Installation of new radiator (upgraded version we had left over from our race car)
- New Fuel AEM Pressure Regulator
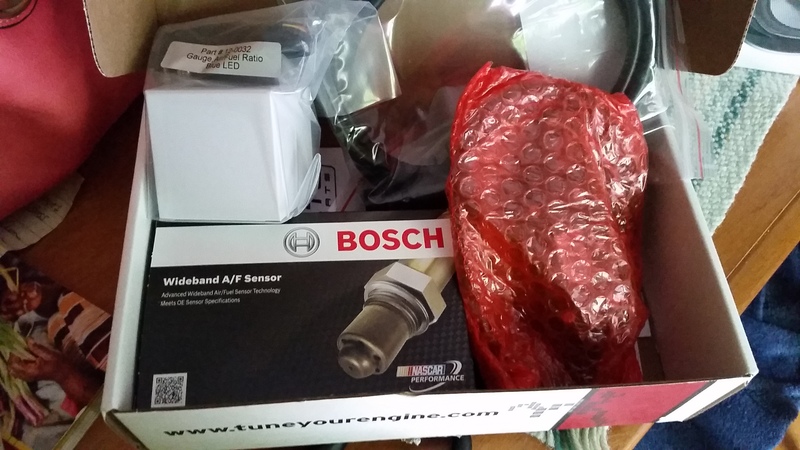
- New Innovate LC-2 + wideband 02 sensor
- Installation of "interrupter" switch for de-flooding
- Installation of the power window switches that were tested working on the "parts" car
- Some new hoses, heat wrap, etc
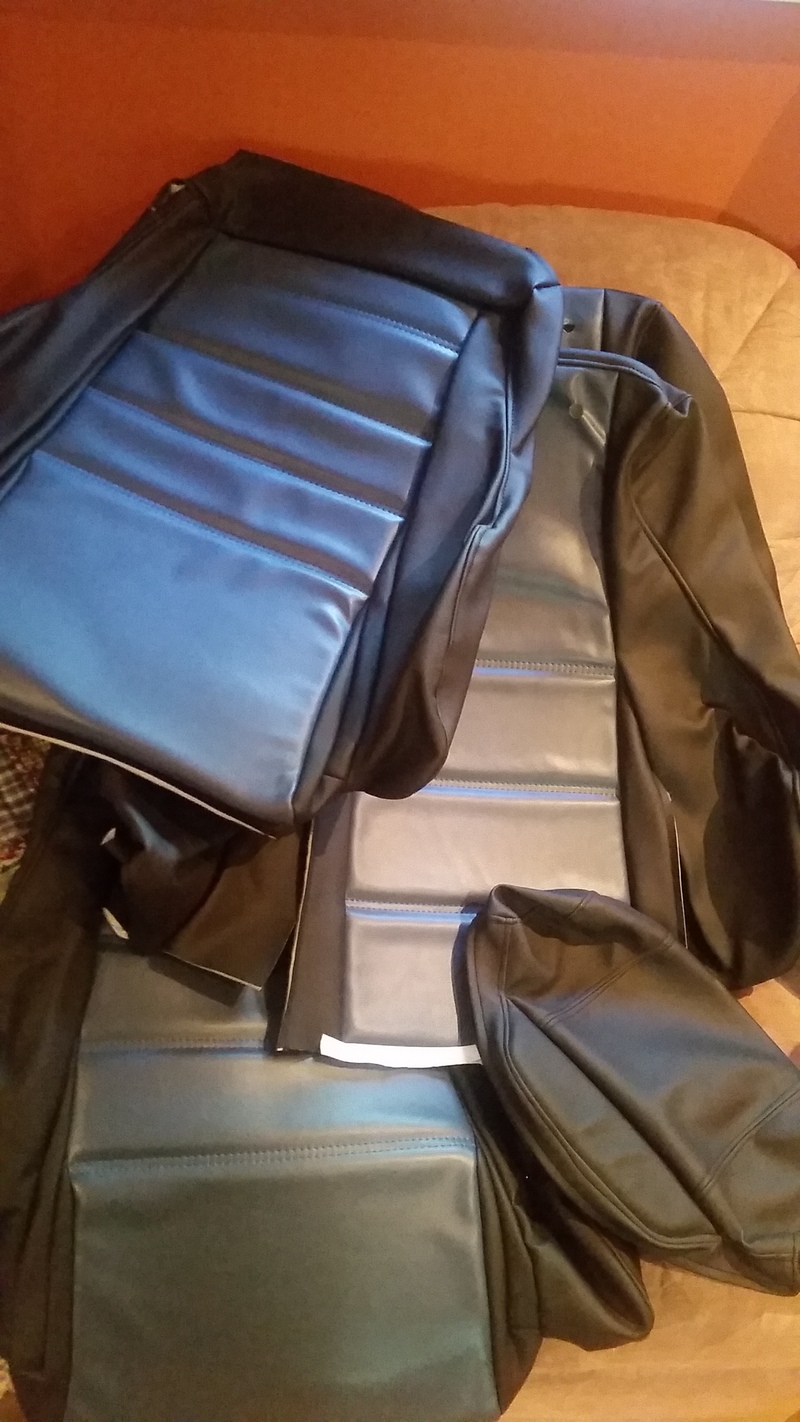
- New seat upholstery (on order from Racing Beat as of yesterday in a custom 2-tone old school)
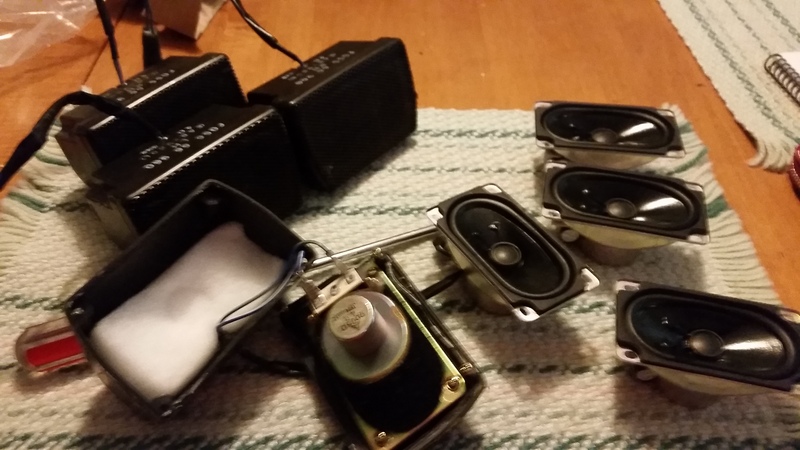
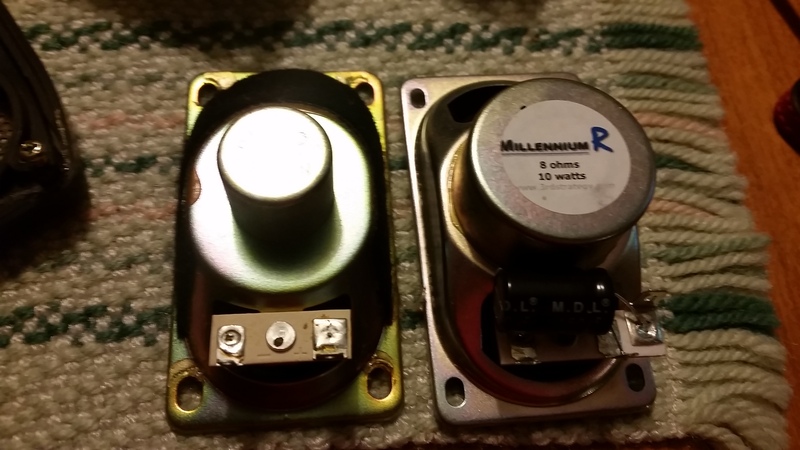
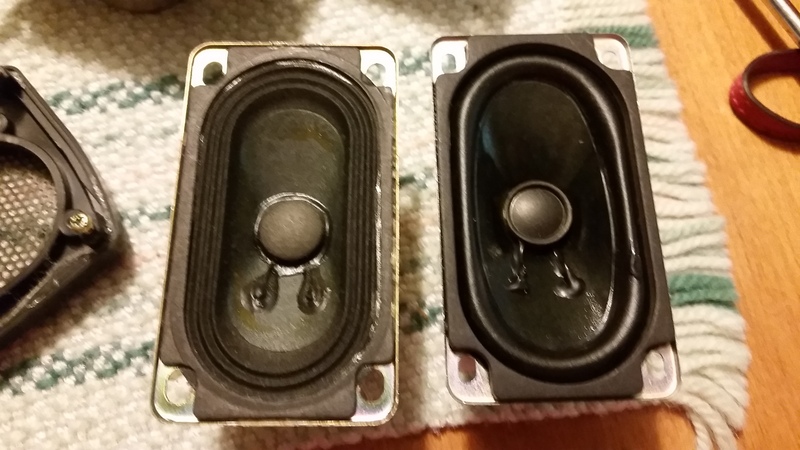
- New speakers - including new headrest speakers
- Need to swap out the headliner from the bad top to the good top - this involves removing the back window --- any tips???
- Installation and tuning of Adaptronic ECU
- Installation of Rays valve stems in the wheels - the tires currently don't hold air because of the plastic valve stems
- Installation of top on the "good car".
- A thorough cleaning of the interior and re-assembly using some plastics from the parts car to replace missing sections on the good car.
- Paint!
Eventually, we will be taking the Dual Racing Beat exhaust off the race car (a '1986 RX7 coupe) and repurposing it on the convertible with a special adapter. Also, will likely harvest the suspension off the race car when it gets upgraded - KYB AGX, Ground Control Sleeves, Eibach Springs, HKS pillowball mounts.
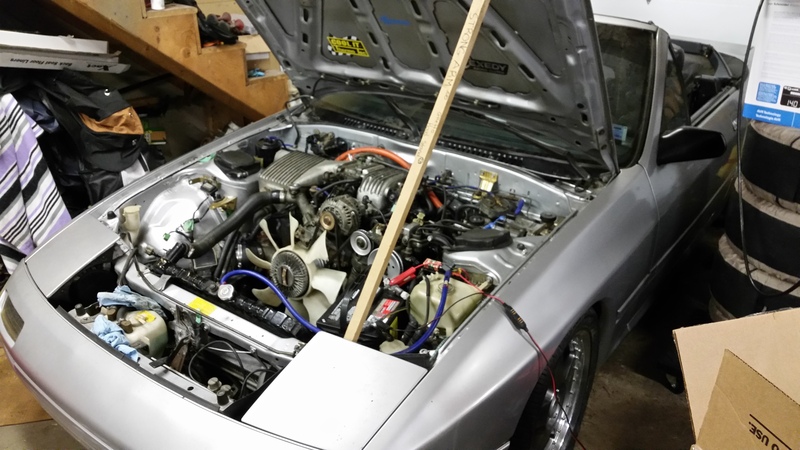
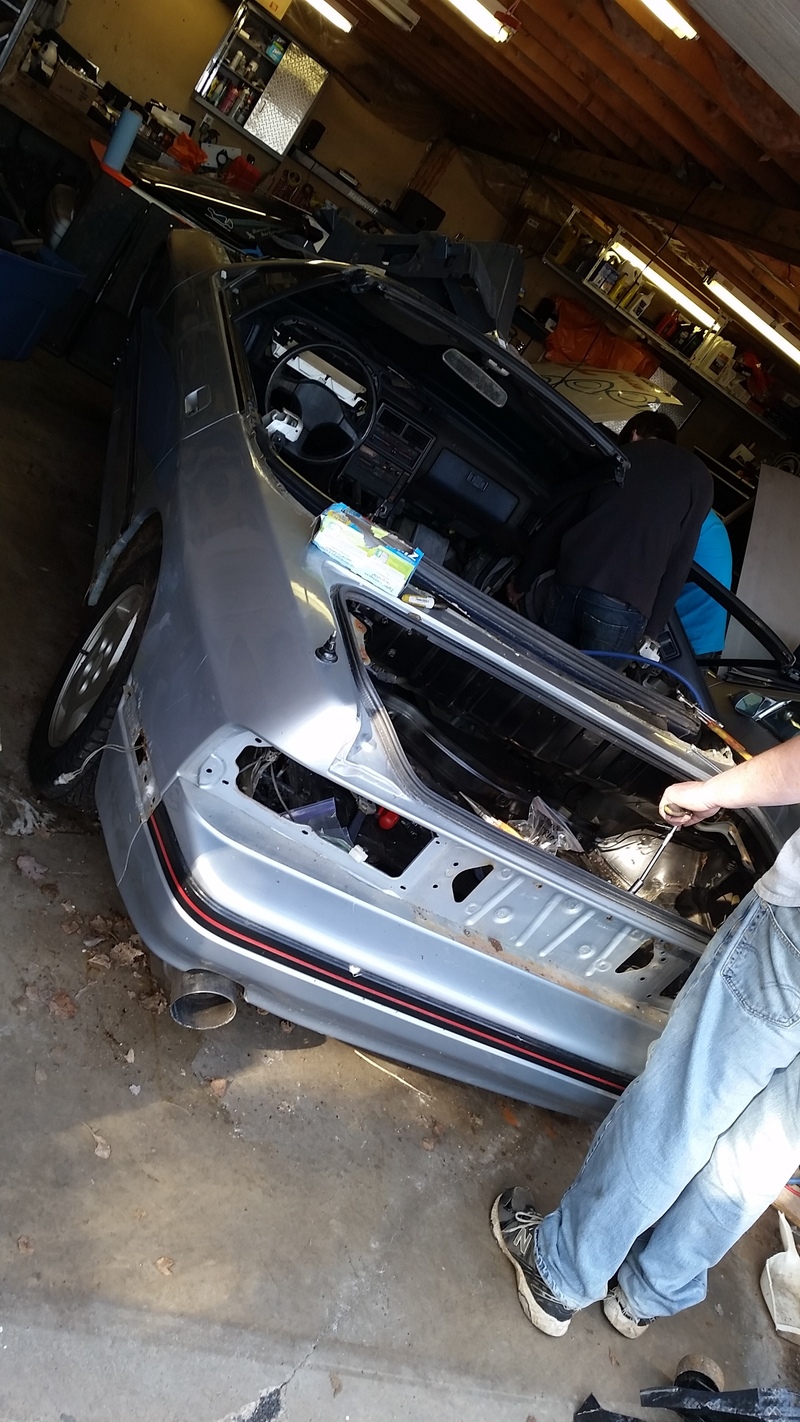
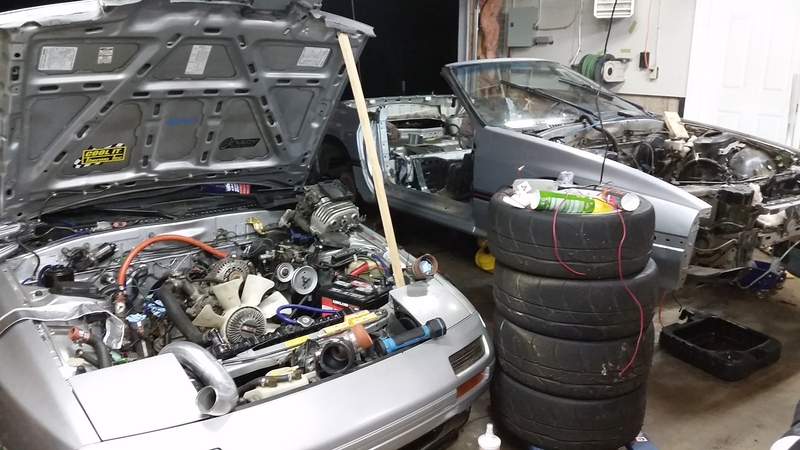
Some pics for you:

About 4 years ago, I came across a 1988 vert (in silver with a blue interior) for sale for like $1000. The body was ok, and the rear rotor was gone in it (the guy couldn't get it to run, but that was mainly because the CAS was unplugged). But, the car had a good top (bad headliner), so I thought, yeah, I can rebuild this. Only had around 150,000 km on it (93,000 miles)
Anyway, it turns out, it was missing a bunch of other stuff too - the seats w/ headrest speakers, the wheels, the vinyl cover for the top, etc.
Fastforward to about 2 years ago - I see another 1988 silver vert with a blue interior for sale. This time, the top is bad (good headliner), but the engine is newly rebuilt, the body is in great shape, and it has the original seats. I pick that one up as well. I figure - hey, now we can make one good car! This one only has 116,000 km on it (72,000 miles).
We discover that the second car also has a lot of good stuff on it, including:
- Cartech FC NA Turbo kit (rare) with Air to Water intercooler, the original rising rate fuel pressure regulator, and lots of other stuff
- A full suite of gauges, including EGT, AFR, and Fuel Pressure - and many more - built into a gauge pod in the ash tray
- The original CD player (!!) and all of the original audio gear and controls
I figure, after doing some research, I can make a truly period correct resto-mod of this car with these components. The principle behind it is that I want to keep it fairly old school while making some subtle modernizations.
For our 10th anniversary, my husband buys me a set of Mazdaspeed MS01-LM wheels - they're missing the clips, but we had a new set re-manufactured by a local machine shop.
For my birthday, he picks me up an Adaptronic Plug & Play S4 ECU.
We couldn't get the second car to start, so we start taking it apart, and that's where the project really begins......
In the last 3 weeks, we've accomplished the following:
- New Walbro 255 fuel pump with upgraded wiring
- Complete removal of the emissions rats nest
- Removal of EGR, Air pump, ACV
- Modification of Throttle Body to remove BAC valve, secondary plates, thermowax, and cold idle cam.
- Elimination of Fuel Pulsation Dampener
- Full servicing of a set of turbo injectors
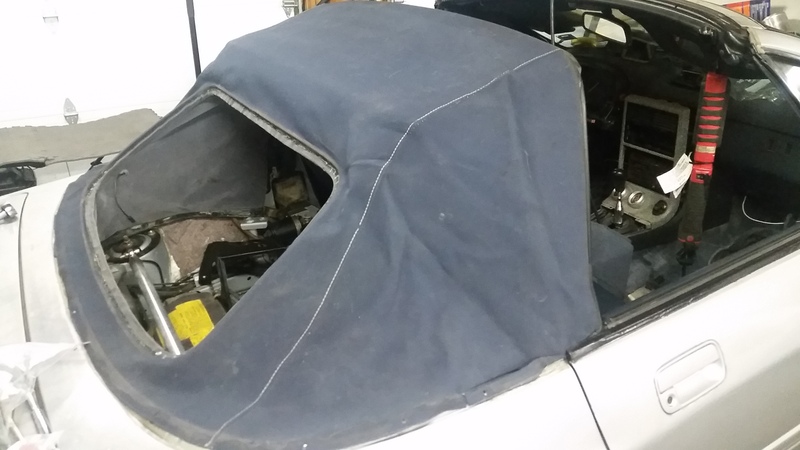
- Removal of the torn top
- Removal of a lot of electrical installed by previous owner ("sleepy eyes" switch, window switches were removed and replaced with toggle switches, fuel pump was wired to just a switch - not the ignition)
- Complete strip down of the parts donor car (it's ready to tow away today)
- Accumulation of a lot of parts....
To do in the coming 4-5 weeks:
- Pull the engine and check the assembly under the front cover - there was a slight wobble in the main pulley, so we want to check deflection and that the front assembly is correct
- Final installation of block off plates for cold start and BAC Valve
- Fabrication of custom air intake
- Installation of new radiator (upgraded version we had left over from our race car)
- New Fuel AEM Pressure Regulator
- New Innovate LC-2 + wideband 02 sensor
- Installation of "interrupter" switch for de-flooding
- Installation of the power window switches that were tested working on the "parts" car
- Some new hoses, heat wrap, etc
- New seat upholstery (on order from Racing Beat as of yesterday in a custom 2-tone old school)
- New speakers - including new headrest speakers
- Need to swap out the headliner from the bad top to the good top - this involves removing the back window --- any tips???
- Installation and tuning of Adaptronic ECU
- Installation of Rays valve stems in the wheels - the tires currently don't hold air because of the plastic valve stems
- Installation of top on the "good car".
- A thorough cleaning of the interior and re-assembly using some plastics from the parts car to replace missing sections on the good car.
- Paint!
Eventually, we will be taking the Dual Racing Beat exhaust off the race car (a '1986 RX7 coupe) and repurposing it on the convertible with a special adapter. Also, will likely harvest the suspension off the race car when it gets upgraded - KYB AGX, Ground Control Sleeves, Eibach Springs, HKS pillowball mounts.
Some pics for you:
Last edited by PinkRacer; Jul 17, 2015 at 07:05 AM.
Thread Starter
Licensed Zip Tie Mechanic
Joined: May 2004
Posts: 510
Likes: 2
From: Halifax, NS
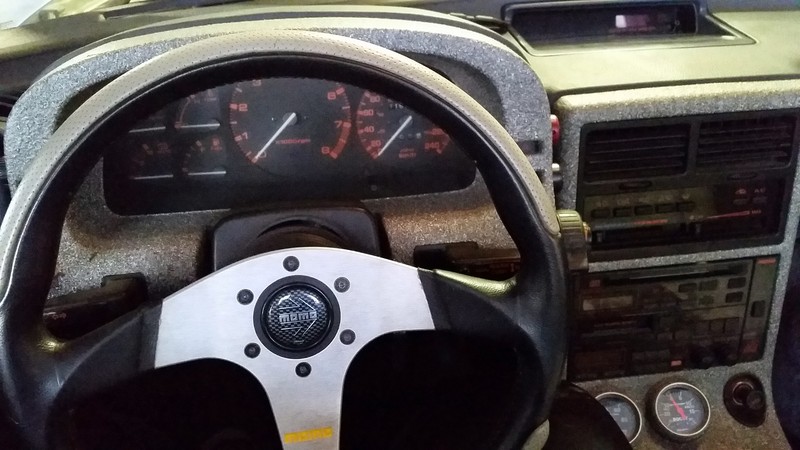
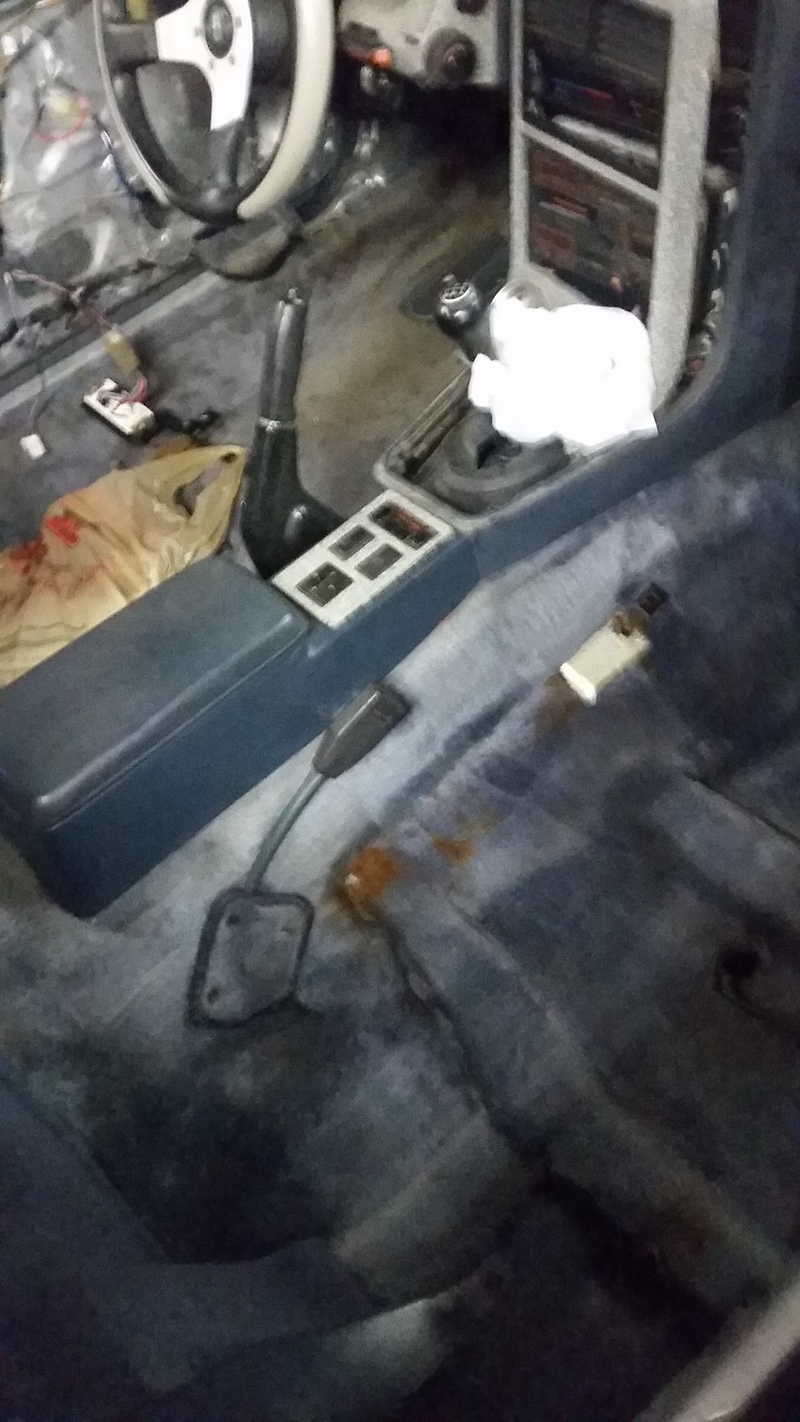
Here's the dash, you can see the gauges in the lower right (NOTE: The faux granite finish is going to be disappearing very quickly)
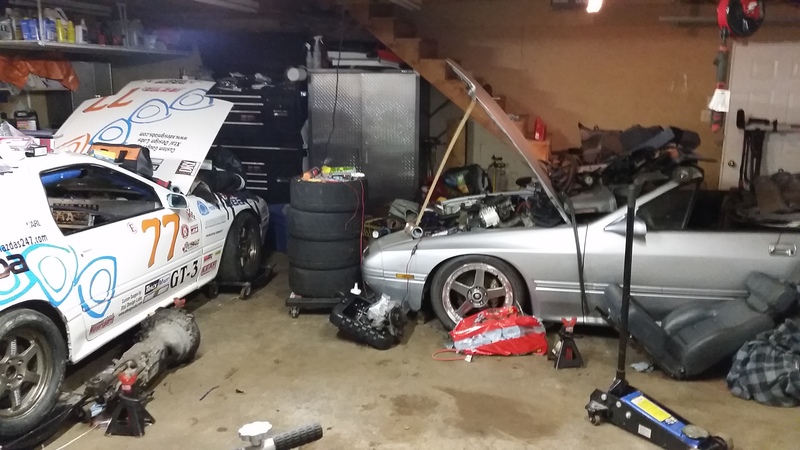
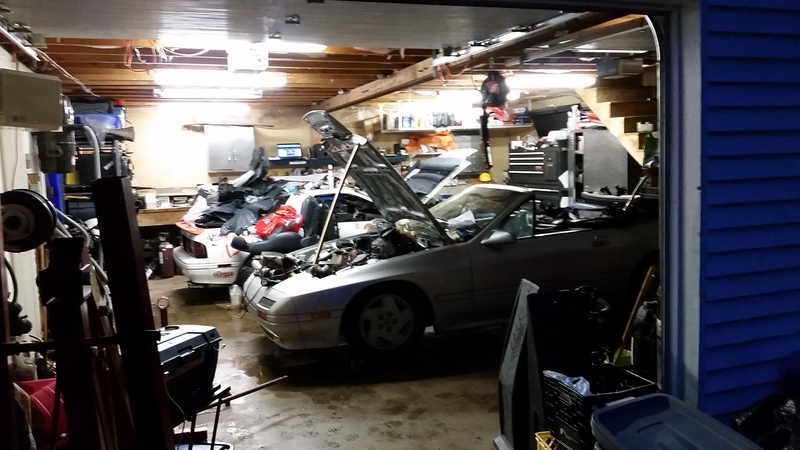
And for fun, a panorama of the garage:

And for fun, a panorama of the garage:

Thread Starter
Licensed Zip Tie Mechanic
Joined: May 2004
Posts: 510
Likes: 2
From: Halifax, NS
Trending Topics
Thread Starter
Licensed Zip Tie Mechanic
Joined: May 2004
Posts: 510
Likes: 2
From: Halifax, NS
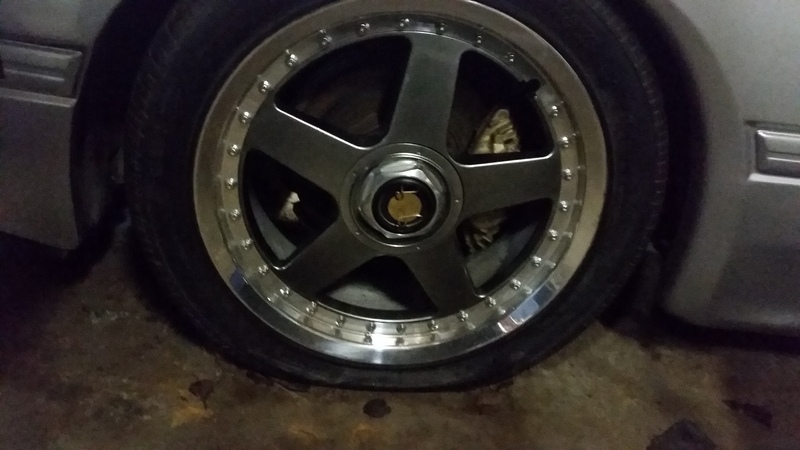
Took the wheels off to get new valve stems put in
Got the car on dollies so we could move it around and make some space.
Now working on the headrest speakers - these are pretty slick to install!
Got the car on dollies so we could move it around and make some space.
Now working on the headrest speakers - these are pretty slick to install!
Thread Starter
Licensed Zip Tie Mechanic
Joined: May 2004
Posts: 510
Likes: 2
From: Halifax, NS
I finished reassembling the headrests with the new speakers - they're ready for interior now. 
We have decided not to pull the engine just yet. We found a tensioner pulley that could have been causing the wobble with tight belts. Anything beyond that will require us to pull the engine, and some of the stuff will require pulling it apart, whether I start it first to try it or not. So we're going to reassemble everything, start it, and if the wobble is bad, we'll pull it all apart again.
Block off plates kit arrived and are installed!
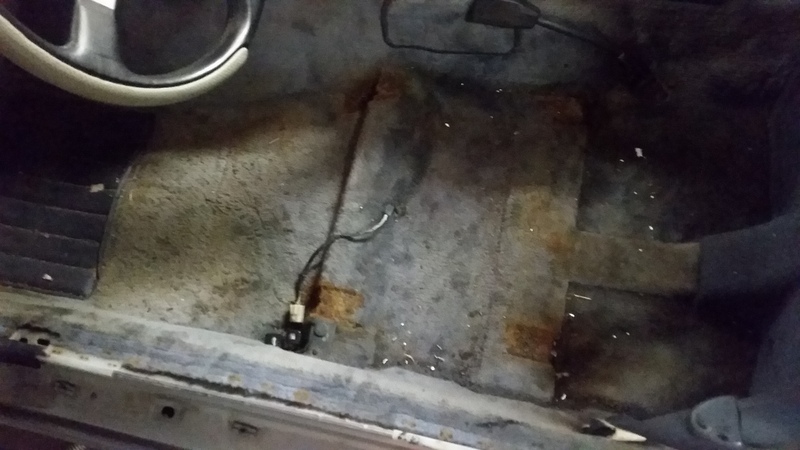
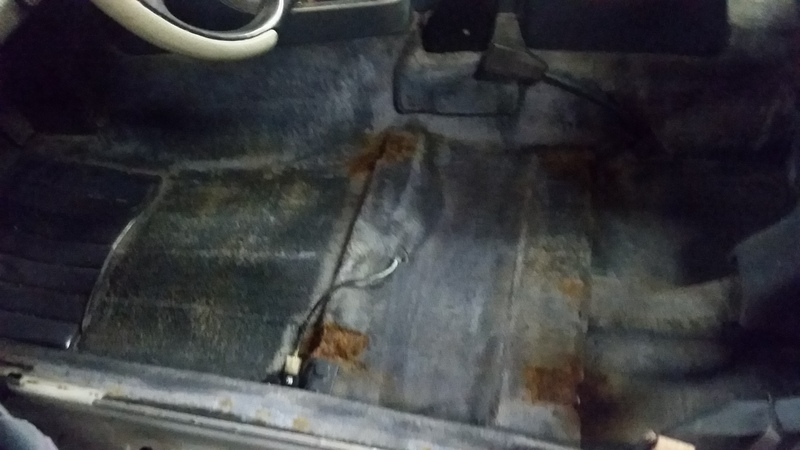
Busted out the Bissell carpet cleaner the other night and started to shampoo the carpets, etc. What a difference!
Below is a pic of the cleaned side (passenger side) vs the still dirty side (drivers side).
We have decided not to pull the engine just yet. We found a tensioner pulley that could have been causing the wobble with tight belts. Anything beyond that will require us to pull the engine, and some of the stuff will require pulling it apart, whether I start it first to try it or not. So we're going to reassemble everything, start it, and if the wobble is bad, we'll pull it all apart again.
Block off plates kit arrived and are installed!
Busted out the Bissell carpet cleaner the other night and started to shampoo the carpets, etc. What a difference!
Below is a pic of the cleaned side (passenger side) vs the still dirty side (drivers side).
Thread Starter
Licensed Zip Tie Mechanic
Joined: May 2004
Posts: 510
Likes: 2
From: Halifax, NS
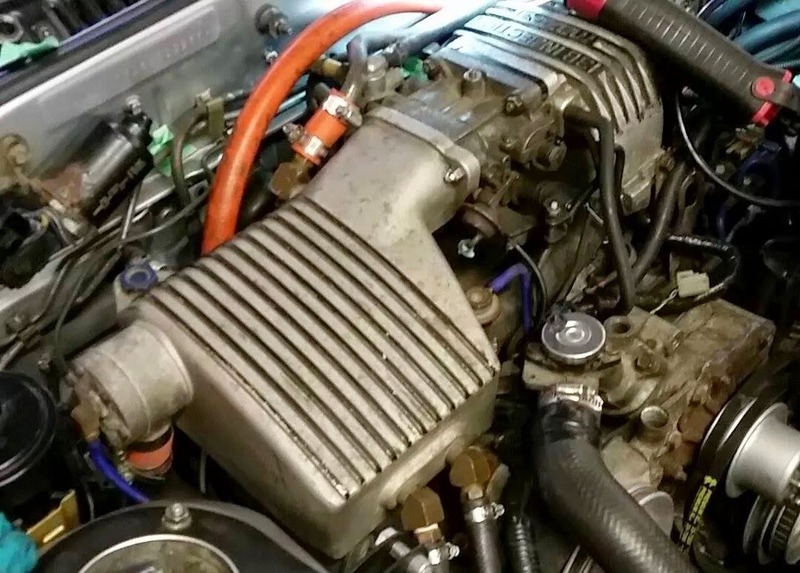
Changed out the fuel filter last night, changed out the stupid granite finished gauge cluster surround for a plain black one, blocked off the output on the intercooler that went to the BAC vavlve, cleaned the drivers side carpet, reinstalled the drivers side door panel and put a new vent in it because the old one was broken.
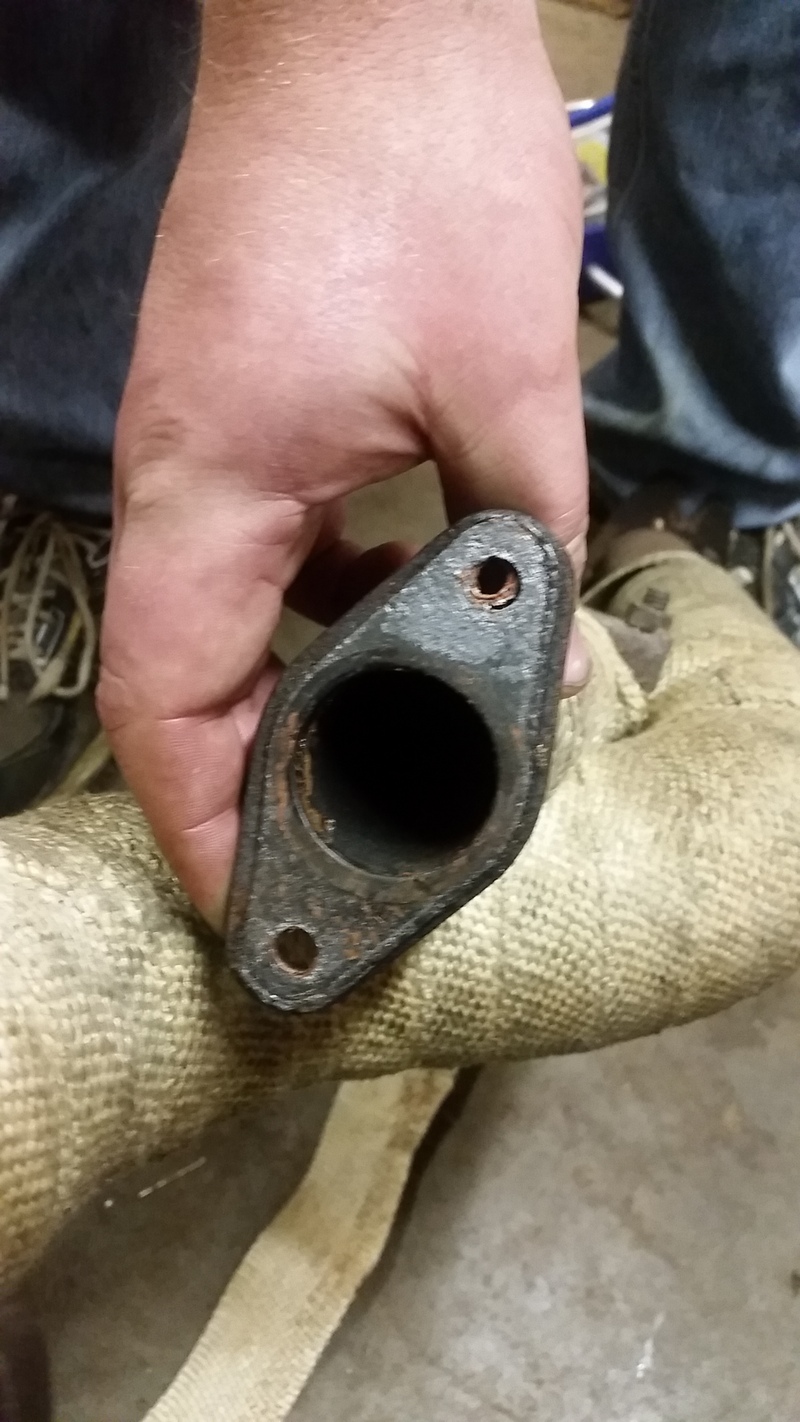
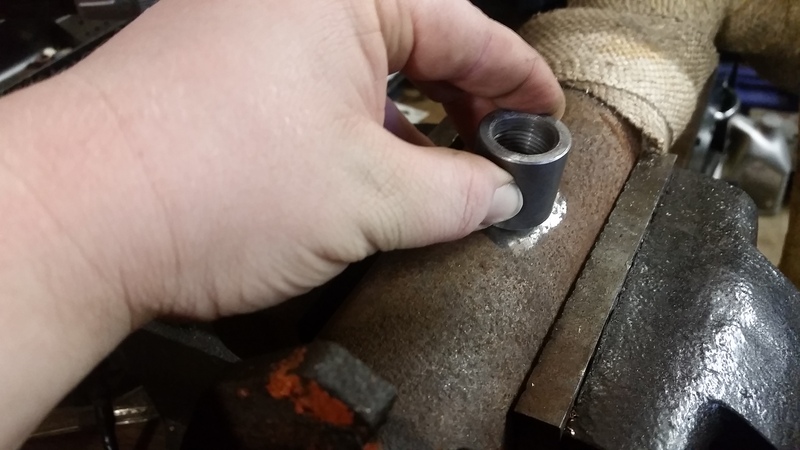
Next, we're taking off the downpipe tonight so I can get a new O2 bung welded into it. Also, I need to put a proper gasket between it and the Turbo - right now they have copper silicone, but on a rotary, the high exhaust gas temps will burn that up.
Also, hunting around the garage last night, I found a bunch of Racing Beat parts I bought like 4 years ago that will go on this car - rad hoses, new exhaust gaskets, a new resonator... I love finding stuff I forgot about.
I decided not to pull the rad because it looks in good shape and like it has been replaced.
Thread Starter
Licensed Zip Tie Mechanic
Joined: May 2004
Posts: 510
Likes: 2
From: Halifax, NS
Before and after shampooing the carpet:
Oh hi thar!
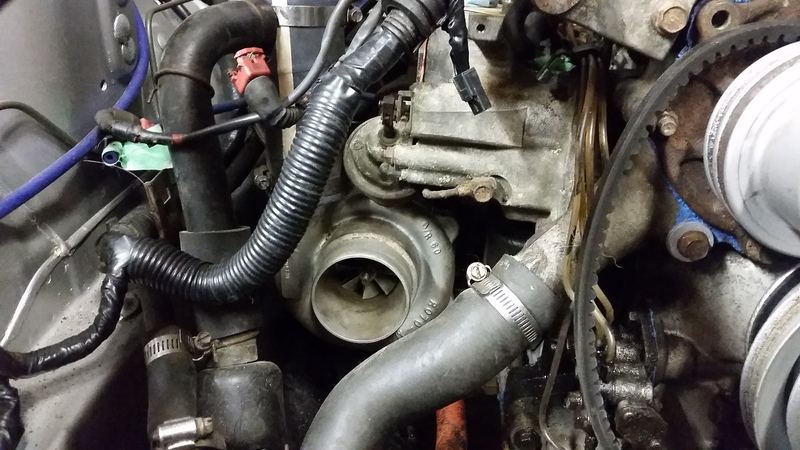
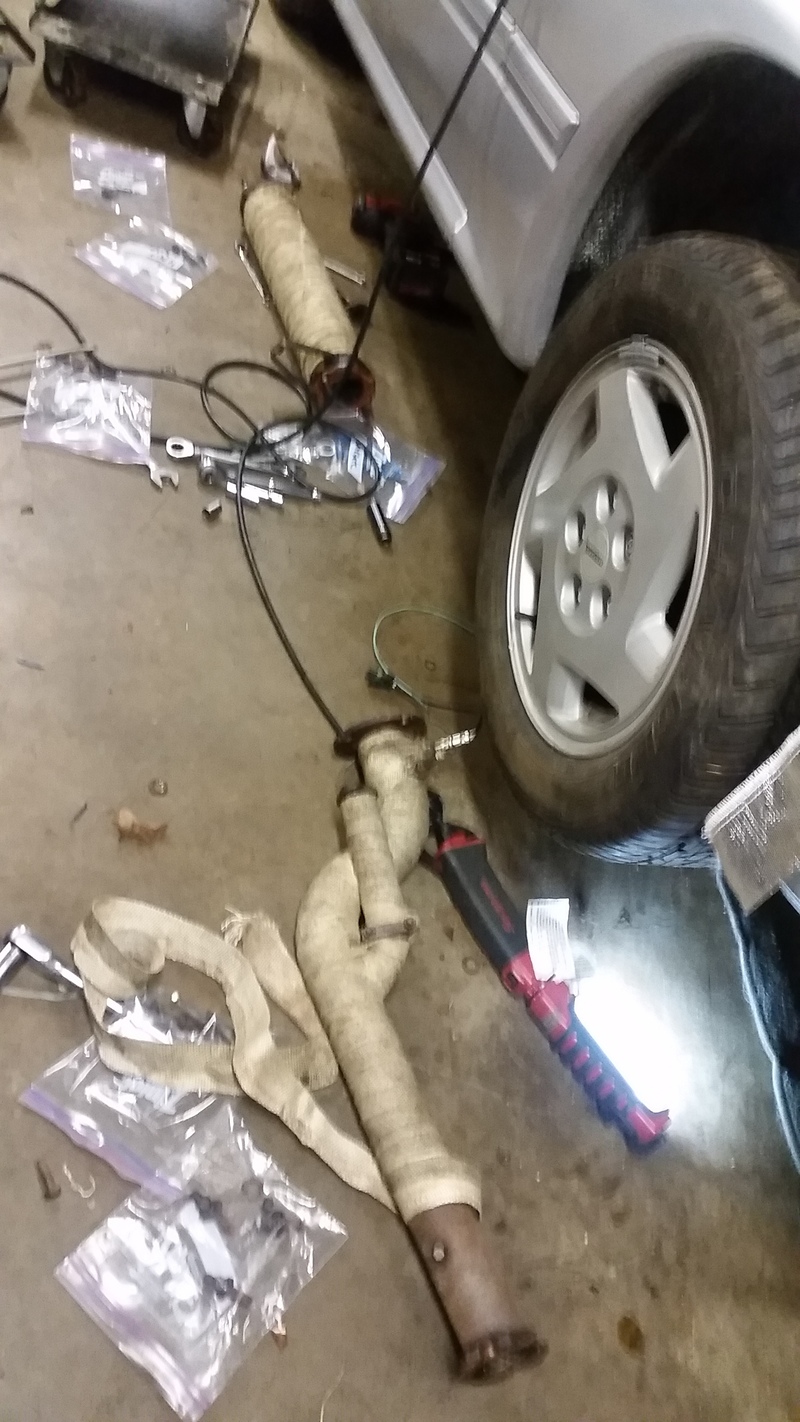
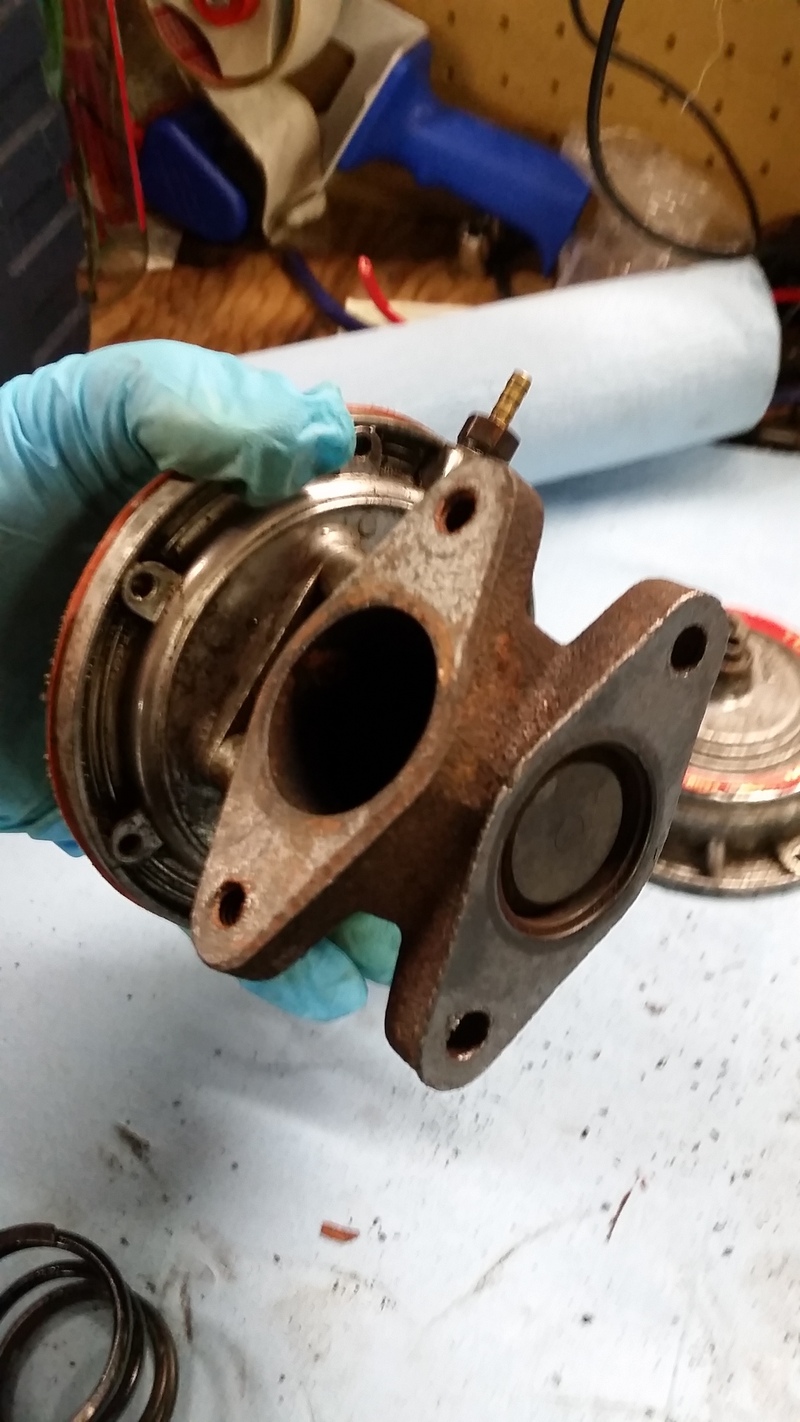
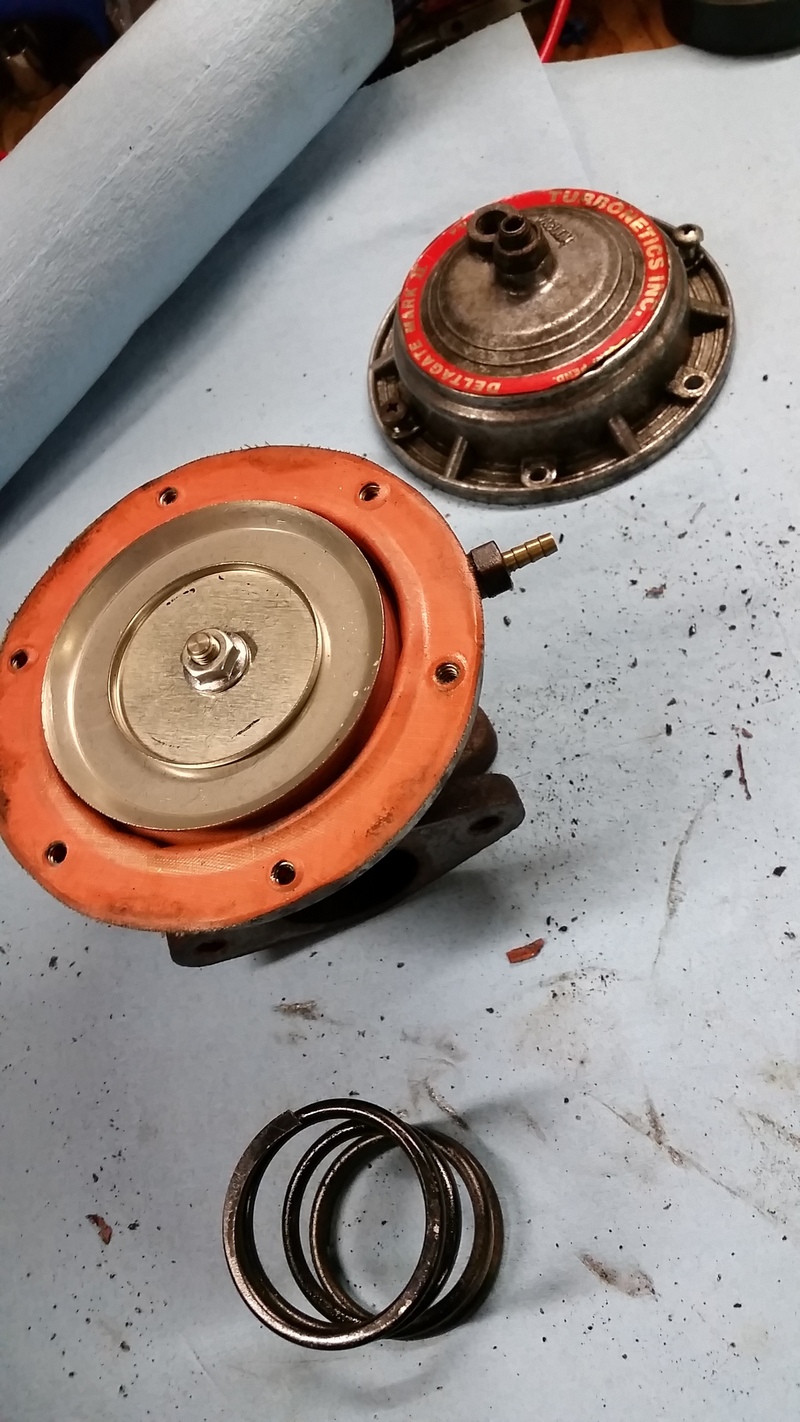
Shots from under the car - downpipe, wastegate, etc.
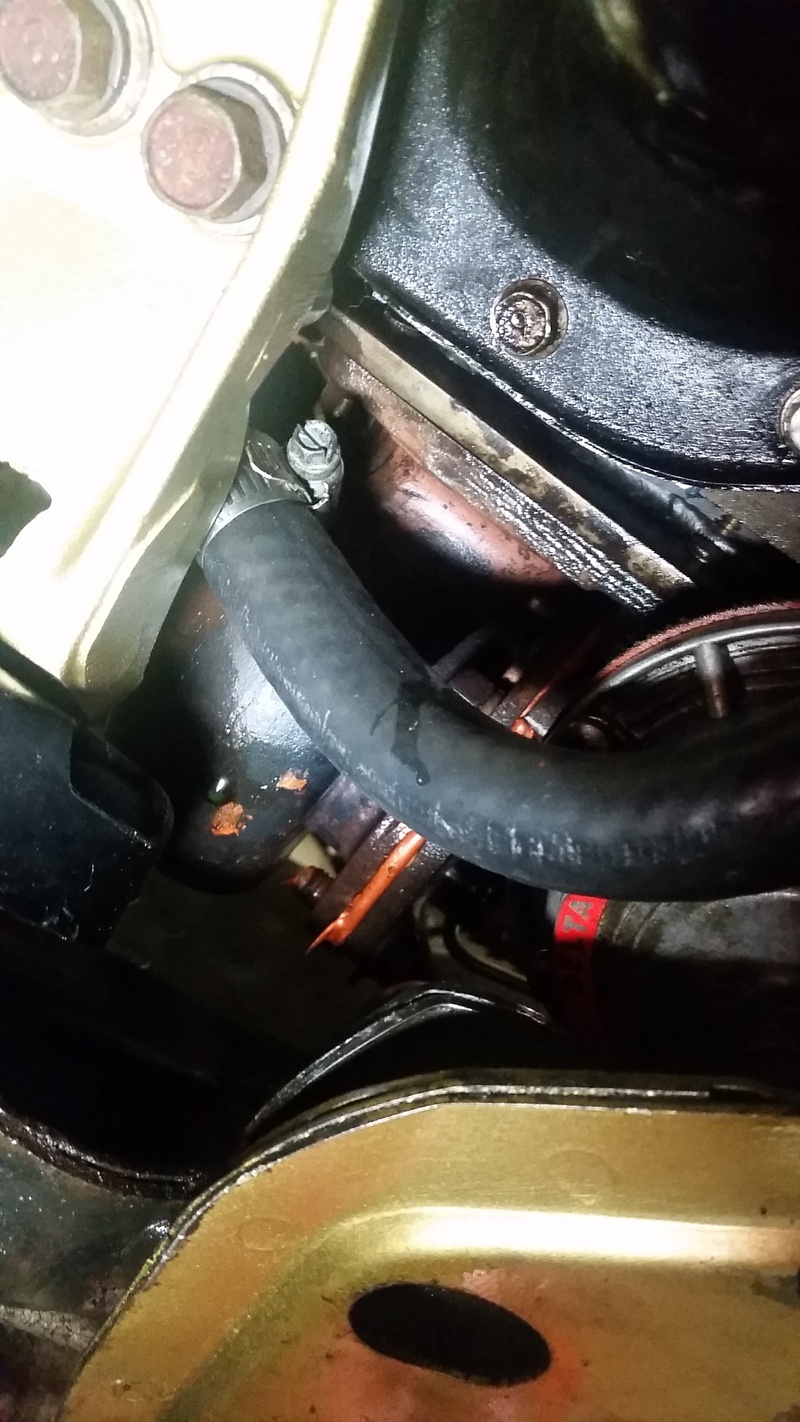
They really thought silicone would hold as an exhaust gasket at the turbo on a rotary
Oh hi thar!
Shots from under the car - downpipe, wastegate, etc.
They really thought silicone would hold as an exhaust gasket at the turbo on a rotary
Last edited by PinkRacer; Jul 23, 2015 at 08:23 PM.
Thread Starter
Licensed Zip Tie Mechanic
Joined: May 2004
Posts: 510
Likes: 2
From: Halifax, NS
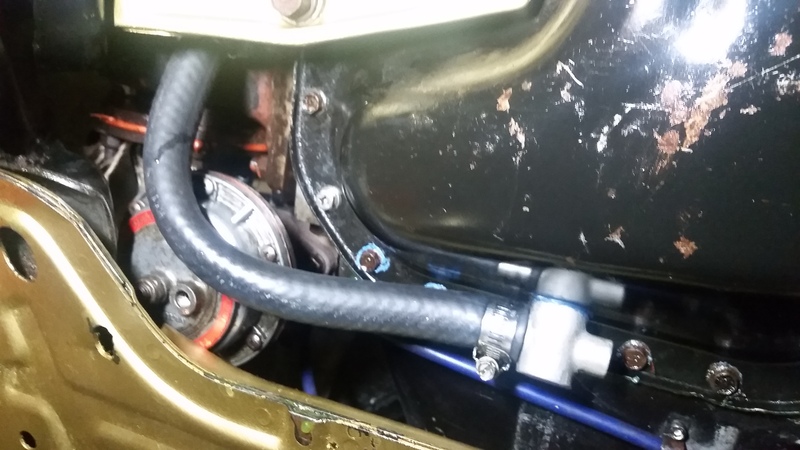
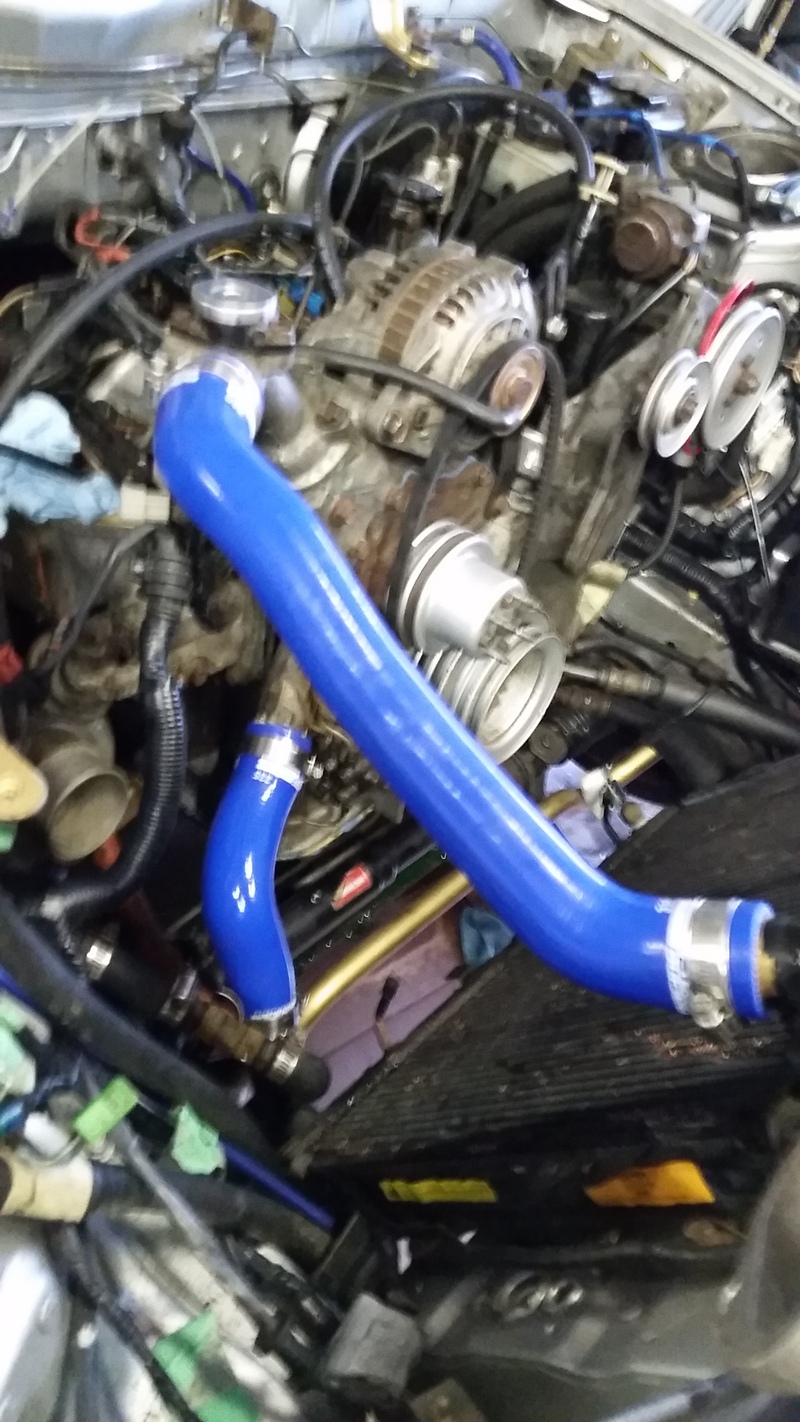
Replaced the rad hoses with a set of Racing Beat hoses I had laying around.
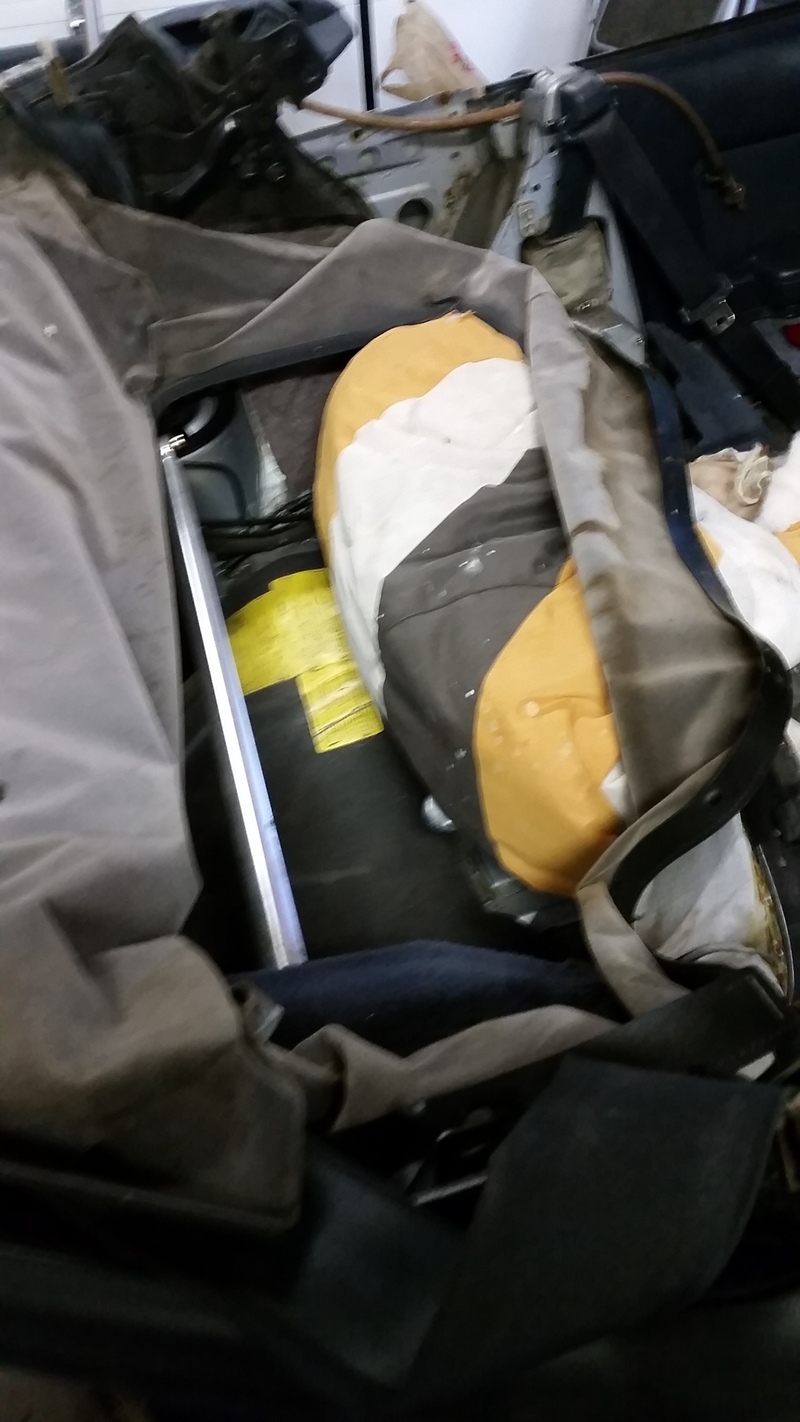
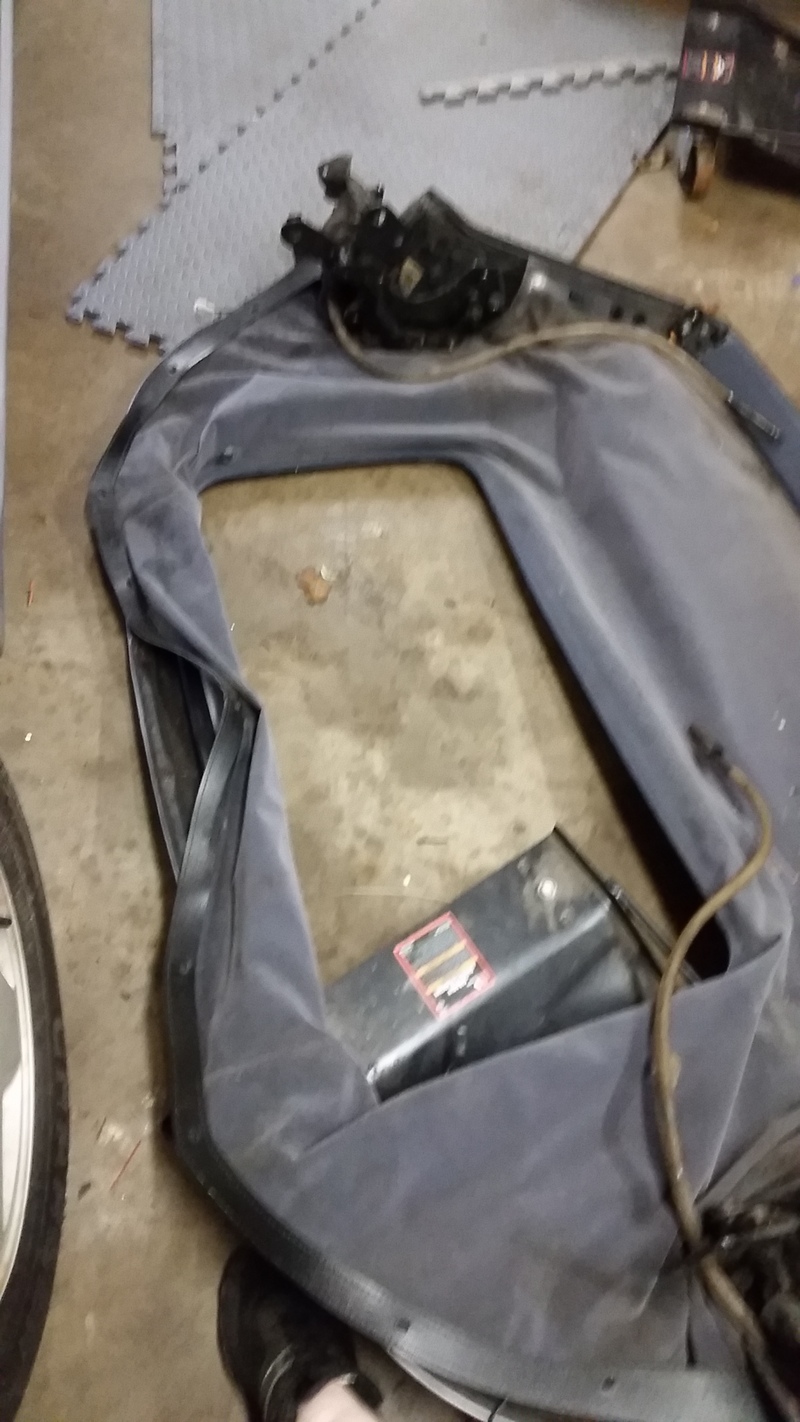
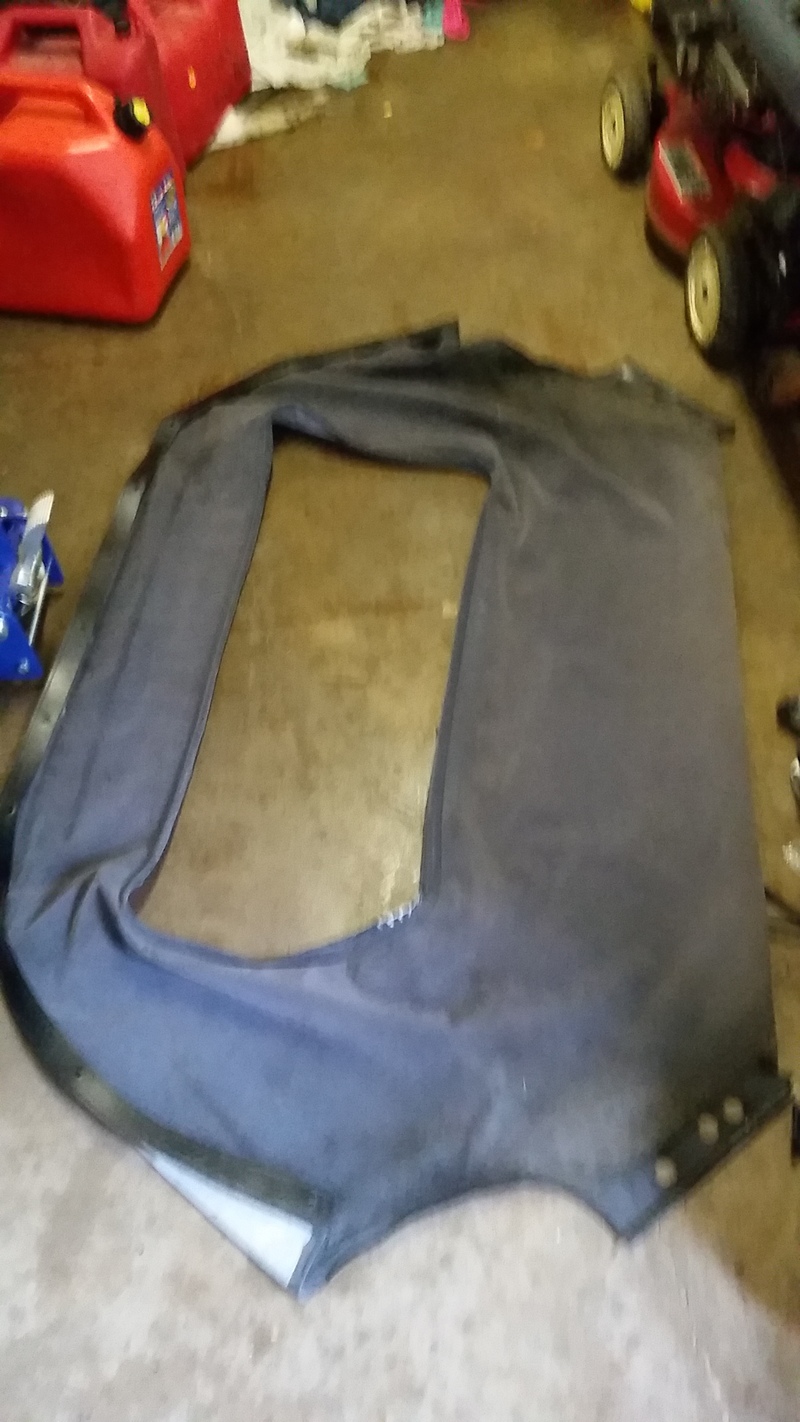
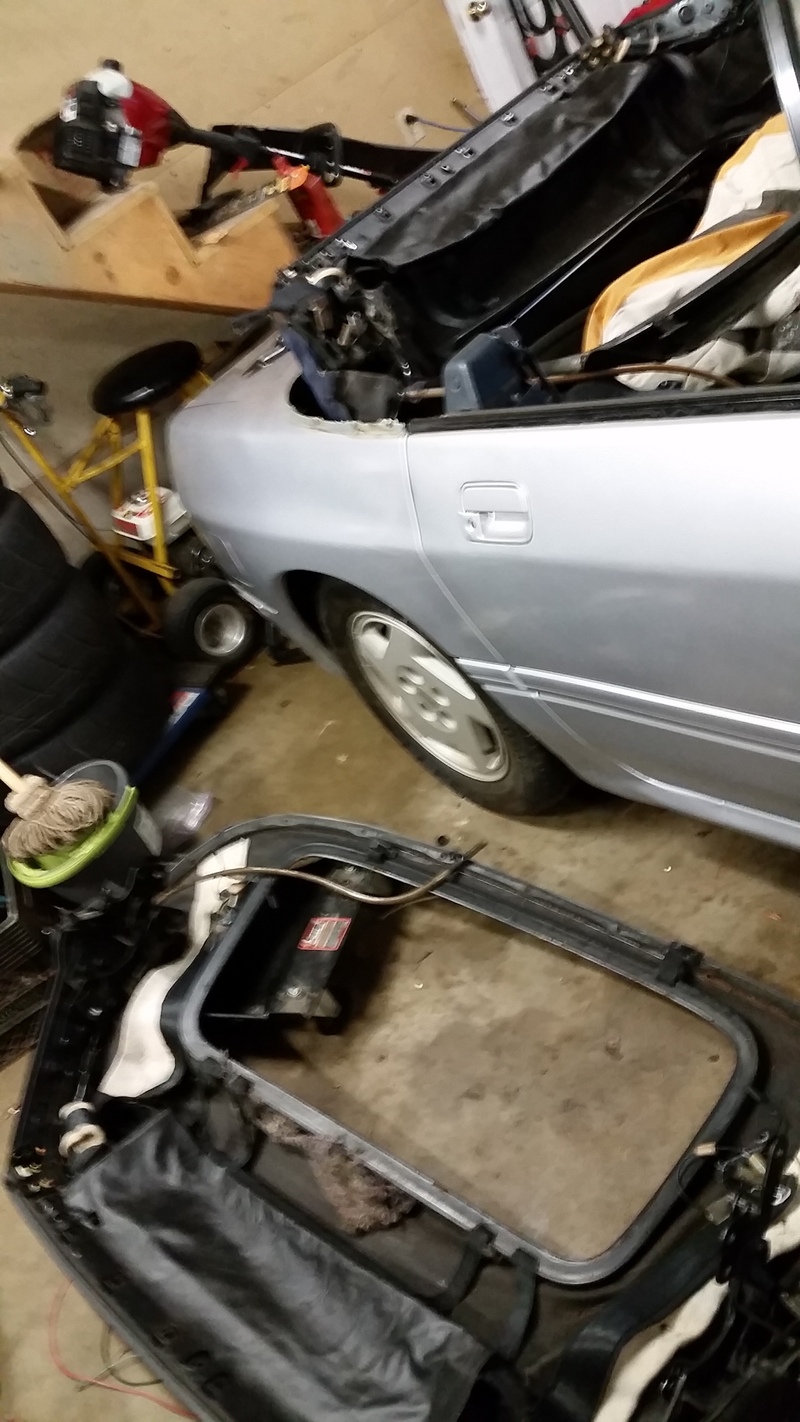
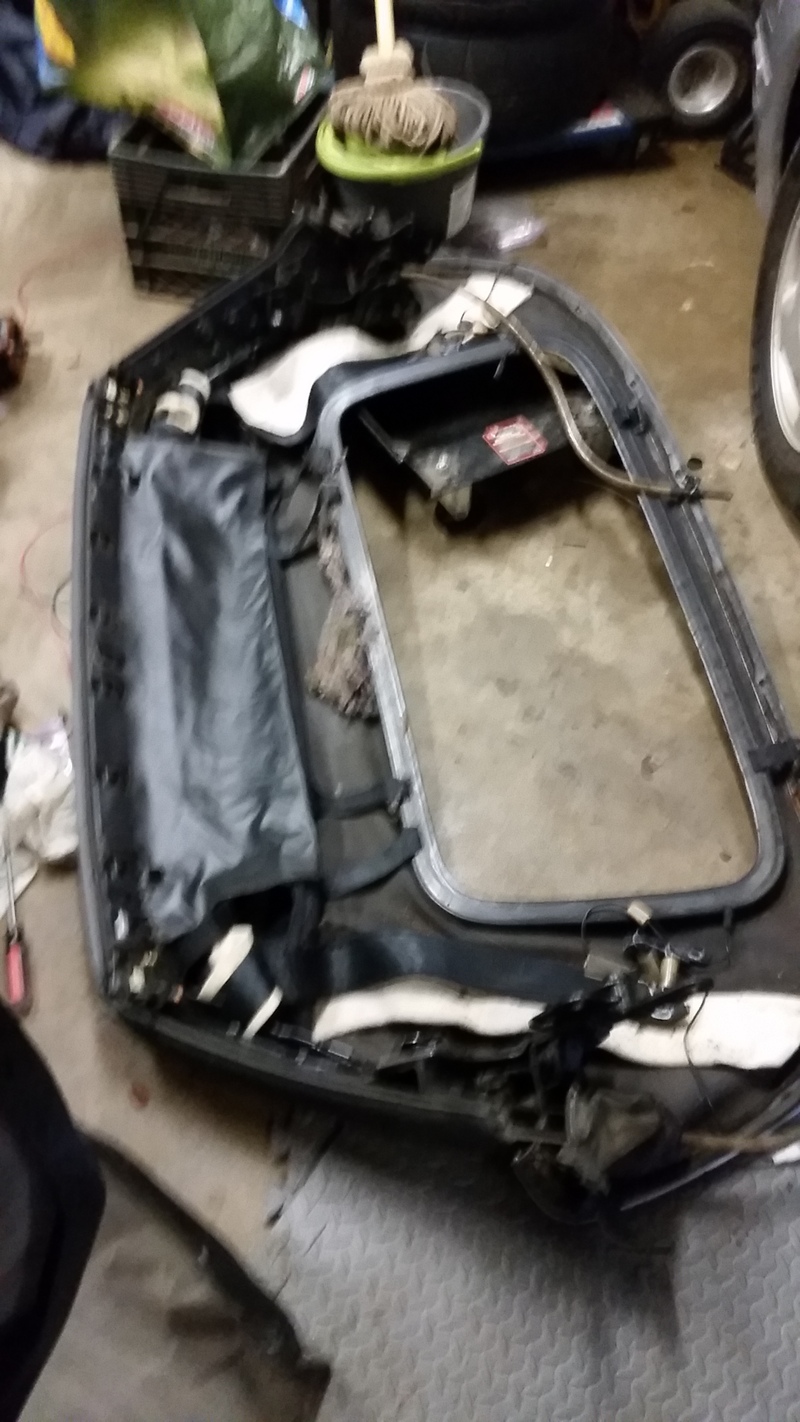
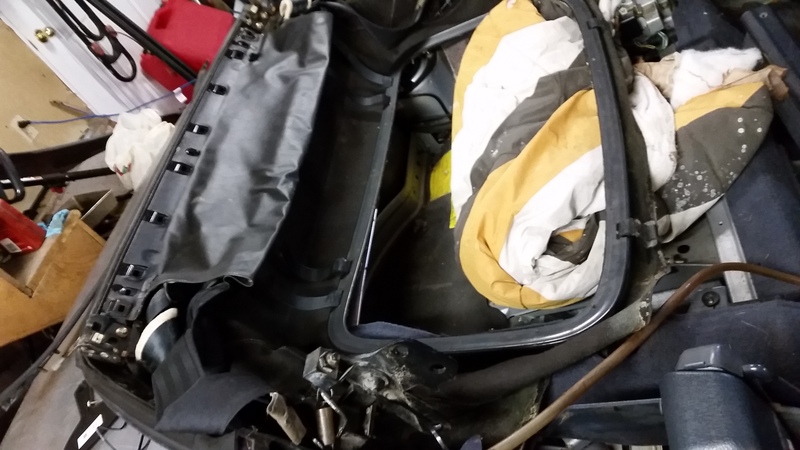
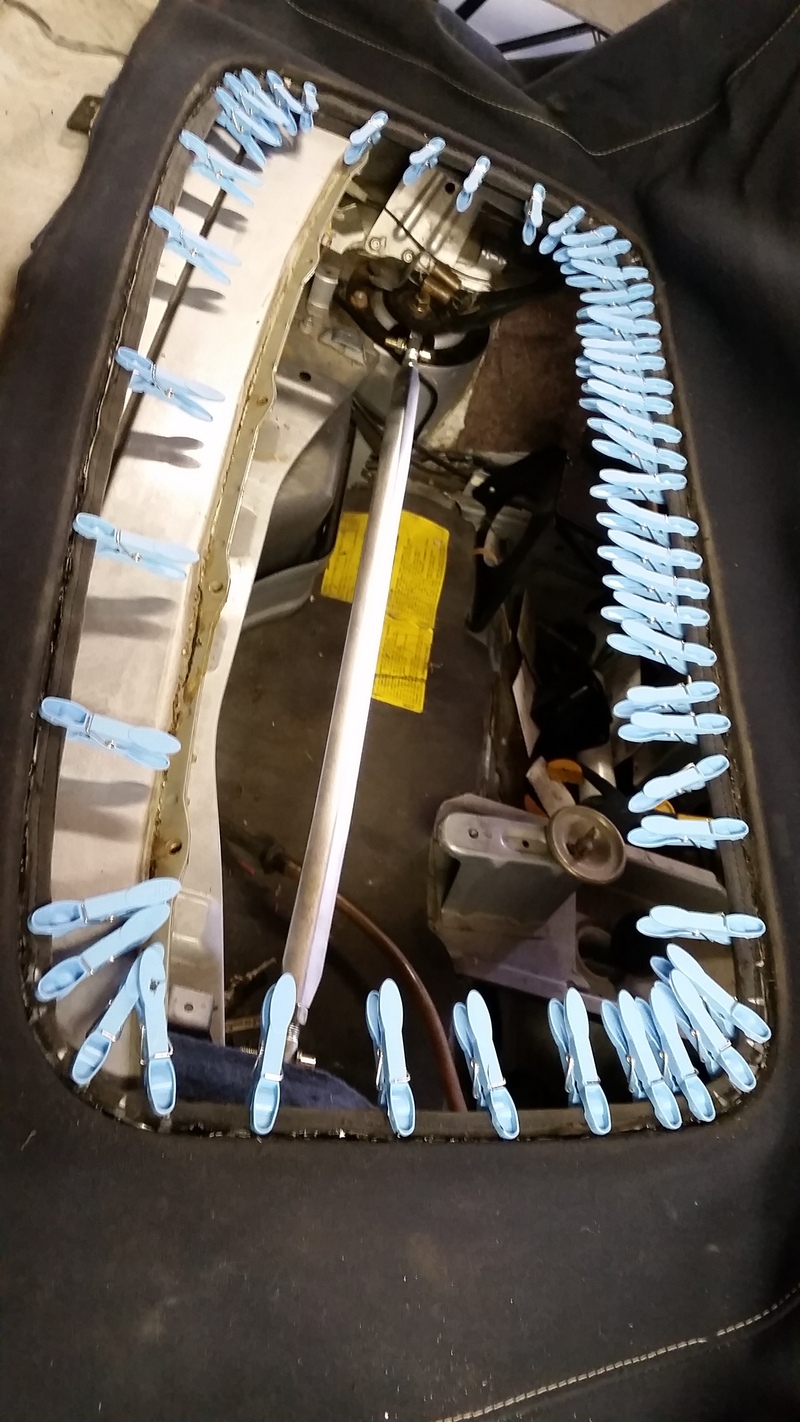
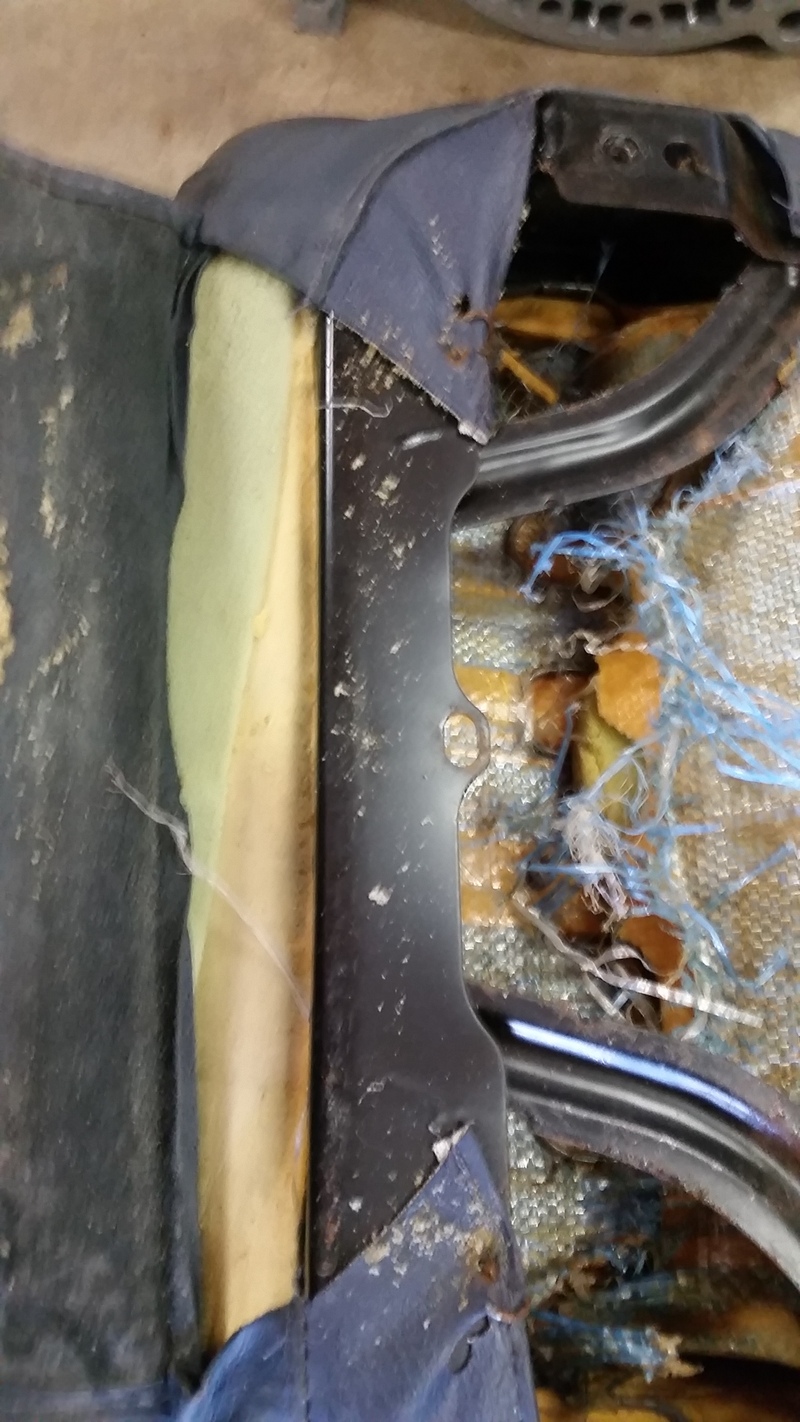
Took the glass out of the convertible tops to strip out the good headliner and clean it.
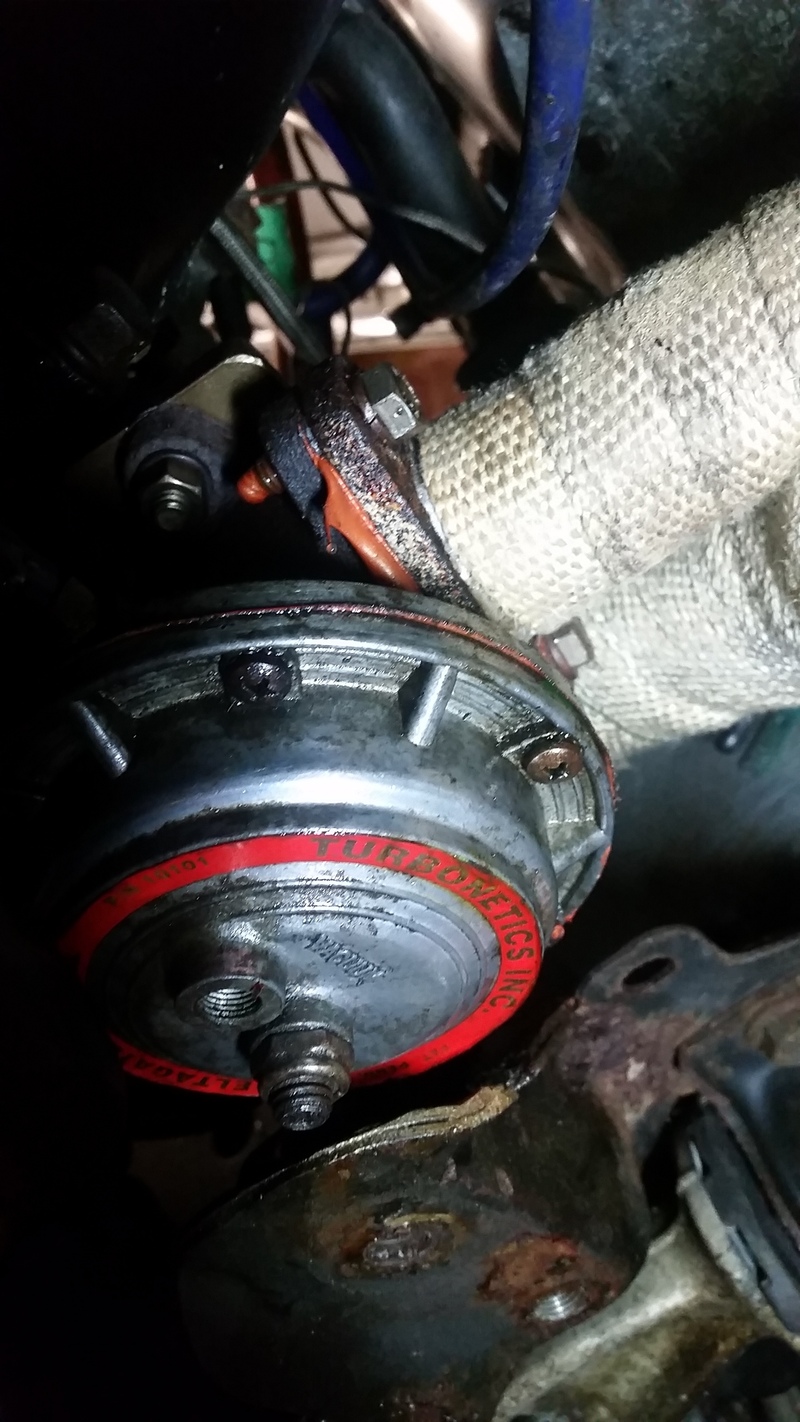
Cleaned up the Waste Gate while I have it out.
Got the new o2 Sensor bung tig welded in by a friend of mine in the right spot.

Took the glass out of the convertible tops to strip out the good headliner and clean it.
Cleaned up the Waste Gate while I have it out.
Got the new o2 Sensor bung tig welded in by a friend of mine in the right spot.
Last edited by PinkRacer; Jul 28, 2015 at 05:51 AM.
Thread Starter
Licensed Zip Tie Mechanic
Joined: May 2004
Posts: 510
Likes: 2
From: Halifax, NS
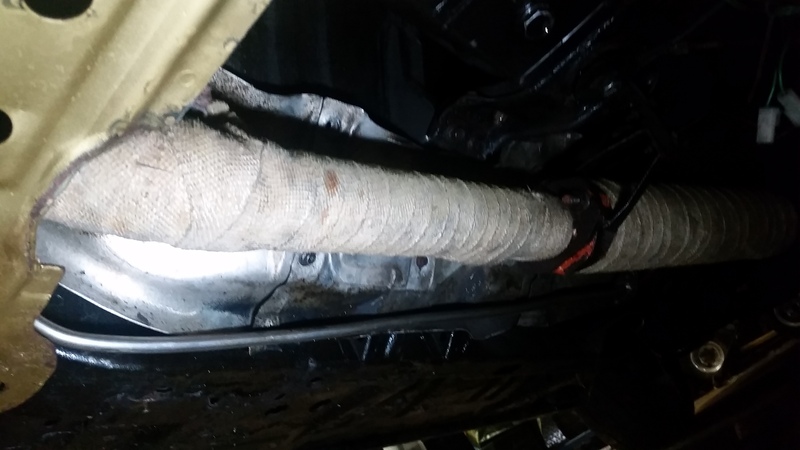
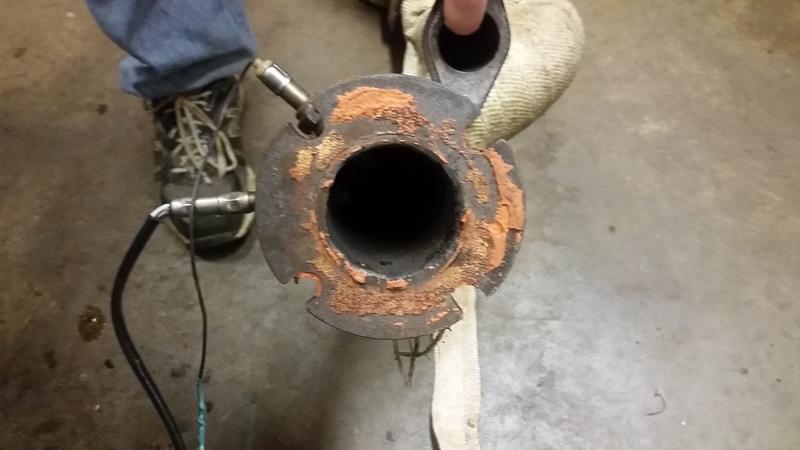
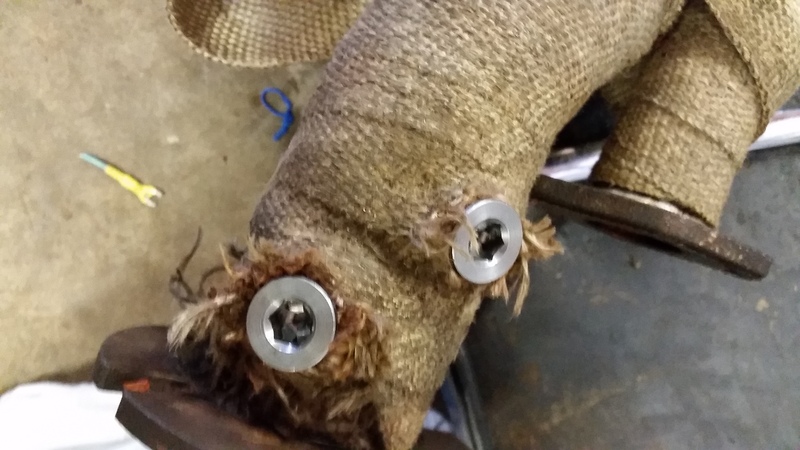
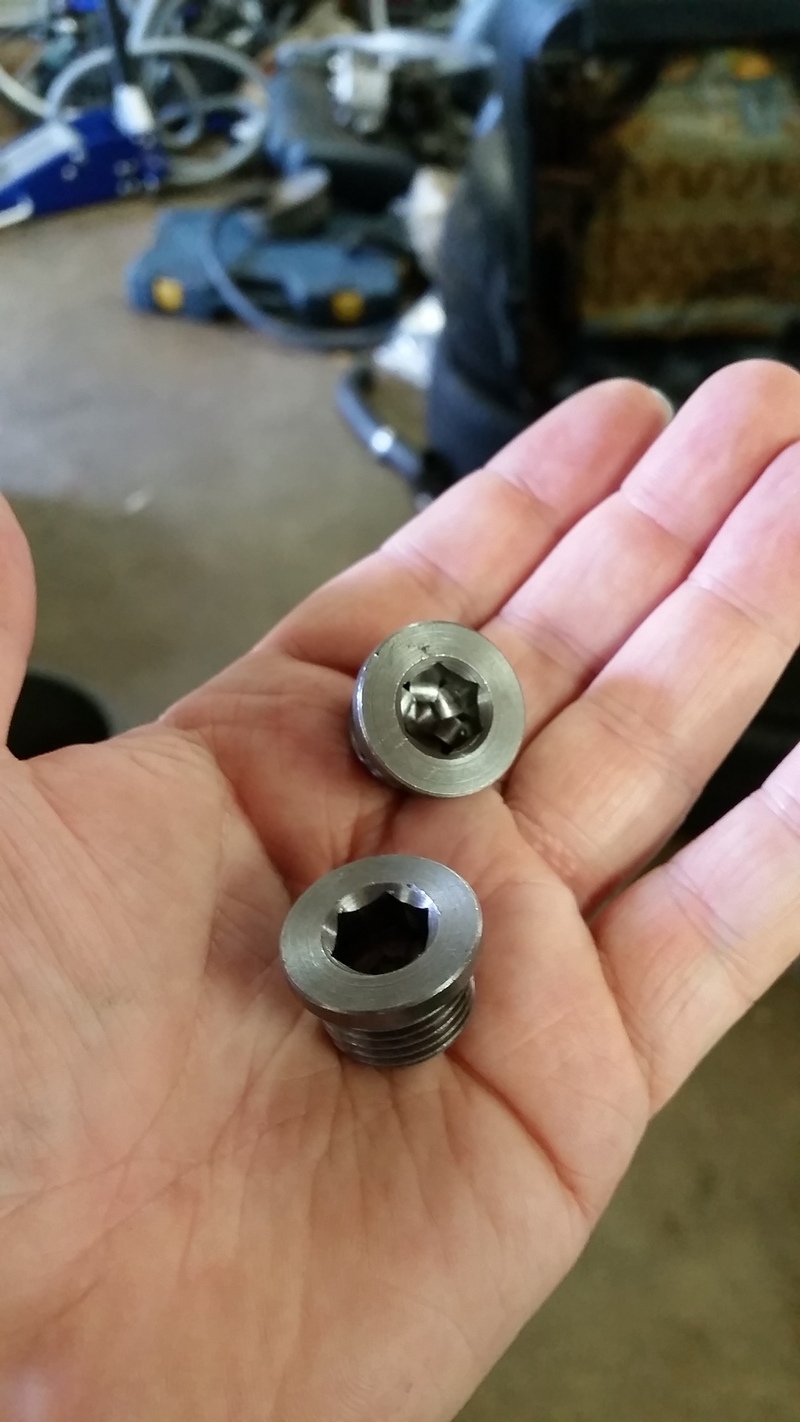
Blocked off the two spots where the O2 sensors were previously and re-wrapped the downpipe. 2 weeks and $35 for these two little plugs....

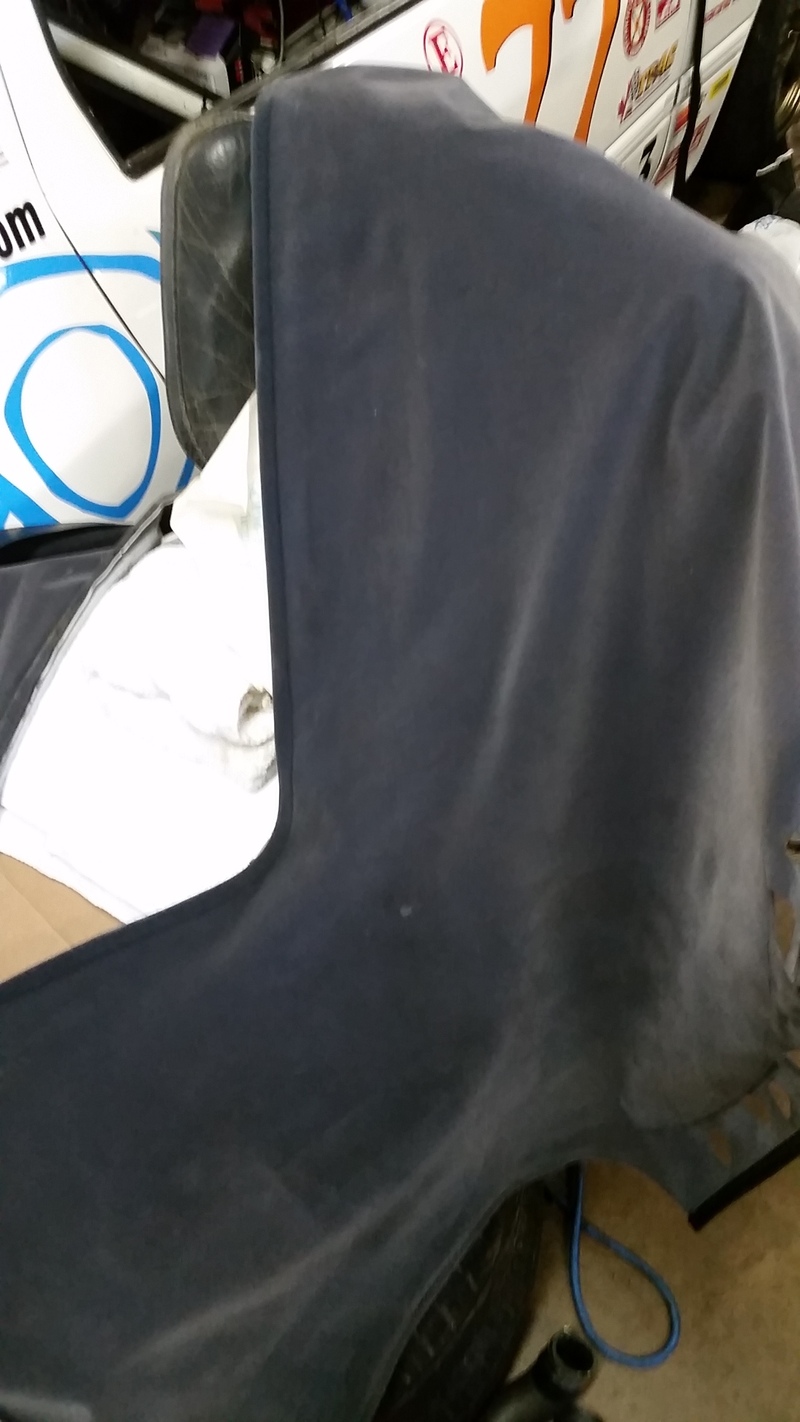
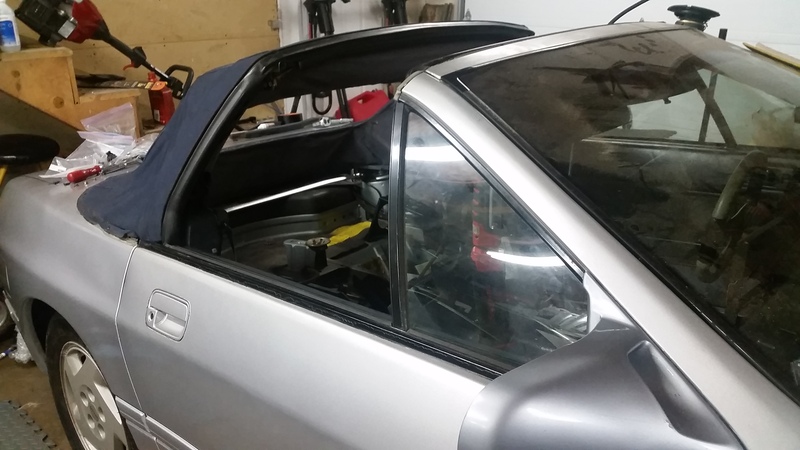
Got the headliner back on the top and the top is somewhat installed on the car. Going to do the window last once the top is completely in.

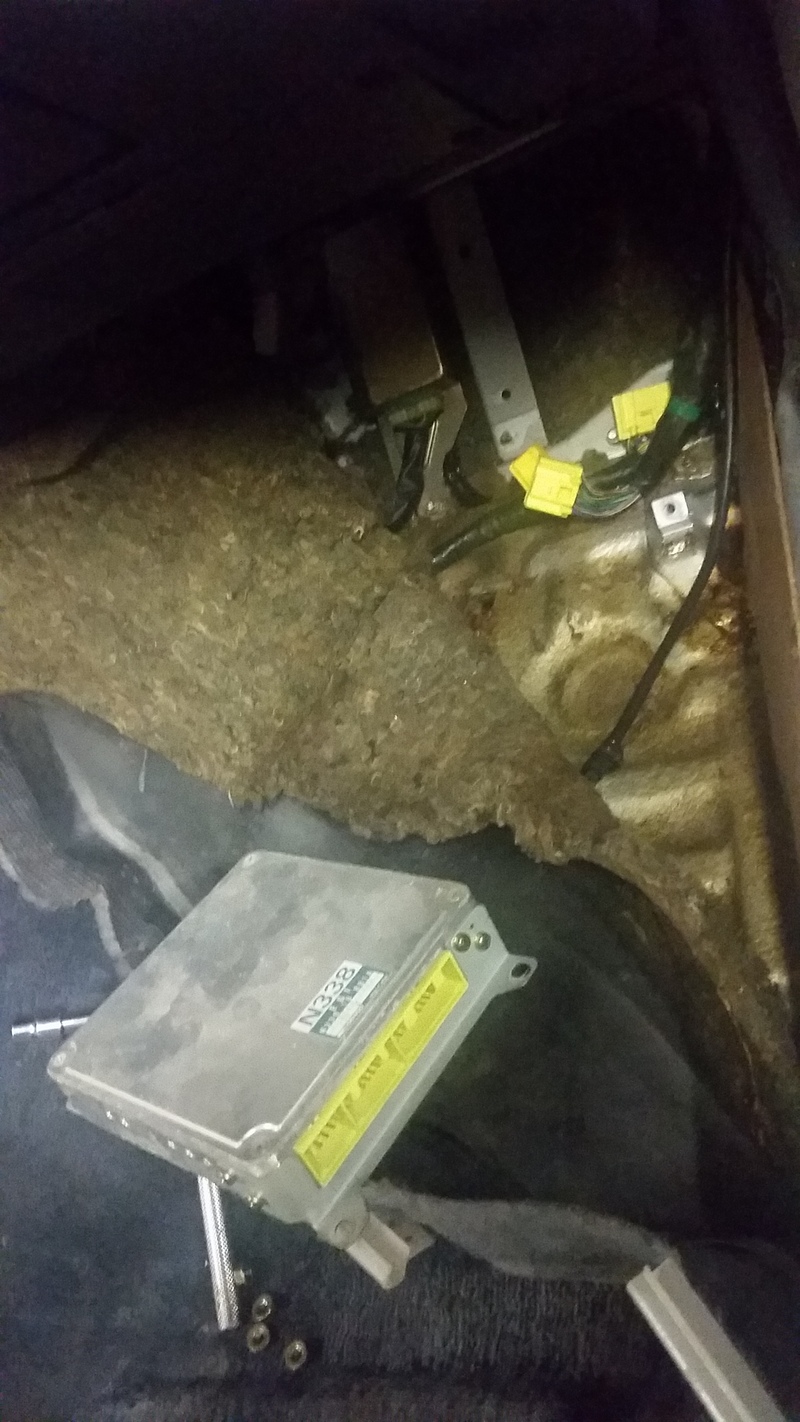
Out comes the computer to make way for the Adaptronic.
Got the headliner back on the top and the top is somewhat installed on the car. Going to do the window last once the top is completely in.
Out comes the computer to make way for the Adaptronic.
Last edited by PinkRacer; Jul 31, 2015 at 06:25 AM.
Thread Starter
Licensed Zip Tie Mechanic
Joined: May 2004
Posts: 510
Likes: 2
From: Halifax, NS
Recent pics:
Top done (except window)

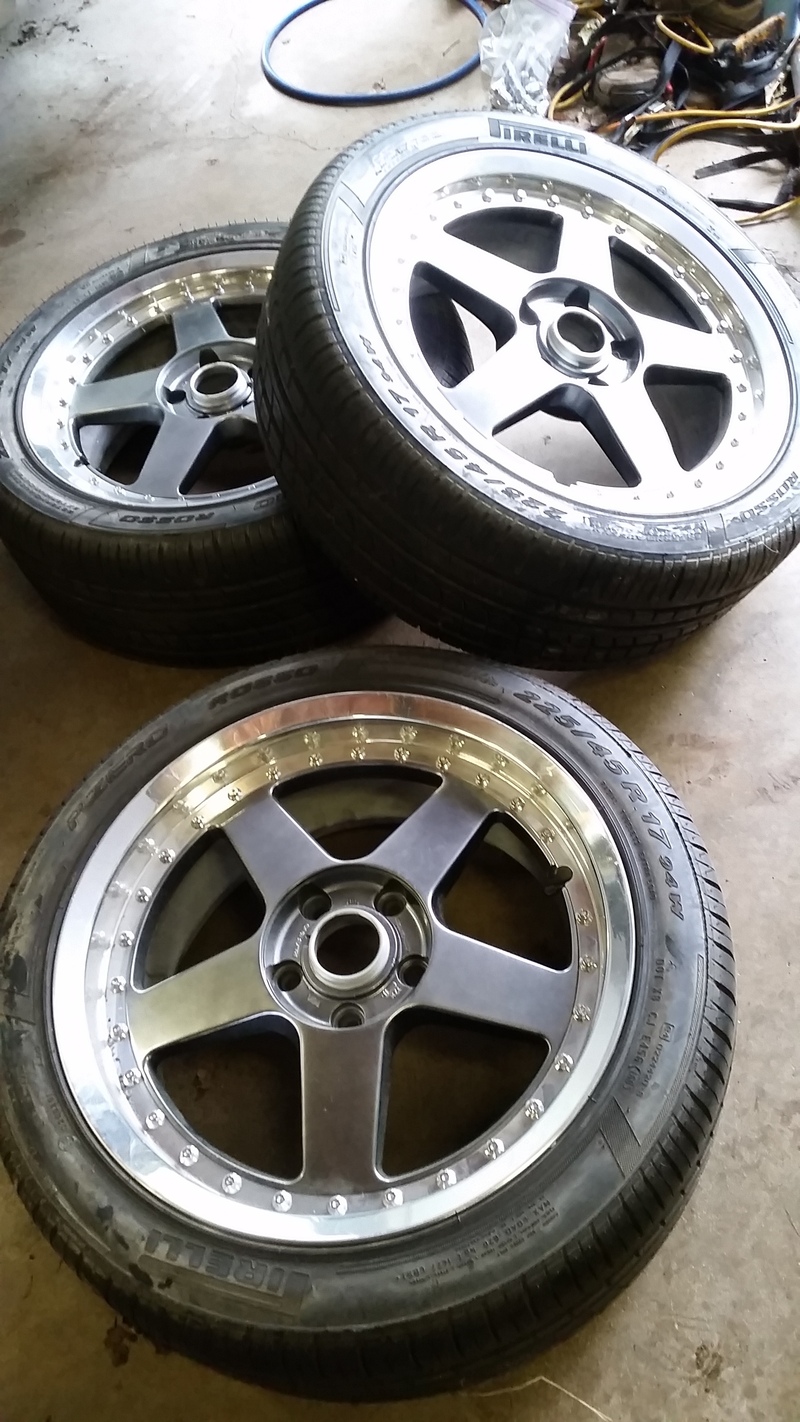
Finished assembling wheels:
Upholstery has arrived! Just need to install it now.
To do:
Engine:
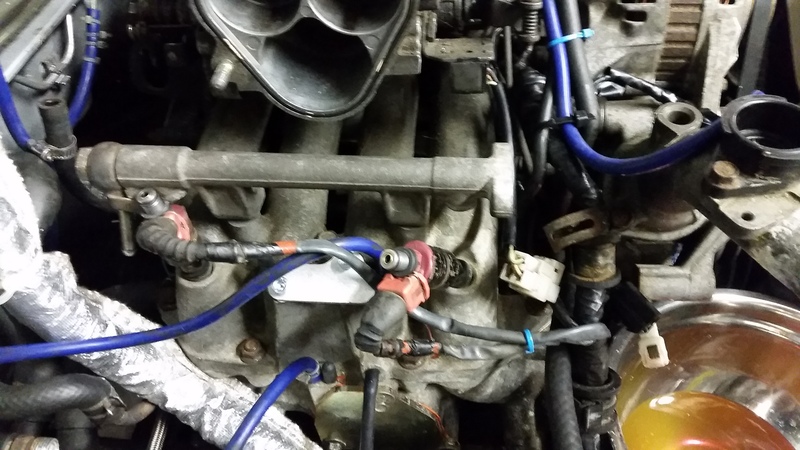
Reassemble exhaust with gaskets and new resonator DONE!
Reassemble Injectors/Fuel rails/Upper Intake Manifold DONE!
Tie up fuel pump wiring DONE!
NEW! Install Electronic Boost Control Solenoid
NEW! Install Dual Belt Alternator Pulley
Seats:
Take apart seats and rebuild foam
Install new upholstery
Replace drivers side seat rail (waiting for this to arrive in the mail now)
Repaint seat rails
Reinstall seats
Top
Reinstall rear window
Interior
Fabricate trunk floor panel
Tie up all wiring under the dash
Chassis
Replace tires on two wheels DONE!
Top done (except window)
Finished assembling wheels:
Upholstery has arrived! Just need to install it now.
To do:
Engine:
Reassemble exhaust with gaskets and new resonator DONE!
Reassemble Injectors/Fuel rails/Upper Intake Manifold DONE!
Tie up fuel pump wiring DONE!
NEW! Install Electronic Boost Control Solenoid
NEW! Install Dual Belt Alternator Pulley
Seats:
Take apart seats and rebuild foam
Install new upholstery
Replace drivers side seat rail (waiting for this to arrive in the mail now)
Repaint seat rails
Reinstall seats
Top
Reinstall rear window
Interior
Fabricate trunk floor panel
Tie up all wiring under the dash
Chassis
Replace tires on two wheels DONE!
Thread Starter
Licensed Zip Tie Mechanic
Joined: May 2004
Posts: 510
Likes: 2
From: Halifax, NS
Recent pics:
Top done (except window)
Finished assembling wheels:

Upholstery has arrived! Just need to install it now.

To Do List
Engine:
Reassemble exhaust with gaskets and new resonator DONE!
Reassemble Injectors/Fuel rails/Upper Intake Manifold DONE!
Tie up fuel pump wiring DONE!
NEW! Install Electronic Boost Control Solenoid
NEW! Install Dual Belt Alternator Pulley

Seats:
Take apart seats and rebuild foam
Install new upholstery
Replace drivers side seat rail (waiting for this to arrive in the mail now)
Repaint seat rails
Reinstall seats
Top
Reinstall rear window
Interior
Fabricate trunk floor panel
Tie up all wiring under the dash
Chassis
Replace tires on two wheels DONE!
Install two brake flex lines
Top done (except window)
Finished assembling wheels:
Upholstery has arrived! Just need to install it now.
To Do List
Engine:
Reassemble exhaust with gaskets and new resonator DONE!
Reassemble Injectors/Fuel rails/Upper Intake Manifold DONE!
Tie up fuel pump wiring DONE!
NEW! Install Electronic Boost Control Solenoid
NEW! Install Dual Belt Alternator Pulley
Seats:
Take apart seats and rebuild foam
Install new upholstery
Replace drivers side seat rail (waiting for this to arrive in the mail now)
Repaint seat rails
Reinstall seats
Top
Reinstall rear window
Interior
Fabricate trunk floor panel
Tie up all wiring under the dash
Chassis
Replace tires on two wheels DONE!
Install two brake flex lines
Thread Starter
Licensed Zip Tie Mechanic
Joined: May 2004
Posts: 510
Likes: 2
From: Halifax, NS
Seat rail arrived! Just need to clean it up and paint it.
We put coolant/fuel in the car last night and tried to start, but 2 things happened:
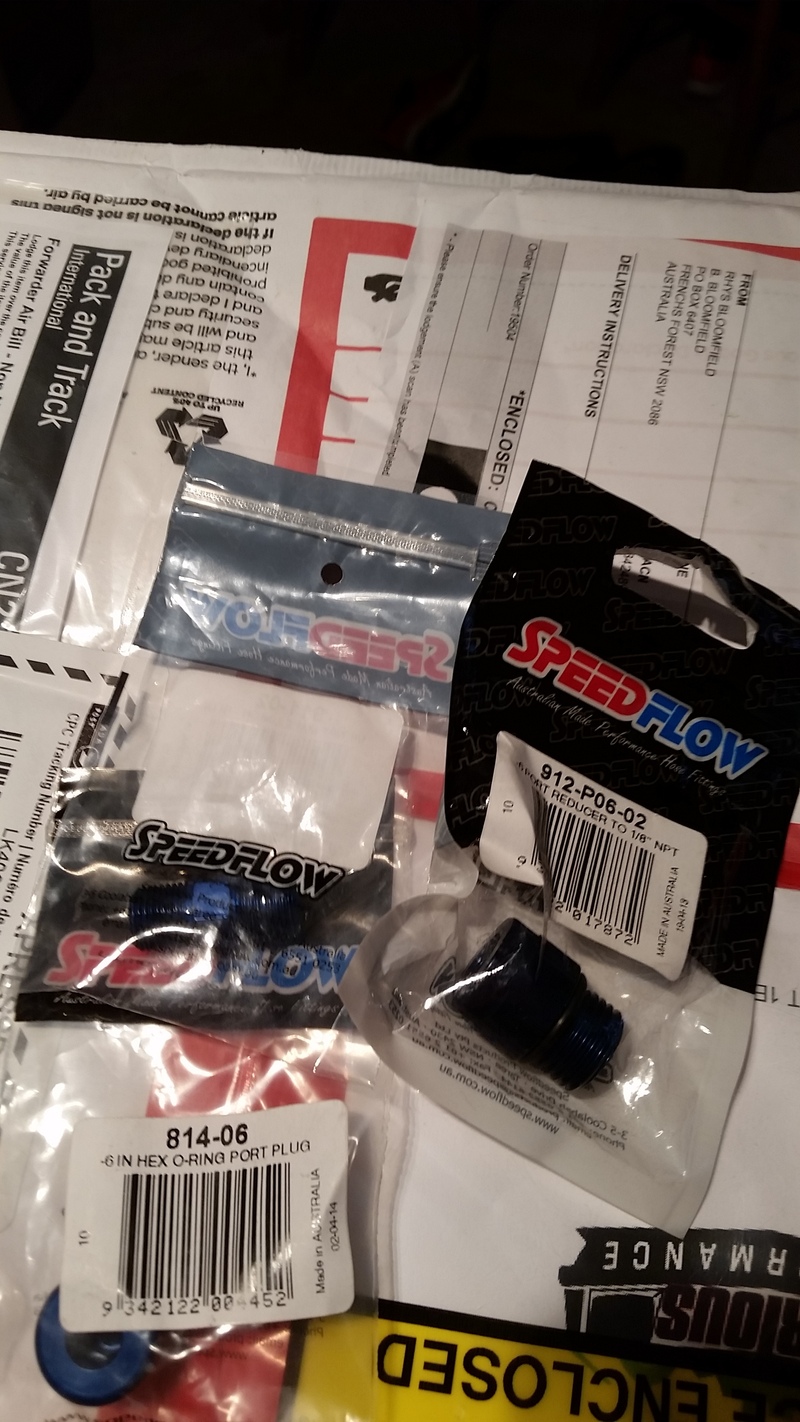
1) We had a fuel leak at the Fuel Pressure Regulator - I need to find a couple of fittings for this because the type I had were wrong. Just ordered the fittings I need for this from Australia. Should be here in September.
2) The starter didn't engage - could be a trigger wire or a sticky solenoid. Tried to draw the power but it never kicked over.
We put coolant/fuel in the car last night and tried to start, but 2 things happened:
1) We had a fuel leak at the Fuel Pressure Regulator - I need to find a couple of fittings for this because the type I had were wrong. Just ordered the fittings I need for this from Australia. Should be here in September.
2) The starter didn't engage - could be a trigger wire or a sticky solenoid. Tried to draw the power but it never kicked over.
Thread Starter
Licensed Zip Tie Mechanic
Joined: May 2004
Posts: 510
Likes: 2
From: Halifax, NS
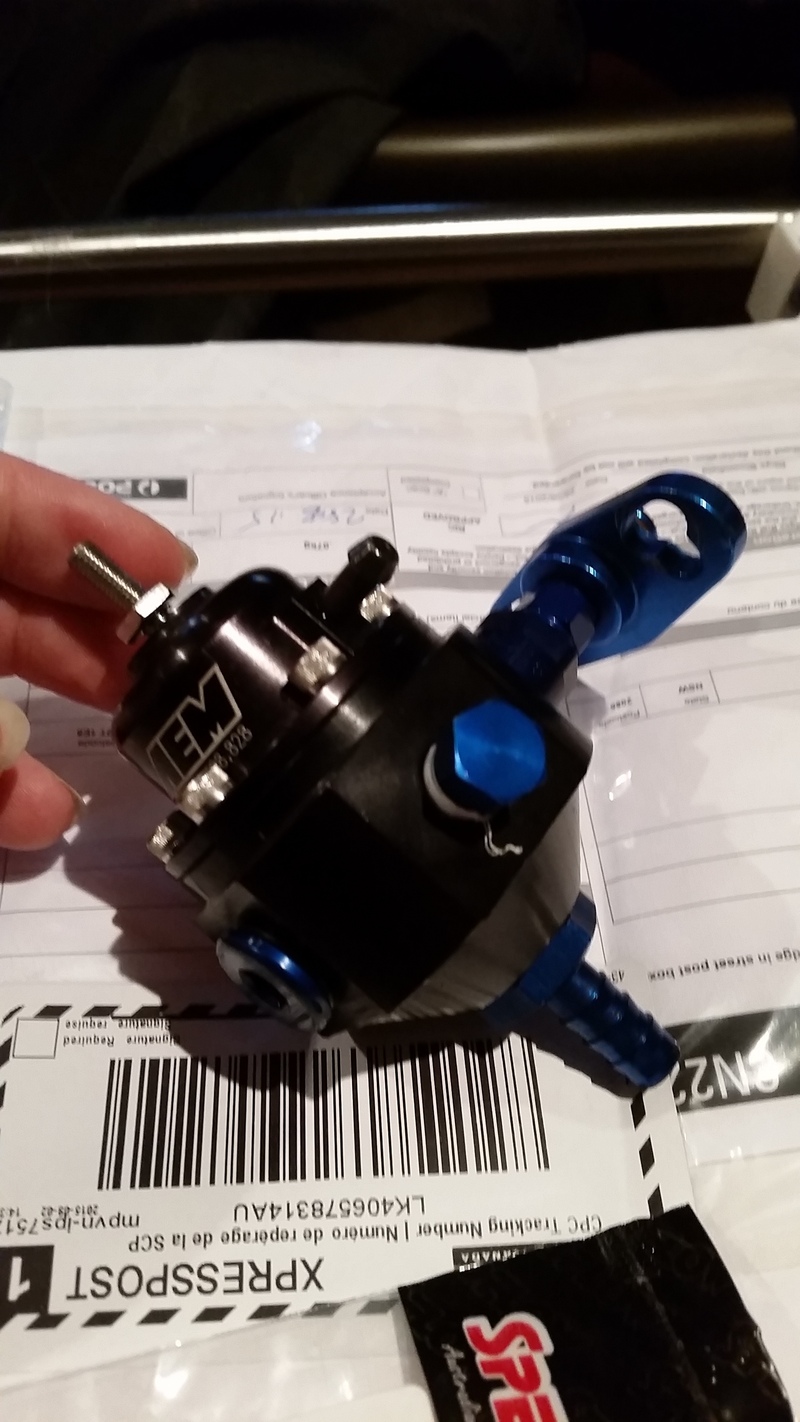
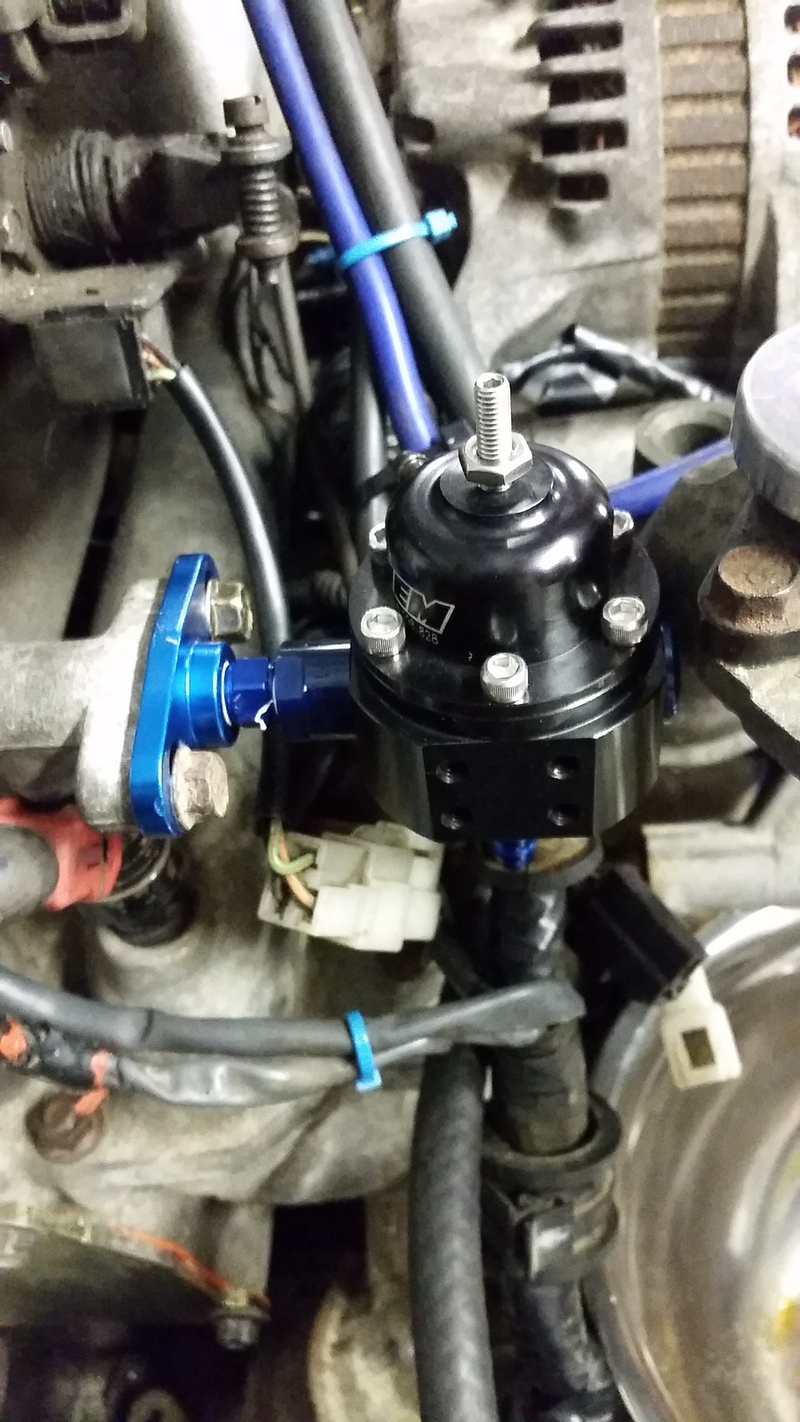
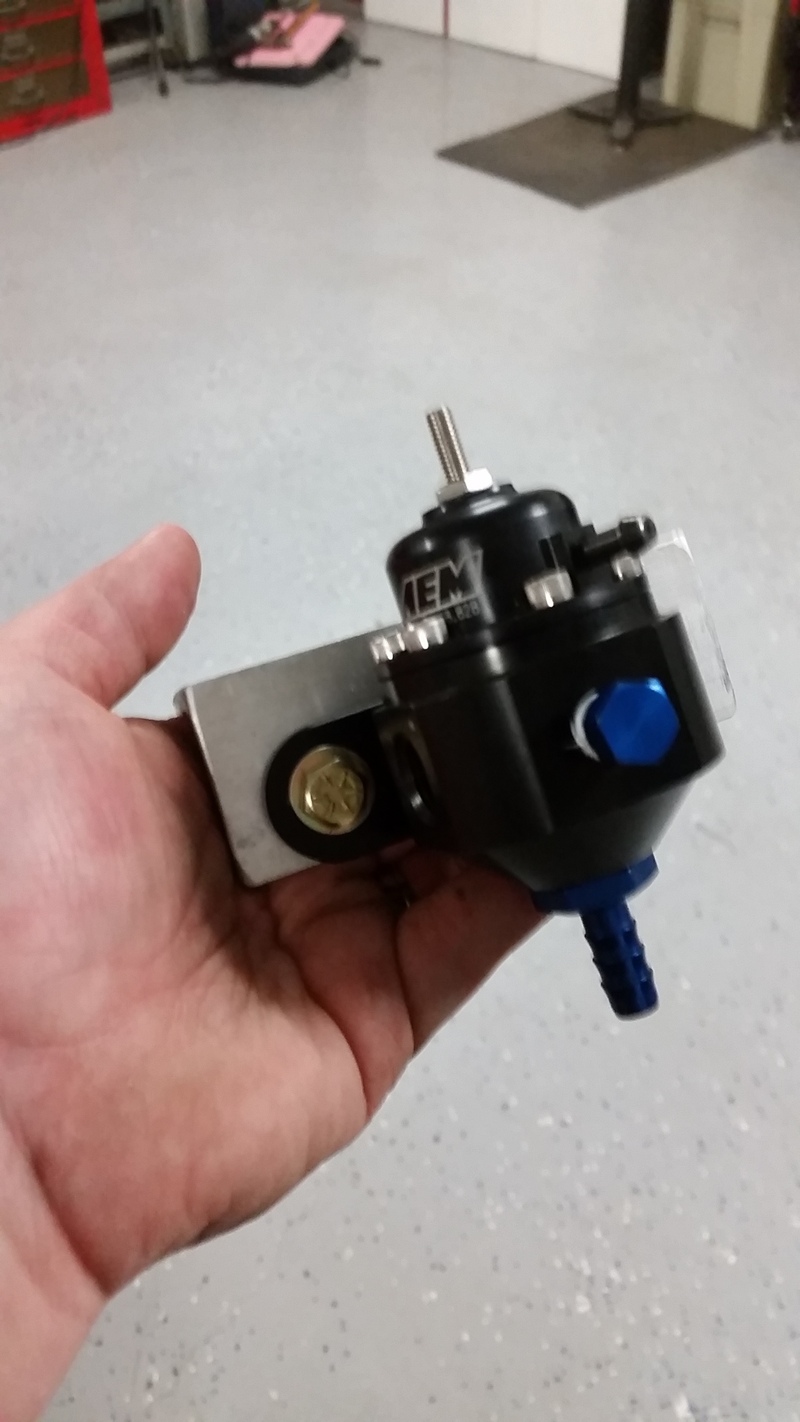
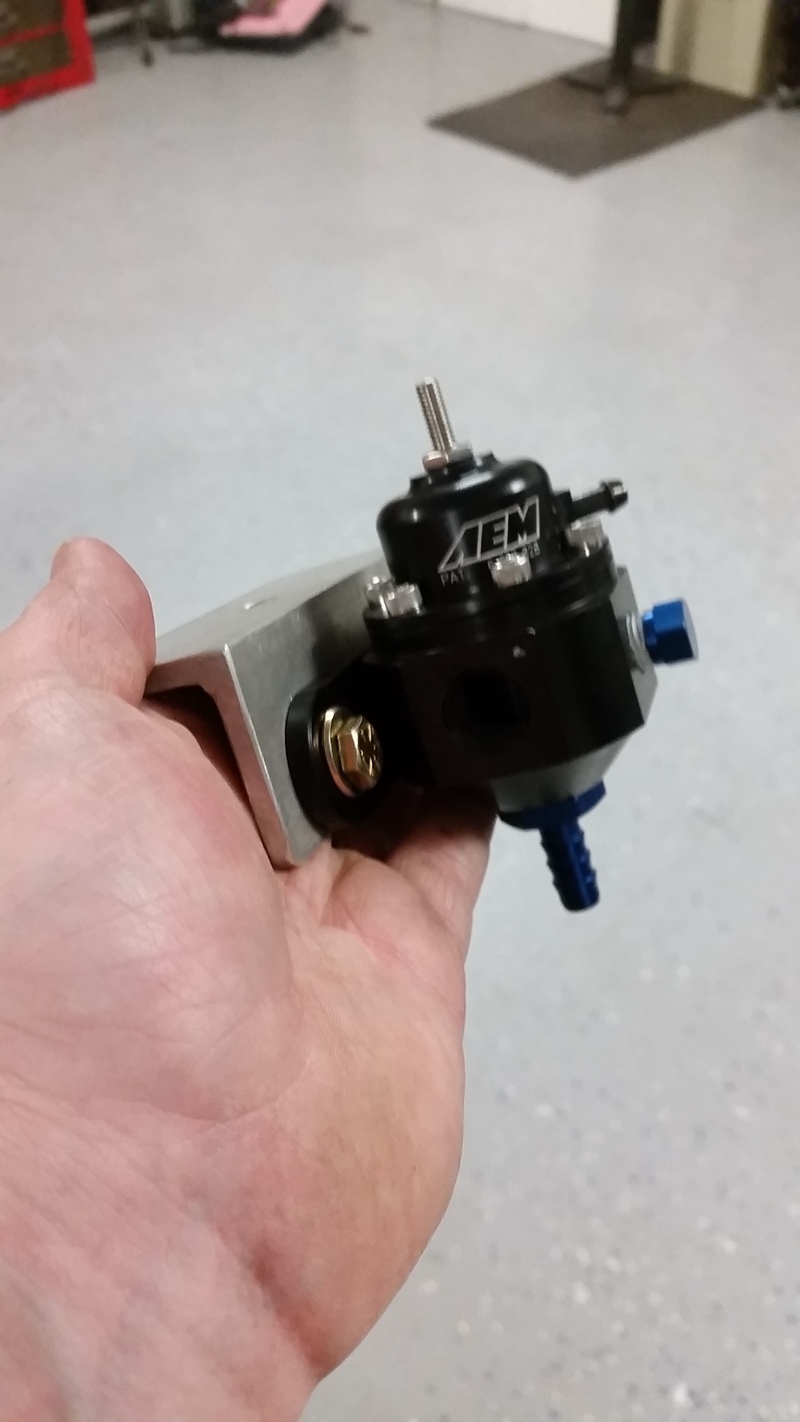
Parts arrived from Australia, only to find out I have a clearance issue between the regulator and the coolant neck. Just ordered more parts to fabricate a stainless AN line to relocate the Fuel Pressure Regulator to the firewall.
Started taking the drivers seat apart - no wonder it was saggy. New foam acquired to refoam it and new springs bought for it as well! Now to carve the foam.
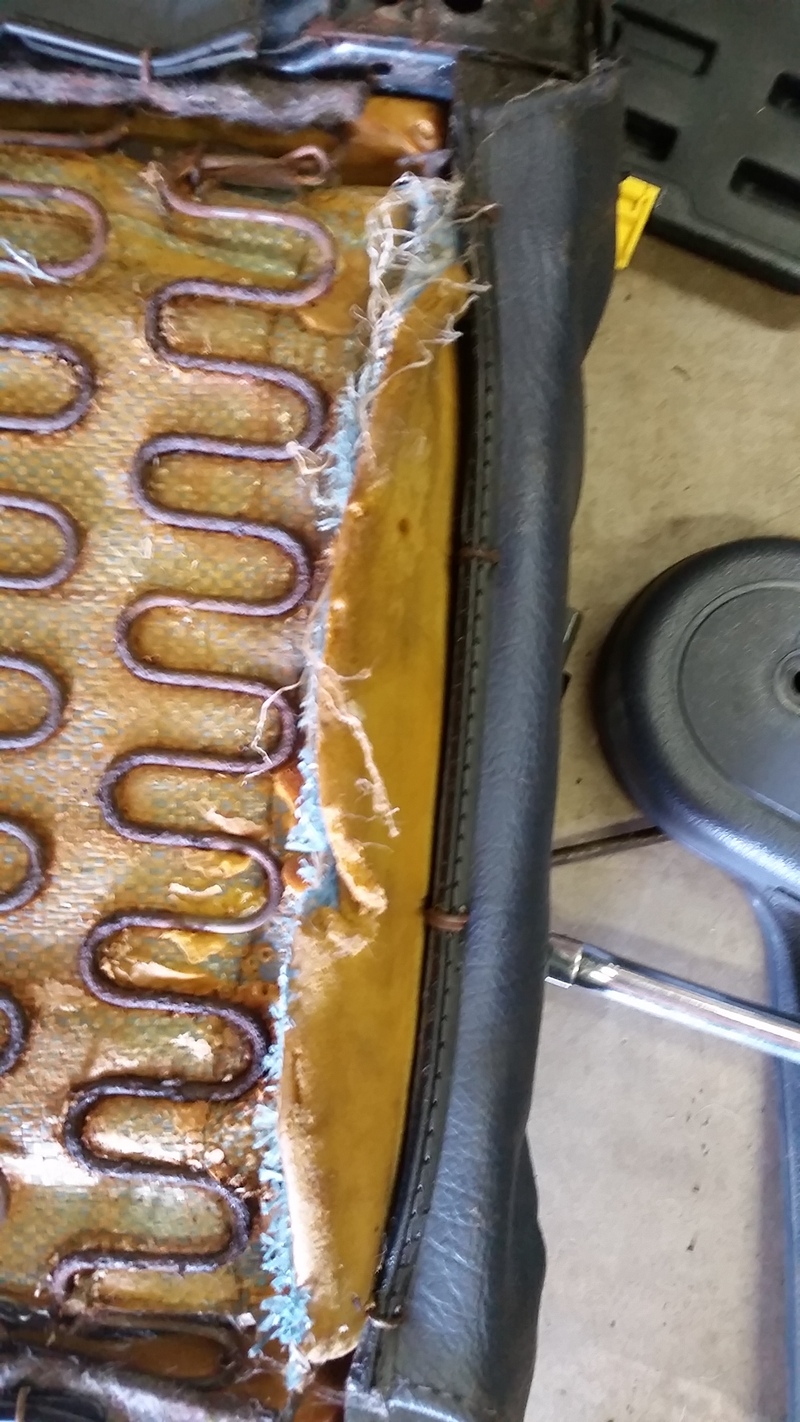
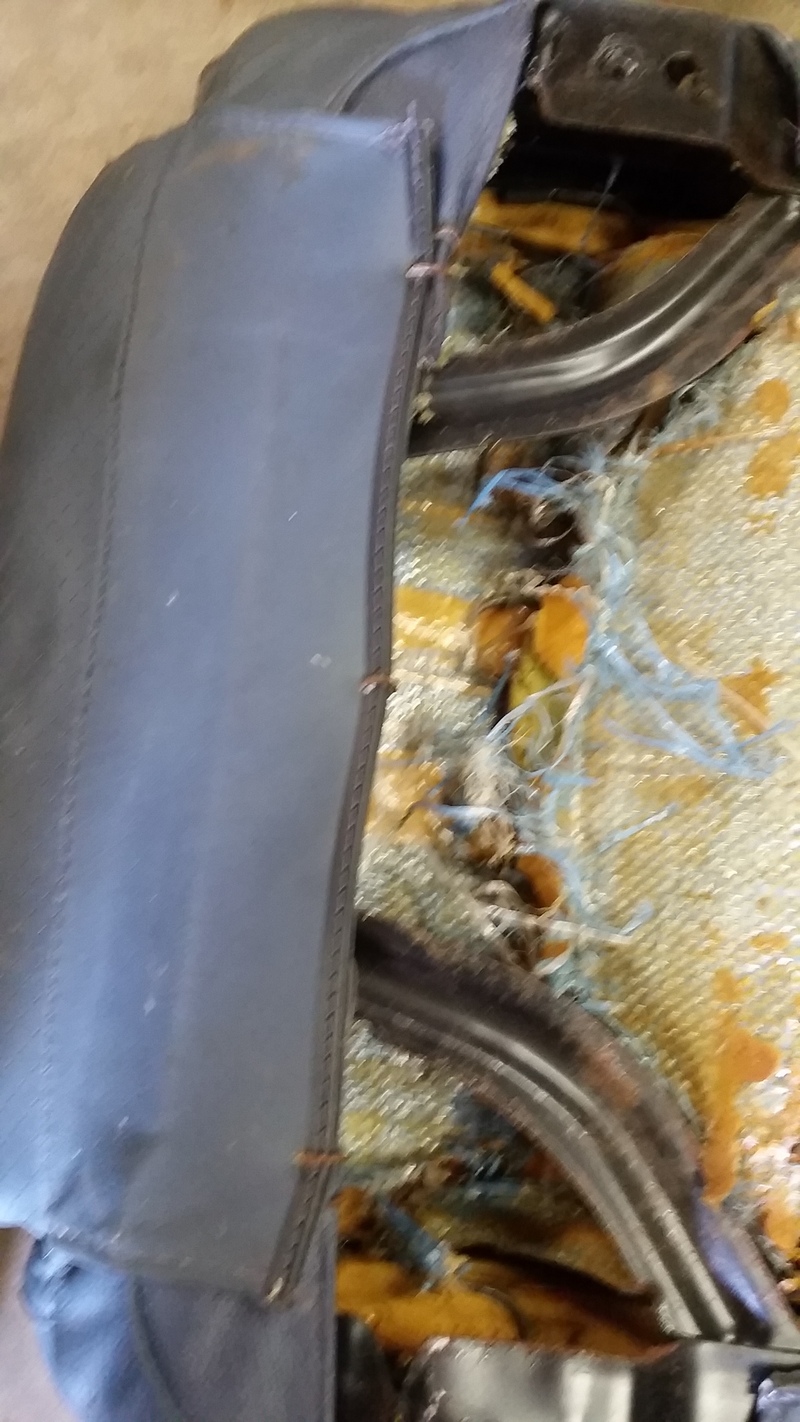
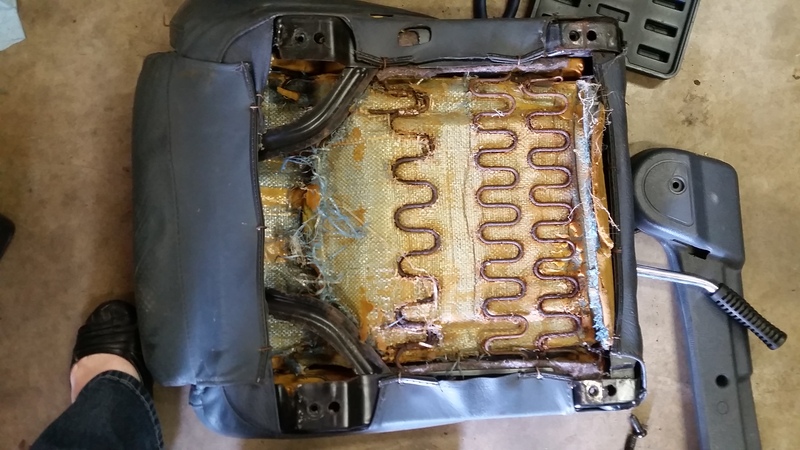
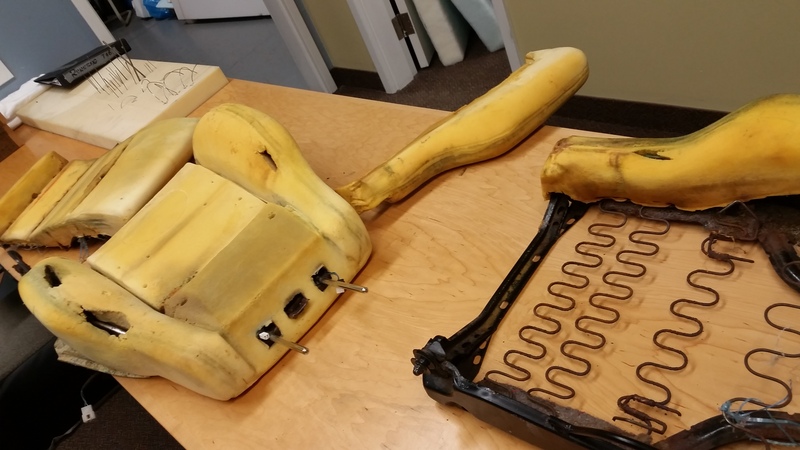
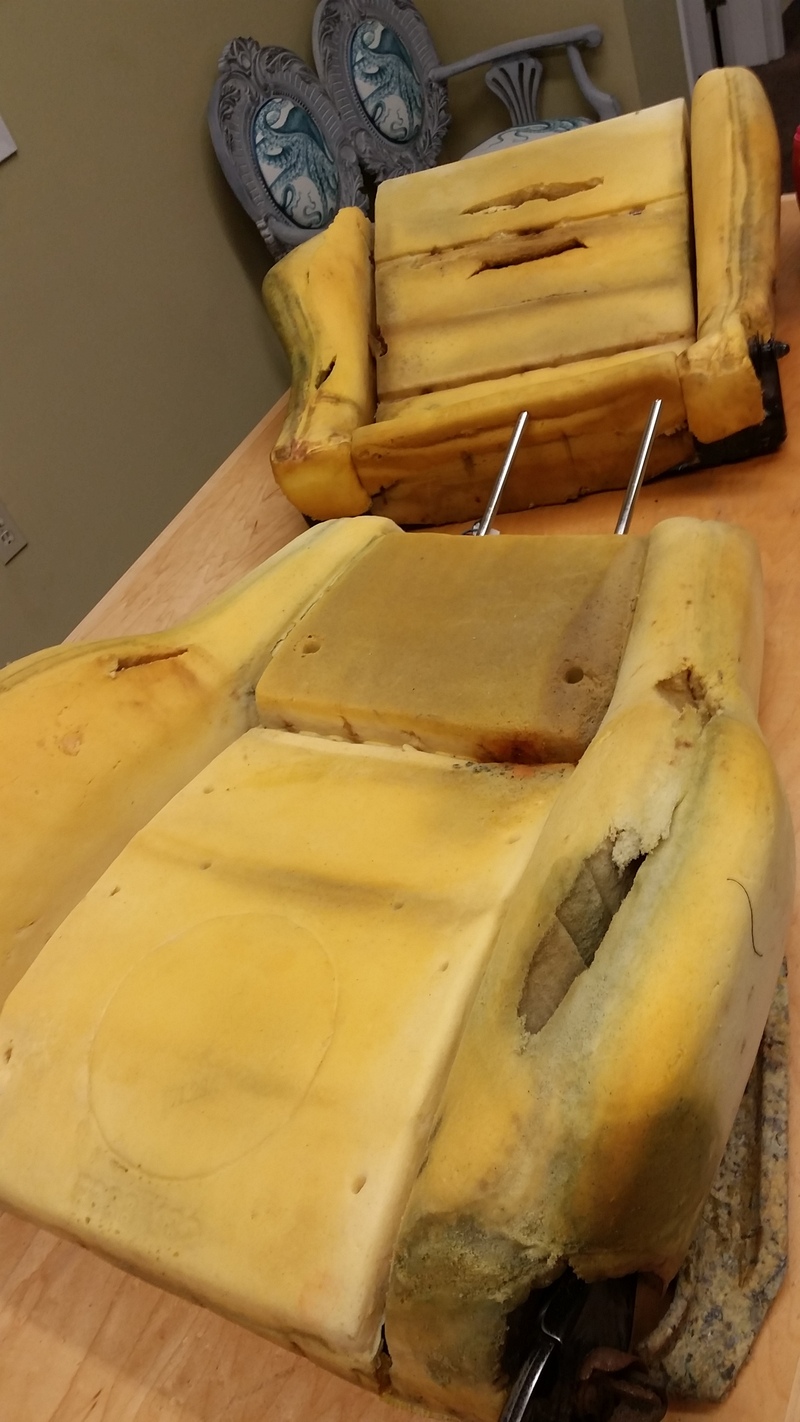
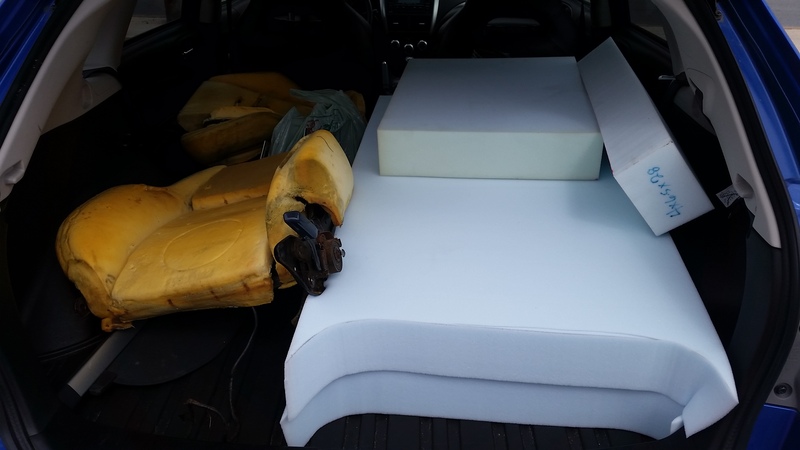
Started taking the drivers seat apart - no wonder it was saggy. New foam acquired to refoam it and new springs bought for it as well! Now to carve the foam.

Ah, you have gone the completely new foam route. Luckily I had a spare set of seats and was able to cobble together enough old foam that was in good shape. Seats should definitely be comfy now though!
Thread Starter
Licensed Zip Tie Mechanic
Joined: May 2004
Posts: 510
Likes: 2
From: Halifax, NS
I can't wait to do more to it! haha
Waiting for some fittings from Pegasus right now to fab up that fuel line. Going to start cleaning up the seat rails and painting them tonight.
Waiting for some fittings from Pegasus right now to fab up that fuel line. Going to start cleaning up the seat rails and painting them tonight.
Thread Starter
Licensed Zip Tie Mechanic
Joined: May 2004
Posts: 510
Likes: 2
From: Halifax, NS
Pulley is from here: RX - Engine: Rotary13B1.com
Yes, stock alternator. I have a lot of spares...let's just say...hahaha
Thread Starter
Licensed Zip Tie Mechanic
Joined: May 2004
Posts: 510
Likes: 2
From: Halifax, NS
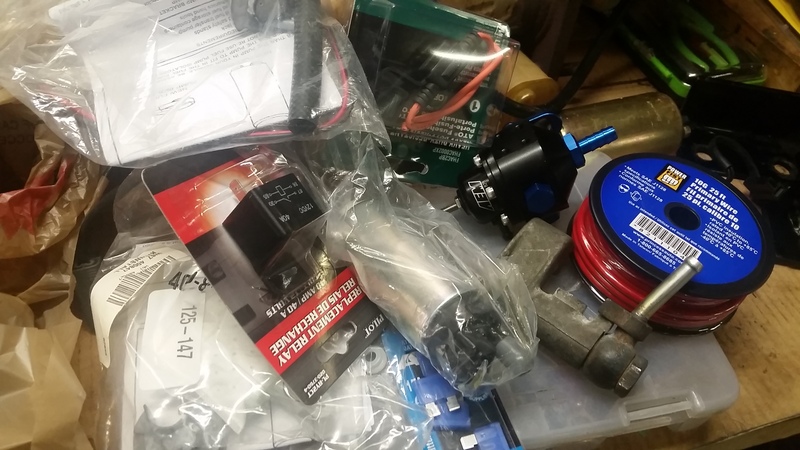
Supplies arrived for the great fuel pressure regulator relocation.
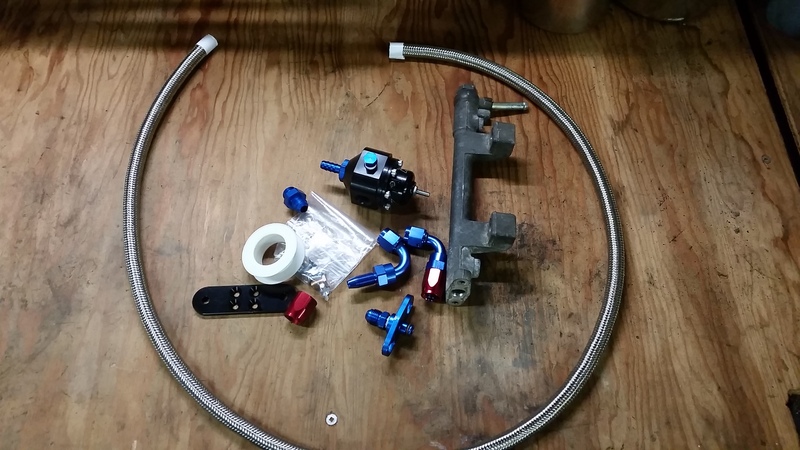
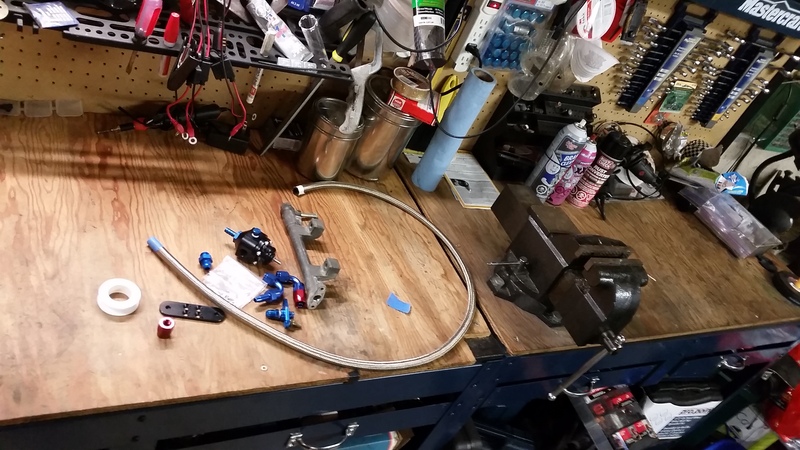
Got one end on the hose:
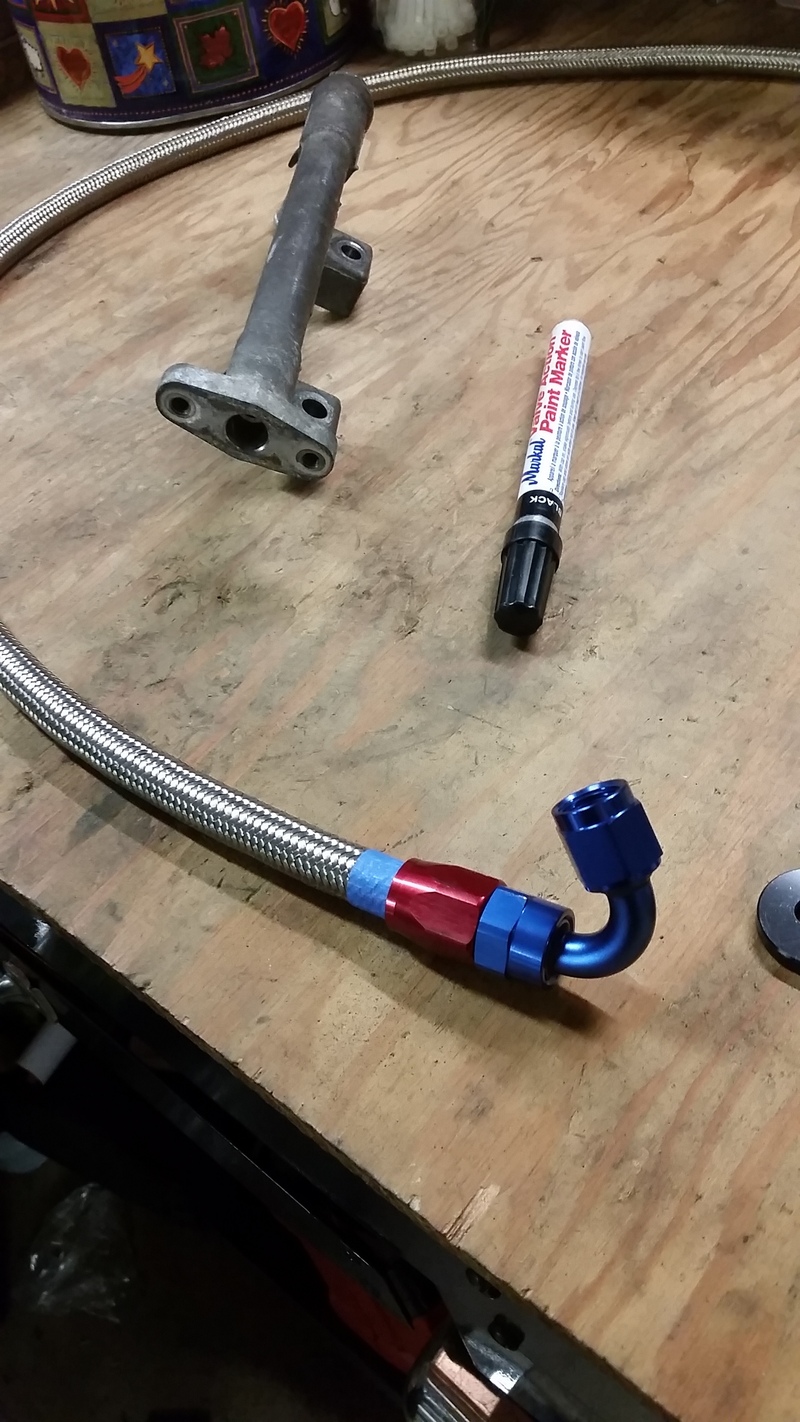
Had to build a bracket to mount it on a lip on the firewall.
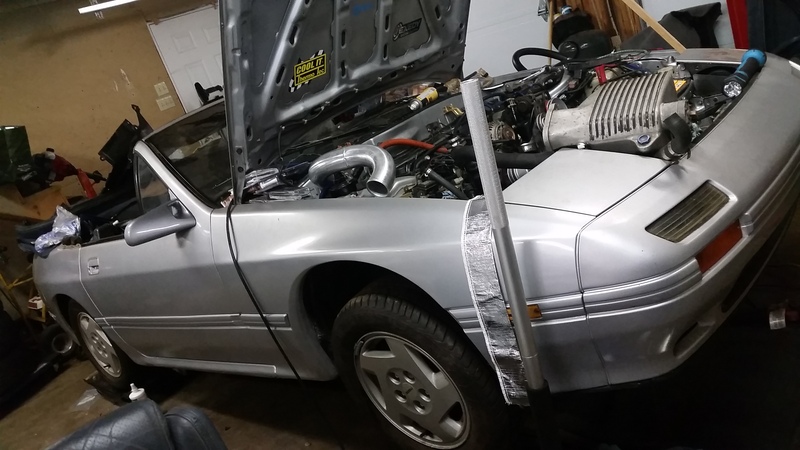
Current state of the car:
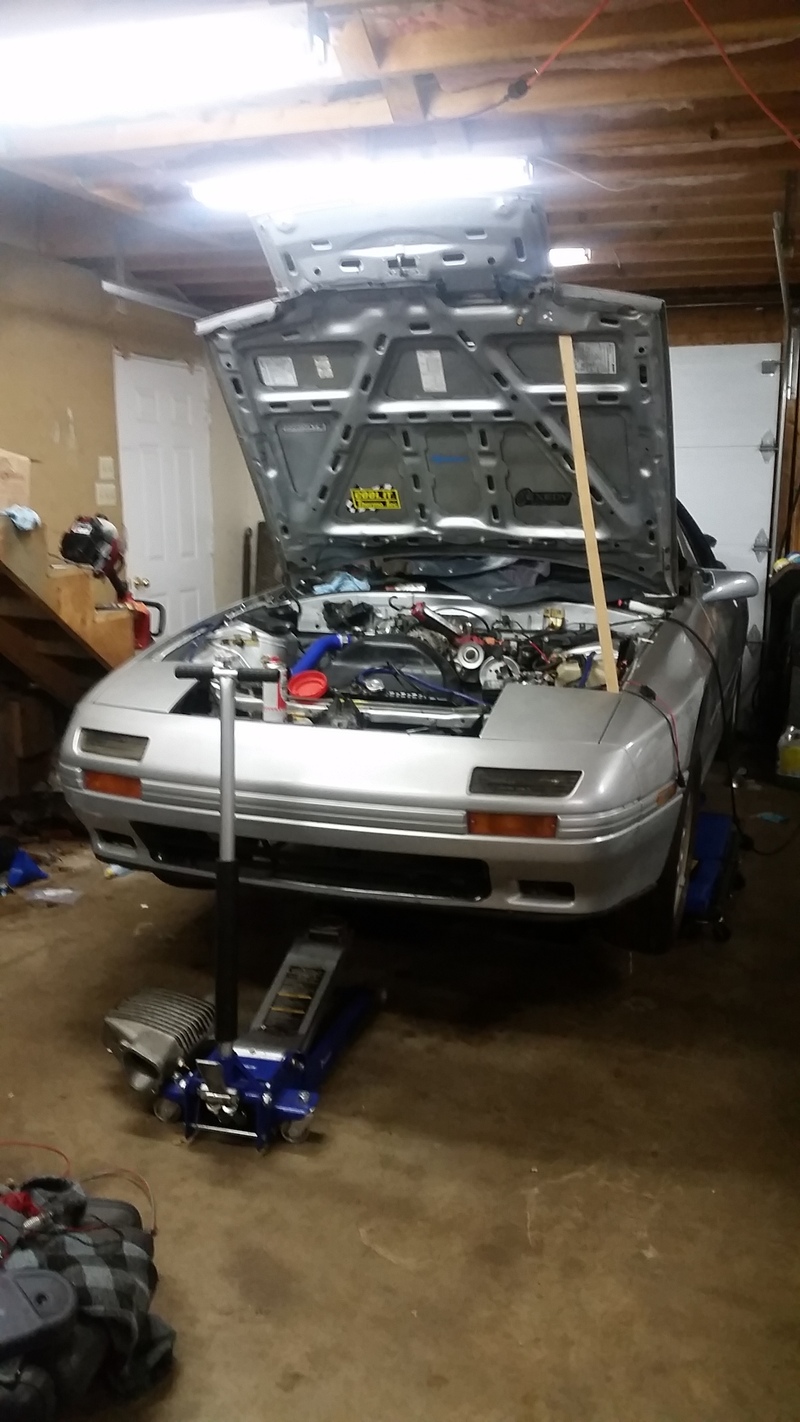
Next is to mount the FPR, cut the hose to length, and attach the other end. Then on to brake lines, putting in the old coupe seats while I'm rebuilding the vert seats, putting the wheels on, and the back window in the top.
Got one end on the hose:
Had to build a bracket to mount it on a lip on the firewall.
Current state of the car:
Next is to mount the FPR, cut the hose to length, and attach the other end. Then on to brake lines, putting in the old coupe seats while I'm rebuilding the vert seats, putting the wheels on, and the back window in the top.