
Project IIc: The road to 350 rwhp

It is finally time for me to start my build thread. I would like to start out with a little bit of history:
During my high school years cars were a big hobby of mine, mainly because I was bored (who wasn't). I gathered around with my friends in somebody's drive way in the afternoons and we all poked around in the engine bays of our Civics. It was all good and fun since we didn't have any responsibilities.
Fast forward 10 years or so (passed by way to fast) after lots of schooling, I wanted to get back into my old hobby. I picked up an interest in rx7's from a video game (can't remember the name) I used to play. It was my favorite car to race in that game. After lurking around the internet and reading about the Wankel engine, I became obsessed with it. I started reading forums, books, and articles. I spent numerous hours looking at different builds on this forum. This happened for about 2 years and finally at in April 2014, I used up all of my savings and bought one for myself. I had recent started a new job, was getting married, and had the extra garage stall in the new house we bought.
Here is the description of my rx7:
1988 TII. I bought the car from one of the members here. He had done extremely tasteful and safe upgrades to the car. What drew me to it was that the interior was in great shape and the engine had nearly 110K on it and hadn't been rebuilt yet. It was surprising that it could still handle 10 lbs of boost and idle without any hiccups. Here is the list of upgrades that came with the car:
Engine:
-Original 13b with 108k
-Emissions removed (running dual alt. pulley since smog pump removed)
-Rtek 1.7 ECU
-S5 turbo and turbo manifold
-Greddy Type RS BOV
-Corksport 80mm turbo back exhaust (wrapped downpipe and bung for wideband)
-HKS EVC-S electronic boost controller
-HKS type 1 turbo timer
-Walbro 255 lph fuel pump
-720 secondary injectors
-Custom parallel fuel system w/ braided SS line and AN fittings (removed FPD)
-Aeromotive adjustable fuel pressure regulator
-Carbon fiber coolant reservoir cover
Suspension:
-Powerstop drilled rotors front/rear
-Hawk HPS pads front/rear
-Pinion Snubber
-New Mazdatrix comp. front diff mount
-MMR UHMW engine/trans/rear diff mounts (only engine mounts installed currently)
-Tanabe GF210 lowering springs
-KYB AGX adjustable dampers (4 way front/8 way rears)
-Cusco front camber plates
-Corksport rear camber adjuster
Interior:
-Momo Gotham steering wheel and shift ****
-NRG black/silver steering wheel quick release
-New black shift boot w/ red stiching from Redline Goods
-RX7club red anodized e-brake ****
-Premium Prosport gauges - oil temp, water temp, oil pressure, boost (a-pillar/console mounted)
-Prosport digital wideband O2 sensor/gauge
Exterior:
-5Zigen FN01R-C redlines 17x8 +35 all four corners (ran 5 mm spacers in front)
-Falken Ziex Ze912s 225/45/17 on all four corners
My goal for this car is to eventually produce 350 rwhp. This might be a slow process since I work close to 100 hours per week and money will also be limited. Anyways, this is my first rotary build and I hope to be able to go through this process with all the experienced members in this forum. My general plan for the car is as follows:
-Rebuild the engine
-Rebuild the transmission and upgrade it
-Upgrade the fuel system
-Upgrade the turbo
I will discuss the specifics of each step as I get to them. For now, here are some pictures of the car as it sits.

First Upgrade
I have bought these gorgeous MazdaSpeed strut bars. I spent a few hours polishing the bars, but I couldn't get all the imperfections/scratches out. Anyways, they still look very sexy and the good thing is that they are MS brand.
The only thing that really bothered me about this modification was cutting a pocket in the the perfectly good rear carpet to fit the bars.
Enjoy the pics:
The only thing that really bothered me about this modification was cutting a pocket in the the perfectly good rear carpet to fit the bars.
Enjoy the pics:
Joined: Oct 2013
Posts: 25
Likes: 0
From: Washington - The 25Stupid
You basically just explained my life in a nutshell but I havent forked over my savings yet and we had KIAs a ford and Chevys, although we spent most of our time around that Ford  ... Anyway good luck and congrats.
... Anyway good luck and congrats.


Joined: Mar 2001
Posts: 31,851
Likes: 3,241
From: https://www2.mazda.com/en/100th/
I have bought these gorgeous MazdaSpeed strut bars. I spent a few hours polishing the bars, but I couldn't get all the imperfections/scratches out. Anyways, they still look very sexy and the good thing is that they are MS brand.
The only thing that really bothered me about this modification was cutting a pocket in the the perfectly good rear carpet to fit the bars.
Enjoy the pics:
The only thing that really bothered me about this modification was cutting a pocket in the the perfectly good rear carpet to fit the bars.
Enjoy the pics:
Thanks! Unfortunately, I think the front strut bar makes the car understeer quite a bit, but at least it looks good.
Trending Topics
Joined: Mar 2001
Posts: 31,851
Likes: 3,241
From: https://www2.mazda.com/en/100th/
Cool, I will answer what I can.
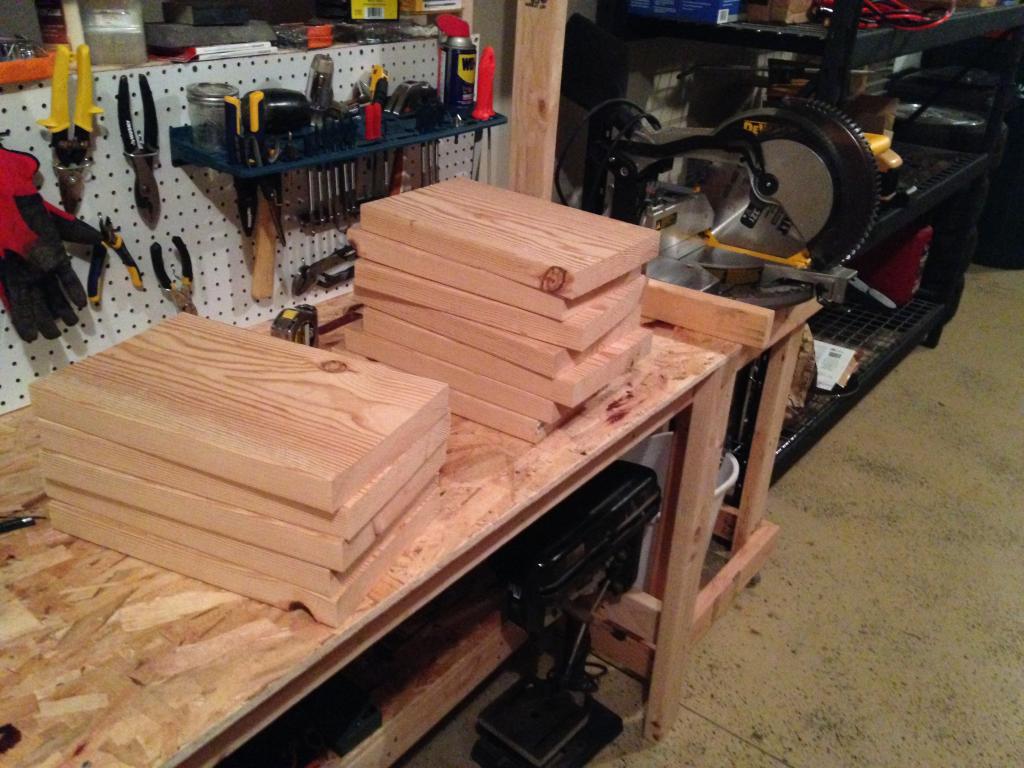
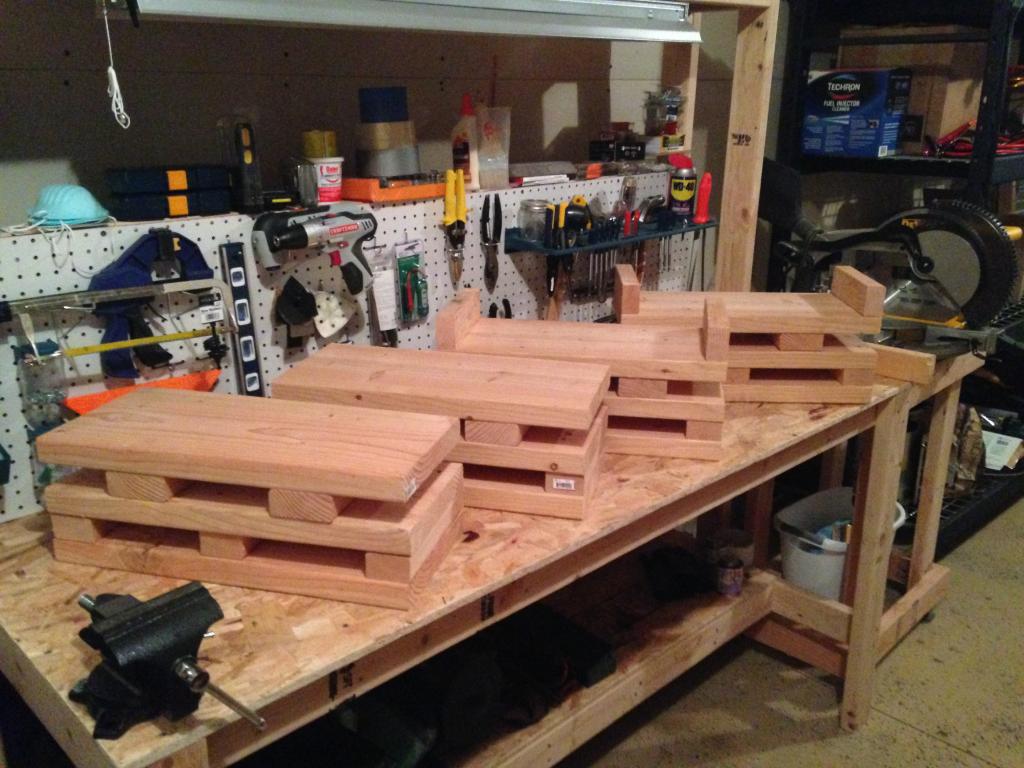
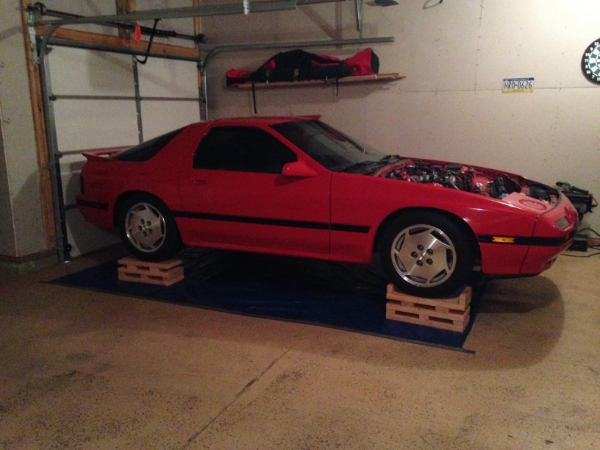
Storing preparations
I'm getting ready to prepare the car for storing. Since it will be sitting for a long time (~2 years), I built these blocks to raise the car instead of using jack stands. The thought is that I don't want the nice suspension to wear down with jack stands.
Before:
After:

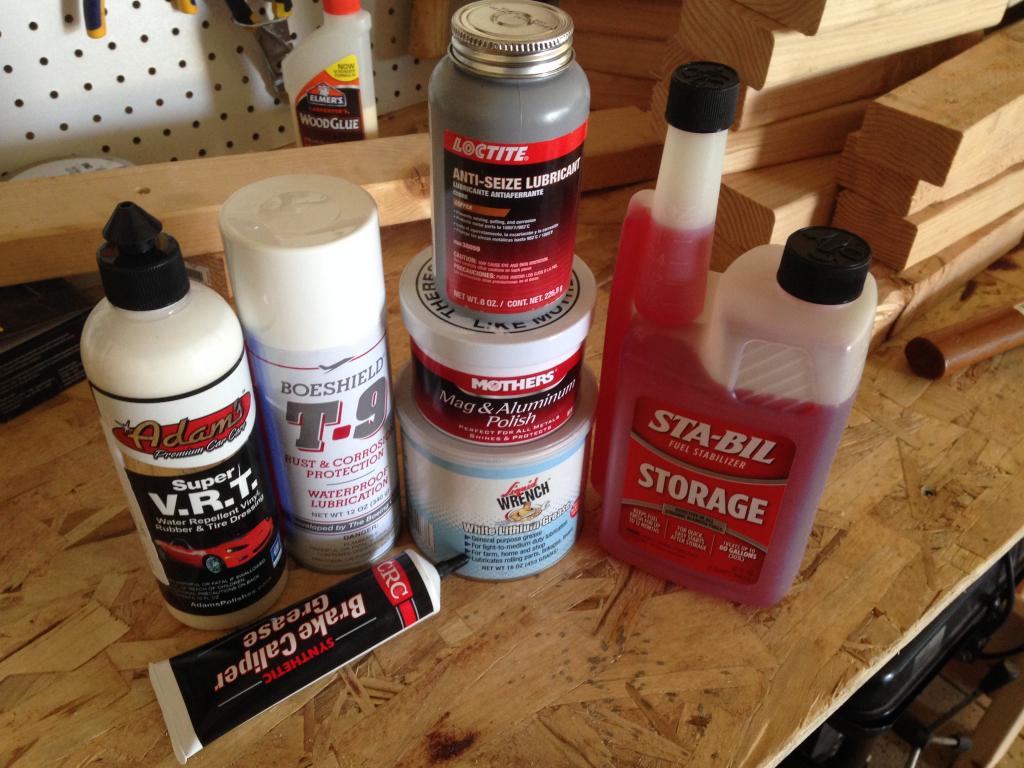
Here is the break down of what each item will be used for:
1. Loctite anti-seize: I will be swapping the wheels with the original wheels. Even though I will be pumping the tires to 50-60 PSI to prevent flat spotting, I wouldn't want to risk the nice Falken's to get any flat spots. The anti-seize will be applied to the lug nuts.
2. Sta-bil: This will be poured into the gas tank to stabilize the fuel and prevent build up of fuel break down byproducts. It recommends a full tank to avoid condensation. S4 has a 16.8 gallon capacity fuel tank which equates to about 7oz (1oz per 2 1/2 gallon) of Sta-bil. The important step is then to DRIVE the car (not idle) for at least 5 minutes.
3. Lithium Grease: This will be applied to all of the moving parts that won't be moving during storage such as door hinges, sun roof mechanics, latches, lock mechanism and seat rails.
4. WD-40: This is terrible lubricant but a good at cleaning rust and preventing corrosion. This will be applied to almost any steel/aluminum surface such as brake discs, throttle body linkages and other moving parts in the engine bay. I'm not too worried about covering all the engine bay metals since most will be removed and rebuilt anyways.
5. Boeshield T-9: This is used by Boeing to prevent rust and corrosion forming during periods of storage AKA WD-40 on steroids without any "lubricating" effects. I will be using this on the suspension. Can't forget the rear hatch hydraulic.
6. Brake Caliper Grease: This is a high temperature grease that will be applied to brake caliper guide pins and parking break mechanism.
7. Adam's super VRT: This is a fantastic non silicone based preservative. I will apply this to the dash and anything vinyl inside the car. It will be applied to the rubber sealing the hatch and doors, and the tires as well.
8. On top of all of this, the car will get a really nice vacuum and wash with a hefty coat of wax. Although I won't be working on the brakes, the fluid definitely needs to be drained since it absorbs water and can damage the lines.
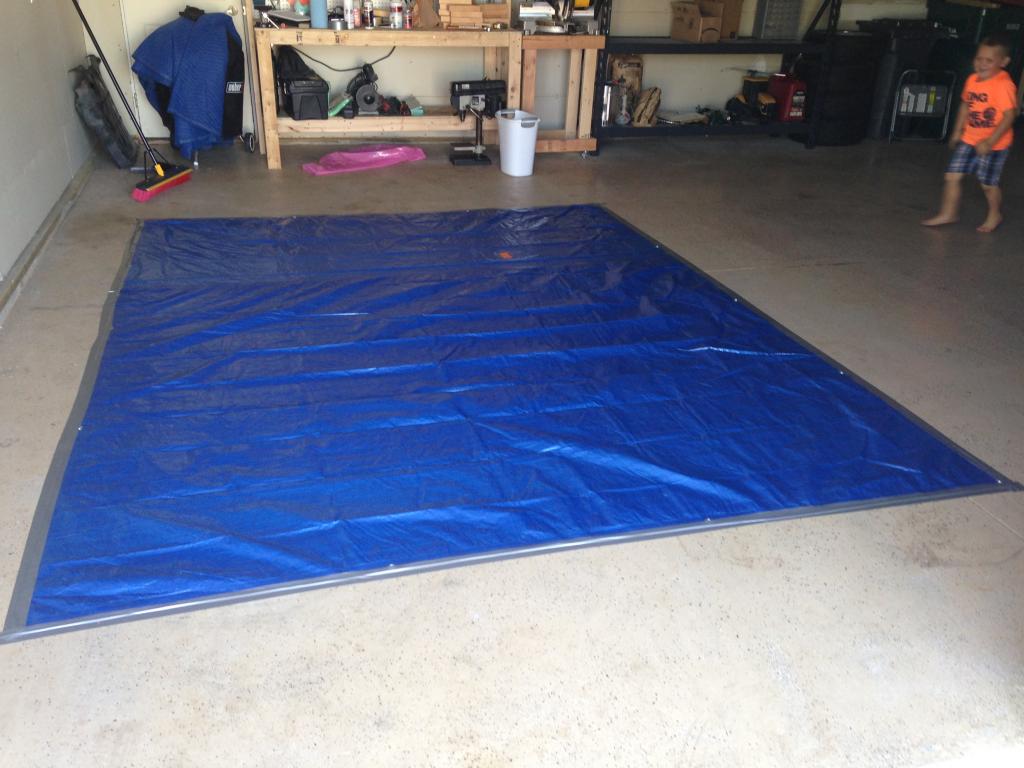
9. I determined the final resting place of the car, swept and cleaned it, and taped down a large tarp to avoid any condensation from rising up and rusting the bottom of the car.
These were taken from Aaron Cake's guide on Properly storing an Rx-7 with a little bit of modification.
Tarp:
Before:

After:


Here is the break down of what each item will be used for:
1. Loctite anti-seize: I will be swapping the wheels with the original wheels. Even though I will be pumping the tires to 50-60 PSI to prevent flat spotting, I wouldn't want to risk the nice Falken's to get any flat spots. The anti-seize will be applied to the lug nuts.
2. Sta-bil: This will be poured into the gas tank to stabilize the fuel and prevent build up of fuel break down byproducts. It recommends a full tank to avoid condensation. S4 has a 16.8 gallon capacity fuel tank which equates to about 7oz (1oz per 2 1/2 gallon) of Sta-bil. The important step is then to DRIVE the car (not idle) for at least 5 minutes.
3. Lithium Grease: This will be applied to all of the moving parts that won't be moving during storage such as door hinges, sun roof mechanics, latches, lock mechanism and seat rails.
4. WD-40: This is terrible lubricant but a good at cleaning rust and preventing corrosion. This will be applied to almost any steel/aluminum surface such as brake discs, throttle body linkages and other moving parts in the engine bay. I'm not too worried about covering all the engine bay metals since most will be removed and rebuilt anyways.
5. Boeshield T-9: This is used by Boeing to prevent rust and corrosion forming during periods of storage AKA WD-40 on steroids without any "lubricating" effects. I will be using this on the suspension. Can't forget the rear hatch hydraulic.
6. Brake Caliper Grease: This is a high temperature grease that will be applied to brake caliper guide pins and parking break mechanism.
7. Adam's super VRT: This is a fantastic non silicone based preservative. I will apply this to the dash and anything vinyl inside the car. It will be applied to the rubber sealing the hatch and doors, and the tires as well.
8. On top of all of this, the car will get a really nice vacuum and wash with a hefty coat of wax. Although I won't be working on the brakes, the fluid definitely needs to be drained since it absorbs water and can damage the lines.
9. I determined the final resting place of the car, swept and cleaned it, and taped down a large tarp to avoid any condensation from rising up and rusting the bottom of the car.
These were taken from Aaron Cake's guide on Properly storing an Rx-7 with a little bit of modification.

Tarp:

Anyway, here is an update of what I've been doing:
First of all, I saved a small amount of money and could make a trip to the local HF store for some toys; air compressor, floor jack, jack stands and a few miscellaneous items.

I spent a good weekend storing the car as I mentioned above. Despite being careful and pumping the tires to 50 PSI, I wanted to avoid any kind of damage to the brand new Falkens. So I decided to throw on the original wheels with the old tires on them.
This week I had a few hours and I started to break down the engine bay.
Here is a bad surprise, but expected. Looks like the suspension bushings will need to be replaced at some point. Plan would be when the engine block is out of the car; easier to replace them when there is less load.
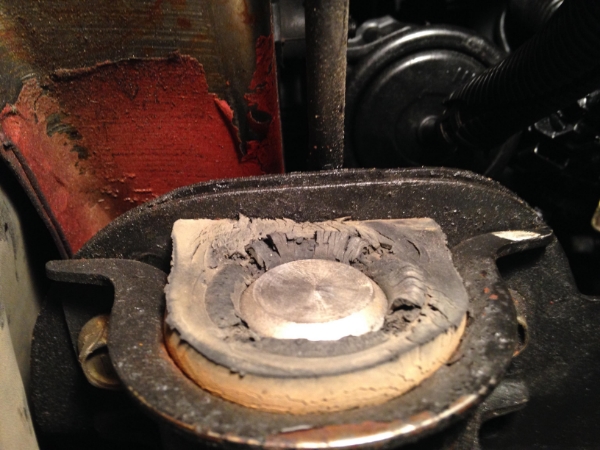
Surprise
So today my awesome wife surprised with an early Christmas present:
 [/URL]
I know that this is the generic Costco brand "Kirkland." Before you start judging it, I can tell you that for the past few months I've been looking at some tool chests and test most of them on the low to mid tier market. Except for the awesome Snap-on and Cornwell tool chests, I can attest that beats almost all the other brands that I have tested out (mostly the ones at Home Depot and Harbor Freight).
1. It is made of sturdier steel that actually has some nice weight and strength to it.
2. All the drawers are ball bearing with side locks.
3. I like the variety of drawer sizes and shapes that you get.
4. It is from Costco which means that you can return whenever you want and for whatever reason.
5. It has really nice drawer liners.
6. It was for an awesome price of $499.
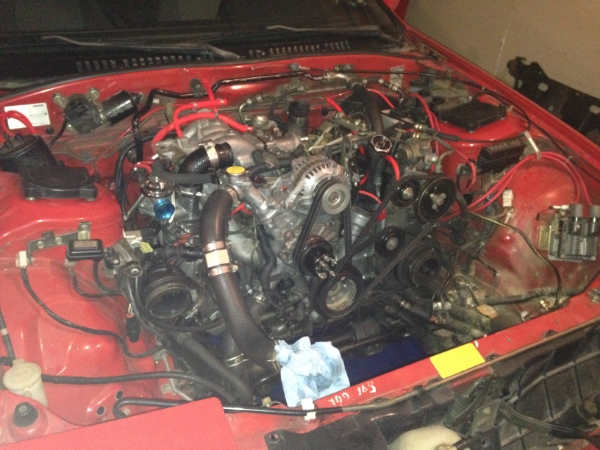
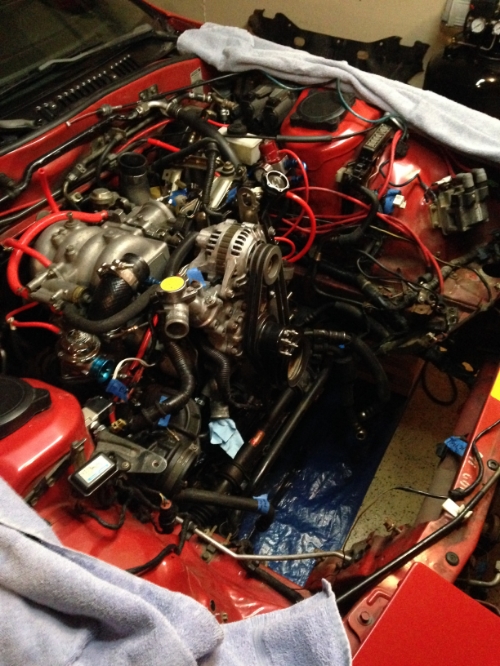
More importantly, let's talk about progress on the car. As the Minnesota weather gets colder and colder, so does my garage. But that hasn't stopped me from working on the car. I have made some progress on cleaning up the engine bay for engine removal. I removed the PS and AC and all the AC related parts. I haven't decided fully if I want to keep either of those. I'm 99% sure I can't keep the PS especially since I'll be putting in a FMIC. There just isn't enough space. I was hoping to keep the AC but when I was removing the hard line from the condenser, it was literally stuck and I had to cut the line to be able to remove it. If I decide down the road to replace the AC, I may have to go with an aftermarket one. The next step would be to remove the engine, which has caused the main pause in progress. I need an engine crane and a stand. I don't have the money right now to get either of those. I have been trying to borrow one from a nearby shop and then hauling to my house would be another issue since I don't have a pick up. I hope I can figure it out soon. Here is a pic of the engine bay as the car sits:
 [/URL]
[/URL]I know that this is the generic Costco brand "Kirkland." Before you start judging it, I can tell you that for the past few months I've been looking at some tool chests and test most of them on the low to mid tier market. Except for the awesome Snap-on and Cornwell tool chests, I can attest that beats almost all the other brands that I have tested out (mostly the ones at Home Depot and Harbor Freight).
1. It is made of sturdier steel that actually has some nice weight and strength to it.
2. All the drawers are ball bearing with side locks.
3. I like the variety of drawer sizes and shapes that you get.
4. It is from Costco which means that you can return whenever you want and for whatever reason.
5. It has really nice drawer liners.
6. It was for an awesome price of $499.
More importantly, let's talk about progress on the car. As the Minnesota weather gets colder and colder, so does my garage. But that hasn't stopped me from working on the car. I have made some progress on cleaning up the engine bay for engine removal. I removed the PS and AC and all the AC related parts. I haven't decided fully if I want to keep either of those. I'm 99% sure I can't keep the PS especially since I'll be putting in a FMIC. There just isn't enough space. I was hoping to keep the AC but when I was removing the hard line from the condenser, it was literally stuck and I had to cut the line to be able to remove it. If I decide down the road to replace the AC, I may have to go with an aftermarket one. The next step would be to remove the engine, which has caused the main pause in progress. I need an engine crane and a stand. I don't have the money right now to get either of those. I have been trying to borrow one from a nearby shop and then hauling to my house would be another issue since I don't have a pick up. I hope I can figure it out soon. Here is a pic of the engine bay as the car sits:
[/URL]
1 Nothing wrong with that box. Good stuff man
2 insulate the garage attic and get a heater (maybe not this year, but you will hug me later)
3Look at mounting the PS in the space the AC used to be. It has been done a few times on here to great success.
4 I have 2 S4 complete AC systems and 1 will be lingering for a long time if you so choose to go back stock. Should be same thing, if not ( like I said) complete system.
5 I knew you wouldn't let it sit. You have the bug now, you love it and you know it!! haha
Nothing wrong with that box. Good stuff man2
insulate the garage attic and get a heater (maybe not this year, but you will hug me later)3
Look at mounting the PS in the space the AC used to be. It has been done a few times on here to great success.4
I have 2 S4 complete AC systems and 1 will be lingering for a long time if you so choose to go back stock. Should be same thing, if not ( like I said) complete system.5
I knew you wouldn't let it sit. You have the bug now, you love it and you know it!! haha
1 Nothing wrong with that box. Good stuff man 2 insulate the garage attic and get a heater (maybe not this year, but you will hug me later) 3Look at mounting the PS in the space the AC used to be. It has been done a few times on here to great success. 4 I have 2 S4 complete AC systems and 1 will be lingering for a long time if you so choose to go back stock. Should be same thing, if not ( like I said) complete system. 5 I knew you wouldn't let it sit. You have the bug now, you love it and you know it!! haha
Nothing wrong with that box. Good stuff man 2 insulate the garage attic and get a heater (maybe not this year, but you will hug me later) 3Look at mounting the PS in the space the AC used to be. It has been done a few times on here to great success. 4 I have 2 S4 complete AC systems and 1 will be lingering for a long time if you so choose to go back stock. Should be same thing, if not ( like I said) complete system. 5 I knew you wouldn't let it sit. You have the bug now, you love it and you know it!! haha2) agreed with archaphil in insulating the garage and installing a heater....
3) no comment lol
4) I have one from an 88 t2
 .
. 5) agreed with archaphil again....good luck getting rid of the bug.... It's like crack :p (not that I know wtf crack is like :lol).
Thanks for the reassuring feedback guys. I've been reading a little about the PS removal on the forums. It sounds like the manual s4 requires more muscle than an s5, but at the same time everyone who has done the modification swears by the awesome feel of a manual rack. The only problem with the modification is that once it's done, there is no turning back unless I pick up another steering rack. With regards to the AC, I guess if I do decide to put it back in, I have some resources thanks to you guys.
The heater in the garage is something my wife and I have talked about and will definitely go into the works for next year. For now, I'm just going to get by with lots of layering.
The heater in the garage is something my wife and I have talked about and will definitely go into the works for next year. For now, I'm just going to get by with lots of layering.
I am using an s4 t2 manual rack in my fd. Had to make slight modifications to the brackets and use different outter tie rod ends, but it's awesome!! Cleans up the bay extra nice! Manual rack for the win! Even if you depower the rack these cars aren't that heavy so it shouldn't take that much muscle to move the wheel.
Thanks for the reassuring feedback guys. I've been reading a little about the PS removal on the forums. It sounds like the manual s4 requires more muscle than an s5, but at the same time everyone who has done the modification swears by the awesome feel of a manual rack. The only problem with the modification is that once it's done, there is no turning back unless I pick up another steering rack. With regards to the AC, I guess if I do decide to put it back in, I have some resources thanks to you guys.
The heater in the garage is something my wife and I have talked about and will definitely go into the works for next year. For now, I'm just going to get by with lots of layering.
The heater in the garage is something my wife and I have talked about and will definitely go into the works for next year. For now, I'm just going to get by with lots of layering.
I want to keep the PS in my GXL, but looking ways to get around the speed sensing nonsense.
But seriously, look into the AC/PS pump mod. Lets you keep the PS mounted in AC location. you can 2 at 60 everything else
Interior Breakdown
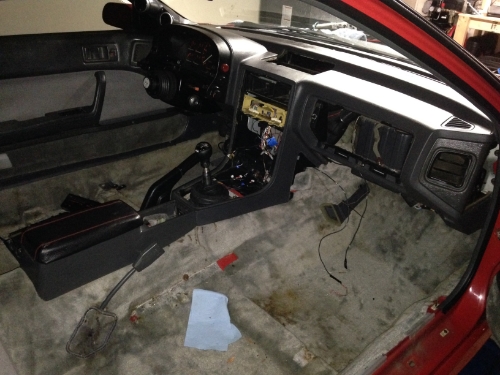
I removed both of the seats and the carpet under is really dirty with both food particles and rust from the rail bolts. I'm going to try and find a nice carpet cleaning company and see what they can do. If they can't remove those stains... then I will have to try and find one in a better shape. If it's worth anything, there were no tears that I could find on the carpet.
Driver side:
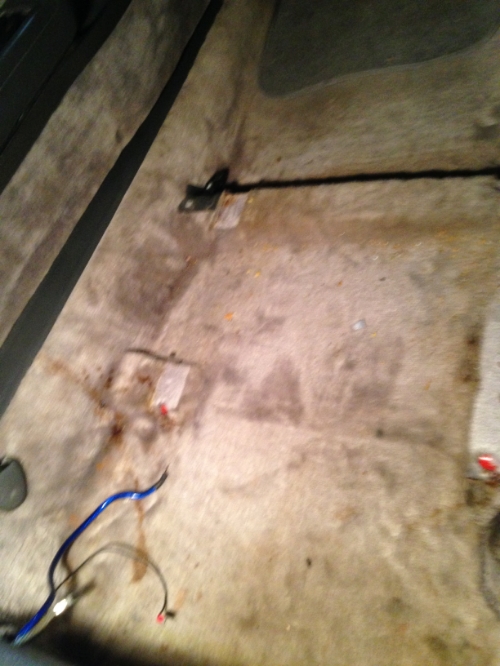
Passenger side:

There was a gauge pod in the center console which was nicely done by the previous owner. When I removed it and looked closer at the Plexiglas of the gauges it was somewhat scuffed up. I ordered some of this stuff to give it a nice polish.