I Bit Off More Than I Can Chew: A Drift Car
 09-27-18, 01:20 PM
#201
Senior Member
Thread Starter

 12-22-18, 01:53 PM
#202
Senior Member
Thread Starter
been meaning to post this artist for quite some time but lol haven’t posted enough,


Anderson Paak, smooth, kinda funk, I think this counts as rap but doesn’t feel like it most of the time. There is maybe 2 songs I don’t like on both albums combined. He has a new album out, listened to it a few times now and its not bad but its like these albums.
as usual, a lot has happened since my last update.
I had a few, well actually a lot, of loose ends that quickly arose even from driving the short time I had.
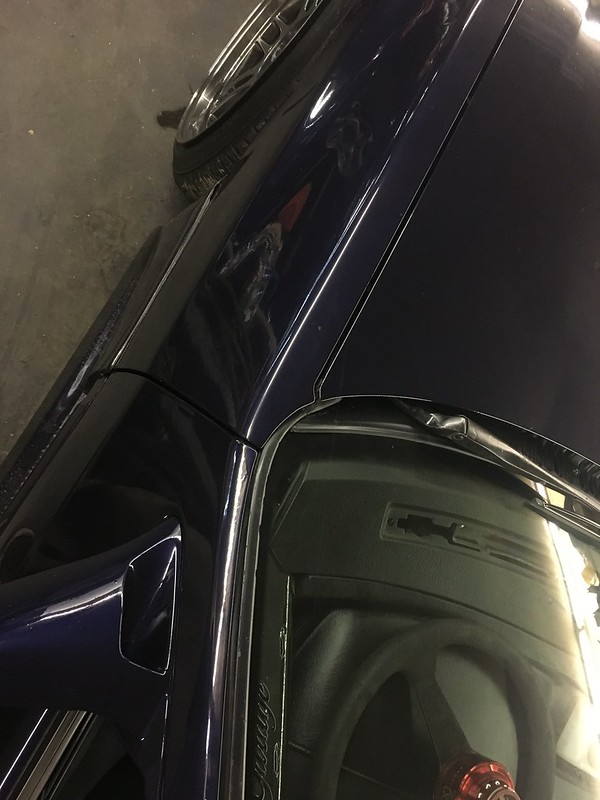
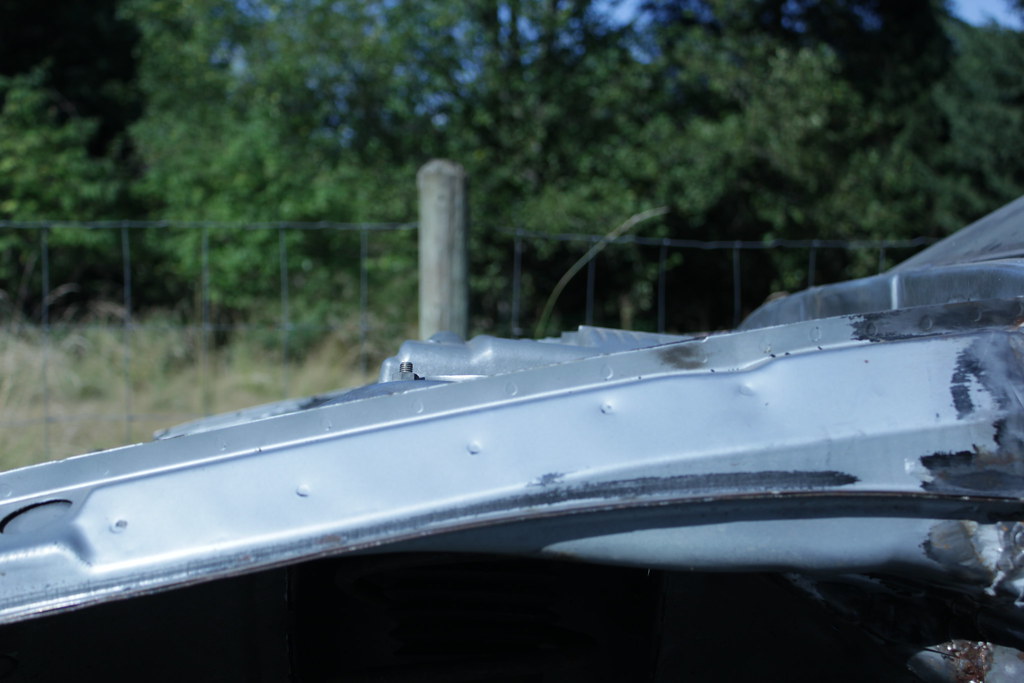
I don’t know why I took this but i guess it looks cool
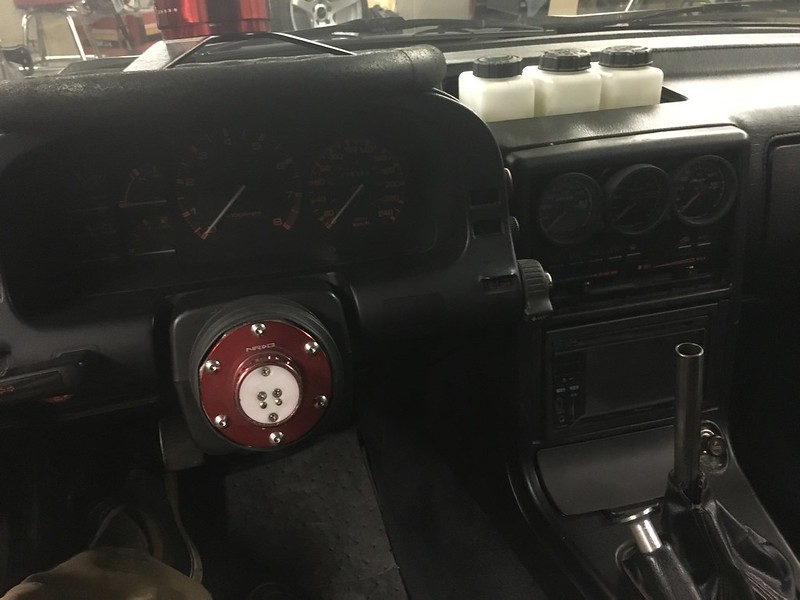


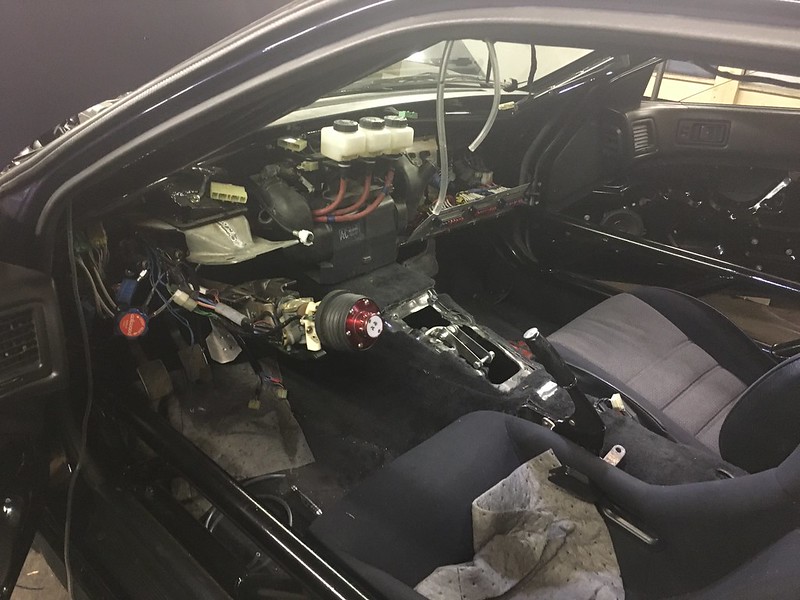
I realize I hadn’t really posted a photo of the interior. Many of the things that aren’t finished are in the interior. The shift **** is a 3/4 tube, the gauges aren’t mounted, the factory coolant temp kinda works.
the shift surround isn’t sealed, and this lets a lot smell in mostly but also noise.
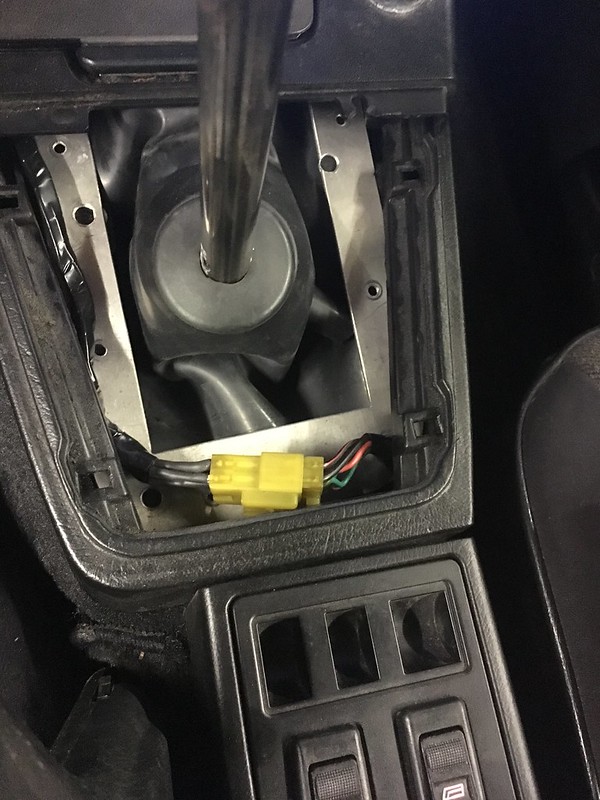
but the connector for the relocated window switches fits nicely. Cage doesn’t allow me to have armrests where the original switches were so BMW style fits pretty good. And they light up, though thanks to china not evenly. They are just pressure fit with tape, but I need to solder on the wires I think as the spade connectors are too tall.
Anderson Paak, smooth, kinda funk, I think this counts as rap but doesn’t feel like it most of the time. There is maybe 2 songs I don’t like on both albums combined. He has a new album out, listened to it a few times now and its not bad but its like these albums.
as usual, a lot has happened since my last update.
I had a few, well actually a lot, of loose ends that quickly arose even from driving the short time I had.
I don’t know why I took this but i guess it looks cool
I realize I hadn’t really posted a photo of the interior. Many of the things that aren’t finished are in the interior. The shift **** is a 3/4 tube, the gauges aren’t mounted, the factory coolant temp kinda works.
the shift surround isn’t sealed, and this lets a lot smell in mostly but also noise.
but the connector for the relocated window switches fits nicely. Cage doesn’t allow me to have armrests where the original switches were so BMW style fits pretty good. And they light up, though thanks to china not evenly. They are just pressure fit with tape, but I need to solder on the wires I think as the spade connectors are too tall.
Last edited by teeson; 12-22-18 at 01:57 PM.
12-22-18, 02:47 PM
#203
Senior Member
Thread Starter
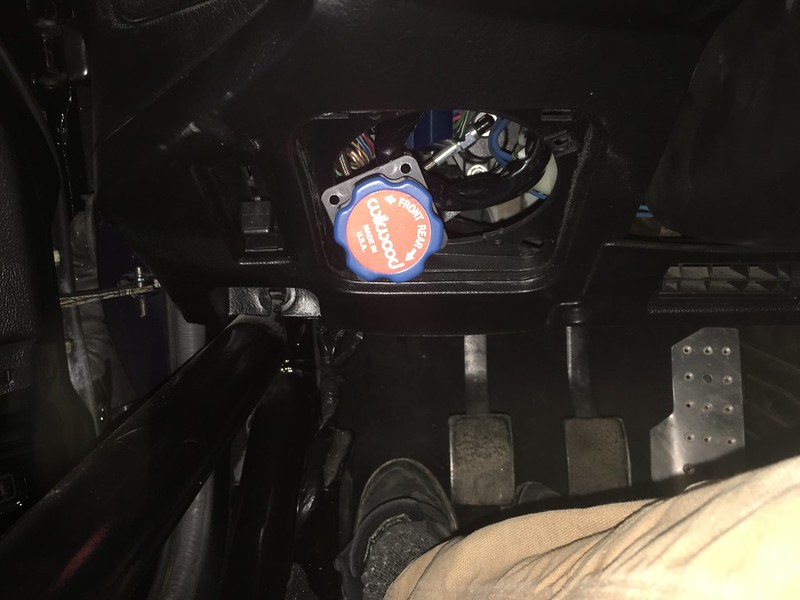
the other thing not done is the bracket for this. I also tried swapping the front and rear masters and much improved braking feel, was reeeeaaaalllly stiff with the 3/4 bore on the front 5/8 rear, but that required so much leg force. Swapping them around it feels like power brakes again kinda. Anyway this is the bias adjuster hidden behind what used to be the front speaker cover. My plan here is to hold the cover on magnetically.
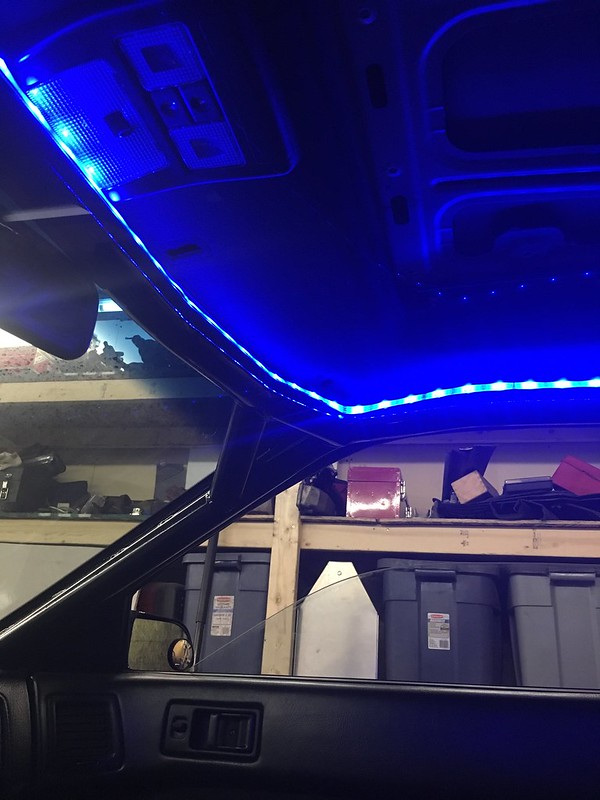
also, obviously did interior lighting. Its wifi controlled too, as will be the underglow when I get around to it.
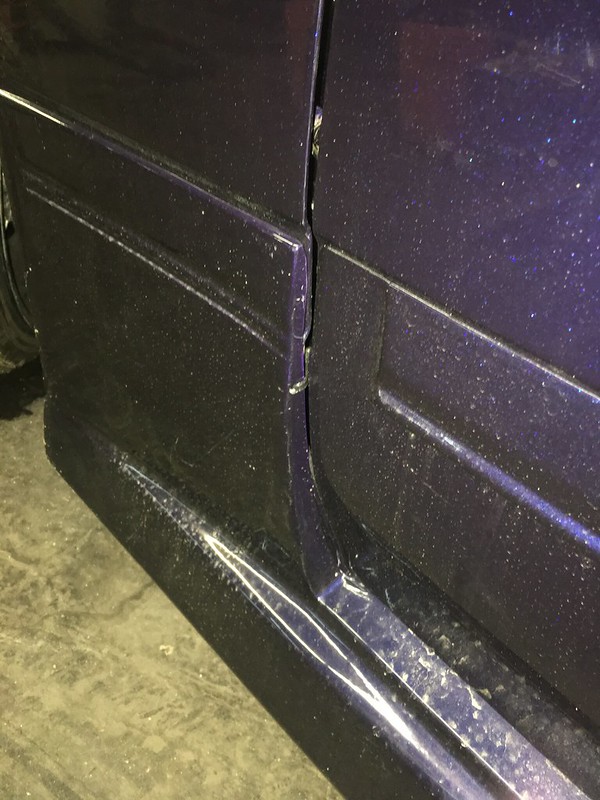
also couldn’t get my skirts to fit like how I thought they should so theres a zip tie behind the door, and 2 in each wheel well. the door ones a bit tricky to get right but makes the skirts fit sooo
and then I obviously took it apart, had to fix a few wiring goofs, I missed a ground, got a pinout backwards, small stuff. Dash isn’t too bad to get out but the top part doesn’t come out, or I didn’t try hard enough and risk scratching everything.
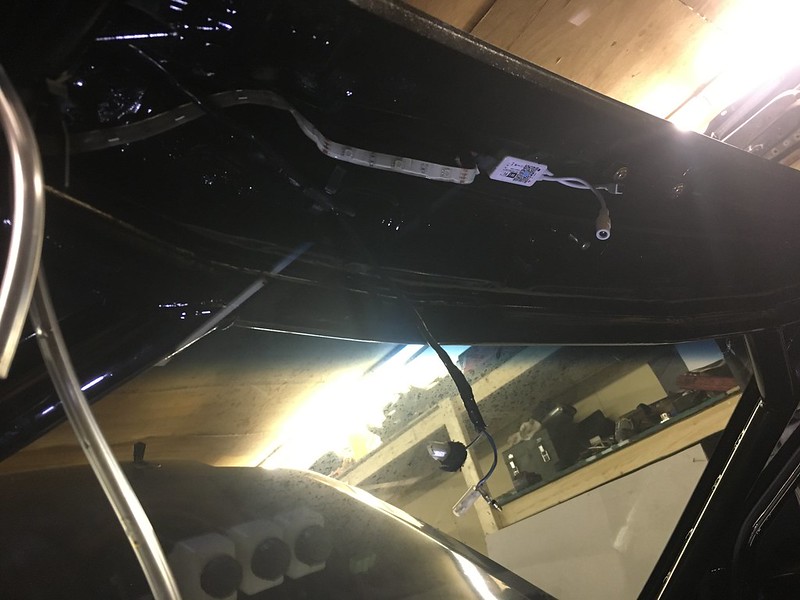
the other thing that severely needed dealing with was the lack of front sunroof drains. I thought it would be fine just having rears so I capped the fronts. Well I was wrong, tray overflows immediately and drips onto my lap.
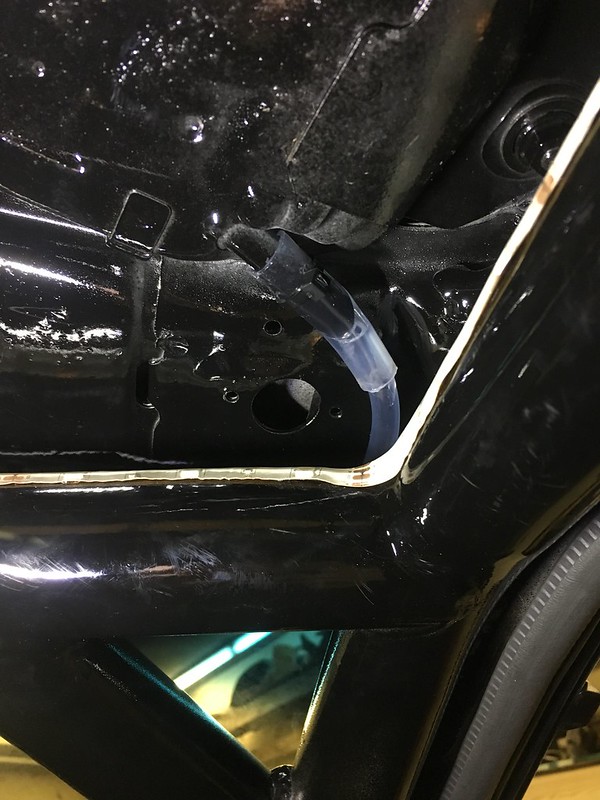
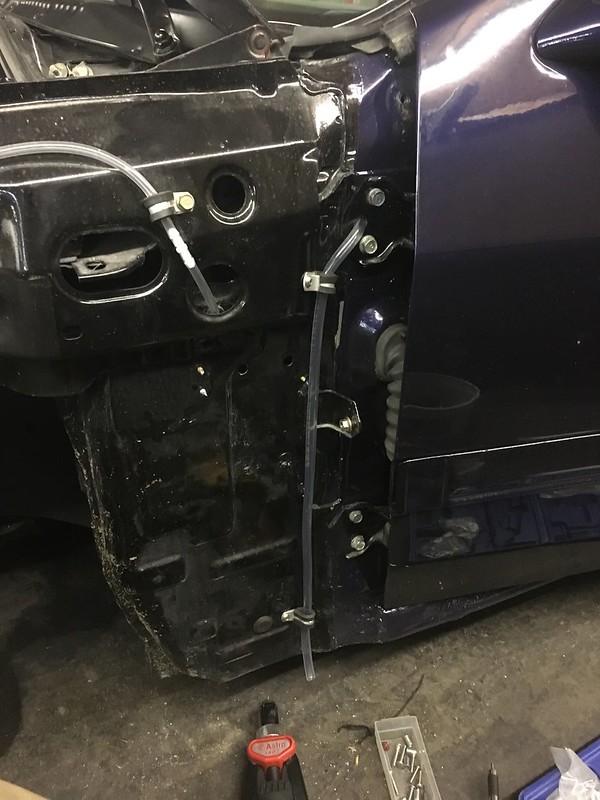
made an adapter with some silicone and tubes, was a tricky routing to get outside the car but managed, and it works.
12-22-18, 02:48 PM
#204
Senior Member
Thread Starter
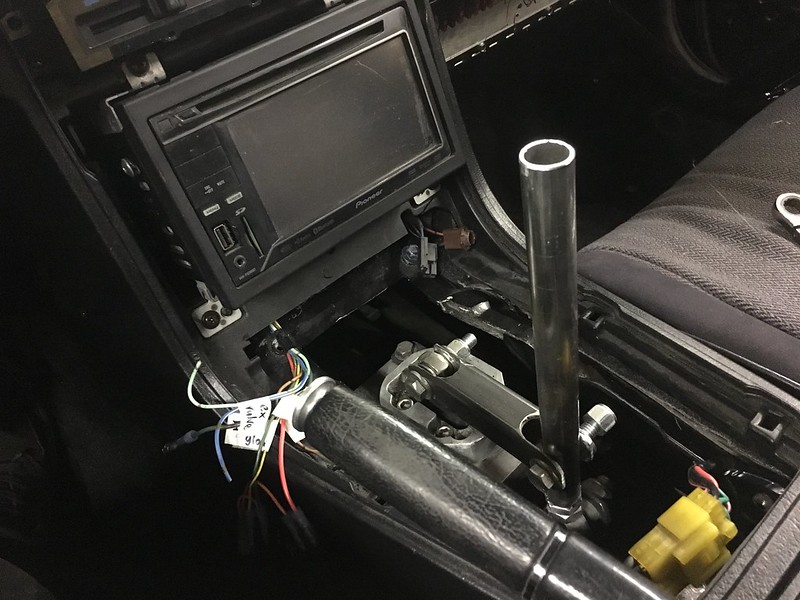
made a semi proper shifter, shortened it a bit. Shifts much more solid, not sure if I still want to bother making a piece with bearings or something anymore. Link being level was preference, shifted really short otherwise.
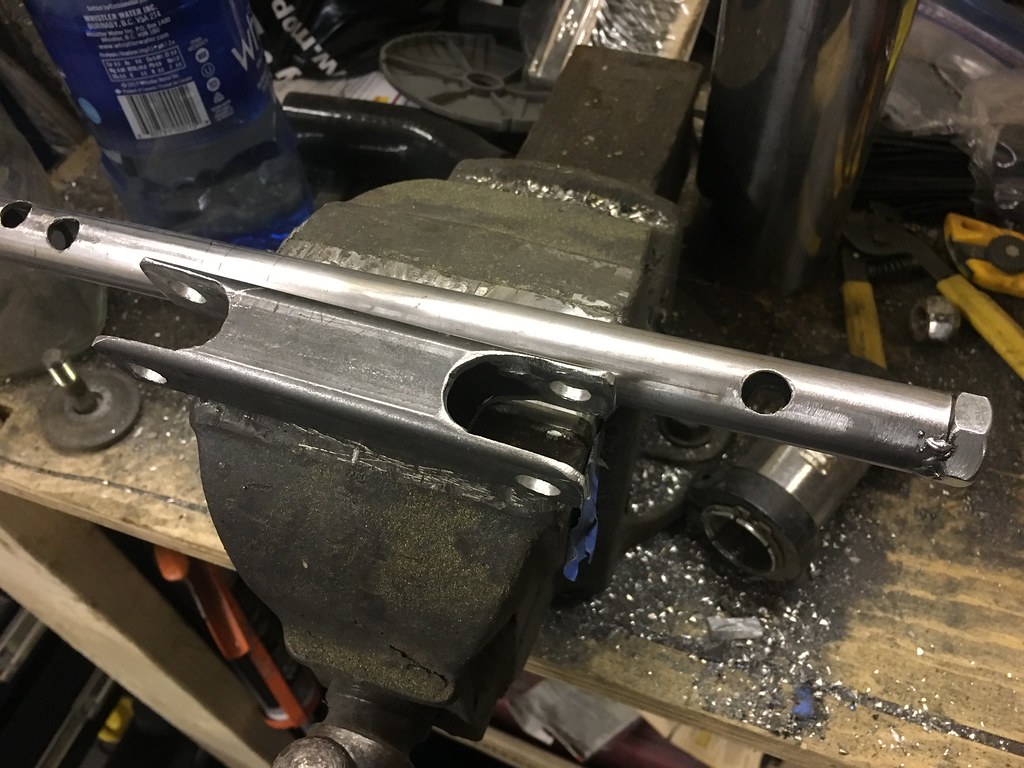

now the real issue I was having was with my E brake, it really wasn’t working like I had hoped. Bracket and assembly had a lot of flex, and friction. Very not sure where to go from here, I don’t want to spend a bunch of money machining a better bracket and lever etc to still have it not work. So I dipped my toes into the deep end and built a better version but with material I had around.

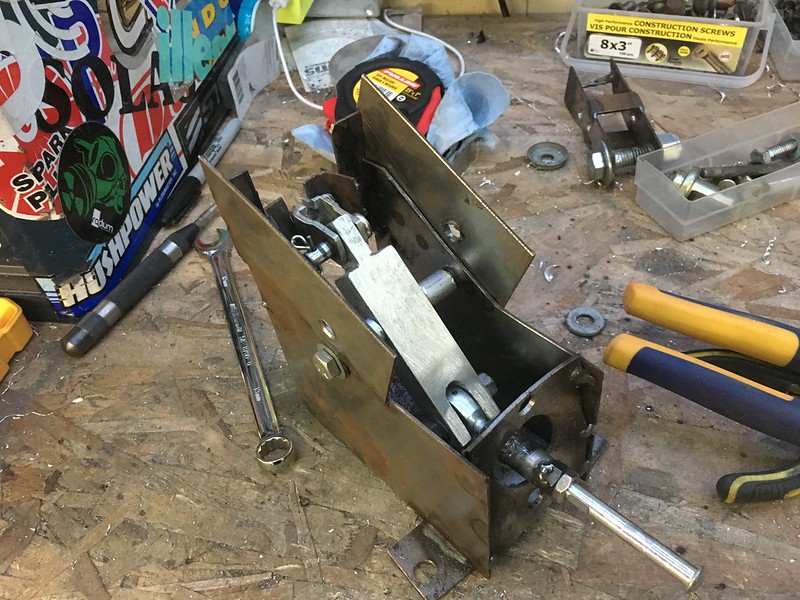
I’ll fill you in on how that worked in a bit
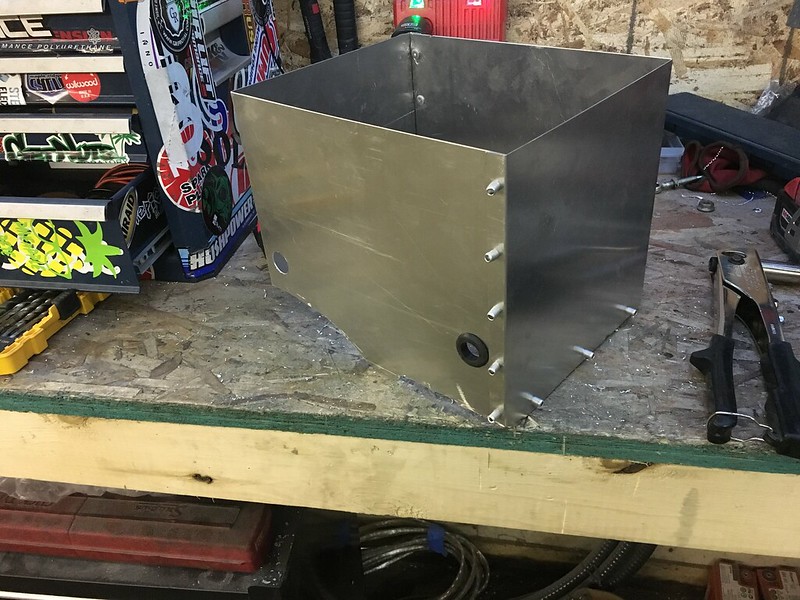
A thing I didn’t have time to do before the wedding but needed to be done before tech was a battery box. Hat tip to Kris for help bending this.
Per last time I built it to NHRA spec, sealed, vented, wall thickness etc.

 12-22-18, 02:49 PM
#205
Senior Member
Thread Starter

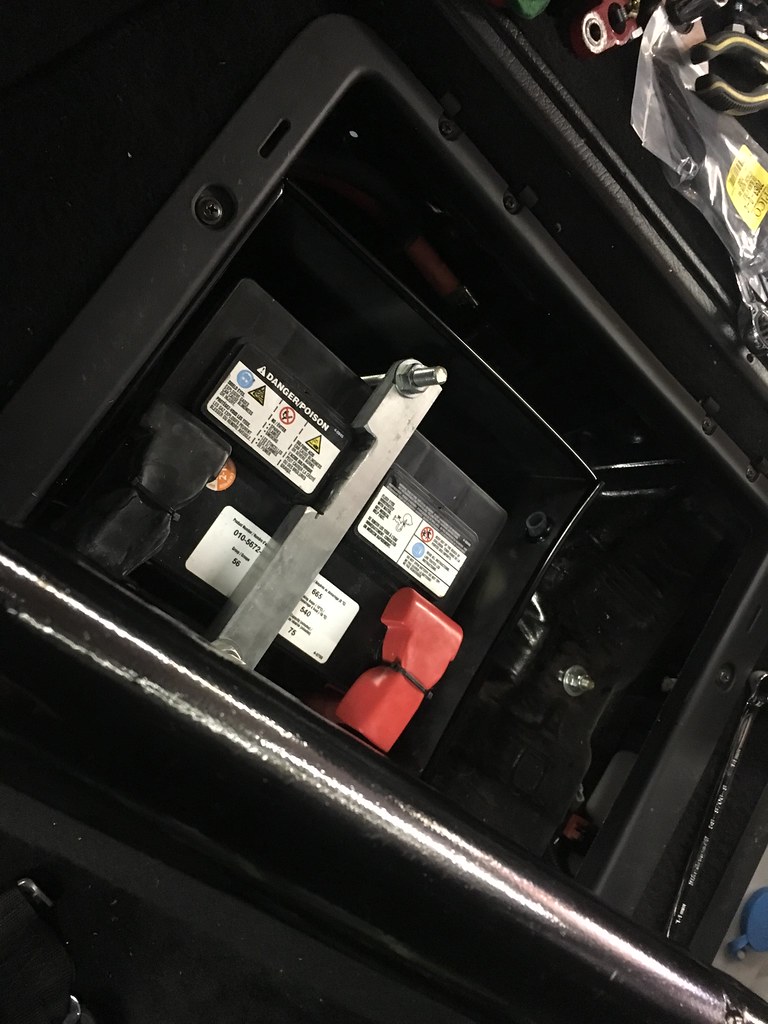
I siliconed it to the floor of the car, so its kinda permanent, but tech legal which is important. Also can’t say enough bad things about this Motomaster battery. Returned it once already as they sold me a defective battery and now this one barely holds a charge so It’s going back as well. I’ve checked the car multiple times, theres no draw going on and if the thing is driven and put away for more than 24 hours it needs a jump, but is fine after its jumped.
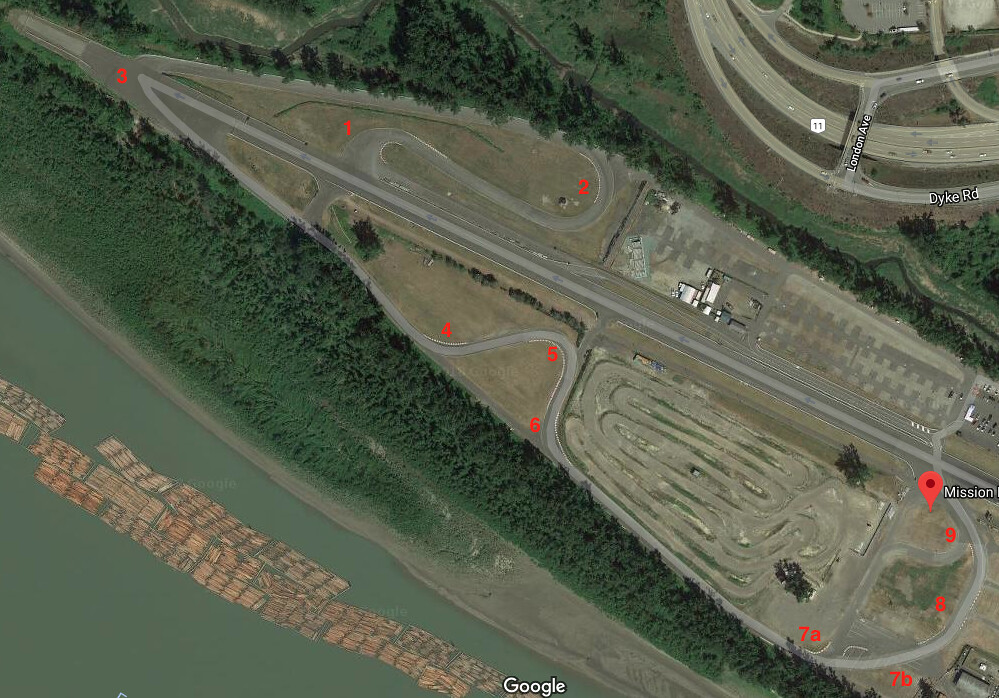
Theres this racetrack in Mission which is maybe 30 min away, and it has a road course but most of its use is the drag strip. The ownership wants very little to do with sports outside of drag racing. Every few years a rumour goes around that mission raceway is going to allow drifting blah blah blah. The options locally otherwise are Penticton Speedway (4-5 hours away), Western speedway (like 2 hours of driving but also an expensive 2 hour ferry ride), or Evergreen Speedway in Monroe (2-3 hours away, but a border crossing). Mission being super close would be great for the scene, AND IT FINALLY HAPPENED. One of the clubs that uses the road course jumped some hoops or something (I don’t know some people were up in arms, what else is new) and put an event together.
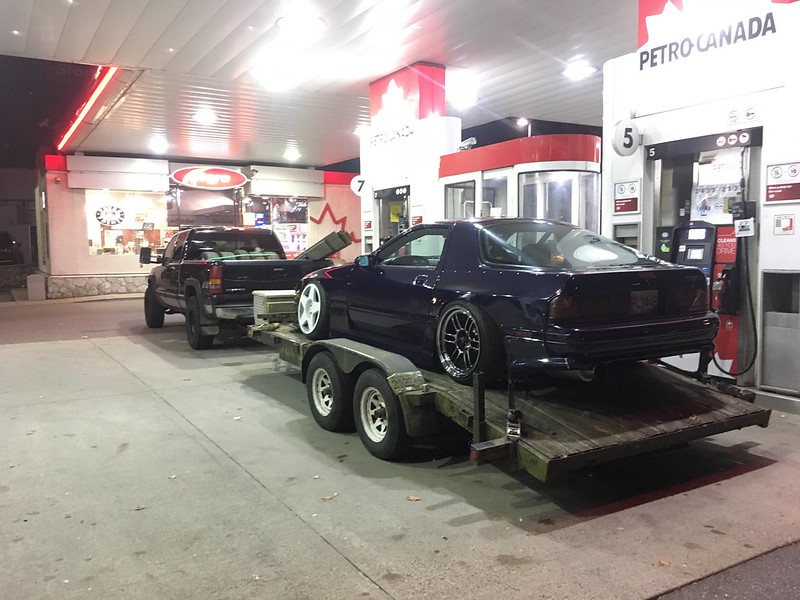
I wasn’t planning on doing an even until next year but I was also not going to miss potentially the only drift even Mission would host. Or if it goes well the first.
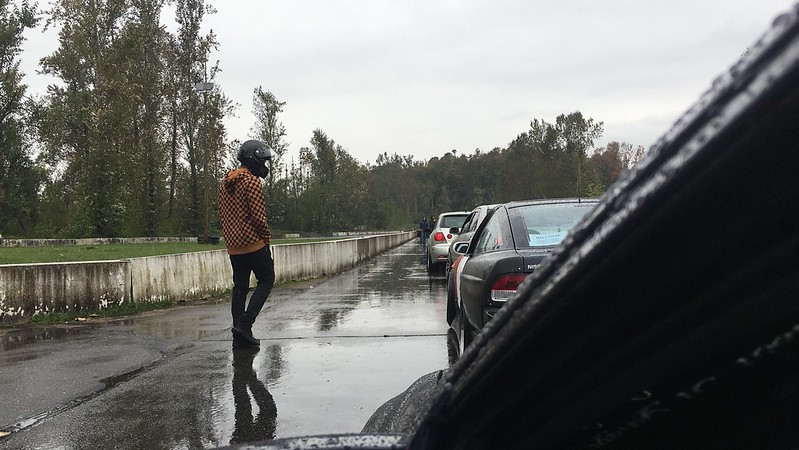
I took 0 pics that day as usual lol.
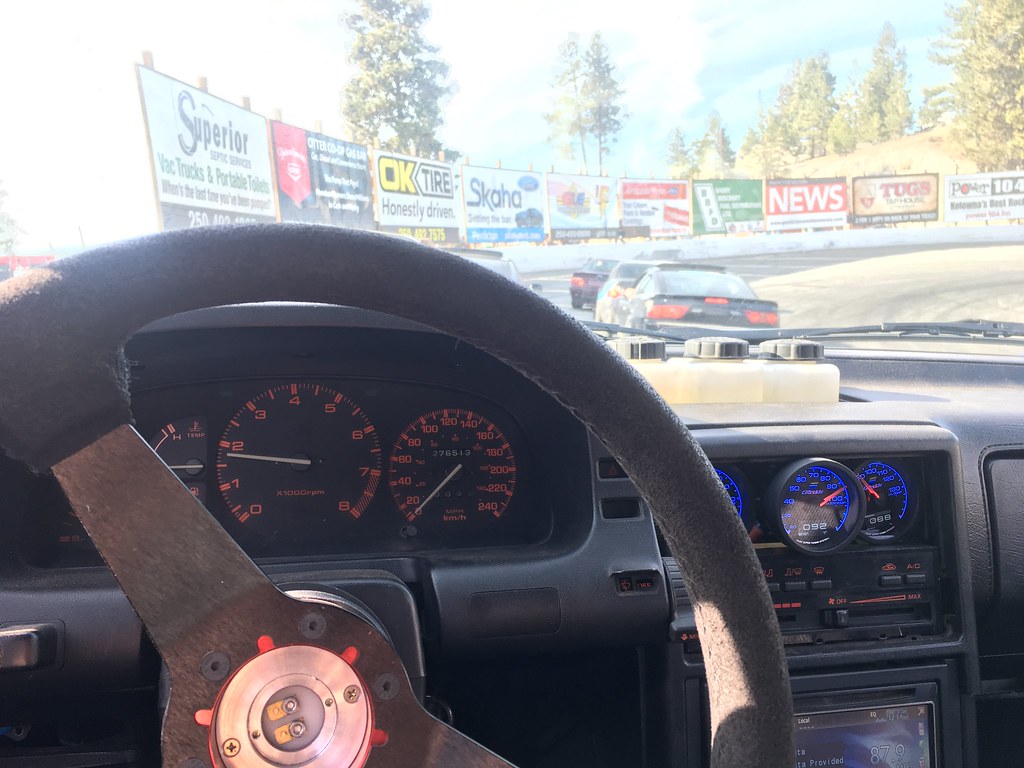
One photographer did take a pic or two tho, @project_604 tagged me in this photo which I believe was taken buy @alex.hruswicki
For the first ever event it went pretty well. The leadership was quite unfamiliar with how drift events usually work but they brought in a few guys that have run them and are more familiar with drift tech rules and event proceedings. Missions track layout is also not very ideal for drift, most of the corners are far apart and require either FD car speed and or a ton of manji’s. They had 3 courses setup, a skid pad at the top of 3, turn 2 to 1, and 7-8-9 but you hair pin at 9 and return.
I wasn’t as prepared as I thought I was. The front tires I had (nankang ns-20) suuuucked in the rain and I had like 8* of front camber not helping it. So with no front grip, and I barely remembered how the knuckles felt to drive, never having driven this chassis and a lot of rain, it was kinda tough. Oh and my e brake didn’t lock at all. But thanks to the knuckles I didn’t spin as much as I ought to and most of the courses are low speed and have large run offs. So the risk was very low. The event didn’t allow tandems so I at least had no pressure to do anything but struggle though the course.
12-22-18, 02:50 PM
#206
Senior Member
Thread Starter
My car also overheated in staging, for some reason the ECU decided to not sure on either fan. I jumped the relay and the fans just stayed on with ignition and that kinda solved the issue. Car had a really hard time cooling down after a run though, even with the 170 t stat it never stayed that low. So theres an issue there to be dealt with.
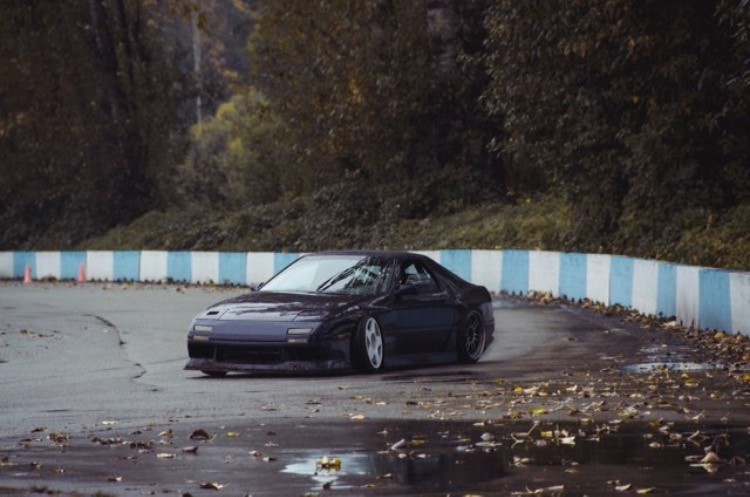
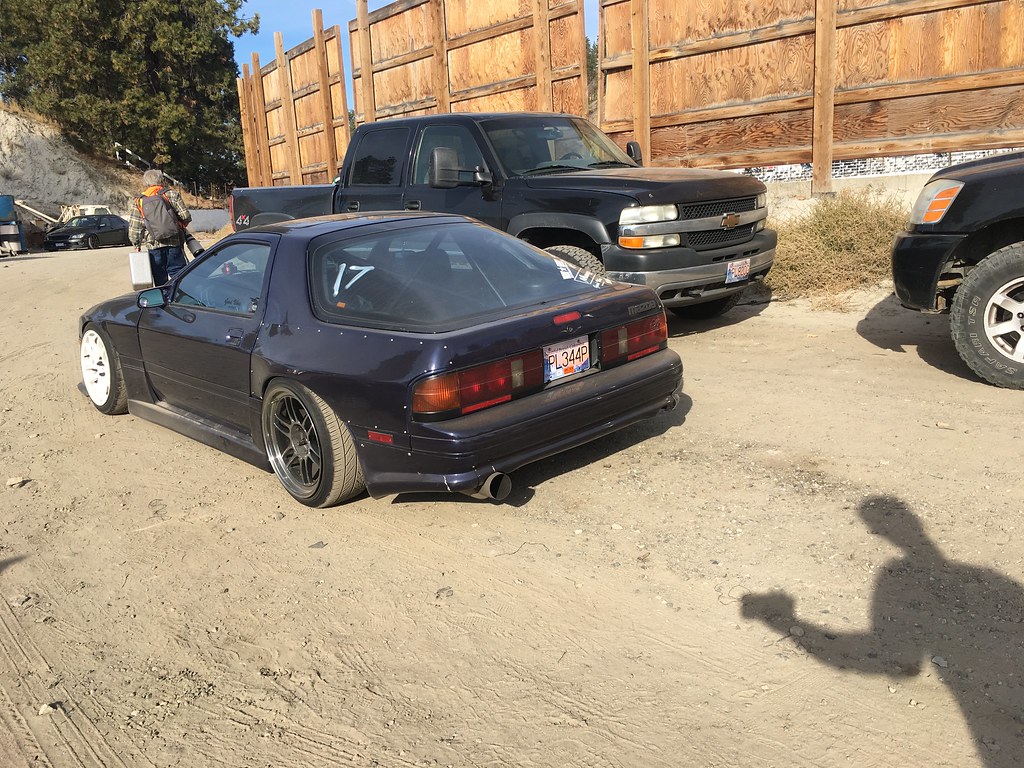
front splitter doing its thing. I did go off track a few times but a lot of this mud was just kicked onto the track.
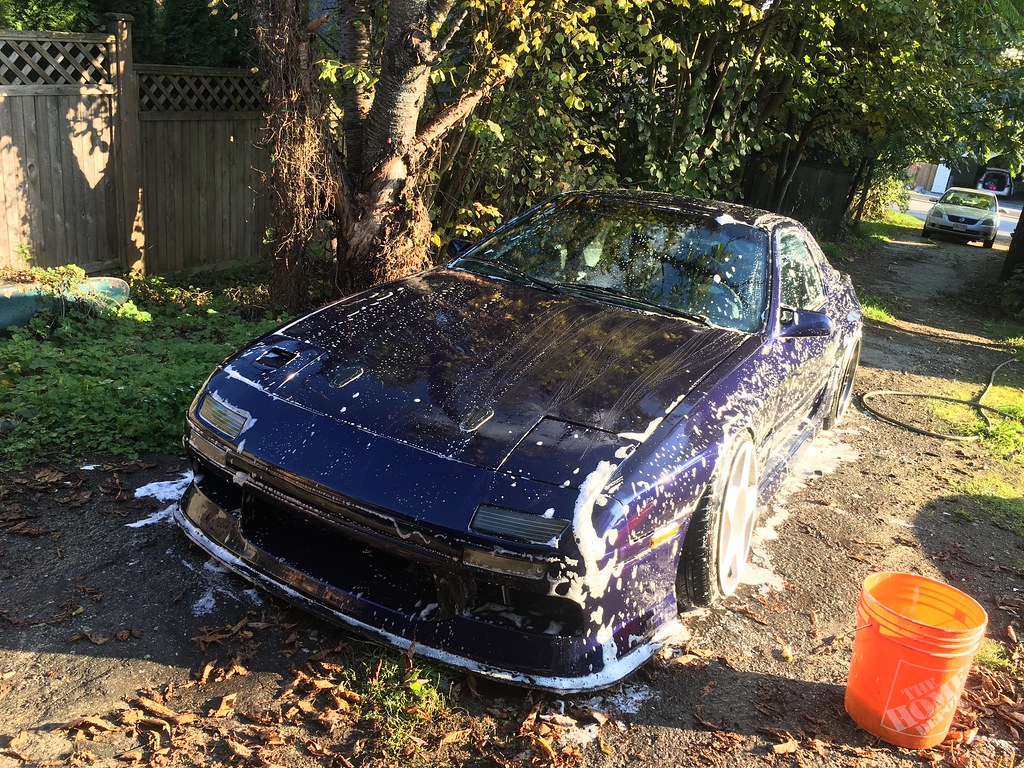
gave it a good bath when I got it home


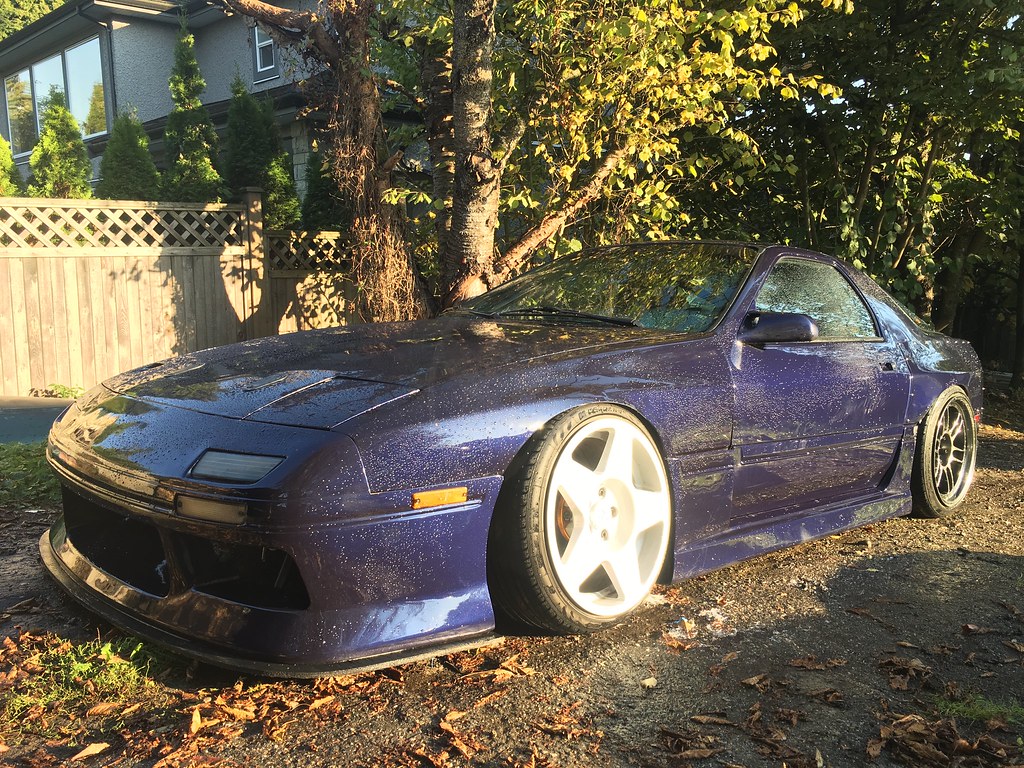
even in direct golden hour sun my iPhone doesn’t really do the colour justice.
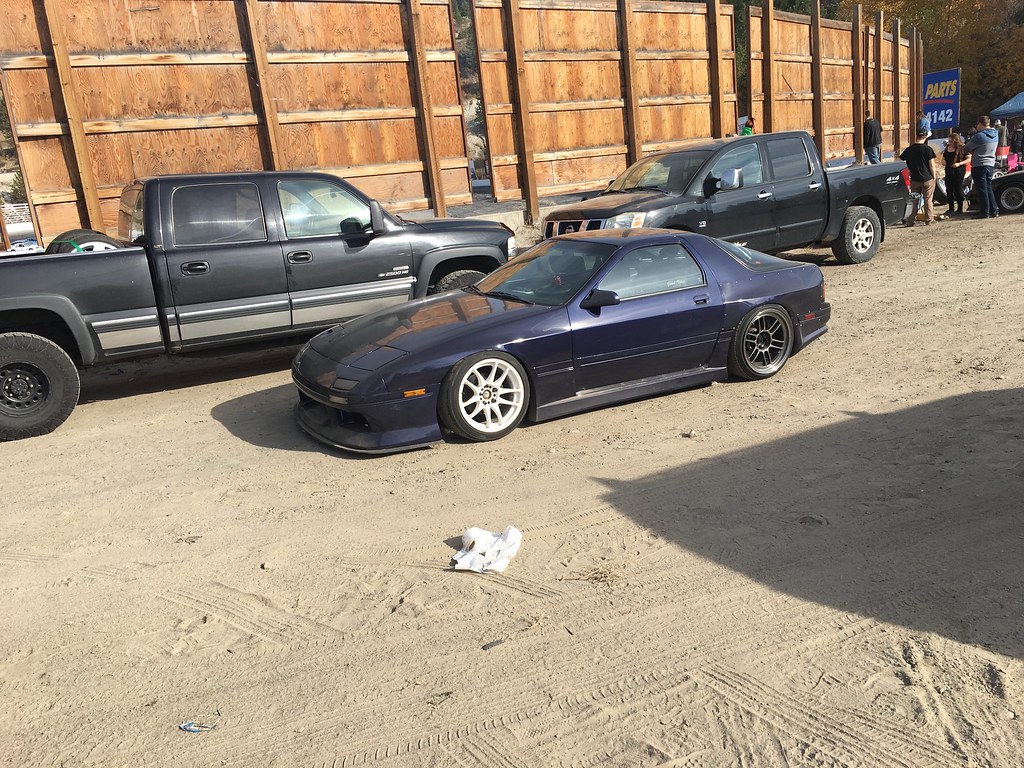
So I figured id do a few more meets, fiddle with a few things and park it for the winter and tackle anything else once it was off the road. But then another event came up, Pentictons final event of the year and a week before they had 9 drivers signed up and the weather looked dry. There was a good chance my garage mate Kris was going to just be able to make it after getting his car tuned. So I signed up and paid. Changed the alignment and traded some 17 tires I had for more sticky ones. Kris’ tuner got sick and cancelled his tune so he and another buddy came up with me, and lol because I can’t tell time we were late.
again, I take terrible few pictures at events. There was a comp but the winner was already determined because he was untouchable all season. The S13 in that pic, Dylan Zupanksi I think won the day and the season, then proceeded to blow his motor (again) doing a victory burnout. I think he’s had enough of swapping KA-T’s and is doing something else next year, but he’s one of the best drivers I know and his KISS and seat time> all philosophies are smart and working for him. He took me for a ride along or two and basically scared me with how close and fast he can be with like 200hp battling much more powerful cars. Have much to learn before I can get even close to him.
front splitter doing its thing. I did go off track a few times but a lot of this mud was just kicked onto the track.
gave it a good bath when I got it home
even in direct golden hour sun my iPhone doesn’t really do the colour justice.
So I figured id do a few more meets, fiddle with a few things and park it for the winter and tackle anything else once it was off the road. But then another event came up, Pentictons final event of the year and a week before they had 9 drivers signed up and the weather looked dry. There was a good chance my garage mate Kris was going to just be able to make it after getting his car tuned. So I signed up and paid. Changed the alignment and traded some 17 tires I had for more sticky ones. Kris’ tuner got sick and cancelled his tune so he and another buddy came up with me, and lol because I can’t tell time we were late.
again, I take terrible few pictures at events. There was a comp but the winner was already determined because he was untouchable all season. The S13 in that pic, Dylan Zupanksi I think won the day and the season, then proceeded to blow his motor (again) doing a victory burnout. I think he’s had enough of swapping KA-T’s and is doing something else next year, but he’s one of the best drivers I know and his KISS and seat time> all philosophies are smart and working for him. He took me for a ride along or two and basically scared me with how close and fast he can be with like 200hp battling much more powerful cars. Have much to learn before I can get even close to him.
12-22-18, 02:50 PM
#207
Senior Member
Thread Starter
17 cars made it out and basically all of them were good drivers (except meeeee) so the flow was really good and I got a fair amount of seat time. Car drove much better adding some SAI to it and reducing camber to about 5*. Still 0 toe front and rear, I think adding toe in or out in the front is the next thing to try. Was starting to pick Shawn Browne’s mind and he and Dylan run toe in, where Dan a few other guys I know drifting FC’s all run toe out. Actually I feel like most people with drift alignments favour toe out. Was struggling all day to keep the rears turning tho, very unusual feeling with the V8, but towards the end of the day Shawn encouraged me to change something, do a few laps, change something do a few laps. So I tried adding caster, kinda felt better. Swapped my rears to the 1552’s with those crap Nankang’s on them, car felt great all of a sudden, I had much more control. Then of course they debeaded (they had debeaded sitting in the driveway the week before) so that kinda ended the day as we were out of time.
I took the t stat out, after a bunch of reading it seems that a dual pass rad adds enough pressure to the system to ensure that water gets into the nooks and crannies of the head and rad, my issue hasn’t been keeping the temps up as much as down. I could do a few laps before having to pull off to let the thing cool, we were basically hot lapping when the comp ended. Fans definitely need to come on earlier and probably come on regardless of speed. Rad needs ducting too and I’ve noticed that the bumper opening is below like 80% of the rad so airflow over is probably nil when the fans aren’t running and Ford set them so stinking high, the things basically ready to boil over when the high setting kicks on. I read somewhere that most overheating problems are actually an airflow problem, I believe thats true for me as well.
I’m also not used to receiving compliments on my car, especially after doing a few terrible runs in a row lol. I’m glad people appreciate it though.
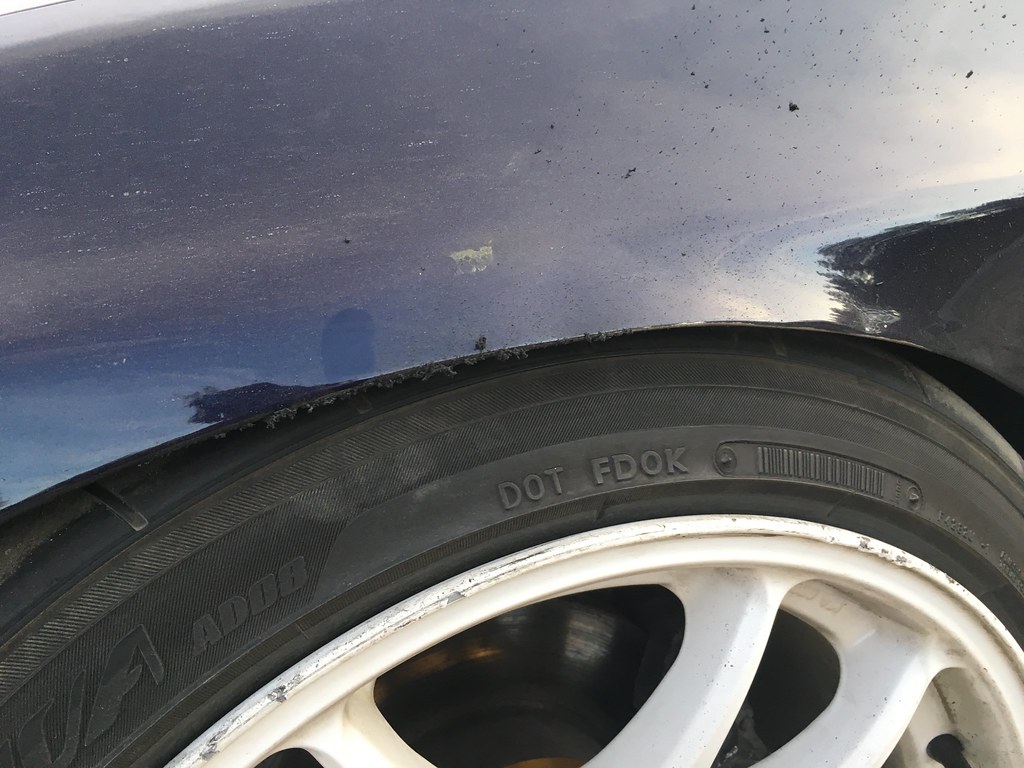
keeping the fitment tight, rubbed quite a bit on this track actually. E brake still barely did anything, getting pretty frustrated there. Might buy project Mu D1 pads and try that but I’m close to giving up on the cable all together and have the handle push a rod or something.
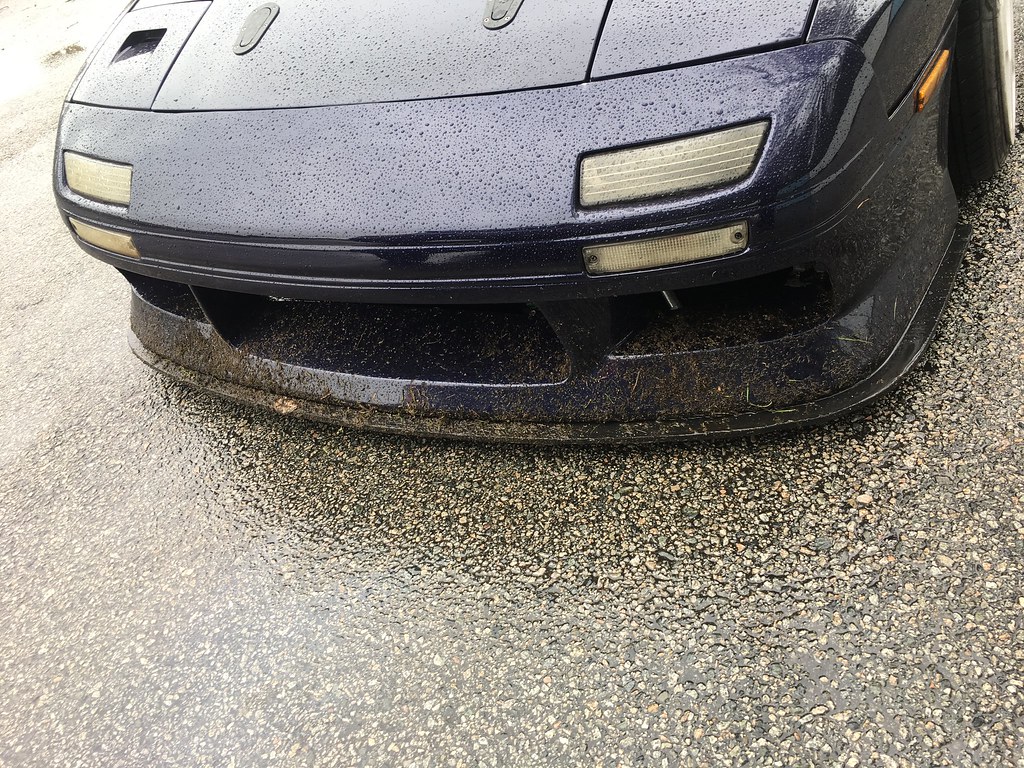
but 2 events down and no real crashes or damage to speak of. Had a small giggle when I lined up for the first time that day Shawn told me I’m gonna want to take my bumper off or the transition off the bank will eat it. I told him thats what the splitter is for.
I took it off a bit later and its a lot thinner on the front lol but its doing its thing and I’m happy with it. I also entered super early on one layout and nailed a rim that was beside a bunch of tires acting as a hair pin (don’t ask me why that was there, obvs a bad place for it),
Next time I’m up there I’ll have to get pics of Dan’s 1UZ FC and my other buddy Caetano’s FC. Both are white, both are good and yet very different.
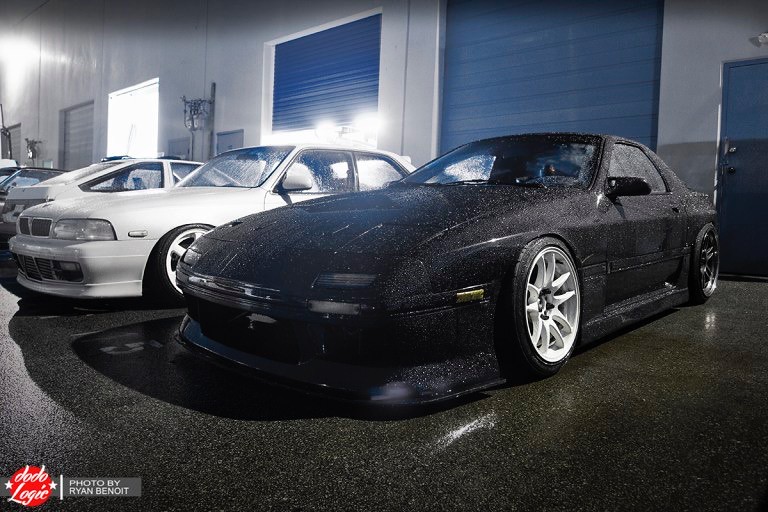
did one last meet up for a shop opening before the insurance ran out for the year, this photo is from Ryan Benoit of Dodologic, still not sure what witchcraft he pulled to get it to look this well lit and it was really dark outside.
Actually we went to a street spot after that, on a dry cold winters day. Took it really easy as I do on the street and am kinda starting to feel comfortable in the car. E brake is the biggest thing I want to fix, but the alignment and knuckle turn speed I’m beginning to understand.
12-22-18, 02:51 PM
#208
Senior Member
Thread Starter
So with “winter rebuild season” upon me, time to start tidying up a bunch of stuff.


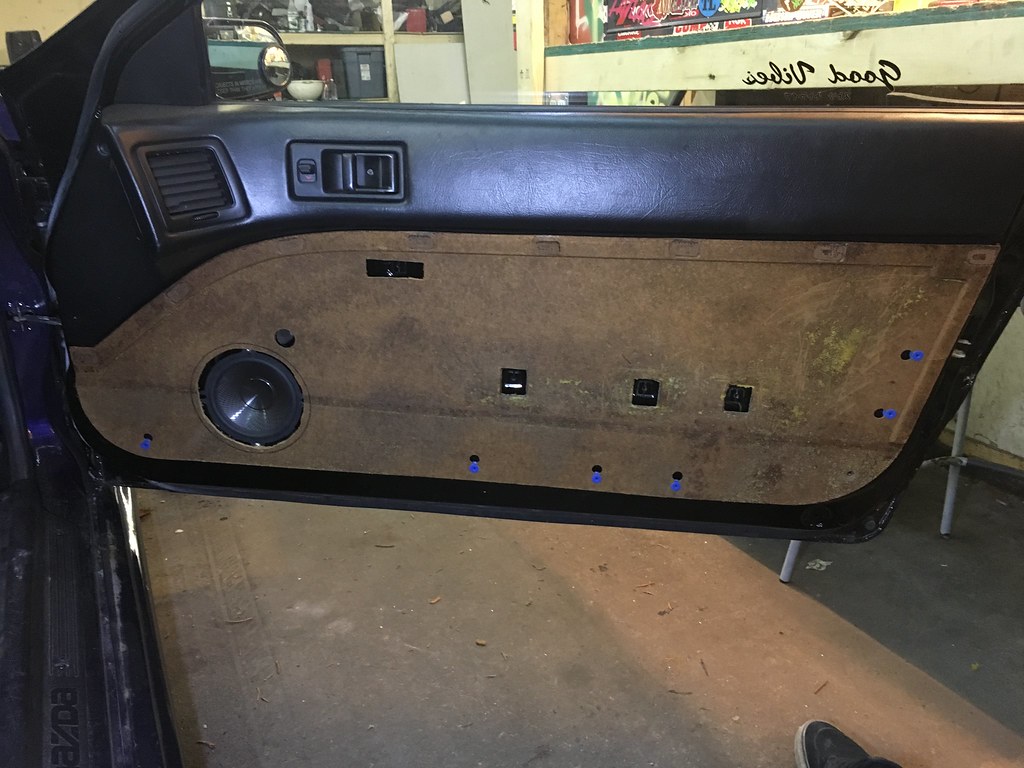
took the door cards, skinned them and trimmed for the speakers. I went out to the local fabric store and went hunting for the right material. Originally I was just going to get like sub speaker box carpet, but found something a little classier but still dark and hopefully easier to clean. But because it’s been so cold I don’t trust the glue to stick so I haven’t tried doing it yet.
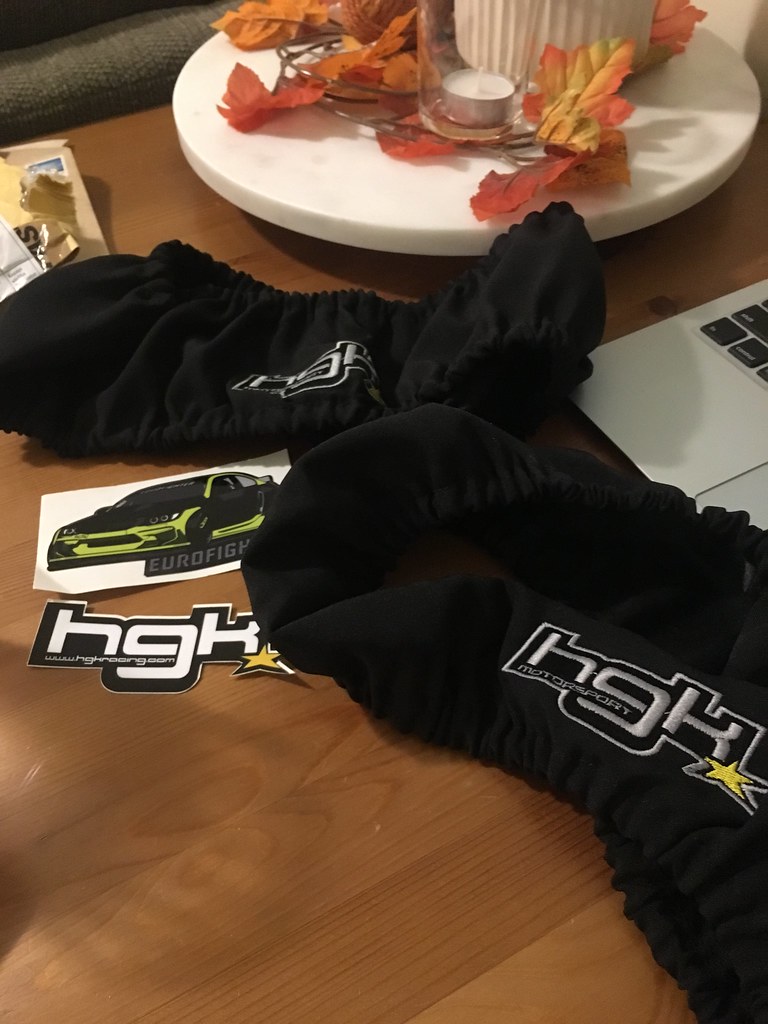
Ordered a pair of these HGK steering wheel covers str8 from Latvia. Pretty nice for working on the car but not getting your nice steering wheel dirty.
took the door cards, skinned them and trimmed for the speakers. I went out to the local fabric store and went hunting for the right material. Originally I was just going to get like sub speaker box carpet, but found something a little classier but still dark and hopefully easier to clean. But because it’s been so cold I don’t trust the glue to stick so I haven’t tried doing it yet.
Ordered a pair of these HGK steering wheel covers str8 from Latvia. Pretty nice for working on the car but not getting your nice steering wheel dirty.
12-22-18, 02:52 PM
#209
Senior Member
Thread Starter
And now, this is worthy of its own post, nay its own build thread as theres a lot of change about to happen and a lot of long winded explaining going on.
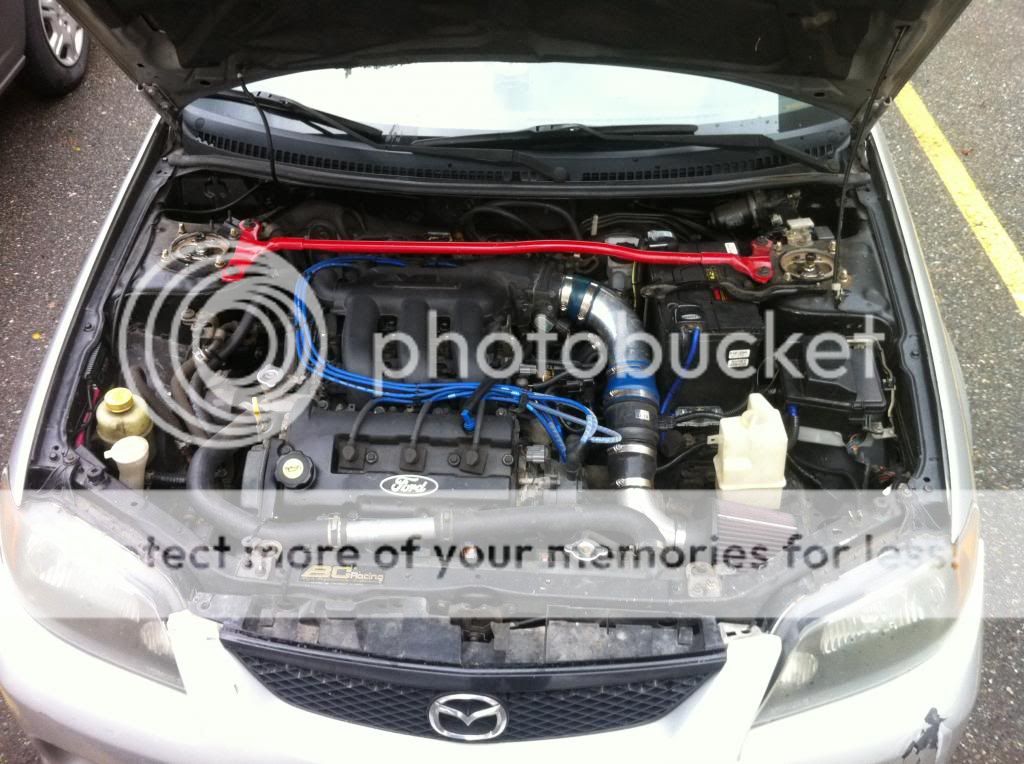
So when I first built the 1st V8 car, a 5.0 was not the dream. But it was really cheap and really simple as far as swaps go. Engine came up at a good time and price, same with the swap kit, and it kinda all fell into place perfectly. But when I bought the FC I had a different dream for it. Before I discovered drifting I just liked cars. I had heard about drift, kinda knew what it was but bug didn’t bite me yet. And what kind of cars does a poor fresh out of high school kid play with? before you say Honda’s, my answer is just FWD econoboxes. I had a protege 5 which I started by doing little stuff, then bought coil overs, spent a lot of time on Mazdas247 and learned to most of it myself, with help here and there from my dad or the techs at Kal tire where I worked at the time.
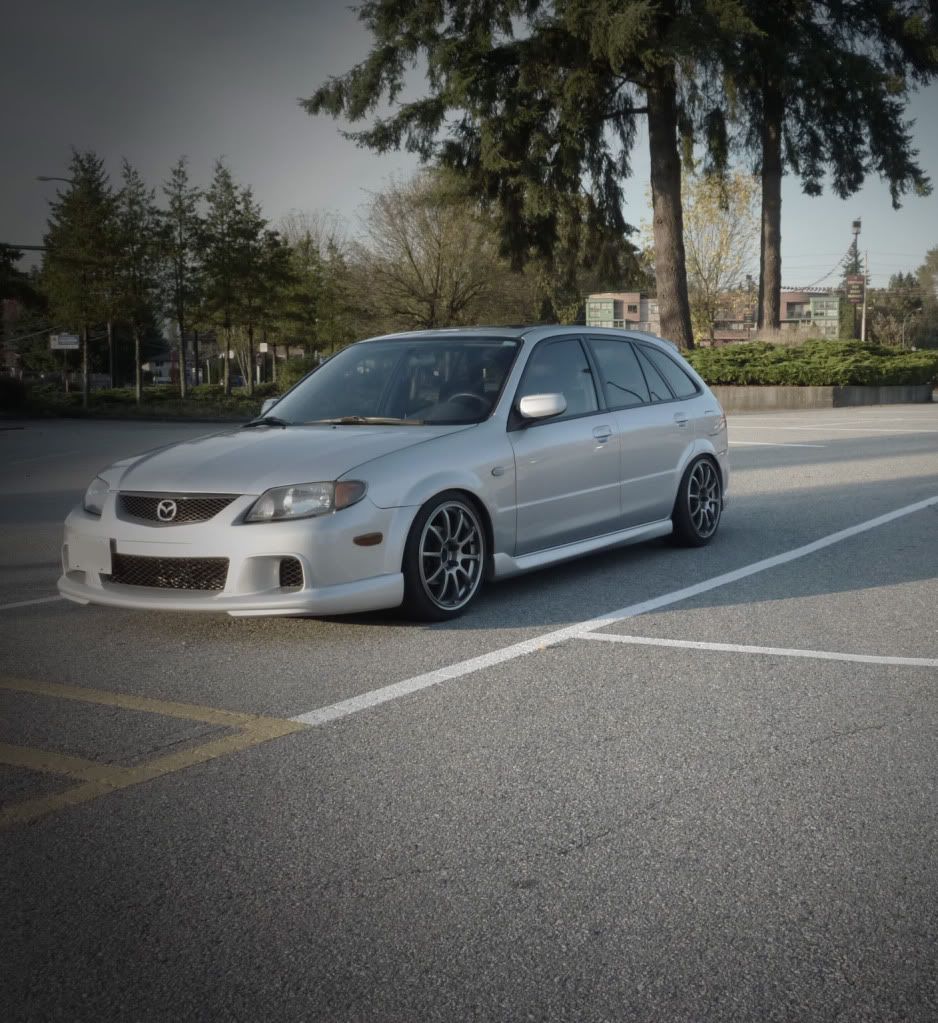
Man I loved this car. Was pretty reliable, until I really got into messing with it then it left me stranded once, but I learned so much from doing it. I switched jobs from Kal tire to Futureshop doing 12V installs, so I now had access to a lot of wiring things. Sometimes I still miss that job I just wish it paid more.
Hoping these photos work as they are on Photobucket, which has single handedly ruined forums. I see Flickr is going to be updating to a similar system, you have to pay a monthly if you have over 1000 photos (i have 1700 lol) so looks like I may have to open a 2nd account.
But anyway, this is my roots. I swapped a KLDE from a 96 cali spec Ford probe I bought for dirt cheap. Threw in a clutch, light flywheel, eBay headers and painted a bunch of stuff. Sounded lovely, had a ton of midrange torque, still got decent fuel economy and did a 15.6 (I thinnnnnk, been years) in the 1/4 mile. But then I found drifting and bought an FC and its been downhill from there. My dream was to combine the two but at the time there was no rwd swaps completed, there was no transmission options available as theres no factory trans that bolts up. The intake goes through the firewall, exhaust doesn’t fit, coolant piping is fwd biased, the oil pan is front sump. There was just too much fabrication that I couldn’t do 6 years ago. But I’ve been keeping my eye out for what others have done with these. In the last few years theres been a bunch swapped into miata’s, frankly an ideal car for them, but on that note I think this engine would have been a killer candidate for the FC had it not been for the rotary part of RX7. USDM spec makes 170hp at the flywheel and the JDM makes 200hp, very similar to the 13b-re. There’s a girl in the UK that makes an adapter plate to bolt it onto a stock Miata trans, but this has some really bad compromises such as cutting a large part of the bellhouse to fit a starter adapter. I think I have a better solution to this but we’ll get to that. Since that kit, quite a few miata owners have started building a KL swapped miata, but you still need a custom exhaust, custom or modified intake that may or may not clear the hood, and the usual plumbing and wire that all swaps take. So needless to say not all of them have been completed and the thread on miata.net is a bit cold…. I also have yet to see anyone do this swap into an FC, I’ve seen it talked about but not done. Theres even one in a 944 that Larry Chen found and put on Hoonigans extra.
I have been dreaming of doing this swap for 6 years; planning out how; taking what I’ve learned from other projects and mapping out how to apply it; spending hours comparing pictures and trying to separate folklore from fact (you thought mustang forums were bad for info? LOL) to finally come to the point where I’m ready to start. I planned a lot of things in this chassis to be ideal for this engine swap, and the layout of it I’m planning.
These engines are usually pretty cheap, but at least where I am finding one can be a bit of a challenge. They came in 2nd get Probe GT’s, MX6’s and certain year 626’s and Millenia’s. MX3’s got a K8, which is 85% the same except for the fact its a 1.8L, and 2000+ 626’s got a variant called a KLG4 which has a coil pack instead of a distributor and a few other changes (no not cast cranks, they still all seem to be forged). Every now and then I would search the wrecking yards websites and craigslist and even borrow my wife’s Facebook account to check marketplace to see if there was a steal of a deal on either a running car or a parts car. Well Pick a Part in chilliwack happened to have 2 vehicles in stock with KL V6’s and both of them hadn’t been there long and cherry on top they were having a sale that weekend. Unable to find anyone to go with me I packed up and headed out solo prepared for a long day.
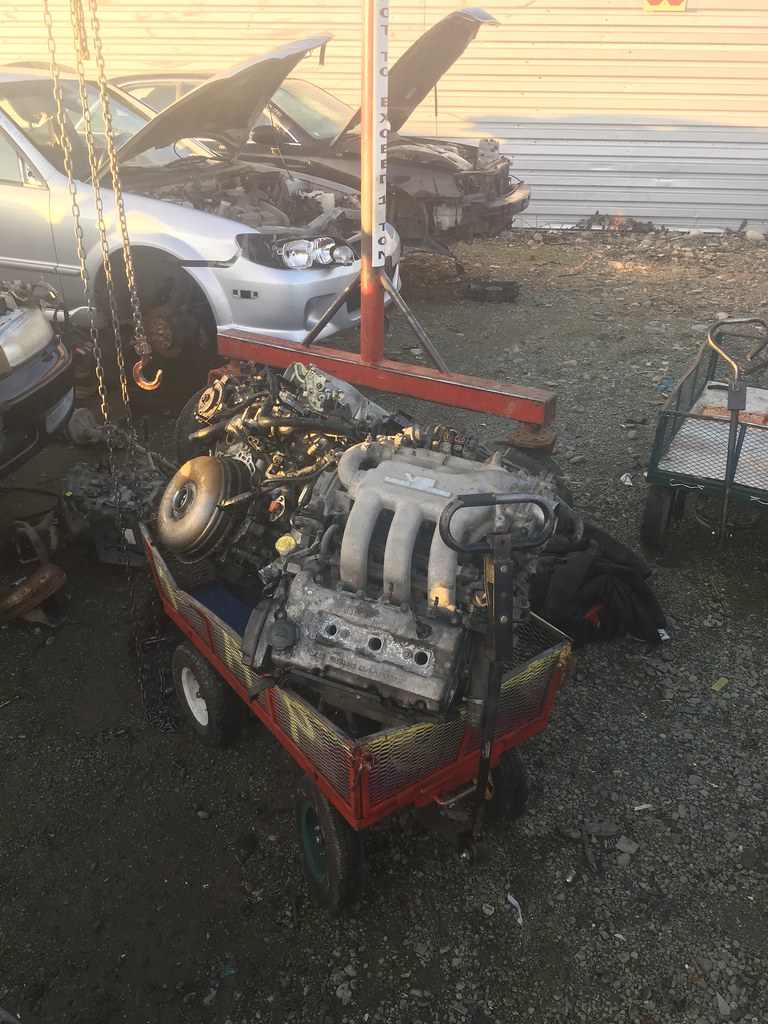
One engine was in a 97 probe, other was in a 97 626. I scoped both of them out before starting on one, the probe had a bunch of newer parts, was cleaner and looked better maintained except for the timing cover someone broke. So pulled the engine on it in about an hour and a half, remembering all the past had taught me lol. Couldn’t get the torque converter bolts though, the crank would spin but only like 20 degrees. Thought “maybe its the park pin or something” so pulled apart what I could get off the trans, still nothing. Eventually got annoyed and set the thing on the ground, flipped it over and pulled the pan to find a snapped rod. Great. I was hoping to get 2 half decent engines out of it but I guess this ones a mock block and hopefully the heads are still good. Went over to the 626 and did the same, but since I had just practiced this engine was out in like 35 min. Also some one had come before me that day and helped, lol they also took the distributor and wires out of it which I have a feeling was the very reason that car was there to begin with. For some reason people always pull the plugs and then leave the hood off so water gets in, the probe engine this was the case but the 626 the hood was left down so there was no water in it. I checked that it rotated before pulling it this time and found car had some signs it was sitting a while before it was scrapped, again leading me to believe the disty failed (ignitor’s are super common to fail on these). Pulled it out got the trans off, figured out a way to at least lose the trans from the probe engine and keep the torque converter, and then pulled a car with 2 engines on it to the front. Everyone was a comedian lol “oh did you get enough?” “can you carry all that” etc. When I got there I asked the guy what I needed to take off to count for the sale they were having, he was pretty vague and said they were leniant. The different guy I talked to gave me conflicting answered but basically said “only the heads and oil pan”. So rolled it back out, lifted them with the ghetto engine pullers they have and stripped almost all of it off both engines, left a few sensors and chose to leave the alt and power steering pump on the probes engine. Wheeled it up again, dealt with a 3rd person and she asked far less questions and after like 8 hours I was loading up and heading home, sweaty, covered in filth and with a huge smile on my face.
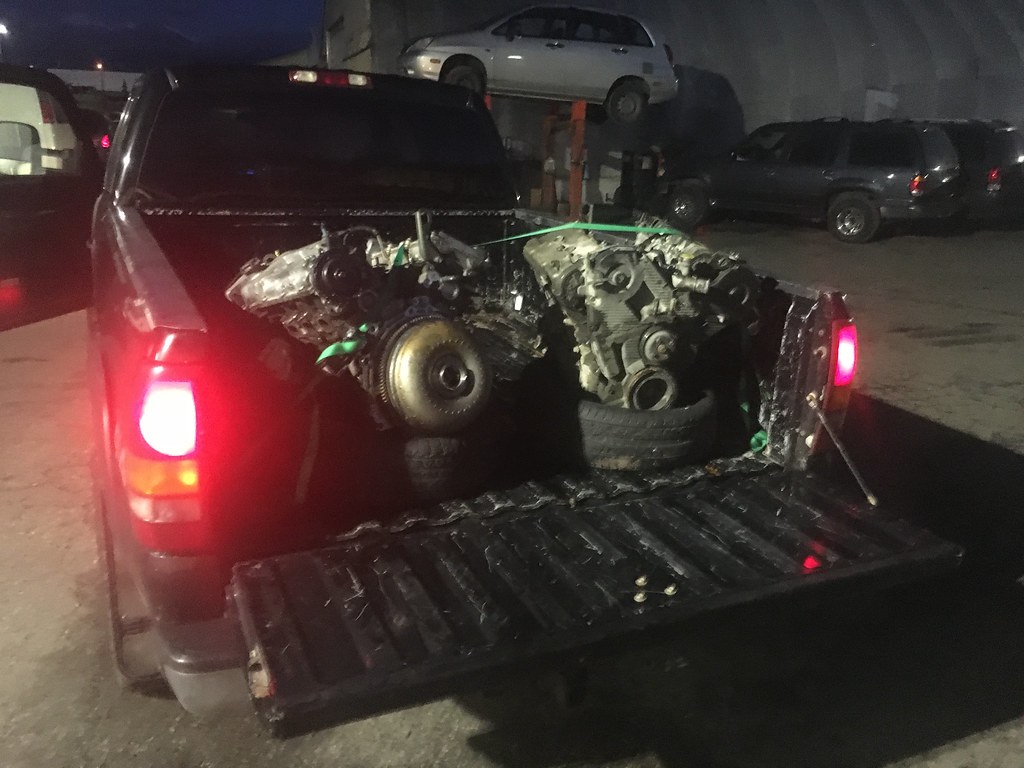
Unloaded, headed to the Good Vibes christmas dinner fundraiser. Came back to it a few nights later and started to deal with what I had.
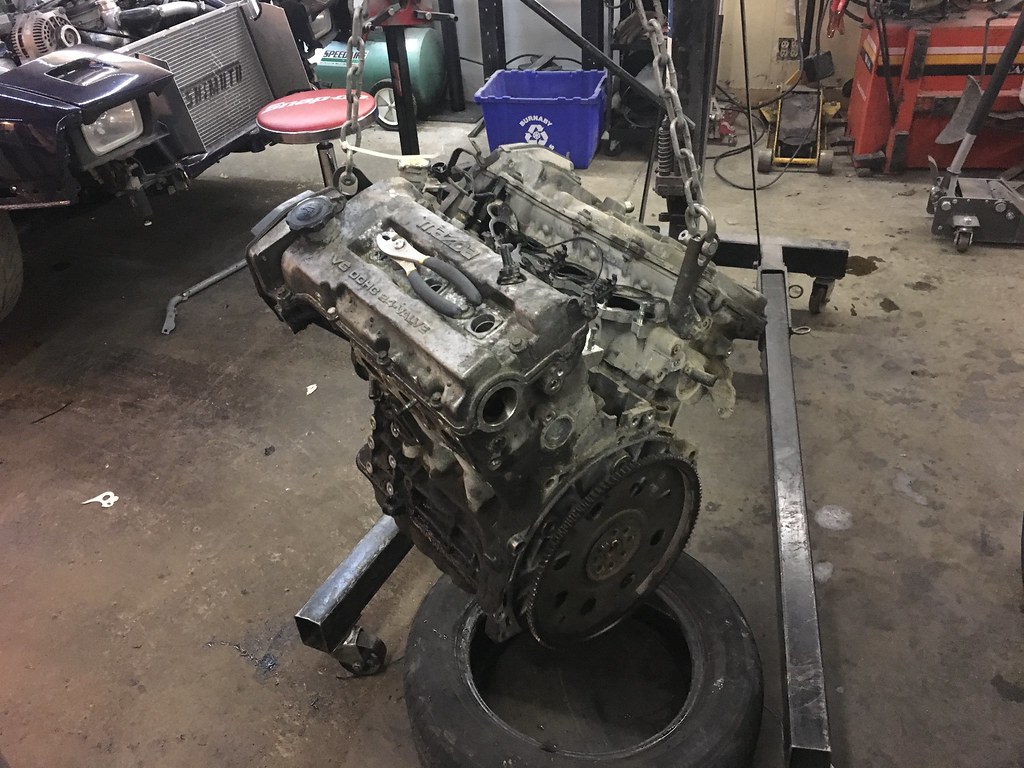
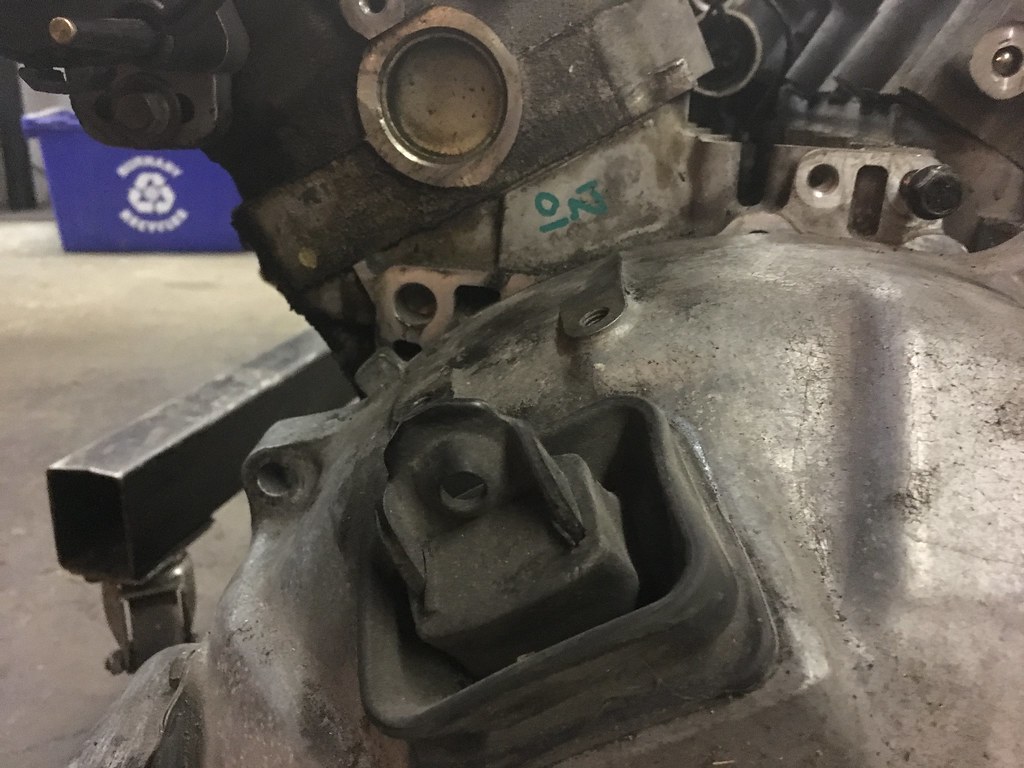
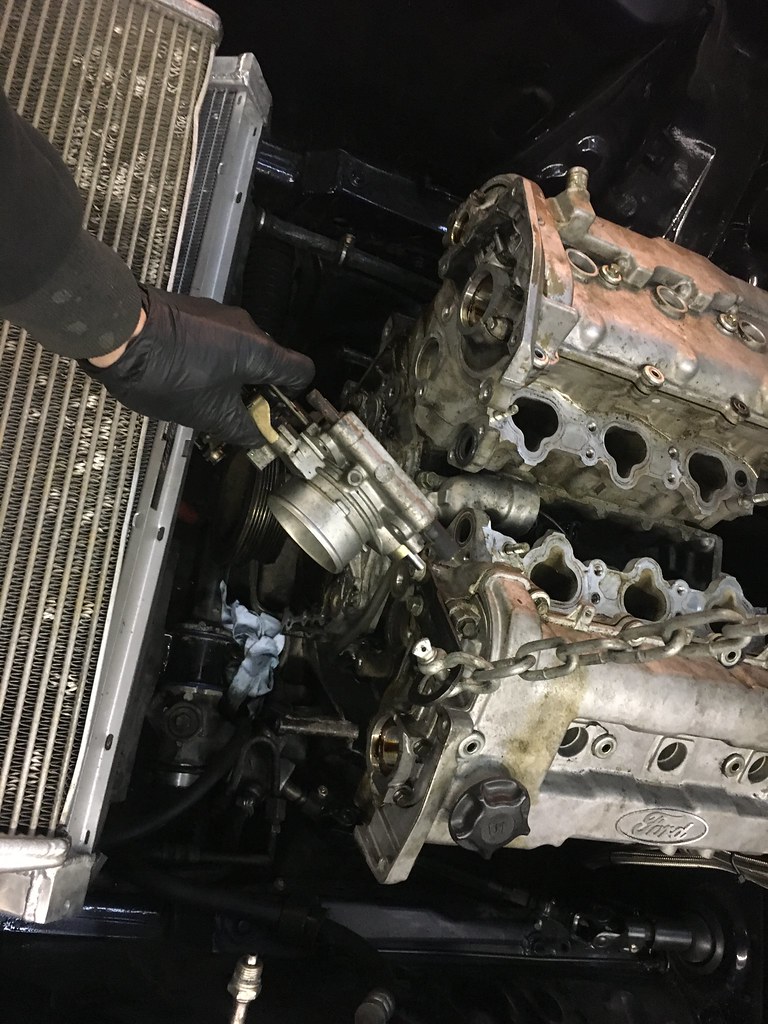
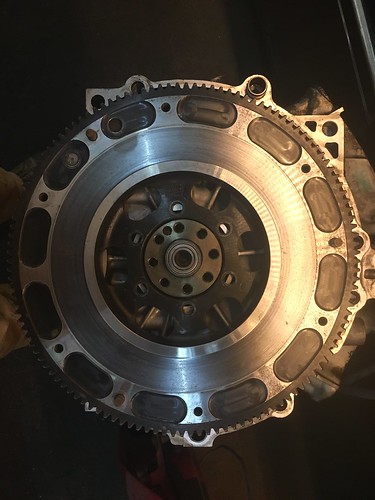
The one bolt holding the flex plate onto the crank stripped, they thankfully didn’t notice or care not sure which. I welded a bigger nut onto it and impacted it off no problem.
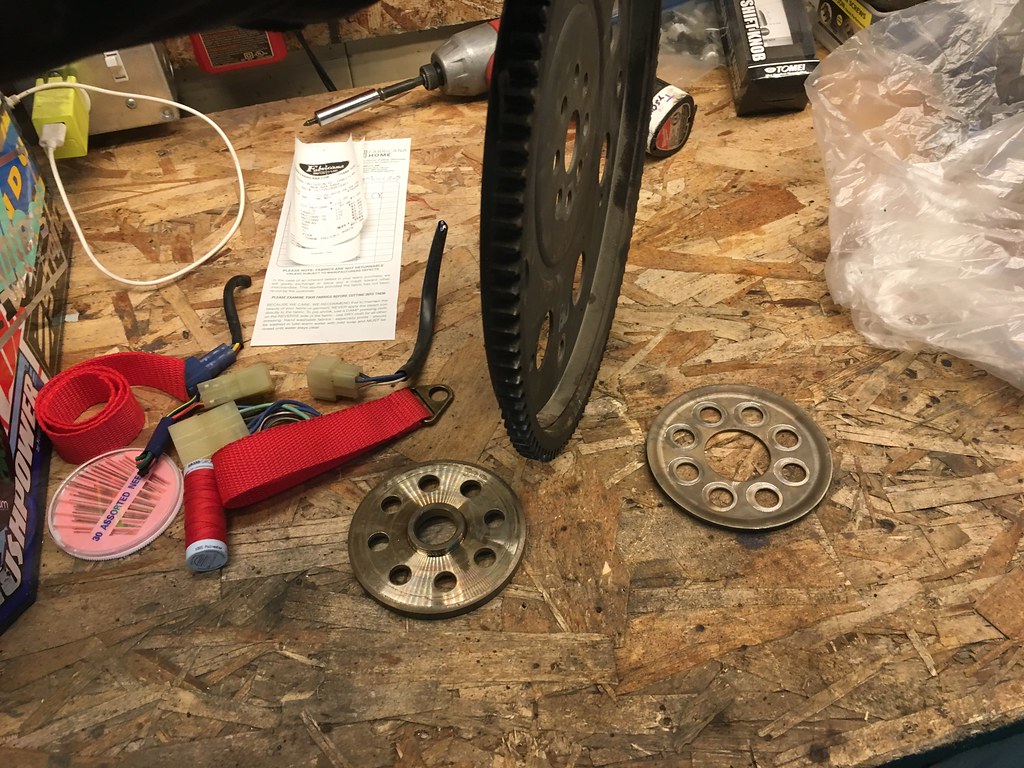
I’ve never seen a flywheel spacer this big on an OEM application before
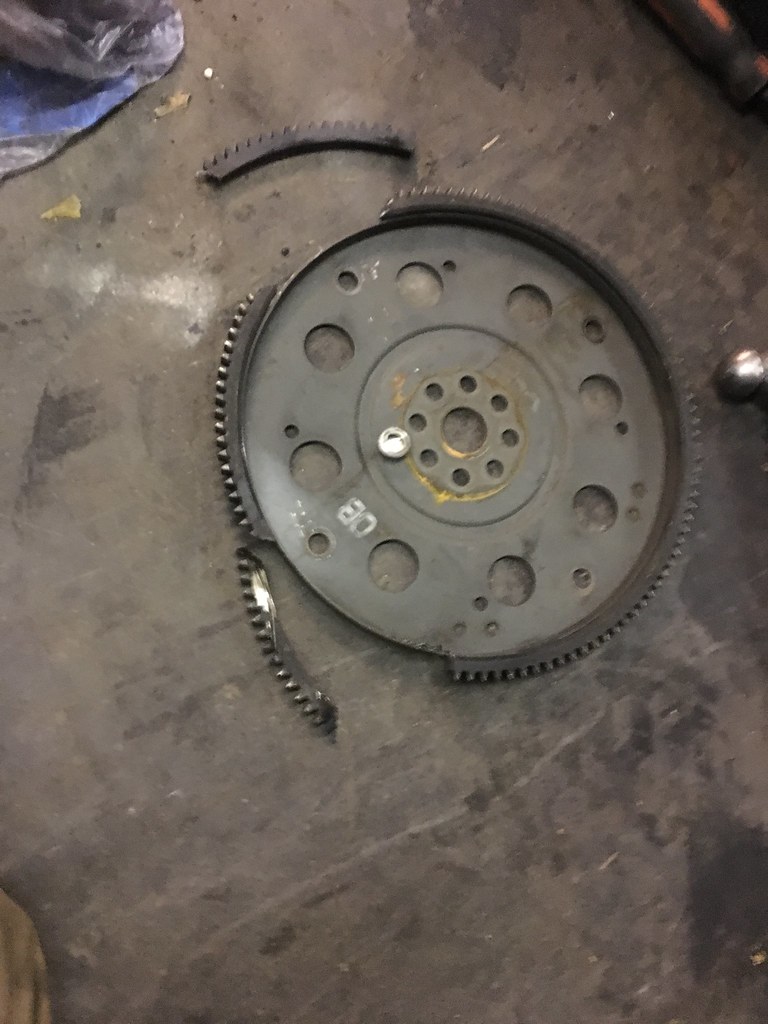
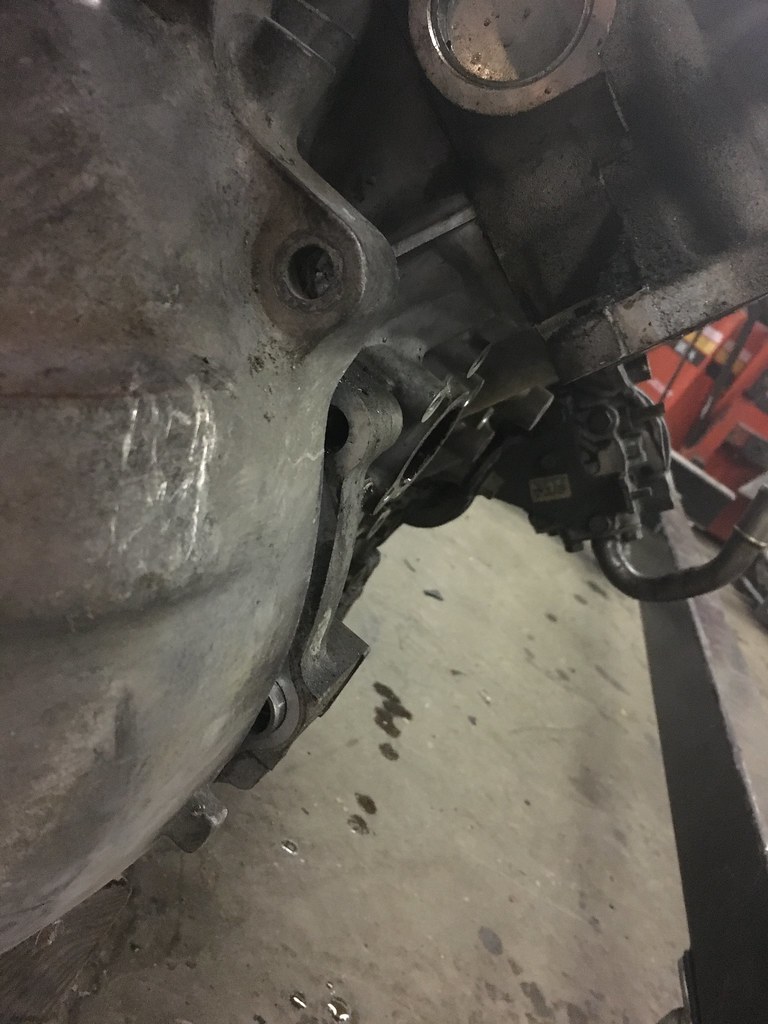
probes engine, well it was a little harder. Had to make some strategic cuts to get a wrench on the torque converter bolts, got that off and the flex plate as well.
So when I first built the 1st V8 car, a 5.0 was not the dream. But it was really cheap and really simple as far as swaps go. Engine came up at a good time and price, same with the swap kit, and it kinda all fell into place perfectly. But when I bought the FC I had a different dream for it. Before I discovered drifting I just liked cars. I had heard about drift, kinda knew what it was but bug didn’t bite me yet. And what kind of cars does a poor fresh out of high school kid play with? before you say Honda’s, my answer is just FWD econoboxes. I had a protege 5 which I started by doing little stuff, then bought coil overs, spent a lot of time on Mazdas247 and learned to most of it myself, with help here and there from my dad or the techs at Kal tire where I worked at the time.
Man I loved this car. Was pretty reliable, until I really got into messing with it then it left me stranded once, but I learned so much from doing it. I switched jobs from Kal tire to Futureshop doing 12V installs, so I now had access to a lot of wiring things. Sometimes I still miss that job I just wish it paid more.
Hoping these photos work as they are on Photobucket, which has single handedly ruined forums. I see Flickr is going to be updating to a similar system, you have to pay a monthly if you have over 1000 photos (i have 1700 lol) so looks like I may have to open a 2nd account.
But anyway, this is my roots. I swapped a KLDE from a 96 cali spec Ford probe I bought for dirt cheap. Threw in a clutch, light flywheel, eBay headers and painted a bunch of stuff. Sounded lovely, had a ton of midrange torque, still got decent fuel economy and did a 15.6 (I thinnnnnk, been years) in the 1/4 mile. But then I found drifting and bought an FC and its been downhill from there. My dream was to combine the two but at the time there was no rwd swaps completed, there was no transmission options available as theres no factory trans that bolts up. The intake goes through the firewall, exhaust doesn’t fit, coolant piping is fwd biased, the oil pan is front sump. There was just too much fabrication that I couldn’t do 6 years ago. But I’ve been keeping my eye out for what others have done with these. In the last few years theres been a bunch swapped into miata’s, frankly an ideal car for them, but on that note I think this engine would have been a killer candidate for the FC had it not been for the rotary part of RX7. USDM spec makes 170hp at the flywheel and the JDM makes 200hp, very similar to the 13b-re. There’s a girl in the UK that makes an adapter plate to bolt it onto a stock Miata trans, but this has some really bad compromises such as cutting a large part of the bellhouse to fit a starter adapter. I think I have a better solution to this but we’ll get to that. Since that kit, quite a few miata owners have started building a KL swapped miata, but you still need a custom exhaust, custom or modified intake that may or may not clear the hood, and the usual plumbing and wire that all swaps take. So needless to say not all of them have been completed and the thread on miata.net is a bit cold…. I also have yet to see anyone do this swap into an FC, I’ve seen it talked about but not done. Theres even one in a 944 that Larry Chen found and put on Hoonigans extra.
I have been dreaming of doing this swap for 6 years; planning out how; taking what I’ve learned from other projects and mapping out how to apply it; spending hours comparing pictures and trying to separate folklore from fact (you thought mustang forums were bad for info? LOL) to finally come to the point where I’m ready to start. I planned a lot of things in this chassis to be ideal for this engine swap, and the layout of it I’m planning.
These engines are usually pretty cheap, but at least where I am finding one can be a bit of a challenge. They came in 2nd get Probe GT’s, MX6’s and certain year 626’s and Millenia’s. MX3’s got a K8, which is 85% the same except for the fact its a 1.8L, and 2000+ 626’s got a variant called a KLG4 which has a coil pack instead of a distributor and a few other changes (no not cast cranks, they still all seem to be forged). Every now and then I would search the wrecking yards websites and craigslist and even borrow my wife’s Facebook account to check marketplace to see if there was a steal of a deal on either a running car or a parts car. Well Pick a Part in chilliwack happened to have 2 vehicles in stock with KL V6’s and both of them hadn’t been there long and cherry on top they were having a sale that weekend. Unable to find anyone to go with me I packed up and headed out solo prepared for a long day.
One engine was in a 97 probe, other was in a 97 626. I scoped both of them out before starting on one, the probe had a bunch of newer parts, was cleaner and looked better maintained except for the timing cover someone broke. So pulled the engine on it in about an hour and a half, remembering all the past had taught me lol. Couldn’t get the torque converter bolts though, the crank would spin but only like 20 degrees. Thought “maybe its the park pin or something” so pulled apart what I could get off the trans, still nothing. Eventually got annoyed and set the thing on the ground, flipped it over and pulled the pan to find a snapped rod. Great. I was hoping to get 2 half decent engines out of it but I guess this ones a mock block and hopefully the heads are still good. Went over to the 626 and did the same, but since I had just practiced this engine was out in like 35 min. Also some one had come before me that day and helped, lol they also took the distributor and wires out of it which I have a feeling was the very reason that car was there to begin with. For some reason people always pull the plugs and then leave the hood off so water gets in, the probe engine this was the case but the 626 the hood was left down so there was no water in it. I checked that it rotated before pulling it this time and found car had some signs it was sitting a while before it was scrapped, again leading me to believe the disty failed (ignitor’s are super common to fail on these). Pulled it out got the trans off, figured out a way to at least lose the trans from the probe engine and keep the torque converter, and then pulled a car with 2 engines on it to the front. Everyone was a comedian lol “oh did you get enough?” “can you carry all that” etc. When I got there I asked the guy what I needed to take off to count for the sale they were having, he was pretty vague and said they were leniant. The different guy I talked to gave me conflicting answered but basically said “only the heads and oil pan”. So rolled it back out, lifted them with the ghetto engine pullers they have and stripped almost all of it off both engines, left a few sensors and chose to leave the alt and power steering pump on the probes engine. Wheeled it up again, dealt with a 3rd person and she asked far less questions and after like 8 hours I was loading up and heading home, sweaty, covered in filth and with a huge smile on my face.
Unloaded, headed to the Good Vibes christmas dinner fundraiser. Came back to it a few nights later and started to deal with what I had.
The one bolt holding the flex plate onto the crank stripped, they thankfully didn’t notice or care not sure which. I welded a bigger nut onto it and impacted it off no problem.
I’ve never seen a flywheel spacer this big on an OEM application before
probes engine, well it was a little harder. Had to make some strategic cuts to get a wrench on the torque converter bolts, got that off and the flex plate as well.
12-22-18, 02:52 PM
#210
Senior Member
Thread Starter

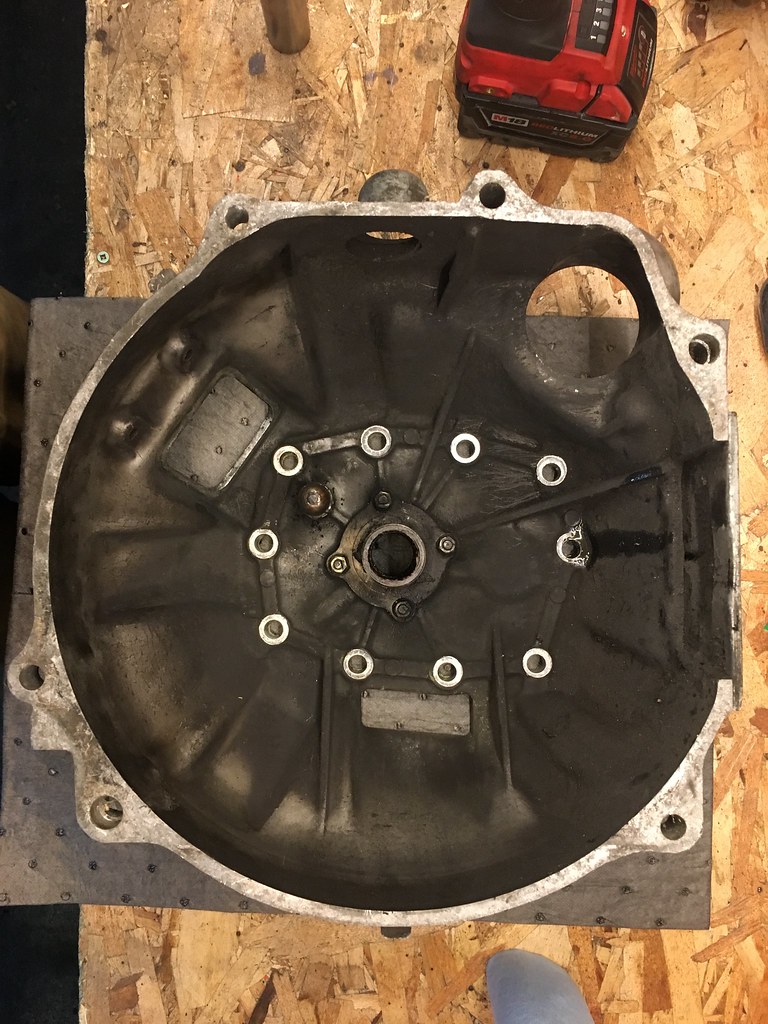
Heres the KLDE bell house pattern that I will need to adapt to this:
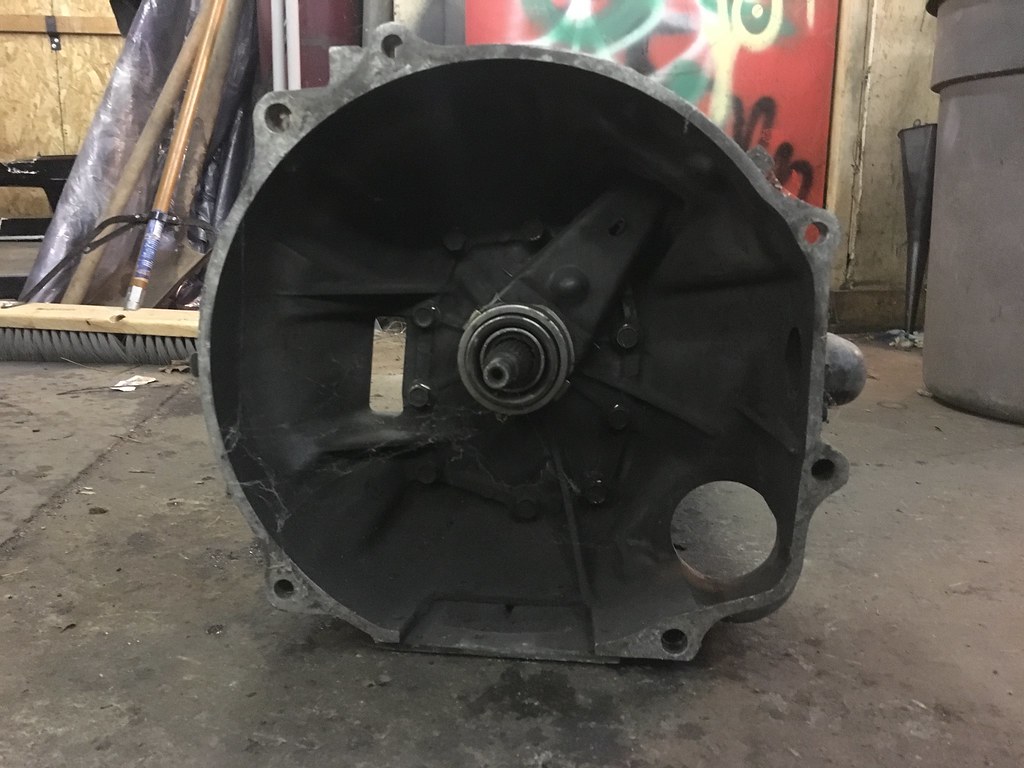
A t2 transmission that I’ve had on a shelf for about a year and a half, came up for a good deal and I jumped on it knowing this was the plan. There was a guy also in the UK that swapped a KL into his 3rd get FD rx7 (he called it project casper), he used the stock trans and made an adapter plate and I think this is the logical trans choice. They are known to handle 500 ish whp on rx7’s, and stay fairly strong even through clutch kicking really aggressive clutches that rotaries tend to run. Aaron Parker makes me question this as I think he went through 7 on his pro-am build before going dog box, but I think he’s past 500 whp. But it bolts into my car (thats a lie as my car is an auto tho) I already have a driveshaft for it and its supposed to fit in the tunnel etc. Not sure where exactly it will sit as an eccentric shaft sits higher than a crank shaft does but all in good time.

preliminary mockup looks good, none of the bolt holes look like they line up lol, which means no conflicts on the adapter.
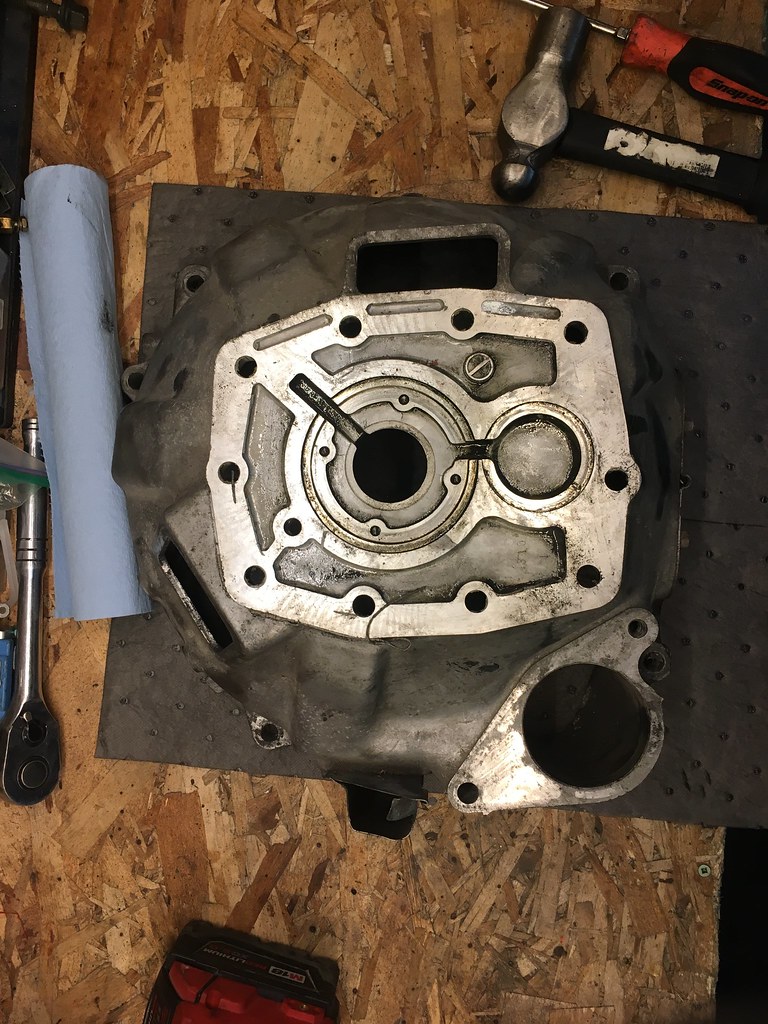
This is my proposed solution for the miata guys, 13b patterns are all the same, and the FC N/a and miata trans are the same to my knowledge except the bellhouse. They are integral bellhouses so you’ll have to swap the front halves but then you have a trans with the starter already on the back in basically the same place as Crapenginfering’s kit. While I’m not sure about the input shaft, alternatively you could swap the miata trans tail onto a rx7 transmission.
/that
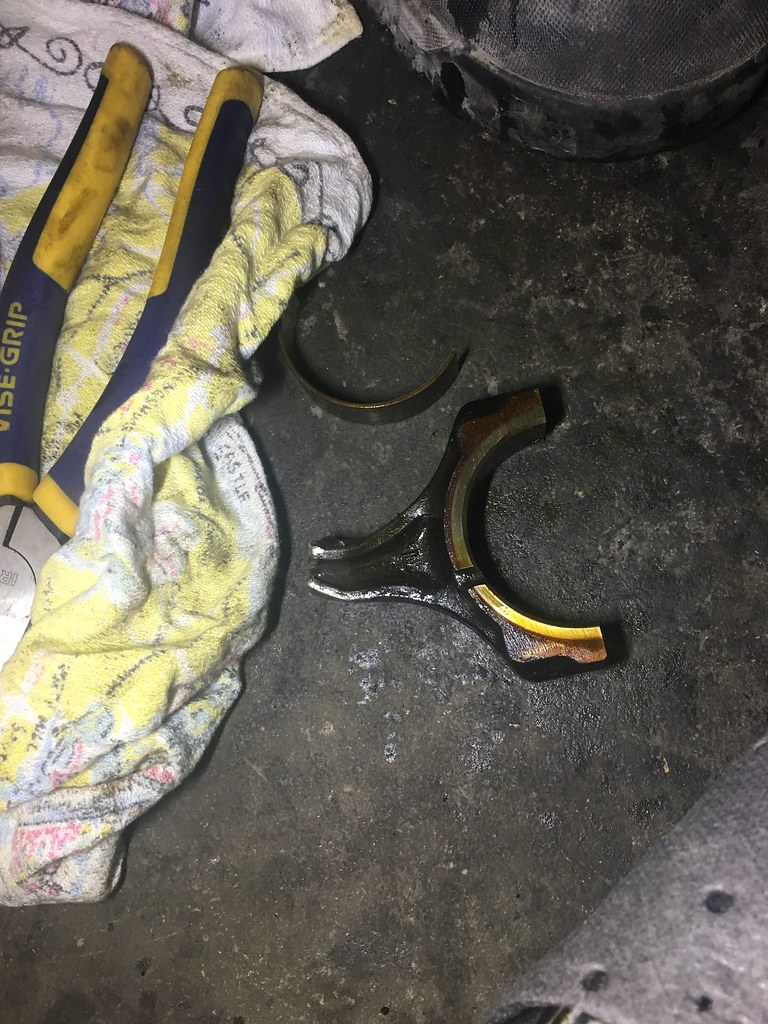
Found the snapped rod, usually #6 is the rod bearing that fails on these engines, but this was #1. They are known for having oiling issues especially in autoX where the pan can risk the pick up oil starving. High Rpm’s are also frowned upon, it seems crossing the 7500 redline is dangerous. The theory is oil pump cavitation, I’m going to try and use a few trick Schuuman oil pumps came up with, but theres a company called Boundary that makes a billet oil pump gear set which may also solve some of the issue. Id like to be comfortable sitting on limiter at 8k rpm, as thats what drifting will do to it.
12-22-18, 02:53 PM
#211
Senior Member
Thread Starter
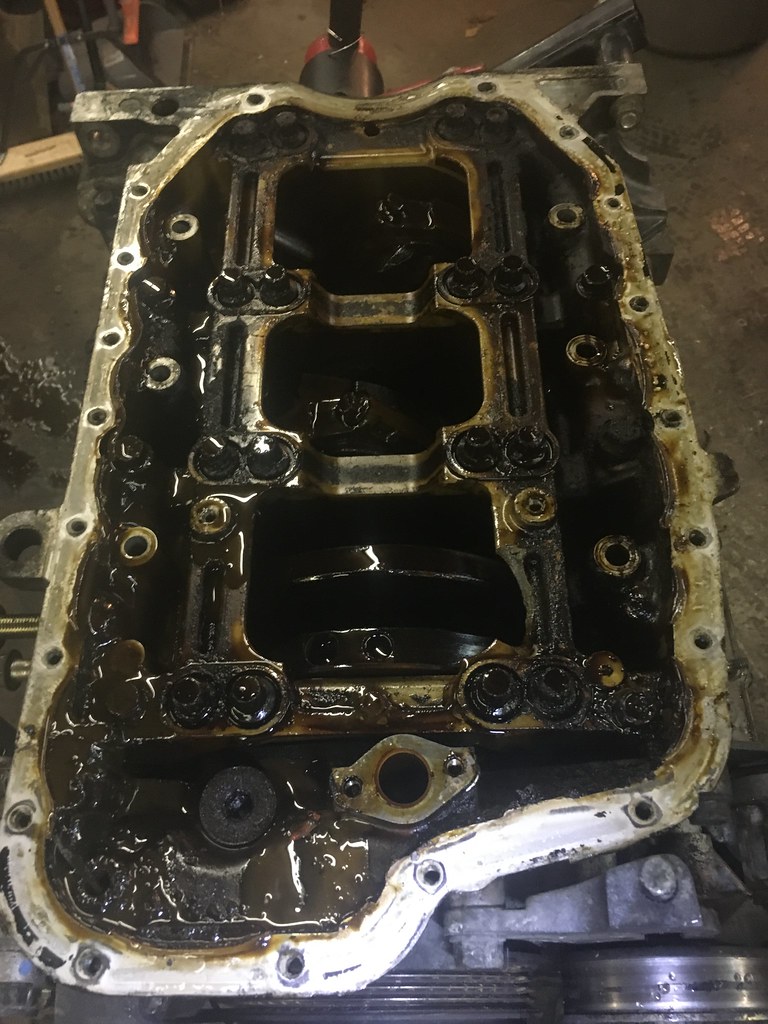
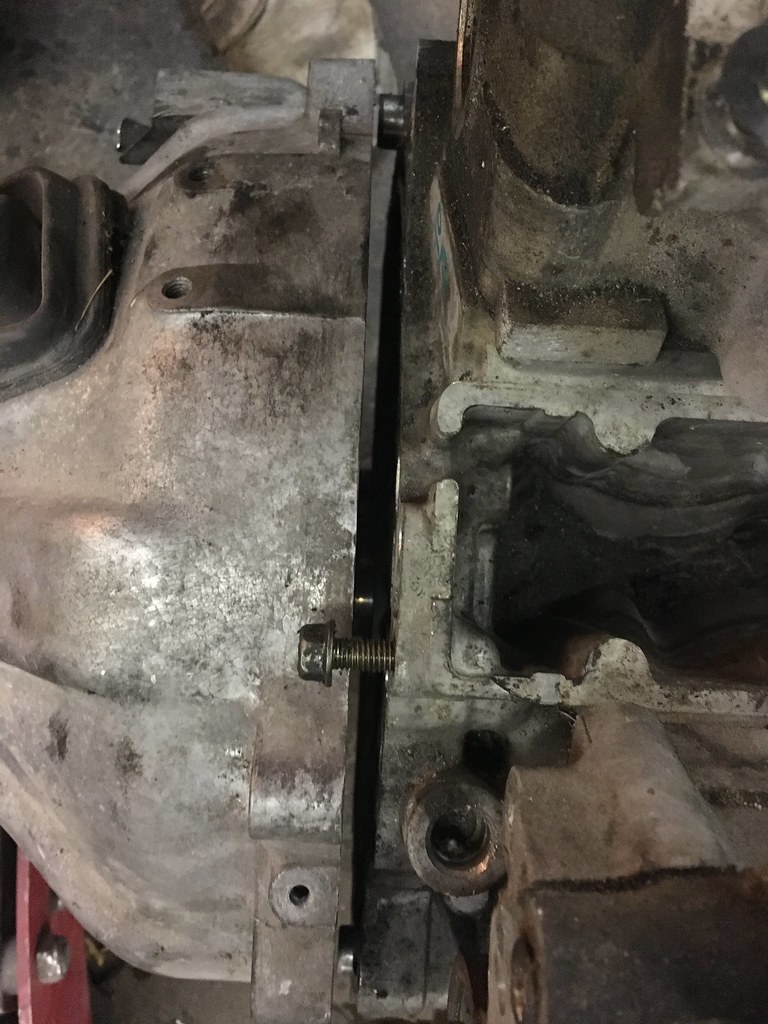
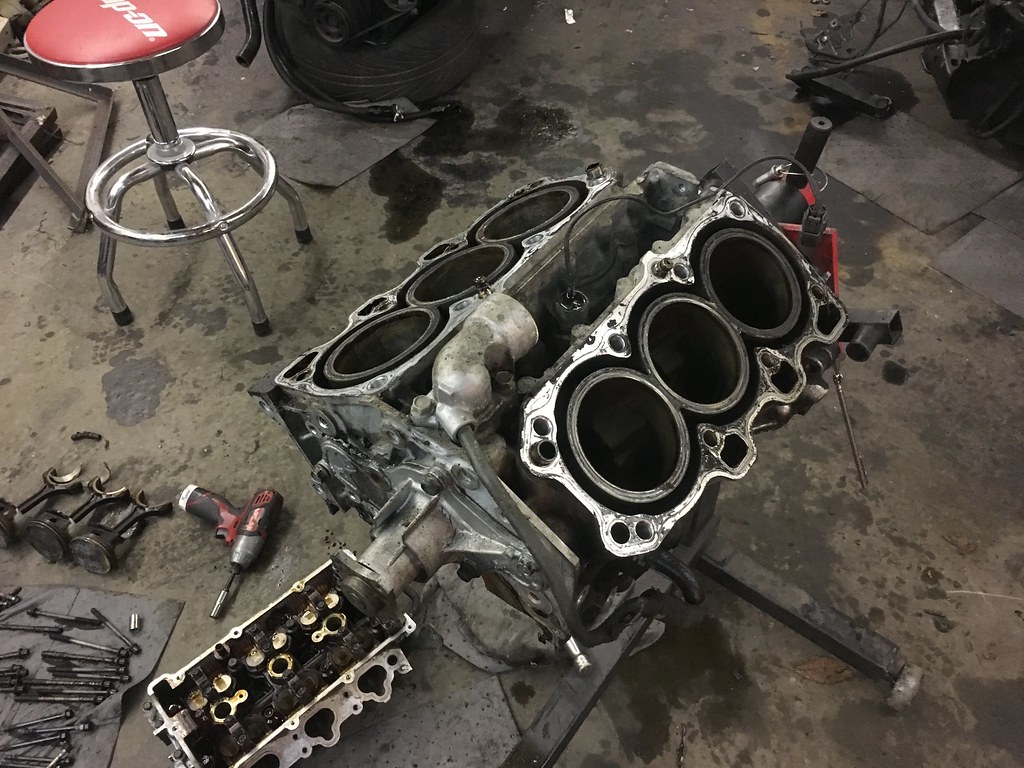
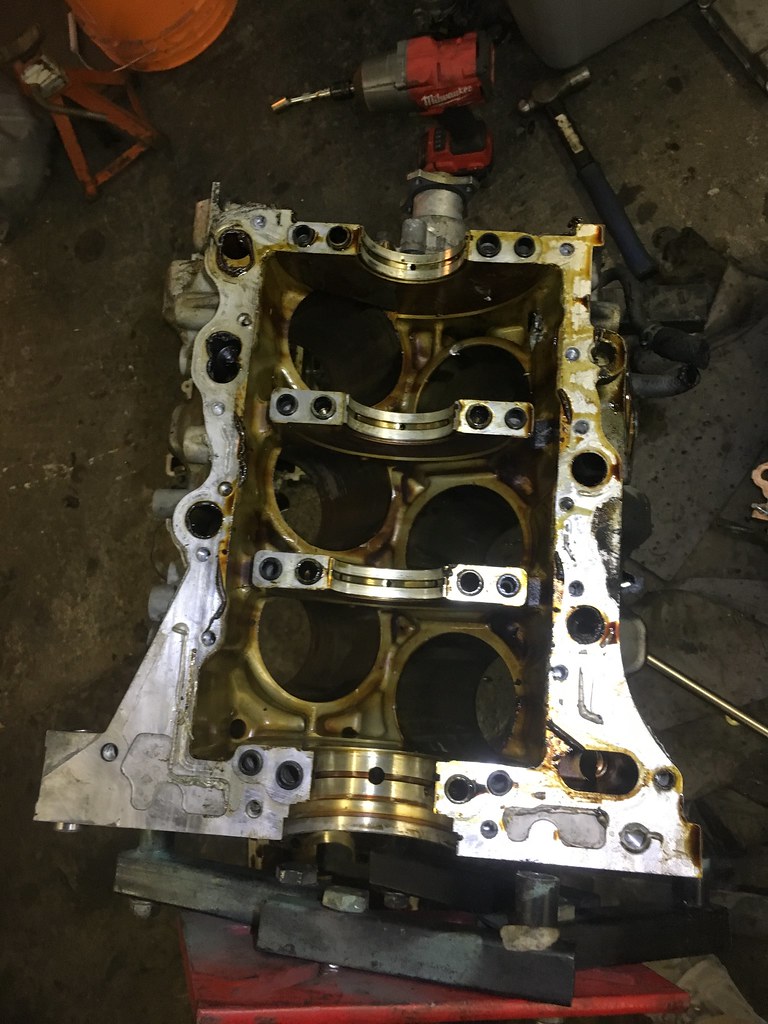
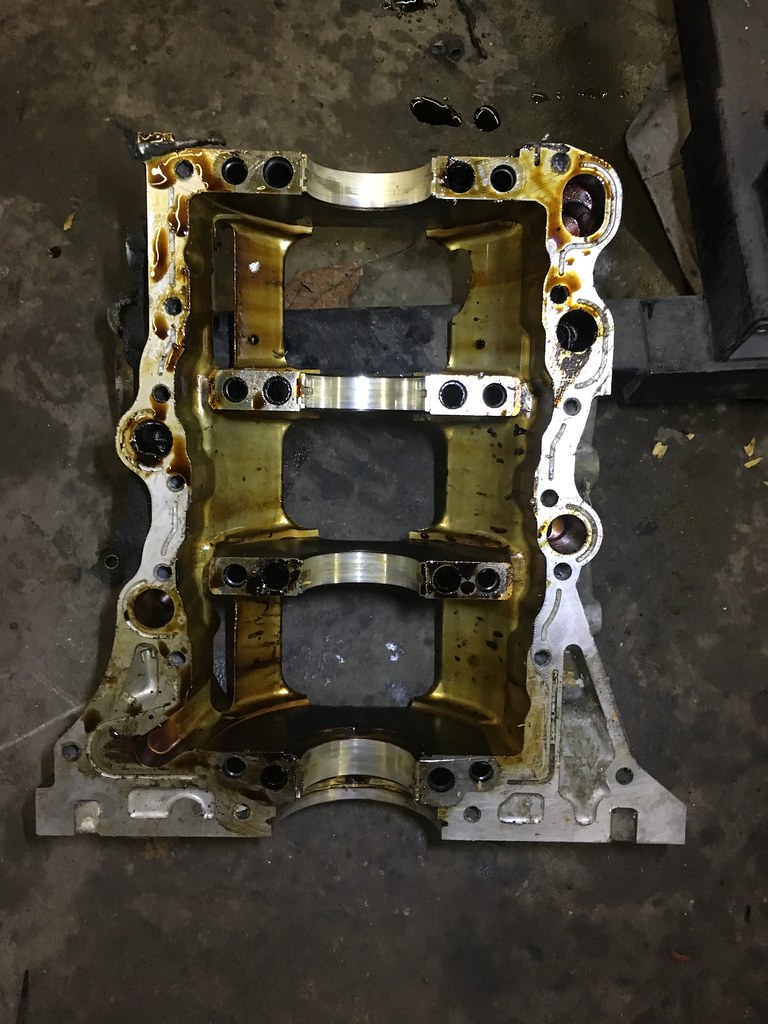
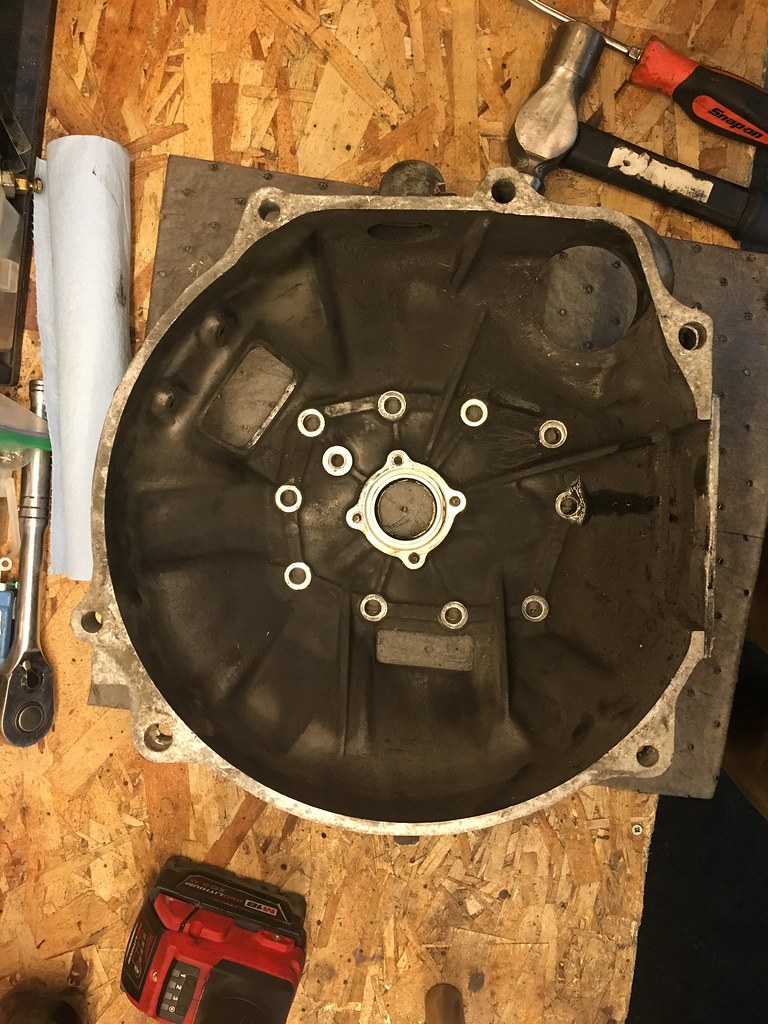
not the worst I’ve seen, but not that clean either. These engines have a lot of clever engineering going for them (I feel like I’ve down sold them the whole time) and one of these things is a split block. Theres a few SAE papers published on the KL and one of the things they said was they experimented with block materials and main cap design and found that a split block like this was the best at subduing resonance and maintaining bore alignment. The rumour is that a designer from Porsche was snatched for help developing this engine, and this feels like a trait inspired by Porsche (yeah I guess their flat engines they really don’t have a choice).

there you is. somehow didn’t split or even penetrate the block which is how I missed it in the yard, but the timing cover broken to check if the belt had snapped should have been a tip. I guess the mechanic who worked on it didnt know these are non interference engines which happens to be another awesome trait about them.

was a bit tricky and require some help to get this apart, but not like I can use the block ever again.
I also learned that you cannot install the pistons from the bottom
with that sitting on a stand spinning freely again I took the 626 engine and shrink wrapped it, built a little cart and slid it under my shelves. Long term plan for this one is to build it up as a built motor. The rods are the weak link in these, after 300-350hp they bend. The easiest upgrade is Millenia S rods which are pretty hard to come by and still OEM spec I beams. Before Probetalk died I found that a few guys were using 347 stroker rods and custom pistons, but i’ll cover that later.
stripped the probe engine right down

I’m taking 1000 pics of everything as it gives me reference for research later. Garage is no longer 2 steps outside my door so I have to plan ahead as much as possible
12-22-18, 02:54 PM
#212
Senior Member
Thread Starter

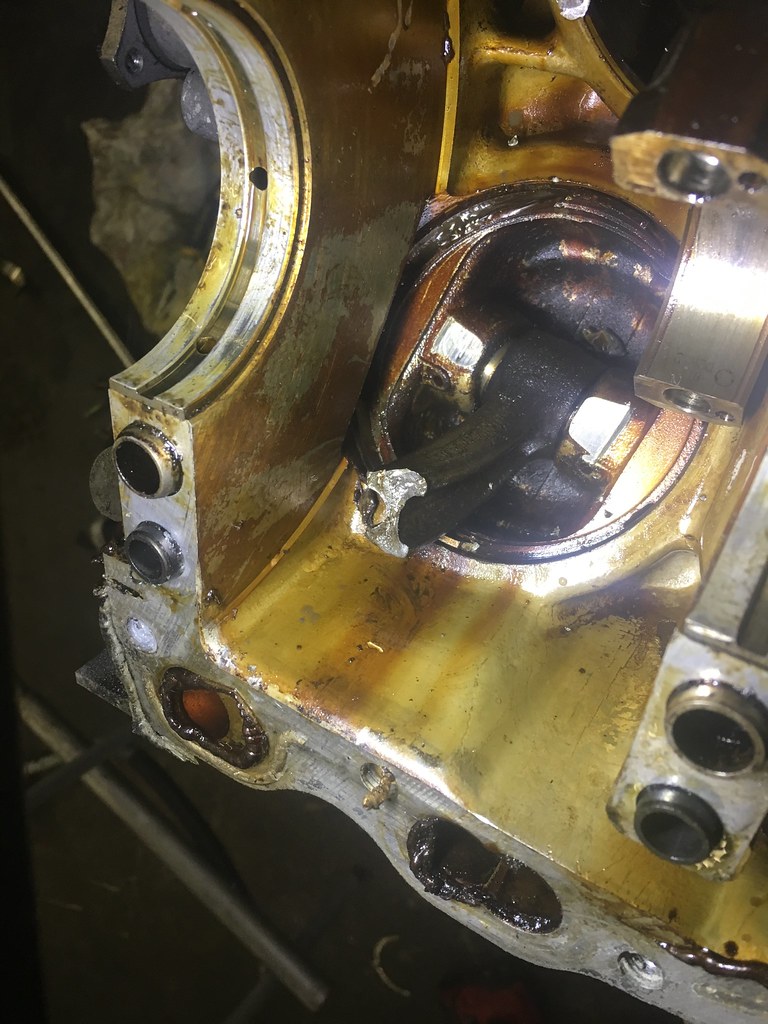
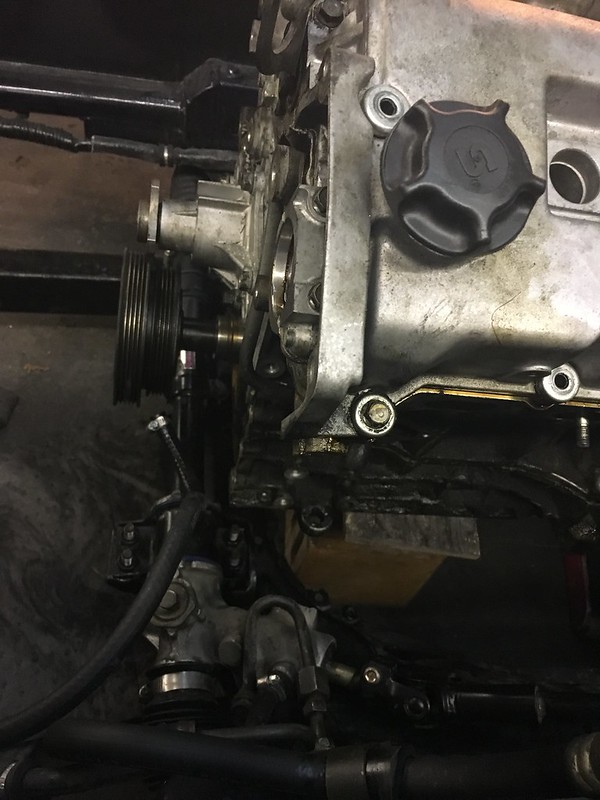
The rear bank all 3 rods were bent/broke, head gaskets looked ok so I’m not sure how this happened. Kinda seems like water got in somehow

now I also found a great deal on a T2 clutch, thanks again Ramsay.
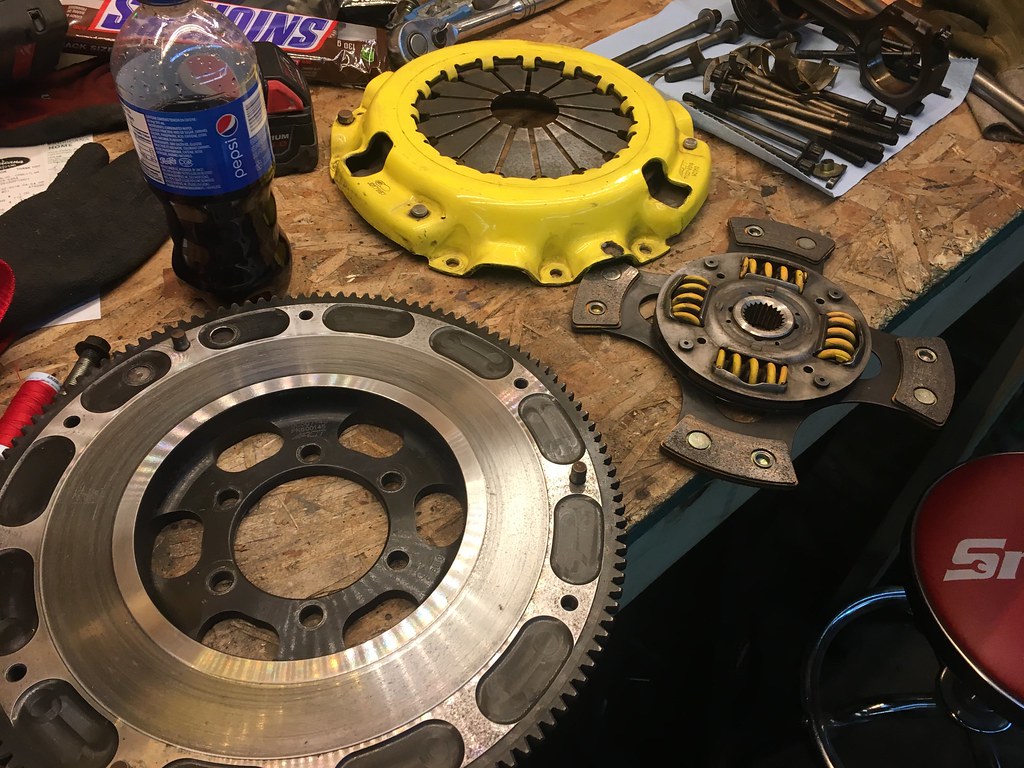
Lightweight flywheels on rx7’s are 0 balanced and bolt onto an auto rx7 counterweight that then bolts onto the eccentric shaft with a single huge 250ft lb torque spec nut. The project casper built did the same thing I’m going to, he built an adapter that bolts the v6 crank to the rx7 lightweight flywheel, the rx7 counterweight pattern is much bigger than the KL pattern so it isn’t complicated. Pilot bearing is easy this way, I see it as safe so long as I use a similar grade material to what the crank shaft is made of and good hardware. This is something I’ll have to outsource though, as I don’t have a lathe.
12-22-18, 02:54 PM
#213
Senior Member
Thread Starter

I’m going back and forth on what to do for the bell house though. Adapter would be easiest but they eat up precious space in the engine bay, and they use cone allen head bolts which I don’t like that much. Alternative options are making a new bell house, something ive always wanted to try, even though it kinda seems more complex to do than an adapter. Keeping the centre true through both patterns and during welding might be a task. Neil at SCG is helping with the CAD part and he doesn’t think replicating the back of the bellhouse that centres the input shaft and has some oil passages would be hard, but I think it will and it’ll be hard to know if you’re bang on until it eats transmissions over time or something. Currently thinking of cutting/milling the bell down to a flange that I could just bolt a plate to and that would be the transmission side of the bell. Serial Nine’s CD-Pro kit that adapts a CD009 to a JZ is very similar to what I’m thinking, I just don’t want to bankroll casting a bellhouse for just me as I’m sure selling them would be a waste of time.
moving onto the next problem to solve, the intake manifold. Stock ones put the throttle body through the firewall, which is a shame because the stock manifold is an engineering beaut. That SAE paper also outlines how they experimented with runner length and what it does to the power band. The intake has 2 sets of butterflies that change the runner length while using the plenum volume to do it and provide really good torque from low down to the rpm where the manifold chokes the flow. Back when I had my probege I didnt have a working tach and often hit limiter, the power never dropped off with the stock rpm limit and I credit this to the headers/exhaust I ran. I was worried that straying from the stock manifold would ruin the engines power curves, which is one of my favourite parts of it. But the more reading I did into manifold design, the resonance properties that make it work are built on acoustic waves and that all changes when air density changes. So as soon as one adds forced induction basically all of that engineering is thrown out and your power adder decides power curve shape. I also really like the look of Itb’s and almost want to make it a high comp n/a for that reason, or boost it through itb’s but then they need a plenum and that kills the look. High comp N/A sounds like a lot of work for little payoff too, as these engines are 9.2:1 USDM (KLDE) and the JDM variant is 10:1 (KLZE). Best N/A I know of is a guy in Puerto Rico with a 323 hatch, I think his makes 270whp and he’s done a lot to get there. A turbo makes great noises and just is where I want to go.


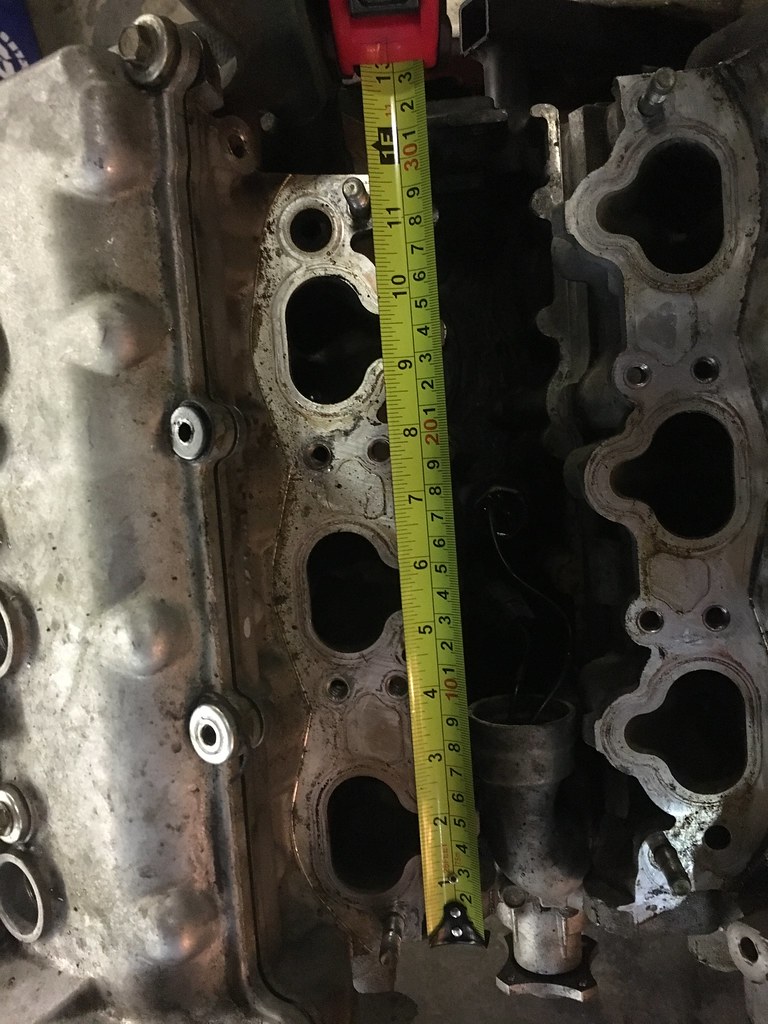
spent a bunch of time studying the LS engines intake, also a clever mix of runner and plenum. 3UZ does something similar and I kinda like the look of those, provided I have the hood clearance I may try something similar.
the stagger of the intake ports makes 180* bends that kinda blend into the plenum look very possible.
12-22-18, 02:57 PM
#214
Senior Member
Thread Starter

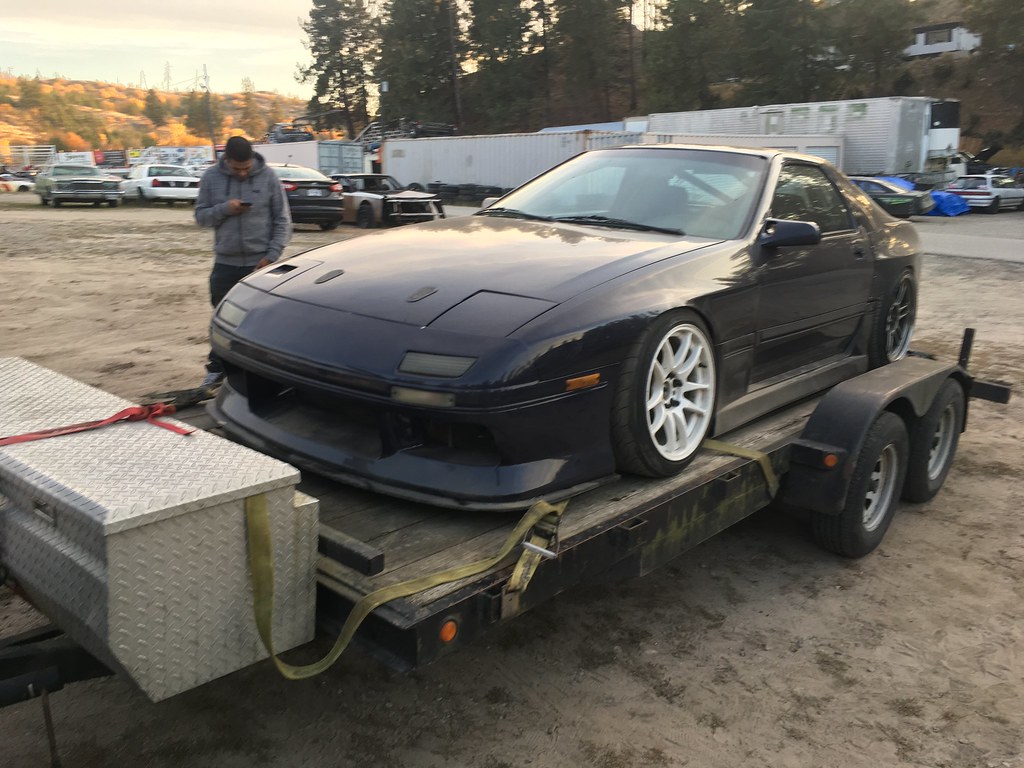
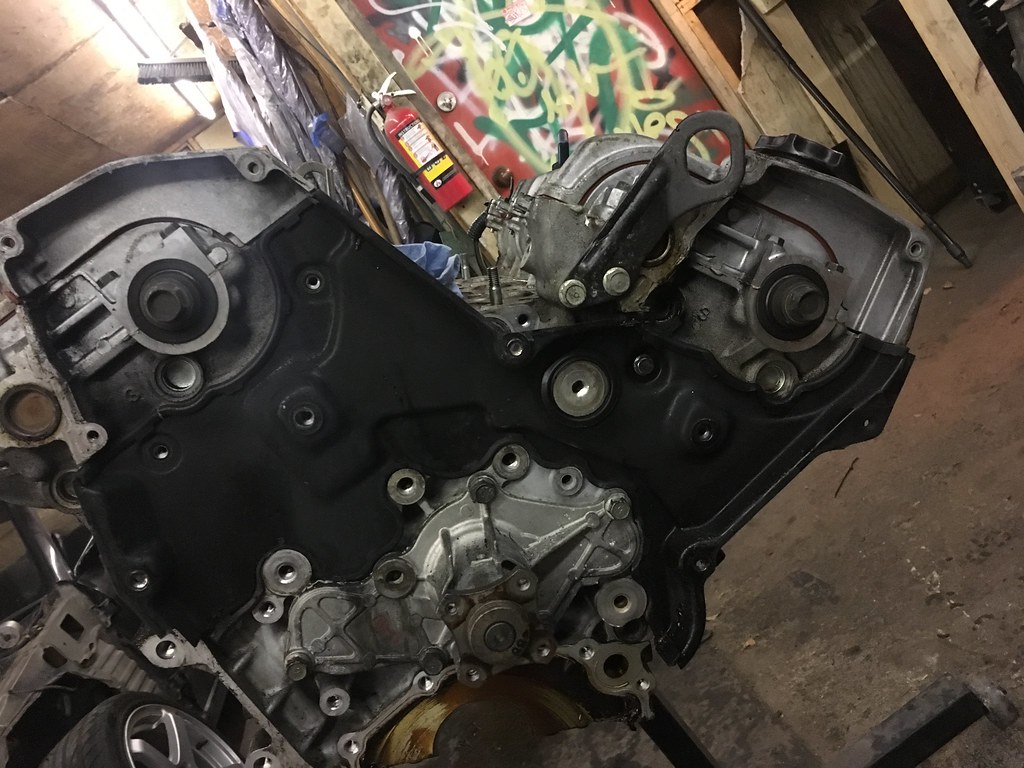
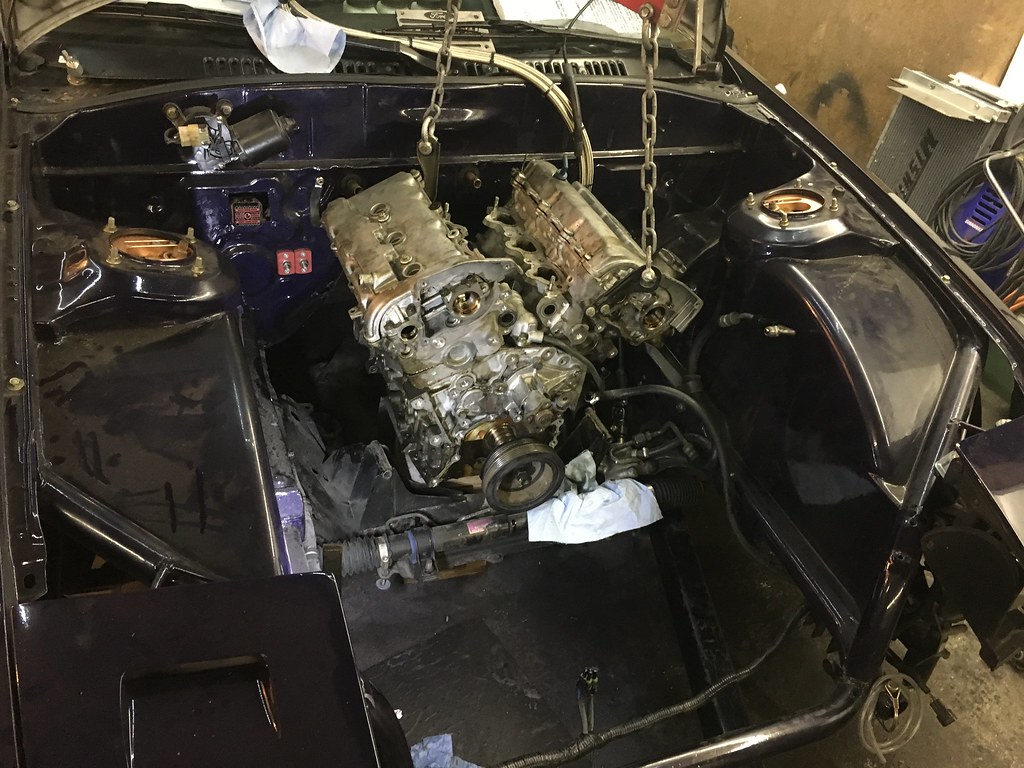
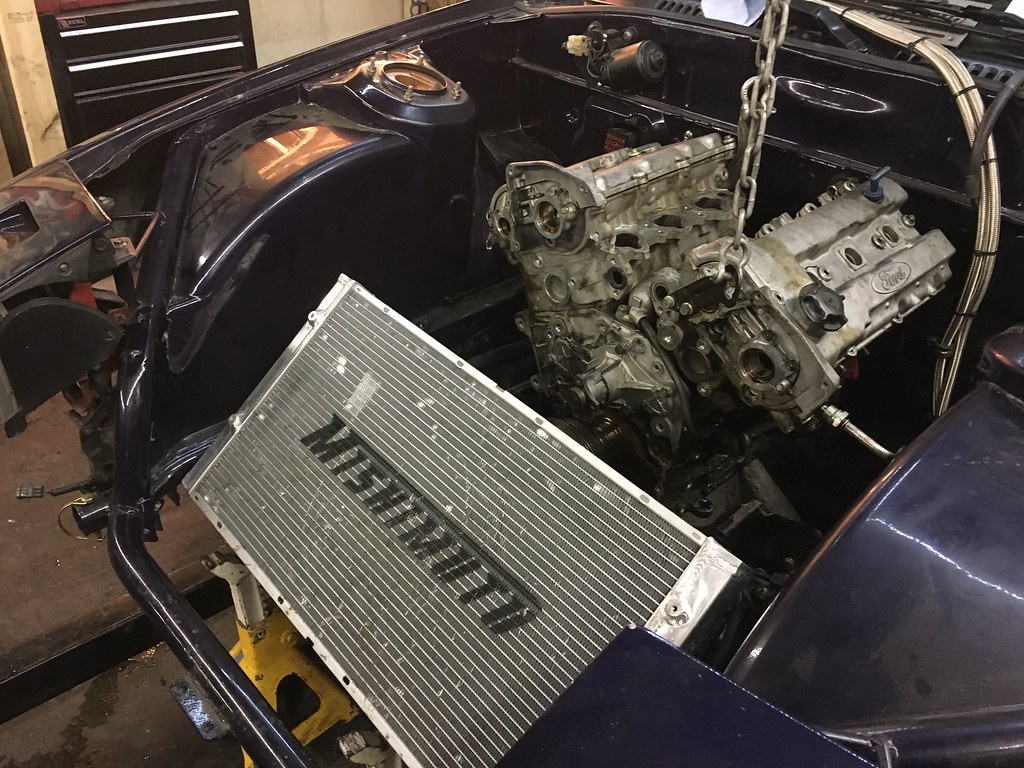
pulled the v8, bought a dolly and rolled it into the corner for a while. This swap is going to take a while, the V8 will be in a time out until spring where it will go back in the car so I can still drift in 2019. I will probably be selling it to pay for some of the bigger ticket items of the v6 swap.
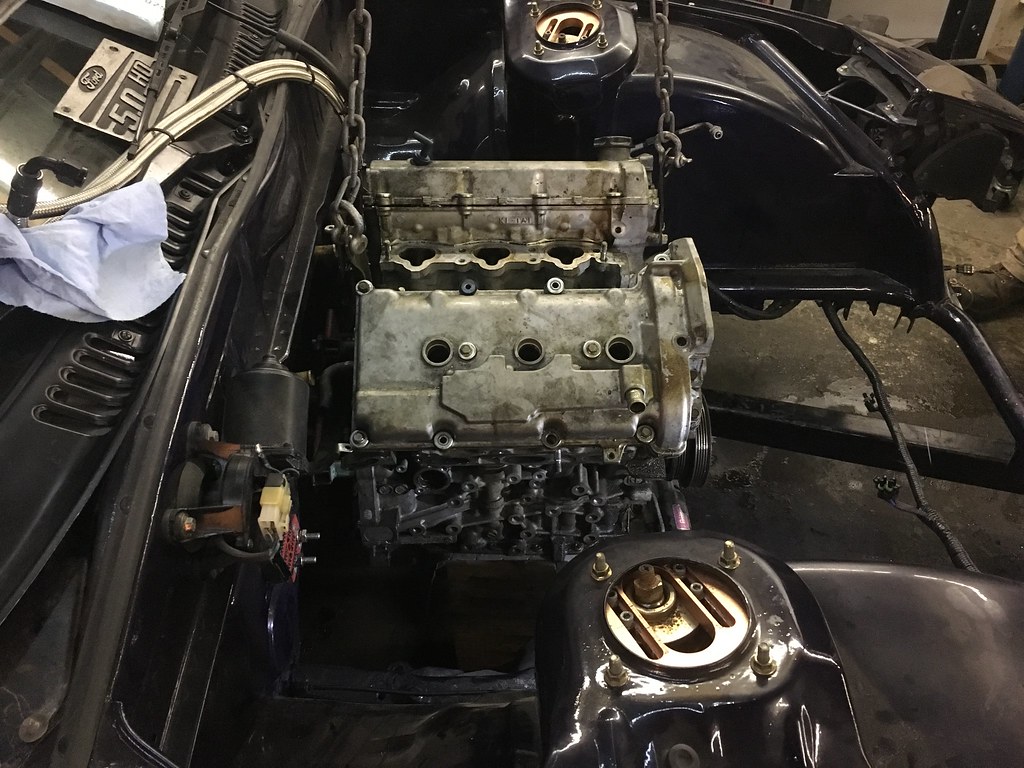
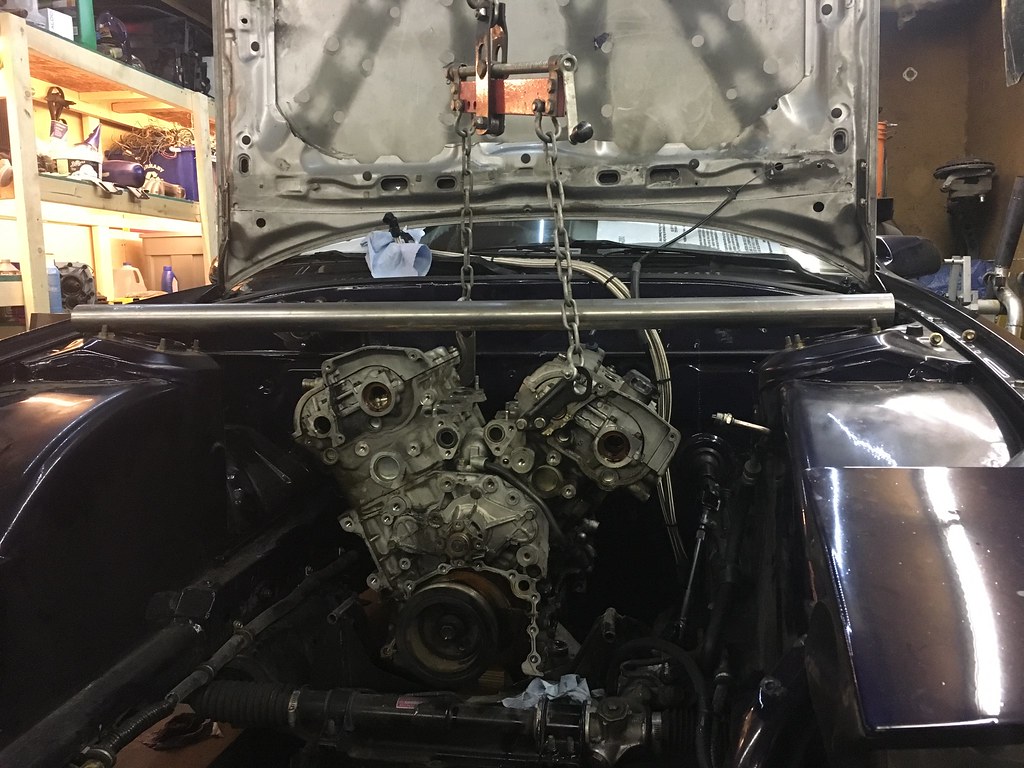
so lets see what we’re dealing with for room. Cannot express how excited I was to actually do this after so long thinking and speculating.

[img[https://farm5.staticflickr.com/4828/45677880874_70b06fd297_b.jpg[/img]
now obviously this is a very rough idea, the trans isn’t fit and I don’t know for sure where it’ll end up. But everything looks really good, cylinder 1 is inline with the towers which I think still counts as a front mid engine.
hood clearance is muuuuch better than the 5.0.
for comparison heres a similar photo from when I first mocked up the v8 in the old car, keep in mind thats without the distributor.
12-22-18, 02:58 PM
#215
Senior Member
Thread Starter
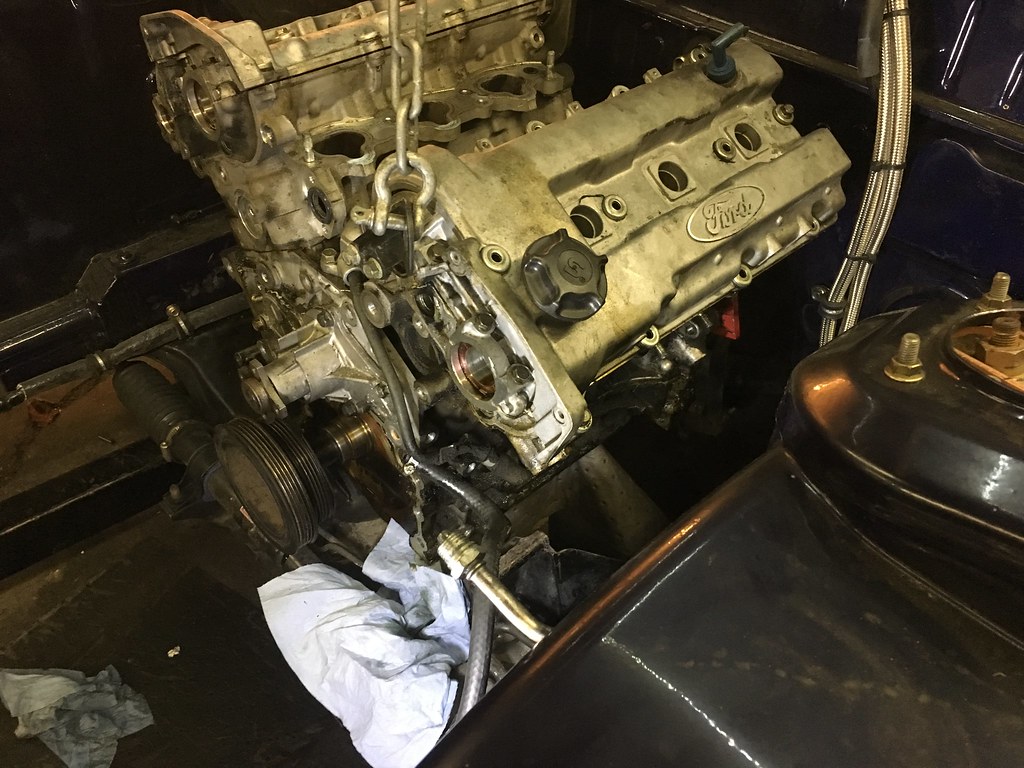
again rough idea because I know theres more room than this because the hood kinda curves over the middle
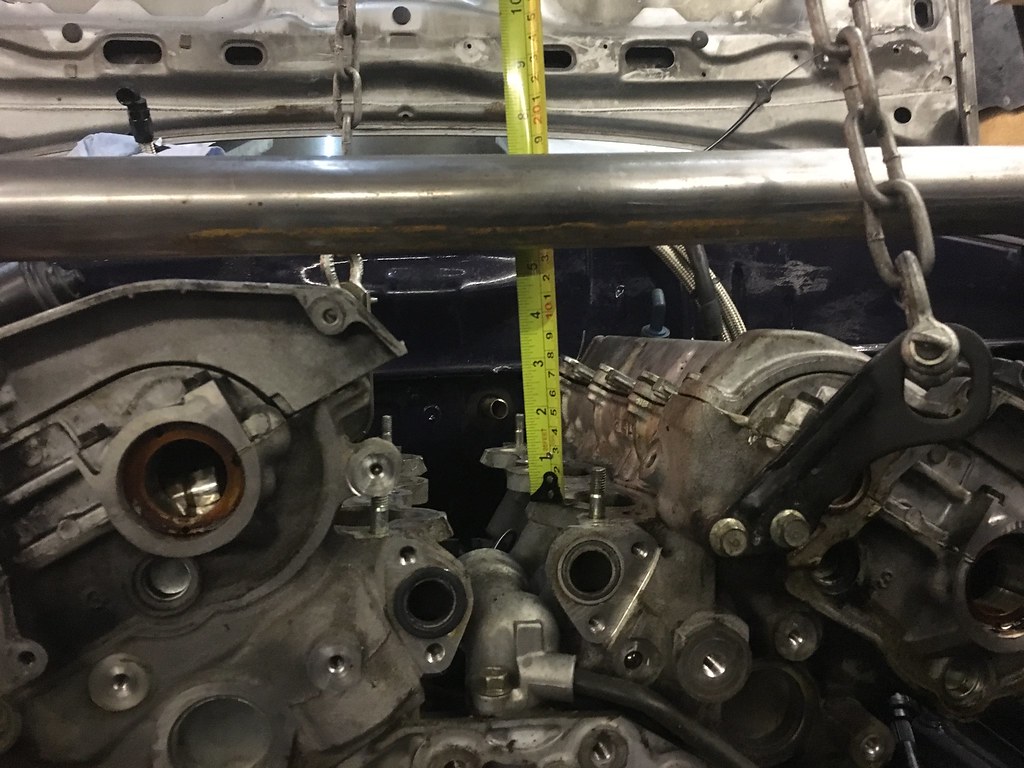
was hoping the crank pulley would end up behind the steering rack, but it happens to be right on top of it. I still have plenty of room for an oil pan though, because the stock KL is a front sump I will have to remake the pickup and pan.
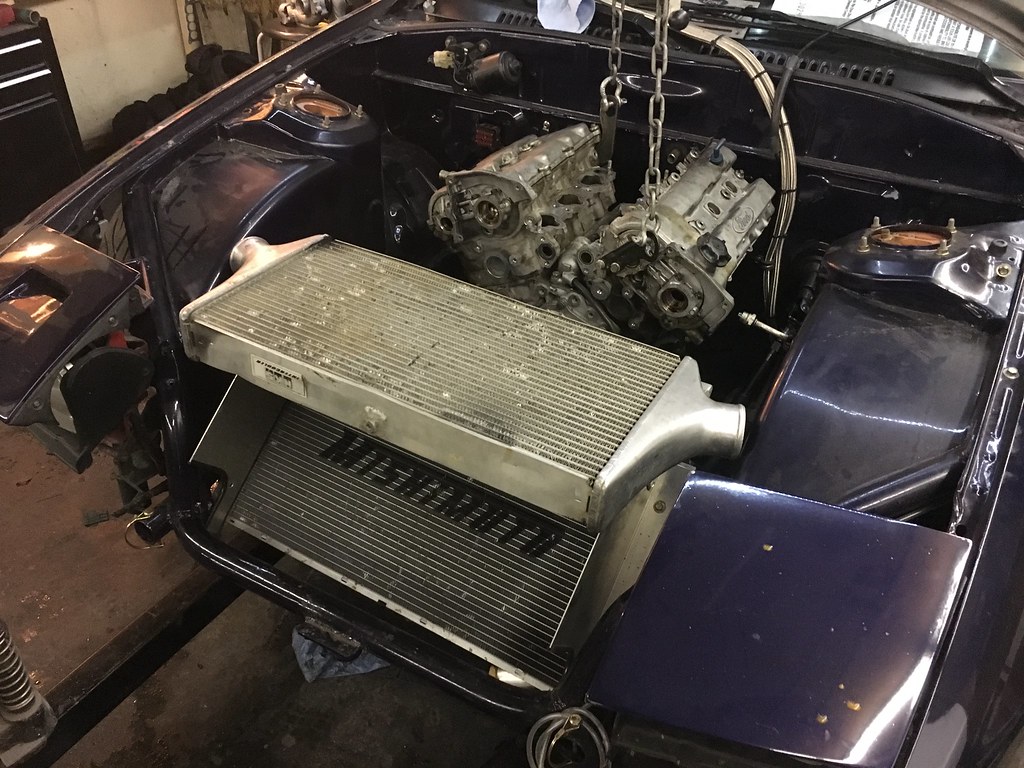
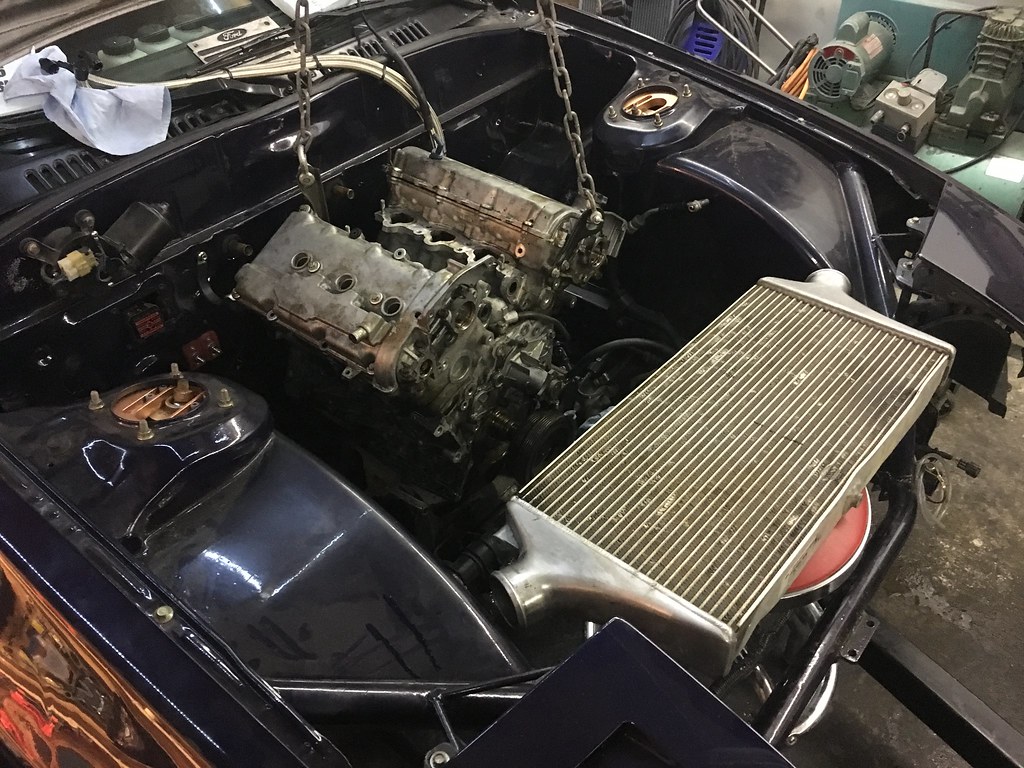
I’ve definitely already alluded to the fact I want to turbo this swap, and with so much room for activities I’m thinking V mount. It feels like a classic rx7 thing and I can’t really get a clear idea if they work better or not but guys drift with them successfully so I guess ill make it work lol. That intercooler is kinda big but as i’m seeing with Kris’ car I’m thinking that actually might be better.
the piping gonna be really short, and yes while larger intercoolers hold more air, take longer to fill and introduce lag I think the benefit of keeping the charge air cooler/denser kinda makes it worth it. Kris’ car has a high mount intercooler and I think airflow is his problem but his core heat soaks and then his ECU dials back power and knock begins to happen. I plan to do a plate to separate the intercooler and the rad, should keep heat soak down when sitting. This intercooler is a damaged one I had sitting around, kinda a shame as it was a nice HKS core but its a bit old and corroded anyway.
12-22-18, 03:00 PM
#216
Senior Member
Thread Starter
I’ve gone back and forth a lot on single or twin turbos. I’m going to try and talk to our local turbo wizard and hear his thoughts but, I think that the lesser of 2 evils is shorter hot side piping vs slightly longer cold side. I’m thinking 2 really short log style -ish manifolds with a turbo on each bank should spool the best, and while having 2 turbos means that the cold side will be a bit longer so they can meet at the intercooler inlet. Twin turbo also just sounds cool so theres that.
I have mocked it up with the old civic turbo from the stag build, while that K04 has a long compressor housing it does have plenty of room on both sides for the turbo, manifold and engine mount. I currently have two 2.5” exhaust tubes meeting a 3” with the V8 so I think keeping that is ideal.
I’m undecided what turbos to run though, with so many parts of this build being experimental I am game to buy some cheap or used turbos and see the results before going another step ahead. I will likely be taking the long route on this swap, I enjoy building cars and learning the why and the how along the way as opposed to just bolting on what we know works and not worrying about it. I don’t see that as wrong, just different, and it will likely result in more driving of ones car but thats only half the fun for me.
I have spent a bit of time learning to read compressor maps and messing around with Borg Warner’s Matchbot software. I’m either really off or OEM turbos are really undersized and favour low rpm a lot, prime example is subaru TD04’s on WRX’s and such. Punching in the engine numbers into Matchbot and those turbos are so far off efficient long before red line. Not many people have done twin turbo KL’s, I found one on youtube and he used a pair of TD04-15g’s I believe, which on paper seem pretty big but there were also designed to run higher psi than what he was using. The determined safe psi for a 9.2:1 KLDE is 8-10psi, any more and you’re guarantee’d to bend a rod. I’ve also spent a while reading on 3000gt/stealth twin turbo setups as those are 3.0L and have a bunch of upgrade options. Stealth316.com was also pretty useful for getting info on the mitsubishi turbos. 300zx also use a variant of Garret looking turbos, and while those and RB26DETT turbos are appealing they use all kinds of flange mounts vs coupling, and id rather having coupling partially for looks and partially for convenience. However even stock RB26 turbos are $$. Mitsubishi turbos kinda seem old tech, but there is plenty of upgrade options for them that are off the shelf available. Then I took another look at the turbo I had from the honda, I knew it was off a cx9, turns out its a 3K turbo which is now Borg Warner. Getting accurate info on these turbos is also pretty tricky as theres a lot of variable parts and they affect characteristics. But they are also very cheap to get aftermarket versions, upgrades do exist and theres a ton of VW 1.8t’s that use the K03/K04 hybrids etc. They mostly use couplings and the exhaust side has a small compact internal waste gate and a easier to deal with looking flange then the mistu turbos.
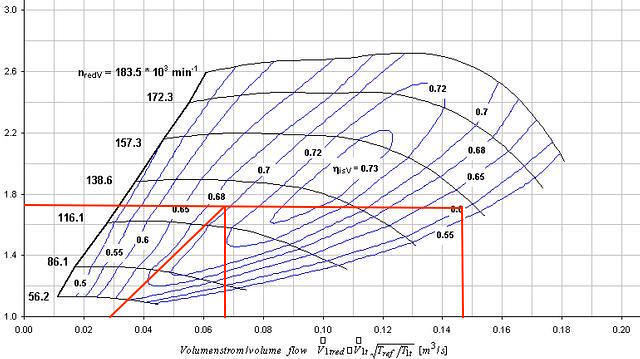
using a website with a guide I mapped out a K04 in use for twin turbo (so half the displacement of 2.5L, 90% VE across the board and 10 psi as the max gauge pressure) on Matchbot and took the data points and laid it out on a K04-0025 map. Someone with more knowledge chime in here but to me that looks pretty ideal for top end while still maintaining decent spool. Ideally I’d like 10psi by 3000 rpm or sooner without choking at 8000 rpm. Spool seems to be a black art as far as calculating, too many variables to be sure but so long as its not surging. It would also be great if I can find a turbo thats comfy at a higher psi like 15 or 20 so when I do build a stronger motor its a matter of swapping it in and not changing much else.
I also plan to take advantage of modern ECU technology as this has come a long way and gotten a lot cheaper in the last 6 years. The ECU/wiring/sensors will easily be where I spend the most time and money, I believe that is the backbone of every good engine setup. Good engine management can perform better, save your engine from damage and communicate problems better than factory ECU’s.
Anyway, hope I didn’t state any facts wrong lol, hope you enjoy reading me explain many of my thought processes (I tried to nutshell them) and that you’ll keep coming back as I update more even though the thread title is now going to be wrong.
 02-18-19, 09:27 PM
#219
Senior Member
Thread Starter
appreciate it. good to know others are into the details too
02-18-19, 09:28 PM
#220
Senior Member
Thread Starter
hope everyone had a good christmas/new years whatever lol. The days that the stat holidays landed on worked out well for time off from work this year, relaxed a good bit and got a bit of time to work on my car. Weather wasn’t even too bad yet.
side note, I’m also getting emails pretty much daily from Photobucket and Flickr about my accounts being over the new storage limits, so I’ve started a new Flickr account. Photo bucket is dead to me and I really hope flickr doesnt pull the same stunt. But if like 1/2 my photos go missing thats why and I’ll have to deal with that when it happens.
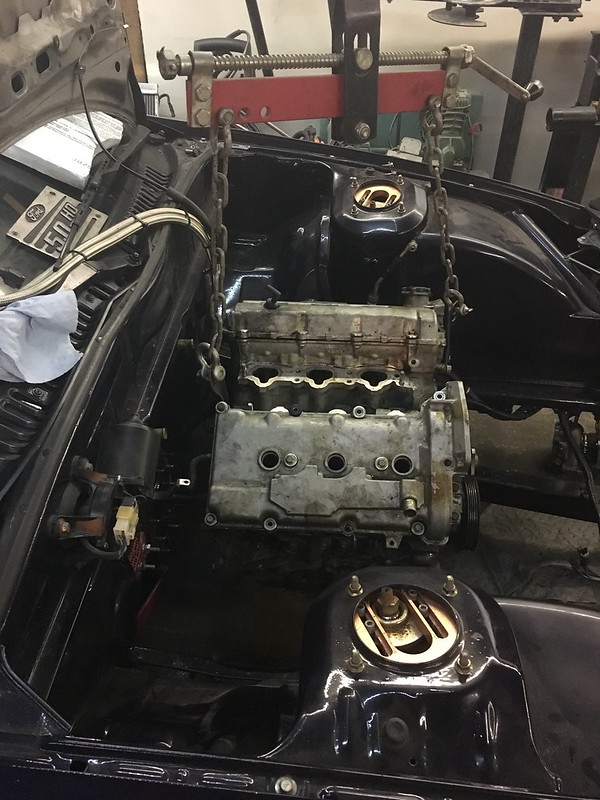
Now the last post I had shown the first mock up with the engine. I was too excited and impatient to try and line up the transmission first, but shortly after the first try I dug the t2 trans out of storage and put it in place. I don’t have a stock trans mount or crossmember and since this chassis is an auto originally the mounts are in different places and don’t line up anyway. So that leaves me with the driveshaft (which I have) and the shifter hole to get the trans roughly in the right spot.
I put the trans in roughly the right place, then lined the engine up with the crank into the pilot bearing hole on the crank. It will likely sit slightly further forward maybe A 1/2” than the pics.

To my surprise it actually sits further away from the firewall then I thought it would.

height is another thing I’m unsure of now, the V6 has a crankshaft which sits much lower than the 13B eccentric shaft (which is why the rx7 tunnel is so big) so either the trans will sit lower as a whole or the engine higher. As it sits right now I may even be able to use the OEM KL oil pan (not sure if I want to lol, being that its mean for an engine mounted in fwd) but need room to clear the intake manifold etc. But I also don’t want the trans scrapping the ground.


side note, I’m also getting emails pretty much daily from Photobucket and Flickr about my accounts being over the new storage limits, so I’ve started a new Flickr account. Photo bucket is dead to me and I really hope flickr doesnt pull the same stunt. But if like 1/2 my photos go missing thats why and I’ll have to deal with that when it happens.
Now the last post I had shown the first mock up with the engine. I was too excited and impatient to try and line up the transmission first, but shortly after the first try I dug the t2 trans out of storage and put it in place. I don’t have a stock trans mount or crossmember and since this chassis is an auto originally the mounts are in different places and don’t line up anyway. So that leaves me with the driveshaft (which I have) and the shifter hole to get the trans roughly in the right spot.
I put the trans in roughly the right place, then lined the engine up with the crank into the pilot bearing hole on the crank. It will likely sit slightly further forward maybe A 1/2” than the pics.
To my surprise it actually sits further away from the firewall then I thought it would.
height is another thing I’m unsure of now, the V6 has a crankshaft which sits much lower than the 13B eccentric shaft (which is why the rx7 tunnel is so big) so either the trans will sit lower as a whole or the engine higher. As it sits right now I may even be able to use the OEM KL oil pan (not sure if I want to lol, being that its mean for an engine mounted in fwd) but need room to clear the intake manifold etc. But I also don’t want the trans scrapping the ground.
02-18-19, 09:29 PM
#221
Senior Member
Thread Starter

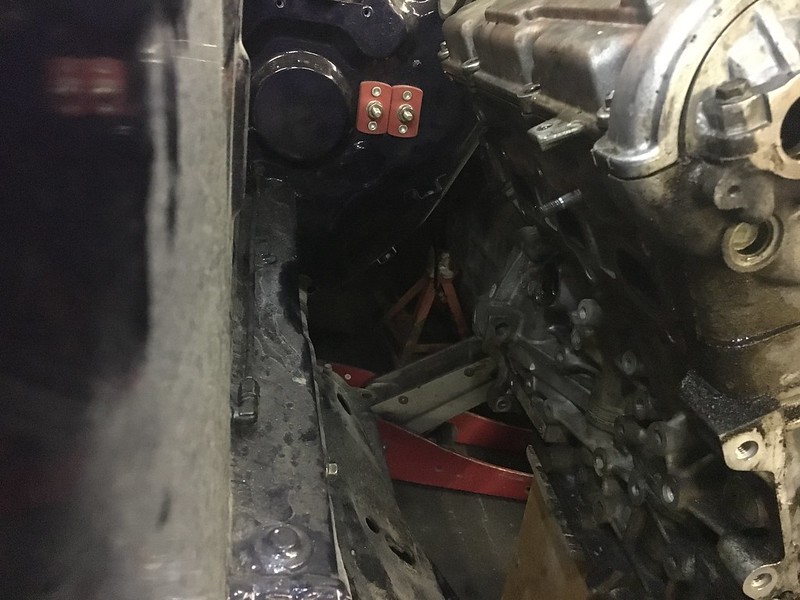
Tons of room for activities

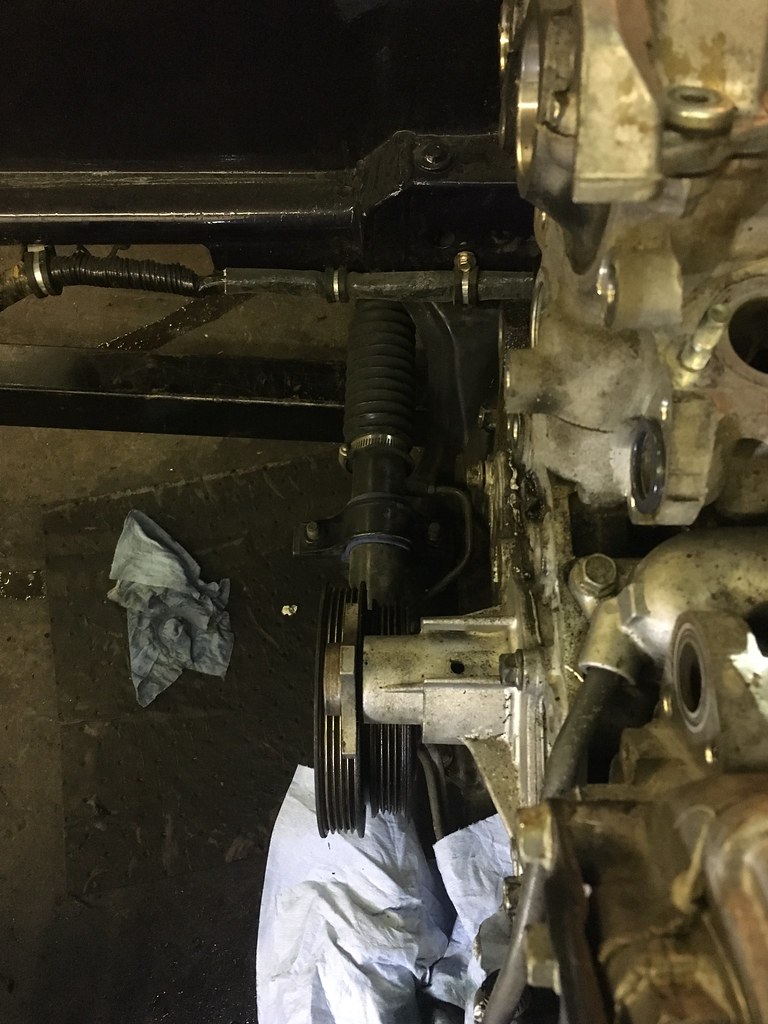
the steering shaft is a mile away
crank pulley is still over the steering rack, getting closer to the oil pump housings home now though… need to get the trans and engine mated together now before going any farther forward there. Still lots of little things to figure out though.
[img[https://farm8.staticflickr.com/7889/33263042718_01a2748ce8_c.jpg[/img]
shoutout to my buddy Craig for hooking me up with a junk rear iron to help with the trans mockup. I’m not a rotary guy but I’m still an rx7 guy and am grateful to have friends who are both lol.
Gave that thing a good pressure wash before doing anything else.

my family got me a good bunch of tools for christmas this year, chop saw being one of the highlights. Id also love to have a belt sander for doing the manifolds but we’ll see if thats in the budget later.
Neil at SCG does CAD. Like real deal solid works and 3D printing stuff for all the brake kit adapters and anything and everything else. He’s been instrumental in the transmission adapting and making a file so I can get flanges cut for the intake and exhaust. Measuring out the transmission pieces actually wasn’t that bad. Neither of us had done it before, so we are learning as we go but everything revolves around the centre of the crank. Measurement from there and then apart and once you’ve done all of them like twice its pretty accurate.
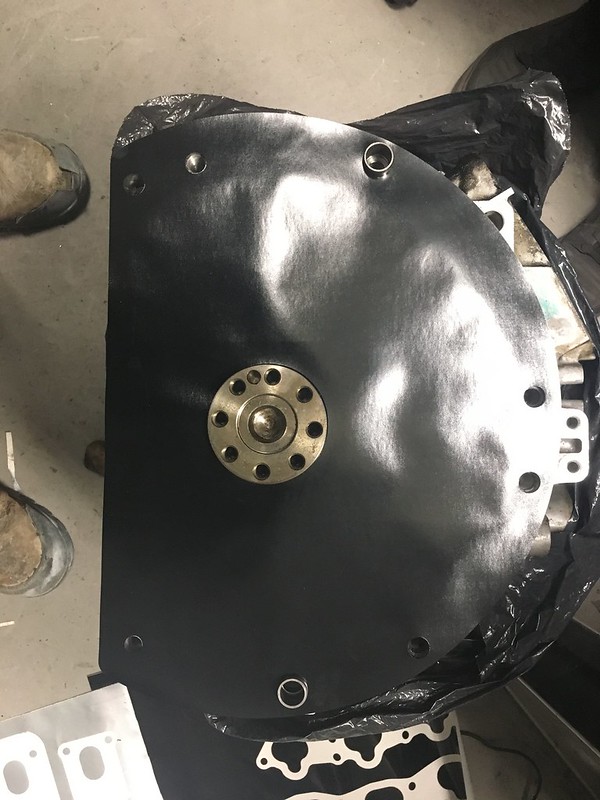
I brought the bare short block over after a good clean and we measured it all and, drew it in CAD and printed it out on a vinyl sticker plotter. Can speak to the accuracy level of the printer but easily below 1 mm. The vinyl is also pretty cheap and prints in seconds vs 3D printing. After about 3-4 tries we had all the holes lined up on the dowels and the crank centered.
02-18-19, 09:29 PM
#222
Senior Member
Thread Starter
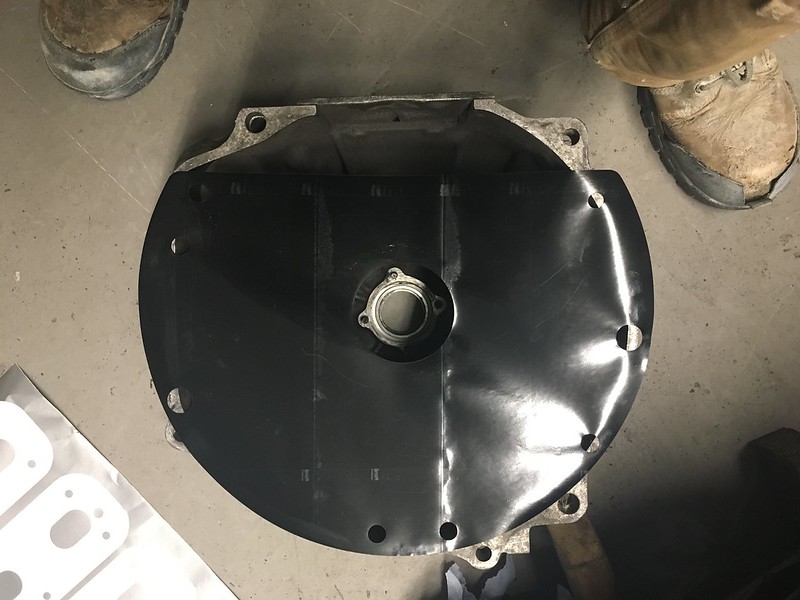
did the same for the trans bellhouse inside and out (using the 13b rear iron mind you)

We did the same for the exhaust flange, but this was much harder as there is no good datum in each direction to measure off of. At first we used the head surface and that worked for a couple of the holes, then we used a framing square and positioned it on the studs to get the rest. Ended up being difficult but after more tries than anticipated it was pretty dead on.

made the shape a little more pleasing to the eye and more like the factory manifold
Vinyl has this nice side benefit of being sticky. Using a bit of water you can stick it on the surface and still slide it around to line everything up.

Same same with the intake side. I think we shrunk the port size by 10% or something after this. We found it easiest to have some of the mating surface showing so we could see the gaps were even. Then measure the gaps and do the math to shrink it.

lol this is a time consuming process.
I am a Mac user and it turns out that not at all surprising the industry does not use OsX. There are very few options for CAD programs that work on macs and I wasn’t really interested in paying for them to be a let down. The computer I have is an older macbook pro and its specs aren’t enough to run Solidworks or anything like that even if I dual booted windows onto it.
But I found a fairly ghetto software that kinda works called FreeCad.
 02-18-19, 09:31 PM
#223
Senior Member
Thread Starter
part of me just wants to learn but also to be somewhat independent when it comes to building my own parts. However I would probably be laughed out of the room if I tried to send these directly to a machinist as I don’t think the program makes true circles/arcs. Anyway, I made this as an illustration for the flywheel adapter. Its a simple enough piece to be made on a manual lathe.
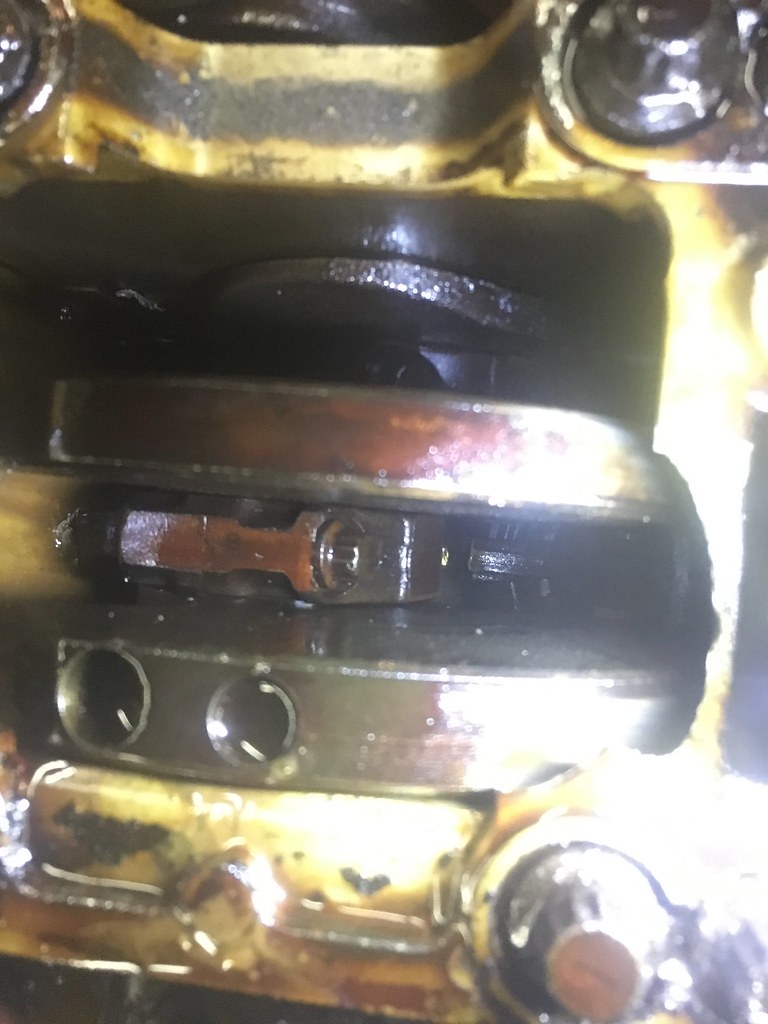
interesting tid bit,
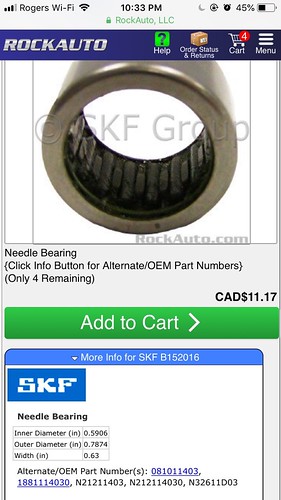
^ T2 pilot bearing, the easily destroyed needle bearing kind. It mounts in the Eccentric shaft

^ KLDE pilot bearing the good ball bearing kind. The KL’s mounts into the flywheel limited by the crank.
They have the same size ID, so I went and bought a KL one that was in stock and $12 and what do you know it fits on the T2 trans.
So that was an easy solve
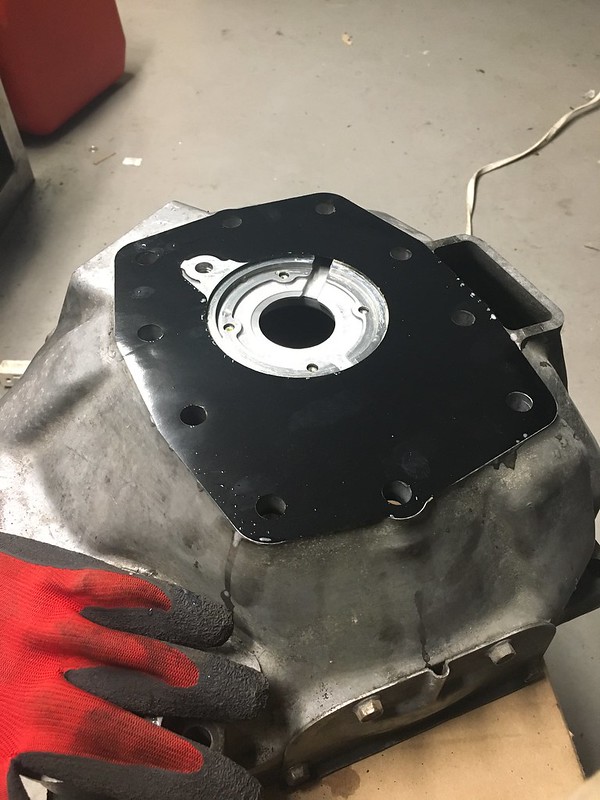
another interesting thing I found was the KL crank and the 13B counter weight mating surfaces (where you bolt the flywheels to, in the 13b’s case an aftermarket lightweight one) are both proud of the trans mating surfaces 10mm. Makes the adapter just a little less complicated to make

ran into a bit of a snag here. In the last update we were looking at potentially doing a whole new bellhouse. But I wanted to use a T2 flywheel and clutch and had already bought one for a screaming deal. The flywheel is too big though for the V6 bolt pattern on the bell. I must have spent a week thinking/comparing/deciding what to do.
The V6 and the 13B n/a have the same size flywheel. Same size friction surface, same tooth count, same part numbers for clutch discs (according to ACT’s website).
But the power holding and clutch options are far more limited.
If I really wanted a new adapting bellhouse, which is pretty tempting I would use a lightweight 13B flywheel, and a 13b n/a clutch kit.
But I decided on using what I had, the T2 stuff. More surface area, more power holding, more clutch options and its been done before. An adapter plate also seems less complicated and easier to make than an all new bell housing.

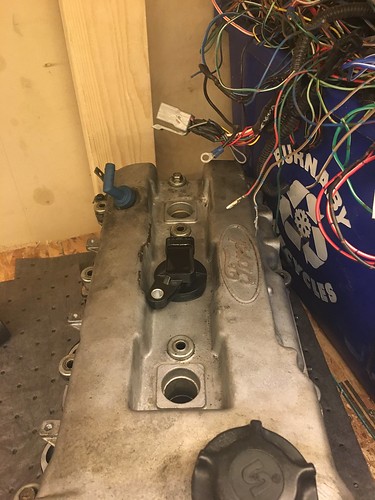
One of the other things on my to do list was to find a COP that fits.
This is a VAG coil I believe the “R8” coil, which theres a few sizes of that look the same except for length. The coil pictured is from a Jetta and this photo was stolen off Nico club or something for SR20 conversions. The R8 coils are the same but red. Really good coils apparently and they can handle a lot of hp.

So i did what you’re not supposed to do and wasted my local parts store’s time and bought one after measuring a few others to see how it would fit. I knew that Honda D17 coils fit almost perfectly except the mount bolt has to be cut off. The VAG coils are suction fit or wedge fit so this isn’t an issue. But they stick really far off the head and I didn’t love the look.

I’ll keep in mind as a back up but I knew there was a better option out there at least for fit.
Spent a lot of time surfing google images for different coils, narrowed it down to about 5 potential candidates and went back to the parts store, wasted more of Jordans time and came back with 2 more strong potentials.
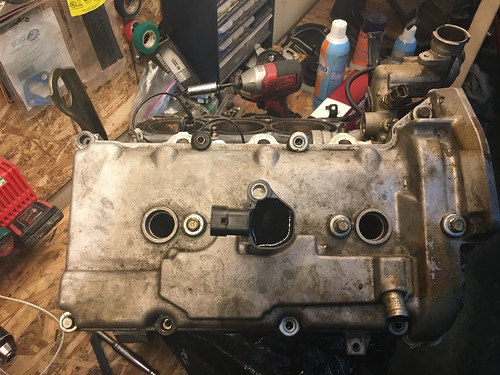
Land rover/jaguar coil. These fit most of it ok, the rear head valve cover would require some weird twisting of angles and the front head one position doesn’t really fit at all without some cutting.
interesting tid bit,
^ T2 pilot bearing, the easily destroyed needle bearing kind. It mounts in the Eccentric shaft
^ KLDE pilot bearing the good ball bearing kind. The KL’s mounts into the flywheel limited by the crank.
They have the same size ID, so I went and bought a KL one that was in stock and $12 and what do you know it fits on the T2 trans.
So that was an easy solve
another interesting thing I found was the KL crank and the 13B counter weight mating surfaces (where you bolt the flywheels to, in the 13b’s case an aftermarket lightweight one) are both proud of the trans mating surfaces 10mm. Makes the adapter just a little less complicated to make
ran into a bit of a snag here. In the last update we were looking at potentially doing a whole new bellhouse. But I wanted to use a T2 flywheel and clutch and had already bought one for a screaming deal. The flywheel is too big though for the V6 bolt pattern on the bell. I must have spent a week thinking/comparing/deciding what to do.
The V6 and the 13B n/a have the same size flywheel. Same size friction surface, same tooth count, same part numbers for clutch discs (according to ACT’s website).
But the power holding and clutch options are far more limited.
If I really wanted a new adapting bellhouse, which is pretty tempting I would use a lightweight 13B flywheel, and a 13b n/a clutch kit.
But I decided on using what I had, the T2 stuff. More surface area, more power holding, more clutch options and its been done before. An adapter plate also seems less complicated and easier to make than an all new bell housing.
One of the other things on my to do list was to find a COP that fits.
This is a VAG coil I believe the “R8” coil, which theres a few sizes of that look the same except for length. The coil pictured is from a Jetta and this photo was stolen off Nico club or something for SR20 conversions. The R8 coils are the same but red. Really good coils apparently and they can handle a lot of hp.
So i did what you’re not supposed to do and wasted my local parts store’s time and bought one after measuring a few others to see how it would fit. I knew that Honda D17 coils fit almost perfectly except the mount bolt has to be cut off. The VAG coils are suction fit or wedge fit so this isn’t an issue. But they stick really far off the head and I didn’t love the look.
I’ll keep in mind as a back up but I knew there was a better option out there at least for fit.
Spent a lot of time surfing google images for different coils, narrowed it down to about 5 potential candidates and went back to the parts store, wasted more of Jordans time and came back with 2 more strong potentials.
Land rover/jaguar coil. These fit most of it ok, the rear head valve cover would require some weird twisting of angles and the front head one position doesn’t really fit at all without some cutting.
02-18-19, 09:33 PM
#224
Senior Member
Thread Starter
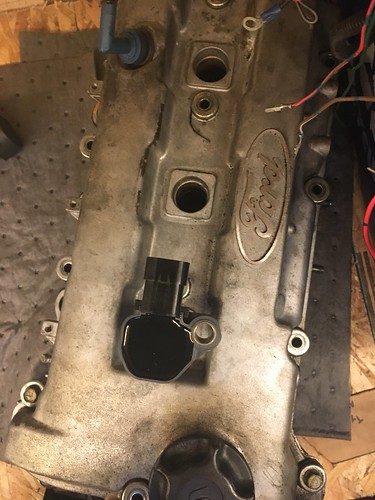
The fiat 500 coil. Theres a few options under fiat 500 but this is for i believe the non multi air USDM version. Not the cheapest coil of the group. It also has one flaw
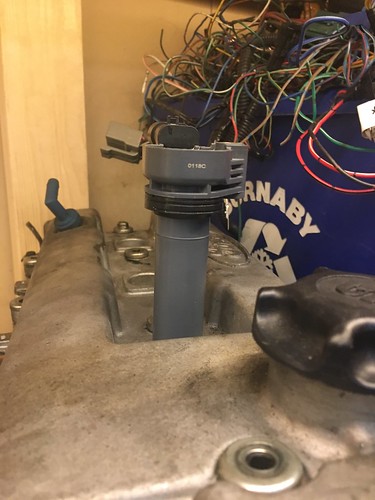
its too fat.
By approx 1 mm.
Racked my brain for a while for a way that wouldn’t be crazy hard or require machining to open that up a bit. I bought a small engine hone for $20 that compresses small enough for the task. Took a while and you won’t be honing any small engines with it after lol
but it works.

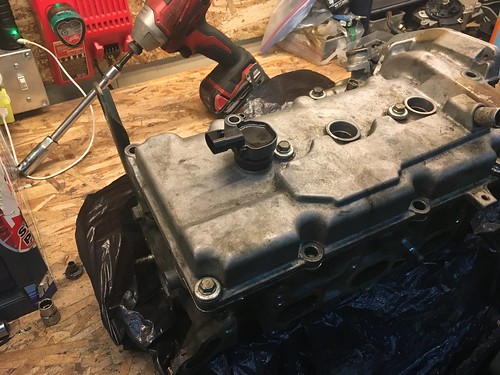
Did a hole in each head, confirmed fitment with a spark plug and we have a winner.
The land rover and a few others also hit the bolt that holes the valve covers on. I figure I can deal with that using allen taper head screws or something it just doesn’t look nice having them all twisted different directions. Many of the other coils I tried were too large in diameter. There is more pictures of the fitments on my flickr account if you want to see more.
I could list all the coils that i tried/measured but it’ll be easier to list the ones that I didn’t. There is 2 other coils that I know fit, BMW off an e46 or something and CBR1000 or other pencil coils. The BMW coils I think are just plain ugly and not locally stocked. The CBR coils are also not something I can get from an auto parts store and they are passive coils (don’t let the connector size fool you, the Fiat coils are smart coils). The ECU I intend to use is actually capable of powering them, but i’d rather not. The CBR coils use a screw type spark plug, I found there is a spark plug that is the right thread pitch, length, reach etc and screw type that will fit but its for a 1974 VW westfalia. Limited heat ranges and options there deterred me from that route.
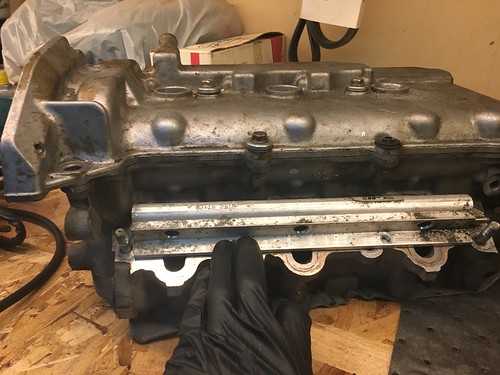
I’ve read before and had it saved that a few KL ITB conversions used honda fuel rails. But they said Honda J23a fuel rails. Im not a honda guy but I don’t know what a J23 is lol. I figure that must have been a typo and he/she meant j32a. So one day I’m jump starting a v6 honda accord that we have at our garage.
“Wouldn’t that be funny if this is the right engine?”
pop the engine cover off, take a peak with a flash light and whaddaknow (again) they look like the right ones.
That weekend I went out to a junk yard, had a list of things to look for but started with those. First v6 accord I walk up has the intake stripped off and all I have to do is unbolt the fuel rails. I took a caliper with me just to check and they are bang on 97mm. jackpot.
I later learned that RB26 fuel rails are also 97mm spacing, so cutting one in half and tapping for a fitting is an option for prettier rails.
02-18-19, 09:34 PM
#225
Senior Member
Thread Starter
I also grabbed a DBW throttle body and pedal off a 2005 ish Chevy Equinox. Went all through the yard trying to find a pedal that would fit with little to no mods, I even brought an rx7 pedal with for comparison.

While its close and may work as is its also a metal pedal, most of the many other cars I looked at were all fully plastic. This way modifying it is simpler and will be more reliable.

the throttle body itself is also what I wanted. Was trying to find a Toyota one as I like the connector more but these are cheaper and theres a bunch of them in the yards. Keeping the matching set of throttle pedal and throttle body may have its advantages later. But the TB looks cool, the “backpack” hangs on the right side and the connector is in a good spot. The blade is a 70mm best I can measure without taking it apart. And its an OEM piece, which I like. Oh and it uses an O ring to seal which is another plus.

Did some quick testing with the multimeter to confirm what wires are the TPS pots and which are the motors. Same with the pedal, was thankfully pretty straight forward.
[img]https://farm8.staticflickr.com/7812/32196374307_c3a406426a.jpg[/mg]
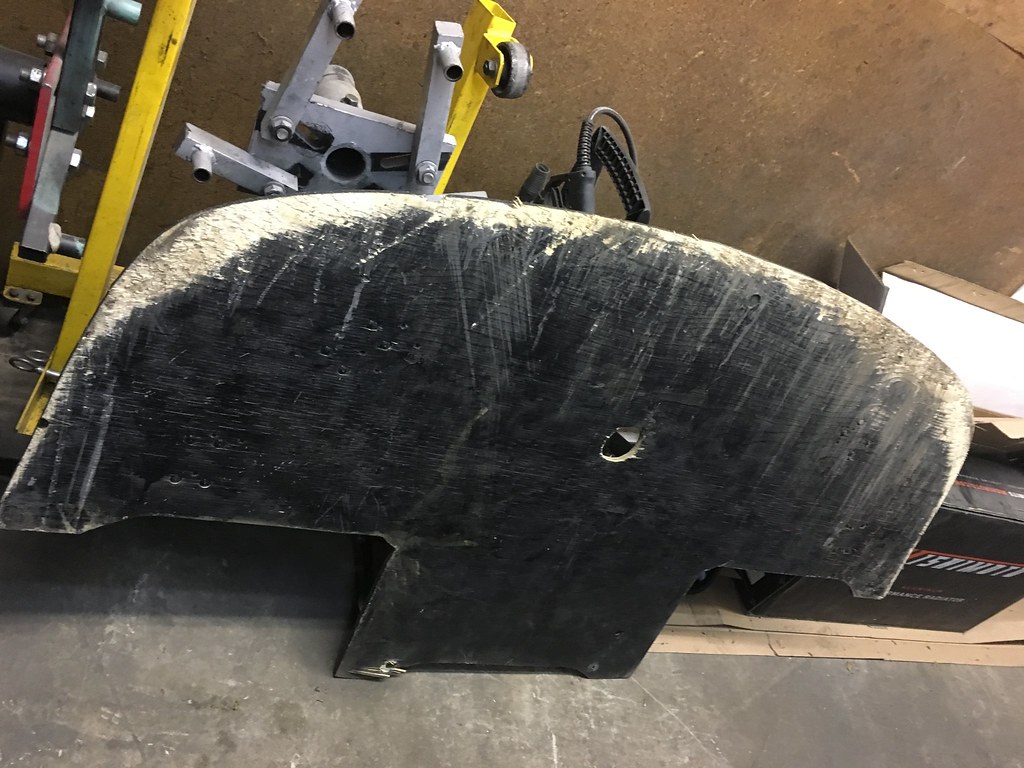
a friend gave me an old hood with a few dents and bad paint, and I made it into a “will this clear the hood?” hood

I cut the webbing off after but this will make it easy to figure out what will work for the intake manifold etc and later if I do some fancy ducting for the V mount
While its close and may work as is its also a metal pedal, most of the many other cars I looked at were all fully plastic. This way modifying it is simpler and will be more reliable.
the throttle body itself is also what I wanted. Was trying to find a Toyota one as I like the connector more but these are cheaper and theres a bunch of them in the yards. Keeping the matching set of throttle pedal and throttle body may have its advantages later. But the TB looks cool, the “backpack” hangs on the right side and the connector is in a good spot. The blade is a 70mm best I can measure without taking it apart. And its an OEM piece, which I like. Oh and it uses an O ring to seal which is another plus.
Did some quick testing with the multimeter to confirm what wires are the TPS pots and which are the motors. Same with the pedal, was thankfully pretty straight forward.
[img]https://farm8.staticflickr.com/7812/32196374307_c3a406426a.jpg[/mg]
a friend gave me an old hood with a few dents and bad paint, and I made it into a “will this clear the hood?” hood
I cut the webbing off after but this will make it easy to figure out what will work for the intake manifold etc and later if I do some fancy ducting for the V mount