When you click on links to various merchants on this site and make a purchase, this can result in this site earning a commission. Affiliate programs and affiliations include, but are not limited to, the eBay Partner Network.
You won't yield much power, basically a waste of time and money, send them off to get them truly bridged, it'll get rid of that cheese port you'll have the power idle you're looking for.
You won't yield much power, basically a waste of time and money, send them off to get them truly bridged, it'll get rid of that cheese port you'll have the power idle you're looking for.
Engine was built years ago and is ready to install. I�m not going to tear it apart at this point unless I have issues.
Got ya, I mean it'll give you the sound you want, I don't know how tuning will go, but power wise, it won't be there like you expect. I have a buddy with this done to his rx8 and another buddy with an rx8 that doesn't, their top speeds are only 10mph difference and one has a tune and the other doesn't and I'm putting my money on the the tune for the 10mph difference .
I'm not knocking your project by any means, you didn't know so you asked a legit question, but when it comes time to rebuild again, get that cheese port removed with a true half bridge or even a full bridge and really wake the car up.
oh I hear you, and didn�t take any offense at all. Thanks for the info.
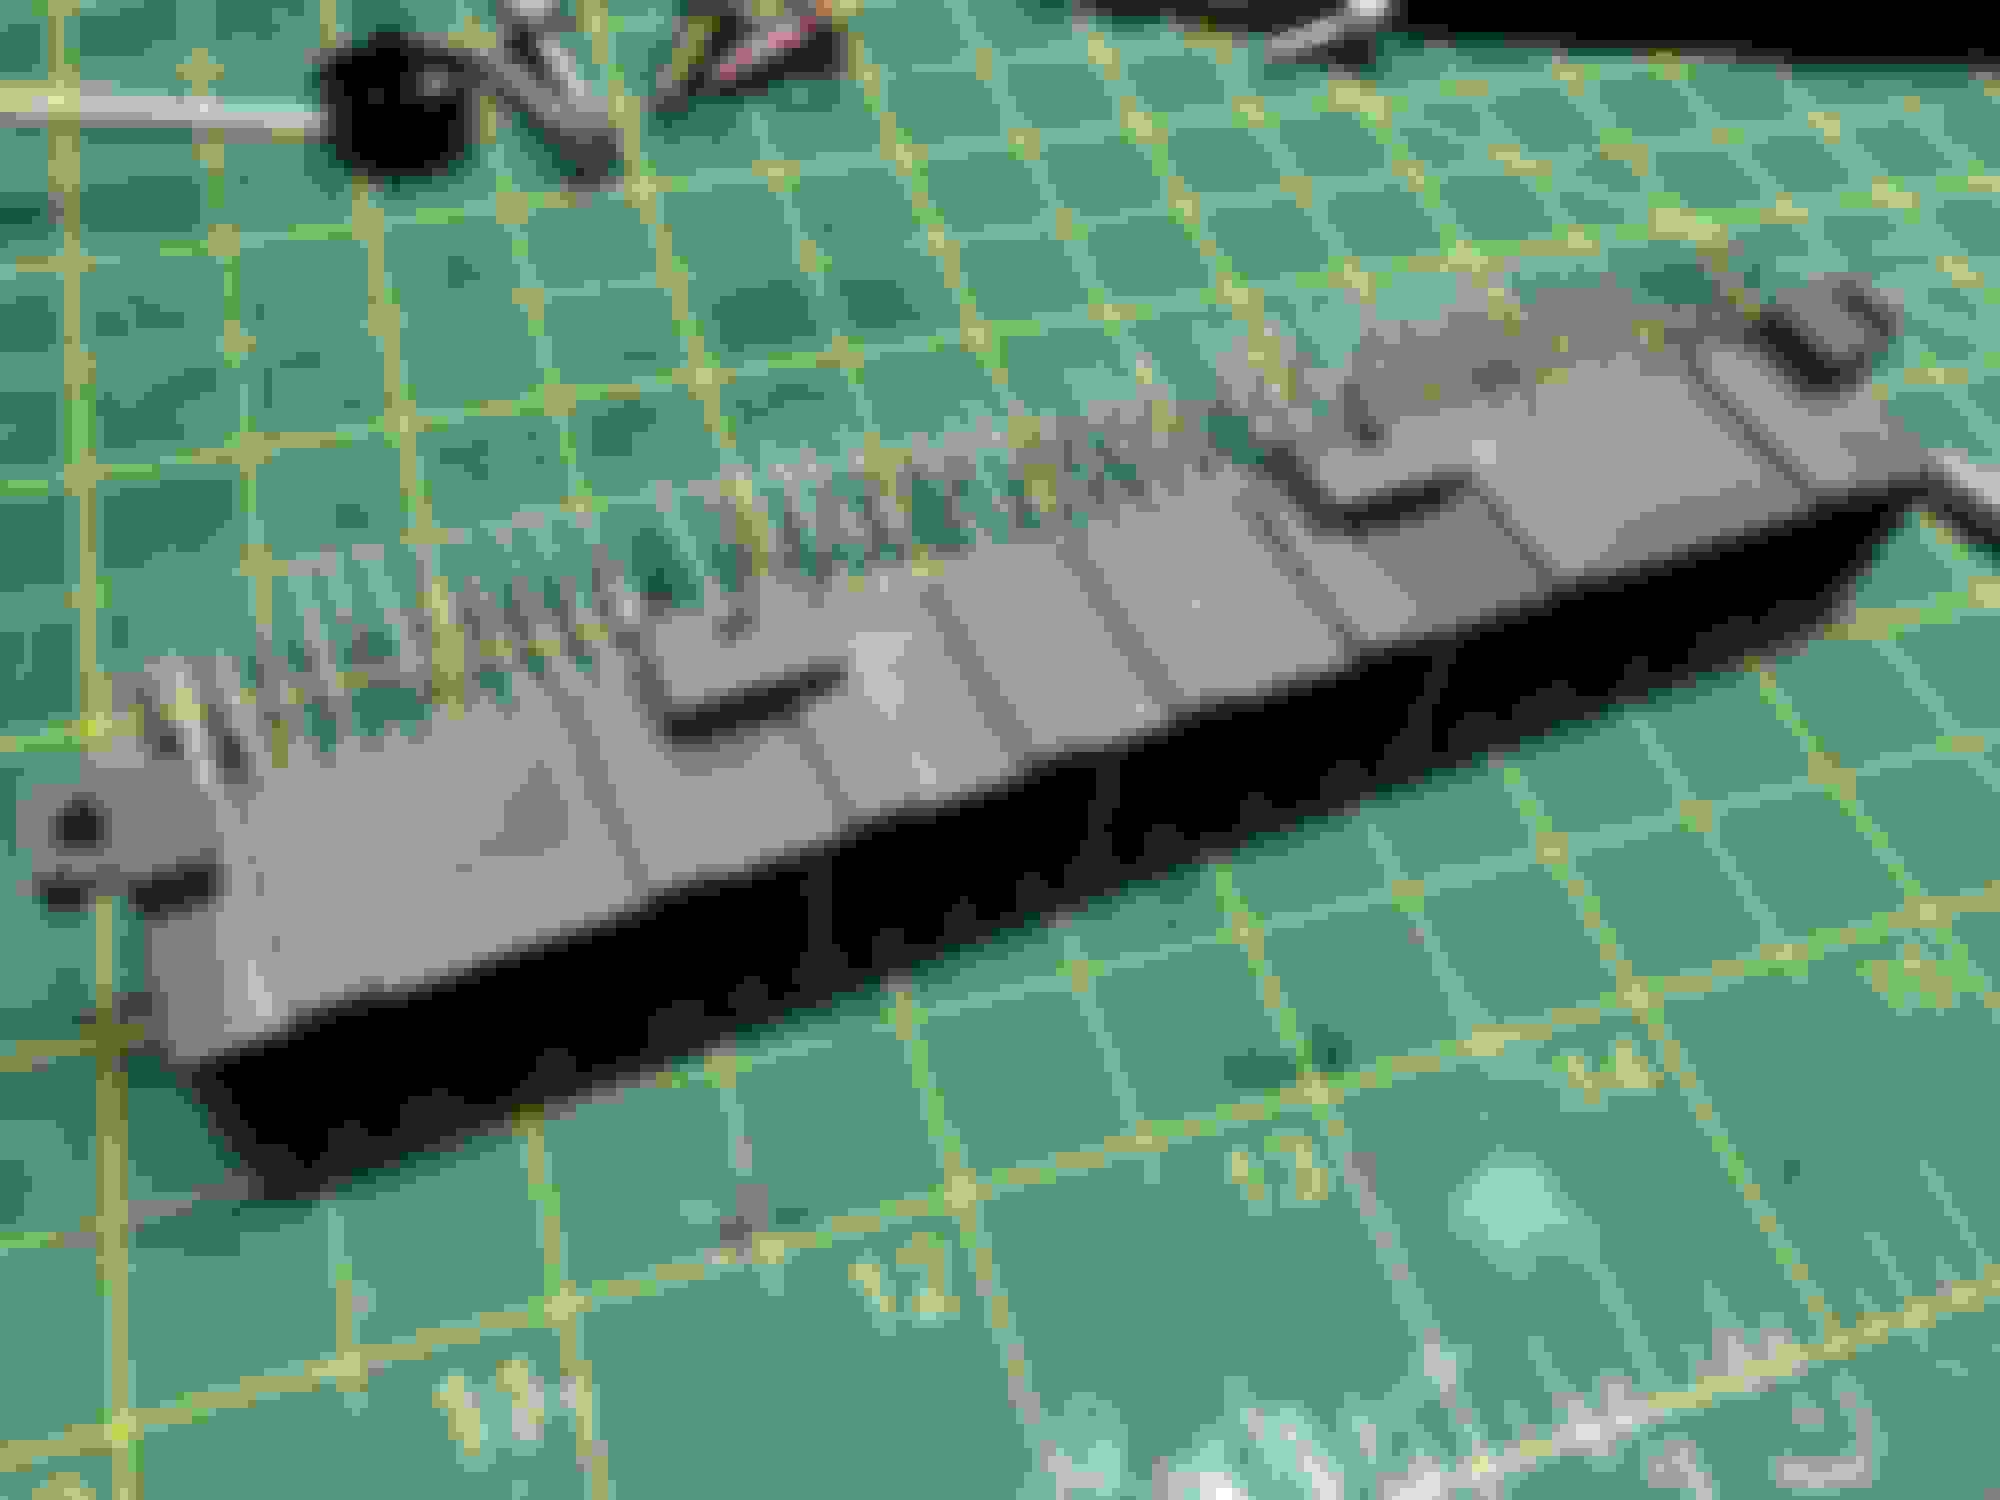
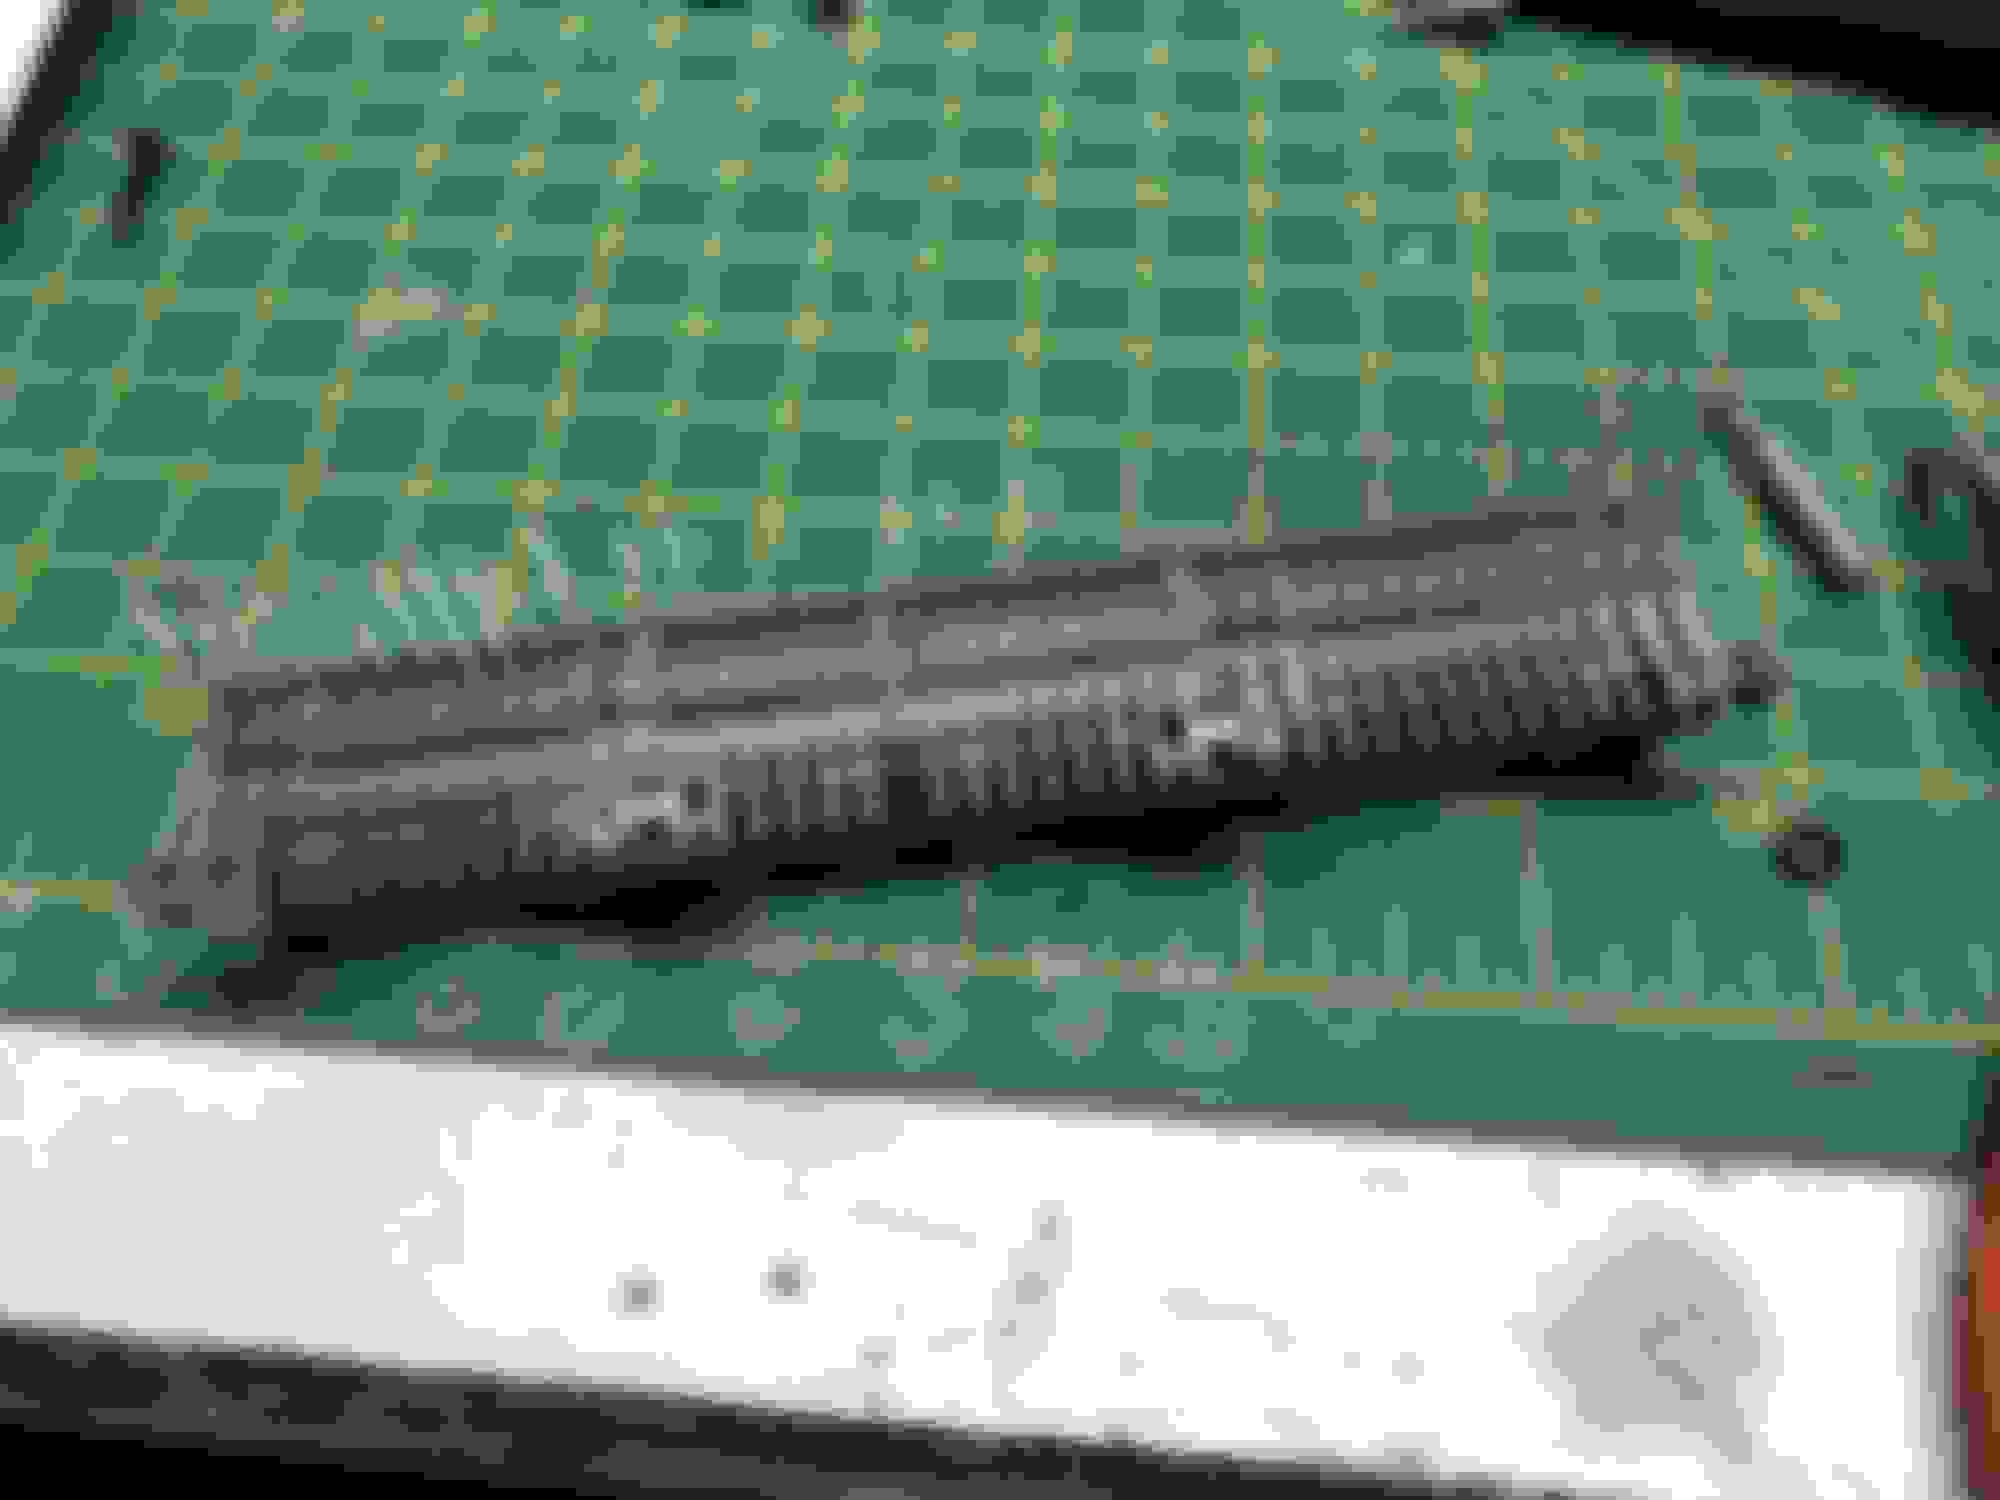
Started figuring out and preparing to build my patch harness tonight. Kind of a personal challenge due to a strange vision problem I was blessed with two years ago. Used to be able to solder anything but we will see how this goes. Will be a slow part of the process as it’s inside work and I’m still enjoying being outside. Plan is to straighten one row of pins, solder wires on, and then repeat on the second row. Then make a case out of polystyrene and pot it with hot glue. It will either work great or end up in the trash. Thanks to Chris at lms-efi for supplying the S5 ecu header.
Be sure to use rosin flux when soldering, and lead base decreases melting temp making it easier to work with.
Yep. One of the sockets won�t be used so I�ll experiment with it first as to how short I can make the pins without damaging the base. Then will shrink wrap each connection before potting and finally will figure out where to pin each in the Haltech connector. Should be interesting.
We already did all the hard work, with the correct bulkhead connector, just have to remove the OEM and add the Haltech connectors Patch Harness (89-91 RX-7)
We already did all the hard work, with the correct bulkhead connector, just have to remove the OEM and add the Haltech connectors Patch Harness (89-91 RX-7)
And that very well may end up happening. I like a challenge though and am not afraid to try. This project with my kids is more about the journey and not the destination. The harness I want to make will go from the oem connection straight to the haltech.
Last edited by Locoelectrician; Sep 7, 2018 at 07:05 AM.
Reason: Content
As I said, this is the correct 3 connector S5 bulkhead (not the 4 connector for FD) with removable OEM ECU connectors. Take them off, add Haltech connectors, done.
As I said, this is the correct 3 connector S5 bulkhead (not the 4 connector for FD) with removable OEM ECU connectors. Take them off, add Haltech connectors, done.
Well, I can’t say I’m disappointed, especially because I’m legally blind in one eye due to the wonders of optic neuritis and also have not just a lack of depth perception, but a false sense since the **** eye still sees light and lies to my brain. I wasn’t afraid to try though, and while it may not be perfect, I can’t see why it won’t work. I thought I had some polystyrene left over to make a frame so I could pot it, but I was wrong and will pick some up tomorrow.
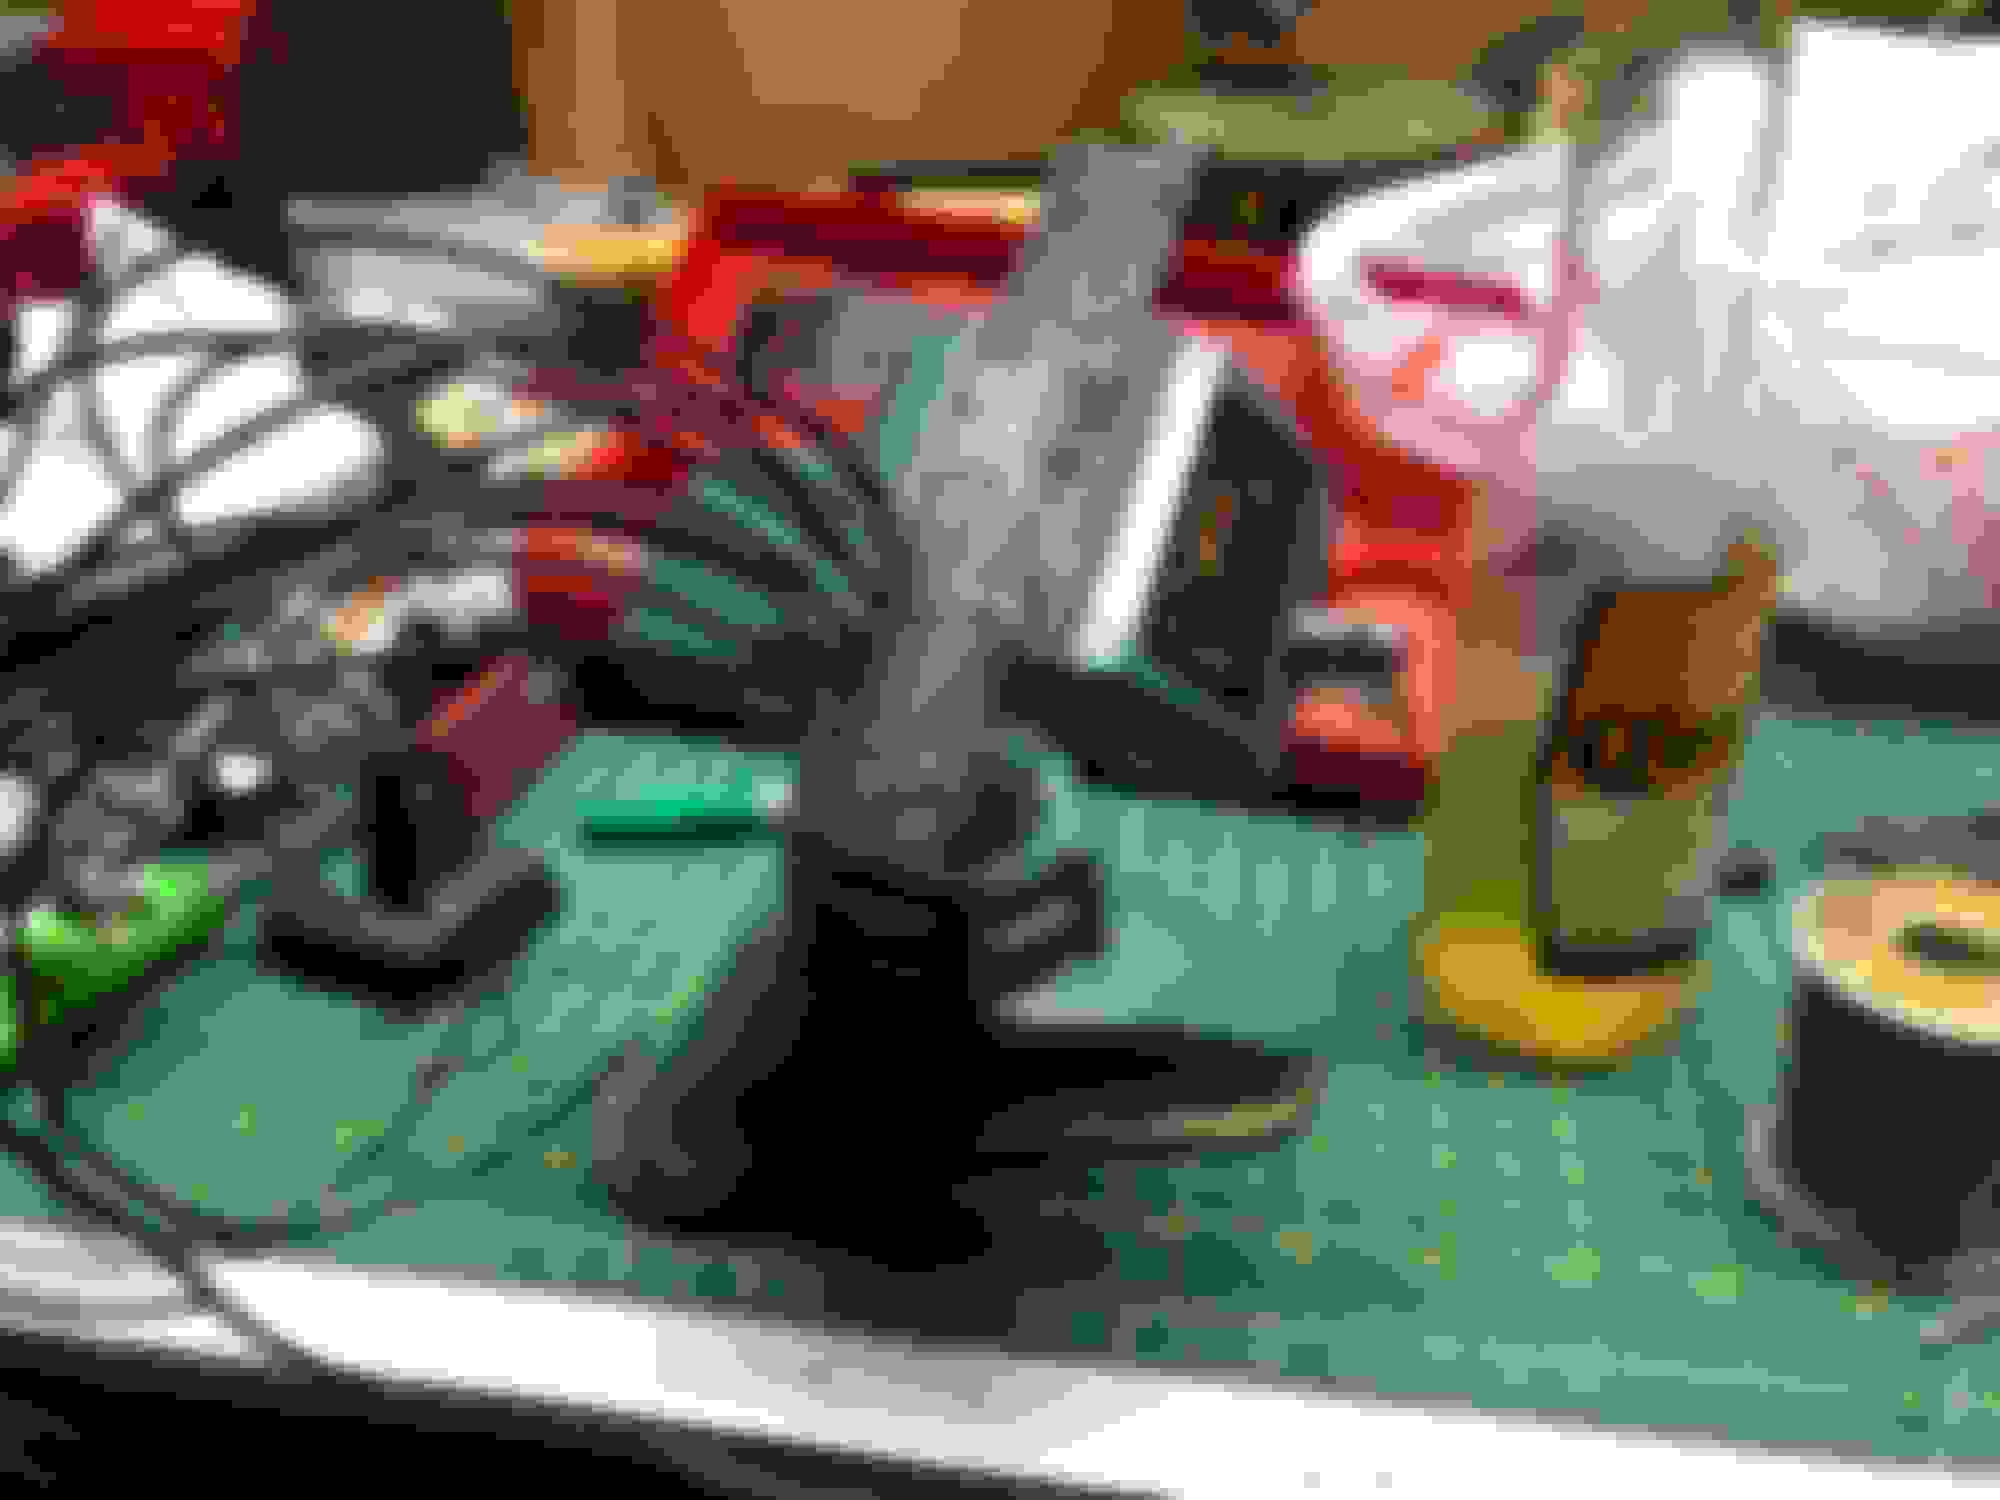
Your soldering job looks a hell of a lot better than what I'd do. On my first fc I soldered in an safc2 and it looked horrible but it worked so I did something right.
Your soldering job looks a hell of a lot better than what I'd do. On my first fc I soldered in an safc2 and it looked horrible but it worked so I did something right.
Thanks. I was almost too embarrassed to post it but enough Corona does wonders. A few years ago it would have looked much better. Such is life though. Now I just need to pot it and then introduce it to the Haltech plug. I imagined this part happening on a snowy day, but this project seems to be in warp speed (at least to me).
Looks good, much better than my skills with a soldering iron could produce. Hopefully the Haltech terminals are a breeze to crimp on too. Seems they're a bit more picky than GM Metripack ones.
Well I potted my first connector tonight, and while it won’t win any beauty contests, it’s fully functional. Made a mold to surround it, coated it with cooking spray to act as a release agent (which did not work at all) and filled it with slow set hot glue. Finally fought and got the mold off and could have left it alone with the decent edges, but the glue didn’t flow into every space I wanted between the wires so I used the heat gun tip on my butane soldering iron and “reanimated” the glue. Lost the edges and made it look worse but it worked great and the glue flowed into every space I wanted. Looking back I should have pre heated the connector or placed the whole thing in the oven when I was done, but oh well. Sure I could have just bought one, but for 1/8th the price, I got the experience and satisfaction of doing it myself and if I hate it too much, I can either build another or fold and buy one already made. We’re expecting up to 6 inches of rain tomorrow so it might be a good day to figure out the Haltech side of this.