
Daulton's new GTU | Project Cone-Killer

Thread Starter
Passion for Racing
Joined: Aug 2010
Posts: 1,066
Likes: 2
From: Crown Point, Indiana
I feel that it should be fine as long as the clear coat stays true. And the only time you'll ever really see it is when the wheels are off anyway. And the car drives really nice now. It no longer falls flat on its face a thousand times while I'm cruising. Coming off throttle and back on no longer results in whiplash. And braking distance is dramatically reduced while the firmness of the pedal has increased and no wheel or back end wobble under braking anymore either. It's really amazing what a difference it all makes. I had to drive his friends base-as-hell EG civic hatch 45 minutes in the typhoon we had last night. Mechanical clutch, no power steering, good brakes but terrible pedal travel, no tach or any fork of electronics in the car besides the dash and AC. Football field shift throws, and the worst seating position ever.
Driving home in my car felt like a Porsche mixed with mercedes hahaha.
Driving home in my car felt like a Porsche mixed with mercedes hahaha.
Thread Starter
Passion for Racing
Joined: Aug 2010
Posts: 1,066
Likes: 2
From: Crown Point, Indiana
Thread Starter
Passion for Racing
Joined: Aug 2010
Posts: 1,066
Likes: 2
From: Crown Point, Indiana

Thread Starter
Passion for Racing
Joined: Aug 2010
Posts: 1,066
Likes: 2
From: Crown Point, Indiana
Still trying to get ahold of my GoPro vids from auto crossing on sunday, but in the mean time I ordered new Raybestos outer tie rods to clean up some steering issues and so I can get an alignment with new parts. Went with Raybestos because of they're one piece forged design. Hopefully they hold up good. And new tires will be ordered pretty soon as well. I'm hoping to have a list of things done by the next round on the 22nd, and the list is quite extensive.
Mainly getting all new gaskets for the intake so I can throw all the new ones on and clean everything up in the engine bay. I'm also going to get a new oil cap cover. I didn't notice it on my last oil change bc I didn't look, but it was coming off weird again so I looked a the threads of the cap and they were al freakin broke and like chopped up and whatnot. So I guess that gives me an excuse to buy the neat lookin racing beat one.
Also on the list of things to do is to replace the brake lines and the slave cyl line with stainless steel to rid of any play in those systems. Then it's the exhaust. Just going to go with new flanges, weld them up, and put it all back together. That's where I'm having my leaks anyway.
On a side note, I'm not doing anything to the car this year to throw it out of ES since I want to learn how to drive faster, not learn how to drive my faster car. It won't really much matter since I'll be thrown in with the Novice class until my second season anyway but it's better practice.
And here's a couple links from Sunday.
Results: http://inr-scca.org/Results/2012-04fin.html#N
Pics:


^^that is the guy I bought my car from


Master gallery: http://s1245.photobucket.com/albums/...filter=noflash
So hopefully I have finally proven myself worthy of having a real and useful build thread lol. And as I said for now all stock but once I improve my driving more, you can be sure I'll be taking care of all that monster truck height and Oldsmobile roll through the corners :P sad and scary thing is nothing is broken and everything is how it should be. So that is just what it is stock.
Thanks for peepin again!
Mainly getting all new gaskets for the intake so I can throw all the new ones on and clean everything up in the engine bay. I'm also going to get a new oil cap cover. I didn't notice it on my last oil change bc I didn't look, but it was coming off weird again so I looked a the threads of the cap and they were al freakin broke and like chopped up and whatnot. So I guess that gives me an excuse to buy the neat lookin racing beat one.
Also on the list of things to do is to replace the brake lines and the slave cyl line with stainless steel to rid of any play in those systems. Then it's the exhaust. Just going to go with new flanges, weld them up, and put it all back together. That's where I'm having my leaks anyway.
On a side note, I'm not doing anything to the car this year to throw it out of ES since I want to learn how to drive faster, not learn how to drive my faster car. It won't really much matter since I'll be thrown in with the Novice class until my second season anyway but it's better practice.
And here's a couple links from Sunday.
Results: http://inr-scca.org/Results/2012-04fin.html#N
Pics:
^^that is the guy I bought my car from
Master gallery: http://s1245.photobucket.com/albums/...filter=noflash
So hopefully I have finally proven myself worthy of having a real and useful build thread lol. And as I said for now all stock but once I improve my driving more, you can be sure I'll be taking care of all that monster truck height and Oldsmobile roll through the corners :P sad and scary thing is nothing is broken and everything is how it should be. So that is just what it is stock.
Thanks for peepin again!
Joined: May 2006
Posts: 3,881
Likes: 3
From: Jacksonville, Tampa & Tallahassee
Lookin good! lol @ the ride height. Mine was never that high, but I recon thats because the stock springs we sagging so badly. I swapped in some lowering springs from a friend for a day and it actually RAISED the car.
Have fun in the novice class, I completely agree with learning to drive fast first, "learning" in a fast car hurts the learning curve bad. Its far more rewarding to learn the characteristics of the chassis and make improvements as needed.
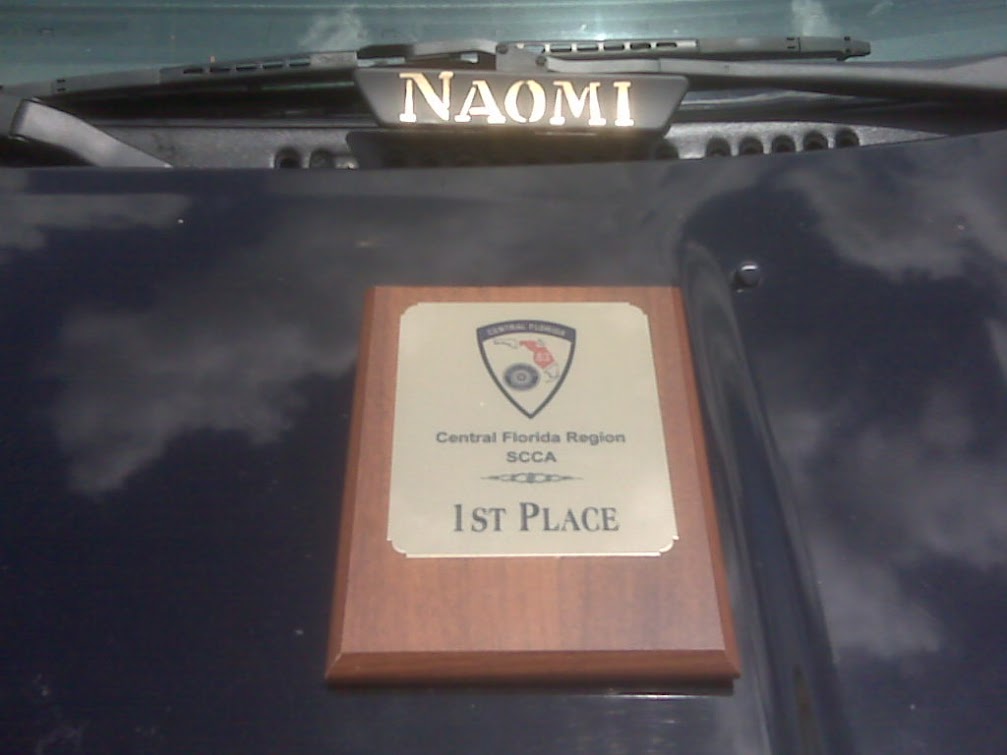
Here is my first outing in my TII, all stock except the FD wheels and catback. Fortunately there were only about 10 cars in the novice class and I was able to squeeze out a victory. They run it a little different down here, you compete in the novice class until you win, then they put you where you belong.
https://www.rx7club.com/build-threads-294/naomi-cant-keep-good-bitch-down-999774/

Ok, back to our regular scheduled programming
Have fun in the novice class, I completely agree with learning to drive fast first, "learning" in a fast car hurts the learning curve bad. Its far more rewarding to learn the characteristics of the chassis and make improvements as needed.
Here is my first outing in my TII, all stock except the FD wheels and catback. Fortunately there were only about 10 cars in the novice class and I was able to squeeze out a victory. They run it a little different down here, you compete in the novice class until you win, then they put you where you belong.
https://www.rx7club.com/build-threads-294/naomi-cant-keep-good-bitch-down-999774/
Ok, back to our regular scheduled programming
Thread Starter
Passion for Racing
Joined: Aug 2010
Posts: 1,066
Likes: 2
From: Crown Point, Indiana
In about a week or so i will have a good grand to drop on the car so its all maintenance work in the engine and a few other random things. Mainly all new gaskets for my intakes, new silicone vacuum lines, fuel and air filters, atkins 6 port rods, PowerSlot rotors front and rear, hawk HP+ pads, DOT approved SS brake lines, and a few other items. All just to freshen things up and make it look better for when im at shows and whatnot. Might also invest in a baffle plate and brace for the oil pan since ill be crossing the car more.
Thread Starter
Passion for Racing
Joined: Aug 2010
Posts: 1,066
Likes: 2
From: Crown Point, Indiana
Made some good "progress" today. I just finished ordering parts and earlier today I got my new tires on the car. Very pleased with how speedy Discount Tire Co. was. I ordered my tires yesterday and they were ordered by Discount this morning and arrived at the shop by 1:30. So I got there about 2, had a really nice conversation with a guy named Ryan about autocross and his old 3000GT VR4 (Evo engine and 4WD. Sorry, i'm not very up on my Mitsu lingo!)
After getting everything sorted out, I was sitting at $413 for all four tires, mounted/balanced/installed, and road hazard. This was after $40 off online and an additional SCCA discount of some sort.
First, I just want to throw in a random picture of how I blow off steam from always having to work on the 7. I pretend the targets are my car :P
http://www.flickr.com/photos/globekidd/7492165346/http://www.flickr.com/photos/globekidd/7492165346/ by http://www.flickr.com/people/globekidd/, on Flickr
Here were my tires just waiting to go on
http://www.flickr.com/photos/globekidd/7492165486/http://www.flickr.com/photos/globekidd/7492165486/ by http://www.flickr.com/people/globekidd/, on Flickr
With everything off. The one thing I was very annoyed by was the fact that in the process of removing the surface rust from the wheel mating surfaces, they completely ate into the paint on my calipers. I WAS NOT happy about that. I didn't notice until I got to my buddies house to change my tie rods.
http://www.flickr.com/photos/globekidd/7492165626/http://www.flickr.com/photos/globekidd/7492165626/ by http://www.flickr.com/people/globekidd/, on Flickr
Tires being changed out.
http://www.flickr.com/photos/globekidd/7492165758/http://www.flickr.com/photos/globekidd/7492165758/ by http://www.flickr.com/people/globekidd/, on Flickr
The new Raybestos outer tie rods installed. The old ones were so bad. I had to literally shear the cotter pin off with the castle nut since it was all rusted together and impossible to remove any other way. My only gripe with this was they gave me the wrong sized backing nut with one of the rods.
http://www.flickr.com/photos/globekidd/7492165898/http://www.flickr.com/photos/globekidd/7492165898/ by http://www.flickr.com/people/globekidd/, on Flickr
Got home and cleaned the tires with the newest Turtle Wax tire cleaner and shined it with the same newest Turtle Wax Natural Look tire shine. Personally I like it more than the Black Magic stuff I was using before and it's much easier and doesn't run. After you clean the tires real good (assuming you never clean them, but as long as you keep up on them it should only take a rinse, spray and wait, then another rinse) let them dry and then spray the shine on, wait about 10 mins, then use a microfiber to wipe off the excess. The shine will soak into the rubber a bit and after you wipe it off, it really does look like a natural black rubber shine.
http://www.flickr.com/photos/globekidd/7492165986/http://www.flickr.com/photos/globekidd/7492165986/ by http://www.flickr.com/people/globekidd/, on Flickr
And a quick shot of the tread.
http://www.flickr.com/photos/globekidd/7492165158/http://www.flickr.com/photos/globekidd/7492165158/ by http://www.flickr.com/people/globekidd/, on Flickr
It's amazing just how much the ride transformed with new tires and outer tie rods. Can't wait for the packages from Atkins and Mazdatrix to arrive so I can really go to town
Last edited by REAmemiya_fan; Jul 3, 2012 at 12:38 AM.
Thread Starter
Passion for Racing
Joined: Aug 2010
Posts: 1,066
Likes: 2
From: Crown Point, Indiana
Took my car to get the alignment checked today, and this is pretty much what they told me...

Every aspect of alignment in the front is off, and both camber and toe in the rear is off. SO, looks like it's time to do bushings and the camber link before I take it back. That way I can have that taken care of and out of the way and to not void the warranty on the alignment.
Every aspect of alignment in the front is off, and both camber and toe in the rear is off. SO, looks like it's time to do bushings and the camber link before I take it back. That way I can have that taken care of and out of the way and to not void the warranty on the alignment.
Thread Starter
Passion for Racing
Joined: Aug 2010
Posts: 1,066
Likes: 2
From: Crown Point, Indiana
Got more done today. Started to get the leaky exhaust all patched up. The flanges between the first and second pre-cats (well in my case only the second one exists) were garbage so we simply cut it out and welded in a new section of pipe. We still have to drop the exhaust to finish welding the top and replace a gasket at a different flange but due to time constraints we couldn't get that done tonight.
On another note I began to take care of some of the rust. Here is what I started with (pic from before I even bought the car).
http://www.flickr.com/photos/globekidd/6865319170/http://www.flickr.com/photos/globekidd/6865319170/ by http://www.flickr.com/people/globekidd/, on Flickr
So as we can see the rust is pretty bad. It did come through to the back side of the sheet metal but not enough to make any holes. So in short the panel needs to cut and replaced with a new one from a clean donor car. But for now, just to keep it from spreading as quickly and to kind of clean up the rear a bit. My "fix" is merely a band-aid for the situation so it wasn't meant to be perfect, just good enough until I can get the problem professionally assessed.
I started by taking a wire wheel to the cancer and cleaning it up the best I could with that, then went back over it with 80 grit sandpaper to rough it up good. Then I used some bondo to fill everything in and sort of patch the spots on the third light panel that curves into the body for it to sit on. It was by no means perfect, but it was smooth enough to be able to deal with.
http://www.flickr.com/photos/globekidd/7525425354/http://www.flickr.com/photos/globekidd/7525425354/ by http://www.flickr.com/people/globekidd/, on Flickr
After letting the bondo dry for a good 45 mins I took the 80 grit back to the surface to smooth it out and take down any high spots, then I started with the first coat of self-etching primer. After about ten minutes I did a light sanding of 400 grit then put down another coat. After an additional 20 minutes I took off the masking tape and called it a night since I forgot to pick up primer sealer. So tomorrow I will run and grab some then mask the area off again, sand down the primer a little, then do sealer. It does create a high spot on the paint though as is, anybody have any experience with this and can offer help as how to make it a nice flat surface so I can get a rattle-can paint match done?
http://www.flickr.com/photos/globekidd/7525425244/http://www.flickr.com/photos/globekidd/7525425244/ by http://www.flickr.com/people/globekidd/, on Flickr
While I was waiting for the bondo to dry, I decided to make myself a funny little drift charm (even though I don't drift, I thought it would be funny just to put on at local car meets and whatnot :P)
http://www.flickr.com/photos/globekidd/7525425444/http://www.flickr.com/photos/globekidd/7525425444/ by http://www.flickr.com/people/globekidd/, on Flickr
Joined: May 2006
Posts: 3,881
Likes: 3
From: Jacksonville, Tampa & Tallahassee
Awesome charm! My buddy just blew his RB20, I think I'll pick up a couple pistons.
As far as the paint, I did something similar when I shaved the emblem mounting holes w/ jb weld, lol.to get the deface flat you need to sand the area (w/ a block preferably) . To get it to look nice you'll nede to blend the paint with the surrounding area. You can use the body lines to conceal the transitions.
Duplicolor oem colormatch worked great for me. The universal black was a perfect match for color code PZ.
Thread Starter
Passion for Racing
Joined: Aug 2010
Posts: 1,066
Likes: 2
From: Crown Point, Indiana
To start off this update here is a poorly drawn version of the track day FC I wish to one day own!
http://www.flickr.com/photos/globekidd/7547356050/http://www.flickr.com/photos/globekidd/7547356050/ by http://www.flickr.com/people/globekidd/, on Flickr
I did it at work so I didn't really have much in my arsenal as to what I could draw with.
So now for this update. Well my little rust spot fix came out a little less than desirable. I got a paint code color match from Van Senus in a rattle can since I do not have a spray gun available to me. It worked decently, but it's really noticeable in the sunlight and up close. I REALLY need to get some heavy-cut buffing compound to try to even it all out. But it still just needs to be repainted. The whole car. I'm thinking of doing a dark silver from like the R32 or something similar.
http://www.flickr.com/photos/globekidd/7547358996/http://www.flickr.com/photos/globekidd/7547358996/ by http://www.flickr.com/people/globekidd/, on Flickr
And as you can see it didn't even cover up the primer. Which kinda pissed me off but I figured whatever it's only temporary. Then I went to work on the right hand fender to cover up some big scratches. Another job that looks good 10ft away. It turned out better than the rear though.
http://www.flickr.com/photos/globekidd/7547361454/http://www.flickr.com/photos/globekidd/7547361454/ by http://www.flickr.com/people/globekidd/, on Flickr
http://www.flickr.com/photos/globekidd/7547363080/http://www.flickr.com/photos/globekidd/7547363080/ by http://www.flickr.com/people/globekidd/, on Flickr
Then I decided to do the spoiler since the color faded away a long time ago and not even a buff could bring it back. It turned out really good though apart from all the places the rubber cracked or was chipped.
http://www.flickr.com/photos/globekidd/7547374330/http://www.flickr.com/photos/globekidd/7547374330/ by http://www.flickr.com/people/globekidd/, on Flickr
http://www.flickr.com/photos/globekidd/7547377966/http://www.flickr.com/photos/globekidd/7547377966/ by http://www.flickr.com/people/globekidd/, on Flickr
http://www.flickr.com/photos/globekidd/7547380662/http://www.flickr.com/photos/globekidd/7547380662/ by http://www.flickr.com/people/globekidd/, on Flickr
http://www.flickr.com/photos/globekidd/7547382832/http://www.flickr.com/photos/globekidd/7547382832/ by http://www.flickr.com/people/globekidd/, on Flickr
http://www.flickr.com/photos/globekidd/7547384504/http://www.flickr.com/photos/globekidd/7547384504/ by http://www.flickr.com/people/globekidd/, on Flickr
Then today I got my package from Mazdatrix. 19ft total of vacuum hose and the seals and gaskets for the aux port actuators. Tomorrow my package from Atkins will be in and then I can begin work on the intakes and whatever else.
http://www.flickr.com/photos/globekidd/7547387042/http://www.flickr.com/photos/globekidd/7547387042/ by http://www.flickr.com/people/globekidd/, on Flickr
Thread Starter
Passion for Racing
Joined: Aug 2010
Posts: 1,066
Likes: 2
From: Crown Point, Indiana
Final package arrived today, can't wait to get everything on the car.
http://www.flickr.com/photos/globekidd/7551335312/http://www.flickr.com/photos/globekidd/7551335312/ by http://www.flickr.com/people/globekidd/, on Flickr
And it has to be said, the quality of the Aux port rods are phenomenal. And they seem a little lighter than the stock ones despite having more material.
http://www.flickr.com/photos/globekidd/7551341428/http://www.flickr.com/photos/globekidd/7551341428/ by http://www.flickr.com/people/globekidd/, on Flickr
Last edited by REAmemiya_fan; Jul 11, 2012 at 02:53 PM.
Thread Starter
Passion for Racing
Joined: Aug 2010
Posts: 1,066
Likes: 2
From: Crown Point, Indiana
Time once again for another pretty dull update! Got the K&N in today as well as the NGK wires and did a little repainting on the air box and intake snorkel. Saturday is when the real fun begins with the new intakes going in along with the vacuum hoses and whatnot. While it's not a beastly GT2872R with a v-mount and crazy power upgrade, it will still give it some 4k pep and more drivability with the new vacuum hoses. Also hopefully the exhaust will be finished welding up so it won't sound like *** anymore.
Okay onto the pictures.
Here is the stock filter element. Pretty clean but very restrictive. I tried to blow through it and it simply blew back at me with dirt. Gross.
http://www.flickr.com/photos/globekidd/7559520814/http://www.flickr.com/photos/globekidd/7559520814/ by http://www.flickr.com/people/globekidd/, on Flickr
Then I held up the K&N and blew through it. Felt a nice gentle breeze on my hand on the other side. And while I was waiting for the paint to dry I had my buddy wash the car for my and so we backed it out with just the filter in. Sounded pretty cool actually. Without the major restriction you could hear the engine noise through the filter. I pretended I had ITB's hahaha.
http://www.flickr.com/photos/globekidd/7559524110/http://www.flickr.com/photos/globekidd/7559524110/ by http://www.flickr.com/people/globekidd/, on Flickr
And a shitty picture of it all back together. It actually looks really good in person. I just cleaned them with WD40 and a power washer. Then after they were dry I just sprayed them with Duplicolor Trim Paint. Three coats later they were looking mighty good.
http://www.flickr.com/photos/globekidd/7559526728/http://www.flickr.com/photos/globekidd/7559526728/ by http://www.flickr.com/people/globekidd/, on Flickr
Then after a shower and a little more detailing it was off to the weekly Thursday car show on our town square. My autocross buddy was able to get a spot next to me after a civilian car left. And yes I put on display the fresh manifolds with the Atkins Aux port inserts. Had a LOT of people stop to look at it since I did that. Probably because they were confused haha. I even had a guy ask me if the manifolds were a high flow lightweight design. I laughed and said no it's stock and explained to him how it all worked.
http://www.flickr.com/photos/globekidd/7559530136/http://www.flickr.com/photos/globekidd/7559530136/ by http://www.flickr.com/people/globekidd/, on Flickr
And now for those GoPro videos I've been promising. It was Gabe's camera and SD card so I had to wait for him to get the card to me. Just hard since he works a lot. Here are three out of the four runs I got with the camera. The fourth one has the same angle as the first one though so I didn't bother posting it yet. Or uploading it for that matter.
And this was my fastest run of the day, given the little fist pump at the end haha
Thread Starter
Passion for Racing
Joined: Aug 2010
Posts: 1,066
Likes: 2
From: Crown Point, Indiana
After about 38 hours of labor over the weekend, we finished the long waited intake rebuild 
Why did it take 38 hours to do everything? Allow me to walk you through the weekend.
DAY 1
Got to his house and working by about 4. Pulled the car in, started listing off things we needed to do, then got about doing things.
http://www.flickr.com/photos/globekidd/7584087228/http://www.flickr.com/photos/globekidd/7584087228/ by http://www.flickr.com/people/globekidd/, on Flickr
We do tend to bullshit a lot as we work, but its 95% of the time talking about the rx7, rotaries, crashing civics, and other car related topics. But as always, work got done in the mean time. Started by pulling anything and everything that was either A) in the way or B) I wanted to sandblast and repaint.
http://www.flickr.com/photos/globekidd/7584091068/http://www.flickr.com/photos/globekidd/7584091068/ by http://www.flickr.com/people/globekidd/, on Flickr
Seeing this just made it all the more worth it to get this all done. It was just literally disgusting.
http://www.flickr.com/photos/globekidd/7584095236/http://www.flickr.com/photos/globekidd/7584095236/ by http://www.flickr.com/people/globekidd/, on Flickr
So off it was with all the vacuum lines and grounds and whatever else needed to come off. A big part of the time spent was checking every little detail and system to make sure everything was working and working well. One of the things we made sure to do was clean up every ground in the engine bay and use dielectric grease as they were put back together (as well as any other part that acted as a part of the grounding system.)
http://www.flickr.com/photos/globekidd/7584100958/http://www.flickr.com/photos/globekidd/7584100958/ by http://www.flickr.com/people/globekidd/, on Flickr
To me, every little detail counts. This is what really took up a huge portion of our time. Not the injector you see below but the attention to detail on everything is what turned a five minute job into an hour long job. In all honesty, we could have had everything torn apart, replaced, and put back on without any changes in a matter of a few hours. But what is the point in that? I am the type of person that says "well why not do this since were already in here." It is very time intensive, but to me it is worth it in the end.
Anyway, as far as the injectors go, getting them that pretty was really simple. Use a wire wheel (by hand, no power) to scrape off most of the surface rust, then go around with a wet sand of 1000 grit. Next just use a jewelry polishing kit that you could pick up from Menard's and get to it. The end result is quite nice.
http://www.flickr.com/photos/globekidd/7584106368/http://www.flickr.com/photos/globekidd/7584106368/ by http://www.flickr.com/people/globekidd/, on Flickr
This was the work bench/ prep table. All the new pieces sat here waiting to go on until they were ready. It is always good to stay organized, and remember, zip-lock baggies are always your best friend.
http://www.flickr.com/photos/globekidd/7584111048/http://www.flickr.com/photos/globekidd/7584111048/ by http://www.flickr.com/people/globekidd/, on Flickr
Dynamic chamber and extended manifold off. Next up was removing the rats nest. All I am going to say is I now see exactly why people get rid of them. It will be explained in more detail though as the post moves on.
http://www.flickr.com/photos/globekidd/7584115106/http://www.flickr.com/photos/globekidd/7584115106/ by http://www.flickr.com/people/globekidd/, on Flickr
This was as I was removing the LIM, took off the ACV and I was very shocked to see the back side of it. So god damn clean! On my S4, this was black and caked in carbon. The anti-backfire valve (as we call it) was also really clean compared to the S4, which literally had a mountain of carbon on the back.
http://www.flickr.com/photos/globekidd/7584118626/http://www.flickr.com/photos/globekidd/7584118626/ by http://www.flickr.com/people/globekidd/, on Flickr
This was DEEP into the night. I would say at this point we were approaching 11 or 12? Anyway, at this point I have cut all my new vacuum lines and layed them out how they go on the nest. Good time to clean it all up with some brake clean and a toothbrush. I didn't put the work into this as my buddy did with the injectors simply because you will never see it with the manifolds on. So a good simple clean was good enough for me.
http://www.flickr.com/photos/globekidd/7584123762/http://www.flickr.com/photos/globekidd/7584123762/ by http://www.flickr.com/people/globekidd/, on Flickr
Next was cleaning up the aux port runners and making sure that the Atkins sleeves will always work as they should. Now it may seem extremely silly to polish something that will literally never be seen, however, the reason we did was because it really made a big difference in how easily the sleeves turned inside the runners. In short, the final product between cleaning the runners and polishing the sleeves was a sleeve that turned like a puck on an air hockey table. We could blow on them to make them turn, yet it still sealed around the edges.
http://www.flickr.com/photos/globekidd/7584127698/http://www.flickr.com/photos/globekidd/7584127698/ by http://www.flickr.com/people/globekidd/, on Flickr
This was the final product of the extended manifold. And I must say, although the work I will have to put in to keep it that clean will be insane, it is completely worth it given how great it looks. We did the same thing to the fuel rail as we did the injectors, but didn't wire wheel as there was no rust.
http://www.flickr.com/photos/globekidd/7584132526/http://www.flickr.com/photos/globekidd/7584132526/ by http://www.flickr.com/people/globekidd/, on Flickr
By the time 5 am rolls around we are dragging *** and just ready for some rest. Another friend of mine joined us for a good 8 or so hours so even less got done when that happened but it doesn't matter because we had a good time as always. Day 2 post on the way.
Last edited by REAmemiya_fan; Jul 16, 2012 at 08:26 PM.


The polishing looks VERY nice man. That's sadly something I feel I'll never have the patience for. I like to go, and go as fast as possible.
I hope you never go off course and end up in loose dirt. That **** will reek havoc on your car inside, under the hood, and outside.
Ask me how I know. Lol.
How do you like those new port sleeves? They're one of my favorite N/A mods, but I've only used the pineapple inserts.
I hope you never go off course and end up in loose dirt. That **** will reek havoc on your car inside, under the hood, and outside.
Ask me how I know. Lol.
How do you like those new port sleeves
? They're one of my favorite N/A mods, but I've only used the pineapple inserts.
Thread Starter
Passion for Racing
Joined: Aug 2010
Posts: 1,066
Likes: 2
From: Crown Point, Indiana
Day 2
Were up bright and early after just a five hour power nap and ready to go back at it. We figured, eh, it'll be done by around 2-3 o'clock.
I was up first so I began getting the rats nest back together and ready to be slapped on the car for when it was ready. This is why I now know why most people just throw it in the trash and just throw some block off plates on everything. What a nightmare and a half it was replacing the vacuum lines and anything that happened to break. And in all honesty, If I lived in an emissions exempt county, all that **** would have been taken off and nothing would have been retained other than the fuel feed and return lines.
http://www.flickr.com/photos/globekidd/7584137368/http://www.flickr.com/photos/globekidd/7584137368/ by http://www.flickr.com/people/globekidd/, on Flickr
Another shot.
http://www.flickr.com/photos/globekidd/7584142220/http://www.flickr.com/photos/globekidd/7584142220/ by http://www.flickr.com/people/globekidd/, on Flickr
So fast forwarding through the day and I wasn't taking any pictures. But in short, a lot of brackets were removed, sandblasted, and painted. The brake booster hardline was wire wheeled the night before then I primer and painted it. We took the coil packs apart and sandblasted and painted the metal parts, and Adam cleaned up and polished the plastic really well. Looked factory new.
Then came time to blast and paint the air pump. As usual we taped off all the openings and anything that should not have sand introduced to it. Well, he forgot one little hole on the back of the pump that I would have overlooked as well. When it came out it rotated really shitty and grinded along the way. So since it was his mistake, he took it apart, cleaned everything out really well, greased up the bearings, put it back together, and tested it with an air gun. Good as new!
Eventually it came time to start putting all the manifolds back on. We had gotten the LIM on the night before and but we began to wonder which way the sleeves went in. So we pull it off, and sure enough they were in backwards. That was my fault However I was glad because the rear actuator rod ended up sticking in the full open position during testing so we ended up pulling the sleeve back out and the groove that the retaining washer goes into ended up being really gunked up with carbon and would catch and just stay. So we cleaned it off and polished the rod and threw it back in. Working perfectly now. Now it was back on, and the oil drippers were back on.
http://www.flickr.com/photos/globekidd/7584147202/http://www.flickr.com/photos/globekidd/7584147202/ by http://www.flickr.com/people/globekidd/, on Flickr
It was about this point that we came onto a realization. We had put a lot of clues together... Randomly replaced parts, home-brew gaskets, missing aux sleeves (stock ones were not in the engine. So this can prove that daily driving with them out is actually not bad at all), painted rotor housings, really strong compression: The engine has at one point been rebuilt.
http://www.flickr.com/photos/globekidd/7584150112/http://www.flickr.com/photos/globekidd/7584150112/ by http://www.flickr.com/people/globekidd/, on Flickr
Fast forward many many more hours later and we have everything completely back together and ready to fire up. Crank, it starts, but has an EXTREMELY loud vacuum leak and a very strong smell of fuel. So we go through and check as much as we could without having to take everything back apart again. Nothing. An hour or so of troubleshooting and him trying to find his dog that had run off and were left with one choice. Rip it all back apart and find out what the **** was going on.
Sure enough, by the time we got to it, no vacuum lines were off or misplaced, but the primary fuel rail would NOT seat right. Even after replacing the grommets and o-rings they actually sat worse than before. So we ended up re-using the old ones with a little bit of high-temp rtv around the edges and put them back in. Better, but still sucked. Tried using the spacer for between the rail and the iron, made it worse. Ended up going redneck and just hammering on the bracket until there was no lateral play in the injectors.
http://www.flickr.com/photos/globekidd/7584153242/http://www.flickr.com/photos/globekidd/7584153242/ by http://www.flickr.com/people/globekidd/, on Flickr
Threw it all back together and started it up again (and realize this was after once again draining the coolant and refilling it for the second time that night). Boom, ran perfectly fine apart from idle issues. Idle and TPS both need to be reset and timing should be checked. But it ran, and the aux ports both opened and closed without issue as well as the VDI. However, ran into a problem with coolant spraying out of the BACV hose that ran to the TB after the aux ports would open up.
http://www.flickr.com/photos/globekidd/7586822700/http://www.flickr.com/photos/globekidd/7586822700/ by http://www.flickr.com/people/globekidd/, on Flickr
It was again 130 am and Adam decided to go take a shower and go to bed as he had to work at 6 in the morning and I decided to stay and let the car cool down then replace the clamp. But he came back and convinced me to just call it quits for the night and start fresh in the morning. So this ends Day 2, onto Day 3.
Were up bright and early after just a five hour power nap and ready to go back at it. We figured, eh, it'll be done by around 2-3 o'clock.
I was up first so I began getting the rats nest back together and ready to be slapped on the car for when it was ready. This is why I now know why most people just throw it in the trash and just throw some block off plates on everything. What a nightmare and a half it was replacing the vacuum lines and anything that happened to break. And in all honesty, If I lived in an emissions exempt county, all that **** would have been taken off and nothing would have been retained other than the fuel feed and return lines.
http://www.flickr.com/photos/globekidd/7584137368/http://www.flickr.com/photos/globekidd/7584137368/ by http://www.flickr.com/people/globekidd/, on Flickr
Another shot.
http://www.flickr.com/photos/globekidd/7584142220/http://www.flickr.com/photos/globekidd/7584142220/ by http://www.flickr.com/people/globekidd/, on Flickr
So fast forwarding through the day and I wasn't taking any pictures. But in short, a lot of brackets were removed, sandblasted, and painted. The brake booster hardline was wire wheeled the night before then I primer and painted it. We took the coil packs apart and sandblasted and painted the metal parts, and Adam cleaned up and polished the plastic really well. Looked factory new.
Then came time to blast and paint the air pump. As usual we taped off all the openings and anything that should not have sand introduced to it. Well, he forgot one little hole on the back of the pump that I would have overlooked as well. When it came out it rotated really shitty and grinded along the way. So since it was his mistake, he took it apart, cleaned everything out really well, greased up the bearings, put it back together, and tested it with an air gun. Good as new!
Eventually it came time to start putting all the manifolds back on. We had gotten the LIM on the night before and but we began to wonder which way the sleeves went in. So we pull it off, and sure enough they were in backwards. That was my fault
However I was glad because the rear actuator rod ended up sticking in the full open position during testing so we ended up pulling the sleeve back out and the groove that the retaining washer goes into ended up being really gunked up with carbon and would catch and just stay. So we cleaned it off and polished the rod and threw it back in. Working perfectly now. Now it was back on, and the oil drippers were back on.http://www.flickr.com/photos/globekidd/7584147202/http://www.flickr.com/photos/globekidd/7584147202/ by http://www.flickr.com/people/globekidd/, on Flickr
It was about this point that we came onto a realization. We had put a lot of clues together... Randomly replaced parts, home-brew gaskets, missing aux sleeves (stock ones were not in the engine. So this can prove that daily driving with them out is actually not bad at all), painted rotor housings, really strong compression: The engine has at one point been rebuilt.
http://www.flickr.com/photos/globekidd/7584150112/http://www.flickr.com/photos/globekidd/7584150112/ by http://www.flickr.com/people/globekidd/, on Flickr
Fast forward many many more hours later and we have everything completely back together and ready to fire up. Crank, it starts, but has an EXTREMELY loud vacuum leak and a very strong smell of fuel. So we go through and check as much as we could without having to take everything back apart again. Nothing. An hour or so of troubleshooting and him trying to find his dog that had run off and were left with one choice. Rip it all back apart and find out what the **** was going on.
Sure enough, by the time we got to it, no vacuum lines were off or misplaced, but the primary fuel rail would NOT seat right. Even after replacing the grommets and o-rings they actually sat worse than before. So we ended up re-using the old ones with a little bit of high-temp rtv around the edges and put them back in. Better, but still sucked. Tried using the spacer for between the rail and the iron, made it worse. Ended up going redneck and just hammering on the bracket until there was no lateral play in the injectors.
http://www.flickr.com/photos/globekidd/7584153242/http://www.flickr.com/photos/globekidd/7584153242/ by http://www.flickr.com/people/globekidd/, on Flickr
Threw it all back together and started it up again (and realize this was after once again draining the coolant and refilling it for the second time that night). Boom, ran perfectly fine apart from idle issues. Idle and TPS both need to be reset and timing should be checked. But it ran, and the aux ports both opened and closed without issue as well as the VDI. However, ran into a problem with coolant spraying out of the BACV hose that ran to the TB after the aux ports would open up.
http://www.flickr.com/photos/globekidd/7586822700/http://www.flickr.com/photos/globekidd/7586822700/ by http://www.flickr.com/people/globekidd/, on Flickr
It was again 130 am and Adam decided to go take a shower and go to bed as he had to work at 6 in the morning and I decided to stay and let the car cool down then replace the clamp. But he came back and convinced me to just call it quits for the night and start fresh in the morning. So this ends Day 2, onto Day 3.
Last edited by REAmemiya_fan; Jul 16, 2012 at 09:07 PM.
Sounds like you have some good help, helping you work on her. Always nice, especially once things go south and you start to get frustrated with your car.
Keep up the good work. The detailing and finish looks great. Really neat color your using, what is it? If you don't mind. I really like it's strong blue tint!
Keep up the good work. The detailing and finish looks great. Really neat color your using, what is it? If you don't mind. I really like it's strong blue tint!
Thread Starter
Passion for Racing
Joined: Aug 2010
Posts: 1,066
Likes: 2
From: Crown Point, Indiana
Day 3
So here we are, Monday morning I'm waking up at 8 am after a healthy 6 hour nap. I'm still tired as hell but eager to just get everything settled, cleaned up, and go home. I go out to the barn, switch out the hose clamp, put a zip tie on another hose that like very slowly "drools" out coolant to slow it down a bit, and start it up to see how we are. After it warms up a little bit, I give it some revs to open the Aux ports then check to see if the hose was still spitting or not. Sure enough it wasn't, so I let out a sigh of relief, then turned the car off, lowered it down, and moved his GTUs out from behind my car and then took mine out for a little test drive to check for any problems.
Came back with no problems, so I sat it outside and went to clean up the garage-house-thing. Packed up, took some pictures, and went home. Here are the pics:
http://www.flickr.com/photos/globekidd/7584161906/http://www.flickr.com/photos/globekidd/7584161906/ by http://www.flickr.com/people/globekidd/, on Flickr
http://www.flickr.com/photos/globekidd/7584370356/http://www.flickr.com/photos/globekidd/7584370356/ by http://www.flickr.com/people/globekidd/, on Flickr
http://www.flickr.com/photos/globekidd/7586825656/http://www.flickr.com/photos/globekidd/7586825656/ by http://www.flickr.com/people/globekidd/, on Flickr
http://www.flickr.com/photos/globekidd/7586837280/http://www.flickr.com/photos/globekidd/7586837280/ by http://www.flickr.com/people/globekidd/, on Flickr
http://www.flickr.com/photos/globekidd/7586841396/http://www.flickr.com/photos/globekidd/7586841396/ by http://www.flickr.com/people/globekidd/, on Flickr
http://www.flickr.com/photos/globekidd/7584365536/http://www.flickr.com/photos/globekidd/7584365536/ by http://www.flickr.com/people/globekidd/, on Flickr
My initial thoughts of the rebuilt intake:
In addition to fully repairing the exhaust, the whole engine just runs a lot smoother now. Thanks to the Atkins sleeves, I now have low end torque again. It is beautiful for street driving because I no longer need to revs the ***** off the car just to keep up with people from a dig. Above 5500 it is able to breathe nicely too since the VDI is all nice and new again. It looks great, especially in the sun where you can see the metallic in the paint. All the new vacuum lines give me peace of mind that none of them are gonna fail or anything like that. Final thoughts will have to come after we set the idle and reset the TPS and check timing.
I know to a lot of you this is a really low end upgrade that wouldn't excite any of the high power guys, but for me, it's just really nice having a good, reliable, moderately powered car. Plus I won't be embarrassed to go to car shows and pop the hood only to show a dirty *** worn down engine. Now people can see and appreciate the car for what it is. Especially the muscle car guys, since they tend to think cleaner is more powerful or something.
One last thought; on the way home I passed by an automotive place that has had a really clean '85 RX-7 just sitting for a long time so I stopped in and asked what was going on with it. They said about a month or so ago the owner dropped it off for fuel system and wiring work to be done and since then he just kind of disappeared off the face of the earth. So they took my name and number and said if they can sell it or just get it out of there I would be the first to know. So my fingers are crossed and I'm saving my pennies to buy it once they can official get rid of it. I wasn't able to check it out but it looked extremely clean from the road and they said the owner took phenomenal care of it and it only has 90k on the clock, so I would really love to have that. Anyways thanks for checking next round of autocross is Sunday so I will have more to come after then!
So here we are, Monday morning I'm waking up at 8 am after a healthy 6 hour nap. I'm still tired as hell but eager to just get everything settled, cleaned up, and go home. I go out to the barn, switch out the hose clamp, put a zip tie on another hose that like very slowly "drools" out coolant to slow it down a bit, and start it up to see how we are. After it warms up a little bit, I give it some revs to open the Aux ports then check to see if the hose was still spitting or not. Sure enough it wasn't, so I let out a sigh of relief, then turned the car off, lowered it down, and moved his GTUs out from behind my car and then took mine out for a little test drive to check for any problems.
Came back with no problems, so I sat it outside and went to clean up the garage-house-thing. Packed up, took some pictures, and went home. Here are the pics:
http://www.flickr.com/photos/globekidd/7584161906/http://www.flickr.com/photos/globekidd/7584161906/ by http://www.flickr.com/people/globekidd/, on Flickr
http://www.flickr.com/photos/globekidd/7584370356/http://www.flickr.com/photos/globekidd/7584370356/ by http://www.flickr.com/people/globekidd/, on Flickr
http://www.flickr.com/photos/globekidd/7586825656/http://www.flickr.com/photos/globekidd/7586825656/ by http://www.flickr.com/people/globekidd/, on Flickr
http://www.flickr.com/photos/globekidd/7586837280/http://www.flickr.com/photos/globekidd/7586837280/ by http://www.flickr.com/people/globekidd/, on Flickr
http://www.flickr.com/photos/globekidd/7586841396/http://www.flickr.com/photos/globekidd/7586841396/ by http://www.flickr.com/people/globekidd/, on Flickr
http://www.flickr.com/photos/globekidd/7584365536/http://www.flickr.com/photos/globekidd/7584365536/ by http://www.flickr.com/people/globekidd/, on Flickr
My initial thoughts of the rebuilt intake:
In addition to fully repairing the exhaust, the whole engine just runs a lot smoother now. Thanks to the Atkins sleeves, I now have low end torque again. It is beautiful for street driving because I no longer need to revs the ***** off the car just to keep up with people from a dig. Above 5500 it is able to breathe nicely too since the VDI is all nice and new again. It looks great, especially in the sun where you can see the metallic in the paint. All the new vacuum lines give me peace of mind that none of them are gonna fail or anything like that. Final thoughts will have to come after we set the idle and reset the TPS and check timing.
I know to a lot of you this is a really low end upgrade that wouldn't excite any of the high power guys, but for me, it's just really nice having a good, reliable, moderately powered car. Plus I won't be embarrassed to go to car shows and pop the hood only to show a dirty *** worn down engine. Now people can see and appreciate the car for what it is. Especially the muscle car guys, since they tend to think cleaner is more powerful or something.
One last thought; on the way home I passed by an automotive place that has had a really clean '85 RX-7 just sitting for a long time so I stopped in and asked what was going on with it. They said about a month or so ago the owner dropped it off for fuel system and wiring work to be done and since then he just kind of disappeared off the face of the earth. So they took my name and number and said if they can sell it or just get it out of there I would be the first to know. So my fingers are crossed and I'm saving my pennies to buy it once they can official get rid of it. I wasn't able to check it out but it looked extremely clean from the road and they said the owner took phenomenal care of it and it only has 90k on the clock, so I would really love to have that. Anyways thanks for checking
next round of autocross is Sunday so I will have more to come after then!
Thread Starter
Passion for Racing
Joined: Aug 2010
Posts: 1,066
Likes: 2
From: Crown Point, Indiana
Quick vid from today. Car was good but the tires are a bit of a let down. But it's what I kind of expected from 400 treadwear all-seasons.
INR SCCA Event 5 - Run 2 - YouTube
Also drove an E92 M3 today, but that is in this thread.
INR SCCA Event 5 - Run 2 - YouTube
Also drove an E92 M3 today, but that is in this thread.
Thread Starter
Passion for Racing
Joined: Aug 2010
Posts: 1,066
Likes: 2
From: Crown Point, Indiana
Update time:
Not too much done, but a few things.
Tore apart the dash and did a real good clean of everything and polished out the clear plastic with mag and aluminum polish. I swear that stuff works on everything. Did the same thing with the idiot cluster.
http://www.flickr.com/photos/globekidd/7725735114/http://www.flickr.com/photos/globekidd/7725735114/ by http://www.flickr.com/people/globekidd/, on Flickr
http://www.flickr.com/photos/globekidd/7730052104/http://www.flickr.com/photos/globekidd/7730052104/ by http://www.flickr.com/people/globekidd/, on Flickr
http://www.flickr.com/photos/globekidd/7730053948/http://www.flickr.com/photos/globekidd/7730053948/ by http://www.flickr.com/people/globekidd/, on Flickr
Also replaced with my rusty *** hood latch with one that I had sandblasted and painted. Not to stand out, but now it looks a lot better since it stands out LESS.
http://www.flickr.com/photos/globekidd/7730055592/http://www.flickr.com/photos/globekidd/7730055592/ by http://www.flickr.com/people/globekidd/, on Flickr
Then my buddy gave me a working but not that great cd player to throw in. Problem is, this is how the wiring looked when I took the old cassette deck out...
http://www.flickr.com/photos/globekidd/7744172510/http://www.flickr.com/photos/globekidd/7744172510/ by http://www.flickr.com/people/globekidd/, on Flickr
But after a lot of time and swearing later, this is how I got it to look:
http://www.flickr.com/photos/globekidd/7743813440/http://www.flickr.com/photos/globekidd/7743813440/ by http://www.flickr.com/people/globekidd/, on Flickr
Then after wrapping it all up:
http://www.flickr.com/photos/globekidd/7743815180/http://www.flickr.com/photos/globekidd/7743815180/ by http://www.flickr.com/people/globekidd/, on Flickr
The extension harness after soldering and a wrap:
http://www.flickr.com/photos/globekidd/7743816222/http://www.flickr.com/photos/globekidd/7743816222/ by http://www.flickr.com/people/globekidd/, on Flickr
And the finished product!!
http://www.flickr.com/photos/globekidd/7743817454/http://www.flickr.com/photos/globekidd/7743817454/ by http://www.flickr.com/people/globekidd/, on Flickr
I know it's not very high-tech or cool, but hey it works and it plays my CD's so I don't care. BUT I think I wired something wrong because I flipped on my lights and the whole dash went out. The only things that work are the radio and idiot cluster. turn signals work too. So I need to figure that out asap, since it is kinda hard to drive at night without seeing RPM/MPH.
And I also managed to injure myself during all of this. Just a fore-warning to anyone who is going to work with solder: Please, for the love of god, wear shoes.
http://www.flickr.com/photos/globekidd/7743810496/http://www.flickr.com/photos/globekidd/7743810496/ by http://www.flickr.com/people/globekidd/, on Flickr
I got lucky enough that it just seared away my nerve endings so it doesn't hurt at all, but it is there so I have to make sure I keep it clean.
Hopefully after I source two S5 TPS's (hint hint, if anyone has some that work right and want to sell them, PM me), I can work on getting new speakers and figure out how to wire the door amps so those speakers work.
Thread Starter
Passion for Racing
Joined: Aug 2010
Posts: 1,066
Likes: 2
From: Crown Point, Indiana
Well you can polish a turd, but...
http://www.flickr.com/photos/globekidd/7763571048/http://www.flickr.com/photos/globekidd/7763571048/ by http://www.flickr.com/people/globekidd/, on Flickr
http://www.flickr.com/photos/globekidd/7763570140/http://www.flickr.com/photos/globekidd/7763570140/ by http://www.flickr.com/people/globekidd/, on Flickr
http://www.flickr.com/photos/globekidd/7763569336/http://www.flickr.com/photos/globekidd/7763569336/ by http://www.flickr.com/people/globekidd/, on Flickr