Clean 90 FC build
 06-04-14, 08:41 PM
#101
So a big batch of pretty parts arrive today and I began cleaning to the S5 rotors and housing that i have received in the mail....Only they were sold as s5 but were actually s4... I just dropped a bunch of money in seals and parts just to have been sold the wrong engine parts and return to square one..
If anybody knows somebody in the montreal-greater toronto area-Ottawa who may be in possession of s5 parts. please contact me.
If anybody knows somebody in the montreal-greater toronto area-Ottawa who may be in possession of s5 parts. please contact me.
if your going NA still and not turboing, why not just use the s4 housings? they would work fine in your situation since ur not doing high boost/high horse power on the motor.. unless you can get your money back then go all for it, if you cant then use what cha got son!
 06-04-14, 08:44 PM
#102
Senior Member
Thread Starter
iTrader: (1)
Join Date: Oct 2012
Location: Ontario
Posts: 386
Likes: 0
Received 0 Likes
on
0 Posts
you cant mix and match the s4 vs s5. Heres why. If i had two s4 housings then sure, but you cant have one of each. S4 is in the middle
Also the s4 rotors are heavier than s5, so i cant use them with the counterweights I have. I need all s5 components.

Also the s4 rotors are heavier than s5, so i cant use them with the counterweights I have. I need all s5 components.
06-05-14, 09:24 PM
#104
Senior Member
Thread Starter
iTrader: (1)
Join Date: Oct 2012
Location: Ontario
Posts: 386
Likes: 0
Received 0 Likes
on
0 Posts
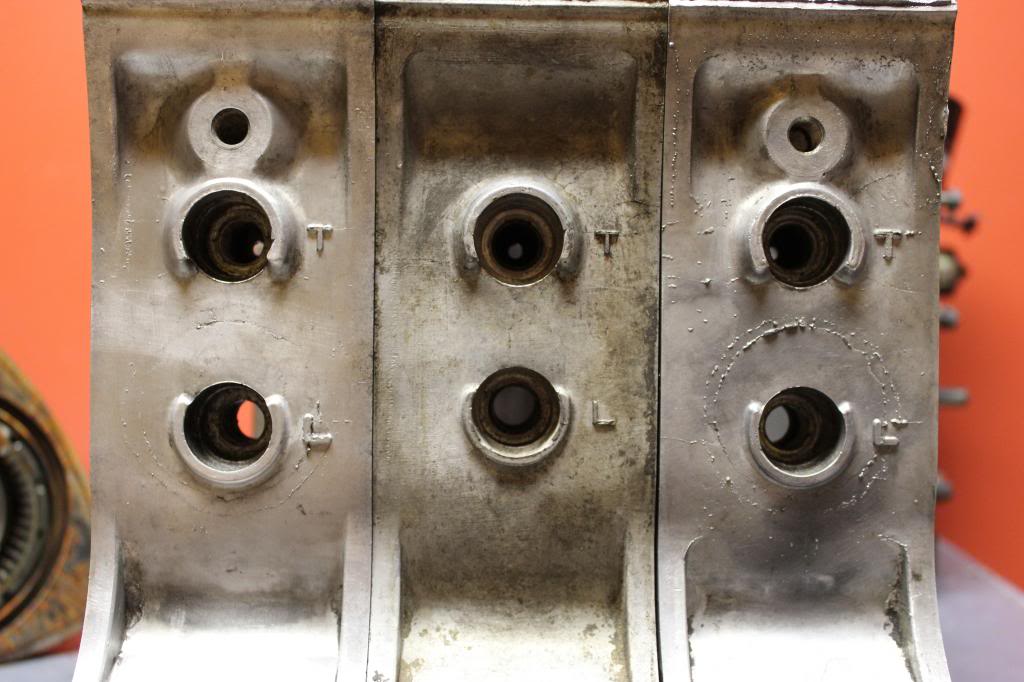
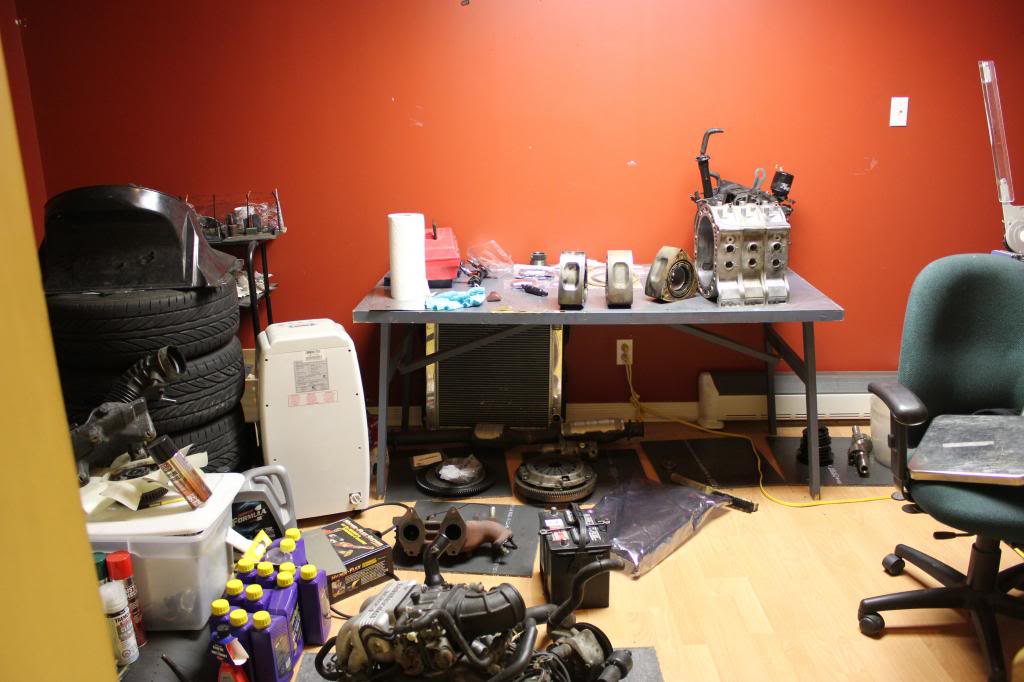
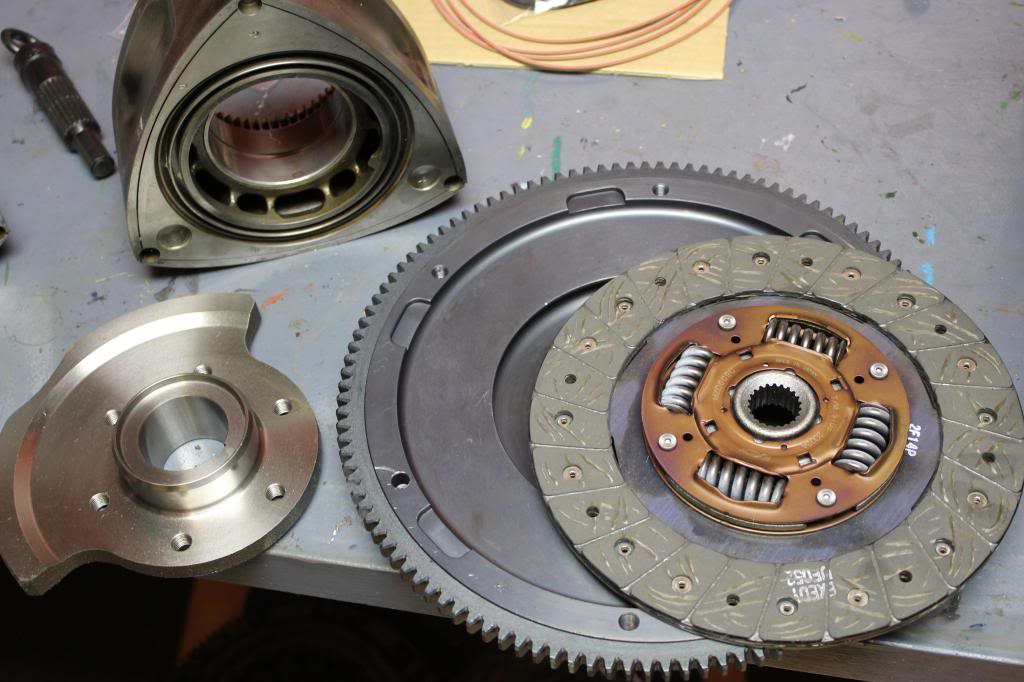
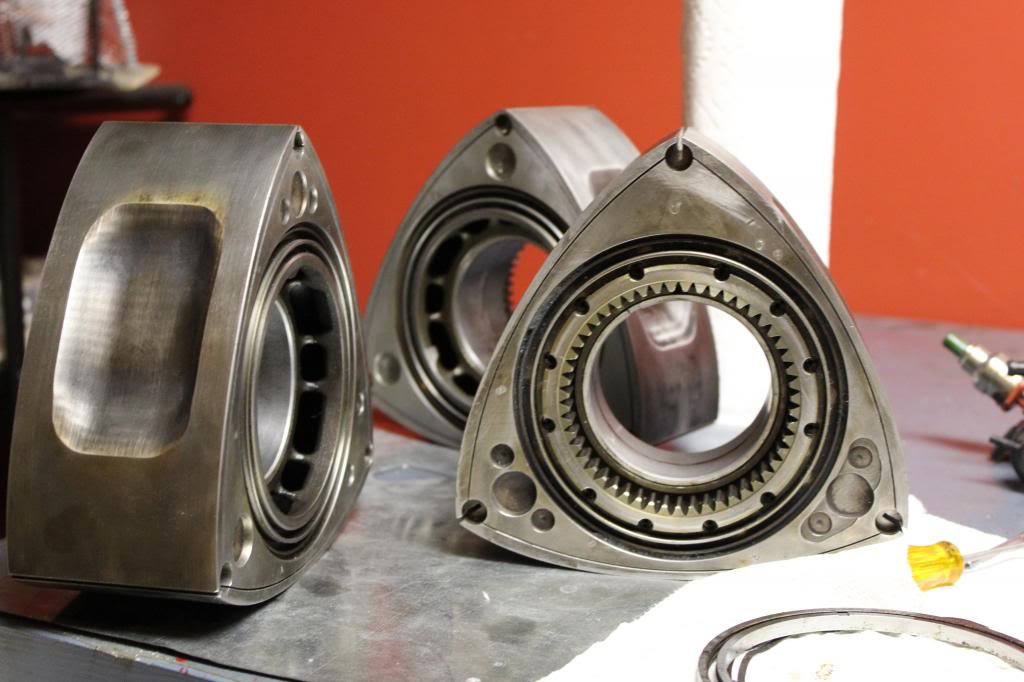
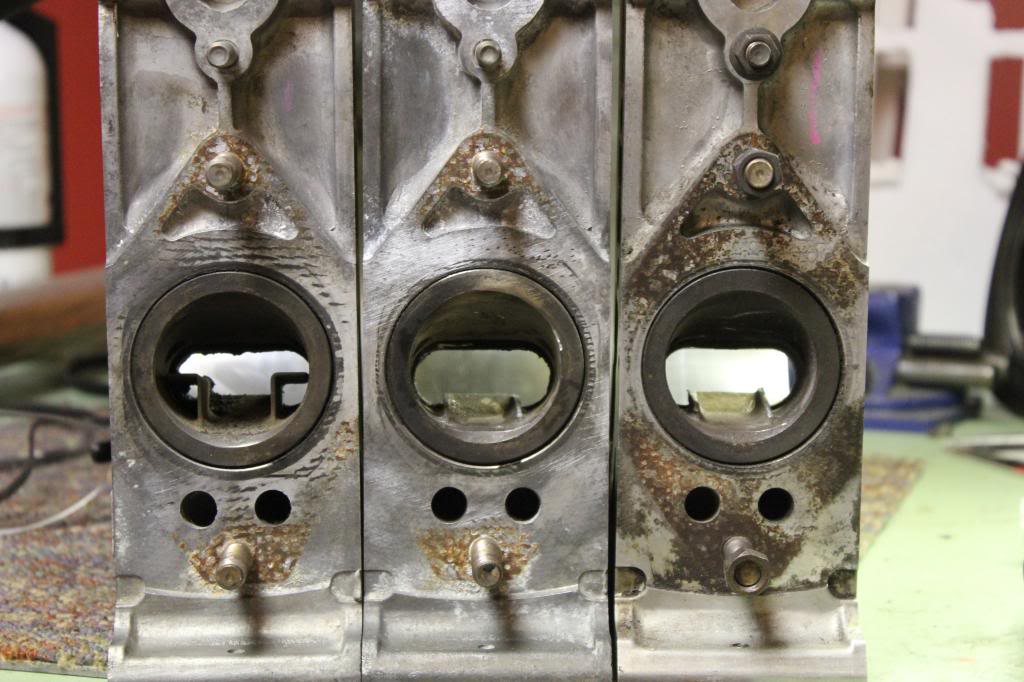
I need s5 rotors to ballance with the counterweights i have. I dont have a single pair of housing in my possesion right now so i just need a pair of any gen housing as long as they are 13b. Anywho, here are some purdy pictures of the loot.


 06-14-14, 08:52 PM
#105
Senior Member
Thread Starter
iTrader: (1)
Join Date: Oct 2012
Location: Ontario
Posts: 386
Likes: 0
Received 0 Likes
on
0 Posts
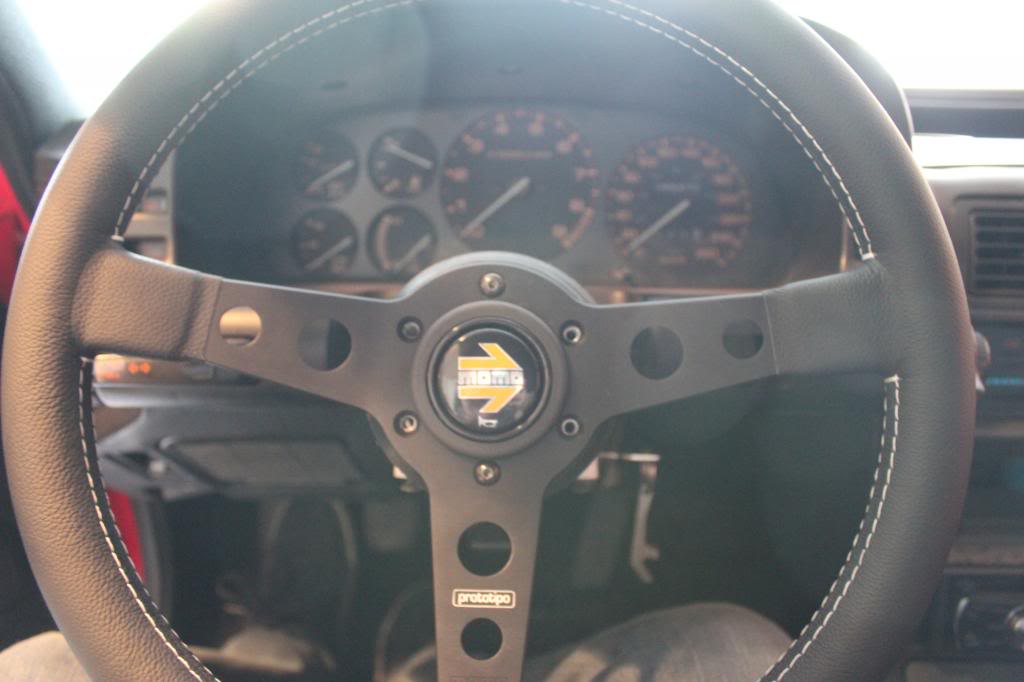
mounted the steering wheel properly and wired up the horn so it works. I took the time to do all the little jobs i was putting off now that I have nothing left to work on, so i repaired the rust patches remaining on the car and fixed the rear left brake caliper so it would actually actuate while pulling the handbrake. It feels good to fix things, but im still stuck trying to find parts for my rebuild.
 06-23-14, 07:54 PM
#106
Senior Member
Thread Starter
iTrader: (1)
Join Date: Oct 2012
Location: Ontario
Posts: 386
Likes: 0
Received 0 Likes
on
0 Posts
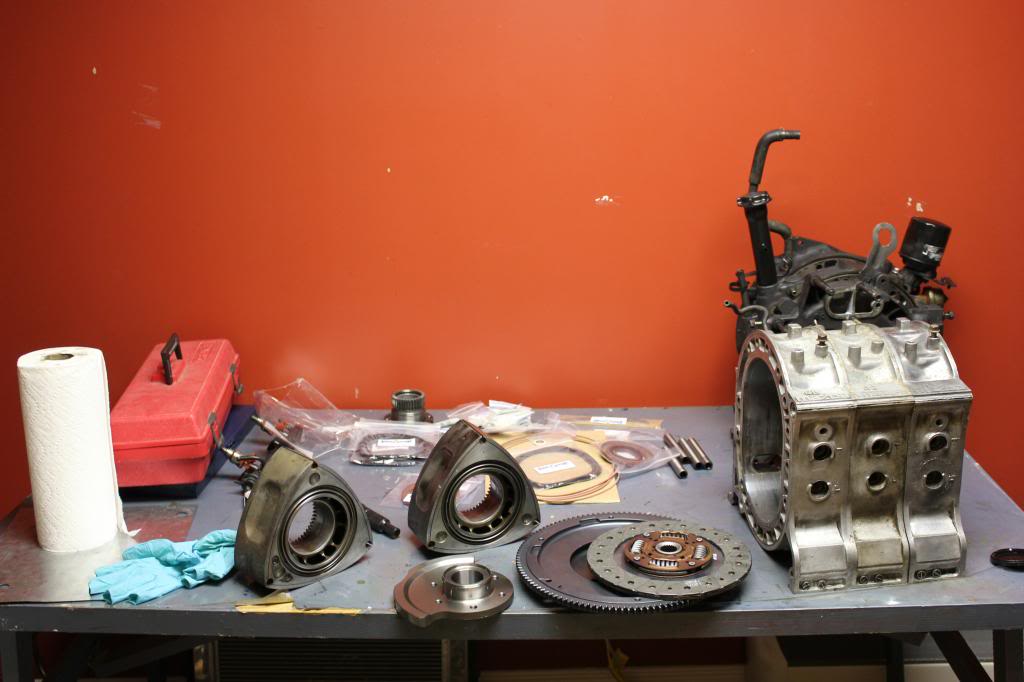
to anybody scrolling through, this next post will look exactly the same as one made earlier, but its very VERY different. After screwing around since april and trying to find parts i FINALLY found what i was looking for. Big thank you to thewird, RacerJason and misterstyx69 for making things finally come together!
I can finally start putting this B*tch back together. After sending those exhaust diffusers to hell
I now have 3 NA S5 housings and 3 rotors i could use in the future for a potential 20B NA down the road
I can finally start putting this B*tch back together. After sending those exhaust diffusers to hell
I now have 3 NA S5 housings and 3 rotors i could use in the future for a potential 20B NA down the road

 06-24-14, 10:28 AM
#108
Senior Member
Thread Starter
iTrader: (1)
Join Date: Oct 2012
Location: Ontario
Posts: 386
Likes: 0
Received 0 Likes
on
0 Posts
i built my own template for the portjob, I had a look around to see what other people are doing and used kahren's ports as a guide. link here https://www.rx7club.com/time-slips-d...inside-416012/
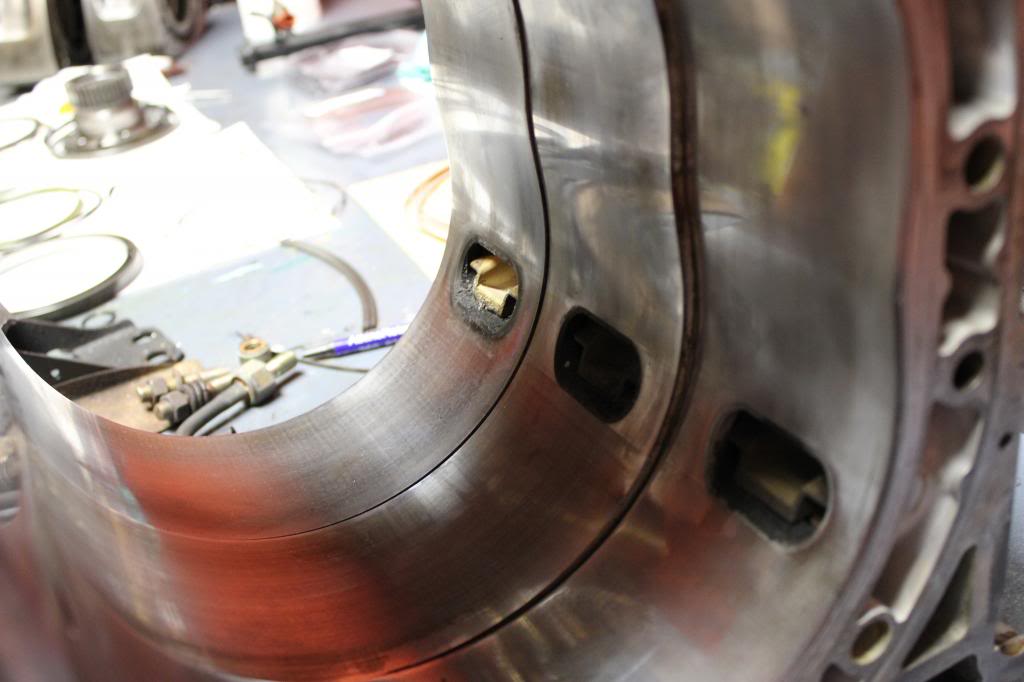
For the exhaust diffusers, i tried taping them and pulling them out but i broke a tap and a drill on my junk housing. I then took it to a friend to tack weld it and pull it out and wasnt all to impressed with what it did to the housing. I think im just going to get some kind of die grinder bit and go nuts with a dremel untill the diffusers are gone. Some people say the diffusers do nothing in terms of power, some people believe they are a huge restriction. Im chopping them and saying to hell with it. Im not sure how much i want to port the exhaust or if i want to port it much at all. I'll figure it out when i get there and build some more templates.
Started clearancing the new sideseals and they dont seem to pop back out even if they have the correct size gap between the corner seal brand new seals from atkins, its almost like they dont curve to the shape of the grove or something..
For the exhaust diffusers, i tried taping them and pulling them out but i broke a tap and a drill on my junk housing. I then took it to a friend to tack weld it and pull it out and wasnt all to impressed with what it did to the housing. I think im just going to get some kind of die grinder bit and go nuts with a dremel untill the diffusers are gone. Some people say the diffusers do nothing in terms of power, some people believe they are a huge restriction. Im chopping them and saying to hell with it. Im not sure how much i want to port the exhaust or if i want to port it much at all. I'll figure it out when i get there and build some more templates.
Started clearancing the new sideseals and they dont seem to pop back out even if they have the correct size gap between the corner seal
brand new seals from atkins, its almost like they dont curve to the shape of the grove or something..
06-30-14, 09:24 PM
#109
Senior Member
Thread Starter
iTrader: (1)
Join Date: Oct 2012
Location: Ontario
Posts: 386
Likes: 0
Received 0 Likes
on
0 Posts
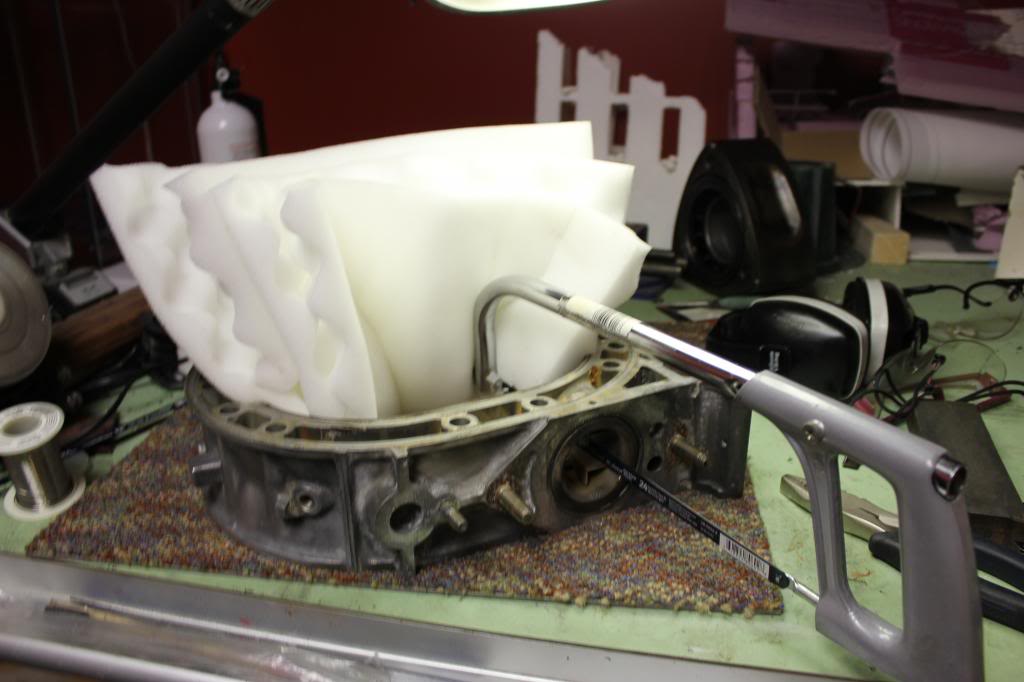
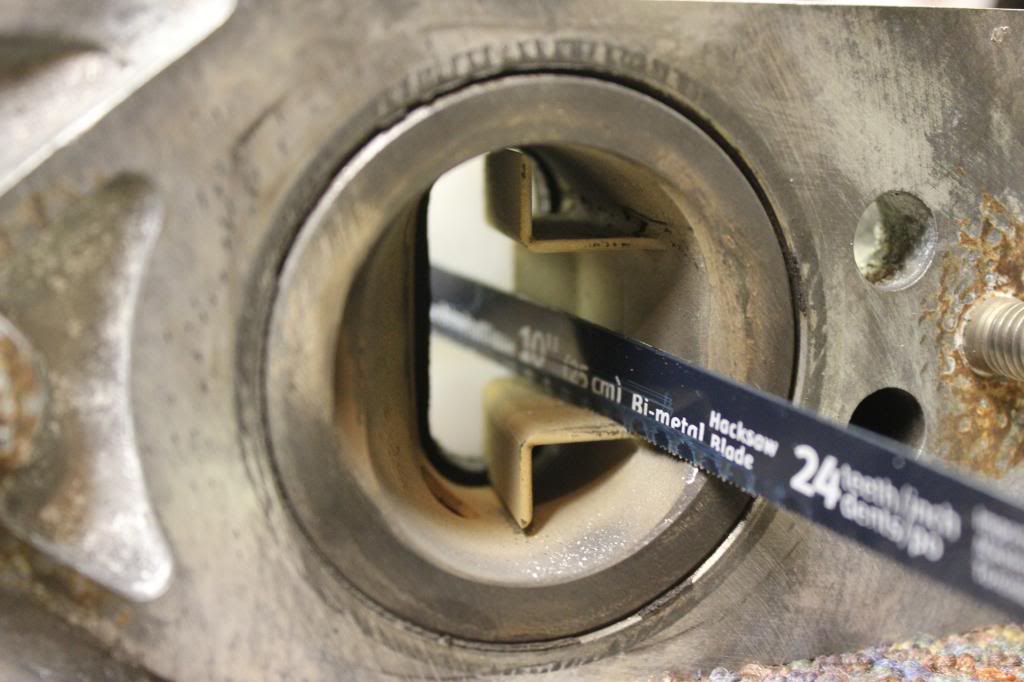
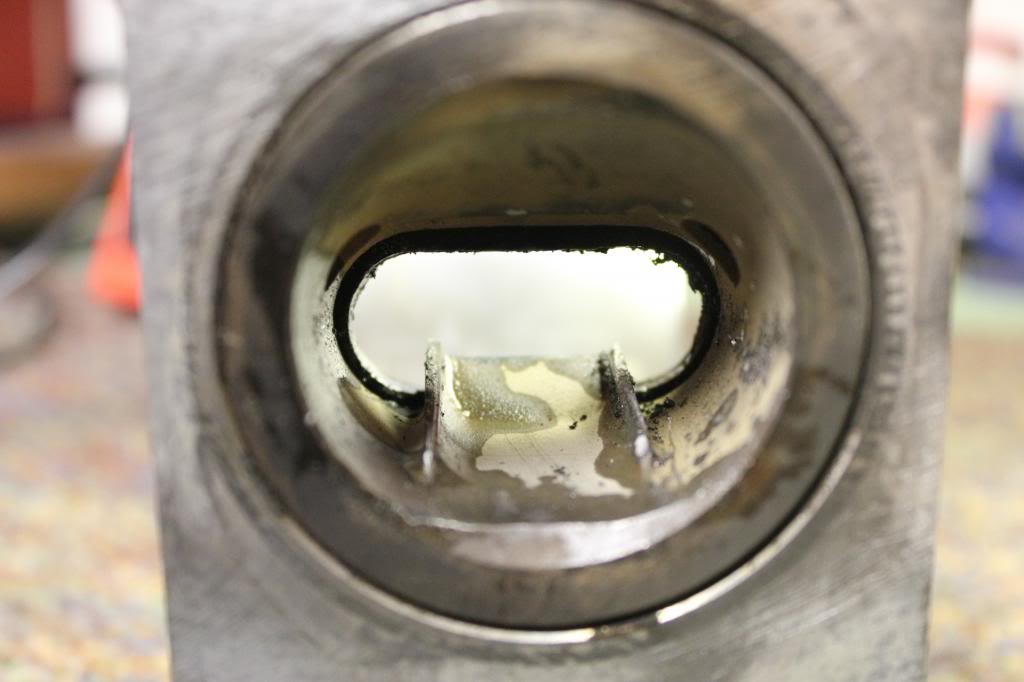
killing exhaust diffusers
Due to my limited access to tools, it took some thinking to figure out what would be the best course of action. Initially I wanted to remove the sleeves completely so that their would be zero chance of damaging the housings. upon experimentation on a scrap housing, I was unable to tap the pins and pull them out and I wasnt impressed with the damage created when spot welding them either. The solution i opted for was to keep them inside the housings, but using a hacksaw and a dremel to cut and grind away the diffusers. I used a substantial amount of soft packing foam to protect the housing while i cut the wings off the diffuser. This process actually took far less time than one would think. A few minutes of cutting and then working the metal back and forth with pliers seems to do the trick.
All that remains is to continue filing and grinding away at the remnants of the diffuser until im satisfied with the results. I'm on the fence about porting the exhaust at the same time but I'll see where my head's at when im done. Any suggestion on the matter are welcome
All that remains is to continue filing and grinding away at the remnants of the diffuser until im satisfied with the results. I'm on the fence about porting the exhaust at the same time but I'll see where my head's at when im done. Any suggestion on the matter are welcome


 07-02-14, 10:55 AM
#110
Due to my limited access to tools, it took some thinking to figure out what would be the best course of action. Initially I wanted to remove the sleeves completely so that their would be zero chance of damaging the housings. upon experimentation on a scrap housing, I was unable to tap the pins and pull them out and I wasnt impressed with the damage created when spot welding them either. The solution i opted for was to keep them inside the housings, but using a hacksaw and a dremel to cut and grind away the diffusers. I used a substantial amount of soft packing foam to protect the housing while i cut the wings off the diffuser. This process actually took far less time than one would think. A few minutes of cutting and then working the metal back and forth with pliers seems to do the trick. All that remains is to continue filing and grinding away at the remnants of the diffuser until im satisfied with the results. I'm on the fence about porting the exhaust at the same time but I'll see where my head's at when im done. Any suggestion on the matter are welcome
If you ever need a hand let us know !
07-02-14, 11:04 AM
#111
Senior Member
Thread Starter
iTrader: (1)
Join Date: Oct 2012
Location: Ontario
Posts: 386
Likes: 0
Received 0 Likes
on
0 Posts
Will do! So far the ONLY hitch i see in getting this whole thing back together, is the key which holds the oil pump drive gear seems to have gone missing. I had everything placed in ziplock bags when pulling apart the engine but these things can still happen. im going to have a good look around my parts bin before i decide its lost and need to find a replacement. I'm hoping i could order something like that through mazda and not need to purchase an entire new oil pump. I need to order some odds and ends from them anyways so we'll see what happens.
EDIT: i still need to source a dial indicator to set the endplay correctly and figure out a way to torque the front stack. Same goes with torquing the flywheel i guess haha
EDIT: i still need to source a dial indicator to set the endplay correctly and figure out a way to torque the front stack. Same goes with torquing the flywheel i guess haha


 07-05-14, 02:29 PM
#114
Rotary Enthusiast
iTrader: (1)

Join Date: Nov 2012
Location: bloomington, mn
Posts: 1,100
Likes: 0
Received 0 Likes
on
0 Posts
I most certainly would worry about torquing the flywheel properly. I have personally witnessed one go shooting across a farm field from a guy who "snugged it". Lucky no one was standing in the way, they would of died. There is a tool you can buy that bolts to the housing and locks the wheel in place. After that, rent/buy a torque multiplier. After all this ways, and what you have been through, I hate to see more disasters. There is a reason Mazda recommends that stupid high toque rating on that bastard.
07-05-14, 10:00 PM
#115
Senior Member
Thread Starter
iTrader: (1)
Join Date: Oct 2012
Location: Ontario
Posts: 386
Likes: 0
Received 0 Likes
on
0 Posts
I most certainly would worry about torquing the flywheel properly. I have personally witnessed one go shooting across a farm field from a guy who "snugged it". Lucky no one was standing in the way, they would of died. There is a tool you can buy that bolts to the housing and locks the wheel in place. After that, rent/buy a torque multiplier. After all this ways, and what you have been through, I hate to see more disasters. There is a reason Mazda recommends that stupid high toque rating on that bastard.
i will look into a torque multiplier to see if i can find a way to be sure that it is actually torqued to the required spec vs just guesing it. I torqued the front stack and measured the endplay last night and everything seems to be in check. SOMEHOW, i managed to completely mangle one of the stationary gear bolts while using a torque wrench set to the right spec... I have to go find a GOOD replacement and im gonna need to figure out what the heck these things are made of in the firstplace.
more delaayyys... but i would rather do it right than fck it up again like i did when replacing the injectors
07-24-14, 09:40 PM
#116
Senior Member
Thread Starter
iTrader: (1)
Join Date: Oct 2012
Location: Ontario
Posts: 386
Likes: 0
Received 0 Likes
on
0 Posts
after some struggling, the engine is in the car and she runs! No leaks, purrs at idle. Considering this is my first engine build and how god damn terrified i was of this thing blowing up again, im pretty happy with the way things turned out. For all the hardship she caused, she has now been named the " busted red *****" Heres how she sits after a rip around the block

 07-27-14, 07:00 PM
#118
Senior Member
Thread Starter
iTrader: (1)
Join Date: Oct 2012
Location: Ontario
Posts: 386
Likes: 0
Received 0 Likes
on
0 Posts
while breaking in the car and tieing up any loose ends, theres still a list of things i would like to complete by summers end. Im planning on building my own custom header when i have access to my school's shops again to get the most out of the portjob. Also planning on building a better intake box that doesnt take air from the engine bay.
Im considering upgrading to extended studs and aftermarket lugs simply because i dont find the stock setup to be very safe with the crown vics and spacers installed.
An LSD would be a fabulous upgrade to close the season with but the list never seems to get any shorter so I'll see what happens.

Im considering upgrading to extended studs and aftermarket lugs simply because i dont find the stock setup to be very safe with the crown vics and spacers installed.
An LSD would be a fabulous upgrade to close the season with but the list never seems to get any shorter so I'll see what happens.
 07-27-14, 10:45 PM
#119
07-28-14, 05:30 AM
#120

Bummer about dropping the fastener down the intake!!!! Glad you didn't give up-- nice work. Car's definitely getting there.
I have done the dreaded fastener-in-engine thing TWICE now. The first time, a washer fell into my turbo manifold, & took out the turbo once I got into boost. The second time, was on a fresh rebuild, but THANK GOD I saw the thing go down so I was able to chase after it w/ a magnet. Sucks!!
I have done the dreaded fastener-in-engine thing TWICE now. The first time, a washer fell into my turbo manifold, & took out the turbo once I got into boost. The second time, was on a fresh rebuild, but THANK GOD I saw the thing go down so I was able to chase after it w/ a magnet. Sucks!!
07-28-14, 12:04 PM
#121
Senior Member
Thread Starter
iTrader: (1)
Join Date: Oct 2012
Location: Ontario
Posts: 386
Likes: 0
Received 0 Likes
on
0 Posts
Im having some issues with powersteering/steering effort. For starters i still cant find where the pressure switch from the pump plugs into the rest of the car, and the steering seems to be really heavy after bleeding the system. If anybody has a picture of their stock PS unit it might aid in finding the harness end of mine. My cheap knockoff hub adapter might have something to do with the rack feeling heavier than it should.
07-29-14, 07:44 AM
#122
Senior Member
Thread Starter
iTrader: (1)
Join Date: Oct 2012
Location: Ontario
Posts: 386
Likes: 0
Received 0 Likes
on
0 Posts

Im searching for the harness end of the power steering pressure switch. In the photo above there are two connectors near the fuse box that look like they may be it. There is one near the coilpacks and a black one under the fusebox which is wrapped to some other wiring. I had a look at the FSM wiring diagrams a while back and found nothing of use as this connector isnt part of the engine harness or the driver-side harness which goes to the tranny, alt, ect.
07-31-14, 10:35 AM
#124
Senior Member
Thread Starter
iTrader: (1)
Join Date: Oct 2012
Location: Ontario
Posts: 386
Likes: 0
Received 0 Likes
on
0 Posts
The damage wasnt very bad at all in my case, if you have big gaping holes you might have to cut and weld. It depends on the damage.
07-31-14, 11:47 AM
#125
Junior Member

Join Date: Jul 2014
Location: Virgina
Posts: 11
Likes: 0
Received 0 Likes
on
0 Posts
First i went to town on the rust with a wire wheel to see the extend of the damage. The two problem areas I had didnt leave massive holes in the body so i elected not to cut and weld (I might live to regret this but oh well). After sanding as much of the rust in the area off to the point that bare metal is visible, i coated everything with rust killer before starting the actual bodywork. To patch the holes i bought some bondo and bodywork wire mesh which served as a base to which the body work can be built from. coated everything i more rust paint before beginning to prime and paint.
The damage wasnt very bad at all in my case, if you have big gaping holes you might have to cut and weld. It depends on the damage.
The damage wasnt very bad at all in my case, if you have big gaping holes you might have to cut and weld. It depends on the damage.