Build Threads
Sponsored by:

Brandon's FC Build

Thread Tools
 
Search this Thread
 
Old 12-13-12, 07:57 AM
  #76  
Mr. Fix-it

Thread Starter
iTrader: (3)
 
Brandon Robinson's Avatar
 
Join Date: Feb 2012
Location: Texas
Posts: 181
Likes: 0
Received 0 Likes on 0 Posts
Originally Posted by Groshuk
I'm really curious to see how you like this set up, I'm wanting to do something similar with N/A rotors to get more low end but other than the 6 port turbo guys I haven't seen anyone else trying what you are doing.
Goopy performance turned me on to it. We where talking about what I planned to do with this build and I was explaining that the BNR Stage 4 really didn't build boost until the end of the power band. He asked do you want to know how to fix that and I replied "Porting". He said that the porting would help but the best thing to do is throw N/A rotors in it and the turbo would scream.

I have not even programmed the twin scroll actuator and the car builds boost instantly with minimal lag. If you look at the rotors in the Turbo motors between the S4 and S5 motors they jumped from 8.4:1 to 9:1. The N/A rotors for the S4 are 9.5:1 and so long as you stay in the realm of the S4 internals you can use N/A rotors with your existing counterweight and flywheel. If you can shop them out one at a time and get matching weight stamps you can safely rev a tad bit higher. I plan on pushing 18psi on them with pump gas.
Old 12-13-12, 09:42 PM
  #77  
Senior Member

 
bikeboy23332's Avatar
 
Join Date: May 2007
Location: kentucky
Posts: 720
Received 0 Likes on 0 Posts
Awesome build, reminds me of mine only everything on your car is red haha. This car is going to a quick !
Old 12-24-12, 11:37 PM
  #78  
Junior Member
 
ICanHazBoost's Avatar
 
Join Date: Jul 2011
Location: Baytown/CorpusChristi - Tx
Posts: 13
Likes: 0
Received 0 Likes on 0 Posts
Awesome build!
Old 12-28-12, 08:49 PM
  #79  
Mr. Fix-it

Thread Starter
iTrader: (3)
 
Brandon Robinson's Avatar
 
Join Date: Feb 2012
Location: Texas
Posts: 181
Likes: 0
Received 0 Likes on 0 Posts
Well I have not had any luck. The POS Walbro seized up on me a few weeks ago with low low hours of use on it. So I have bought some necessities. A new Walbro 255, a Optima red top battery a new alternator and the big time, a rotary works v-mount kit. The build is going to take a tad bit longer than I thought. I will keep you all posted on the progress once parts start to show up.
Old 12-31-12, 07:16 PM
  #80  
Junior Member

 
rxguh's Avatar
 
Join Date: May 2008
Location: houston
Posts: 5
Likes: 0
Received 0 Likes on 0 Posts
I hate it when things go wrong...but its always happens in a build. Hope you get it worked out.
Old 01-01-13, 08:05 PM
  #81  
Junior Member
 
BlackenWkN's Avatar
 
Join Date: Jul 2012
Location: Texas
Posts: 9
Likes: 0
Received 0 Likes on 0 Posts
great job that motor looks beautiful
Old 01-02-13, 06:47 PM
  #82  
Full Member

iTrader: (3)
 
king_reyes's Avatar
 
Join Date: Oct 2005
Location: Panama City, FL
Posts: 109
Likes: 0
Received 0 Likes on 0 Posts
Sweet build!
Old 01-03-13, 05:41 PM
  #83  
Junior Member
 
Kewtdz's Avatar
 
Join Date: Oct 2012
Location: Missouri
Posts: 18
Likes: 0
Received 0 Likes on 0 Posts
Your work is really impressive. Great job!
Old 01-03-13, 06:41 PM
  #84  
Mr. Fix-it

Thread Starter
iTrader: (3)
 
Brandon Robinson's Avatar
 
Join Date: Feb 2012
Location: Texas
Posts: 181
Likes: 0
Received 0 Likes on 0 Posts
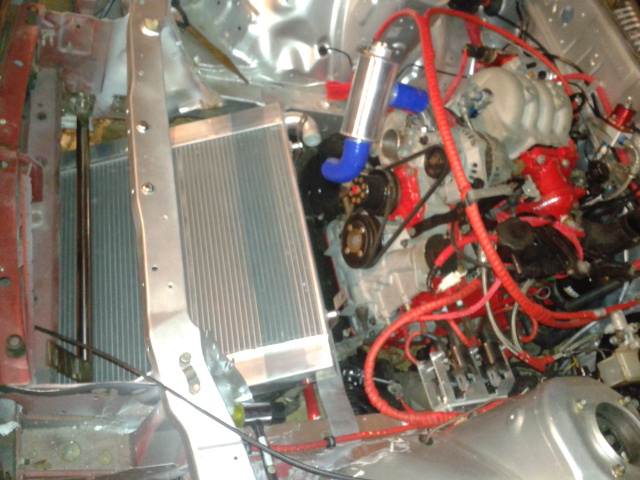
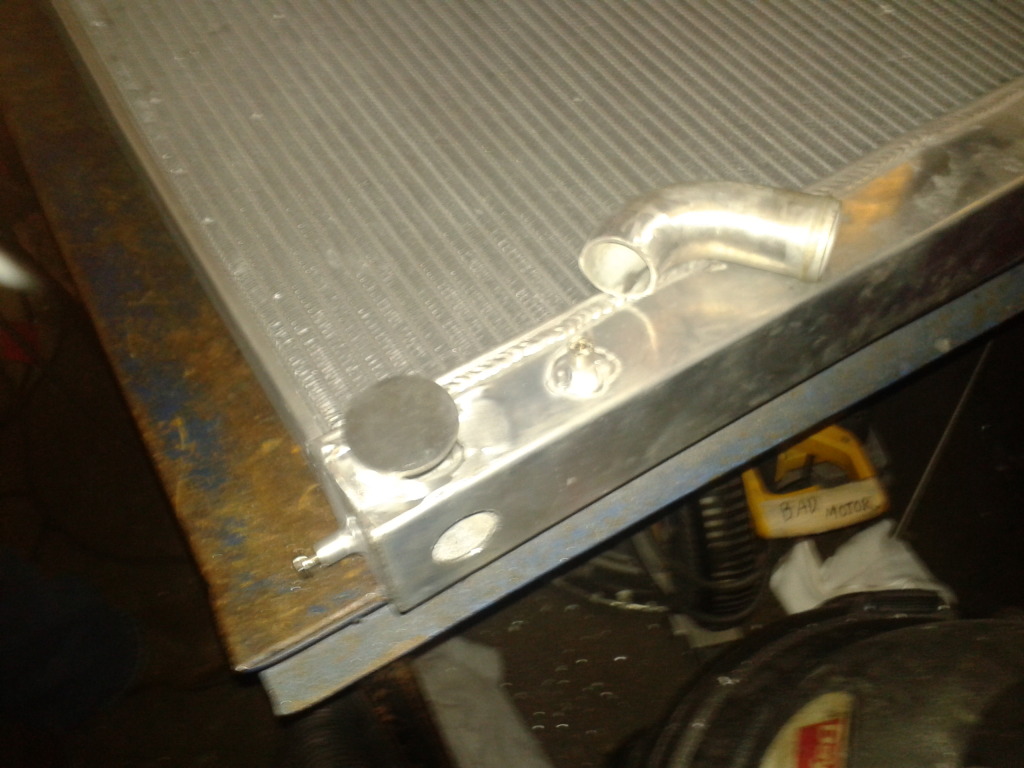
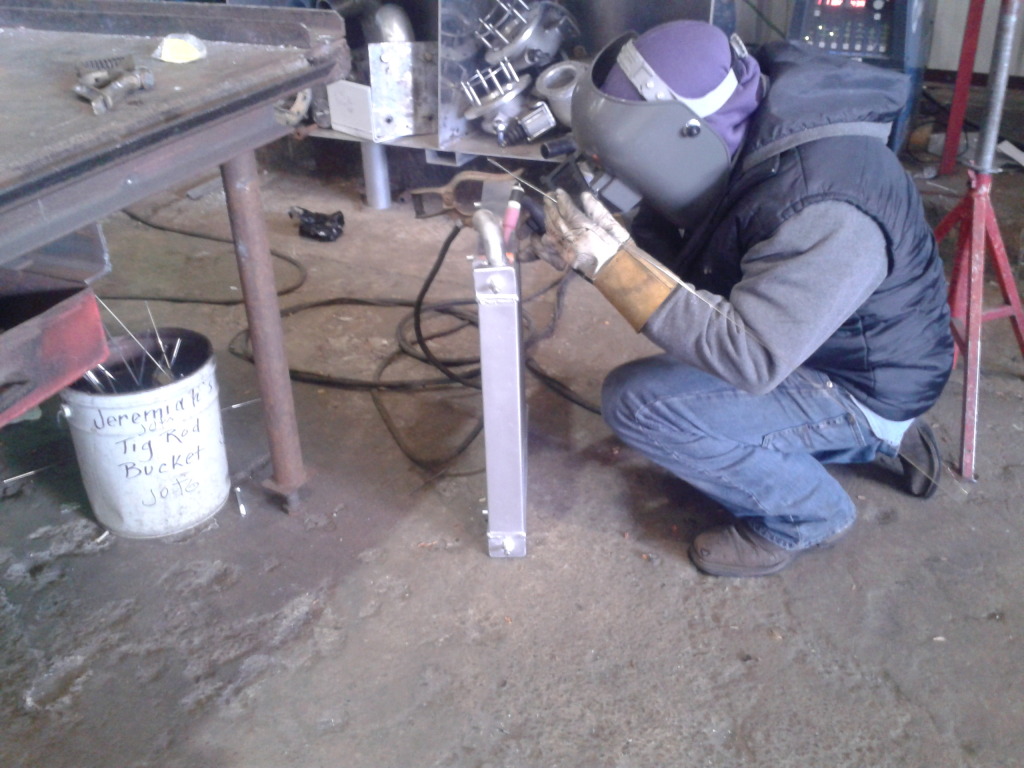
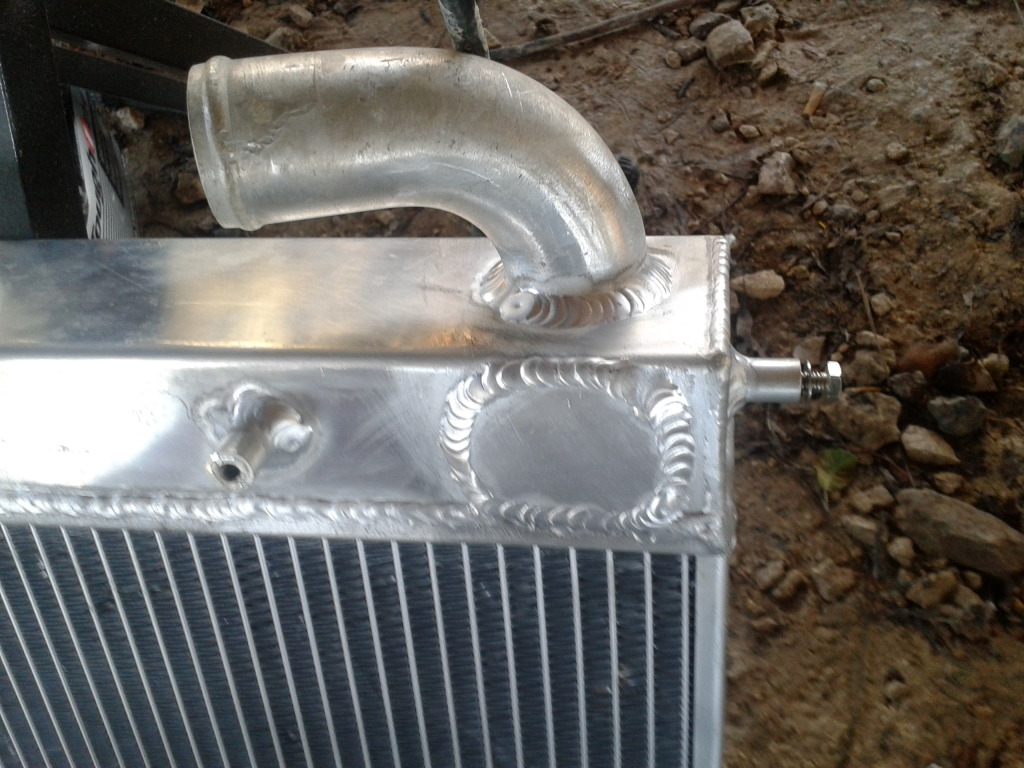
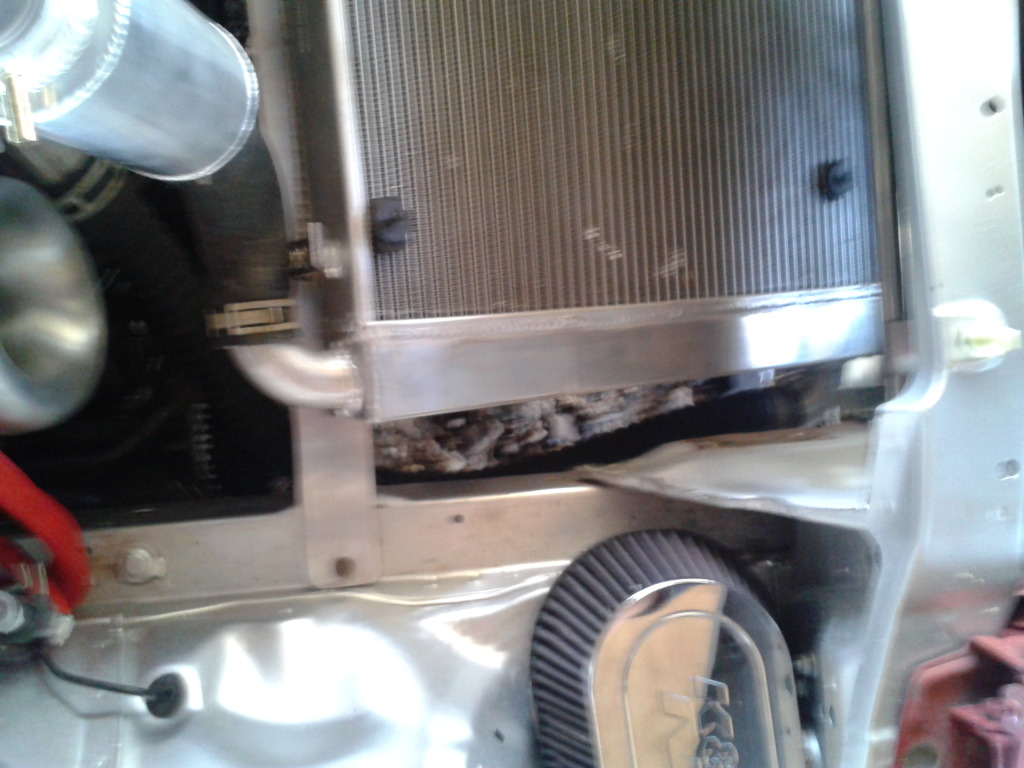
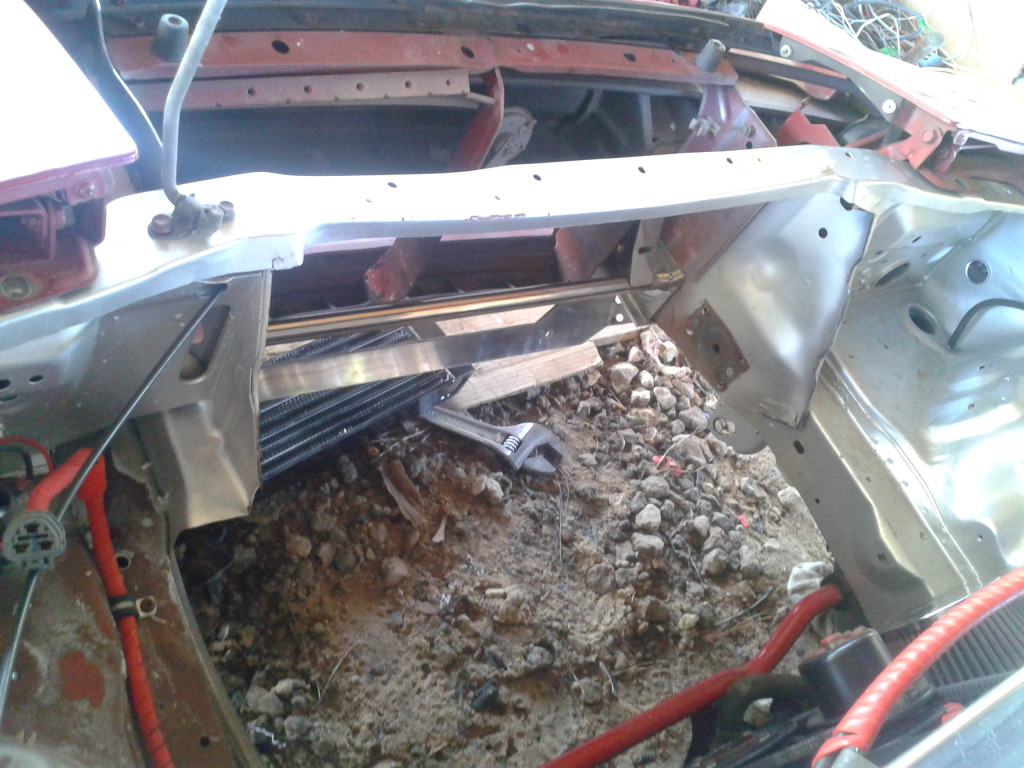
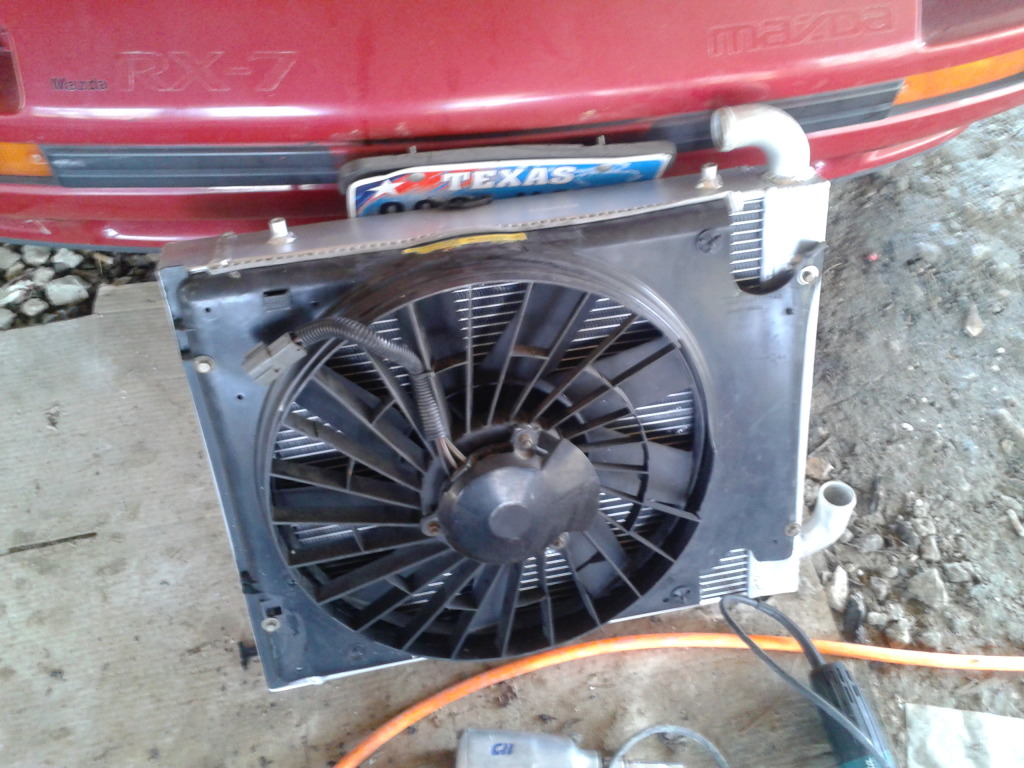
Thank you for all of the compliments, they are reinforcing. I have made some real progress since my last post. The Rotary-Works v-mount kit arrived today and I have some issues with it. All around a decent kit for the price, though it was missing all of the plumbing that you need to completely install it. Aside from the trimming and slotting that was required to get everything to line up the fit up installation only took two hours. The machine work was a little shabby and the radiator will have to be modified to relocate the lower radiator neck so that it is not the first thing to hit the road. As to be expected with any v-mount there will be a lot of modification to the car to make it work. The old radiator mounts have to go, I hammered them out of the way for the moment. The oil cooler lines will have to be custom built, I may just buy a better cooler with the lines made for the kit from rotary works. Now for the pics...
Old 01-03-13, 06:53 PM
  #85  
Mr. Fix-it

Thread Starter
iTrader: (3)
 
Brandon Robinson's Avatar
 
Join Date: Feb 2012
Location: Texas
Posts: 181
Likes: 0
Received 0 Likes on 0 Posts


Attached Thumbnails Brandon's FC Build-20130103_173516.jpg   Brandon's FC Build-20130103_175207.jpg   Brandon's FC Build-20130103_180627.jpg   Brandon's FC Build-20130103_180557.jpg   Brandon's FC Build-20130103_180650.jpg  

Old 01-03-13, 06:55 PM
  #86  
Mr. Fix-it

Thread Starter
iTrader: (3)
 
Brandon Robinson's Avatar
 
Join Date: Feb 2012
Location: Texas
Posts: 181
Likes: 0
Received 0 Likes on 0 Posts
Pictures

Multipost edit
Attached Thumbnails Brandon's FC Build-20130103_173516.jpg   Brandon's FC Build-20130103_175207.jpg   Brandon's FC Build-20130103_180627.jpg   Brandon's FC Build-20130103_180557.jpg   Brandon's FC Build-20130103_180650.jpg  


Last edited by Brandon Robinson; 01-03-13 at 06:57 PM.
Old 01-04-13, 12:10 AM
  #87  
Junior Member
 
FC4STrey's Avatar
 
Join Date: Dec 2012
Location: SoCal
Posts: 6
Likes: 0
Received 0 Likes on 0 Posts
Keep it coming!
Old 01-15-13, 03:49 PM
  #88  
Mr. Fix-it

Thread Starter
iTrader: (3)
 
Brandon Robinson's Avatar
 
Join Date: Feb 2012
Location: Texas
Posts: 181
Likes: 0
Received 0 Likes on 0 Posts
More parts have been streaming in, here are some updates. I still have some painting to do so the colors are a bit mismatched at the moment.

Name:  20130115_151813.jpg
Views: 111
Size:  301.8 KB

Name:  20130115_151622.jpg
Views: 121
Size:  168.9 KB

Name:  20130115_151751.jpg
Views: 117
Size:  185.0 KB

Name:  20130115_151726.jpg
Views: 125
Size:  234.7 KB
Old 01-16-13, 02:52 AM
  #89  
BlackSilk,bold yet smooth

iTrader: (3)
 
ChocolateThunderFC's Avatar
 
Join Date: Jun 2011
Location: Colorado
Posts: 16
Likes: 0
Received 0 Likes on 0 Posts
curious too see what the na rotors do, good work
Old 01-16-13, 09:24 AM
  #90  
Junior Member
 
sinistervr's Avatar
 
Join Date: Jan 2013
Location: south florida
Posts: 16
Likes: 0
Received 0 Likes on 0 Posts
awesome build
Old 01-16-13, 10:50 AM
  #91  
Senior Member

iTrader: (12)
 
gregs22's Avatar
 
Join Date: Jan 2009
Location: oxnard
Posts: 390
Likes: 0
Received 2 Likes on 2 Posts
Any pictures of your lower radiator hose routing?
Old 01-17-13, 09:07 PM
  #92  
Eat. Sleep. Rotate.
 
SC-FC's Avatar
 
Join Date: Dec 2011
Location: South Carolina
Posts: 220
Likes: 0
Received 0 Likes on 0 Posts
Wowow, awesome stuff, just scrolling through the pics is inspirational. Great work.
Old 01-20-13, 09:19 PM
  #93  
Mr. Fix-it

Thread Starter
iTrader: (3)
 
Brandon Robinson's Avatar
 
Join Date: Feb 2012
Location: Texas
Posts: 181
Likes: 0
Received 0 Likes on 0 Posts
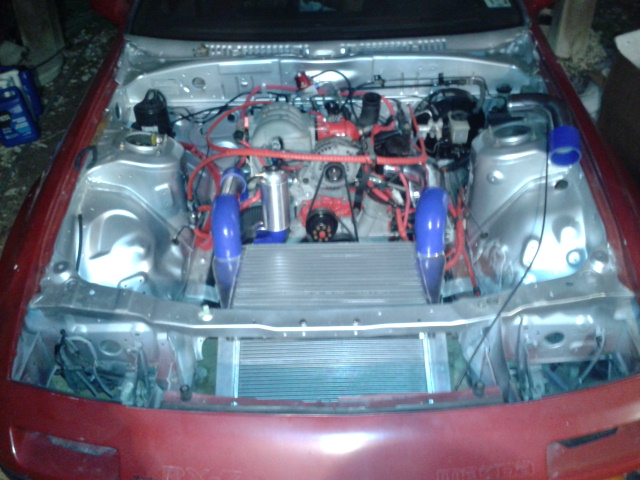
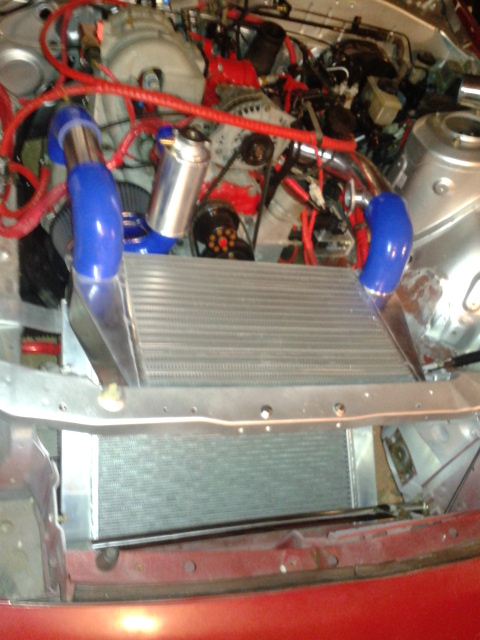
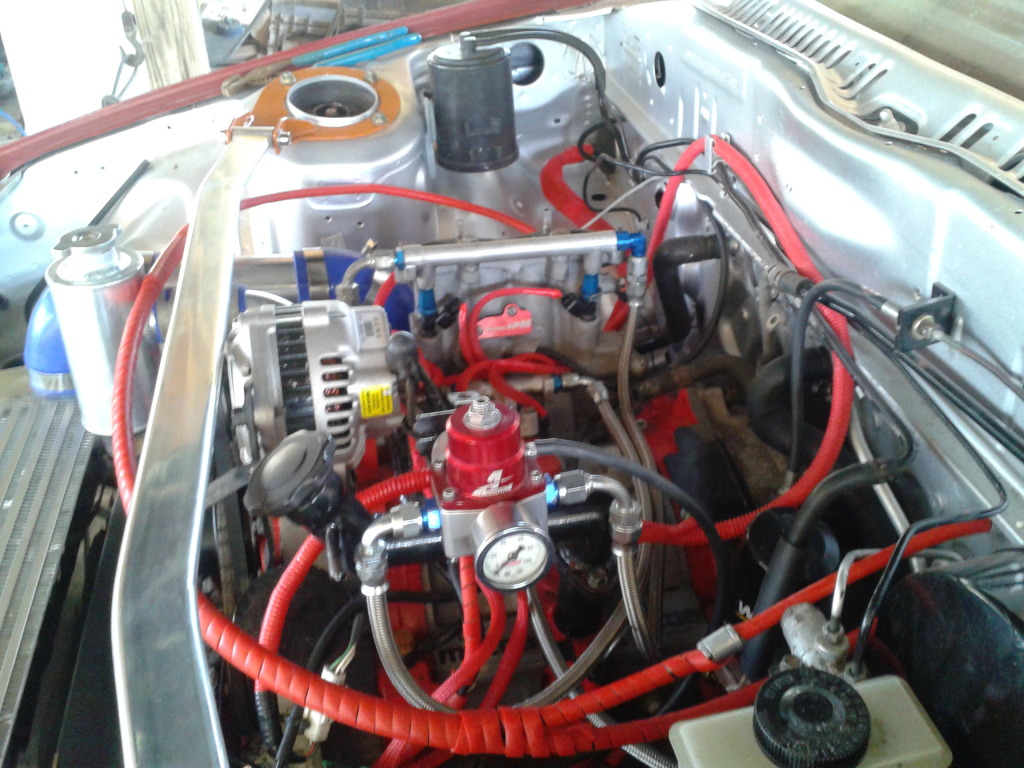
Ok the lower radiator hose is going to be changed this week. I am going to weld up an aluminum tube and use couplings like the intake plumbing. I finished the fan install, re-plumbed the fuel system and added a regulator gauge and made up the oil cooler lines. I lack a 16x1.5mm to -10an adapter and the lower radiator pipe with heater hose t-fitting. Enjoy.

Name:  20130119_102753.jpg
Views: 120
Size:  229.4 KB

Name:  20130119_102814.jpg
Views: 131
Size:  180.5 KB

Name:  20130119_104034.jpg
Views: 119
Size:  218.2 KB

Name:  20130120_114718.jpg
Views: 134
Size:  246.4 KB

Name:  20130120_135707.jpg
Views: 115
Size:  192.2 KB

Name:  20130120_135718.jpg
Views: 118
Size:  172.2 KB

Name:  20130120_114735.jpg
Views: 126
Size:  251.6 KB

Name:  20130120_133444.jpg
Views: 124
Size:  248.9 KB

Name:  20130120_145325.jpg
Views: 115
Size:  262.7 KB

Name:  20130120_145337.jpg
Views: 127
Size:  266.3 KB

Name:  20130120_151550.jpg
Views: 114
Size:  259.6 KB

Name:  20130120_151514.jpg
Views: 118
Size:  314.9 KB
Old 01-20-13, 09:23 PM
  #94  
Mr. Fix-it

Thread Starter
iTrader: (3)
 
Brandon Robinson's Avatar
 
Join Date: Feb 2012
Location: Texas
Posts: 181
Likes: 0
Received 0 Likes on 0 Posts
Overall, not a bad weekend

Name:  20130120_151458.jpg
Views: 136
Size:  220.3 KB
Old 01-22-13, 08:23 AM
  #95  
Full Member

 
black_turbo_FC's Avatar
 
Join Date: Jun 2007
Location: Sycamore, Ohio
Posts: 102
Likes: 0
Received 1 Like on 1 Post
Very tasteful mods nice! love the V-mount setup.
Old 01-22-13, 06:58 PM
  #96  
Mr. Fix-it

Thread Starter
iTrader: (3)
 
Brandon Robinson's Avatar
 
Join Date: Feb 2012
Location: Texas
Posts: 181
Likes: 0
Received 0 Likes on 0 Posts
I am really digging it.. I am addicted. The next test drive is going to be intense.
Old 01-22-13, 07:09 PM
  #97  
Mr. Fix-it

Thread Starter
iTrader: (3)
 
Brandon Robinson's Avatar
 
Join Date: Feb 2012
Location: Texas
Posts: 181
Likes: 0
Received 0 Likes on 0 Posts
I may move the fin down a few inches and change it completely. I found a neat aluminum fin that is more sexy.

Old 01-27-13, 07:39 PM
  #98  
Mr. Fix-it

Thread Starter
iTrader: (3)
 
Brandon Robinson's Avatar
 
Join Date: Feb 2012
Location: Texas
Posts: 181
Likes: 0
Received 0 Likes on 0 Posts
Thumbs up

Originally Posted by gregs22
Any pictures of your lower radiator hose routing?
I will be welding them out this week, being as how it is the suction hose and how long it is I decided to use a solid pipe to avoid complications. It also lets me keep the heater

Name:  20130127_173119_zpsf7a97353.jpg
Views: 128
Size:  82.4 KB
Old 01-27-13, 07:48 PM
  #99  
Mr. Fix-it

Thread Starter
iTrader: (3)
 
Brandon Robinson's Avatar
 
Join Date: Feb 2012
Location: Texas
Posts: 181
Likes: 0
Received 0 Likes on 0 Posts
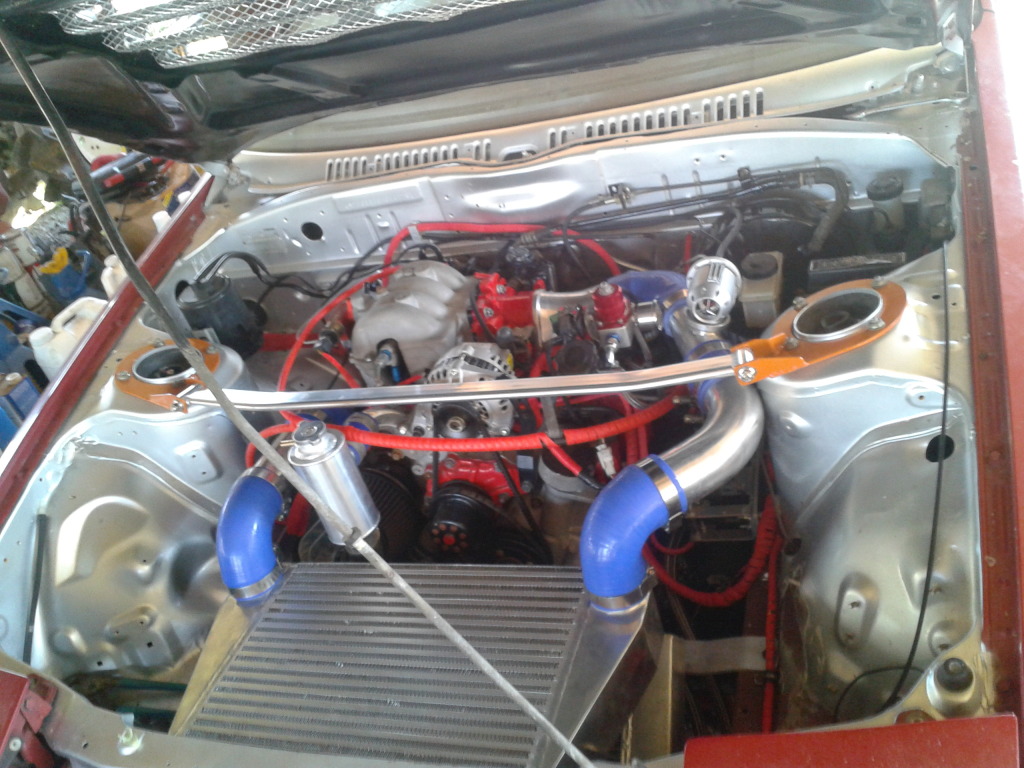
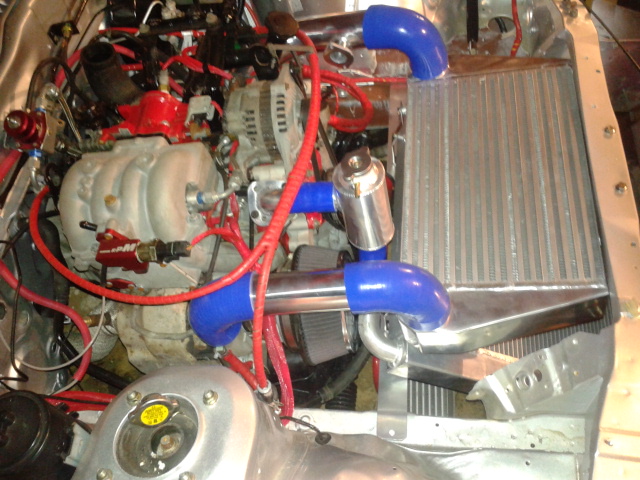
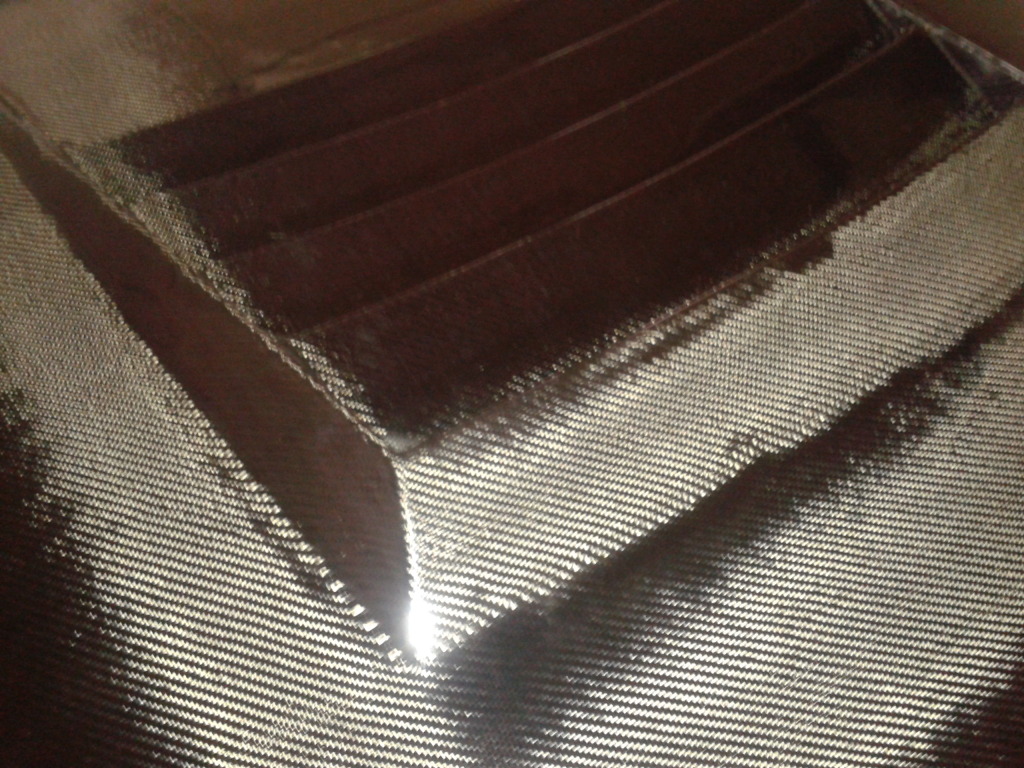
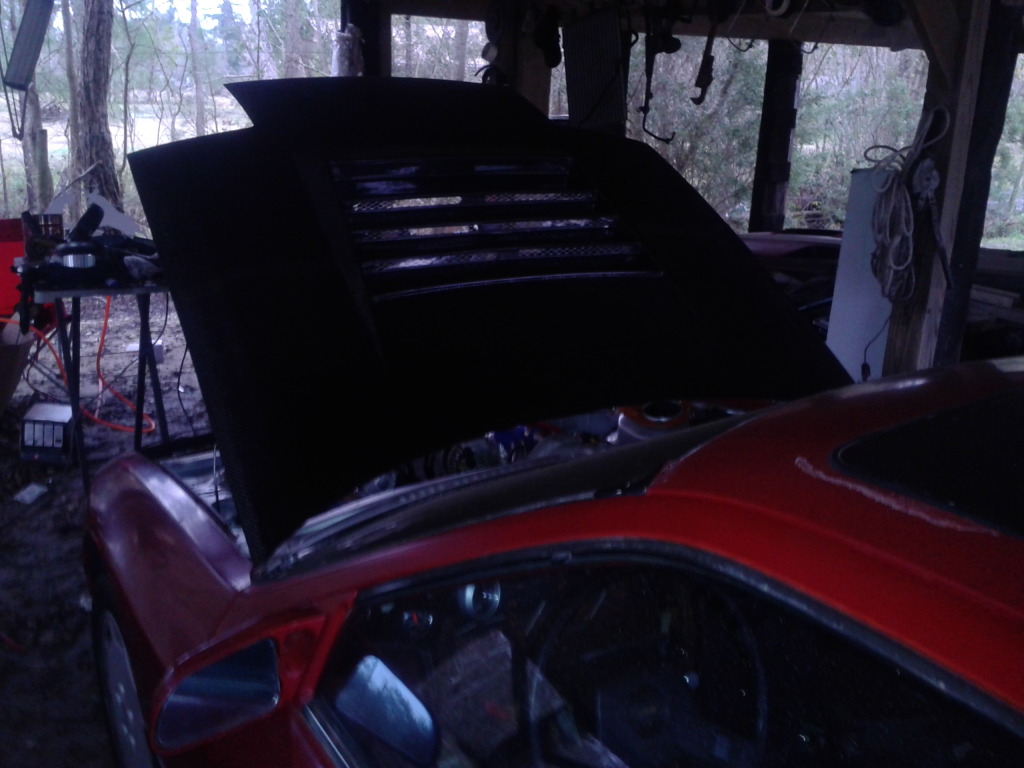
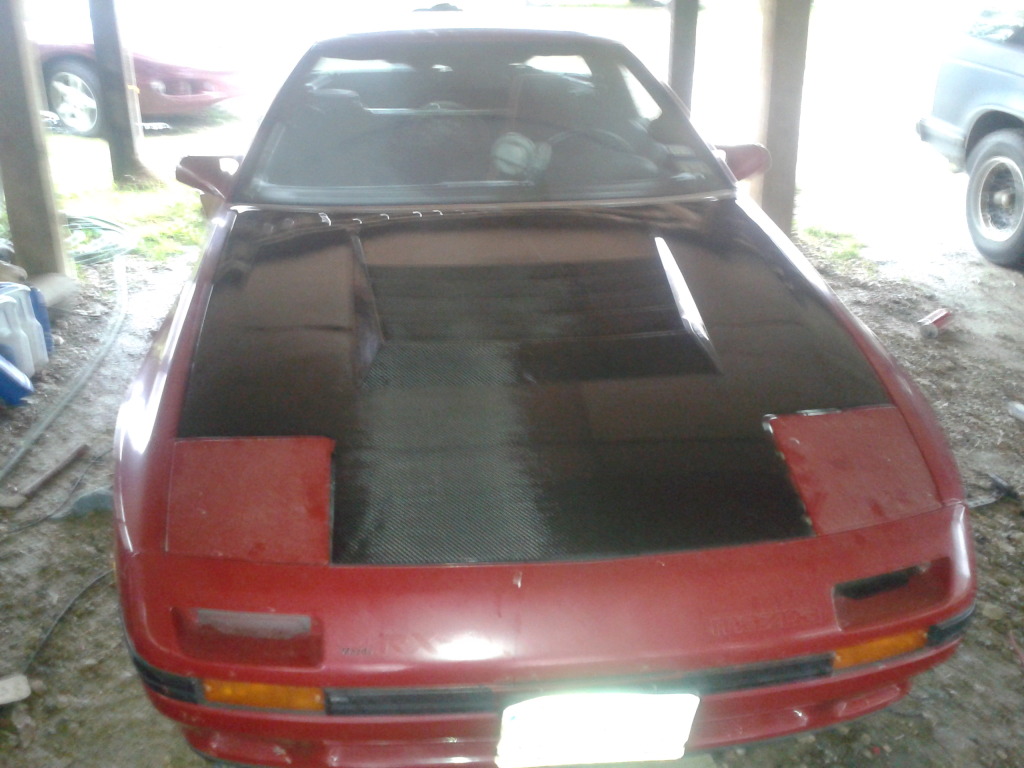
I finally took her out for a drive today it was pure satisfaction. I pushed the boost until 20 psi before I ran out of injector. I logged 102f intake temp on the intercooler. Second gear was over with in a matter of seconds and my adrenalin gland squeezed off. I added a vent to the front clip devoted to the oil cooler and also put a fan on the intercooler. I did not have time to install the carbon fiber sunroof panel as i am confused on how it works with the oem gasket. Enjoy

Name:  20130127_152305_zps642c8fde.jpg
Views: 120
Size:  61.9 KB
Old 01-27-13, 08:05 PM
  #100  
Mr. Fix-it

Thread Starter
iTrader: (3)
 
Brandon Robinson's Avatar
 
Join Date: Feb 2012
Location: Texas
Posts: 181
Likes: 0
Received 0 Likes on 0 Posts
Here is what the idle sounds like. Nice muffled brap brap Soon I can get some road vids, she gets quite loud at 18psi.


Last edited by Brandon Robinson; 01-27-13 at 08:07 PM.


Quick Reply: Brandon's FC Build


All times are GMT -5. The time now is 05:58 AM.