Build Threads
Sponsored by:

Brandon's FC Build

Thread Tools
 
Search this Thread
 
Old 10-13-12, 11:36 PM
  #51  
Mr. Fix-it

Thread Starter
iTrader: (3)
 
Brandon Robinson's Avatar
 
Join Date: Feb 2012
Location: Texas
Posts: 181
Likes: 0
Received 0 Likes on 0 Posts
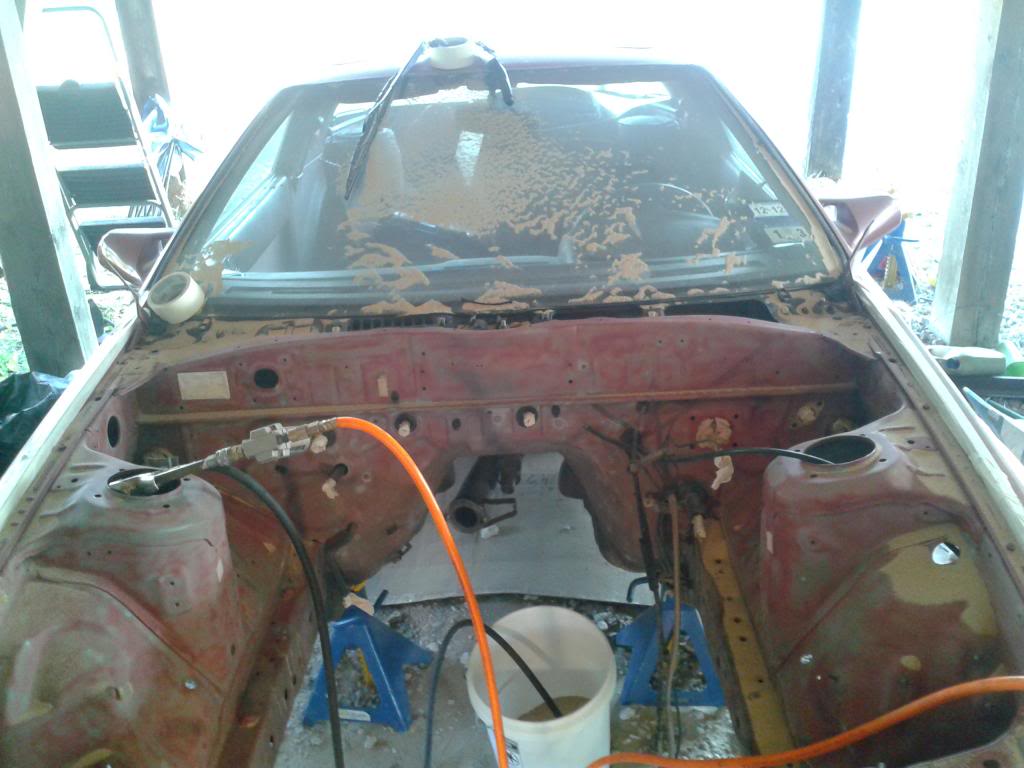
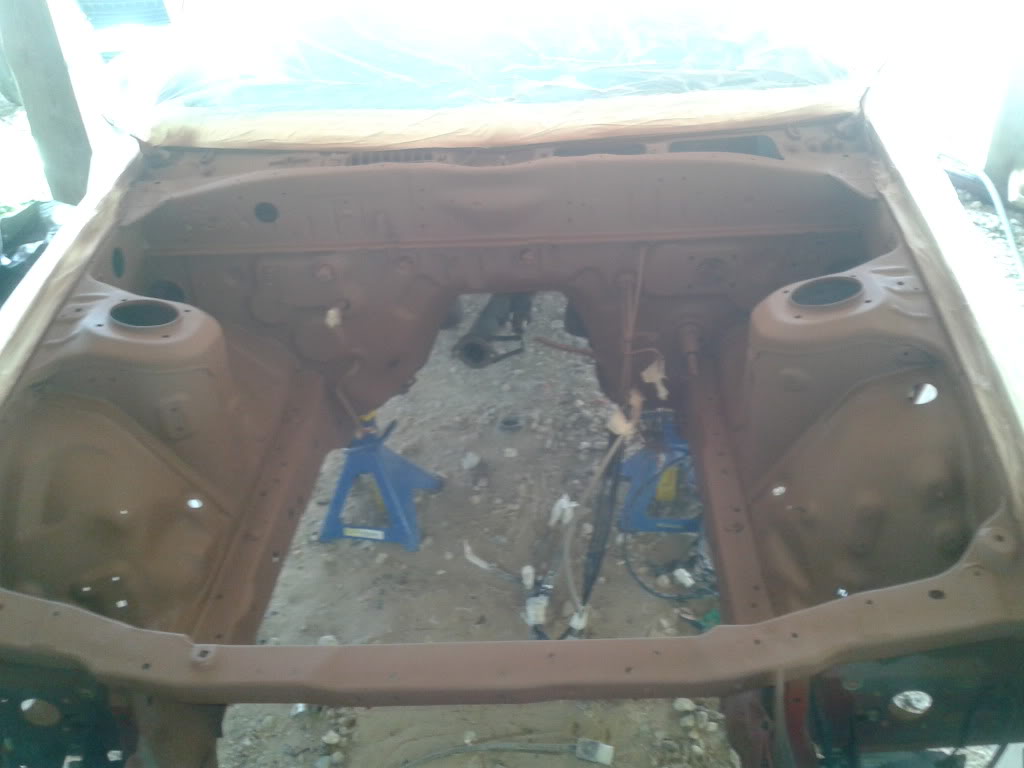
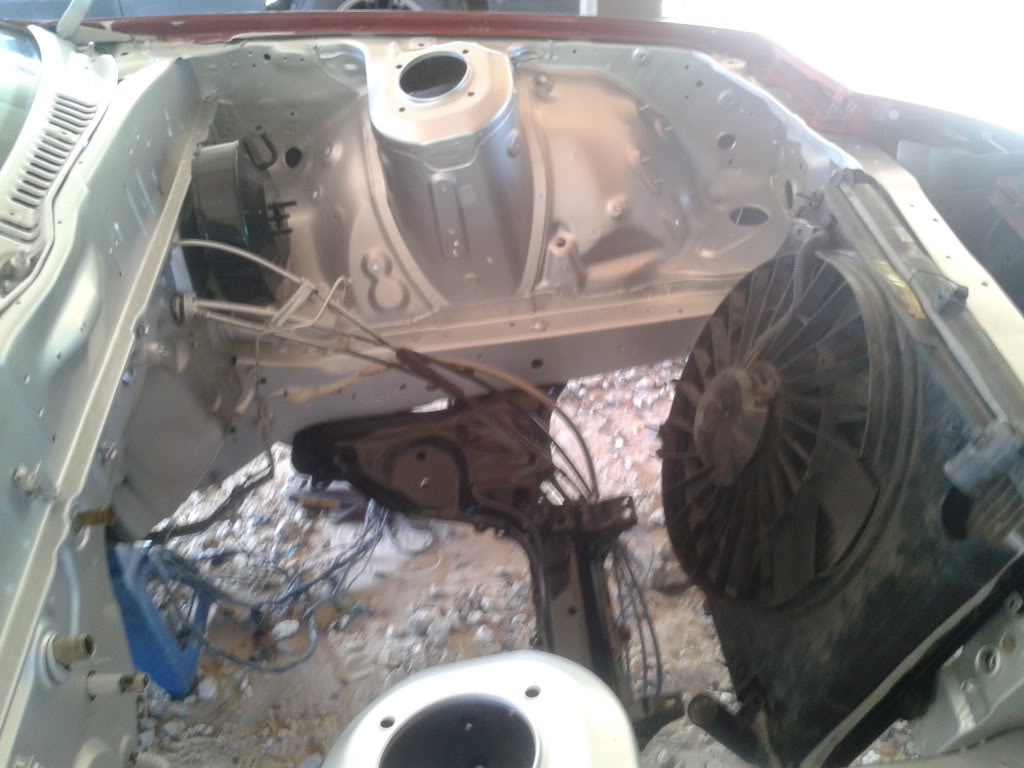
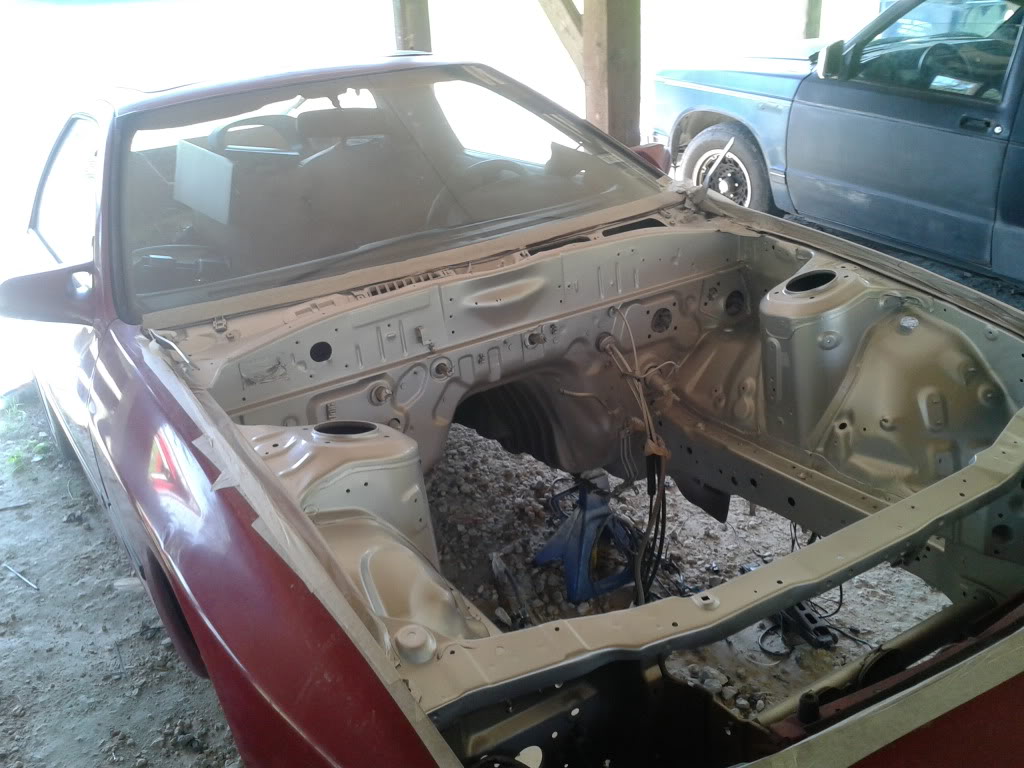
Also sand blasted the engine bay and prepped it for paint. Found Carbon Fiber Metallic from Summit Racing for $30 a quart, going to do the two tone...

Name:  20121013_174815_zpsfa2894ed.jpg
Views: 165
Size:  86.6 KB

Name:  20121013_195135_zps4d52fb93.jpg
Views: 153
Size:  67.6 KB

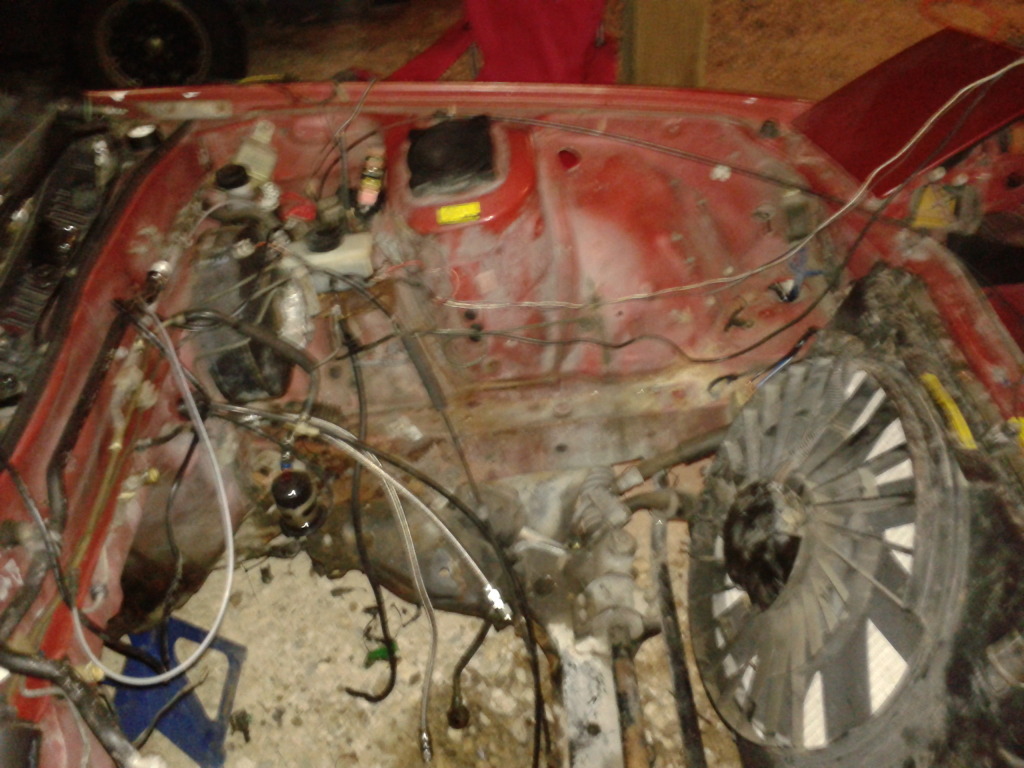
You can see where overfilling or spilling brake fluid can really damage the fender. The rust was a pain in the a$$ to get off but it was not very deep.
Old 10-14-12, 02:45 PM
  #52  
Mr. Fix-it

Thread Starter
iTrader: (3)
 
Brandon Robinson's Avatar
 
Join Date: Feb 2012
Location: Texas
Posts: 181
Likes: 0
Received 0 Likes on 0 Posts
Layed down some primer today and really like the outcome...
Name:  20121014_141110.jpg
Views: 155
Size:  114.5 KB
Name:  20121004_193239.jpg
Views: 147
Size:  229.6 KB
Name:  20121014_141122.jpg
Views: 143
Size:  94.5 KB

Name:  20121014_141056.jpg
Views: 144
Size:  60.1 KB
Old 10-20-12, 04:17 PM
  #53  
Mr. Fix-it

Thread Starter
iTrader: (3)
 
Brandon Robinson's Avatar
 
Join Date: Feb 2012
Location: Texas
Posts: 181
Likes: 0
Received 0 Likes on 0 Posts
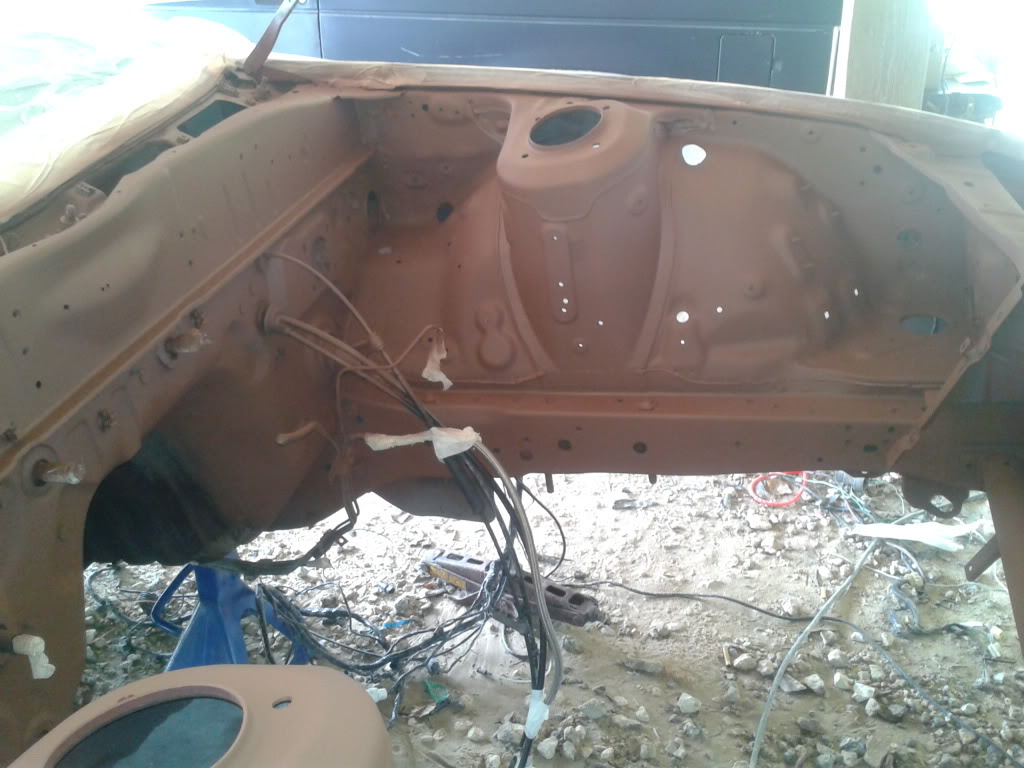
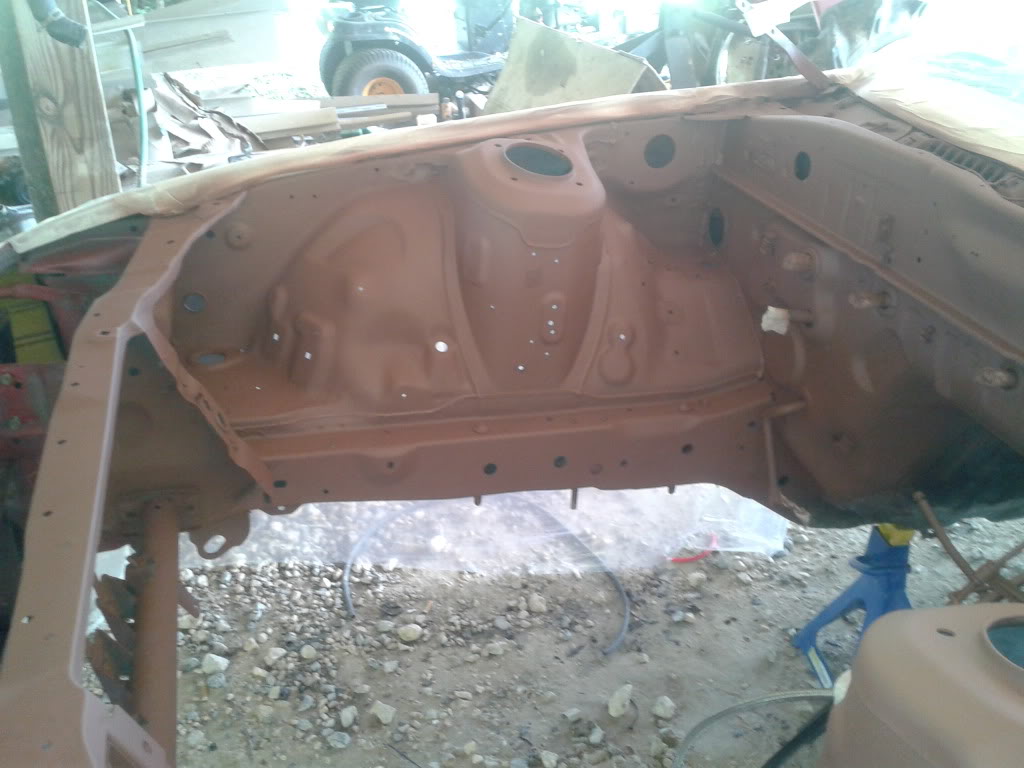
So i finally got down to business and made a decision on what color to go with. Thinking of a two tone brilliant silver with royal maroon underneath.

Before:
Name:  20121004_193239.jpg
Views: 136
Size:  229.6 KB

After:
Name:  20121020_160449.jpg
Views: 146
Size:  92.5 KB

Huge difference.
Old 10-20-12, 04:26 PM
  #54  
Mr. Fix-it

Thread Starter
iTrader: (3)
 
Brandon Robinson's Avatar
 
Join Date: Feb 2012
Location: Texas
Posts: 181
Likes: 0
Received 0 Likes on 0 Posts
Name:  20121019_180727.jpg
Views: 145
Size:  178.5 KB

Name:  20121020_162200.jpg
Views: 144
Size:  223.0 KB

Name:  20121020_162211.jpg
Views: 146
Size:  193.1 KB
Old 10-20-12, 04:27 PM
  #55  
Mr. Fix-it

Thread Starter
iTrader: (3)
 
Brandon Robinson's Avatar
 
Join Date: Feb 2012
Location: Texas
Posts: 181
Likes: 0
Received 0 Likes on 0 Posts
Name:  20121020_142109.jpg
Views: 144
Size:  126.3 KB
Old 10-20-12, 04:39 PM
  #56  
Rotary Freak

iTrader: (2)
 
JWteknix's Avatar
 
Join Date: Mar 2006
Location: Wayne NJ
Posts: 2,508
Likes: 0
Received 0 Likes on 0 Posts
looking good dude making me jelious
Old 11-14-12, 06:53 PM
  #57  
Mr. Fix-it

Thread Starter
iTrader: (3)
 
Brandon Robinson's Avatar
 
Join Date: Feb 2012
Location: Texas
Posts: 181
Likes: 0
Received 0 Likes on 0 Posts
Talking

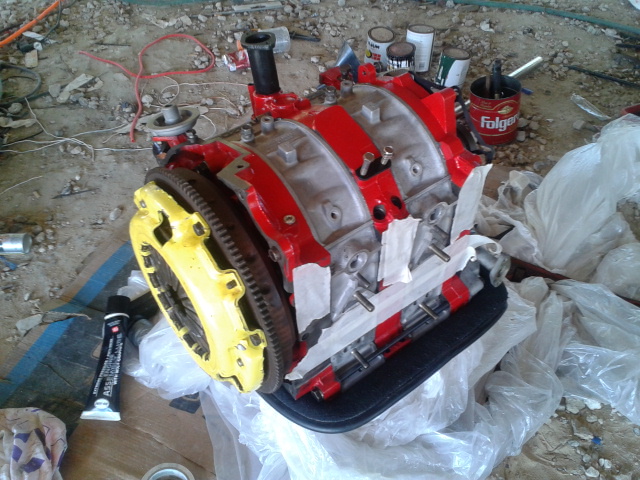
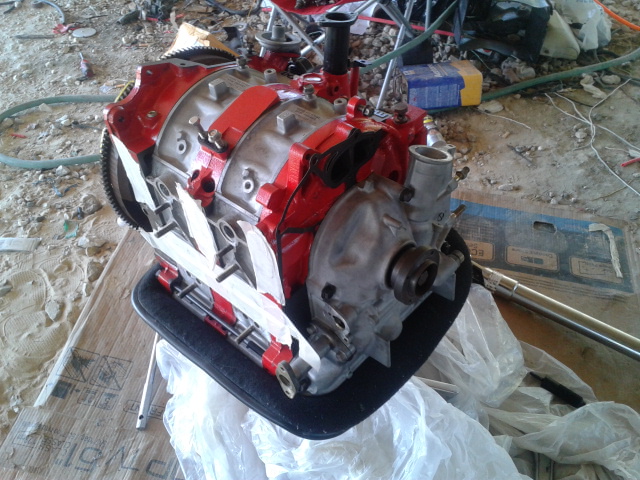
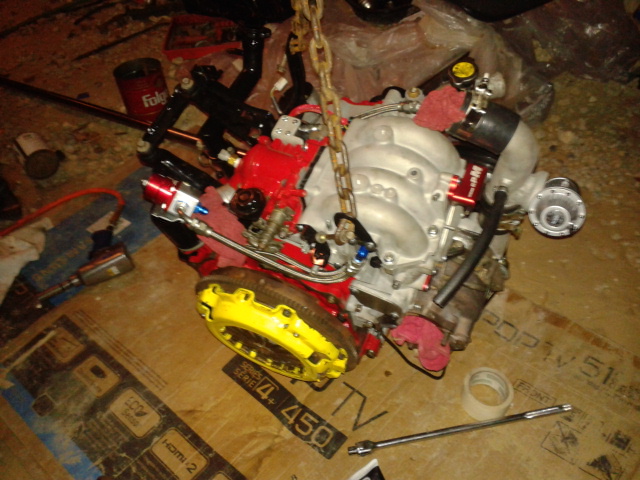
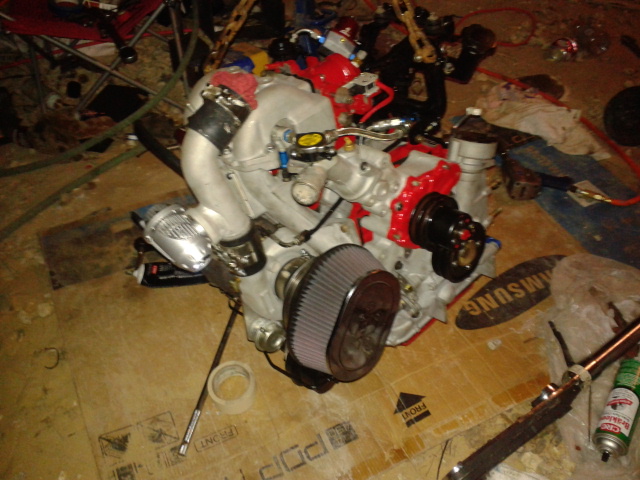
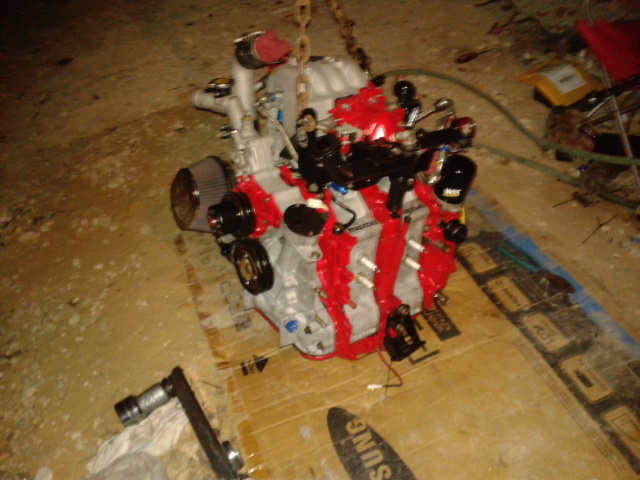
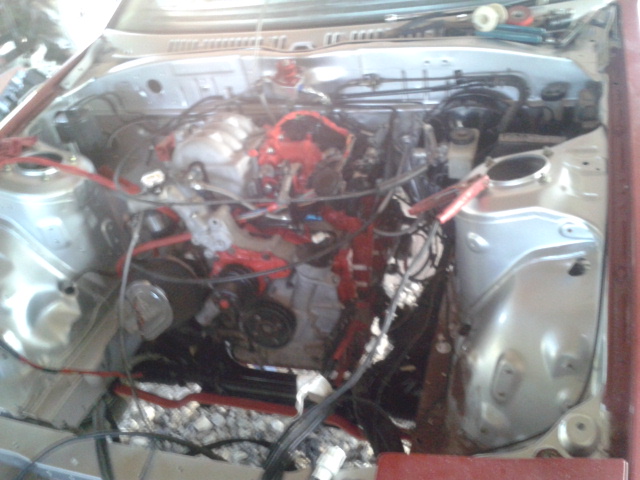
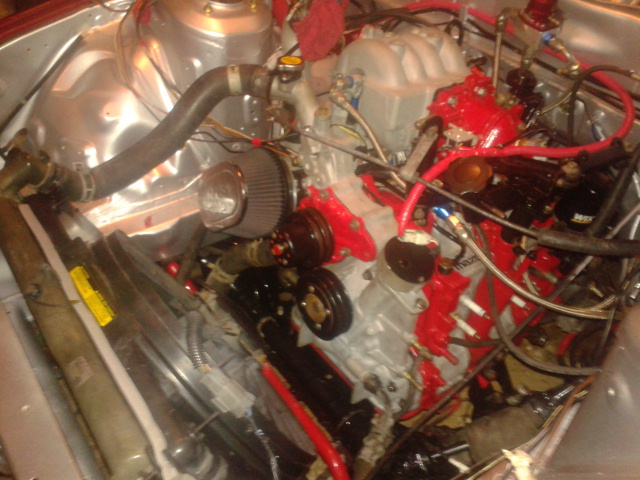
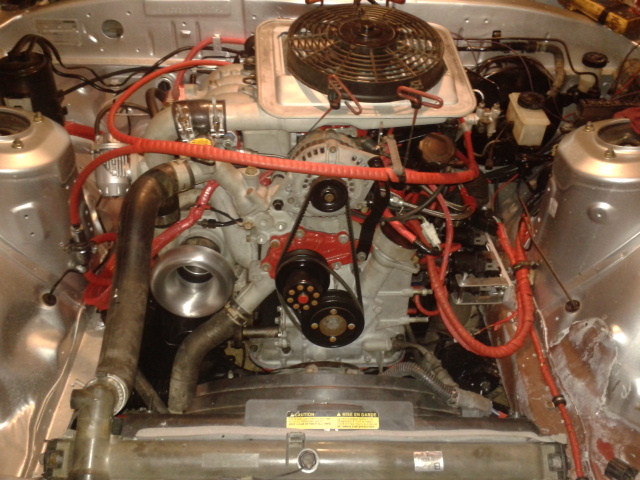
A little update, I always find threads that never go to the final product so I will try to keep this one updated to the end. I finally built the motor and set it in the car. Wired up the ECU and battery and have a semi decent base map that gets me a steady idle. She smokes like crazy and I fear that there was a mistake made in the porting but I will have to wait and see how it pans out. When I first installed teh exhaust it smoke pretty bad for two days untill the oil burned out of the presilencer. The IAC does an excellent job at keeping idle steady even when sudden tune changes happen. Enough talk lets get to the good stuff.
Old 11-14-12, 06:59 PM
  #58  
Mr. Fix-it

Thread Starter
iTrader: (3)
 
Brandon Robinson's Avatar
 
Join Date: Feb 2012
Location: Texas
Posts: 181
Likes: 0
Received 0 Likes on 0 Posts
Build night, the anticipation was pretty intense.

Name:  20121025_192639.jpg
Views: 140
Size:  126.6 KB
Name:  20121027_221637.jpg
Views: 134
Size:  149.8 KB
Name:  20121027_221702.jpg
Views: 144
Size:  169.1 KB

And I got to busy to take any more pics until the next day.
Old 11-14-12, 07:01 PM
  #59  
Mr. Fix-it

Thread Starter
iTrader: (3)
 
Brandon Robinson's Avatar
 
Join Date: Feb 2012
Location: Texas
Posts: 181
Likes: 0
Received 0 Likes on 0 Posts
This is what I call a tourqe wrench, the wife actuall did the tourqing while I held the motor. I was quite proud of her.

Name:  20121103_133956.jpg
Views: 138
Size:  223.4 KB
Old 11-14-12, 07:04 PM
  #60  
Mr. Fix-it

Thread Starter
iTrader: (3)
 
Brandon Robinson's Avatar
 
Join Date: Feb 2012
Location: Texas
Posts: 181
Likes: 0
Received 0 Likes on 0 Posts
Name:  20121103_140233.jpg
Views: 138
Size:  193.6 KB
Name:  20121103_140239.jpg
Views: 145
Size:  199.0 KB
Name:  20121103_140239.jpg
Views: 145
Size:  199.0 KB
Name:  20121103_192531.jpg
Views: 140
Size:  167.9 KB
Name:  20121103_192543.jpg
Views: 143
Size:  160.5 KB
Name:  20121103_192553.jpg
Views: 135
Size:  148.1 KB
Attached Images
File Type: jpg
20121103_140239.jpg (199.0 KB, 24 views)
Old 11-14-12, 07:05 PM
  #61  
Mr. Fix-it

Thread Starter
iTrader: (3)
 
Brandon Robinson's Avatar
 
Join Date: Feb 2012
Location: Texas
Posts: 181
Likes: 0
Received 0 Likes on 0 Posts
Name:  20121104_164433.jpg
Views: 138
Size:  137.8 KB
Name:  20121105_180806.jpg
Views: 136
Size:  160.0 KB
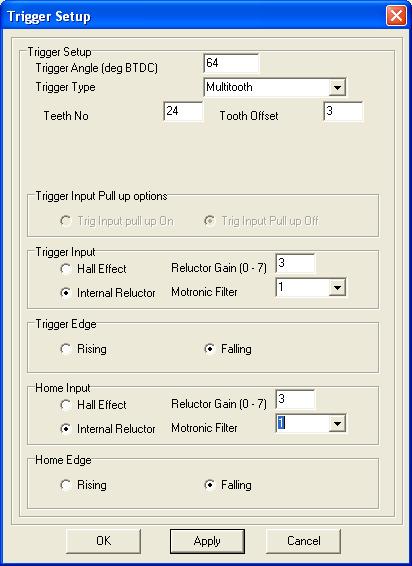
It is a good ideal when using a Haltech E6X to route the crank trigger wire away from any other electrical circuits to avoid interference. They are stupid sensitive to crosstalk.

Last edited by Brandon Robinson; 11-14-12 at 07:09 PM.
Old 11-14-12, 07:11 PM
  #62  
Senior Member

 
Customisbetter's Avatar
 
Join Date: Jun 2012
Location: Michigan
Posts: 462
Received 0 Likes on 0 Posts
Thats a good looking engine!
Old 11-14-12, 07:14 PM
  #63  
Will TIG for 20b

iTrader: (1)
 
jaggermouth's Avatar
 
Join Date: Mar 2008
Location: Nanaimo
Posts: 1,422
Likes: 0
Received 2 Likes on 2 Posts
How'd you find rebuilding it? Pretty straight forward? Looks good
Old 11-14-12, 07:15 PM
  #64  
Mr. Fix-it

Thread Starter
iTrader: (3)
 
Brandon Robinson's Avatar
 
Join Date: Feb 2012
Location: Texas
Posts: 181
Likes: 0
Received 0 Likes on 0 Posts
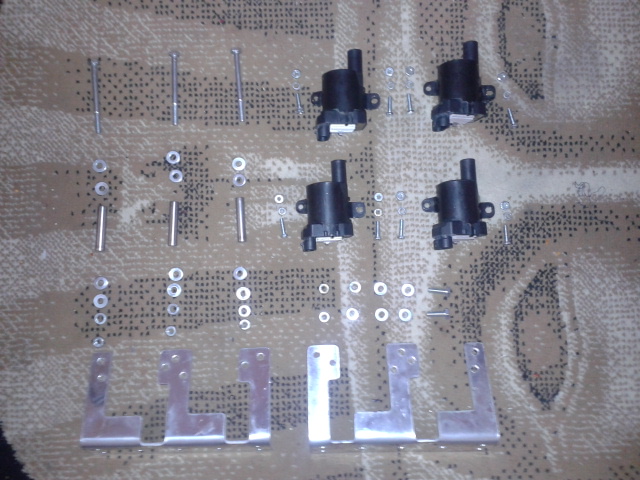
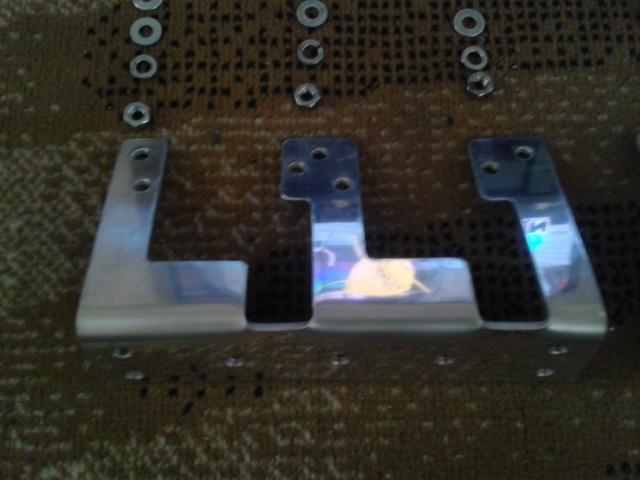
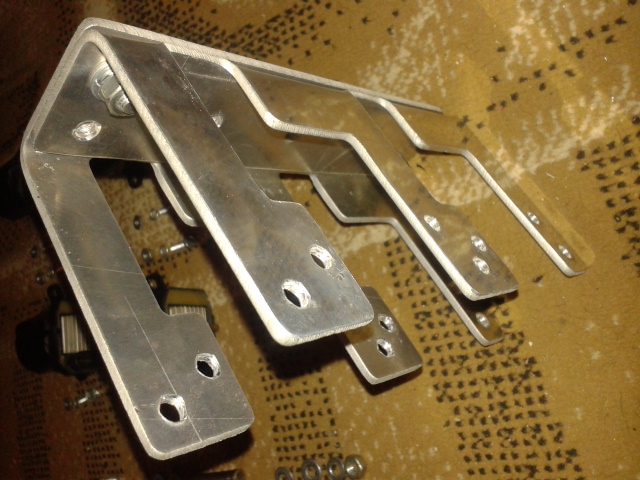
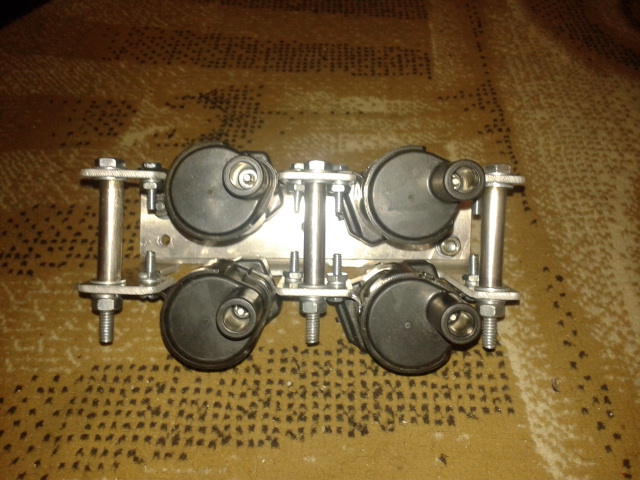
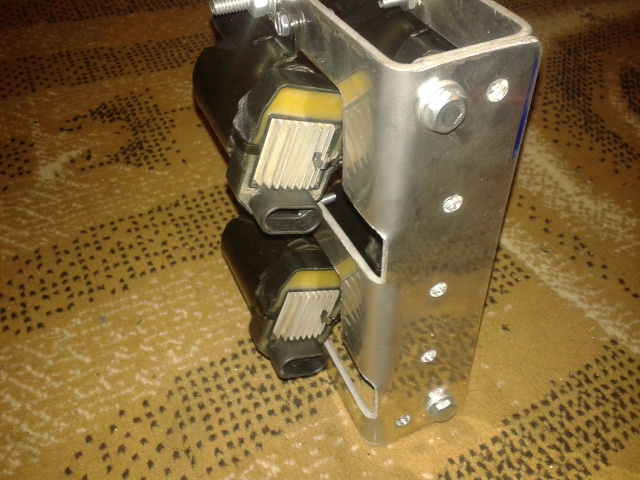
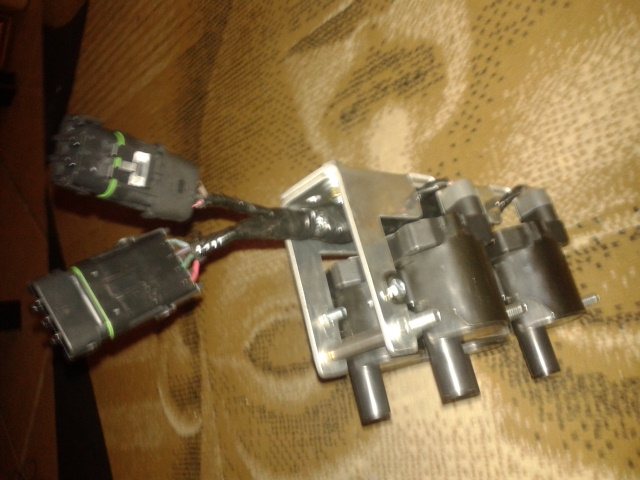
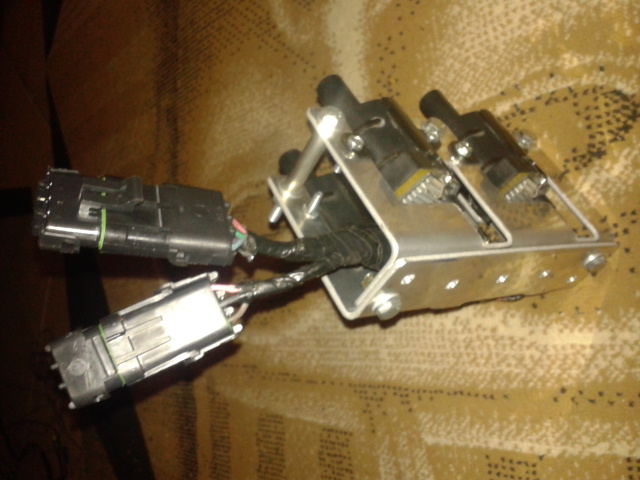
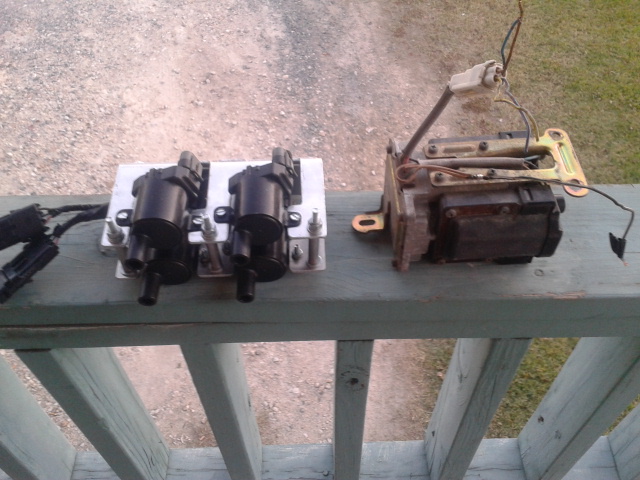
I though I had blown a apex seal after a good rev, when i realized my coils where just plain weak it would just start firing on one rotor for some odd reason. So i decided it was time to setup the LS2 coils. Here are some pics of my custom coil carrage. By the way those N/A rotors make the BNR Stage 4 scream 5+ psi on a unloaded rev. I finally have obtained the sitting at the stoplight BOV rev sound
Old 11-14-12, 07:18 PM
  #65  
Mr. Fix-it

Thread Starter
iTrader: (3)
 
Brandon Robinson's Avatar
 
Join Date: Feb 2012
Location: Texas
Posts: 181
Likes: 0
Received 0 Likes on 0 Posts
Name:  20121114_152049.jpg
Views: 135
Size:  166.6 KB
Name:  20121114_152056.jpg
Views: 156
Size:  123.2 KB
Name:  20121114_152056.jpg
Views: 156
Size:  123.2 KB
Name:  20121114_152315.jpg
Views: 133
Size:  160.0 KB
Name:  20121114_155715.jpg
Views: 144
Size:  161.4 KB
Name:  20121114_155733.jpg
Views: 135
Size:  167.0 KB
Name:  20121114_164457.jpg
Views: 135
Size:  128.0 KB
Name:  20121114_164512.jpg
Views: 139
Size:  129.4 KB


Comparison in size to the old trailing coil...
Name:  20121114_170938.jpg
Views: 146
Size:  153.3 KB
Attached Images
File Type: jpg
20121114_152056.jpg (123.2 KB, 20 views)
Old 11-14-12, 07:24 PM
  #66  
Mr. Fix-it

Thread Starter
iTrader: (3)
 
Brandon Robinson's Avatar
 
Join Date: Feb 2012
Location: Texas
Posts: 181
Likes: 0
Received 0 Likes on 0 Posts
Originally Posted by jaggermouth
How'd you find rebuilding it? Pretty straight forward? Looks good
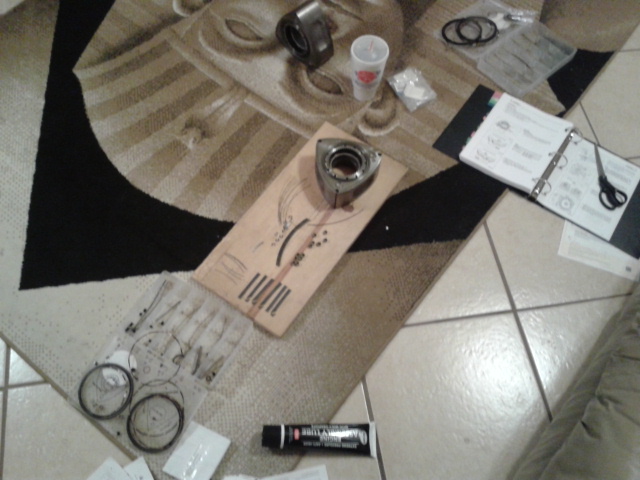
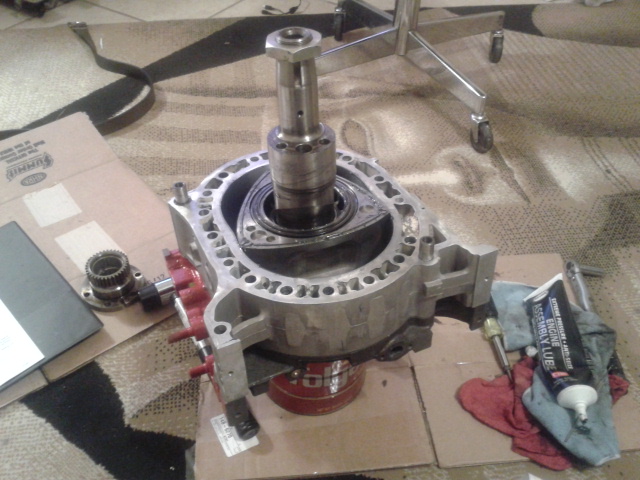
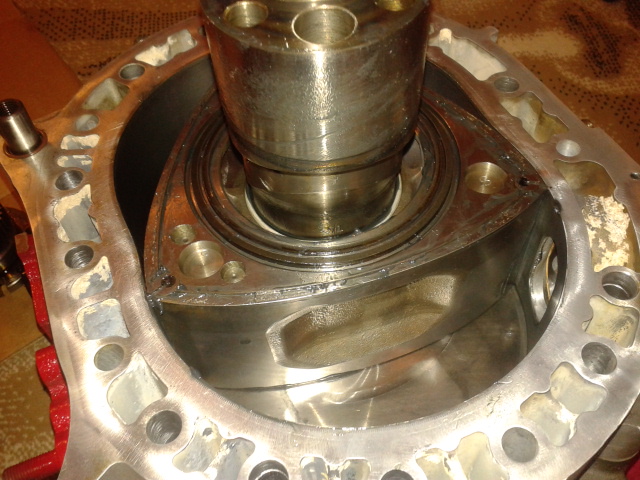
It was a whole lot easier than I led myself to believe it would be. I just printed out the FSM and followed the instructions, made sure everything was super clean and went to town. May have took a few hours tops... The fun part was carrying it downstairs by myself. Also when installing the side seals avoid running your finger down them while checking the spring tension, I cut my index finger pretty good.

Last edited by Brandon Robinson; 11-14-12 at 07:31 PM.
Old 11-14-12, 07:26 PM
  #67  
Mr. Fix-it

Thread Starter
iTrader: (3)
 
Brandon Robinson's Avatar
 
Join Date: Feb 2012
Location: Texas
Posts: 181
Likes: 0
Received 0 Likes on 0 Posts
Originally Posted by Customisbetter
Thats a good looking engine!
Thank you.
Old 11-14-12, 07:33 PM
  #68  
Mr. Fix-it

Thread Starter
iTrader: (3)
 
Brandon Robinson's Avatar
 
Join Date: Feb 2012
Location: Texas
Posts: 181
Likes: 0
Received 0 Likes on 0 Posts
Once I get the ignition and tune lined out I will post some drawings and maps.
Old 11-15-12, 10:07 PM
  #69  
On the fasttrack!

iTrader: (22)
 
magus2222's Avatar
 
Join Date: Oct 2006
Location: virginia beach, virginia
Posts: 2,493
Likes: 0
Received 0 Likes on 0 Posts
how do i obtain one of these coil brackets? looks perfect

Lloyd
Old 11-16-12, 11:26 AM
  #70  
Mr. Fix-it

Thread Starter
iTrader: (3)
 
Brandon Robinson's Avatar
 
Join Date: Feb 2012
Location: Texas
Posts: 181
Likes: 0
Received 0 Likes on 0 Posts
Originally Posted by magus2222
how do i obtain one of these coil brackets? looks perfect

Lloyd
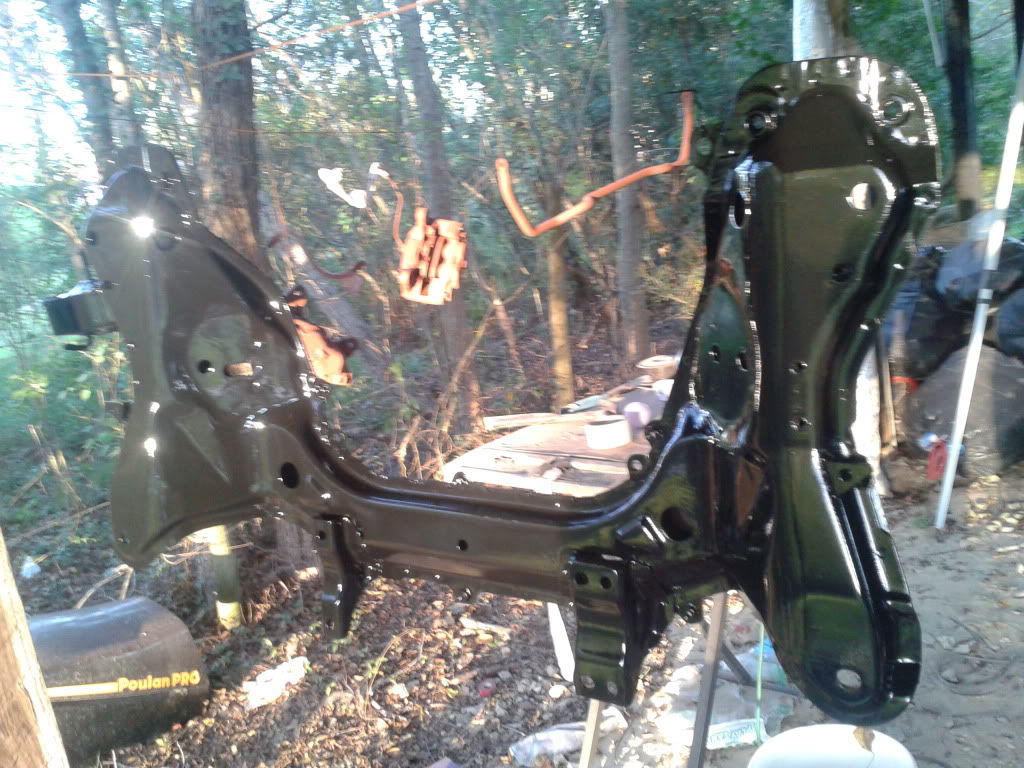
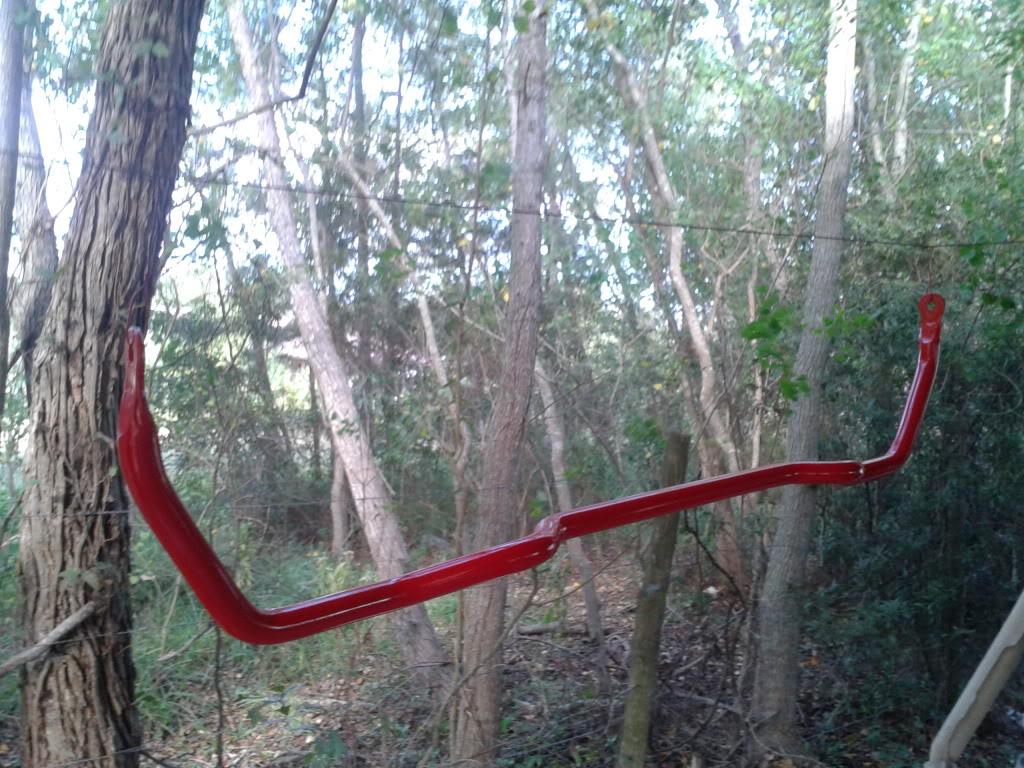
I will post a dxf that you can use to make your own I do not have the capacity to manufacture more at the moment. It will require a lazer table / plasma table (and drill press if plasma) and a brake press.
Old 11-20-12, 10:30 AM
  #71  
Boosted
 
spindill's Avatar
 
Join Date: Nov 2012
Location: Connecticut
Posts: 14
Likes: 0
Received 0 Likes on 0 Posts
Good work, nice looking engine bay.
Old 12-08-12, 06:53 PM
  #72  
Mr. Fix-it

Thread Starter
iTrader: (3)
 
Brandon Robinson's Avatar
 
Join Date: Feb 2012
Location: Texas
Posts: 181
Likes: 0
Received 0 Likes on 0 Posts
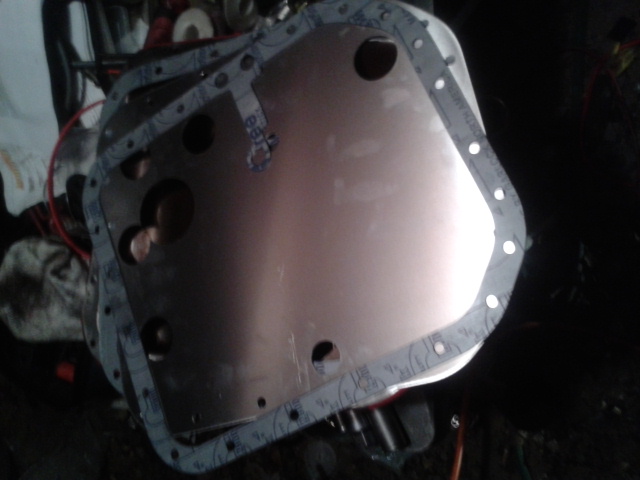
I finally squared away most of the electrical work and added a oil pan baffle from Atkins Rotary. I thought i had left the oil PRV hand tight butiwas wrong so there went a few weeks of lost time. Those n/a rotors are pushing the turbo to opening the wastegate on open revs. The engine is building 7 psi of boost around 4k rpm unloaded, surprised me to hear the bov on the jack stands.

Name:  20121208_175147.jpg
Views: 177
Size:  176.0 KB

Name:  20121207_181721.jpg
Views: 138
Size:  91.5 KB
Old 12-08-12, 07:49 PM
  #73  
Full Member
 
food37's Avatar
 
Join Date: Nov 2012
Location: Lancaster, PA
Posts: 60
Likes: 0
Received 0 Likes on 0 Posts
I really like the intercooler fan setup. Awesome idea! Good luck with build man!
Old 12-12-12, 05:40 PM
  #74  
Mr. Fix-it

Thread Starter
iTrader: (3)
 
Brandon Robinson's Avatar
 
Join Date: Feb 2012
Location: Texas
Posts: 181
Likes: 0
Received 0 Likes on 0 Posts
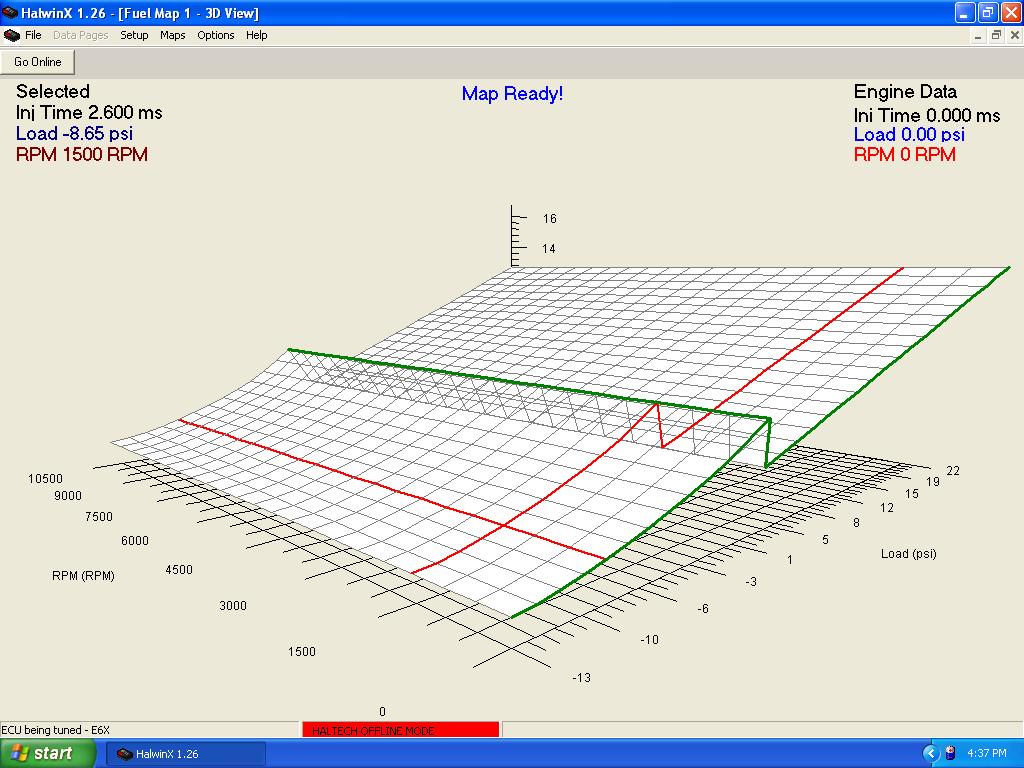
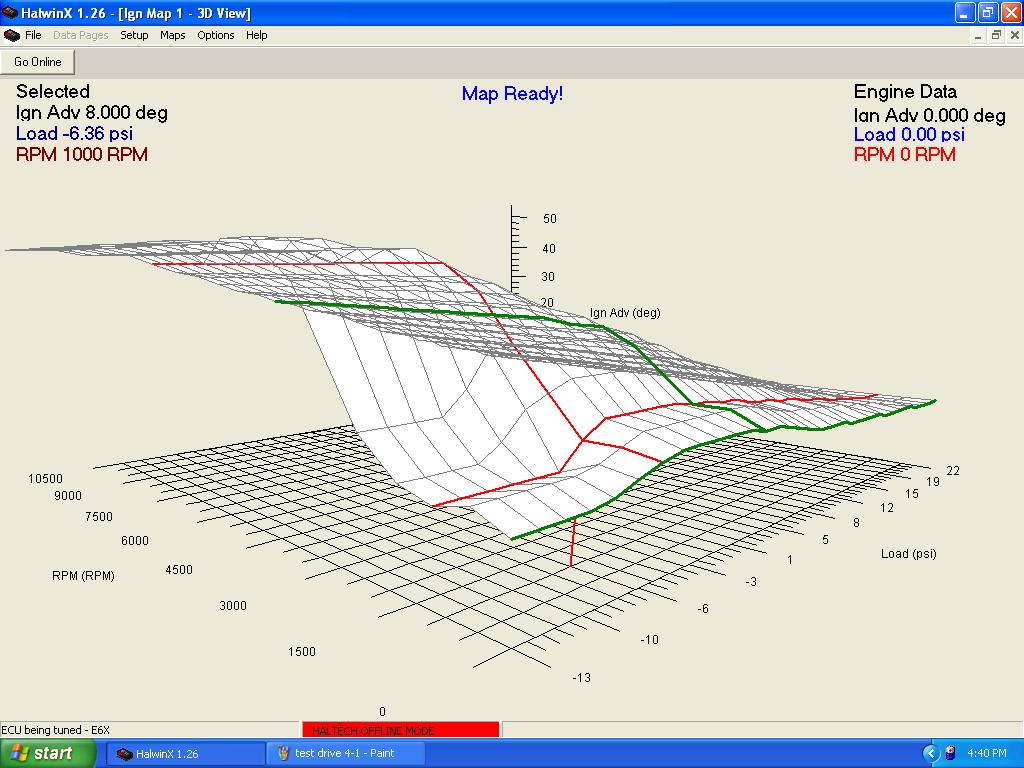
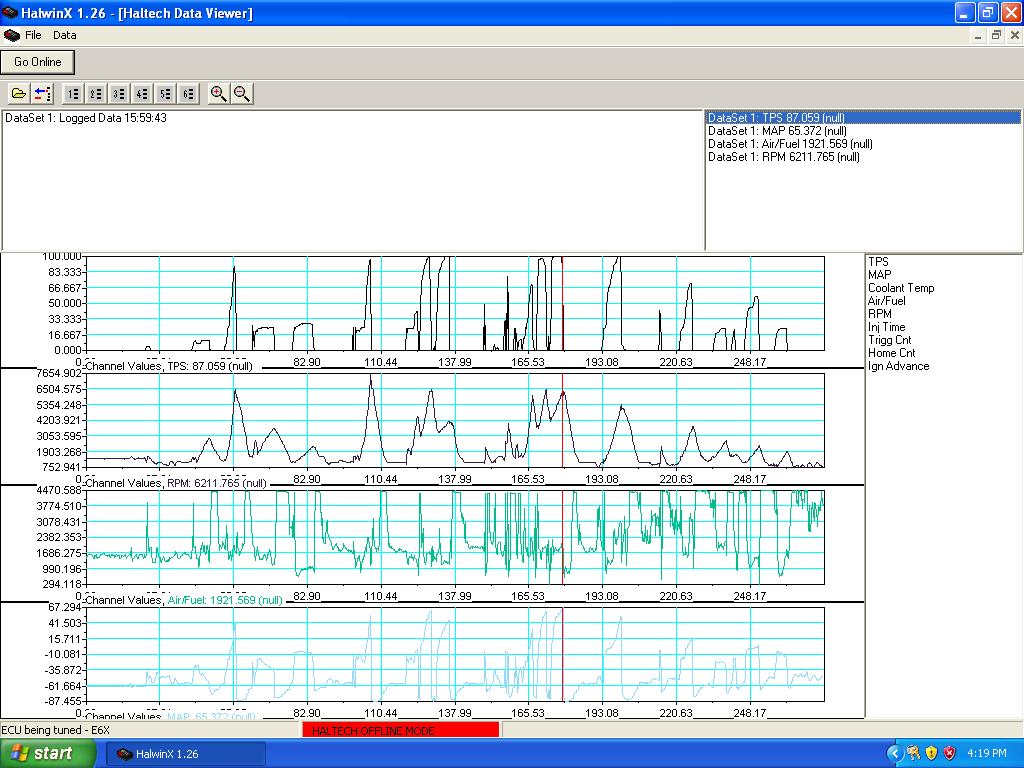
Test drive number 4 and I have finally worked all of the bugs out of my tune. The trigger signal is strong and i finally am getting the proper injection times. Tuning on a fresh rebuild can prove to be a pain because the apex seals have not worn in yet. I have to contest that Goopy seals do seat quite fast. Mabey 5 gallons of fuel on jackstands and two test and tune drives and they are set. I will post some video later once I have confidence in the tune. The HKS sounds awesome, the car pulls hard but i am having issues with electrical charging. The interior needs a lotof assembly as well as the exterior. If i get a bonus this year the v-mount or fmic will go in. Here are some screen shots to keep you in the know.

Name:  testdrive4-1.jpg
Views: 145
Size:  133.5 KB

Name:  testdrive4-2.jpg
Views: 141
Size:  129.3 KB

Name:  testdrive4.jpg
Views: 144
Size:  156.0 KB

Name:  fuelsettings.jpg
Views: 153
Size:  46.6 KB

Name:  triggersettings-1.jpg
Views: 128
Size:  38.9 KB
Old 12-12-12, 06:01 PM
  #75  
Full Member

 
Groshuk's Avatar
 
Join Date: Jul 2006
Location: Canada
Posts: 89
Likes: 0
Received 0 Likes on 0 Posts
I'm really curious to see how you like this set up, I'm wanting to do something similar with N/A rotors to get more low end but other than the 6 port turbo guys I haven't seen anyone else trying what you are doing.


Quick Reply: Brandon's FC Build


All times are GMT -5. The time now is 12:50 AM.