Another, "Hey look at my car's rebuild journey" attention deprived thread.

 08-22-09, 12:49 PM
#152
UPDATE:
Well I have not posted on this forum in a while due to the fact I have been extremely busy.
I built the motor two Mondays ago and besides a couple ups and downs with super glue and those damn corner apex seal pieces....it went pretty smooth.
Total build time was about 4 hours due to applying that damn Hylomar(time consuming).
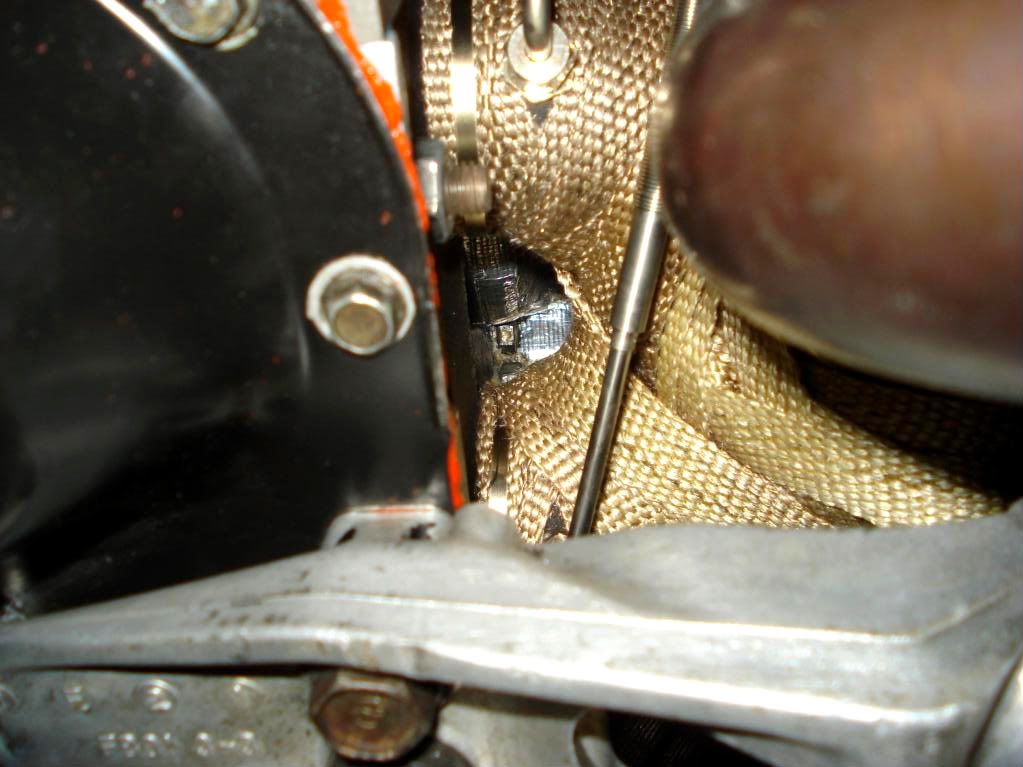
I then put the motor in on the following Thursday. I also installed some EGT probes in my exhst mani runners so the drilling and tapping the cast manifold slowed me down a day or two. Start up was this last sunday and it was a little scary too......short story: I thought I had burped all the coolant out the day prior and when she was idling for about the first 20 mins the thermostat never came open by 85*C so I shut down the car. I had a huge air pocket that made my boil over reservoir go crazy and water thermo sensor readings spike to 115*C and frankly made me think I fucked my motor within the first five minutes. I was pissed and sick to my stomach.
While she cooled down and after a little research and some reassuring advice from RETED I was feeling better about my "common" blunder/trend that happens with dry motor/rebuild start ups. Either way I was not 100% confident until she cooled down and was reassured when I didn't see any white smoke on start up.
I took her out the next day for a drive and she ran great. I was pulling -13 inHG at first but by about 100 miles on the motor I have -15 inHG at idle.
After a coule days of driving I was pretty pissed about my lower idle AFR of about 11.5(even though it has a SWEET "brap brap brap" sound). See... The ONLY bad thing about the Apexi Power FC is the ecu is set up for only allowing your primary injs to be lower to a certain duty cycle %. Combine 750cc primaries and the duty cycle lowered as much as it can go and the end result is a rich idle AFR....you can try to lower your base map, inj map, ect and your idle AFR wont change because the ecu won't allow it any lower. This is why you have to actually decrease the firing LAG of the injectors to lean out the idle AFR.
SOOO... I tried some negative lag on my PFC and it made my idle a smoother, 12.3/12.5 and the sound was more a "pur" , but your map tune is now messed up AND even AFTER I corrected the base map in one night of tuning, I was experiencing idle issues that should be non-existant because of some certain fail proof settings I got from Chuck Westbrooks notes. I ended up setting it back up to my old map since it was tuned and pretty cose to the last motors "comfort zone" AFR wise. I will settle for the rich idle. I will just make sure she doesn't idle too long so my plugs can have some life.
Since then I have been driving and finishing my fine tuning in cruise areas of my map. She is running awesome never-the-less and I am happy. Hopefully I can get these break in miles on by mid Sept so I can WOT tune before winter.
Here are a couple pics and a Vid of my idle sound at 129 miles on the motor.
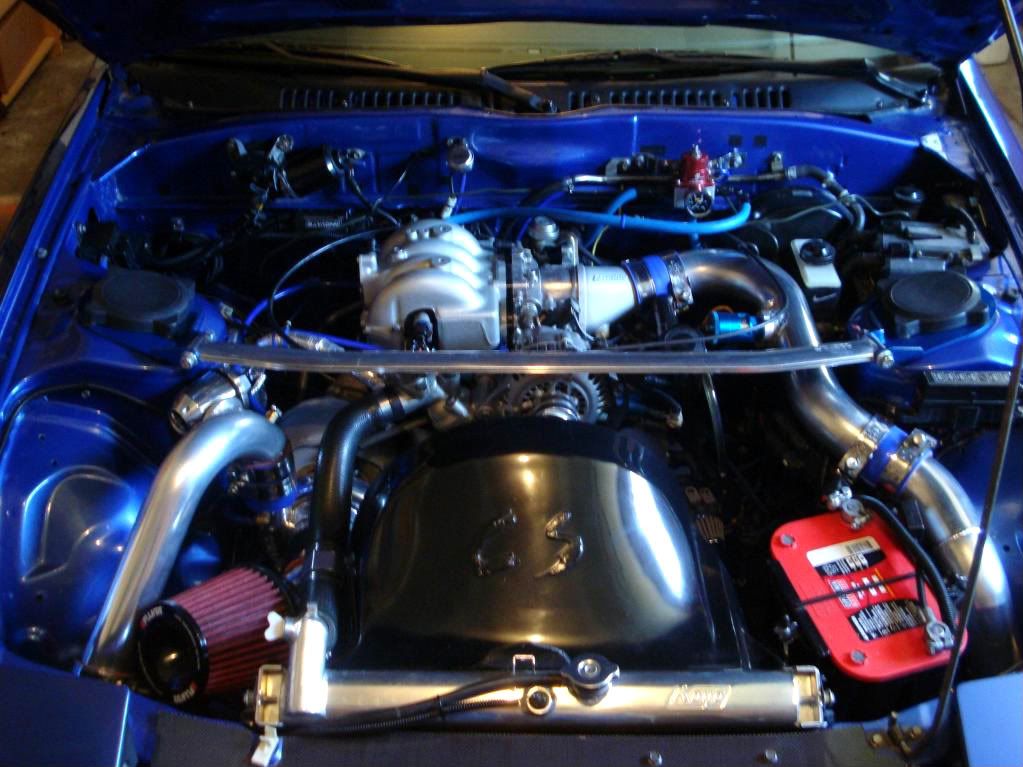
EGT set up
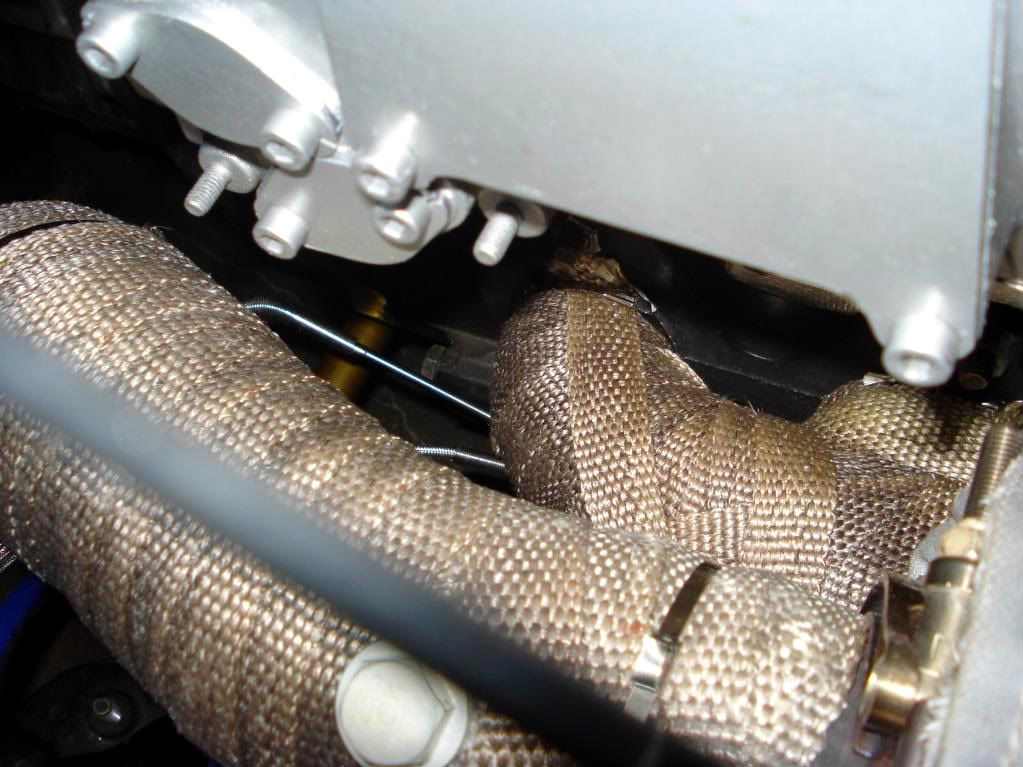
I plan on moving the EGT gauges to my center consule this winter..

Well I have not posted on this forum in a while due to the fact I have been extremely busy.
I built the motor two Mondays ago and besides a couple ups and downs with super glue and those damn corner apex seal pieces....it went pretty smooth.
Total build time was about 4 hours due to applying that damn Hylomar(time consuming).
I then put the motor in on the following Thursday. I also installed some EGT probes in my exhst mani runners so the drilling and tapping the cast manifold slowed me down a day or two. Start up was this last sunday and it was a little scary too......short story: I thought I had burped all the coolant out the day prior and when she was idling for about the first 20 mins the thermostat never came open by 85*C so I shut down the car. I had a huge air pocket that made my boil over reservoir go crazy and water thermo sensor readings spike to 115*C and frankly made me think I fucked my motor within the first five minutes. I was pissed and sick to my stomach.
While she cooled down and after a little research and some reassuring advice from RETED I was feeling better about my "common" blunder/trend that happens with dry motor/rebuild start ups. Either way I was not 100% confident until she cooled down and was reassured when I didn't see any white smoke on start up.
I took her out the next day for a drive and she ran great. I was pulling -13 inHG at first but by about 100 miles on the motor I have -15 inHG at idle.
After a coule days of driving I was pretty pissed about my lower idle AFR of about 11.5(even though it has a SWEET "brap brap brap" sound). See... The ONLY bad thing about the Apexi Power FC is the ecu is set up for only allowing your primary injs to be lower to a certain duty cycle %. Combine 750cc primaries and the duty cycle lowered as much as it can go and the end result is a rich idle AFR....you can try to lower your base map, inj map, ect and your idle AFR wont change because the ecu won't allow it any lower. This is why you have to actually decrease the firing LAG of the injectors to lean out the idle AFR.
SOOO... I tried some negative lag on my PFC and it made my idle a smoother, 12.3/12.5 and the sound was more a "pur" , but your map tune is now messed up AND even AFTER I corrected the base map in one night of tuning, I was experiencing idle issues that should be non-existant because of some certain fail proof settings I got from Chuck Westbrooks notes. I ended up setting it back up to my old map since it was tuned and pretty cose to the last motors "comfort zone" AFR wise. I will settle for the rich idle. I will just make sure she doesn't idle too long so my plugs can have some life.
Since then I have been driving and finishing my fine tuning in cruise areas of my map. She is running awesome never-the-less and I am happy. Hopefully I can get these break in miles on by mid Sept so I can WOT tune before winter.
Here are a couple pics and a Vid of my idle sound at 129 miles on the motor.
EGT set up
I plan on moving the EGT gauges to my center consule this winter..
 08-23-09, 12:33 PM
#158
About the idle AFR -- you got your air bleeds hooked up? OMP still on there or not? I've never had the infamous idle problem either with or without manual idle control, with or without stock plugs. I'm running Greddy/Denso 720 primary's with an OEM resistor pack (which is I believe 6 ohm).
Who makes your injectors? I actually found a table of lag vs. battery voltage for my injectors ( www.injector-rehab.com ) and just put that into InjPr Lag vs Batv and InjSc Lag vs Batv. Then I left the usual lag trim settings that you used mostly zero'd out. The car can idle fine at high 12's/low 13's, using PFC controlled idle and a BAC valve with Idle ignition control on. Maybe it's a coincidence that at all that stuff works. On my current setup the car pulls about 11-12 inches vacuum due to the aggressive exhaust ports.
Who makes your injectors? I actually found a table of lag vs. battery voltage for my injectors ( www.injector-rehab.com ) and just put that into InjPr Lag vs Batv and InjSc Lag vs Batv. Then I left the usual lag trim settings that you used mostly zero'd out. The car can idle fine at high 12's/low 13's, using PFC controlled idle and a BAC valve with Idle ignition control on. Maybe it's a coincidence that at all that stuff works. On my current setup the car pulls about 11-12 inches vacuum due to the aggressive exhaust ports.
08-23-09, 05:41 PM
#159
About the idle AFR -- you got your air bleeds hooked up? OMP still on there or not? I've never had the infamous idle problem either with or without manual idle control, with or without stock plugs. I'm running Greddy/Denso 720 primary's with an OEM resistor pack (which is I believe 6 ohm).
Who makes your injectors? I actually found a table of lag vs. battery voltage for my injectors ( www.injector-rehab.com ) and just put that into InjPr Lag vs Batv and InjSc Lag vs Batv. Then I left the usual lag trim settings that you used mostly zero'd out. The car can idle fine at high 12's/low 13's, using PFC controlled idle and a BAC valve with Idle ignition control on. Maybe it's a coincidence that at all that stuff works. On my current setup the car pulls about 11-12 inches vacuum due to the aggressive exhaust ports.
Who makes your injectors? I actually found a table of lag vs. battery voltage for my injectors ( www.injector-rehab.com ) and just put that into InjPr Lag vs Batv and InjSc Lag vs Batv. Then I left the usual lag trim settings that you used mostly zero'd out. The car can idle fine at high 12's/low 13's, using PFC controlled idle and a BAC valve with Idle ignition control on. Maybe it's a coincidence that at all that stuff works. On my current setup the car pulls about 11-12 inches vacuum due to the aggressive exhaust ports.
That INJ lag to Batt volt I found a while back from your site(or maybe someone else) and it is set to Siemen Deka standards.
I am running a manual idle control since I have no BAC. Just use the throttle set screw, linear base map settings in idle area and some linear timing as well.
Can I run the PFC controlled idle with no O2 sensor hooked up?
09-14-09, 07:46 PM
#160
update:
So I have 577 miles on the motor and have cured my dreaded idle woes. When I was assembling the motor I remembered to line up the main pulley with the 5*atdc mark and stab my CAS with the dot aligned to the gear.
Well since start up I have had a good idle but it was very rich 11.1:1 AFR and was a bit lumpy and sparatic. So after messing with some negative lag to day and just getting frustrated I remebered I never put a timing light on the motor(it was stabbed correctly, top off the CAS and thumb on the internal wheel). Well once I got my idle down to 750rpm my timing was at a whopping 10-12*btdc.
So I pulled the CAS after I lined the pully back up at 5*atdc and the front cover pin. re-stabbed the CAS and started her up. smooth as butter and is at a perfect 5*atdc @ 750rpm. I raised the idle back up to 950rpm and my idle AFR went to 12.4:1
Much happier and glad I didn't go negative lag. re-tuning the map would have blowed and been a major waste of time last year.
Now as for my comp test it was shaky. I used a piston tester that is brand new from my craftsman professional series kit.
BOTH front and rear rotors had 3 DEAD EVEN pulses at 50 psi each
When I got to the accumulative PSI reading on each rotor I was worried at first...
Front was 95 psi
Rear was 88/90 psi
I know that I want 115+ and after talking to some pro's I need to do this @ 1500/2000 miles. I feel like an idiot BUT for some reason I figured compression would be damn near close to high numbers at 577 miles(some have stated it would). I will wait till then(maybe do another at 1000 miles for ***** and giggles).
On another note I recieved the "Street Rotary" book in the mail today and am very impressed. Much more informative then the "Rotary Performance" novel that came out some time ago.
One thing that confuses me is on the pre-mix section where the book states that "most experts recommend 1 ounce of pre-mix oil to 1 gallon". Meanwhile my Idemitsu pre-mix bottle states that I use 1/2 ounce per 1 gallon.
I am not running my OMP and would like to hear some input on this. Should I stick with 1/2 ounce until my breakin is done THEN go to 1 ounce per gallon?
***side note: Racing Beat reccomends 4 ounces per gallon on 500HP+ rotaries
NEXT ON THE TO DO list is to make some ducting to my oil cooler. My oil temps when cruising around town stabilize at 182* F. I dont like that temp BUT am unsure if that is excessivley high( I would perferr 160* F). I should point out that when I ran synthetic the temps went to about 175* F constant.
So I have 577 miles on the motor and have cured my dreaded idle woes. When I was assembling the motor I remembered to line up the main pulley with the 5*atdc mark and stab my CAS with the dot aligned to the gear.
Well since start up I have had a good idle but it was very rich 11.1:1 AFR and was a bit lumpy and sparatic. So after messing with some negative lag to day and just getting frustrated I remebered I never put a timing light on the motor(it was stabbed correctly, top off the CAS and thumb on the internal wheel). Well once I got my idle down to 750rpm my timing was at a whopping 10-12*btdc.
So I pulled the CAS after I lined the pully back up at 5*atdc and the front cover pin. re-stabbed the CAS and started her up. smooth as butter and is at a perfect 5*atdc @ 750rpm. I raised the idle back up to 950rpm and my idle AFR went to 12.4:1
Much happier and glad I didn't go negative lag. re-tuning the map would have blowed and been a major waste of time last year.
Now as for my comp test it was shaky. I used a piston tester that is brand new from my craftsman professional series kit.
BOTH front and rear rotors had 3 DEAD EVEN pulses at 50 psi each
When I got to the accumulative PSI reading on each rotor I was worried at first...
Front was 95 psi
Rear was 88/90 psi
I know that I want 115+ and after talking to some pro's I need to do this @ 1500/2000 miles.
I feel like an idiot BUT for some reason I figured compression would be damn near close to high numbers at 577 miles(some have stated it would). I will wait till then(maybe do another at 1000 miles for ***** and giggles).On another note I recieved the "Street Rotary" book in the mail today and am very impressed. Much more informative then the "Rotary Performance" novel that came out some time ago.
One thing that confuses me is on the pre-mix section where the book states that "most experts recommend 1 ounce of pre-mix oil to 1 gallon". Meanwhile my Idemitsu pre-mix bottle states that I use 1/2 ounce per 1 gallon.
I am not running my OMP and would like to hear some input on this. Should I stick with 1/2 ounce until my breakin is done THEN go to 1 ounce per gallon?
***side note: Racing Beat reccomends 4 ounces per gallon on 500HP+ rotaries
NEXT ON THE TO DO list is to make some ducting to my oil cooler. My oil temps when cruising around town stabilize at 182* F. I dont like that temp BUT am unsure if that is excessivley high( I would perferr 160* F). I should point out that when I ran synthetic the temps went to about 175* F constant.
09-14-09, 08:17 PM
#161
Knucklehead
iTrader: (2)
Join Date: Nov 2002
Location: Fife, WA
Posts: 920
Likes: 0
Received 0 Likes
on
0 Posts
Well, I use Idemitsu as well. Someone told me they only recommend that much when you still have the OMP, but isnt that for race engines anyhow? Anyway, if RB recommends 4oz, I'd do it to save myself from popping a motor. Better to spend the money on premix than a rebuild. But I'm sure you have the same mentality.
Those 4 spokes are odd, havent seen many cars with those, but they do look great. The whole car is great.
Those 4 spokes are odd, havent seen many cars with those, but they do look great. The whole car is great.
09-20-09, 10:41 PM
#162
This weekend I am currently working on some custom .025'' ducting that travels from my intercooler-by the oil cooler- to the koyo. My water and oil temps are fine BUT I would like to see my oil temps a little lower. I hit about 185* city driving and want about 165-170*F
I have been doing it all by hand with some sheet metal snips and some small 3/8 self tapping sheet metal screws. lol
It is coming along, I just have to put some sealing foam/ soft rubber around the edges that will cease chaffing against the intercooler and radiator cores. Two more brackets to fabricate and then I will test her on tues.
This should take all the lost air after the intercooler and guide it right to the oil cooler and rad. This "should" work great since the radatior shroud I bought years ago and the new improved fan shroud from corksprt have improved air flow. I just NEEDED something to keep the air from dissipating out the bottom of the car after it passes through the intercooler
09-20-09, 10:43 PM
#163
Well ducting is done. Like I said, kinda ghetto( I hate sub-par **** on my FC) BUT hopefully will be functional. I would've liked rivets and had spot welded a couple of the brackets but I work with what I have.
All the screws are secured on the backside with a retaining bead of clear RTV and all the corners are sealed with weather stripping foam. The front and rear of the duct has about 1.5'' of foam so when it is bolted it is very air tight and compressed. Along the sides was a little more difficult. Some small areas for a little air loss BUT NOT MUCH.
I hope my oil cooler line doesn't get too hot on the foam....
All in all I am pleased and wil be much happier once I see some temps drop, Lets hope for a high 80* F day tomorrow so I can test compared to last week.
09-21-09, 09:40 PM
#164
Well after driving around for about an hour and constantly charging the intake to atmospheric pressure and cruising around 3k constant, my oil temps never ran above 165* F.
It would go back to about 178*F sitting and heat soaking but the moment I got above 25mph it would drop pretty fast.
SAME goes for my SWEET new Fast Reacting AIT sensor. That SOB would read 45*C after heat soaking and then immediately after driving it would drop to 36*C. After about 2 mins @ 30 mph she was reading 29* C steady and actually went down to 27* C at 50 mph. Much MUCH better then the factory FD sensor!!
Good ****. Now lets see what an 85* F day will do tomoorow temp wise.
09-22-09, 08:54 PM
#167
Hi Carl, thanks for the kind words man! It hs been a very long project in the making but like most "projects" it is rarely ever close to being done.
How goes your FC build? I read your blog on Speedhunters. I am happy for you and there is NOTHING better then that feeling of excitement and anticipation in light of a new build. I hope the FC gives you just as many happy years as the Cobra did.
Thank you.
As for an update on my FC, I offically hit the half way mark!! 750 miles to go. 250 miles to go until I can fianlly push 5 psi and actually have this thing get up and move a lttle when pulling onto a busy street. Staying below atmospheric pressure with a light weight flywheel and large ports make the car feel like it is creeping up to speed.
How goes your FC build? I read your blog on Speedhunters. I am happy for you and there is NOTHING better then that feeling of excitement and anticipation in light of a new build. I hope the FC gives you just as many happy years as the Cobra did.
very nice indeed!
As for an update on my FC, I offically hit the half way mark!!
09-23-09, 11:36 AM
#168
Full Member

Join Date: Aug 2009
Location: Long Beach, CA, USA
Posts: 63
Likes: 0
Received 0 Likes
on
0 Posts
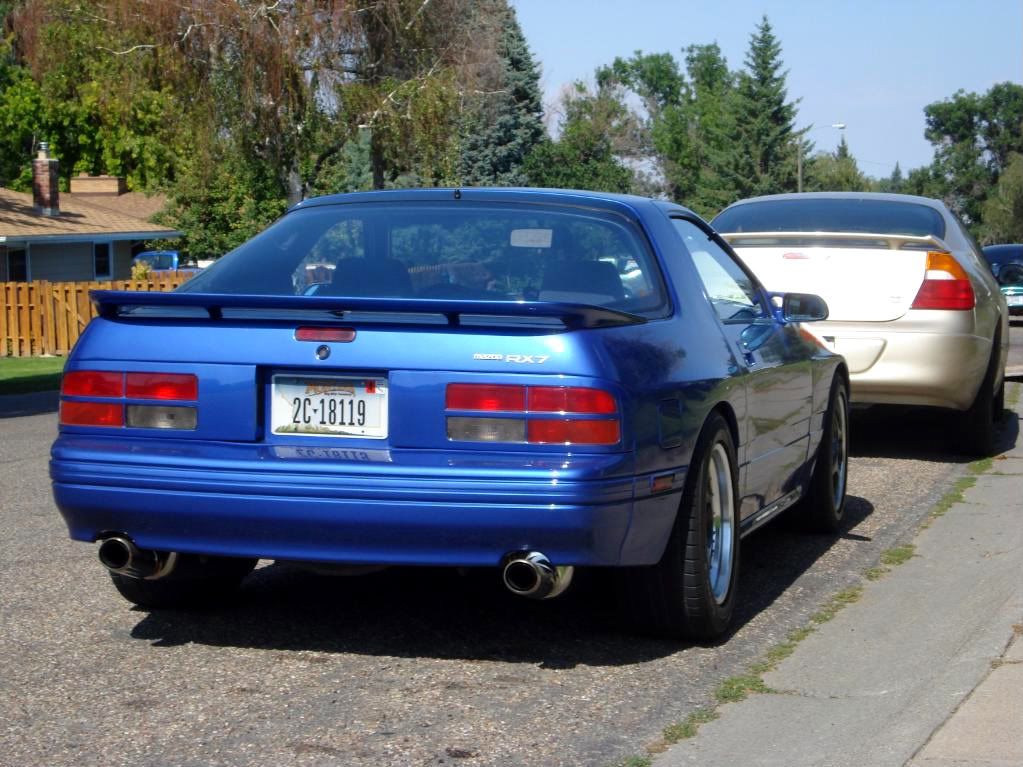
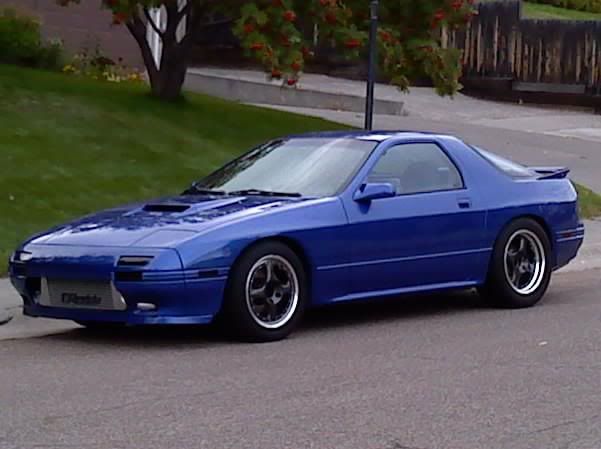
The paint colour is really neat.
I think you need to ditch those eye sore taillights and put on some kind of body kit or something.
Paint is great, but it's like using a rock instead of a canvas.
canvas = body kit.
stock = rock. (boring).
Keep up the good work.
love the paint colour.
I think you need to ditch those eye sore taillights and put on some kind of body kit or something.
Paint is great, but it's like using a rock instead of a canvas.
canvas = body kit.
stock = rock. (boring).
Keep up the good work.
love the paint colour.
09-23-09, 02:52 PM
#169
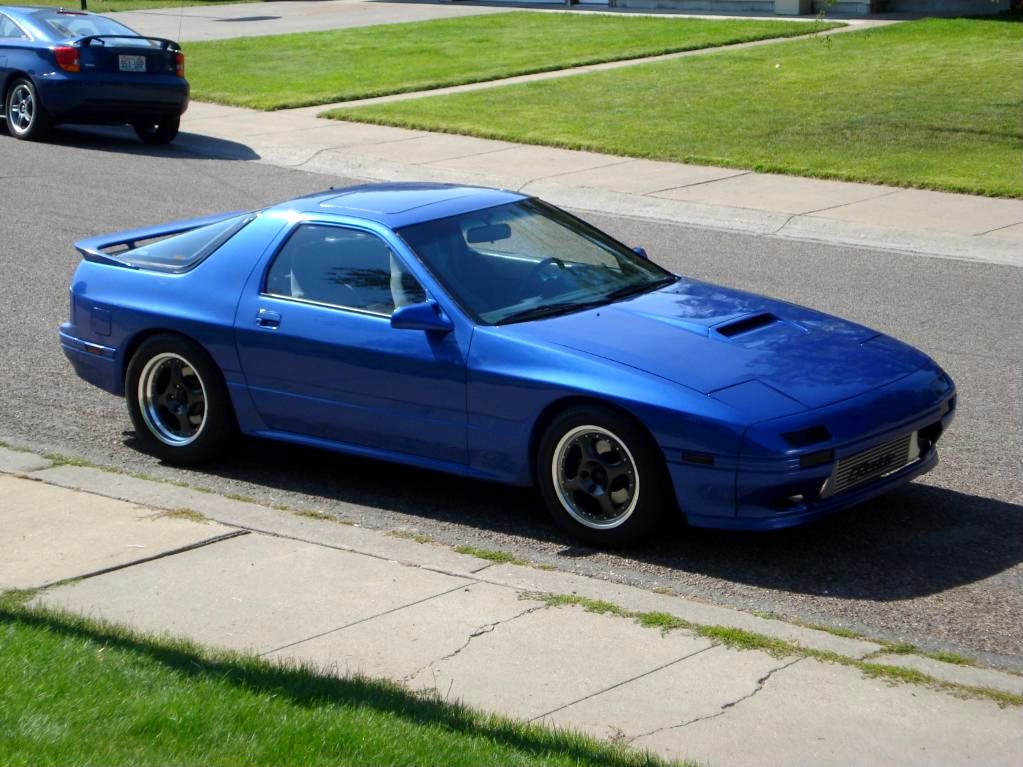
Thanks for the compliment.
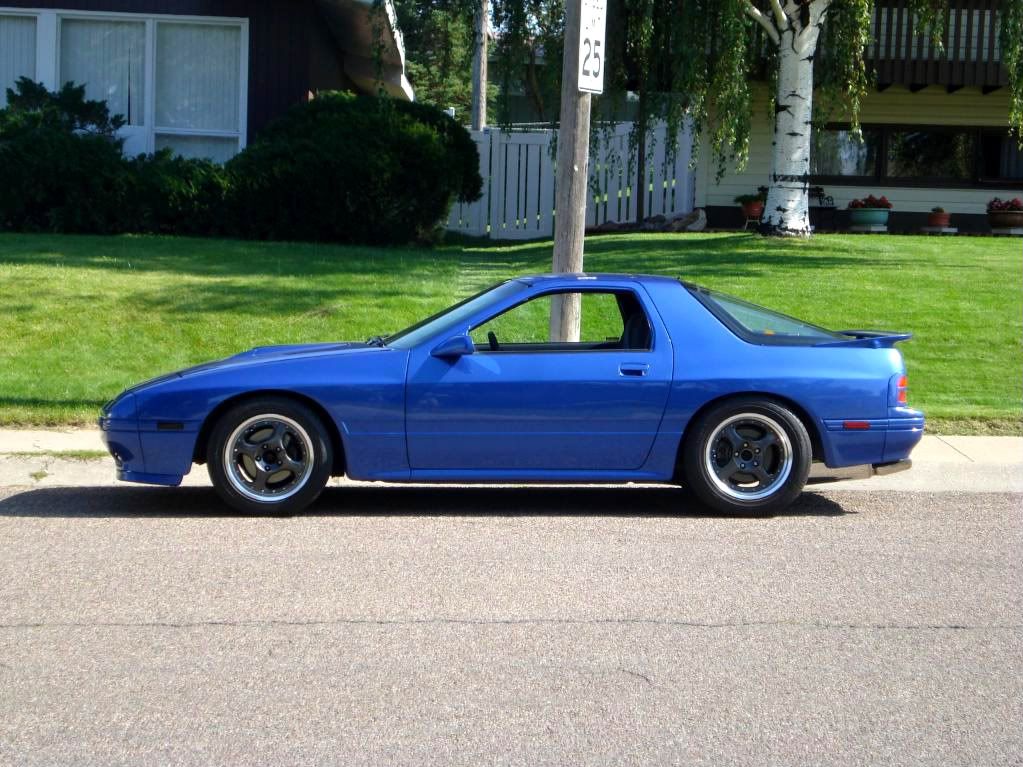
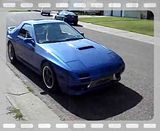
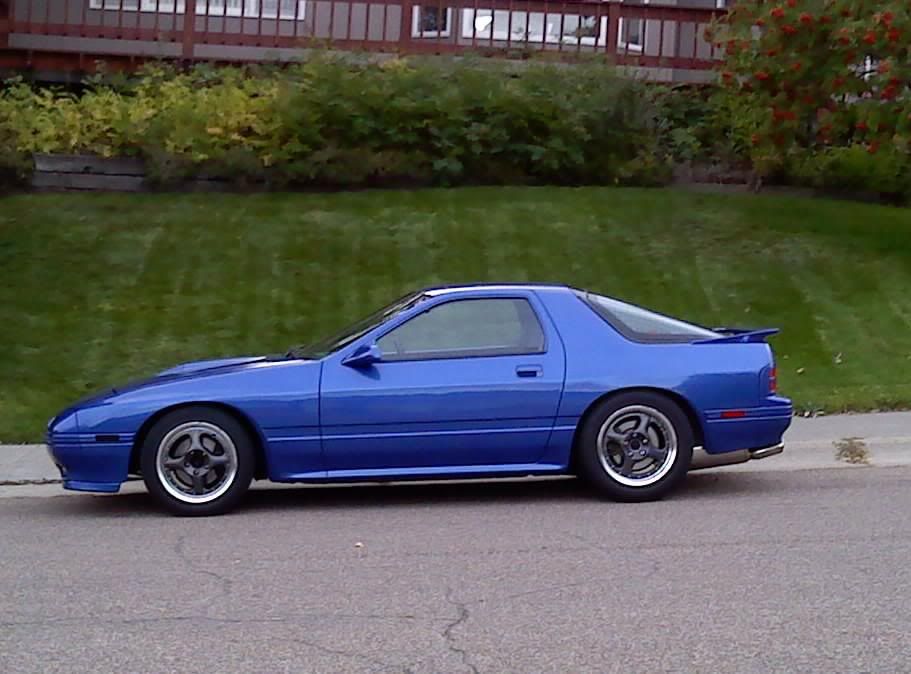
Sorry bud but I think the factory lines are great. Pictures don't do the car justice. With 16'' wheels and NO kit the car is low and aggressive looking for being an late 80's car.
I constantly surprise people when I tell them it is an 88. I also say, "you would be shocked to see what a 93 looks like."
Anyway, I did plan on adding modded(no trim) S5 skirts and an aftermarket lip(unsure what one for now) AFTER I order my 17'' SSR SP1's. MAybe a rear diffuser if the back bumper looks to "high" with the rest of the car. THIS is all hypethetical considering if I get bored with my look.
BTW.....................the tails stay.
10-03-09, 10:42 PM
#170
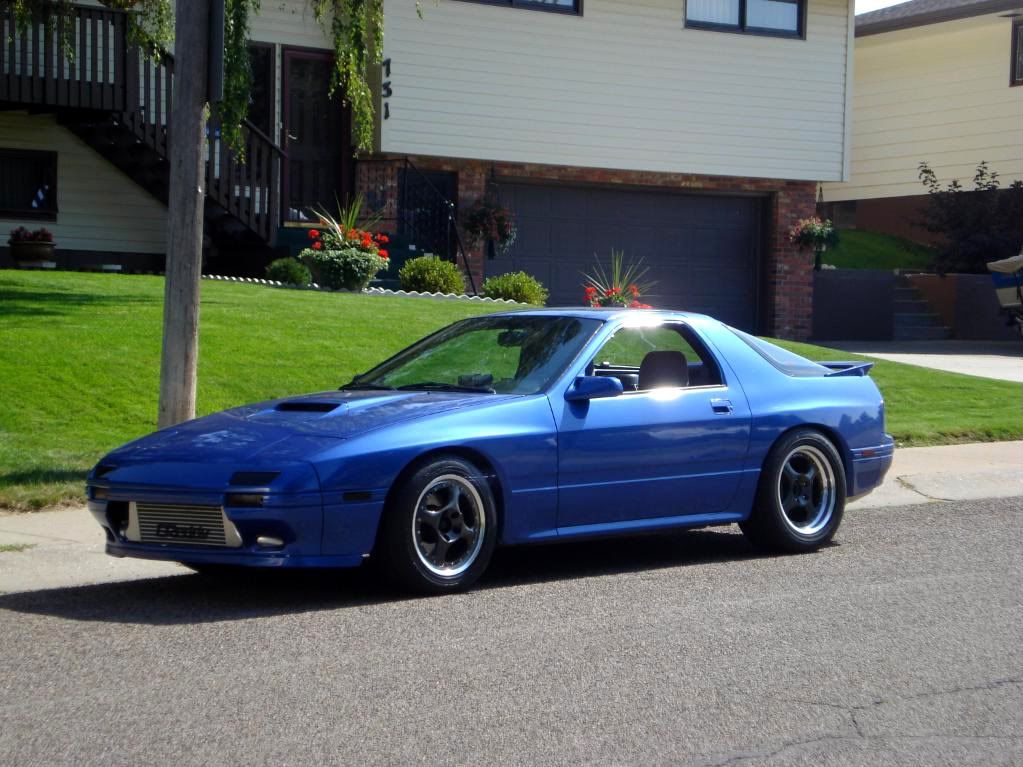
Well I have 955 miles on her now. ******* taking forever BUT she is feeling more responsive everyday and I am getting a PERFECT tune done for cruise all the way up to Atmospheric pressure.
Sorry.....I am in Picture ***** Mode. Was a nice evening and the color of the car stands out the best at dusk. Crappy phone pics but better then nothing...
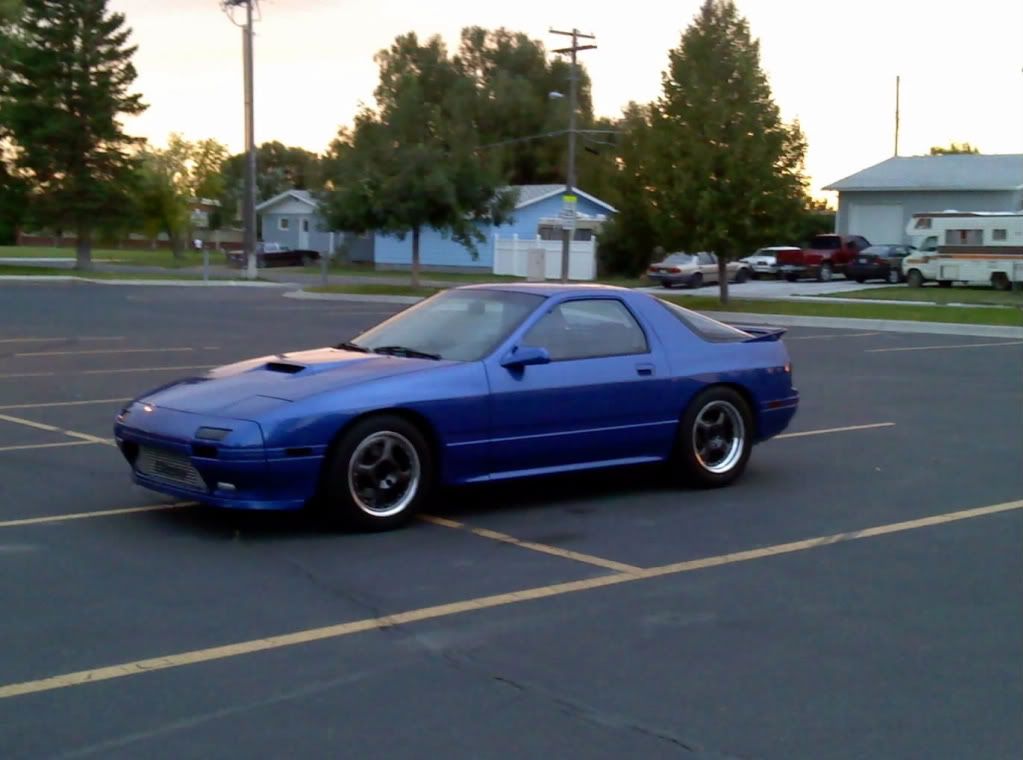
I thought this was a cool shot but wish I could get it in a larger fromat from my cell

Sorry.....I am in Picture ***** Mode. Was a nice evening and the color of the car stands out the best at dusk. Crappy phone pics but better then nothing...
I thought this was a cool shot but wish I could get it in a larger fromat from my cell
01-20-10, 09:54 PM
#171
Well here is a lttle update:
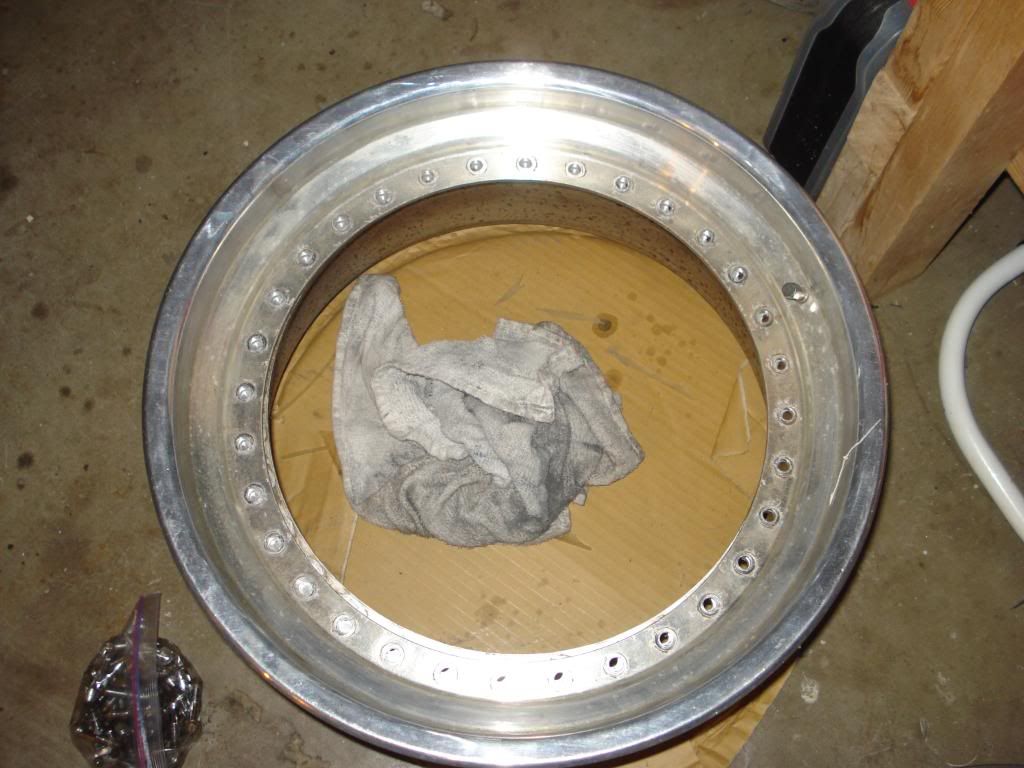
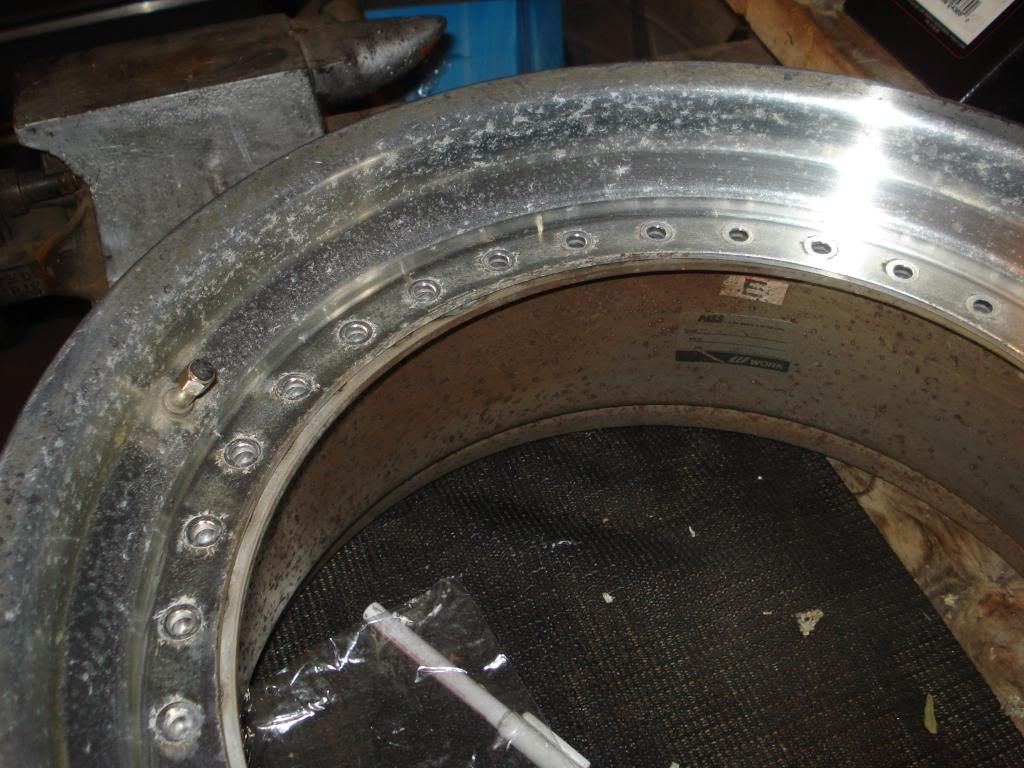
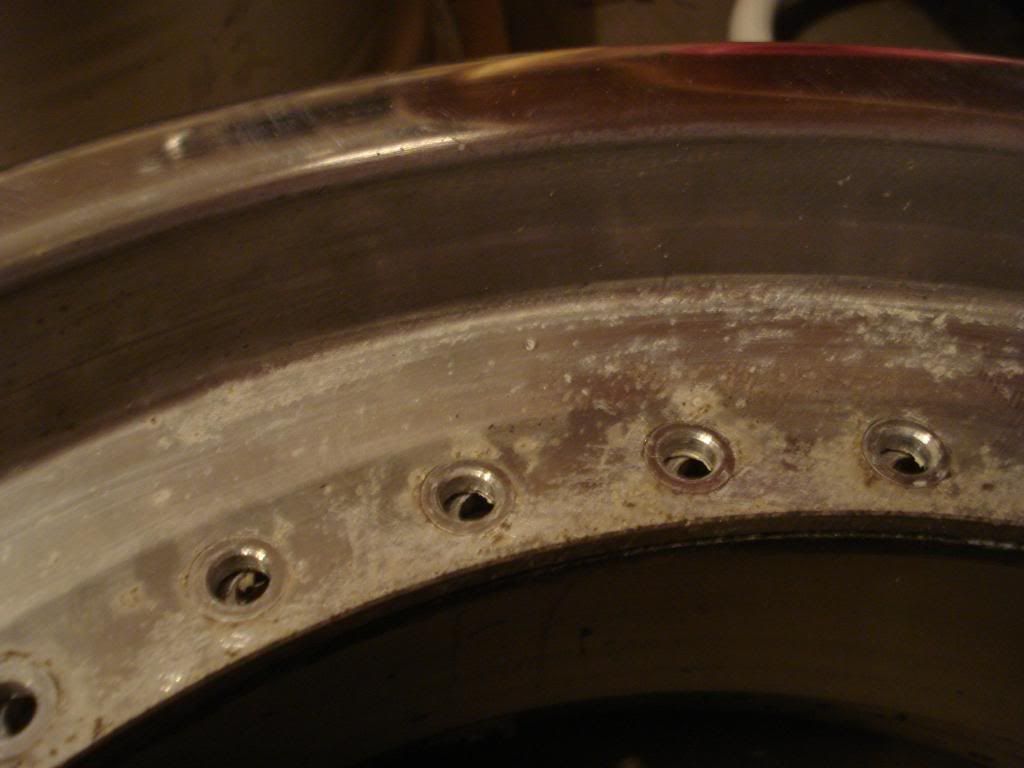
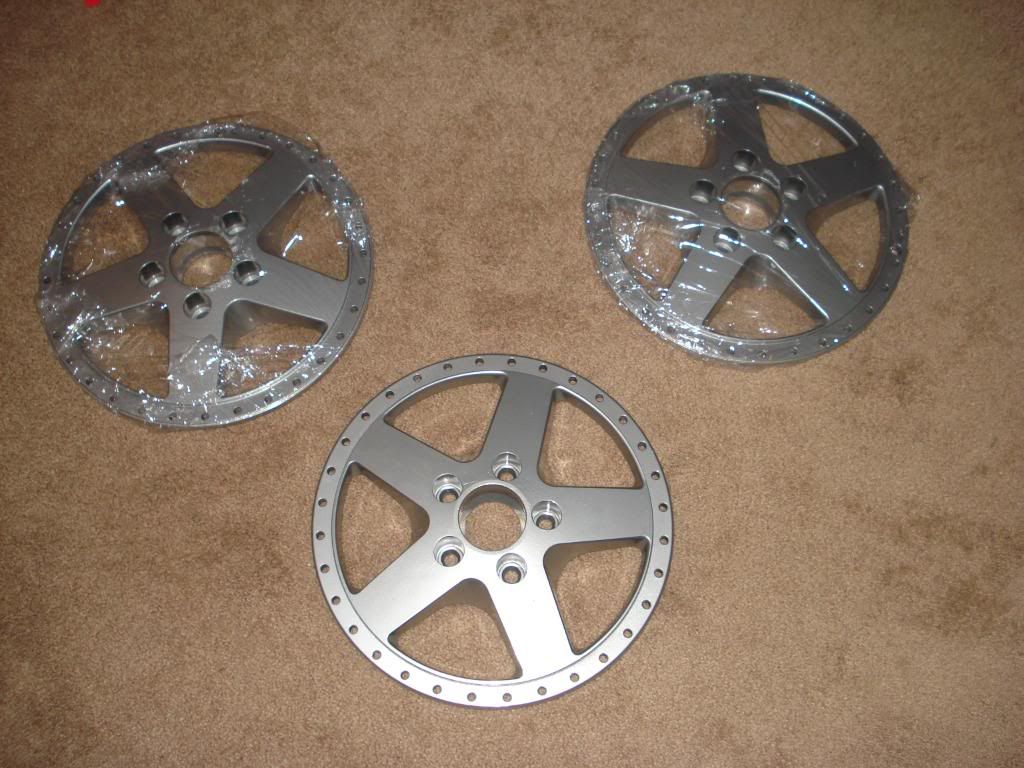
I finally got my Do-it-yourself wheel refurbish done on my poor condition Work Equips. After 6 grits of sandpaper and some water and elbow grease, I have to say they came out great. There are some minor imperfections BUT frankly at this point I dont give two *****(it does slightly bother me though).
I had the centers powder coated here in town and he did a wonderful job for the price. I have one face that has some "acne" that hopefully I can wet sand but I am unsure if you can wet sand powder coating.?.?..I think it is in the clear coat, if so no biggy I can fix that.
All the bolts were in rusty shape and only 20 of the 128 came out bad. I had to order 15 more from WORK and they were $20 per 5!! WOW!!
All that is left is to clean the old silicon off of the rim pieces and seal up. I wonder if I need to remove the powder coating on the outside diameter of the center face to better ensure a sealwith the silicone upon assembly...anyone know??
Here are some pics:
Before: bad corrision as you can see n:n:
n:n:
I finally got my Do-it-yourself wheel refurbish done on my poor condition Work Equips. After 6 grits of sandpaper and some water and elbow grease, I have to say they came out great. There are some minor imperfections BUT frankly at this point I dont give two *****(it does slightly bother me though
). I had the centers powder coated here in town and he did a wonderful job for the price. I have one face that has some "acne" that hopefully I can wet sand but I am unsure if you can wet sand powder coating.?.?..I think it is in the clear coat, if so no biggy I can fix that.
All the bolts were in rusty shape and only 20 of the 128 came out bad. I had to order 15 more from WORK and they were $20 per 5!! WOW!!
All that is left is to clean the old silicon off of the rim pieces and seal up. I wonder if I need to remove the powder coating on the outside diameter of the center face to better ensure a sealwith the silicone upon assembly...anyone know??
Here are some pics:
Before: bad corrision as you can see
01-20-10, 09:55 PM
#172
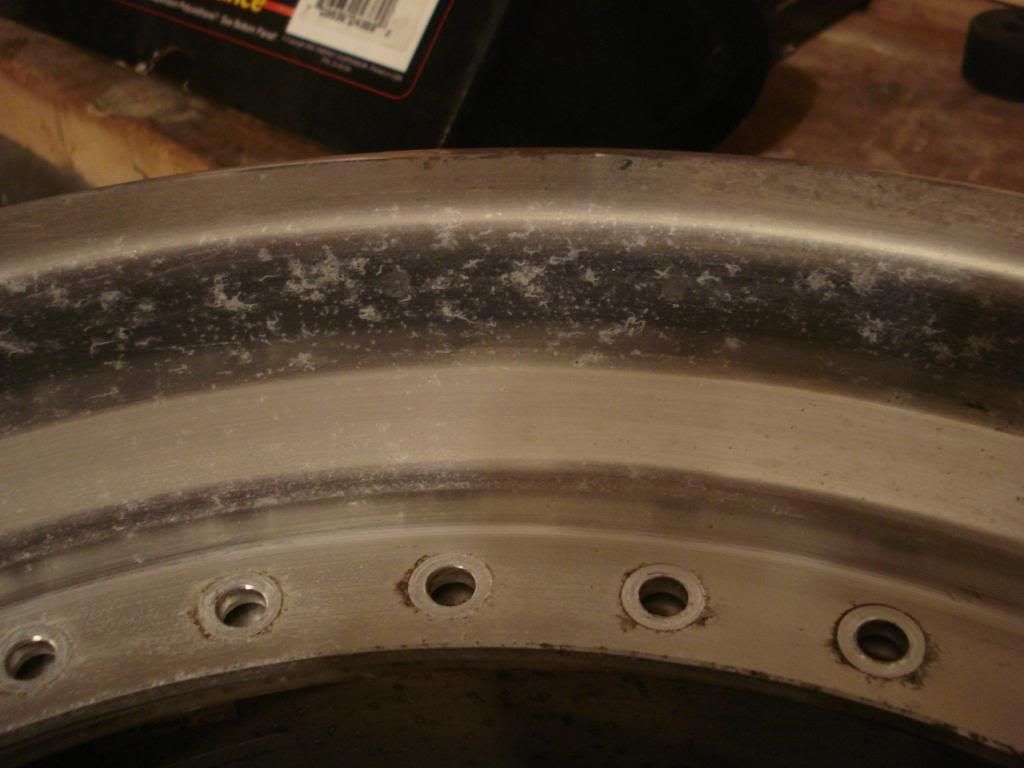
After some sanding at 600 grit(still have 800, 1000, 1500 and 2000
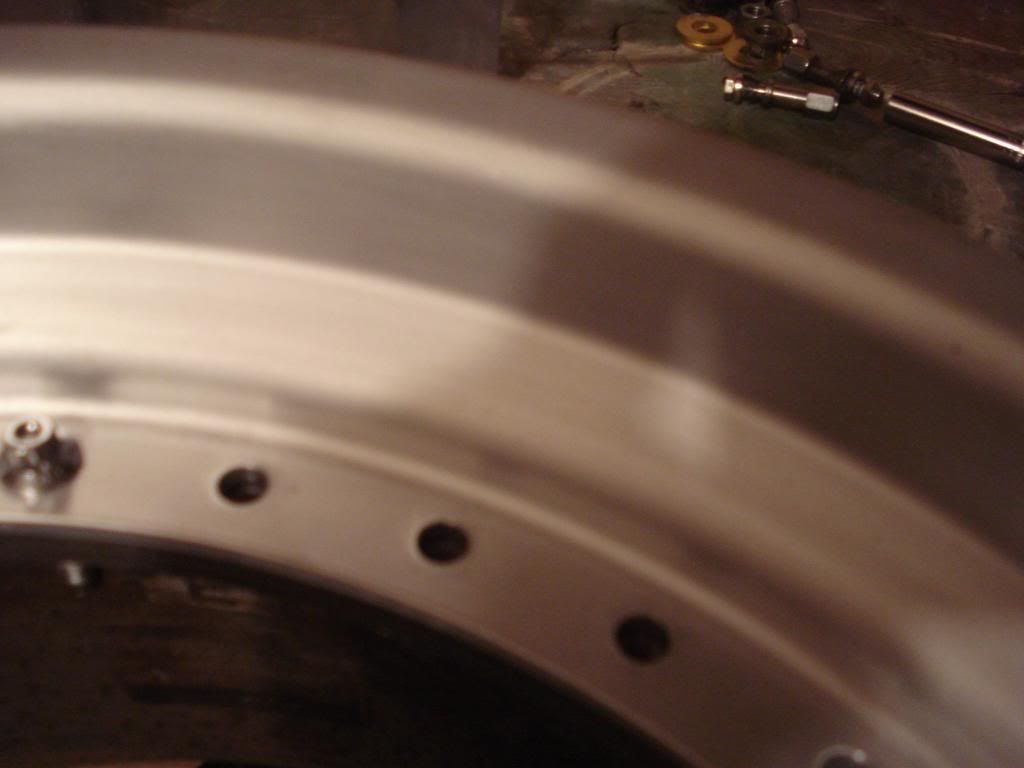
Finished lips and newly coated "darker silver" centers

And the final product
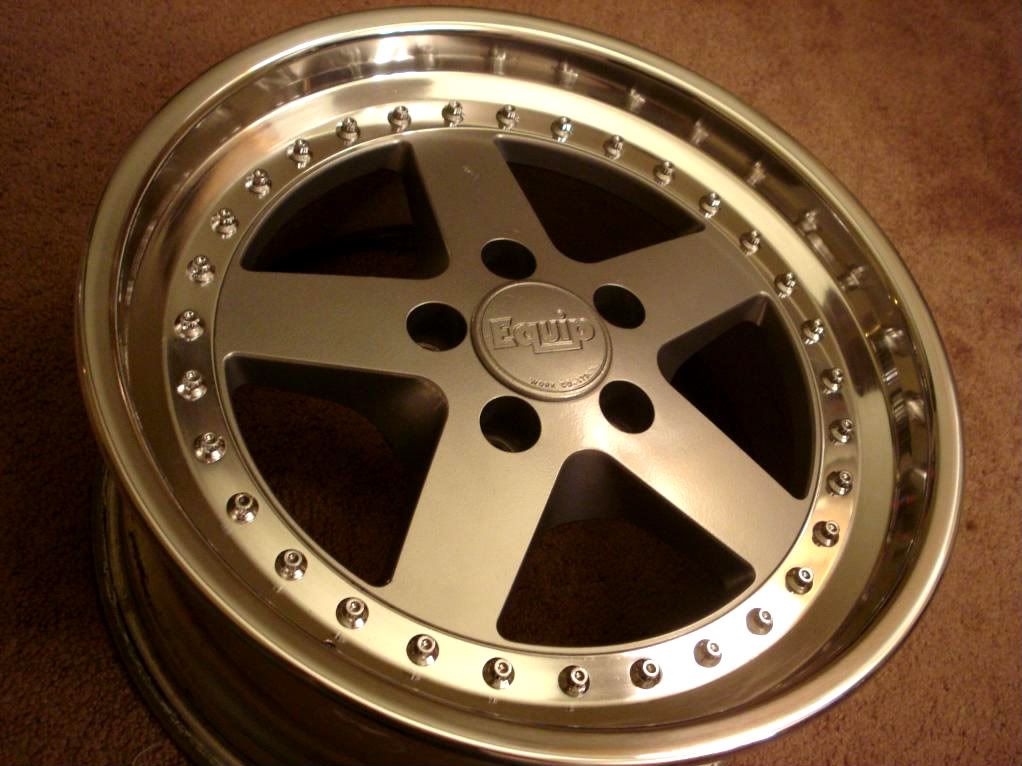
SOO much work but I found it ironic that i had to work for my WORK's HAHAHAHAHAHAHAH....Tires are next: Falken FK-452's in 235/40 and 255/40.
Awaiting money for BC coilovers I am about to buy. Updates soon...........................................
Finished lips and newly coated "darker silver" centers
And the final product
SOO much work but I found it ironic that i had to work for my WORK's HAHAHAHAHAHAHAH....Tires are next: Falken FK-452's in 235/40 and 255/40.
Awaiting money for BC coilovers I am about to buy. Updates soon...........................................
