When you click on links to various merchants on this site and make a purchase, this can result in this site earning a commission. Affiliate programs and affiliations include, but are not limited to, the eBay Partner Network.
Hey everyone! Ill try to keep the texts short, and the pics heavy! Ill do a quick introduction of myself, and my rx7 project, and drop photos just after. My name is Joseph, and I am currently 20 years of age, and I am a enthusiast of Japanese cars. I mostly spent my time around Datsuns and nissans, and currently I daily drive my 1972 datsun 620.
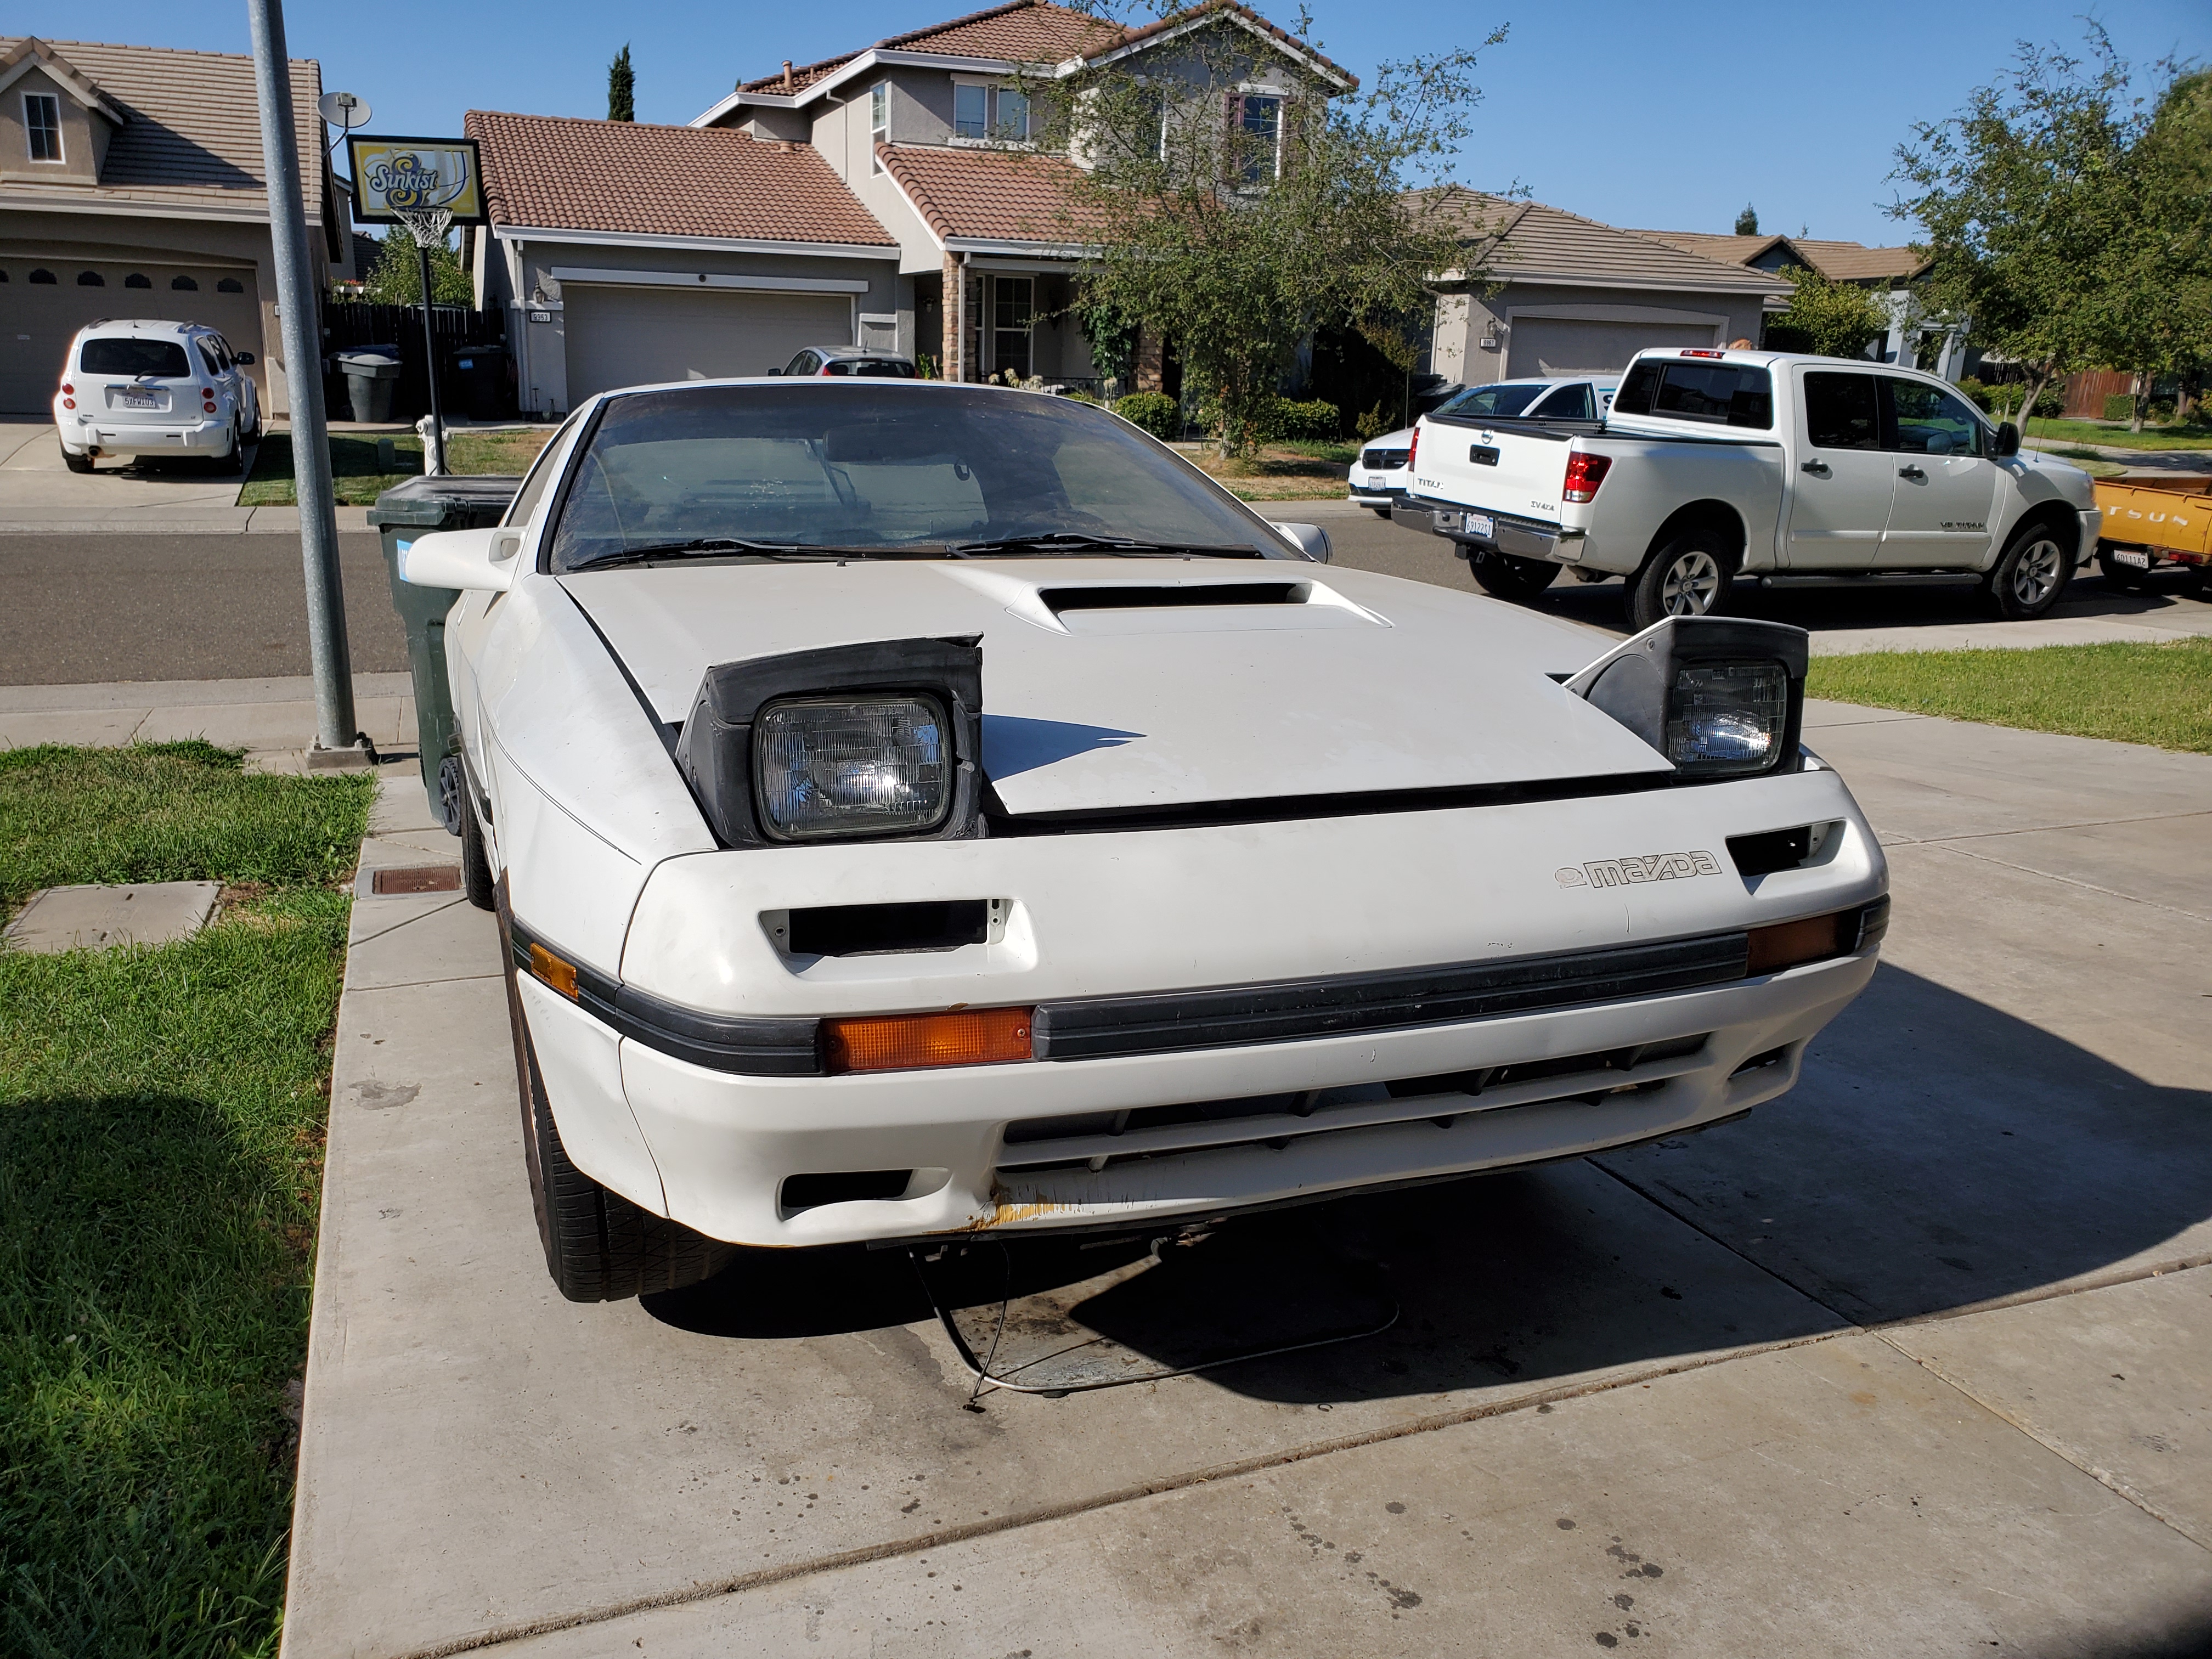
I picked up my rx7 tii project from a local resident off of letgo about 3 weeks or so. I got her for a great price, and was mostly unmolested, but she's got a ton of miles (140k). She sat around under a car port for about 10 years, and then was stored in a garage, under piles of stuff for another 5. The very last registration sticker was 2003. Now I know some people may say that a car that has been sitting for this long is either too big of a project, or only worth parts, but I have had my fair share of project cars in the past. My 620 sat in a field since 89' and was picked up in 16'.
But enough words, here's pictures.
The garage where she had sat for 5 or so years. The interior was mostly complete, it seems like the p.o was starting to take apart the interior, and sadly broke tabs and plastics everywhere. First time it had moved in a long time. A thorough wash at a coin op car wash cleaned her up pretty nicely!
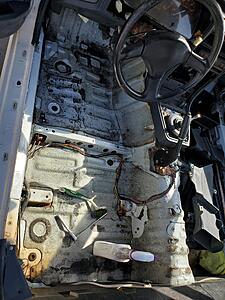
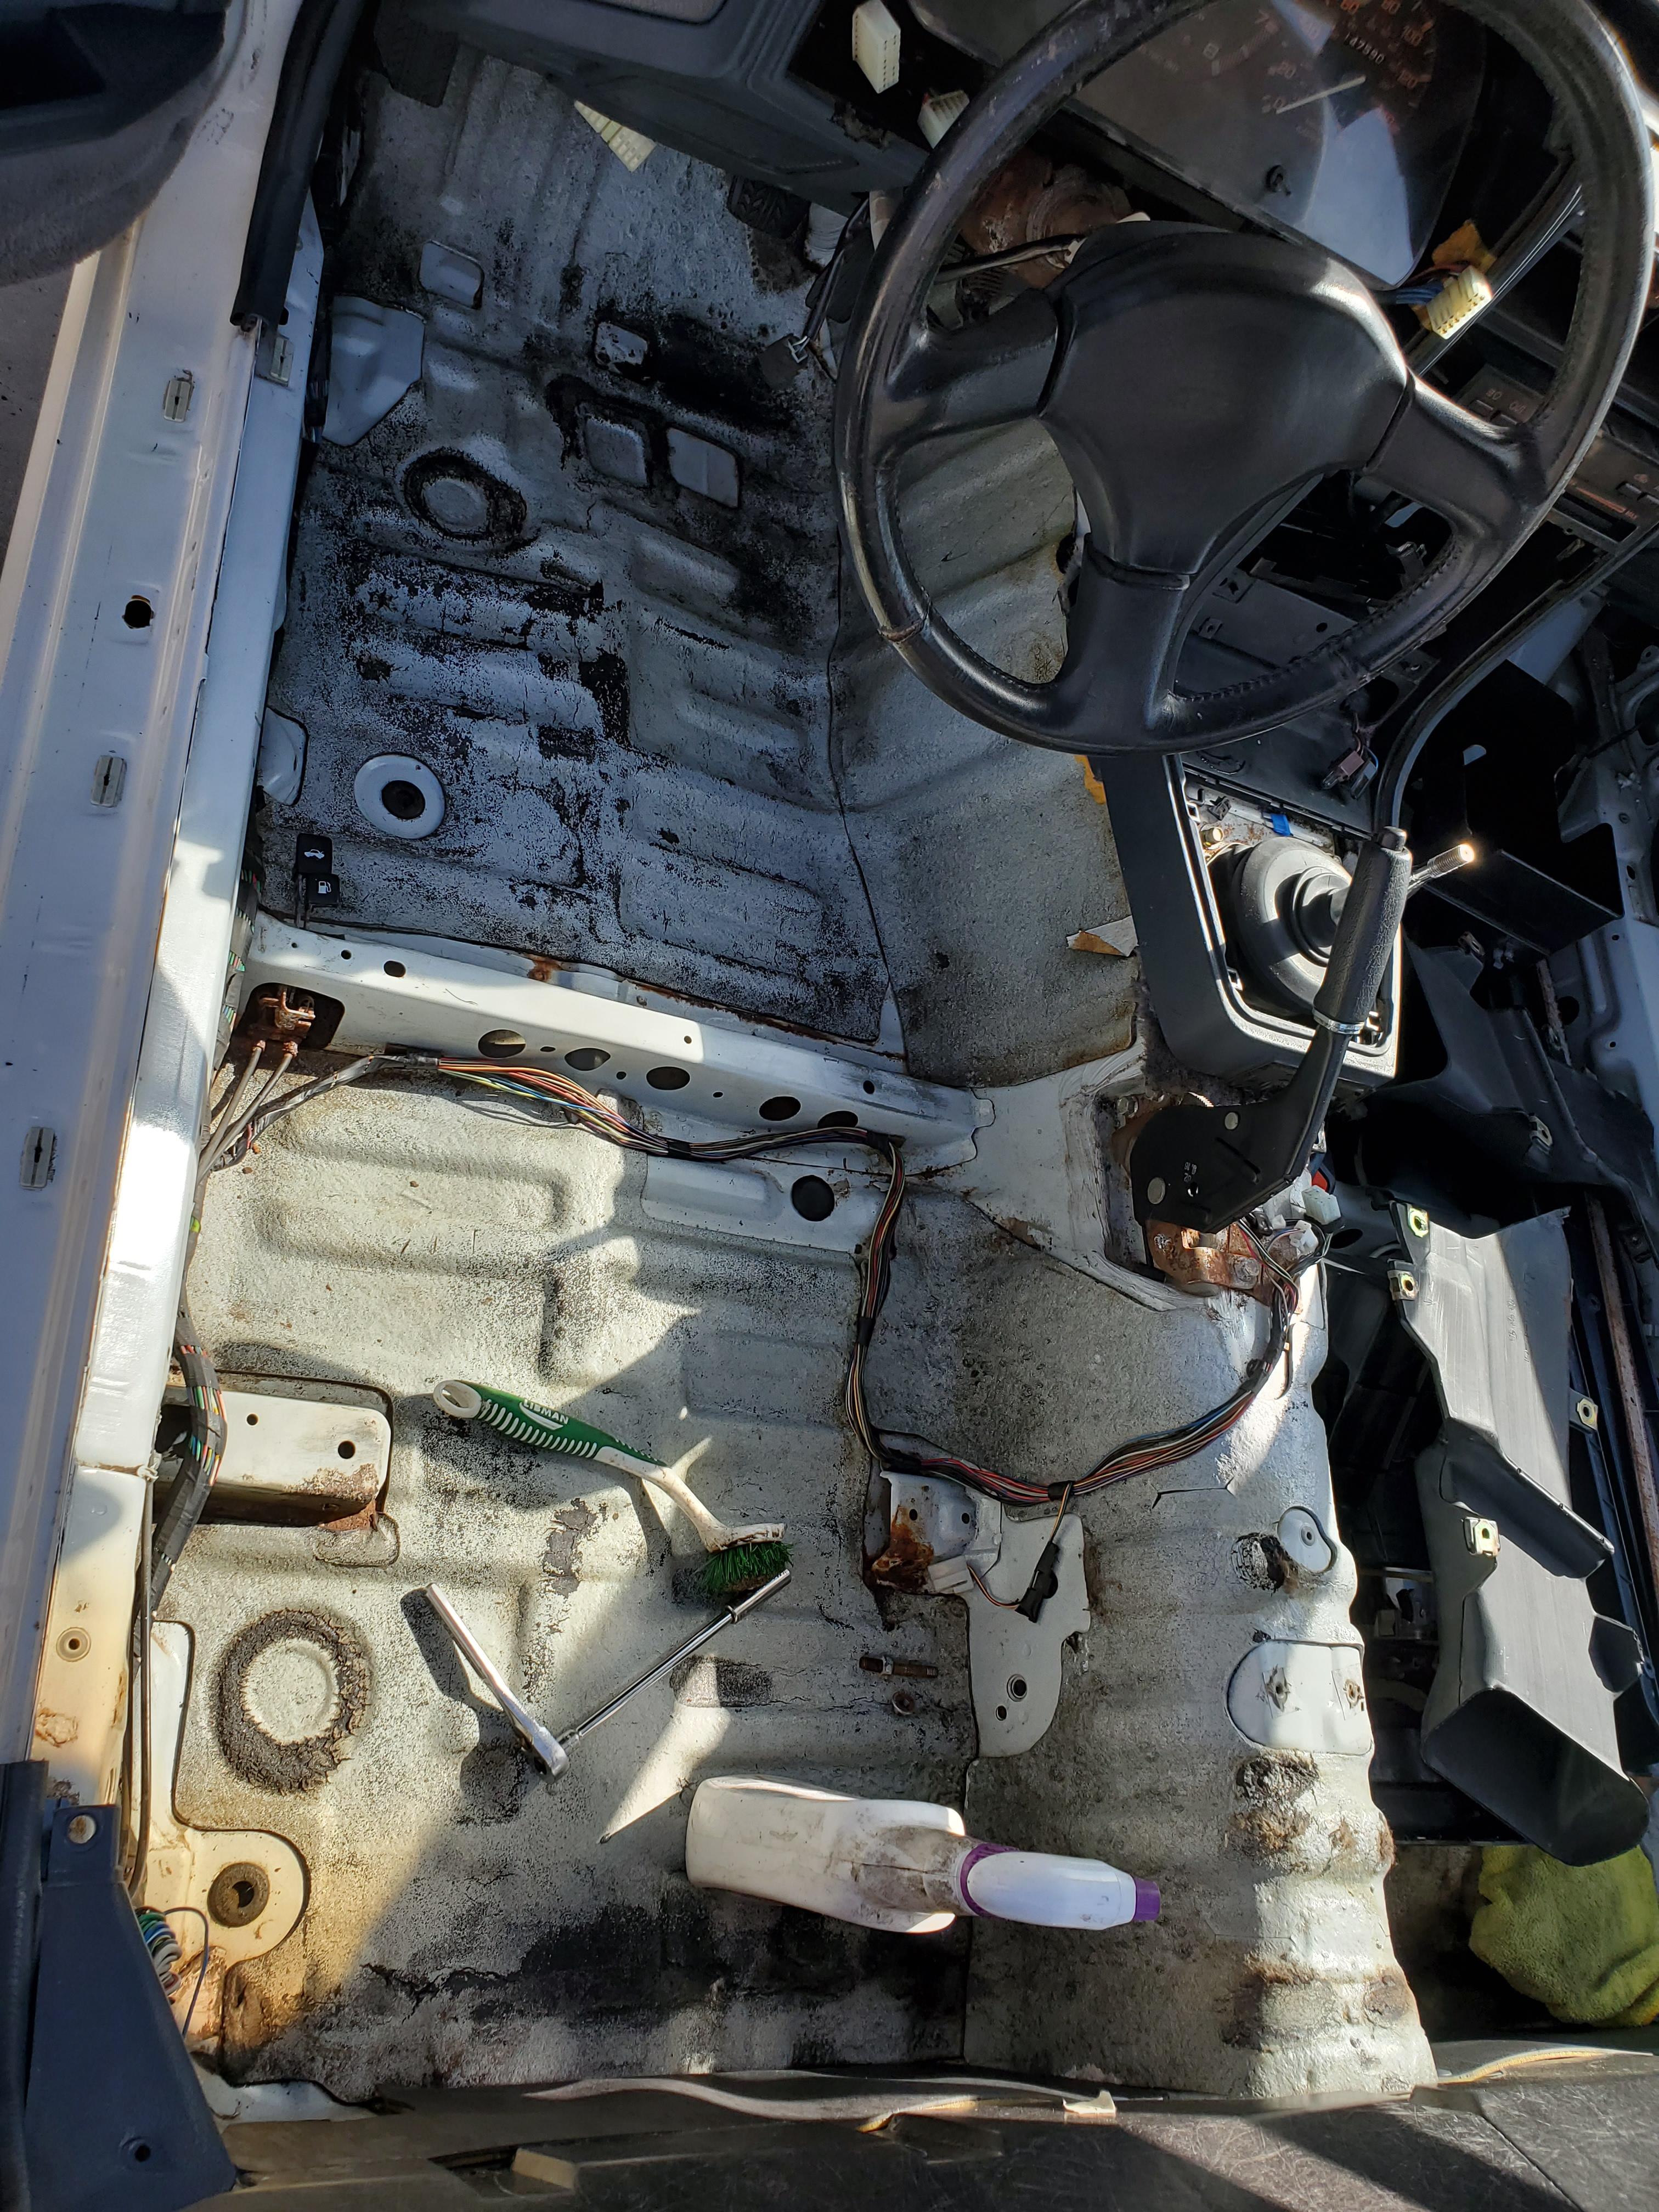
After I brought her home, I went straight to cleaning and disassembling the interior. Some of you may ask why I would take apart the interior so quickly, but I did so within reason. First and foremost, the interior was gross, the carpet needed a good clean.. And secondly, I wanted to check the floorboards for jack damage and rust. These rx7's are quite similar in unibody design to a Datsun 240z, so I began to notice the similar common p.o. issues they can get.
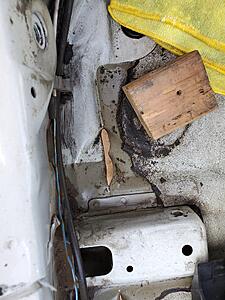
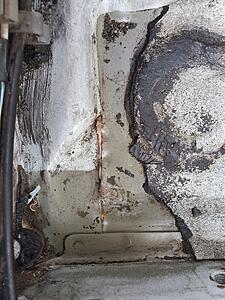
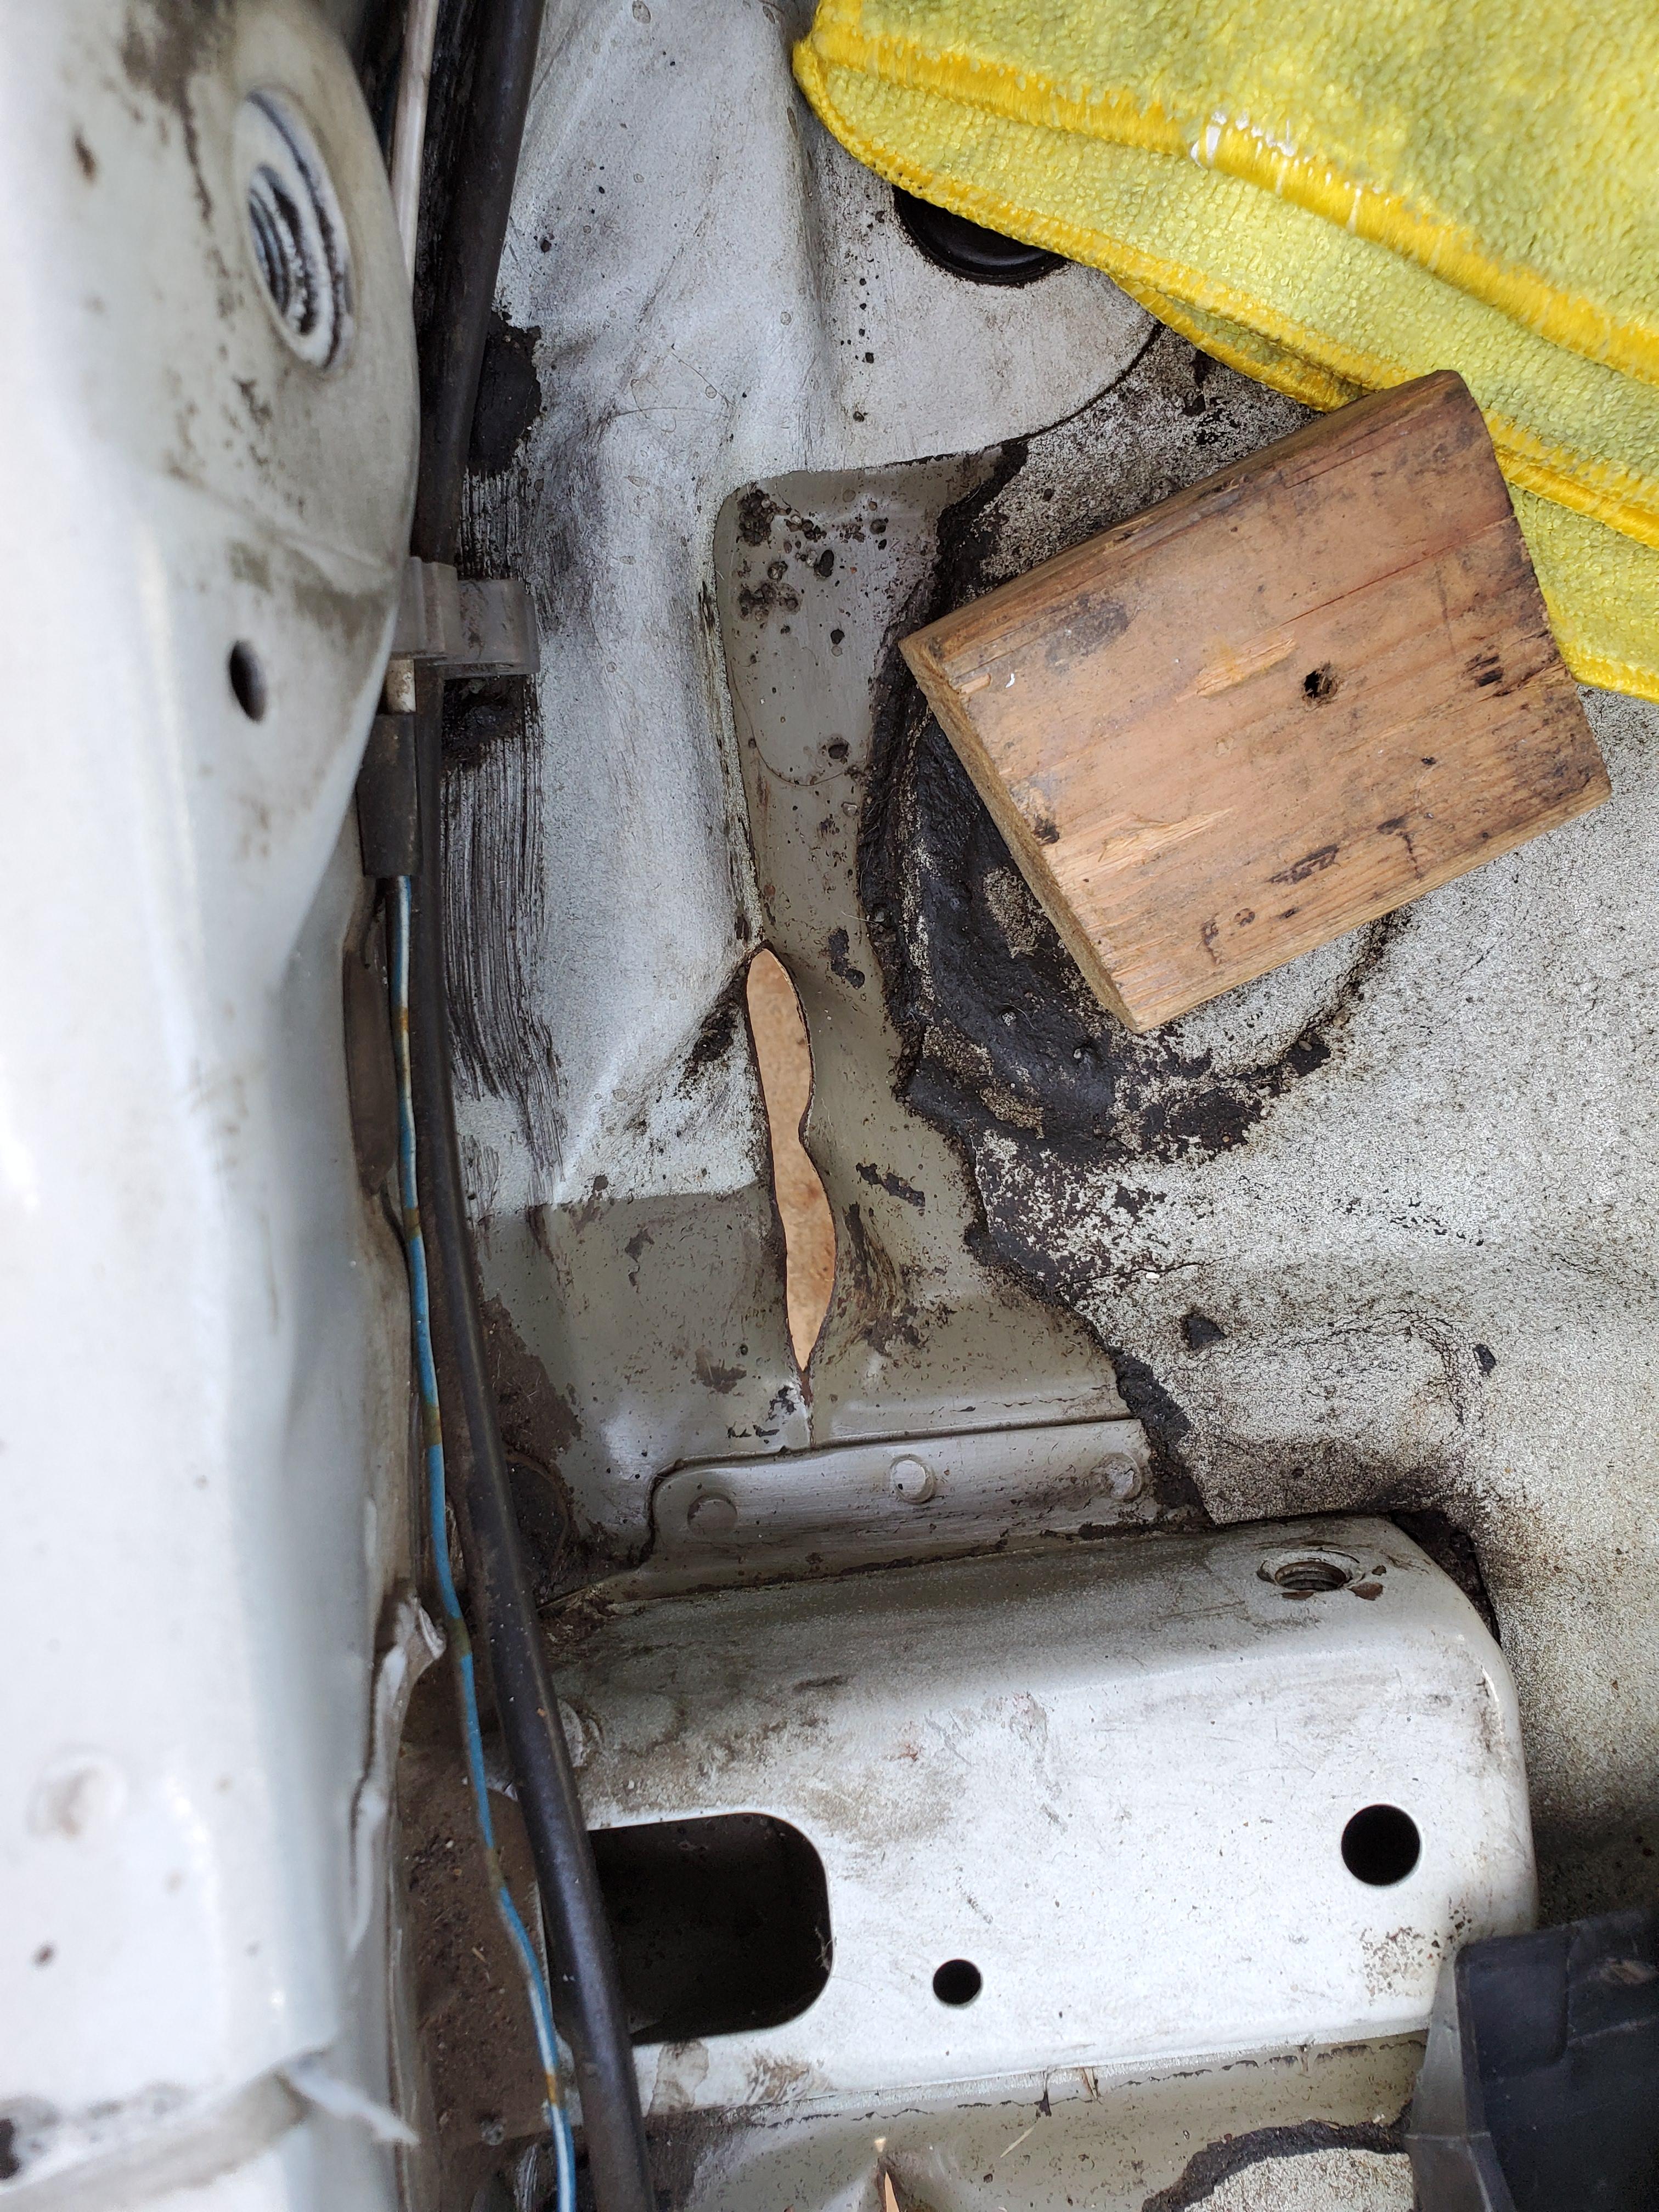
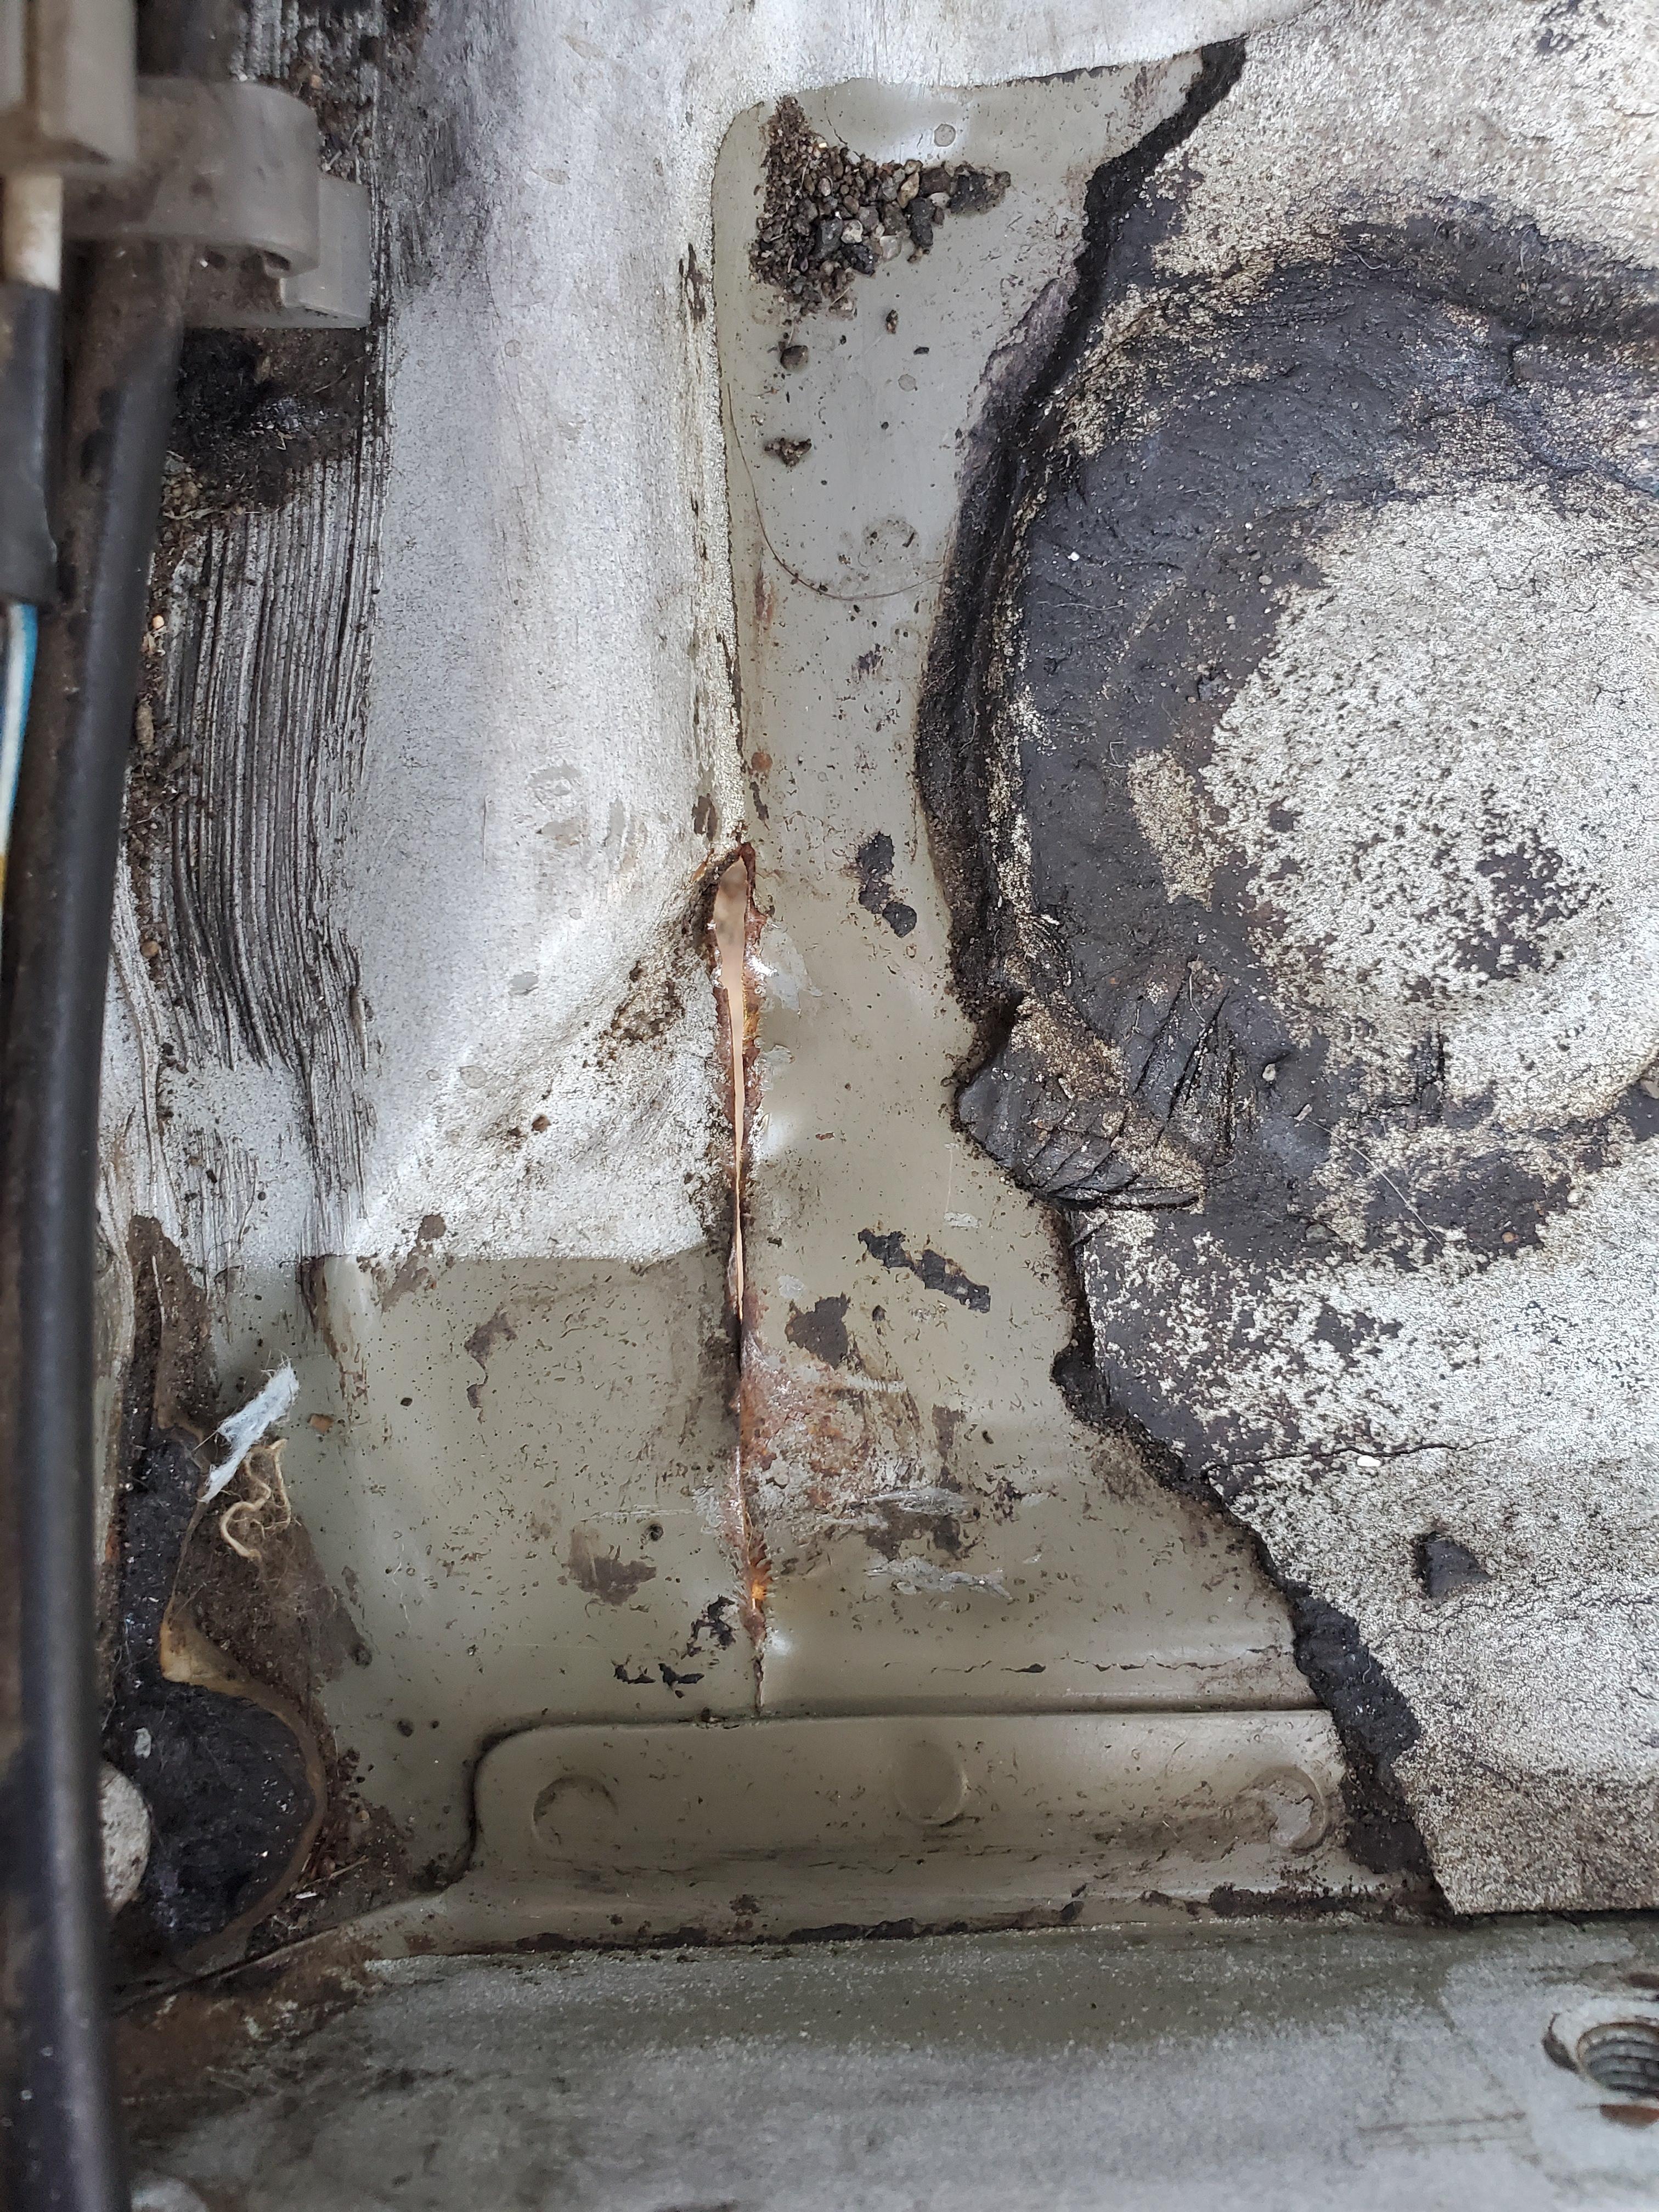
Driver side has some jacking damage on the floor rail. Shouldn't be too terrible to fix. Passenger side is a little worse for wear. The floor was jacked hard enough where the floor has ripped and caused the sound deadening to crack. Here is the ripped section of the floor. I believe the seam between the floor and the pinch metal has separated. I will most likely straighten it and weld it. This is the only bit of concern. I cannot tell if this is rust pitting, or if the sound deadening is separating. If anyone could give any insight to this, I would appreciate it.
I think I'll give her the nickname "Sunflower" seeing how many sunflower seeds were strewn about under the carpet!
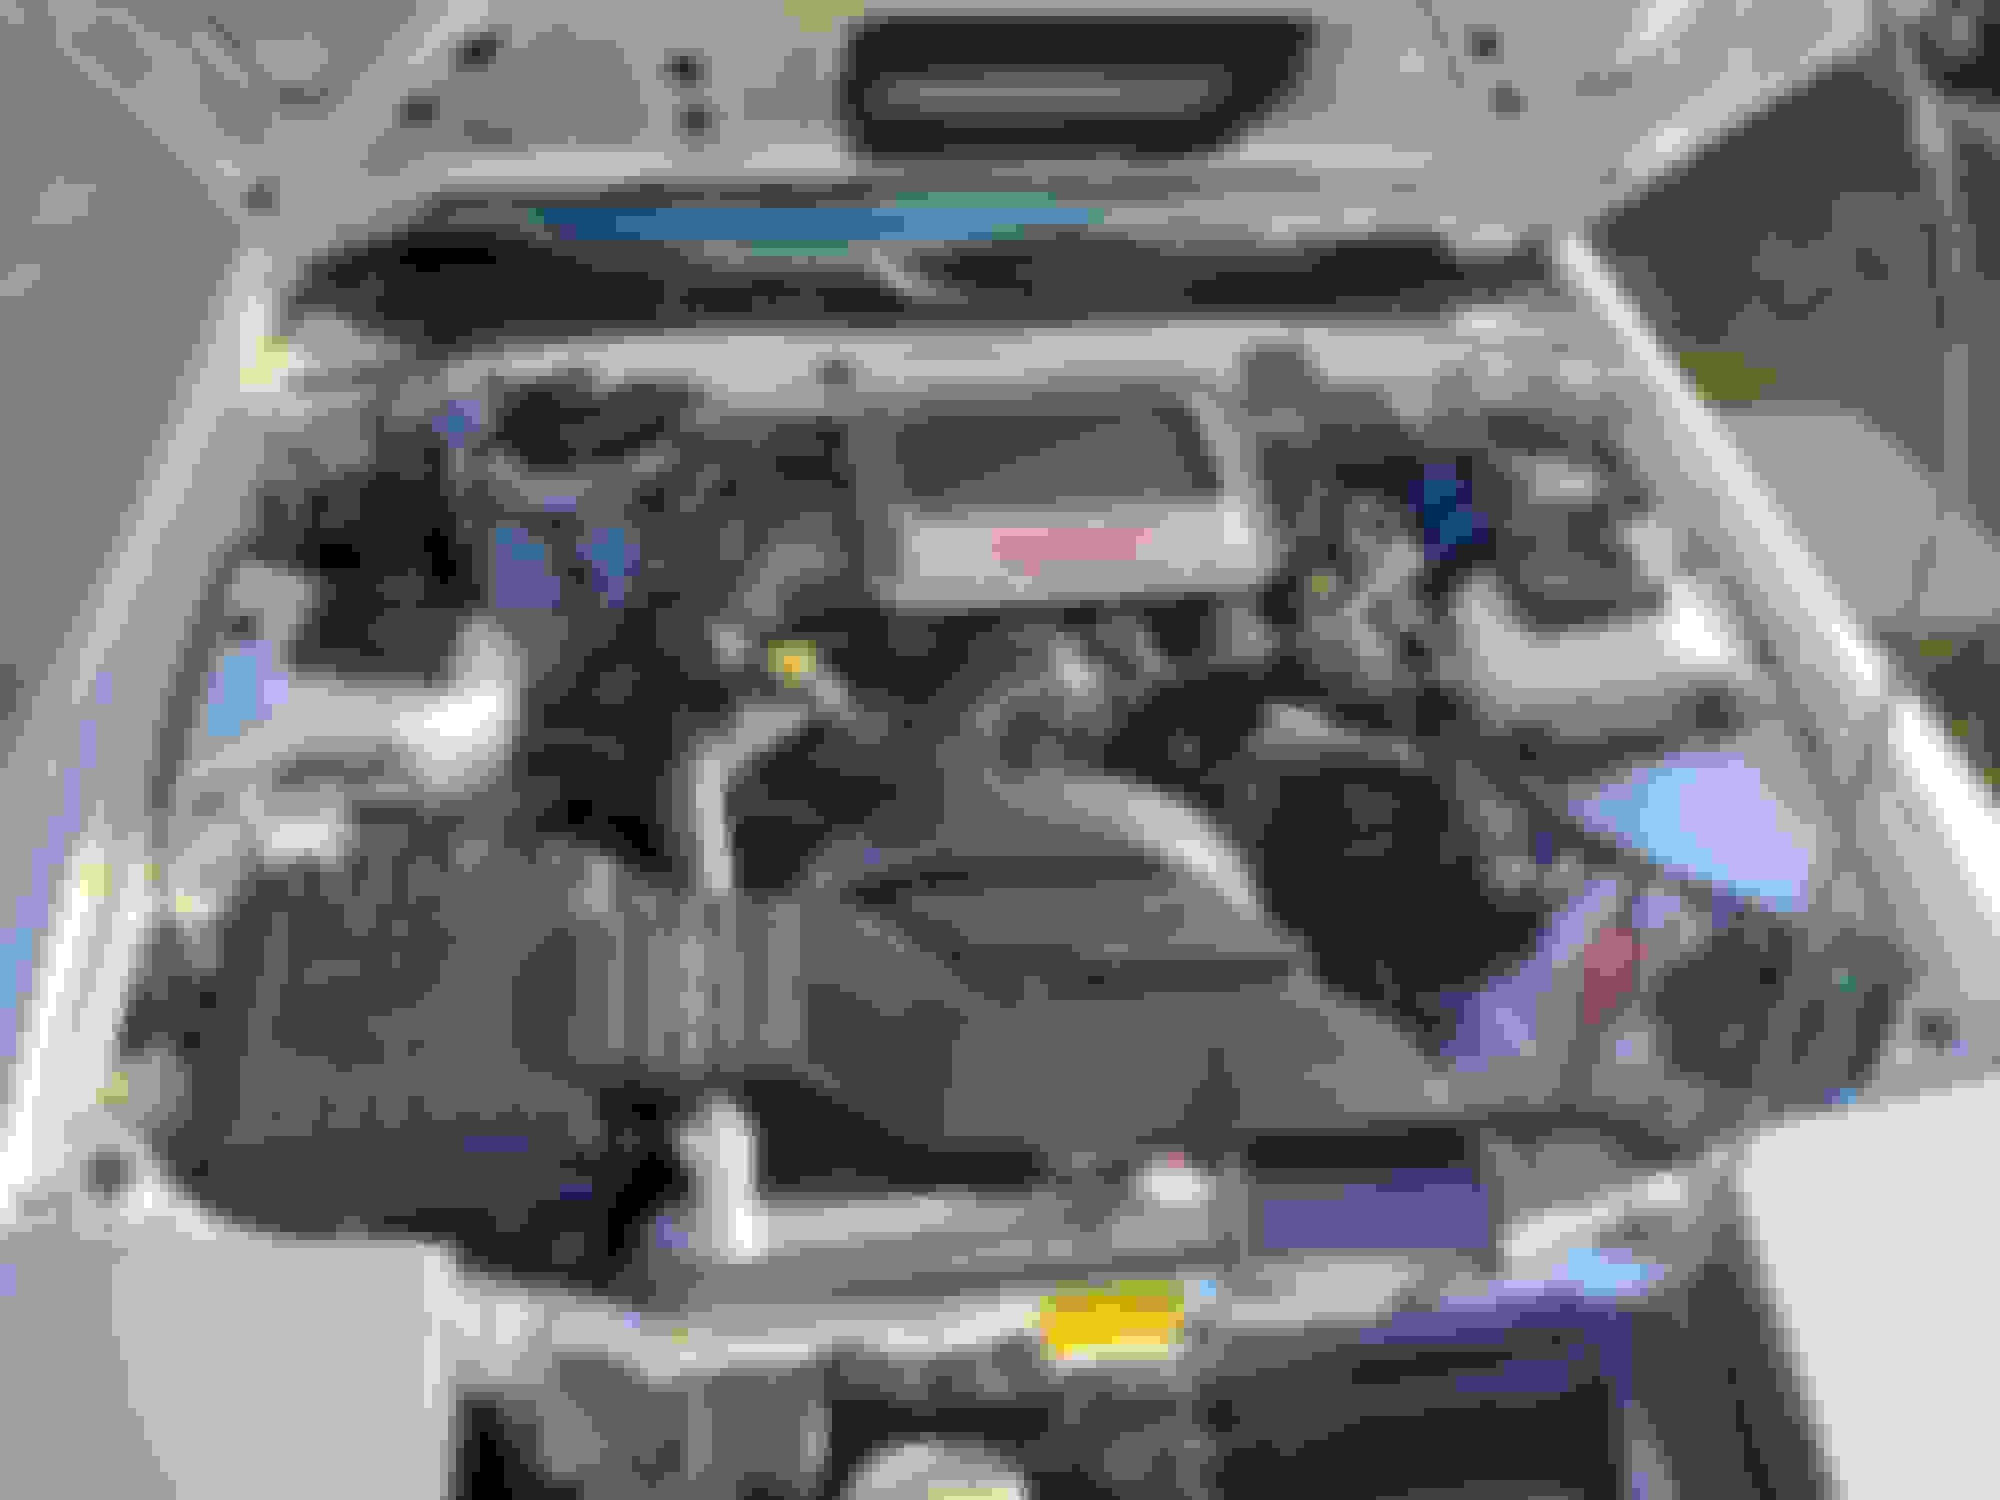
Here are more updates, this is what I've been mostly up to for the last week or so. I am mostly waiting on the typical tune up and 100k parts to show up, but while I was at it, I've been taking the engine bay apart, and finding what was broken, or in need of repair/replacement.
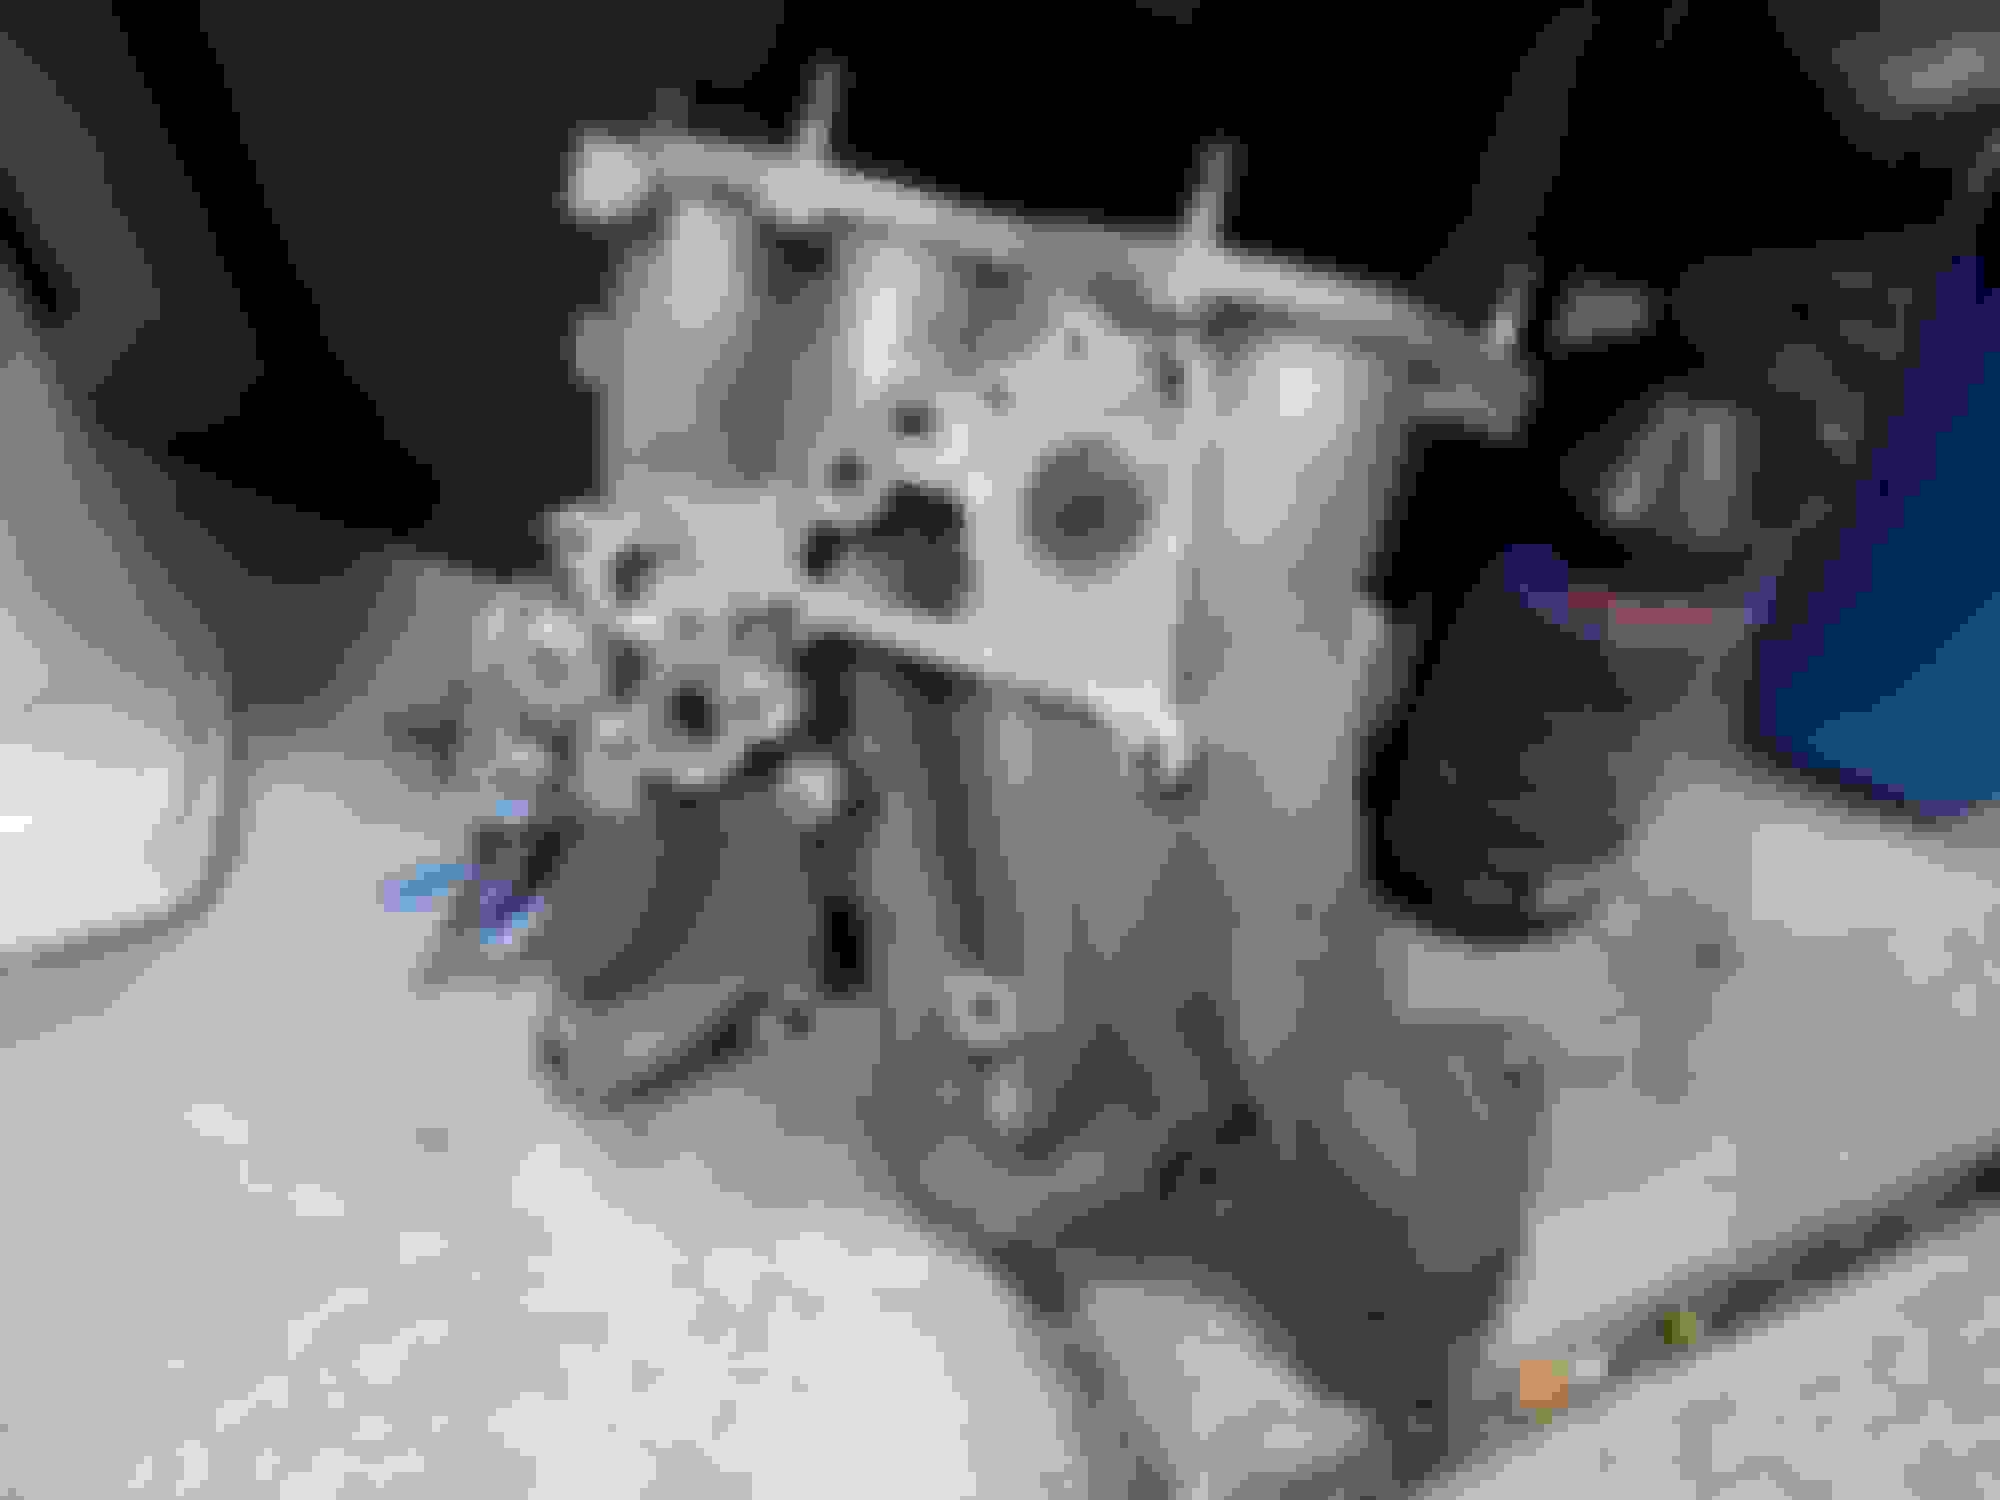
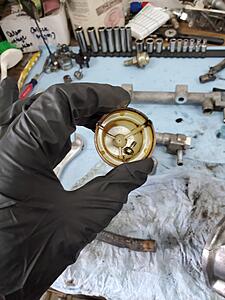
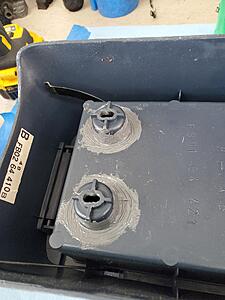
Most of the engine bay has been disassembled. Found one broken bolt, and broke another one.One bolt that holds the smog pump bracket to the thermo housing was broken, but 2/3 is good enough, and one of the thermostat housing bolts, broke flush, but I was able to drill it and put new threads back in it. I'll just have to make sure the housing and thermostat cover sits flush and straight when it bolts down. I will have to say, the turbo is a mighty fine son of a... well, no need for fighting words. It was not easy to pull. Spent an entire day fiddling with all of the stock heat shields, but I somehow got the turbo and heat shields out without cutting anything. Think that gasket is still good? haha Sorry that I don't have a picture of my dirty turbo, but I started the disassembly and marking of the turbo since it needed a rebuild. I noticed excessive burned oil on the exhaust side, and some shaft play. Here's all of it buttoned up, loctited, with new oil control rings, bearings, and carbon seal. The exhaust housing has a few cracks, but nothing too crazy, as I have read that the cracks are normal with these rotary turbos. Question to everyone.. If I wanted to make my own gaskets for the coolant and oil inlet/return passages, would ordinary gasket material work? Or do you need a special high temp gasket material due to the heat of the turbo's chra? Here are my injectors, or at least one of them. This is what prompted the engine disassembly in the first place. After installing a temporary fuel pump, I noticed that on cranking, I could hear one of the injectors was constantly spraying... So it was stuck open, yay! I'm going to bring them to a reputable rebuilder local to me.
List of things I will be doing and may need some community input on.
- Vacuum lines, most likely silicone + German VW braided fuel line for heat prone areas. (continental n203531-5)
- New OMP lines, most likely will build my own
- Possibly go to 2 stroke resevoir omp mod.
- Precat is basically destroyed. Whats a good downpipe I could use that will look "stock" and wont be noticed for smog?
Last edited by Anonymous Waffle; Nov 7, 2018 at 03:31 AM.
You have an awesome start on that project!! Thank you for posting the pics. The car is very restorable! There aren't a ton of unmolested TII's out there anymore and its nice to see that you are treating this car right. How did you find the car and why was it parked unused for so long?
You have an awesome start on that project!! Thank you for posting the pics. The car is very restorable! There aren't a ton of unmolested TII's out there anymore and its nice to see that you are treating this car right. How did you find the car and why was it parked unused for so long?
I found this car just by sheer luck. When I lived in japan, I've always loved the rx7's, I just thought they looked so cool. Every once in a while ill look via craiglist or any similar community ad's for a rx7, but never could find one that would work for me. One day I happend to be playing Forza Horizon 4, and I'm not kidding you, I was driving a rx7 and it reminded me to look for them online, and I stumbled on my project on Letgo. The owner didn't want to sell the car to someone who would just yank the turbo parts out, so he ended up selling it to me.
It's been a while since I've updated. The project has been slow, and I hated that so lately I've been picking up the pace. I'm still waiting on injectors, but progress is good!
Lovely surprise was under the pump. Not surprised, it was similar to how my datsuns pulp was. Cleaned up rats nest. Cleaned up and made new omp lines
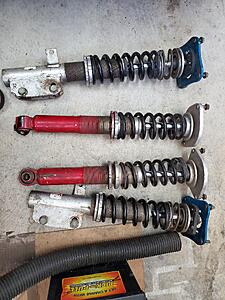
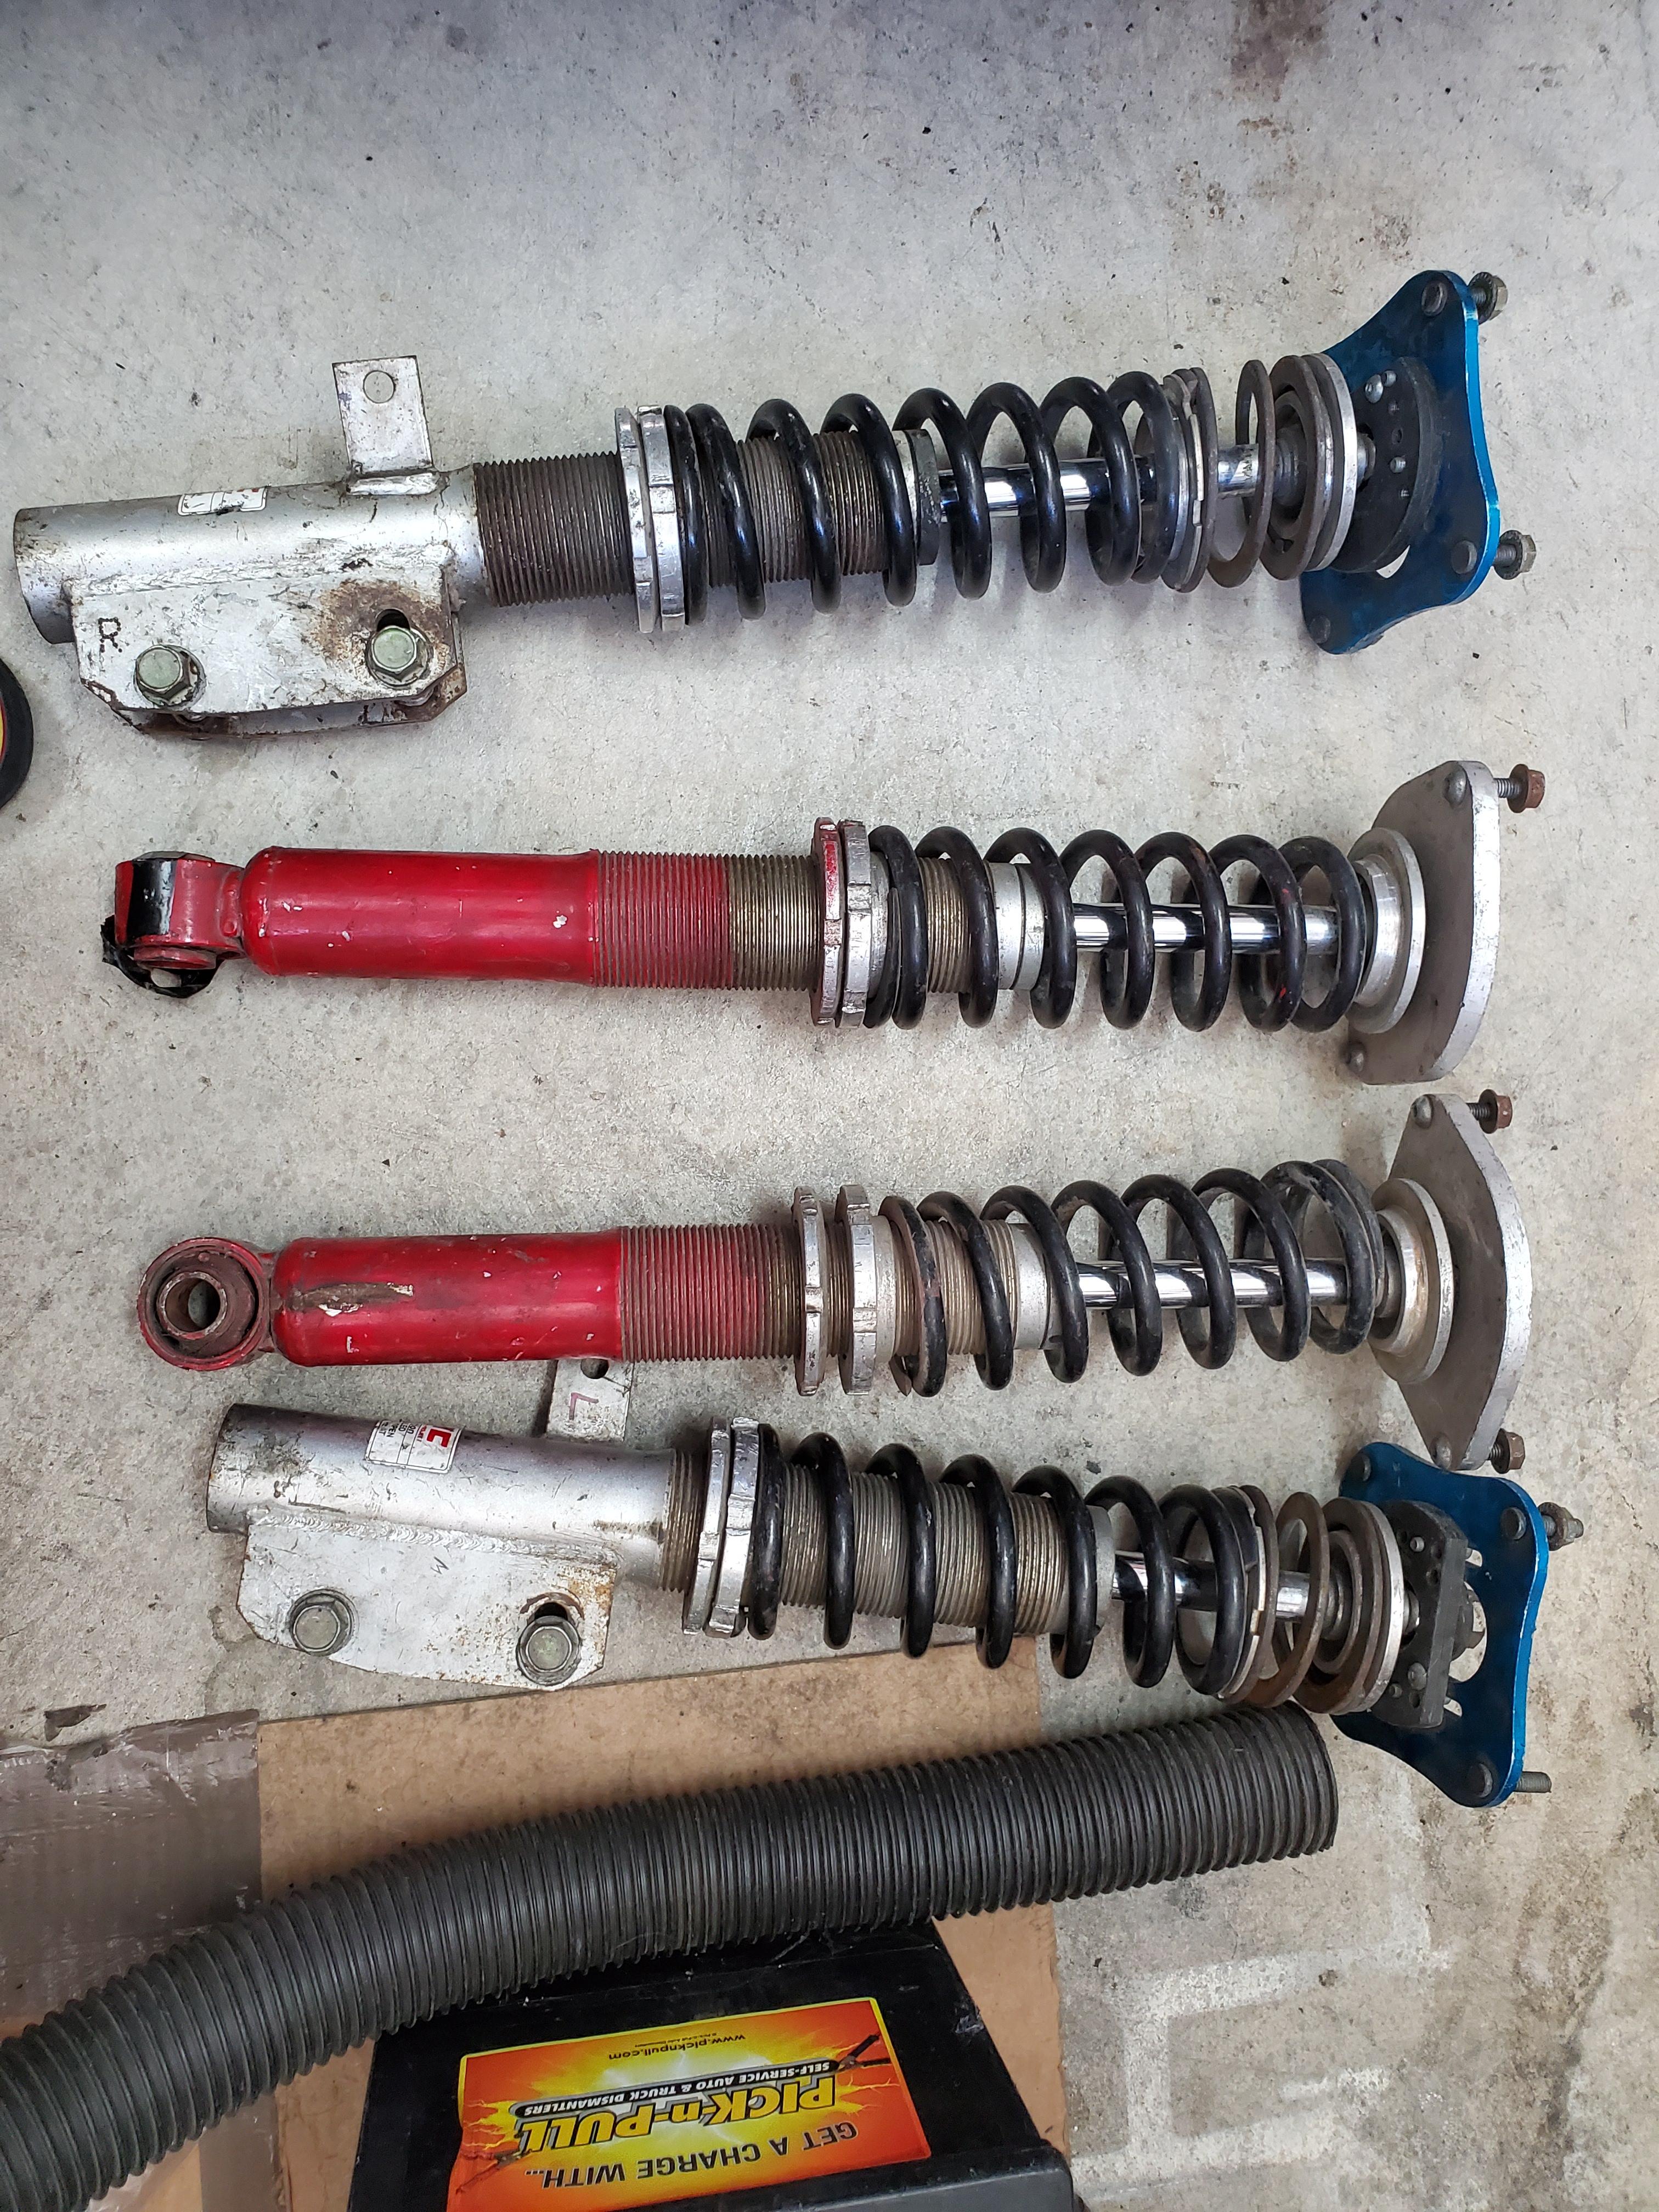
Picked up 3 crown vic meshies, for 80$! Im hoping I can find one more at a junkyard. Also traded a carls jr meal for these sets of struts and lowering springs. Met an awesome local rx7 guy who didnt want these.
Forgot to mention that I did a small port to the wastegate.
Also here's a video of my rotors and Apex seals, viewer from my exhaust ports.
wow, and i thought my 19year garage find was dirty... what kind of garage was that in haha?
If I remember correctly the house was used as storage, the house was owned by the mother of the rx7's owner, and the house kinda got thrown around in ownership between family. It was weird.
I've been trying to step it up to get this turd running haha
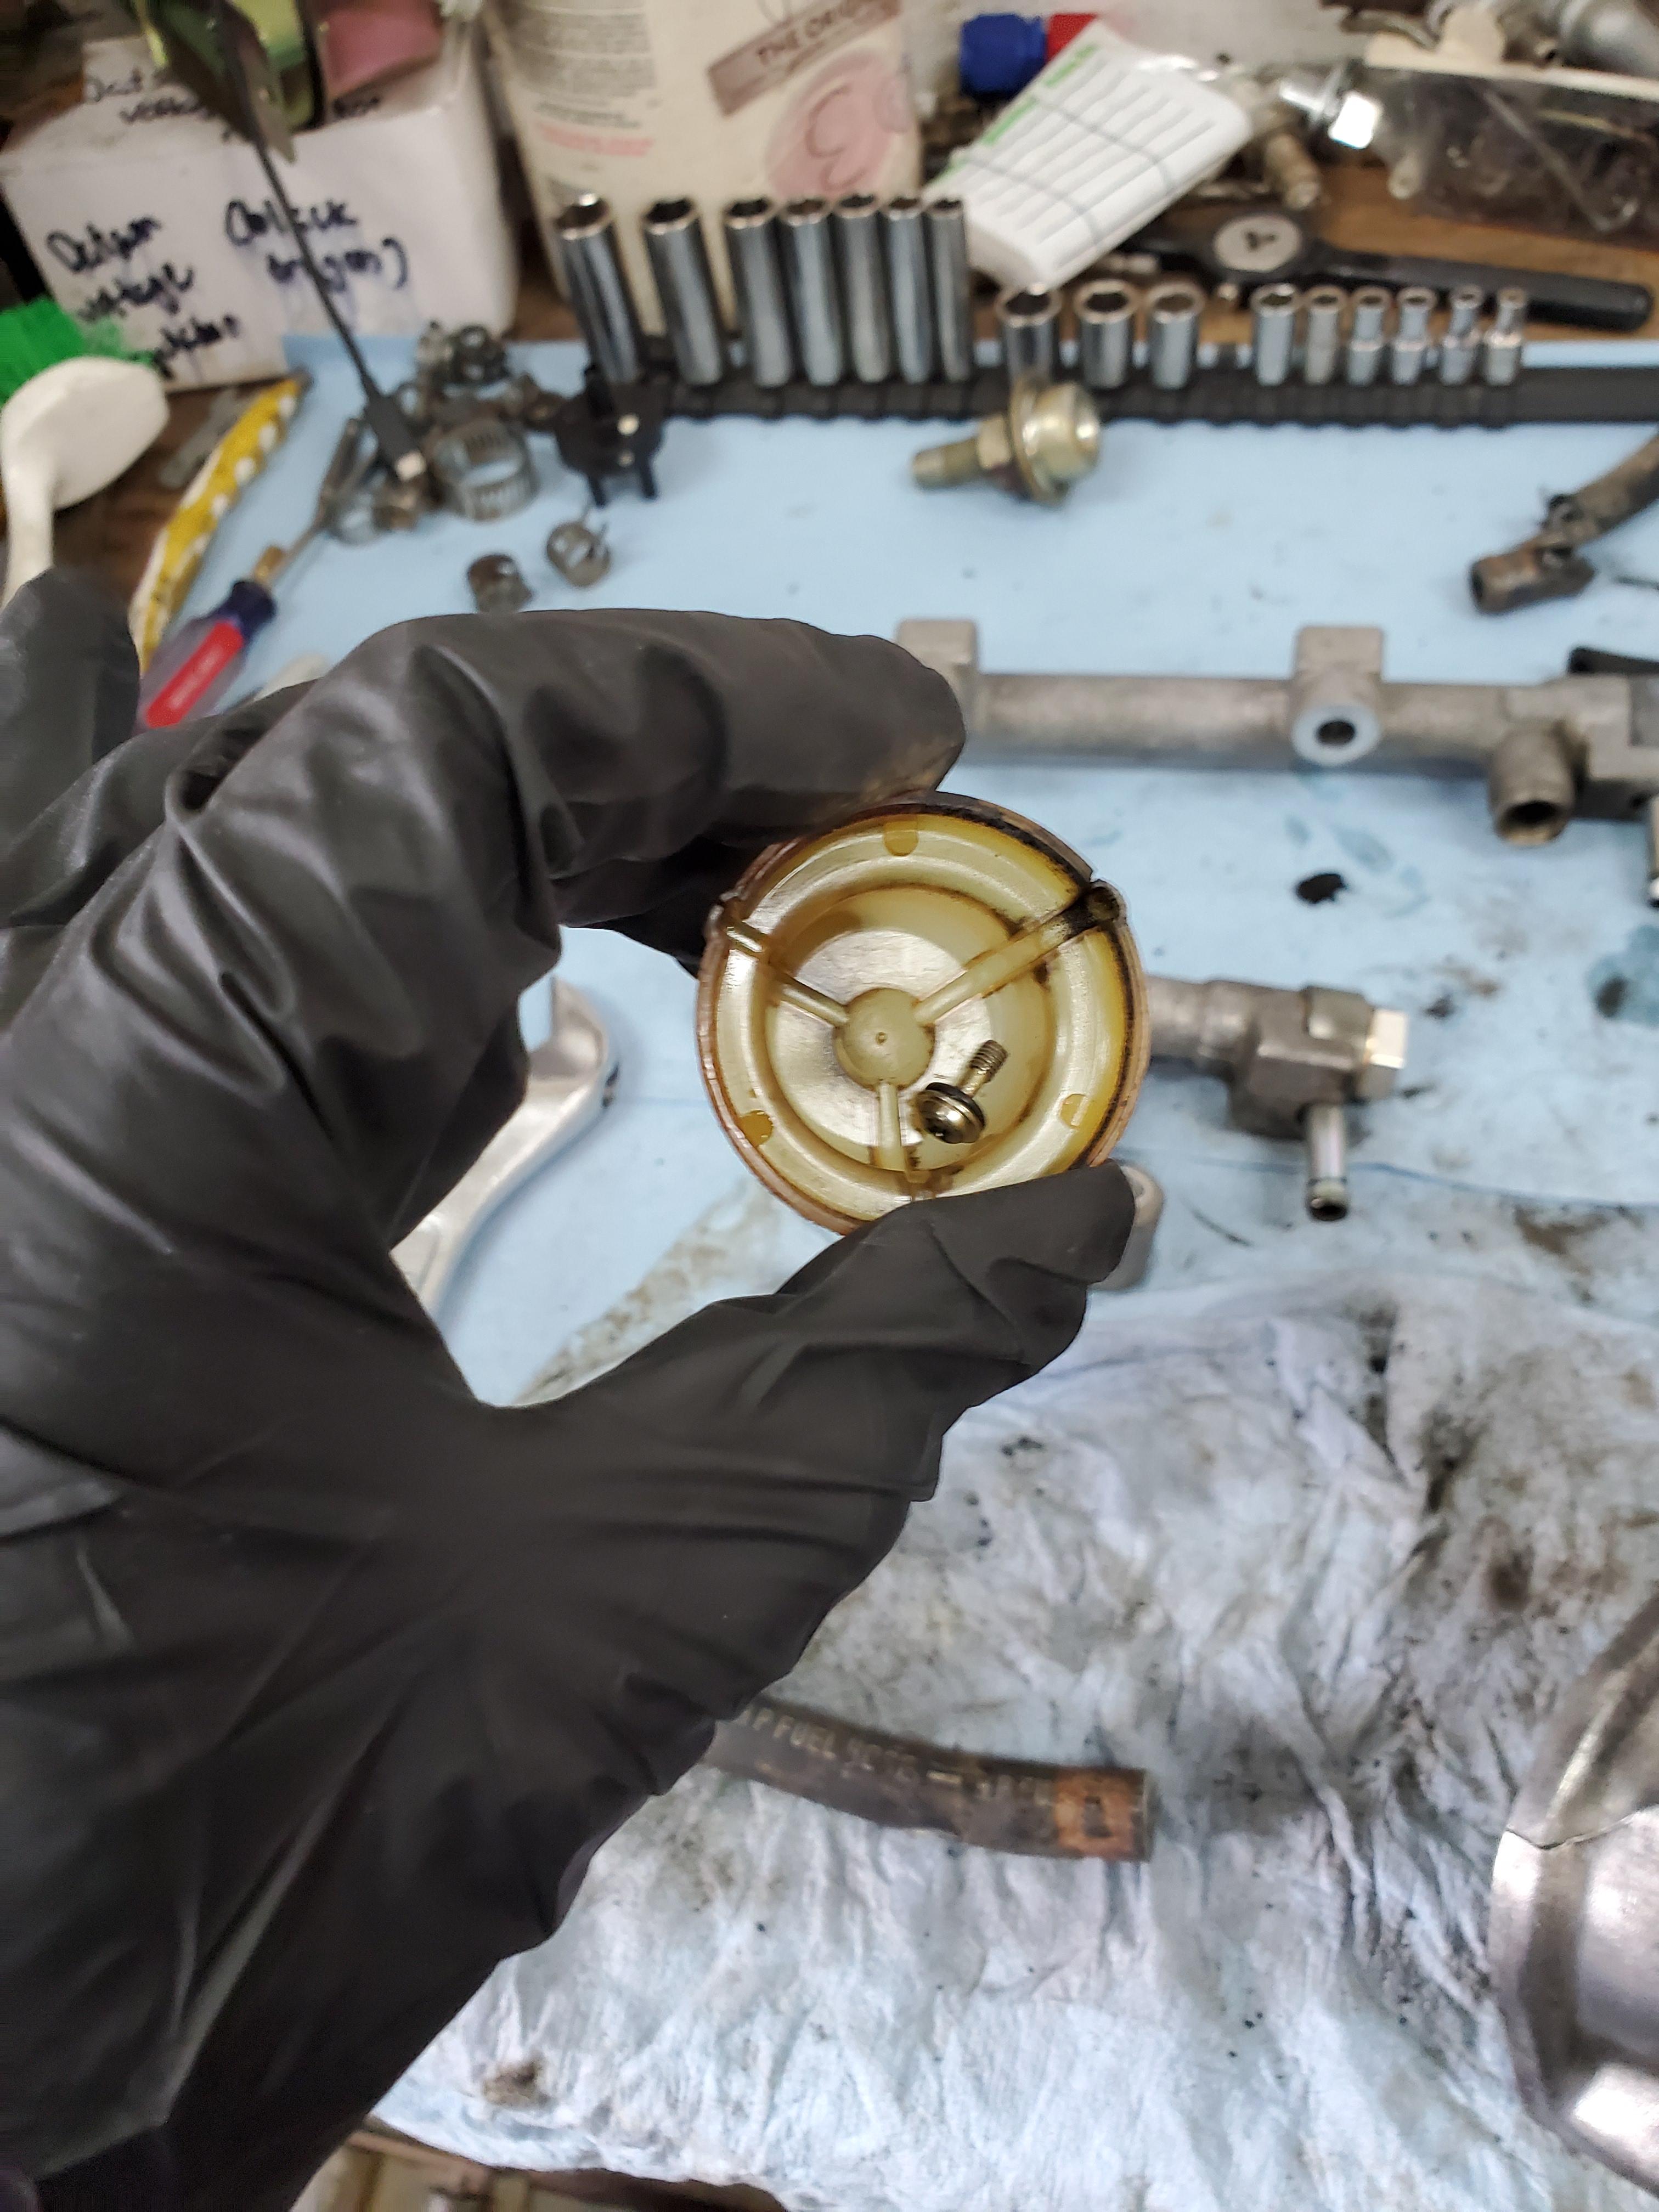
First things first. Replaced the fire starter of a fuel dampener on my fuel rail. Screw wasn't it, and I'm glad I removed it!
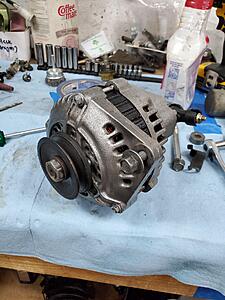
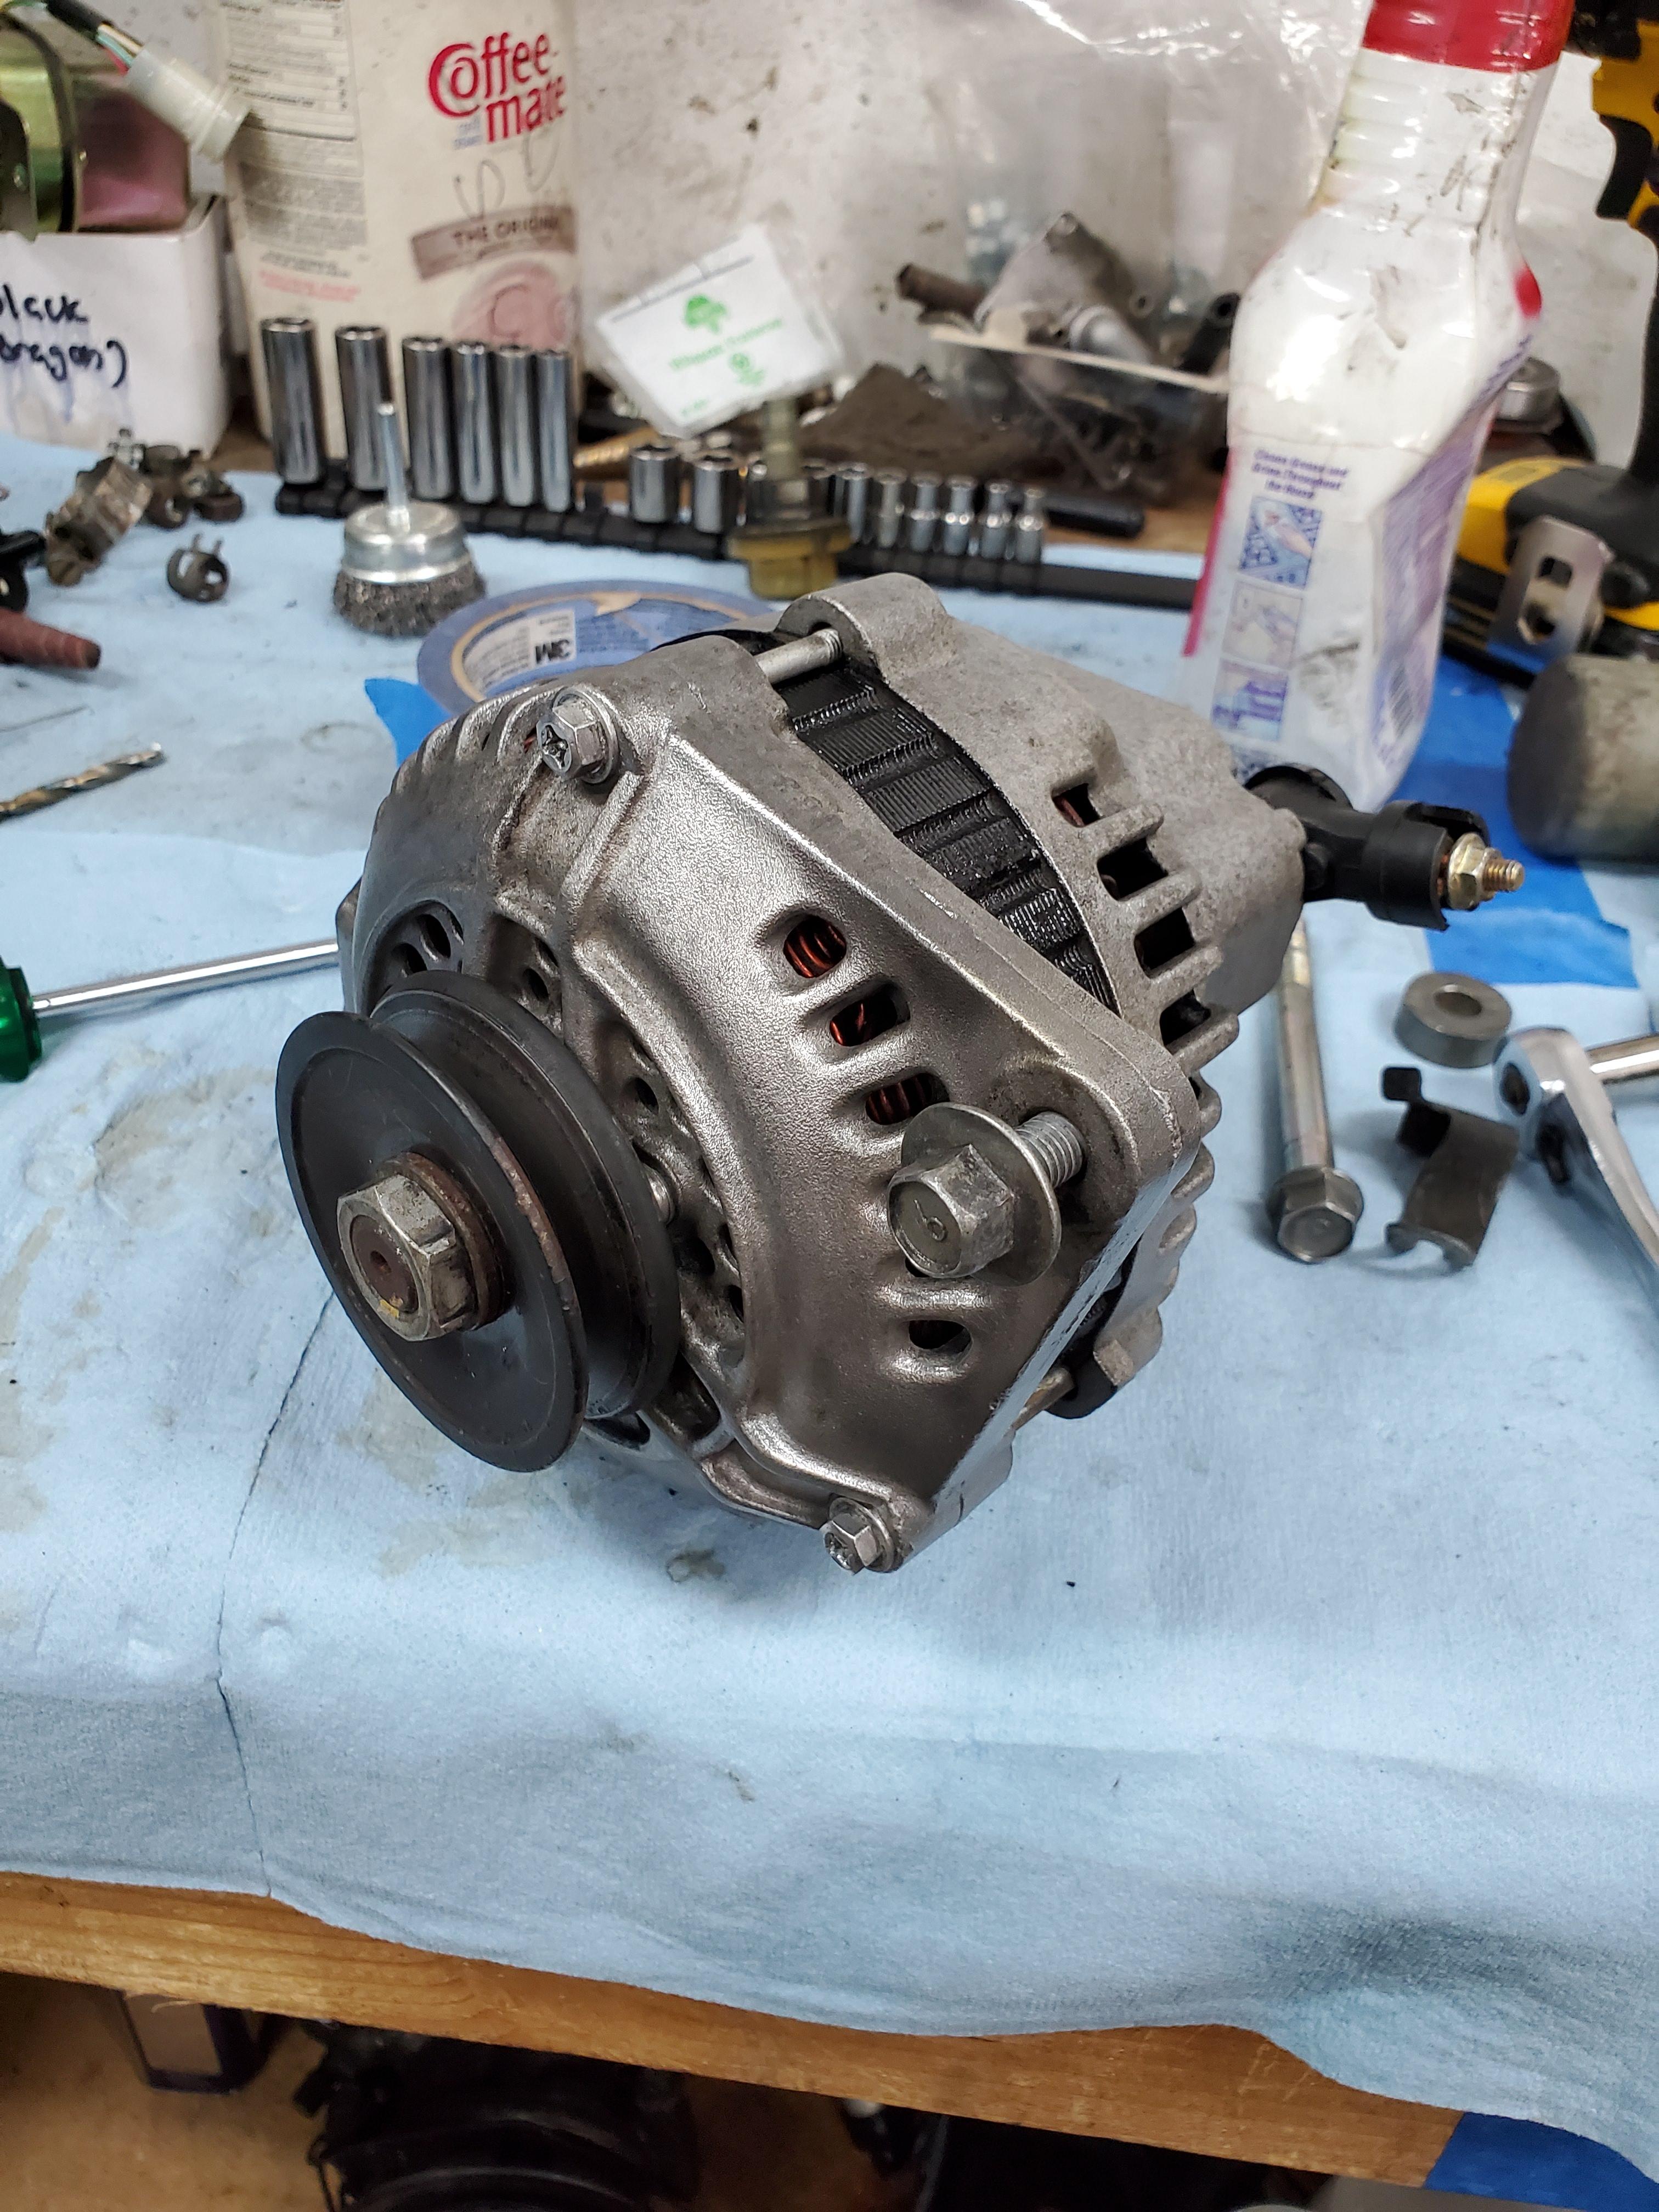
I disassembled and cleaned the alternator. Brushes are still good, so I cleaned everything up and reassembled.
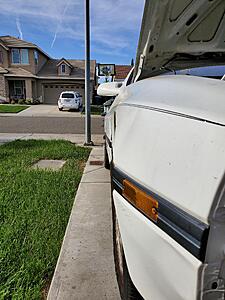
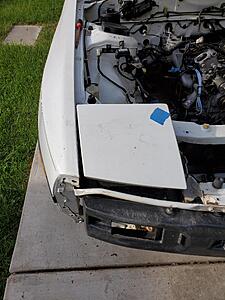
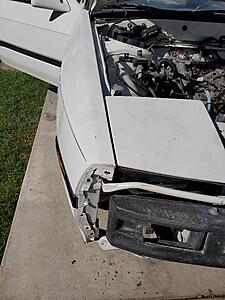
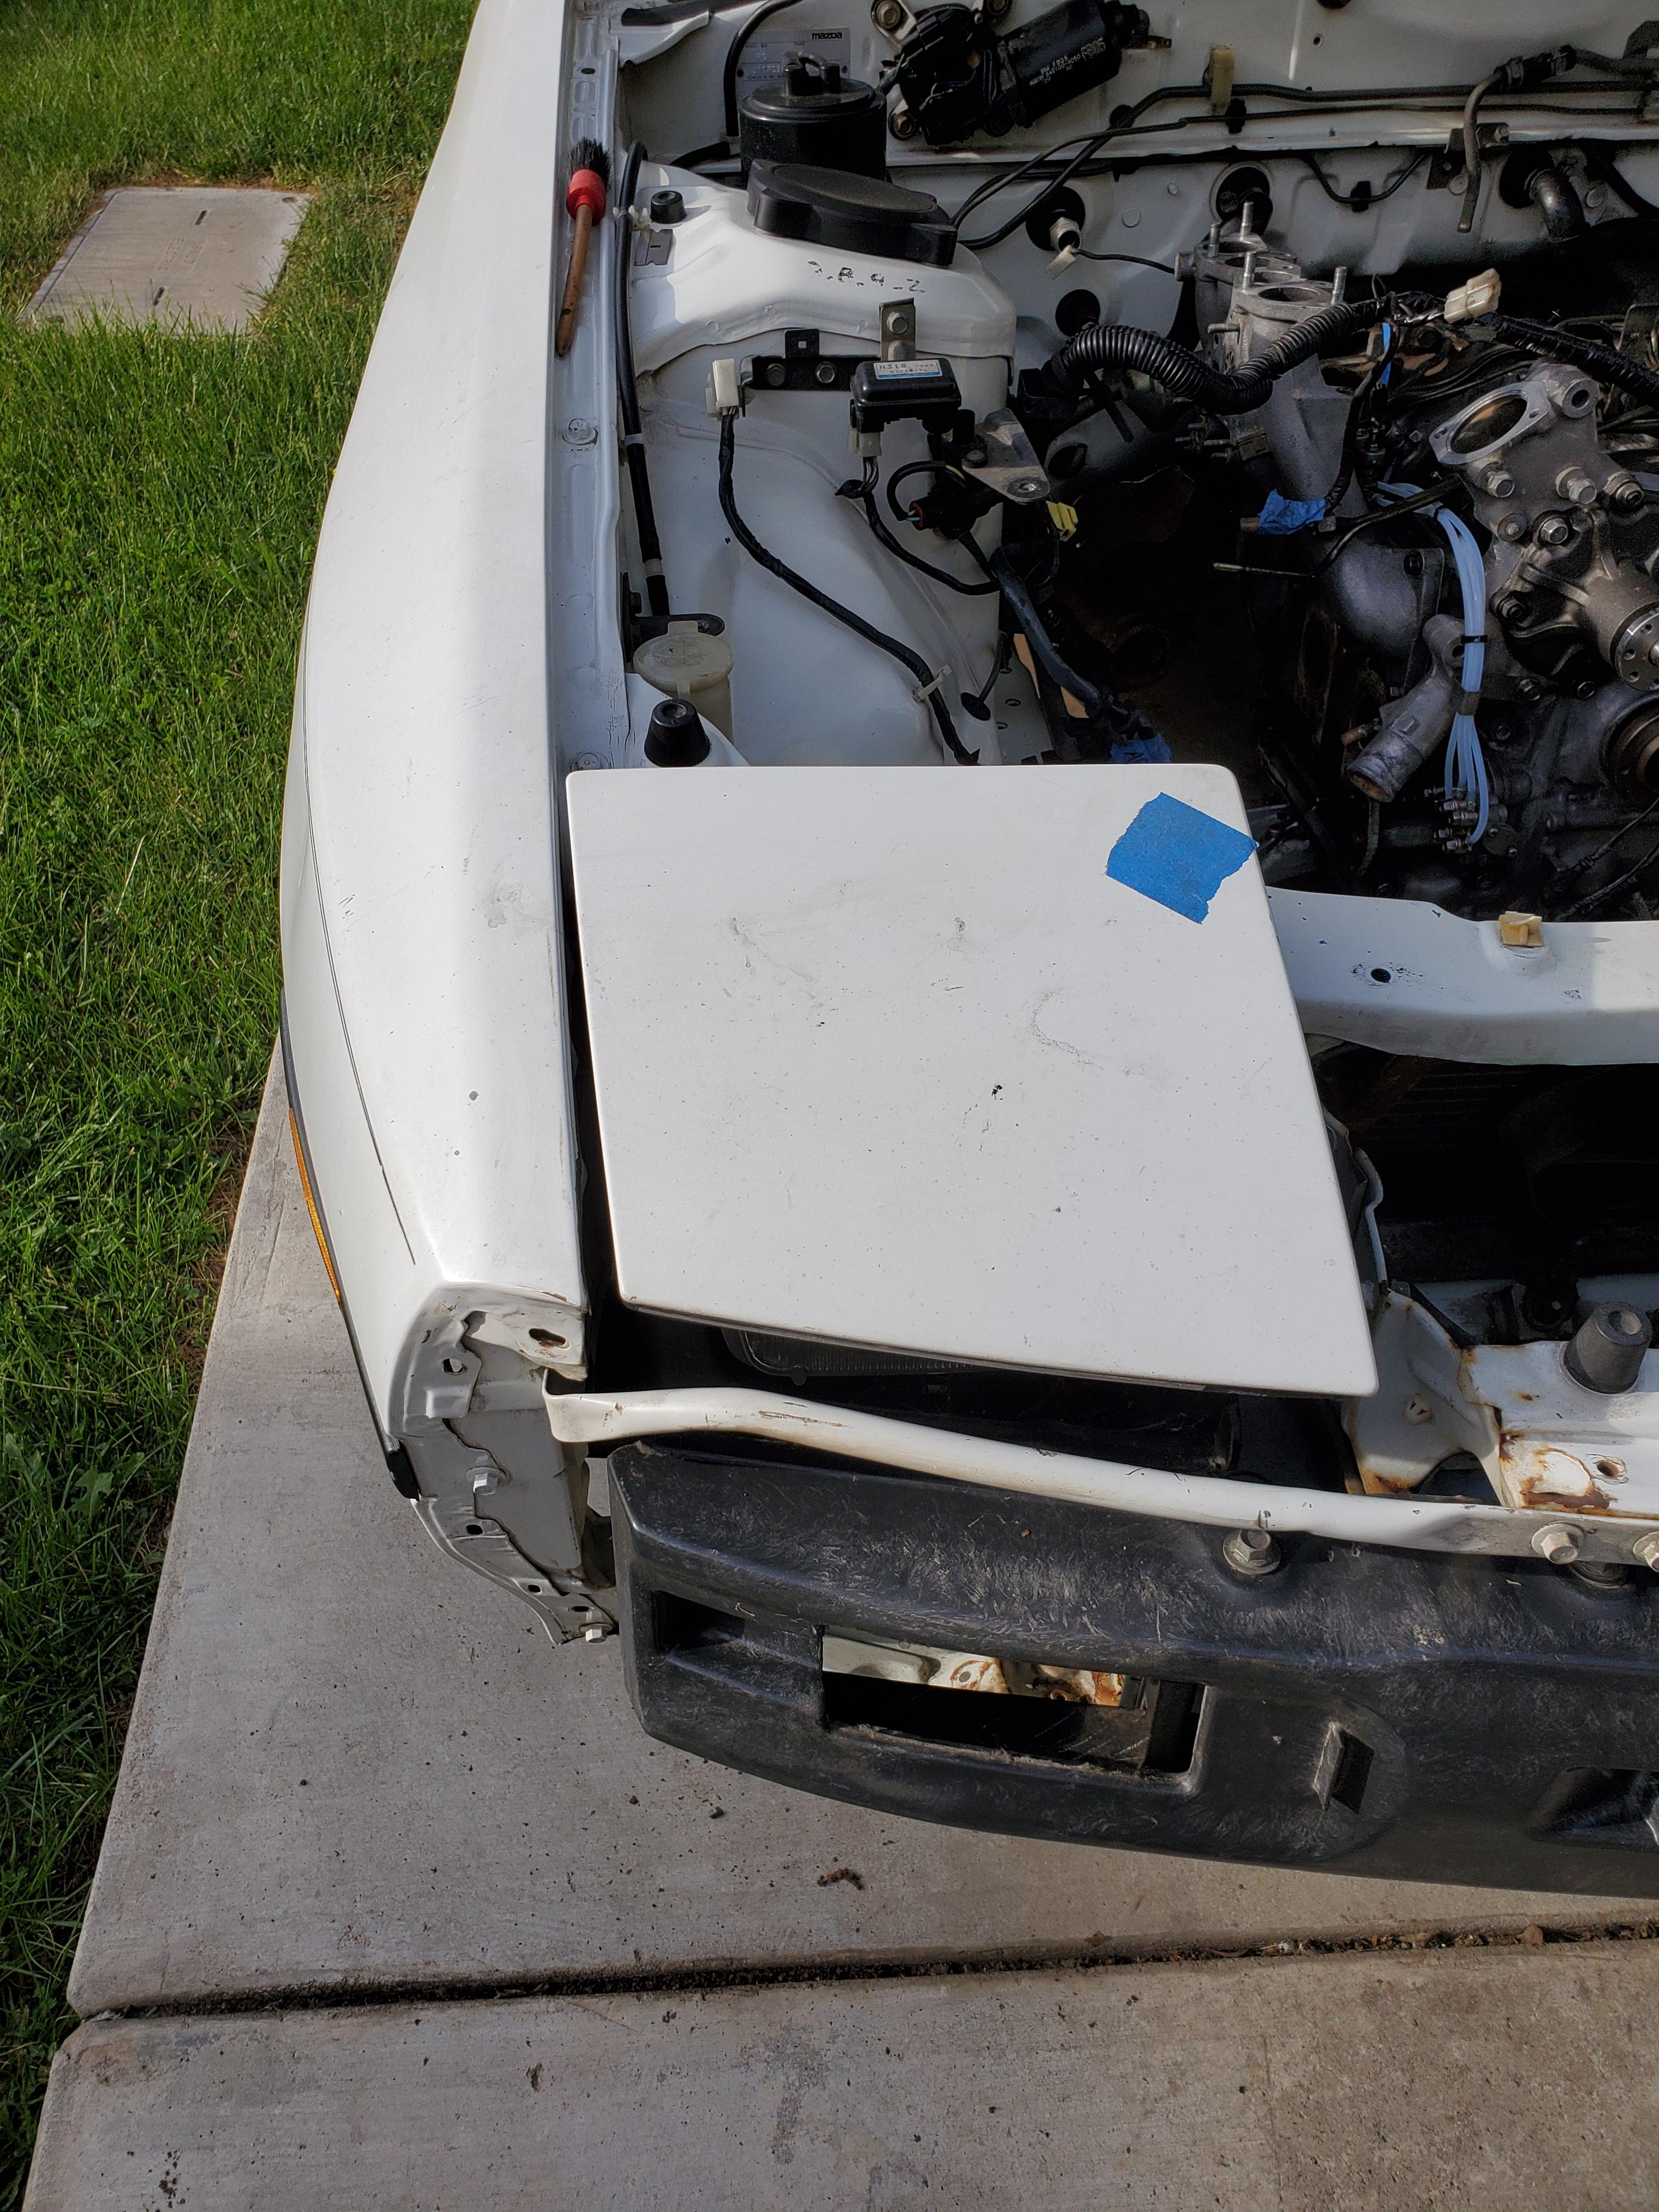
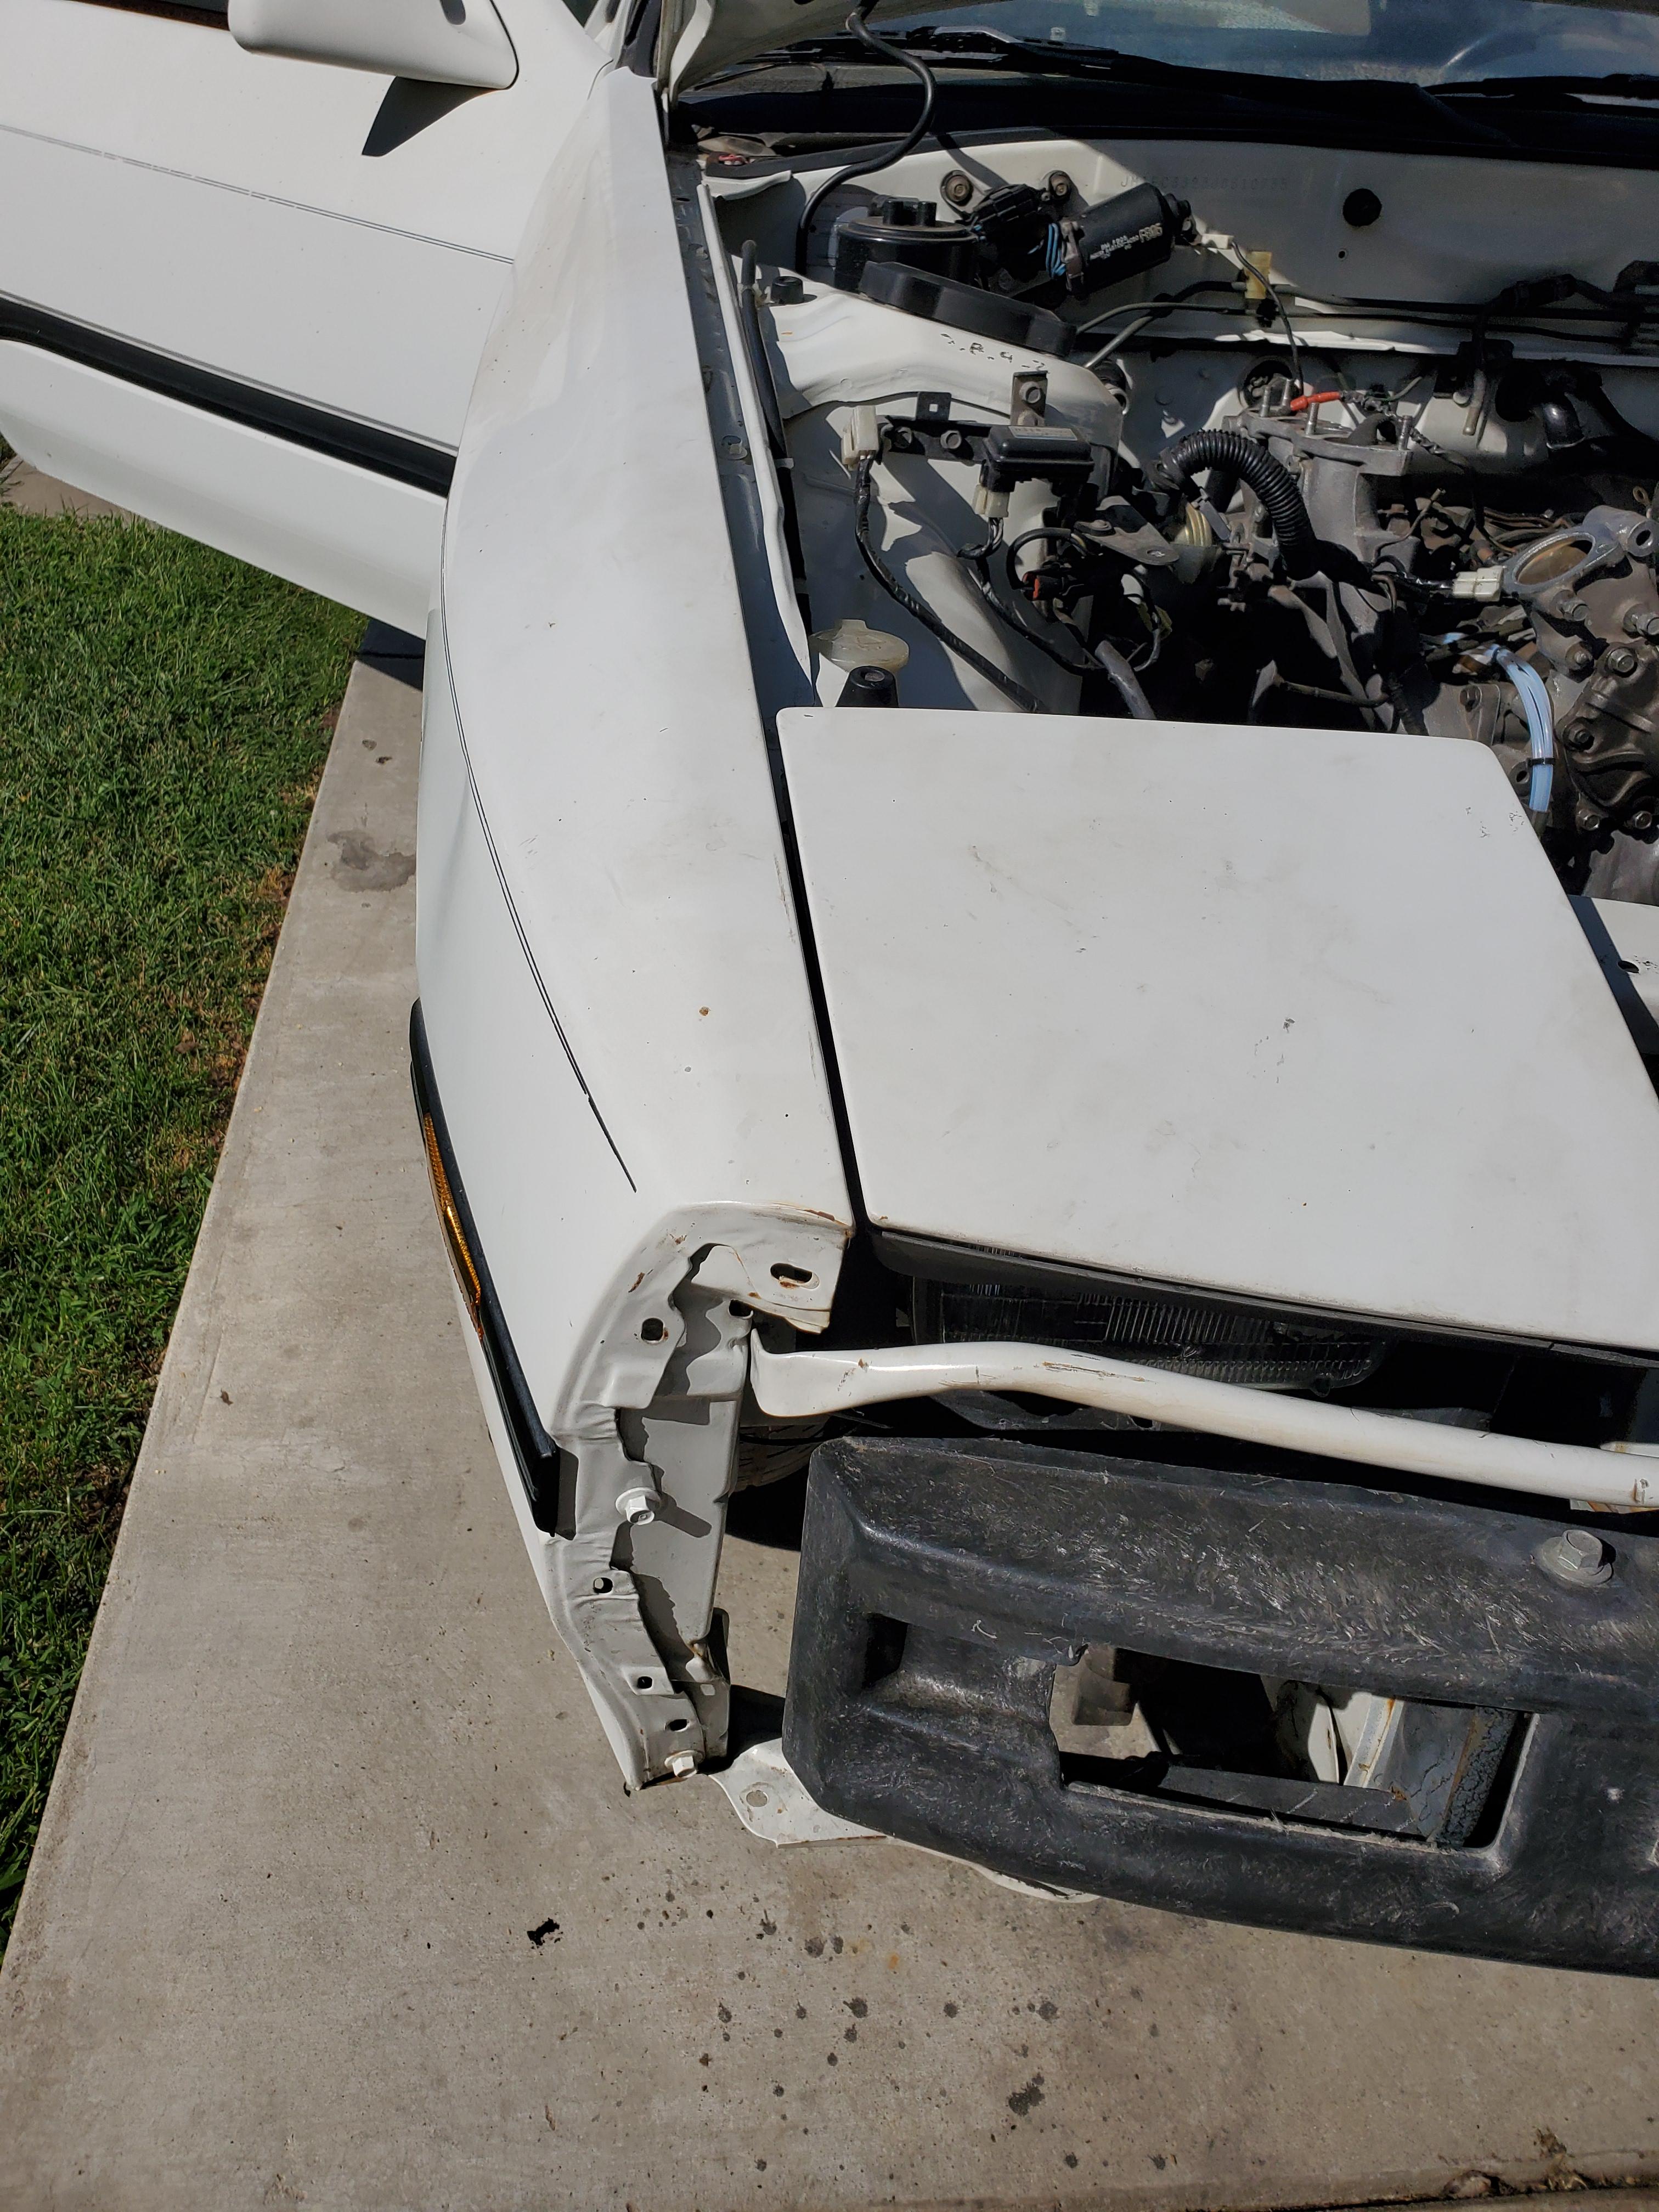
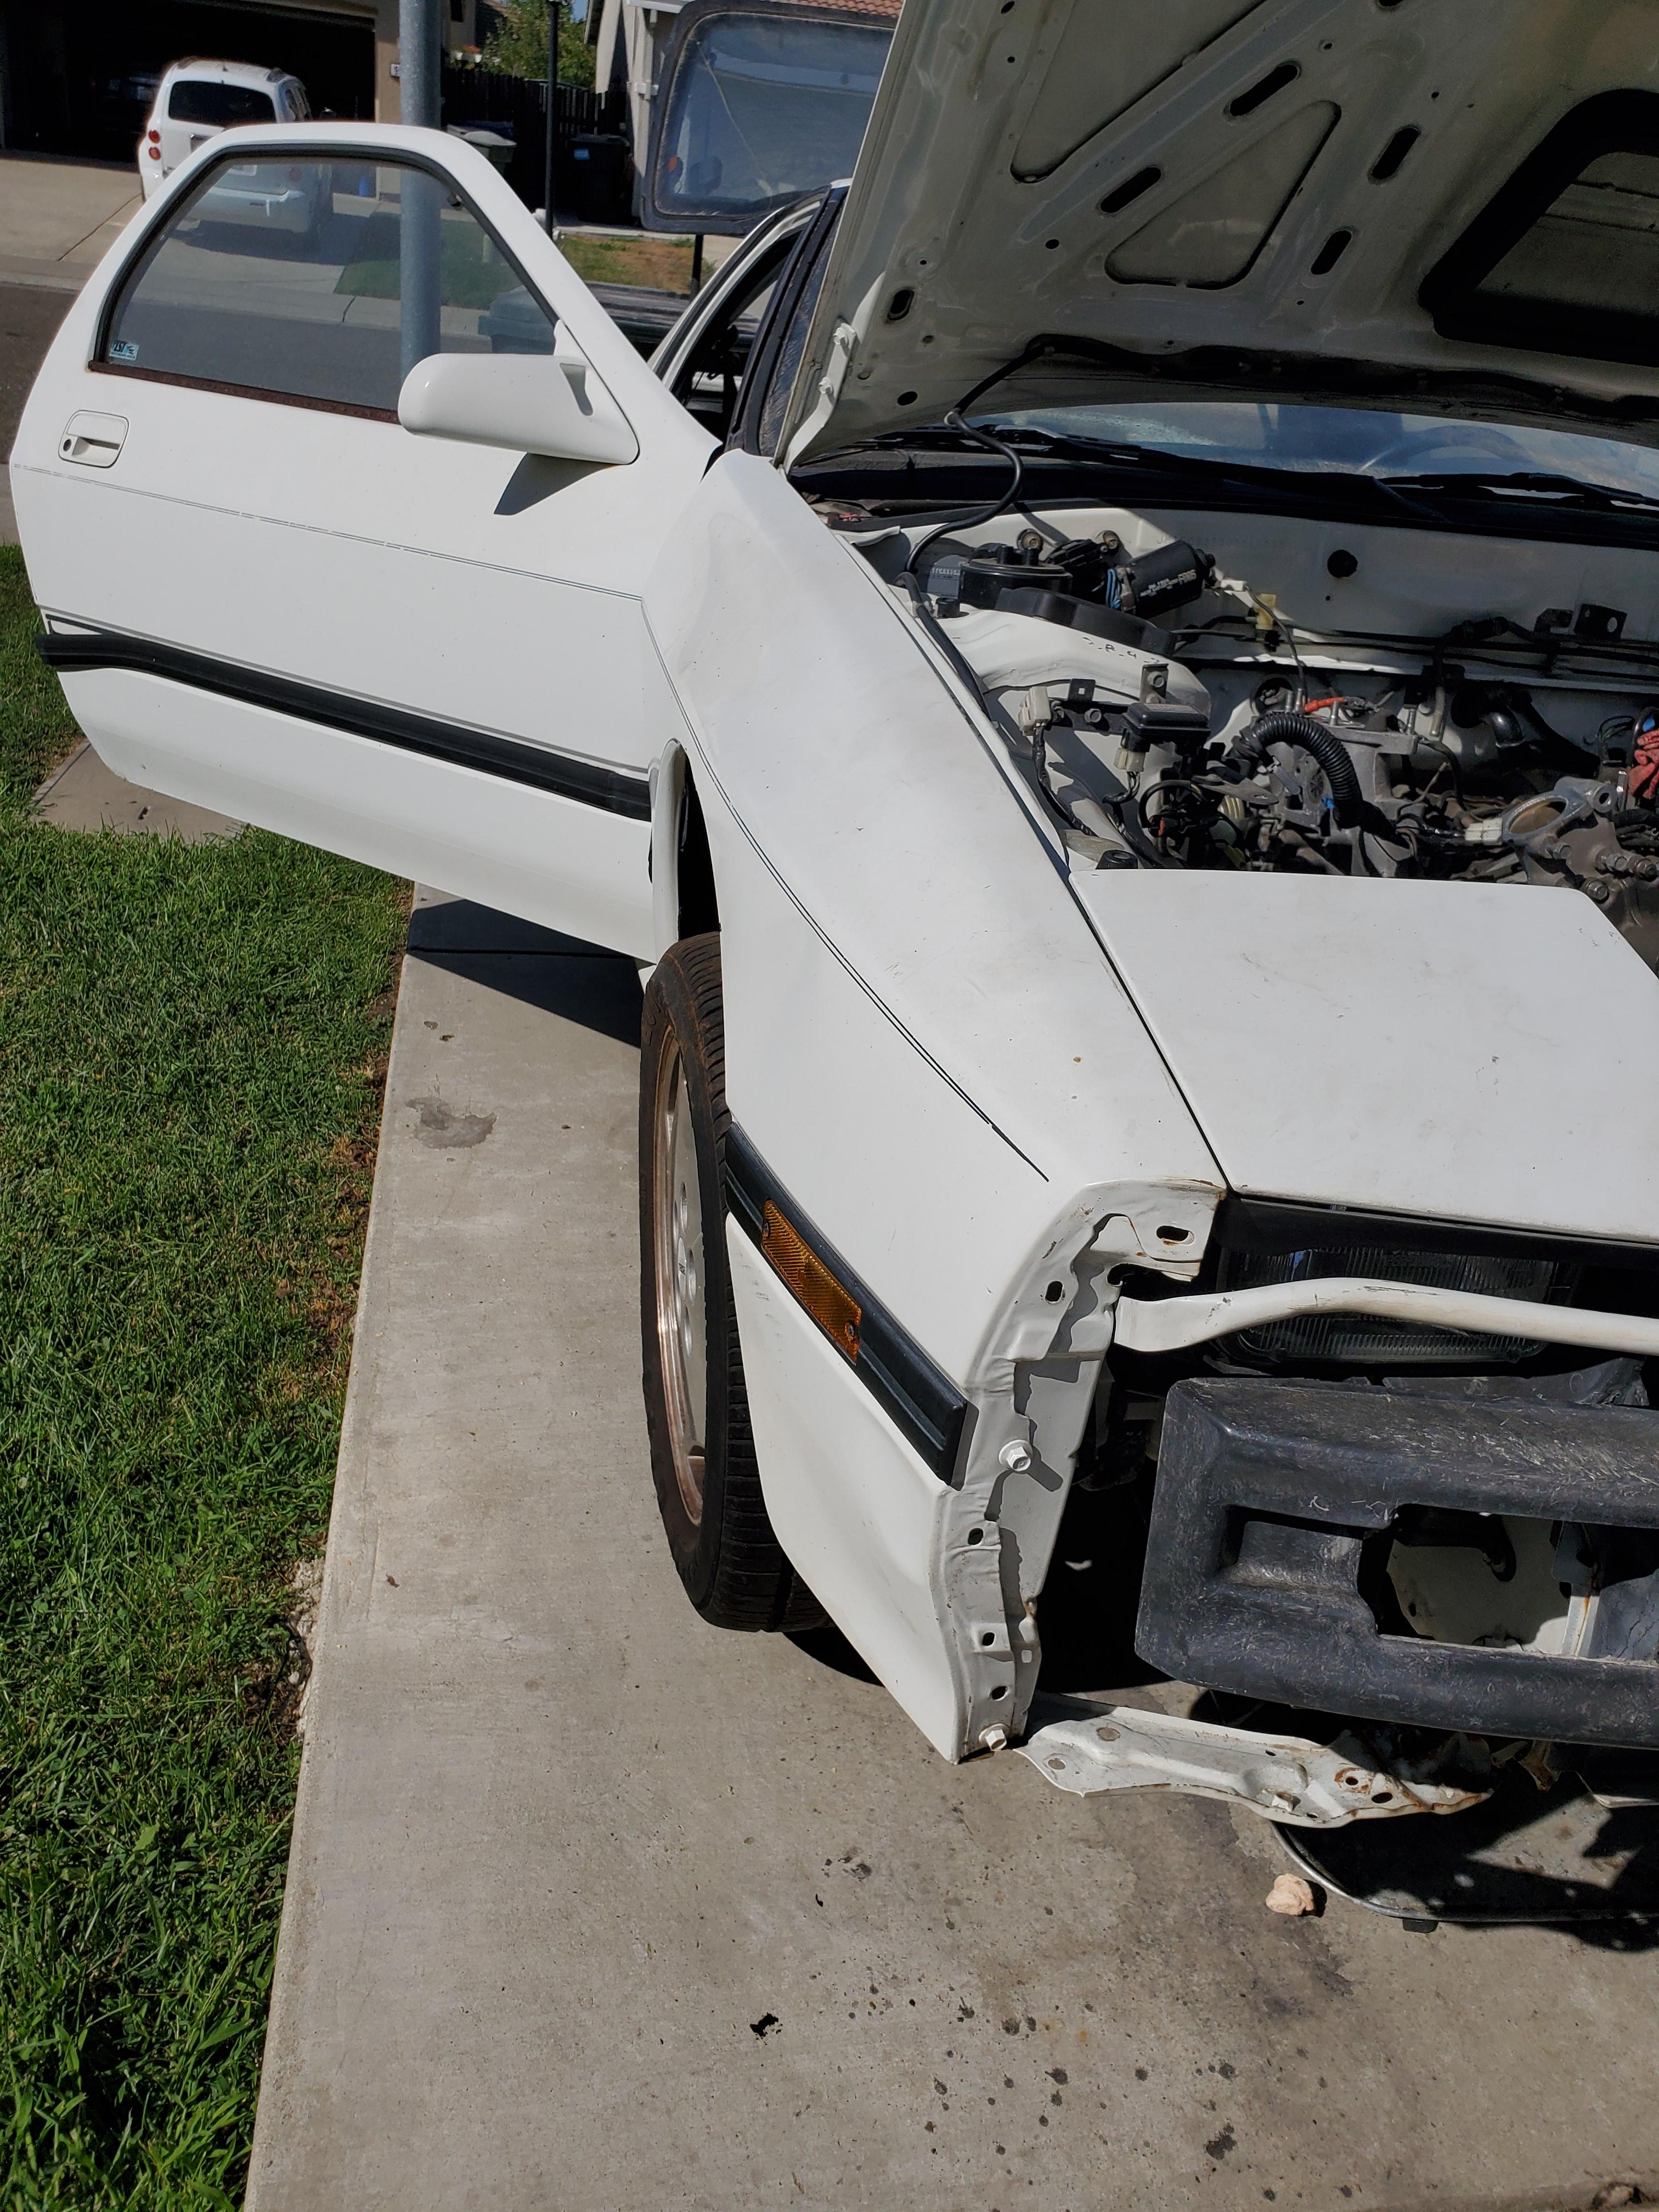
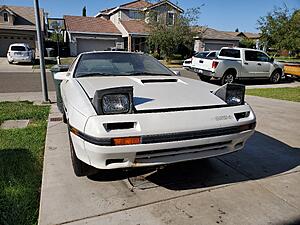
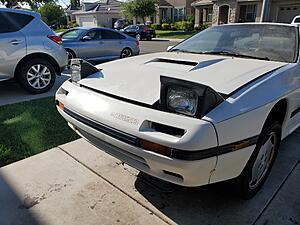
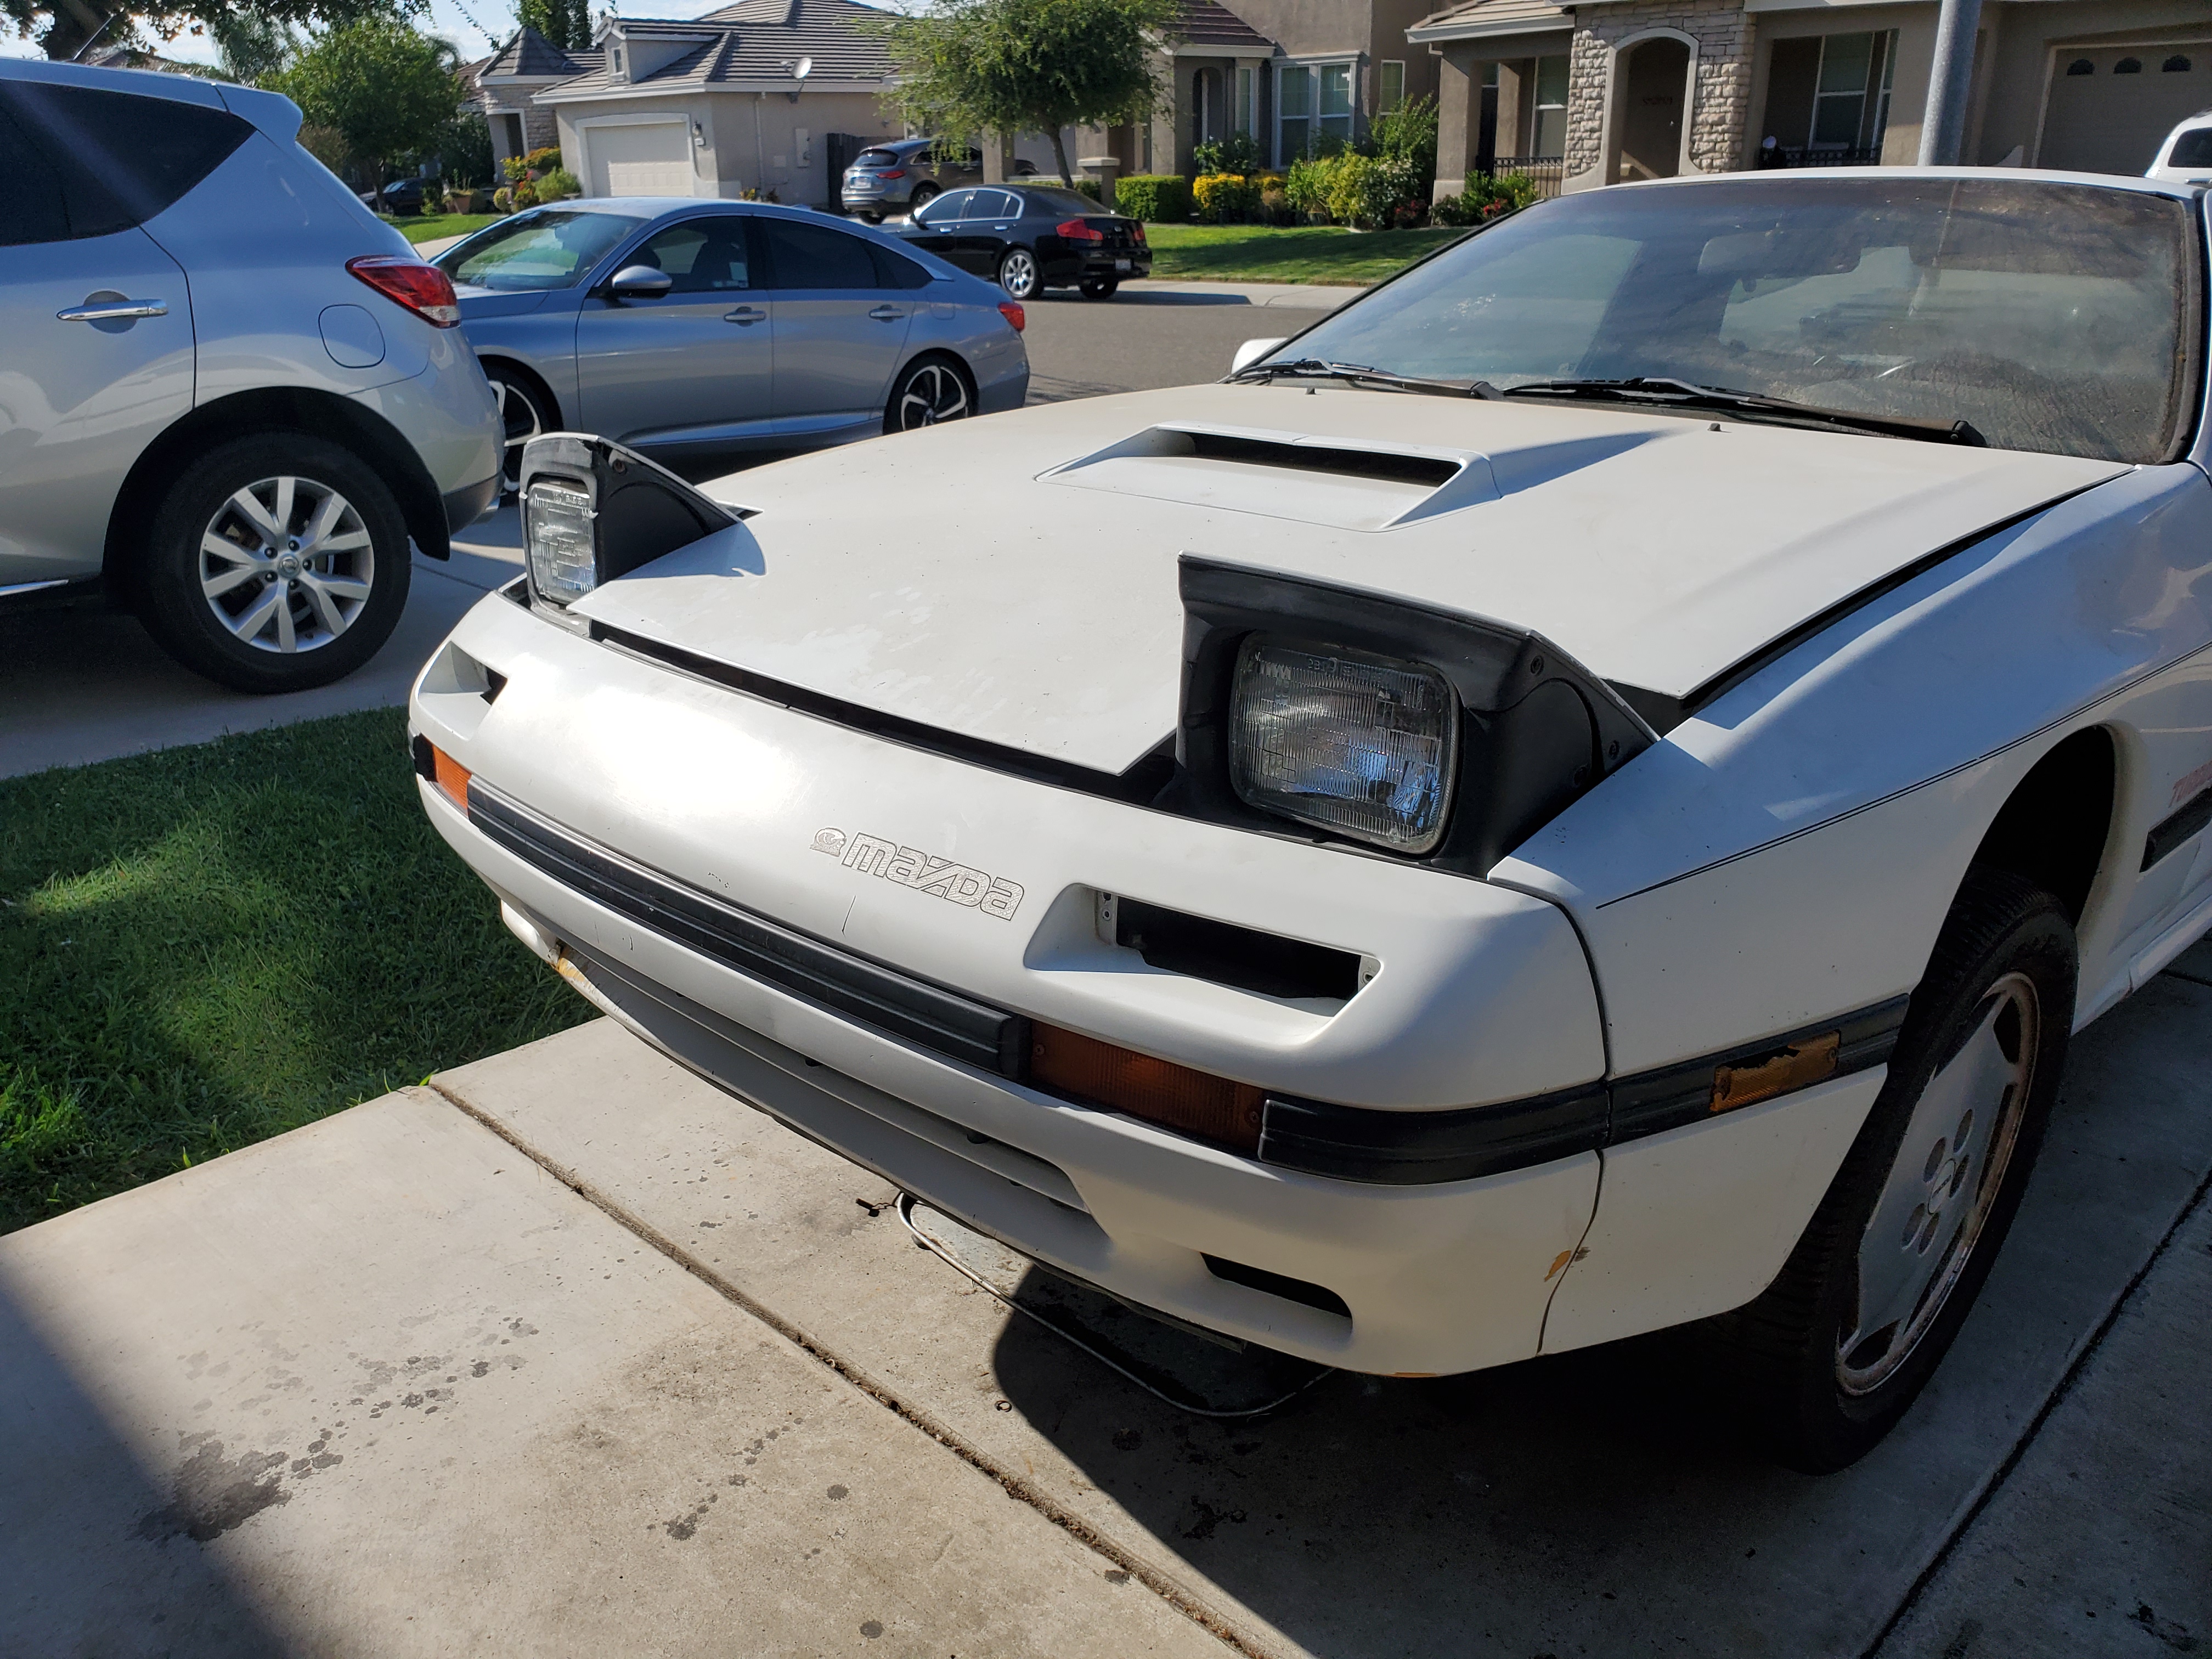
Did a little bit of "bodywork" Front end damage from the p.o. knocked the passenger fender and headlight out. As can be seen in the photos.
Little better!
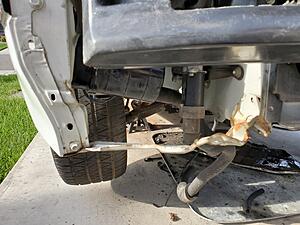
Here is some floor damage on my passenger side. I'm guessing someone placed a jack or high sided. It's not actually fixed, just mended until it can move on it's own power so I can move it into the garage to weld it up. Also I only have a standard hammer and some random square tubing as bodywork tools haha
Last edited by Anonymous Waffle; Sep 1, 2019 at 01:46 AM.
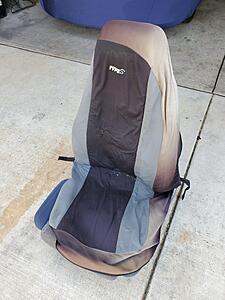
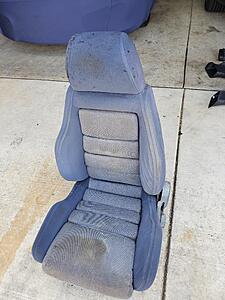
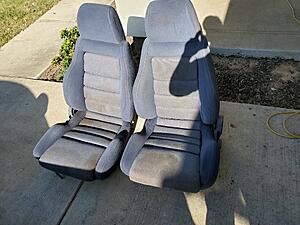
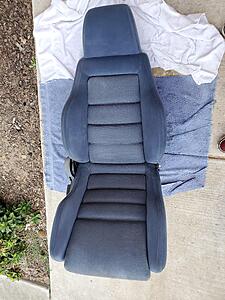
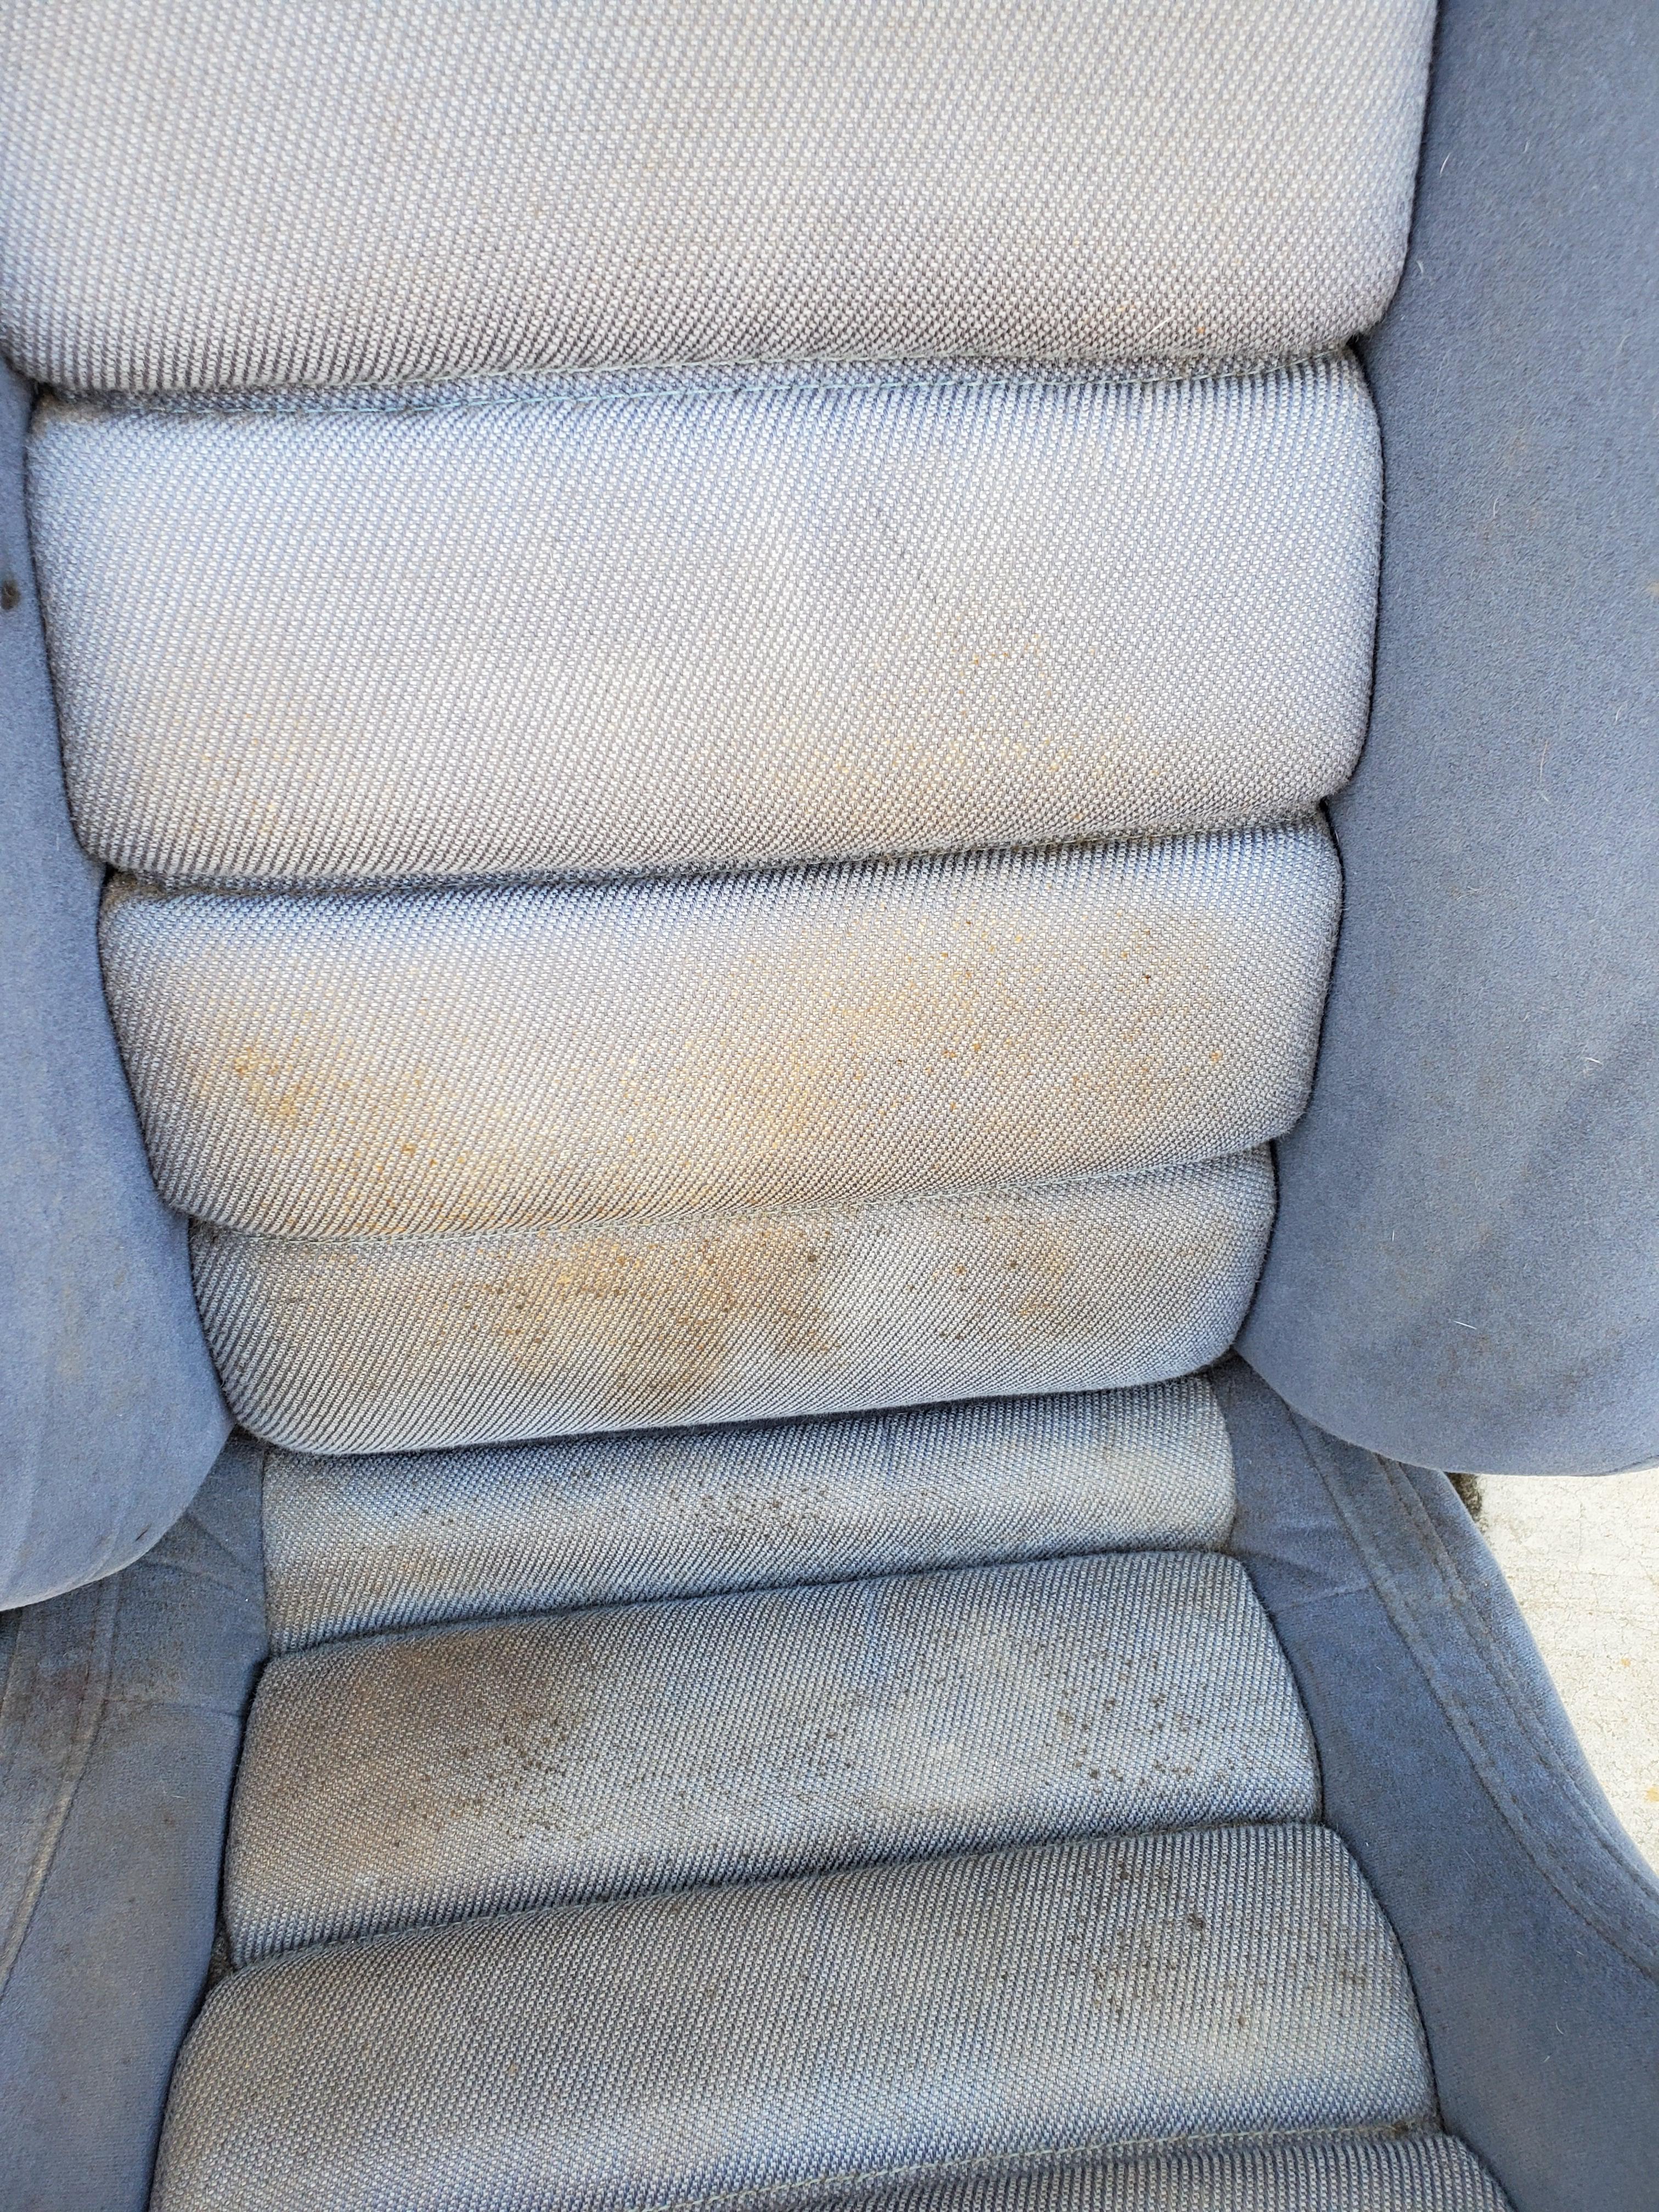
I have finally uncovered my turbo 2 seats. I never actually took a peek underneath, and to my surprise, they were pretty good! Dirty as hell, but not too worn!
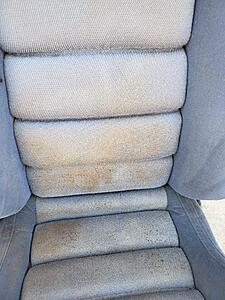
The passenger seat was a bit grosser. The little dots are I'm pretty sure, mold. But since I live in California, I left it in the sun for a day to let nature kill the germs. (But I think that mold has been on there for years, cant be too careful!)
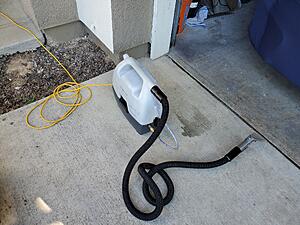
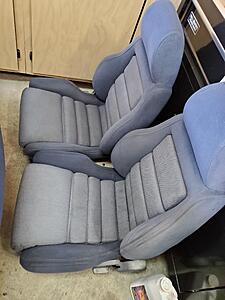
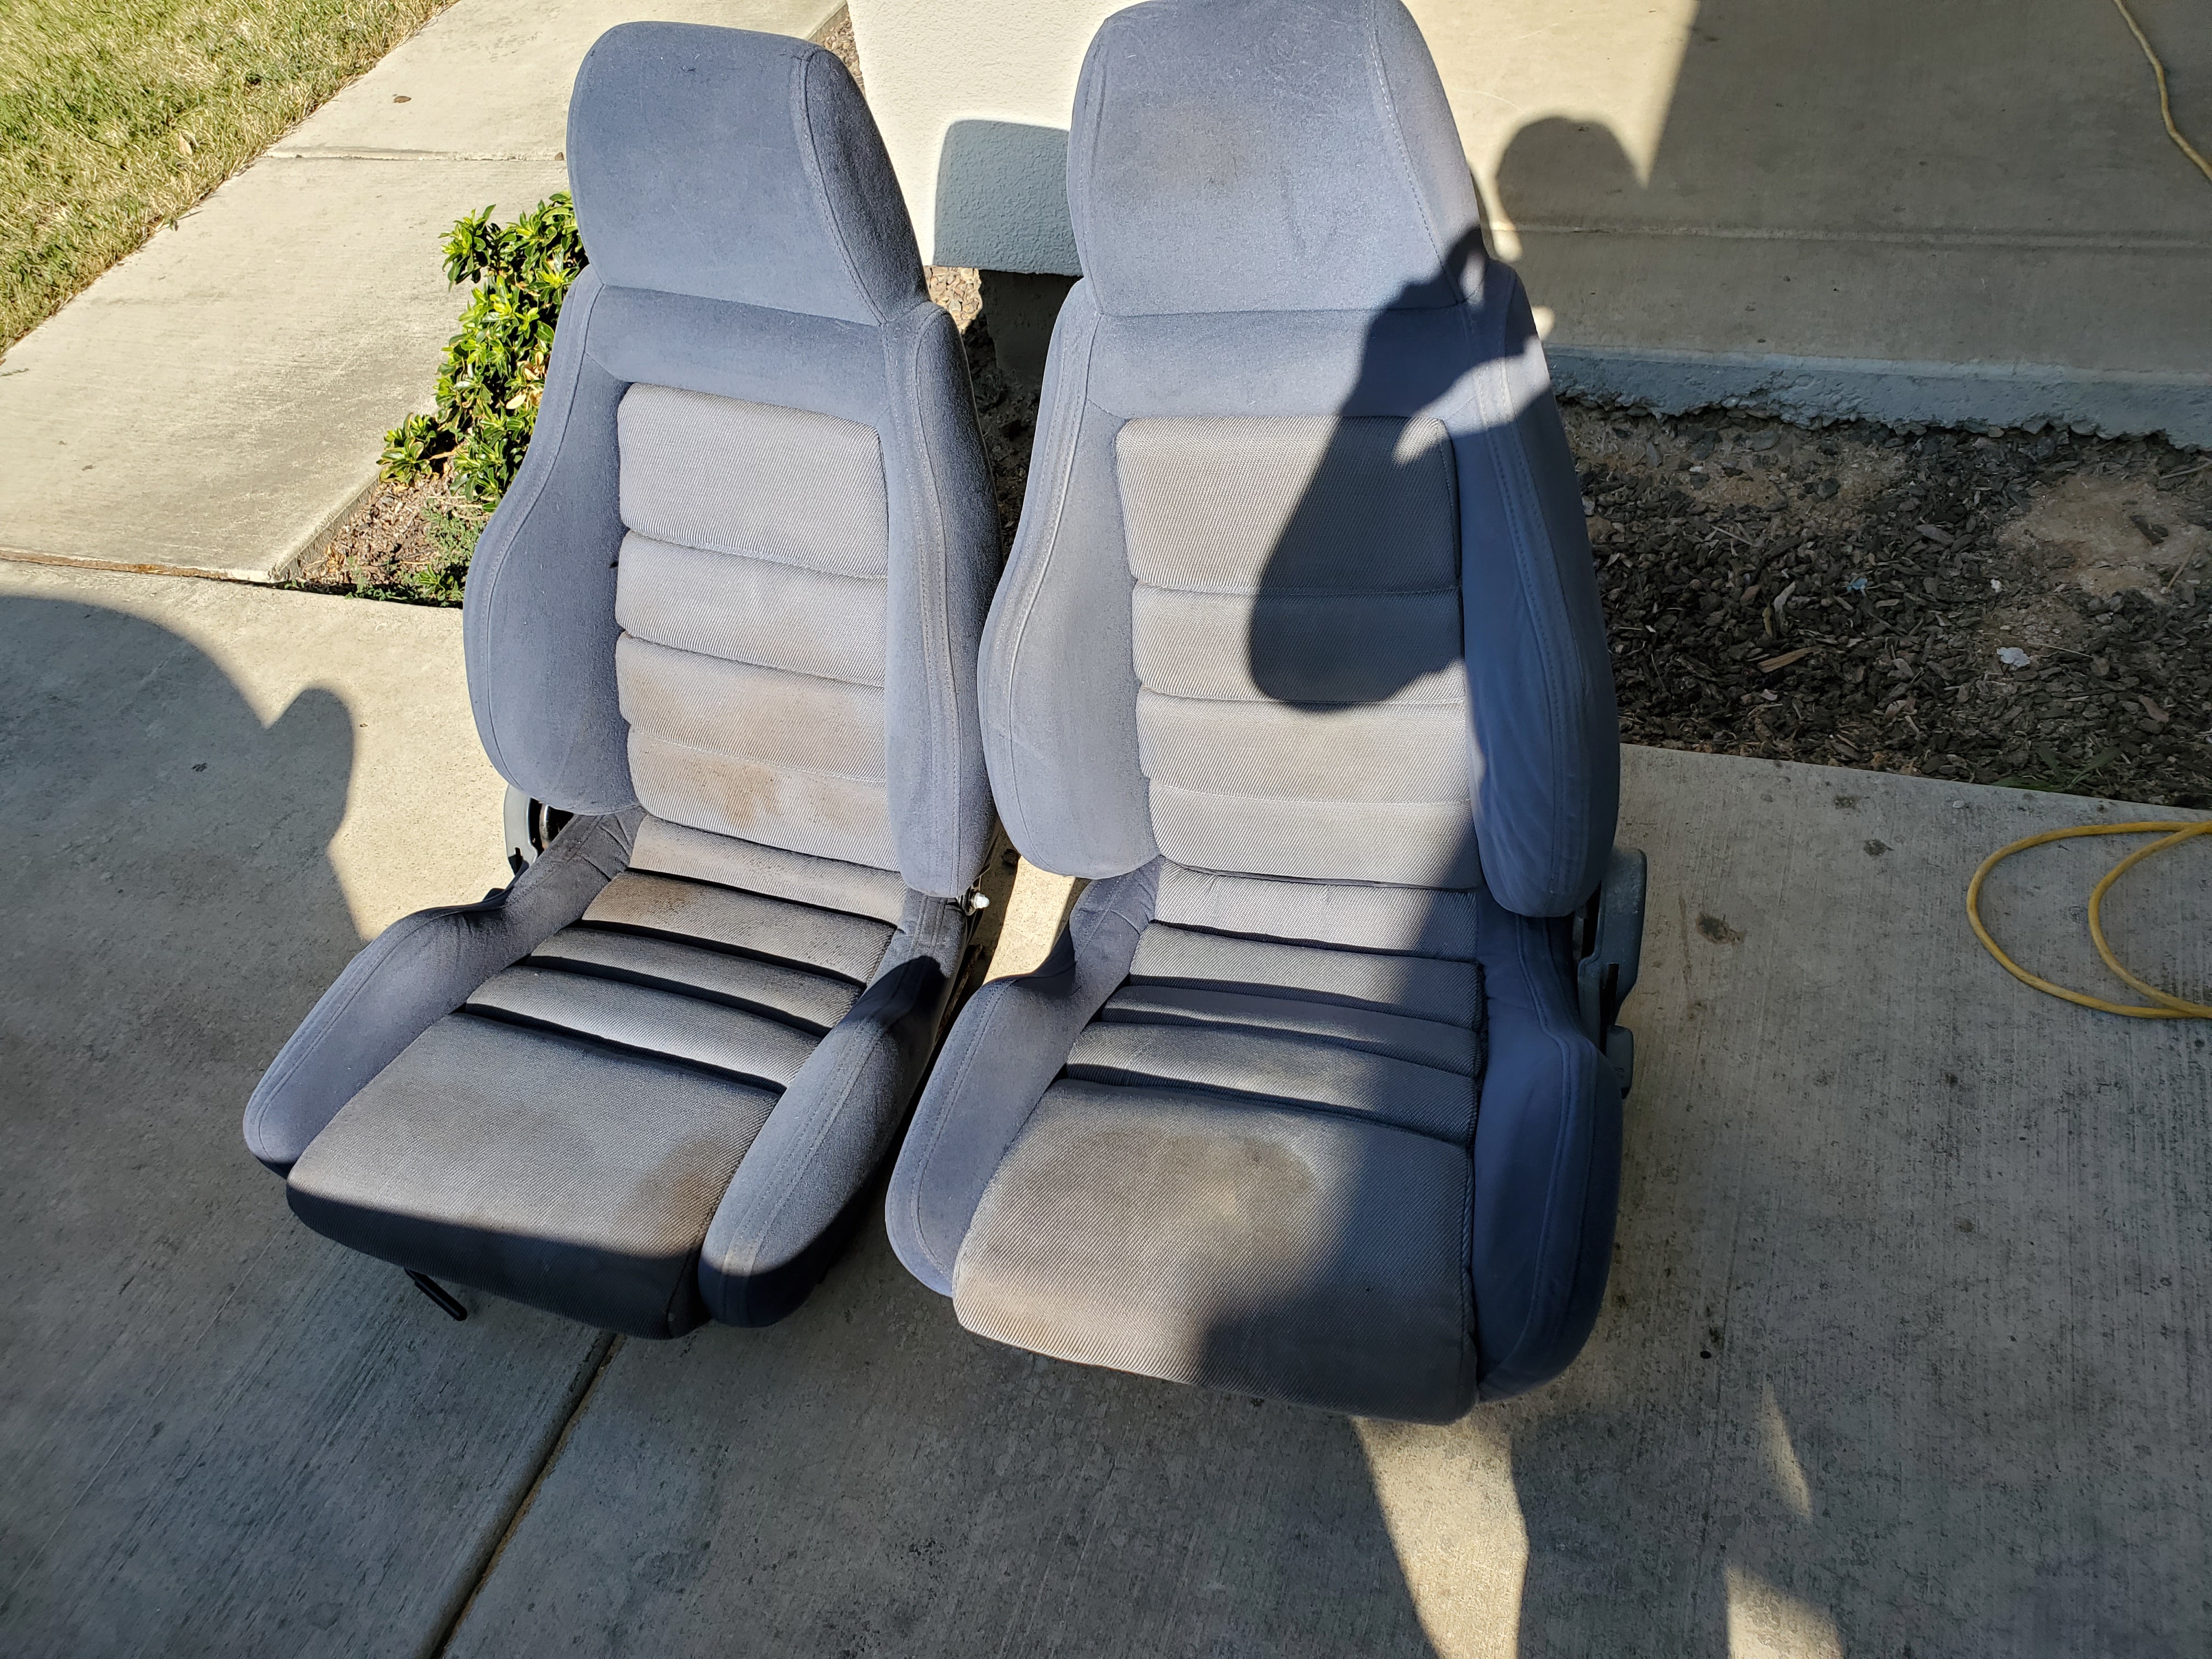
Here are the two seats together.. and I went to home depot to rent a wet vacuum/carpet cleaner for 24 hours. Only about 20$! A day of cleaning brought surprising results!
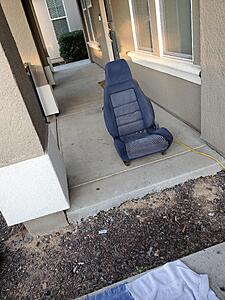
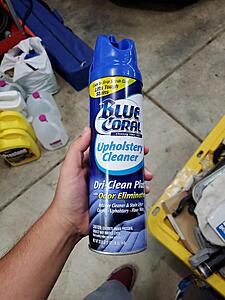
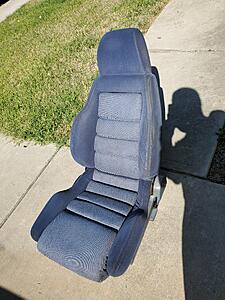
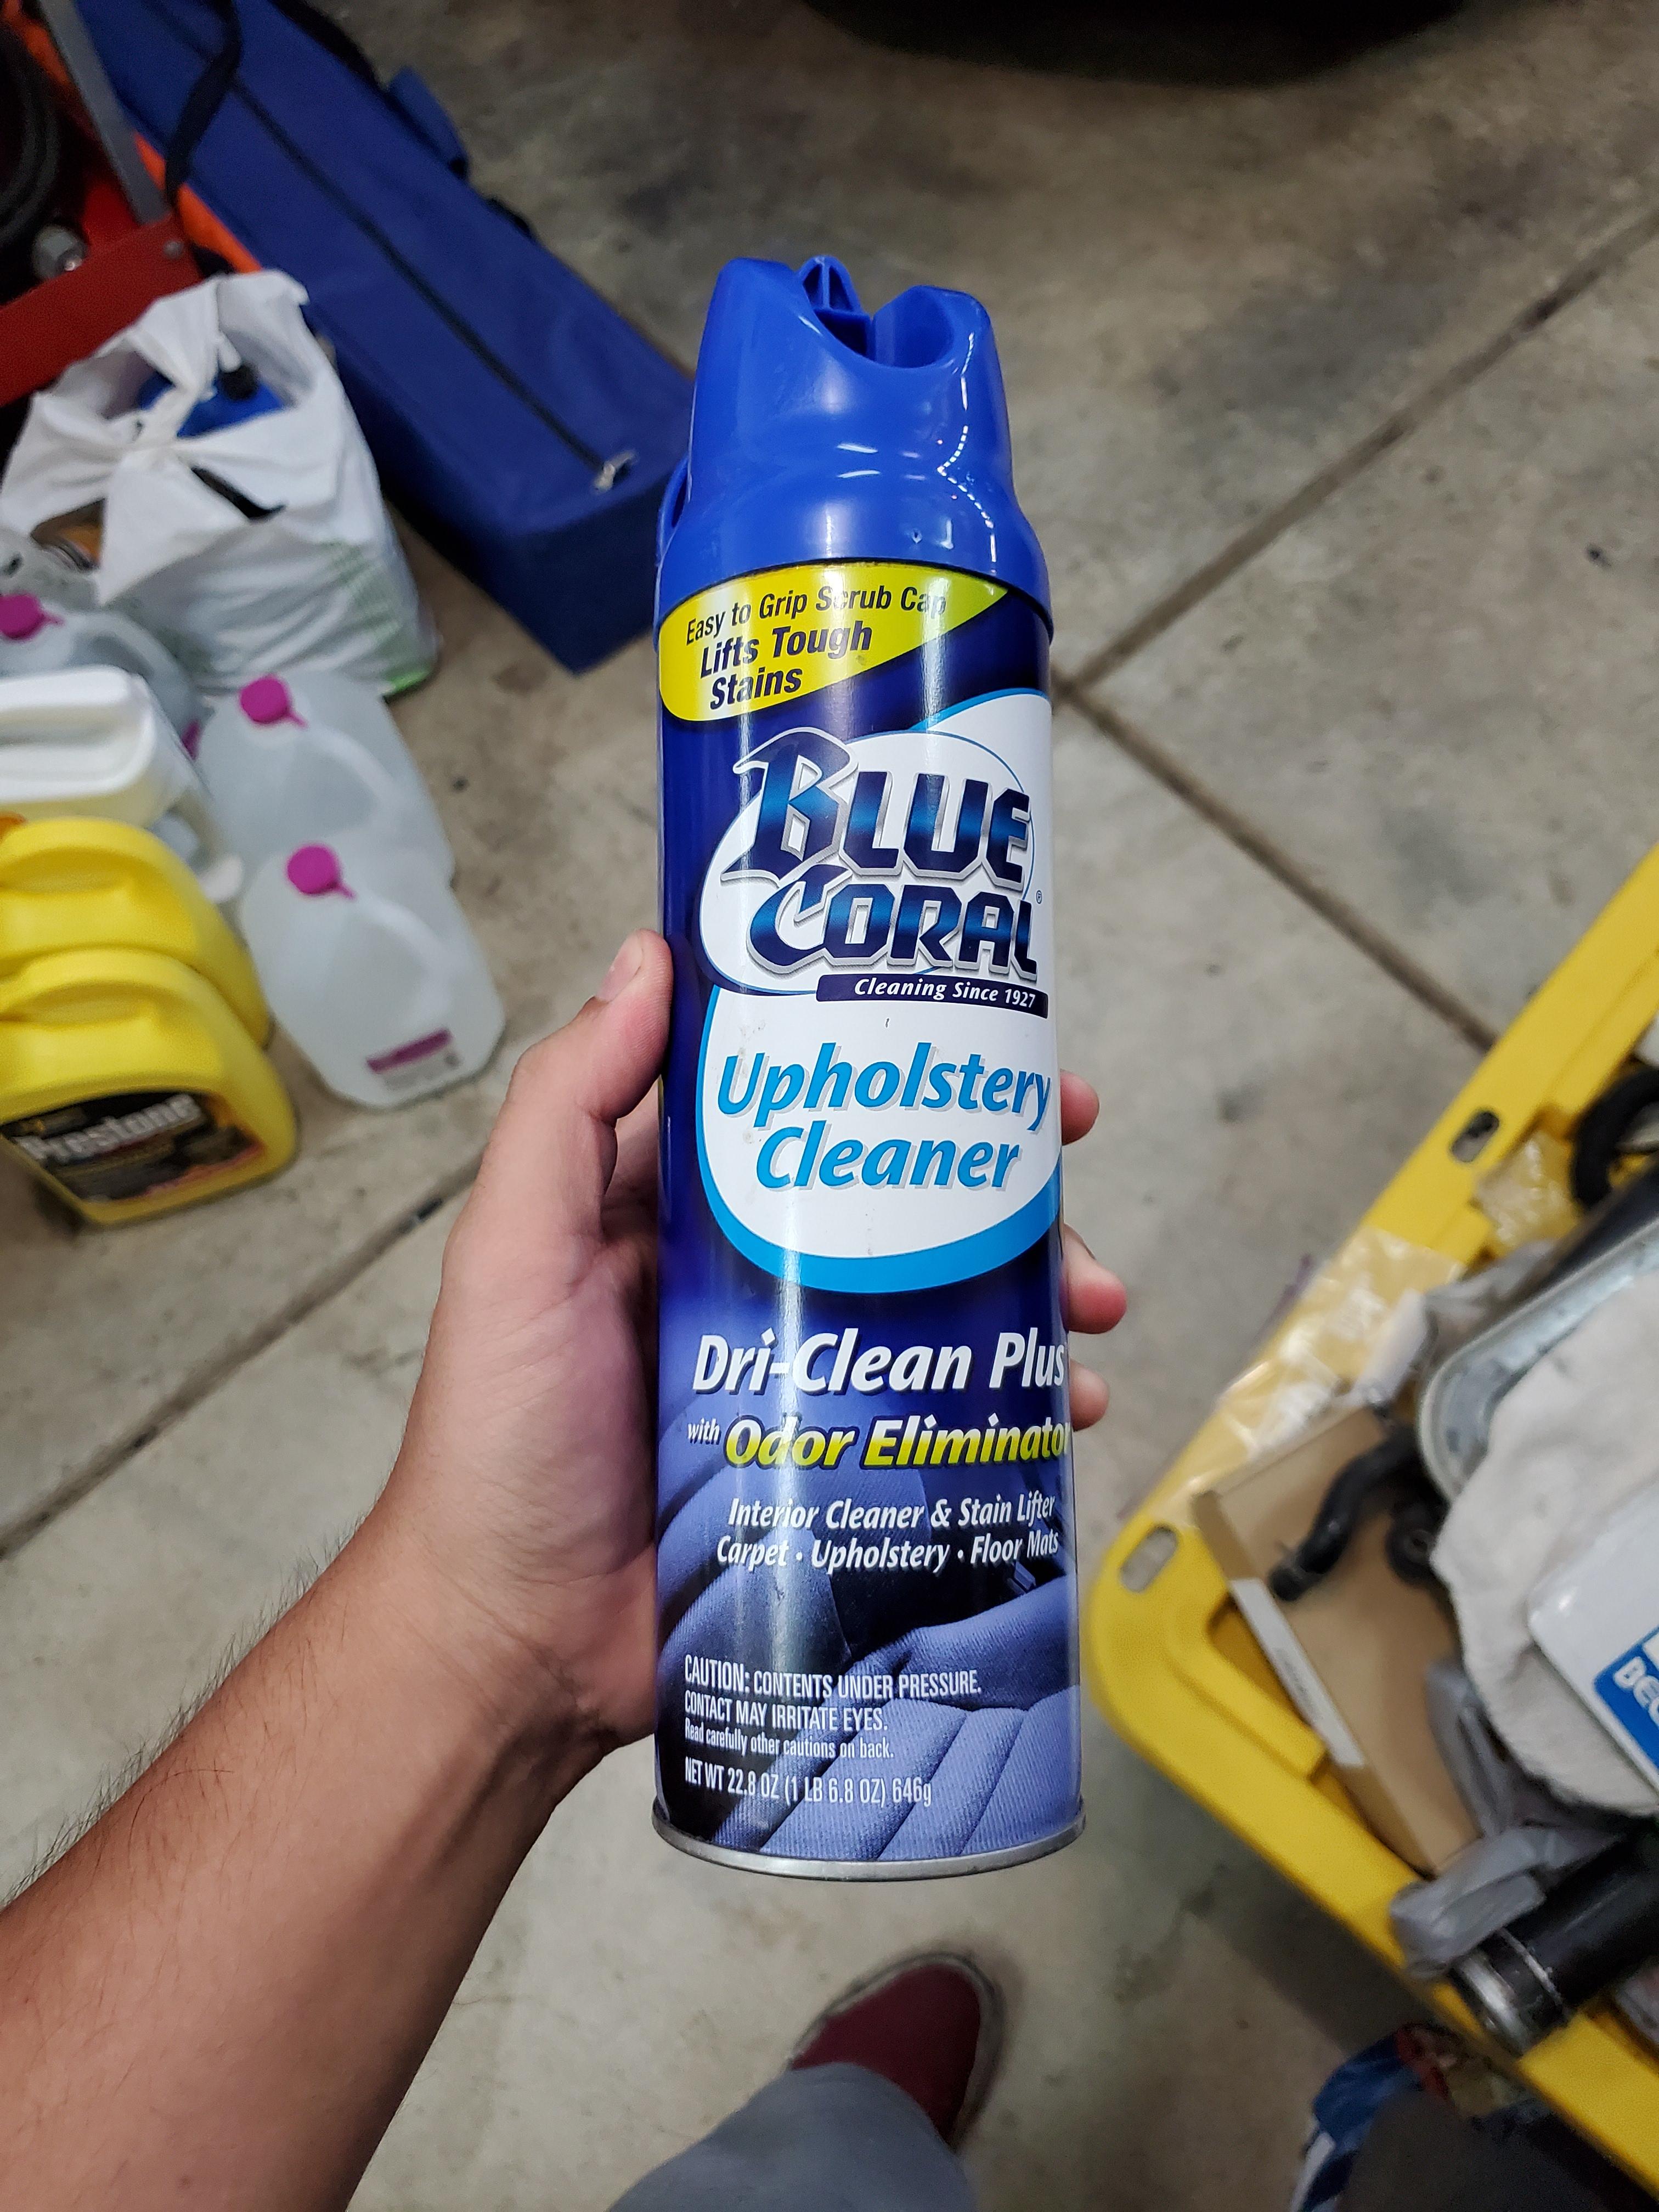
On my first try, the driver seat's stains would not come out... well upholstery cleaner to the rescue! This stuff works GOOD
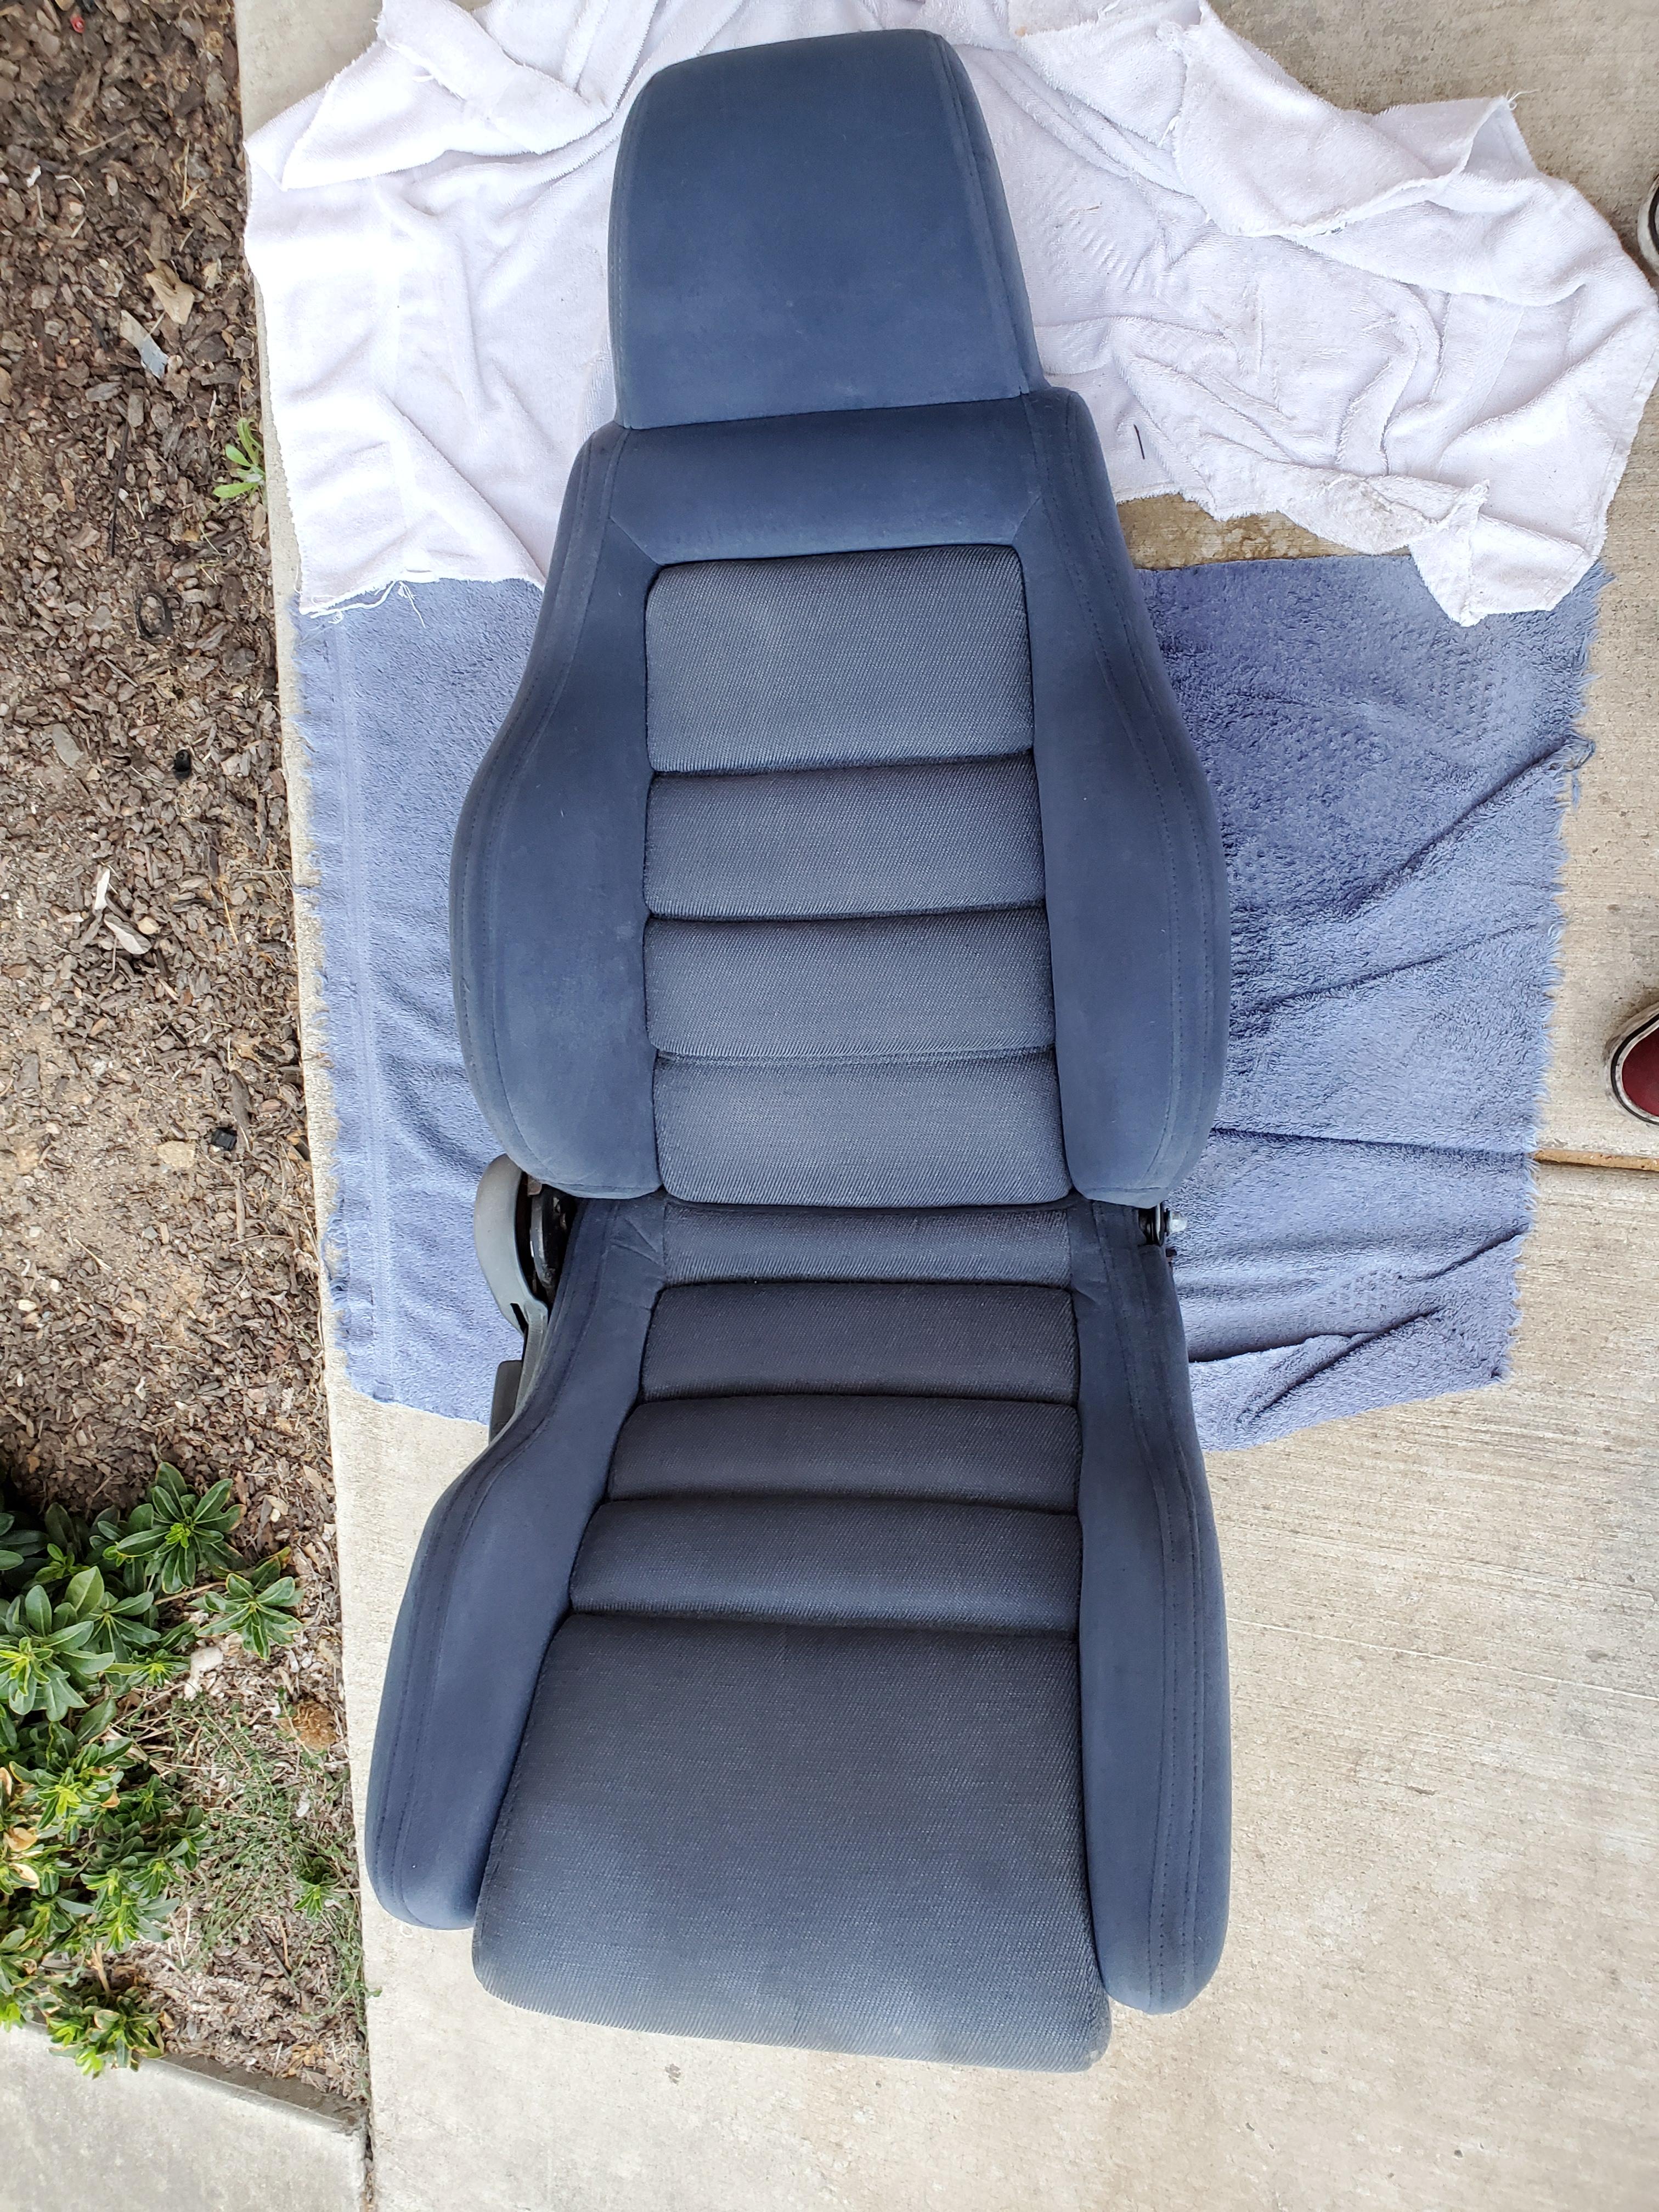
Not perfect, but so much better!! Tiny little stains still need a bit of work, and they're quite faded, but the photos dont do a justice, they look pretty good in person!
Oh wanna see something cool but gross? Heres a quick video of me cleaning the seats...
Remember I said I'll be pic heavy?? Well heres some more! Mostly just some random work I did on ol' sunflower.
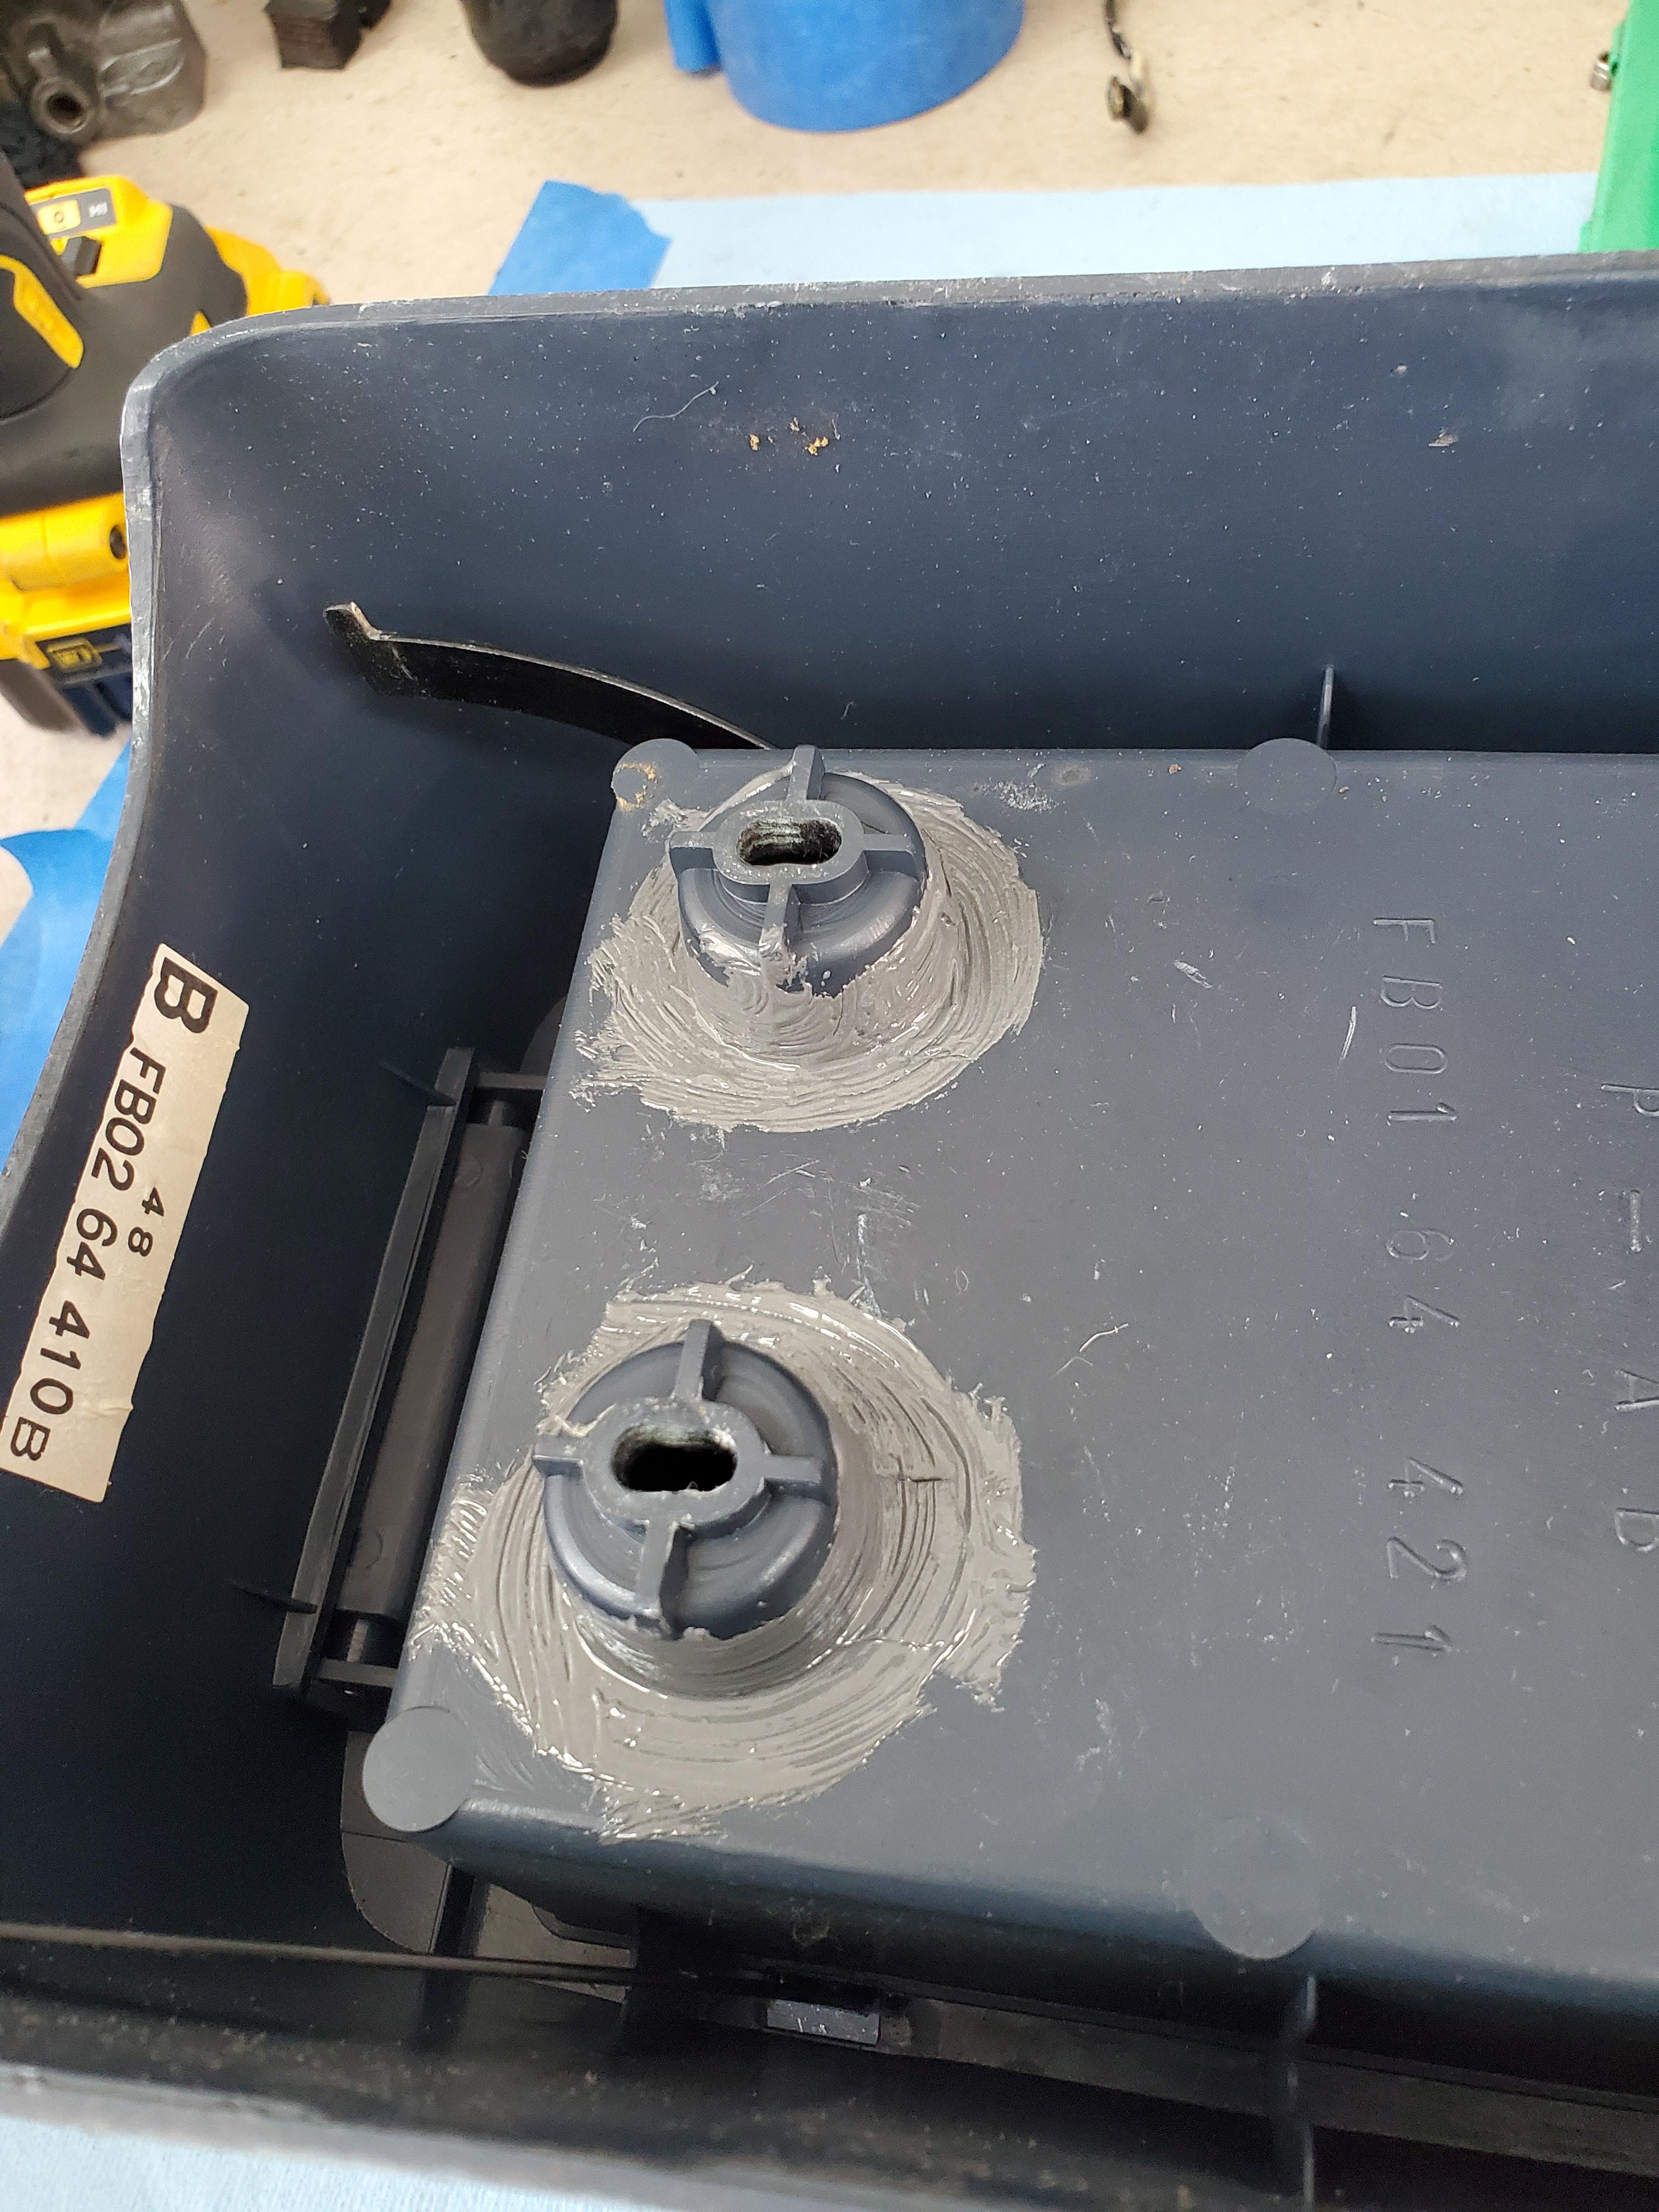
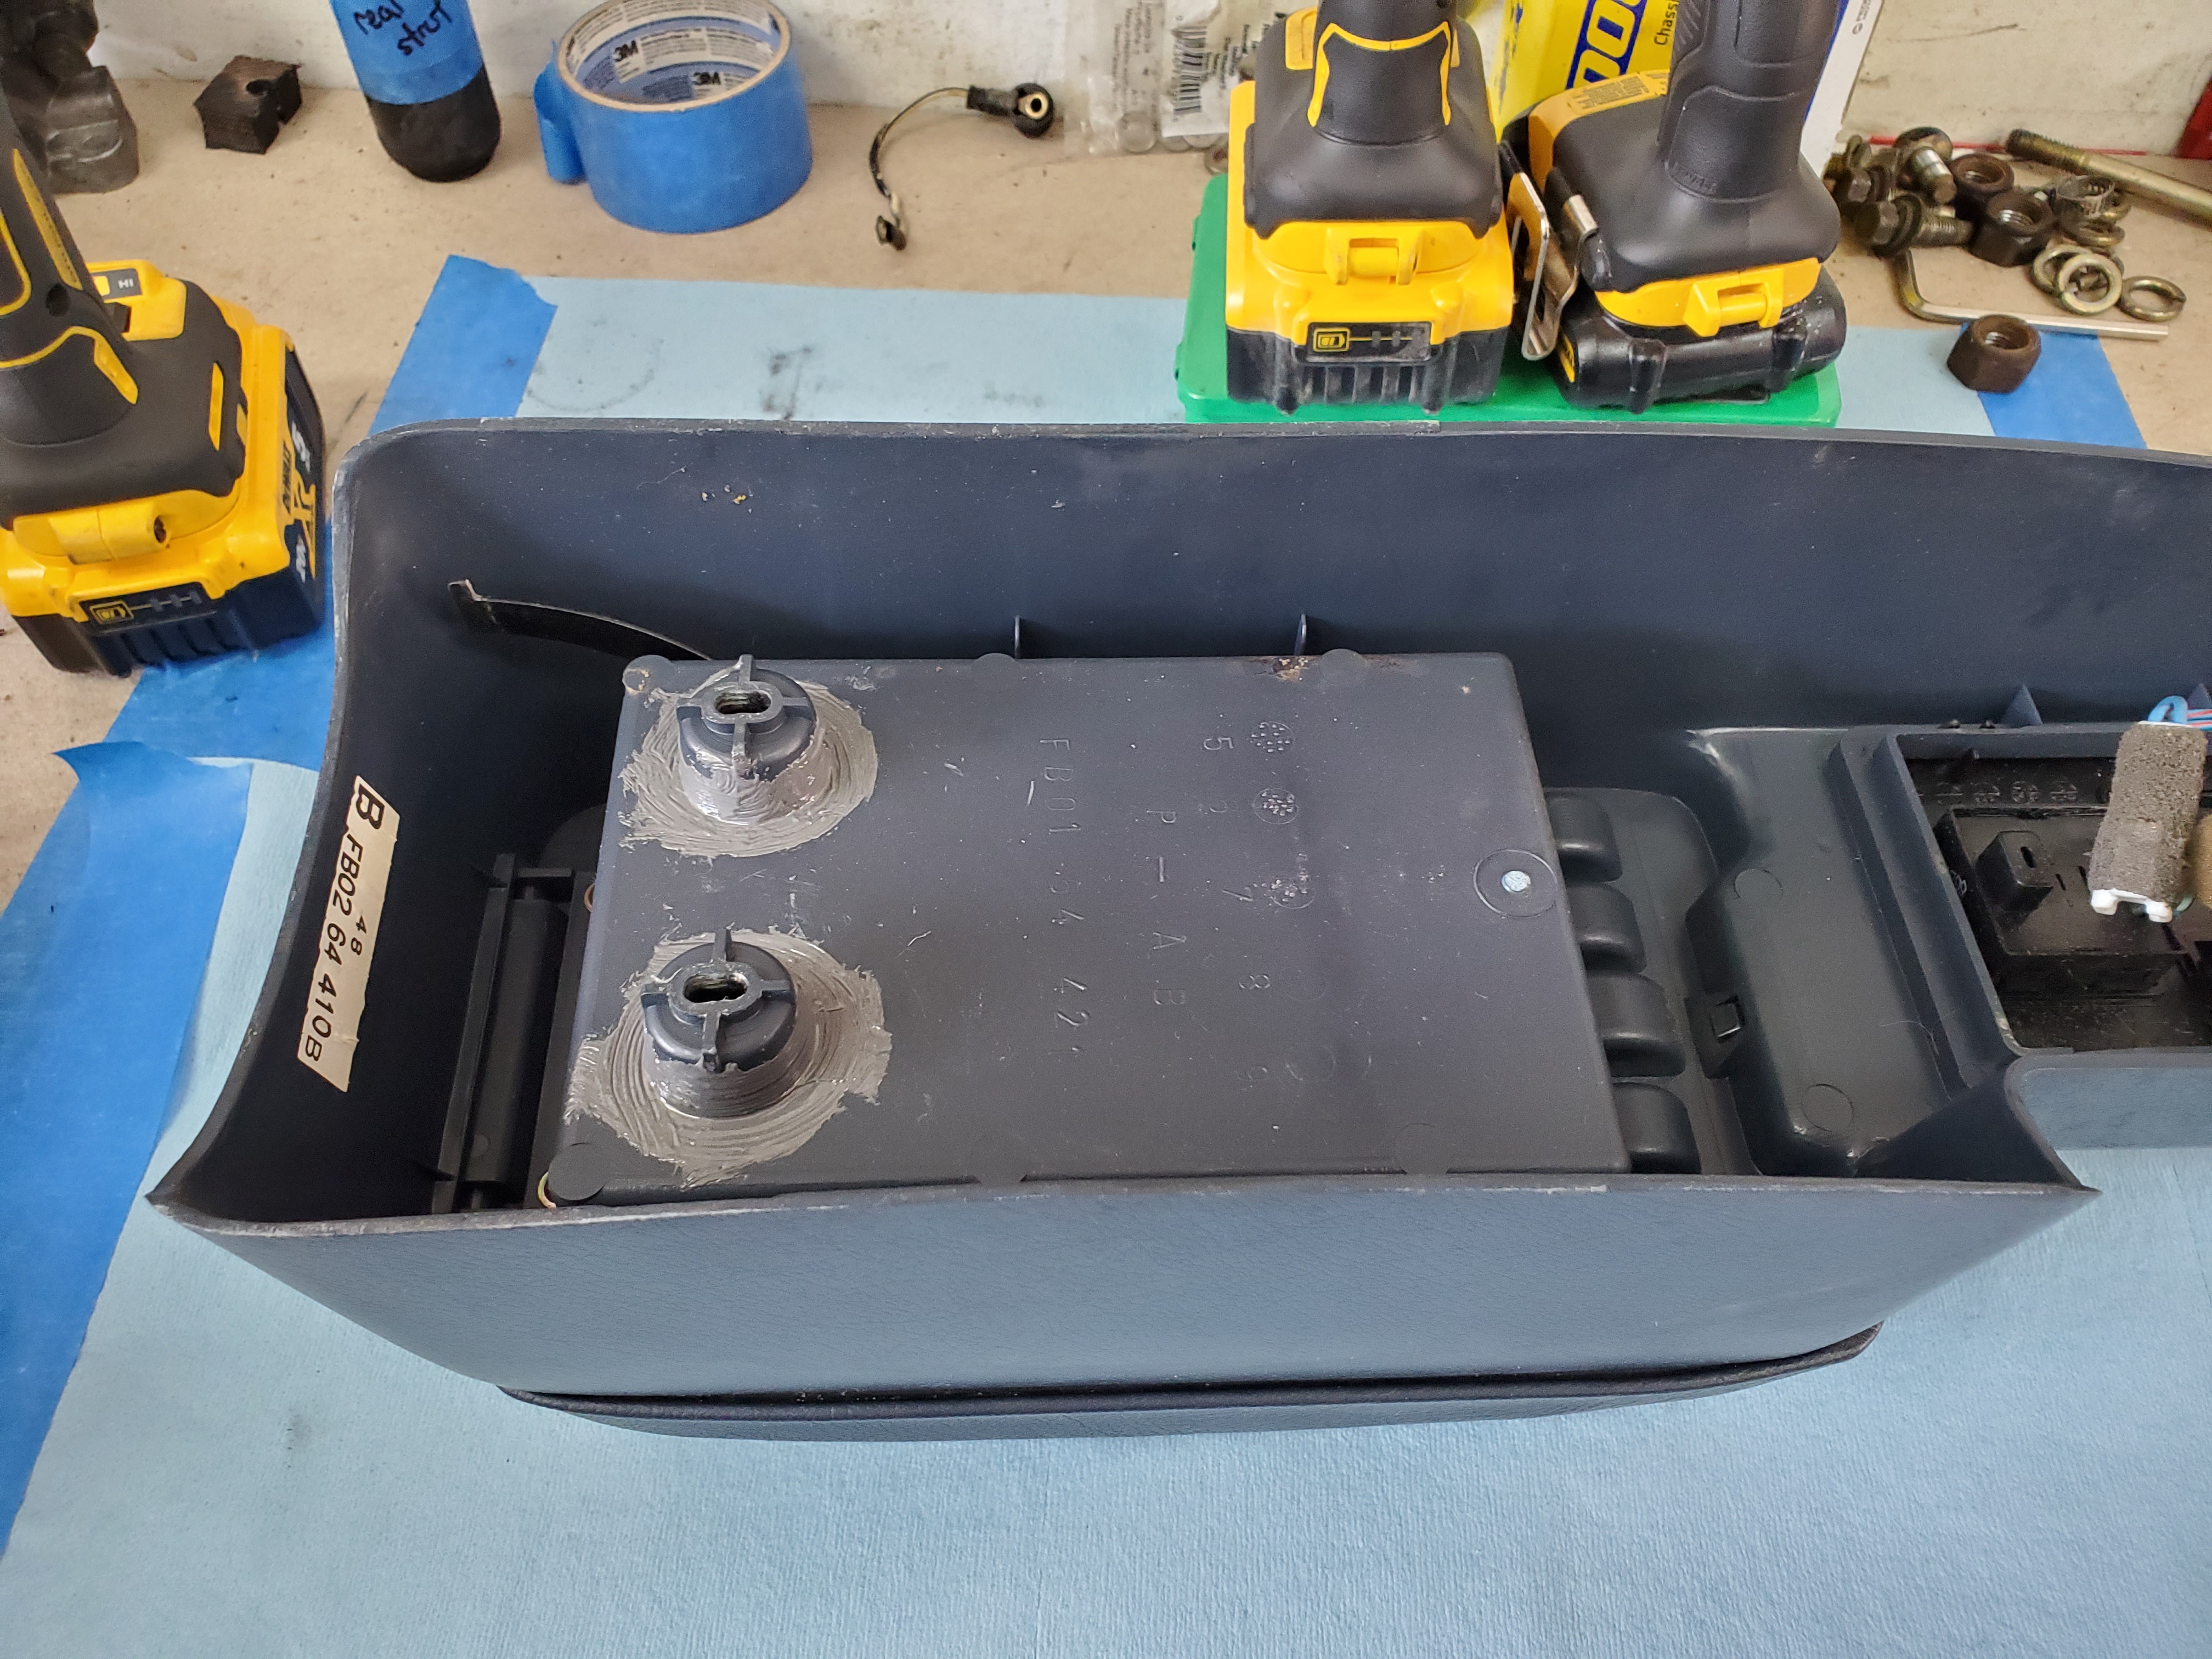
I fixed the center console. The p.o. literally ripped it from the floor. I only fixed the rear screw mounts, I'm not going to bother with the front ones. Unless it feels too loose.. I might plan on getting some fiberglass to reinforce the mounts.
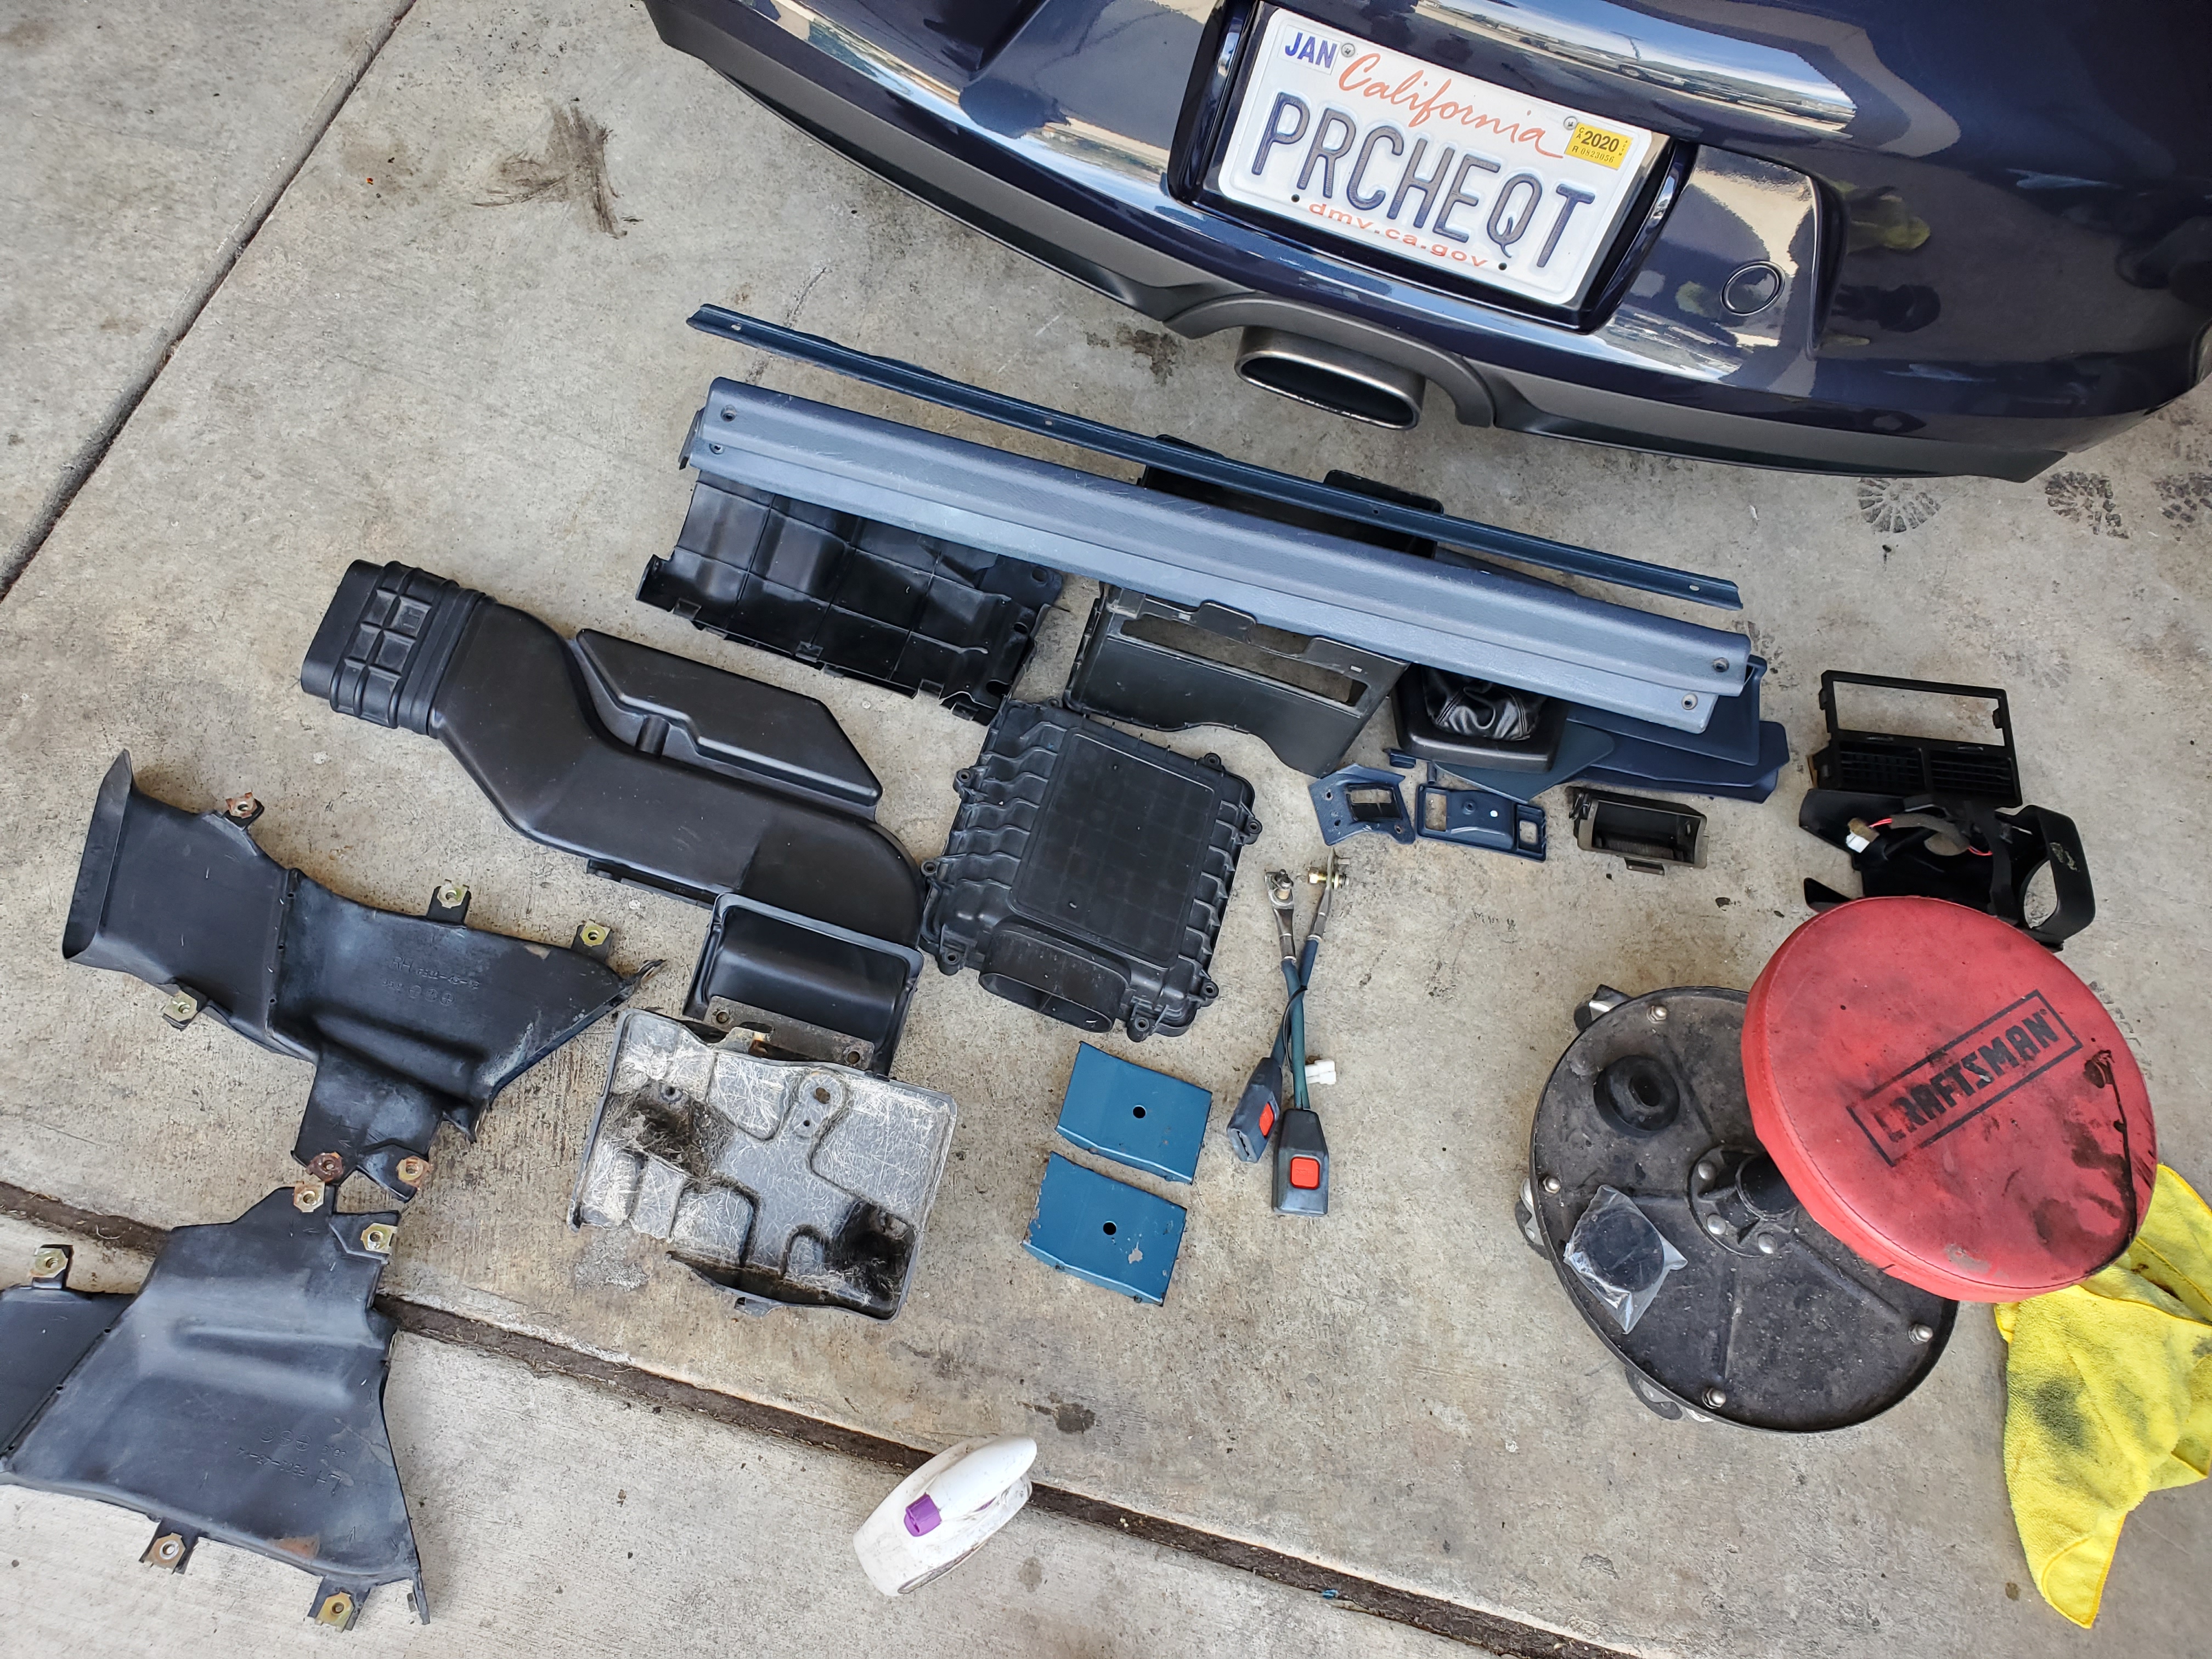
Spent a day cleaning the crap out of everything I took off. Diluted purple power and a detailer brush made good work.
The whole interior has been cleaned to the best of my ability.. it doesnt look pretty, but the paint on the sound deadening is worn off, showing the black tar under the white.
After cleaning the bumper, I went and threw it back on. I'm glad to see it more and more complete. I still need to buy a new grill support that goes behind the bumper, but I'll worry about that later.
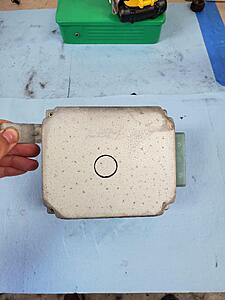
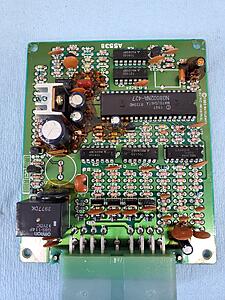
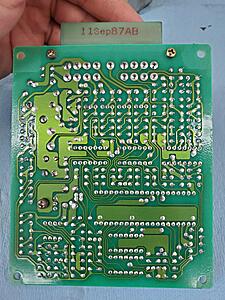
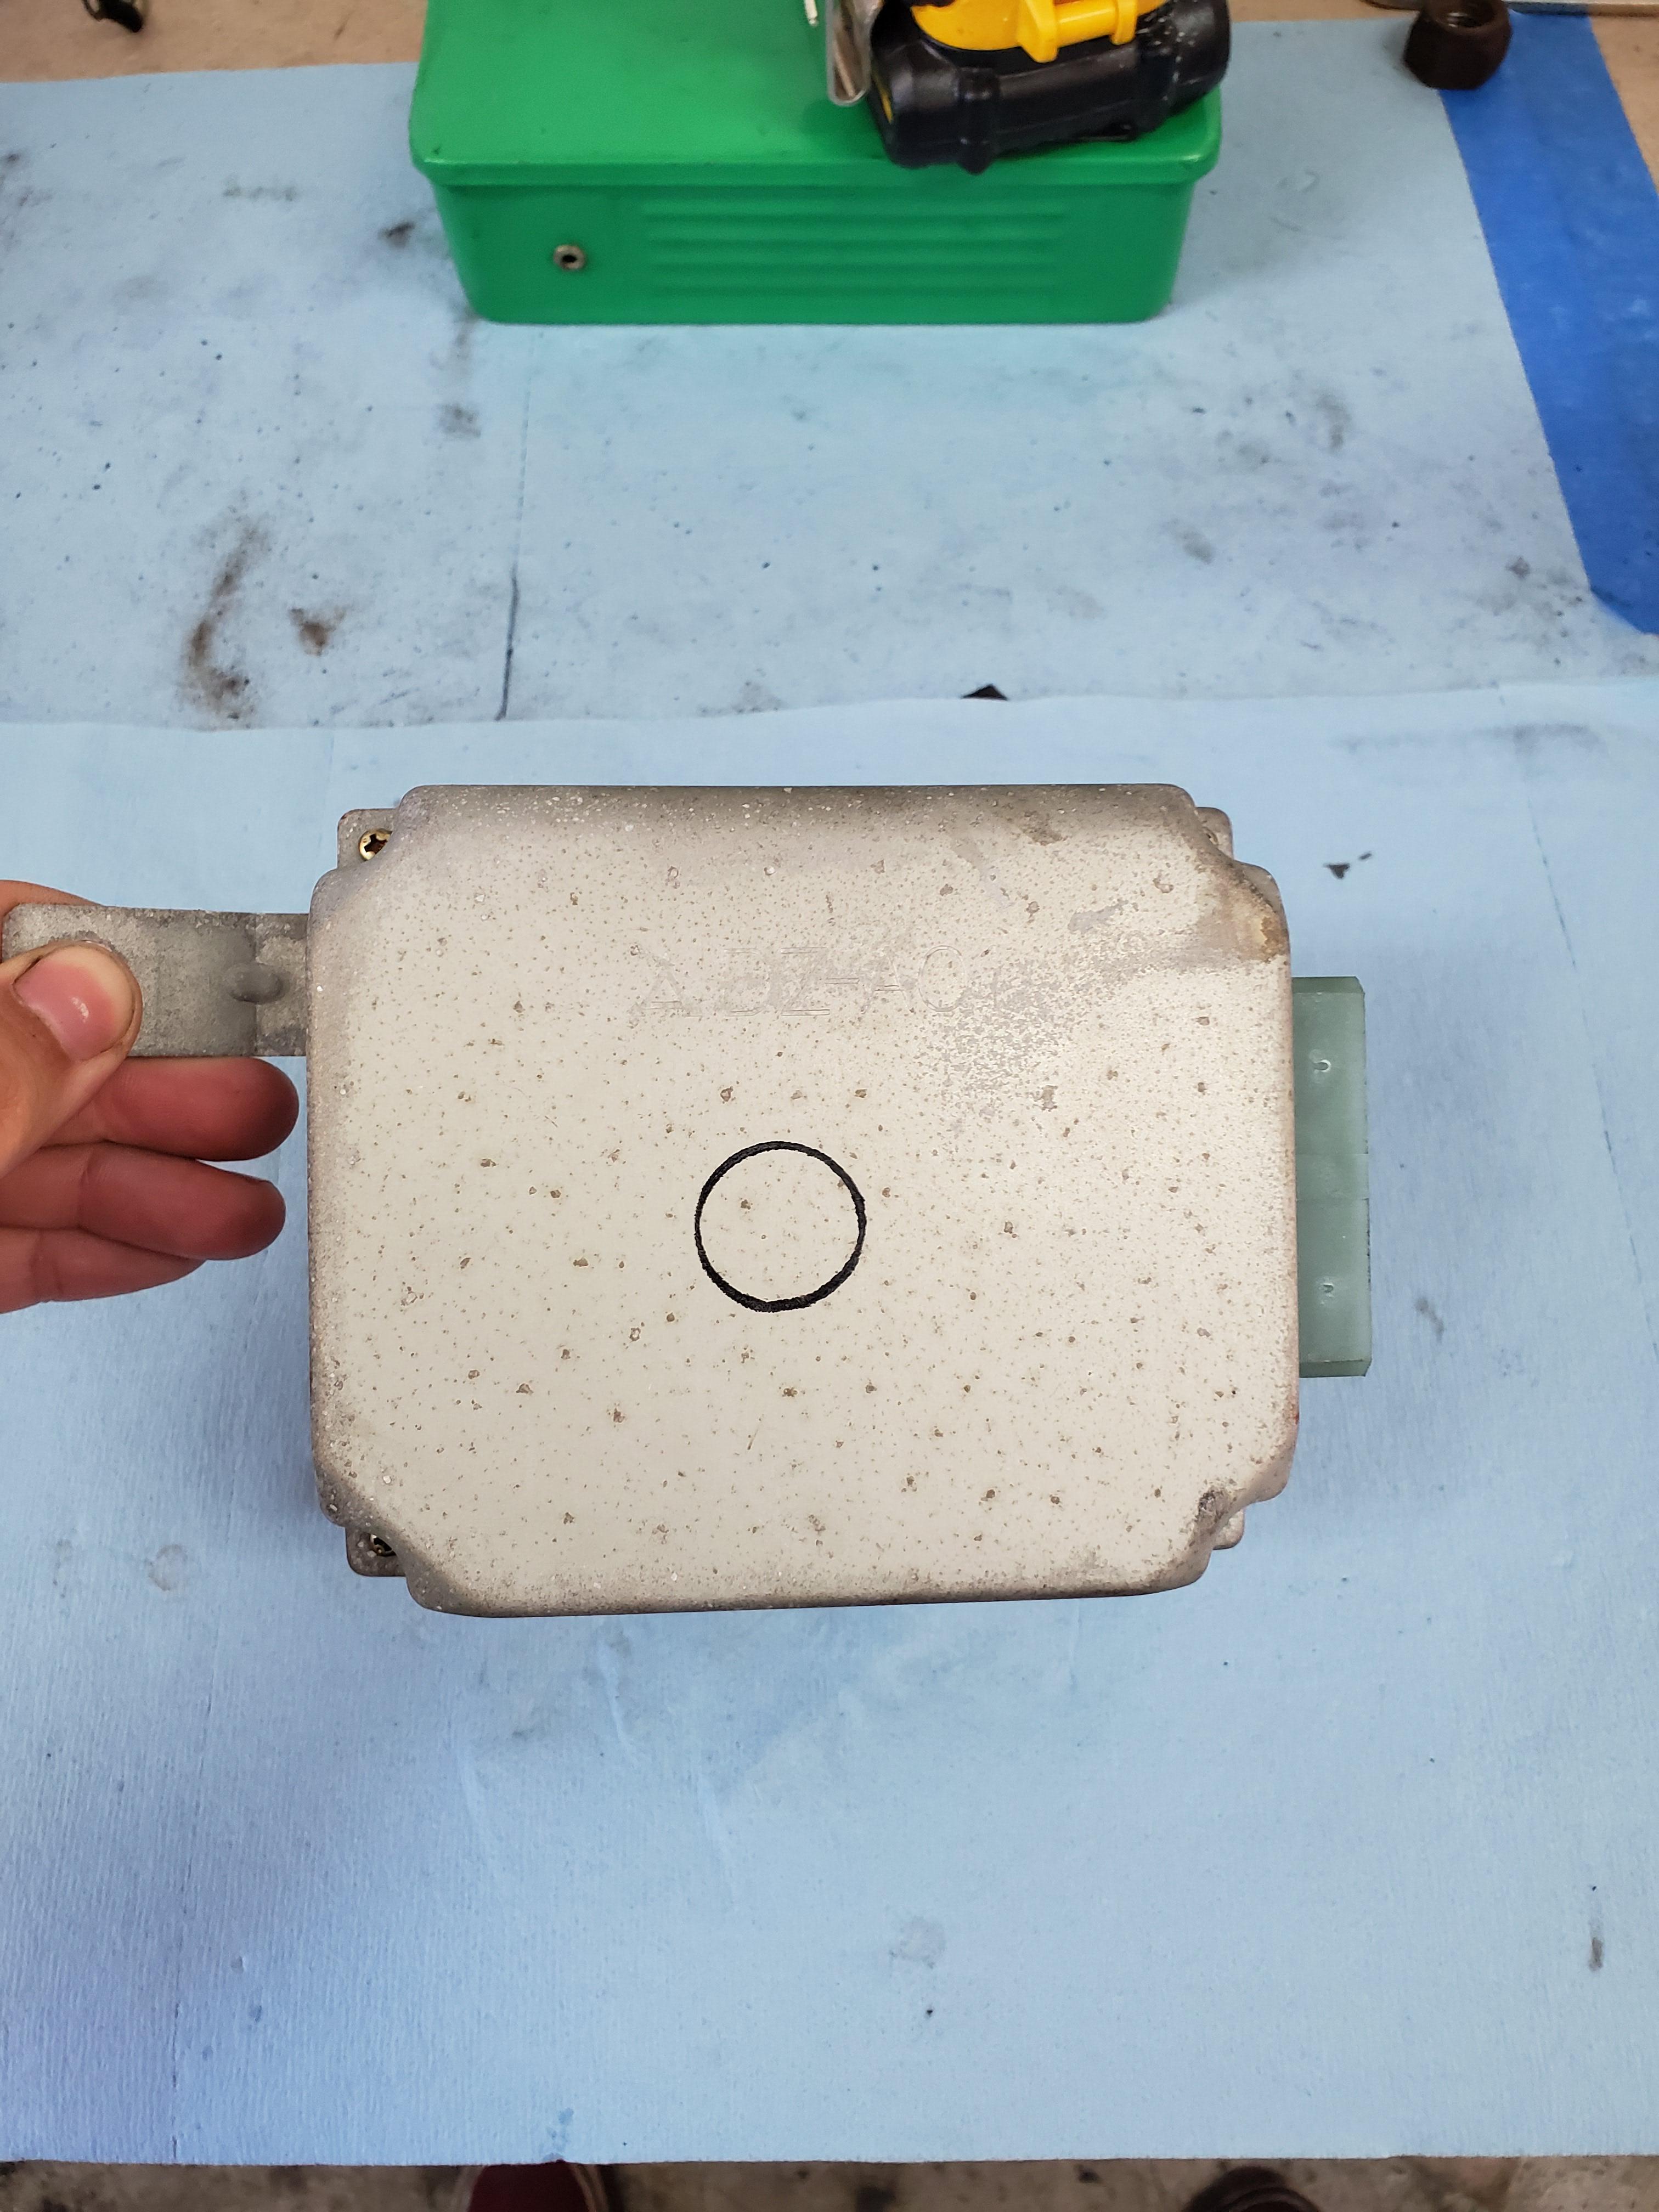
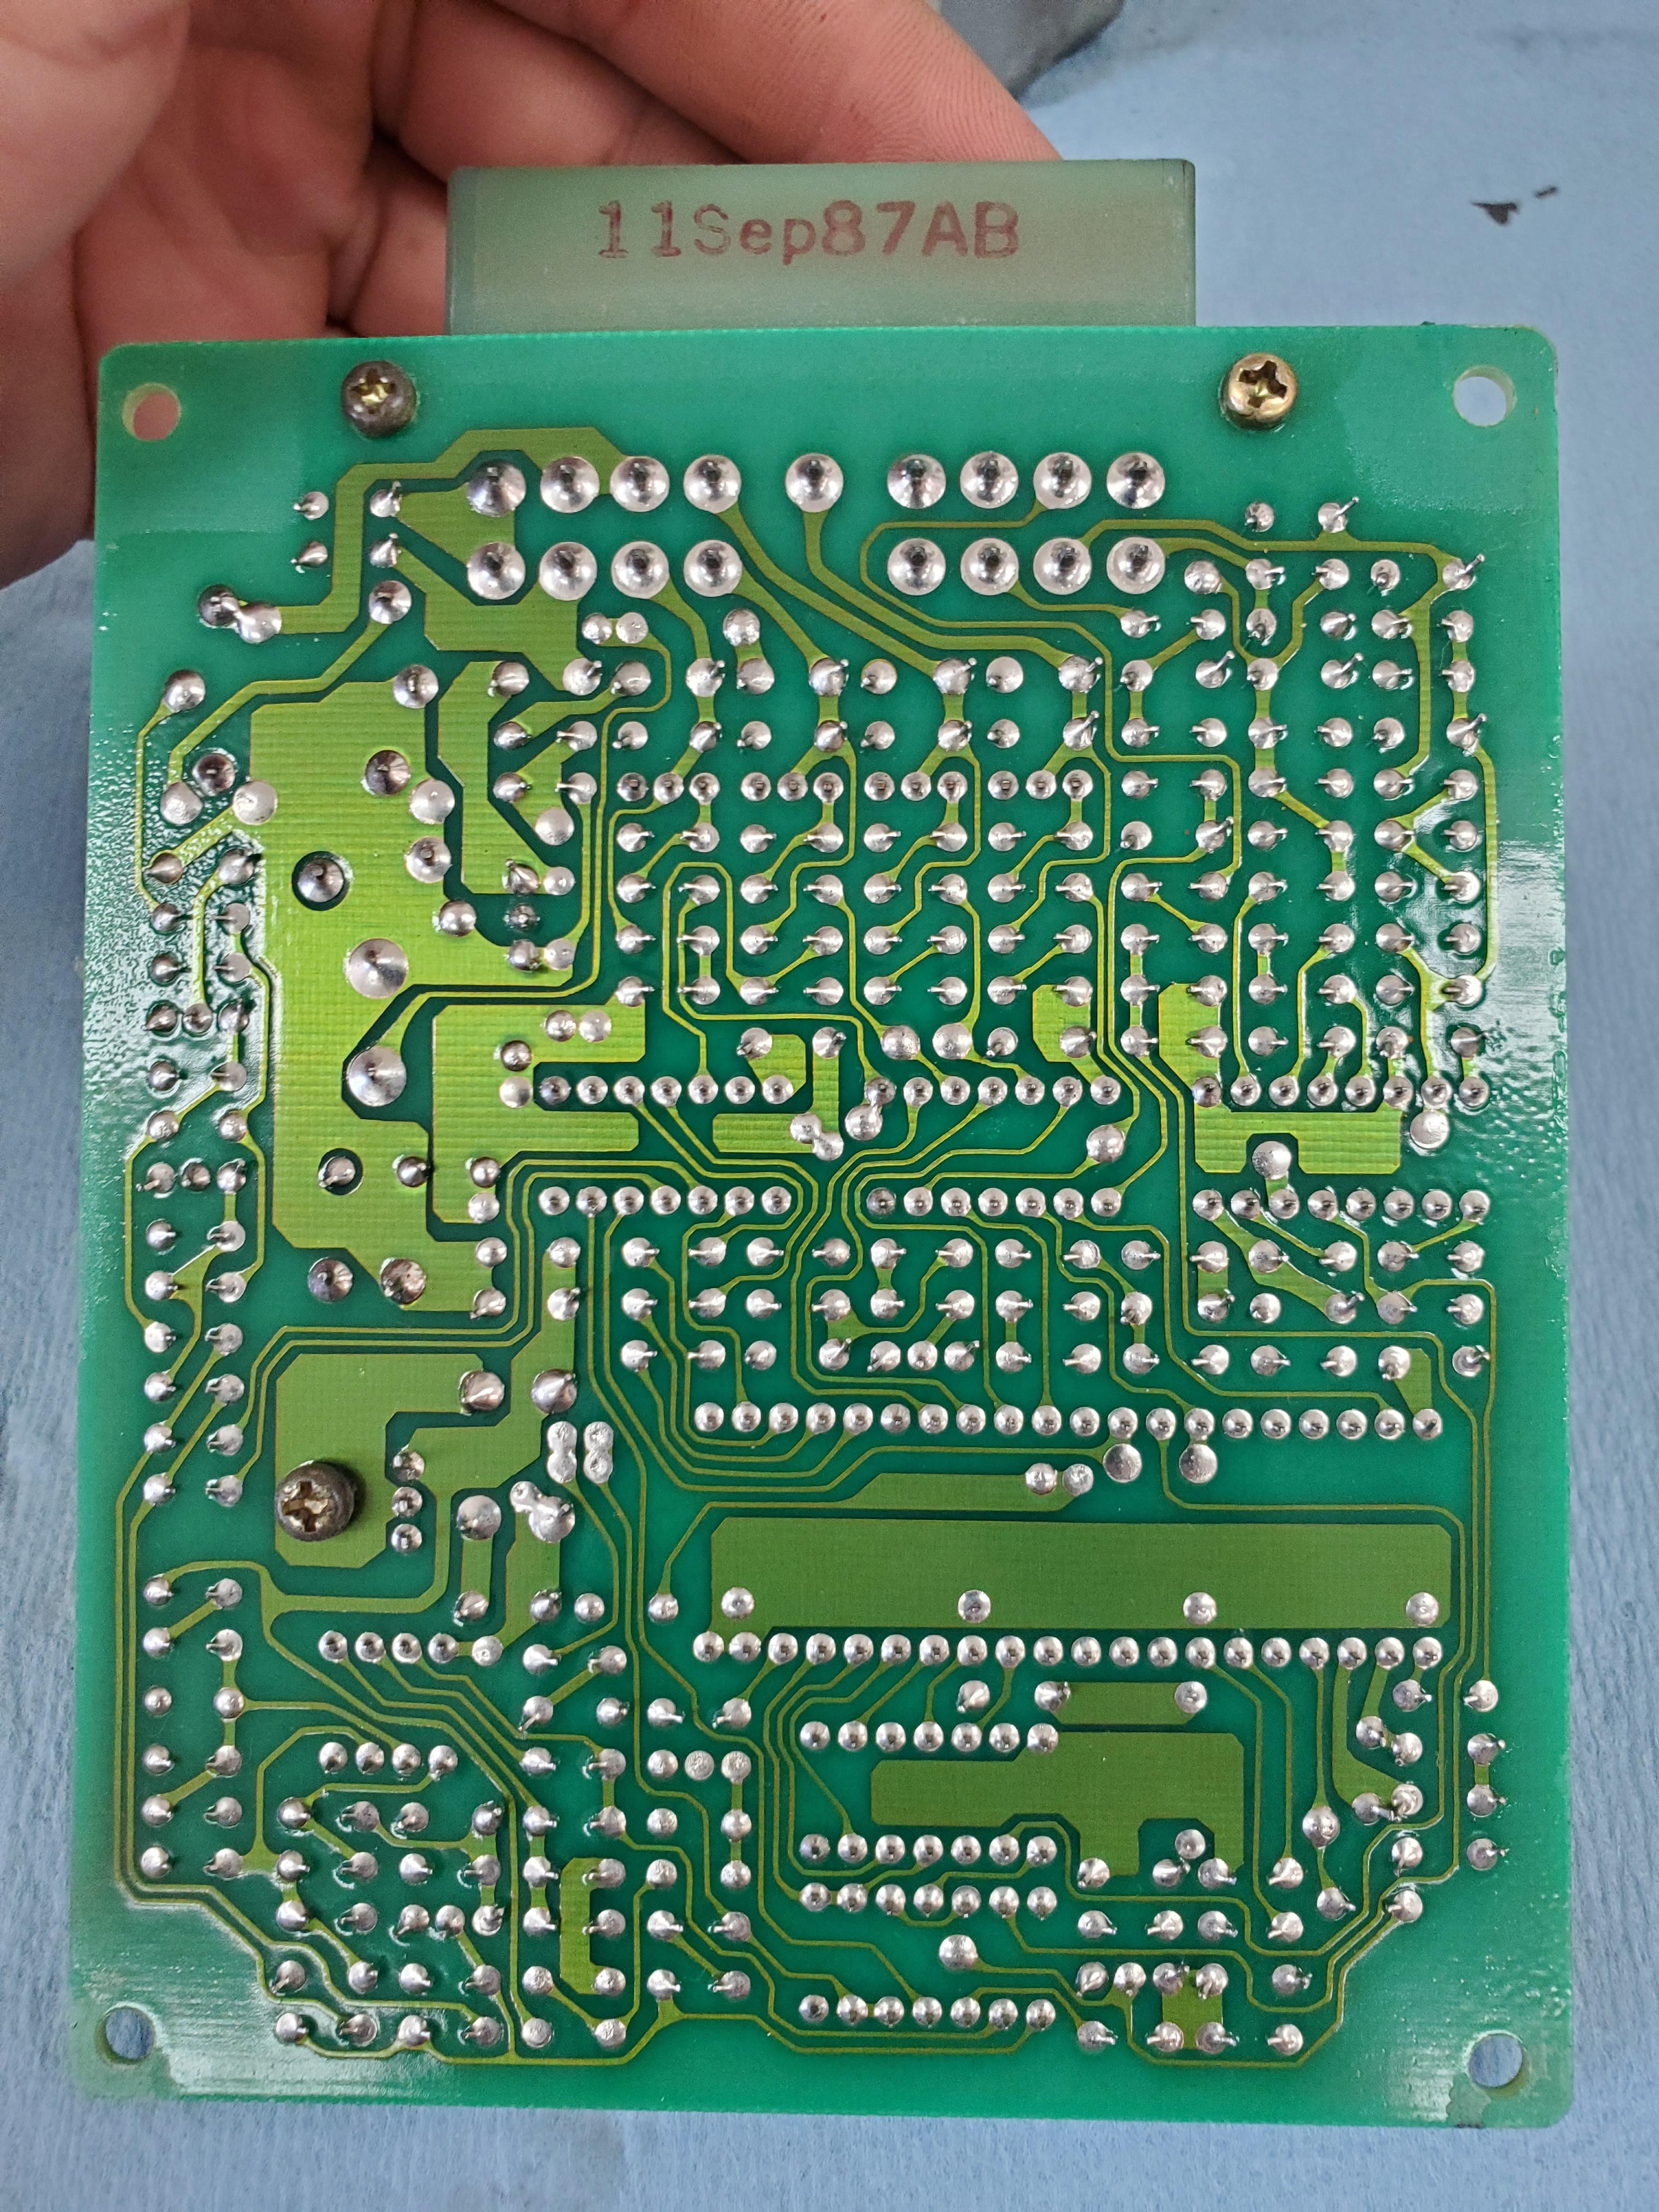
While I was under the dash replacing the clutch master, I took out the power steering cpu to take a quick look over. The case is rusty, but the internals looked good. From my very minor experience of working on old gameboys, everything looked okay. If you see something, I'd always like some input!
Also got a set of JIC coilover for stupid cheap. They're worn, but since I've got lots of time, I'm going to tear them apart, and try to bring them back to good condish. I've read that they arent the best, but I plan on changing out the shocks inside with koni adjustables, and might reinforce the coil body. We will see! All the low tier JIC coilovers I've seen are golden, and these are the older silver ones.. so they might actually be from Japan, not from the american market.
Last edited by Anonymous Waffle; Sep 1, 2019 at 02:35 AM.
Now that's what I call progress!! The omp lines look great!! What did you use for the tubing and clamps? The clamps look fantastic!! I'm shocked at how well the seats cleaned up. A buddy of mine used to remove his carpet and take it to the car wash and pressure washing out there. Actually turned out really nice.
Great start on a promising build! Although, that waterpump housing makes me fear the worst for your coolant jackets/seals. My rx7 sat for several years prior to my ownership and eventually ate a coolant seal at 90k. I hope that's not the case for you, but I have my doubts. Even if it goes bad, soft seal rebuild kits are pretty cheap.
Now that's what I call progress!! The omp lines look great!! What did you use for the tubing and clamps? The clamps look fantastic!! I'm shocked at how well the seats cleaned up. A buddy of mine used to remove his carpet and take it to the car wash and pressure washing out there. Actually turned out really nice.
I used racer x-8's thread on OMP rebuild guide to rebuild mine! I looked for alternative methods, and found that his method was the cheapest and most effective. I believe I bought the clamps from amazon, and the lines from msc direct I believe.
I'll need to re rent the carpet cleaner since I never got a chance to clean my door card carpet, and floor carpet. I just reinstalled it and it would be the perfect time to clean it once more and get rid of some of the seat rail rust stains.
Originally Posted by djSL
Great start on a promising build! Although, that waterpump housing makes me fear the worst for your coolant jackets/seals. My rx7 sat for several years prior to my ownership and eventually ate a coolant seal at 90k. I hope that's not the case for you, but I have my doubts. Even if it goes bad, soft seal rebuild kits are pretty cheap.
Oh trust me, that's been stewing in the back of my mind the entire build. I'm on a tight budget, so I've always been debating if I should run it and take a gamble, or take a plunge and rebuild the motor. If I get the rotary running, and find it's got a coolant leak, I'll rebuild or swap out the keg. But mainly I just want to drive it badly haha
Long story short, the engine needed to be pulled and rebuilt. No matter what, compression never built up, and the coolant seals were bad. So here are my updates on removal, tear, rebuild and current update on the rx7.
Tearing the engine back down to a removable stage. Its pulled! Had to do it myself since I dont have friends lol You know what this means... 😉
So the engine plans. This is not a perfect build. I do not have the money to buy new parts like new housings, bearings, etc, so I built an engine with what I had. New apex seals, and gaskets and seals, new corner seals and upgraded springs from an FD. But the scarred housings are what I will use. If I'm lucky I'll hope for 30k miles out of this motor. I'm not expecting 100k.
Ew. Thats coolant, coolant gunk, and premix mixed together... Yeouch. This isnt pretty, but this is a budget beater build sooo 🤫 Cleaned, measured, and painted stuff.
Back to an engine!
Last edited by Anonymous Waffle; Feb 26, 2020 at 09:05 PM.
Clean enough! Got seats for free just so i can get a good pair of sliders. My pair of sliders has a broken handle so its hard to adjust the seat. Por-15 to repair some rusty spots i found on the body. Cheap, since I had it on hand, and will stop it for a long while. Got a koyo from a guy on facebook 😘 Throwing stuff onto the rotary. Did a battery relocation! I found the battery hold down from a VW buggy site!
Install time! Installed!! I took the gauge cluster off to clean it. I was trying to prime the engine but wouldnt get oil pressure. Took this apart, cleaned up, and got oil pressure!! I still dont have lights or a fuel gauge though Look how clean it is!
SO. First start up. It actually started. You'll notice some smoke from the turbo, I found that the precat wasn't bolted correctly.
It runs, but doesnt run very well. It doesnt want to idle, needs to be feathered to run o.k. When i get it to hold about 2500-3000, I will hear the second rotor fire, and will sound like a proper rotary. As soon as I let go of the gas, itll backfire through the exhaust hard, and die.
I believe I have either a faulty injector, or injector wires mixed up. Either that or a bad fuel pump, or I'm getting Fuel Cut to the rear rotor. Let me know what you guys think, I need some help!
Tore half the engine bay apart, found that I accidentally swapped my front rotor's primary and secondary injectors. Now it runs like a top! Bit cold blooded, but its progress! I also dropped my catback stock exhaust and threw on a Single exit cat back I bought from a local rx7 guy.
So the last time I posted, I managed to fire up the car. I kept fighting a issue where it really didnt want to idle. After looking for every vacuum leak possible, I found two small vacuum leaks. Readjusted the tps, fully warmed it up and got it idling very nicely.
Had a oil pan leak that i fixed in the car. Replaced with hondabond and used a oil pan brace from Banzai Racing, and it worked nicely! Fixed 👍
Bought tires! 205/50 on two crown vic wheels and two turbo 2 wheels. Why you ask? Because I only have 3 crown vic wheels haha. Also one of my turbo 2 wheels has a gigantic chunk missing so I went with a two two setup for the time being.
Then I proceeded to fight a mid range rom bog and hesitation, which after pinning the ecu, turned out to be a injector connector wire not fully seated in the injector clip. But now that is fixed, and the motor sounds even better!
Followed a thread on here to build this, so I could do some tests and adjust the idle and tps. Sadly i think my tps is bad since the voltage isnt correct, no matter how hard I try to adjust it.
It looks pretty good for a stock heigh rx7. Springs must be sagging haha First drive! I drove it around my neighborhood since it isnt even registered or even in the dmv system 😅😅 Ricey 😆
Last edited by Anonymous Waffle; Mar 28, 2020 at 06:18 PM.
First time repairing an antenna. The mast was completely missing on mine from the vandals 10+ years back. I followed a couple threads I found on here and other sites for repairing the assembly.
FYI, I bought this antenna replacement from TheAntennaSource.com, as suggested by a member on this forum. Fit perfectly.
excellent thread , thanks for sharing this with us waffle.
I've PM'd you with a couple of questions about your build and how things are holding up. FYI
Nothing too crazy with the rx7. Had it in storage for the early parts of corona, and judt recently I've been really starting to drive it. Found all kinds of stuff that really needs attention. Oil pan still leaks, but only leaks from the back of the pan, if it sits on level ground for a day. Annoying as frick, I think my pan is warped in the rear corner, or im not using enough silicone. Also still have an annoying exhaust leak from the main cat, as if the cat has a split in it.
Also need a better TPS. I cleaned and cleaned my tps and got it to a good adjustment, but the range is too high in resistance, and every other day has dead spots. My heater fan also does not work and ive got no air flow at all in the car. Almost like its stuck on recirculation mode. But besides the problems, its been very fun to drive and I cant wait to take it to the hills and take it for a cruise!
Also here's the current height with lowering springs, which im very happy with. Im still out looking for a 4th crown vic wheel.


 lol
lol


 But now that is fixed, and the motor sounds even better!