86' GXL novice rebuild project
 05-16-14, 03:13 PM
#26

I would agree it looks like a ground, I'll look into this further once i get to cleaning out the engine bay.
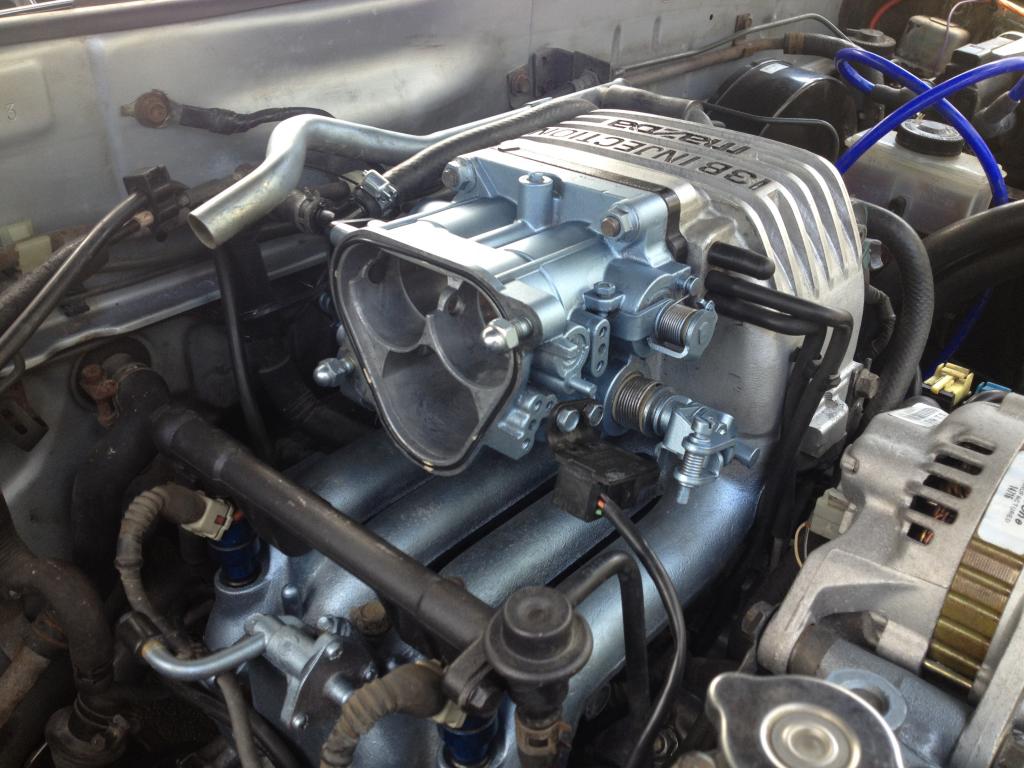
So, Removed the clutch, engine harness, engine mounts, exhaust and lower intake manifolds. I was glad the engine harness and vacuum mess (Rats nest?) came out in one piece. Have all but four bolts on the oil pan removed, seems like the gasket is sealed really well on there. Besides that, I think it's nearly ready for dis-assembly, once I get the 54mm socket delivered that is.
So, Removed the clutch, engine harness, engine mounts, exhaust and lower intake manifolds. I was glad the engine harness and vacuum mess (Rats nest?) came out in one piece. Have all but four bolts on the oil pan removed, seems like the gasket is sealed really well on there. Besides that, I think it's nearly ready for dis-assembly, once I get the 54mm socket delivered that is.

 05-25-14, 02:12 PM
#27
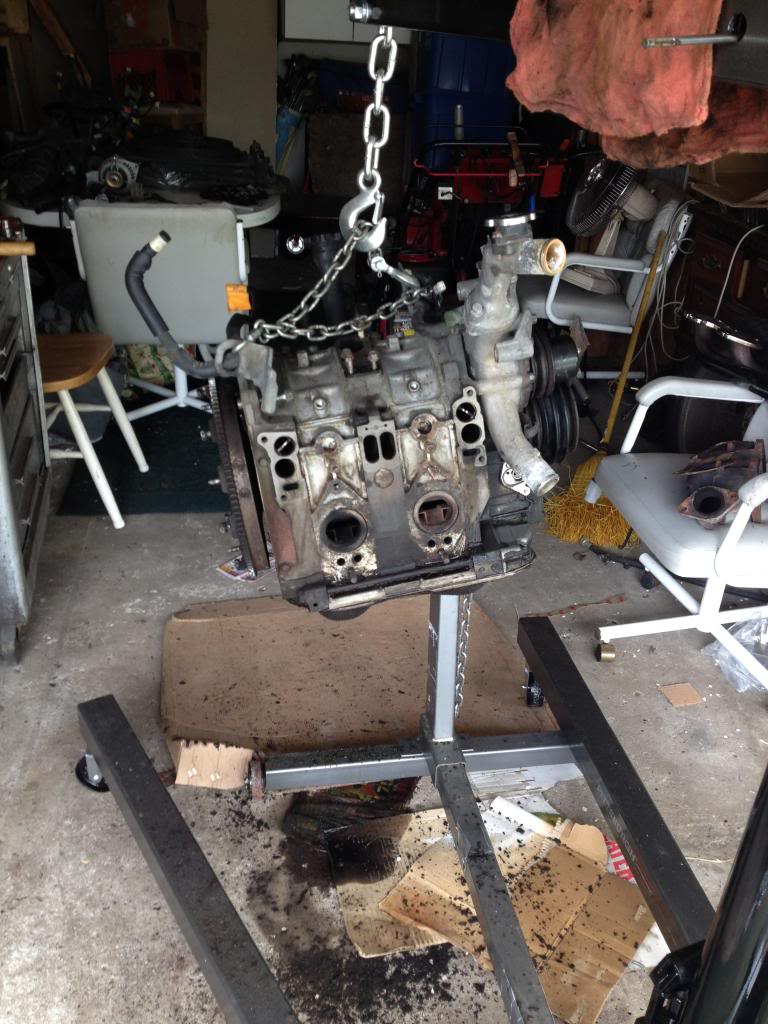
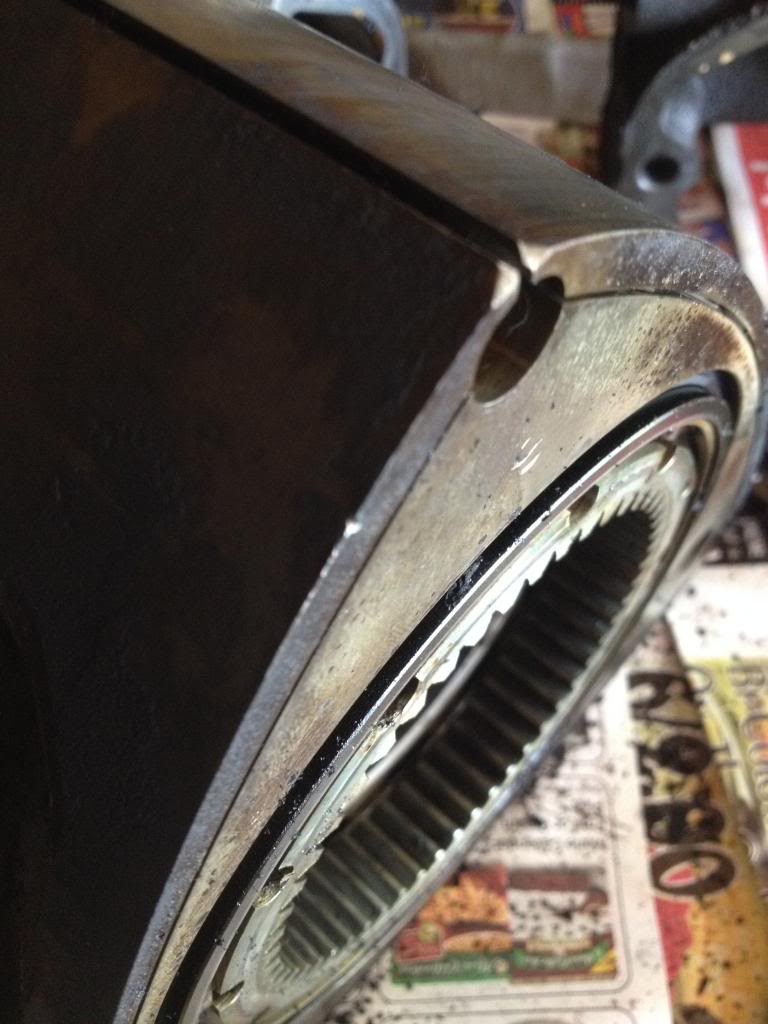
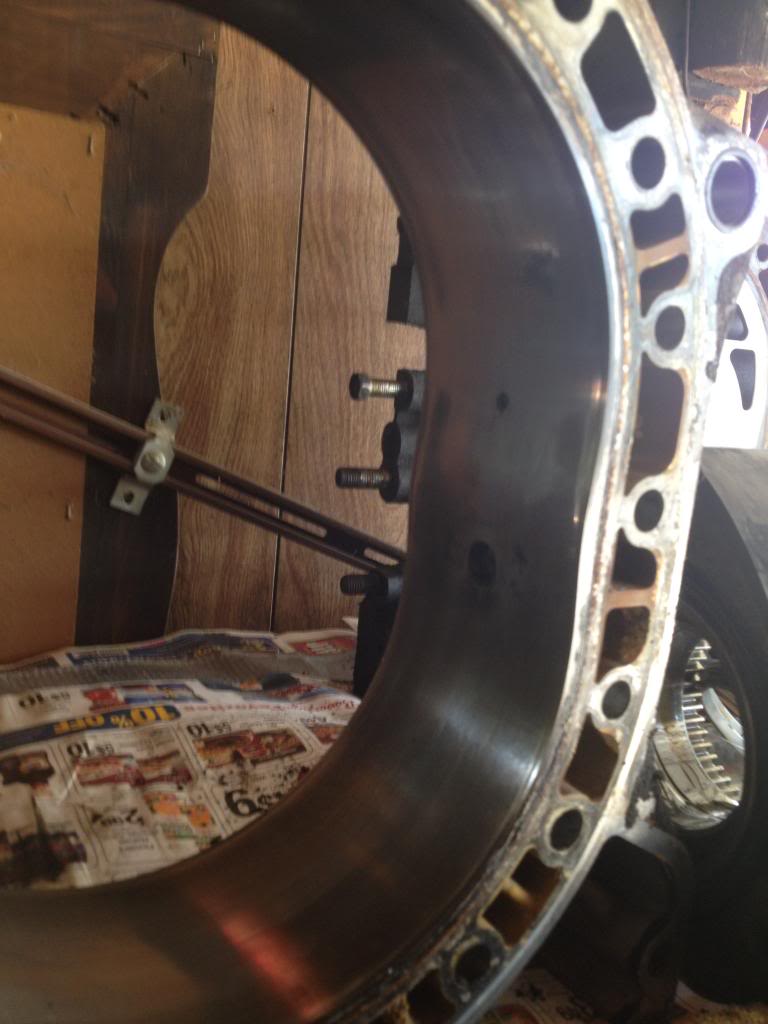
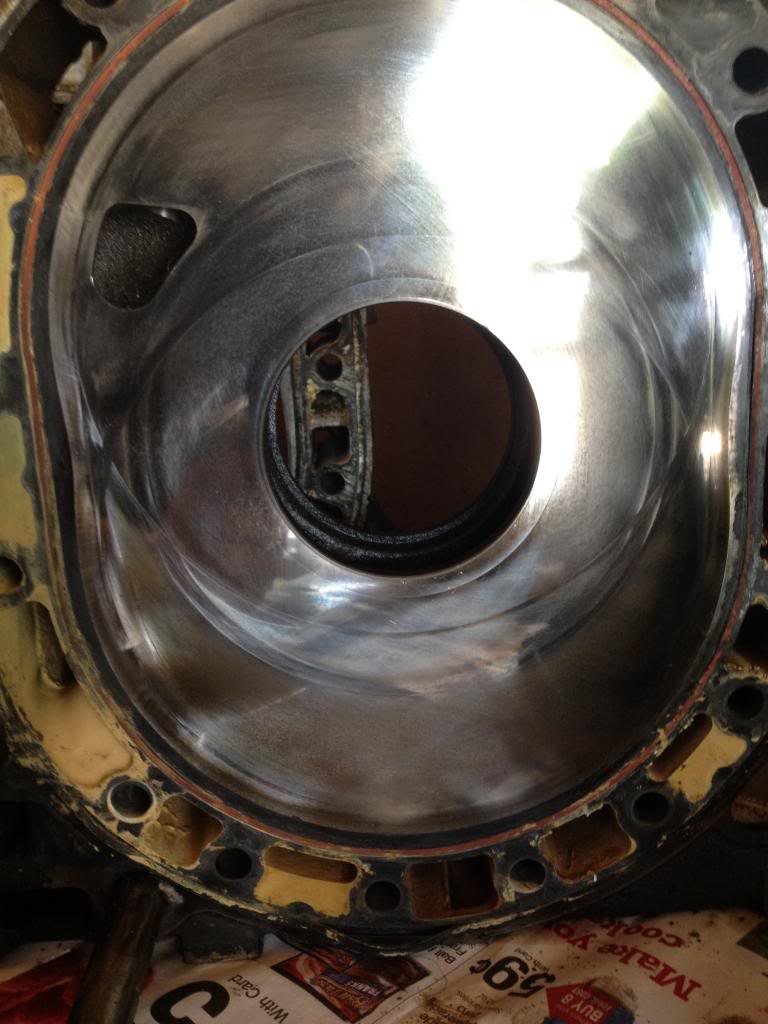
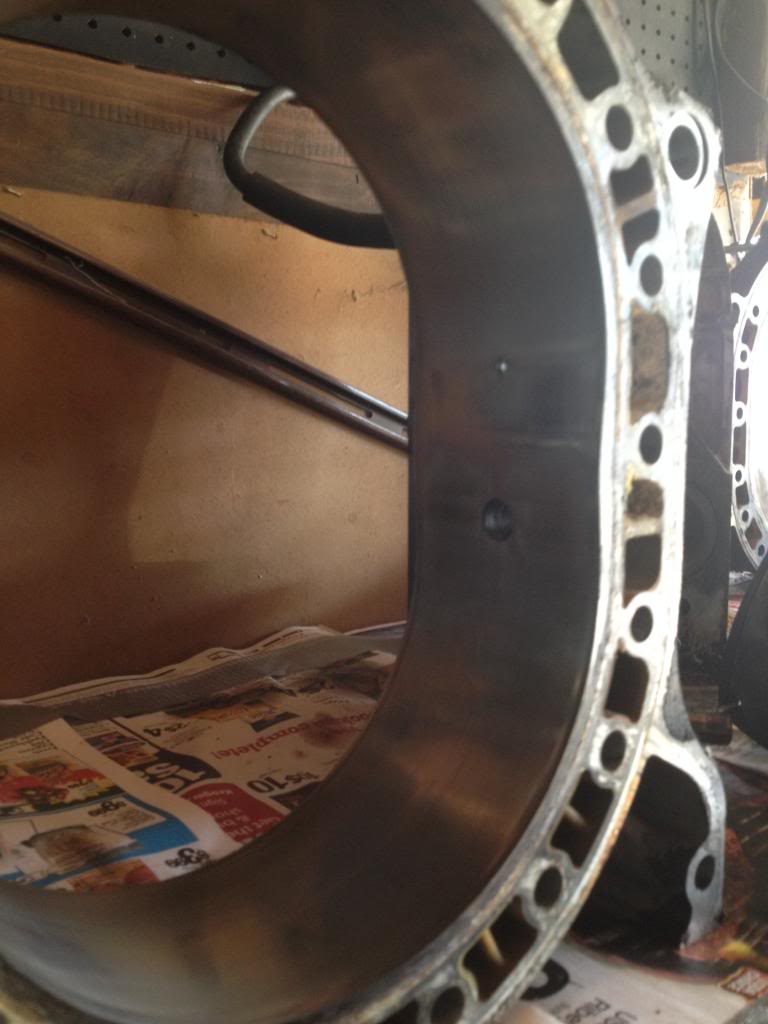
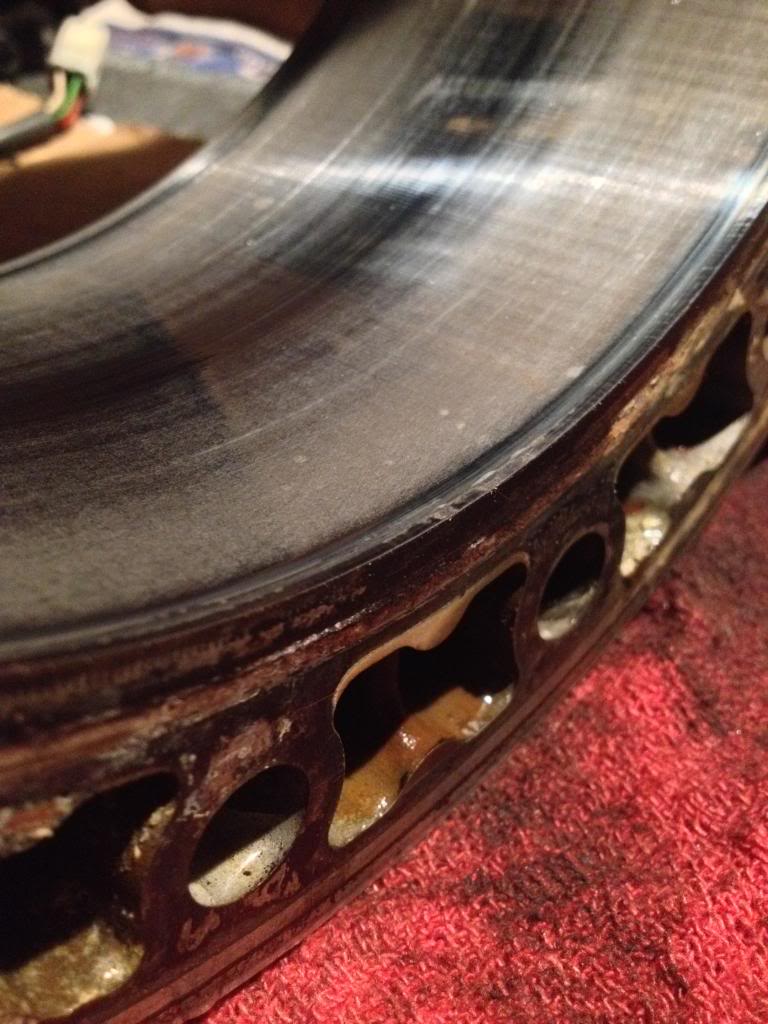
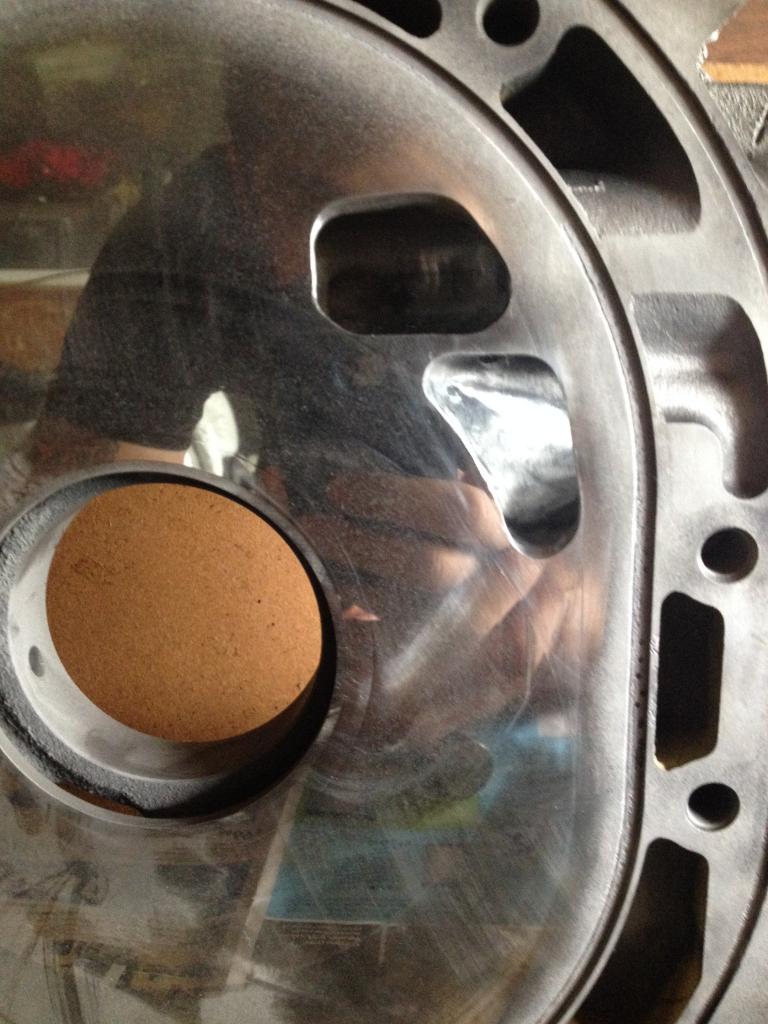
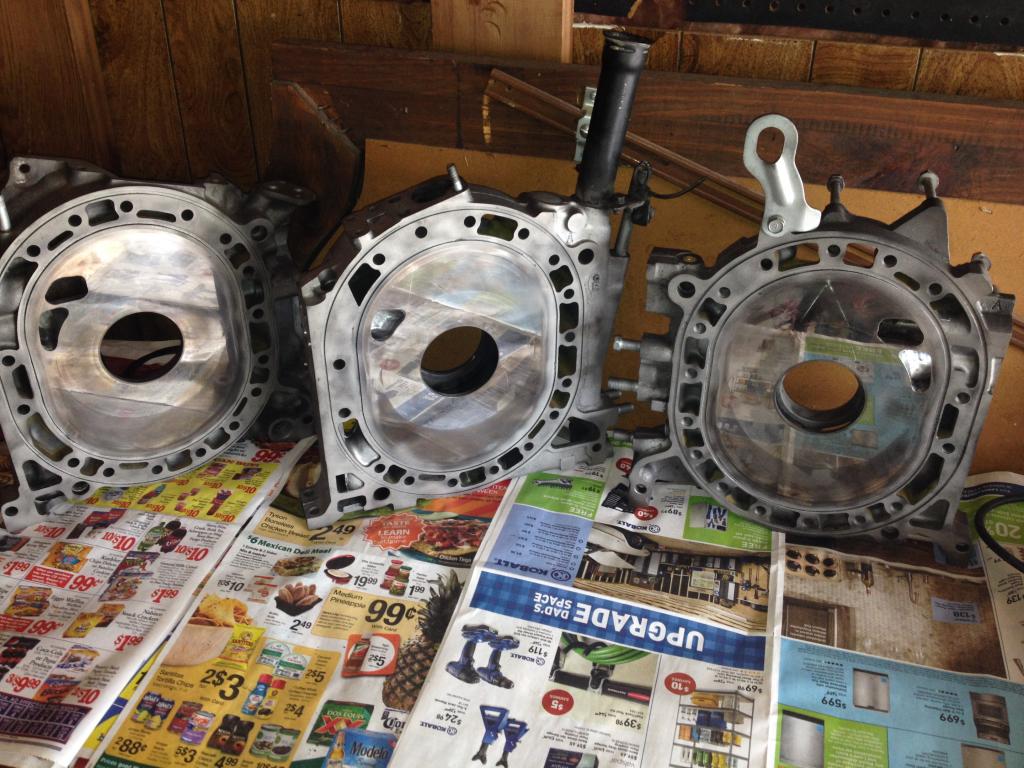
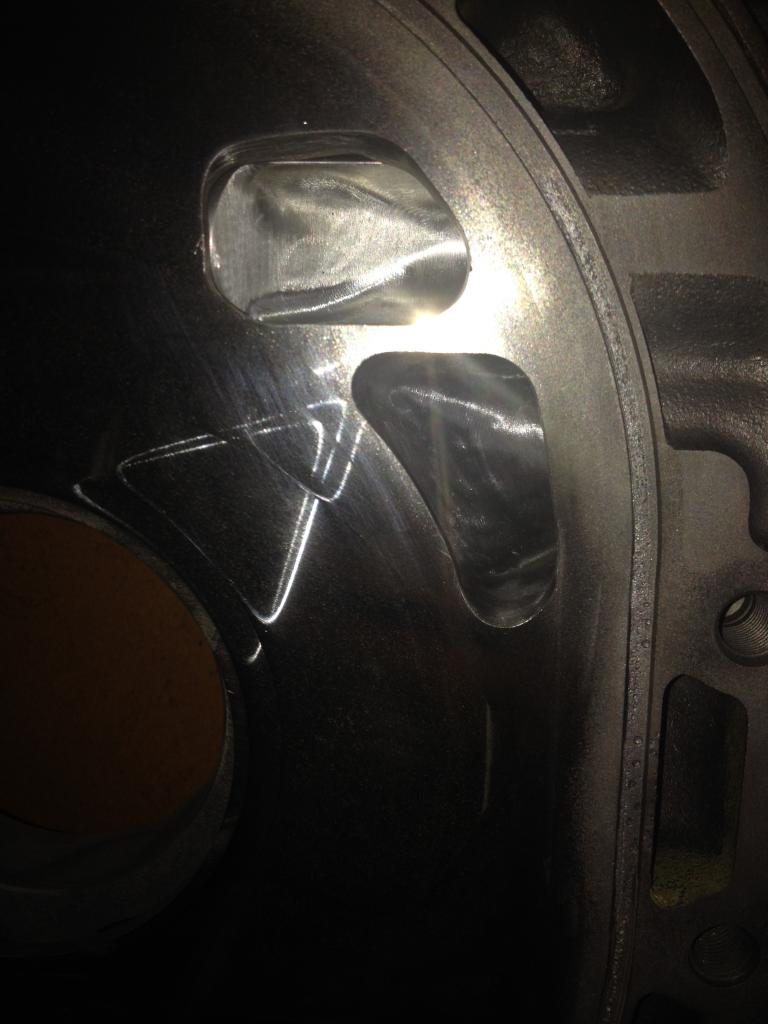
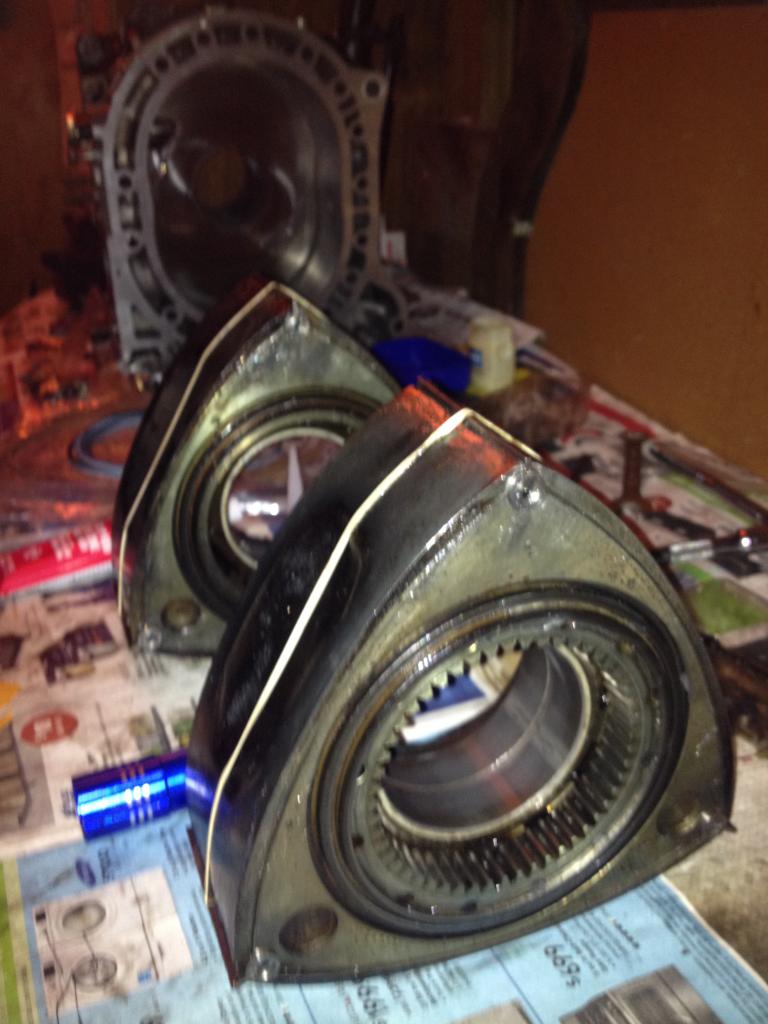
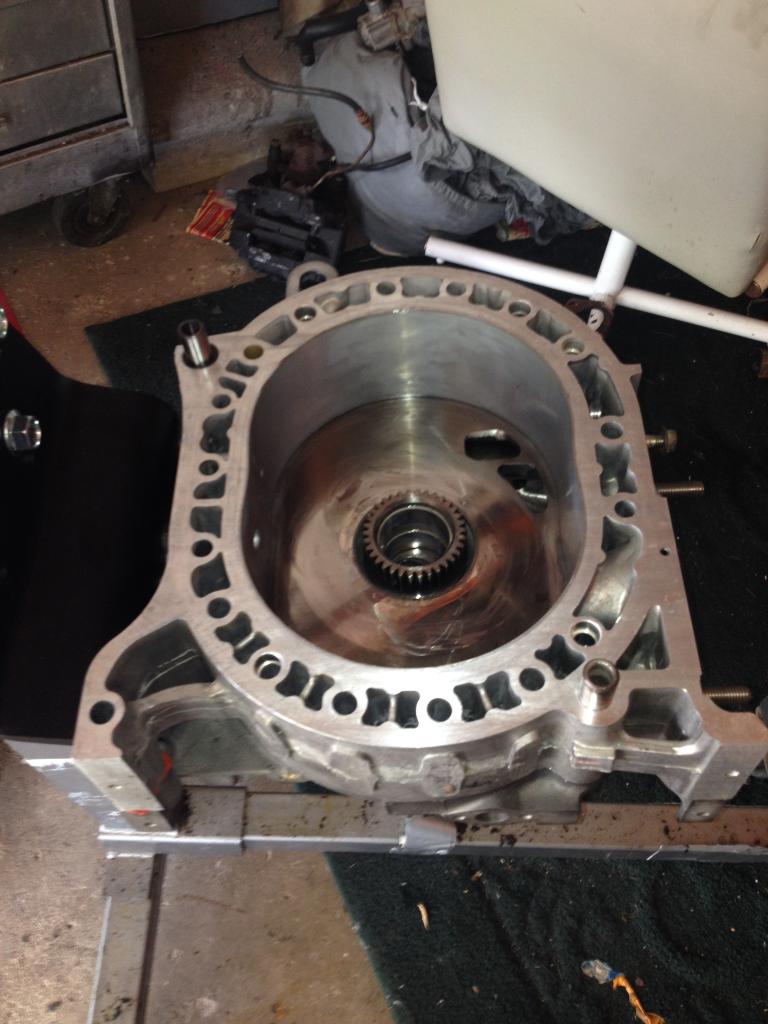
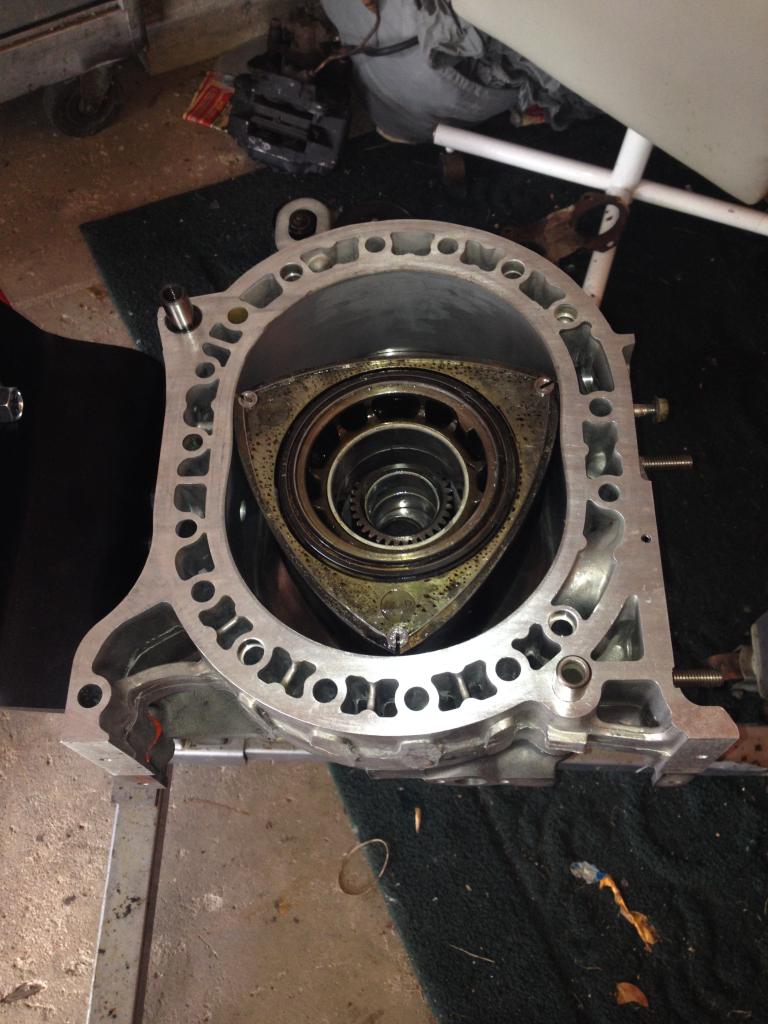
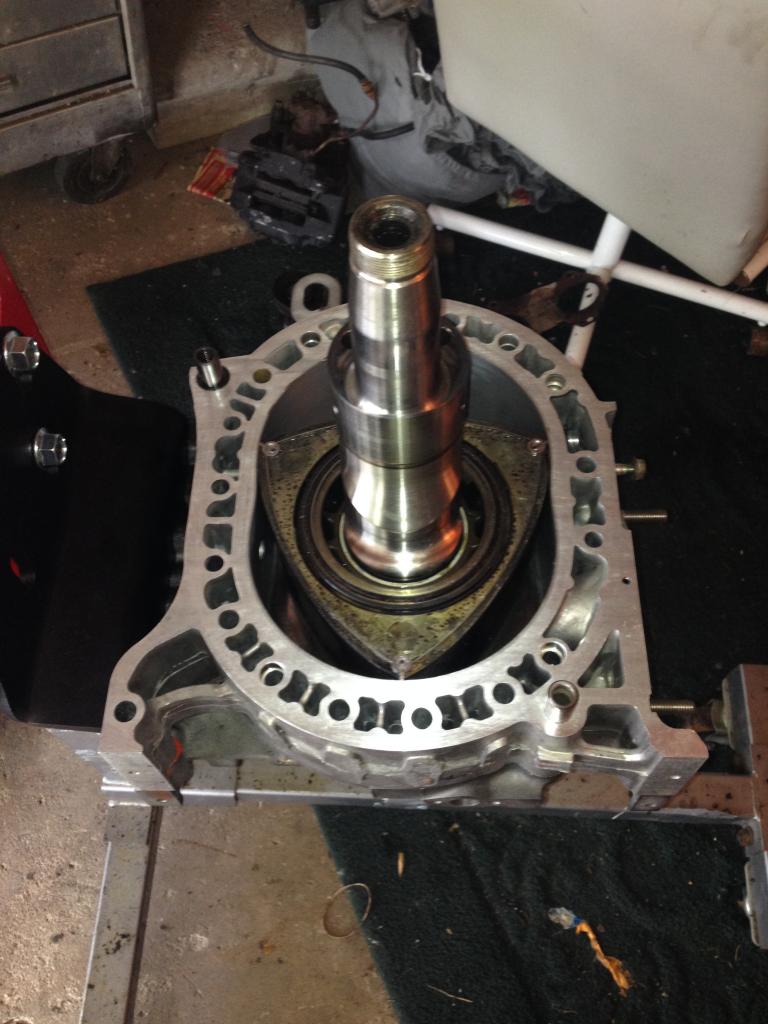
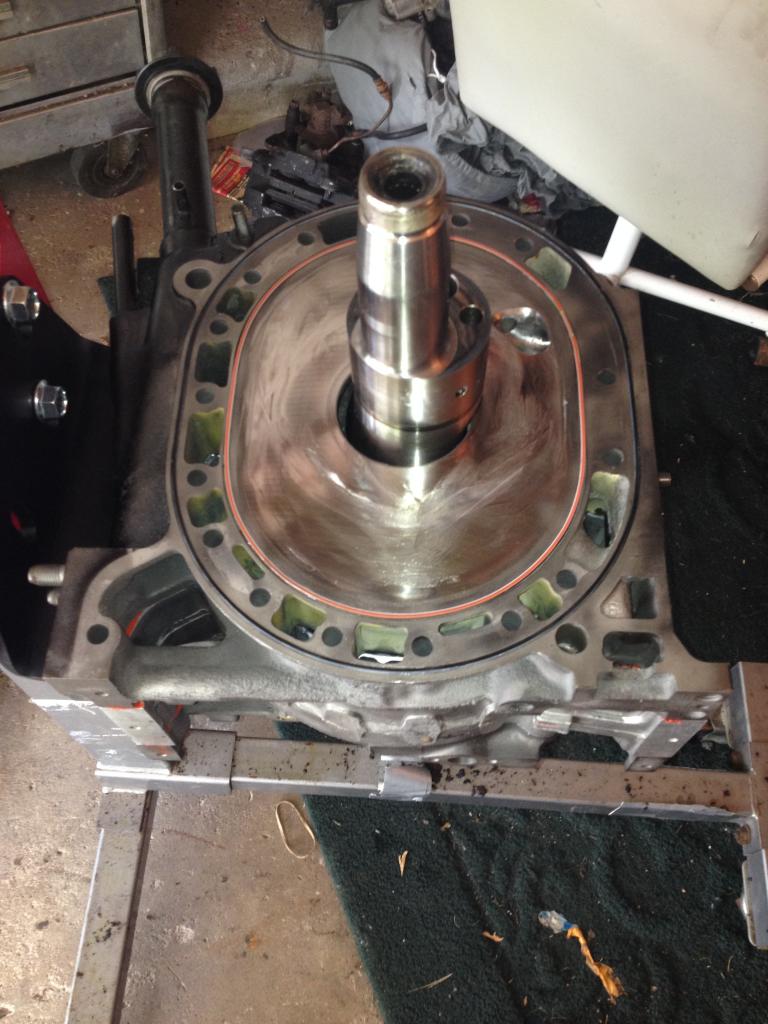
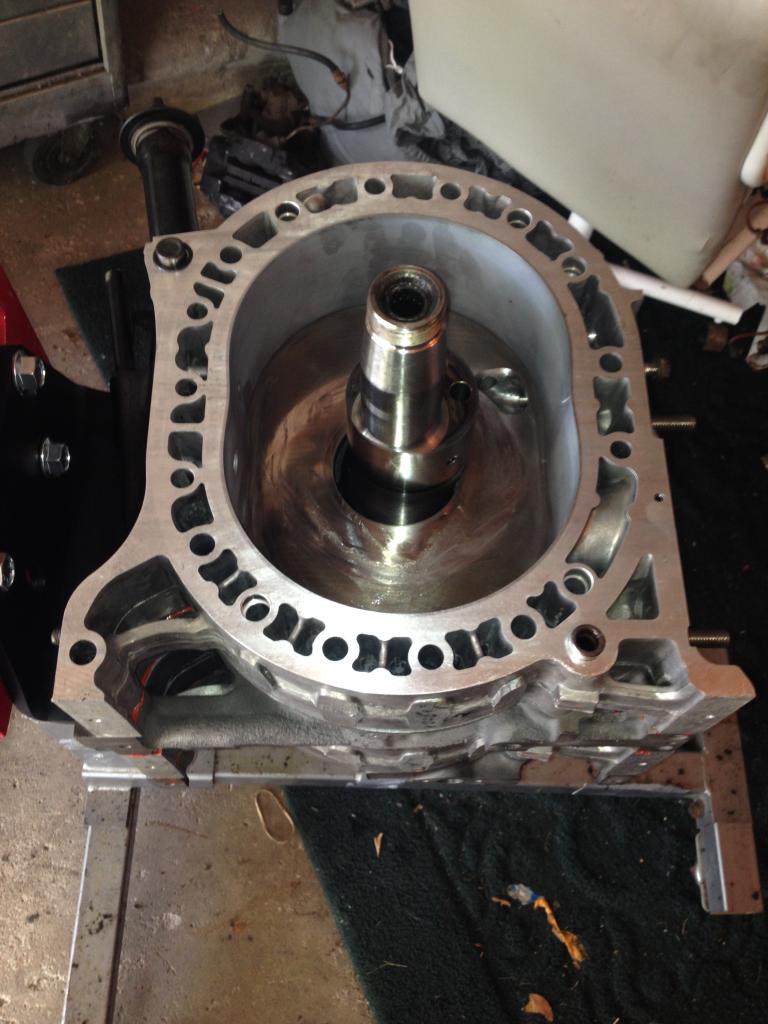
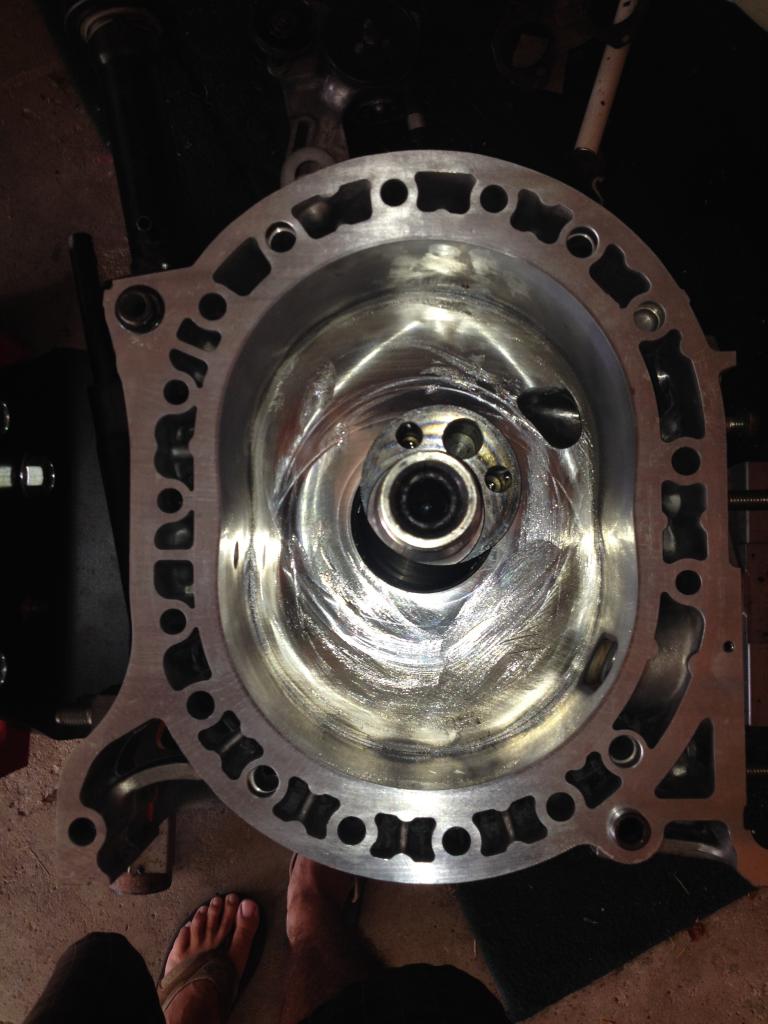
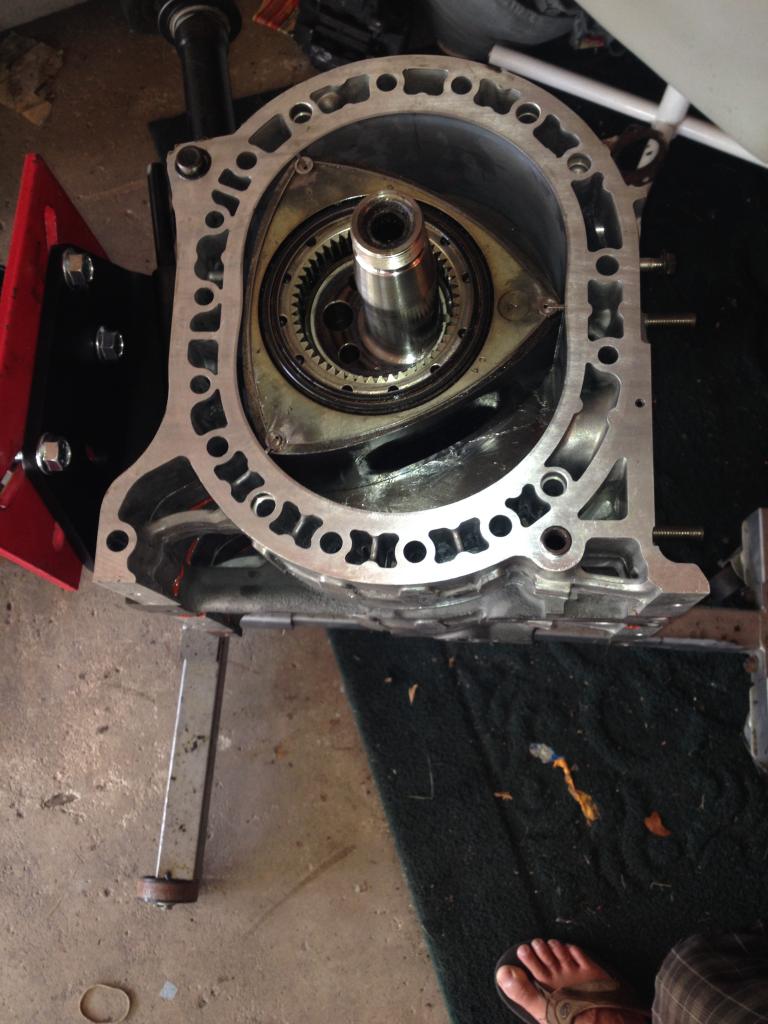
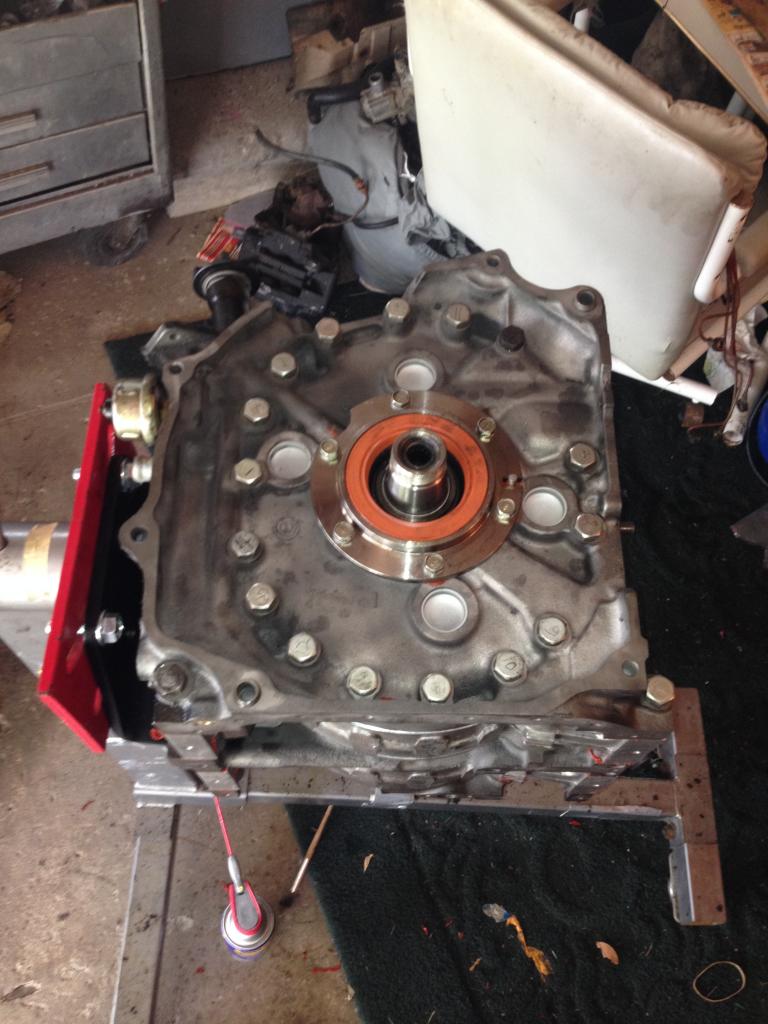
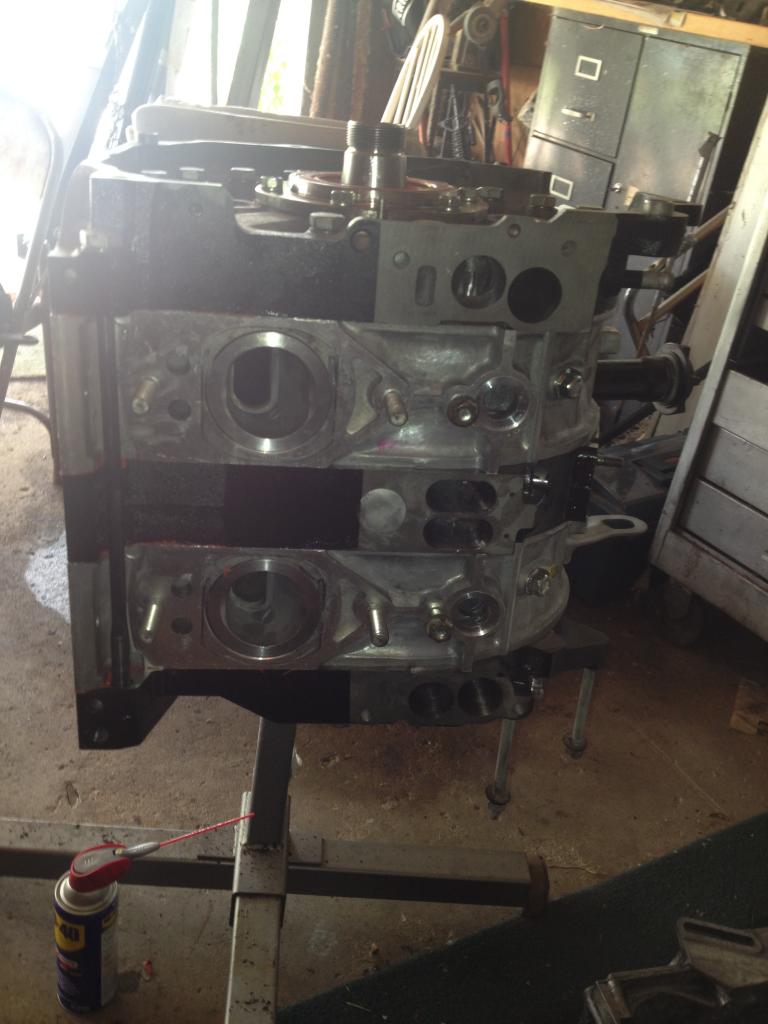
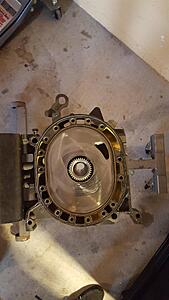
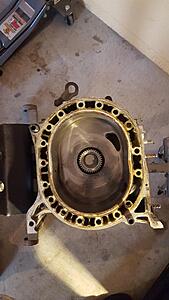
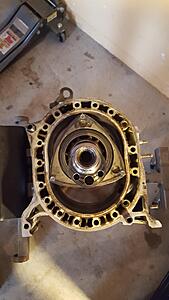
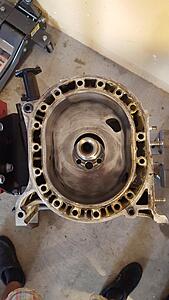
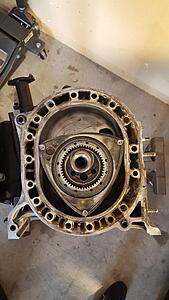
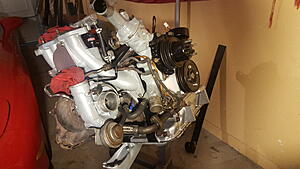
54mm flywheel tool came in, ordered the one from racingbeat, a little bit of force (okay, a lot) and the flywheel nut came off. Took off the front pulley and front cover, then took the flywheel off using a steel hammer. Completely dissassembled the engine according to the Haynes manual. Seeing all this was pretty cool and exciting to be honest. Anyways, here's what I'm looking at now, everything seems fine, minus a dent on the front rotor. Not sure what seals I'll need to replace. What do you guys think?
Front Rotor, notice the dent in the corner, still usable?
Front Iron
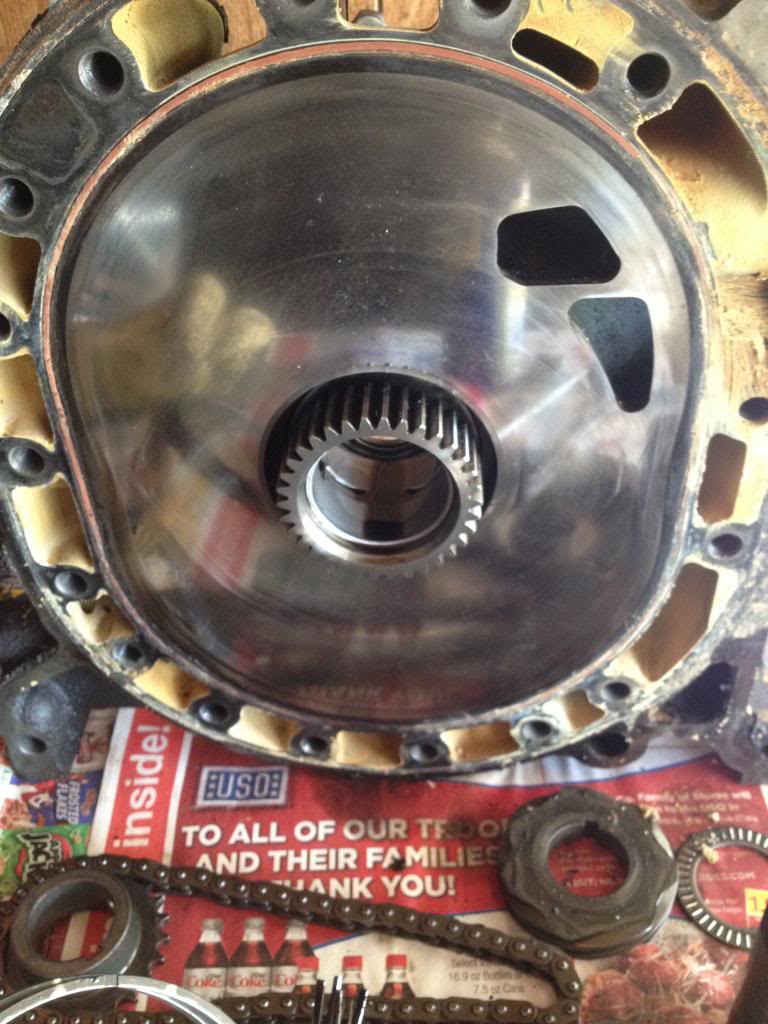
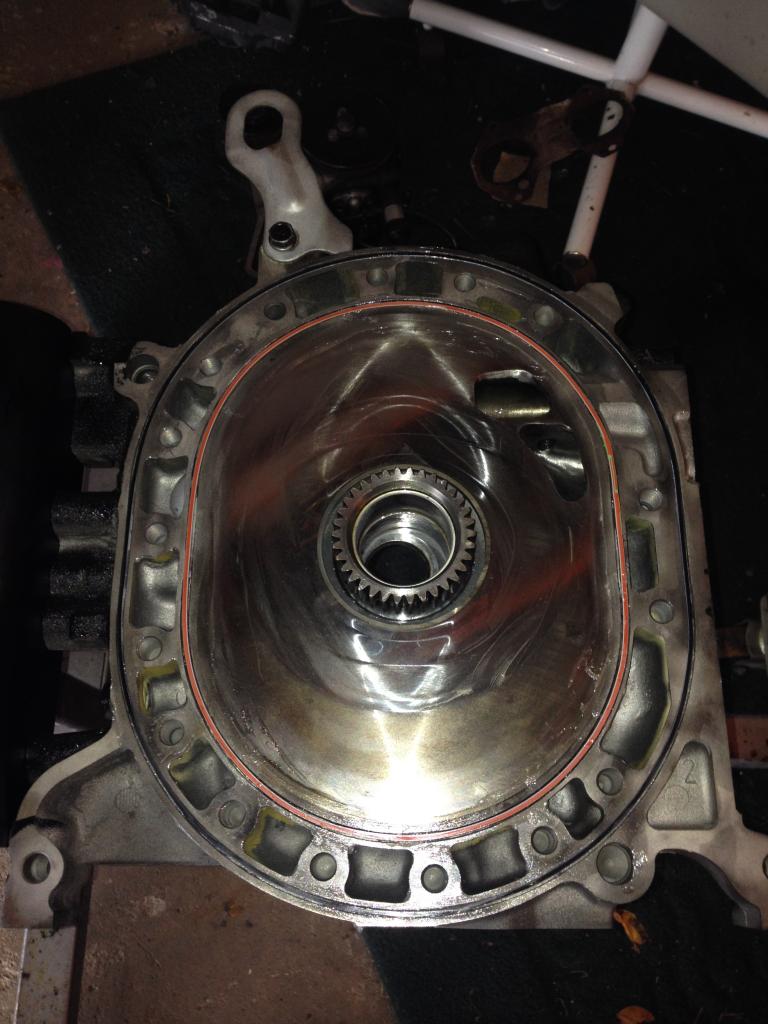
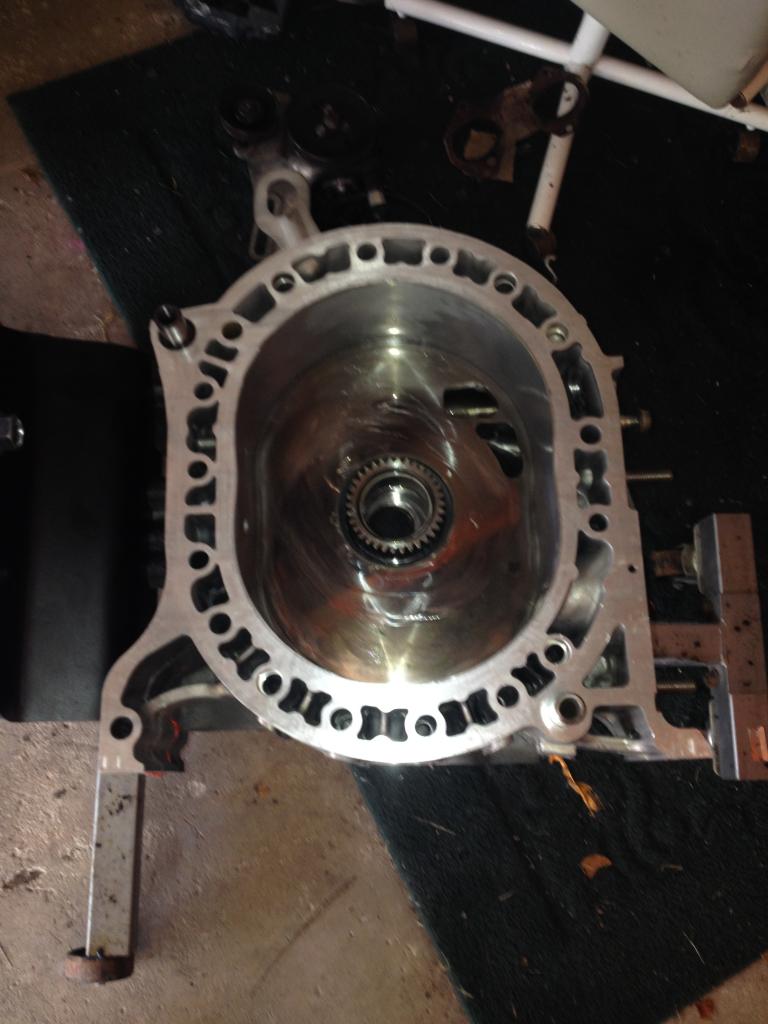
Front housing
Intermediate Iron
Rear housing

Rear Iron

Rear rotor
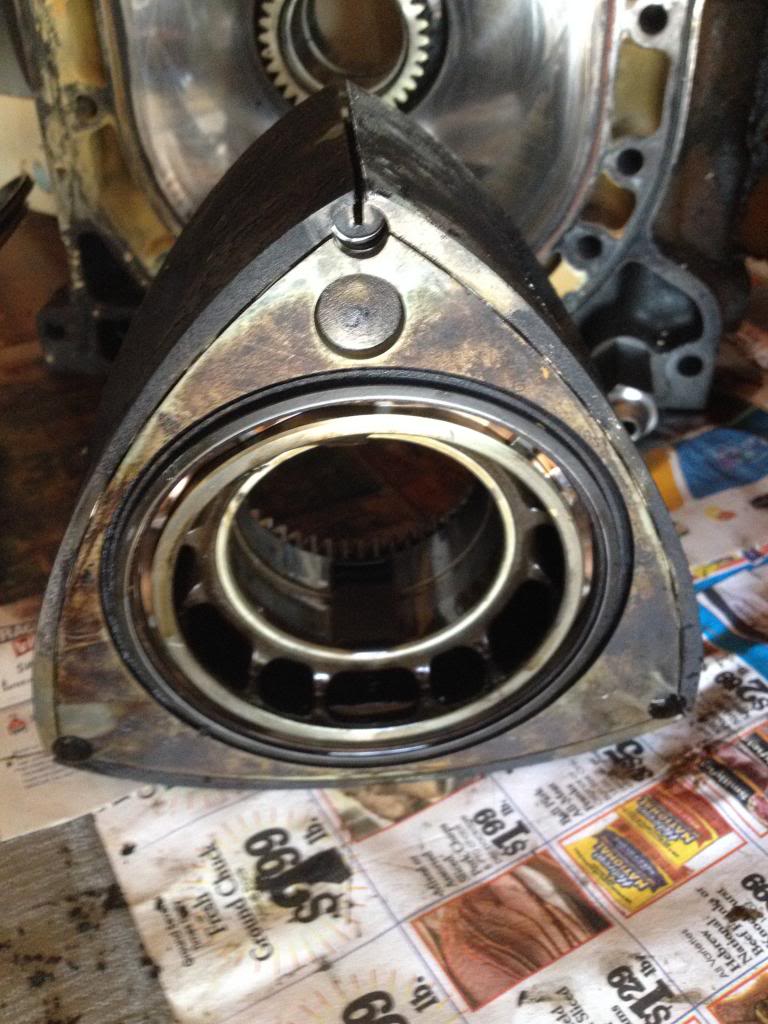
Front Rotor, notice the dent in the corner, still usable?

Front Iron

Front housing


Intermediate Iron

Rear housing


Rear Iron

Rear rotor
 06-09-14, 02:20 PM
#28
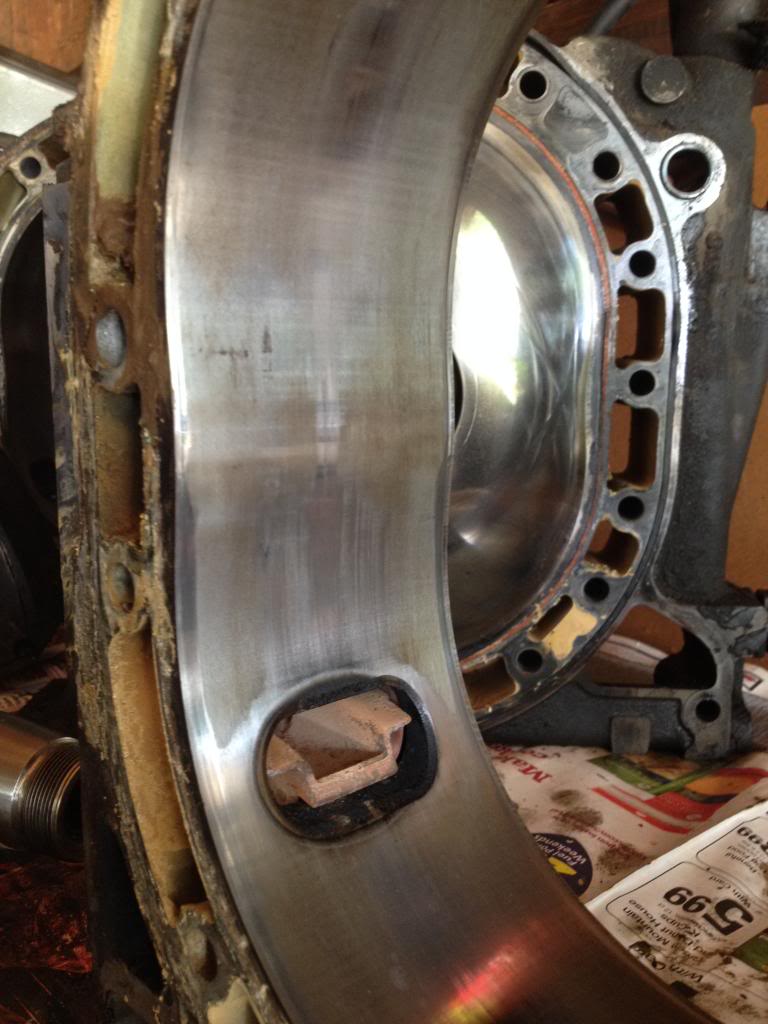
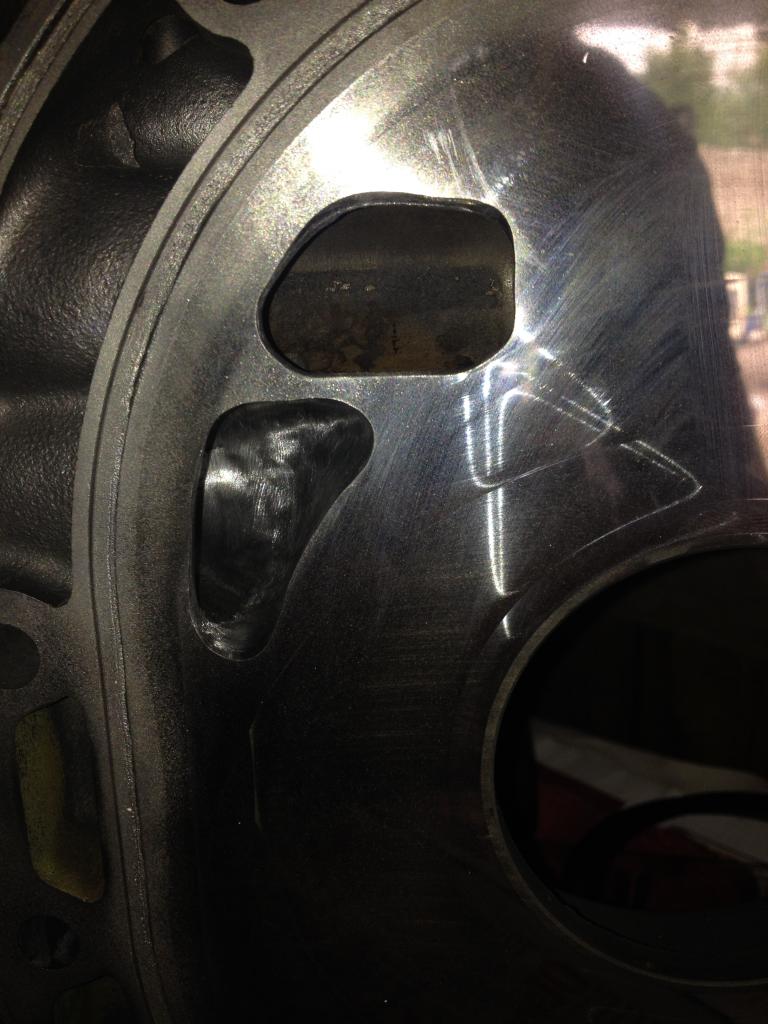
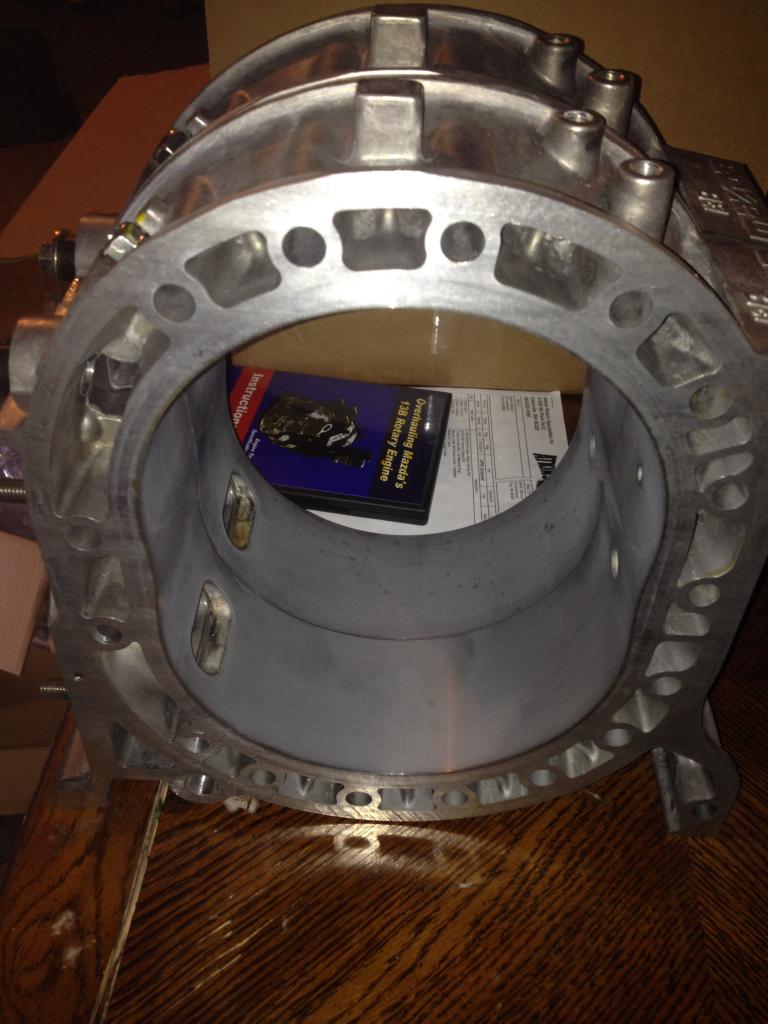
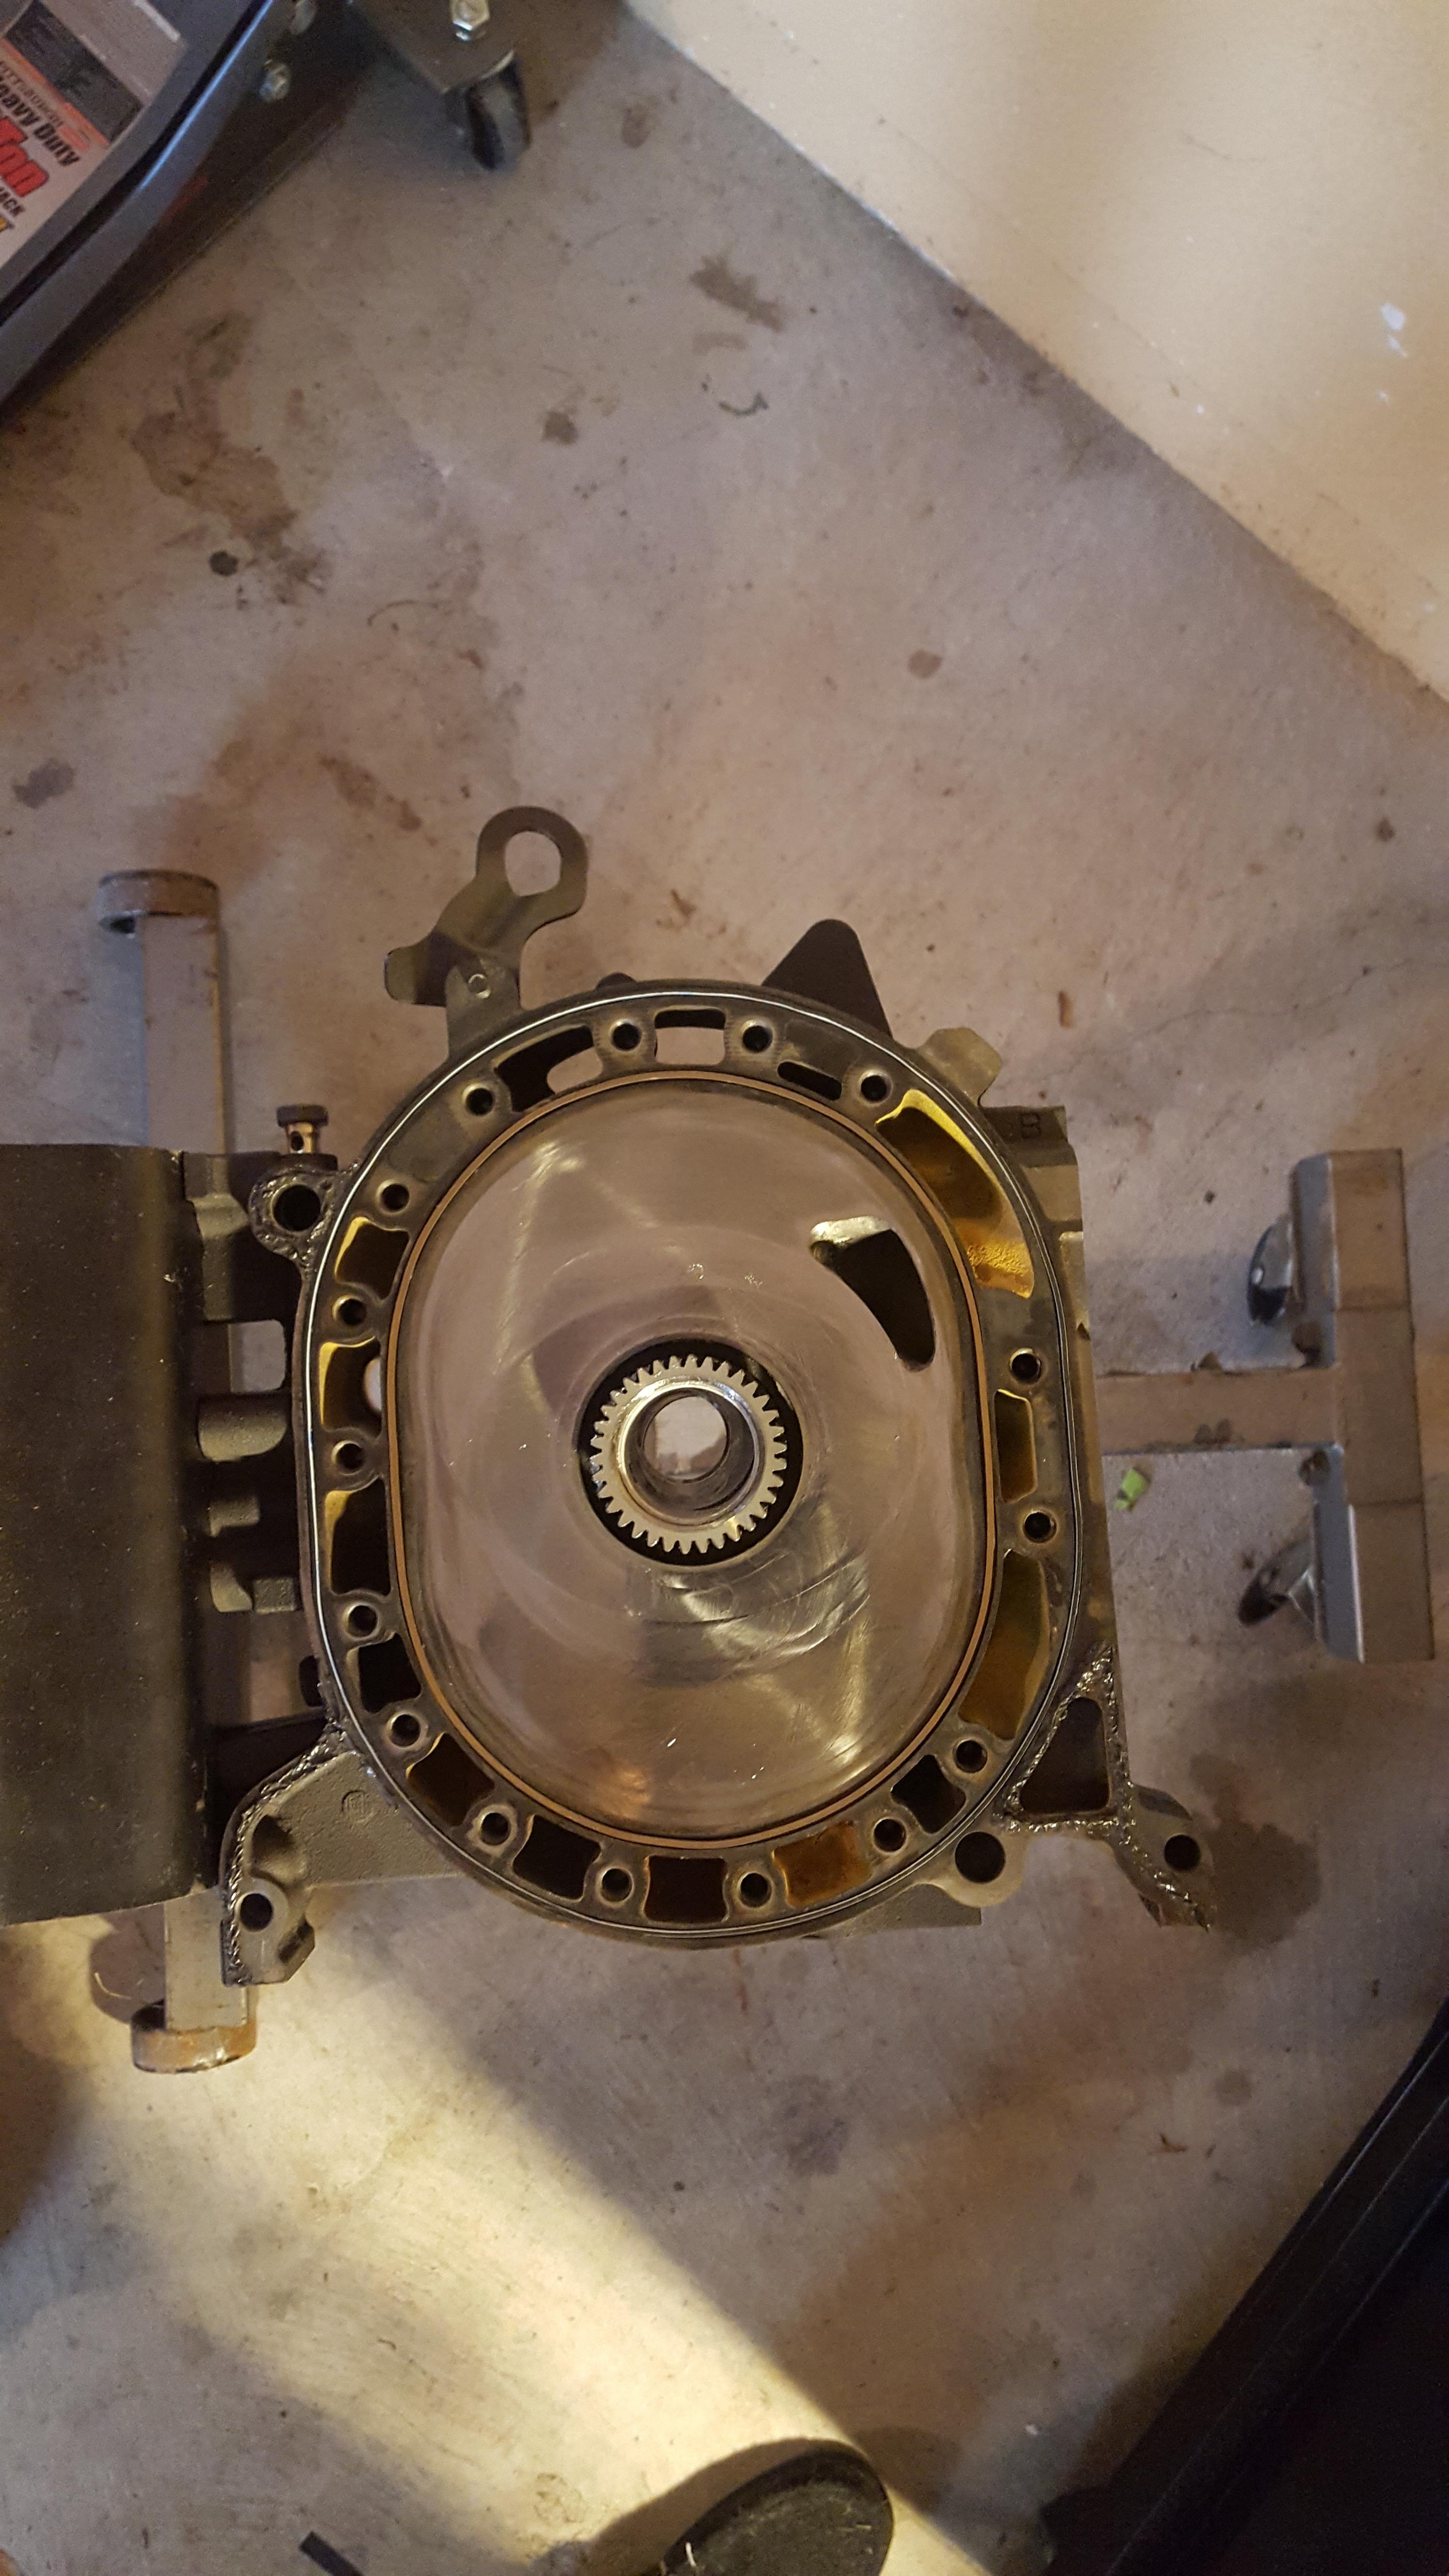
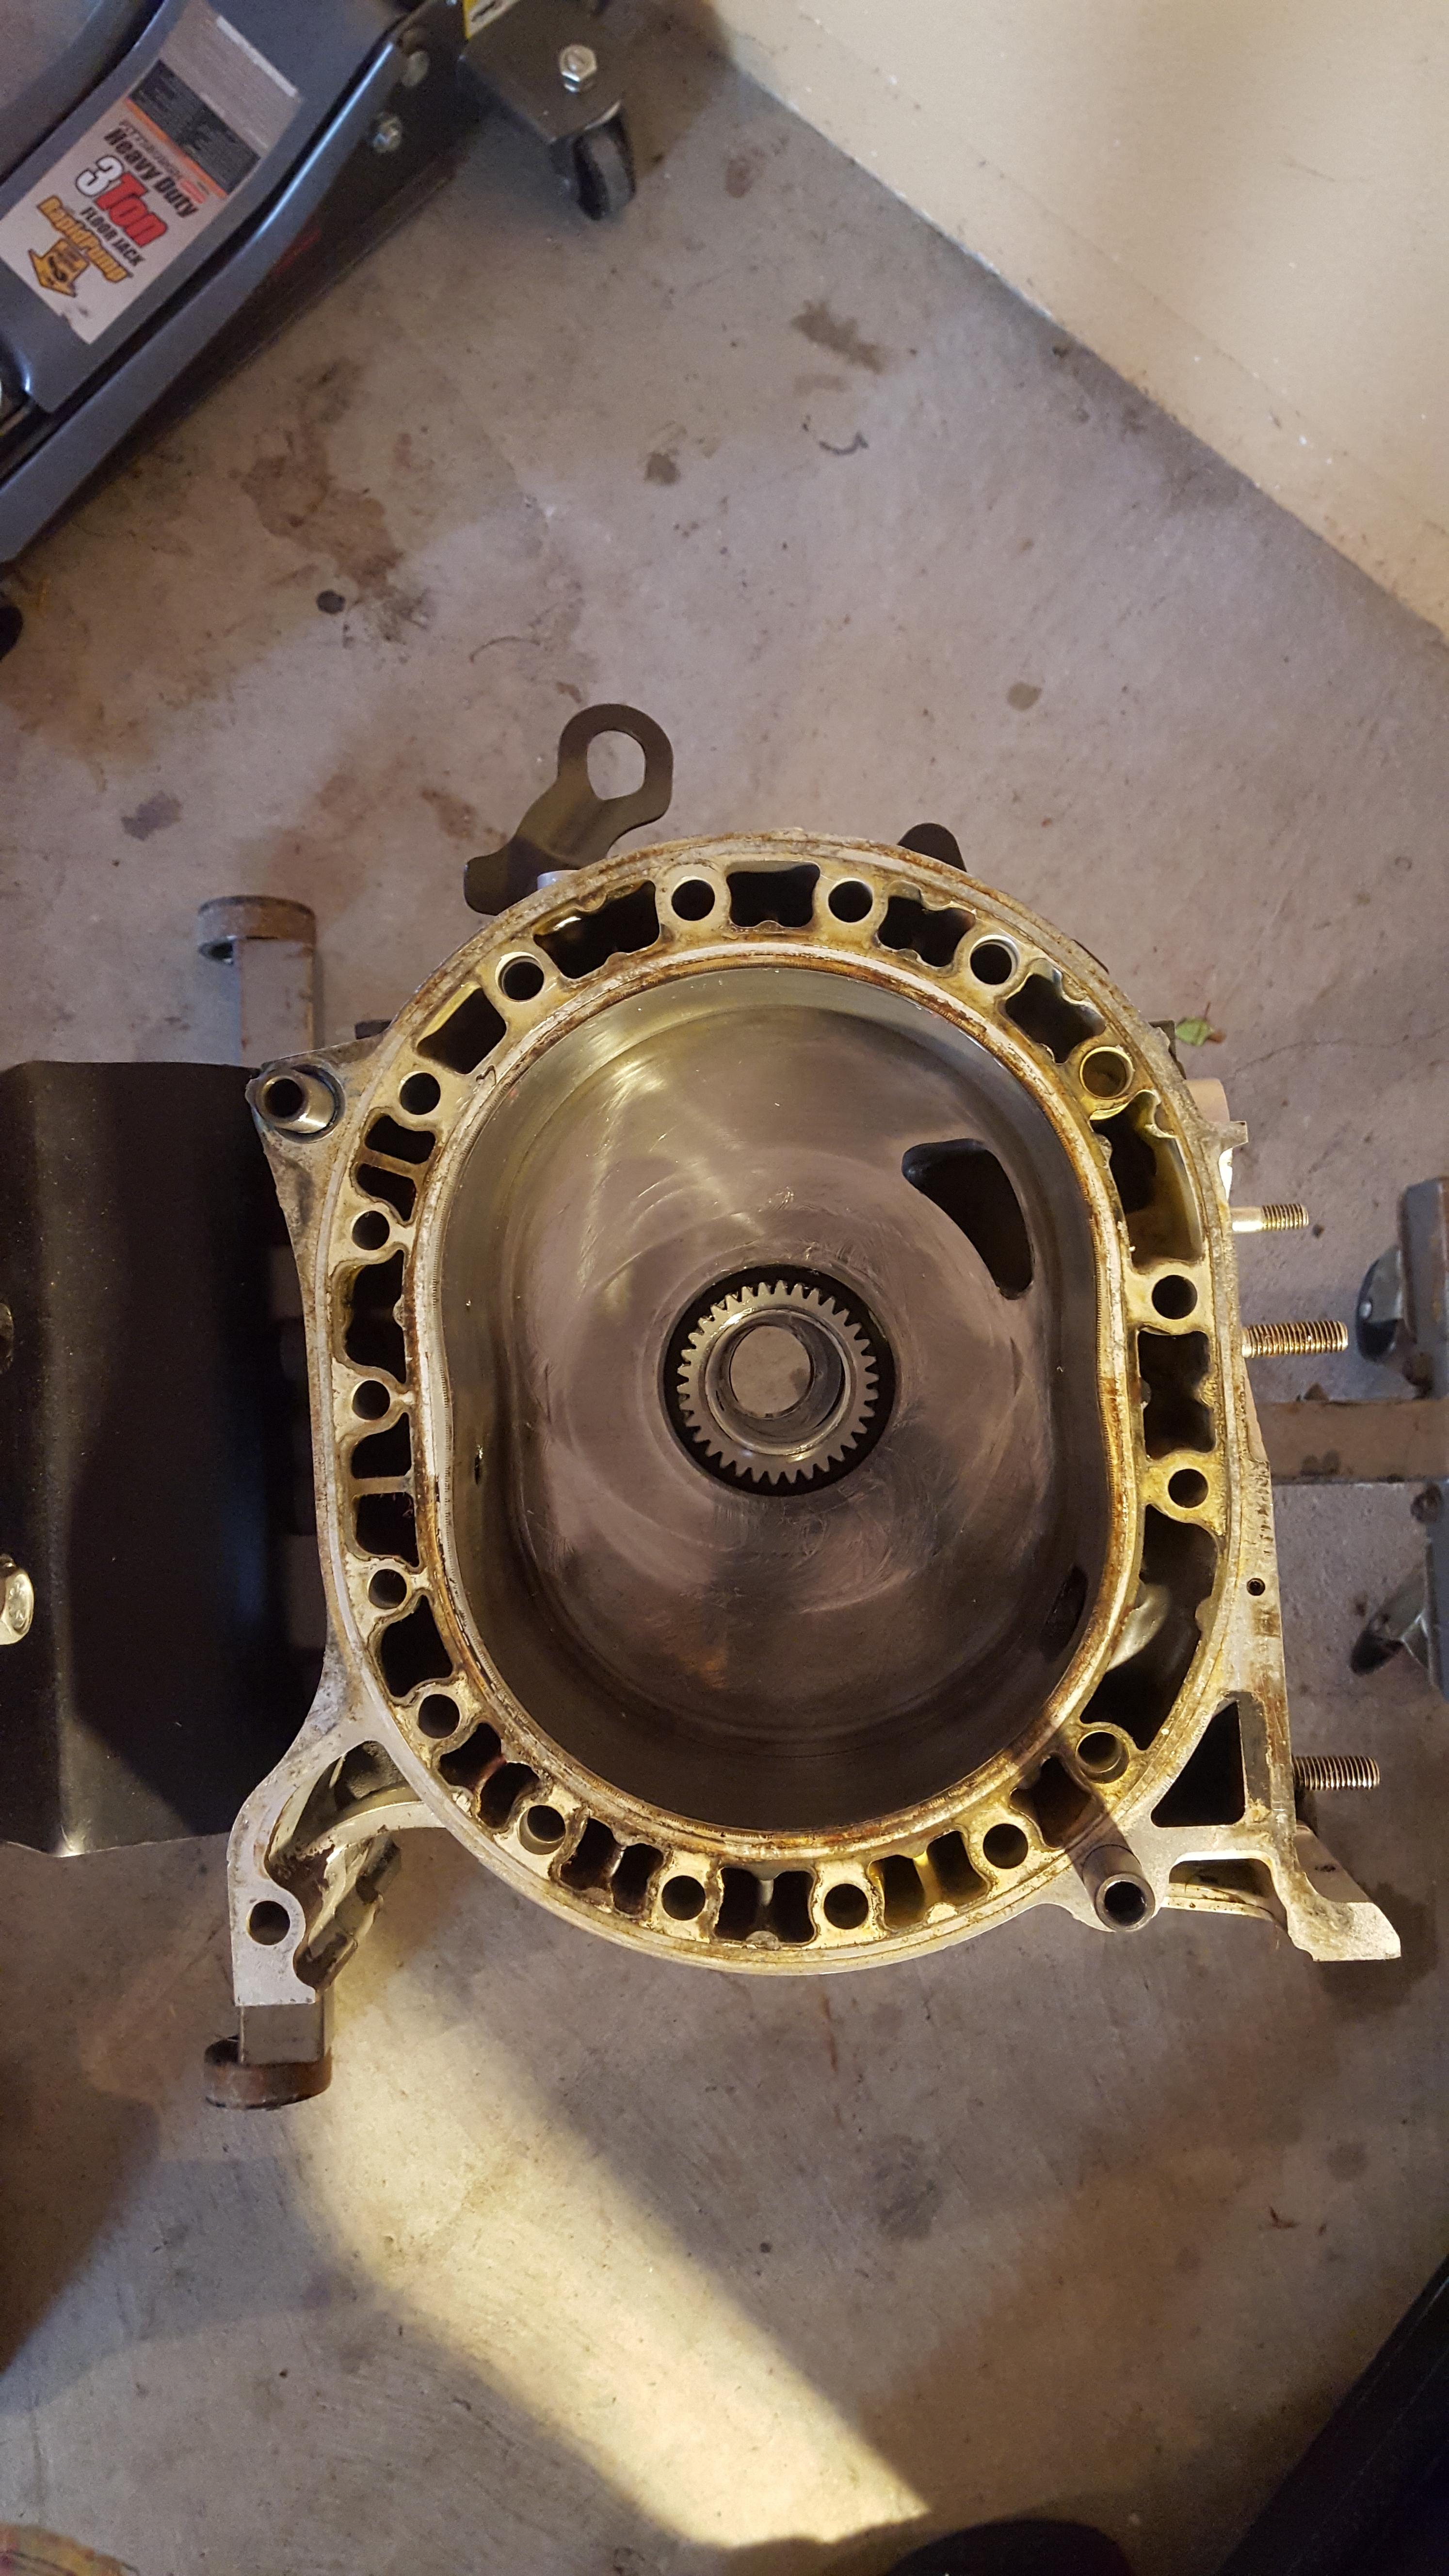
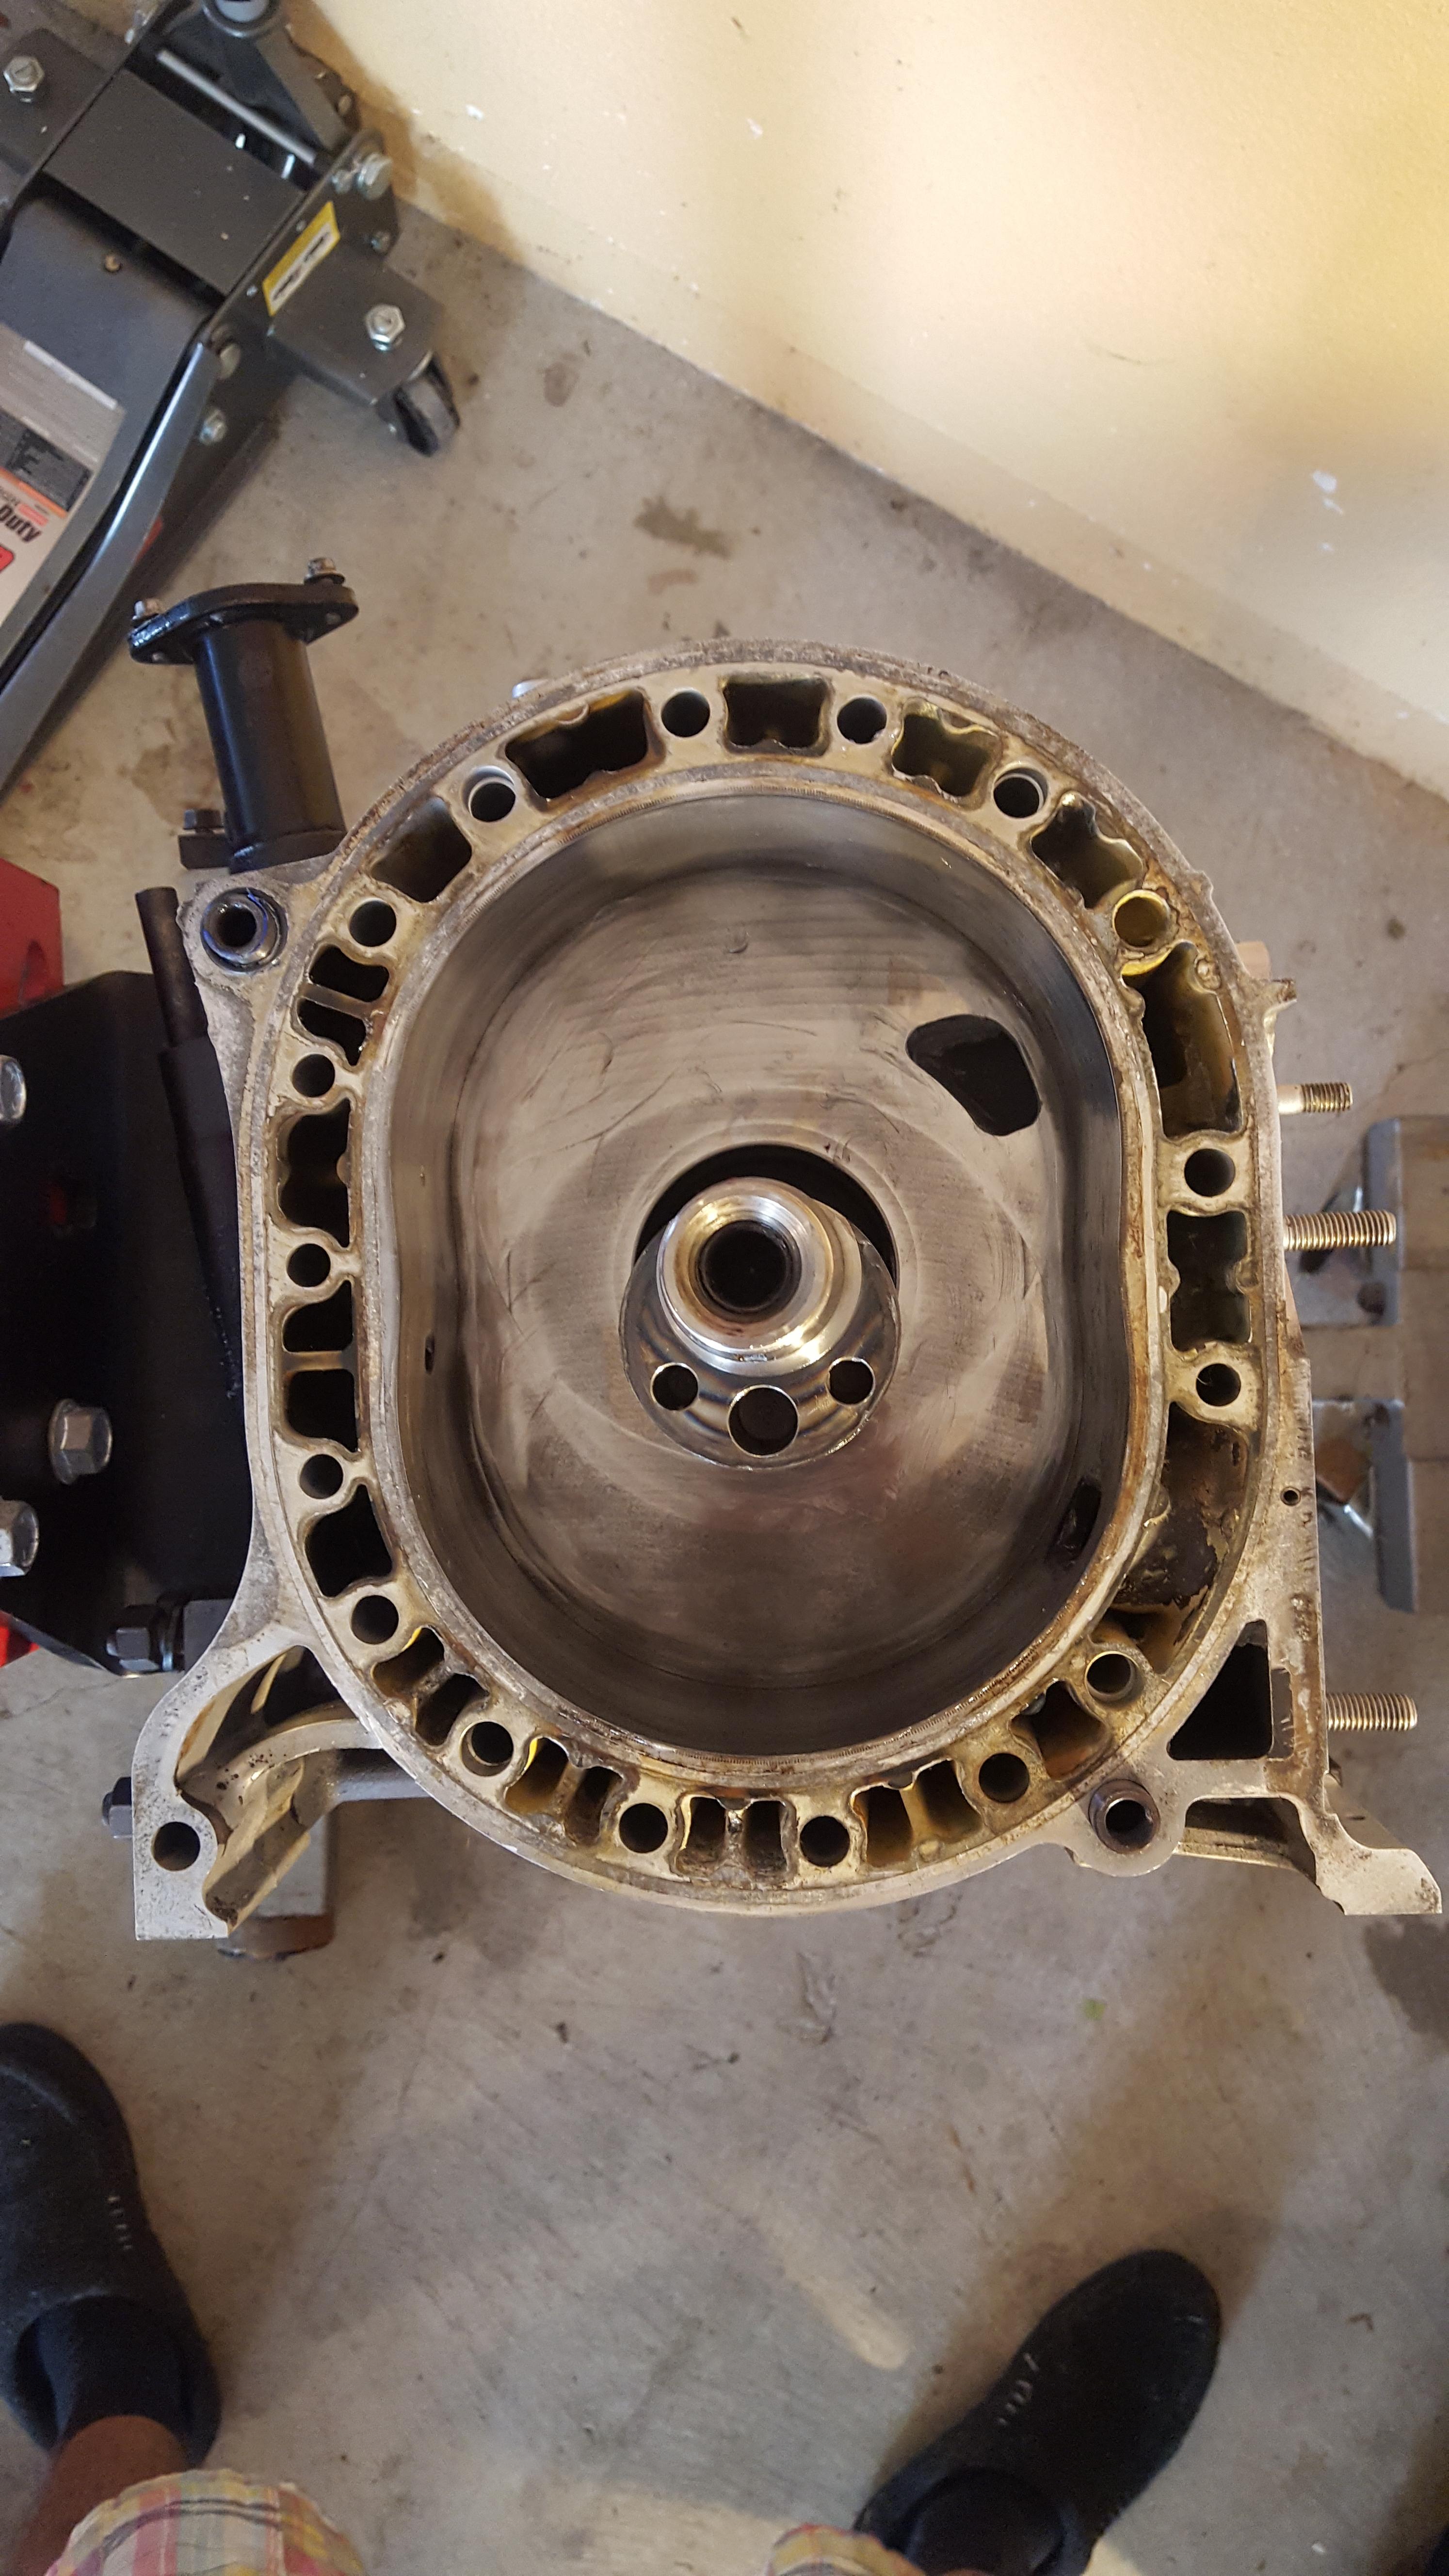
So, been busy with finals and what not, 2 weeks of summer break for me now, yay! Have my irons getting street-ported by Chips-Motorsports, which is conveniently located nearby. Bad news is that my housings are trash, the sides of them are badly worn and overall they're badly warped. Perhaps this is due to a faulty OMP? Either way, pre-mix it will be from now on! The seals don't look bad, but I haven't gave them a closer inspection, will definitely be replacing the Apex seals and gaskets either way...
Ordered new Turbo II housings (Figured the Turbo sleeves are better) from Atkins, since I won't be using the Airpump and a few other Emissions, I ordered X 2 of the rear housings, they're significantly cheaper anyways. They do have a coolant hole that will need to be filled up though. I plan on using a rubber-expansion-plug-thing on these, which was recommended by a forum member on the Michigan Rotary club (If you're in MI, you should join if you haven't yet already!) rather than the freeze plug.
Right now as it stands, I'll be purchasing a lightweight steel flywheel... But there's still time to convince me to go Aluminum! I have a brand new Exedy Stage 1 clutch as well that will be going in. Soon will get the Injectors cleaned, Kinsler Fuel Injection is right down the road from me, how nice? Thinking of a Wide Band O2 sensor with the No weld strap-on-thing from Atkins, as the O2 sensor hole is too far back on the Header making the O2 wire not able to reach to the Engine harness plug. AEM No Weld Oxygen Sensor Mount (30-2355-350) (That).
Anyways, just been cleaning all the parts for now, have a pile of used brake cleaner cans already!
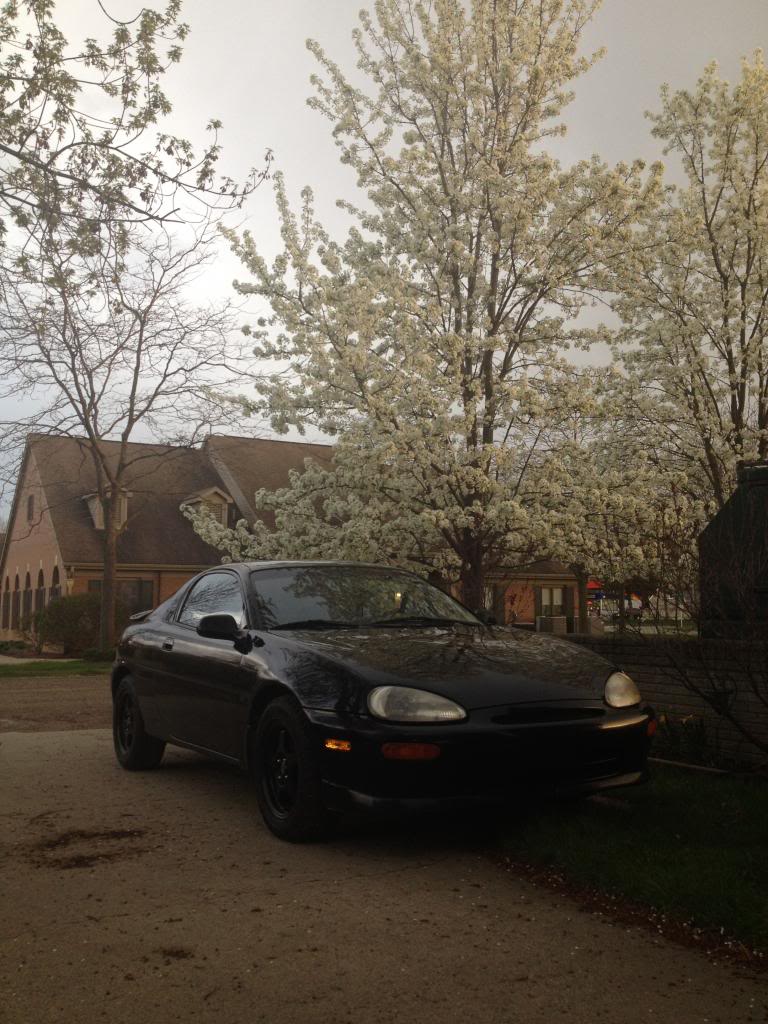
I'm setting my deadline for this project August 16th 2014, which is the Michigan Woodward Dream cruise, (The Woodward Dream Cruise) I've always wanted to drive in the cruise with my own vehicle that's deserving of it. That gives me about 67 days from this post! I've gone to it almost annually, minus the the past 4 years (Military)... Never once had a vehicle worthy of showing off, except an old 73 Super Beetle that I gave up on.
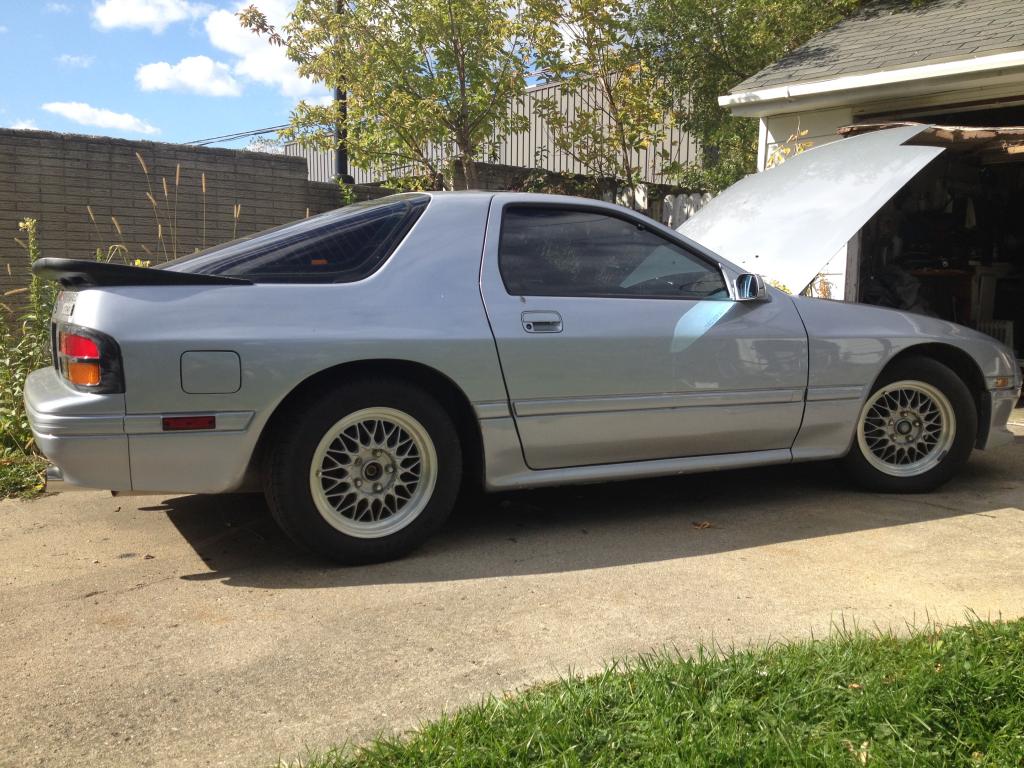
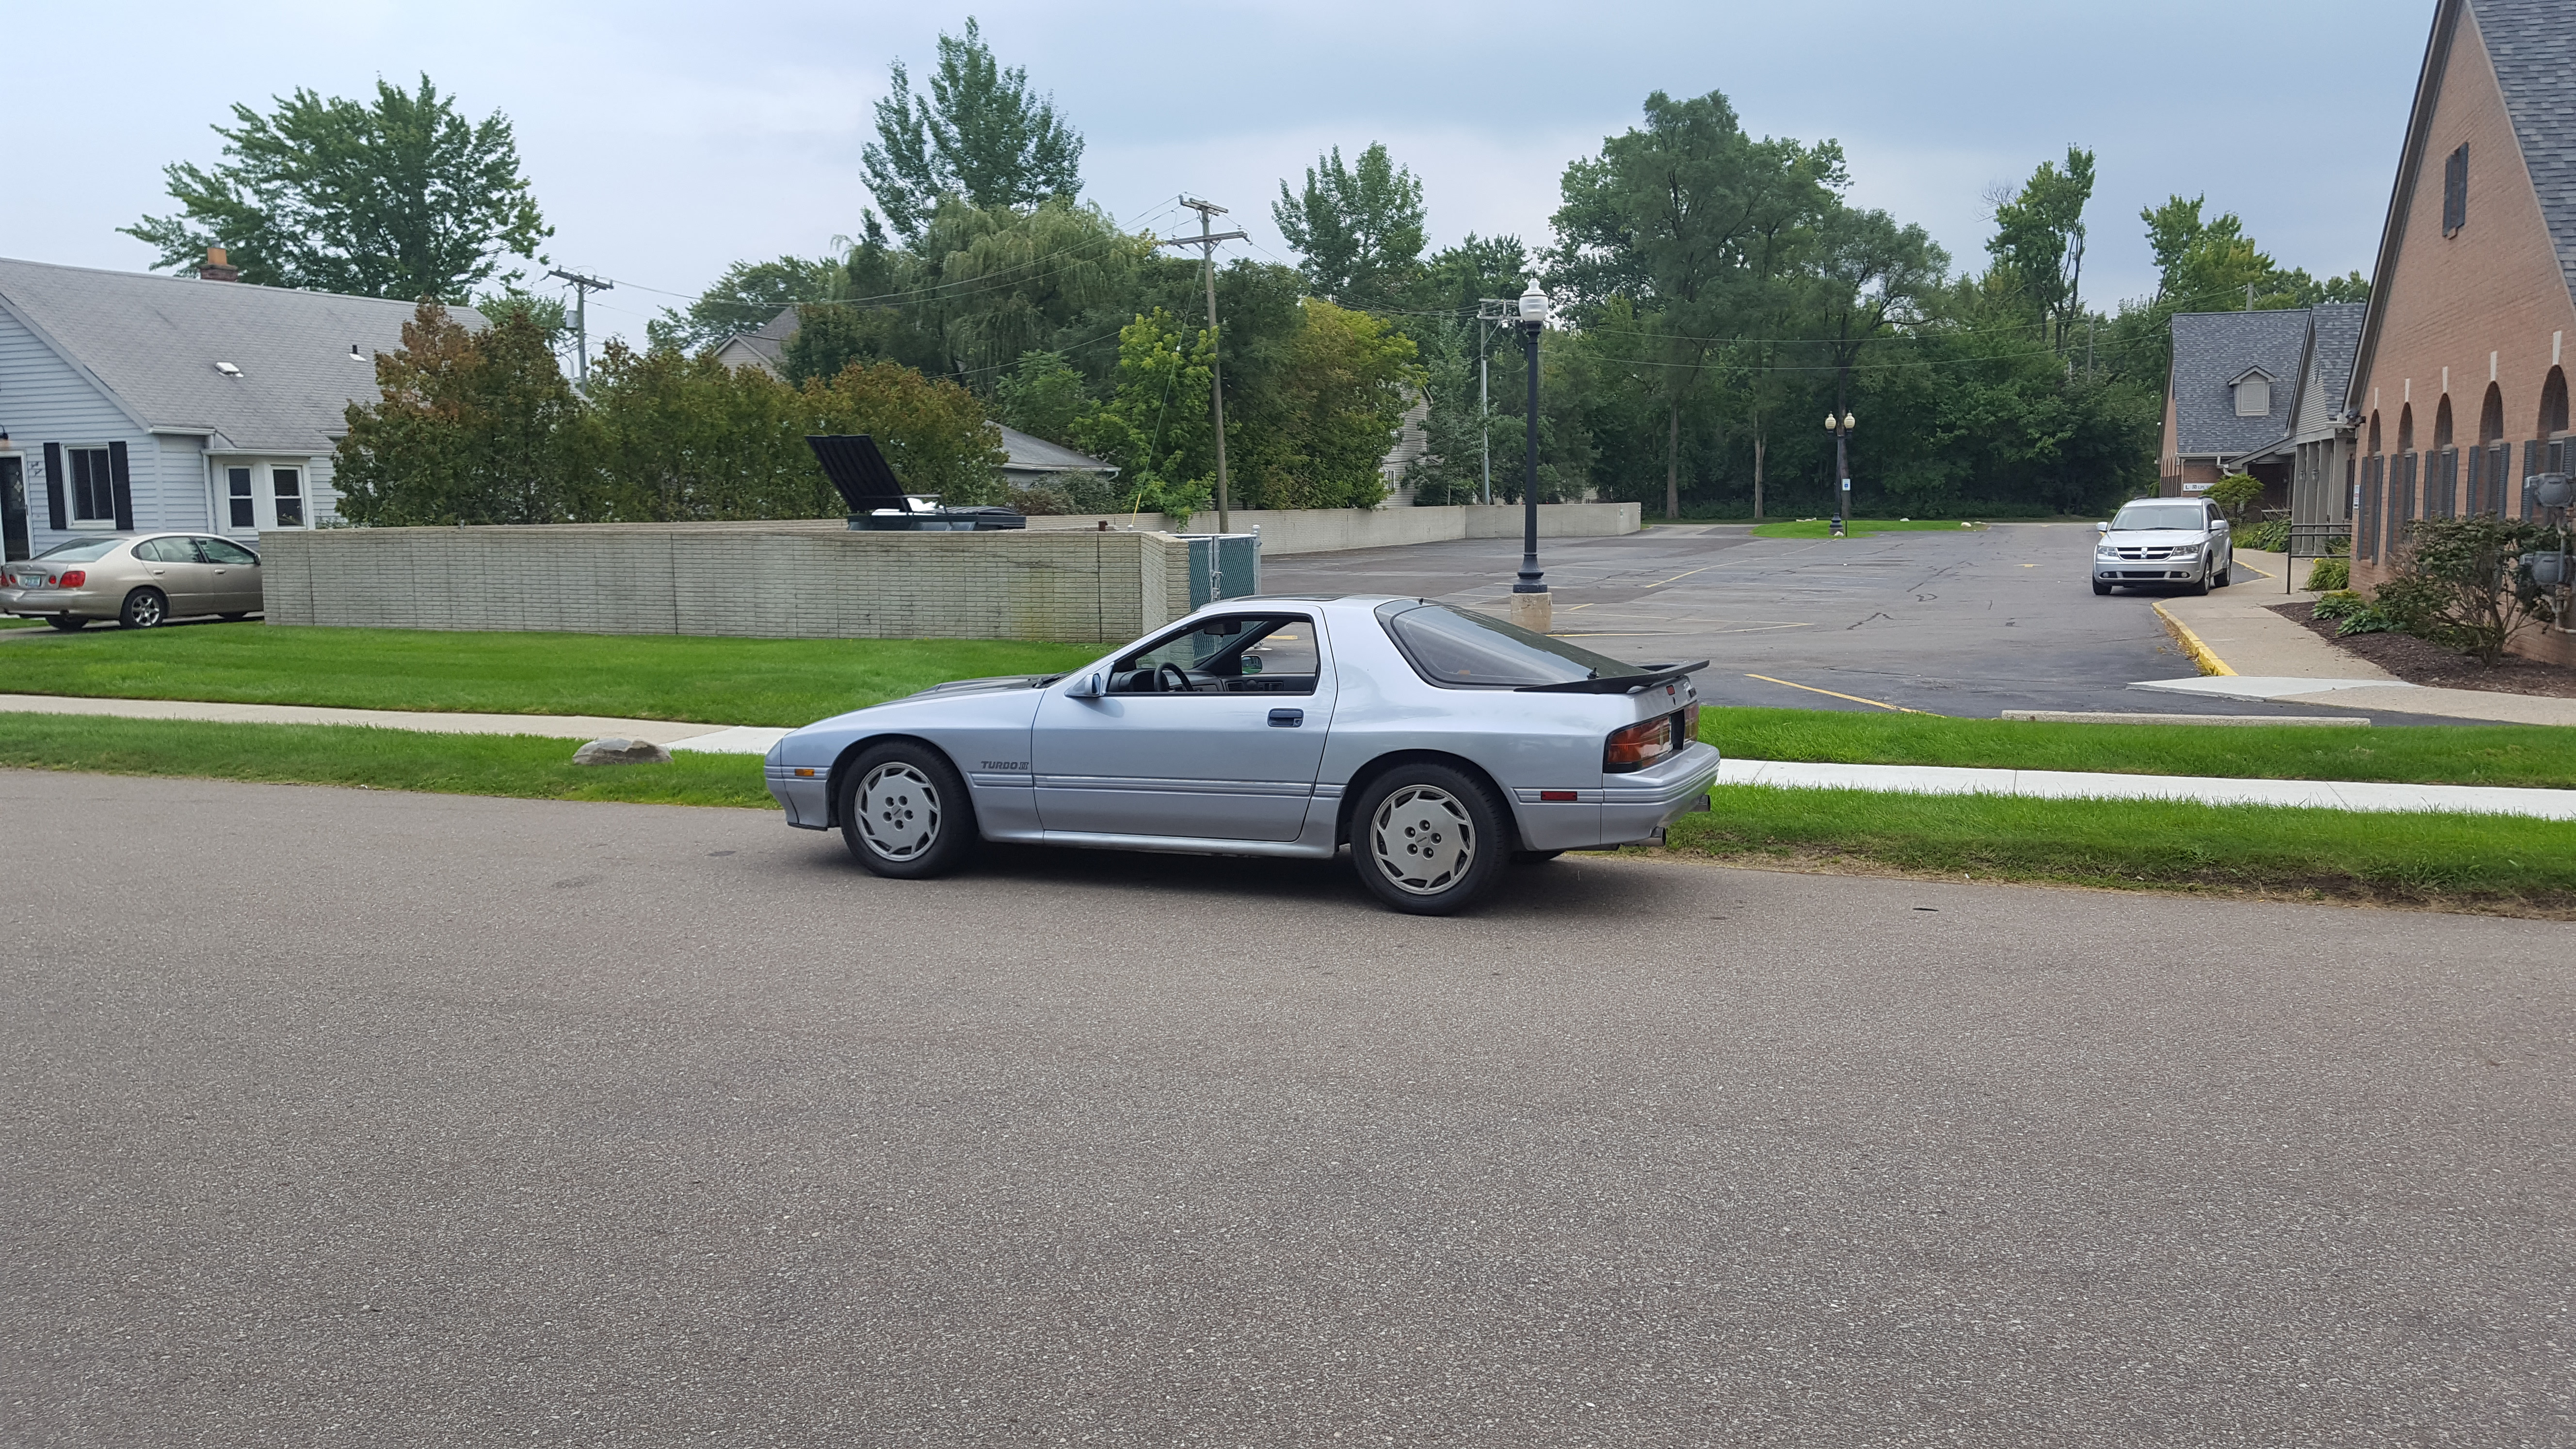
Here she is right now, pretty isn't she?


Ordered new Turbo II housings (Figured the Turbo sleeves are better) from Atkins, since I won't be using the Airpump and a few other Emissions, I ordered X 2 of the rear housings, they're significantly cheaper anyways. They do have a coolant hole that will need to be filled up though. I plan on using a rubber-expansion-plug-thing on these, which was recommended by a forum member on the Michigan Rotary club (If you're in MI, you should join if you haven't yet already!) rather than the freeze plug.
Right now as it stands, I'll be purchasing a lightweight steel flywheel... But there's still time to convince me to go Aluminum! I have a brand new Exedy Stage 1 clutch as well that will be going in. Soon will get the Injectors cleaned, Kinsler Fuel Injection is right down the road from me, how nice? Thinking of a Wide Band O2 sensor with the No weld strap-on-thing from Atkins, as the O2 sensor hole is too far back on the Header making the O2 wire not able to reach to the Engine harness plug. AEM No Weld Oxygen Sensor Mount (30-2355-350) (That).
Anyways, just been cleaning all the parts for now, have a pile of used brake cleaner cans already!

I'm setting my deadline for this project August 16th 2014, which is the Michigan Woodward Dream cruise, (The Woodward Dream Cruise) I've always wanted to drive in the cruise with my own vehicle that's deserving of it. That gives me about 67 days from this post! I've gone to it almost annually, minus the the past 4 years (Military)... Never once had a vehicle worthy of showing off, except an old 73 Super Beetle that I gave up on.
Here she is right now, pretty isn't she?
 06-10-14, 08:23 PM
#29
Full Member

Man I love that stock color. Coming along nicely. Keep us posted. Following along this build. What kind of street port you go with? Small, mild, big? Are they doing there own thing or using a template from atkins or pineapple racing?
 06-12-14, 10:26 AM
#30
Thank you! I do as well, it's a really unique color, which can be a good thing and a bad thing haha. Bad news, either my clutch master cyclinder or slave cylinder went out on me yesterday with my daily driver, and well I had a week long vacation to Traverse city Michigan planned... ouch! I guess at least it didn't happen on my way there?
The good news is, I sent out my Injectors to Kinsler yesterday (Literally right before my car went) and I received my Irons back from Chips-Motorsports, and damn do they look awesome! Hopefully I can pick up my injectors later (On my 2 wheeled 18-speed wal-mart special), I should have taken a picture of them beforehand, they were nasty.
I believe they're a custom template, i'd say they're mild to large, while remaining street-able. It's hard to notice a large difference until you compare previous pictures to these and then it's quite evident haha. Can't wait to put it all together, everything else should get in mid next week, so in about 2 weeks time I should be complete with the engine assembly (hopefully).

My question is now, should I keep the stock six port sleeves or should I order the pineapple racing sleeves?
The good news is, I sent out my Injectors to Kinsler yesterday (Literally right before my car went) and I received my Irons back from Chips-Motorsports, and damn do they look awesome! Hopefully I can pick up my injectors later (On my 2 wheeled 18-speed wal-mart special), I should have taken a picture of them beforehand, they were nasty.
I believe they're a custom template, i'd say they're mild to large, while remaining street-able. It's hard to notice a large difference until you compare previous pictures to these and then it's quite evident haha. Can't wait to put it all together, everything else should get in mid next week, so in about 2 weeks time I should be complete with the engine assembly (hopefully).


My question is now, should I keep the stock six port sleeves or should I order the pineapple racing sleeves?
06-15-14, 11:38 AM
#31
re-amemiya body vert
iTrader: (2)
Join Date: Oct 2003
Location: Calgary, Canada
Posts: 503
Likes: 0
Received 0 Likes
on
0 Posts
My first RX-7 was Arctic Silver, your's is in nice condition! As for pinnapple sleeves for the 5th 6th ports, I would do it. You've got everything apart so it won't get any easier... plus you can see inside it's just a rough dead stop... smoothing that out will definitely make a difference.
06-19-14, 03:30 PM
#32
Thanks Flash, the interior is really nice as well, the only rust is on the pinch welds underneath the car, and the sun roof. Which of course I'll take care of when I get to it, first off is getting it running though! Then suspension, then body.
Little back story here, back in high school, one of my best friends had a 1987 SE Tornado silver Rx-7 with a street port, his dad re-did the whole car from a rolling chassis with no engine, he owned a body shop, so I guess that made it easier. Anyways, it ended up being beautiful (I would saw flawless), then he sold it for $8k to some guy who was buying it for his kid's graduation. I really missed driving around in the car, and just plain seeing it. Thus my passion for the Rx-7 was born! It didn't help living in Japan for 2 years seeing Rx-7s everywhere all the time. So I had always wanted one! I bought one the 2nd week I came home from Japan, few years later here I am!
Anyways... got my DD fixed, ended up being a shot Master and Slave cylinder, got it fixed an hour before I left for vacation, for a lot less than I was expecting as well. Here's my daily for the hell of it, another Mazda, 92 Mx-3 GS (the one with the tiny V6).
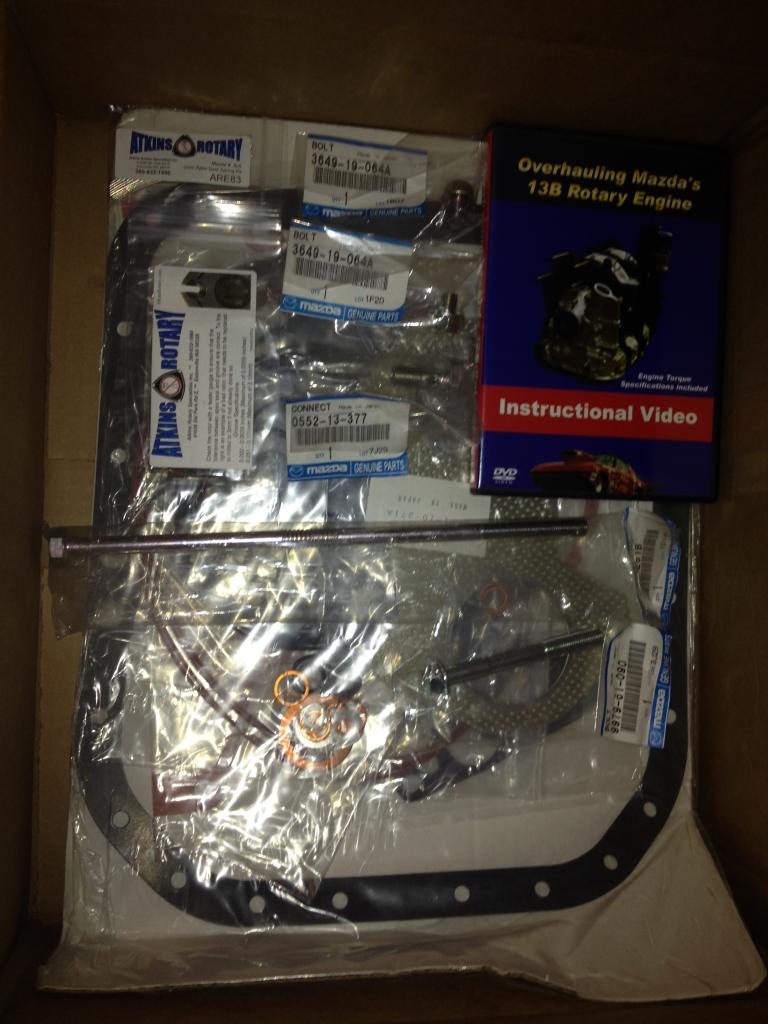
Got back from Vacation and I had some parts waiting for me! Two S4 TII housings, gasket kit, apex seals, various bolts that needed to be replaced, a dvd, engine mounts, and a stage 1 Exedy clutch kit that I forgot to take a picture of. I got these all from Atkins or Racing Beat.


Also, for the coolant passages in the rotor housings, I'll be using a set of expansion plugs (19mm-22mm) I picked up from the auto parts store, they're sitting in the holes currently.
Decided to test out the 5th and 6th port actuators, I used compressed air into the vacuum hose, and noticed only one pump working. Took off the other, and it was stuck open! I sprayed WD40 into it many times, and it wouldn't budge. Eventually, after knocking it a bit with a hammer and just pulling on it, it came loose. Threw it back on there, tightened it up real good, and it works like a charm now!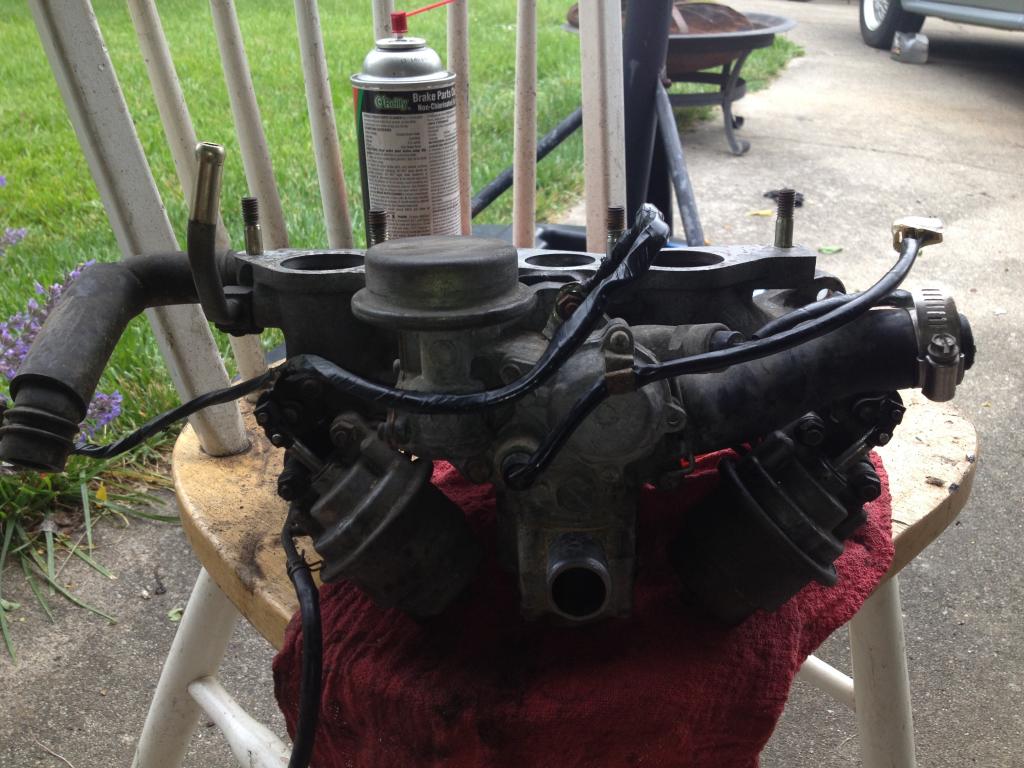
So, the rebuild should commence soon! I did order atkins sleeves, (84-92 Rx7 Atkins Designed Six Port Actuator...) rather than the pineapple ones, just for sanity reasons of worrying about the inserts falling out I guess...
Little back story here, back in high school, one of my best friends had a 1987 SE Tornado silver Rx-7 with a street port, his dad re-did the whole car from a rolling chassis with no engine, he owned a body shop, so I guess that made it easier. Anyways, it ended up being beautiful (I would saw flawless), then he sold it for $8k to some guy who was buying it for his kid's graduation. I really missed driving around in the car, and just plain seeing it. Thus my passion for the Rx-7 was born! It didn't help living in Japan for 2 years seeing Rx-7s everywhere all the time. So I had always wanted one! I bought one the 2nd week I came home from Japan, few years later here I am!
Anyways... got my DD fixed, ended up being a shot Master and Slave cylinder, got it fixed an hour before I left for vacation, for a lot less than I was expecting as well. Here's my daily for the hell of it, another Mazda, 92 Mx-3 GS (the one with the tiny V6).

Got back from Vacation and I had some parts waiting for me! Two S4 TII housings, gasket kit, apex seals, various bolts that needed to be replaced, a dvd, engine mounts, and a stage 1 Exedy clutch kit that I forgot to take a picture of. I got these all from Atkins or Racing Beat.


Also, for the coolant passages in the rotor housings, I'll be using a set of expansion plugs (19mm-22mm) I picked up from the auto parts store, they're sitting in the holes currently.
Decided to test out the 5th and 6th port actuators, I used compressed air into the vacuum hose, and noticed only one pump working. Took off the other, and it was stuck open! I sprayed WD40 into it many times, and it wouldn't budge. Eventually, after knocking it a bit with a hammer and just pulling on it, it came loose. Threw it back on there, tightened it up real good, and it works like a charm now!

So, the rebuild should commence soon! I did order atkins sleeves, (84-92 Rx7 Atkins Designed Six Port Actuator...) rather than the pineapple ones, just for sanity reasons of worrying about the inserts falling out I guess...
06-23-14, 10:34 PM
#33
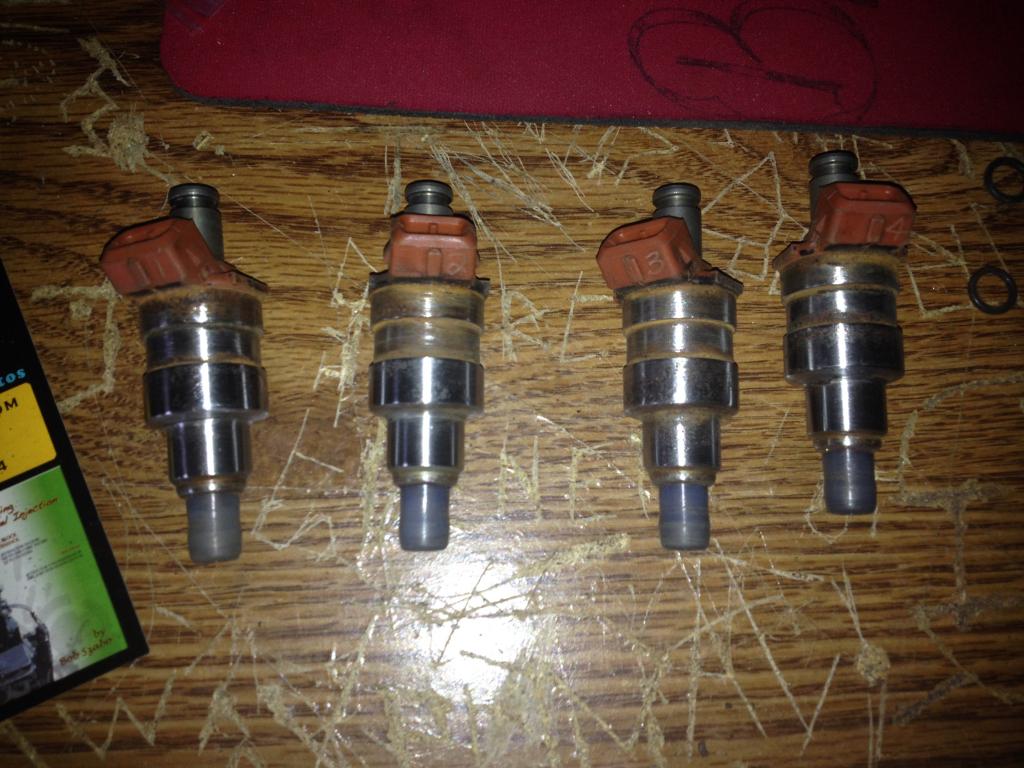
Vacation was great, I'd say I needed it, but I'm getting paid to go to college full time, so not really haha! Anyways, got home and painted some things here and there, got my Injectors back. Apparently they were pretty bad, a-lot needed replacing with them, but they run great (48-49 Lb/hr), one of them runs 6% better than the others at 51 lb/hr for some reason. Think I'll paint these too, while I'm on a painting spree.
So, hopefully this Friday I will begin re-assembly, i'm excited! I watched the assembly portion of the Atkins rotary DvD, doesn't look too complicated at all!


So, hopefully this Friday I will begin re-assembly, i'm excited! I watched the assembly portion of the Atkins rotary DvD, doesn't look too complicated at all!
06-25-14, 03:28 PM
#34
Finally, the last shipment of parts came in! Racing beat lightweight steel flywheel, rear counter weight, Atkins aux intake sleeves and a few other things.
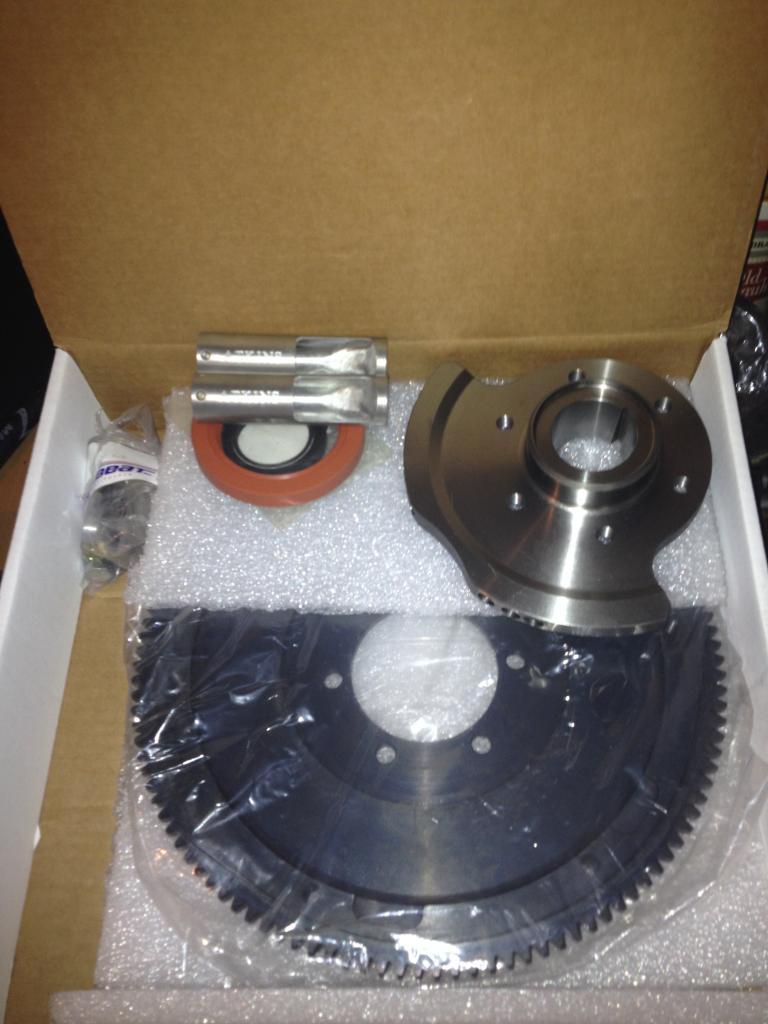
The sleeves look really good, well polished throughout, much better than the stock 90 degree bend!
This Friday I begin! hopefully...

The sleeves look really good, well polished throughout, much better than the stock 90 degree bend!

This Friday I begin! hopefully...
07-06-14, 05:45 PM
#35
So, i managed to get the major engine assembly finished. It wasn't too bad, I followed Atkin's rebuild dvd and followed along the haynes manual. The most difficult part was getting the second rotor into the housing, matching up with the Eccentric shaft without dropping any of the rotor seals, a rubber band did help. I used petroleum jelly to support the water seals, not too much of it was needed really. I realized after the fact that I should have used hylomar, as PJ would cause the seals to swell. How ever, I called Atkins and they reassured me i'd be fine, as long as I don't take her apart anytime soon. Phew! Oh, front and main seal were replaced as well.
Anyways, it wasn't bad really, coming from someone that has pretty much no experience with this sort of thing. Took 2 hours total. No help, no power tools, just a torque wrench and basic tools. Definitely a confidence booster when it comes to the automotive repair world.
I haven't yet assembled the front cover yet, because I don't have a dial indicator to measure end play, tomorrow I'll swing by and grab one from harbor freight hopefully. Oh, I also decided to paint the irons! (I'm sure endplay won't really change, but I'd rather be safe.)
Anyways, hope everyone has had a great 4th of July weekend! Murica! It would be AWESOME if I was able to get this car up and going this week!
Anyways, it wasn't bad really, coming from someone that has pretty much no experience with this sort of thing. Took 2 hours total. No help, no power tools, just a torque wrench and basic tools. Definitely a confidence booster when it comes to the automotive repair world.
I haven't yet assembled the front cover yet, because I don't have a dial indicator to measure end play, tomorrow I'll swing by and grab one from harbor freight hopefully. Oh, I also decided to paint the irons! (I'm sure endplay won't really change, but I'd rather be safe.)


Anyways, hope everyone has had a great 4th of July weekend! Murica! It would be AWESOME if I was able to get this car up and going this week!


 07-08-14, 12:50 PM
#39
Thanks haha. More to come!
RagNaRok, I didn't go with an actual kit, I did purchase the gasket kit (One with the metal gaskets) and individually purchased new seals and springs besides the side seals, they were still healthy. Upgraded to 1 piece corner seals and FD springs. Used the 2 piece Apex seals.
RagNaRok, I didn't go with an actual kit, I did purchase the gasket kit (One with the metal gaskets) and individually purchased new seals and springs besides the side seals, they were still healthy. Upgraded to 1 piece corner seals and FD springs. Used the 2 piece Apex seals.
07-14-14, 11:14 PM
#40
So, I've slowed down progress a bit. Full time college takes a bit out of my free time. Also, rebuilding a rotary engine is a lot to take in, especially for someone with my basically zero previous automotive maintenance experience. Though, I can't tell you how many hours have been spent reading build threads, looking up how-to's, double checking what it is that I'm even doing, the forums have been my home as of lately, as well as the Haynes manual.
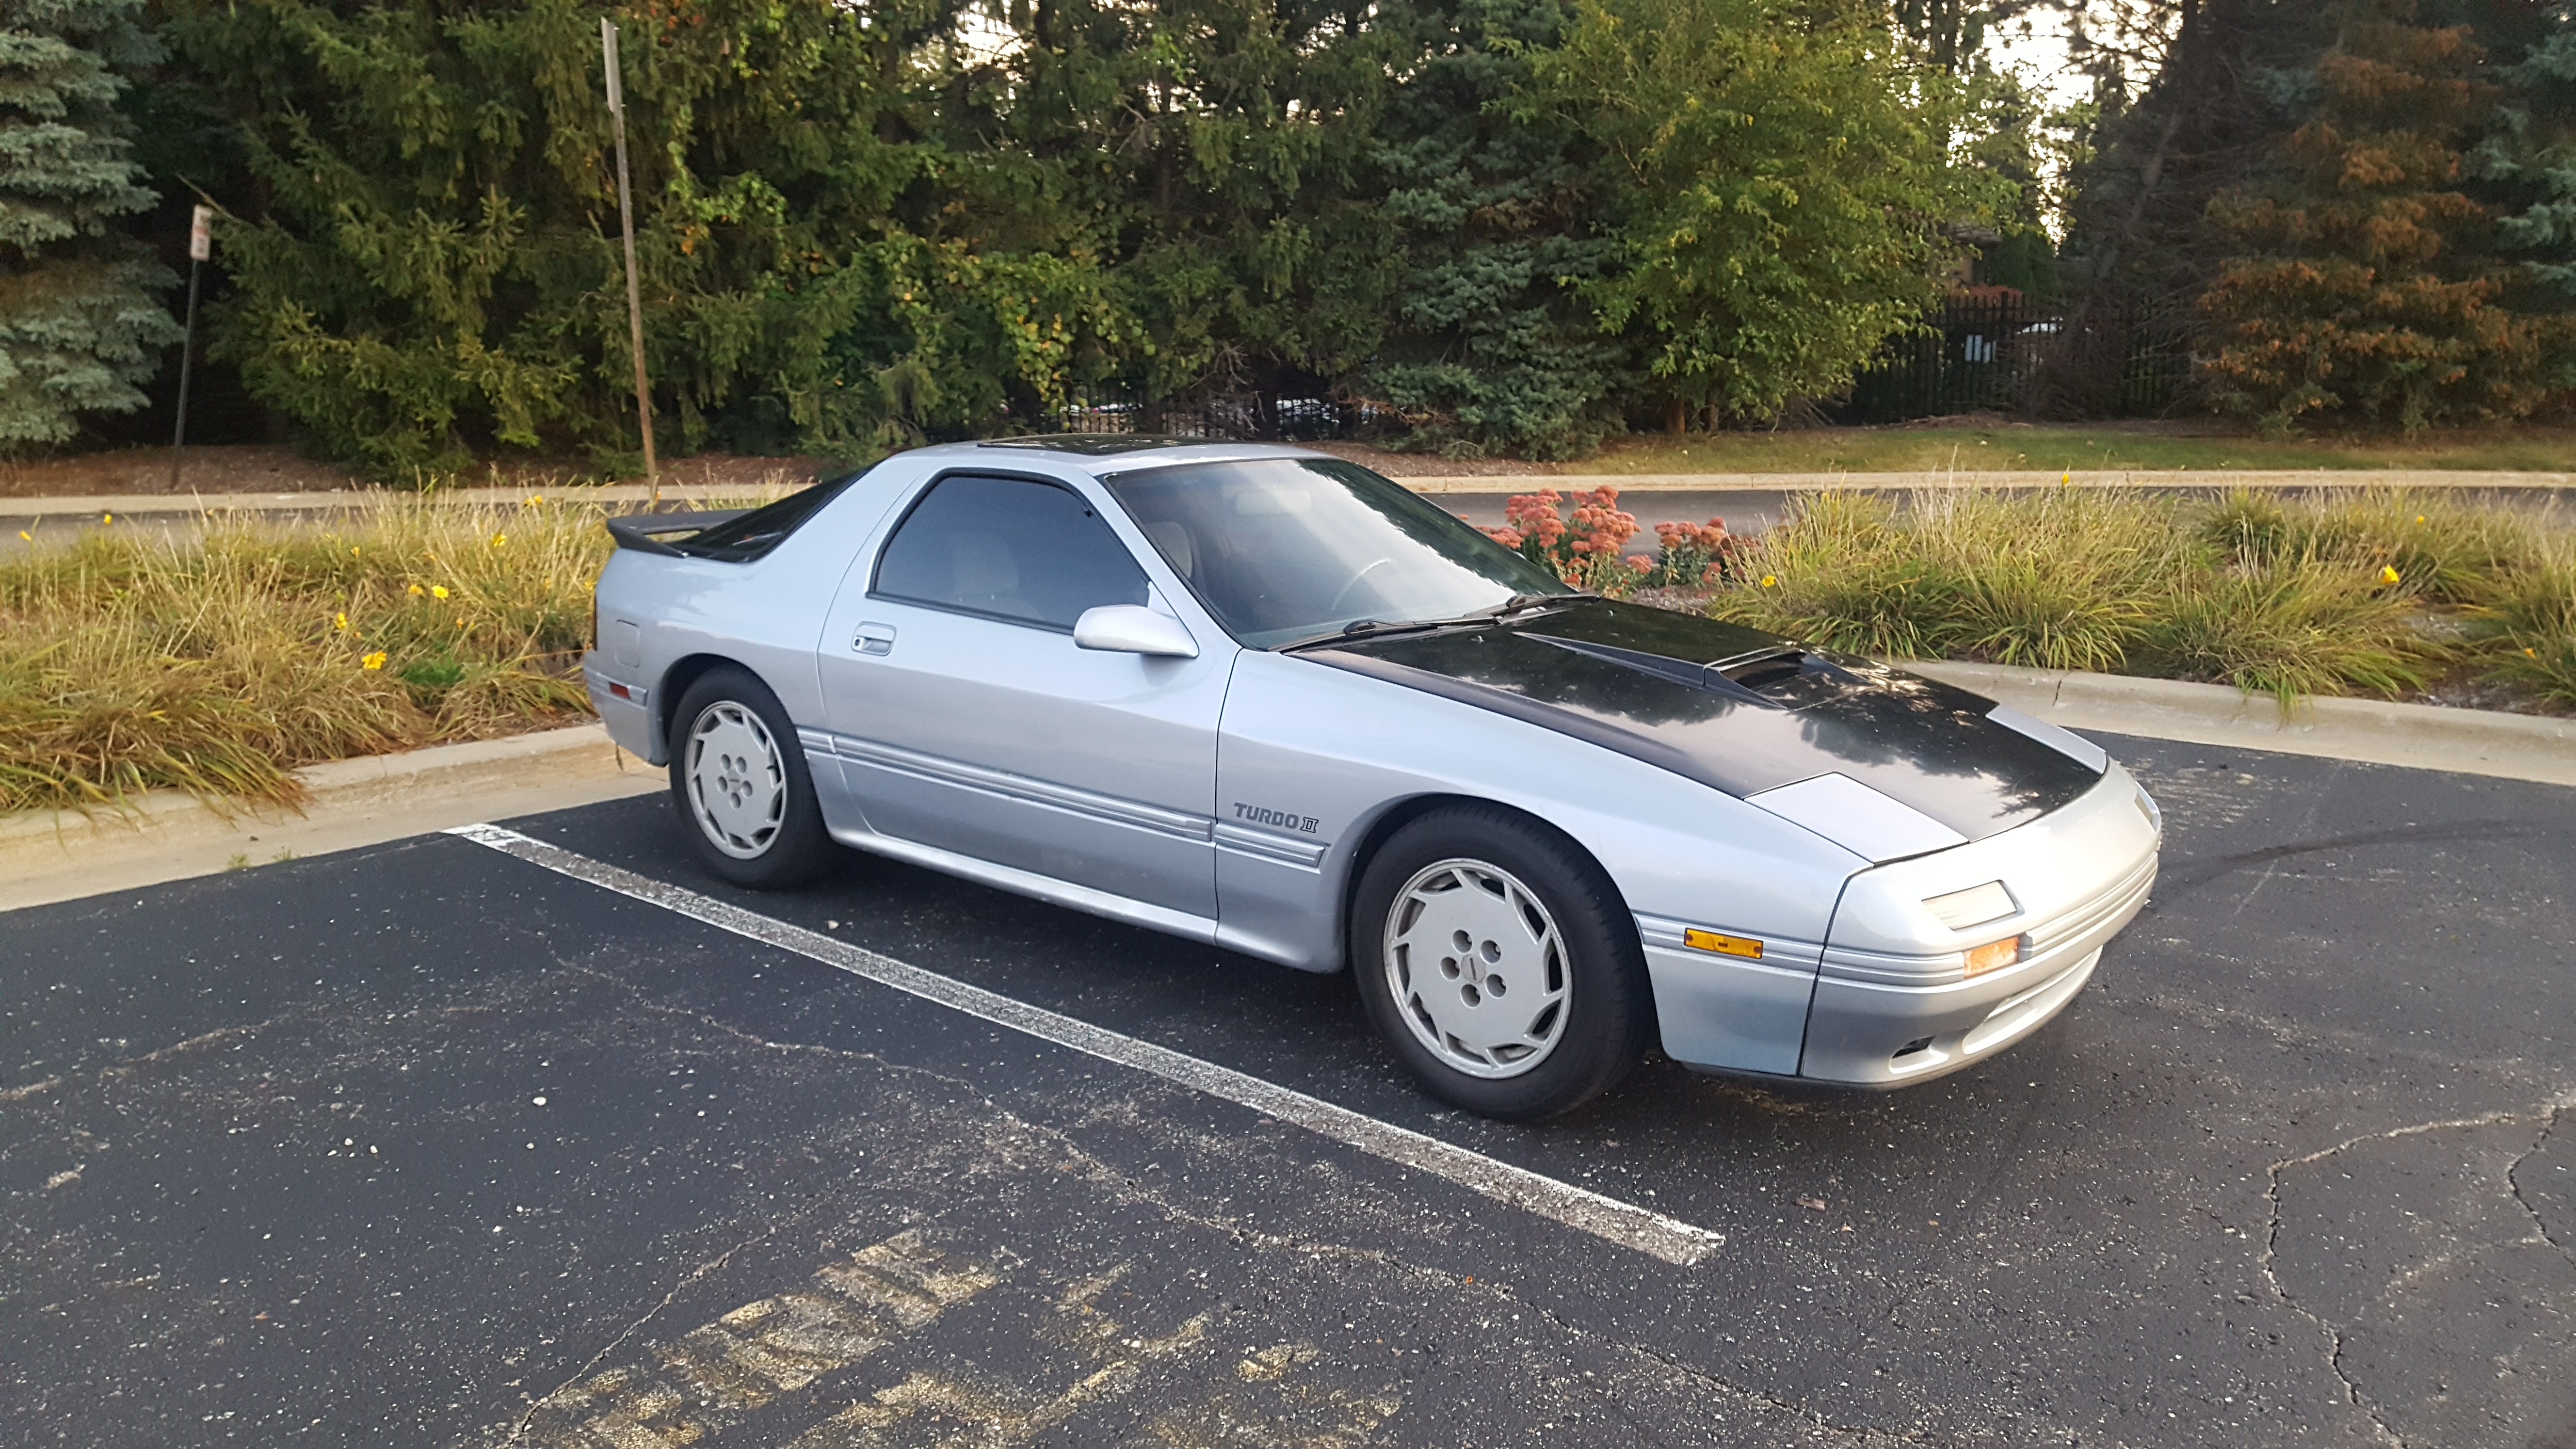
So, as of now, I have 32 days left until I reach my deadline of having this build complete (as in running, reliable etc.). I'm pretty confident I'll reach my goal, how ever, it would be nice to have it running by this upcoming weekend as the 26 and 27th I'll be up in Icecoda Michigan (Oscoda, oops), and it will make the perfect opportunity to break in my engine. So... I'm going to try for that! Even if I don't make my goal, then I'll still continue to work on it. After I meet my goal, I think the next thing to do is upgrade suspension, then body work stuff, I need a new front fender badly, I absolutely hate the one I have on right now, it's also cracked... I found this image on facebook, I think I'm going to try and aim for getting my car to look similar to this one, while staying NA, minus painting the spoiler silver and T2 hood, I think my tint is darker also. I wonder what the wheel and tire specs are though?

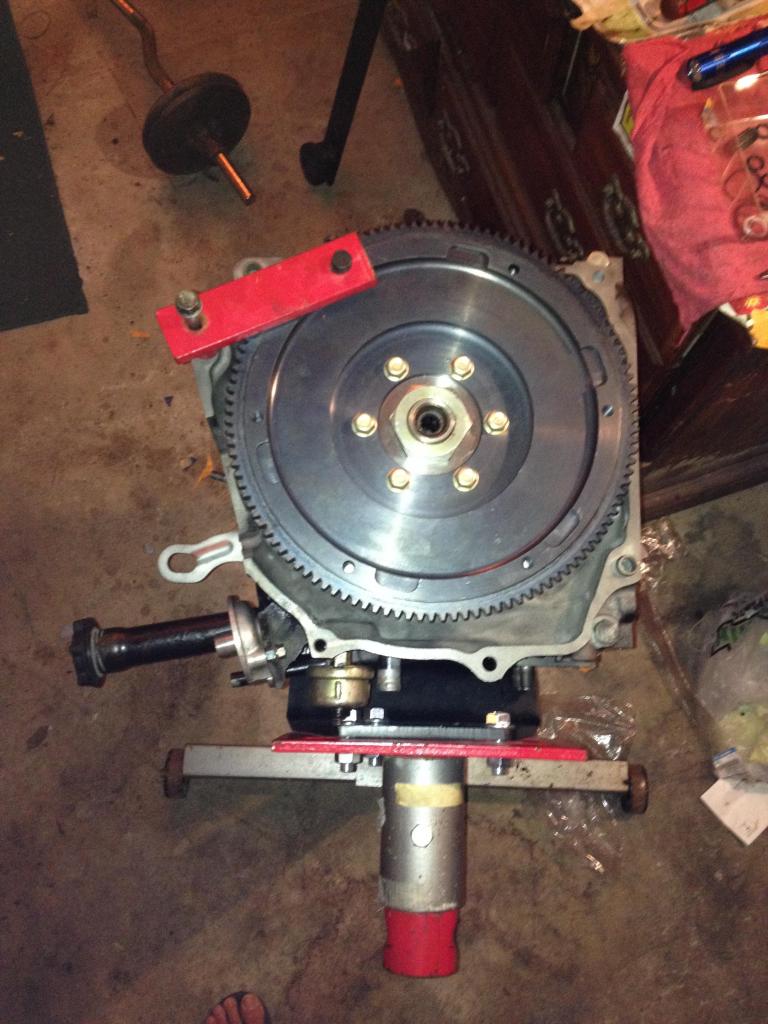
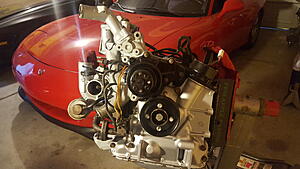
Anyways, after the major assembly was done I took a bit of a break. Finally got off my *** and got to work. This is how I was able to torque the flywheel and front hub assembly. Using an engine stand arm as a stopper, saved me from buying an actual flywheel stopper. Notice the new flywheel? Lightweight Steel Racing beat, with the appropriate counterweight as well.
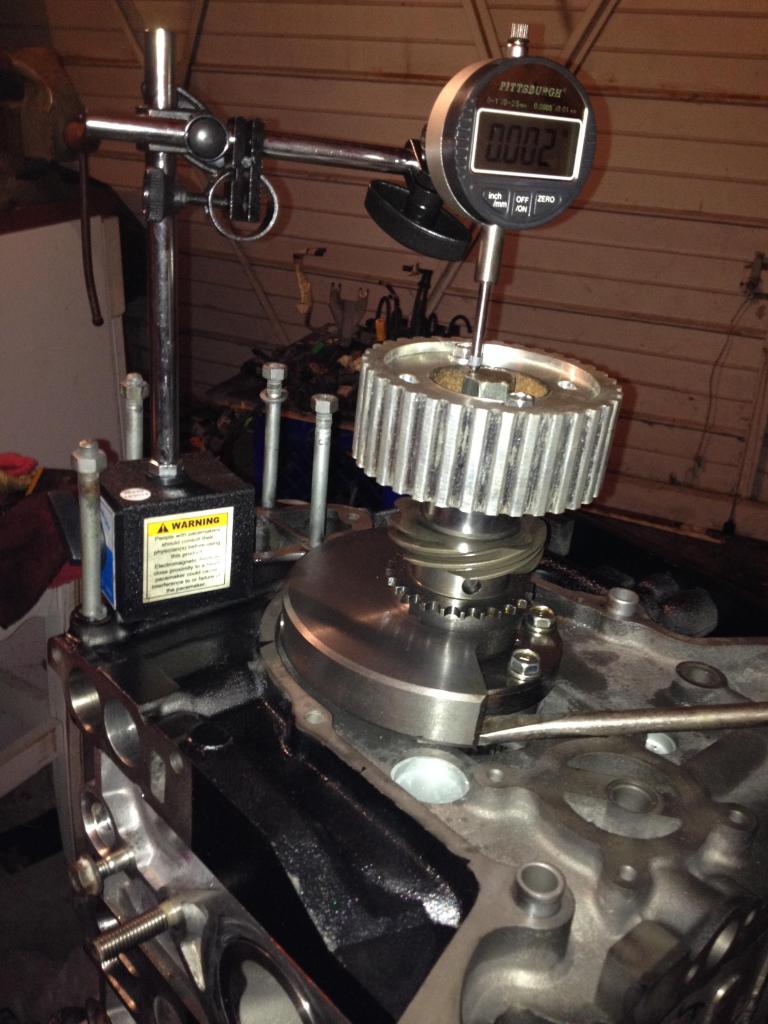
Next step was to assembly the front stack and measure end play, I was getting 0.0025 in' until I properly torqued the flywheel then I got 0.002. According to the manual, it was in specifications, so I went with it.
New clutch!
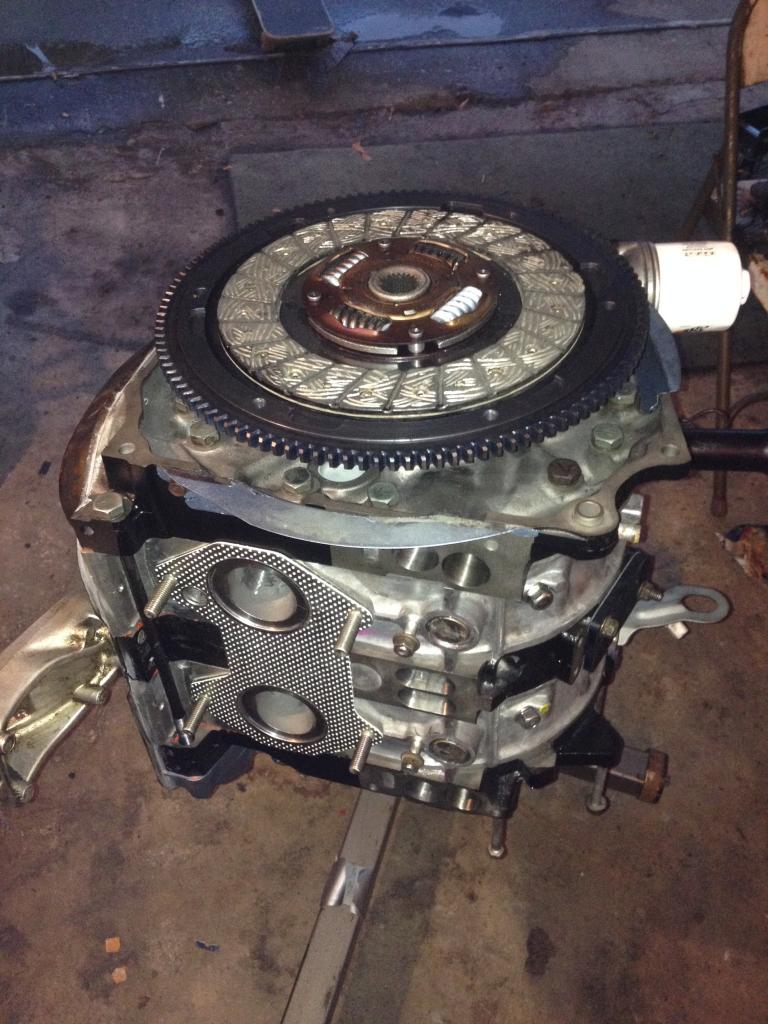
New Pressure plate!
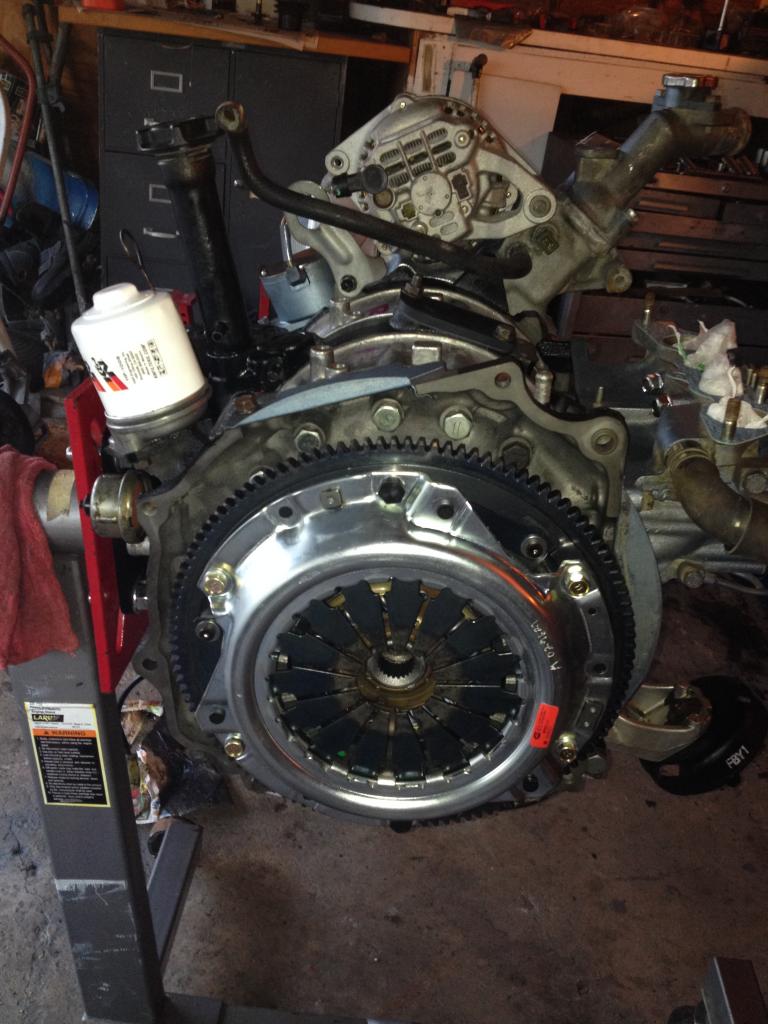
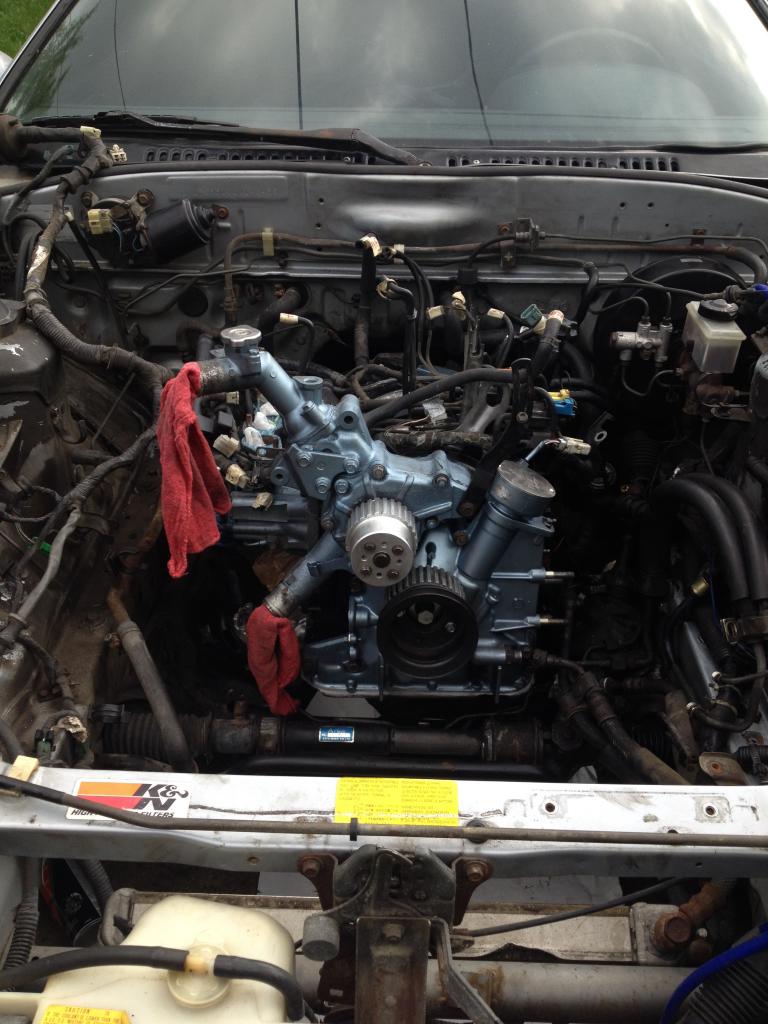
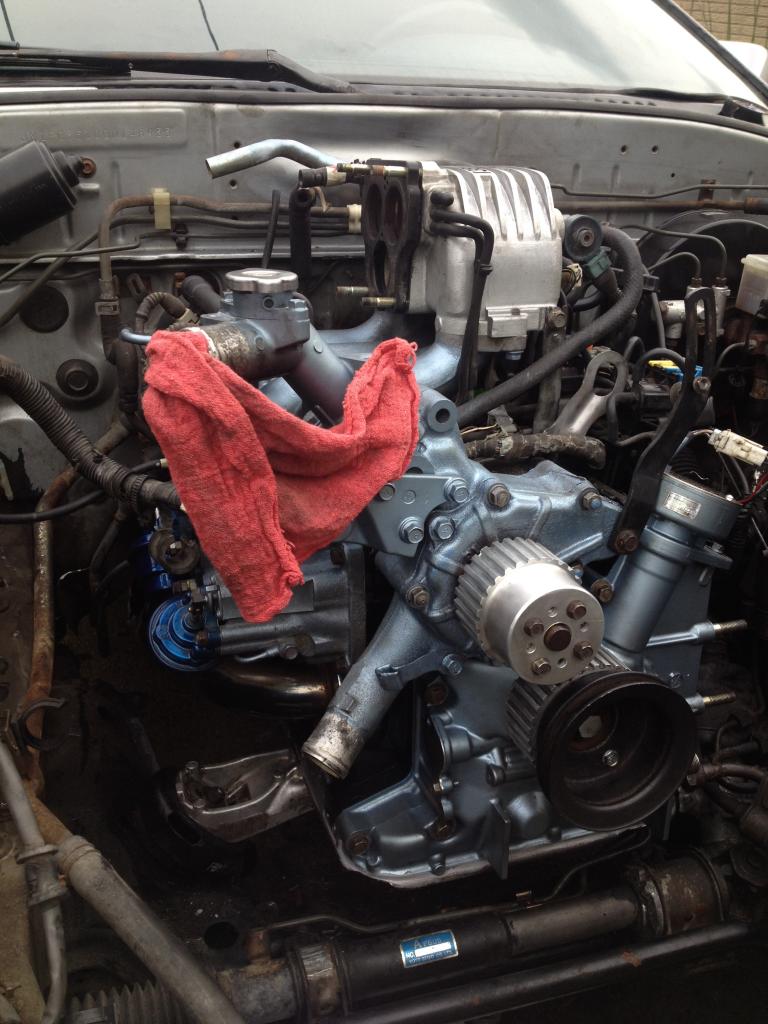
Notice the pulley? Yeah... as an early birthday present I got myself a glimer pulley set. I've read that fabrication had to be done about 50% of the time. Yeah... I had to fabricate the water pump pulley, just used a stone drill grinder bit thing, and walah, it fit! Assembled the front cover, using a gasket and RTV. Then threw the oil pan on, just using RTV great stuff without the gasket, which is something I read on the forums as well. Transferred timing marks over, and set the CAS properly. Turned the engine, and heard the whooosh noises! I'd be lying if I said that didn't excite me. Threw the power steering pulley on and called it a day, the water pump housing is just on it for looks right now... been to lazy to actually seal it down for some reason. Anyways, it looks good, at least to me it does. Also have my new motor mounts as well, my old ones were bad, one snapped in half, and the other is about to.
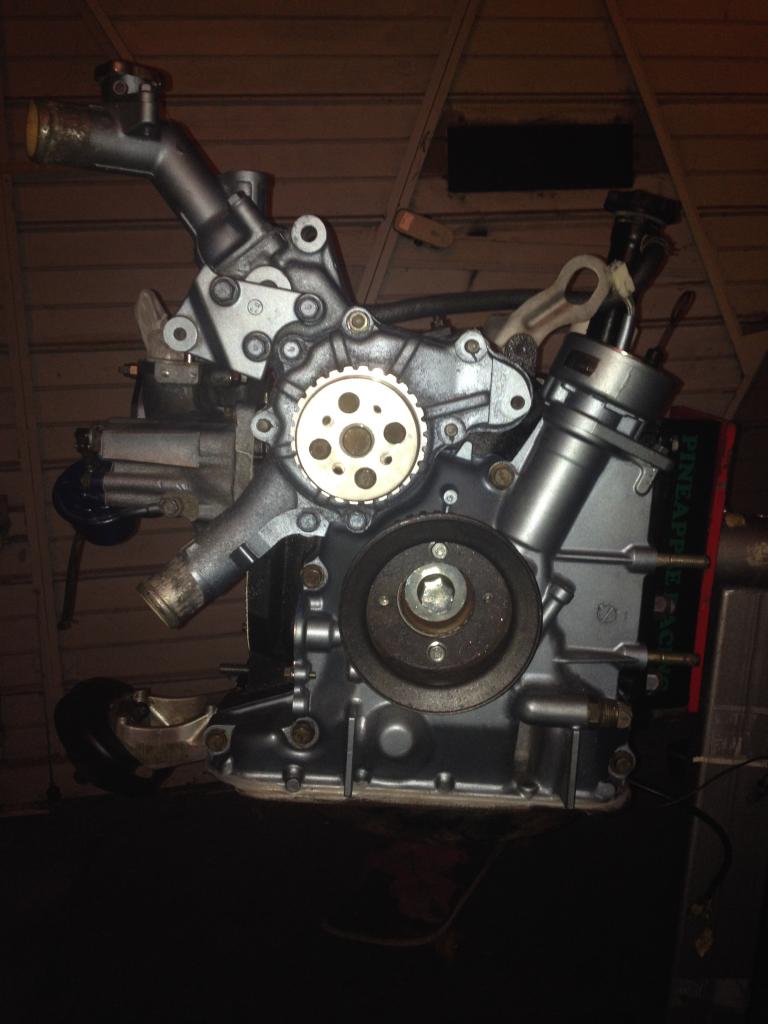
Forgot to mention, replaced the pilot bearing and seal, throw out bearing, front pulley bolt, and a new thermal pellet from Atkins rotary. There's probably more that I can't remember right now.
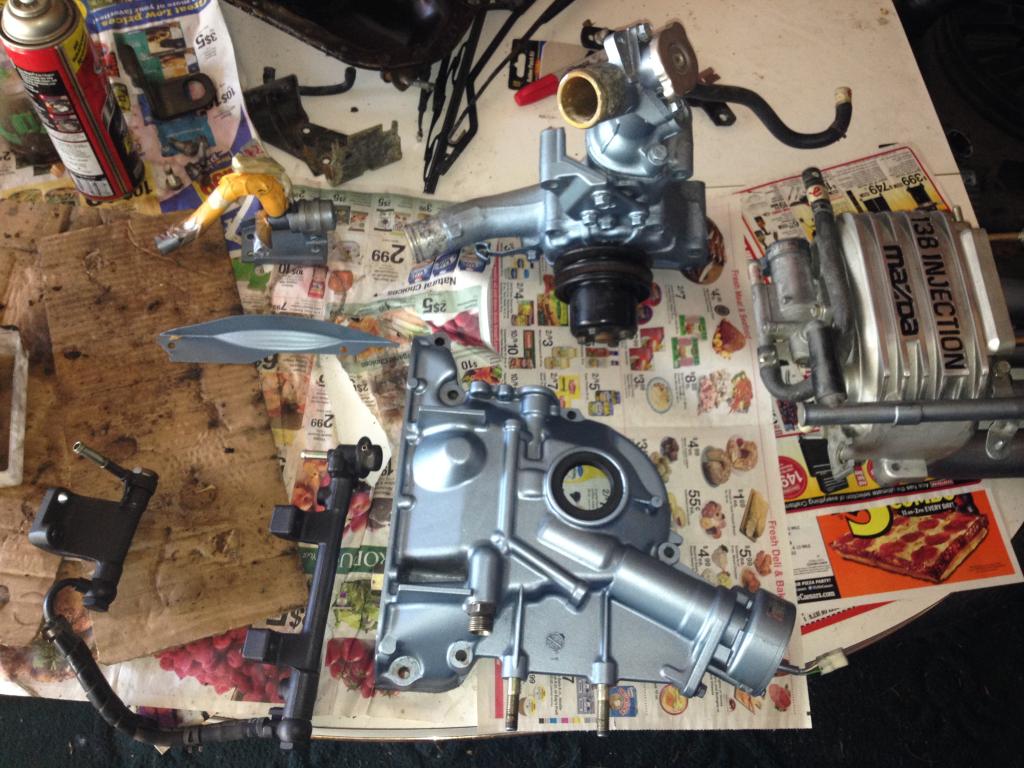
Here's a picture of block off plates, OMP and ACV, as well as my painted 5th and 6th port actuators. The LIM is bolted and sealed down, I actually almost forgot to add the sleeves! That could have been bad...
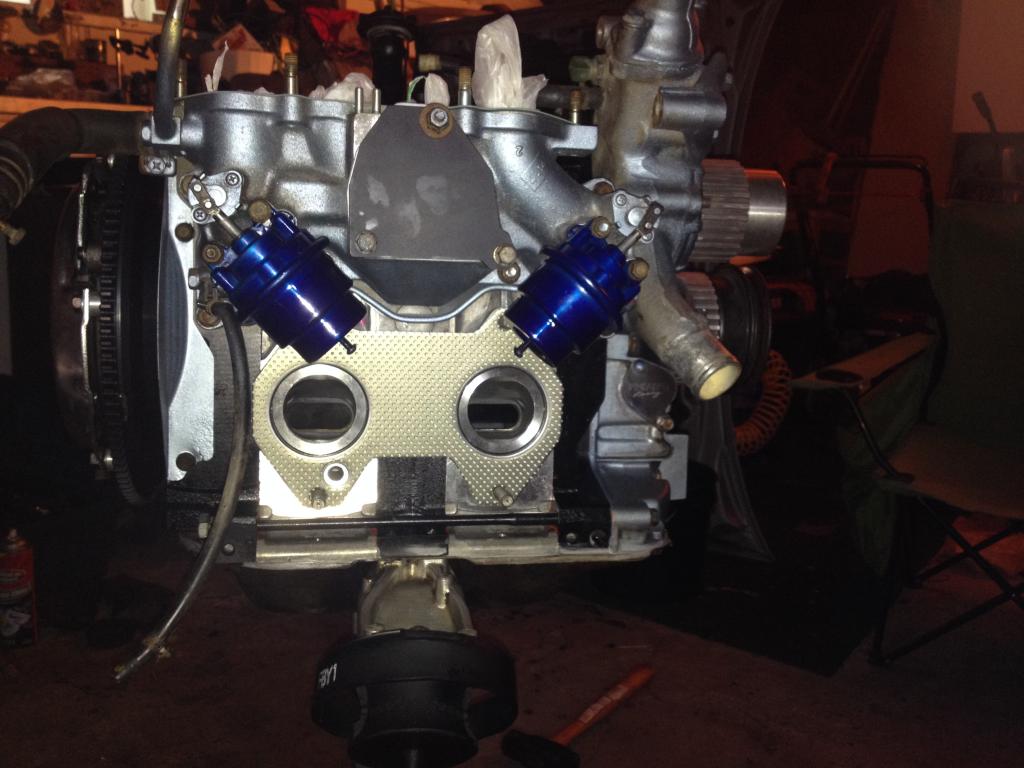
It's ready to get installed into the bay really, I want to install the rest (rat's nest, fuel rails, hoses, etc.) once it's in. One thing that's hanging me up a bit is the old previous exhaust pipe from manifold to pre-silencer has 2 nuts that are rusted pretty damn good, I don't have enough anger built up in me to get it, and I've tried everything but heat. I'll have to borrow a neighbor's propane torch I think.
So, from researching pre-mixing, I think it's safe to say I'll be mixing 100:1 TC-W3 2 stroke oil, or one 16oz per tank using 87 octane. Now to find out what type of engine oil to use, so many options. 20w50 perhaps?
So, as of now, I have 32 days left until I reach my deadline of having this build complete (as in running, reliable etc.). I'm pretty confident I'll reach my goal, how ever, it would be nice to have it running by this upcoming weekend as the 26 and 27th I'll be up in Icecoda Michigan (Oscoda, oops), and it will make the perfect opportunity to break in my engine. So... I'm going to try for that! Even if I don't make my goal, then I'll still continue to work on it. After I meet my goal, I think the next thing to do is upgrade suspension, then body work stuff, I need a new front fender badly, I absolutely hate the one I have on right now, it's also cracked... I found this image on facebook, I think I'm going to try and aim for getting my car to look similar to this one, while staying NA, minus painting the spoiler silver and T2 hood, I think my tint is darker also. I wonder what the wheel and tire specs are though?

Anyways, after the major assembly was done I took a bit of a break. Finally got off my *** and got to work. This is how I was able to torque the flywheel and front hub assembly. Using an engine stand arm as a stopper, saved me from buying an actual flywheel stopper. Notice the new flywheel? Lightweight Steel Racing beat, with the appropriate counterweight as well.

Next step was to assembly the front stack and measure end play, I was getting 0.0025 in' until I properly torqued the flywheel then I got 0.002. According to the manual, it was in specifications, so I went with it.

New clutch!

New Pressure plate!

Notice the pulley? Yeah... as an early birthday present I got myself a glimer pulley set. I've read that fabrication had to be done about 50% of the time. Yeah... I had to fabricate the water pump pulley, just used a stone drill grinder bit thing, and walah, it fit! Assembled the front cover, using a gasket and RTV. Then threw the oil pan on, just using RTV great stuff without the gasket, which is something I read on the forums as well. Transferred timing marks over, and set the CAS properly. Turned the engine, and heard the whooosh noises! I'd be lying if I said that didn't excite me. Threw the power steering pulley on and called it a day, the water pump housing is just on it for looks right now... been to lazy to actually seal it down for some reason. Anyways, it looks good, at least to me it does. Also have my new motor mounts as well, my old ones were bad, one snapped in half, and the other is about to.

Forgot to mention, replaced the pilot bearing and seal, throw out bearing, front pulley bolt, and a new thermal pellet from Atkins rotary. There's probably more that I can't remember right now.
Here's a picture of block off plates, OMP and ACV, as well as my painted 5th and 6th port actuators. The LIM is bolted and sealed down, I actually almost forgot to add the sleeves! That could have been bad...

It's ready to get installed into the bay really, I want to install the rest (rat's nest, fuel rails, hoses, etc.) once it's in. One thing that's hanging me up a bit is the old previous exhaust pipe from manifold to pre-silencer has 2 nuts that are rusted pretty damn good, I don't have enough anger built up in me to get it, and I've tried everything but heat. I'll have to borrow a neighbor's propane torch I think.
So, from researching pre-mixing, I think it's safe to say I'll be mixing 100:1 TC-W3 2 stroke oil, or one 16oz per tank using 87 octane. Now to find out what type of engine oil to use, so many options. 20w50 perhaps?
07-22-14, 12:30 PM
#41
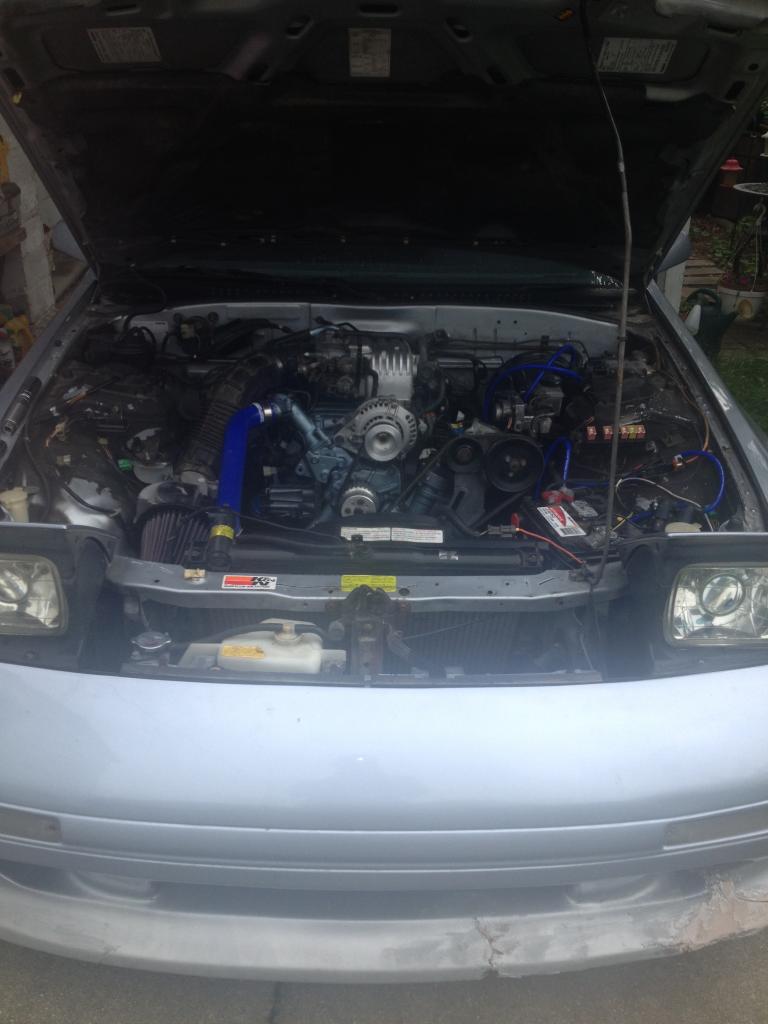
So, I got the engine installed on the 17th, and on the 18th at midnight the car was 98% complete. I had some assistance from my neighbor who helped me raise and lower the engine hoist as I was wrestling the engine into place on the input shaft, this took a few hours, eventually it slid right into place.
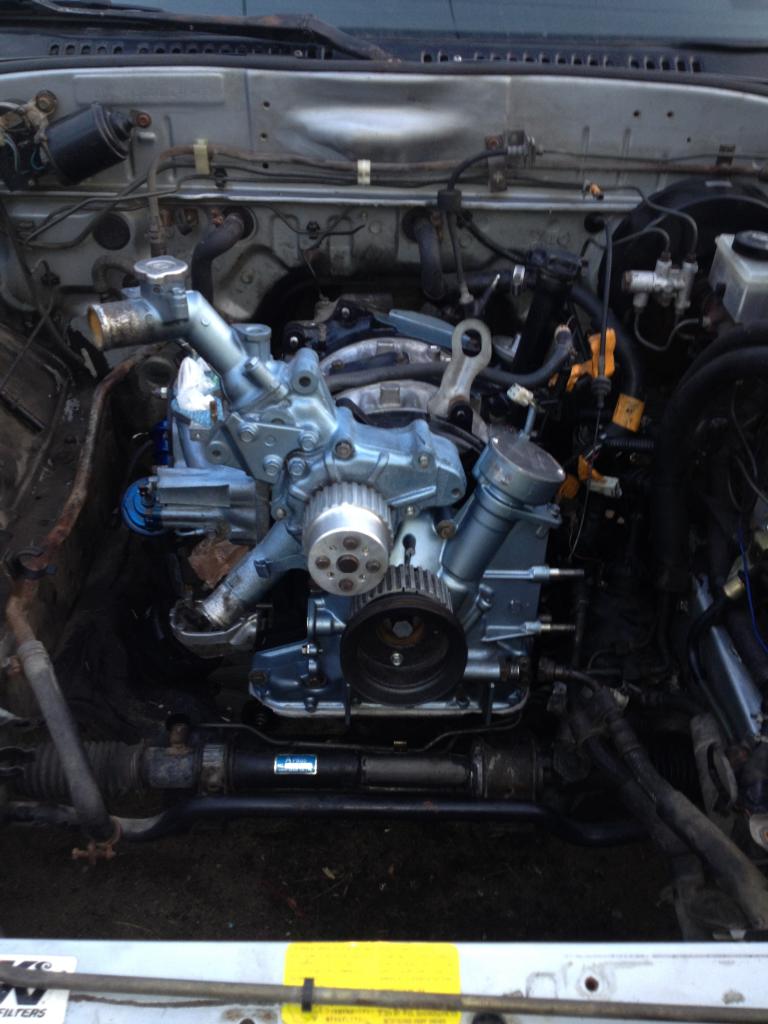
I got the engine in at 4:50, and I had to be on the road by 5:30 for class. So the next day I resumed my work and completed everything except the alternator, which I had to replace the pulley, and charge the battery.
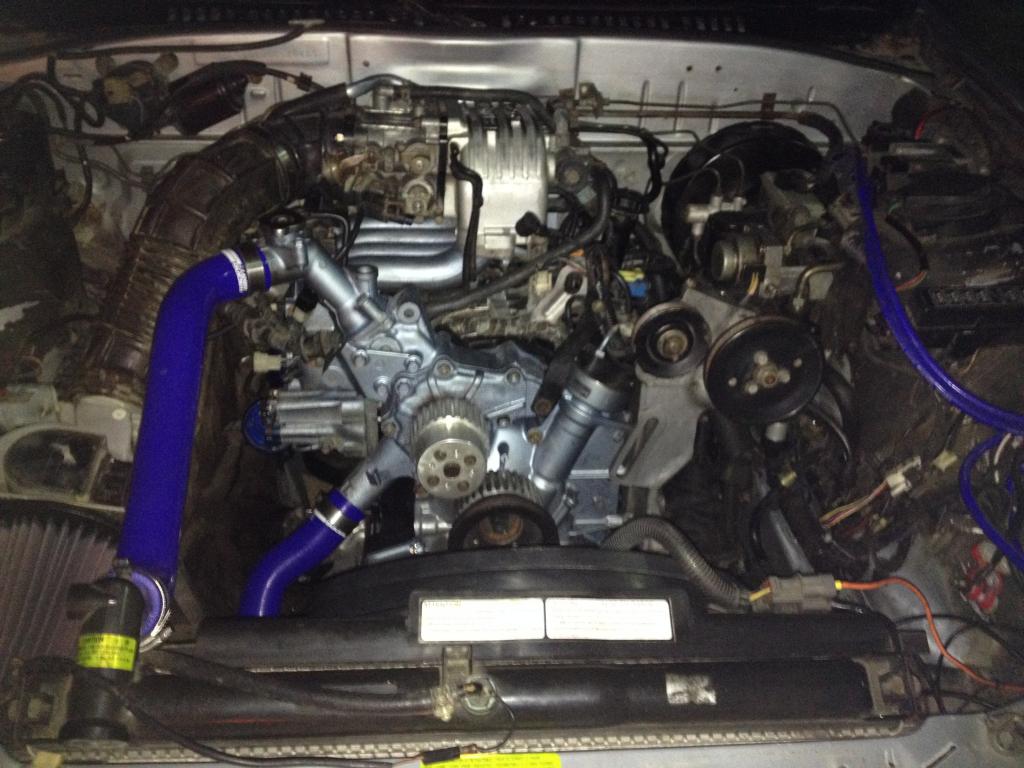
So, woke up the next morning quite early, bought all necessary fluids, got a neighbor to use an impact hammer to replace my pulley, took like 2 seconds. Threw the alternator in, plugged it in and installed the belt. Topped off the oil, the coolant, power-steering and mixed a 5 gallon contain with 87 octane and 2 stroke oil, I added 7 ounces of 2 stroke to 5 gallons of gas, I went with a little extra oil to be safe. I noticed it only took about 3 quarts of coolant before it topped off. Installed the battery and primed it up by removing the fuse and cranking it. Threw the fuse back in, and crossed my fingers and decided to try and start it.
It started up on the first try! I shut her down because she revved to 3k, and then climbed to 4k, freaked me out a bit. Also, after watching the video I realized I forgot to tighten the power-steering bi-pulley. The coolant cap was off due to me still trying to fill it up.
Tried to start her again, and she didn't want to start, figured I flooded her... So I de-flooded it and she started up again, same thing... revved to 3k then climbed to 4k. At the point I realized I should just let her run! First, I decided to take off the TB and re-tighten it and make sure there were no leaks. also took off the cruise control. Started her up again, and now a different issue. Bouncing Idle... I assume it's the TPS (which forum members helped fortify my belief), which isn't a tough fix, how ever It's going to be tough to get it warmed up without actually driving her. Total run time so far, probably about 40 minutes.
Finally got my RX7 Decal on her!

Anyways, I was able to at least build an engine and get her started. That's a pretty awesome feeling.

I got the engine in at 4:50, and I had to be on the road by 5:30 for class. So the next day I resumed my work and completed everything except the alternator, which I had to replace the pulley, and charge the battery.


So, woke up the next morning quite early, bought all necessary fluids, got a neighbor to use an impact hammer to replace my pulley, took like 2 seconds. Threw the alternator in, plugged it in and installed the belt. Topped off the oil, the coolant, power-steering and mixed a 5 gallon contain with 87 octane and 2 stroke oil, I added 7 ounces of 2 stroke to 5 gallons of gas, I went with a little extra oil to be safe. I noticed it only took about 3 quarts of coolant before it topped off. Installed the battery and primed it up by removing the fuse and cranking it. Threw the fuse back in, and crossed my fingers and decided to try and start it.
It started up on the first try! I shut her down because she revved to 3k, and then climbed to 4k, freaked me out a bit. Also, after watching the video I realized I forgot to tighten the power-steering bi-pulley. The coolant cap was off due to me still trying to fill it up.
Tried to start her again, and she didn't want to start, figured I flooded her... So I de-flooded it and she started up again, same thing... revved to 3k then climbed to 4k. At the point I realized I should just let her run! First, I decided to take off the TB and re-tighten it and make sure there were no leaks. also took off the cruise control. Started her up again, and now a different issue. Bouncing Idle... I assume it's the TPS (which forum members helped fortify my belief), which isn't a tough fix, how ever It's going to be tough to get it warmed up without actually driving her. Total run time so far, probably about 40 minutes.
Finally got my RX7 Decal on her!

Anyways, I was able to at least build an engine and get her started. That's a pretty awesome feeling.
07-22-14, 01:04 PM
#42
Full Member
Well congrats on getting her together and started. Alot better then most people do to there cars and claim they build there cars. So should still be proud of that.
07-29-14, 12:24 PM
#45
Thanks guys! The E-fan came with the car when I purchased it, not sure what brand it is, I could take more pictures of it if you'd like though. Glad I've served to be at least somewhat useful!
I Haven't got around to messing with the TPS, found out my multimeter had a blown fuse, haven't been in a hurry really to get it running right. I'm over the hump and all that's left is simple stuff, hopefully. Been out of town this weekend, but Friday look what I bought! The price i got for this was a steal, it runs nicely too! Just needs new brake lines.
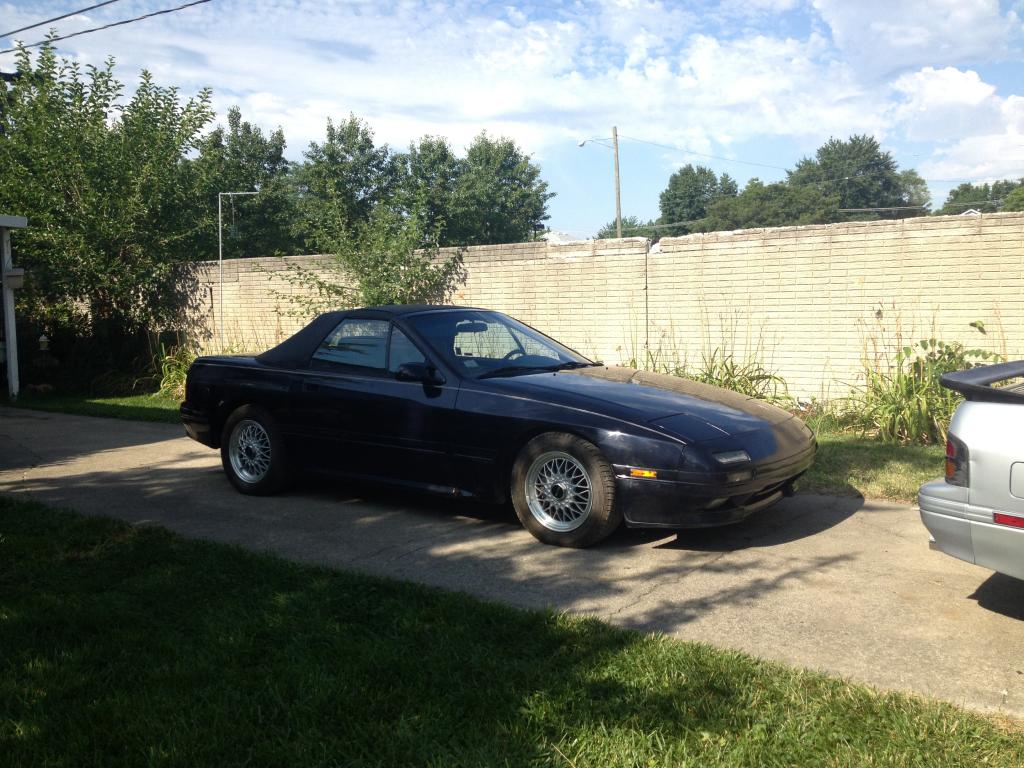
It's a 91, bone stock, with 100300 miles on it. There's some surface rust, but for the most part it's in great shape. She's so quiet compared to my 86. She drives great, minus the fact that brakes don't work... For the price I got her, there was no way I could turn it down! She sat for 5 years outside, she was babied though. looks like the auxiliary port actuators are stuck, a bit different on the S5s as well. Anyways, with new gas she started right up, time for a tune up however.
I Haven't got around to messing with the TPS, found out my multimeter had a blown fuse, haven't been in a hurry really to get it running right. I'm over the hump and all that's left is simple stuff, hopefully. Been out of town this weekend, but Friday look what I bought! The price i got for this was a steal, it runs nicely too! Just needs new brake lines.


It's a 91, bone stock, with 100300 miles on it. There's some surface rust, but for the most part it's in great shape. She's so quiet compared to my 86. She drives great, minus the fact that brakes don't work... For the price I got her, there was no way I could turn it down! She sat for 5 years outside, she was babied though. looks like the auxiliary port actuators are stuck, a bit different on the S5s as well. Anyways, with new gas she started right up, time for a tune up however.
10-09-14, 01:53 PM
#46
So, finally an update! Been busy with school and other things. Kind of drove my attention away from her and towards the new 91 that I acquired, fixed her up and did what needed to be done to get her running the way I wanted. She's been my daily driver for the past few months. Sure, she's slow but she's a great car to cruise in with the top down. As you can tell I've been having my fun with her!
Anyways, the issue I was having with the 86 was the idle was messed up. Well, to sum up what was happening, the thermowax and dash-pot were somehow jamming the throttle, keeping you from really doing anything. It was un-driveable, very un-driveable! So, Fidelity101 gave me the great idea of just simplifying the throttle body by removing those unnecessary plates and the thermowax and dash-pot. I did this, and didn't install it in the car until about a week ago. I also painted it!
And there she sat for another week. Yesterday I got the time and desire to try and start her. She wouldn't start, the battery died from too many attempts, so I put her on the charger and said I'd try tomorrow (today).
So, today I got the desire to give her a shot to shine. I also noticed the Mass Air Flow sensor was unplugged... probably why she wouldn't start yesterday? Anyways, she fired right up, and idled right away too! i didn't expect that... Due to broken studs on the Pre-silencer, she has a giant exhaust leak. So she's louder than anything. I moved all three other vehicles out of the drive way and took her on the road. I feel like an idiot for not doing this previously, as she's an absolute thrill to drive! I'm glad I kept the actuators on, as the low end torque is veddy-nice-ah (compared to the Vert and how she ran previously)! The lightweight flywheel makes a ton of difference, she wants to move all the time, and does it noticeably faster! I'm keeping her below 4k for now, for break in purposes. At 4k RPMs she's too loud anyways. Also the Stage 1 Exedy clutch is very nice, another great mod I'd recommend!

Ohh, so another thing I should note, is I'll be turbo-charging her, I should have really done this in the first place, but I really wanted to rebuild her, and I'm glad I did. Anyways, that really concludes the rebuild story. Thanks for everyone's help and comments, responses, replies, etc.


Anyways, the issue I was having with the 86 was the idle was messed up. Well, to sum up what was happening, the thermowax and dash-pot were somehow jamming the throttle, keeping you from really doing anything. It was un-driveable, very un-driveable! So, Fidelity101 gave me the great idea of just simplifying the throttle body by removing those unnecessary plates and the thermowax and dash-pot. I did this, and didn't install it in the car until about a week ago. I also painted it!

And there she sat for another week. Yesterday I got the time and desire to try and start her. She wouldn't start, the battery died from too many attempts, so I put her on the charger and said I'd try tomorrow (today).


So, today I got the desire to give her a shot to shine. I also noticed the Mass Air Flow sensor was unplugged... probably why she wouldn't start yesterday? Anyways, she fired right up, and idled right away too! i didn't expect that... Due to broken studs on the Pre-silencer, she has a giant exhaust leak. So she's louder than anything. I moved all three other vehicles out of the drive way and took her on the road. I feel like an idiot for not doing this previously, as she's an absolute thrill to drive! I'm glad I kept the actuators on, as the low end torque is veddy-nice-ah (compared to the Vert and how she ran previously)! The lightweight flywheel makes a ton of difference, she wants to move all the time, and does it noticeably faster! I'm keeping her below 4k for now, for break in purposes. At 4k RPMs she's too loud anyways. Also the Stage 1 Exedy clutch is very nice, another great mod I'd recommend!


Ohh, so another thing I should note, is I'll be turbo-charging her, I should have really done this in the first place, but I really wanted to rebuild her, and I'm glad I did. Anyways, that really concludes the rebuild story. Thanks for everyone's help and comments, responses, replies, etc.
09-25-19, 12:39 PM
#47
Five years later...
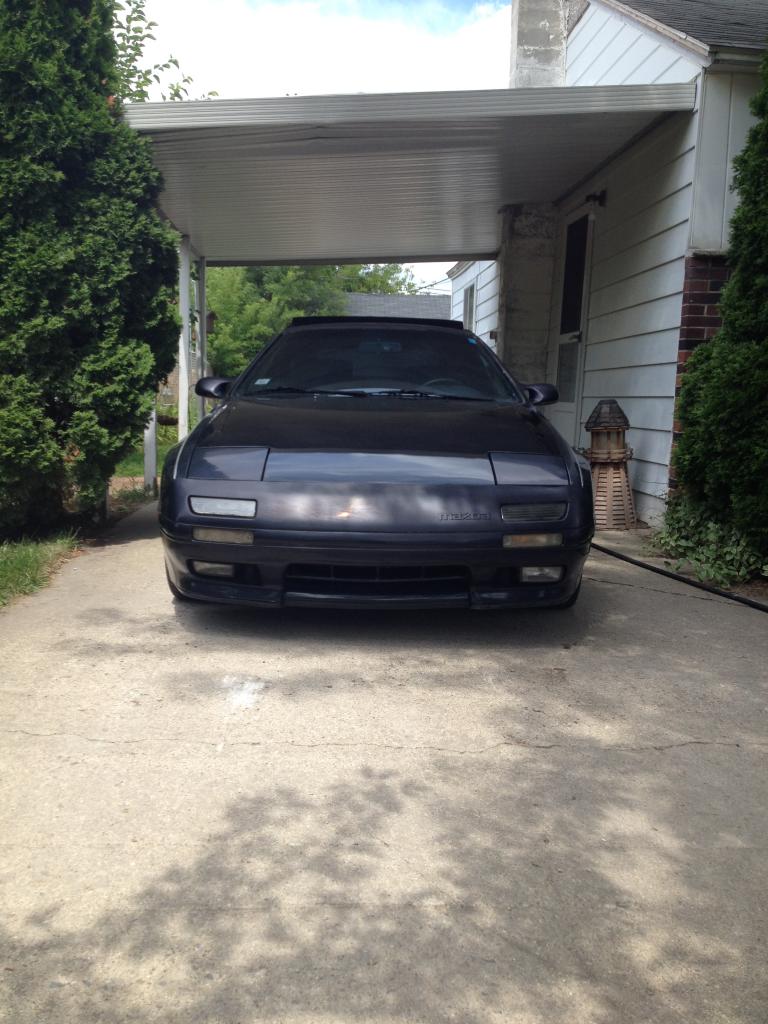
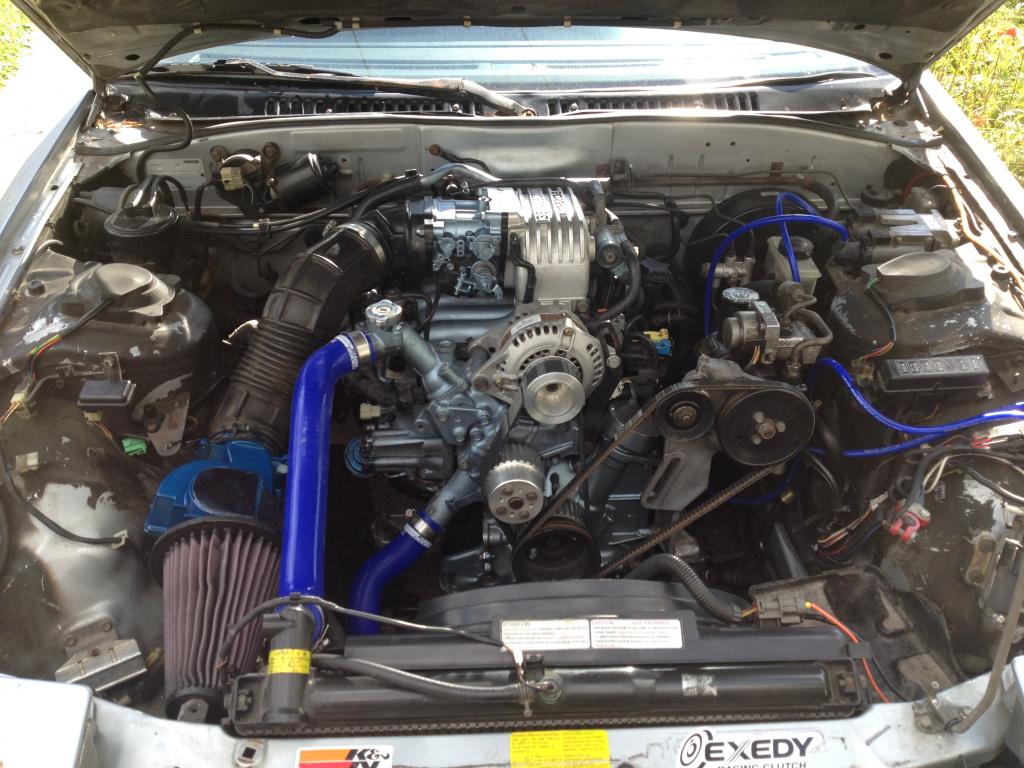
The car runs better than ever now, it's now turbo-charged with a freshly rebuilt T2 motor and an S5 turbo. Power steering has been replaced by a de-powered steering rack, the hideous cracked after-market front fascia has been replaced with a stock unit, the cooling system has been upgraded (oil and coolant), and much more that I'll eventually mention.
This car has been through it all, so many problems and headaches were encountered in every sub-department the car has. The car has proved to be a great learning experience for myself, i've definitely learned a thing or two about Rotaries, RX-7s and just plain ol' automobiles, that's for sure. With all that said, the journey isn't complete, there is still a lot left to do, but right now i'm finally enjoying this car trouble-free!
Things to do down the road:
- Paint, firstly the hood and sunroof needs to be paint matched, rockers and fenders need to be cleaned up a bit as well.
- Aftermarket ECU needs to be installed, then tuned (right now i'm running 720s Secondaries with FCD).
- Exhaust: The current NA Borla catback + RB presilencer to Racing beat Downpipe works fine, but it's way too quiet. Plan to go with a RB REV II exhaust down the road.
- Turbo, stock turbo is fine, but maybe further down the road upgrade to a BNR stage 2-3.
 09-26-19, 08:01 AM
#49
Thank you for the kind words, I think i've ran into every issue possible with this car. Initially I was planning to sell this car as a roller and get something else, I eventually came to my senses andI figured i'd sell my S5 vert and finally finish and enjoy this car and keep it, honestly i don't know how i'd be able to sell this car considering what it's been through under my ownership. Though, a few years back i got sick of this car not running and bought an FD, so having two turbo charged, running, problem-free RX-7s is nice.
Here's a quick run down of what's happened with this car since my last post in 2014.
- Rebuilt engine never ran properly, it was like it had a really bad vacuum leak somewhere hidden. This turned out to be the brake booster to intake manifold line.
- Got the engine running better, but i still had a multitude of problems, from electrical issues, random stalling, fuel pump problems and more.
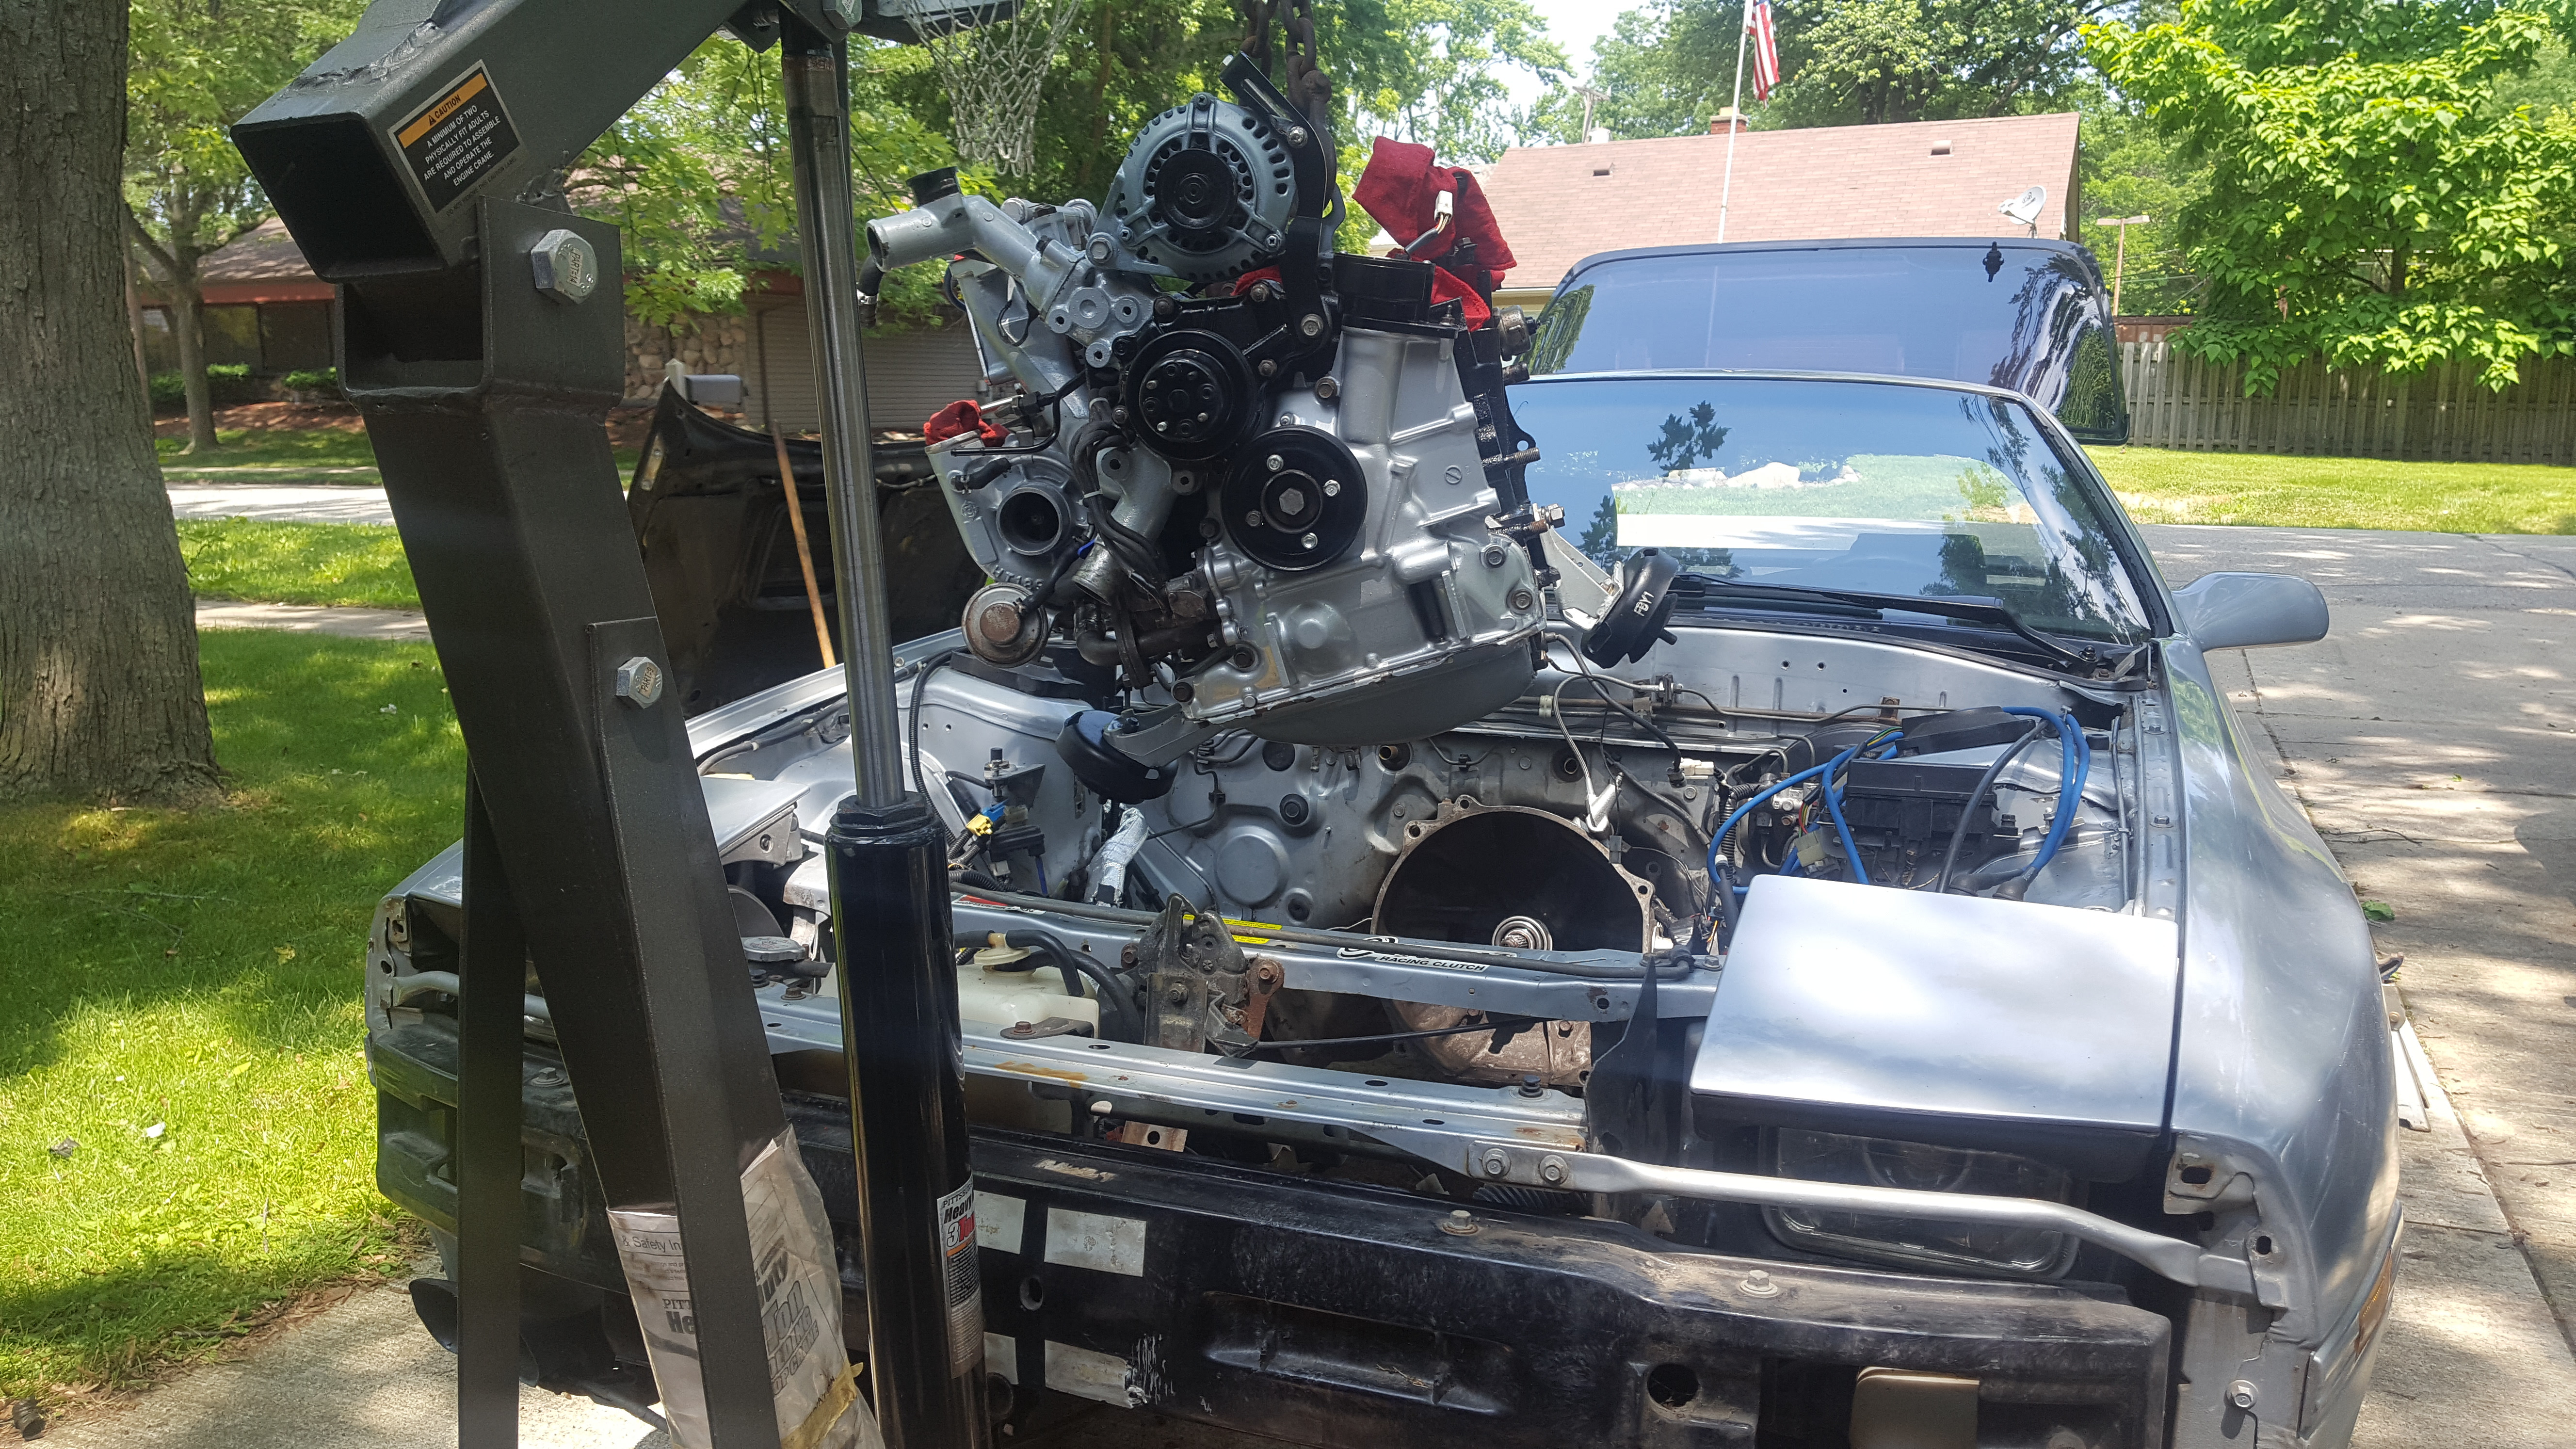
- I came across a really good deal for an entire T2 transmission, running engine and all peripherals for $1200. I ended up with that and started the swap.
- Swap went well, quickly realized the fuel tank was completely junked, rust was so bad in it, i ended up getting a replacement from a local RX-7 shop.
- Two days into running with a replacement fuel pump (walbro 255lph) and cleaned tank I could not get the car to idle right, so i went for a drive with the throttle plates held barely open.
- Car overheats, no leaks, fan works, check oil and coolant, great, oil looks like whipped cream, and coolant looks like a milkshake.
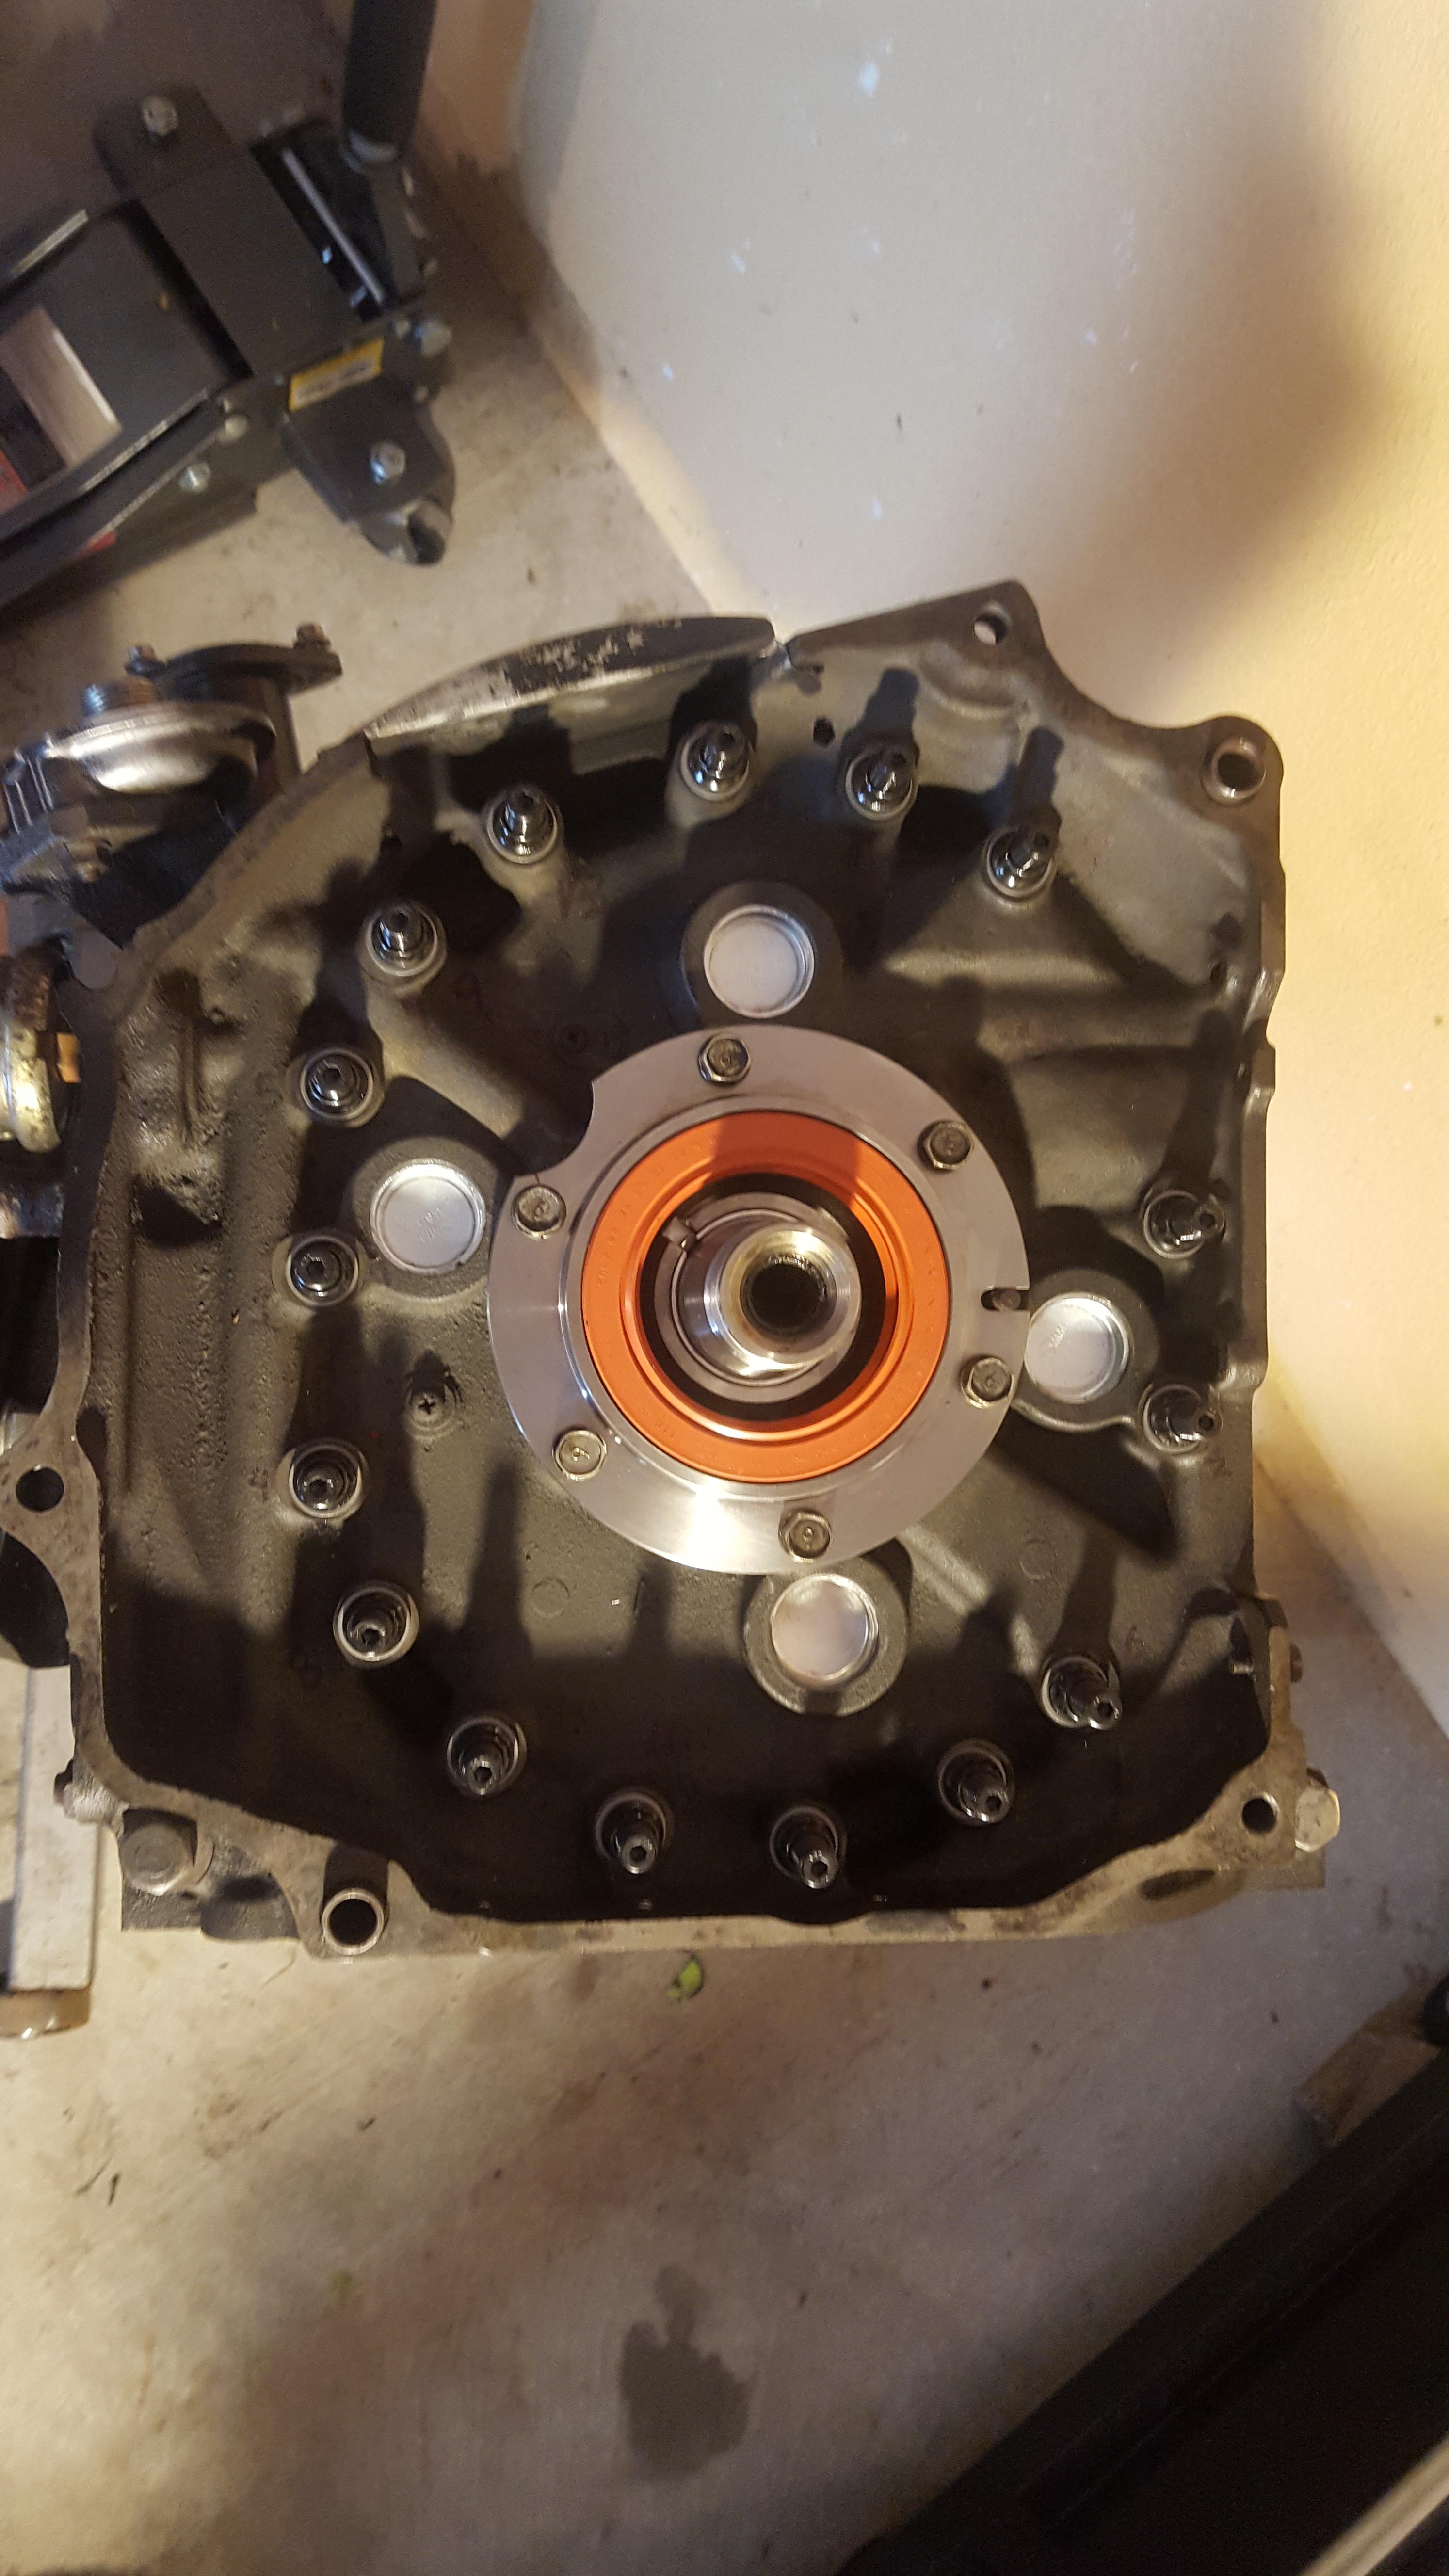
- Pulled engine to inspect if further damage done to internals and find a possible culprit. culprit was the freeze plug that sits on the front iron next to the oil pump, a pin hole had rusted through on it, in just one spot.
- Bearings aren’t looking good, decide this engine will get rebuilt. (Entire 2 year process of deciding what the car will actually become, NA bridgeport, w/ ITB’s, LS7, 13BREW, etc.)
- Decision is made to give the engine a mild street port on the intake ports only, helping broaden the power-band a little without hurting low end, and running the stock turbo.
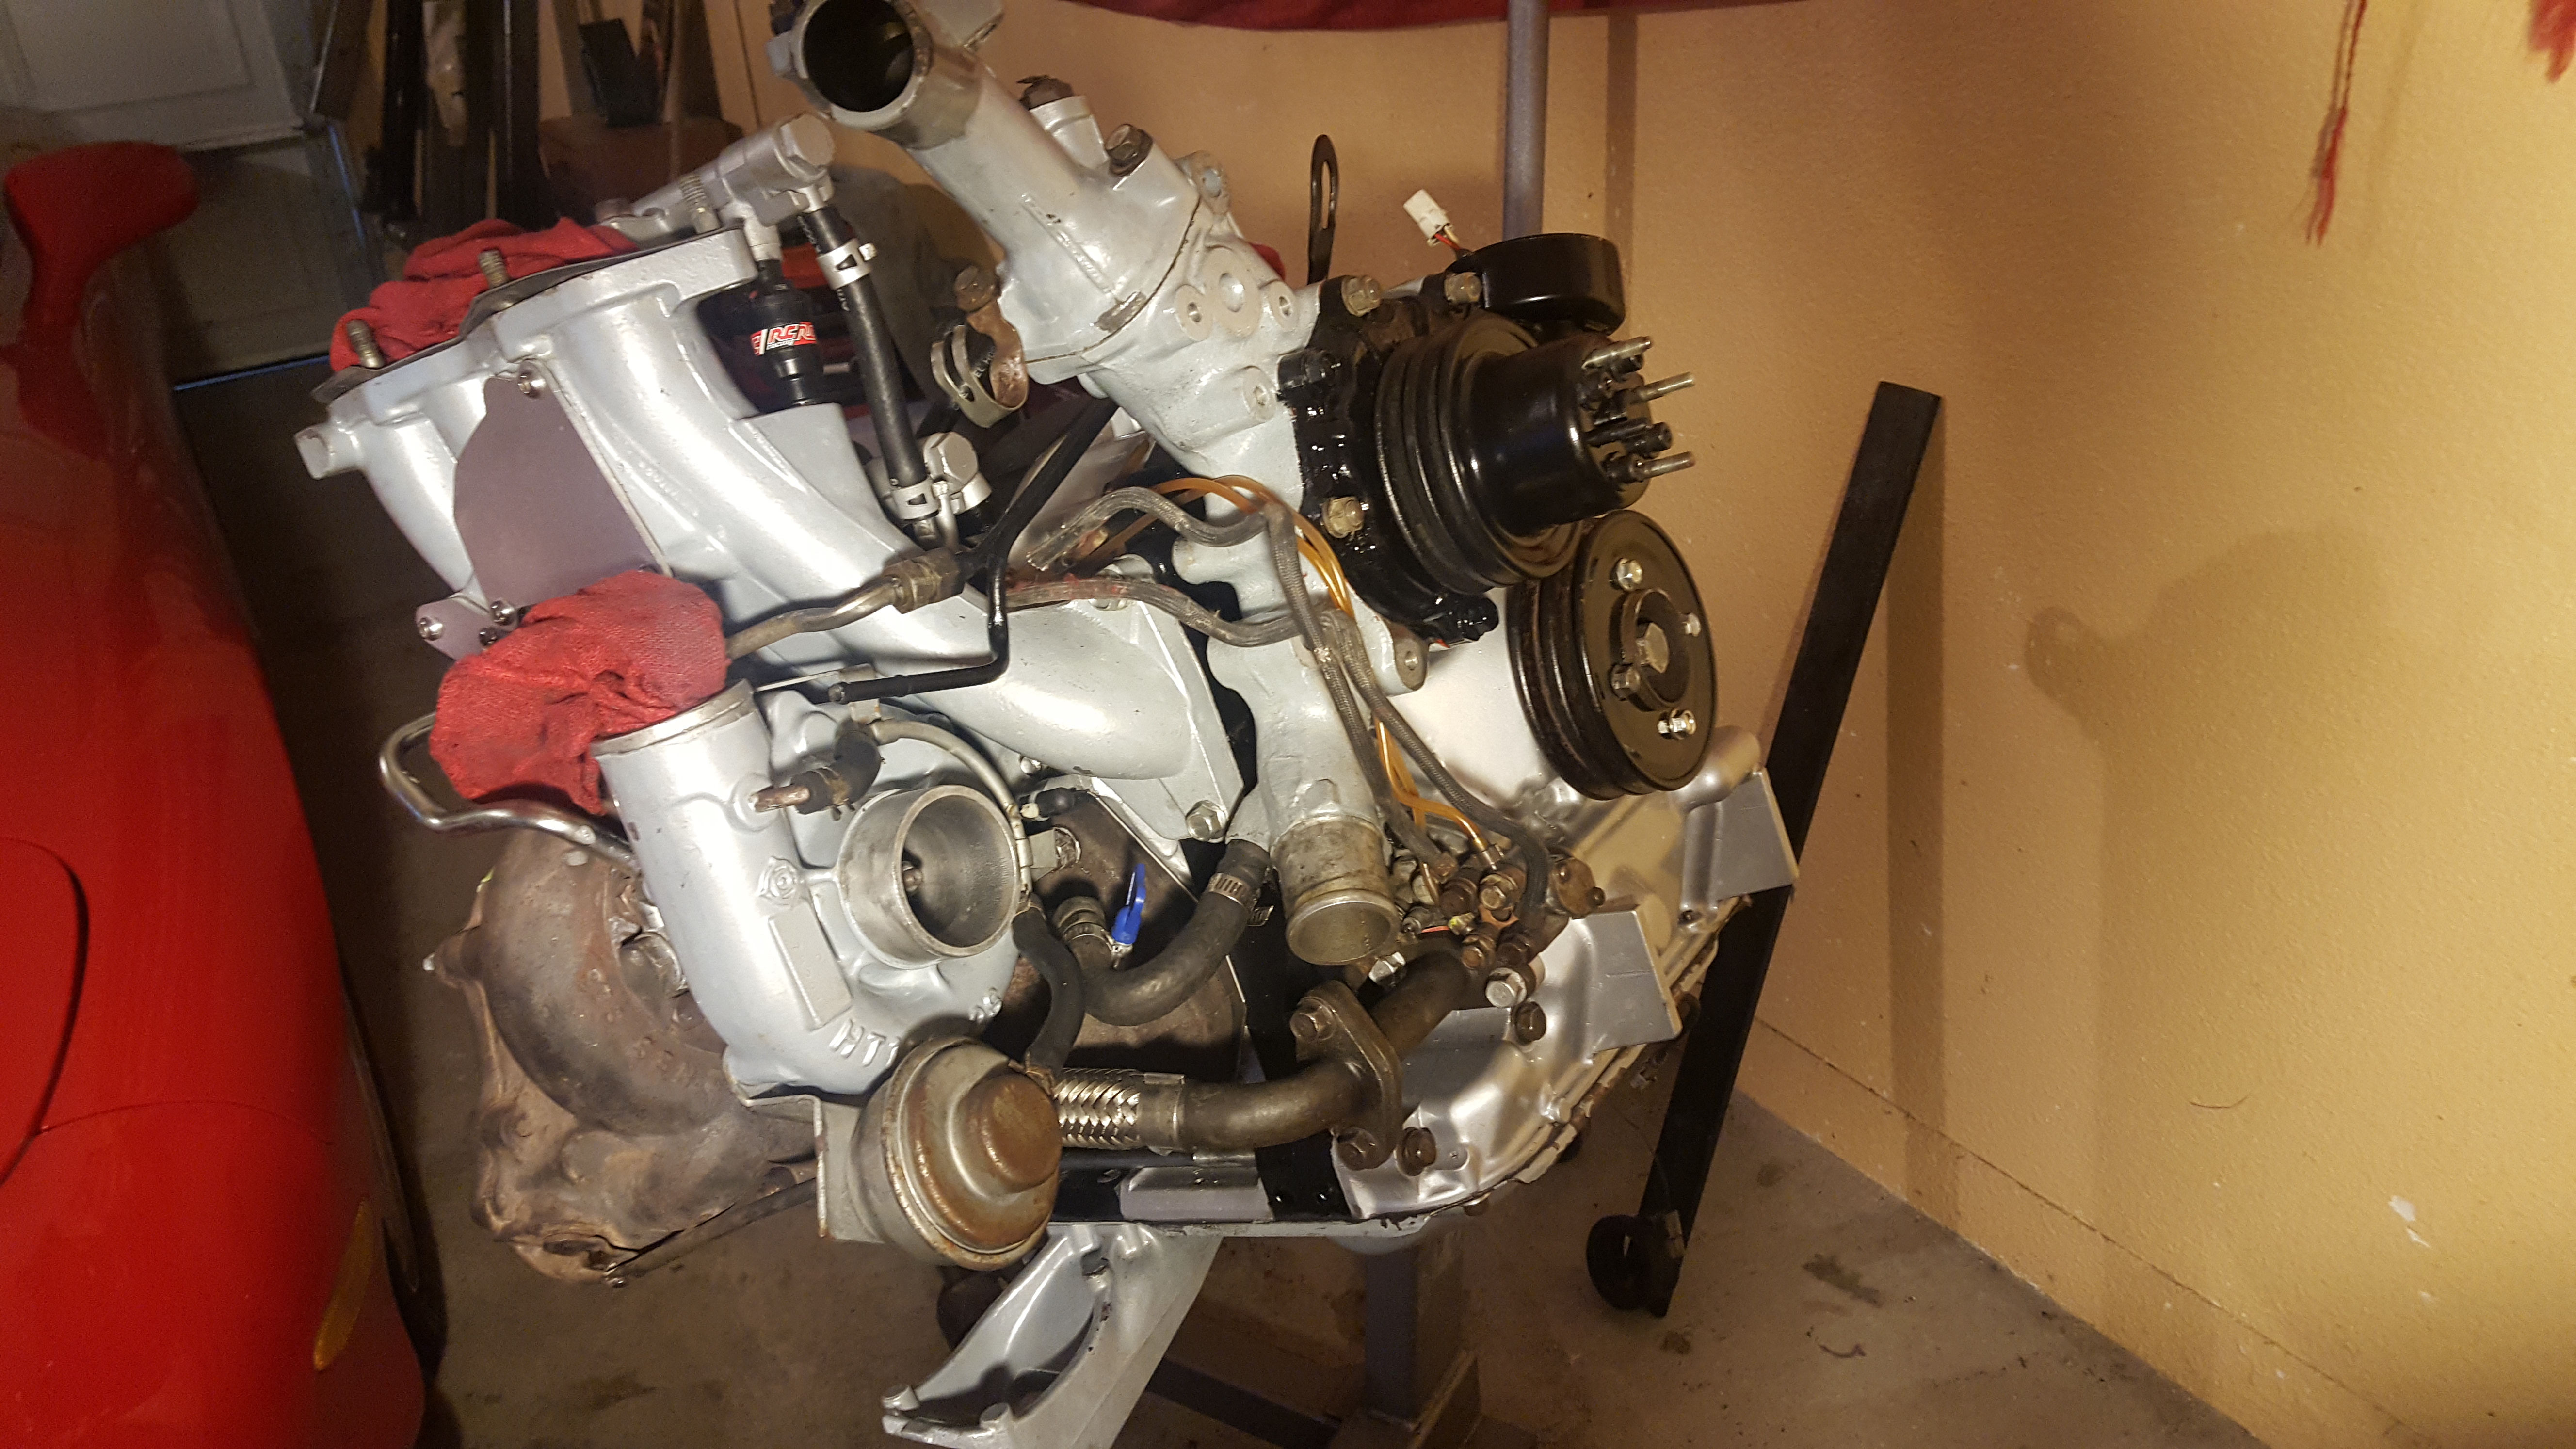
- Eventually, the engine is rebuilt, installed and the car is eventually dialed in. De-powered steering rack is finally added (i love the feel of manual steering) and various weight reductions are done, while keeping the interior looking as stock as possible.
-The engine is an S4 13BT with a mild street port on the intakes, exhaust is left alone, s5 stat gears. S5 turbo, 12lb flywheel, ARP turblown studs, stage 1 hd excedy clutch, stiffer mounts, and tons of little things i can’t think of to mention.
- After market fuel regulator is added, fuel lines converted to parallel, idle is established at 850RPM (correct fuel pressure really helps).
Just some pictures i’ve got.
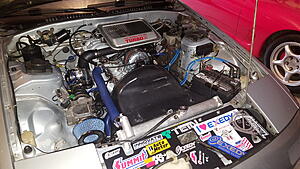
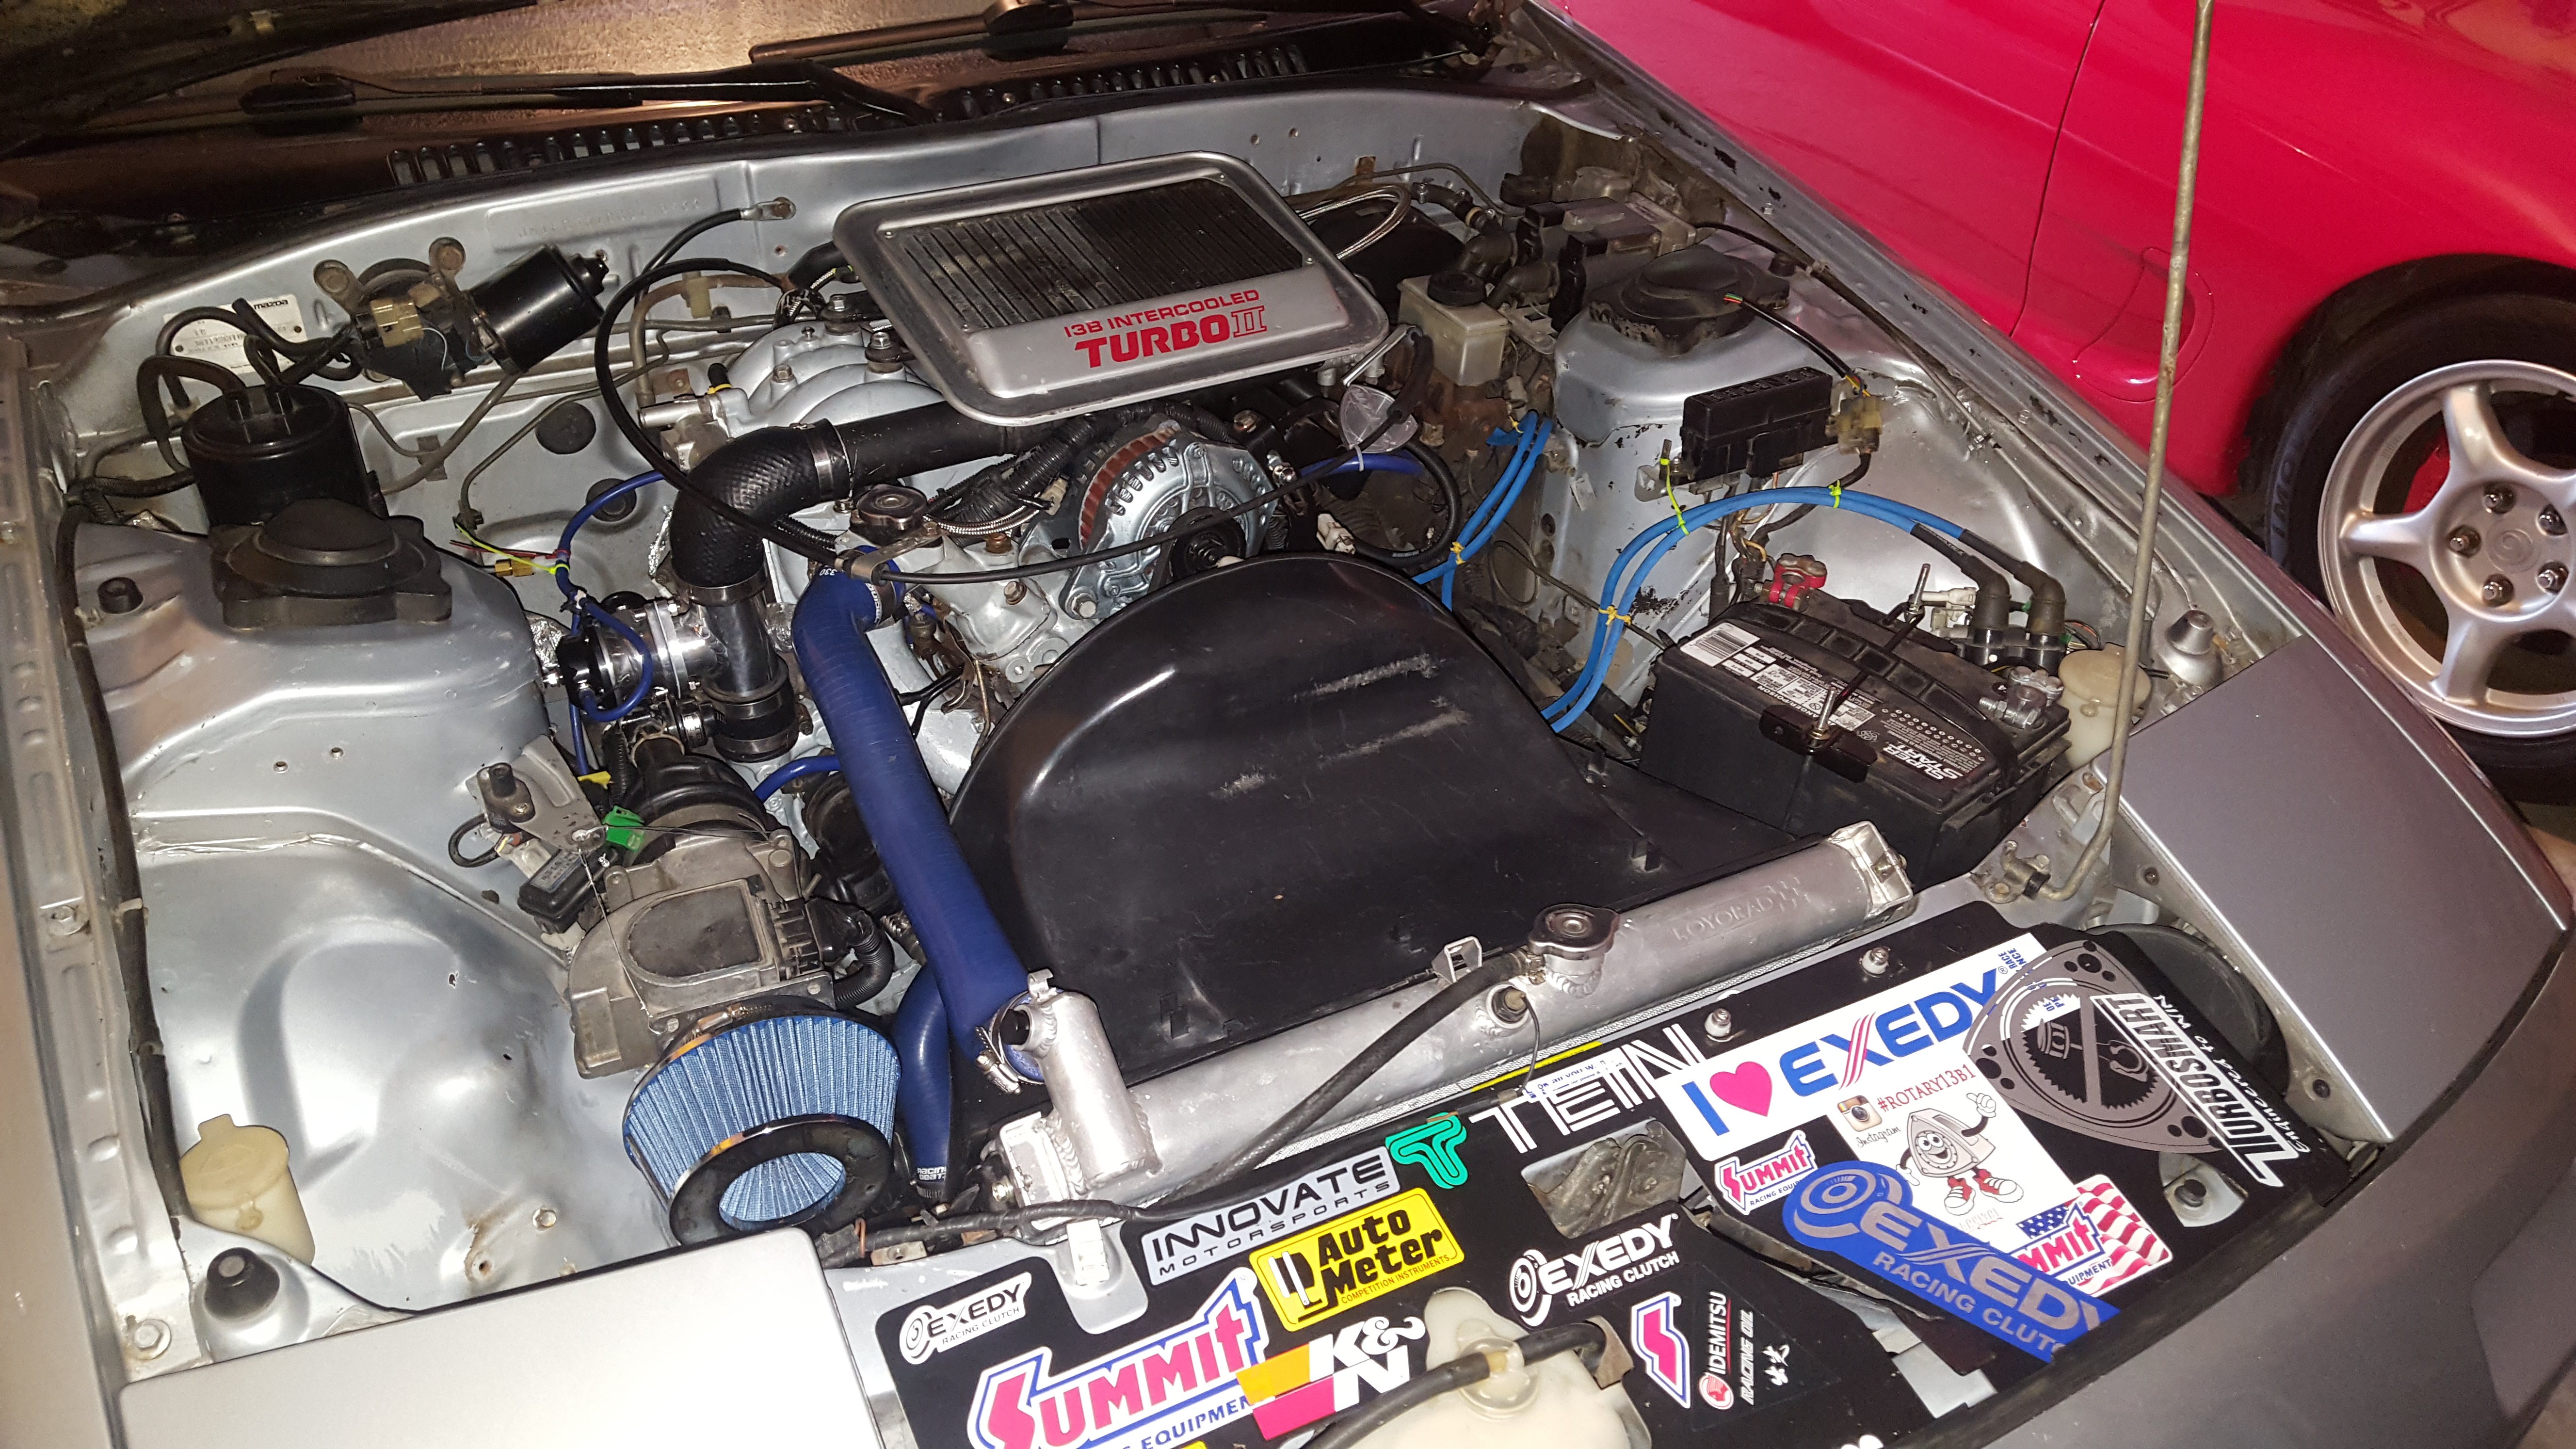
Engine build pictures:


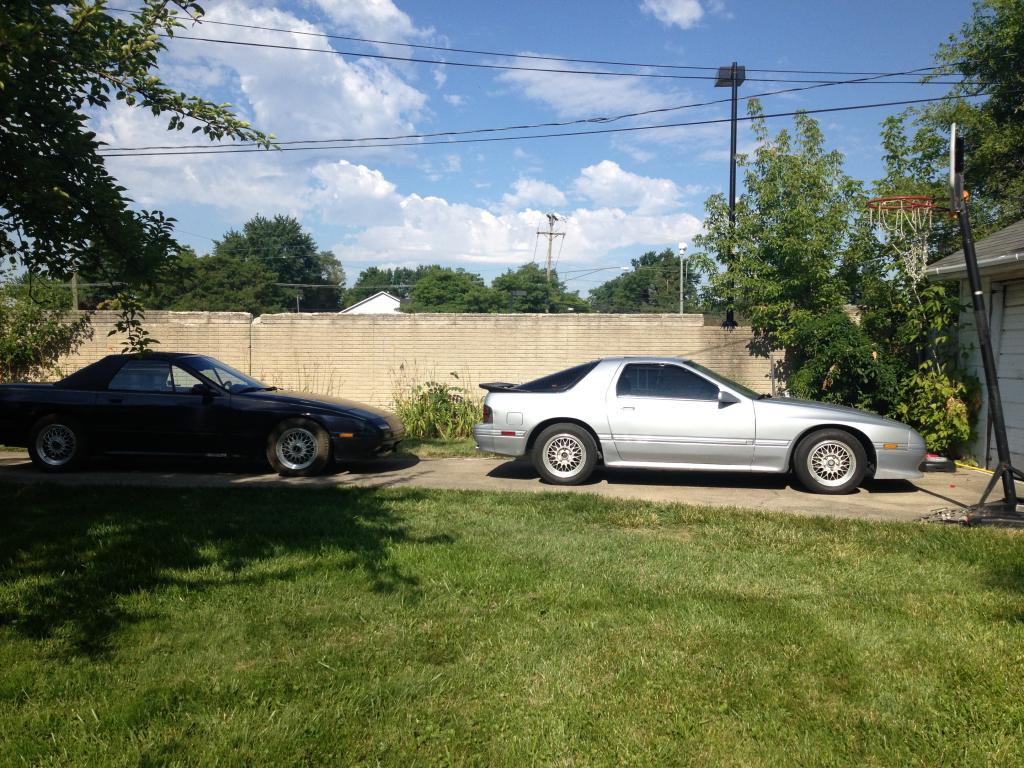
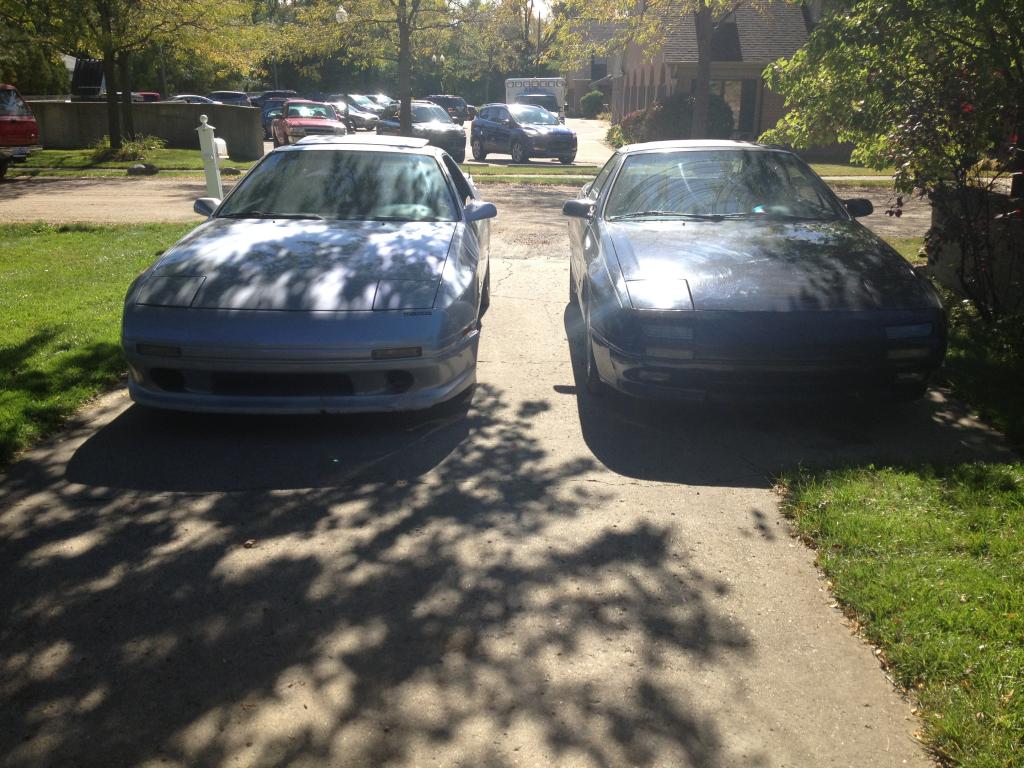
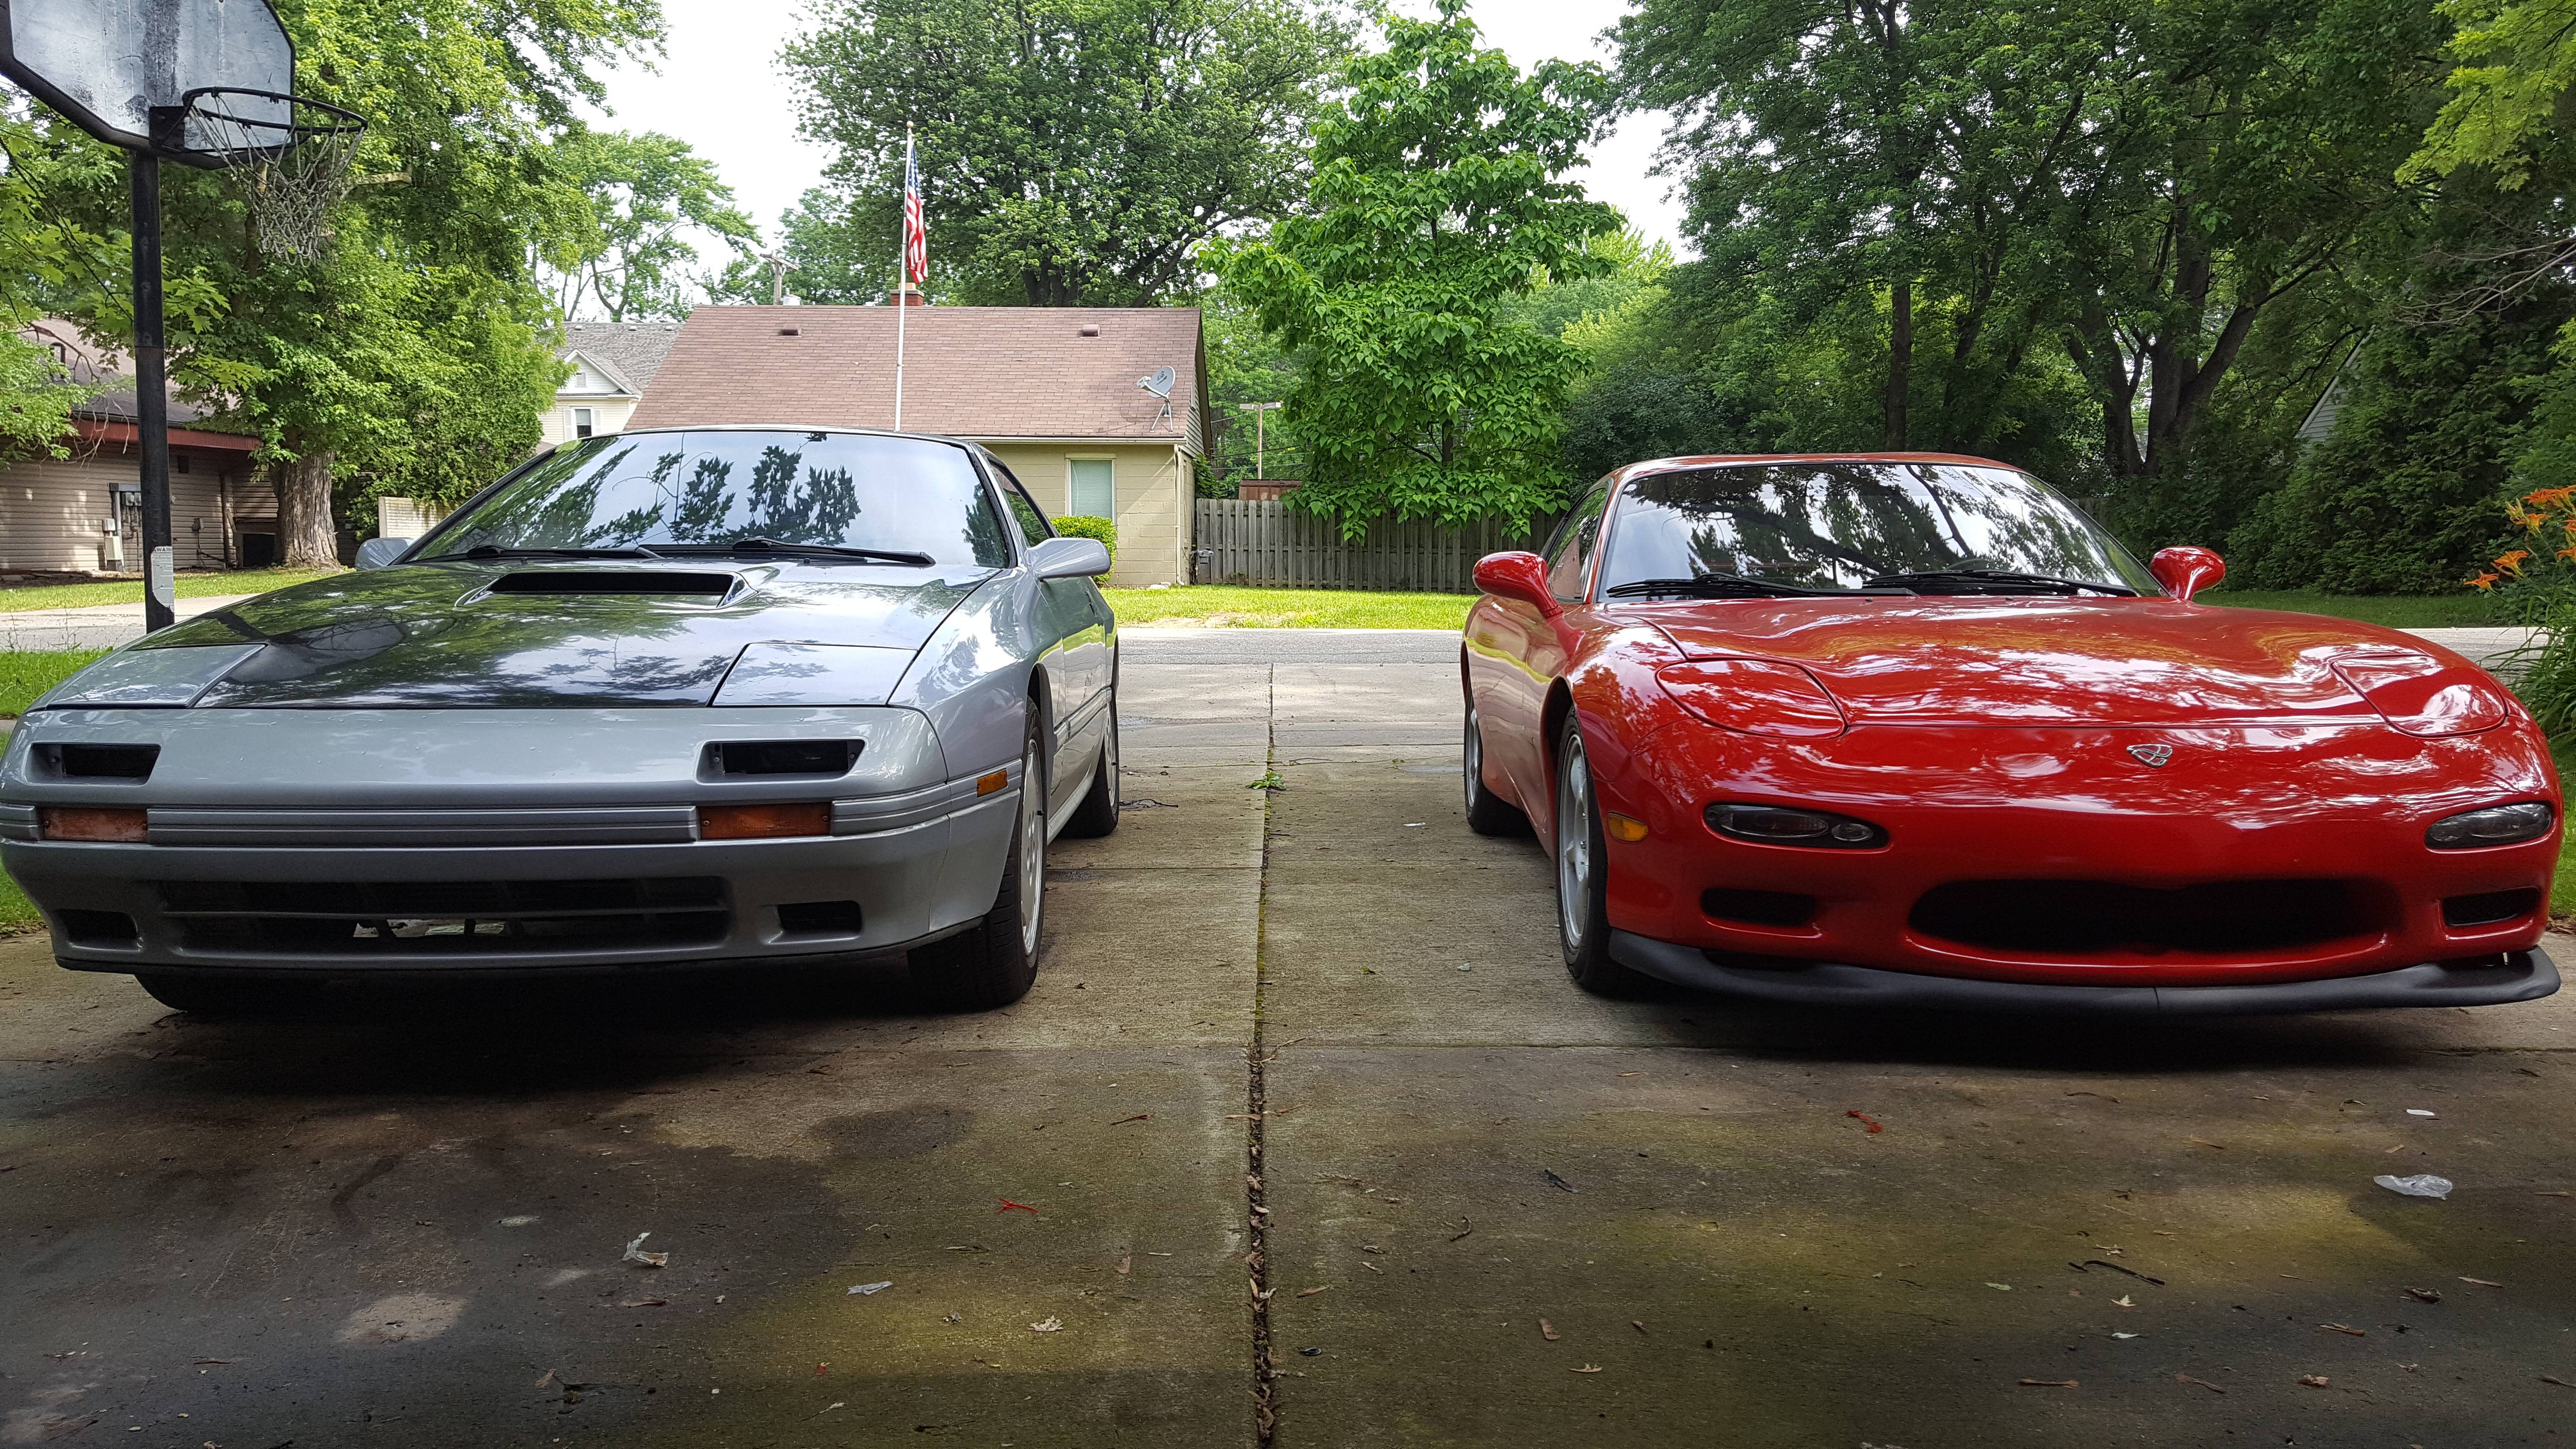
Two running turbo-charged RX-7s!

And, a video of it running!
Here's a quick run down of what's happened with this car since my last post in 2014.
- Rebuilt engine never ran properly, it was like it had a really bad vacuum leak somewhere hidden. This turned out to be the brake booster to intake manifold line.
- Got the engine running better, but i still had a multitude of problems, from electrical issues, random stalling, fuel pump problems and more.
- I came across a really good deal for an entire T2 transmission, running engine and all peripherals for $1200. I ended up with that and started the swap.
- Swap went well, quickly realized the fuel tank was completely junked, rust was so bad in it, i ended up getting a replacement from a local RX-7 shop.
- Two days into running with a replacement fuel pump (walbro 255lph) and cleaned tank I could not get the car to idle right, so i went for a drive with the throttle plates held barely open.
- Car overheats, no leaks, fan works, check oil and coolant, great, oil looks like whipped cream, and coolant looks like a milkshake.
- Pulled engine to inspect if further damage done to internals and find a possible culprit. culprit was the freeze plug that sits on the front iron next to the oil pump, a pin hole had rusted through on it, in just one spot.
- Bearings aren’t looking good, decide this engine will get rebuilt. (Entire 2 year process of deciding what the car will actually become, NA bridgeport, w/ ITB’s, LS7, 13BREW, etc.)
- Decision is made to give the engine a mild street port on the intake ports only, helping broaden the power-band a little without hurting low end, and running the stock turbo.
- Eventually, the engine is rebuilt, installed and the car is eventually dialed in. De-powered steering rack is finally added (i love the feel of manual steering) and various weight reductions are done, while keeping the interior looking as stock as possible.
-The engine is an S4 13BT with a mild street port on the intakes, exhaust is left alone, s5 stat gears. S5 turbo, 12lb flywheel, ARP turblown studs, stage 1 hd excedy clutch, stiffer mounts, and tons of little things i can’t think of to mention.
- After market fuel regulator is added, fuel lines converted to parallel, idle is established at 850RPM (correct fuel pressure really helps).
Just some pictures i’ve got.
Engine build pictures:


Two running turbo-charged RX-7s!
And, a video of it running!
Last edited by Murilli; 09-26-19 at 08:08 AM. Reason: Editing Video link.

Thread
Thread Starter
Forum
Replies
Last Post
airbrush1
2nd Generation Specific (1986-1992)
36
01-26-03 11:36 PM