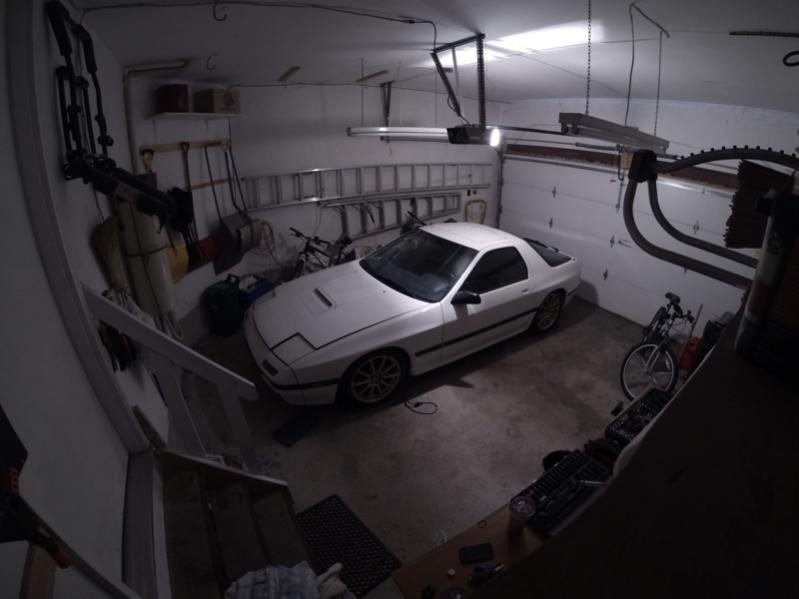
1987 FC3S GXL Turbo Swap Build Thread

Thread Starter
Senior Member
Joined: Oct 2013
Posts: 270
Likes: 1
From: ON, Canada
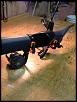
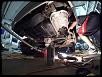
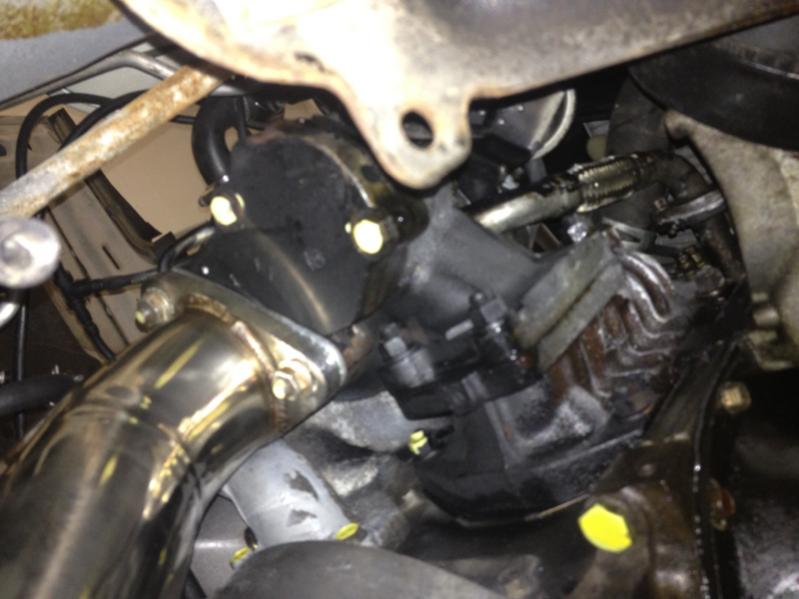
I took the Downpipe and the wideband bung to a welding shop to have it welded in and they told me that they couldn't do it because my cheap exhaust is aluminum and the bung is stainless steel. I put the Downpipe back on for now so that I could try running the car. I ordered an AEM no-weld o2 bung for a 3 inch pipe to fix this problem but I don't think it will come for a while.
Tried running the car and it was pretty crappy even with the new trailing coil to correct my old one which did not produce a spark on T2. I cant get the damn car to idle. I'm also pretty sure that while at first the tachometer was showing rpms reading from the trailing coil it soon stopped and
I had to jump the bullet check connectors from the trailing to the leading in order to see anything on the tach. I don't understand why it is not showing up if both T1 and T2 coils are producing a spark.
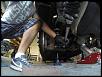
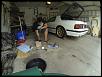
After giving up trying to get the car to idle I started swapping the fuel pump to the Walbro 255lph with my buddy. It was difficult to relieve fuel pressure as I can barely get the car to stay on long enough to pull the connector going to the fuel pump but I tried my best. Then I detached the flex fuel hose that I had replaced my lines with below the fuel filter to help relieve more fuel pressure. But still when we went to detach the lines at the fuel pump cover it shot out all over the spare tire.
As I was told it would be the screws on the fuel pump cover were totally rusted. I tried four and pretty much stripped them. I was kindof discouraged here because it would mean towing to a shop because I'm not that comfortable with grinding the bolts at risk of another fuel fire. I starting googling and came across aaroncakes website and he said that he managed to get some of the screws off by just hammering the screwdriver to get it to set in the screw. I tried this out and luckily I was able to remove all the screws by doing this so that was a great tip.
Swapping in the fuel pump was much easier than I expected.
Went to replace the screws with M4 bolts but couldn't find a store that was open which had them of the right length and had to buy longer ones. I cut them all shorter using an angle grinder and surprisingly enough didnt damage the threads. Ran the car with the new pump and it worked but didnt get the engine to idle as I was sortof hoping it would.
Tried running the car and it was pretty crappy even with the new trailing coil to correct my old one which did not produce a spark on T2. I cant get the damn car to idle. I'm also pretty sure that while at first the tachometer was showing rpms reading from the trailing coil it soon stopped and
I had to jump the bullet check connectors from the trailing to the leading in order to see anything on the tach. I don't understand why it is not showing up if both T1 and T2 coils are producing a spark.
After giving up trying to get the car to idle I started swapping the fuel pump to the Walbro 255lph with my buddy. It was difficult to relieve fuel pressure as I can barely get the car to stay on long enough to pull the connector going to the fuel pump but I tried my best. Then I detached the flex fuel hose that I had replaced my lines with below the fuel filter to help relieve more fuel pressure. But still when we went to detach the lines at the fuel pump cover it shot out all over the spare tire.
As I was told it would be the screws on the fuel pump cover were totally rusted. I tried four and pretty much stripped them. I was kindof discouraged here because it would mean towing to a shop because I'm not that comfortable with grinding the bolts at risk of another fuel fire. I starting googling and came across aaroncakes website and he said that he managed to get some of the screws off by just hammering the screwdriver to get it to set in the screw. I tried this out and luckily I was able to remove all the screws by doing this so that was a great tip.
Swapping in the fuel pump was much easier than I expected.
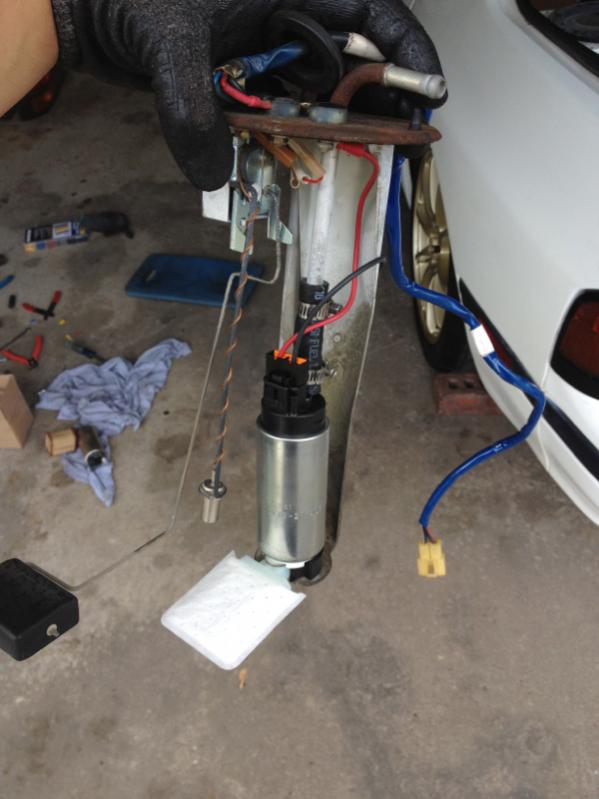
Went to replace the screws with M4 bolts but couldn't find a store that was open which had them of the right length and had to buy longer ones. I cut them all shorter using an angle grinder and surprisingly enough didnt damage the threads. Ran the car with the new pump and it worked but didnt get the engine to idle as I was sortof hoping it would.
Thread Starter
Senior Member
Joined: Oct 2013
Posts: 270
Likes: 1
From: ON, Canada
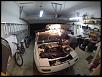
I was looking in the Haynes manual as to why I cant get the engine to idle and one of the suggested problems was incorrect timing. I checked the resistance on the crank angle sensor to see if it was working and the resistance was within spec. Some of my buddies came by and brought a timing light and I began removing components to get access to the eccentric pulley.
I was concerned because I had taken the pulley from my NA engine and so assuming it could be attached any way then the timing mark could be off by 90, 180, or 270 degrees. When we got all the fan and belts removed though we found it was even more serious of a problem because there was no marking on the pulley to indicate the timing position.
Spent a long time researching and looking at my old engine to try and determine where the mark belongs on the pulley. We noticed there was a little circle cut out of the wheel behind the eccentric pulley but couldnt be for sure that this was what was used to mark the pulley. We also tried other suggestions including looking for a certain dimple on the flywheel when looking though the inspection panel on the bottom of the transmission. However I was missing the entire counterweight plate that the website was telling us to look at.
Finally one of my buddies found a link which told us how to make the mark. I can't post the link because he had it on his phone but I can post the instructions here:
How to mark the eccentric pulley for timing
1. Remove the rear rotor spark plugs
2. Then the eccentric shaft using a ratchet and look through the trailing spark plug until you see an Apex seal pass by.
3. When you do, make a mark on the pulley at the pin used for timing.
4. Turn the eccentric shaft until you see the same Apex seal appear in the leading spark plug.
5. Make a mark on the pulley at the pin used for timing.
6. The correct make is directly in between the two marks that you made.
We did this on my old engine because it is easier to access the alarm plugs and look through the side with a light rather than with a mirror in the engine bay. Then we transferred the pulley to the new engine in the car. Turns out I wasn't crazy and the pulley only fits on the shaft one way.
After all of this we checked the timing and it was fine. We tried adjusting the crank angle sensor anyways and it really didn't help and eventually we just put it back to the original position.
So while incorrect timing isn't the cause of my engines inability to idle at least I can rule it out from the list. Not really sure what to check next, I'm fairly sure that there aren't any vacuum leaks.
Thread Starter
Senior Member
Joined: Oct 2013
Posts: 270
Likes: 1
From: ON, Canada
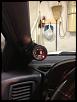
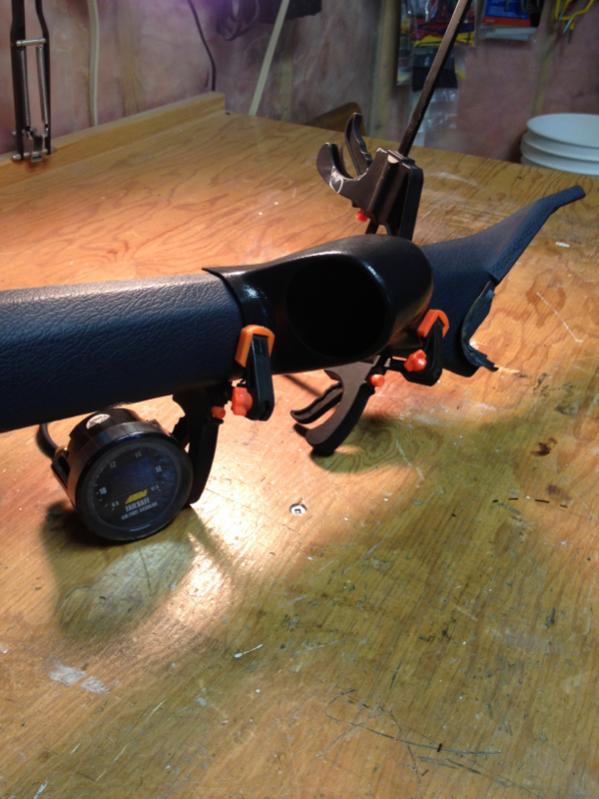
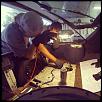
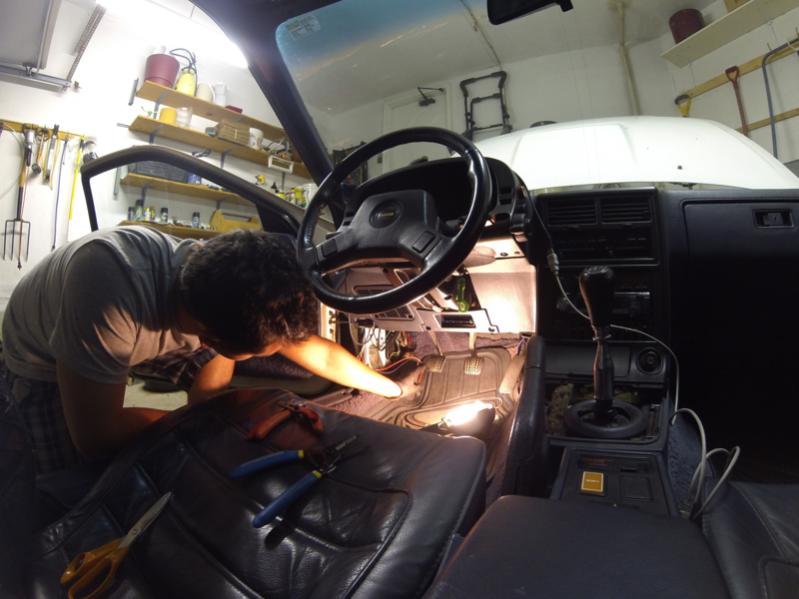
I decided I wanted to get the AEM failsafe gauge finalized inside the car so that I wouldn't just have wires dangling everywhere.
I passed the wideband cable through the firewall as well as the green wire which will later attach to the trailing or leading ignition coils in order for the gauge to determine rpms. Since I am having trouble with the trailing coil sending the rpms to the tachometer right now and have a jumped to the leading ignition coil I left that green wire for now.
Next I ran the afr cable down along the transmission and tied it up for now as I don't have the bung in my Downpipe yet. Then I wrapped up all the other wires which are for analog output to a data logger and tucked them up in the drivers footwell.
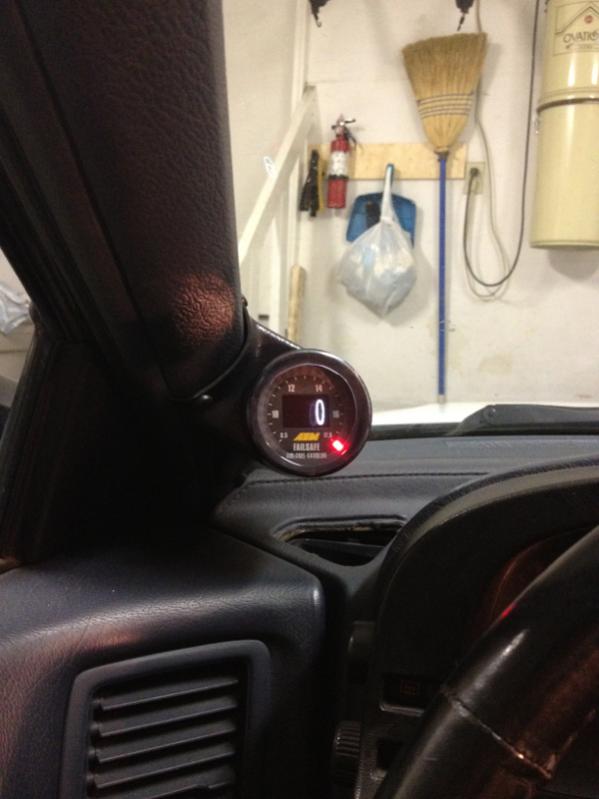
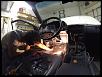
I then removed the a pillar and drilled holes through the a pillar gauge mount using clamps to keep it in the right spot. I trimmed the excess plastic on the pod which annoyingly came an odd shape.
I then drilled a 3/4 inch hole in the a pillar for the wires. I took the a piller and gauge pod back to the car and ran the wires and vacuum hose through the hole and hooked them up to the failsafe gauge. Then I attached the pod to the a pillar and reinstalled the a pillar into the car. It looks sick now and it's good to know that the cables can run under the back of the a pillar and aren't getting squashed. I really like the way it looks. I ran the USB cable up under the drivers footwell and tucked it behind the plastic panel on the right side of the footwell.
I passed the wideband cable through the firewall as well as the green wire which will later attach to the trailing or leading ignition coils in order for the gauge to determine rpms. Since I am having trouble with the trailing coil sending the rpms to the tachometer right now and have a jumped to the leading ignition coil I left that green wire for now.
Next I ran the afr cable down along the transmission and tied it up for now as I don't have the bung in my Downpipe yet. Then I wrapped up all the other wires which are for analog output to a data logger and tucked them up in the drivers footwell.
I then removed the a pillar and drilled holes through the a pillar gauge mount using clamps to keep it in the right spot. I trimmed the excess plastic on the pod which annoyingly came an odd shape.
I then drilled a 3/4 inch hole in the a pillar for the wires. I took the a piller and gauge pod back to the car and ran the wires and vacuum hose through the hole and hooked them up to the failsafe gauge. Then I attached the pod to the a pillar and reinstalled the a pillar into the car. It looks sick now and it's good to know that the cables can run under the back of the a pillar and aren't getting squashed. I really like the way it looks. I ran the USB cable up under the drivers footwell and tucked it behind the plastic panel on the right side of the footwell.

Took the words out of my mouth. Tiny leaks create headaches. One of my last videos shows a make shift smoke machine to hook to any old air compressor with low PSI and smoke bombs. Sure, other things could be used like charcoal and cardboard scraps.
I recall the turbo guys have a place factory installed that can be re purposed for hooking an air hose to hear for leaks as well. I am still NA, and can not confirm.
I recall the turbo guys have a place factory installed that can be re purposed for hooking an air hose to hear for leaks as well. I am still NA, and can not confirm.
Thread Starter
Senior Member
Joined: Oct 2013
Posts: 270
Likes: 1
From: ON, Canada
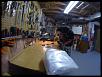
As I said before I've started to make the video compiling the 8000 GoPro photos ive taken during the swap project so I'm going to be posting up some of my favorites where I only posted phone photos before.
Thread Starter
Senior Member
Joined: Oct 2013
Posts: 270
Likes: 1
From: ON, Canada
GoPro photos from the past little while:
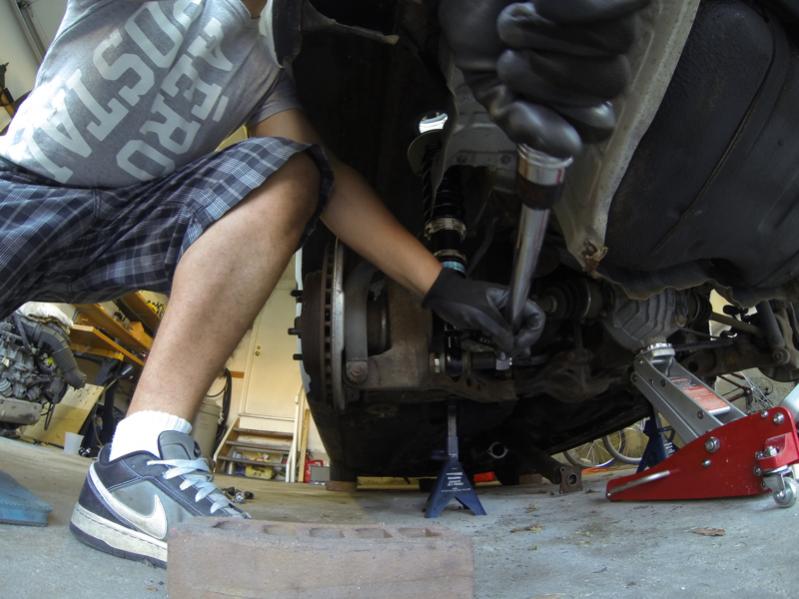
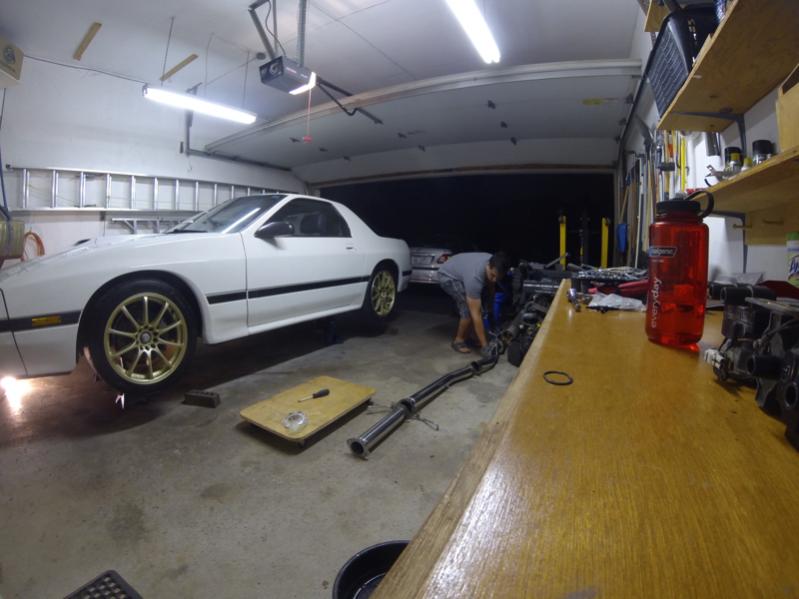
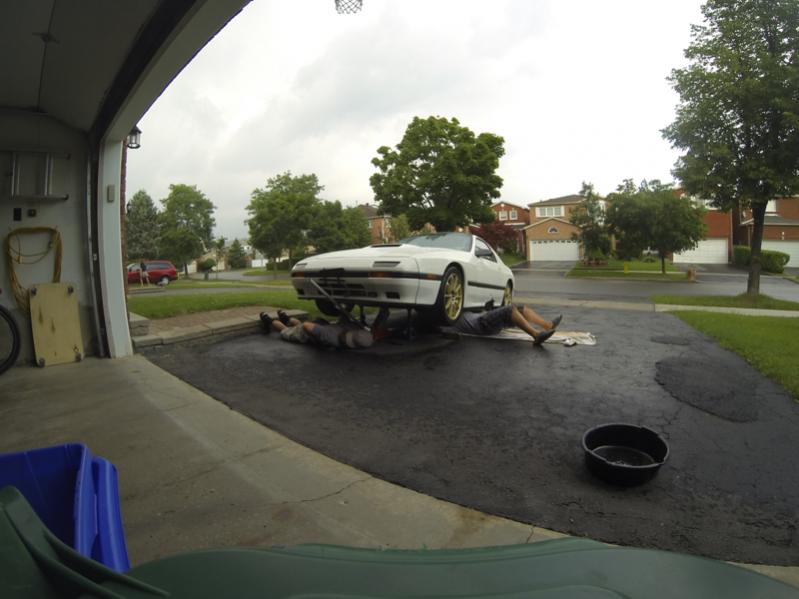
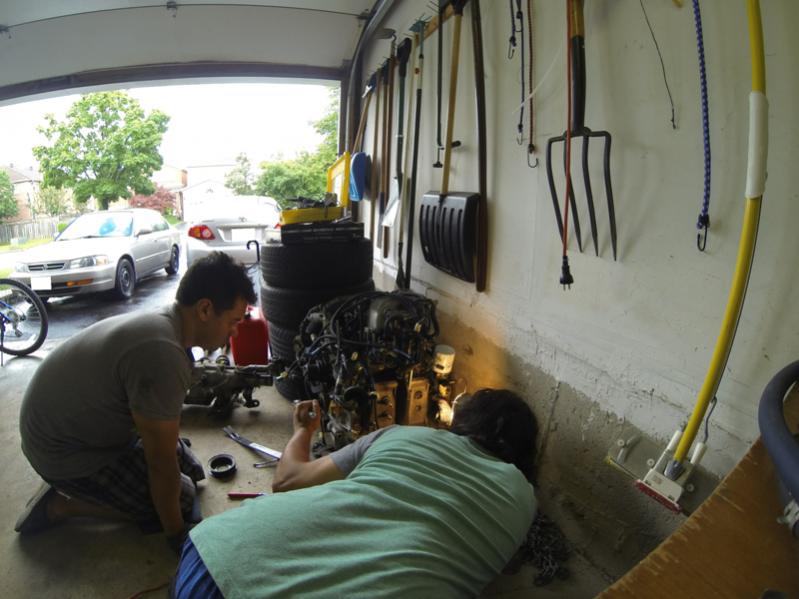
During the subframe drop. My buddy and I trying to drop that bitch down smoothly
Borrowed a larger jack from my friend and trying to orient it so that I could roll it as one unit under the back end of the car
Torquing on one of the rear BC coilovers
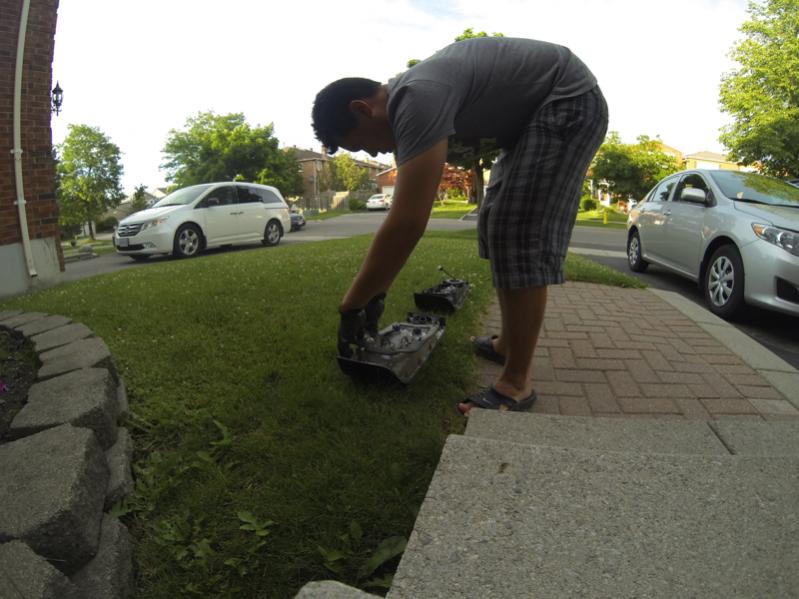
Swapping bulbs from the s4 to s5 taillights and a photo of the lights removed


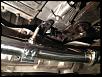
Lining up the new exhaust to see how it looks
With my buddy unhooking my new flex fuel hose below the fuel filter in order to assist with removing some of the fuel pressure before swapping the pump
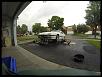
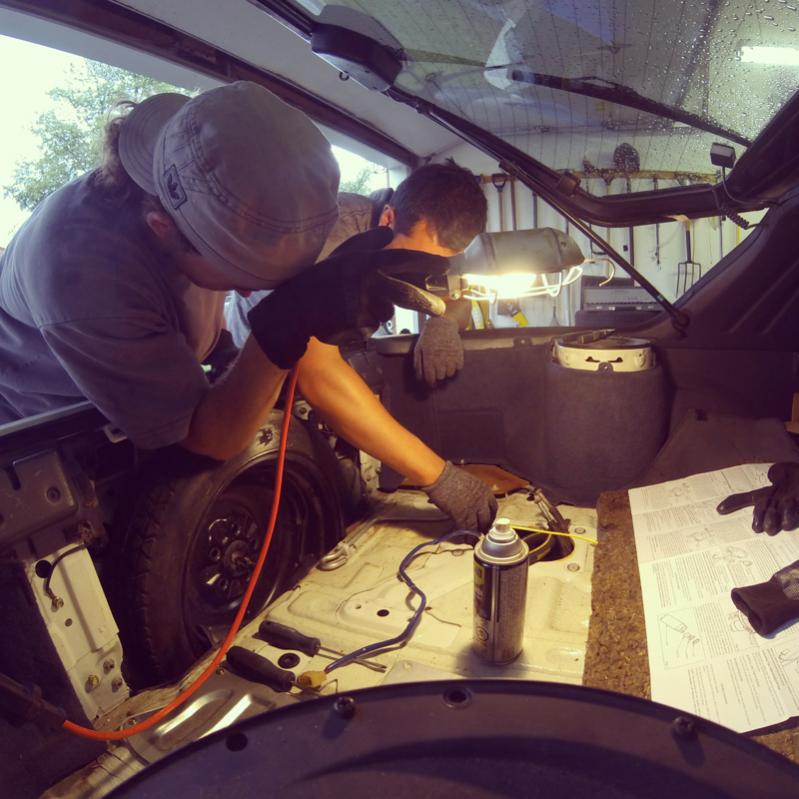
Using a coat hanger to shove the wideband cables for the AEM failsafe gauge through the firewall. Finalizing the wiring underneath the footwell, removing the a-pillar and drilling it out.

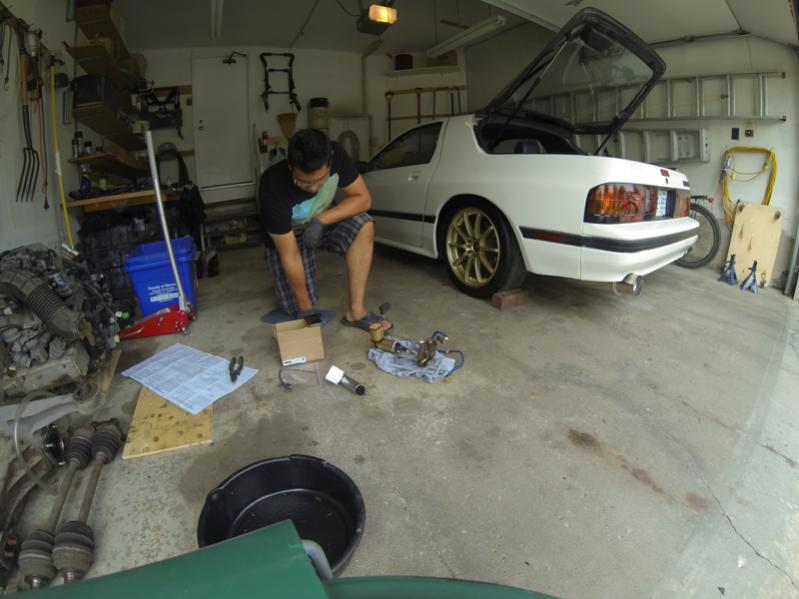
Spark plugs removed from the rear rotor on my NA engine and my buddy and I looking inside in order to mark the timing mark onto the eccentric pulley.

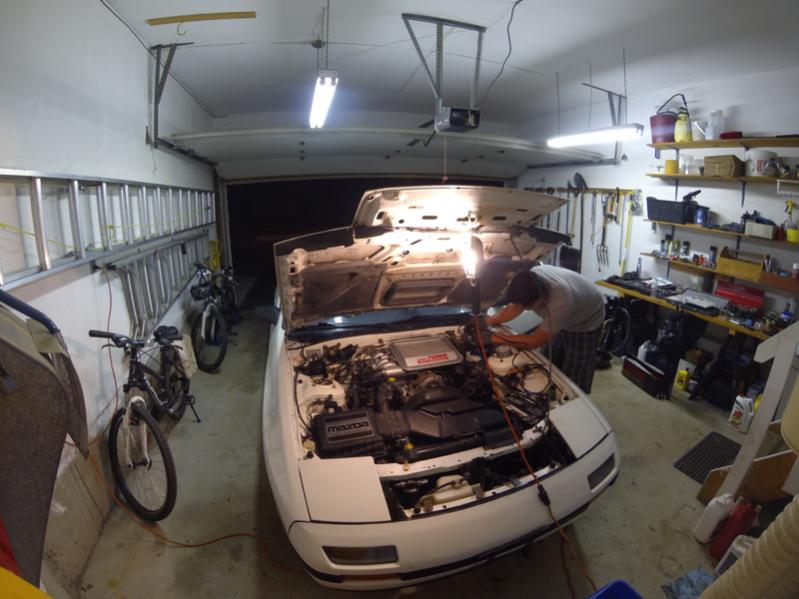
When I forgot the GoPro was still running and went inside.
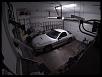
During the subframe drop. My buddy and I trying to drop that bitch down smoothly
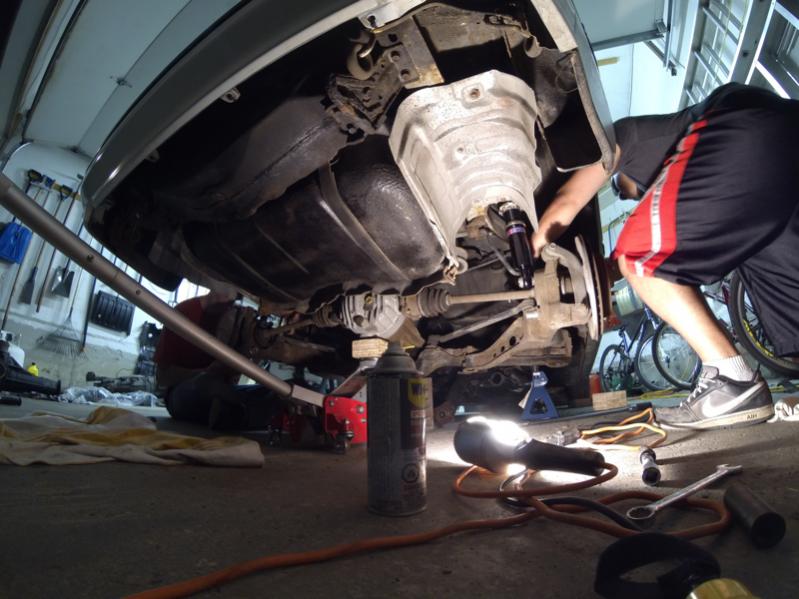
Borrowed a larger jack from my friend and trying to orient it so that I could roll it as one unit under the back end of the car

Torquing on one of the rear BC coilovers
Swapping bulbs from the s4 to s5 taillights and a photo of the lights removed
Lining up the new exhaust to see how it looks
With my buddy unhooking my new flex fuel hose below the fuel filter in order to assist with removing some of the fuel pressure before swapping the pump
Using a coat hanger to shove the wideband cables for the AEM failsafe gauge through the firewall. Finalizing the wiring underneath the footwell, removing the a-pillar and drilling it out.
Spark plugs removed from the rear rotor on my NA engine and my buddy and I looking inside in order to mark the timing mark onto the eccentric pulley.
When I forgot the GoPro was still running and went inside.
Thread Starter
Senior Member
Joined: Oct 2013
Posts: 270
Likes: 1
From: ON, Canada
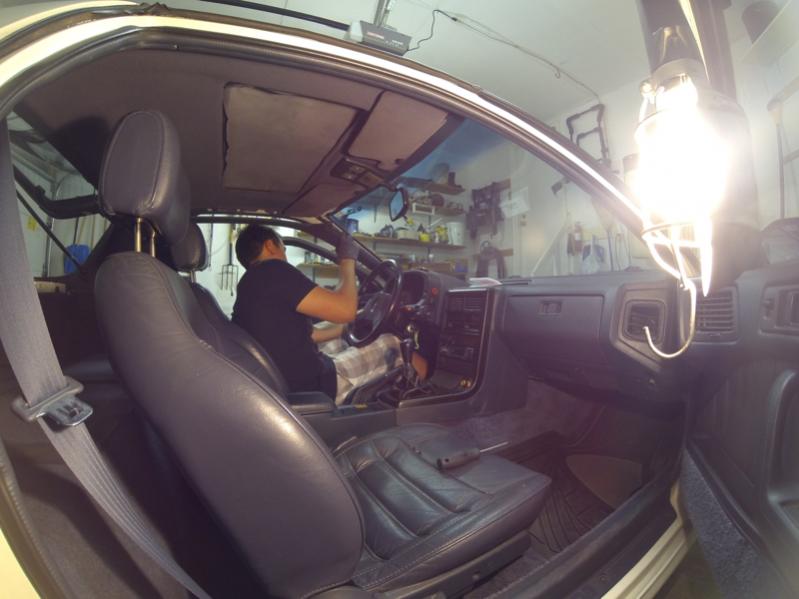
This weekend I'm trying to correct my idling issue . I started with checking up on my TPS trying to set it properly using the guide on FC3SPro. The TPS is supposed to read 1k at no throttle and under 6k at WOT.
So I checked mine at no throttle and it was reading 5k?! Went to the next step to adjust the idle adjustment screw and it was totally missing. So no wonder. I took one off my NA engine and set it back to 1K. Not sure if I should be setting it a little bit higher since I have no emissions or if I should raise up the throttle stop screw. But I am going to raise that one a bit more. I tried to get the car warmed up a little but it would still only idle for a few seconds. it was too late at night and too loud to try it any longer.
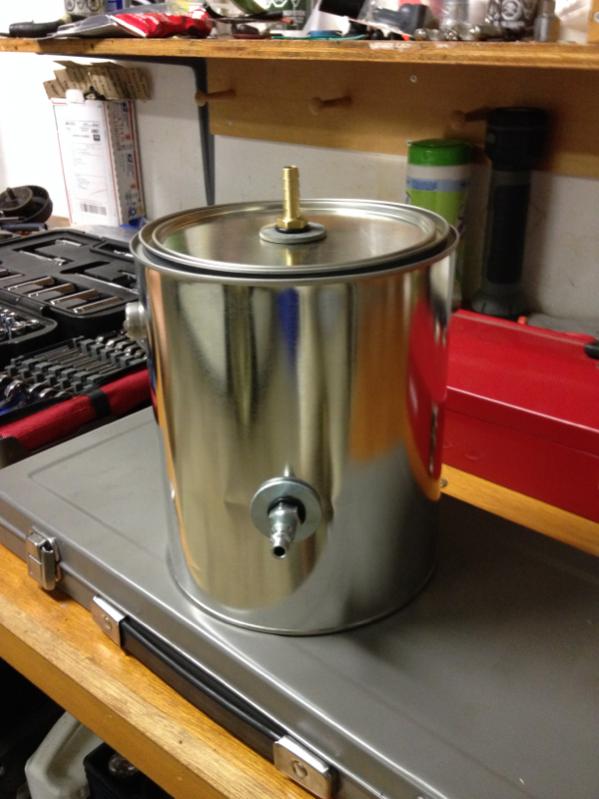
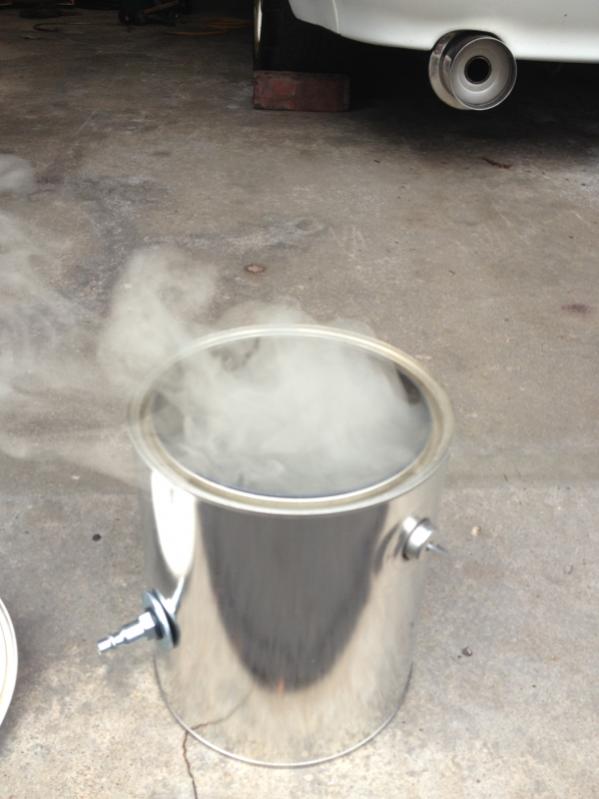
Thanks to archaphil's video of the smoke tester he made my dad made one the same so I'm going to smoke test it for leaks in the morning.
Hopefully that leads to some solid results. Also thanks to Satch I'm trying to diagnose my key not shutting off the car issue.
So I checked mine at no throttle and it was reading 5k?! Went to the next step to adjust the idle adjustment screw and it was totally missing. So no wonder. I took one off my NA engine and set it back to 1K. Not sure if I should be setting it a little bit higher since I have no emissions or if I should raise up the throttle stop screw. But I am going to raise that one a bit more. I tried to get the car warmed up a little but it would still only idle for a few seconds. it was too late at night and too loud to try it any longer.
Thanks to archaphil's video of the smoke tester he made my dad made one the same so I'm going to smoke test it for leaks in the morning.
Hopefully that leads to some solid results. Also thanks to Satch I'm trying to diagnose my key not shutting off the car issue.
Haha, nice. You do not need a ton of pressure, I think is was around 5-10psi. And cap off the outlets, well technically air inlets with zip-lock baggies and rubber bands (or similar). My method of smoke bombs was tricky in the sense they do not smoke very long. I had a couple people help, one lit it and dropped it in, while another pounded the lid on, then another hooked up to the brake booster while I checked with a flashlight for the colored smoke to pour out.
If I had to do it again, I would of used charcoal and cardboard scraps. They burn longer. And if I was to do it again PRO style, I would wrap wire in one inch loops about 11 coils worth, and hook that up to 12v, then run a wick of some nature and baby oil. Just like a vaporizer. I saw a nifty vaporizer made from a similar endeavor as my paint can.
Hopefully we get it sorted out.
Thread Starter
Senior Member
Joined: Oct 2013
Posts: 270
Likes: 1
From: ON, Canada
Archaphil I ended up taking your advice and using cardboard scraps and charcoal. It worked very well, almost too well, it was difficult to control the heat produced by the fire inside. I did actually see that video with the baby oil fed smoke tester but that's just too much work for my needs. Still very cool though.
I don't have the actual footage from my GoPro here with me but maybe I'll post up a screenshot from it later of the whole setup.
I ended up finding two leaks. One was from the a block off plate for an emissions related component and the other was at one of the three tubes on the back of the UIM which I had capped off. One of the vacuum caps had come off or I had forgotten to cap it. I ended up putting the tube for my failsafe gauge on there since I knew already that it isn't blocked off inside from the smoke streaming out of it.
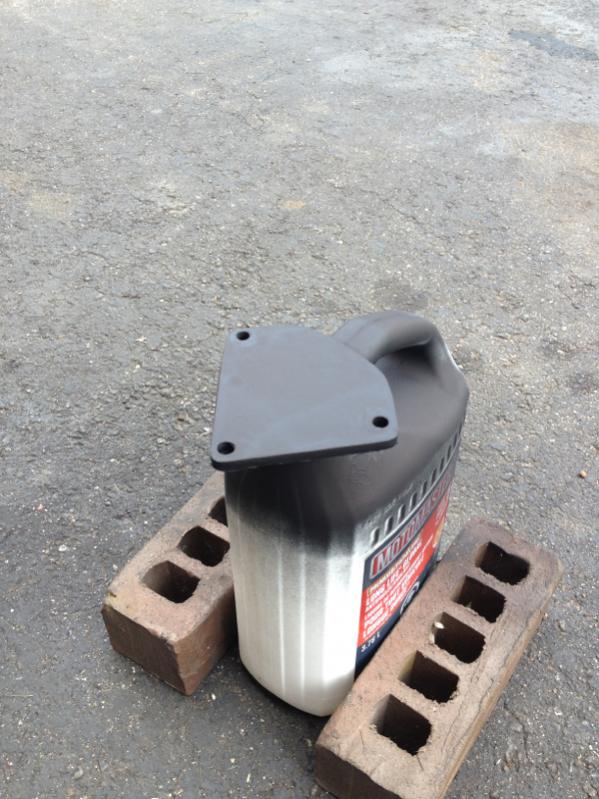
I took off the block off plate and cleaned it up but then the Paint came off so I repainted it flat black with some exhaust header paint I had laying around and resealed it with some ultra grey.
Reattached it and now I could determine that the vacuum leaks were covered. Thinking about it now though I probably should go back and check it again just because the two combined were fairly large leaks and maybe there could be more smaller ones that didn't have enough pressure to see.
So after all this was done I was thinking about it and looking through my Haynes manual in the trouble shooting section and I've sortof covered all the most common issues as to why the car won't stay on without pressing the pedal.
So I decided to raise the idle using the idle stop screw. The guide on rotaryressurrection says that a few turns are necessary so I turned it three times.
I went to start the car and it started and immediately began to idle at 3000 rpm. I had obviously set the idle too high and with the exhaust on it kinda freaked me out. I went to turn off the key and of course it didn't turn off so I went and pulled the EGI comp fuse which I usually pull to turn off all the electronics once I've switched to OFF. However, that didn't turn off the engine and it continued to roar at 3000 rpm. So I pulled the battery and that didn't do anything.
I had read about this problem before when I was researching that my key wouldn't turn off the interior electronics. And I read someone posting about how their car wouldn't turn off and that they had pulled the battery and I just thought well at least I'm not having those problems. Except now I was.
So I was standing there freaking out and I pulled the L1 spark wire and got shocked by the Leading coil pack. The engine started to misfire but just kept on hauling at 3000. I went to pull the L2 spark wire but then I got shocked over and over again by the open L1 outlet.
I considered pulling one of the trailing spark wires but then realized it would probably just start sparking and grounding with the metal components infront of it which happened before when I removed them to see if there was spark.
Finally in desperation I pulled the EGI inj fuse and HEAD fuse at the same time and the engine finally turned off. Honestly I thought it was just going to roar to life again as I was standing there, I was so freaked out. It was the second scariest thing since the fire. So in all, the first idling experience wasn't that chill.
I turned the idle down three turns because I had turned it up a bit more than three when it had reached 3000. The engine sortof sputtered but then began to idle at 1000. Following rotaryressurrection's guide for breaking in rebuilt engines I wanted to raise it to 1500. So I turned the screw up a half turn but since then I have not been able to get the car to turn on again. I'm suspecting low battery. I had to leave for the week so this weekend I'll try it again with a charged battery. Hopefully it will idle and I can actually drive it ?!
Since it wasn't starting my buddy and I removed the brake master cylinder we installed a few months ago because when we did the brake bleeding I noticed it was leaking at the bottom
From the pressure sensor and it was beginning to eat away the paint in my engine bay. It was a bit more of a bitch than when we installed it because at that time the engine was out.
But we got it out and I Teflon taped the sensor this time and it seems to be holding now. So at least I don't have to worry about losing brakes while driving but I will have to re-bleed the system.
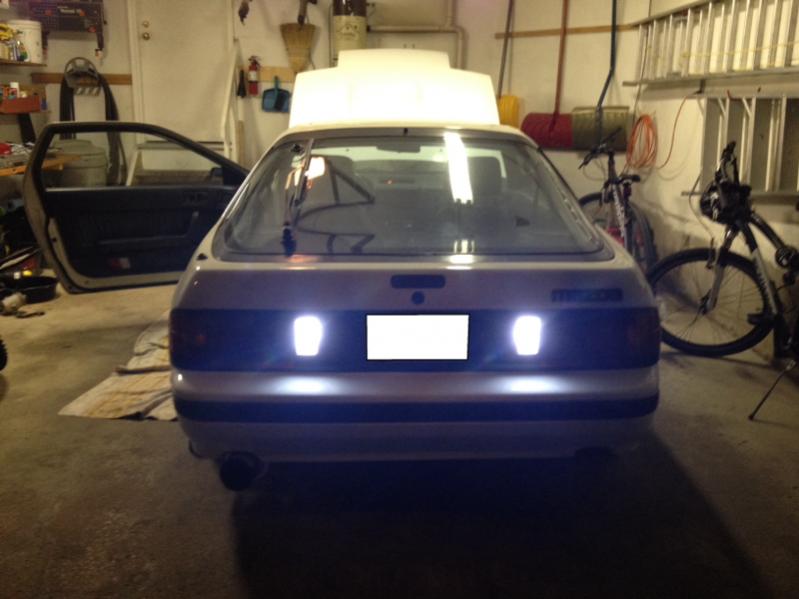
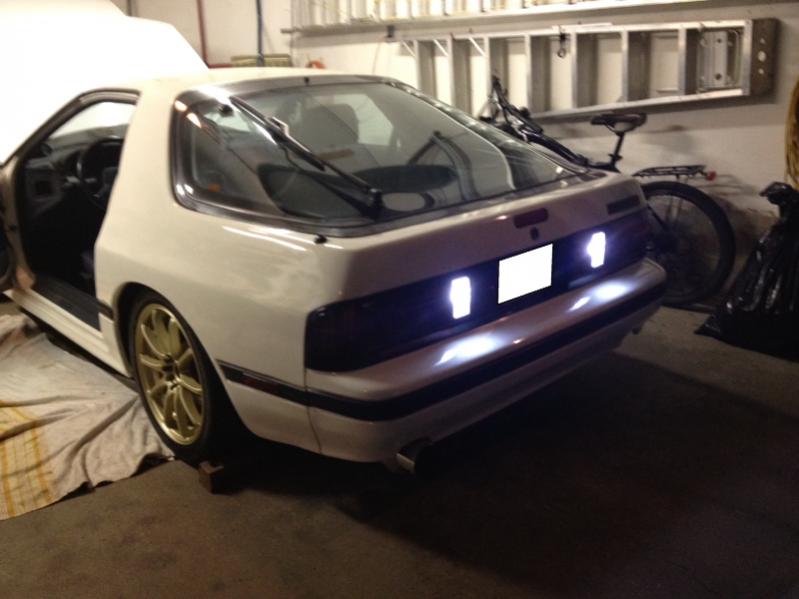
Finally, I got in an order of LEDs and changed my reverse light to bright white LEDs instead. I'll have to get a proper picture at night later.

I don't have the actual footage from my GoPro here with me but maybe I'll post up a screenshot from it later of the whole setup.
I ended up finding two leaks. One was from the a block off plate for an emissions related component and the other was at one of the three tubes on the back of the UIM which I had capped off. One of the vacuum caps had come off or I had forgotten to cap it. I ended up putting the tube for my failsafe gauge on there since I knew already that it isn't blocked off inside from the smoke streaming out of it.
I took off the block off plate and cleaned it up but then the Paint came off so I repainted it flat black with some exhaust header paint I had laying around and resealed it with some ultra grey.
Reattached it and now I could determine that the vacuum leaks were covered. Thinking about it now though I probably should go back and check it again just because the two combined were fairly large leaks and maybe there could be more smaller ones that didn't have enough pressure to see.
So after all this was done I was thinking about it and looking through my Haynes manual in the trouble shooting section and I've sortof covered all the most common issues as to why the car won't stay on without pressing the pedal.
So I decided to raise the idle using the idle stop screw. The guide on rotaryressurrection says that a few turns are necessary so I turned it three times.
I went to start the car and it started and immediately began to idle at 3000 rpm. I had obviously set the idle too high and with the exhaust on it kinda freaked me out. I went to turn off the key and of course it didn't turn off so I went and pulled the EGI comp fuse which I usually pull to turn off all the electronics once I've switched to OFF. However, that didn't turn off the engine and it continued to roar at 3000 rpm. So I pulled the battery and that didn't do anything.
I had read about this problem before when I was researching that my key wouldn't turn off the interior electronics. And I read someone posting about how their car wouldn't turn off and that they had pulled the battery and I just thought well at least I'm not having those problems. Except now I was.
So I was standing there freaking out and I pulled the L1 spark wire and got shocked by the Leading coil pack. The engine started to misfire but just kept on hauling at 3000. I went to pull the L2 spark wire but then I got shocked over and over again by the open L1 outlet.
I considered pulling one of the trailing spark wires but then realized it would probably just start sparking and grounding with the metal components infront of it which happened before when I removed them to see if there was spark.
Finally in desperation I pulled the EGI inj fuse and HEAD fuse at the same time and the engine finally turned off. Honestly I thought it was just going to roar to life again as I was standing there, I was so freaked out. It was the second scariest thing since the fire. So in all, the first idling experience wasn't that chill.
I turned the idle down three turns because I had turned it up a bit more than three when it had reached 3000. The engine sortof sputtered but then began to idle at 1000. Following rotaryressurrection's guide for breaking in rebuilt engines I wanted to raise it to 1500. So I turned the screw up a half turn but since then I have not been able to get the car to turn on again. I'm suspecting low battery. I had to leave for the week so this weekend I'll try it again with a charged battery. Hopefully it will idle and I can actually drive it ?!
Since it wasn't starting my buddy and I removed the brake master cylinder we installed a few months ago because when we did the brake bleeding I noticed it was leaking at the bottom
From the pressure sensor and it was beginning to eat away the paint in my engine bay. It was a bit more of a bitch than when we installed it because at that time the engine was out.
But we got it out and I Teflon taped the sensor this time and it seems to be holding now. So at least I don't have to worry about losing brakes while driving but I will have to re-bleed the system.
Finally, I got in an order of LEDs and changed my reverse light to bright white LEDs instead. I'll have to get a proper picture at night later.
I suspected the charcoal might get a tad hot, hence why I went with smoke bombs. But I am glad it found your leaks. It certainly can't hurt to hit it again now that you found the big ones. Minor leaks can still create headaches, especially come time to tune.
You are getting there! I, on the other hand am waiting for a deal on wheels/tires. I just bought the top half of my turbo engine though! so that is something!
You are getting there! I, on the other hand am waiting for a deal on wheels/tires. I just bought the top half of my turbo engine though! so that is something!
Thread Starter
Senior Member
Joined: Oct 2013
Posts: 270
Likes: 1
From: ON, Canada
Thanks a lot, always appreciate getting some feedback. It's nice to know someone is learning from my experience haha
Thread Starter
Senior Member
Joined: Oct 2013
Posts: 270
Likes: 1
From: ON, Canada
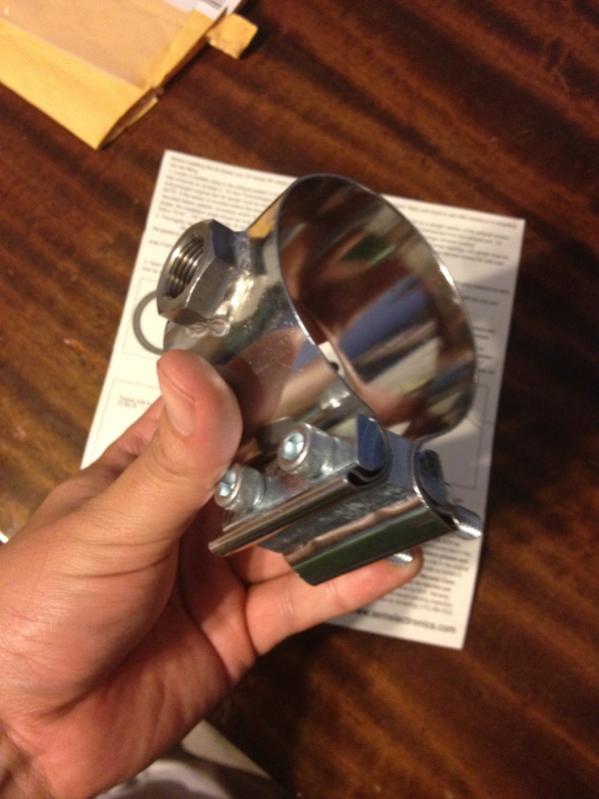
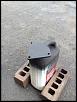
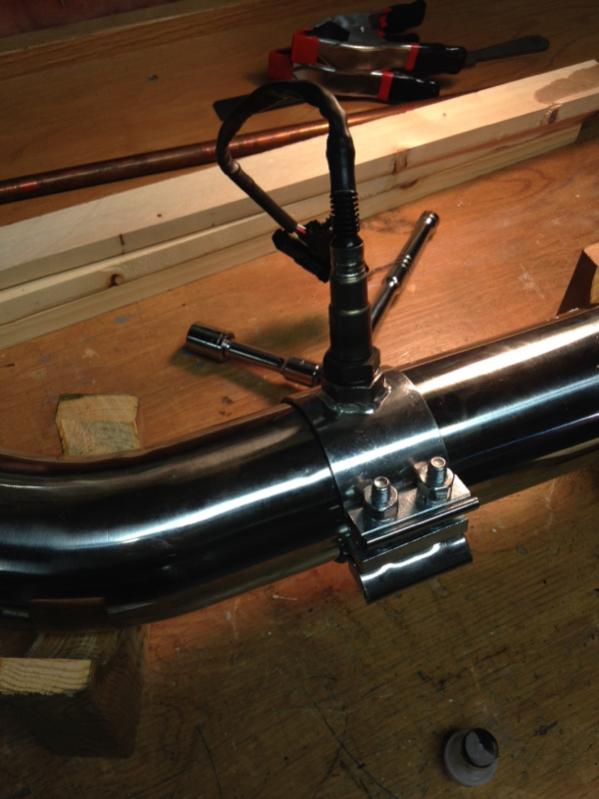
Got my AEM no-weld bung for attaching the wideband sensor to my aluminum Downpipe. Hopefully I can install that on Sunday.
Only had an hour to do stuff today. I tried to bleed the brake master cylinder by disconnecting one of the lines and pumping brake fluid in with a syringe but the pedals still pretty soft. Hopefully I can just bleed the brakes and be done with it because there's not a lot of room to get a syringe in on the other three lines. I forgot to do this process before reinstalling it again.
Tried to start the car with one of my buddies. Took the intercooler off and he was playing with the idle set screw and I was inside starting the car. Almost got it to catch once but finally just gave up for the evening.
I went out and came home and there was a leak which was a **** off.
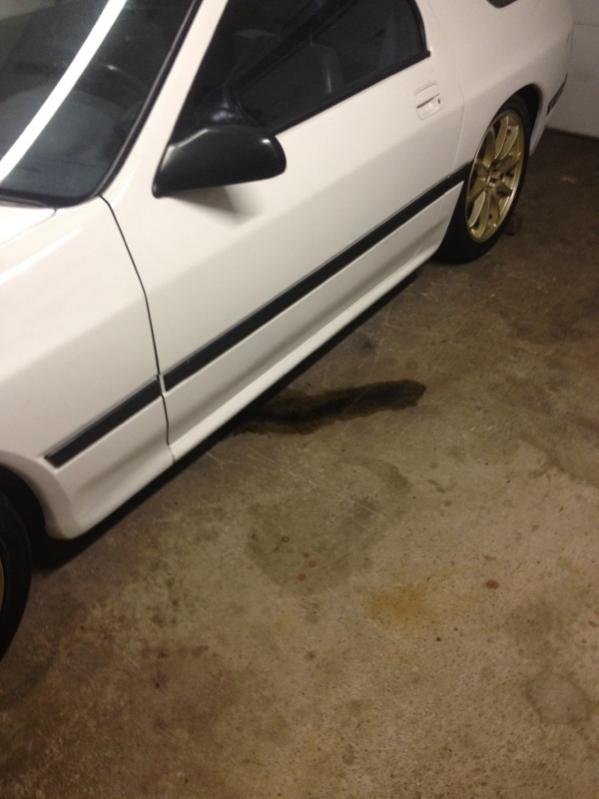
After closer inspection it was fuel. So I guess it was more than flooded.
Bunch of fuel was leaking all around the exhaust manifold and turbo. A little bit even dripped out between the Downpipe and midpipe. Guess lack of fuel isn't the problem.. Luckily the car will have two days to dry out before I mess with it again.
Why do you think your downpipe is aluminum? The picture looks like stainless to me. The weld beads look smaller and more of a golden color. Aluminum is rarely used for exhaust and even then, usually only for the back section. The melting point of 6061 Al is 1200F, my EGTs pre-turbo are 1300-1400F at cruise. There are many different varieties of stainless steel, some magnetic, some not. If you are going by whether its magnetic, that's not always an indicator.
Not sure how I feel about that AEM piece. HOLY **** though! Get that fuel leak fixed fast!
Have you tried bench bleeding the Master cylinder? It can be done still installed in the car, I personally find it to be more of a PITA that way, but it is doable. Head down to NAPA or whatever is convenient and pick up a couple bleed kits ( they will know what you are talking about if you say you are bench bleeding).
They are cheap and come with plastic plugs that screw into the MC where the brake lines go, then run a rubber hose (comes in the kit) off each nipple back into the MC reservoir submerged completely in Brake fluid so no air can come back in. Then pump pump pump it up. Trick part is getting the lines hooked back up quickly. After that, bleed the lines as normal at the calipers and you should be golden.
Thread Starter
Senior Member
Joined: Oct 2013
Posts: 270
Likes: 1
From: ON, Canada
Why do you think your downpipe is aluminum? The picture looks like stainless to me. The weld beads look smaller and more of a golden color. Aluminum is rarely used for exhaust and even then, usually only for the back section. The melting point of 6061 Al is 1200F, my EGTs pre-turbo are 1300-1400F at cruise. There are many different varieties of stainless steel, some magnetic, some not. If you are going by whether its magnetic, that's not always an indicator.
I bought the AEM piece also because I could install that myself. I was tired of chasing around parts and services at shops and having these old guys tell me they don't know what I'm talking about. Since I only work on the car on evenings and also late at night it's difficult to work within the working hours of local shops.
Thread Starter
Senior Member
Joined: Oct 2013
Posts: 270
Likes: 1
From: ON, Canada
Not sure how I feel about that AEM piece. HOLY **** though! Get that fuel leak fixed fast!
Have you tried bench bleeding the Master cylinder? It can be done still installed in the car, I personally find it to be more of a PITA that way, but it is doable. Head down to NAPA or whatever is convenient and pick up a couple bleed kits ( they will know what you are talking about if you say you are bench bleeding).
They are cheap and come with plastic plugs that screw into the MC where the brake lines go, then run a rubber hose (comes in the kit) off each nipple back into the MC reservoir submerged completely in Brake fluid so no air can come back in. Then pump pump pump it up. Trick part is getting the lines hooked back up quickly. After that, bleed the lines as normal at the calipers and you should be golden.
Have you tried bench bleeding the Master cylinder? It can be done still installed in the car, I personally find it to be more of a PITA that way, but it is doable. Head down to NAPA or whatever is convenient and pick up a couple bleed kits ( they will know what you are talking about if you say you are bench bleeding).
They are cheap and come with plastic plugs that screw into the MC where the brake lines go, then run a rubber hose (comes in the kit) off each nipple back into the MC reservoir submerged completely in Brake fluid so no air can come back in. Then pump pump pump it up. Trick part is getting the lines hooked back up quickly. After that, bleed the lines as normal at the calipers and you should be golden.
As for the bench bleeding I did remember to do it the first time I installed the brake master cylinder in april but I forgot to do it when I reinstalled it this week. I'm probably just going to try popping off the other two lines and injecting them with the syringe as well until I stop seeing the bubbles. If I have no room for the syringe then either I'll have to take it out or buy the bleeding tubes as you said I could probably find.
I just tried to drill the hole into the Downpipe but the bit wasn't strong enough because I thought I would be drilling into aluminum.. thanks to that ******* welder. So I gotta get a new bit this week
Thread Starter
Senior Member
Joined: Oct 2013
Posts: 270
Likes: 1
From: ON, Canada
Not sure how I feel about that AEM piece. HOLY **** though! Get that fuel leak fixed fast!
Have you tried bench bleeding the Master cylinder? It can be done still installed in the car, I personally find it to be more of a PITA that way, but it is doable. Head down to NAPA or whatever is convenient and pick up a couple bleed kits ( they will know what you are talking about if you say you are bench bleeding).
They are cheap and come with plastic plugs that screw into the MC where the brake lines go, then run a rubber hose (comes in the kit) off each nipple back into the MC reservoir submerged completely in Brake fluid so no air can come back in. Then pump pump pump it up. Trick part is getting the lines hooked back up quickly. After that, bleed the lines as normal at the calipers and you should be golden.
Have you tried bench bleeding the Master cylinder? It can be done still installed in the car, I personally find it to be more of a PITA that way, but it is doable. Head down to NAPA or whatever is convenient and pick up a couple bleed kits ( they will know what you are talking about if you say you are bench bleeding).
They are cheap and come with plastic plugs that screw into the MC where the brake lines go, then run a rubber hose (comes in the kit) off each nipple back into the MC reservoir submerged completely in Brake fluid so no air can come back in. Then pump pump pump it up. Trick part is getting the lines hooked back up quickly. After that, bleed the lines as normal at the calipers and you should be golden.
Thread Starter
Senior Member
Joined: Oct 2013
Posts: 270
Likes: 1
From: ON, Canada
Installed the AEM no-weld bung on my Downpipe yesterday. Was very very difficult to drill the hole for the sensor. But in the end i got brought and the wideband is all wired up.
Unfortunately I haven't got the car to run since two weekends ago. Can't figure out what's wrong but the last thing I did was lower the idle set screw so I've been messing around with it and can't get it to go.
Any suggestions on how to adjust the throttle body screws if they been completely out of whack would be greatly appreciated. The only two screws I know of are the idle set screw an the TPS sensor adjust screw. I don't know what the others do and I don't know how to set the idle set screw.
Thanks
Thread Starter
Senior Member
Joined: Oct 2013
Posts: 270
Likes: 1
From: ON, Canada
I haven't updated in a long time so its time to explain exactly what happened since august!
I had a goal to get the car running by the end of summer and when the problems started to pile up and I realized I wouldnt be able to have the car running I got kinda sad and decided to step away from working on the car for a few weekends. After working 20 straight weekends in a row I needed a bit of a break anyways. But now I've made some good progress and am back on track!
So after I installed in the wideband sensor into the downpipe I wanted to focus on trying to adjust the idle set screw to get the car to idle again. I turned the idle set screw way down because before I had been starting the car by playing with the throttle so I planned to try that again. After a bit of cranking I would pull the EGI INJ fuse and crank some more to try and unflood the engine. At this point I assume the engine was very flooded as there was still fuel leaking under the downpipe/turbo area, and the engine wasnt making any sounds that pointed towards it trying to start.
I knew I had air fuel and spark now so I assumed that it was just something to do with the idle set screw causing there to be too much or not enough fuel. Suddenly though while I was trying to start, I turned the key to ignition and the whole system made a click and shorted out. I had to disconnect the battery terminal to get it to come back, tried again, and the same thing happened. And then once again the same thing.
I wasn't really sure what had happened here, but I decided it was a short involving the starter. With a buddy I removed the starter from the car and using a battery and jumper cables we tried the starter outside of the car. It seemed to work fine and determined that must not be the problem.
Then we tried hooking the negative terminal on the starter back up to its mount but without the starter in the car, and tried to turn the key. This time the car didn't short out? So i then determined it must be the third wire on the starter shorting out somewhere in the harness. I checked the haynes manual and tried to locate the starter relay in the engine bay but it didn't seem to be where it was supposed to be. There is a bosch relay that always looked out of place and we assumed it to be the starter relay. Using a multimeter, we checked continuity on each of the wires on the bosch relay in connectivity with the third starter wire under the car and all of the wires had some resistance but had connectivity. We tried checking its continuity with other items in the car and found it to have some resistance with everything, including the shock towers?
At this point I decided that the third starter wire must be shorting out somewhere along the harness, caused by the fire that started when my old starter shorted out a couple of months ago. I assumed that over time and from that initial short, the insulation on the third starter wire slowly deteriorated and was now shorting out somewhere in the harness.
Thread Starter
Senior Member
Joined: Oct 2013
Posts: 270
Likes: 1
From: ON, Canada
While all of this was going on, I was also working with the help of Satch to determine why my warning lights, radio, turn signals all were staying on even after turning the key to the OFF position and removing the key. The only way to turn off these items after turning the car ON and OFF was to either pull the EGI INJ fuse or disconnect the battery negative terminal. So all this time whenever I turned the car on I would have to get someone to pull the fuse in order to turn off all the systems. When pulled, we could hear a loud click sound of something electrical switching off. Satch helped me to check my ignition switch, and main relay, but neither proved to be defective.
Satch recommended pulling fuses which were connected to the ignition switch to see which was backfeeding the circuit, and keep pulling them until all of the items turned off. It turned out that the ENGINE fuse in the drivers footwell was backfeeding all of the items, and when I pulled it they switched off. However, as soon as I replaced the fuse they all came back on meaning that whatever was powering it was not effected from the interior end of things, and would continue running regardless until I pulled the EGI INJ fues/pulled negative battery terminal. Checking the wiring diagrams I believe this fuse is coming off the two wires on the back of the alternator.
Satch pointed me to previous posts that show how to wire the alternator when swapping a T2 engine into an NA vehicle, something that I had never done. I always saw the post in the TECH section of rotaryresurrection, but the guy who I bought my engine from told me that everything was already wired up and it was direct plug in play. Turns out you can't trust everyone.. The alternator and coolant temperature sensor had to be rewired. This explained why my coolant temp gauge inside the car wasn't working, I thought it was probably a faulty sensor.
I mentioned earlier how I had the problem with the engine not switching off the only time I got it to run (at 3000rpm). So with the shorting starter, the engine not switching off, and the new wiring that had to be done, there was clearly no chance in getting the car to run before the end of summer, I decided to take a break, and this is where I left it for a month.