
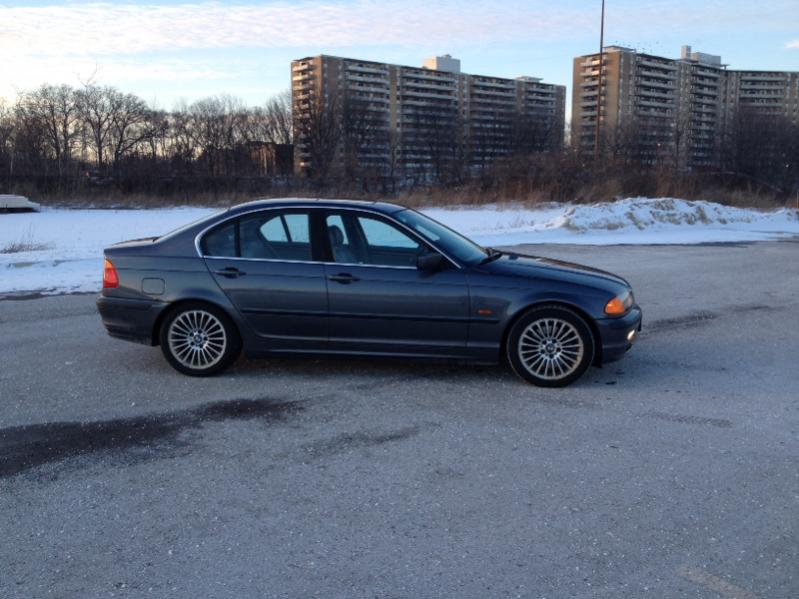
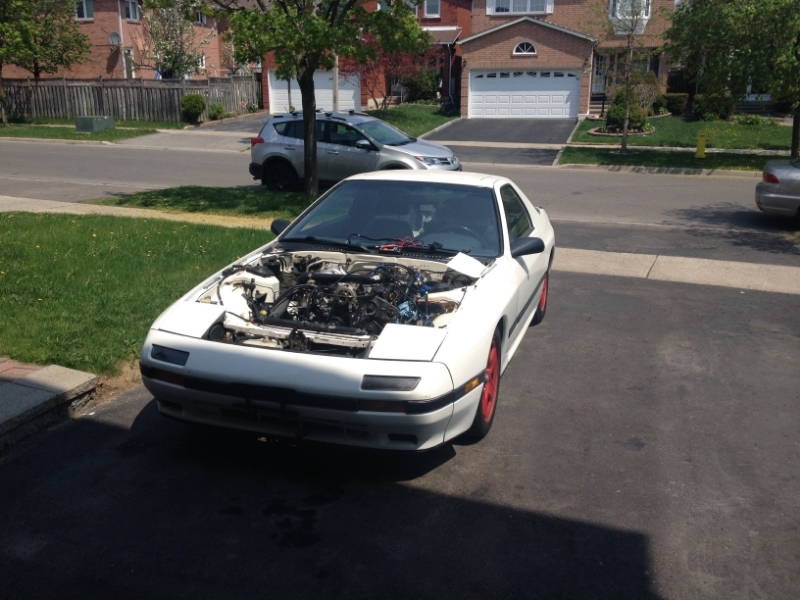
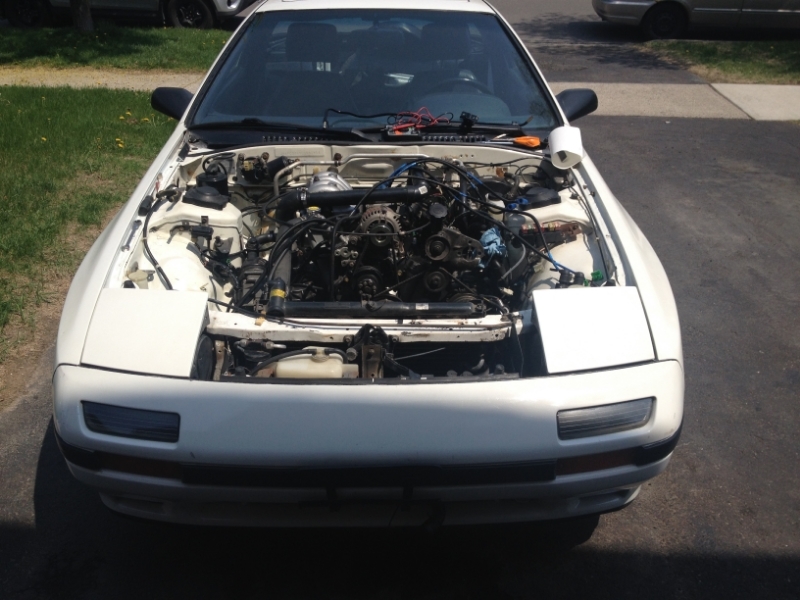
1987 FC3S GXL Turbo Swap Build Thread

Thread Starter
Senior Member
Joined: Oct 2013
Posts: 270
Likes: 1
From: ON, Canada
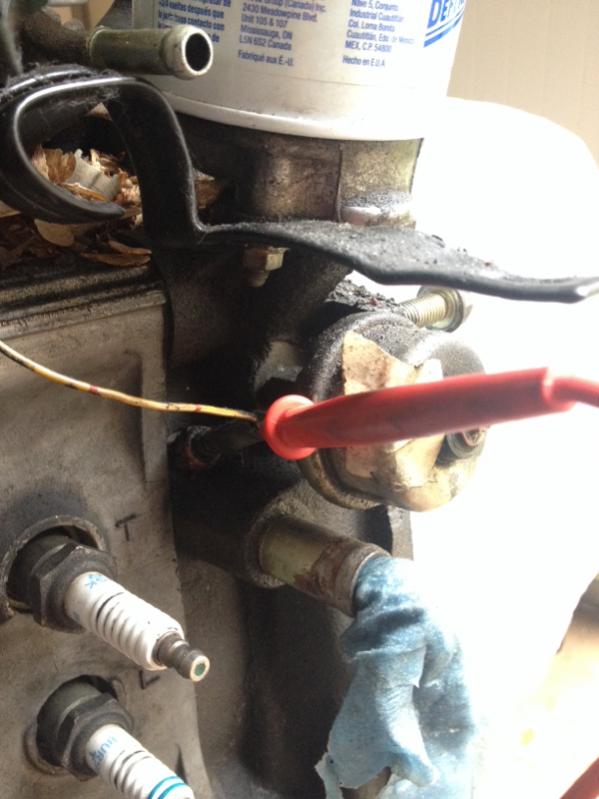
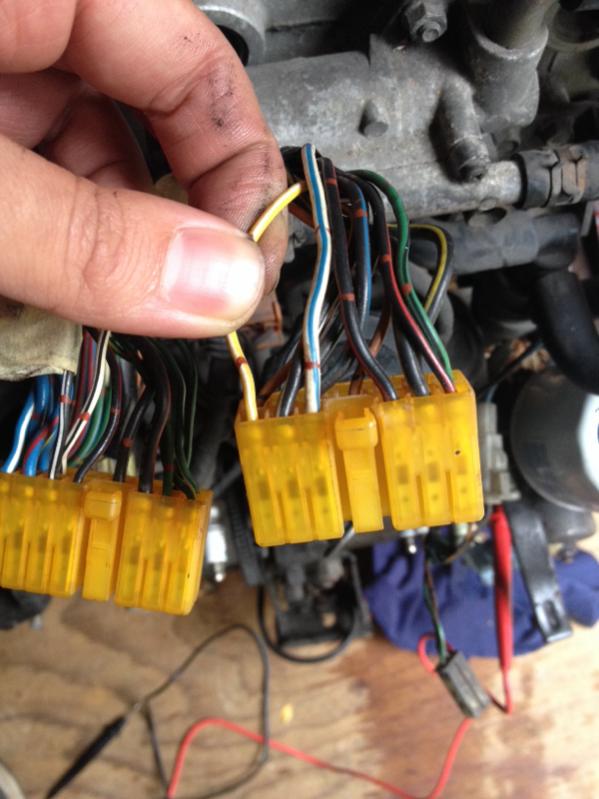
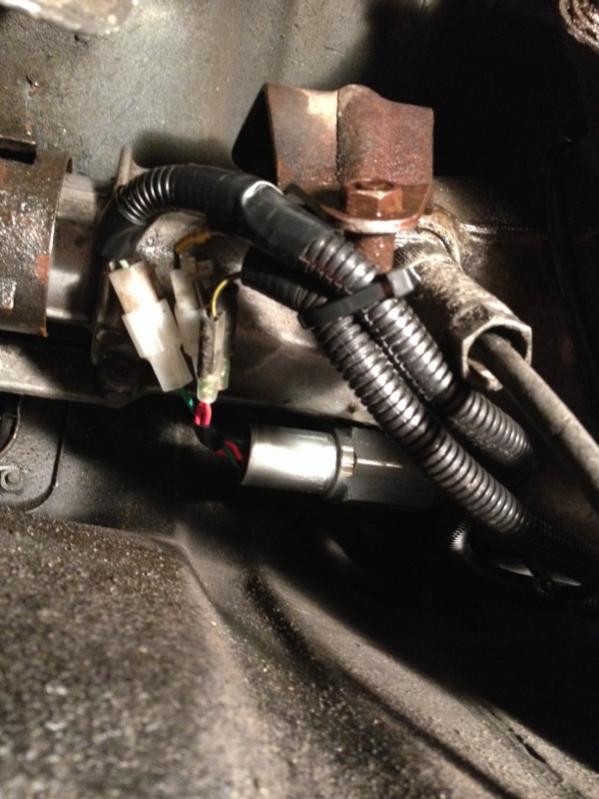
This weekend I finally got motivated to start working on the wiring that needed to be done. Luckily I still have my old NA engine because the steps to rewiring the alternator call for referring to the pin outs on the NA engine harness.
I pulled my passenger carpet back up shoved the harness back through the wall and started trying to find the pins required. I was using the guide on rotaryressurrection to do this. On my old harness I found the pins which the black and white wires coming from the back of the alternator go into one of the large orange connectors on the harness.
On my turbo harness however it was more confusing than I had expected. One wire was going to the wrong connector which was as expected, but the other wire was going to three wrong pins on the wrong connector. It's very likely that these three backfed pins are the cause of my car not turning off when I remove the key.
As the instructions said I ran two new wires from the back of the alternator and soldered them into the pins to match the NA harness. I protected the new wires with some plastic loom and zip tied that along the existing harness.
The second step is to rewire the coolant temperature sensor so that the gauge inside the car works as Mine does not currently. I had trouble understanding these instructions because it asks you to find two wires on the engine side and jump them to fix the connection. I couldn't find the second wire so instead I found which pin lead to the coolant temp sensor on the harness connector side and jumped it to the correct pin as is on my NA engine. As my car doesn't actually start yet I don't know that this works. Oh and of course I sealed off all the wires I had cut that weren't being used anymore.

I pulled my passenger carpet back up shoved the harness back through the wall and started trying to find the pins required. I was using the guide on rotaryressurrection to do this. On my old harness I found the pins which the black and white wires coming from the back of the alternator go into one of the large orange connectors on the harness.
On my turbo harness however it was more confusing than I had expected. One wire was going to the wrong connector which was as expected, but the other wire was going to three wrong pins on the wrong connector. It's very likely that these three backfed pins are the cause of my car not turning off when I remove the key.

As the instructions said I ran two new wires from the back of the alternator and soldered them into the pins to match the NA harness. I protected the new wires with some plastic loom and zip tied that along the existing harness.
The second step is to rewire the coolant temperature sensor so that the gauge inside the car works as Mine does not currently. I had trouble understanding these instructions because it asks you to find two wires on the engine side and jump them to fix the connection. I couldn't find the second wire so instead I found which pin lead to the coolant temp sensor on the harness connector side and jumped it to the correct pin as is on my NA engine. As my car doesn't actually start yet I don't know that this works. Oh and of course I sealed off all the wires I had cut that weren't being used anymore.
Thread Starter
Senior Member
Joined: Oct 2013
Posts: 270
Likes: 1
From: ON, Canada
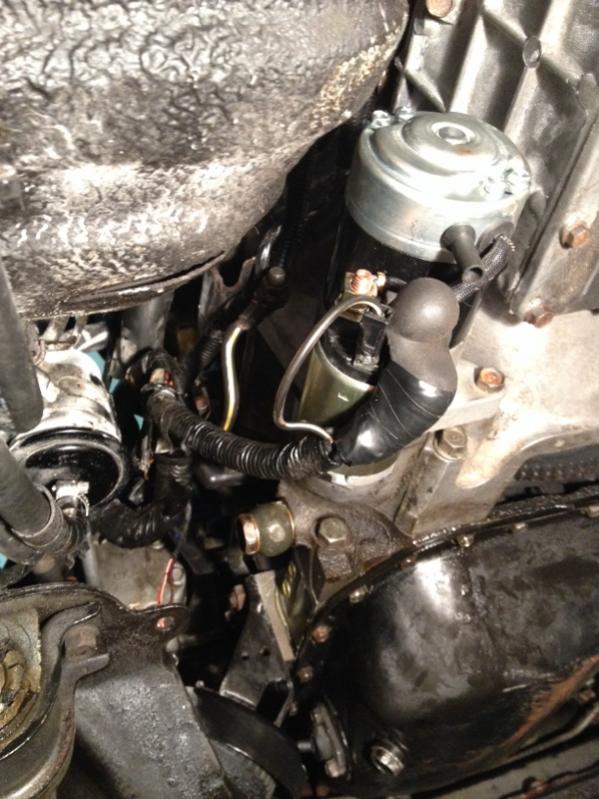
I forgot to mention that when I installed my new starter, the bolt holding the positive lead from the battery stripped. It was holding it tight so I ignored it. When I went to take the starter back off though to test it outside of the car a month ago I had completely ruined the bolt so I brought it to a starter rebuild shop and they gave me a new starter solenoid with bolts intact.
After I finished rewiring the alternator and coolant temp sensor I installed the starter with the new solenoid and went to try turning on the car.
FINALLY when I turned the key to off everything actually turned off! It was the first time since installing the engine that I didn't have to pull the EGI INJ fuse to turn it off. A big thanks to Satch for working with me step by step to figure this out and get to this point.
Another mysterious fix came from this too because when I turned the key to ignition it didn't short out anymore? Possibly because of the rewired alternator, the new solenoid, or maybe the third starter wire just wiggled back into a position where it worked. Not sure where but I am so happy that I don't have to cut apart the harness to find the short.
I tried cranking the engine and it sounded like it was starting to catch but then just got more and more flooded. I kept pulling the EGI INJ fuse and cranking to deflood it but it didn't help, still couldn't get it to start. I assume it actually attempted it at first because it had a month to dry out, then just got more and more flooded as I tried.
Thread Starter
Senior Member
Joined: Oct 2013
Posts: 270
Likes: 1
From: ON, Canada
We also assumed that the battery being low could be the cause of It not starting so we threw it on to the charger and got to work on other things that needed to be done to kill time.
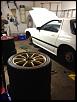
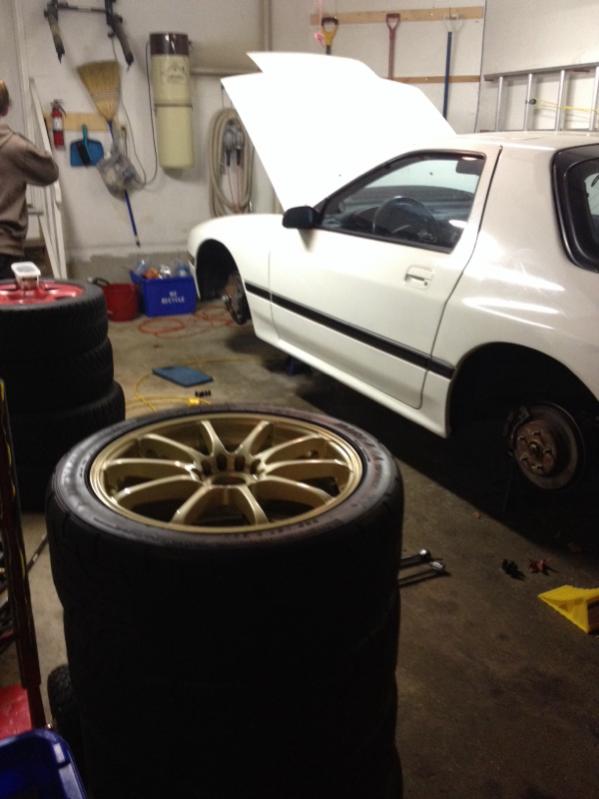
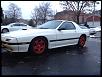
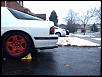
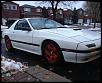
Since I'm in Ontario and it's getting colder, and also because I'm back less and less frequently with school getting busy I decided to take off my gold rims and switch to the red winter rims I had on my prelude. Although I'm not planning to drive the car in the winter I don't want to store it on my gold rims and two of my stock rx7 rims have flats meaning the car will be on the floor at the end of winter.
We also re-bled all the brakes because a little while ago I had to take out the new brake master cylinder and add Teflon tape on the pressure sensor at the bottom. (I forget if that's what it senses).
Then I soldered the connector for my fifth gear sensor that was female to female when connecting the NA wiring to the turbo fifth fear sensor. However, when I put the car in reverse later my reverse lights weren't turning on anymore? Not sure what happened there as it was already working and I didn't touch the second connector which I assume was for the reverse gear sensor. I'll try later to disconnect the new connector or play around with the connections until it comes back - not important right now.
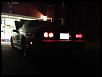
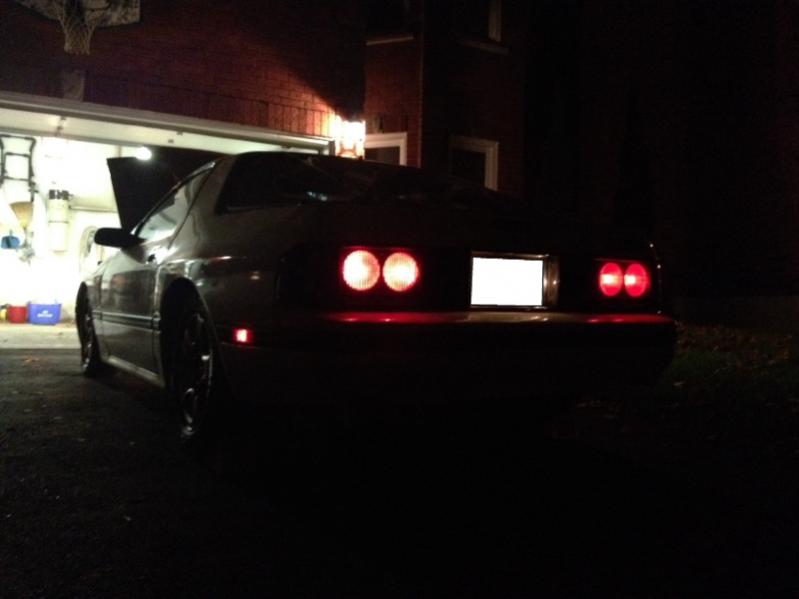
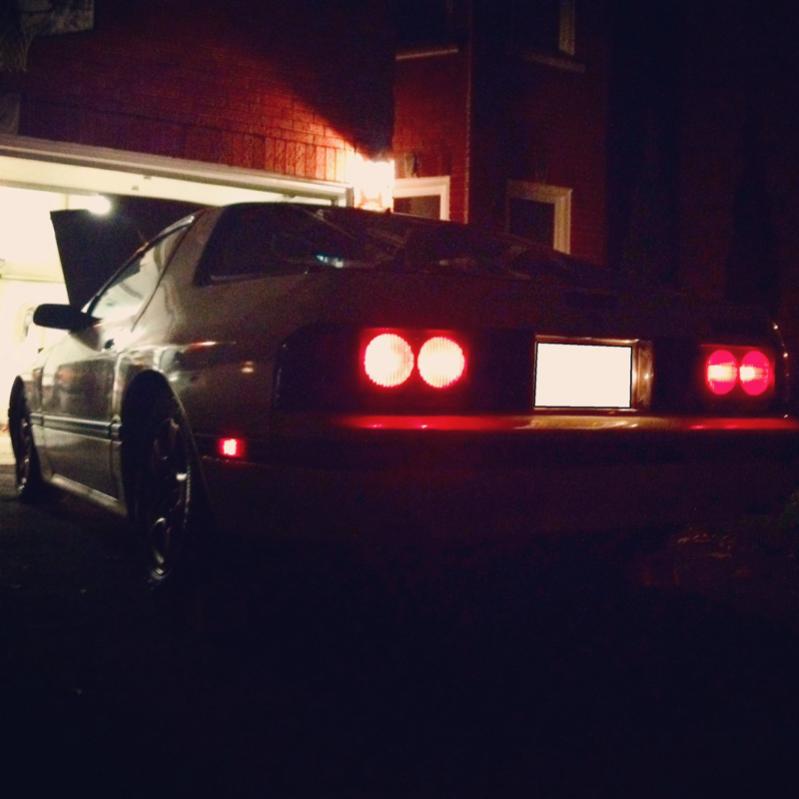
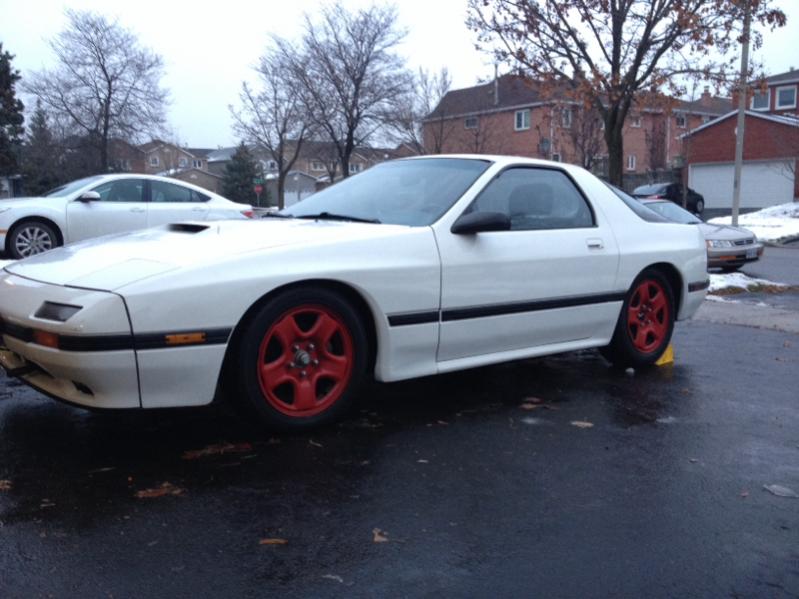
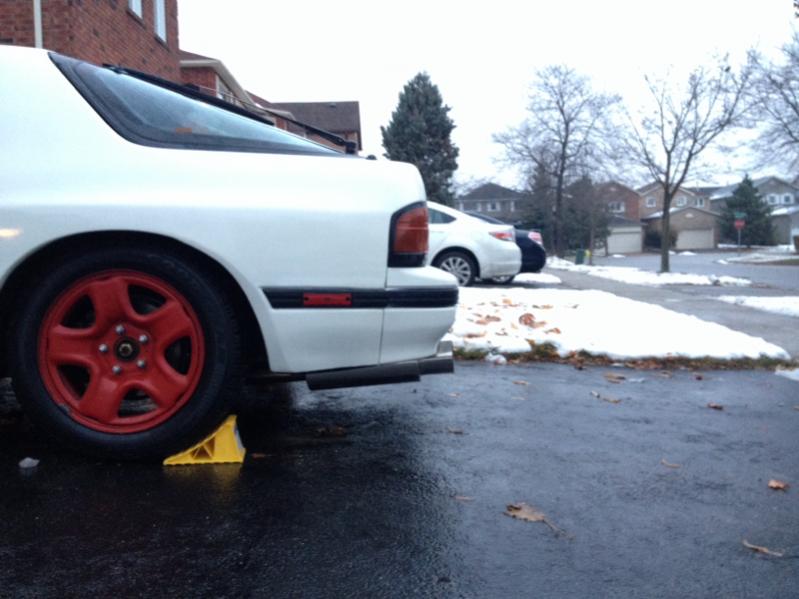
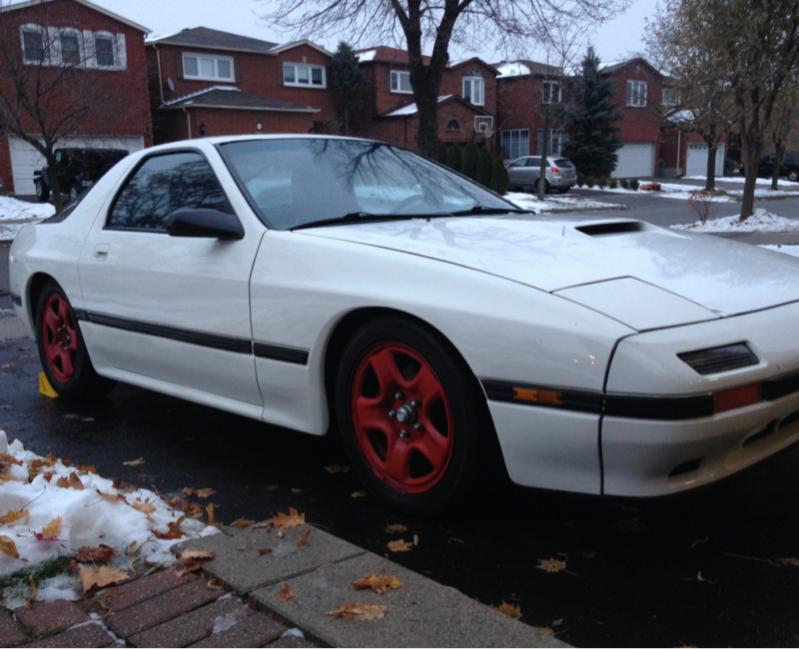
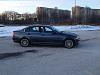
We were determined that with the charged battery the engine was going to start now so we rolled the car outside as to not make too much noise starting in the garage at night. Unfortunately though it didn't make any sign of starting and a bit of fuel was starting to leak under the turbo/Downpipe area so I assume it was still flooded from earlier and only continued to get worse. At least I got to see the car with the lights on outside at night.
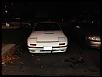
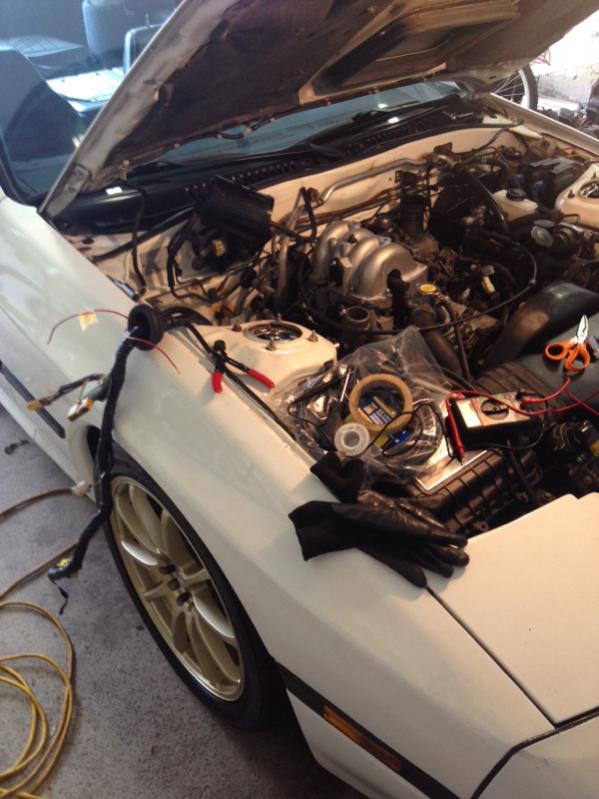
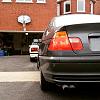
You can see my bent license plate mount from when it got all pushed up against the engine hoist haha. Also I haven't had a chance to remove the bumper and detach that hose which used to connect to the air pump which the new engine doesn't have so for now it's just zip tied up out of the way
Since I'm in Ontario and it's getting colder, and also because I'm back less and less frequently with school getting busy I decided to take off my gold rims and switch to the red winter rims I had on my prelude. Although I'm not planning to drive the car in the winter I don't want to store it on my gold rims and two of my stock rx7 rims have flats meaning the car will be on the floor at the end of winter.
We also re-bled all the brakes because a little while ago I had to take out the new brake master cylinder and add Teflon tape on the pressure sensor at the bottom. (I forget if that's what it senses).
Then I soldered the connector for my fifth gear sensor that was female to female when connecting the NA wiring to the turbo fifth fear sensor. However, when I put the car in reverse later my reverse lights weren't turning on anymore? Not sure what happened there as it was already working and I didn't touch the second connector which I assume was for the reverse gear sensor. I'll try later to disconnect the new connector or play around with the connections until it comes back - not important right now.
We were determined that with the charged battery the engine was going to start now so we rolled the car outside as to not make too much noise starting in the garage at night. Unfortunately though it didn't make any sign of starting and a bit of fuel was starting to leak under the turbo/Downpipe area so I assume it was still flooded from earlier and only continued to get worse. At least I got to see the car with the lights on outside at night.
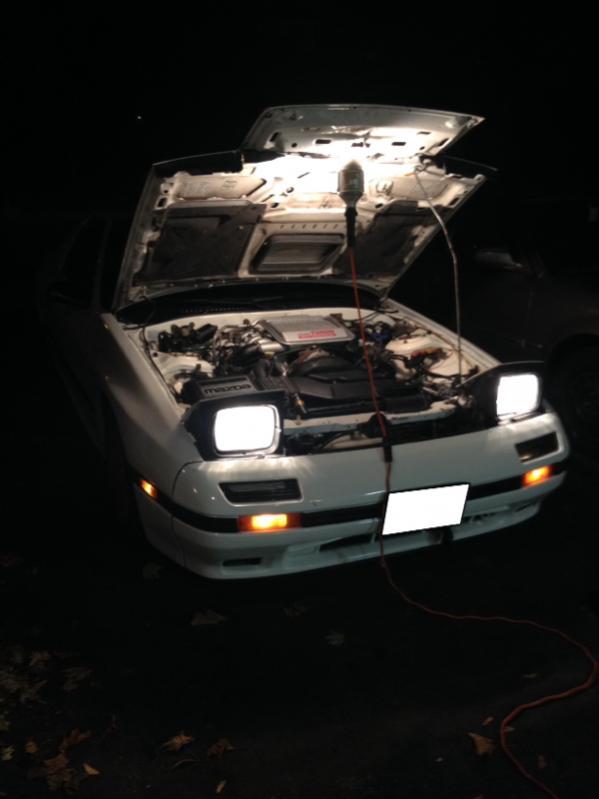
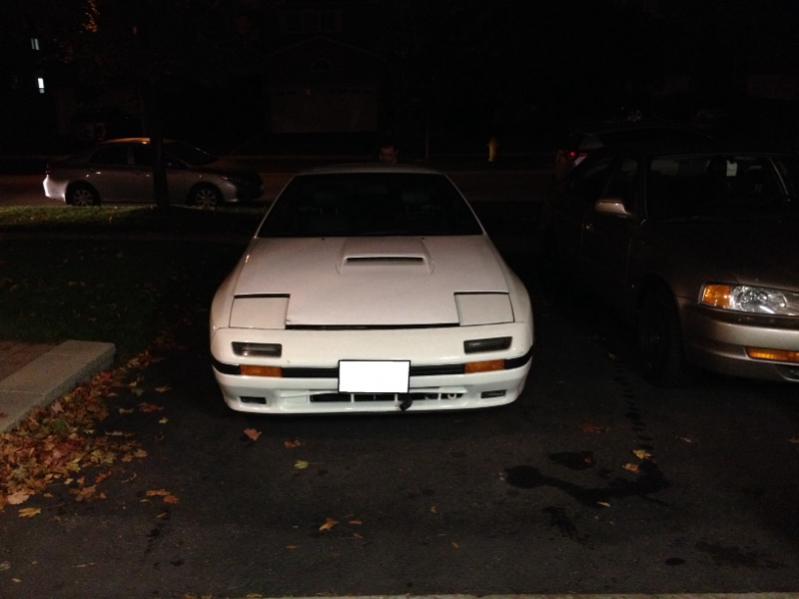
You can see my bent license plate mount from when it got all pushed up against the engine hoist haha. Also I haven't had a chance to remove the bumper and detach that hose which used to connect to the air pump which the new engine doesn't have so for now it's just zip tied up out of the way
Thread Starter
Senior Member
Joined: Oct 2013
Posts: 270
Likes: 1
From: ON, Canada
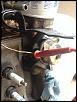
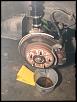
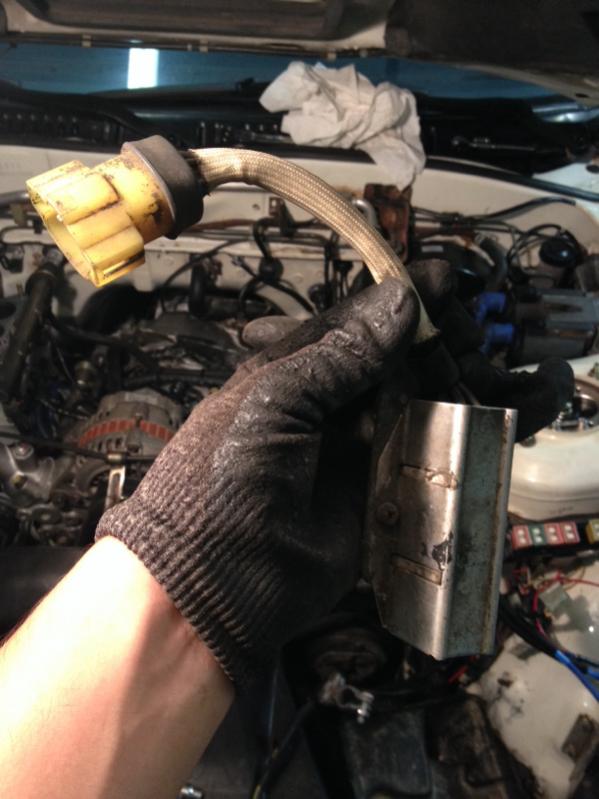
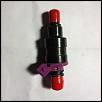
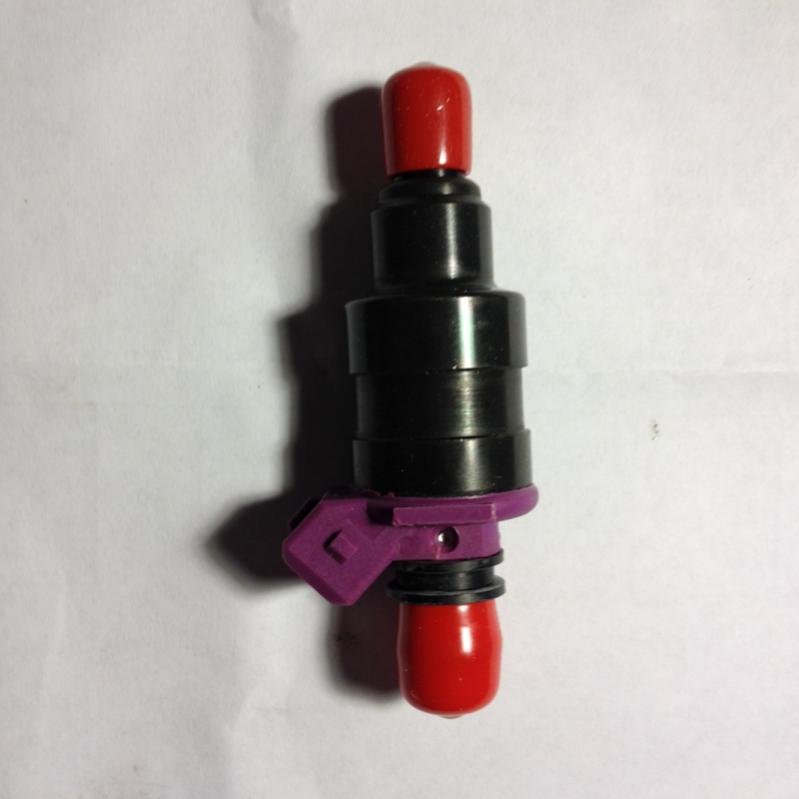
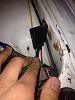
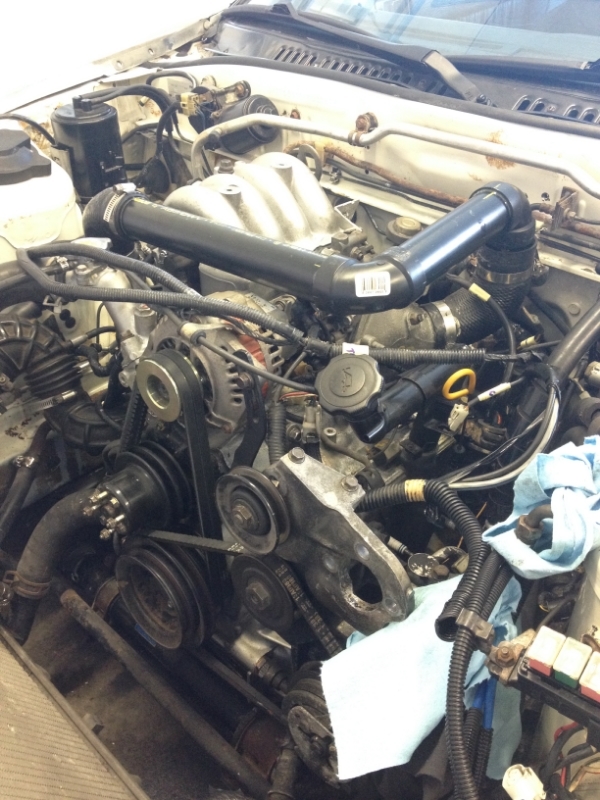
I was trying to think this morning of reasons why the engine keeps flooding and there is so much fuel that it is leaking from the Downpipe. I got suspicious of my fuel injectors which were switched out at the last second before I bought the engine.
I posted up this photo I had taken a while ago when I was trying to figure out the fuel lines which shows the injectors. The feedback I got said that i have the incorrect injectors for my ecu and that they should low impedance not high impedance as these are. Just another problem caused by the engine seller that has wasted my time throughout this project. I purchased the correct injectors and hopefully they'll be arriving next week.
I don't actually know how the injectors work but I assume that the ecu sends a current pulse to the injectors to tell them how much fuel to inject and I assume that a low current means to inject more fuel, and a high current means to inject less fuel. As I currently have high inductance injectors in my car with higher than designed resistance, the injectors are getting a much lower current and are injecting maximum fuel into my engine which is just flooding and getting dumped out the exhaust.
I'm hoping that this will be the last step towards getting the car finally running. And the last few hundred dollars I have to spend this year to finish the car. I'm very excited now and can't wait till they get here.

Glad to see things are coming together for you. I know the feeling of rushing to get things done before winter, I am right there with you there. Luckily I am running fine, and winter is going to be house project time for me vs car stuff this year.
Thread Starter
Senior Member
Joined: Oct 2013
Posts: 270
Likes: 1
From: ON, Canada
Thanks man and good to hear it. When winter comes my cars going to be stored on one side of the garage with another car and all of the tools moved inside. I will basically have no room to work on it.
Thread Starter
Senior Member
Joined: Oct 2013
Posts: 270
Likes: 1
From: ON, Canada
Did a compression test this weekend on my engine as it was a suspect in why I can't get it to run. I was really worried there when it was suggested to me as I could have wasted months of work. But I was pleasantly surprised with the results. Compression shows that the seals are like new! Videos below:
Rotor 2 holding the release valve
Rotor 2 release valve closed
Rotor 1 holding the release valve
Rotor 1 release valve closed
Rotor 2 holding the release valve
Rotor 2 release valve closed
Rotor 1 holding the release valve
Rotor 1 release valve closed
Thread Starter
Senior Member
Joined: Oct 2013
Posts: 270
Likes: 1
From: ON, Canada
I took off the UIM to check for sure that fuel injectors were the wrong type and they were in fact all high impedance injectors. So I put it all back together and then deleted the resistor pack by cutting up my second resistor pack for it's connector.
Tried to start the car didn't seem to make a difference. Still seems very flooded.
Tried to start the car didn't seem to make a difference. Still seems very flooded.
Thread Starter
Senior Member
Joined: Oct 2013
Posts: 270
Likes: 1
From: ON, Canada
The new injectors came in which are 550 cc and 2 ohm but I don't think I'm going to install them for a little bit since the engine is already constantly flooding with the 460 cc and I've removed the resistor pack so they should work.
I also resoldered my CPU on the weekend because of a lot of the features don't work sometimes like the horn. When I reinstalled it though I didn't notice any changes.
Then the next day I turned the car to ON and all the warning lights turned on and a two beep warning signal came on and I mistook it for alternator failure and arbitrary engine speed signal. Meaning that the engine thinks it is on when it isn't. But then Satch told me later that all the warning lights are supposed to come on with key to on and the engine off (just like every car) and the two beep warning signal is just for door open haha. These features had never showed up before so I guess I fixed it?
Thread Starter
Senior Member
Joined: Oct 2013
Posts: 270
Likes: 1
From: ON, Canada
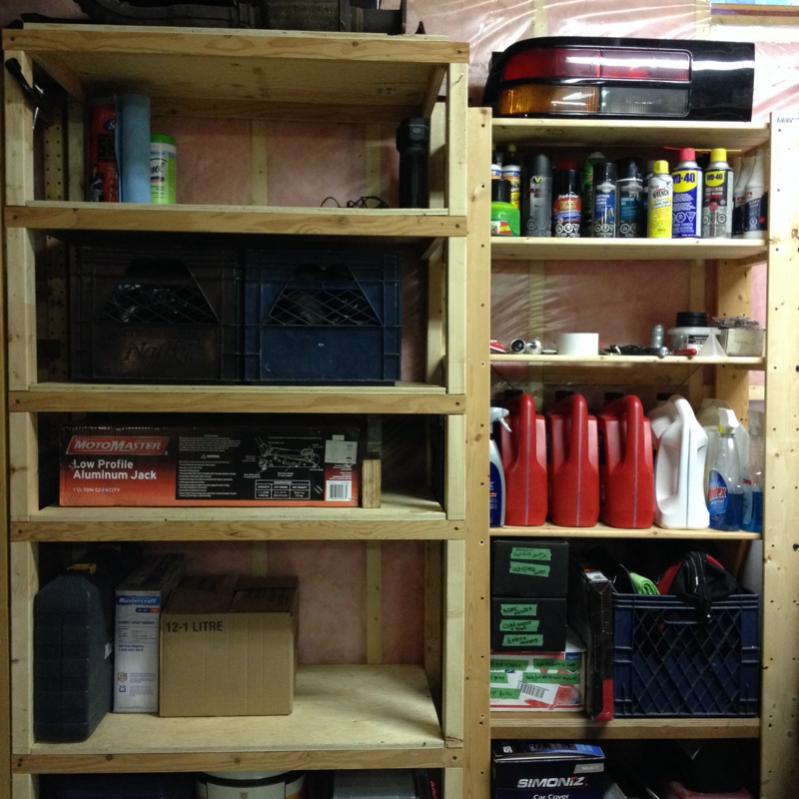
I stored the car for winter a little while ago as my parents started to complain about needing the garage when the first snowfall came for Toronto. So I drove back one evening and washed the car up so it's nice for spring. I moved the engine and drivetrain components to the shed and I got a new shelf for the basement which now has all of the fluids and rx7 parts I racked up throughout this year. I also put the car on winter tires a little while ago because I don't want to potentially get flat spots on the tires for my gold rims. Still need to get some old carpet to put it on as I did last year.
Overall the year was very successful for me. I learned a ton of stuff with help from everyone on here and did a bunch of things I've never tried before. As I've mentioned before I bought the rx7 to learn how to do an engine swap and it's about 95% done now haha (as a result of the many problems that arose this summer). Thanks to everyone who helped me out.
I have to say some things were pretty scary such as the small engine bay fire that happened due to the starter burning out and sparking the leaked fuel, and when I had the engine running at 3000 rpm and couldn't switch it off. But I did have a number of days where I had the engine running and revving which was very rewarding.
From what I've learned in a few of my help threads, the car still needs an aftermarket fuel pressure regulator which I didn't originally plan for. Once the vacuum leaks were fixed and TPS was set, the engine just kept dumping fuel making it impossible to start. As well I'll need to run a new starter wire because it is currently shorting out. I am not looking forward to finding that at all.
I've just remembered I bought a new relay to fix the missing wiper speeds so maybe I can do that sometime. As soon as I parked the car I immediately came across another potential beater to replace my Acura EL because it is BORING and I've almost finished repairing all of it's problems. Only problem is this car is going to need some work before i can get it registered. So hopefully I'll have my hands full again, it seems I like to be kept busy.
Hopefully I'll be cruising my turbo swapped fc this summer. For now I can only dream and wait for the winter to pass.

Thread Starter
Senior Member
Joined: Oct 2013
Posts: 270
Likes: 1
From: ON, Canada
Okayyy time to start checking back in here. The weather at the end of this week it's looking to be in the positive so I might start getting my tools back up and maybe thinking about how I am going to diagnose the problems I left in September.
The car has been sitting in my parents garage where it has taunted me everytime I've gone home through the winter. It's quite a different feeling having a sweet running car that you've purposely parked to get it out of the harsh conditions compared to one which you've failed to solve the issues with.
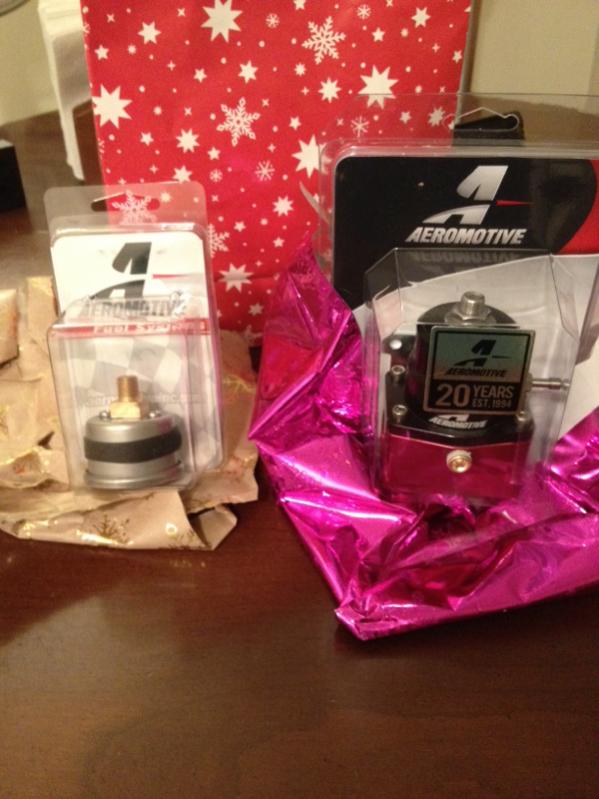
Quickly thinking through the last few months regarding the rx7 I got an aeromotive fuel pressure regulator and gauge for Christmas, and I have yet to look into buying the fittings for it. This will solve my fuel regulation issues. I plan to run it in series with flex fuel hose in order to save costs on that job. I believe I have s4 rails so I'm hoping I can disconnect the stock regulator and get a fitting in there. Not totally sure if I should do this before or after I fix the starter shorting issue? My concerns revolve around the steps for setting up the pressures for idle or whatever else if I can't even run the car.

As for the wiring short I haven't done any research into that but I'm probably going to post up in my other thread to try and get some help with that.
Also got a full new socket set and fire extinguisher for the rx7 to help my fear of fires from last summer haha

I've been keeping busy despite my lack of work on the rx7. I'll try to keep this part as short as my emotions will let me. When my Prelude was totaled in May I bought the Acura EL from my uncle but I can't say I was ever super interested in it, it is just a point a to point b car. So in November an opportunity arose and I bought a 2001 BMW 330i automatic sedan with 280,000 kms for $500. There were issues I knew of and my plan was to repair it and be able to sell the Acura to clear the cost of the BMW plus repairs.
I basically bought the worst maintained BMW ever. It's a sweet car, when it's working, but I've had literally a problem every week since I've owned it. To list it all at once, I replaced: the valve cover gasket, front right control arm, front control arm bushings, downstream o2 sensor, rear springs and shocks, disa valve, another downstream o2 sensor when the first one shorted out, fuel filter, and have had the rear drivers tire go flat on me a few times leading to nearly crashing in the snow.
About a month ago I was driving it back to school and I noticed there was so much smoke behind me that I couldn't see the other drivers. I pulled over, found that there was no oil, filled it, the smoke didn't stop so I ditched it there and came home the next day to tow it back to my parents house. Through research I tracked down the problem to be the crankcase ventilation unit and breather hoses (ccv, essentially PCV in other cars). Last weekend I spent 8 hours replacing it and the damn car is still smoking. So it's currently still left at my parents house and this weekend I plan to do a compression test on it and hope I didn't dump all this money in it for three months of use. I learned a lot from the rapid repairs I did in the last three months but as I haven't been able to sell the Acura my money's way in the negative and now I've got both the rx7 and the BMW taking up space at my parents.
Anyway there's the update since September, I'm sorry it wasn't all rx7 related, but it was automotive and has helped me to develop my skills and patience regarding cars : /
I'm going to post up in my other thread regarding the fuel pressure regulator and the starter wiring short.
The car has been sitting in my parents garage where it has taunted me everytime I've gone home through the winter. It's quite a different feeling having a sweet running car that you've purposely parked to get it out of the harsh conditions compared to one which you've failed to solve the issues with.
Quickly thinking through the last few months regarding the rx7 I got an aeromotive fuel pressure regulator and gauge for Christmas, and I have yet to look into buying the fittings for it. This will solve my fuel regulation issues. I plan to run it in series with flex fuel hose in order to save costs on that job. I believe I have s4 rails so I'm hoping I can disconnect the stock regulator and get a fitting in there. Not totally sure if I should do this before or after I fix the starter shorting issue? My concerns revolve around the steps for setting up the pressures for idle or whatever else if I can't even run the car.
As for the wiring short I haven't done any research into that but I'm probably going to post up in my other thread to try and get some help with that.
Also got a full new socket set and fire extinguisher for the rx7 to help my fear of fires from last summer haha
I've been keeping busy despite my lack of work on the rx7. I'll try to keep this part as short as my emotions will let me. When my Prelude was totaled in May I bought the Acura EL from my uncle but I can't say I was ever super interested in it, it is just a point a to point b car. So in November an opportunity arose and I bought a 2001 BMW 330i automatic sedan with 280,000 kms for $500. There were issues I knew of and my plan was to repair it and be able to sell the Acura to clear the cost of the BMW plus repairs.
I basically bought the worst maintained BMW ever. It's a sweet car, when it's working, but I've had literally a problem every week since I've owned it. To list it all at once, I replaced: the valve cover gasket, front right control arm, front control arm bushings, downstream o2 sensor, rear springs and shocks, disa valve, another downstream o2 sensor when the first one shorted out, fuel filter, and have had the rear drivers tire go flat on me a few times leading to nearly crashing in the snow.
About a month ago I was driving it back to school and I noticed there was so much smoke behind me that I couldn't see the other drivers. I pulled over, found that there was no oil, filled it, the smoke didn't stop so I ditched it there and came home the next day to tow it back to my parents house. Through research I tracked down the problem to be the crankcase ventilation unit and breather hoses (ccv, essentially PCV in other cars). Last weekend I spent 8 hours replacing it and the damn car is still smoking. So it's currently still left at my parents house and this weekend I plan to do a compression test on it and hope I didn't dump all this money in it for three months of use. I learned a lot from the rapid repairs I did in the last three months but as I haven't been able to sell the Acura my money's way in the negative and now I've got both the rx7 and the BMW taking up space at my parents.
Anyway there's the update since September, I'm sorry it wasn't all rx7 related, but it was automotive and has helped me to develop my skills and patience regarding cars : /
I'm going to post up in my other thread regarding the fuel pressure regulator and the starter wiring short.
Thread Starter
Senior Member
Joined: Oct 2013
Posts: 270
Likes: 1
From: ON, Canada
Thread Starter
Senior Member
Joined: Oct 2013
Posts: 270
Likes: 1
From: ON, Canada
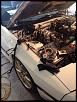
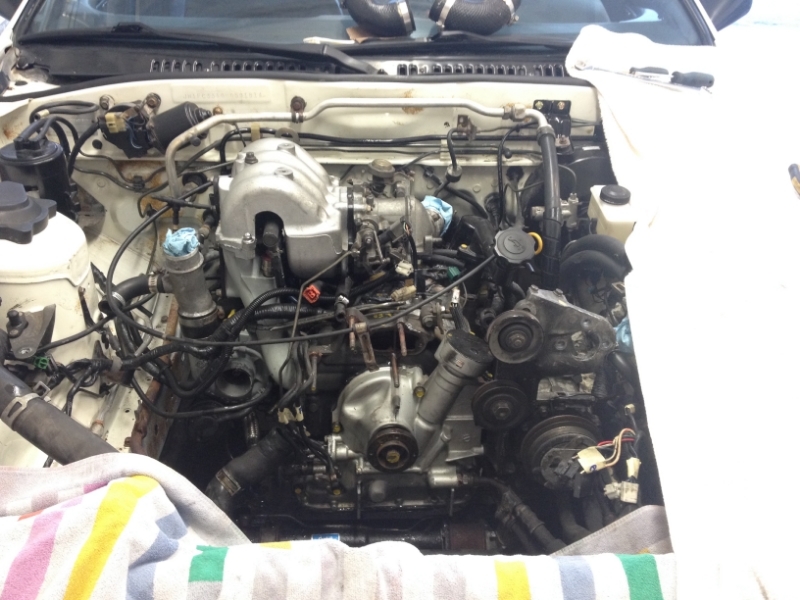
Finally got started on the car for this year. Had a buddy come by to help try and diagnose the starter short I'm having. Got all my tools up in the garage and started to take components back out of the engine bay
Looking at the Haynes manual wiring diagram, we checked continuity at the starter relay B/G wire and it had continuity with both key to off and key to ignition with the positive battery terminal. We did this without the battery in the car. Not sure if it should have had continuity in both cases, but this was what we found.
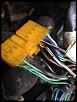
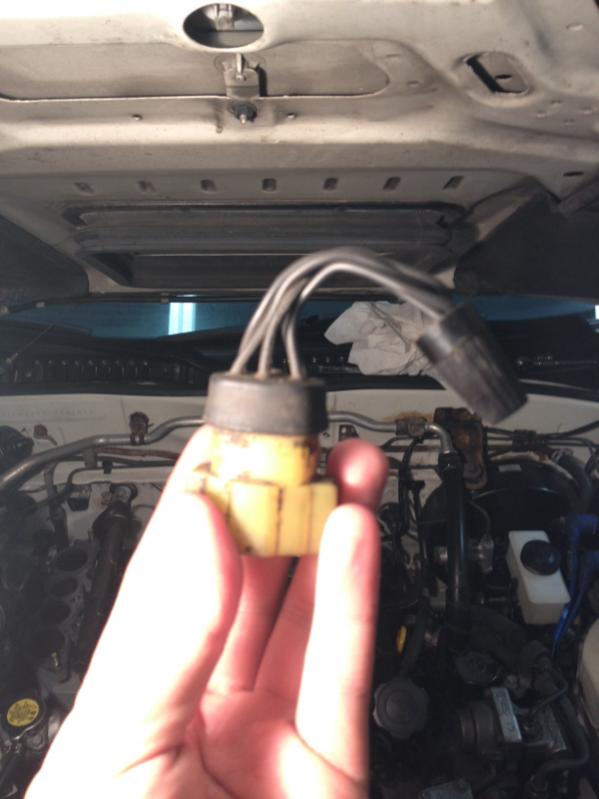
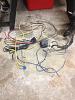
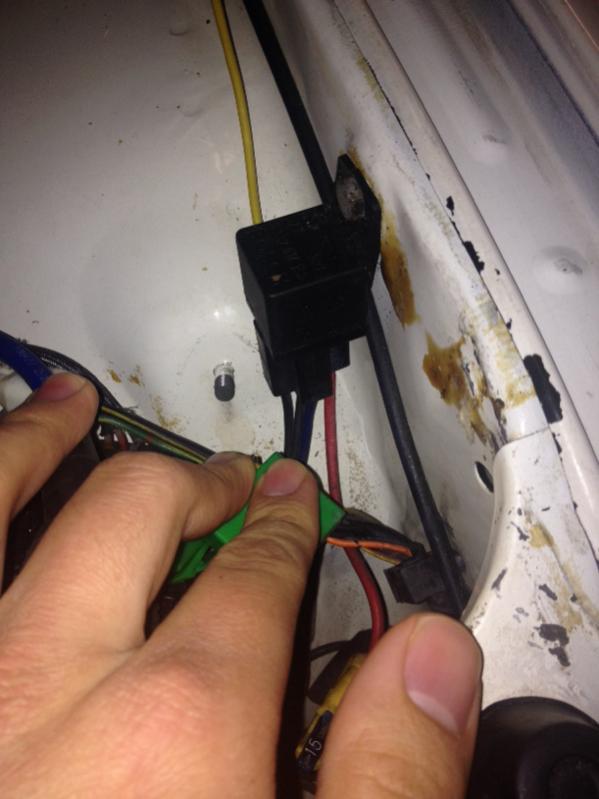
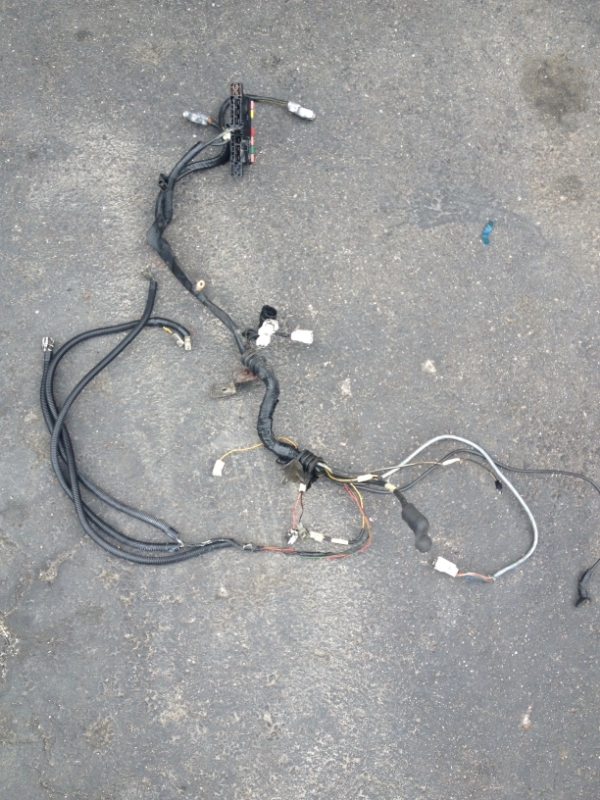
I have some weird relays and wiring which are cut up in my car that I've ignored until now.
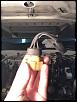
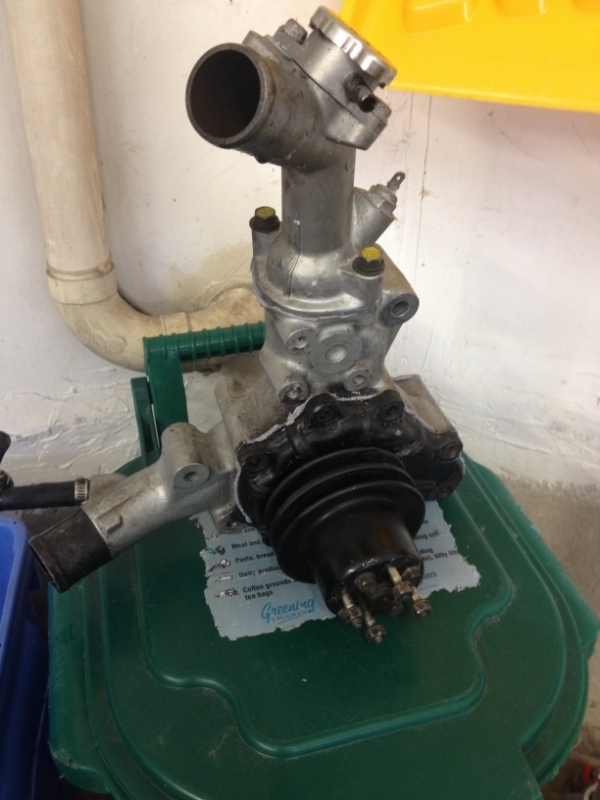
One is this one:
It had a wire running to the main fuse and another wire running into the car which tapped into one of the lines in the large blue connectors under the dash. It also had two black wires running out of it which were cut. So we got that **** out of there.
My buddy also found another relay under the dash which appeared to be stock but wasn't. It tapped into two of the lines on the circuit opening relay. It also had two blue lines which were cut. Previously I found a switch on the foot rest which also had two cut blue lines. So we removed this relay and resoldered the line on the circuit opening relay that it tapped into.
Random relays and wires going nowhere:
Disconnected the fuel pump connector and cranked the car. It didn't short, but this doesn't prove much because the short before was intermittent.
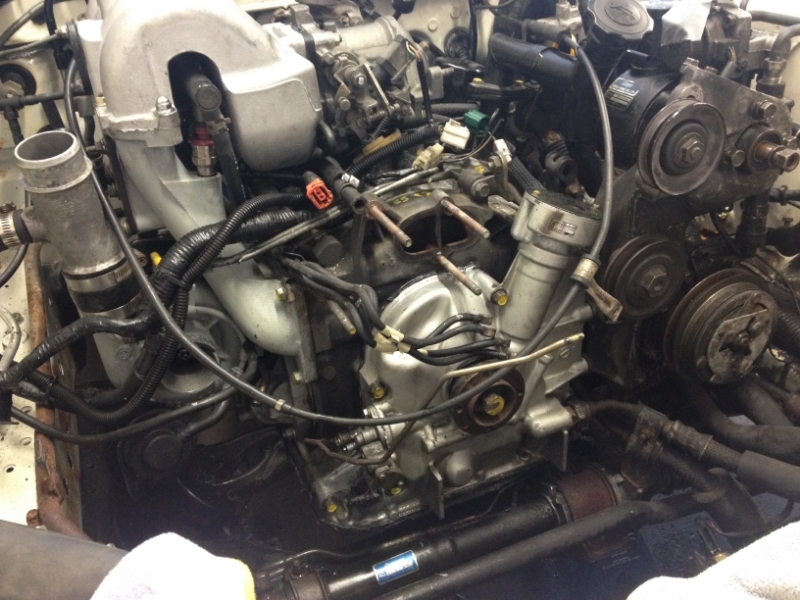
Then I pulled out the intake, fan, fan shroud and power steering pump to get at the wiring harness which runs everything on the drivers side of the vehicle.
Went under and disconnected the connectors for the reverse and fifth gear sensors, other transmission sensor which I forget, maybe neutral, starter positive and battery terminals, starter connector from the relay, oil pan level sensor?, oil pressure sender, the sensor on the clutch slave. Disconnected all of these so that we could pull up the wiring harness and check for shorts on the starter wiring area. Didn't appear to have any shorts after tearing apart the old plastic and tape wiring looms covering the wires. So at this point I won't run a new wire from the starter relay to the starter yet. I'm going to add a new connector thoygh because the old one is a bit melted from the fire.
I don't have my Haynes manual here so I can't reference this, but it showed a ground on top of the transmission although one isn't listed on aaroncakes's guide to proper grounding procedures. I'll probably add one anyways because it can old help.
Still not sure of what was causing everything to switch off when I tried to start the car before? The battery was always fully charged. Short on the starter, voltage drop over the whole system? I don't know.
Looking at the Haynes manual wiring diagram, we checked continuity at the starter relay B/G wire and it had continuity with both key to off and key to ignition with the positive battery terminal. We did this without the battery in the car. Not sure if it should have had continuity in both cases, but this was what we found.
I have some weird relays and wiring which are cut up in my car that I've ignored until now.
One is this one:
It had a wire running to the main fuse and another wire running into the car which tapped into one of the lines in the large blue connectors under the dash. It also had two black wires running out of it which were cut. So we got that **** out of there.
My buddy also found another relay under the dash which appeared to be stock but wasn't. It tapped into two of the lines on the circuit opening relay. It also had two blue lines which were cut. Previously I found a switch on the foot rest which also had two cut blue lines. So we removed this relay and resoldered the line on the circuit opening relay that it tapped into.
Random relays and wires going nowhere:

Disconnected the fuel pump connector and cranked the car. It didn't short, but this doesn't prove much because the short before was intermittent.
Then I pulled out the intake, fan, fan shroud and power steering pump to get at the wiring harness which runs everything on the drivers side of the vehicle.
Went under and disconnected the connectors for the reverse and fifth gear sensors, other transmission sensor which I forget, maybe neutral, starter positive and battery terminals, starter connector from the relay, oil pan level sensor?, oil pressure sender, the sensor on the clutch slave. Disconnected all of these so that we could pull up the wiring harness and check for shorts on the starter wiring area. Didn't appear to have any shorts after tearing apart the old plastic and tape wiring looms covering the wires. So at this point I won't run a new wire from the starter relay to the starter yet. I'm going to add a new connector thoygh because the old one is a bit melted from the fire.
I don't have my Haynes manual here so I can't reference this, but it showed a ground on top of the transmission although one isn't listed on aaroncakes's guide to proper grounding procedures. I'll probably add one anyways because it can old help.
Still not sure of what was causing everything to switch off when I tried to start the car before? The battery was always fully charged. Short on the starter, voltage drop over the whole system? I don't know.

Thread Starter
Senior Member
Joined: Oct 2013
Posts: 270
Likes: 1
From: ON, Canada
I just priced how out much it would be to run parallel fuel setup on my car to get my aeromotive FPR installed and it's NUTS!
In order to run the setup that is on fc3s pro, with some other modifications such as using 6AN to 5/16" female spring lock adapters to attach the steel braided hose to the return fuel line and the fuel filter my total came out to $723 Canadian!! And that price doesn't include the FPR which I already have making the total fuel setup cost to be $1000! How is that reasonable? Does everyone go through this? Are there alternative ways I can get my fuel pressure regulator installed?
I think I'm going to be forced to just run with flex fuse hose and adapters in series fuel setup
Last edited by trickster; Apr 7, 2015 at 06:14 AM.
Thread Starter
Senior Member
Joined: Oct 2013
Posts: 270
Likes: 1
From: ON, Canada
I ordered fittings from Jegs to run the fuel system in series with flex hose. I figure I can always convert it in the future but right now the priority is to get the car running.
Thread Starter
Senior Member
Joined: Oct 2013
Posts: 270
Likes: 1
From: ON, Canada
Finally beginning to assess the plans for this season
Well the app I usually use to browse the forums and post up photos hasn't been working for the last month so I haven't been able to come on and post my thoughts for discussion and what I've been doing. Also repairing that damn BMW really took up a lot my weekend time with exams filling up the week.
I made a PVC pipe replacement for the intercooler based on a photo I had seen somewhere online so that I can adjust the idle whenever I get the car to run. I found it really time consuming in the fall to remove the intercooler, adjust the screw, replace intercooler, start the car, check idle, and replace so now I can adjust it easily when the time comes. I of course won't run it with this pipe in place actually just for the initial settings.
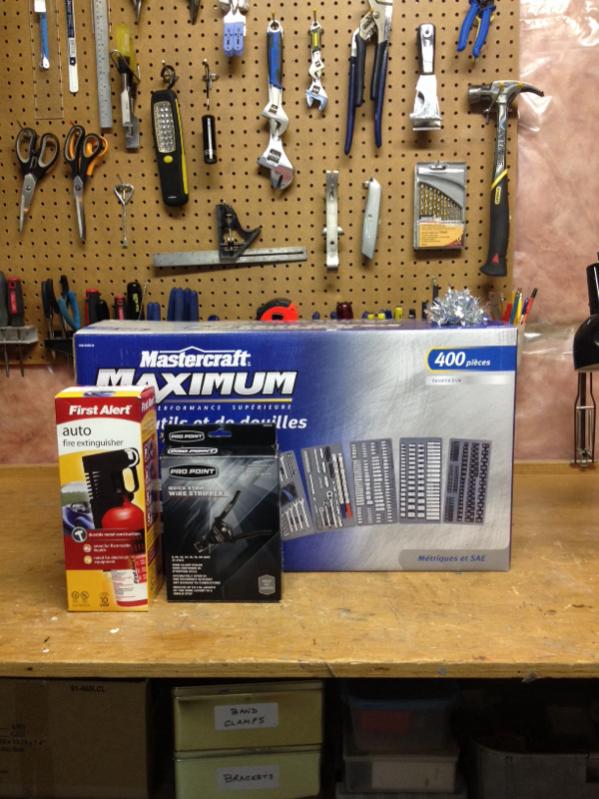
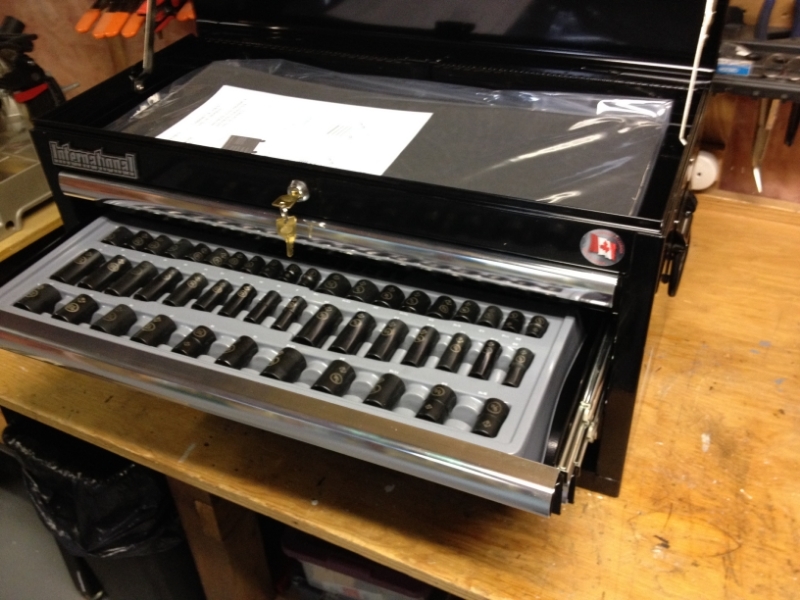
My dad got me a late birthday present of a new toolbox to hold the 400 piece mastercraft set that I got from my girlfriend so that was sweet, was more organized now than just having the trays out on a table
So heres everything that came in either now and including what I didn't install in the fall:
4 x 550 CC low impedance injectors
4 x connectors for the injectors and one for the coolant temp sensor which is chipped
intake manifold gasket set
5/16" flex fuel hose
water pump gasket set
two sizes of vacuum hose
two sizes of plastic wiring loom to redo the front harness
vacuum hose t's and connectors
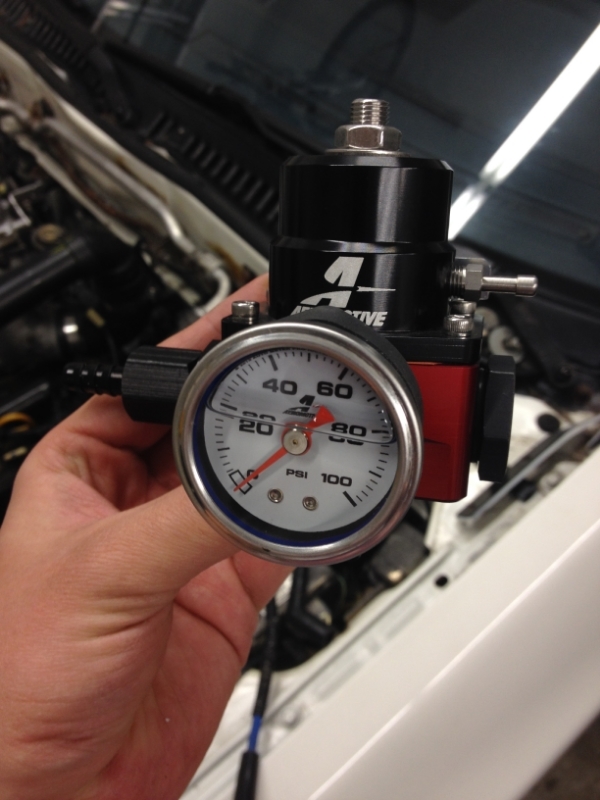
Aeromotive A1000 fuel pressure regulator
Aeromotive fuel pressure gauge
Fittings from summit racing:
M12x1.25 to 6AN adapter
2 x 6AN to barb fitting
6AN to 10AN adapter
10 AN plug
6AN to male barb fitting
Still need to get:
fuel hose clamps
copper crush washers to fix leaks on 4 small oil metering pump hoses
positive battery connector on the starter and insulator cap (melted)
insulator cap for alternator to battery connector (missing)
connector for starter solenoid (melted)
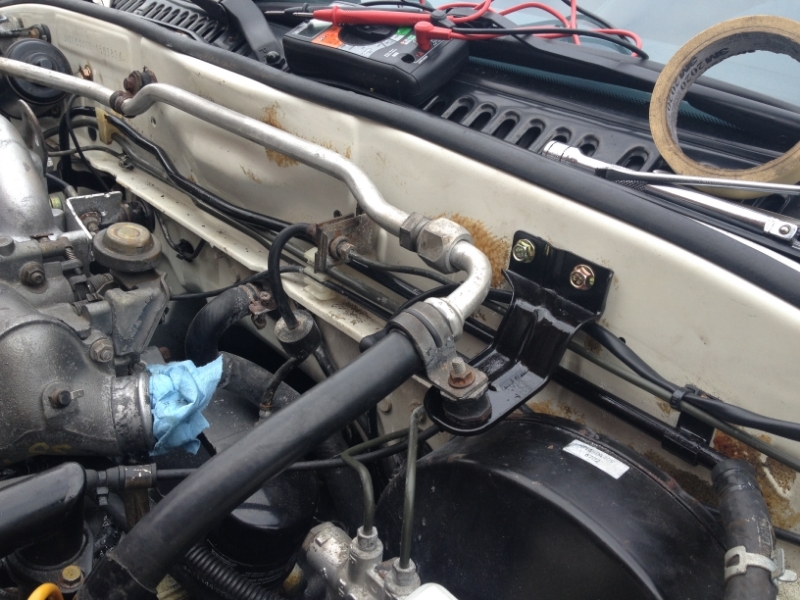
I spent this weekend tearing apart more of the front harness (which connects to all the engine components on the drivers side and looking for melted wires. As mentioned above the positive battery connector and wiring on the starter is melted at the starter from the fire as is the starter solenoid connector. Not sure exactly how to replace wire of that gauge size. Everything else is looking okay though. Going to buy bolts to replace that common 10 mm bolt which is used on most things including the grounds to get better grounding on the engine.
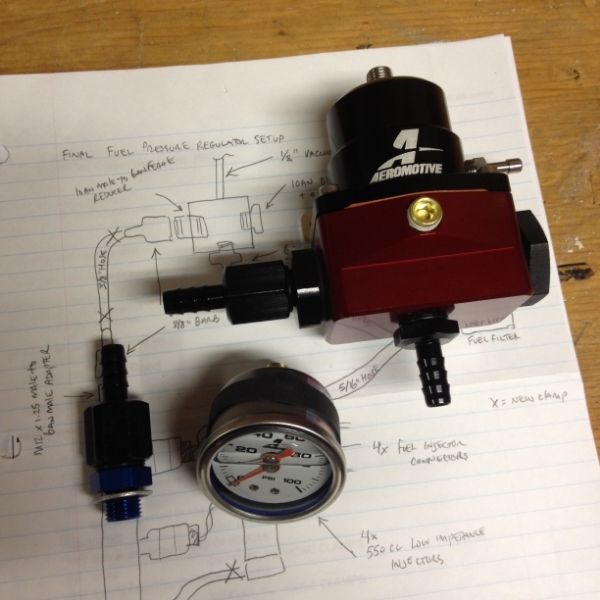
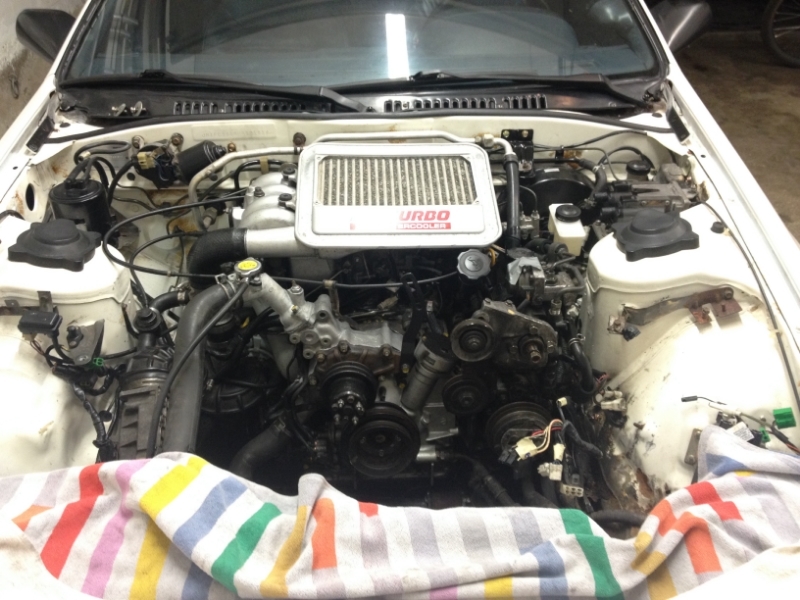
I was also trying to figure out where the heck to put the fuel pressure regulator as with the gauge it sticks out so far. I think I'm going to have to go with the side of the driver strut tower as AaronCake did but he didn't have AC or PS which take up a lot of space.
Here is how I planned it out
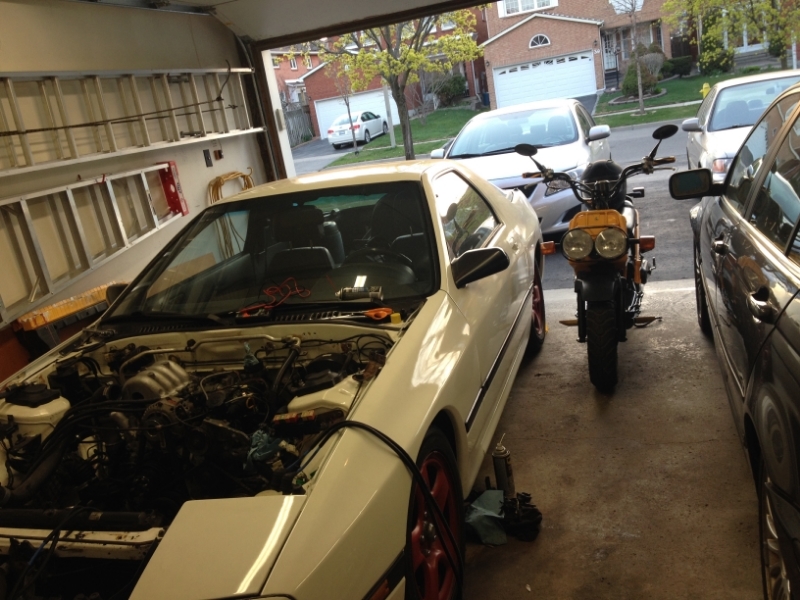
Opened the garage door and realized I had worked straight into the morning which was funny since I hadn't made any real progress, mostly just looking over everything. I've got barely any room since my 3 cars are here when I'm working, (two of which aren't running) and my parents 2 cars. They're starting to get pretty upset about that as well.
Also two items were pissing me off since they were all rusty which were the brake booster metal line which runs across the top of the bay and the bracket which holds the AC line so I painted them with some paint I had already.
Other things I have to do are to replace the copper crush washers on the four small hoses on the OMP as mentioned above because they are leaking since I fixed a previous leak. Install the water pump gasket and pull off the whole water pump and reseal behind it because I think it is leaking coolant from there again although I fixed it. Finally there is an oil leak I believe on the oil cooling line on the bottom of the turbo. I hope I can take this off without removing the turbo or two many other items as it is hard to see underneath where it is. Oil cooler is either cracked or leaking at one of the fittings but that was since I bought the car so I can go over that later without the engine pulled apart as it is now.
There is a rotary meet in Ontario for rx7club and rx8club at the end of May so I guess that is my goal to finish this off. I don't know if I'll be able to but I have the next four weekends to try and pump it out.
I made a PVC pipe replacement for the intercooler based on a photo I had seen somewhere online so that I can adjust the idle whenever I get the car to run. I found it really time consuming in the fall to remove the intercooler, adjust the screw, replace intercooler, start the car, check idle, and replace so now I can adjust it easily when the time comes. I of course won't run it with this pipe in place actually just for the initial settings.
My dad got me a late birthday present of a new toolbox to hold the 400 piece mastercraft set that I got from my girlfriend so that was sweet, was more organized now than just having the trays out on a table
So heres everything that came in either now and including what I didn't install in the fall:
4 x 550 CC low impedance injectors
4 x connectors for the injectors and one for the coolant temp sensor which is chipped
intake manifold gasket set
5/16" flex fuel hose
water pump gasket set
two sizes of vacuum hose
two sizes of plastic wiring loom to redo the front harness
vacuum hose t's and connectors
Aeromotive A1000 fuel pressure regulator
Aeromotive fuel pressure gauge
Fittings from summit racing:
M12x1.25 to 6AN adapter
2 x 6AN to barb fitting
6AN to 10AN adapter
10 AN plug
6AN to male barb fitting
Still need to get:
fuel hose clamps
copper crush washers to fix leaks on 4 small oil metering pump hoses
positive battery connector on the starter and insulator cap (melted)
insulator cap for alternator to battery connector (missing)
connector for starter solenoid (melted)
I spent this weekend tearing apart more of the front harness (which connects to all the engine components on the drivers side and looking for melted wires. As mentioned above the positive battery connector and wiring on the starter is melted at the starter from the fire as is the starter solenoid connector. Not sure exactly how to replace wire of that gauge size. Everything else is looking okay though. Going to buy bolts to replace that common 10 mm bolt which is used on most things including the grounds to get better grounding on the engine.
I was also trying to figure out where the heck to put the fuel pressure regulator as with the gauge it sticks out so far. I think I'm going to have to go with the side of the driver strut tower as AaronCake did but he didn't have AC or PS which take up a lot of space.
Here is how I planned it out
Opened the garage door and realized I had worked straight into the morning which was funny since I hadn't made any real progress, mostly just looking over everything. I've got barely any room since my 3 cars are here when I'm working, (two of which aren't running) and my parents 2 cars. They're starting to get pretty upset about that as well.
Also two items were pissing me off since they were all rusty which were the brake booster metal line which runs across the top of the bay and the bracket which holds the AC line so I painted them with some paint I had already.
Other things I have to do are to replace the copper crush washers on the four small hoses on the OMP as mentioned above because they are leaking since I fixed a previous leak. Install the water pump gasket and pull off the whole water pump and reseal behind it because I think it is leaking coolant from there again although I fixed it. Finally there is an oil leak I believe on the oil cooling line on the bottom of the turbo. I hope I can take this off without removing the turbo or two many other items as it is hard to see underneath where it is. Oil cooler is either cracked or leaking at one of the fittings but that was since I bought the car so I can go over that later without the engine pulled apart as it is now.
There is a rotary meet in Ontario for rx7club and rx8club at the end of May so I guess that is my goal to finish this off. I don't know if I'll be able to but I have the next four weekends to try and pump it out.
Thread Starter
Senior Member
Joined: Oct 2013
Posts: 270
Likes: 1
From: ON, Canada
Thanks man!
I went to Mazda and BMW dealerships today to order in some other parts which I wasn't able to find online.
from Mazda:
4 copper crush washers and the x-shaped gasket for the four small OMP lines that are leaking oil.
3 gaskets for the turbo oil cooling return line which are all leaking oil
the thermostat housing gasket between it and the block which is leaking coolant
from BMW:
flex fuel hose clamps because all mazda has are the spring type fuel clamps so in order to use some OEM spec I just went with the ones that I saw on my 330i
Thread Starter
Senior Member
Joined: Oct 2013
Posts: 270
Likes: 1
From: ON, Canada
3 week completion challenge
Good progress this weekend. Awesome weather here so I rolled the car out with the intention of taking apart the fuel lines so that they could spill not in my garage. However, I ended up getting distracted with other stuff that needed doing
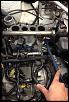
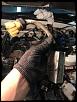
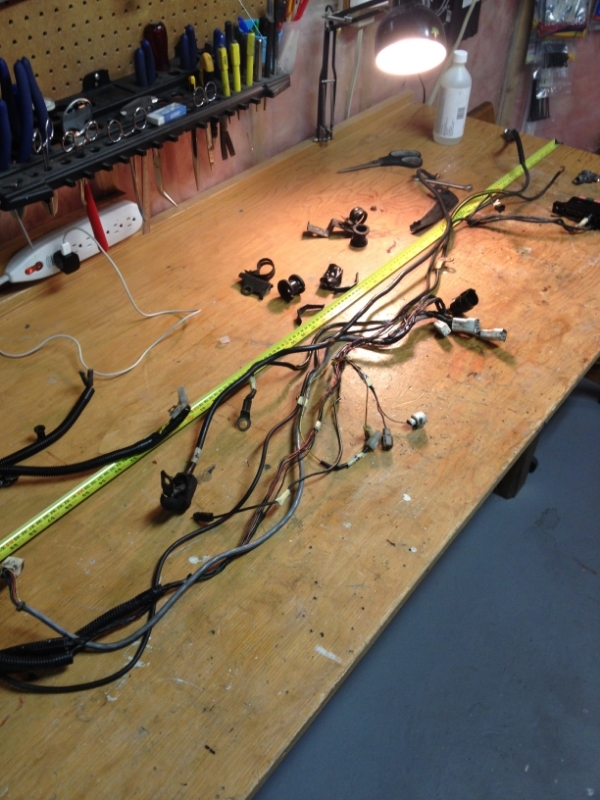
Since most of the front harness connectors are still pulled up from the previous weekend I could see in direct light how badly melted my starter wiring is.

I realized that the only way to fix it would be to just pull up the whole front harness so I can rip it apart and replace those wires. I hope I can remember how to put it back properly.
I also installed my two painted parts and replaced a bunch of mounting bolts and ground bolts with fresh ones which looks way better and will function better
Started to get the water pump housing off so that everything could dry so that I can replace the gaskets. Unfortunately this is the second time that I've repaired these leaks without any actual driving of the car lol
Got the front harness out on the workbench and unwrapped all the gross 28 year old electrical tape. The good thing is that everything other than that one connector and the positive battery wire looks good. So this week I'll try to get a good replacement so that I can rewrap everything and reinstall the harness. I think its going to be hard to wrap everything the same way with the mounts in the right positions so that I can bolt it back in the right spots to the chassis, especially the negative lead ground bolt. I've never repaired a harness before so its kindof fun to have it all apart and it will be good to know that everything inside is fine.
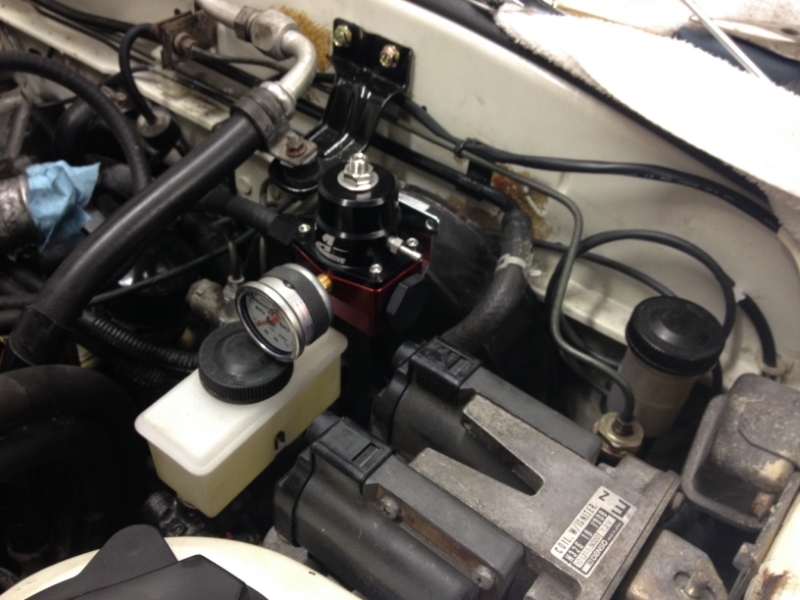
I was trying to find a good spot for the fuel pressure regulator and I settled on this spot (although I have changed my mind since). My concerns about this spot are that its so close to the trailing ignition coil pack. However, based on my replies on instagram I think I should aim to mount it on the engine so that if I ever track the car I don't have any issues with regulations. My new location I think will be just below the engine oil fill spout and to have a bracket coming down from it to hold the regulator. Of course if there are leaks, it will be dripping down right into the spark plugs and wires area.. but I feel better about the location overall. Though, it will be hard to see the fuel pressure gauge through the power steering pump but I can still see it for setting it up initially. Unfortunately I didn't remember to take a photo of the location I am thinking of.
Today I cleaned up the water pump, water pump housing, turbo oil cool return line and the 4 OMP lines. Annoyingly, when I started spraying it with carb cleaner the paint began coming off and I had to use paint thinner and a lot of scrubbing to get that crappy paint off. I didn't paint it that way so I was indifferent to losing the paint and more annoyed with wasting all the time scraping the paint.
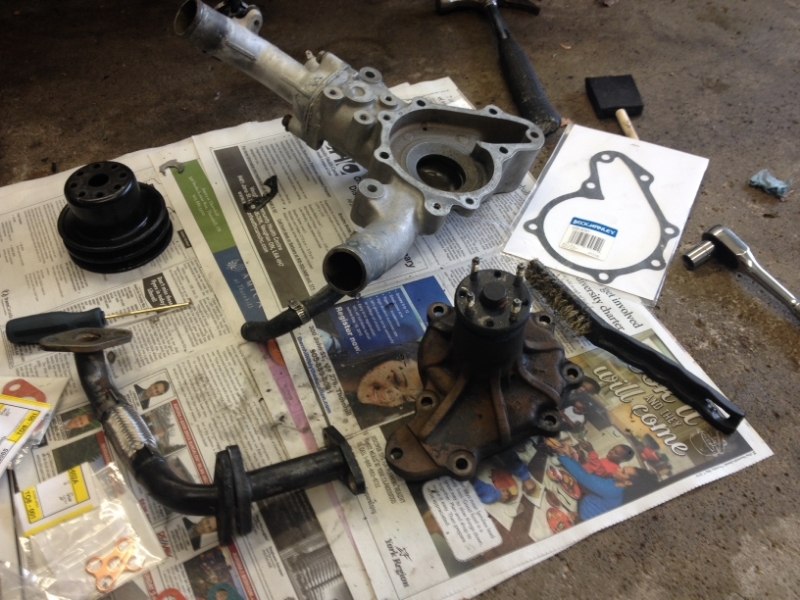
Installed the gaskets and the parts and I really hope this is the last time I have to do it. Last time I repaired the three leaks I had a tiny coolant leak still behind the water pump housing, OMP lines started leaking, and there was still an oil cool return line leak at the top that I hadn't seen since it didn't start leaking until the engine actually turned.
That's all for this weekend. Next weekend I hope I can rewrap the harness and reinstall it, and then mount up the fuel pressure regulator and working on the fuel system. Three more weeks until the rotary meet I'm trying to attend. Of course if I do get it running I'll still have to break in the rebuilt engine and monitor everything really well, but its good to have a goal =p
Since most of the front harness connectors are still pulled up from the previous weekend I could see in direct light how badly melted my starter wiring is.
I realized that the only way to fix it would be to just pull up the whole front harness so I can rip it apart and replace those wires. I hope I can remember how to put it back properly.
I also installed my two painted parts and replaced a bunch of mounting bolts and ground bolts with fresh ones which looks way better and will function better
Started to get the water pump housing off so that everything could dry so that I can replace the gaskets. Unfortunately this is the second time that I've repaired these leaks without any actual driving of the car lol
Got the front harness out on the workbench and unwrapped all the gross 28 year old electrical tape. The good thing is that everything other than that one connector and the positive battery wire looks good. So this week I'll try to get a good replacement so that I can rewrap everything and reinstall the harness. I think its going to be hard to wrap everything the same way with the mounts in the right positions so that I can bolt it back in the right spots to the chassis, especially the negative lead ground bolt. I've never repaired a harness before so its kindof fun to have it all apart and it will be good to know that everything inside is fine.
I was trying to find a good spot for the fuel pressure regulator and I settled on this spot (although I have changed my mind since). My concerns about this spot are that its so close to the trailing ignition coil pack. However, based on my replies on instagram I think I should aim to mount it on the engine so that if I ever track the car I don't have any issues with regulations. My new location I think will be just below the engine oil fill spout and to have a bracket coming down from it to hold the regulator. Of course if there are leaks, it will be dripping down right into the spark plugs and wires area.. but I feel better about the location overall. Though, it will be hard to see the fuel pressure gauge through the power steering pump but I can still see it for setting it up initially. Unfortunately I didn't remember to take a photo of the location I am thinking of.
Today I cleaned up the water pump, water pump housing, turbo oil cool return line and the 4 OMP lines. Annoyingly, when I started spraying it with carb cleaner the paint began coming off and I had to use paint thinner and a lot of scrubbing to get that crappy paint off. I didn't paint it that way so I was indifferent to losing the paint and more annoyed with wasting all the time scraping the paint.
Installed the gaskets and the parts and I really hope this is the last time I have to do it. Last time I repaired the three leaks I had a tiny coolant leak still behind the water pump housing, OMP lines started leaking, and there was still an oil cool return line leak at the top that I hadn't seen since it didn't start leaking until the engine actually turned.
That's all for this weekend. Next weekend I hope I can rewrap the harness and reinstall it, and then mount up the fuel pressure regulator and working on the fuel system. Three more weeks until the rotary meet I'm trying to attend. Of course if I do get it running I'll still have to break in the rebuilt engine and monitor everything really well, but its good to have a goal =p
nice work. The FPR would work nice where that black bracket it currently mounted on the firewall to the left of the booster. I have seen a few guys run it there.
This thread popped up today. https://www.rx7club.com/2nd-generati...stion-1083308/
Found it relevant for you
This thread popped up today. https://www.rx7club.com/2nd-generati...stion-1083308/
Found it relevant for you
Last edited by archaphil; May 11, 2015 at 10:16 AM.