
Project Resurrection: Running Log

Thread Starter
Joined: Jun 2008
Posts: 8,376
Likes: 28
From: Chino Hills, CA
When it comes down to it, Stu, the whole car is just a collection of little dooky bits.
Some are more critical than others, but they all have a purpose. (Except maybe some lockwashers, heh.)
I needed to re-do the hinges and hatch because they were rattling enough to make your teeth hurt.
If I gotta work on something, I just feel compelled to make it "right" if I can, you know?
Some are more critical than others, but they all have a purpose. (Except maybe some lockwashers, heh.)
I needed to re-do the hinges and hatch because they were rattling enough to make your teeth hurt.
If I gotta work on something, I just feel compelled to make it "right" if I can, you know?
Thread Starter
Joined: Jun 2008
Posts: 8,376
Likes: 28
From: Chino Hills, CA
Day 269
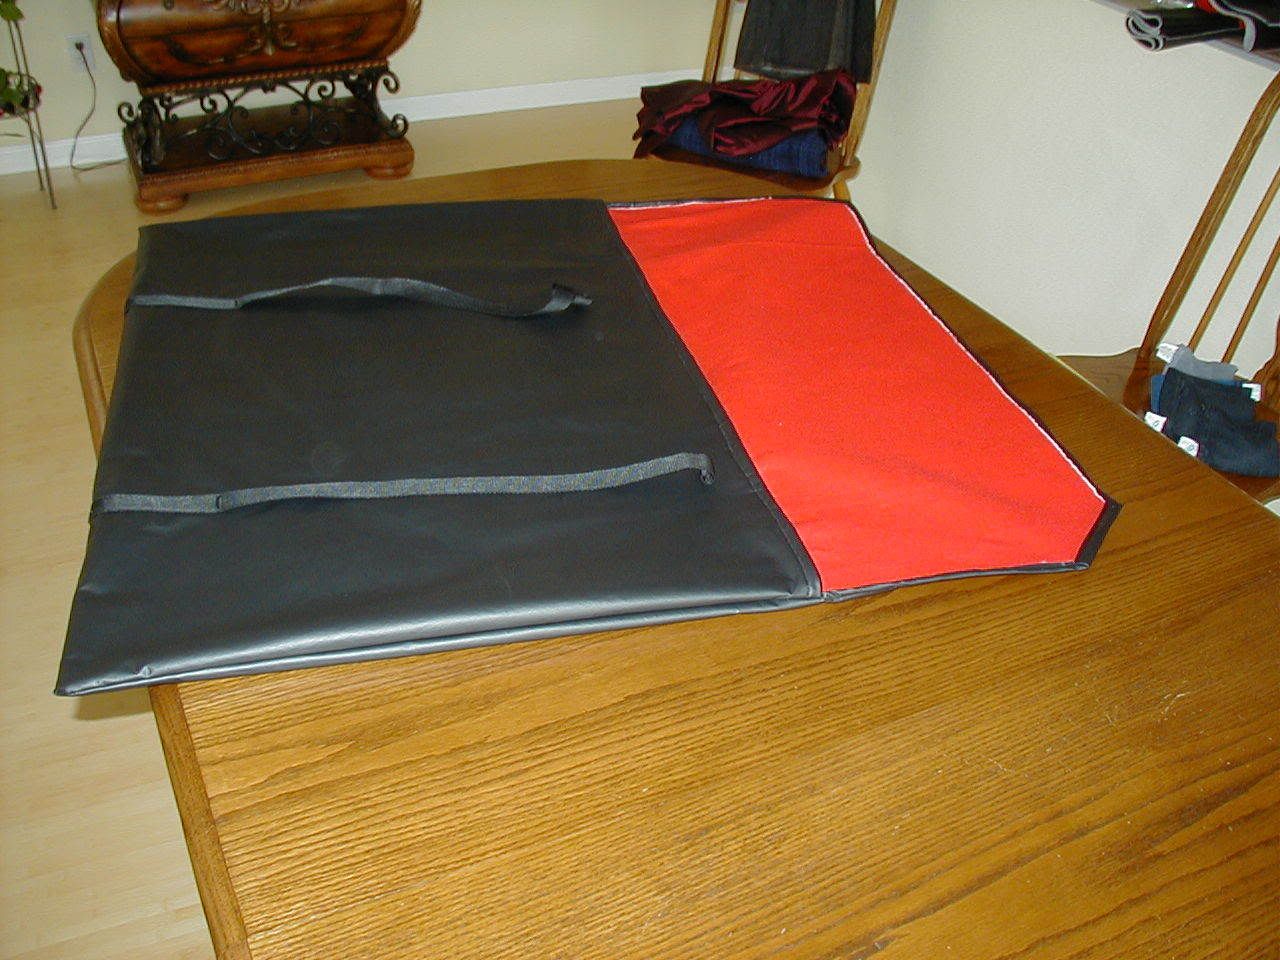
It was SUPPOSED to rain this weekend (didn't) so I'd planned on finally making a storage bag for my sunroof; I needed someplace to put the steel roof when the glass roof is on the car, and vice versa.
I decided some time ago to make a bag that was fitted to be hung from the wall on hooks, so I could get the roof out of the way (they are hard to store safely just anywhere.
The short version:
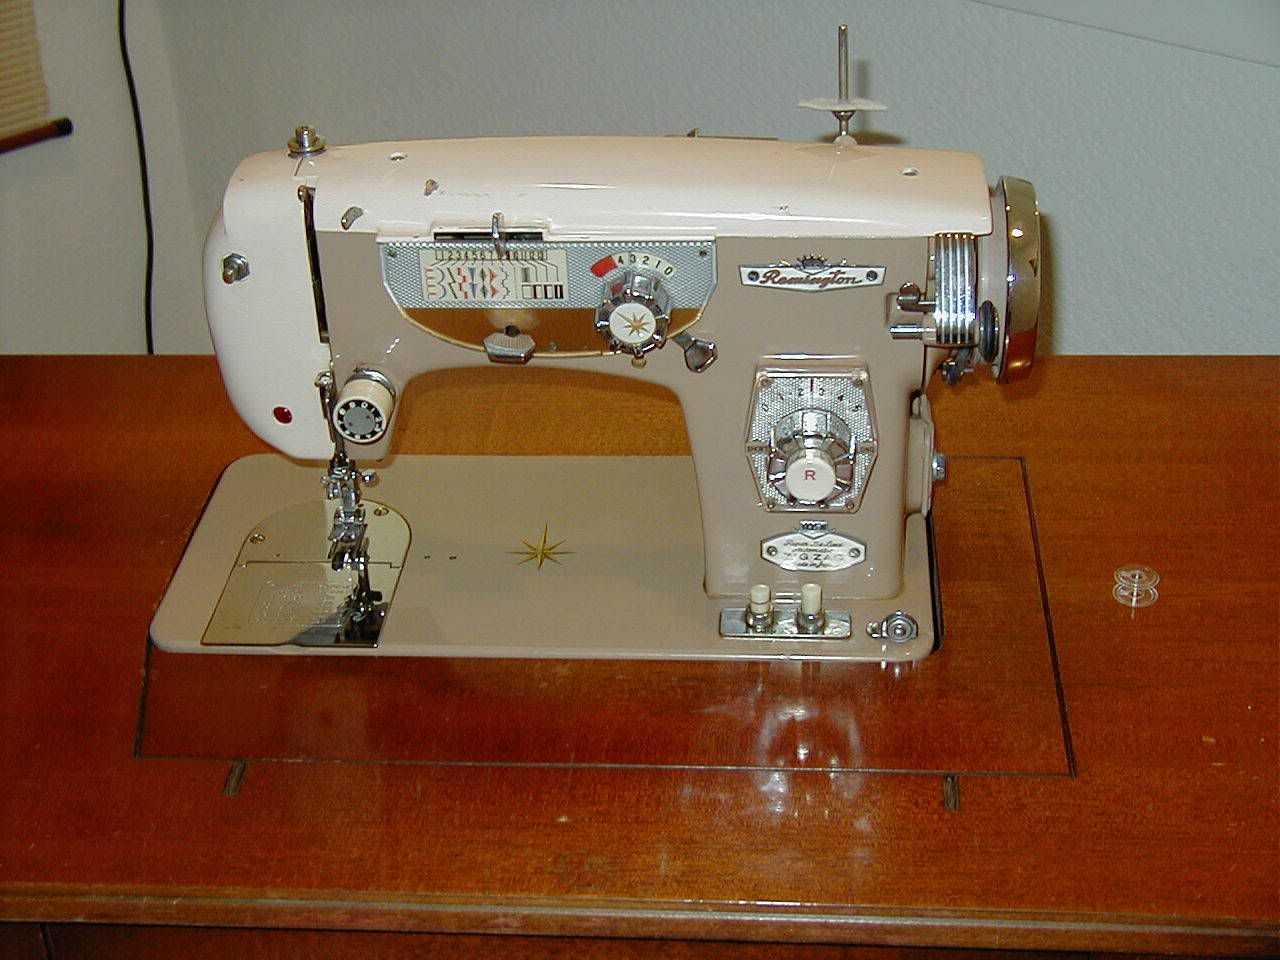
Fisrt, have one of these (or something newer would probably be a good idea, this one's from the 50's, but it's just too pretty to give up!)
Next, add:
2 yards of black vinyl
2 yard of red polarfleece for a liner
2 6-foot web straps, 1" wide, with buckles
Some brass grommets and setting tool
Black upholstery thread.
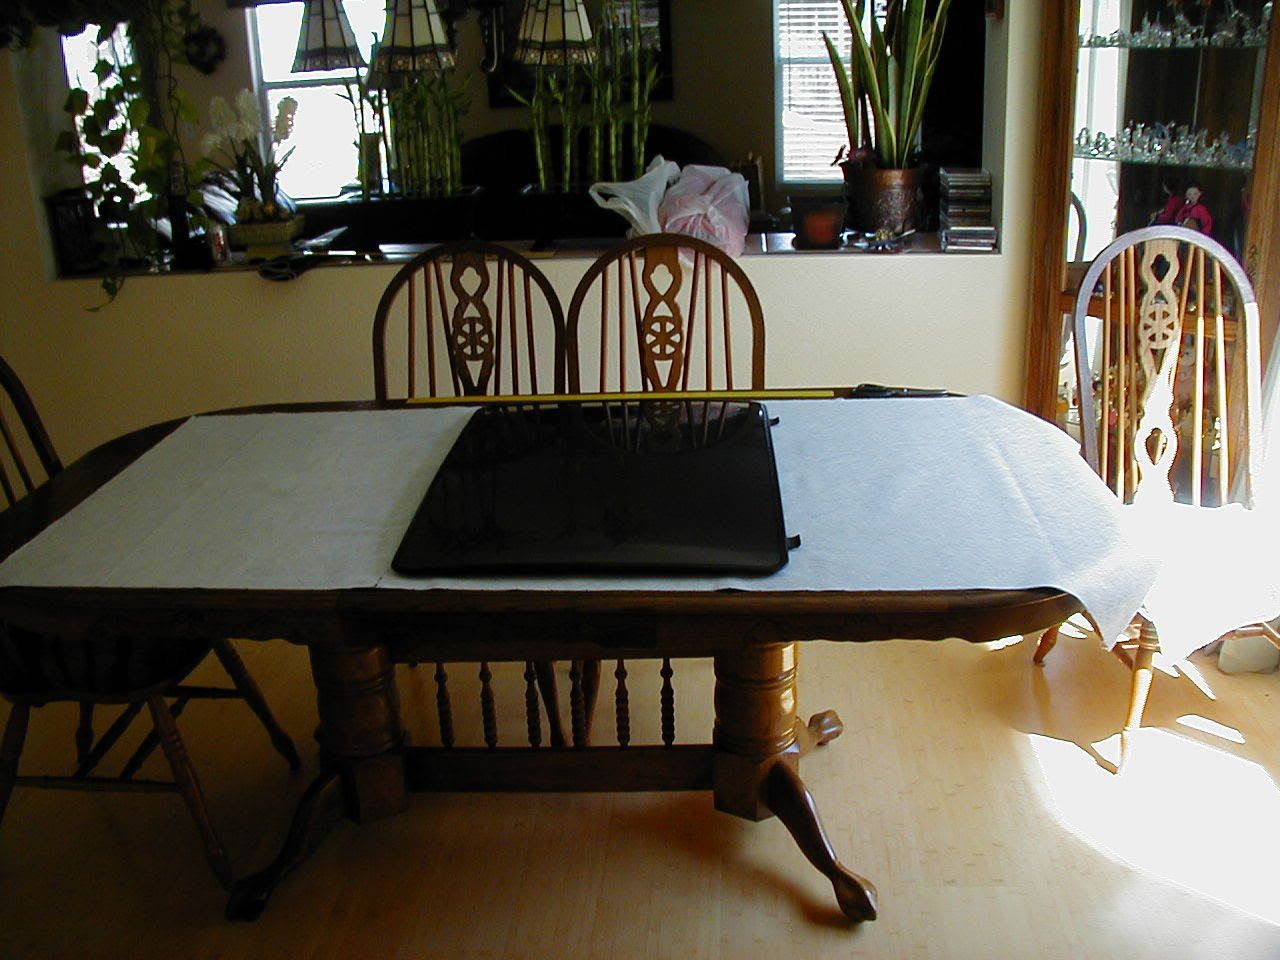
Cut vinyl to 36" wide, & figure out where the folds need to be to properly contain the roof:
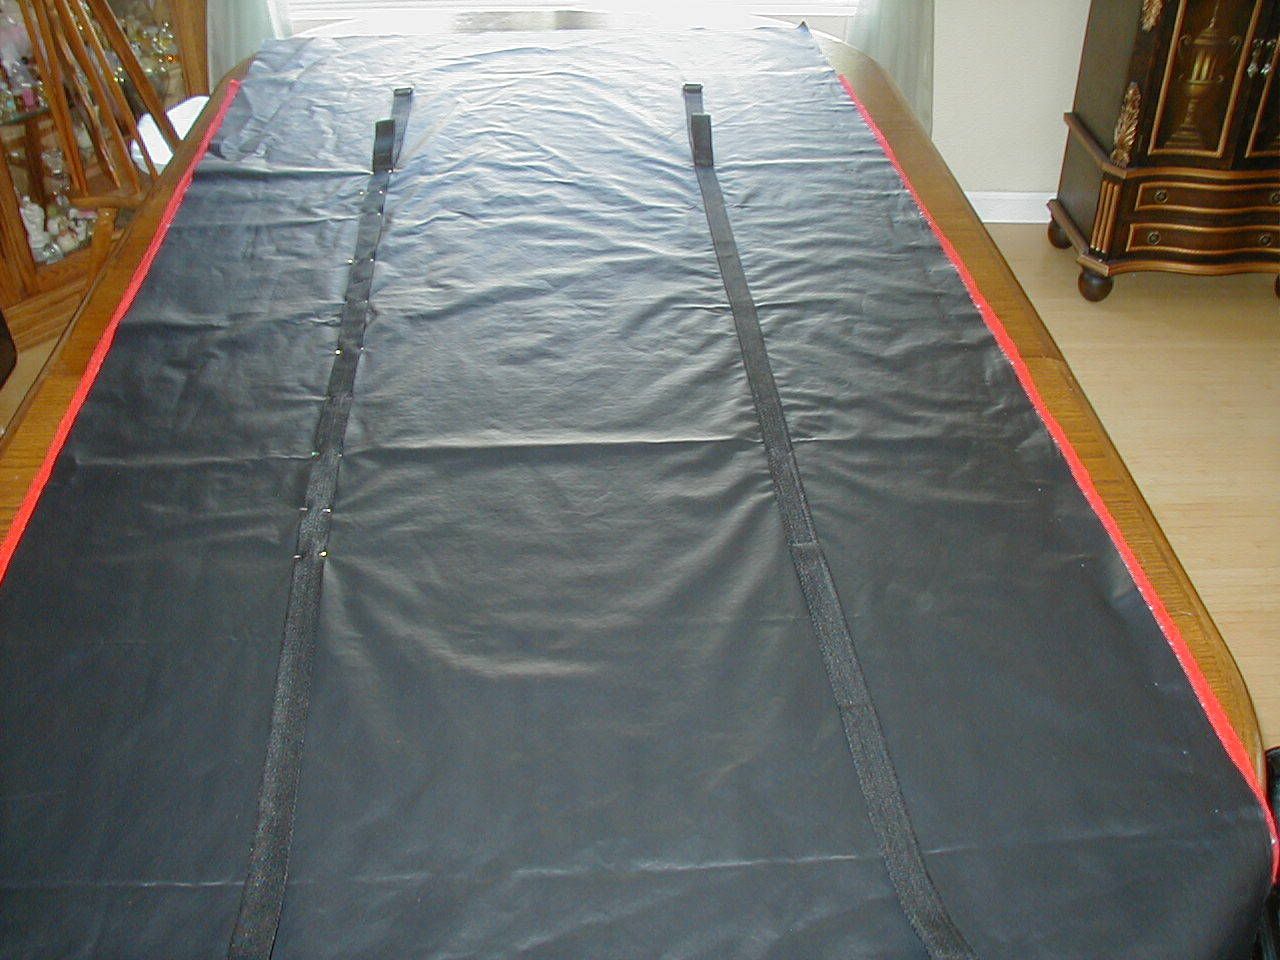
Square-cut one end of the vinyl and the fleece, lap-stitch one edge, and then figure out where the straps need to go. 16" spacing means hanging hooks can go into studs in the garage wall.
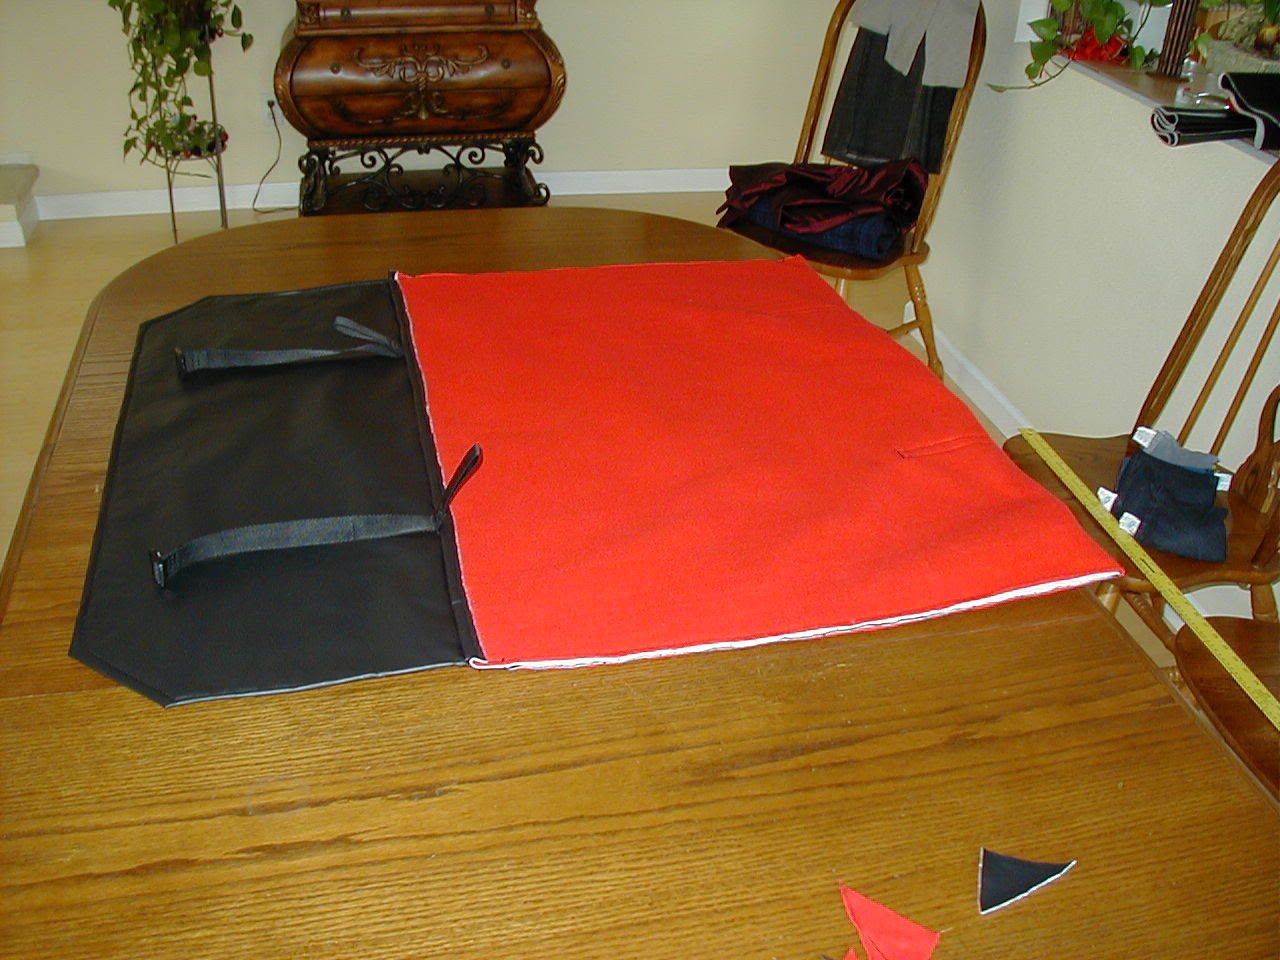
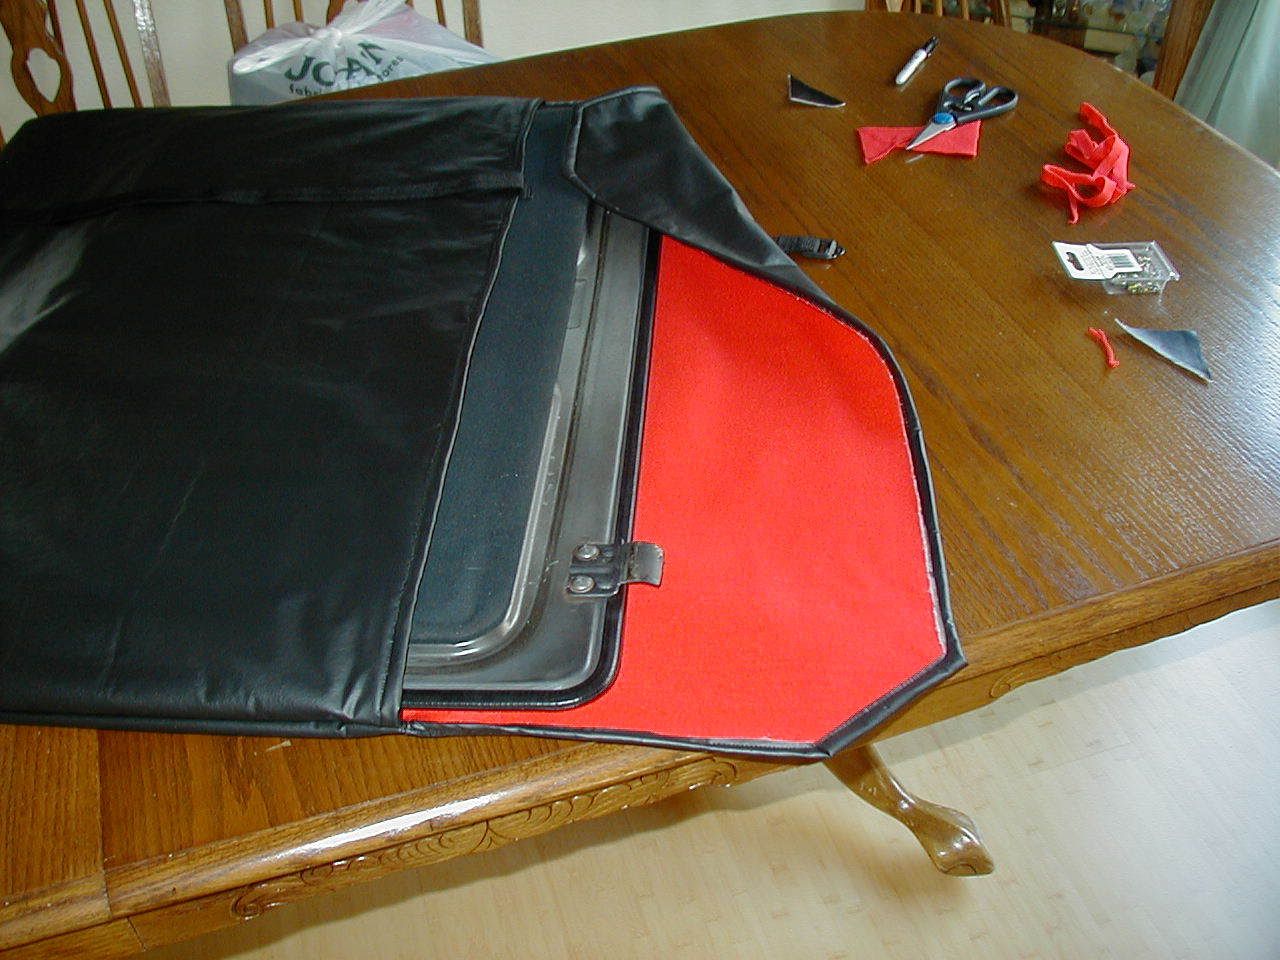
Once the straps are in place, fold, pin and sew the "pocket portion" (inside out as always with sewing) and turn the edges on the "flap" part.
Turn the bag right side out, and test fit:
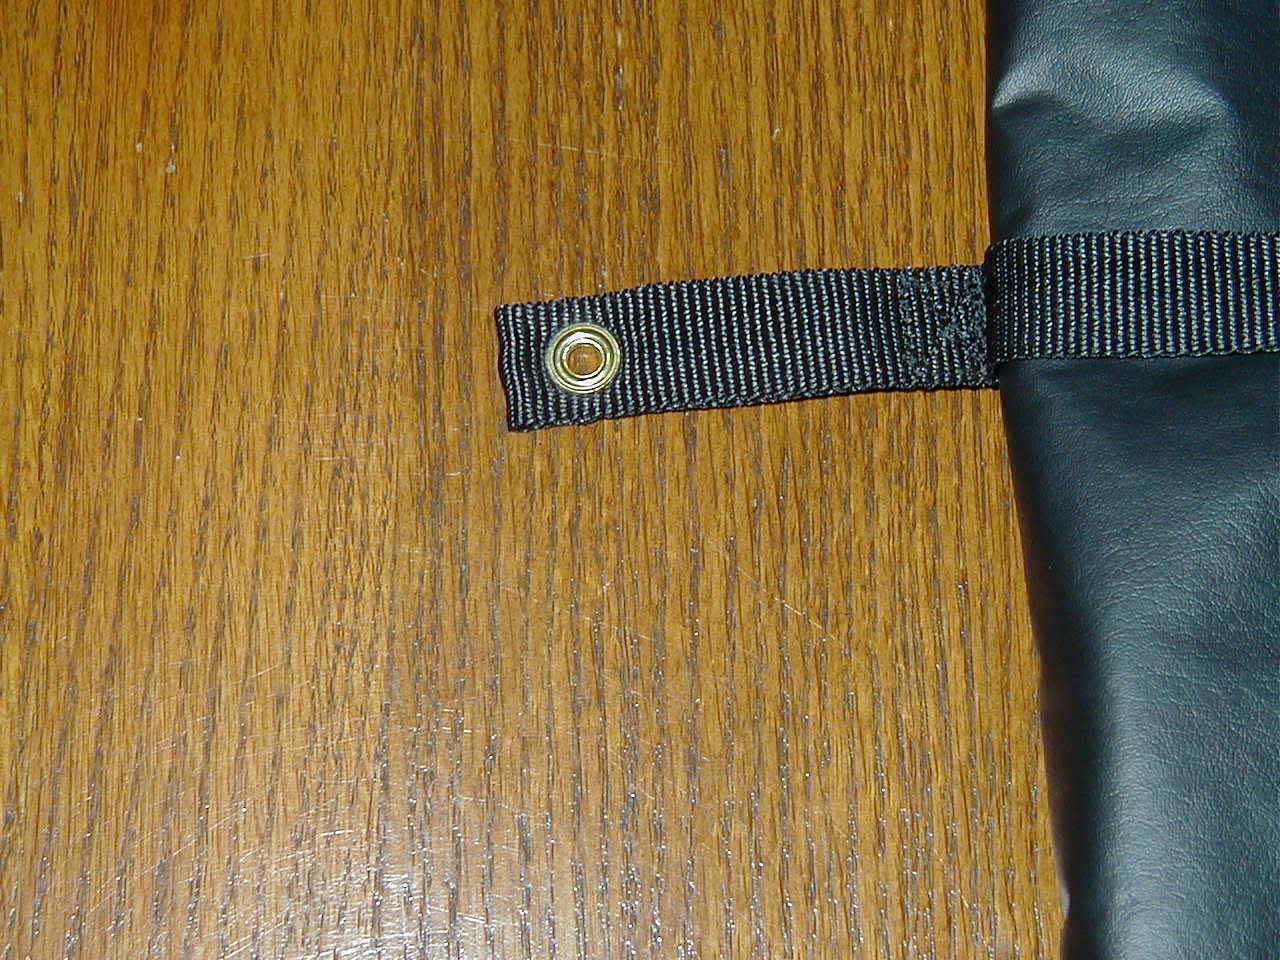
Install brass grommets in the loops left in the straps for hanging purposes, and you're pretty much done:
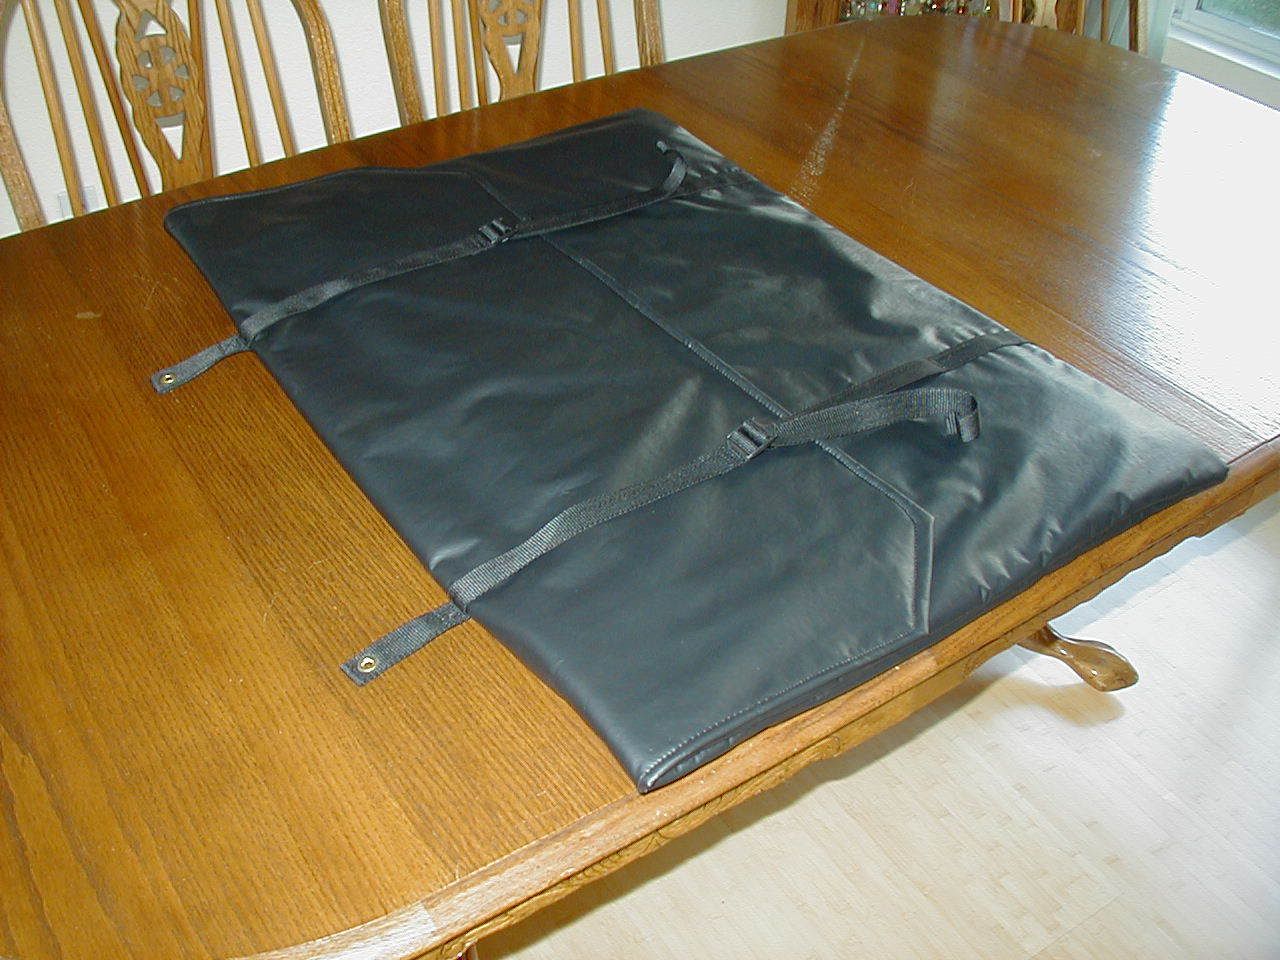
Nice little one-afternoon project. I'm thinking about getting the RX-7 logo and the car's name embroidered on the flap, just for grins.
It was SUPPOSED to rain this weekend (didn't) so I'd planned on finally making a storage bag for my sunroof; I needed someplace to put the steel roof when the glass roof is on the car, and vice versa.
I decided some time ago to make a bag that was fitted to be hung from the wall on hooks, so I could get the roof out of the way (they are hard to store safely just anywhere.
The short version:
Fisrt, have one of these (or something newer would probably be a good idea, this one's from the 50's, but it's just too pretty to give up!)
Next, add:
2 yards of black vinyl
2 yard of red polarfleece for a liner
2 6-foot web straps, 1" wide, with buckles
Some brass grommets and setting tool
Black upholstery thread.
Cut vinyl to 36" wide, & figure out where the folds need to be to properly contain the roof:
Square-cut one end of the vinyl and the fleece, lap-stitch one edge, and then figure out where the straps need to go. 16" spacing means hanging hooks can go into studs in the garage wall.
Once the straps are in place, fold, pin and sew the "pocket portion" (inside out as always with sewing) and turn the edges on the "flap" part.
Turn the bag right side out, and test fit:
Install brass grommets in the loops left in the straps for hanging purposes, and you're pretty much done:
Nice little one-afternoon project. I'm thinking about getting the RX-7 logo and the car's name embroidered on the flap, just for grins.
Thread Starter
Joined: Jun 2008
Posts: 8,376
Likes: 28
From: Chino Hills, CA
Day 297
Made some headway with my hot-restart-flood issue, I think;
Experimentation proves that the bowl vent solenoid is working fine, but unplugging the vapor line at the carbon canister (top of the air cleaner on SA's) seems to help prevent the flood-out; the bowls do not drain down when the line is disconnected.
That would seem to mean that the canister is plugged, but it tests out fine.
So, it might be a ventilation and check valve issue, or it might just be a problem that sometimes doesnt happen. Need to test it more times to be sure it wasn't just an anomaly.
Also, met up with "80's Old School" at the local monthly meet, and he gifted me with a fully-servicable stock front headpipe - - something I've been searching for since I started this writeup, nearly a year ago. It needs a little cosmetic cleanup, but to all appearances it's in perfect working order. I can't thank him enough for this - - I mean, the man brought it all the way from Texas for me!
So, I can finally take out my cobbled-up exhaust with its excessive restrictons, and get fully back to stock... or I can put my header back on, secure knowing that I can switch back to full smog when next needed, with known good parts.
I've determined that my idler arm bushings need replacement, too. I thought about swapping to the Moog arm (clearly stronger and better design, though not original) but unless the ball joint on the stock arm is bad, replacing the bushings only costs $12 versus about $70 for the new arm. I've replaced the bushings once in 20 years of ownership, so they seem like they'd hold up fine for quite a while again. I'm going to order some other bushings as well --drag links, sway bar, etc.--to tighten the front suspension back up.
Still in the middle of refurbing the replacement steering box I bought; when it's ready to go, I also will be pulling the instrument panel to try to figure why my speedo is reading very high; compared to GPS speeds, I'm indicating as much as 15mph high when above 75 actual. Some of that is tire size, but not all of it.
Hey Divin, it was cool to finally meet you. Now I can finally quit lugging that down pipe around!!
Anyhow, your car looked great....hopefully that does fix the flooding issue, or at least you are on the right track to repairing it!
Anyhow, your car looked great....hopefully that does fix the flooding issue, or at least you are on the right track to repairing it!
Thread Starter
Joined: Jun 2008
Posts: 8,376
Likes: 28
From: Chino Hills, CA
Day 302
Replaced the idler bushings last night, and the bushings on the tension bars.
Having taken all the slop out of the other parts, now I can see that the ball joint on the right control arm is toast. About 1/4" or 3/16" lateral movement. Didn't show up while the idler was loose.
Bummer. That's not a cheap part (about $145). It's also the only one I'd replaced (10 years ago). There goes my rear shock money I'd scrounged up this week. But it clearly needs to be replaced; it wouldn't even be possible to get a clean alignment with that much slop.


Thread Starter
Joined: Jun 2008
Posts: 8,376
Likes: 28
From: Chino Hills, CA
Rock Auto says they are replaceable? Odd; Mazdatrix says they are not...
The one that failed looks to be a replaceable... Mtrix used to sell arms with replaceable ball joints, but don't list them that way any more.
Interesting. Thanks for the tip; I'll be looking into it!
The one that failed looks to be a replaceable... Mtrix used to sell arms with replaceable ball joints, but don't list them that way any more.
Interesting. Thanks for the tip; I'll be looking into it!
You can replace them but you need to get some with a cclip on em to make sure they can't come out. I've read one here that its possible. Mine need to done and I'm thinking about do it instead of getting a new arm.
Thread Starter
Joined: Jun 2008
Posts: 8,376
Likes: 28
From: Chino Hills, CA
At the moment, it's pretty much "beautified stock," yeah, except for the interior.
Hmmm... none of the ones that Rock Auto, Kragen, or Napa carry appear to have "c-clips." All are just splined press-fit.
Originally Posted by T G Farrell
You can replace them but you need to get some with a cclip on em to make sure they can't come out. I've read one here that its possible. Mine need to done and I'm thinking about do it instead of getting a new arm.
Lurking on thread near U
Joined: Dec 2008
Posts: 143
Likes: 0
From: Huntsville, Alabama
Never seen a c-clip on a ball joint, on any car--all the ones I can remember are press fit with a snap ring. And i've only done ball joints once on an rx7, and I dont remember how it was set up.
Thread Starter
Joined: Jun 2008
Posts: 8,376
Likes: 28
From: Chino Hills, CA
Day 309
Ordered a replacement ball joint and bushing from Rock Auto; the local NAPA shop was able to press them without issue.
Then, I found out that the balljoint's shaft was misdrilled for the cotter pin; it was drilled off-center, so that when the castle nut was lined up on one side, it blocked most of the hole on the other side.
I improvised by cutting one leg of the cotter pin off just short of exitting the hole; this still left one leg to bend for retention, and a full-thickness pin on the entry side, so no worries about it shearing.
Hopefully, my future Rock Auto purchases will turn out better.
I also got replacement tension arm bushings, and put them in at the same time.
Also a little out with the old...
...and in with the new...
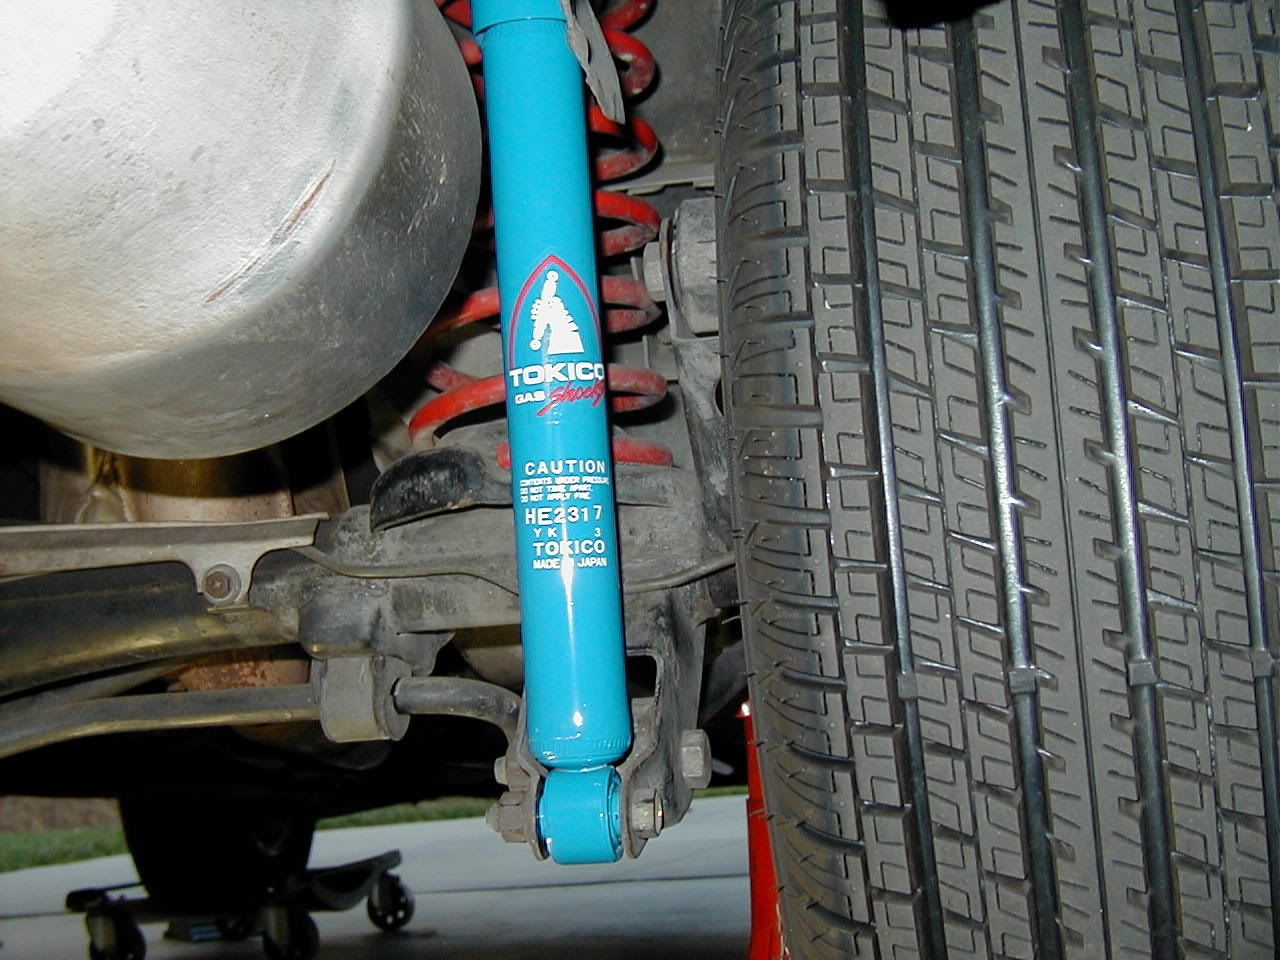
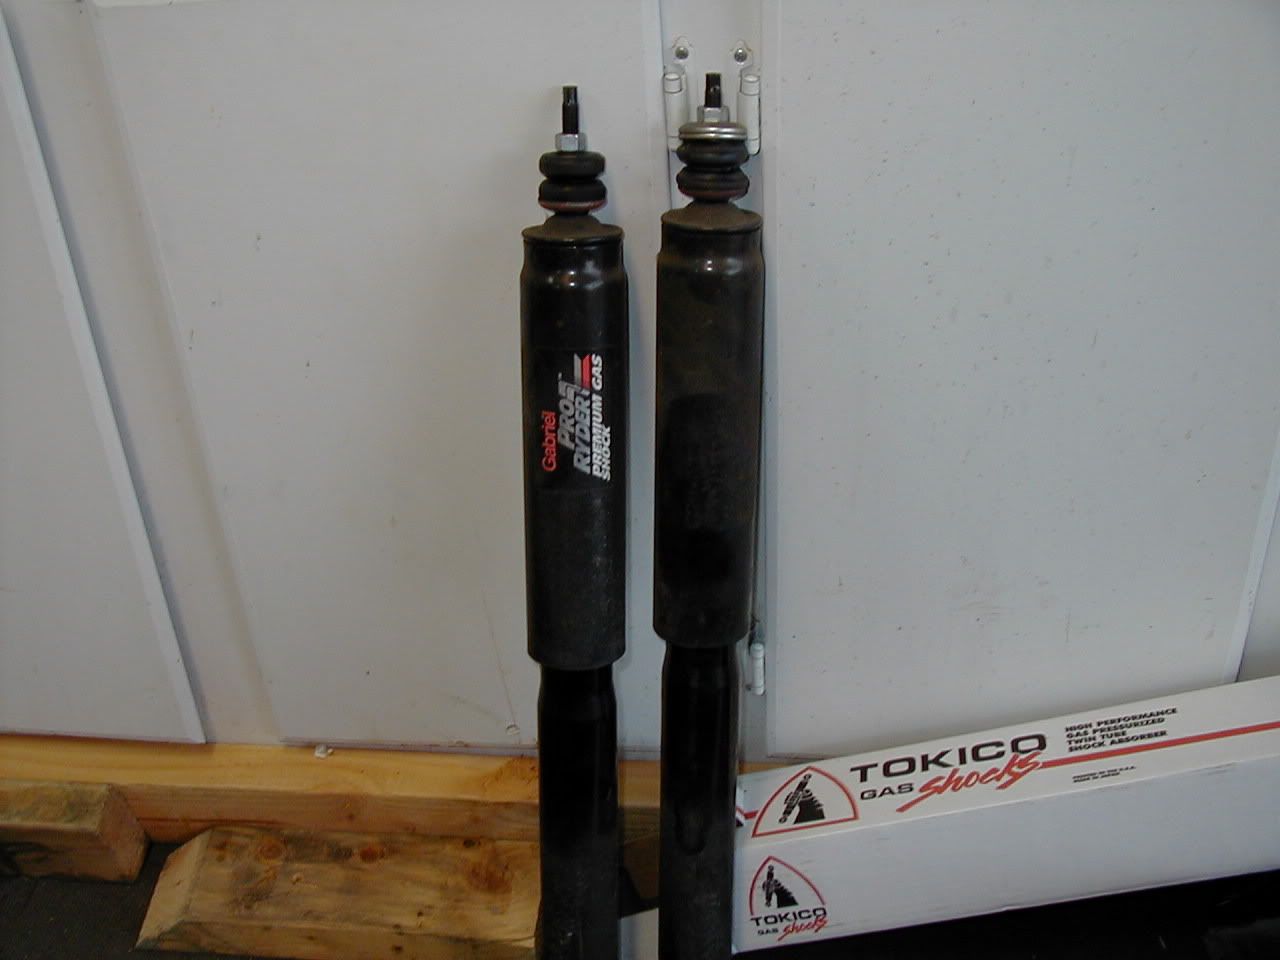
... action took place at the rear; Those old Gabriels served well but were toast.
Test drive proved the pudding; Steering is like-new (for a 1980, that is)
I need to get new sway bar bushings for the front; the ones fitted don't look to be right for the application. Probably something I did years ago before I knew any better, but the spacers look too long.
Meantime, I spent the rest of the day cleaning up the car for MazFest tomorrow, and did a little more engine beautification.
My ratsnest wasn't too bad-looking as is:
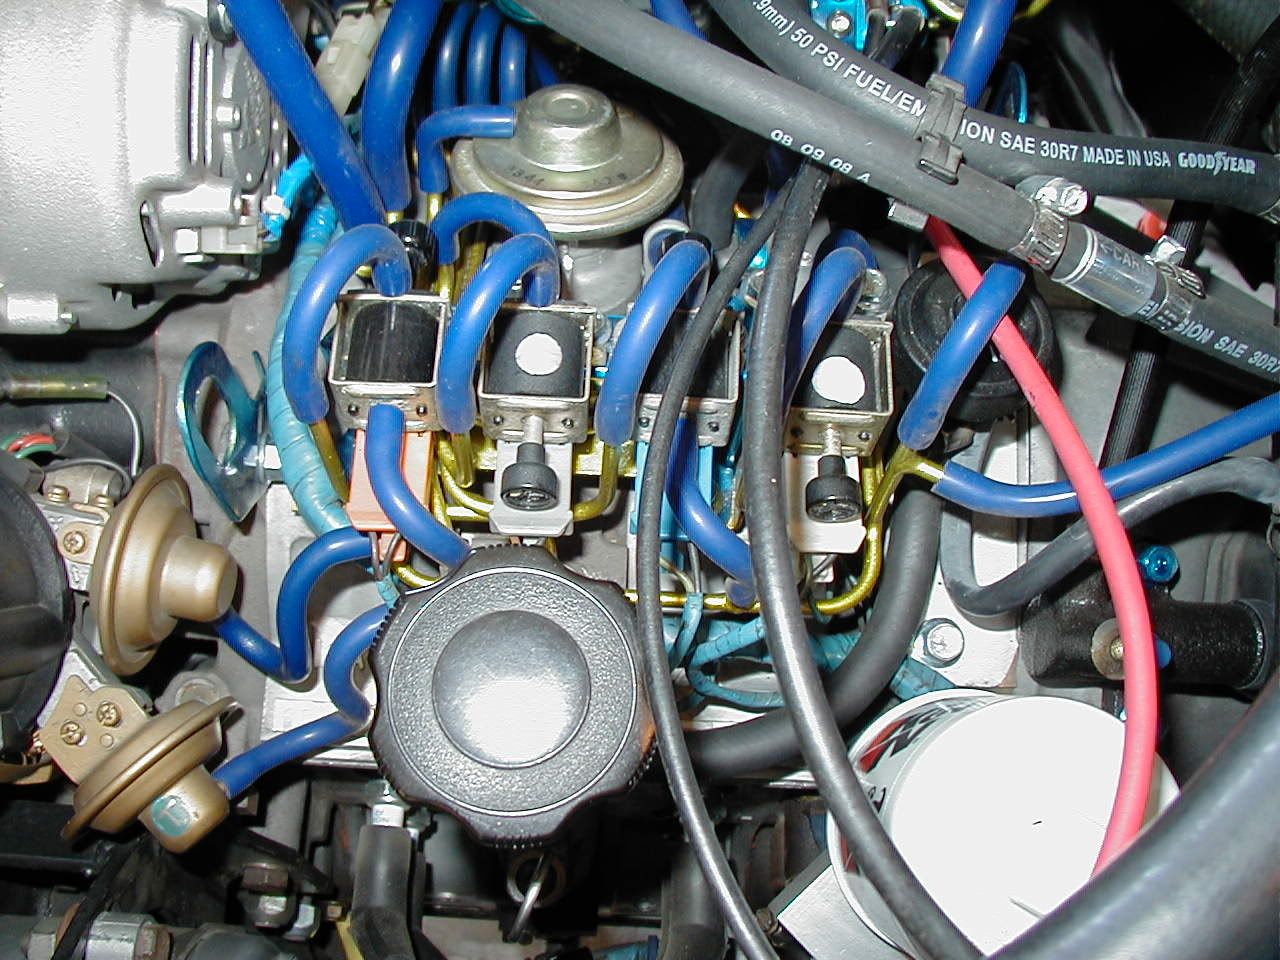
But I've given up trying to keep the little colored dots on the solenoids in place. The damn stickers fall off.
So, I finally decided to properly color-code the solenoids; tore each one down, polished the metal brackets, and metalcast them in the color to match the wiring harness connector.
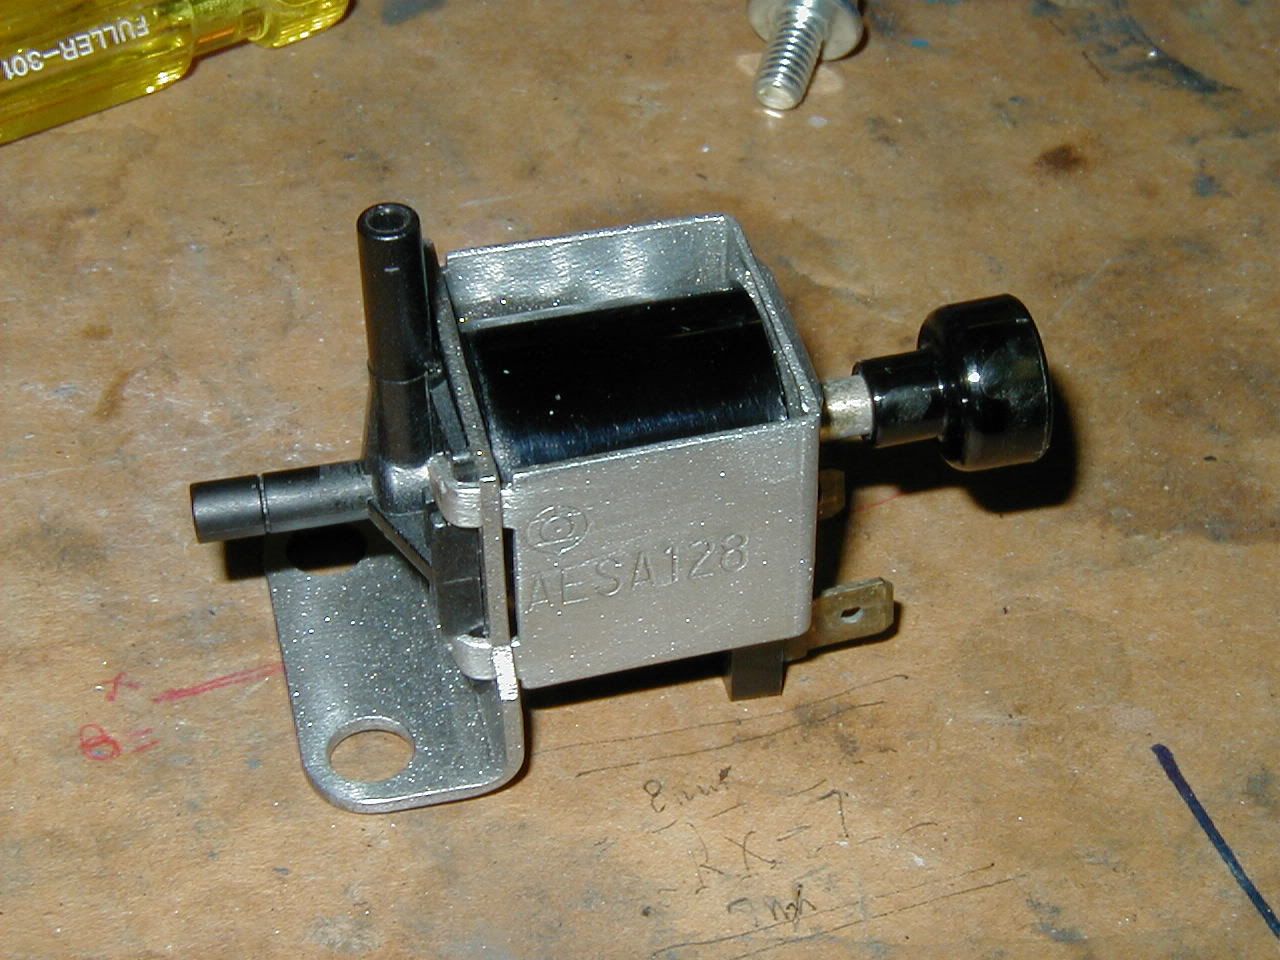
Silver for white, red for orange, grey for grey, and blue for blue
I think they turned out damned nice:

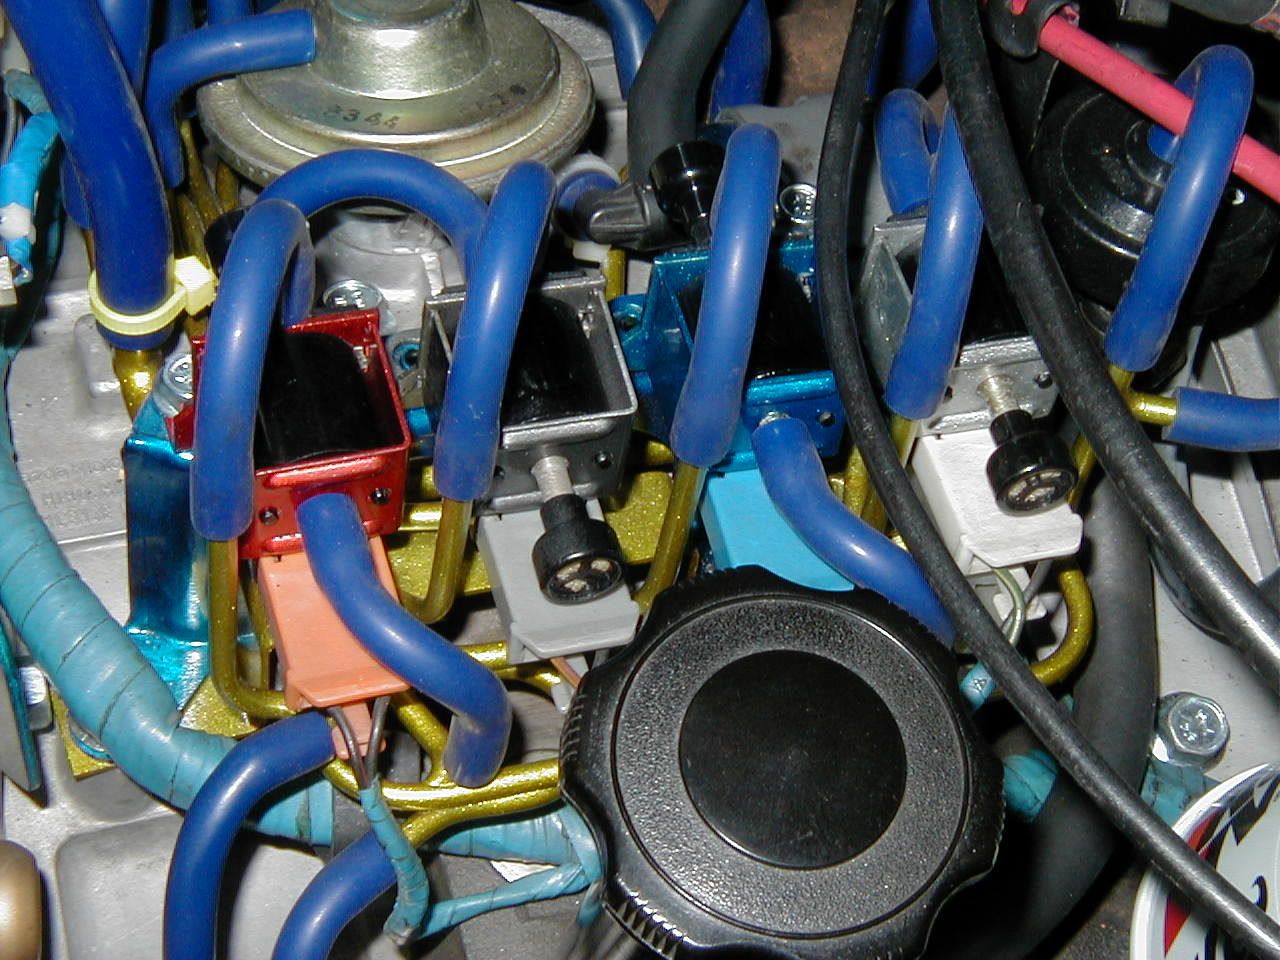

If I gotta have smog stuff, I'm gonna have shiny smog stuff.
Ordered a replacement ball joint and bushing from Rock Auto; the local NAPA shop was able to press them without issue.
Then, I found out that the balljoint's shaft was misdrilled for the cotter pin; it was drilled off-center, so that when the castle nut was lined up on one side, it blocked most of the hole on the other side.
I improvised by cutting one leg of the cotter pin off just short of exitting the hole; this still left one leg to bend for retention, and a full-thickness pin on the entry side, so no worries about it shearing.
Hopefully, my future Rock Auto purchases will turn out better.
I also got replacement tension arm bushings, and put them in at the same time.
Also a little out with the old...
...and in with the new...
... action took place at the rear; Those old Gabriels served well but were toast.
Test drive proved the pudding; Steering is like-new (for a 1980, that is)
I need to get new sway bar bushings for the front; the ones fitted don't look to be right for the application. Probably something I did years ago before I knew any better, but the spacers look too long.
Meantime, I spent the rest of the day cleaning up the car for MazFest tomorrow, and did a little more engine beautification.
My ratsnest wasn't too bad-looking as is:
But I've given up trying to keep the little colored dots on the solenoids in place. The damn stickers fall off.
So, I finally decided to properly color-code the solenoids; tore each one down, polished the metal brackets, and metalcast them in the color to match the wiring harness connector.
Silver for white, red for orange, grey for grey, and blue for blue
I think they turned out damned nice:
If I gotta have smog stuff, I'm gonna have shiny smog stuff.
Thread Starter
Joined: Jun 2008
Posts: 8,376
Likes: 28
From: Chino Hills, CA
Day 336
Getting close to the one-year mark... Passed my one-year anniversary of joining the site last week. HBDTM.
Got the car aligned, and everything is tracking like a champ. Front-end repairs are now substantially complete, with the exception of new sway-bar links which are on order. Handling is good, though my body roll seems a little pronounced, which I'm hoping the new sway bushings and links will tighten up.
I am refurbishing a steering gear bought used off the site, but at this point, I'm not feeling real inclined to install it. Re-adjusting the old box seemed to work wonders. So I'll likely finish cleaning up the replacement box, and wrap it up for spare storage. I'll need one someday...
Bought some more Royal Purple, with the intent of refilling the trans with it since the diff apparently likes it. The trans still shifts well enough, but it's getting older; reverse is a bit noisy. New lube ought to help a lot.
Probably about time to re-adjust the rear drum brakes and do a general inspection in there, make sure all is well.
I've clocked just about 1000 miles since the car was brought back to life, in January. Virtually all of it going to meets or shows - - I think I drove it to work once, just for swank.
I've bought a spare dash cluster; One of these weekends, I'll pull the current one, get the clock working again, replace the cracked lens, and see if swapping speedos gets indicated speed somewhat closer to real speed - - reading waaay high just now. If not, I'll find me a speedo shop and get one recalibrated.
Hot-restart-flood issue has been slowly improving, though I still haven't gotten a clear handle on the cause. Relieving the vent tube from the carbon canister right after shutdown seems to help, but makes little sense, since the carbon canister flows fine. Still chasing. I'll probably swa in a spare vent control valve, and see if it makes a diff. I keep hoping to turn up a good spare carb of proper vintage for parts use, but haven't found the right one yet.
Talked myself into splurging on some nice RB 8mm plug wire, with shields; Jim Tanner offered to make me up a set with their original straight, rather than angled, plug boots, for that old-school look. They haven't sold that style for a lot of years, so I feel all special.
Gathering parts for an electric mirror conversion; I'll probably have that done before SevenStock this year.
Now that summer seems tofinally be coming to SoCal, I probably should look into an AC recharge, too. It's kinda weak.
It's sunny - - gotta drive tonight!
Thread Starter
Joined: Jun 2008
Posts: 8,376
Likes: 28
From: Chino Hills, CA
Day 369
Wow, I let this slip for quite a while... I've been working on several fronts, but not documenting.
Currently in progress:
1) Refurbishing of instrument panel to replace the currently-mounted unit is about 80% done. Pix and write-up to be posted soon.
2) Electric mirror conversion underway; I have mirrors and harness parts, but I need to fabricate a year-appropriate switch mount for it. Borrowed a rare JDM mount from Stu to use as a mold template, and got my first decent resin casting out of it last night. I'm going to try adapting some Jaguar joystick swtiches to the job; if they don't work out, I'll cast a customized version of the mounting plate to hold an FB square-style mirror switch. wiring needs to be adapted ineither case, as SA wiring is not equal to FB wiring on the mirrors, and obviously the Jag switch was not made for this application - - completely different approach. Also being written up.
Also, I'm having to carefully sand out indentations left in the paint by my aftermarket side mirrors, which used larger mounting bases. That's hairy work, there, as I don't have access to any touch-up paint for my color, so don't dare sand or polish all the way thru by accident. Not much experience at cut-and-polish, and I'm sure that Maaco paint is thin as can be. Nerve-wracking.
3) still have to finish up the air cleaner bottom part.
4) swaybar links are on the bench awaiting installation time.
Over a year on this project now, and once again, on the clock to get everything finished before SevenStock. Deja Vu, all over again.
Ironically, going to meets now that the car is running has been cutting into my garage time.
Thread Starter
Joined: Jun 2008
Posts: 8,376
Likes: 28
From: Chino Hills, CA
Day 397
Making headway:
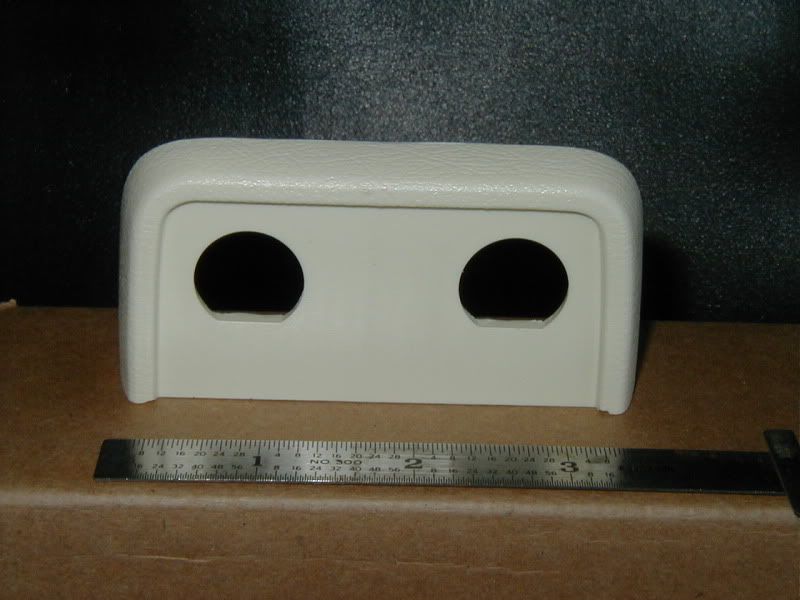
Electric mirrors are in and working; still need a mounting bracket for the switch, but I'm working on it; I'm custom-fabricating a replica of the 80 LS switch bracket, from cast urethane.
Instrument panel refurb is done and installed; ready for testing the next time I start the car, which may be tomorrow night.
Sanding the door imperfections was a marginal success; didn't turn out as perfect as I'd hoped, but look a lot better than they did originally. Essentially, unless you look for them, you don't see the problem.
One things for sure; barring any new problems, I'm not going to miss SevenStock this year!
I've got a couple new approaches to try with regard to the flooding issue; basically, I'm going to disable the vacuum power valve actuators temporarily, and see if that makes a difference. Oif not, one circuit at a time until I find what's making it happen.
Making headway:
Electric mirrors are in and working; still need a mounting bracket for the switch, but I'm working on it; I'm custom-fabricating a replica of the 80 LS switch bracket, from cast urethane.
Instrument panel refurb is done and installed; ready for testing the next time I start the car, which may be tomorrow night.
Sanding the door imperfections was a marginal success; didn't turn out as perfect as I'd hoped, but look a lot better than they did originally. Essentially, unless you look for them, you don't see the problem.
One things for sure; barring any new problems, I'm not going to miss SevenStock this year!
I've got a couple new approaches to try with regard to the flooding issue; basically, I'm going to disable the vacuum power valve actuators temporarily, and see if that makes a difference. Oif not, one circuit at a time until I find what's making it happen.
Thread Starter
Joined: Jun 2008
Posts: 8,376
Likes: 28
From: Chino Hills, CA
Day 408
The refurbed dash checked out in all respects except one: the "Add Coolant" light was not testing. Which meant I had to re-pull the panel (no way to reach it from the back). Problem turned out to be the bulb socket was "spread" a bit, not touching the bulb contacts. Fixed, works. Speedo even tested out properly. Hurray!
Late addition; the bracket work I was doing for the mirror switch was most easily done in a way that left a 3/4" hole on the left side. perfect place for a switch, but I detest having switches that don't do anything... So I had to get motivated and install the fog lights I bought about 10 years ago.
End result:
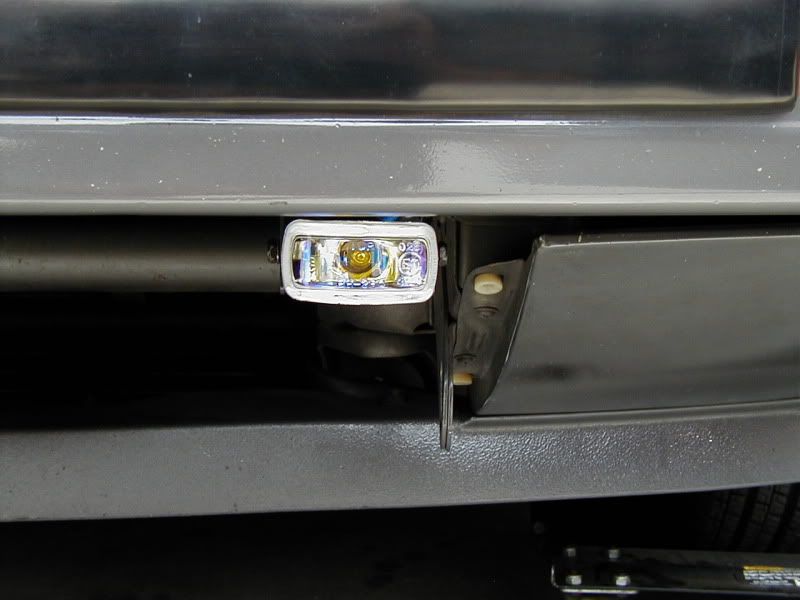
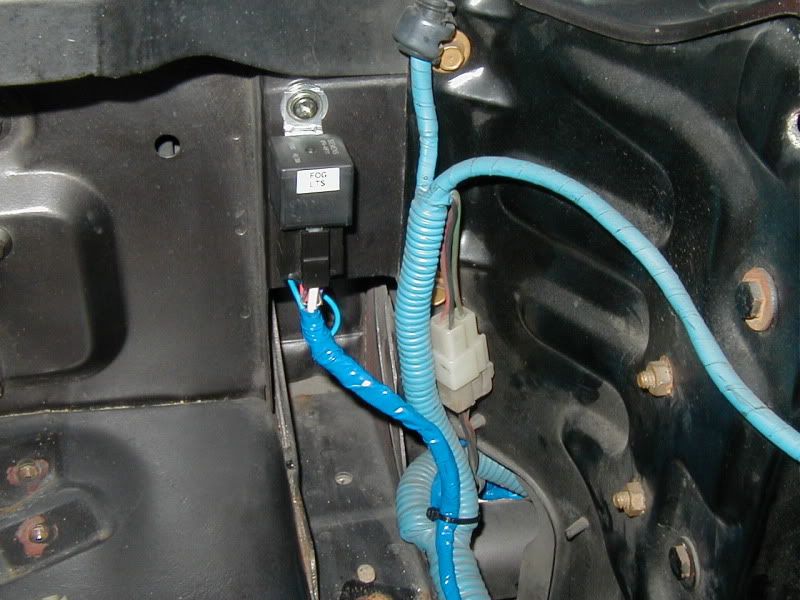
Naturally, I'm not going to switch the full current for the foglights at the dashboard... no, we will do it the right way, and switch fleapower thru the switch, and use a heavy-duty contactor relay out at the front of the engine bay, so the switch will last forever:
And here's the prototype of the mirror/foglight mounting bracket. The final version will have a much better, smoother finish, because I made a second, higher-quality mold from the original bracket which Stu graciously loaned me.
Prototype (poor quality, but Ok for testing)
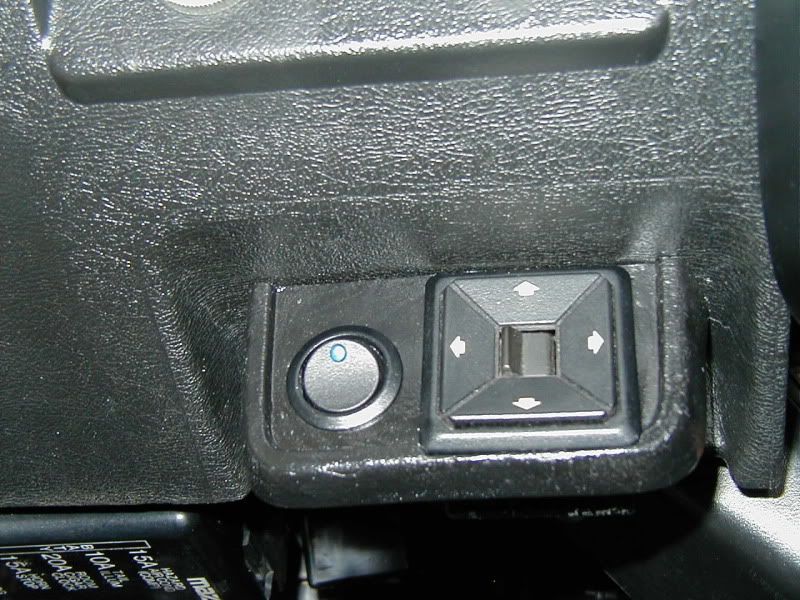
Final-version bracket, ready to be modified for swtiches, and painted:
The air cleaner base is almost complete, but I still need to re-paint the inside, and it is too hot today to paint. It was 102 in the garage when I finally gave up and came inside til it cools down.
Things are looking good, overall.
The refurbed dash checked out in all respects except one: the "Add Coolant" light was not testing. Which meant I had to re-pull the panel (no way to reach it from the back). Problem turned out to be the bulb socket was "spread" a bit, not touching the bulb contacts. Fixed, works. Speedo even tested out properly. Hurray!
Late addition; the bracket work I was doing for the mirror switch was most easily done in a way that left a 3/4" hole on the left side. perfect place for a switch, but I detest having switches that don't do anything... So I had to get motivated and install the fog lights I bought about 10 years ago.
End result:
Naturally, I'm not going to switch the full current for the foglights at the dashboard... no, we will do it the right way, and switch fleapower thru the switch, and use a heavy-duty contactor relay out at the front of the engine bay, so the switch will last forever:
And here's the prototype of the mirror/foglight mounting bracket. The final version will have a much better, smoother finish, because I made a second, higher-quality mold from the original bracket which Stu graciously loaned me.
Prototype (poor quality, but Ok for testing)
Final-version bracket, ready to be modified for swtiches, and painted:
The air cleaner base is almost complete, but I still need to re-paint the inside, and it is too hot today to paint. It was 102 in the garage when I finally gave up and came inside til it cools down.
Things are looking good, overall.
Thread Starter
Joined: Jun 2008
Posts: 8,376
Likes: 28
From: Chino Hills, CA
Day 418
Wow, you can get a lot of work done if you just don't go to work for a while - - I took a vacation day and stretched Labor Day to four days. Powered thru much of my pre-sevenstock list:
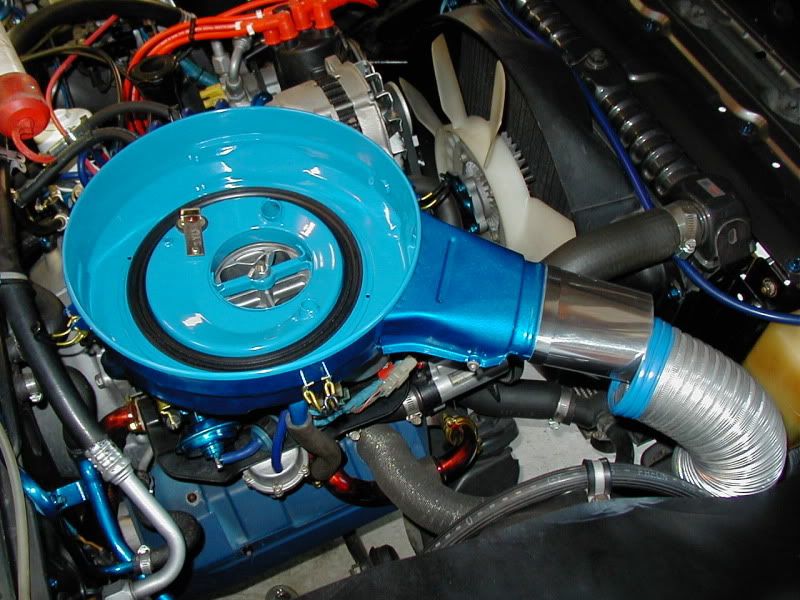
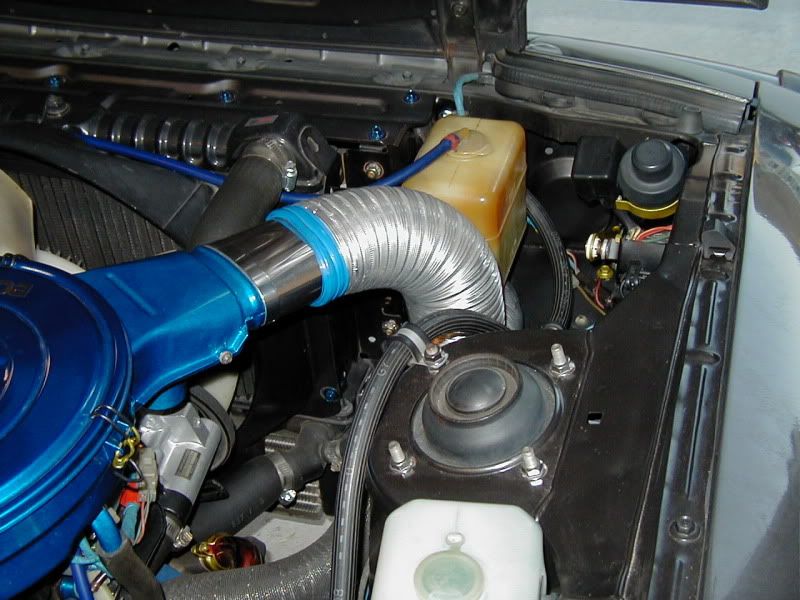
Air Cleaner is done, including fabricating a high-polish adapter for my CAI inlet.
CAI flange is now properly rivetted in place.
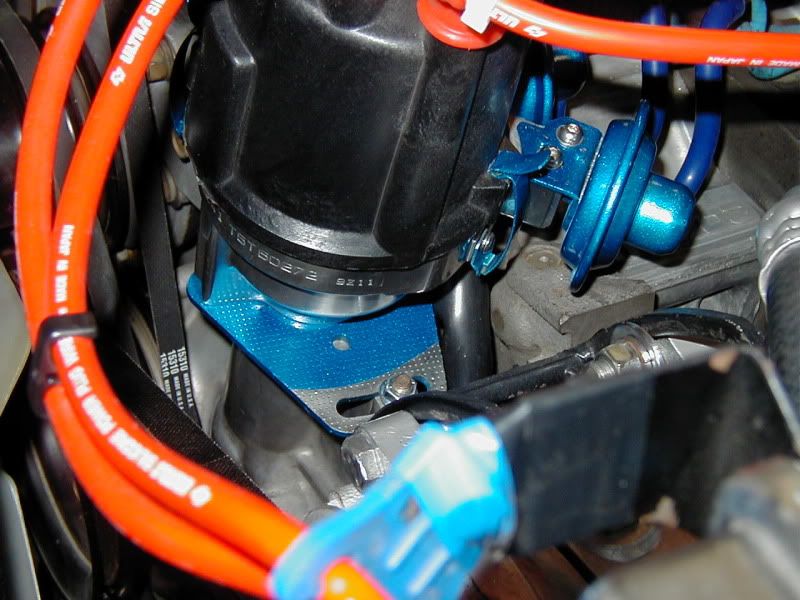
Distributor has been refurbed, and polished/painted.
RB gauge block has been swapped out to a "Type-II" block - much nicer look. Polished the filter base, too, though you really can't see it without shoving your head into the engine bay.
Suspension techniques front sway bushings are in.
Fog lights are done and tested.
Final version of the lights-and-mirrors bracket is finished, just waiting for paint to dry before I can install it.
So, I've got two weeks left to tinker with my carb issues, and clean up some interior odds and ends. Plus wax and detail, of course.
Pics of this week's output:


Wow, you can get a lot of work done if you just don't go to work for a while - - I took a vacation day and stretched Labor Day to four days. Powered thru much of my pre-sevenstock list:
Air Cleaner is done, including fabricating a high-polish adapter for my CAI inlet.
CAI flange is now properly rivetted in place.
Distributor has been refurbed, and polished/painted.
RB gauge block has been swapped out to a "Type-II" block - much nicer look. Polished the filter base, too, though you really can't see it without shoving your head into the engine bay.
Suspension techniques front sway bushings are in.
Fog lights are done and tested.
Final version of the lights-and-mirrors bracket is finished, just waiting for paint to dry before I can install it.
So, I've got two weeks left to tinker with my carb issues, and clean up some interior odds and ends. Plus wax and detail, of course.
Pics of this week's output:
Glen- wow! speechless ! where to begin noting all the tiny details? 
OK - so - where did you get those delish spark wire holders?? I have the oversized Racing Beat wires and no way to hold them...
Thanks for sharing the Love-
Stu Aull
80GS
Alaska
OK - so - where did you get those delish spark wire holders?? I have the oversized Racing Beat wires and no way to hold them...
Thanks for sharing the Love-
Stu Aull
80GS
Alaska

Thread Starter
Joined: Jun 2008
Posts: 8,376
Likes: 28
From: Chino Hills, CA
The black wire spreaders came with the wires, which were custom-fabbed for me by Racing Beat (They have the "old school" straight shielded plug boots, instead of the more recent angled boots). I got wire spreaders and the lovely white snap-on wire ID tags (L1, L2, T1, etc, embossed on the clips) as part of the negotiation.
The blue holder you see on the ignitor box is part of an old (12 years maybe) Accel 8mm wire holder set which had blue plastic holders on chrome metal brackets. Came from an autoparts store ages ago. It's actually just taped onto the ignitor box bracket. I had to trim the ID a little bit to comfortably fit the new wires.