FrankenRex Will Rise: stuffing a GSL-SE into a'79 SA
 07-06-21, 09:59 PM
#176
Not quite. I've got an ultrasonic tank for degreasing and general cleaning, and a tumbler with stainless shot for polishing.

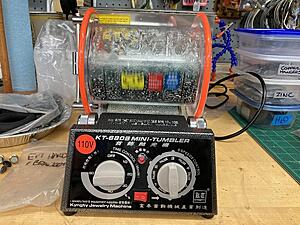
The stainless shot (actually an assortment of shapes) is clearly too aggressive. It's intended for polishing jewelry, and works *great* polishing the bare steel, so still worth it. I'm not really sure what else might work in the tumbler. If I were using a vibratory tumbler, yeah, I'd try walnut or some of the plastic media. That might work in the tumbler I have, without liquid perhaps. It certainly wouldn't hurt to try.
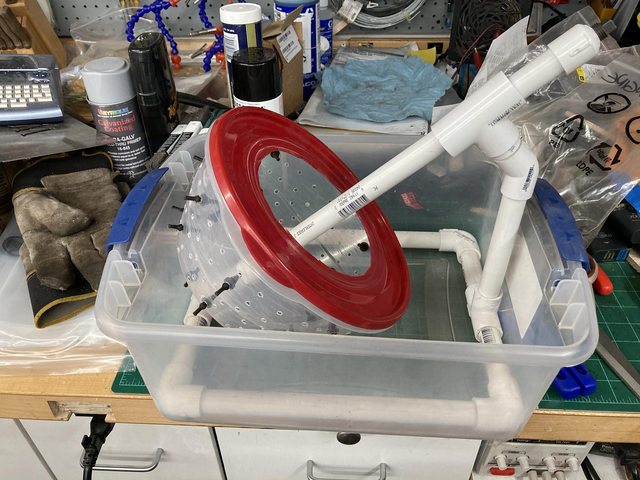
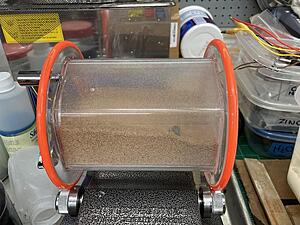
My plating barrel looks almost the same as the one I linked.

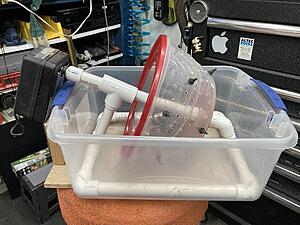
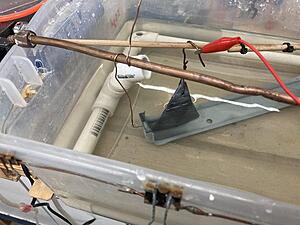
Here it is in action (test with no plating solution - you may need to click through to get it to play):
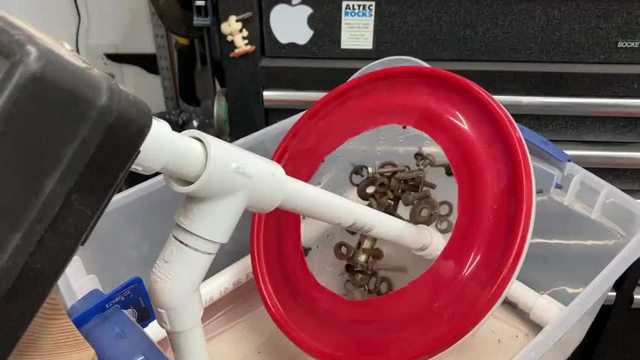
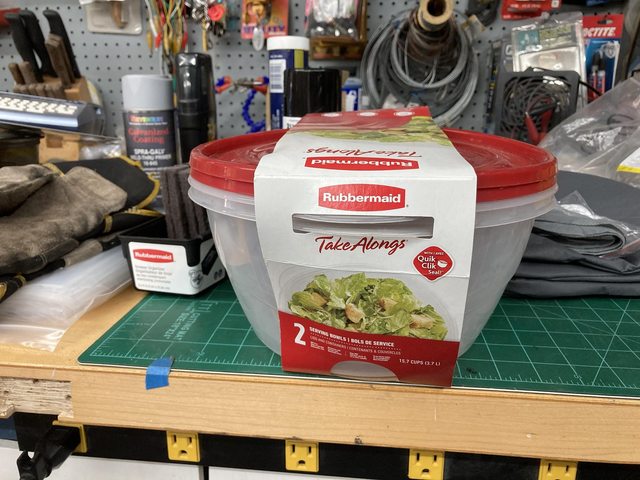
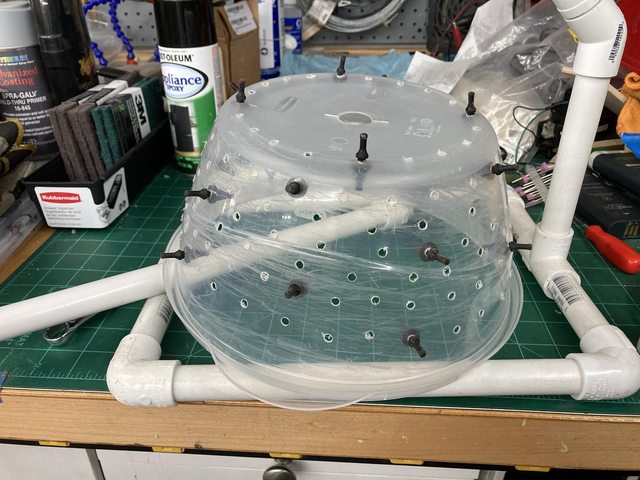
It's just a Rubbermaid bowl with a bunch of holes drilled in it.


And the center of the lid cut away.
The fingers sticking through are rubber mounting nubs for PC cooling fans. I also bought a bunch of nylon #4 bolts and nuts, just in case, but the rubber mounts were enough to keep everything tumbling.
I originally tried to use a colander, but without any sort of lip at the outer rim, stuff tended to fall out.
I did change the angle a bit after that test, to make it more horizontal. Basically so the angled side of the bowl was more or less horizontal at the bottom. So far, it's worked surprisingly well, once I got my process sorted.
The actual plating drums industry uses are made with a series of flats for the sides (kind of like who the jewelry tumbler is designed,) with one side being a hatch, and spun on a horizontal axis. The whole thing is lowered into a tank from above, and driven via a large plastic gear so the actual motor can stay out of the tank. The electrode goes into the tank via a hollow axle.
You can Google "plating" barrel for a lot of examples. All *way* more expensive than my rig, of course.


The stainless shot (actually an assortment of shapes) is clearly too aggressive. It's intended for polishing jewelry, and works *great* polishing the bare steel, so still worth it. I'm not really sure what else might work in the tumbler. If I were using a vibratory tumbler, yeah, I'd try walnut or some of the plastic media. That might work in the tumbler I have, without liquid perhaps. It certainly wouldn't hurt to try.
My plating barrel looks almost the same as the one I linked.

Here it is in action (test with no plating solution - you may need to click through to get it to play):
It's just a Rubbermaid bowl with a bunch of holes drilled in it.
And the center of the lid cut away.
The fingers sticking through are rubber mounting nubs for PC cooling fans. I also bought a bunch of nylon #4 bolts and nuts, just in case, but the rubber mounts were enough to keep everything tumbling.
I originally tried to use a colander, but without any sort of lip at the outer rim, stuff tended to fall out.
I did change the angle a bit after that test, to make it more horizontal. Basically so the angled side of the bowl was more or less horizontal at the bottom. So far, it's worked surprisingly well, once I got my process sorted.
The actual plating drums industry uses are made with a series of flats for the sides (kind of like who the jewelry tumbler is designed,) with one side being a hatch, and spun on a horizontal axis. The whole thing is lowered into a tank from above, and driven via a large plastic gear so the actual motor can stay out of the tank. The electrode goes into the tank via a hollow axle.
You can Google "plating" barrel for a lot of examples. All *way* more expensive than my rig, of course.

The following users liked this post:
Kizmit99 (07-07-21)
07-12-21, 02:43 PM
#177
Not a lot of progress over the weekend. Went to the Parker County Peach Festival and got some peaches, among other things, visited the fam on Saturday, and had my brother-in-law and one of my nephews over for lunch on Sunday, so mainly didn't do, well, anything.
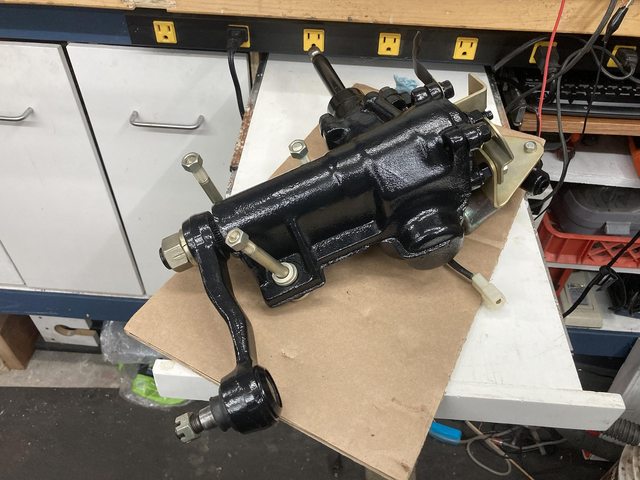
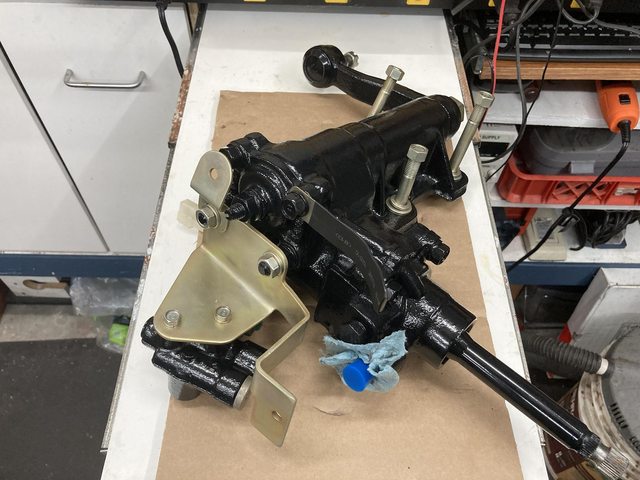
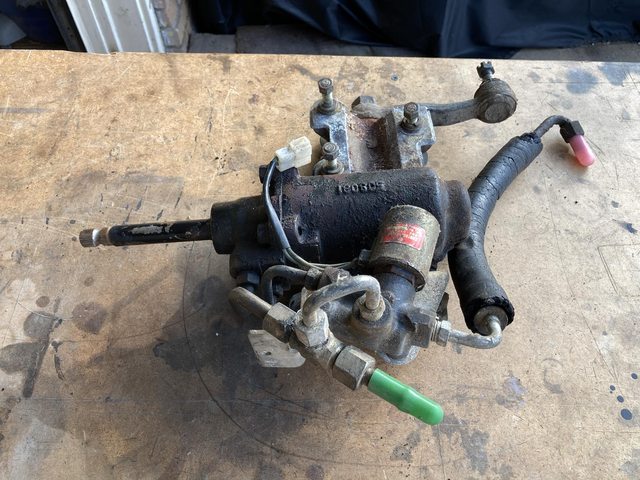
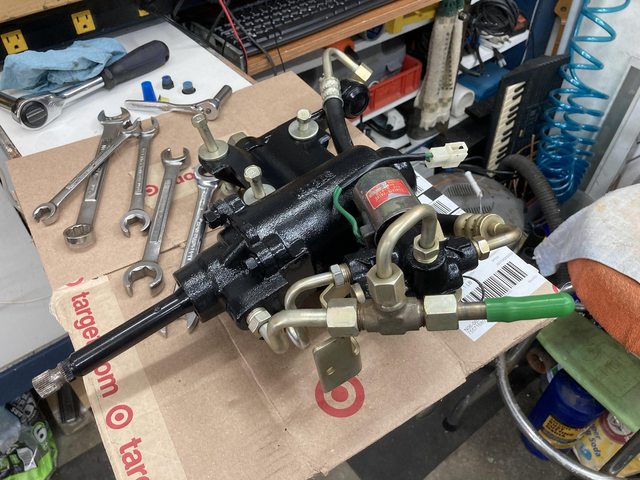
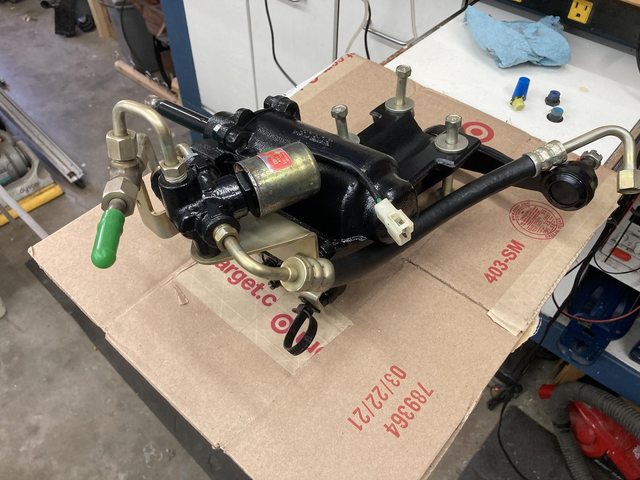
I did take a few minutes to bolt together what I had done of the power steering box:
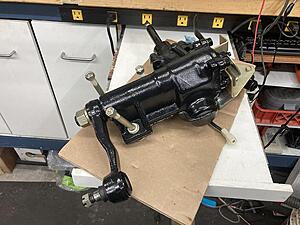

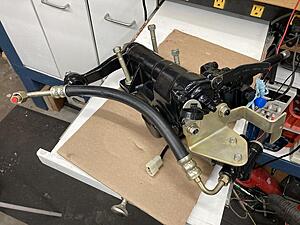
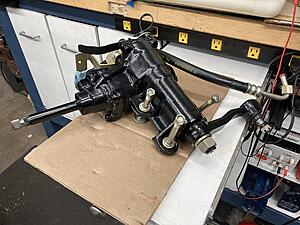
Looking pretty dang good.
I want to take another stab at those 3 hard lines. If I can't get them any better, then that's just the way it will be.
I did order some brightener from Caswell (it was cheaper than I remembered) and will see how well that works. Not having to polish after plating would be a godsend.
You know what's going to happen, right? The brightened parts are going to look much nicer and closer to original, and I'll have to redo everything.
I also found a video for a DIY formula for the yellow (and blue) passivate.
This guy has been plating carbs for years, and has a nice rig for it. I'd really like that pump and filter setup.
For yellow, he uses sodium dichromate and battery (sulphuric) acid, and says he's used the same solution for almost a decade, just adding a little acid every now and again. Blue is sodium dichromate and nitric acid.
Sodium dichromate is pretty cheap, as is battery acid (which is also available locally at NAPA.)
I did take a few minutes to bolt together what I had done of the power steering box:

Looking pretty dang good.
I want to take another stab at those 3 hard lines. If I can't get them any better, then that's just the way it will be.
I did order some brightener from Caswell (it was cheaper than I remembered) and will see how well that works. Not having to polish after plating would be a godsend.
You know what's going to happen, right? The brightened parts are going to look much nicer and closer to original, and I'll have to redo everything.
I also found a video for a DIY formula for the yellow (and blue) passivate.
For yellow, he uses sodium dichromate and battery (sulphuric) acid, and says he's used the same solution for almost a decade, just adding a little acid every now and again. Blue is sodium dichromate and nitric acid.
Sodium dichromate is pretty cheap, as is battery acid (which is also available locally at NAPA.)
Last edited by Frankenrex; 07-12-21 at 02:44 PM. Reason: fixed video link
07-12-21, 03:39 PM
#178
Full Member
Keep up the inspiring work!
07-19-21, 04:39 PM
#180
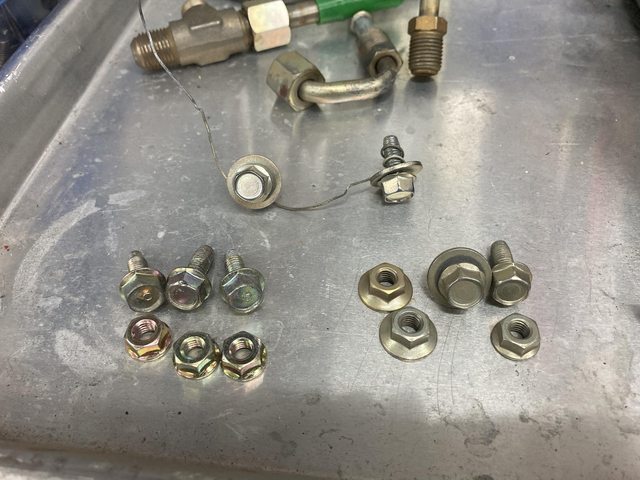
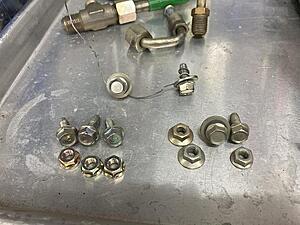
Just for s&gs, here's a comparison of OEM plating versus mine:

Mazda bolts and nuts on the lower left, mine on the right. I think the major difference is they get theirs a lot more shiny before the passivate. I got pretty close with that pair of bolts on the wire in the middle - I put some extra polishing in on those. I'm still pretty happy with mine, particularly given how cruddy they were to start with.
I'll try tumbling with some walnut next time I have a batch of bolts to plate.
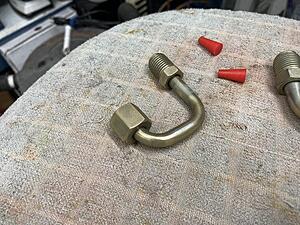
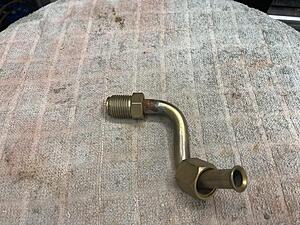
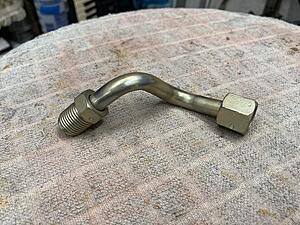
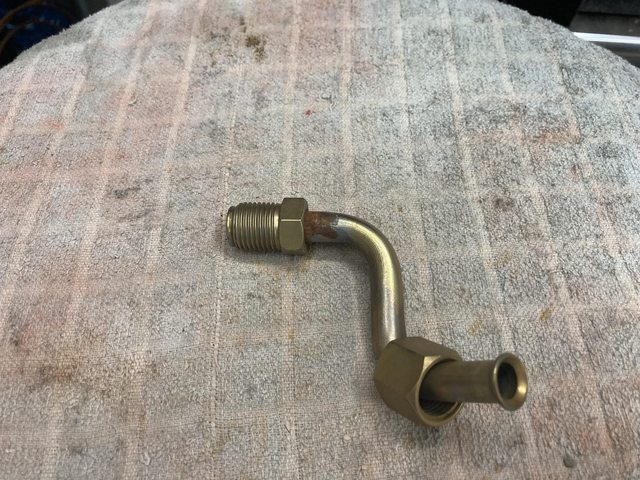
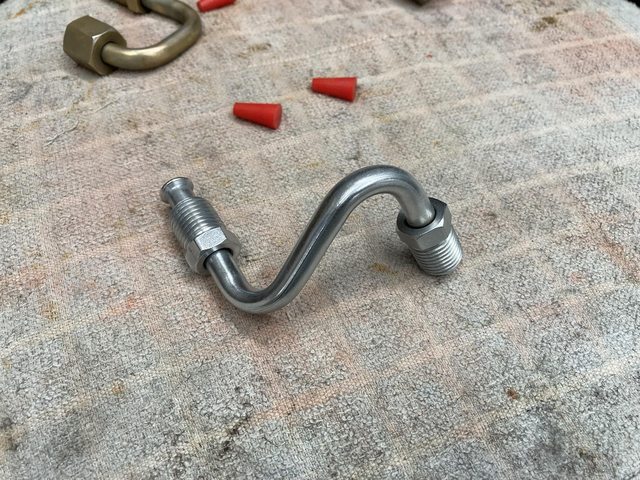
Anyway, took another stab at those hardlines.
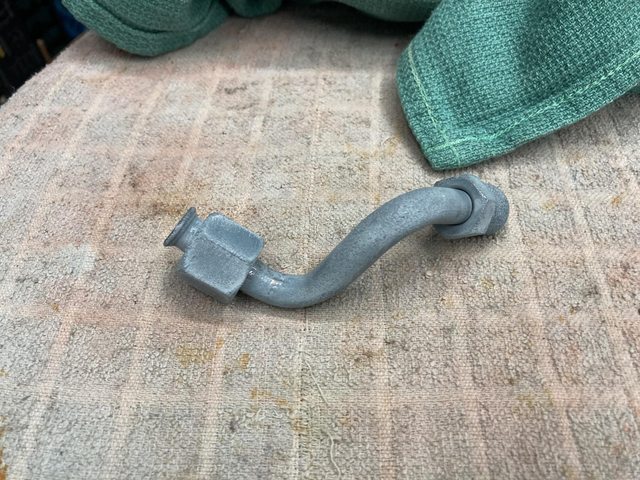
First one before:

Obviously missed a spot last time.
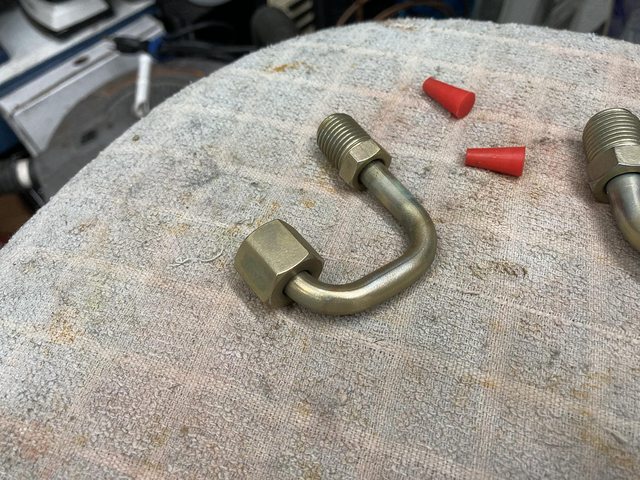
Stripped and replated:

And passivated.

A lot of variation, but it appears to have plated OK. This was the third try, BTW. It took a bit of fiddling with the current and stringing it different ways to get it to take acceptably.
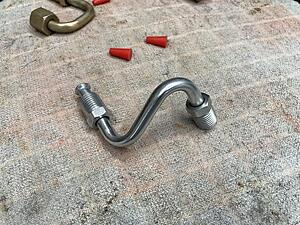
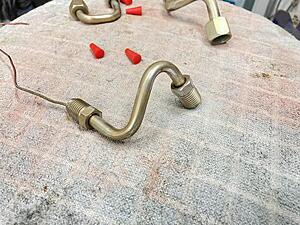
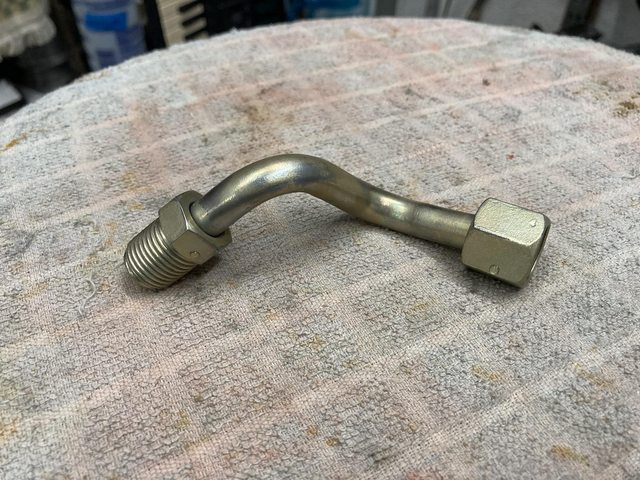
One of the other ones:
Again, acceptable.
And the third one polished:

and passivated:


I'll take it.
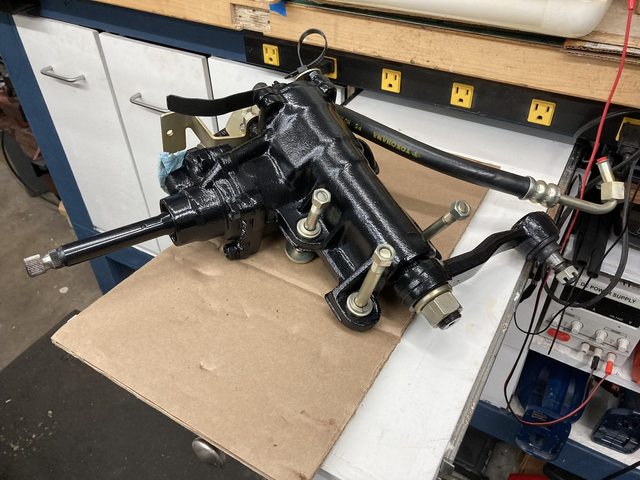
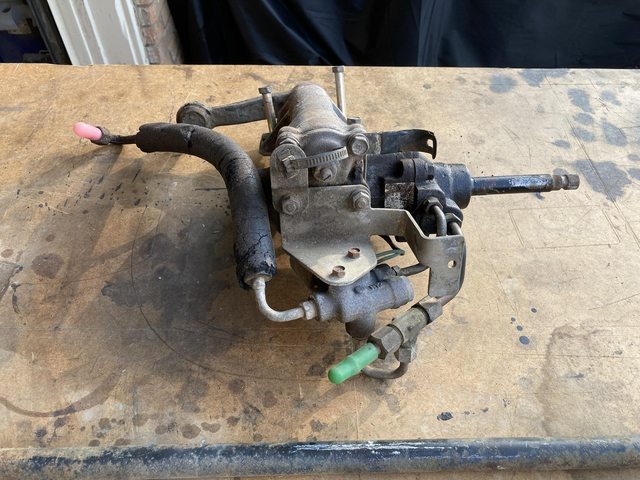
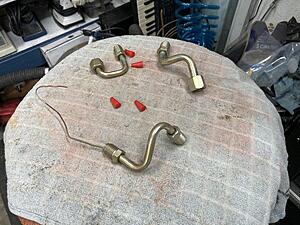
After 24 hours, I slapped it all back together:


As a reminder:
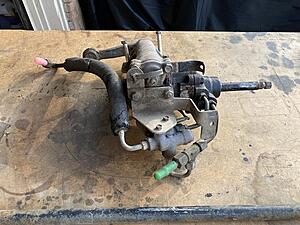

Definitely an improvement.
Mazda bolts and nuts on the lower left, mine on the right. I think the major difference is they get theirs a lot more shiny before the passivate. I got pretty close with that pair of bolts on the wire in the middle - I put some extra polishing in on those. I'm still pretty happy with mine, particularly given how cruddy they were to start with.
I'll try tumbling with some walnut next time I have a batch of bolts to plate.
Anyway, took another stab at those hardlines.
First one before:

Obviously missed a spot last time.
Stripped and replated:

And passivated.

A lot of variation, but it appears to have plated OK. This was the third try, BTW. It took a bit of fiddling with the current and stringing it different ways to get it to take acceptably.
One of the other ones:

Again, acceptable.
And the third one polished:

and passivated:


I'll take it.
After 24 hours, I slapped it all back together:
As a reminder:
Definitely an improvement.
07-19-21, 04:40 PM
#181
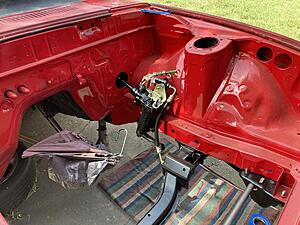
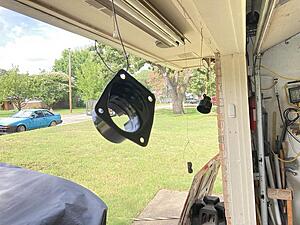
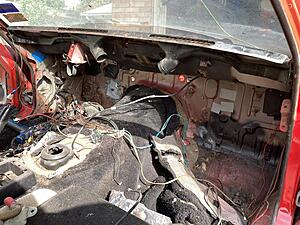
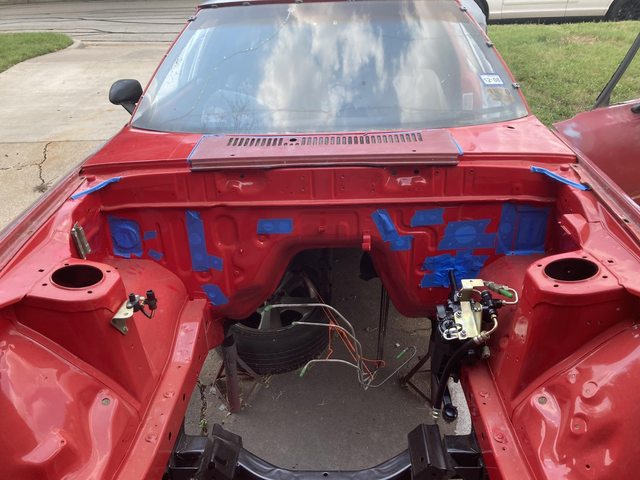
Saturday, I put it where it goes:

And painted the bits that attach the column to the firewall:

I didn't get a picture, but the coupler cleaned up nicely as it was.
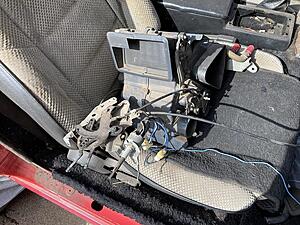
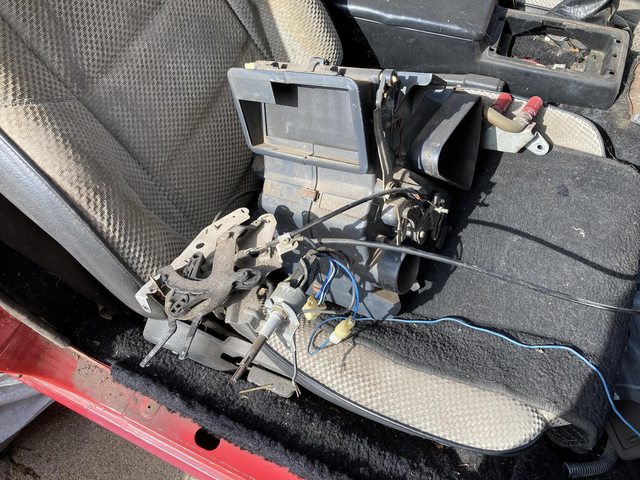
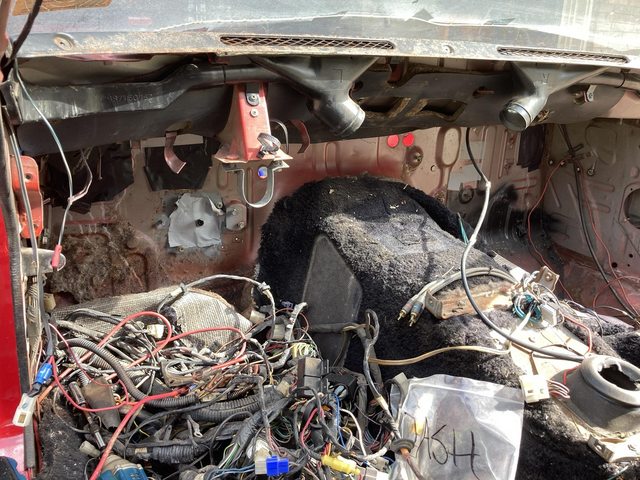
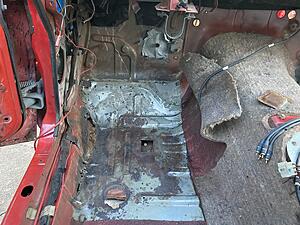
At that point, I realized that I would need to do the firewall heat/sound insulation before I started bolting other stuff to the firewall. 3 more M6 nuts and a bit of wrestling got the heater core/HVAC selector box, the sole remaining thing on the firewall, out:

The insulation was already partly pulled away to deal with the hole for the EFI wiring.

The rubber backing is stiff and cracking, and I had to kind of mangle it on the driver's side modifying the firewall for the GSL-SE power steering column. It's also shrunk a bit, so I'm going to replace it. I'm thinking the Reflectix-style double layer mylar bubble wrap stuff. I'm not a fan of the jute padding particularly, but I may use a modern variant of that with mylar on it instead or as well. *Maybe* some strategic Dynamat-like product, at least down at the feet level. Any better suggestions for firewall insulation?


Still good for a pattern with some adjustments. I'll whip one up out of cardboard for test fitting.
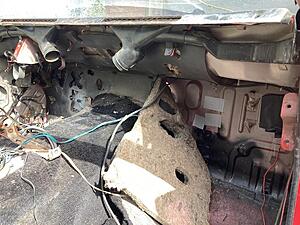
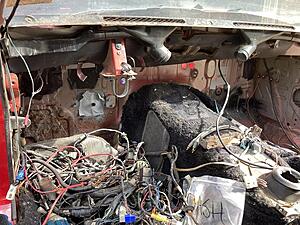
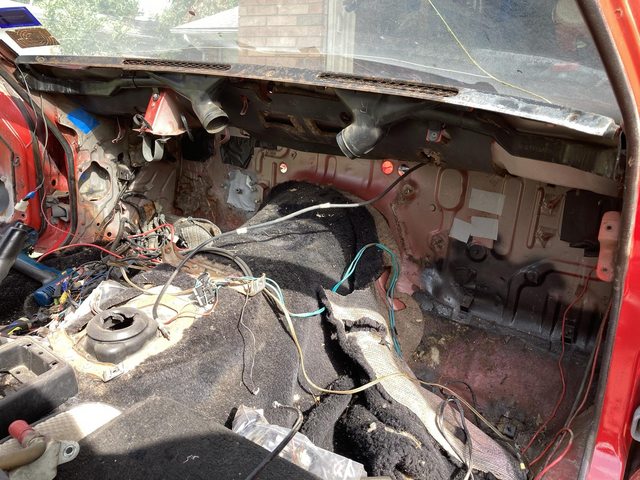
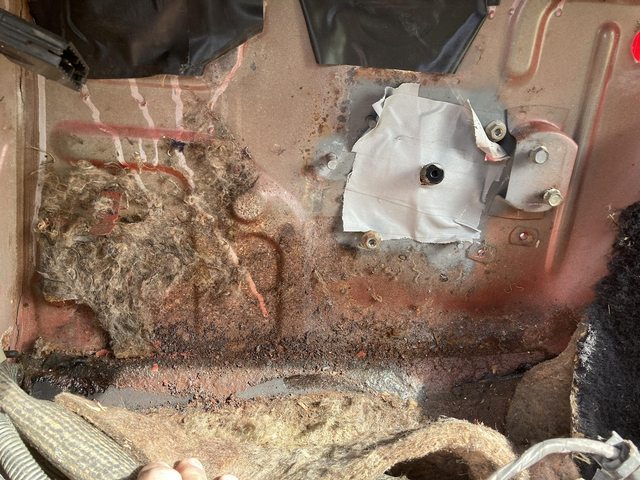
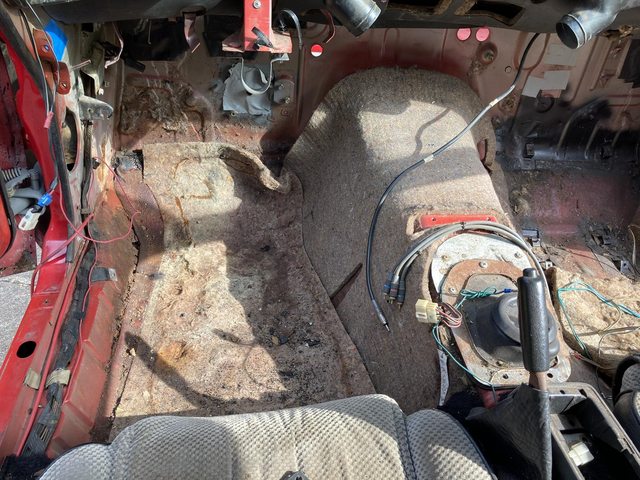
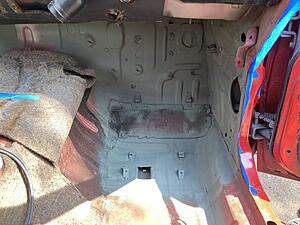
Naked firewall:


Little bit of surface rust down there at the joint between the firewall and floorboard (driver's side)
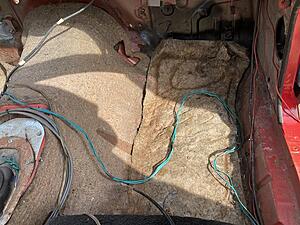
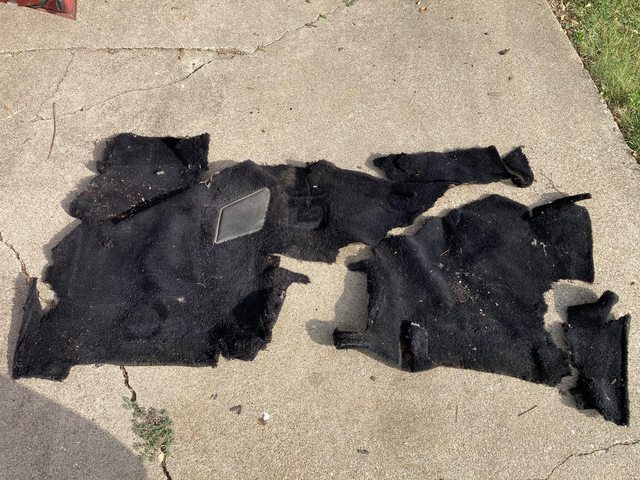
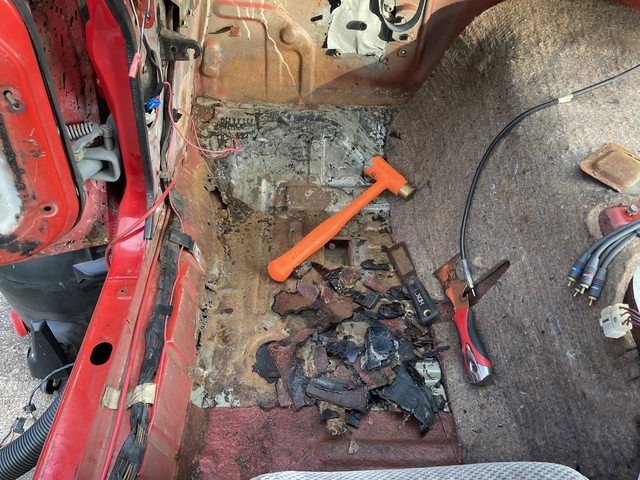
Since I was in there, I decided to pull the front carpeting, since the heater box was out. While the nap is actually in good shape, the backing is disintegrating, sadly. It had one piece torn already, and tore again getting it out.

I'll get new from ACC Auto Carpets, I think. Not many vendors for this.
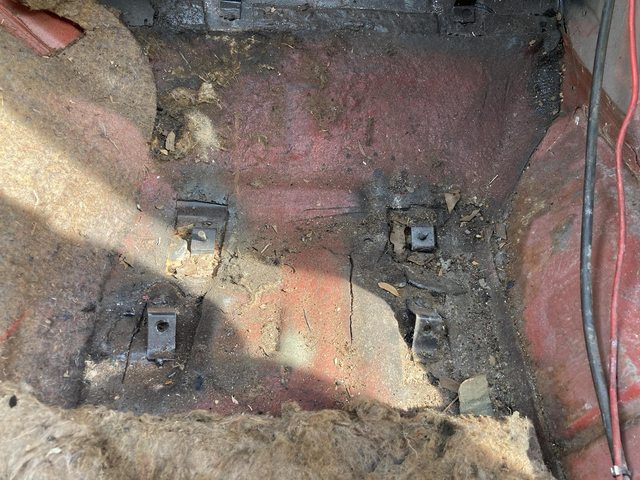
Jute padding on the passenger side is OK. I've already got it partially peeled back from when I added the ECU mounts.


Lot of junk found it's way in through the cracks...
And painted the bits that attach the column to the firewall:
I didn't get a picture, but the coupler cleaned up nicely as it was.
At that point, I realized that I would need to do the firewall heat/sound insulation before I started bolting other stuff to the firewall. 3 more M6 nuts and a bit of wrestling got the heater core/HVAC selector box, the sole remaining thing on the firewall, out:
The insulation was already partly pulled away to deal with the hole for the EFI wiring.
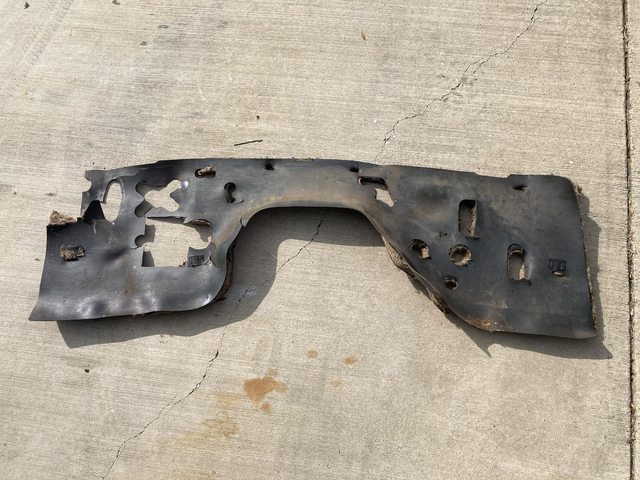
The rubber backing is stiff and cracking, and I had to kind of mangle it on the driver's side modifying the firewall for the GSL-SE power steering column. It's also shrunk a bit, so I'm going to replace it. I'm thinking the Reflectix-style double layer mylar bubble wrap stuff. I'm not a fan of the jute padding particularly, but I may use a modern variant of that with mylar on it instead or as well. *Maybe* some strategic Dynamat-like product, at least down at the feet level. Any better suggestions for firewall insulation?
Still good for a pattern with some adjustments. I'll whip one up out of cardboard for test fitting.
Naked firewall:
Little bit of surface rust down there at the joint between the firewall and floorboard (driver's side)
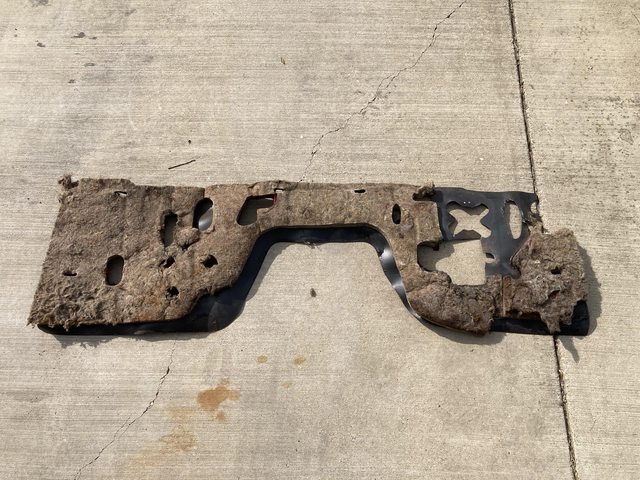
Since I was in there, I decided to pull the front carpeting, since the heater box was out. While the nap is actually in good shape, the backing is disintegrating, sadly. It had one piece torn already, and tore again getting it out.
I'll get new from ACC Auto Carpets, I think. Not many vendors for this.
Jute padding on the passenger side is OK. I've already got it partially peeled back from when I added the ECU mounts.
Lot of junk found it's way in through the cracks...
07-19-21, 04:41 PM
#182
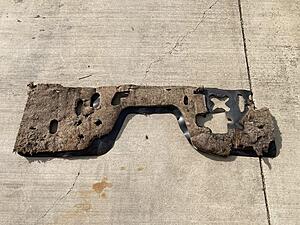
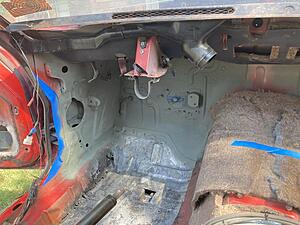
Drivers-side doesn't look terrible either:

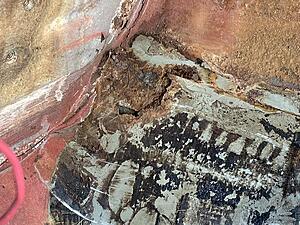
but... wait. What is...
Pan left 40, zoom 2.

Pan left 55, zoom 4. Enhance.
[[url=https://imgur.com/fqKHQMU]
FFFFFFFFFFFFFFFFFFFFFFFFFFFFFFFFFFFFFFFFFFFFFFFFFF FFFFFFFFFFFFFFFFFFFFFFFFFFFFFFFFFFFFFFFFFFFFFFFFFF FFFFFFFFFFFFFFFFFFFFFFFFFFFFFFFFFFFFFFFFFFFFFFFFFF FFFFFFF...
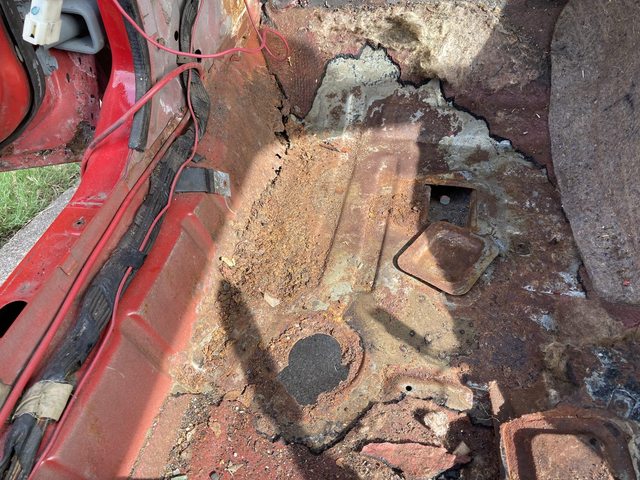
I was able to pull this much asphalt out by hand, because it just wasn't stuck down any more.

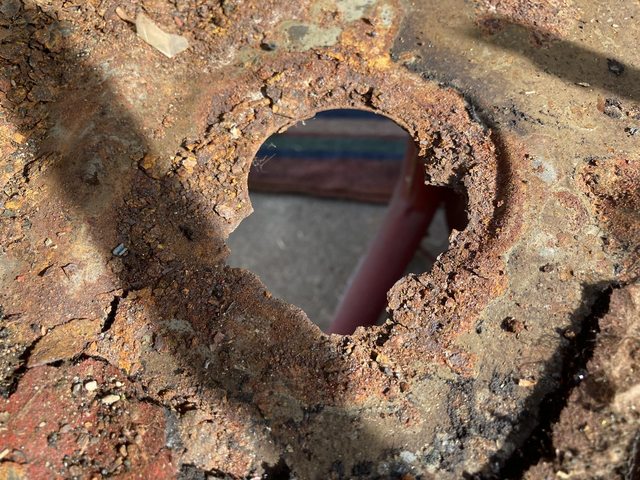
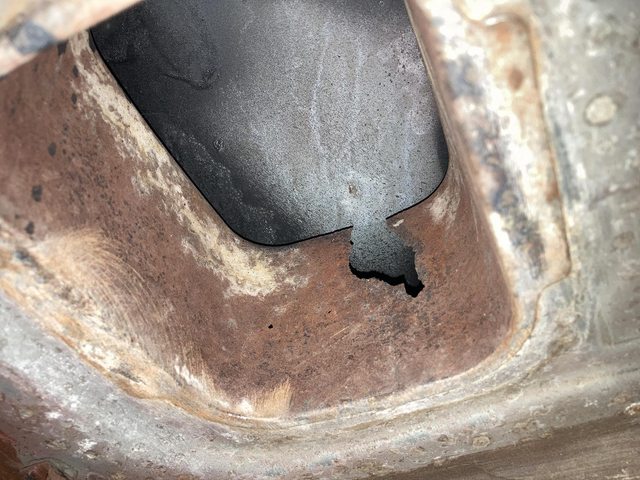
Rust around the drain hole, too.

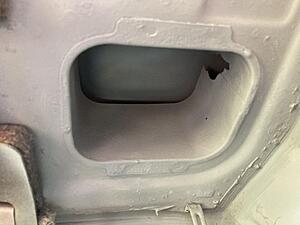
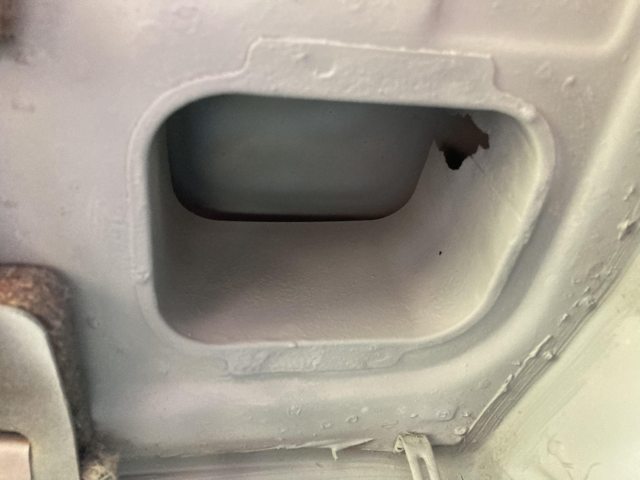
No idea what that access hatch or the threaded inserts next to it are for.

It opens into the frame rail.
Bleah.


Shifting over to the passenger side, I decided to remove all of the asphalt on that side around the ECU area, since some of it didn't seem to be stuck down so well. No major issues, thankfully. A little surface rust.

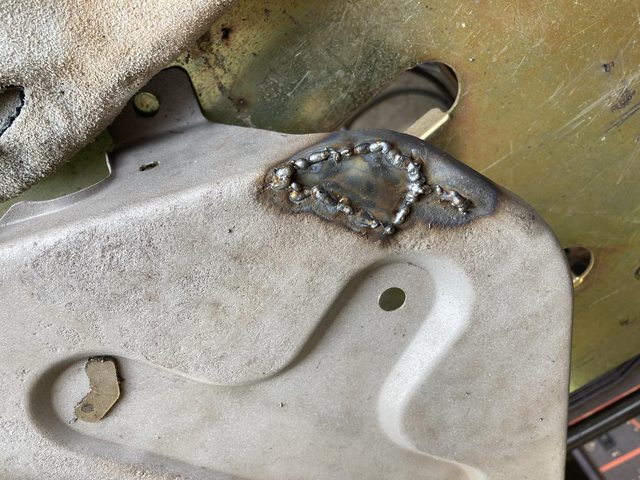
and one small area of pinholes.

This is after wire brushing. IT *was* just one pinhole.
Cleaned:

I just welded the pinholes up, and went to town with zinc primer.

I'll top coat it with some Rustoleum "Cherry Red" before I'm done.
but... wait. What is...
Pan left 40, zoom 2.
Pan left 55, zoom 4. Enhance.
[[url=https://imgur.com/fqKHQMU]
FFFFFFFFFFFFFFFFFFFFFFFFFFFFFFFFFFFFFFFFFFFFFFFFFF FFFFFFFFFFFFFFFFFFFFFFFFFFFFFFFFFFFFFFFFFFFFFFFFFF FFFFFFFFFFFFFFFFFFFFFFFFFFFFFFFFFFFFFFFFFFFFFFFFFF FFFFFFF...
I was able to pull this much asphalt out by hand, because it just wasn't stuck down any more.
Rust around the drain hole, too.
No idea what that access hatch or the threaded inserts next to it are for.
It opens into the frame rail.
Bleah.
Shifting over to the passenger side, I decided to remove all of the asphalt on that side around the ECU area, since some of it didn't seem to be stuck down so well. No major issues, thankfully. A little surface rust.
and one small area of pinholes.
This is after wire brushing. IT *was* just one pinhole.
Cleaned:
I just welded the pinholes up, and went to town with zinc primer.
I'll top coat it with some Rustoleum "Cherry Red" before I'm done.
07-19-21, 04:42 PM
#183
I also noted some rust up in the air inlet at the top of the dash:

:argh:
Back on the driver's side, I wanted most of that **** up and gone:

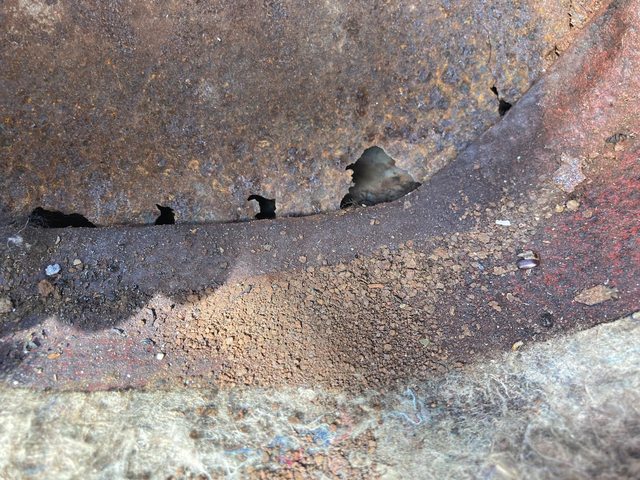
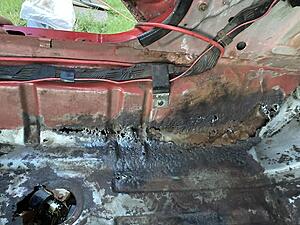
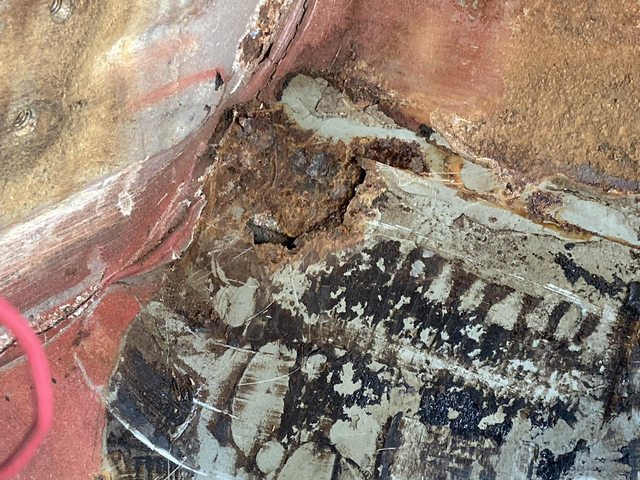
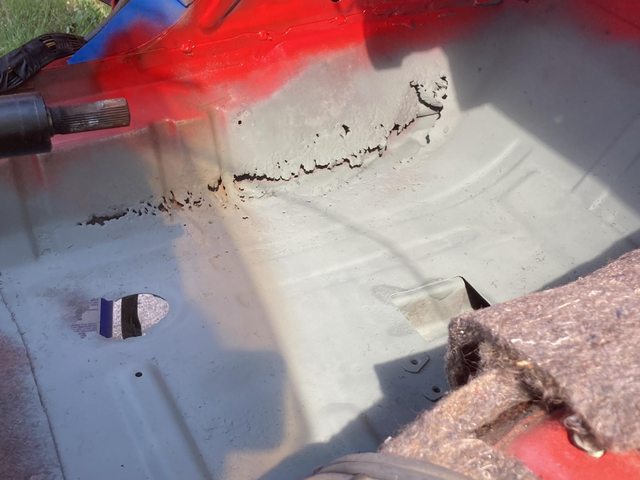
Another spot up where the firewall joins the floor:

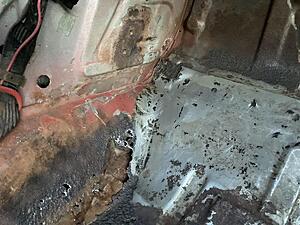
The floor bit after poking it a bunch:

Cleaned up with some acetone, and some wire brushing:


The good news is that seems to be non-structural, and the steel inside/underneath appears to be fine. It's just this bit right here. As far as I can tell, the leaks form the rust in the cowl, plus the jute underlayment acting like a sponge and holding water there, caused this. I'd guess the car was leaning to the left a bit when it was parked around the side of the house.
Yay, more welding, this time with curves. I'll get that cut out at some point, and start replacing it soon.
I'm really uninterested in putting sponges back down under the carpet, so that will definitely be closed-cell foam or mylar bubble-stuff. The only reason I didn't throw them away in disgust is so I can use them as patterns. The layer on the trans tunnel is fine - water doesn't stay up there. Back carpet is going to have to come out to check that, too.
Meanwhile, outside, I removed the trash bag from the fuel and brake hard lines that was protecting them from paint:

They'll need a little cleanup, but not bad. I need to look at the fuel lines on the donor - I suspect the EFI lines are different, but I don't know for certain.
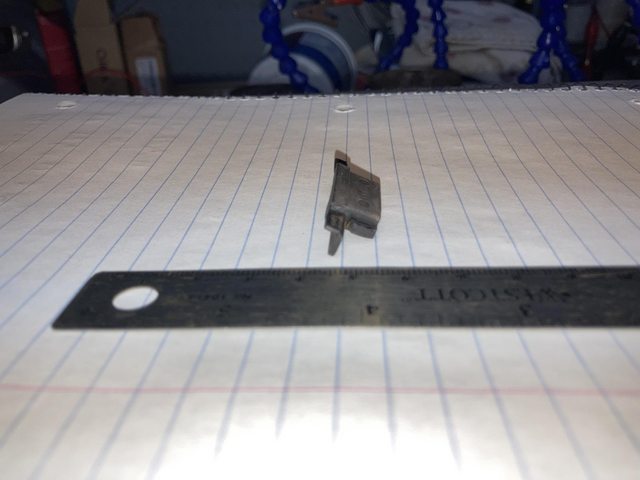
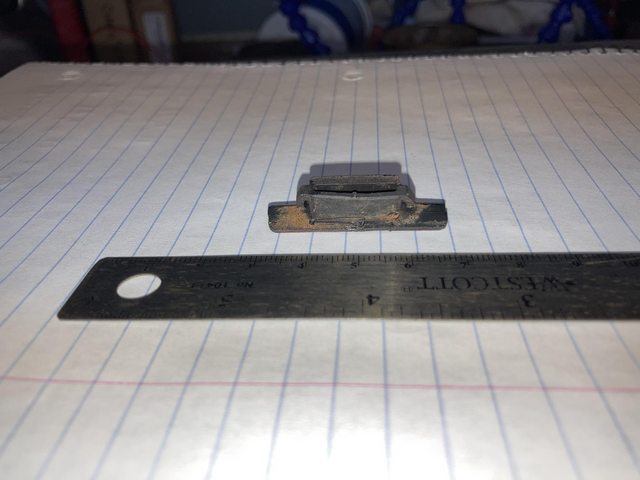
While I was under the car, I noted that I'll need to polish the slip joint a bit:

It never ends, does it?
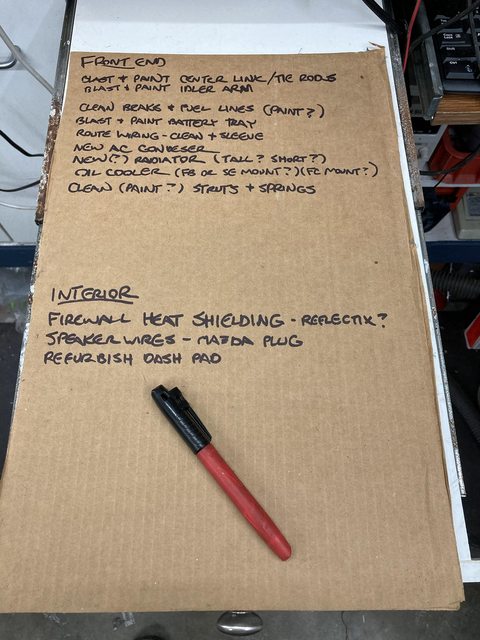
I must be getting serious. I made a list:

Yeah, I could have just used my note-taking app, but I like the immediacy and physicality of the Roadkill-style checklist.
Pffft. I didn't even put the floor rust on the list. D'oh.
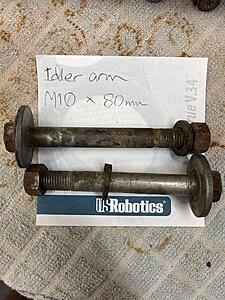
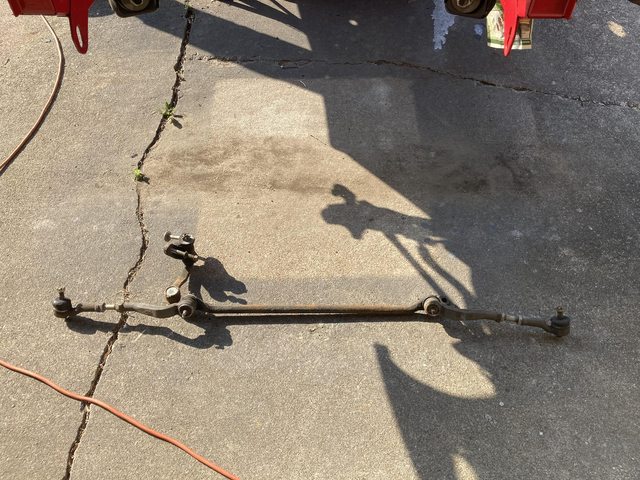
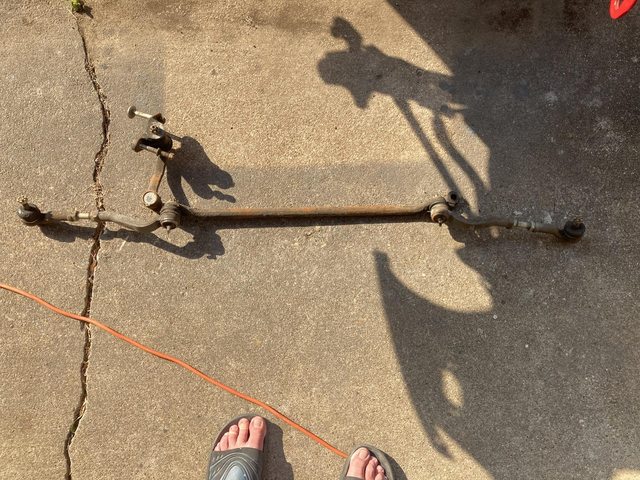
Note that first thing on the list, the center link and tie rod ends? That's what I had actually set out to do Saturday, after installing the steering box. I get sidetracked easily. You should see me play open-world video games. I'm like a cat chasing a laser pointer.
:argh:
Back on the driver's side, I wanted most of that **** up and gone:
Another spot up where the firewall joins the floor:
The floor bit after poking it a bunch:
Cleaned up with some acetone, and some wire brushing:
The good news is that seems to be non-structural, and the steel inside/underneath appears to be fine. It's just this bit right here. As far as I can tell, the leaks form the rust in the cowl, plus the jute underlayment acting like a sponge and holding water there, caused this. I'd guess the car was leaning to the left a bit when it was parked around the side of the house.
Yay, more welding, this time with curves. I'll get that cut out at some point, and start replacing it soon.
I'm really uninterested in putting sponges back down under the carpet, so that will definitely be closed-cell foam or mylar bubble-stuff. The only reason I didn't throw them away in disgust is so I can use them as patterns. The layer on the trans tunnel is fine - water doesn't stay up there. Back carpet is going to have to come out to check that, too.
Meanwhile, outside, I removed the trash bag from the fuel and brake hard lines that was protecting them from paint:
They'll need a little cleanup, but not bad. I need to look at the fuel lines on the donor - I suspect the EFI lines are different, but I don't know for certain.
While I was under the car, I noted that I'll need to polish the slip joint a bit:
It never ends, does it?
I must be getting serious. I made a list:
Yeah, I could have just used my note-taking app, but I like the immediacy and physicality of the Roadkill-style checklist.
Pffft. I didn't even put the floor rust on the list. D'oh.
Note that first thing on the list, the center link and tie rod ends? That's what I had actually set out to do Saturday, after installing the steering box. I get sidetracked easily. You should see me play open-world video games. I'm like a cat chasing a laser pointer.
07-20-21, 08:05 AM
#184
Damn, it did start!
Wait until your list is scribbled on the garage wall�
07-21-21, 06:12 PM
#185
So, apparently, the forum owners, in their infinite wisdom have decided that we can't edit posts? Kinda sucks when your image hosting borks, eh?
OK, fine, I'll just repost all of it, again.
Just for s&gs, here's a comparison of OEM plating versus mine:
Mazda bolts and nuts on the lower left, mine on the right. I think the major difference is they get theirs a lot more shiny before the passivate. I got pretty close with that pair of bolts on the wire in the middle - I put some extra polishing in on those. I'm still pretty happy with mine, particularly given how cruddy they were to start with.
I'll try tumbling with some walnut next time I have a batch of bolts to plate.
Anyway, took another stab at those hardlines.
First one before:
Obviously missed a spot last time.
Stripped and replated:

And passivated.
A lot of variation, but it appears to have plated OK. This was the third try, BTW. It took a bit of fiddling with the current and stringing it different ways to get it to take acceptably.
One of the other ones:

Again, acceptable.
And the third one polished:
and passivated:
I'll take it.
After 24 hours, I slapped it all back together:


As a reminder:


Definitely an improvement.
OK, fine, I'll just repost all of it, again.
Just for s&gs, here's a comparison of OEM plating versus mine:

Mazda bolts and nuts on the lower left, mine on the right. I think the major difference is they get theirs a lot more shiny before the passivate. I got pretty close with that pair of bolts on the wire in the middle - I put some extra polishing in on those. I'm still pretty happy with mine, particularly given how cruddy they were to start with.
I'll try tumbling with some walnut next time I have a batch of bolts to plate.
Anyway, took another stab at those hardlines.
First one before:
Obviously missed a spot last time.
Stripped and replated:
And passivated.
A lot of variation, but it appears to have plated OK. This was the third try, BTW. It took a bit of fiddling with the current and stringing it different ways to get it to take acceptably.
One of the other ones:
Again, acceptable.
And the third one polished:
and passivated:


I'll take it.
After 24 hours, I slapped it all back together:
As a reminder:


Definitely an improvement.
07-21-21, 06:13 PM
#186
- Saturday, I put it where it goes:
And painted the bits that attach the column to the firewall:
I didn't get a picture, but the coupler cleaned up nicely as it was.
At that point, I realized that I would need to do the firewall heat/sound insulation before I started bolting other stuff to the firewall. 3 more M6 nuts and a bit of wrestling got the heater core/HVAC selector box, the sole remaining thing on the firewall, out:
The insulation was already partly pulled away to deal with the hole for the EFI wiring.
The rubber backing is stiff and cracking, and I had to kind of mangle it on the driver's side modifying the firewall for the GSL-SE power steering column. It's also shrunk a bit, so I'm going to replace it. I'm thinking the Reflectix-style double layer mylar bubble wrap stuff. I'm not a fan of the jute padding particularly, but I may use a modern variant of that with mylar on it instead or as well. *Maybe* some strategic Dynamat-like product, at least down at the feet level. Any better suggestions for firewall insulation?

Still good for a pattern with some adjustments. I'll whip one up out of cardboard for test fitting.
Naked firewall:
Little bit of surface rust down there at the joint between the firewall and floorboard (driver's side)

Since I was in there, I decided to pull the front carpeting, since the heater box was out. While the nap is actually in good shape, the backing is disintegrating, sadly. It had one piece torn already, and tore again getting it out.

I'll get new from ACC Auto Carpets, I think. Not many vendors for this.
Jute padding on the passenger side is OK. I've already got it partially peeled back from when I added the ECU mounts.

Lot of junk found it's way in through the cracks...


 07-21-21, 06:14 PM
#187
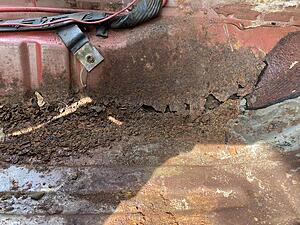
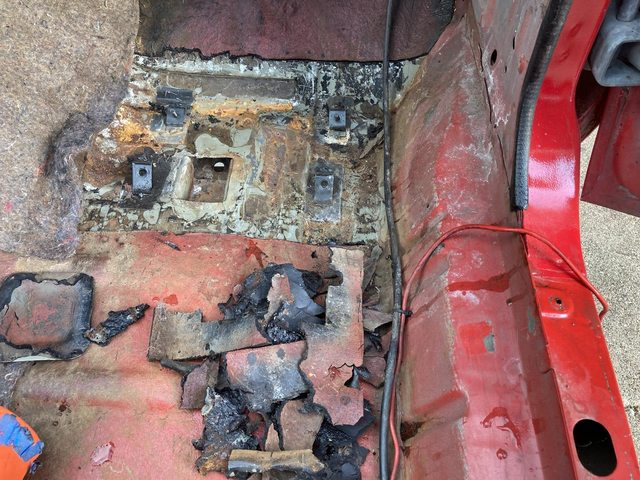
Drivers-side doesn't look terrible either:

but... wait. What is...
Pan left 40, zoom 2.
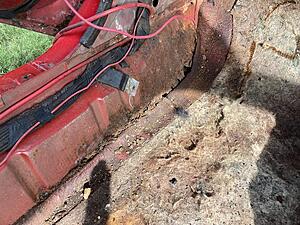
Pan left 55, zoom 4. Enhance.
FFFFFFFFFFFFFFFFFFFFFFFFFFFFFFFFFFFFFFFFFFFFFFFFFF FFFFFFFFFFFFFFFFFFFFFFFFFFFFFFFFFFFFFFFFFFFFFFFFFF FFFFFFFFFFFFFFFFFFFFFFFFFFFFFFFFFFFFFFFFFFFFFFFFFF FFFFFFF...
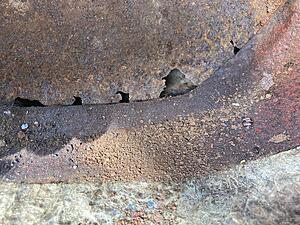
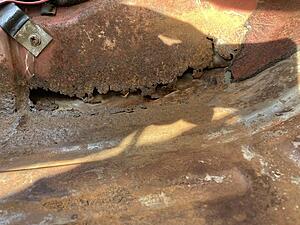
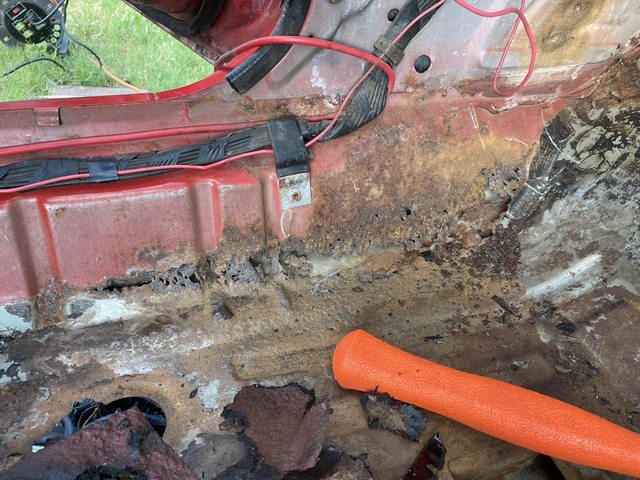
I was able to pull this much asphalt out by hand, because it just wasn't stuck down any more.

Rust around the drain hole, too.
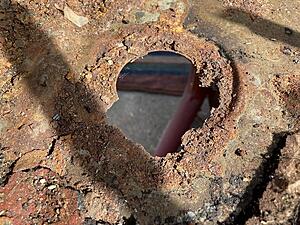
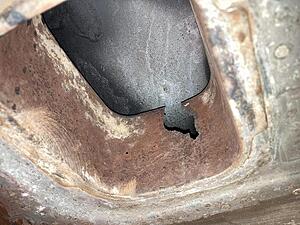
No idea what that access hatch or the threaded inserts next to it are for.
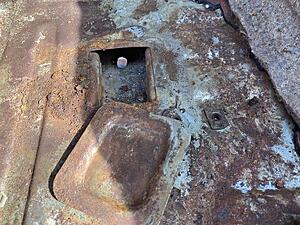
It opens into the frame rail.
Bleah.
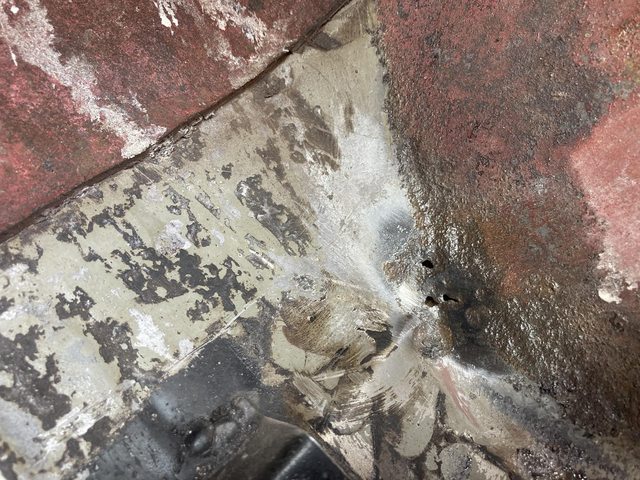
Shifting over to the passenger side, I decided to remove all of the asphalt on that side around the ECU area, since some of it didn't seem to be stuck down so well. No major issues, thankfully. A little surface rust.
and one small area of pinholes.
This is after wire brushing. IT *was* just one pinhole.
Cleaned, and rust converter applied:

I just welded the pinholes up, and went to town with zinc primer.

I'll top coat it with some Rustoleum "Cherry Red" before I'm done.
but... wait. What is...
Pan left 40, zoom 2.

Pan left 55, zoom 4. Enhance.
FFFFFFFFFFFFFFFFFFFFFFFFFFFFFFFFFFFFFFFFFFFFFFFFFF FFFFFFFFFFFFFFFFFFFFFFFFFFFFFFFFFFFFFFFFFFFFFFFFFF FFFFFFFFFFFFFFFFFFFFFFFFFFFFFFFFFFFFFFFFFFFFFFFFFF FFFFFFF...
I was able to pull this much asphalt out by hand, because it just wasn't stuck down any more.
Rust around the drain hole, too.
No idea what that access hatch or the threaded inserts next to it are for.

It opens into the frame rail.
Bleah.


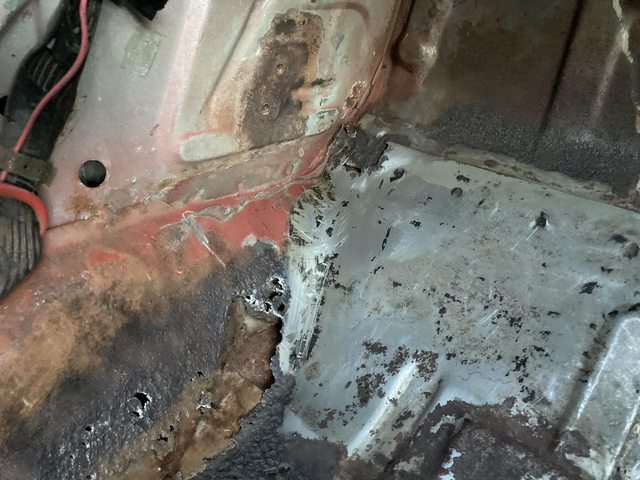
Shifting over to the passenger side, I decided to remove all of the asphalt on that side around the ECU area, since some of it didn't seem to be stuck down so well. No major issues, thankfully. A little surface rust.
and one small area of pinholes.
This is after wire brushing. IT *was* just one pinhole.
Cleaned, and rust converter applied:

I just welded the pinholes up, and went to town with zinc primer.

I'll top coat it with some Rustoleum "Cherry Red" before I'm done.
07-21-21, 06:15 PM
#188
I also noted some rust up in the air inlet at the top of the dash:
:argh:
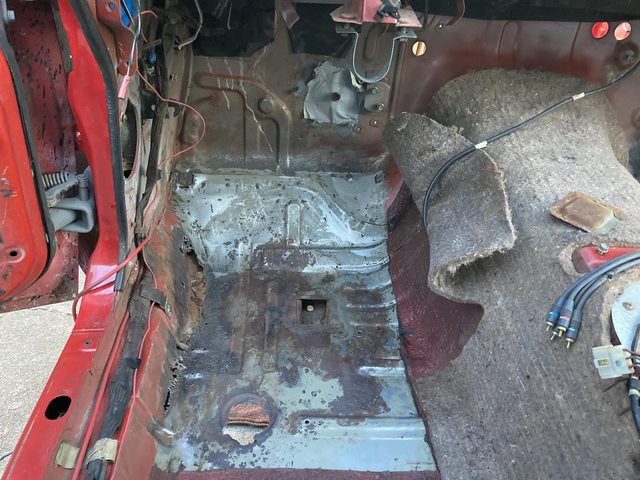
Back on the driver's side, I wanted most of that **** up and gone:
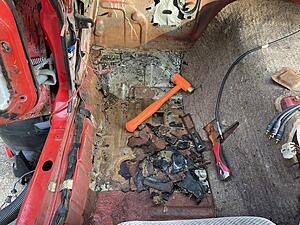
Another spot up where the firewall joins the floor:
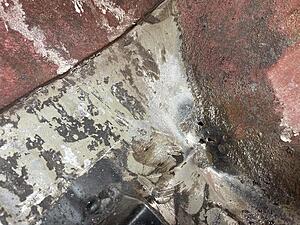
The floor bit after poking it a bunch:

Cleaned up with some acetone, and some wire brushing:
I went to town on it all with rust converter afterward.
The good news is that seems to be non-structural, and the steel inside/underneath appears to be fine. It's just this bit right here. As far as I can tell, the leaks form the rust in the cowl, plus the jute underlayment acting like a sponge and holding water there, caused this. I'd guess the car was leaning to the left a bit when it was parked around the side of the house.
Yay, more welding, this time with curves. I'll get that cut out at some point, and start replacing it soon.
I'm really uninterested in putting sponges back down under the carpet, so that will definitely be closed-cell foam or mylar bubble-stuff. The only reason I didn't throw them away in disgust is so I can use them as patterns. The layer on the trans tunnel is fine - water doesn't stay up there. Back carpet is going to have to come out to check that, too.
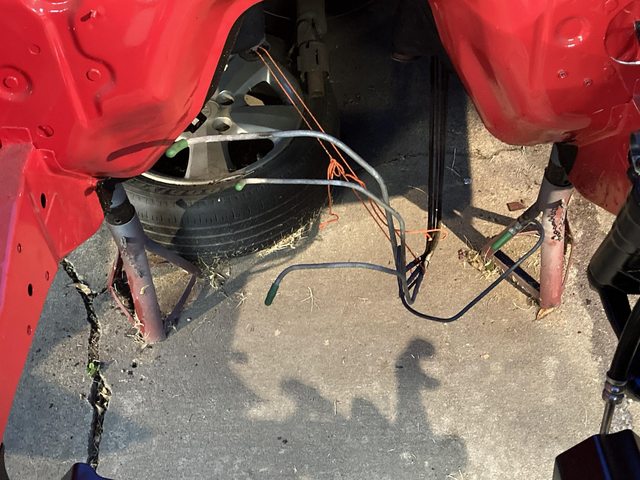
Meanwhile, outside, I removed the trash bag from the fuel and brake hard lines that was protecting them from paint:

They'll need a little cleanup, but not bad. I need to look at the fuel lines on the donor - I suspect the EFI lines are different, but I don't know for certain.
While I was under the car, I noted that I'll need to polish the slip joint a bit:
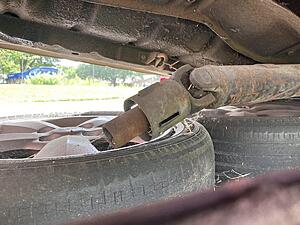
It never ends, does it?
I must be getting serious. I made a list:

Yeah, I could have just used my note-taking app, but I like the immediacy and physicality of the Roadkill-style checklist.
Pffft. I didn't even put the floor rust on the list. D'oh.
edit: I did put it, and a bunch of other stuff on the list. I took the picture when I was just getting started.
Note that first thing on the list, the center link and tie rod ends? That's what I had actually set out to do Saturday, after installing the steering box. I get sidetracked easily. You should see me play open-world video games. I'm like a cat chasing a laser pointer.
:argh:
Back on the driver's side, I wanted most of that **** up and gone:
Another spot up where the firewall joins the floor:
The floor bit after poking it a bunch:
Cleaned up with some acetone, and some wire brushing:

I went to town on it all with rust converter afterward.
The good news is that seems to be non-structural, and the steel inside/underneath appears to be fine. It's just this bit right here. As far as I can tell, the leaks form the rust in the cowl, plus the jute underlayment acting like a sponge and holding water there, caused this. I'd guess the car was leaning to the left a bit when it was parked around the side of the house.
Yay, more welding, this time with curves. I'll get that cut out at some point, and start replacing it soon.
I'm really uninterested in putting sponges back down under the carpet, so that will definitely be closed-cell foam or mylar bubble-stuff. The only reason I didn't throw them away in disgust is so I can use them as patterns. The layer on the trans tunnel is fine - water doesn't stay up there. Back carpet is going to have to come out to check that, too.
Meanwhile, outside, I removed the trash bag from the fuel and brake hard lines that was protecting them from paint:
They'll need a little cleanup, but not bad. I need to look at the fuel lines on the donor - I suspect the EFI lines are different, but I don't know for certain.
While I was under the car, I noted that I'll need to polish the slip joint a bit:
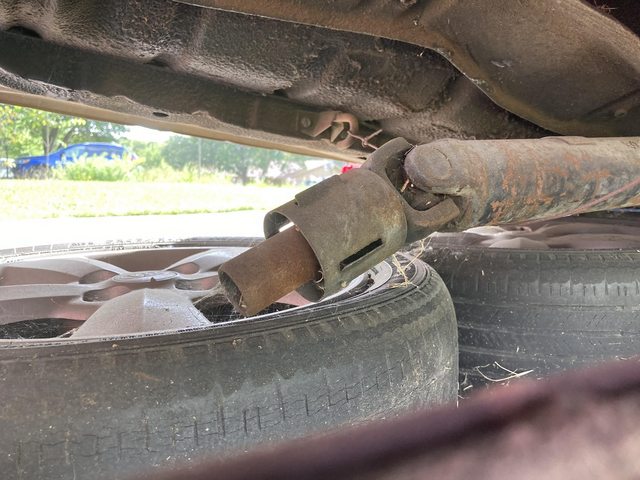
It never ends, does it?
I must be getting serious. I made a list:

Yeah, I could have just used my note-taking app, but I like the immediacy and physicality of the Roadkill-style checklist.
Pffft. I didn't even put the floor rust on the list. D'oh.
edit: I did put it, and a bunch of other stuff on the list. I took the picture when I was just getting started.
Note that first thing on the list, the center link and tie rod ends? That's what I had actually set out to do Saturday, after installing the steering box. I get sidetracked easily. You should see me play open-world video games. I'm like a cat chasing a laser pointer.
07-22-21, 02:09 AM
#189
Rotary Enthusiast
For example I can edit this reply
But once you reply to my reply, I can't
Last edited by Toruki; 07-22-21 at 02:27 AM. Reason: Editing for the sake of editing
07-22-21, 12:09 PM
#190
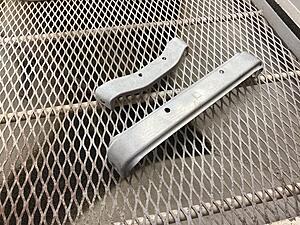
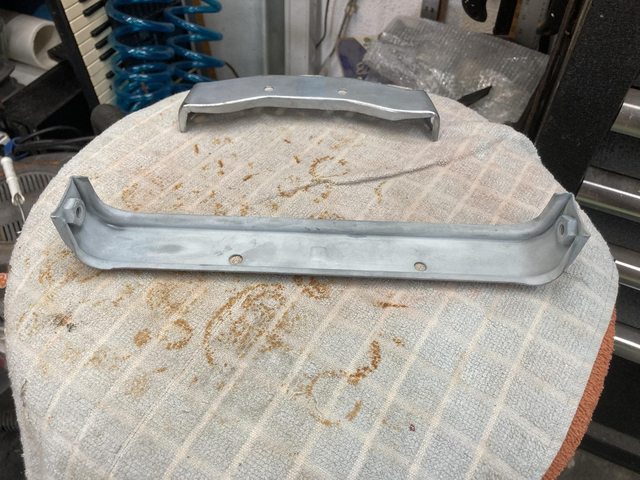
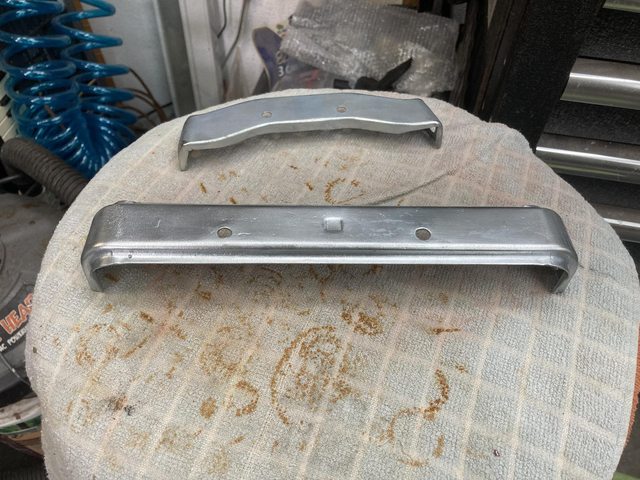
While I was ripping out more of the interior, I grabbed some brackets and whatnot to refurbish.
These are the mounting brackets for the lower center dash plastics - the bit around the radio and AC controls, down to around the shifter.
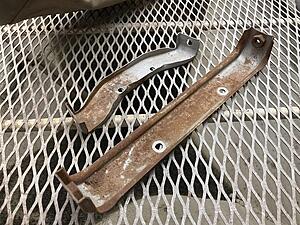
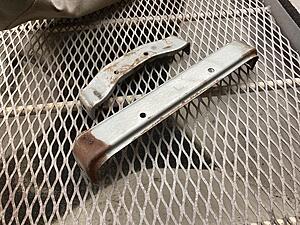
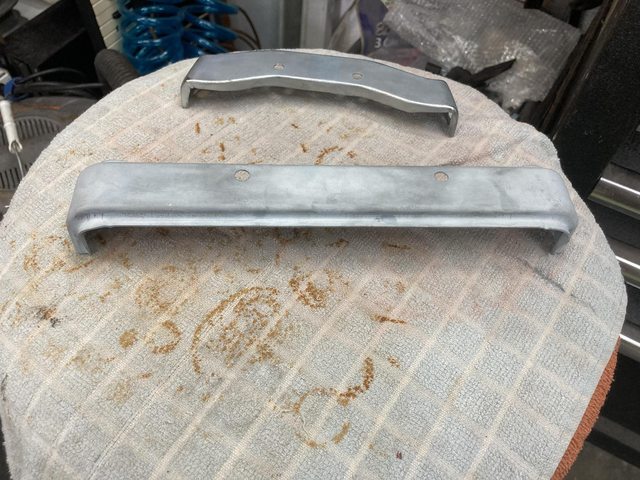
Not bad, but they picked up some rust along the way.
Clean:
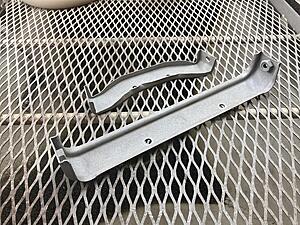
Polished:
Small one plated:

(I left it in too long and it over-plated, making the surface finish rougher, but, oh, well.)
I went with the "blue" passivate on these pieces:
It's a lot more obvious in person - the iridescence shows up nicely.
These are the mounting brackets for the lower center dash plastics - the bit around the radio and AC controls, down to around the shifter.
Not bad, but they picked up some rust along the way.
Clean:
Polished:

Small one plated:

(I left it in too long and it over-plated, making the surface finish rougher, but, oh, well.)
I went with the "blue" passivate on these pieces:
It's a lot more obvious in person - the iridescence shows up nicely.
07-22-21, 12:10 PM
#191
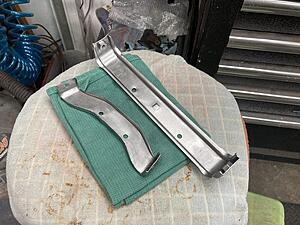
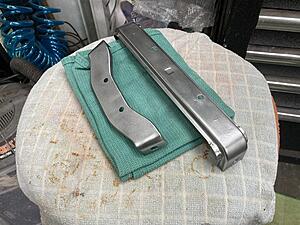
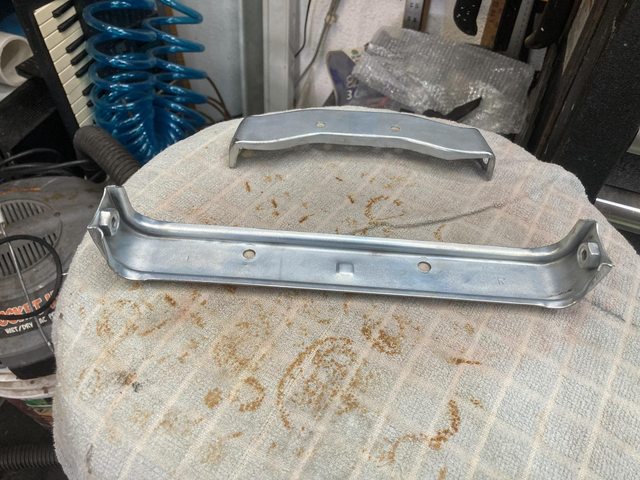
The bigger bracket took some fiddling to get the inside corners plated to my satisfaction.
All plated:

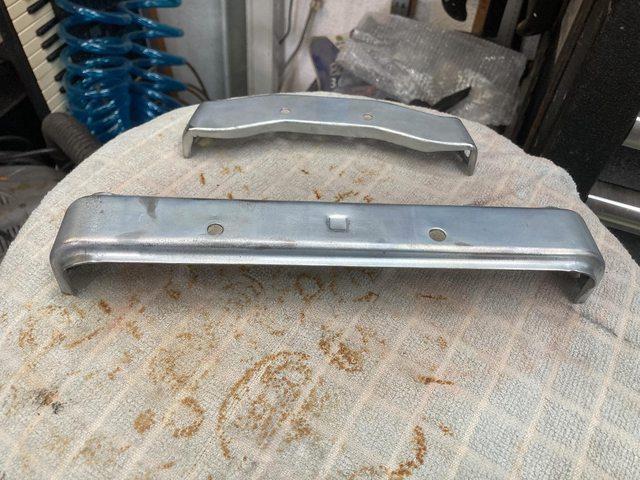
Polish:
And blue chromate:

I'm happy with that.
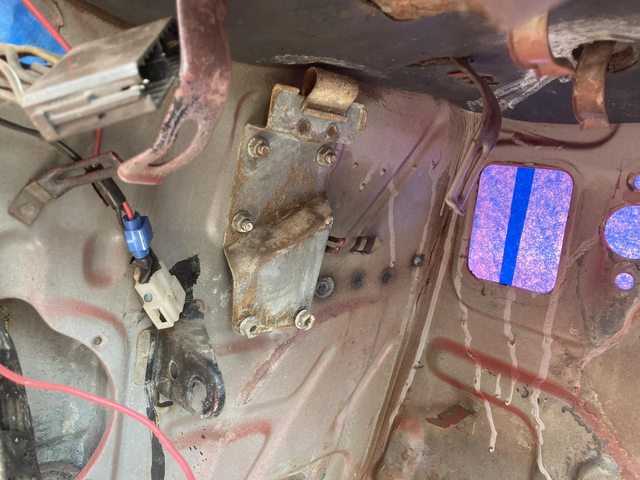
This is mainly a reference photo for me so I know where that bracket came from and how it was fitted:

I took it out to paint that area.
Speaking of, I pulled all the tape sealing the holes in the firewall from the inside (for when I painted the engine bay) and taped the from the *outside* to paint the firewall inside.

Then, to the priming of the firewall (and floor):
Made sure to get up in that air inlet as well:

All plated:
Polish:

And blue chromate:
I'm happy with that.
This is mainly a reference photo for me so I know where that bracket came from and how it was fitted:
I took it out to paint that area.
Speaking of, I pulled all the tape sealing the holes in the firewall from the inside (for when I painted the engine bay) and taped the from the *outside* to paint the firewall inside.
Then, to the priming of the firewall (and floor):


Made sure to get up in that air inlet as well:
 07-22-21, 12:11 PM
#192
The Rustoleum "Gloss Cherry" red I picked up isn't far off the Mazda Sunrise Red, or at least the version I got from AutoColor Library/TCP Global
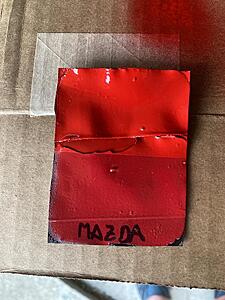
(Mazda Sunrise red on bottom, Cherry Red on top)
Close enough for the interior, especially since most of it will be hidden. Honestly,most of this could be any color, but if I'm buying paint anyway, might as well get close as I can.
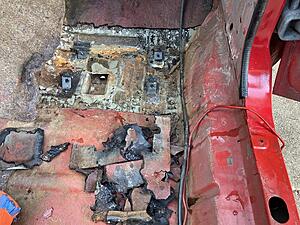
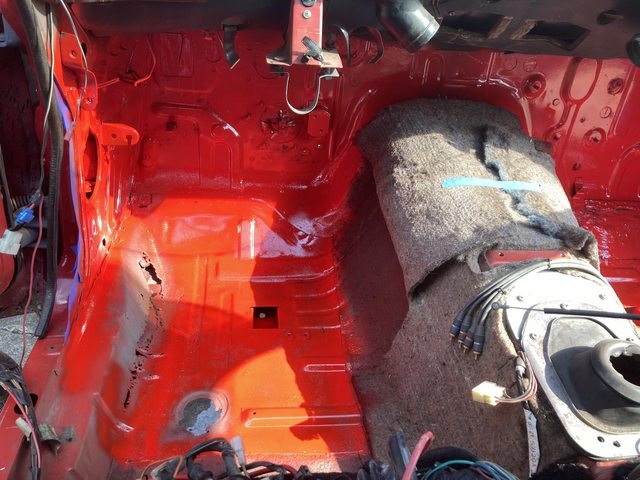
Partway through I realized I could actually do most of the driver's floor, too:

you can see I've already put down a light coat of red further up.
After a second coat:
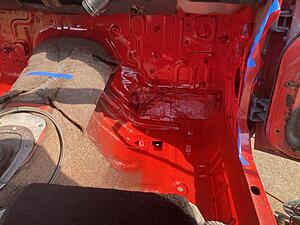

Looks nice!
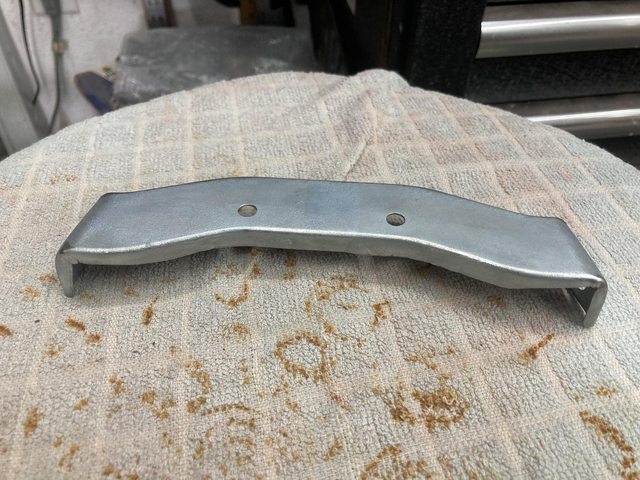
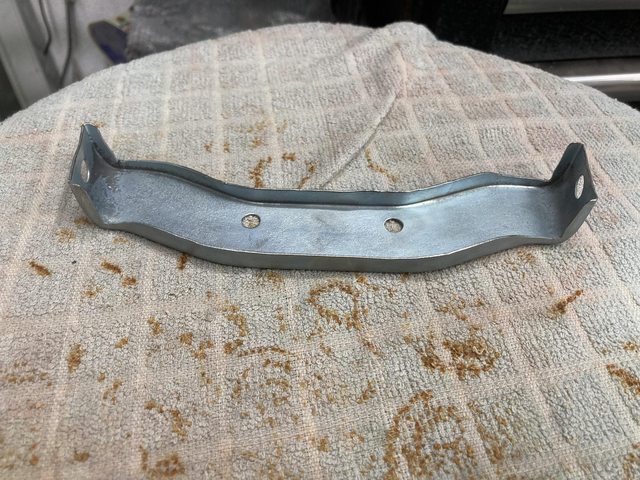
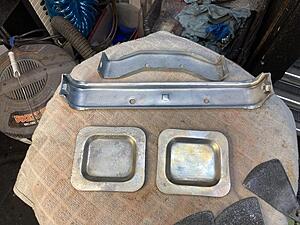
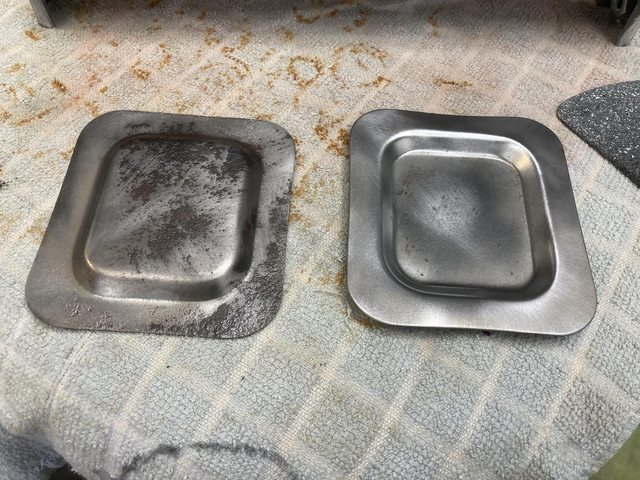
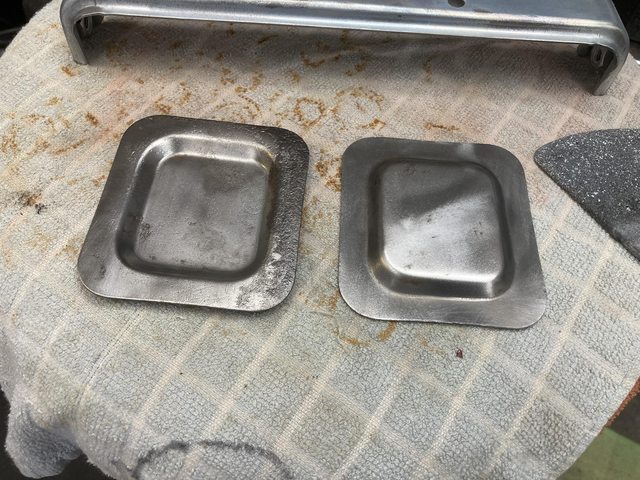
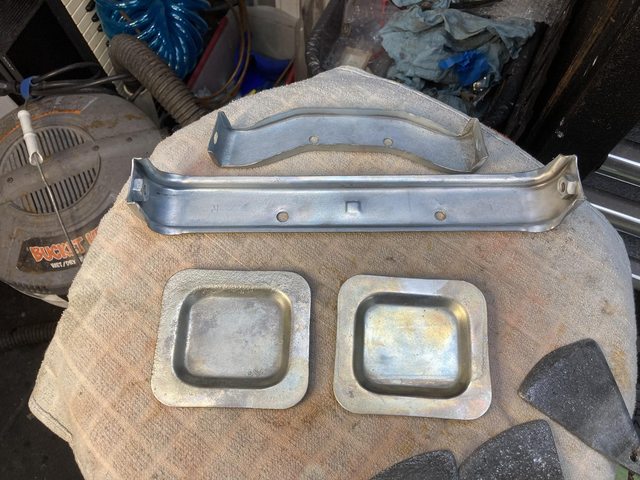
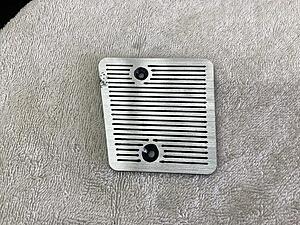
In between coats of paint and such, I also tackled the block-off plates for the holes in the floor:
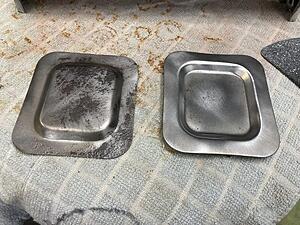
Initially I just ran them through the wire wheel. That proved to be inadequate on the pitted one. The wire brush just couldn't get the rust out of the pits without a lot more work, so that one got a trip to the media blaster, and I blasted just those areas, then back to the wire wheel for smoothening.
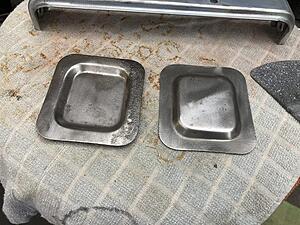
So of course, I started plated the other one while doing all that.
It took a little jury-rigging, but it went OK:

I should have taken pictures of the little wire cradle I made to hold these, since they had no holes to hook into.
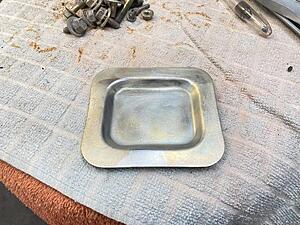
The pitted one came out OK, too:
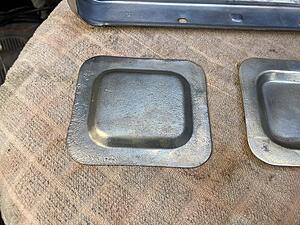
All the plated pieces from this session:

(Mazda Sunrise red on bottom, Cherry Red on top)
Close enough for the interior, especially since most of it will be hidden. Honestly,most of this could be any color, but if I'm buying paint anyway, might as well get close as I can.
Partway through I realized I could actually do most of the driver's floor, too:
you can see I've already put down a light coat of red further up.
After a second coat:

Looks nice!
In between coats of paint and such, I also tackled the block-off plates for the holes in the floor:
Initially I just ran them through the wire wheel. That proved to be inadequate on the pitted one. The wire brush just couldn't get the rust out of the pits without a lot more work, so that one got a trip to the media blaster, and I blasted just those areas, then back to the wire wheel for smoothening.
So of course, I started plated the other one while doing all that.
It took a little jury-rigging, but it went OK:
I should have taken pictures of the little wire cradle I made to hold these, since they had no holes to hook into.
The pitted one came out OK, too:


All the plated pieces from this session:
 07-22-21, 12:12 PM
#193
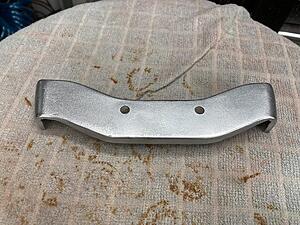
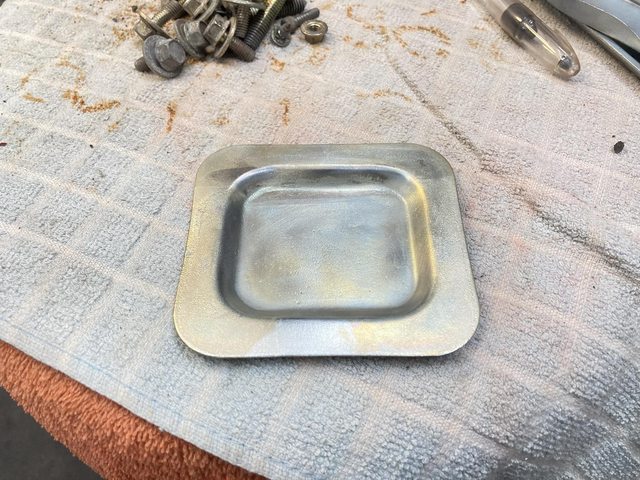
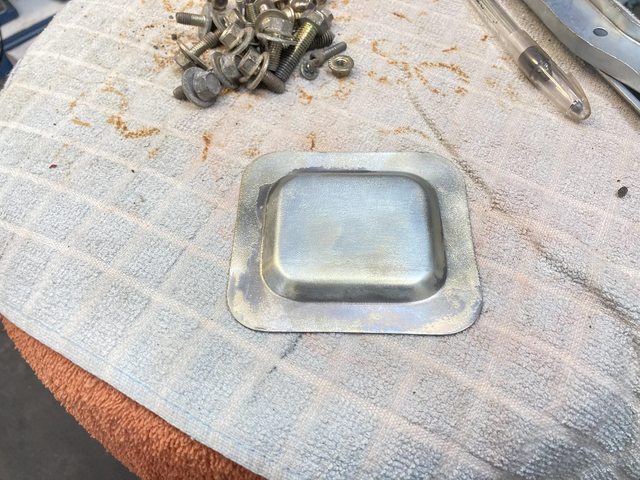
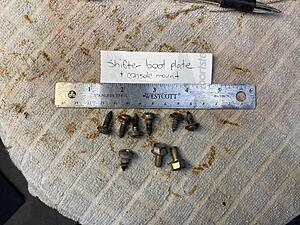
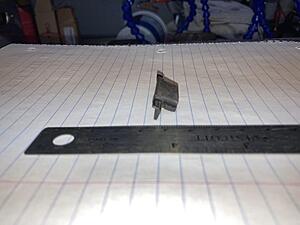
I also worked on the shifter seal plate. Folks, never underestimate the power of a grinder with a wire wheel:
For reference, that's supposed to be mostly flat.
After a little hammer and dolly work, I got it back to where it should be:
I ran out of time (and energy) to plate that piece, but I'll get to it. For one thing, I need to get a larger shallow tray to use to dunk it in the chromate.
The funny thing is that I really had started the day with the intention of refurbishing the center link.


Ah, well, I'll get to it.
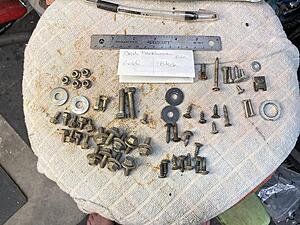
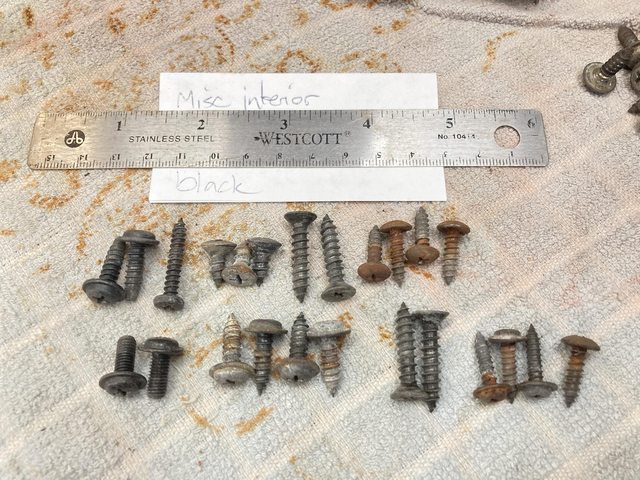
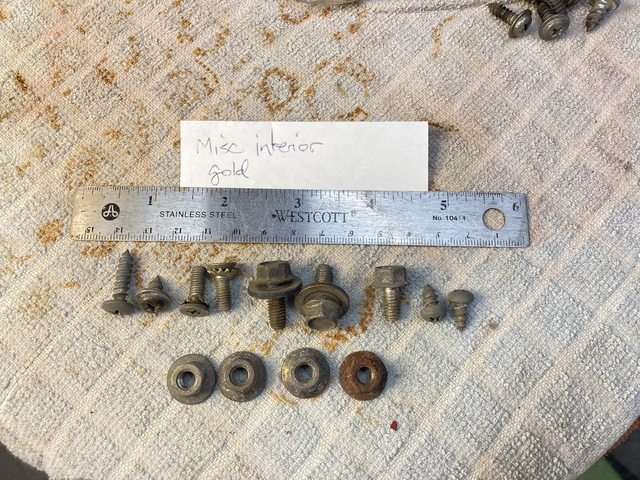
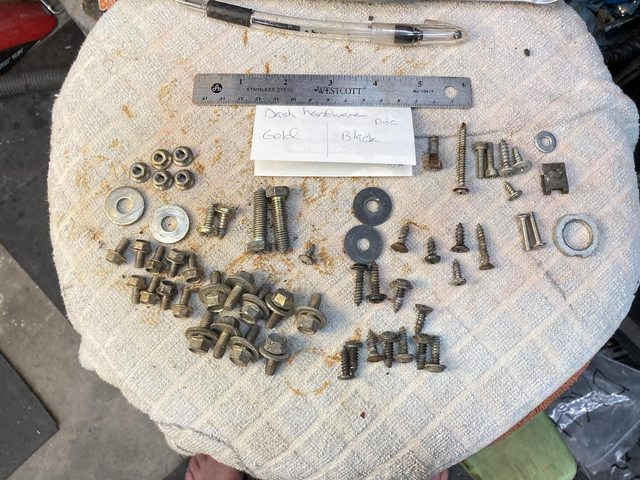
I'm gathering another pile of hardware to plate in the barrel, but it's coming from various areas, so some reference photos for what came from where, for myself:


For the stuff that was still in decent shape, I tried polishing them in the tumbler with walnut shell:
Not bad after 10 minutes:
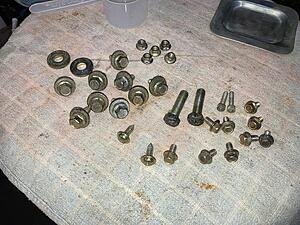
I stuck them back in for another 20 minutes, but have yet to make my way back out to the garage to see how it went, but, of course, I will.
For reference, that's supposed to be mostly flat.
After a little hammer and dolly work, I got it back to where it should be:

I ran out of time (and energy) to plate that piece, but I'll get to it. For one thing, I need to get a larger shallow tray to use to dunk it in the chromate.
The funny thing is that I really had started the day with the intention of refurbishing the center link.
Spoiler
I'm gathering another pile of hardware to plate in the barrel, but it's coming from various areas, so some reference photos for what came from where, for myself:


For the stuff that was still in decent shape, I tried polishing them in the tumbler with walnut shell:

Not bad after 10 minutes:
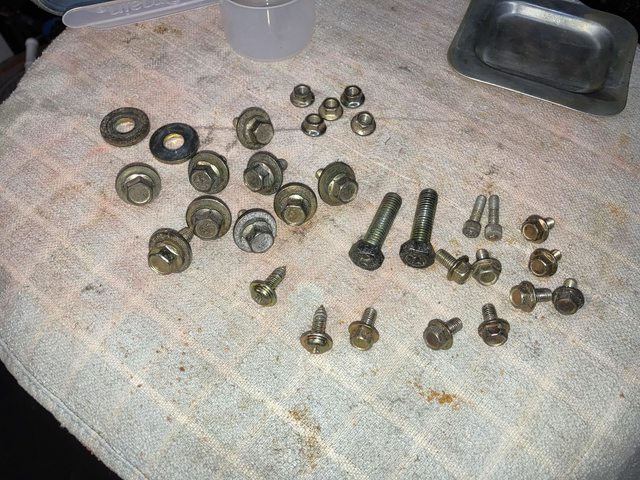
I stuck them back in for another 20 minutes, but have yet to make my way back out to the garage to see how it went, but, of course, I will.
07-22-21, 09:19 PM
#194
It's either that or time-limited. Probably what you suggest. I suppose I could have contacted a mod to edit or allow me to edit the posts, but it was easy enough to just post again, as messy as it looks. I was already editing the same posts on another forum, so just copy-pasted.
07-26-21, 12:08 PM
#195
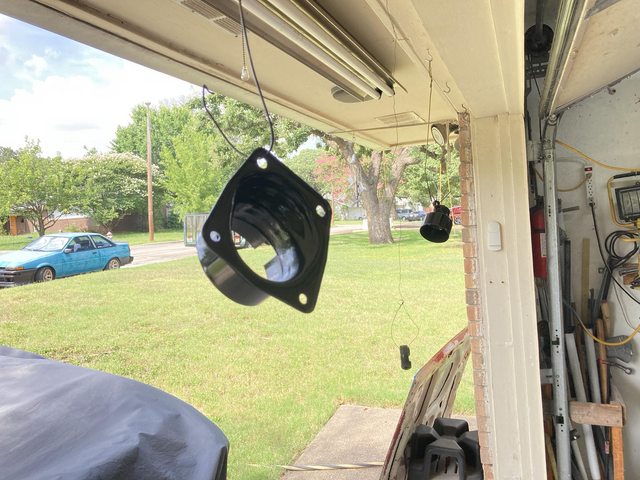
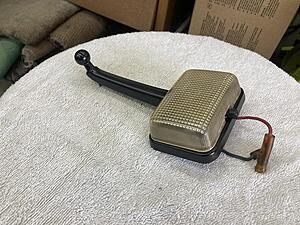
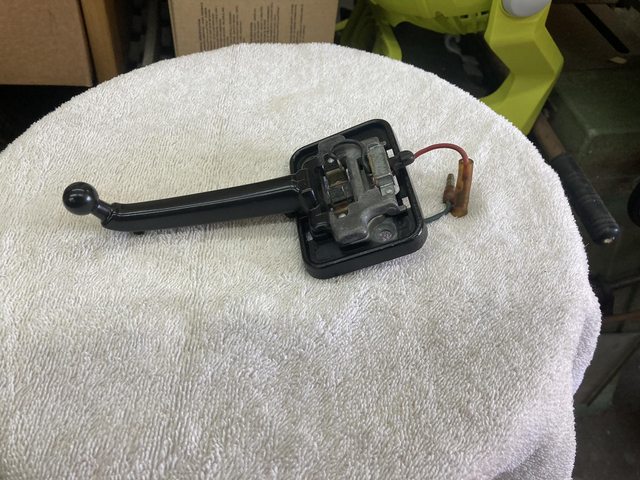
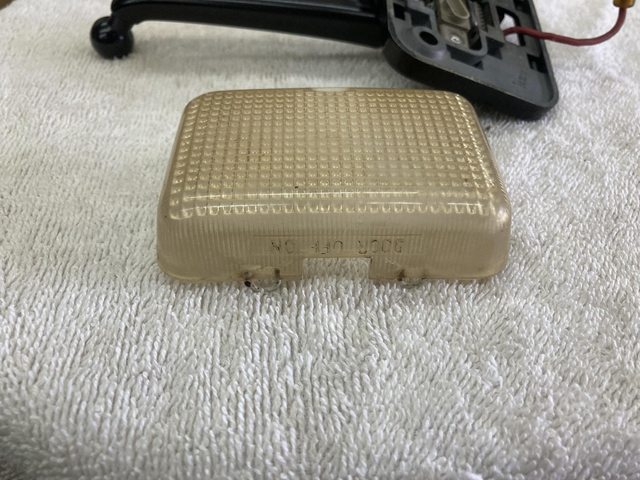
Here's the inside mirror mount done:

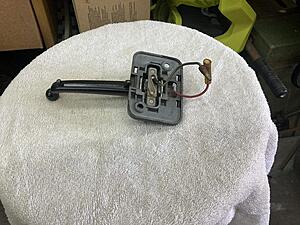
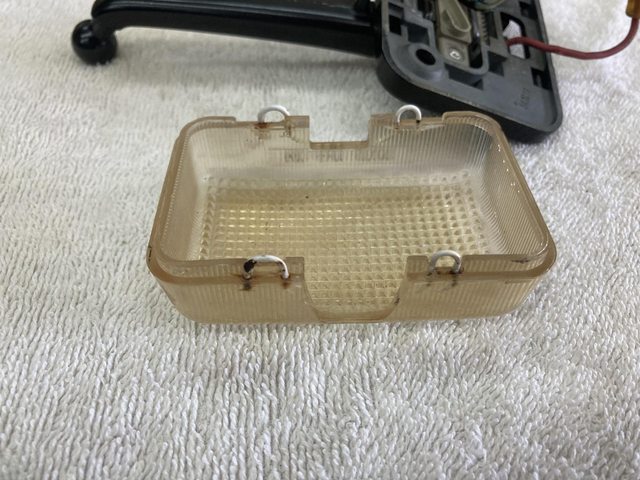
The lens is pretty crappy:

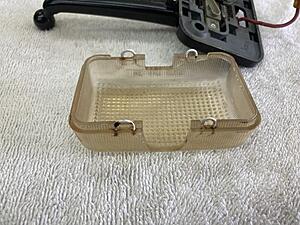
Not sure if anything can be done to "un-yellow" it.
You can see where the tabs broke of many years ago. Being a model builder, I just drilled little holes in the right place and super-glued in cut off ends of paper clips, bent just the right amount. The did and still does work great, other than the bit of rust, there.
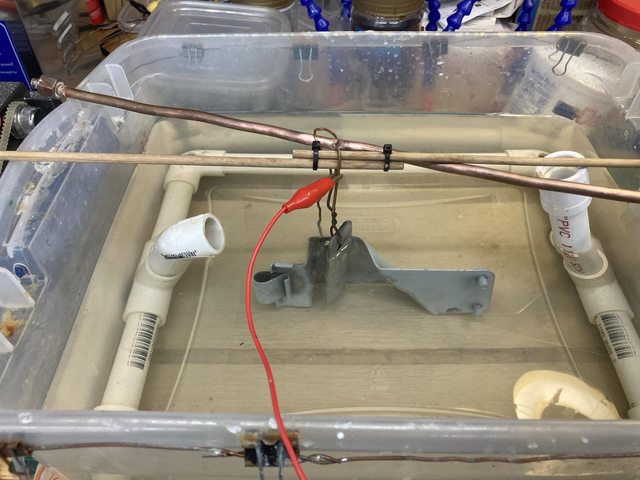
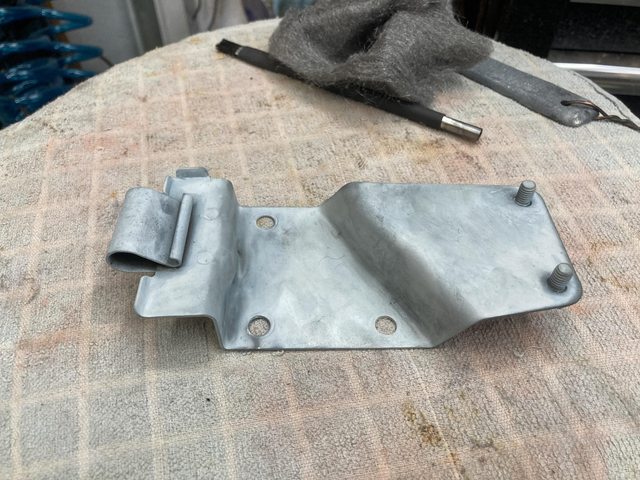
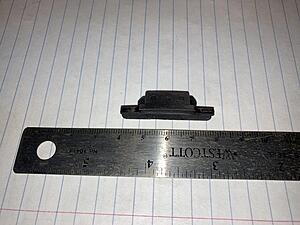
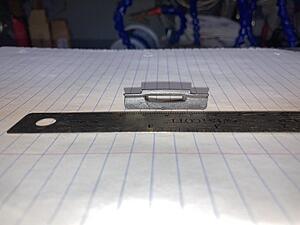
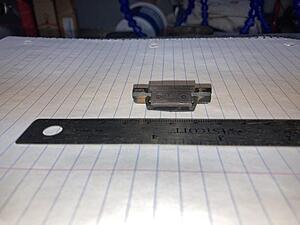
Had to get t alittle targeted plating that relay bracket. It just did not want to plate in that inset.

Eventually, though, it came down to "turn it up." I wasn't using enough current for the part's size.

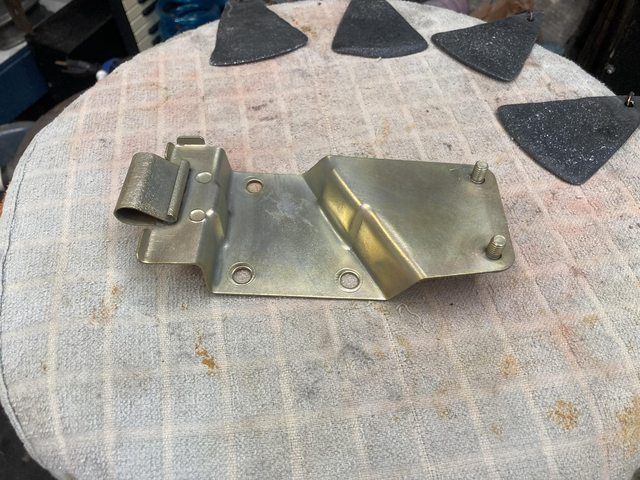
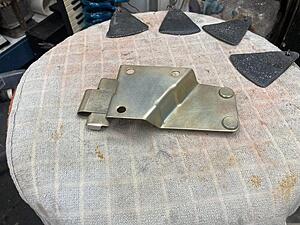
It came out nicely.
I added about 1/2 a bottle of corn syrup to the mix last week. It's in some of the recipes as a brightener, and I noted that the brightener that I bought from Caswell also made the mixture sweeter (don't ask - it was accidental.) It actually seems to be working. The parts still need polishing, but not as much. That could be confirmation bias, but I don't think so. In any case, doesn't seem to hurt, and was cheap.
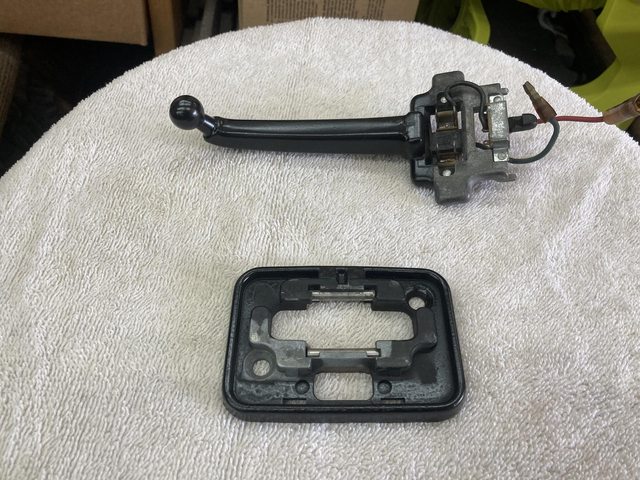

The lens is pretty crappy:
Not sure if anything can be done to "un-yellow" it.
You can see where the tabs broke of many years ago. Being a model builder, I just drilled little holes in the right place and super-glued in cut off ends of paper clips, bent just the right amount. The did and still does work great, other than the bit of rust, there.

Had to get t alittle targeted plating that relay bracket. It just did not want to plate in that inset.
Eventually, though, it came down to "turn it up." I wasn't using enough current for the part's size.
It came out nicely.
I added about 1/2 a bottle of corn syrup to the mix last week. It's in some of the recipes as a brightener, and I noted that the brightener that I bought from Caswell also made the mixture sweeter (don't ask - it was accidental.) It actually seems to be working. The parts still need polishing, but not as much. That could be confirmation bias, but I don't think so. In any case, doesn't seem to hurt, and was cheap.
07-26-21, 12:09 PM
#196
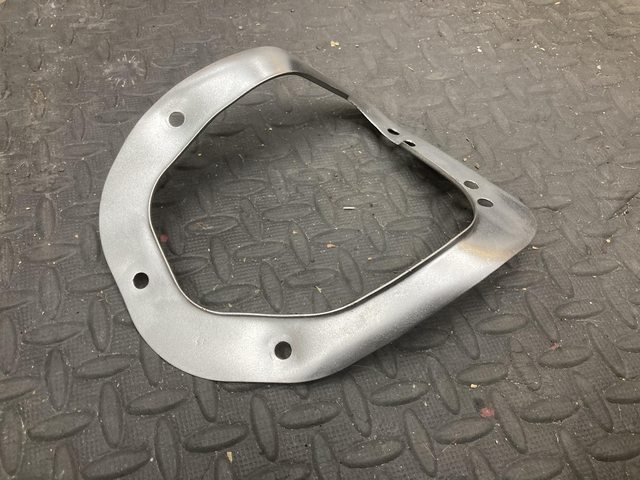
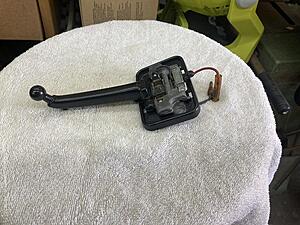
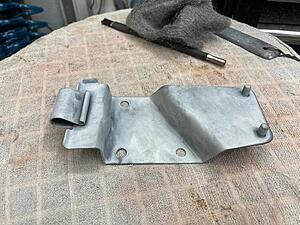
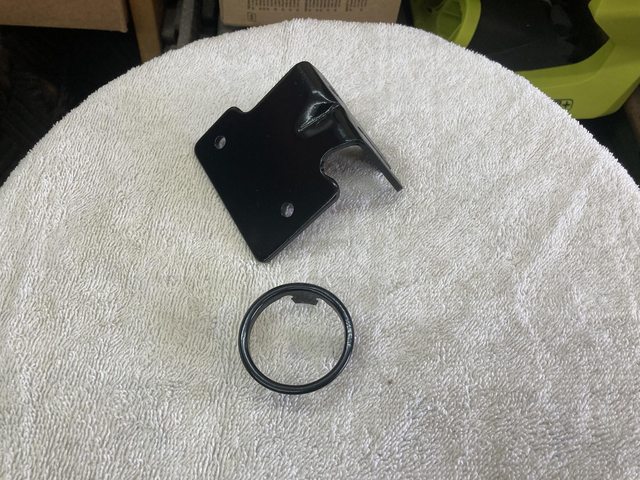
Also, here's the dead pedal pad after sanding.
The little schmutz at the top left is a manufacturing error. I neglected to have the waterjet that cut it start the cut a little bit away from the part, and the initial penetration pitted the surface of the actual part. Fortunately, it's tough to see when it's down in the footwell.
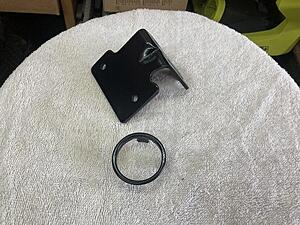
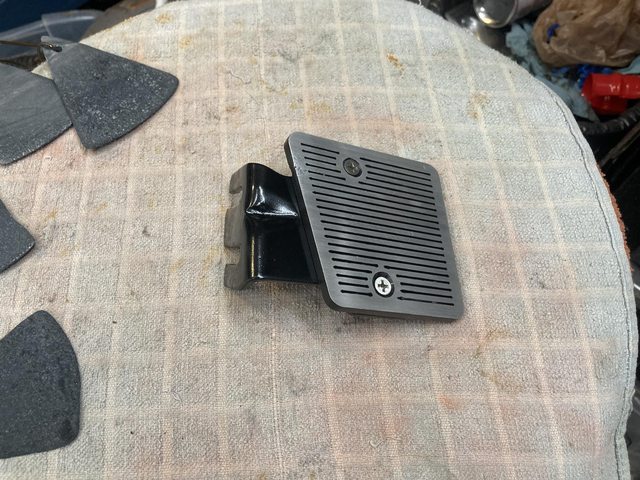
And the dead pedal bracket and ignition trim ring after painting:
Dead pedal reassembled:

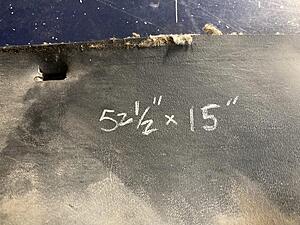
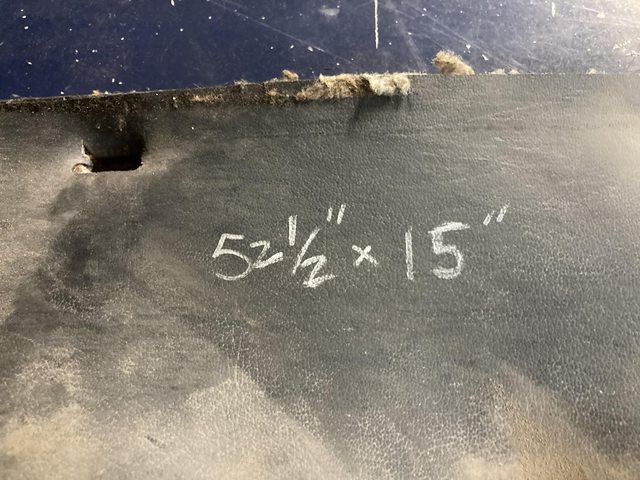
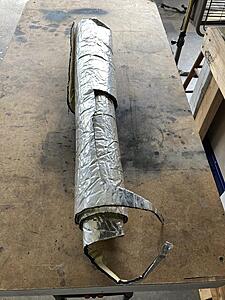
References for me. This is the rough size of the firewall pad:
And I need a couple more of these (grommet for the tabs on the cowl vent):

I think there are 3 of those tabs. May be 4. I may just put heatshrink on the tabs and be done with that. These are NLA, and I don't currently have a 3D printer.
The little schmutz at the top left is a manufacturing error. I neglected to have the waterjet that cut it start the cut a little bit away from the part, and the initial penetration pitted the surface of the actual part. Fortunately, it's tough to see when it's down in the footwell.
And the dead pedal bracket and ignition trim ring after painting:
Dead pedal reassembled:
References for me. This is the rough size of the firewall pad:
And I need a couple more of these (grommet for the tabs on the cowl vent):
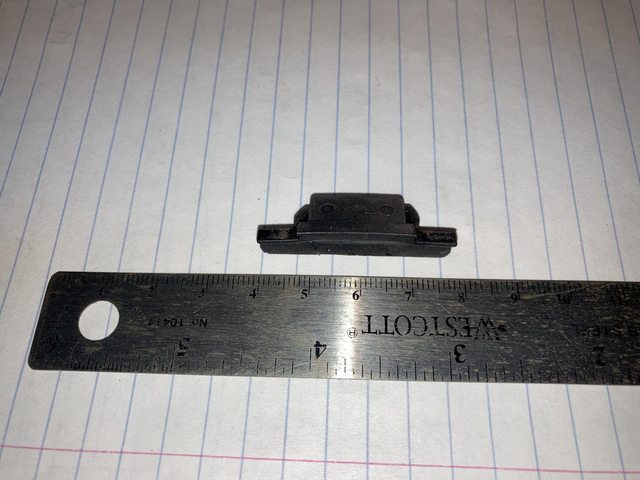
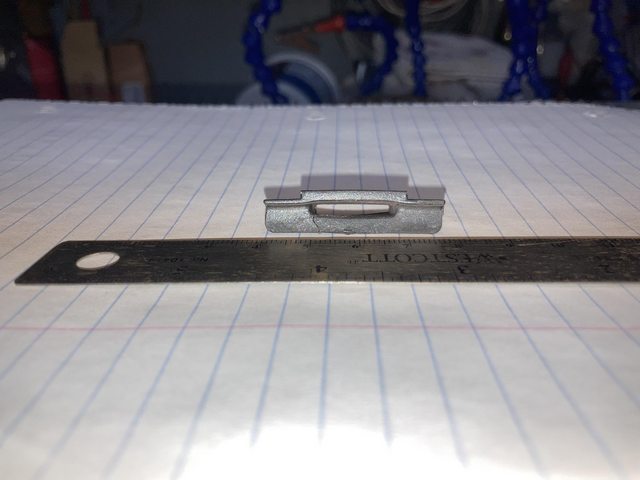
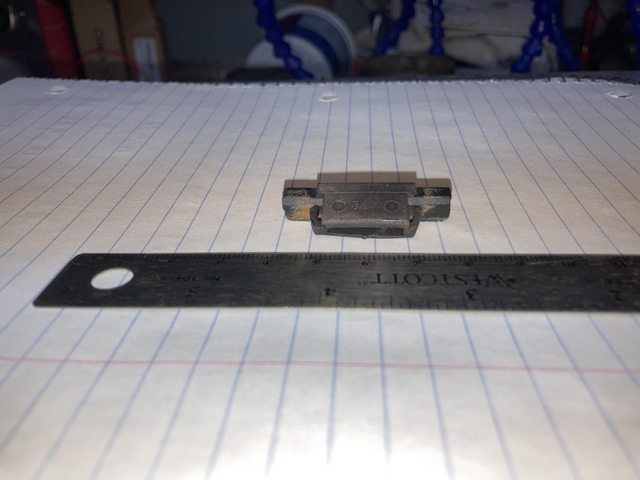
I think there are 3 of those tabs. May be 4. I may just put heatshrink on the tabs and be done with that. These are NLA, and I don't currently have a 3D printer.
07-30-21, 02:11 PM
#197
Some progress, since I worked from home on Thursday, and slipped out into the garage for several hours from time to time when I had a break.
Turned out I bought some of the mylar-backed foam for the AE86, so I have extra of that if I need it.
I bought a roll from China last week, it just needs to get here.
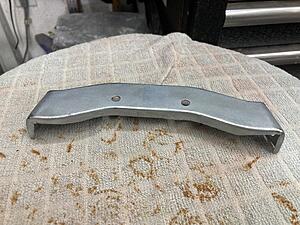
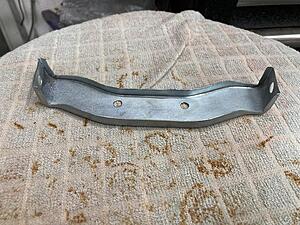
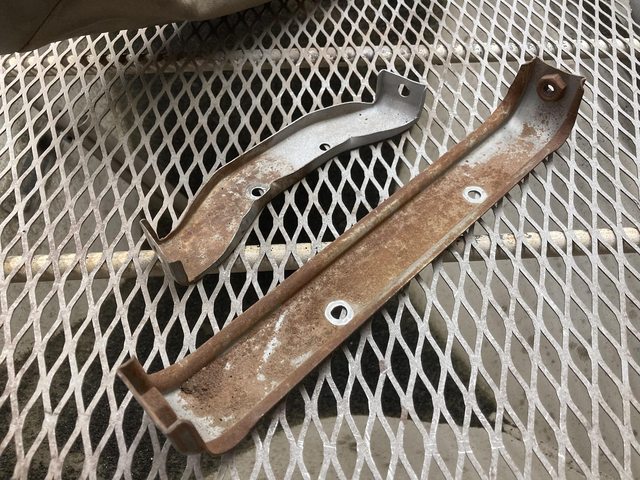
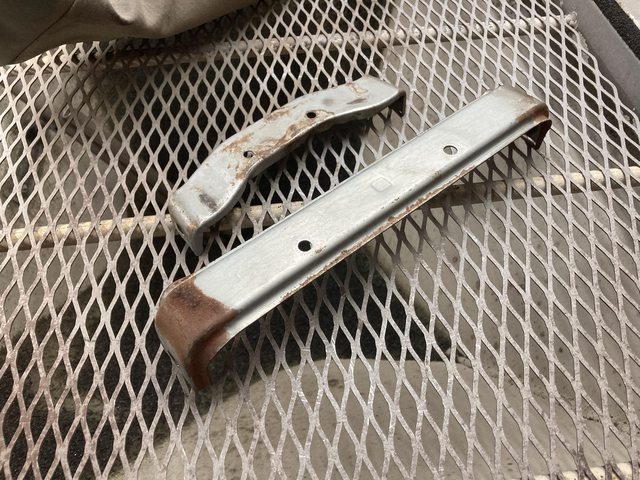
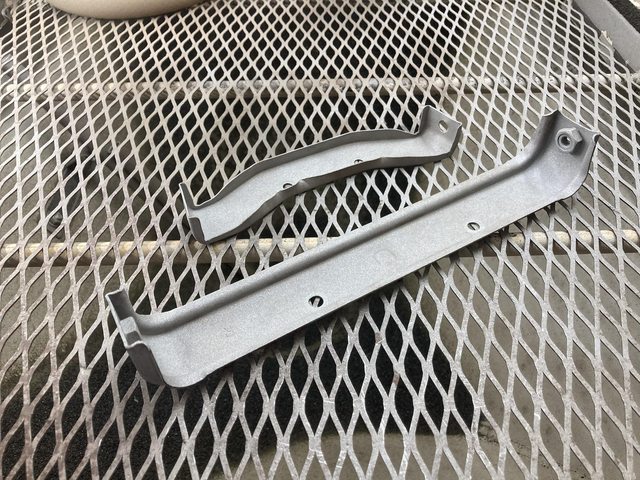
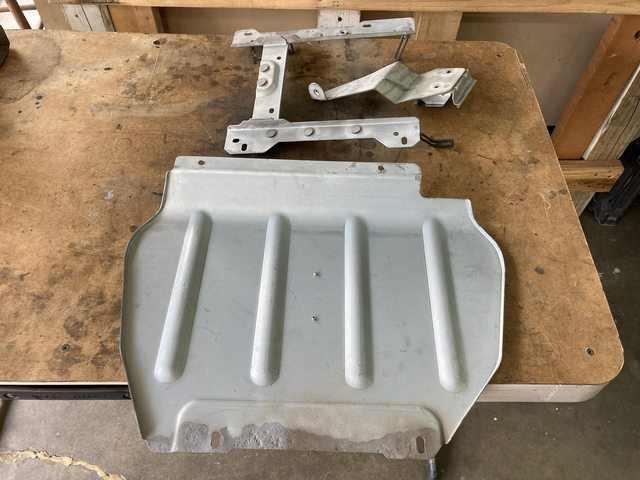
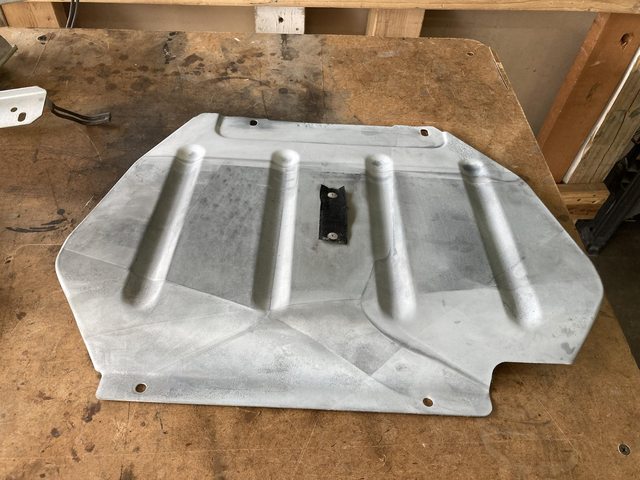
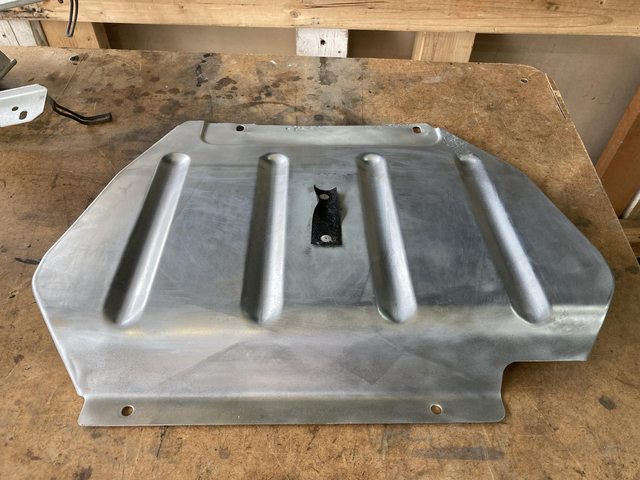
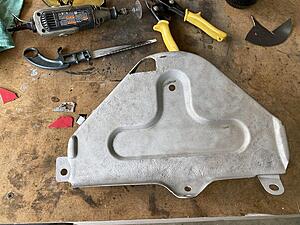
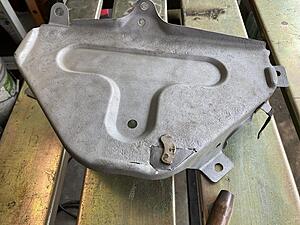
Stuff that I pulled out to work on:

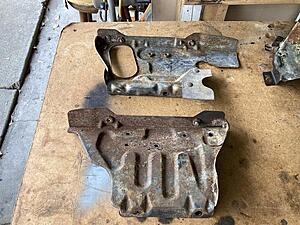
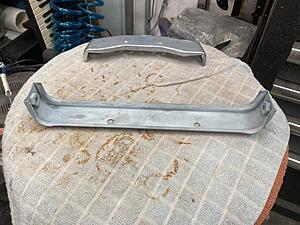
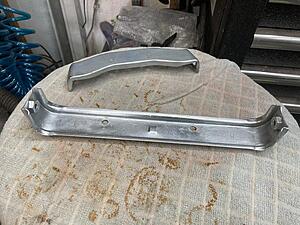
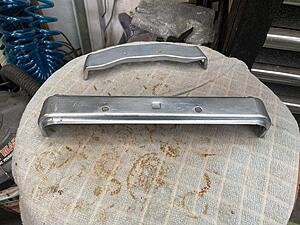
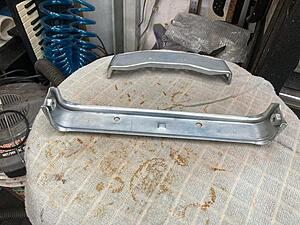
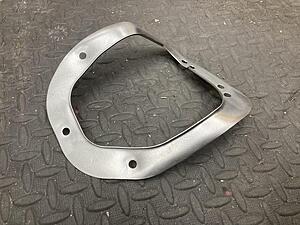
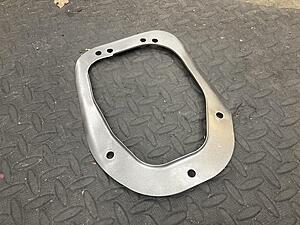
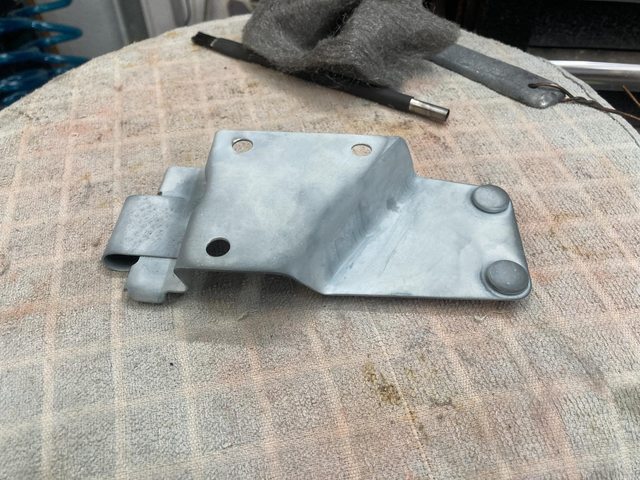
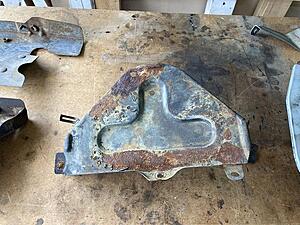
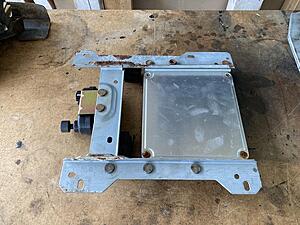
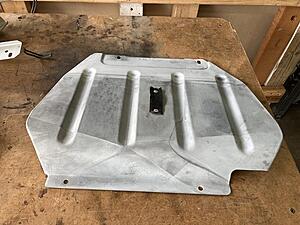
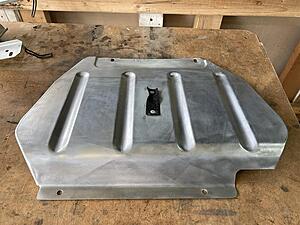
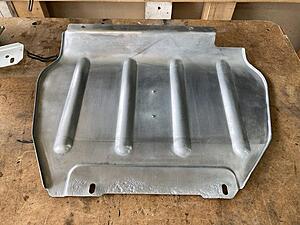
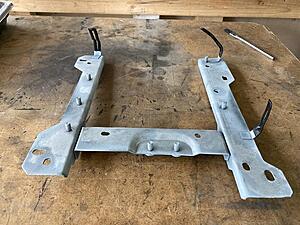
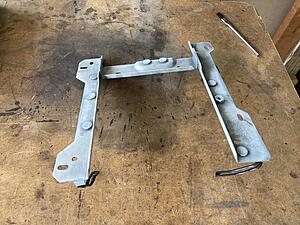
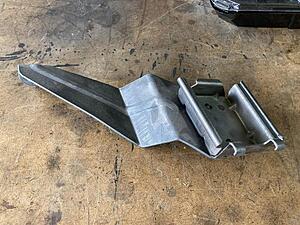
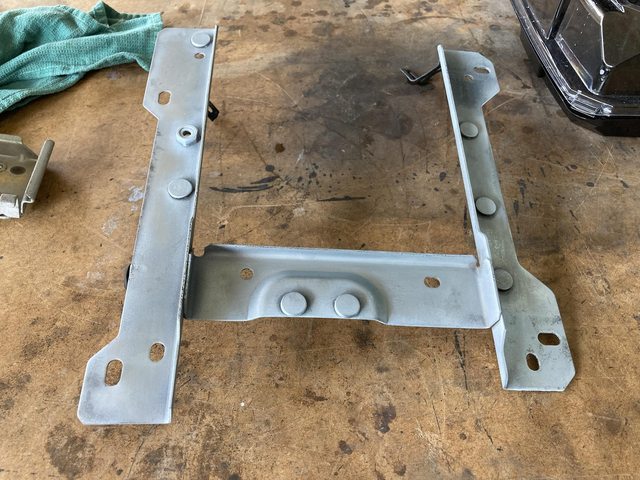
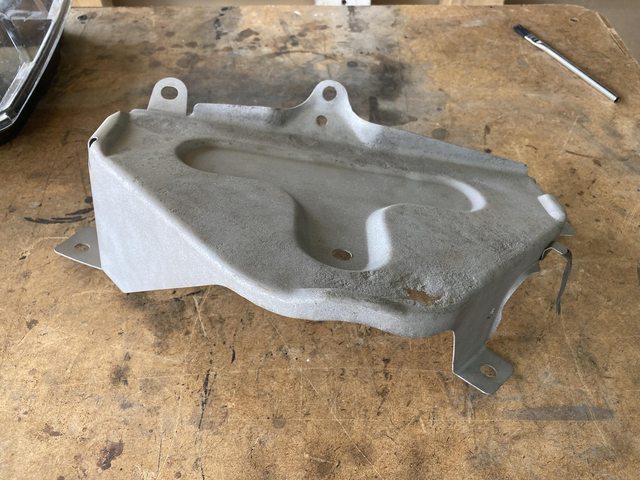
These are the panels that the radiator mounts to, and they attach to the engine side of the core support. The GSL-SE ones are different in that one has bolt holes for the third mount for the airbox, and a hole for said airbox to get cold air from inside of the nose of the car (basically, replacing the airbox is dumb, because it's factory cold air,) and the other has slightly different reliefs for the oil cooler hoses, due to a different oil cooler location.
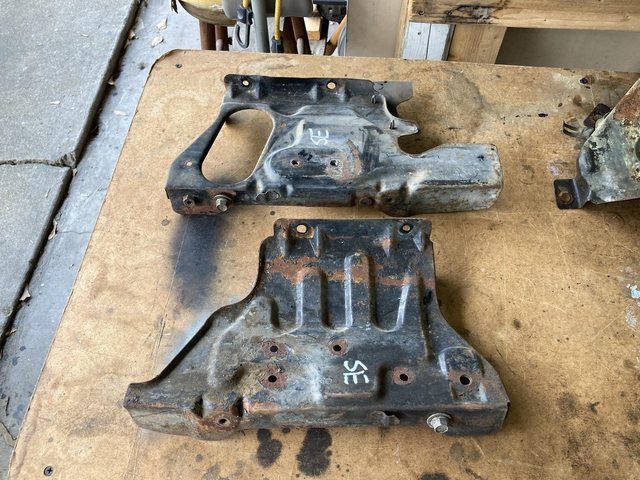
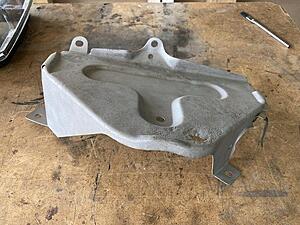
Battery tray:
Bit of a rust through in one corner. The "AWE" is a marking from Awesome Auto Parts, a local you-pull-it yard. My original battery tray was swiss cheese, and I replaced it years ago with this one. I repainted the top (with Plastidip,) but the underside is OEM paint!
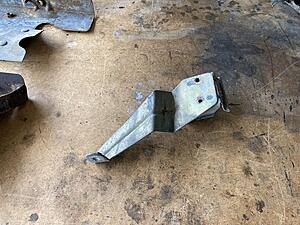
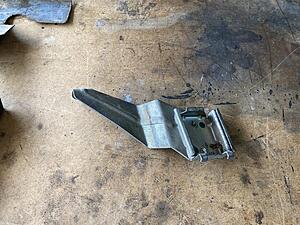
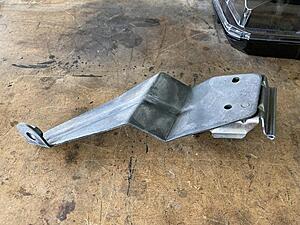
This is the third airbox mount I was talking about above, which also serves as an overflow bottle mount. The overflow bottle mount on the original radiator side piece is just welded to the panel.
ECU and mount:

For those that don't know, this goes under the carpet on the passenger side, so is victim to any moisture that gets under there. Fortunately just a little bit of rust. The plating did it's job for the most part.
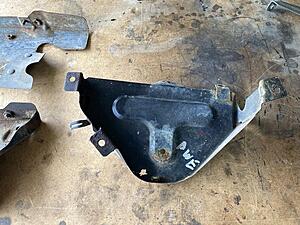
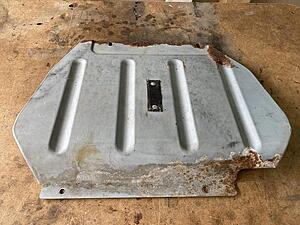
The panel that goes over the ECU, same comments apply.
Turned out I bought some of the mylar-backed foam for the AE86, so I have extra of that if I need it.

I bought a roll from China last week, it just needs to get here.
Stuff that I pulled out to work on:

These are the panels that the radiator mounts to, and they attach to the engine side of the core support. The GSL-SE ones are different in that one has bolt holes for the third mount for the airbox, and a hole for said airbox to get cold air from inside of the nose of the car (basically, replacing the airbox is dumb, because it's factory cold air,) and the other has slightly different reliefs for the oil cooler hoses, due to a different oil cooler location.
Battery tray:


Bit of a rust through in one corner. The "AWE" is a marking from Awesome Auto Parts, a local you-pull-it yard. My original battery tray was swiss cheese, and I replaced it years ago with this one. I repainted the top (with Plastidip,) but the underside is OEM paint!
This is the third airbox mount I was talking about above, which also serves as an overflow bottle mount. The overflow bottle mount on the original radiator side piece is just welded to the panel.


ECU and mount:
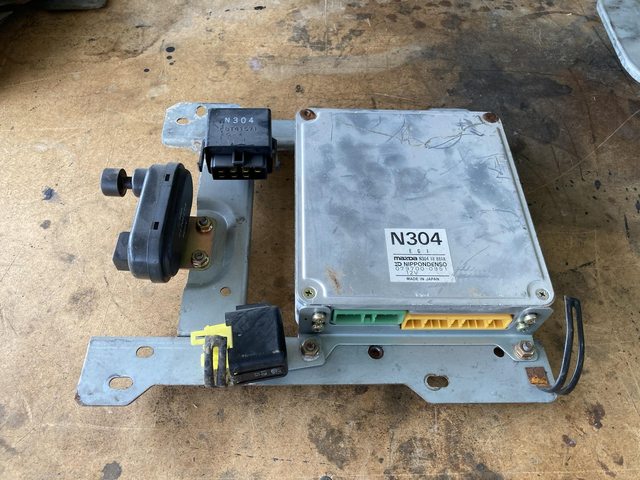

For those that don't know, this goes under the carpet on the passenger side, so is victim to any moisture that gets under there. Fortunately just a little bit of rust. The plating did it's job for the most part.
The panel that goes over the ECU, same comments apply.

 07-30-21, 02:12 PM
#198
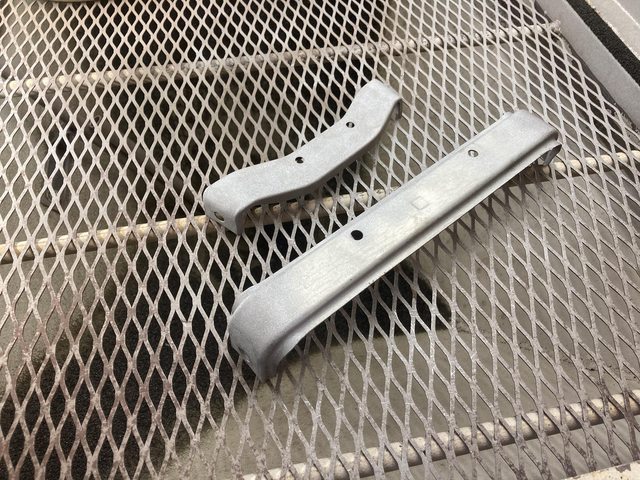
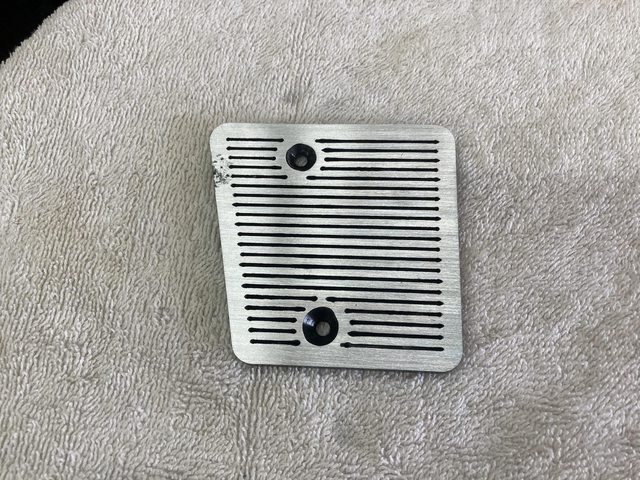
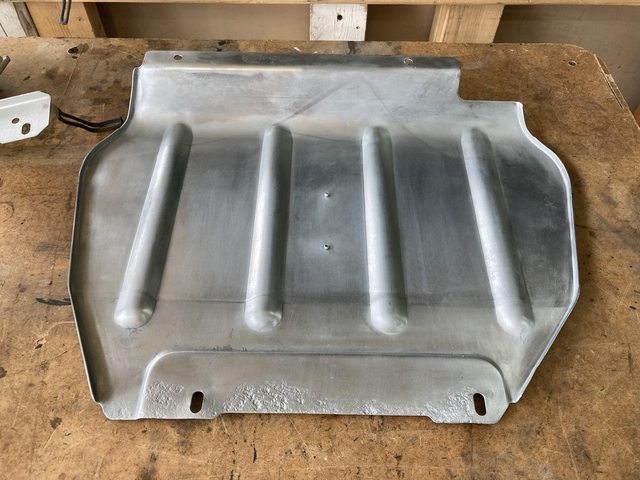
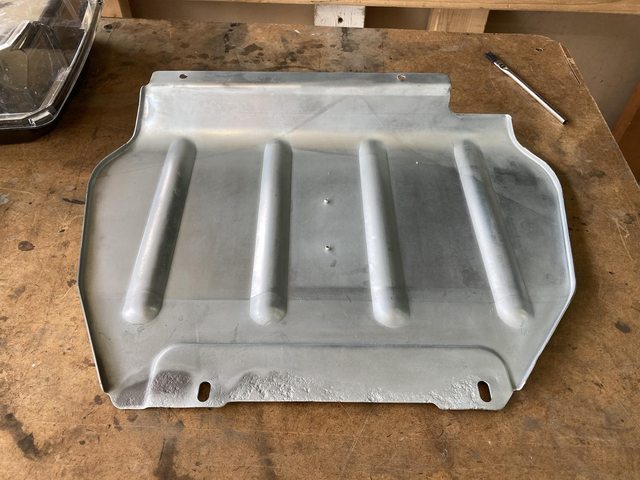
And here's the 3 plated parts after a trip through the blaster:
I basically only hit the areas that were rusty on the ECU parts, working on the theory that they aren't passivated. The airbox bracket I blasted wholesale, at least enough to remove the passivate layer.
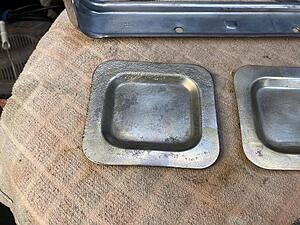
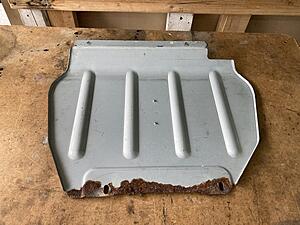
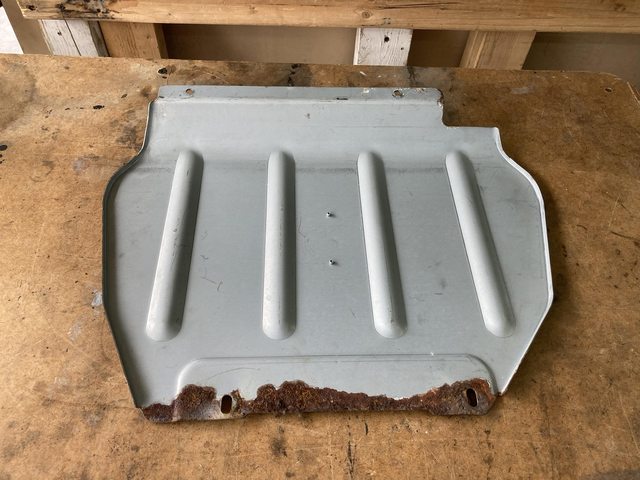
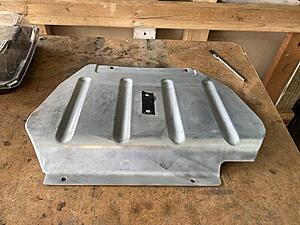
Bit of pitting on the floor plate, but no throughs.
The floor plate didn't fit in my tank, but thankfully I only needed to get the edges, so...
Just to be thorough, I did all four edges:

I actually went back and blasted the pitting a second time after the first round of plating. There appeared to be some schmutz in the pits, which usually mean s I didn't get everything clean enough. Looks like the second time around was adequate.
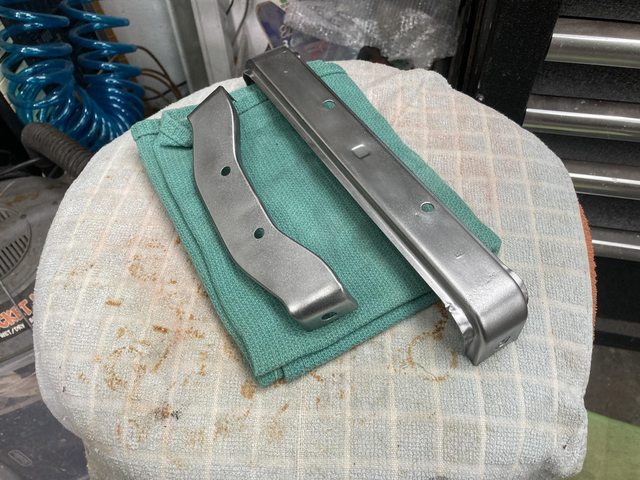
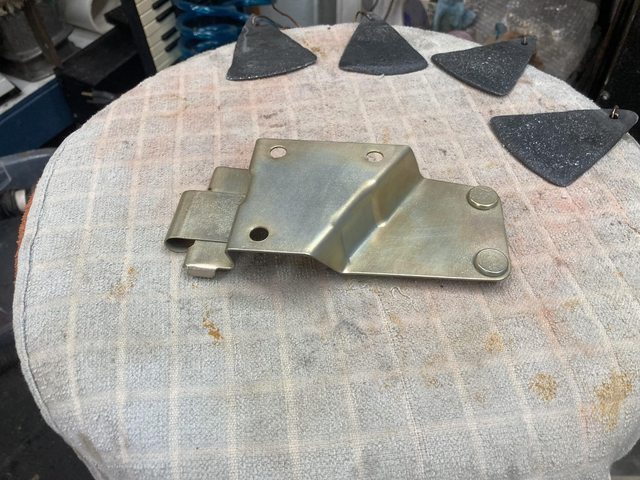
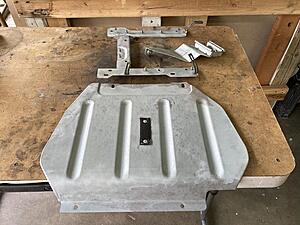
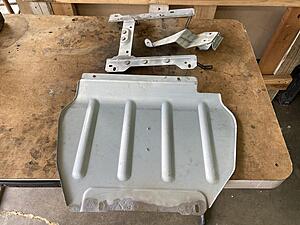
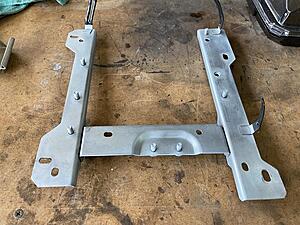
Polished:
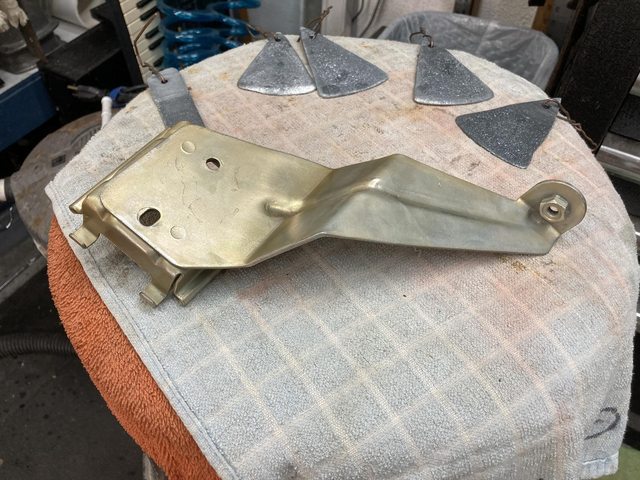
Passivated (blue. I wanted that extra durability the chromate provides):


I basically only hit the areas that were rusty on the ECU parts, working on the theory that they aren't passivated. The airbox bracket I blasted wholesale, at least enough to remove the passivate layer.
Bit of pitting on the floor plate, but no throughs.
The floor plate didn't fit in my tank, but thankfully I only needed to get the edges, so...
Just to be thorough, I did all four edges:
I actually went back and blasted the pitting a second time after the first round of plating. There appeared to be some schmutz in the pits, which usually mean s I didn't get everything clean enough. Looks like the second time around was adequate.
Polished:
Passivated (blue. I wanted that extra durability the chromate provides):

 07-30-21, 02:13 PM
#199
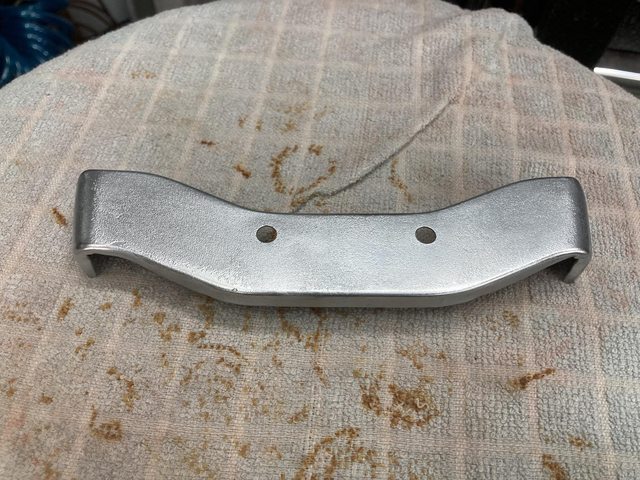
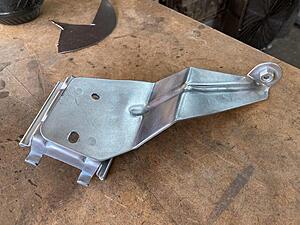
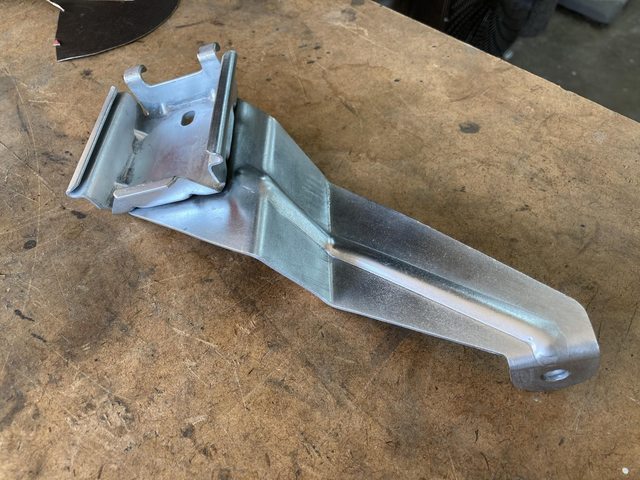
Did the ECU bracket pretty much the same way, but it actually fit in the tank (barely,) so it got done in one go:
After polish and passivate:

I didn't get too involved as far as prettying them up, with either of those pieces, since they're both under the carpet. Just a good functional protective coating is all I'm looking for. They actually came out pretty nice anyway. I mean, I did knock down the dull grey finish they come out of the tank with. I have someprofessional amatuer pride.
On that note, I need some more "fine" steel wool.
The ECU bracket fresh out of the tank:
(It's a little polished from a mid-plate shine-up.)
That took a little creative positioning of the anodes to get inside the boxed section, and under the overhangs, but it seems to have done OK. This part is on full view in the engine bay, so got a little more car.
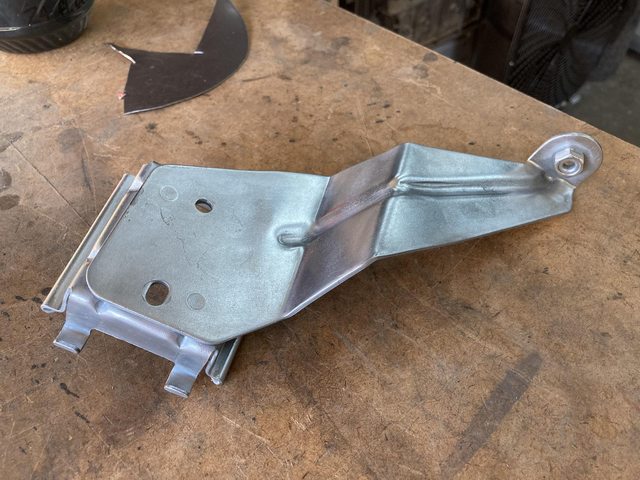
Polished up:

Aaaaaand:


Not bad!

After polish and passivate:
I didn't get too involved as far as prettying them up, with either of those pieces, since they're both under the carpet. Just a good functional protective coating is all I'm looking for. They actually came out pretty nice anyway. I mean, I did knock down the dull grey finish they come out of the tank with. I have some
On that note, I need some more "fine" steel wool.
The ECU bracket fresh out of the tank:


(It's a little polished from a mid-plate shine-up.)
That took a little creative positioning of the anodes to get inside the boxed section, and under the overhangs, but it seems to have done OK. This part is on full view in the engine bay, so got a little more car.
Polished up:
Aaaaaand:

Not bad!
07-30-21, 02:14 PM
#200
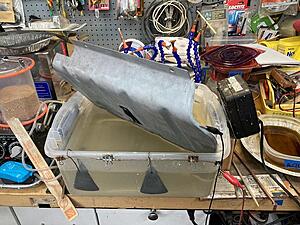
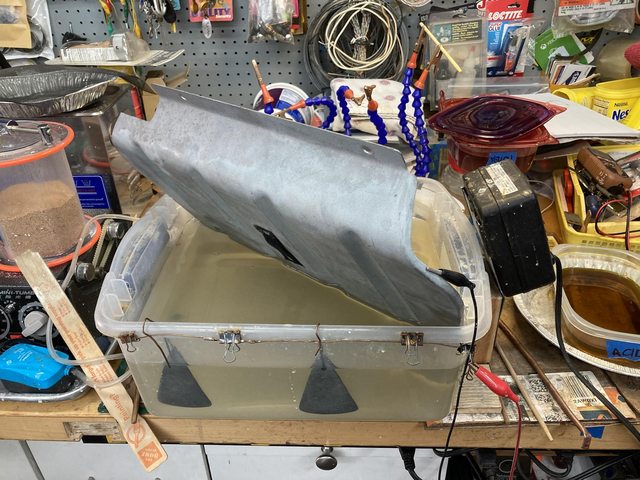
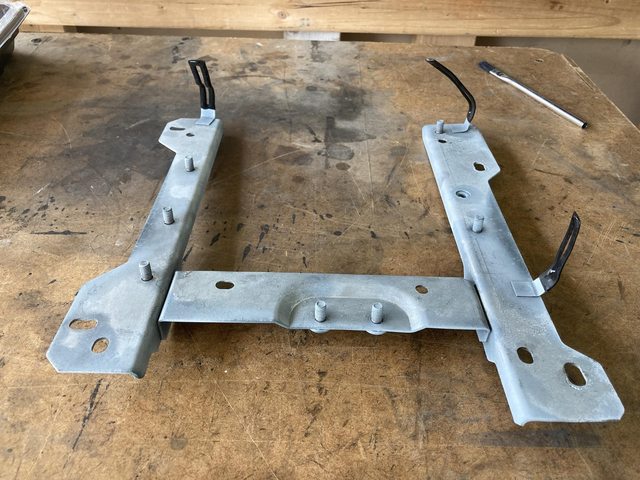
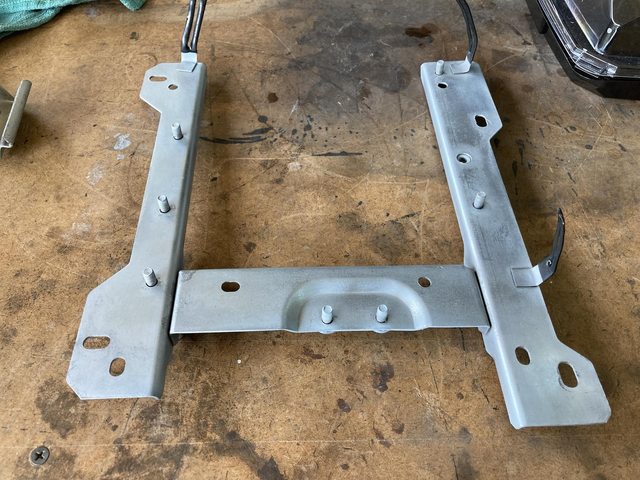
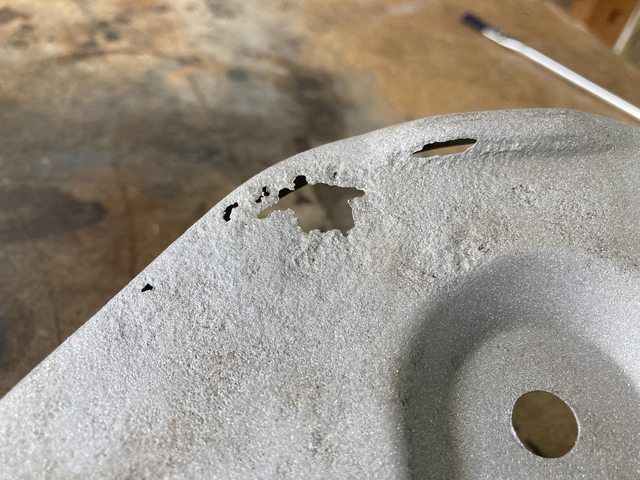
This mother took forever to blast.
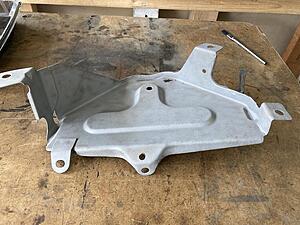
The paint came off easily enough, and even the rust wasn't really difficult, but the Plastidip, while not impossible, took at least twice as long as the paint, due to the media loving to just bounce off of it. The dip was compromised in places, so I was able to get under it, but it was still slower.
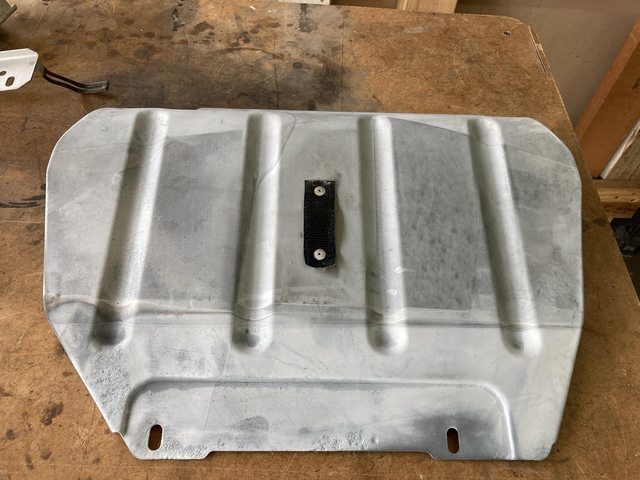
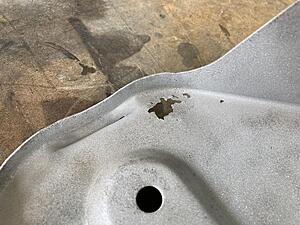
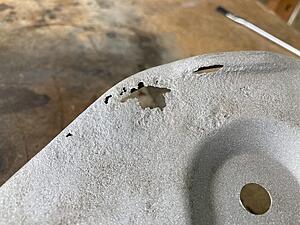
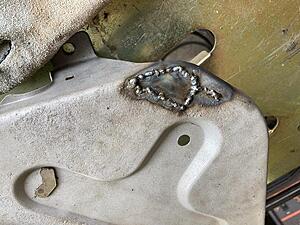
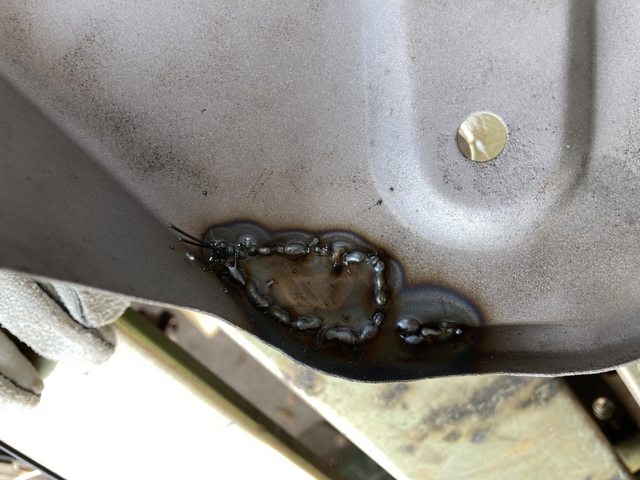
Discovered a few more pinholes:
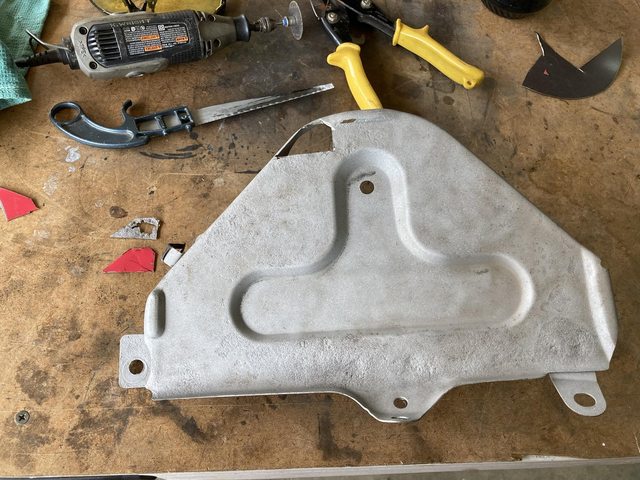
Cut out the bad stuff.
Patch from a remaining piece of the HF tabletop blaster I modified.


I used a lot of that piece of steel in the rust repairs in the cowl, you may recall.
Let's glue it in!
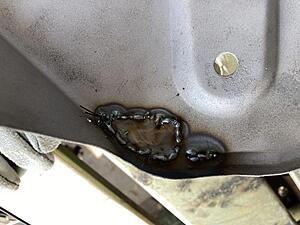
Well, it's not terrible. I guess.

The paint came off easily enough, and even the rust wasn't really difficult, but the Plastidip, while not impossible, took at least twice as long as the paint, due to the media loving to just bounce off of it. The dip was compromised in places, so I was able to get under it, but it was still slower.
Discovered a few more pinholes:

Cut out the bad stuff.
Patch from a remaining piece of the HF tabletop blaster I modified.
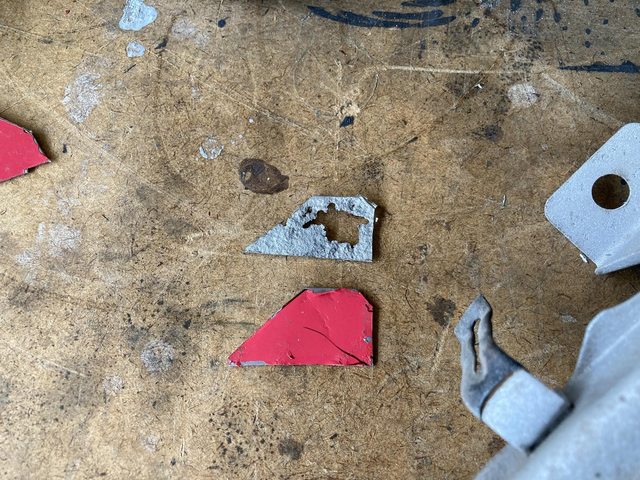

I used a lot of that piece of steel in the rust repairs in the cowl, you may recall.
Let's glue it in!

Well, it's not terrible. I guess.