When you click on links to various merchants on this site and make a purchase, this can result in this site earning a commission. Affiliate programs and affiliations include, but are not limited to, the eBay Partner Network.
.
.
.
.
.
.
.
.
.
.
.
.
.
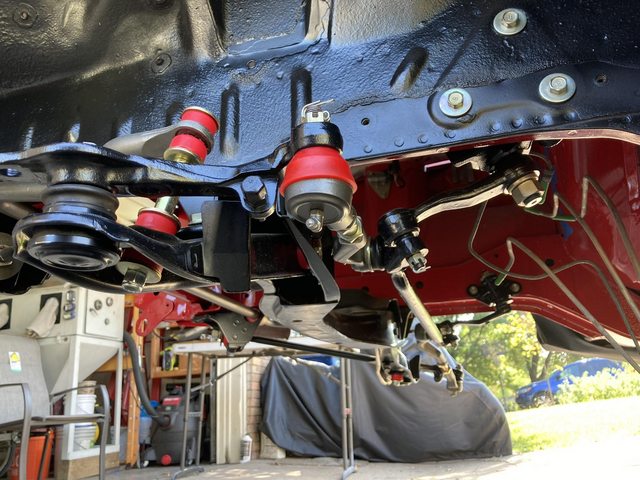
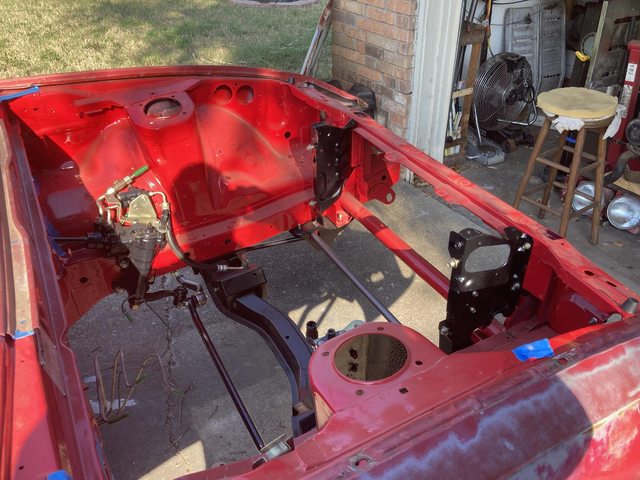
I put the end link with the red boot on backwards. The red boot is the outer joint.
Thankfully it came back apart easily. I greased the tapers and used anti-seize on the threads, so it better have.
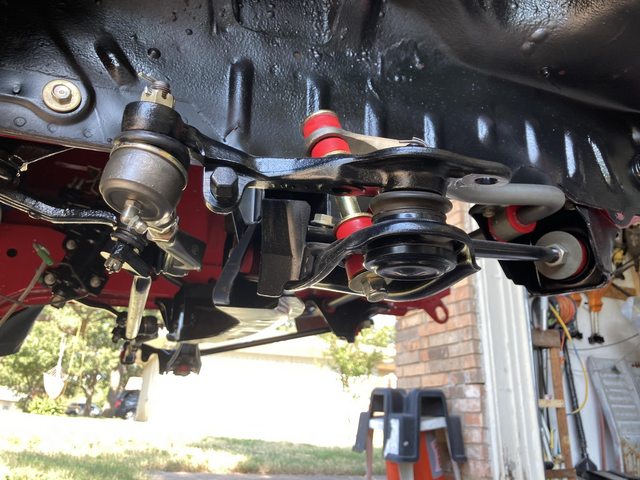
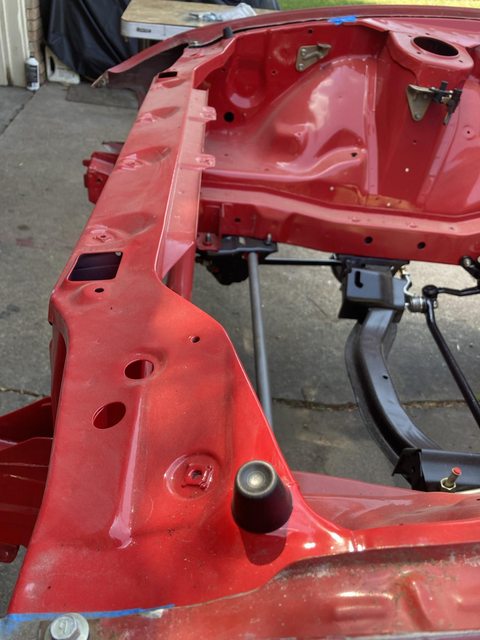
And installed, finally:
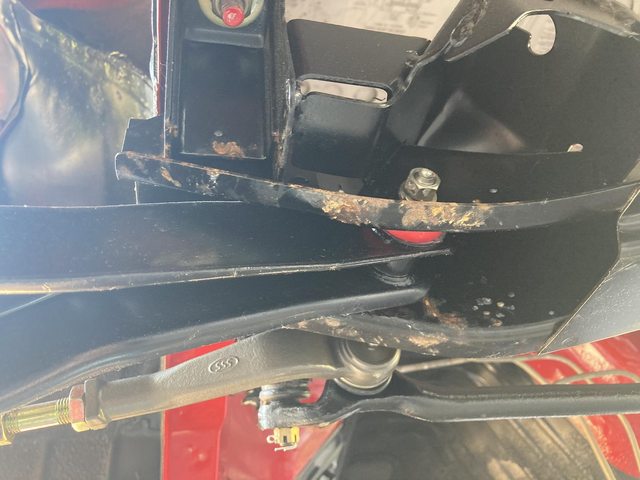
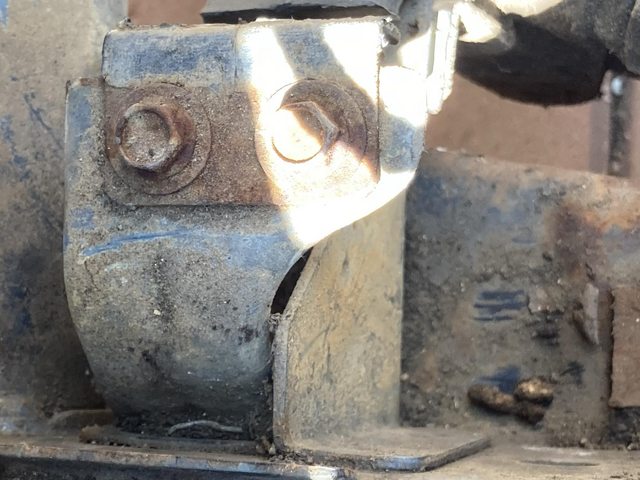
But wait, what is that I spy?
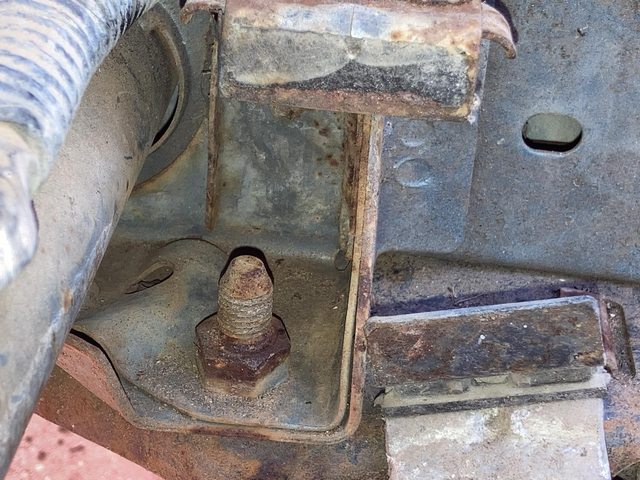
...what in the actual F*CK. Why the HELL is there rust on my just-blasted-and-painted crossmember?
<sigh>
Well, I'll have to get under there and wire brush that off and repaint those areas, maybe replate the nut. It's almost like an acid splash or a critter peed on it or something, but it didn't get the control arm, for some reason. I don't know. Infuriating, though.
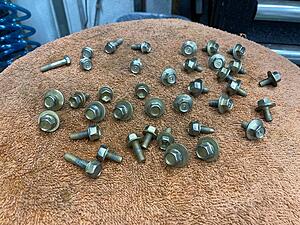
I moved on to the remaining hardware that was unsatisfying. Acid dip, plate, brass wire brush, steel wool:
Aaaaaaaaaaaand then it went a bit **** again.
I'm baffled why the passivate is missing spots.
I spent some time today (Sunday) redoing some of them. I think maybe it's because I failed to rinse between polish and passivate. There may have been something on the wire wheel or steel wool, so I made sure to do that, and I also did some in the big tak rather than the peanut-butter jar, though that didn't seem to be the issue.
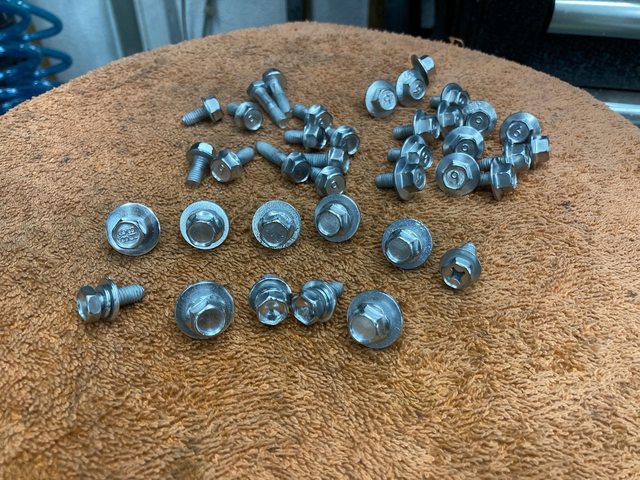
Results:
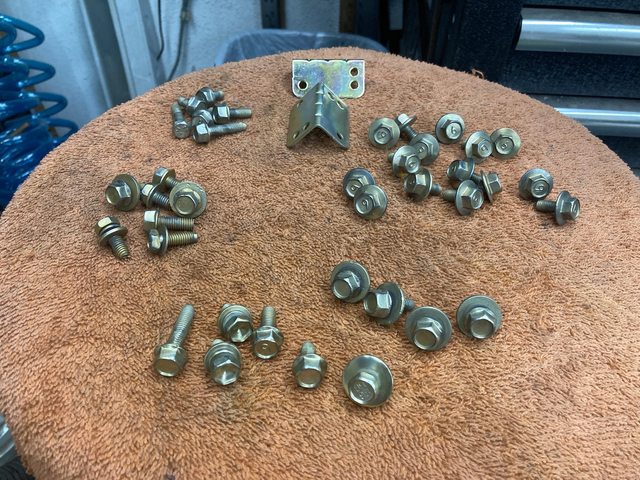
Clockwise from upper left:
The acceptable hardware from the previous meh batch.
A couple of corner brackets that I use to test that the passivate is OK. It was. (The bracket in the rear is OEM plating, which is nice and "bright", and the frontmost one is one I previously used to test, and acid dipped and re-plated. You can see the difference in finish. I *wish* I could easily get my zinc that bright, but I don't have access to the proprietary brighteners that industrial platers use. Mine is just brass wire brush and 0000 steel wool.
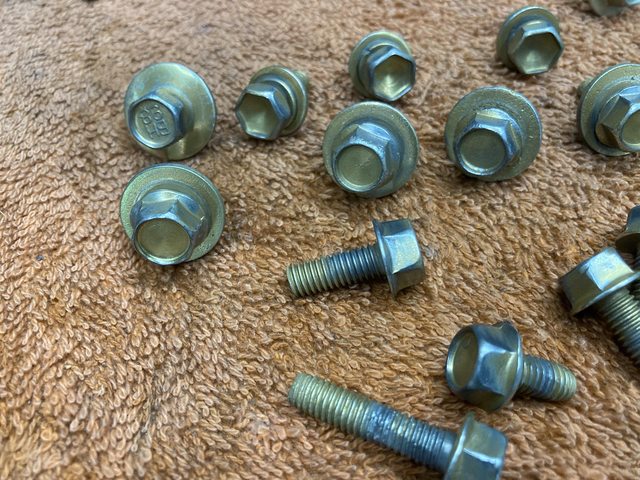
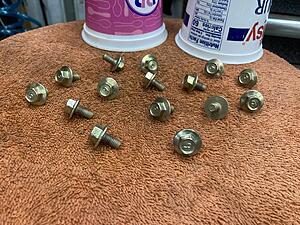
Upper right is the flanged bolts - they're not awful, but some look a bit thin. They may get redone, since those bolts tend to be used in very visible areas, like mounting the tops of the fenders. I might replace those with stainless, though.
Front two groups are the freshly redone ones. The four washer bolts to the rear were done in the PB jar, looked a bit thin when they came out, but look OK after sitting and darkening. The frontmost group cam out of the big tank, got steel wool (the four washer bolts are wire wheel only) and look great.
The group to the middle left still need to be redone.
I ran out of ***** for the day about 7PM, but I'm back on the right track. Rinse, rinse, rinse, and plate heavy-ish seems to be the way to go. It's just disappointing that I can't automate this set of steps very well. I don't have that much more to go, though, so it'll be OK.
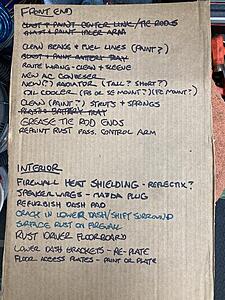
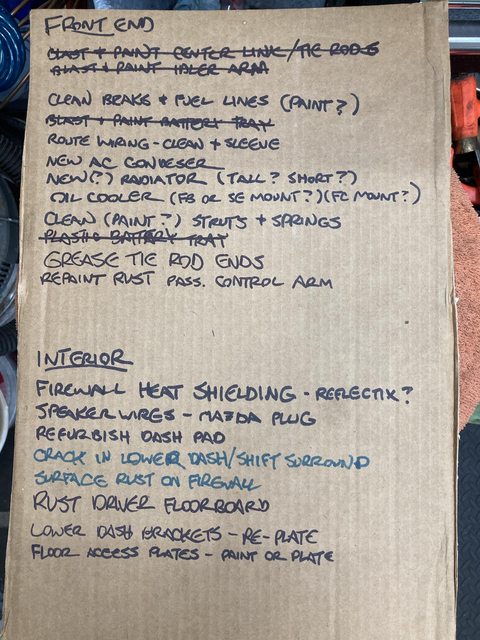
So I got to mark a few things off of the list:
....and added a couple.
Actually, looking at it now, I can mark off "surface rust on firewall" - took care of that a few posts ago with the red paint. Didn't I already plate the floor access plates, too?
fake edit: yeah, I did, along with the lower dash mounts and shifter boot plates.
There may have been something on the wire wheel or steel wool
Steel wool is often oiled to keep it from rusting out before it's been sold and used... A quick soak in acetone will strip it back to bare metal pretty easily.
That is a huge bummer with the rust, so sorry to see that...
Got a wild hair Sunday night after doing other stuff I needed to get done, and not only sorted the hardware according to the pictures I took with the note cards, but redid some of the not-great stuff, and some of the stuff I did in black that should have been gold, and vice versa.
A couple of black washers for the interior (I have 8 already, for the fender liner screws, which matches the number of said screws. I'm not sure if there are supposed to be 10 total and I lost a couple or what, but they're just thin 5mm washers, so I found a couple ugly ones in my stash and made them pretty) and a screw that should have been black there in the middle, the remaining miscellaneous gold hardware that was terrible to the left, and above that some interior screws that got made black that should have been gold. All that's left that needs to be done for now is the pile of flanged bolts to the right.
Given Kizmit99's thoughts above, I was careful to rinse between every step involving dunking in solutions. That seems to have paid out. The last batches came out well.
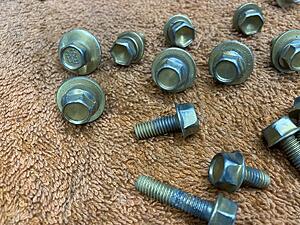
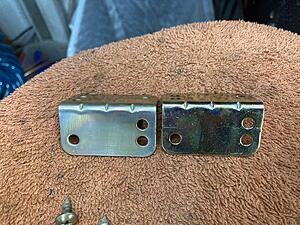
Just for edification, here's a comparison of the corner brackets I did.
On the right is one pulled straight from the box, factory "bright zinc" finish, then gold passivated. On the left is one that was also passivated as a test, spent a little too much time near the muriatic acid, which degraded the finish, and subsequently was stripped, replated, polished (brass wire brush and 0000 steel wool), then gold passivated. You can see how the surface finish of the zinc comes through the passivate, much like chrome plating. You can see the scratches from the steel wool. Good enough, but look how much better the factory finish is. Wish I could do that without a buttload of effort, but really, what I've got so far is very good, articularly when compared against what all this hardware *used* to look like.
Wandered out in the garage Thursday, during break time, of course (as far as you know.)
I redid the remaining flanged bolts again. Third time, I think. Thankfully, redoing zinc plating is really simple. Muriatic acid removed the passivate, and, usually, most if not all of the plating, then you rinse and back into the plating tank they go, fresh and clean. The acid tends to remove any surface rust as well, if present.
I was careful to rinse after brushing and polishing with steel wool, and:
Yeah, that'll do. You can see a clear difference between the head of the bolt that got polished, the underside of the head that only got the brass wire wheel, and the last bit of threads that got nothing. If you want a matte finish on your plated items, all you have to do is... not polish them! It ends up looking a bit like Cerakote. Protection should be the same whether it's polished or not - that's just an appearance thing. It is easier to get a consistent look with at least wire brushing, though. Unless you're pretty careful, the zinc tends to get heavier and darken on some edges, depending on length of time in the tank and amperage. Higher amps tend to do that "burning" more. It doesn't hurt anything, it's just darker right in that area. A big deal for professionals trying to end up with a bright finish out of the tank so no other work is needed before passivate or shipping as is, but I can't seem to get that sort of brightness no matter what.
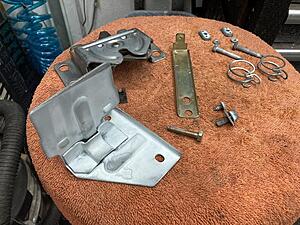
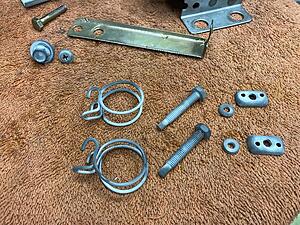
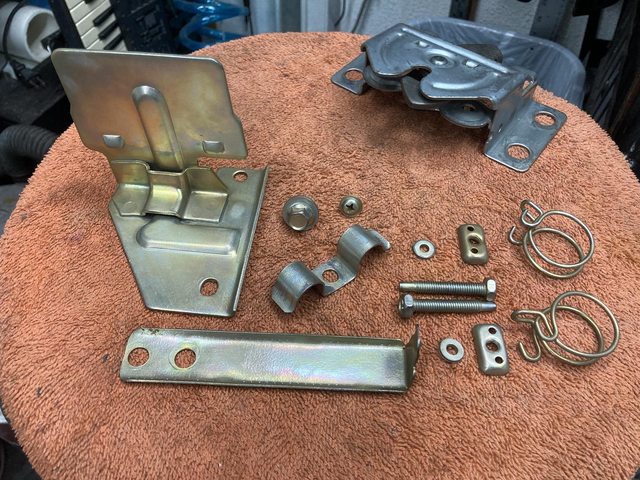
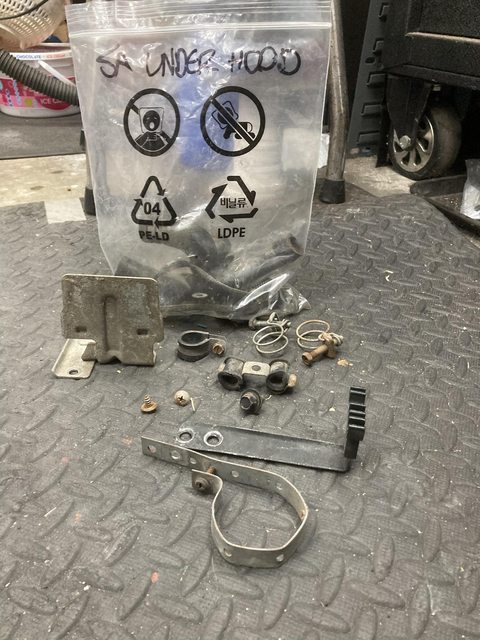
While those bolts were in the tank, I rifled through another bag of stuff to see what other small project was next, plating or otherwise.
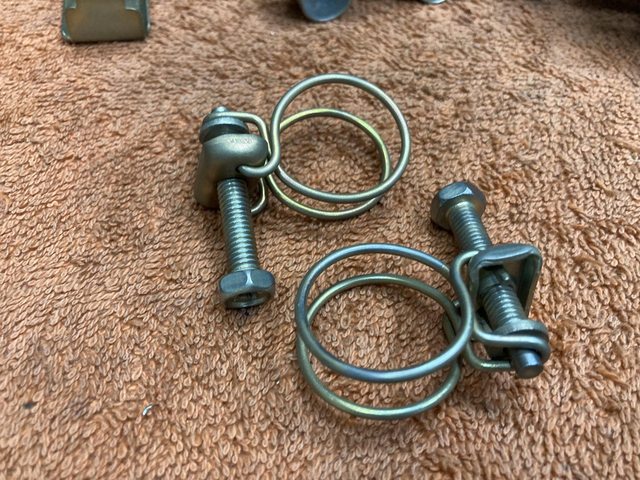
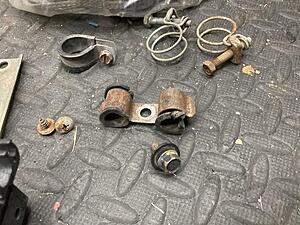
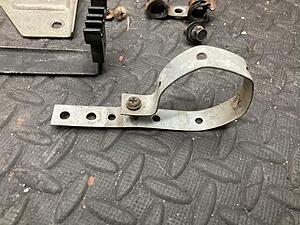
The double clamp is OEM, so that's definitely getting replated. Might need to source new bushings. I don't recall which lines this was for, either fuel or brake. I might try to replate the OEM hose clamps in the rear. Can't hurt to try. The adel clamp I can just get another one. I don't remember what I was using it on anyway. Possibly one of the AC lines. The big bracket is for the "cold start assist." I won't be reinstalling it, but may as well replate, because I can. I'll store it with the other spare parts. The flat thing with the plastic bit on the end attaches to the shock tower and corrals the coil leads going to the distributor.
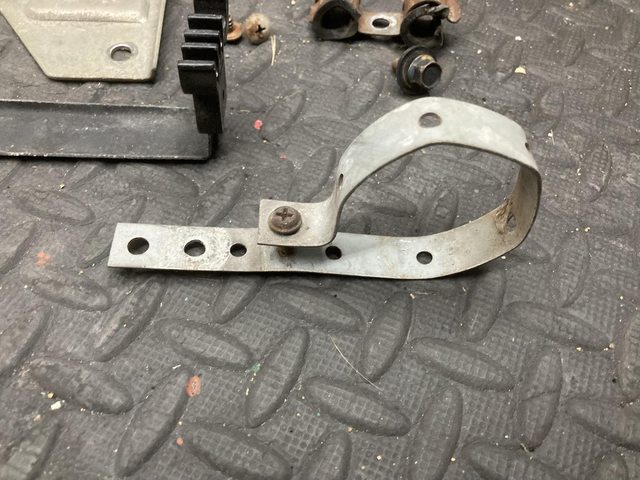
Last, I don't remember what this pipe-strap (actually, radio install back-bracket, which is thicker) clamp was for, so I'll leave it for now.
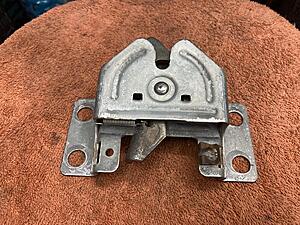
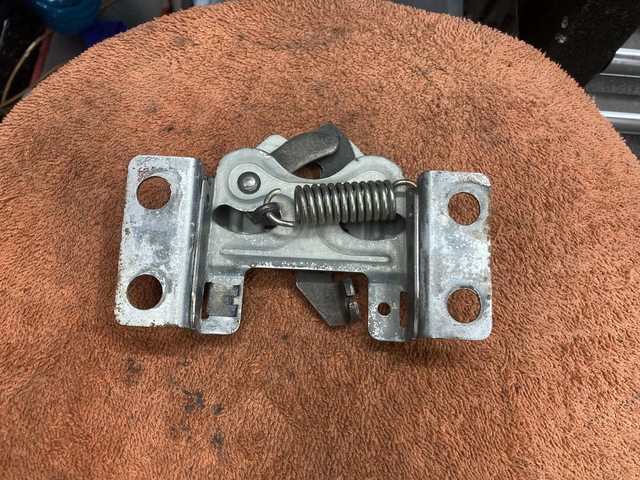
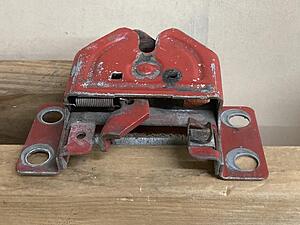
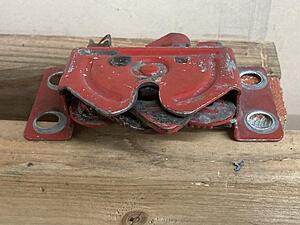
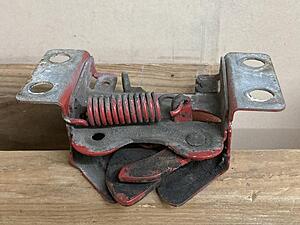
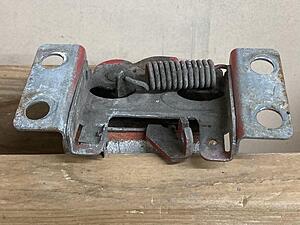
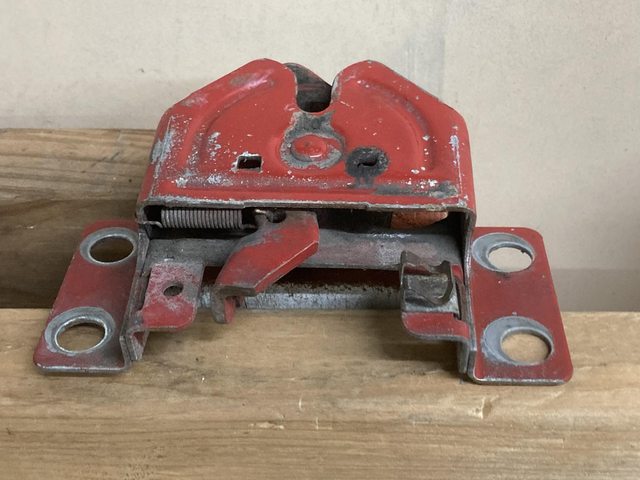
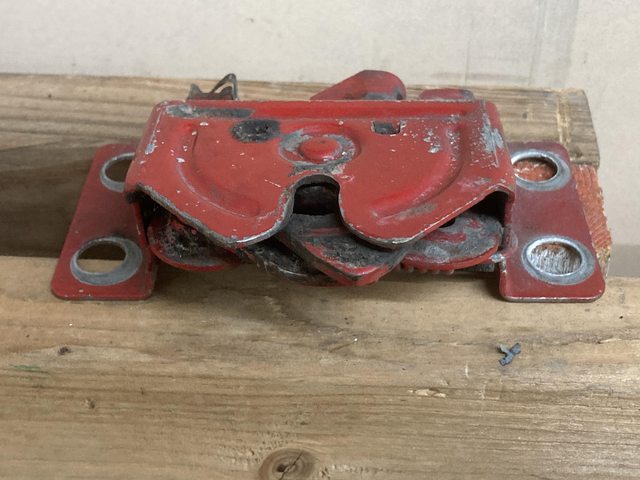
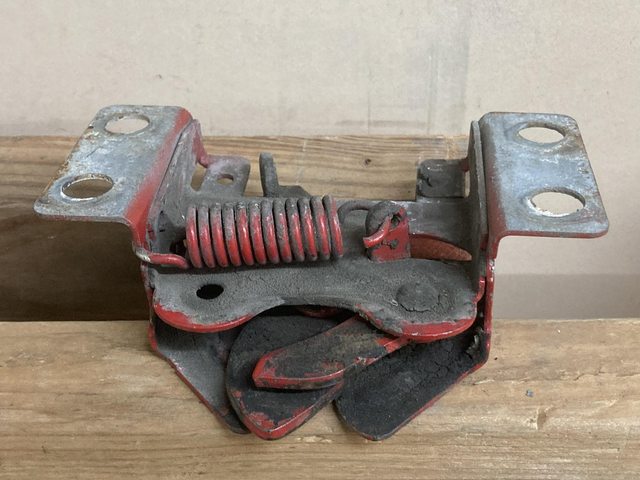
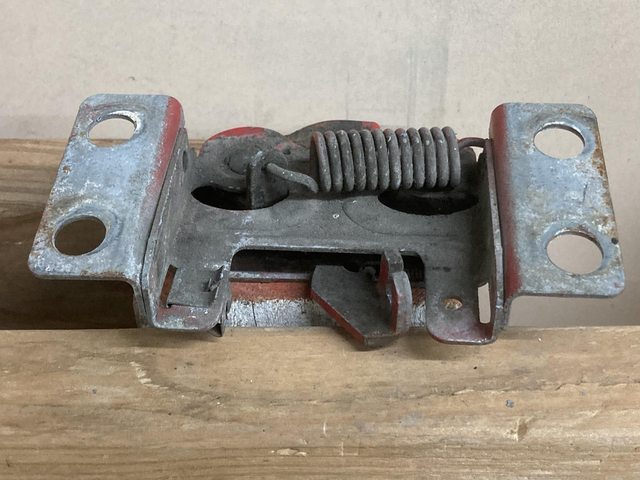
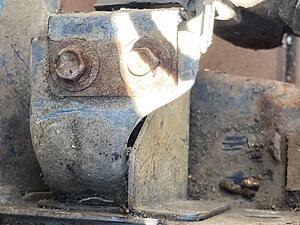
Also going to need to do something with the hood latch. It's a bit messy:
(multiple photos for reference for me)
The issue there is that I'm not really sure how to reassemble it if I take it apart. Possibly bolts and lock nuts, but the back side of the pivot for the actual latch is hidden behind the second layer of the frame that's spot-welded in. It looks like the whole thing is plated, then painted, given the lack of rust where there isn't paint. Also given where there isn't paint, it was installed before the car was finish painted.
I've got it soaking in purple degreaser now. I think I'll try to strip and plate it first. If I can't get into the recesses well enough, I'll fall back and try something else.
Got a couple hours to mess around with the car on Labor Day.
While looking at my parts car to check some fastener types and such, I realized that those hood bumpers I had hanging about were for the front of the hood, so installed them right quick:
Makes it a little less stressful setting the hood in place, with regards to scratching the paint.
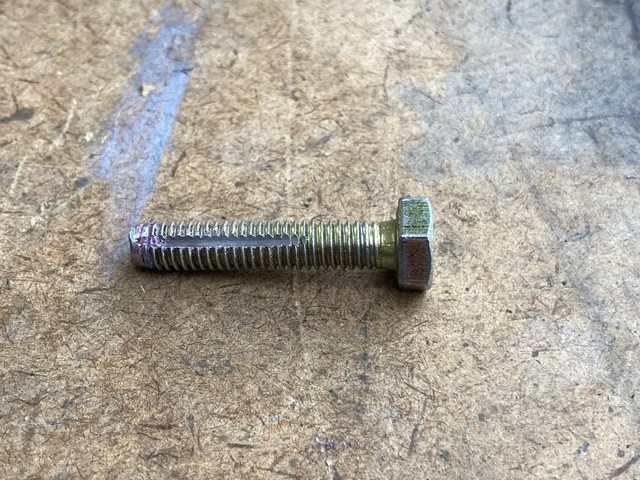
I needed to install some stuff, so made a thread chaser to clear out the paint build up:
It worked pretty well. I thought I had some thread chasers, but I couldn't find them in a quick search. I'll look again later. I swear I bought some. I found the female ones for bolts, but not the male ones. The one I made is fine for cleaning out gunk, but it's not hardened, so probably not the best for actual mangled threads.
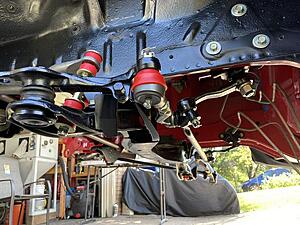
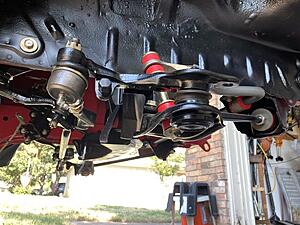
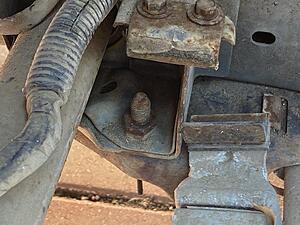
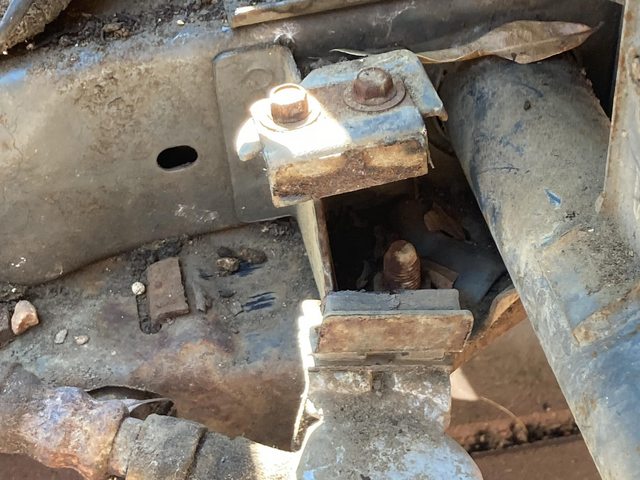
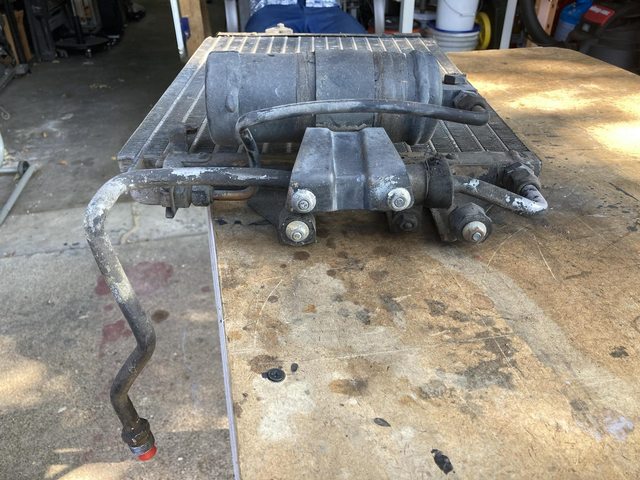
Some reference photos of the brackets I will need to fabricate for mounting the oil cooler:
As you can see, they're welded into the mounting point for the radius rod/swaybar, so I can't easily remove them from the donor. I think I can come up with a better design anyway. In the pics, the oil cooler is there, but you can see that the rubber shock mounts have sheared. The original design is kinda weird, in that it uses rubber at the frame end, in shear, and at the oil cooler, in tension. They almost always fail on the frame side. They are, of course, NLA. I can come up with something at least less special snowflake using easily available shock mount studs. I'm not convinced it needs that much anti-vibration mounting anyway. Second-gen RX-7s pared the mounts down to one piece of rubber, and they're vertical on the sides rather than hanging the damned thing from the top. For that matter, I may switch to an FC oil cooler just for that. I happen to have one, but I also have two correct oil coolers for the GSL-SE, and of course the original for this one (the original hands under the radiator. The GSL-SE moved it to in front of the radiator, while making the radiator taller, occupying the space where the oil cooler used to be. Oddly, the 79-82 oil cooler mounts *are* still available. The third gen RX-7, and RX-8, just use big rubber grommets in flanges, like any sane person would.)
I'm thinking something that comes up under the side brackets, putting the rubber in compression.
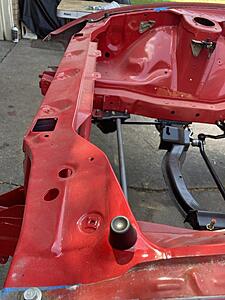
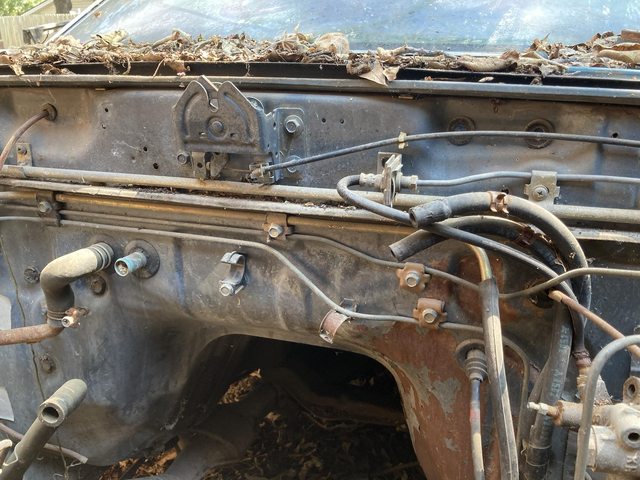
Also a reference photo, the size and placement of the clips for the various steel lines in the firewall:
They're apparently all rubber coated on this car - mine were just bare steel (now replated.)
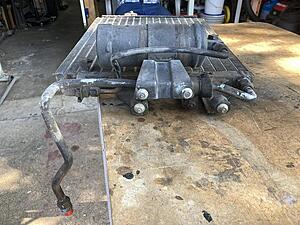
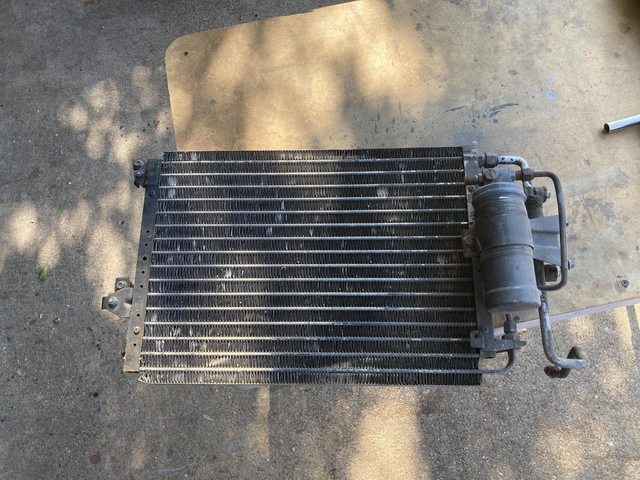
Part of today's work was to determine what I can do about the condenser. Here's the one I have for the car, from an '84.
Mounting on passenger side:
Mounting on driver's side:
It turned out to be stopped up when I charged it - high side pressure went to the moon, and eventually popped a hose on my gauges before I figured out what was happening. At least I know the compressor is (or was) good.
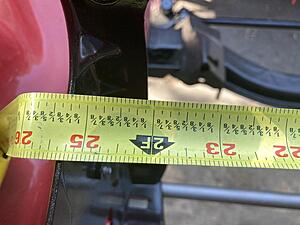
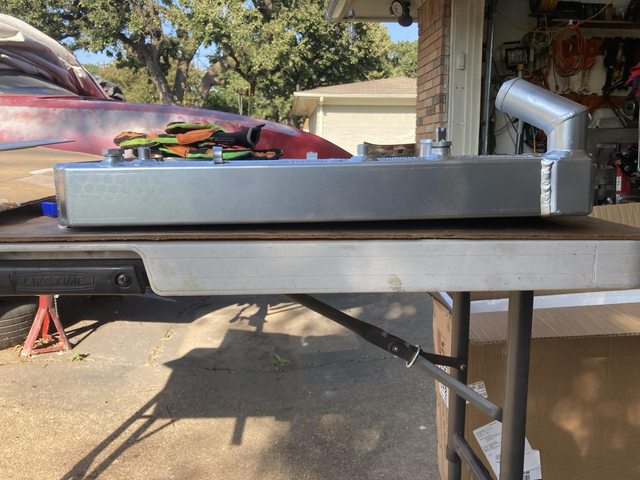
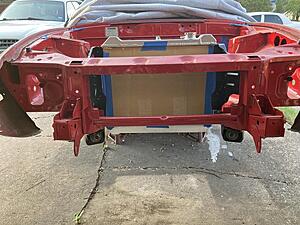
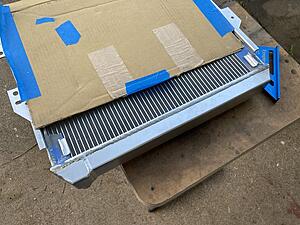
Regardless, I need to replace it. It's a serpentine style (hence the "stopped up",) and I'd like to move to a more efficient parallel-flow, so OEM is out. So I need to measure the space available and see what I can wedge in there. Bigger is better - these were marginal with R-12, much less R-134a.
25-1/4", got it. Height is whatever. Plenty of room there.
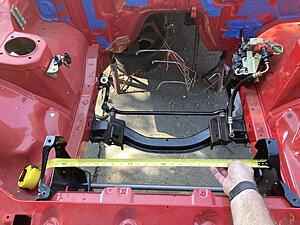
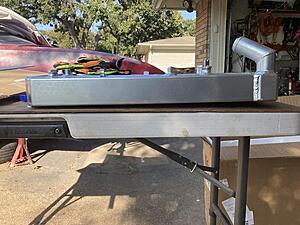
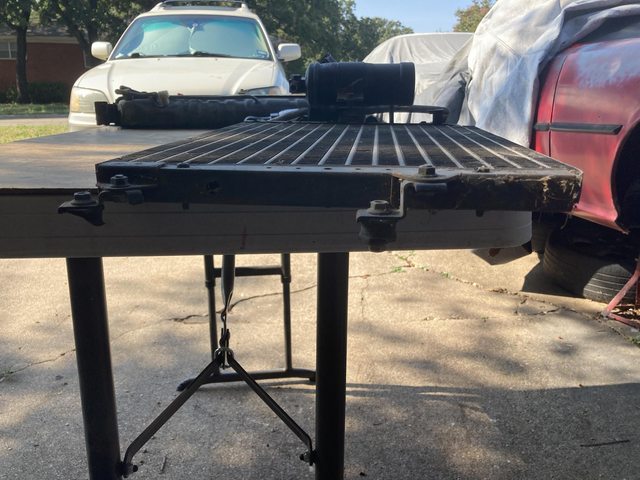
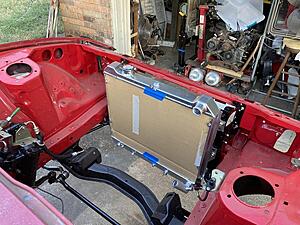
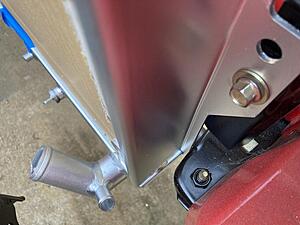
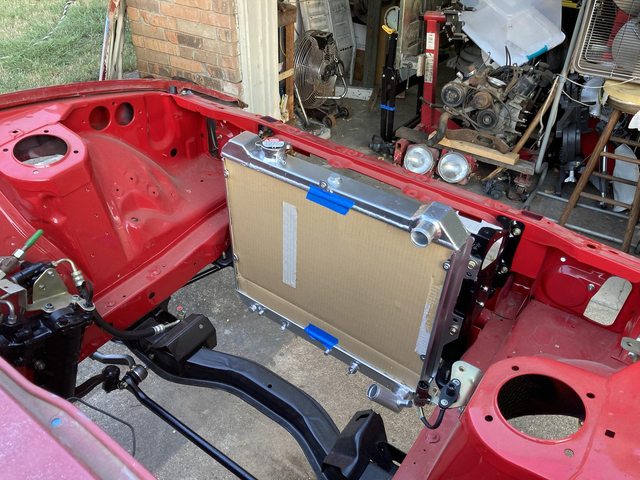
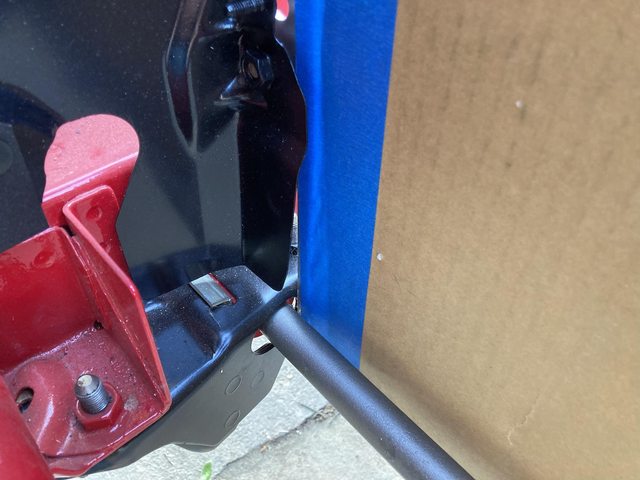
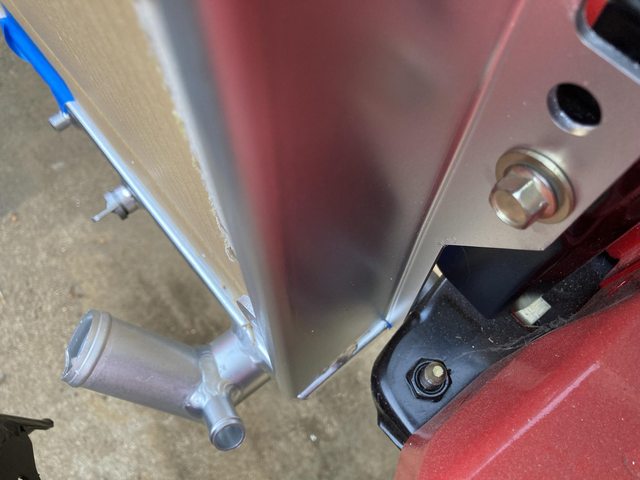
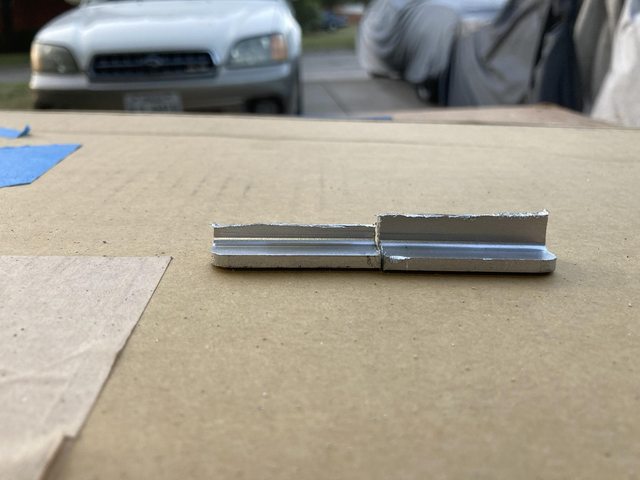
I ran out of time to slap the radiator in (I wanted to cover the core with cardboard first,) but I did not a potential issue:
(The other end is flat on the table.) That's a bit disappointing. Hopefully it won't tear itself apart when I bolt it down.
I did get one detail bit in:
And of course if you were observant in the measuring photo, I got those radiator side plates in:
So not a lot, but a friend stopped by and we shot the **** while I was messing with this, which always slows me down.
I'll hang the radiator this evening, I think, look into a condenser, and start figuring out the oil cooler mounts.
I know you didn't cut into the pressurized section but you might want to run a pressure test anyway before you install. Some of the aftermarket aluminum ones have arrived with built-in leaks , going by previous posts here.
I know you didn't cut into the pressurized section but you might want to run a pressure test anyway before you install. Some of the aftermarket aluminum ones have arrived with built-in leaks , going by previous posts here.
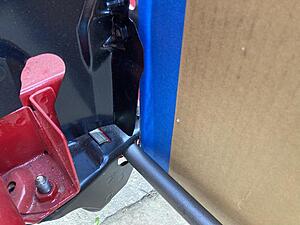
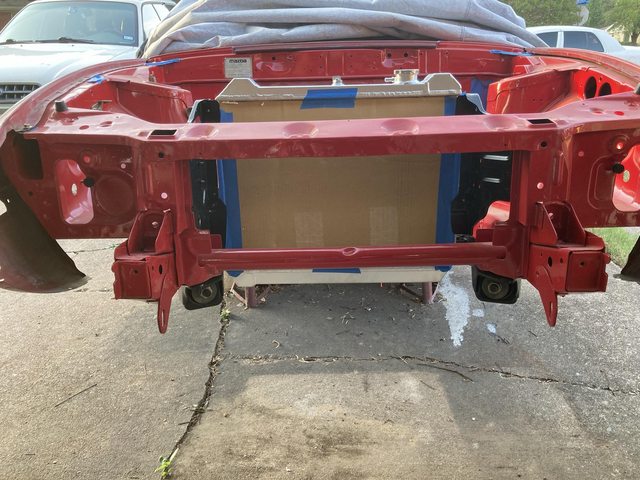
From the post: "It's touching the swaybar, and the passenger side is contacting the radius rod/swaybar bracket. It's not even tightened down in these pictures."
I didn't want to space it out 1/2" or whatever. It's already going to be tight due to the thicker core, and it was tight enough with the stock rad and 12A. The 13B is what? 20mm longer? I need to wedge an electric fan in there somewhere.
So I guess it's the wrong radiator.....I got a 3 row radiator and it fit perfectly with the oil cooler attached at the bottom.......
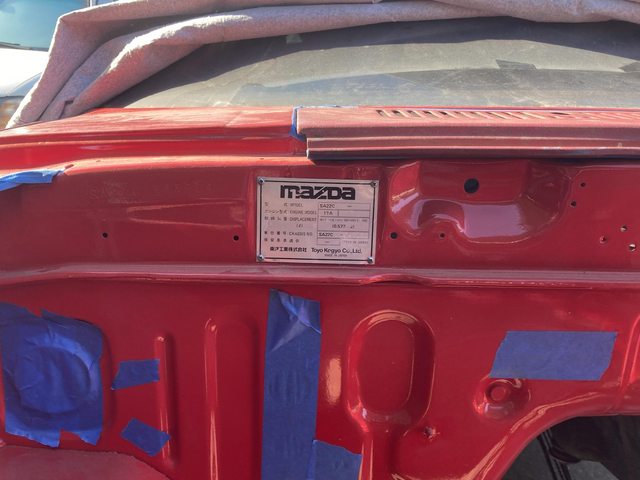
Nah, it bolts in fine, other than that little bit. The problem is probably trying to use a "tall" 83-85 radiator in a "short radiator" '79 chassis. They may have tweaked things a little between them. The brackets are from an '84 GSL-SE. Remember, I'm making a bastard '79 GSL-SE. These things are bound to come up, not to mention it's a cheap eBay radiator, which also vary i quality and fitment. It was a gamble from the start... :P
Nah, it bolts in fine, other than that little bit. The problem is probably trying to use a "tall" 83-85 radiator in a "short radiator" '79 chassis. They may have tweaked things a little between them. The brackets are from an '84 GSL-SE. Remember, I'm making a bastard '79 GSL-SE. These things are bound to come up, not to mention it's a cheap eBay radiator, which also vary i quality and fitment. It was a gamble from the start... :P
Right...I forgot that little detail....79.....mine is a short radiator also...on my 82...
Right...I forgot that little detail....79.....mine is a short radiator also...on my 82...
Why didn't you get the short one?
Because I'm building it as closely to the GSL-SE the engine came out of as possible. I figure they used the bigger radiator and front mount oil cooler for a reason (that reason being another 35 HP to cool.) Maybe the short one in aluminum would be fine, but the cost wasn't hardly any different, and I only need to make a couple adjustments to make it fit. OF course, I still need to figure out how to mount the oil cooler, since my chassis doesn't have the brackets, so I may re-think this.
That looks great! Even looks like the same radiator I got.
Do you have any issues with vibration using the solid mounts? I thought Mazda went overboard on the OEM mounts, not to mention the incredibly bad idea of putting the rubber in both tension AND shear - the ones in shear *always* tear off - but I was thinking I'd need a little isolation. The only downside I see beyond that with your mount is that I'd have to weld something to my freshly painted chassis...
I mean, I can touch up the paint if I have to, but man, it's messy! Especially with the catalyzed urethane I'm using.
...
The only downside I see beyond that with your mount is that I'd have to weld something to my freshly painted chassis...
I mean, I can touch up the paint if I have to, but man, it's messy! Especially with the catalyzed urethane I'm using.
That's a custom piece welded on, so if you're going custom anyway you could build it with a circular compression clamp, sized for the tube there. Something like this...
here's where I grabbed the image, maybe something from here could be lightly modifed.
This is just one part of my 13B Renesis Swap. The final project hasn't been completed yet .. but it's getting close. 1980 Renesis Swap
Looking at your thread, I think maybe my issue with the radiator isn't the fault of the radiator, but the GSL-SE radiator mounts. Your rad ends up close to the sway bar, but not touching, and it's mounted flat to the mounts. Mine is, too, but touches, and may even be touching with the trimming, so I'd wager that the geometry of the core support is slightly different on the SE, or even FB versus SA. I'll make it work I'll probably just add some spacers to the rad mounting flange.
Originally Posted by Toruki
That's a custom piece welded on, so if you're going custom anyway you could build it with a circular compression clamp, sized for the tube there. Something like this...
here's where I grabbed the image, maybe something from here could be lightly modifed.
Looking at your thread, I think maybe my issue with the radiator isn't the fault of the radiator, but the GSL-SE radiator mounts. Your rad ends up close to the sway bar, but not touching, and it's mounted flat to the mounts. Mine is, too, but touches, and may even be touching with the trimming, so I'd wager that the geometry of the core support is slightly different on the SE, or even FB versus SA. I'll make it work I'll probably just add some spacers to the rad mounting flange.
I heard or read that mounting a 13B SE engine into an SA isn't just as simple as using the SE front engine mount. It's not just the length of the engine that's different .. apparently the geometry or angle of the mount is slightly different as well. That's why RB makes a front engine mount specifically for this type of swap.
So it wouldn't surprise me at all if the radiator mounts were slightly different as well.
When I get my RX7 back from Chips Motorsports, I'm planning to refinish the engine bay, suspension, brakes, gas tank etc.
I have a bunch of spare parts from a donor GSL-SE (including the rad supports) .. so when I refinish the engine bay in my SA, I can do a side-by-side comparison.
As far as I know, it's just the mount itself - the engine plate - that's different. Basically the bits that bend back at the ends are longer, putting the holes in the mount further back, so they line up with the holes int he crossmember. I don't think the crossmember is different. I guess I'll find out!
I should have compared the radiator side plates before I put them in - I have all the original bits. I just didn't think to do it. I might still do so - it's not terribly difficult to remove all them now.
It might not be the plates that are different - it could simply be a change made in the core support that the radiator mount bolt to, either in all FB vs. SA, or possibly just GSL-SEs.
Regardless, I can compensate. A section of 1/8" or so aluminum strap sandwiched between the rad and the mount (or the mount and the core support) should take care of the issue, and be unobtrusive.
I completely failed to share how the hood latch came out of the purple cleaner bath:
All grease (and paint!) gone. It appears to already be plated, so I'm debating what to do. Getting plating inside might be tough, and it can't really be disassembled.
I haven't done much - weekend was full up, but I did clean and plate some random bits I pictured a while back.
Some of these took a couple tries - I don't think I got them clean enough initially or between processes - but I eventually got it right.
Working a science fiction convention (I'm a nerd, go figure) this weekend, so nothing will get done on the car, but I did get a little done during the week. Taking a moment to myself to post and catch up on internet things.
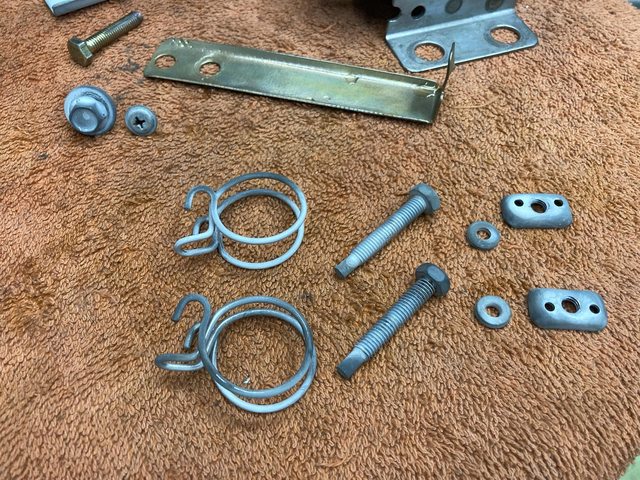
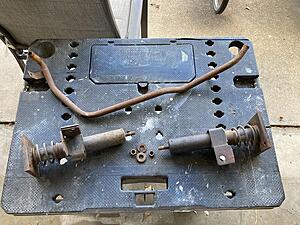
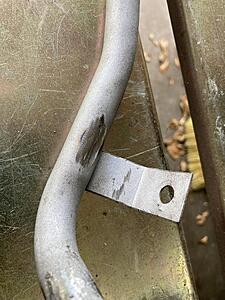
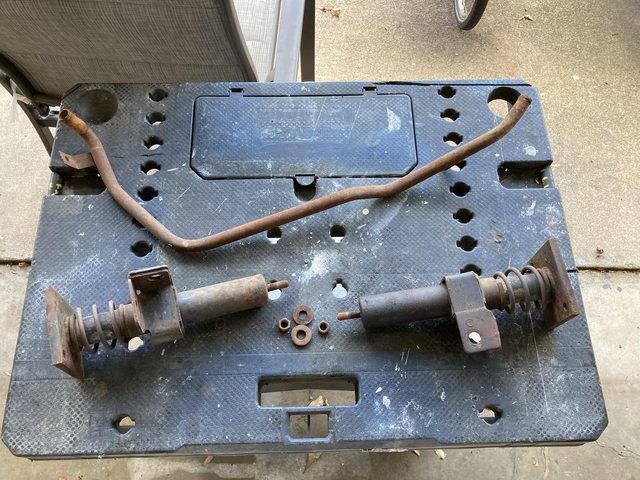
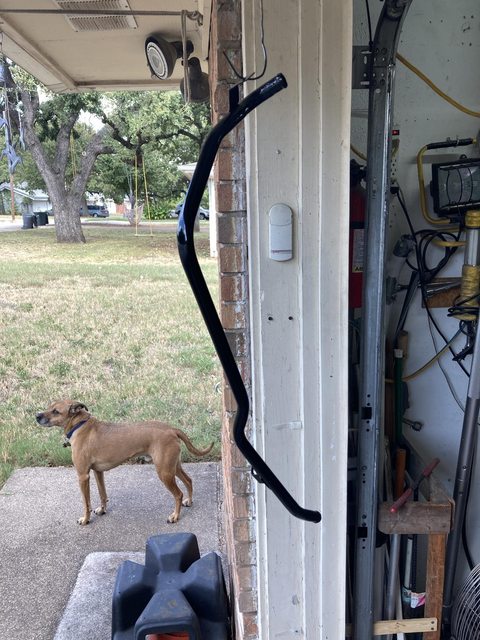
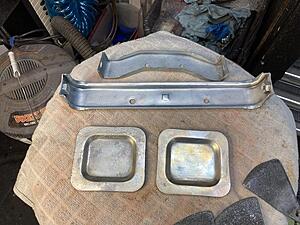
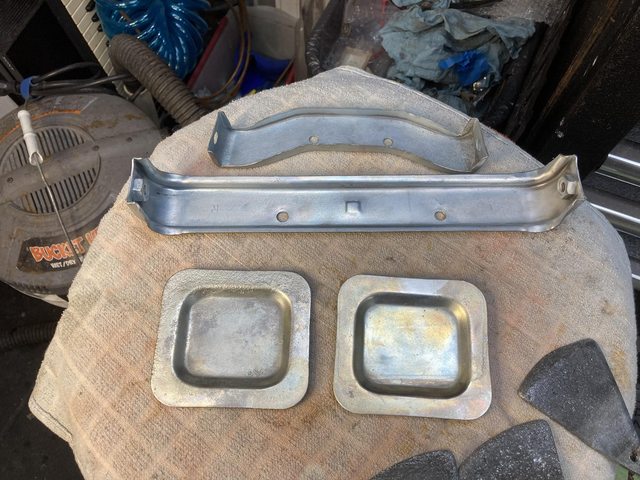
I got tired of looking at these rusty things on the shelf:
That's the front bumper mounts/5 MPH shock absorbers, and a coolant pipe for the heater circuit from the lower radiator outlet to the heater core.
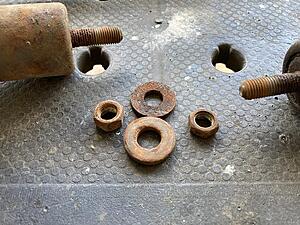
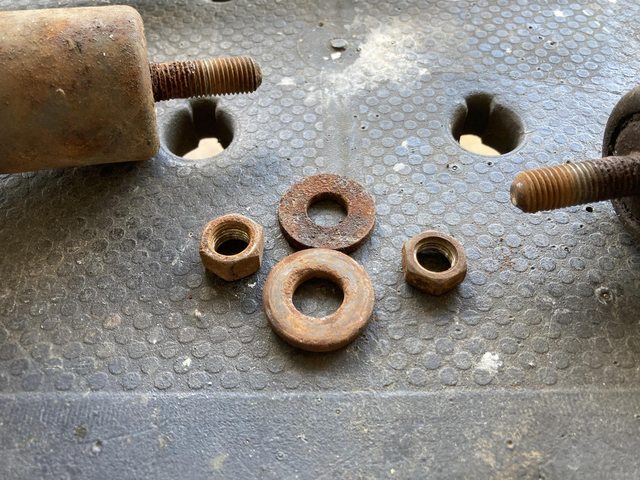
The hardware on the ends of the bumper shocks.
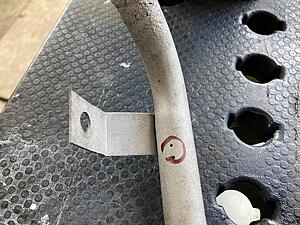
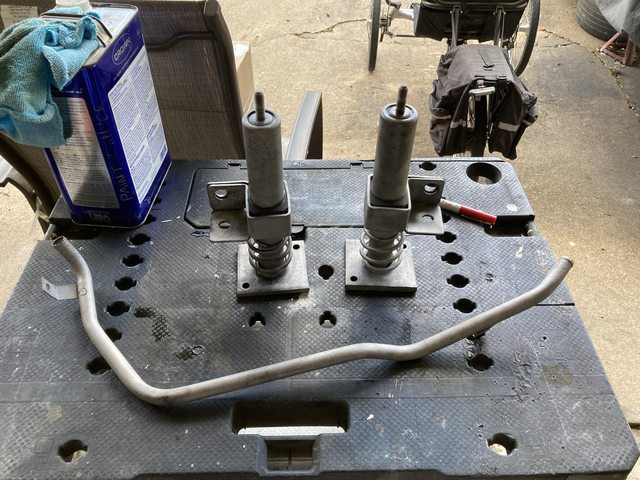
After some quality time in the media blaster:
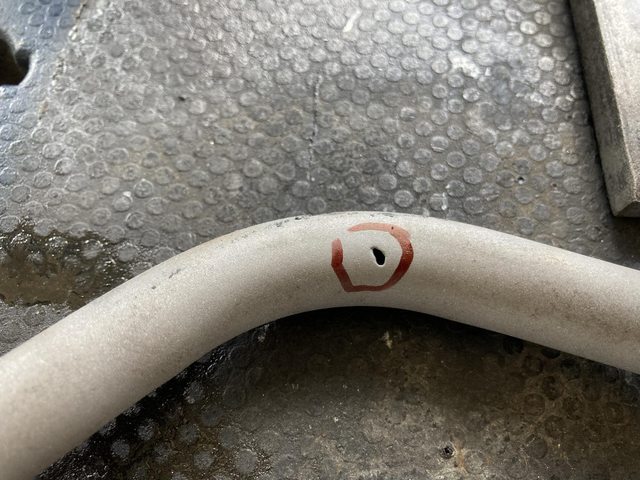
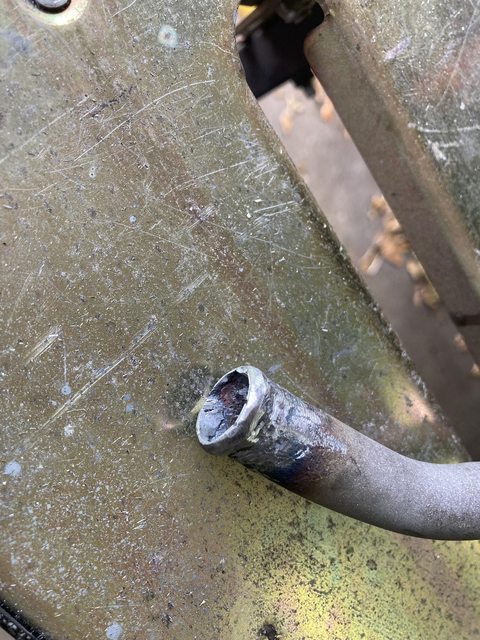
Unfortunately....
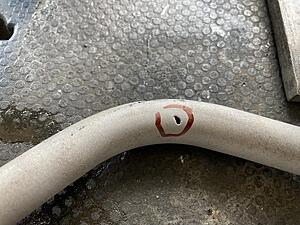
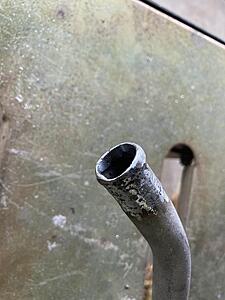
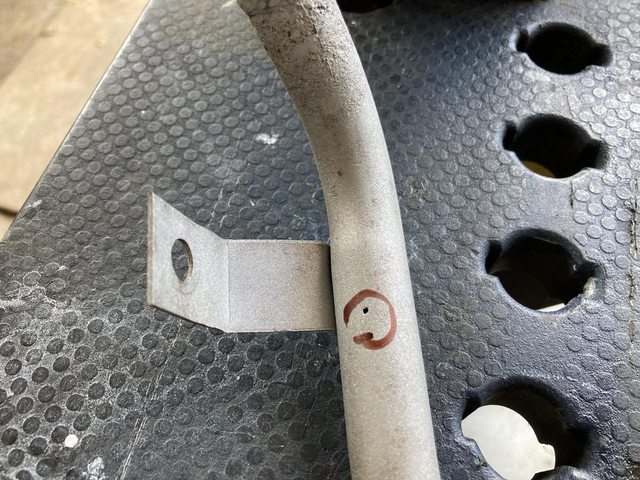
Dammit. I knew the end was ragged, but the pinholes are new. One is on the top of the pipe, the other is on the bottom, in different sections.
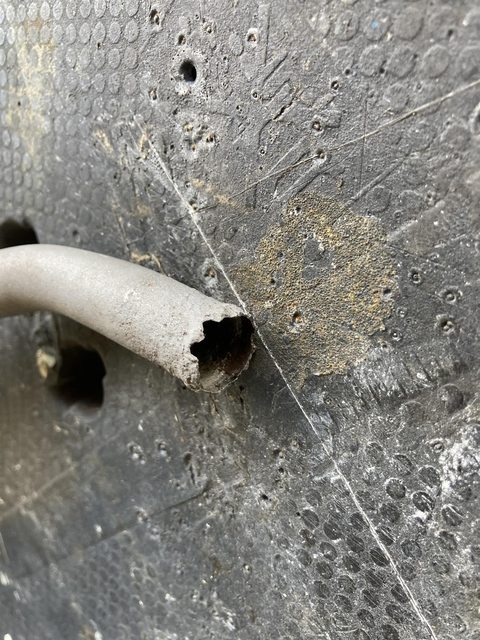
I have a spare on the parts car that looks good at least from a cursory inspection (it's still on the car, and has most of it's galvanizing intact) but I'm going to try and fix this one. For once, the welder cooperated. The holes did widen a bit, but I expected that. That's fine - it gets me to thicker metal.
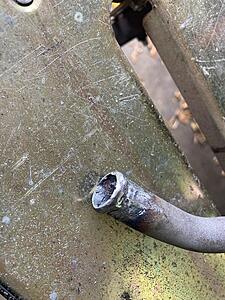
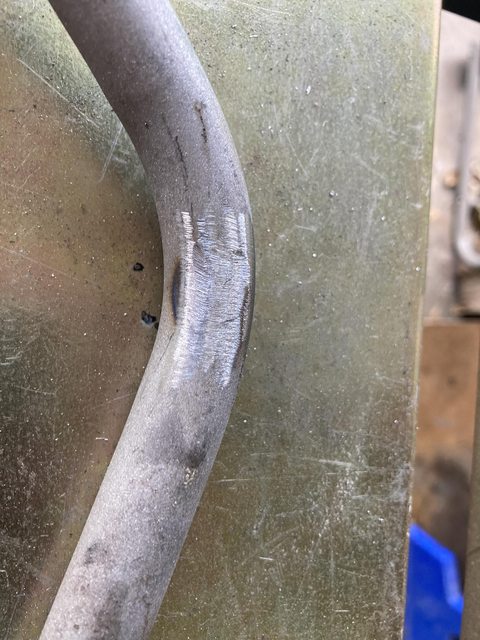
After a bit of work with a flap-wheel on a die grinder:
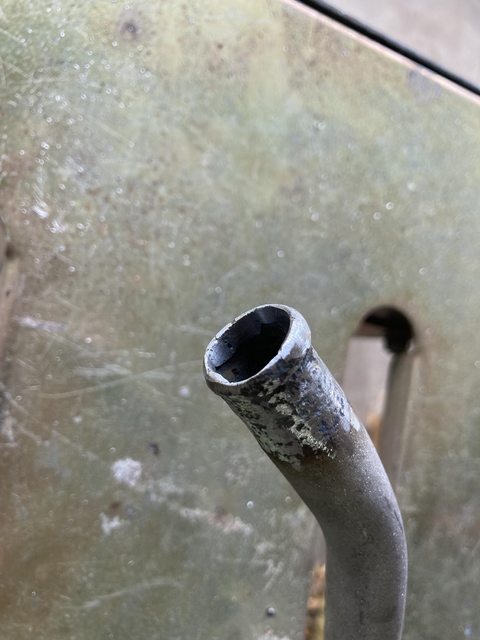
The end took a bit more work, with both the flap-wheel and a rotary file on the inside:
Seems serviceable. I probably should have gone ahead and laid down a bead on the small part of the rolled bead that was still OK, just for reinforcement. Oh, well.
I may cap and fill with water to see if there are any leaks before installing.
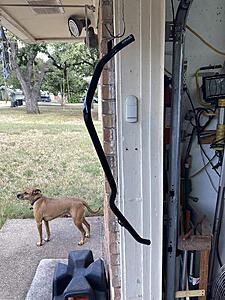
Painted everything with the usual black appliance epoxy (which I now need more of...)
(bonus doggo. That's Bear. He's a Good Boy.)
In retrospect, I probably should have spread some JB Weld in those pits at the ends. I may have trouble getting the hose to seal, though I'm pretty sure it was sealing in the car previously. That was 10 years ago, though.
 08-29-21, 08:40 PM


 , going by previous posts here.