FrankenRex Will Rise: stuffing a GSL-SE into a'79 SA

 04-25-21, 08:26 AM
#127
Peace Love Rotary
Holy. Chit. Just read through your entire thread. Friggin amazing man. You've done scared the bejezus outta me though. I have a '79 / SA my pops purchased the year I was born. I'm about to under take the adventure of a lifetime and remove the engine to rebuild it myself. I'm in Ohio so the car has seen some winter driving, but very little. We've taken pretty damn good care of the car over the years. It runs and drives, so I'm opening a can of worms, and I have none of the experience, tools, or skills you've got. But one doesn't get experience but not trying new things and tools can be purchased and skills will come with time. I love the fact you've posted on this for years! My dad said it best recently, I have until my son's 16th birthday to do what I have to do and he's about to turn 9, so I should be good! I want to empty my engine bay and respray it while getting the little 12a back in shape. I'm scerrrrrd... but excited. Keep up your amazing work and posts!
The following users liked this post:
Frankenrex (04-25-21)
04-26-21, 12:22 AM
#128
It's a journey. I sincerely wasn't expecting that rust, since I'm in North Texas, and that's not typical. I also tend to go a little further than truly necessary to just make a functional OK driver (though I'm not masochistic enough to go full-on concours show car - I actually want to drive it without *too* much fear.)
You've got the right attitude about experience, tools, and skills. I didn't have any of those once upon a time, and I still need a lot of all of them. My welding is mediocre at best, my paint and body work is... probably less than that, and I certainly don't have all the tools I want.
Common wisdom is to break a big job down into smaller tasks and milestones, and that's valid. The problem I keep running into is the interlocking nature of some jobs - the domino effect. Gotta do this before that, and if you do this other thing, you may have to re-do something else later, or make it more difficult. That sort of thing. Definitely break down a big job, but also try hard to keep the overall job in mind to stage and time things - think holistically. Project Binky from Bad Obsession Motorsports on YouTube:
and Patreon is a great example, and I highly recommend watching it. They stuff a significant amount of a Toyota Celica GT4 into an original Mini. They're just starting reassembly after paint. They are a fantastic example of thinking ahead while breaking down the job into manageable bits.
As far as updates for mine - I finally figured out what was going on with my plating setup, and should have good stuff shortly.
You've got the right attitude about experience, tools, and skills. I didn't have any of those once upon a time, and I still need a lot of all of them. My welding is mediocre at best, my paint and body work is... probably less than that, and I certainly don't have all the tools I want.
Common wisdom is to break a big job down into smaller tasks and milestones, and that's valid. The problem I keep running into is the interlocking nature of some jobs - the domino effect. Gotta do this before that, and if you do this other thing, you may have to re-do something else later, or make it more difficult. That sort of thing. Definitely break down a big job, but also try hard to keep the overall job in mind to stage and time things - think holistically. Project Binky from Bad Obsession Motorsports on YouTube:
As far as updates for mine - I finally figured out what was going on with my plating setup, and should have good stuff shortly.
04-26-21, 08:17 AM
#129
Rotary Enthusiast
Holy. Chit. Just read through your entire thread. Friggin amazing man. You've done scared the bejezus outta me though. I have a '79 / SA my pops purchased the year I was born. I'm about to under take the adventure of a lifetime and remove the engine to rebuild it myself. I'm in Ohio so the car has seen some winter driving, but very little. We've taken pretty damn good care of the car over the years. It runs and drives, so I'm opening a can of worms, and I have none of the experience, tools, or skills you've got. But one doesn't get experience but not trying new things and tools can be purchased and skills will come with time. I love the fact you've posted on this for years! My dad said it best recently, I have until my son's 16th birthday to do what I have to do and he's about to turn 9, so I should be good! I want to empty my engine bay and respray it while getting the little 12a back in shape. I'm scerrrrrd... but excited. Keep up your amazing work and posts!
The following users liked this post:
Frankenrex (04-26-21)
05-04-21, 08:50 AM
#131
Peace Love Rotary
god I love what you're doing because I'm embarking on my own similar project! To get the fenders off... did you have to cut through a bit of paint or gunk on the top along the side of the engine bay? I'm so hesitant to hurt anything and I don't want to make any problems bigger, but I want to get the darn fenders off! lol
05-05-21, 01:26 AM
#132
god I love what you're doing because I'm embarking on my own similar project! To get the fenders off... did you have to cut through a bit of paint or gunk on the top along the side of the engine bay? I'm so hesitant to hurt anything and I don't want to make any problems bigger, but I want to get the darn fenders off! lol
If you want to replace it, you can. Several auto body suppliers make seam sealer in squeeze tubes, caulking gun cartridges, and in cans for brushing on. I bought several caulking tubes of 3M's Dynatron seam sealer, to replace what I had to remove (or fell out by itself) when cleaning up the areas behind the front fenders. All the welded overlapping seams have seam sealer applied to them to, well, seal them. :P
3M makes like 20 varieties of seam sealer:
3M Seam Sealers | 3M United States
I used this one i particular: AmazonSmile: 3M Dynatron Auto Seam Sealer Caulk, 550, Grey, 12 oz: Garden & Outdoor
I believe that one was also available at my local O'Reilly Auto, if I needed it quickly.
You can see it in use here, on both one of the original seams, and the seams where I welded in new sheet metal:
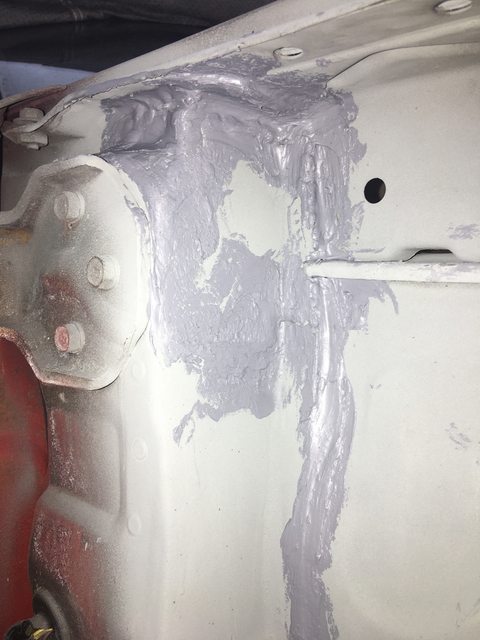
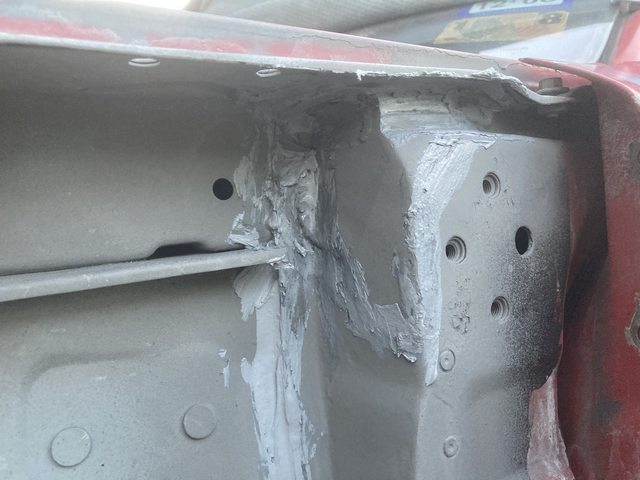

(the grey caulk-looking stuff)
I'm debating whether or not to put sealer back when I reattach everything. I would usually say rust isn't a big problem in Texas, but it did make that mess of the cowl under the chassis braces...
05-12-21, 04:15 PM
#133
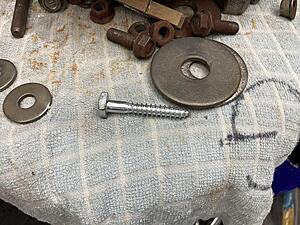
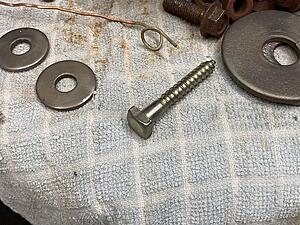
So, it took a few rounds of trial and error to get my plating solution right again, but I finally got a nice plate on my test lag bolt:

Brushed:
Chromated!
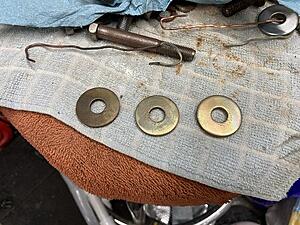
Did a few of the front suspension washers as a further test:
Then decided to go big.
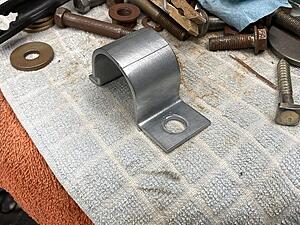
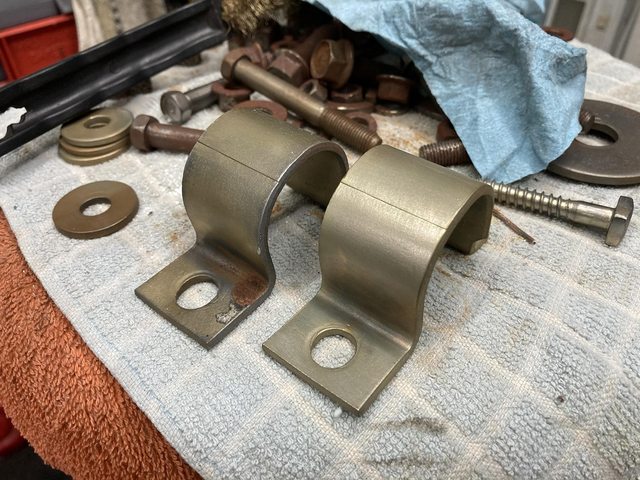
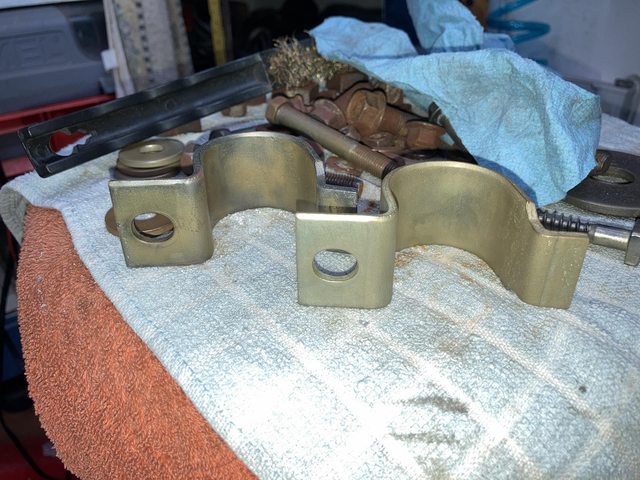
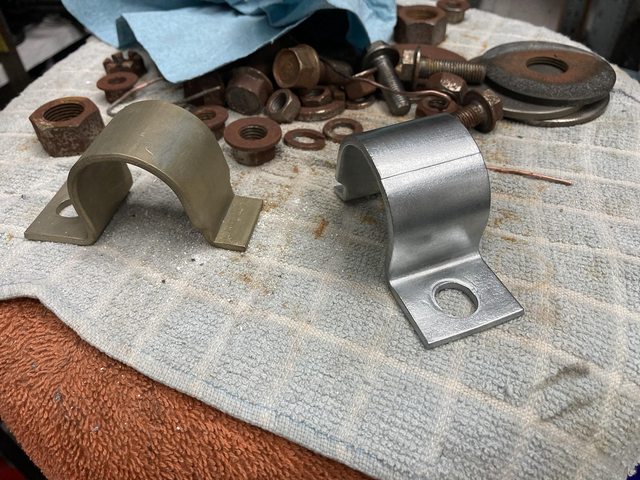
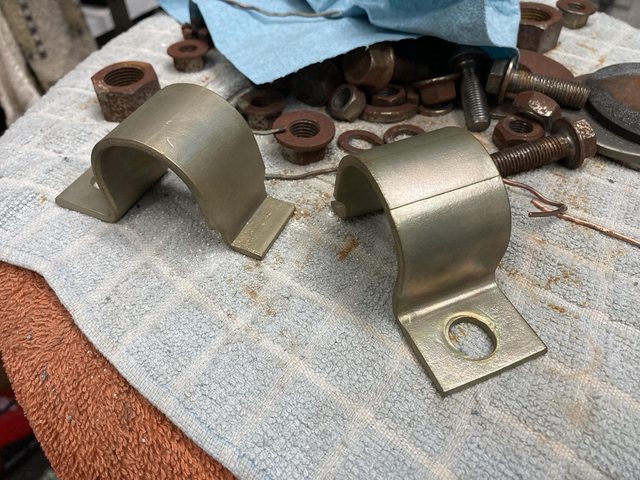
I did one of the sway bar brackets a while back, and apparently missed a few spots:

so I did the other one as another trial:
And it chromated nicely:


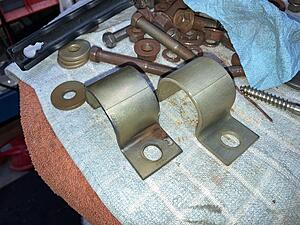
So I stripped the first one and did it again, too:


They came out beautifully. I can't tell you how relieved I was I finally got it working again.
Brushed:

Chromated!
Did a few of the front suspension washers as a further test:

Then decided to go big.
I did one of the sway bar brackets a while back, and apparently missed a few spots:
so I did the other one as another trial:

And it chromated nicely:


So I stripped the first one and did it again, too:
They came out beautifully. I can't tell you how relieved I was I finally got it working again.
05-12-21, 04:16 PM
#134
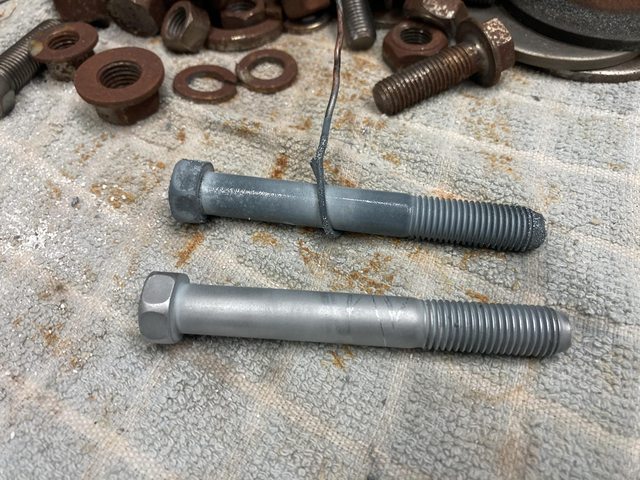
I went ahead and re-plated a couple of the other bolts, just to be sure. These are the control arm pivot bolts.
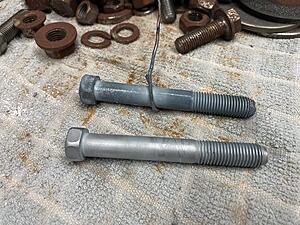
The upper one is fresh out of the tank, and the lower one has been wiped down, but not brushed. They're coming out pretty clean and bright even before brushing, which is nice.
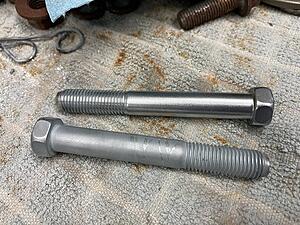
lower bolt is still just wiped down, upper has been brass wire-brushed.
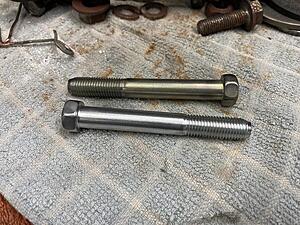
Lower brushed, upper just out of the chromating solution.
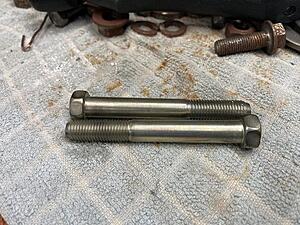
Both chromated. They look like factory-new bolts!
Next up - scaling it up with a plating barrel! I sure hope that works. Doing these one or two at a time will take forever.
05-12-21, 06:42 PM
#135
Rotary Enthusiast
Even the ones you rejected looked great, but wow, with the process perfected, those are factory fresh.
05-21-21, 01:17 AM
#136
Well, the ones I rejected were basically not completely plated, or not plated properly. If the chromate doesn't "stick", that means that the zinc isn't quite right or not there at all, so it's actually an easy way to tell the coating is compromised, and the part will likely rust there.
I had some success with the rest of the bolts, but haven't summoned the effort to write up the post. I plan to do that Friday afternoon. Spoiler: turned out niiiiice.
05-21-21, 10:46 AM
#137
Senior Member
Damn.....those look great.....good job...
05-21-21, 12:47 PM
#138
Thanks! You're really going to like this next bit.
So, trip report with the plating barrel.
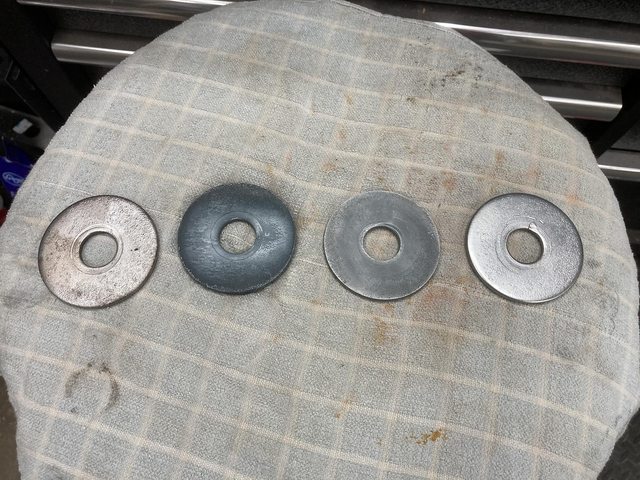
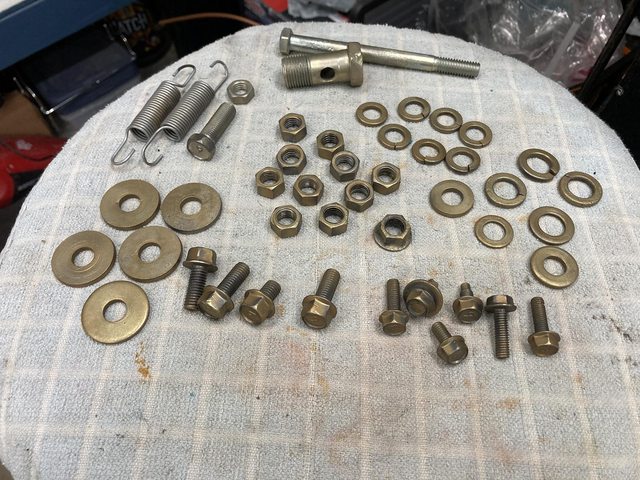
Well, first, I plated the big washers to triple-check my process, and also kind of used them as a demo of the steps:
Raw. Well, two are failed plating.
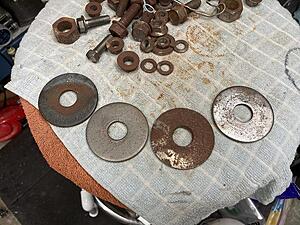
Raw, fresh out of the tank, wiped down, and polished, L to R:

Fresh out, wiped down, polished, and black chromate, L to R:

And all black chromate:
Would prefer a darker black, but they look pretty much like the black chromate bolts I have, so that's it.
On to the bulk plating!
Start:

The hardware developed some nice patina since they were dunked in water, basically, in the previous attempt.
Another trip through the media blaster. Easier this time, since it was just light surface rust.
And then a quick trip to the wire brush wheel:
In progress:
If you look close, you can see the "fizzing" that indicates something good is happening.
Fresh out of the barrel and wiped down:
Starting the brush polishing:
First chromated items looks good!
Yeeessss:

So, trip report with the plating barrel.
Well, first, I plated the big washers to triple-check my process, and also kind of used them as a demo of the steps:
Raw. Well, two are failed plating.

Raw, fresh out of the tank, wiped down, and polished, L to R:
Fresh out, wiped down, polished, and black chromate, L to R:
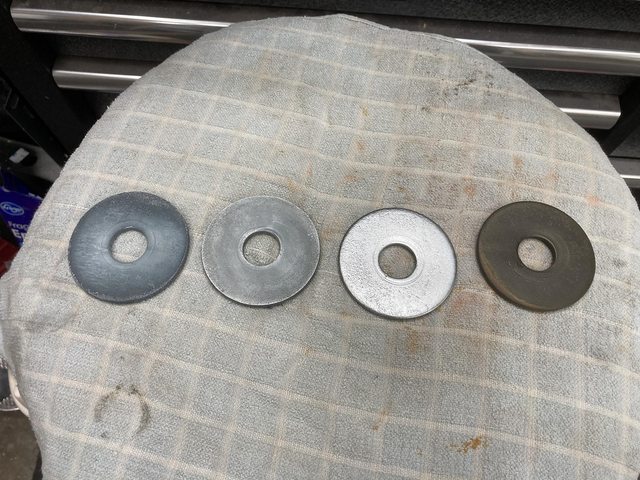
And all black chromate:
Would prefer a darker black, but they look pretty much like the black chromate bolts I have, so that's it.
On to the bulk plating!
Start:

The hardware developed some nice patina since they were dunked in water, basically, in the previous attempt.
Another trip through the media blaster. Easier this time, since it was just light surface rust.

And then a quick trip to the wire brush wheel:

In progress:
If you look close, you can see the "fizzing" that indicates something good is happening.
Fresh out of the barrel and wiped down:

Starting the brush polishing:

First chromated items looks good!
Yeeessss:
 05-21-21, 12:50 PM
#139
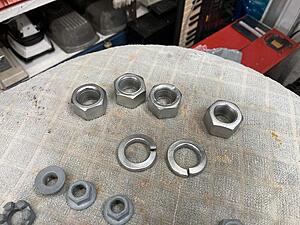
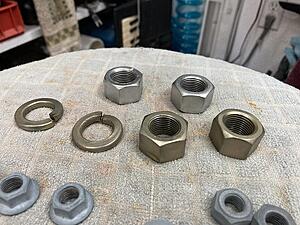
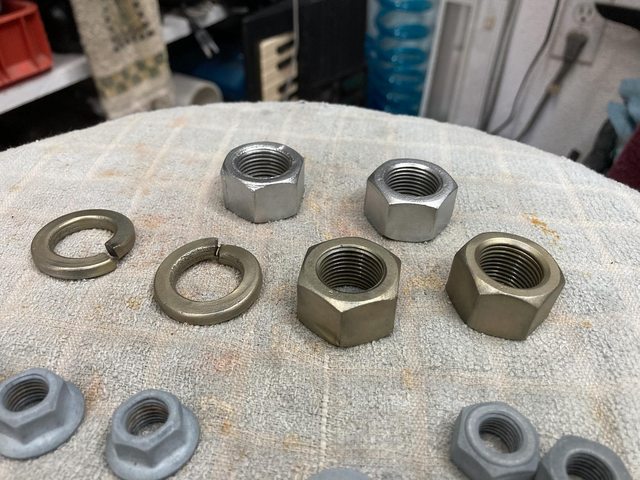
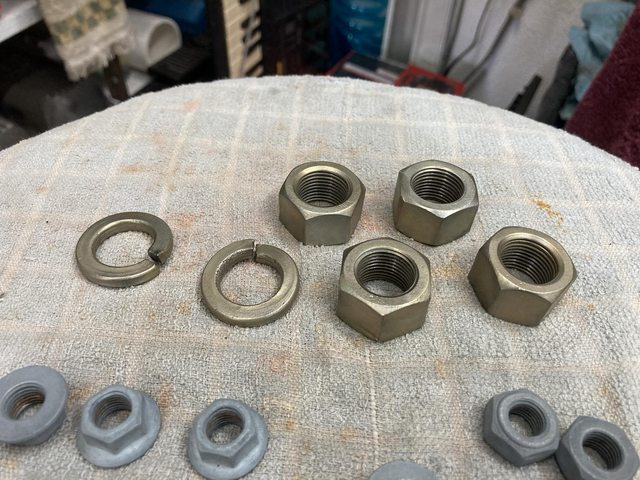
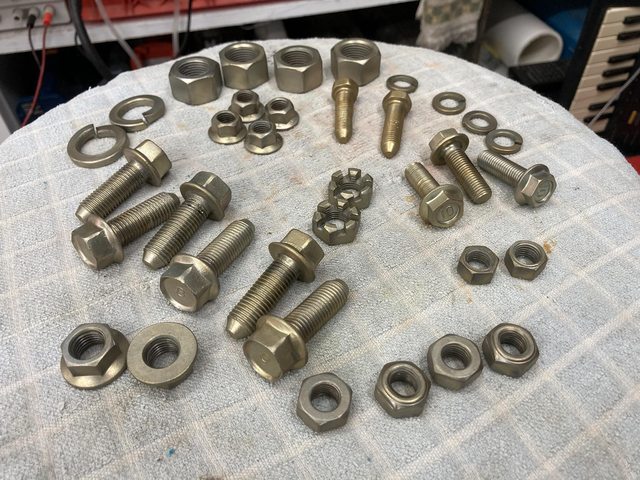
Bolts and nuts next:

Polished:
Chromate:
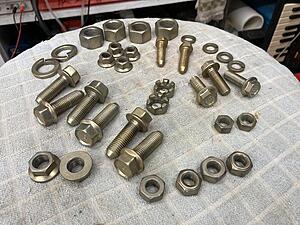
I am beyond stoked. Those came out absolutely fantastic!
I did have one failure:
The flex to the electrode broke. Twice! this is the second time. I was using solder braid for the flex, soldered to the wire and the copper tube. You guessed it - it broke at the solder joint. You can see I fixed it the first time by using a butt crimp, then it broke at the other end.
I fixed that by upgrading to 16ga speaker cable and crimping both ends:


I need to invest in some ferrules and the square or hex crimper for those. Just learned about those a couple weeks ago.
I guess now I don't have an excuse to not reinstall the front suspension, or at least the crossmember. I do still need to order new bushings.
Polished:
Chromate:
I am beyond stoked. Those came out absolutely fantastic!
I did have one failure:

The flex to the electrode broke. Twice! this is the second time. I was using solder braid for the flex, soldered to the wire and the copper tube. You guessed it - it broke at the solder joint. You can see I fixed it the first time by using a butt crimp, then it broke at the other end.
I fixed that by upgrading to 16ga speaker cable and crimping both ends:
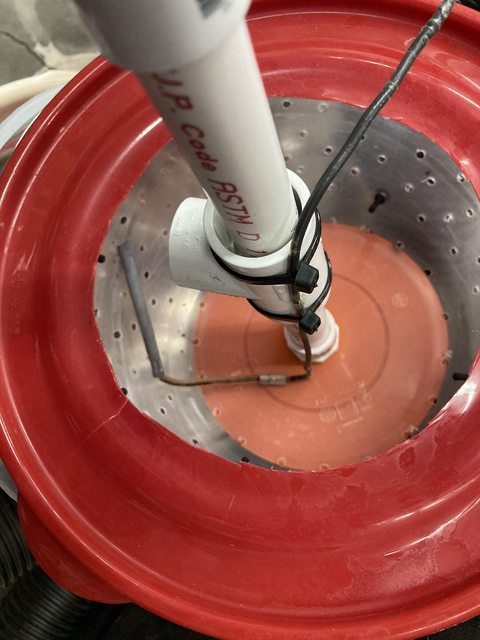
I need to invest in some ferrules and the square or hex crimper for those. Just learned about those a couple weeks ago.
I guess now I don't have an excuse to not reinstall the front suspension, or at least the crossmember. I do still need to order new bushings.
05-21-21, 05:06 PM
#140
Rotary Enthusiast
Damn, between this and 3D printers, we'll have brand new cars. Nice work.
The following users liked this post:
Frankenrex (05-22-21)
05-21-21, 10:32 PM
#141
Senior Member
05-22-21, 06:22 PM
#142
Man, I hope so. I really need a 3D printer, for this and other projects. I backed one on Kickstarter, but it looks like I wasted my money, because: 3D printer on Kickstarter. *Everyone* seems to underestimate the realities of production...
06-04-21, 09:14 AM
#143
Are you tired of plating chat, yet?
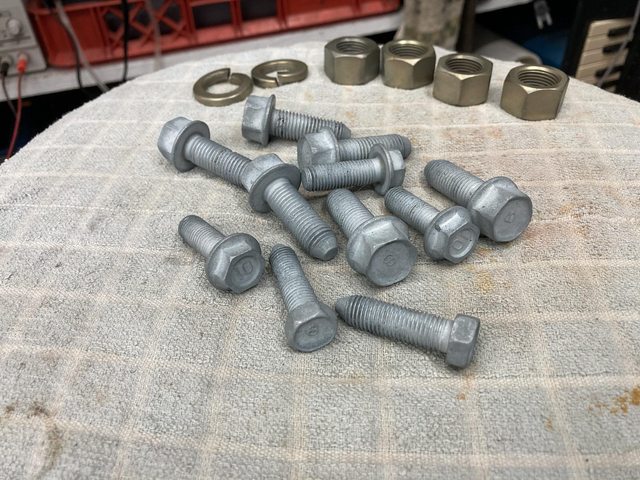
Refreshed the plating solution, and did a test plate.
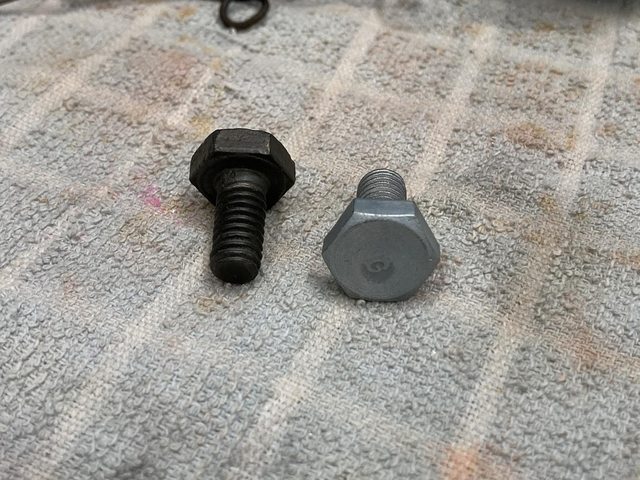
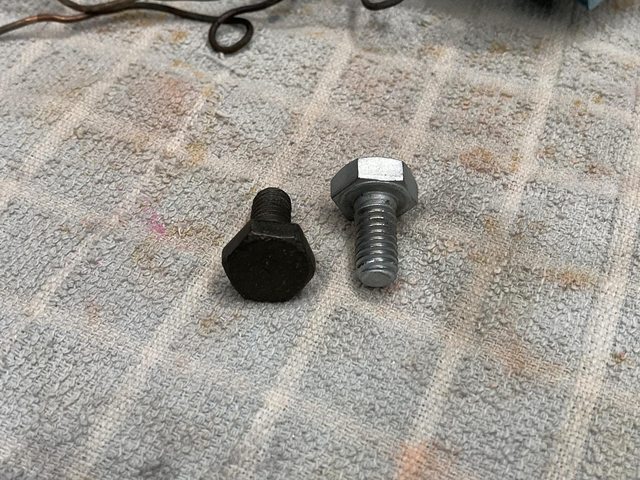
Rusty-*** bolts:
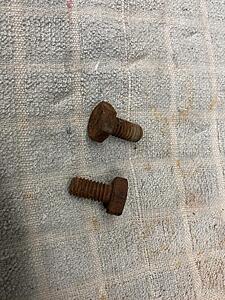
I actually tried to plate these earlier with the previous solution, but I'd obviously tainted that batch, so I had to re-blast them and start over. It went great this time.
You've all seen the gold chromate, so I decided to show the black and "blue" chromate with these:

It's hard to see in the pictures, but even these have a little bit of the iridescence that's in the yellow. It's easier to see in the blue. The black isn't really as dark as I would like, but it's OK.
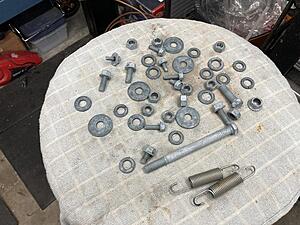
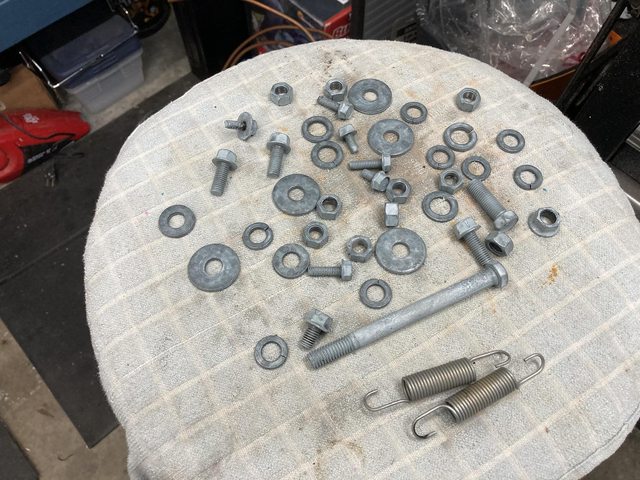
Test successful, I grabbed a baggie of hardware from the engine to clean up.

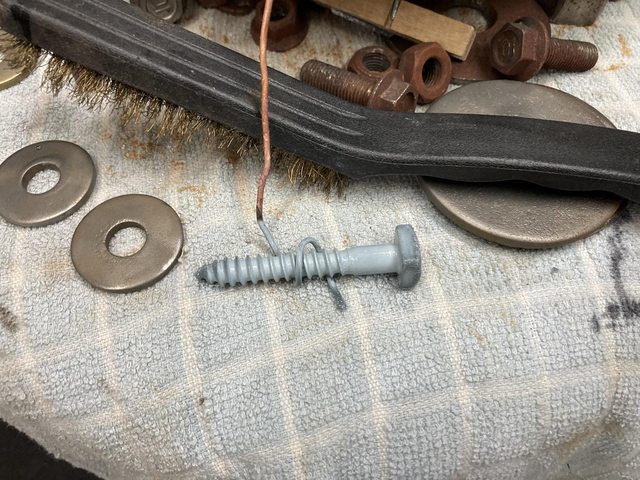
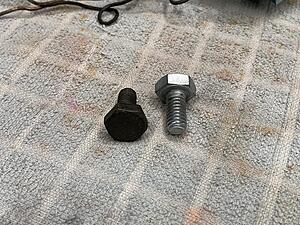
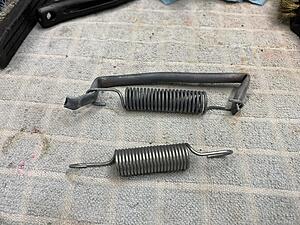
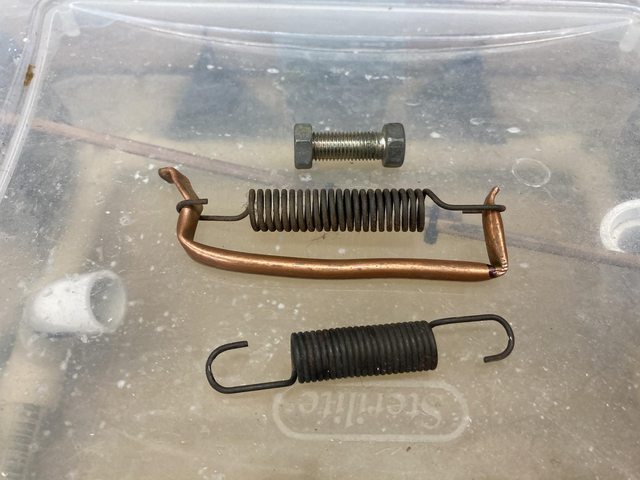
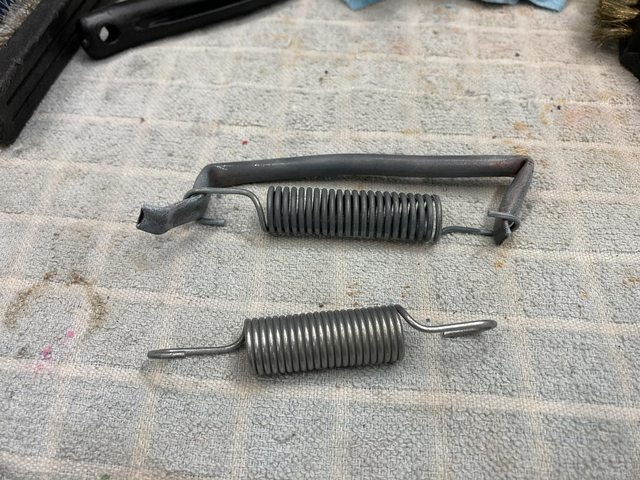
And a pair of springs and one bolt that was worse for wear from the clutch pedal assembly (the rest of that hardware was still fine):
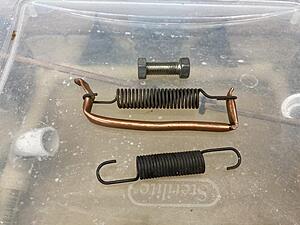
The copper line thing is just a rig to hold the spring somewhat open so it will plate inside and between the coils, and also to let the media blaster get in there as well. I'll plate them one at a time on the frame.
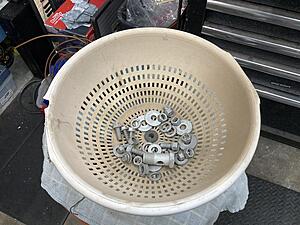
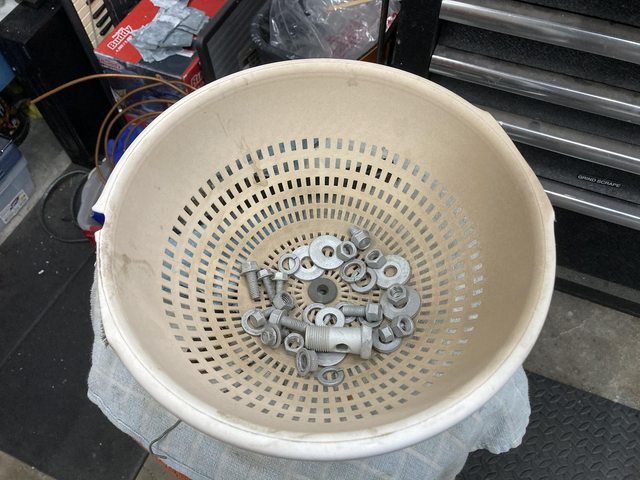
All the stuff blasted:
I also figured out a feed problem with my media blaster. It was acting up again with the new gravity feed. Turns out the filter I had on the "air bleed" was too restrictive, so it couldn't flow enough air volume to draw the media all the way to the gun. Unscrewed that and I had a steady, consistent blast. It was very nice. Don't really need the filter - I just didn't want crap to get into it, mainly when just sitting, but I can close the bleed valve to prevent that, and just blow it out before use.
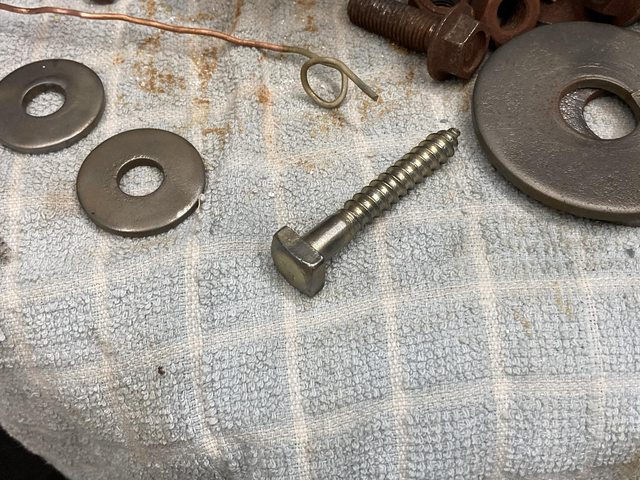
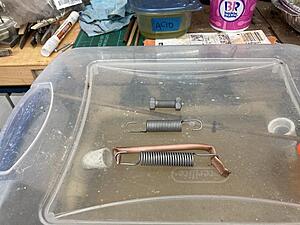
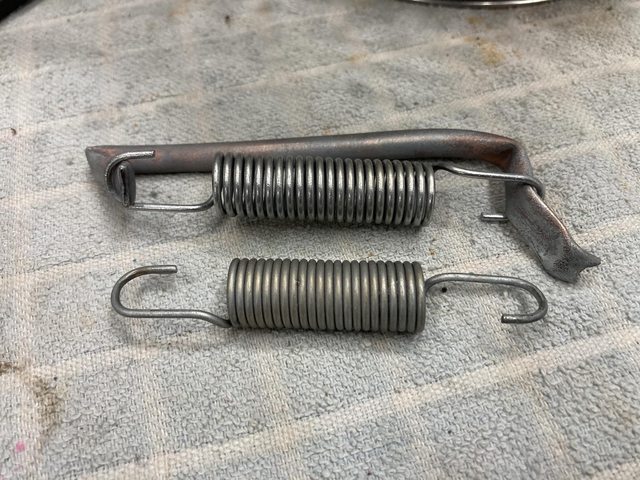
The springs, both plated. The one on the frame is fresh out of the tank, the other has been brushed:
Very nice!
The one on the frame brushed, versus the other with blue chromate:
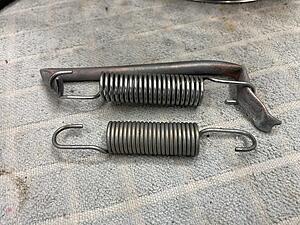
Came out with a little bit more yellow in it, but not an issue. I'm looking for "no rust" here.
All the other hardware after a pass by the wire wheel:
Refreshed the plating solution, and did a test plate.
Rusty-*** bolts:
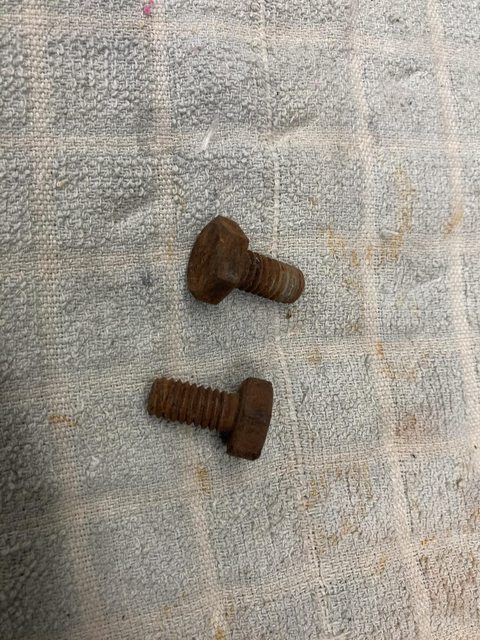
I actually tried to plate these earlier with the previous solution, but I'd obviously tainted that batch, so I had to re-blast them and start over. It went great this time.
You've all seen the gold chromate, so I decided to show the black and "blue" chromate with these:
It's hard to see in the pictures, but even these have a little bit of the iridescence that's in the yellow. It's easier to see in the blue. The black isn't really as dark as I would like, but it's OK.
Test successful, I grabbed a baggie of hardware from the engine to clean up.

And a pair of springs and one bolt that was worse for wear from the clutch pedal assembly (the rest of that hardware was still fine):
The copper line thing is just a rig to hold the spring somewhat open so it will plate inside and between the coils, and also to let the media blaster get in there as well. I'll plate them one at a time on the frame.
All the stuff blasted:

I also figured out a feed problem with my media blaster. It was acting up again with the new gravity feed. Turns out the filter I had on the "air bleed" was too restrictive, so it couldn't flow enough air volume to draw the media all the way to the gun. Unscrewed that and I had a steady, consistent blast. It was very nice. Don't really need the filter - I just didn't want crap to get into it, mainly when just sitting, but I can close the bleed valve to prevent that, and just blow it out before use.
The springs, both plated. The one on the frame is fresh out of the tank, the other has been brushed:
Very nice!
The one on the frame brushed, versus the other with blue chromate:
Came out with a little bit more yellow in it, but not an issue. I'm looking for "no rust" here.
All the other hardware after a pass by the wire wheel:
 06-04-21, 09:15 AM
#144
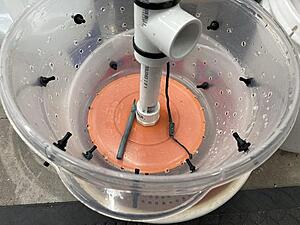
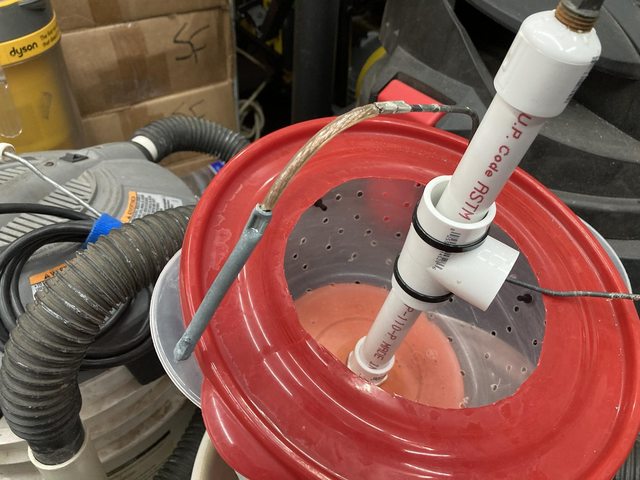
Speaking of the wire wheel, I got tired of the wheel chucking **** out of the garage door, so I built this:

Hopefully it works. I added the rear vertical after it snatched a nut and bounced it off of the rag. Not out of the door, but I still had to go chase it.
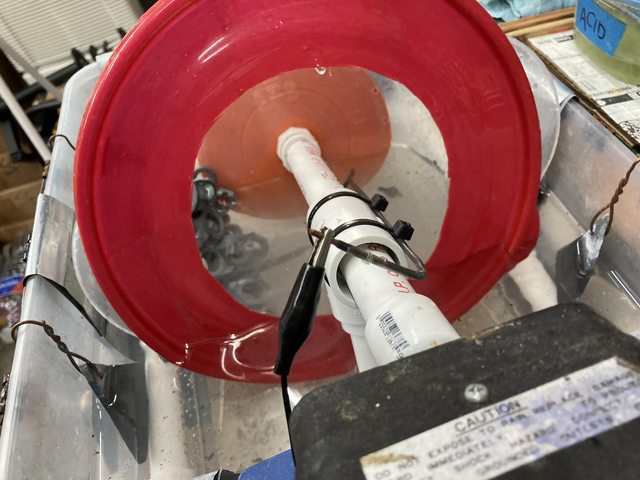
The plating barrel performed well with the new electrode:
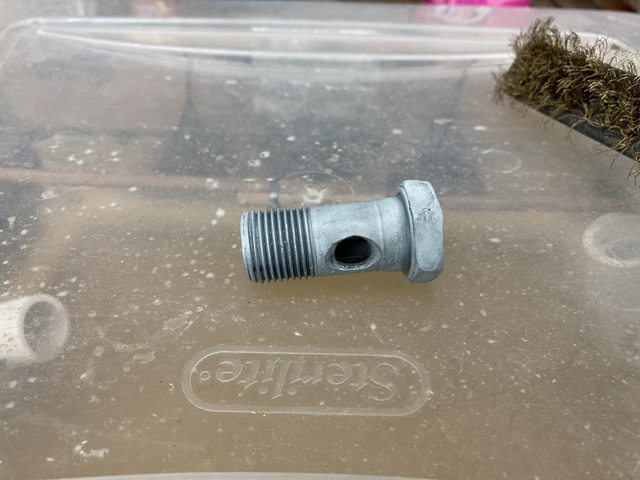
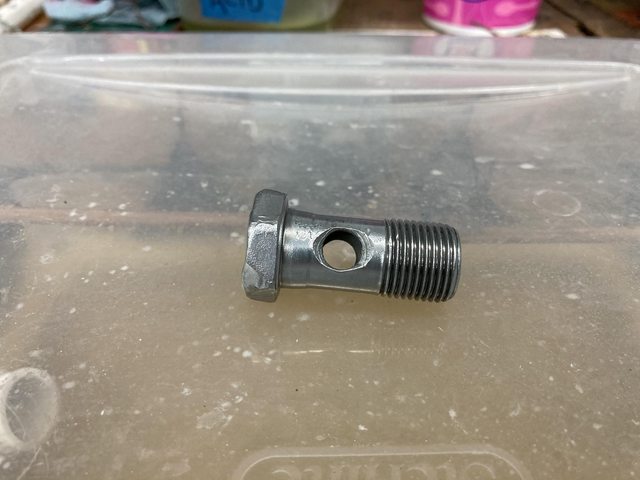
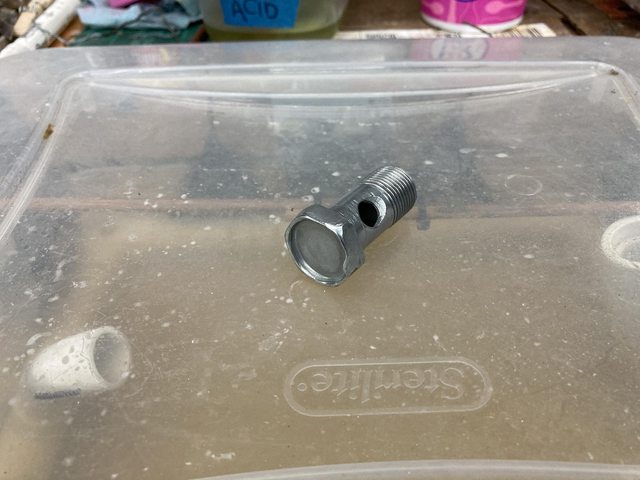
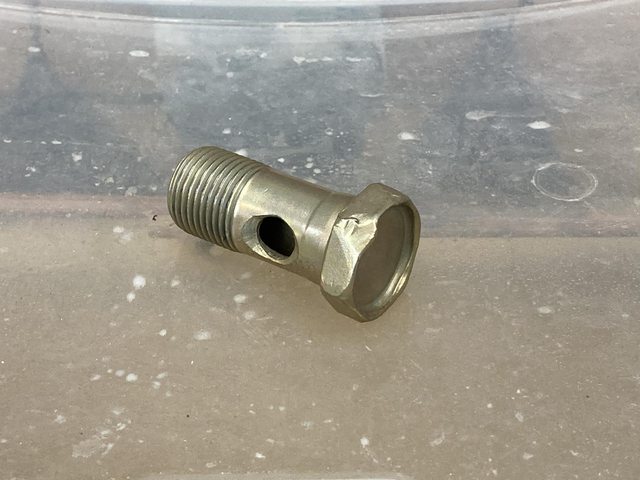
I did the banjo fitting seen in the earlier group picture separately

Brushed:
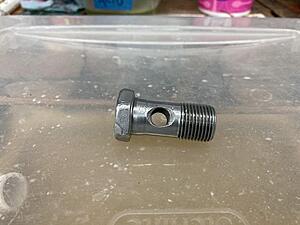
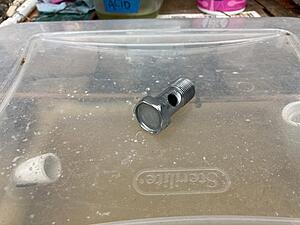
And chromated:
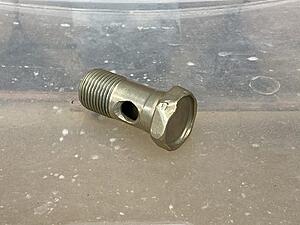
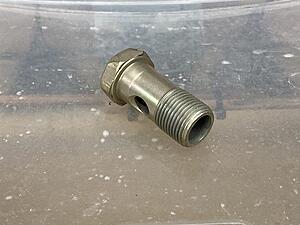
Again, this made me stupidly happy.
I still need to run all the other hardware through the wire brush (I *really* need to drop the $70 for a vbratory tumbler from HF...) and then dunk it in the chromate. I'll probably dunk all those at once rather than the one-at-a-time on a piece of wire I've been doing. I just need a small strainer basket.
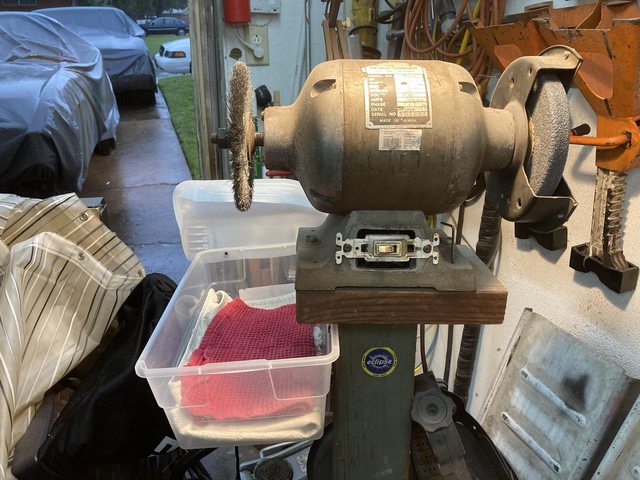
Hopefully it works. I added the rear vertical after it snatched a nut and bounced it off of the rag. Not out of the door, but I still had to go chase it.
The plating barrel performed well with the new electrode:
I did the banjo fitting seen in the earlier group picture separately
Spoiler
Brushed:
And chromated:

Again, this made me stupidly happy.
I still need to run all the other hardware through the wire brush (I *really* need to drop the $70 for a vbratory tumbler from HF...) and then dunk it in the chromate. I'll probably dunk all those at once rather than the one-at-a-time on a piece of wire I've been doing. I just need a small strainer basket.
06-04-21, 09:18 AM
#145
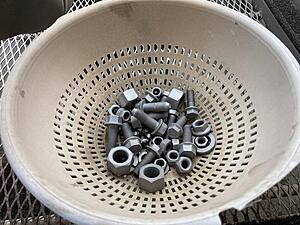
Wandered out in the garage when I was supposed to be working (hey, I caught up on email, and had my phone with me!)
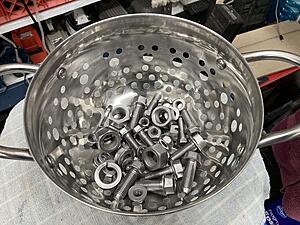
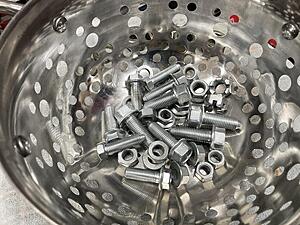
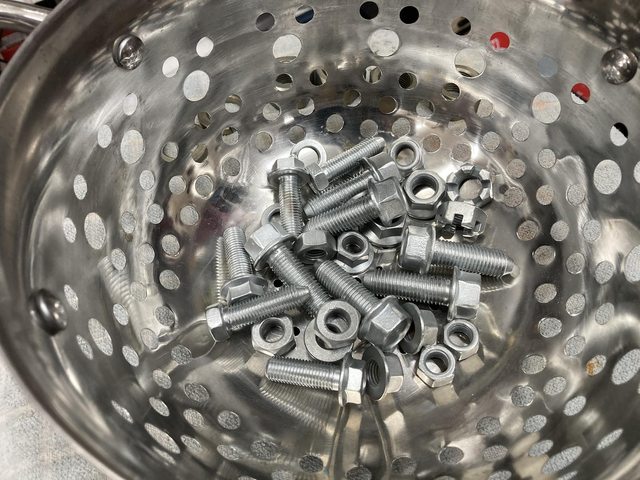
Wire-wheeled:
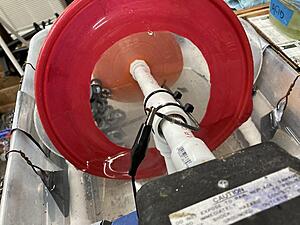
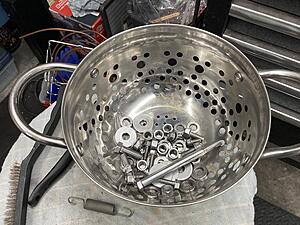
DIY strainer basket:
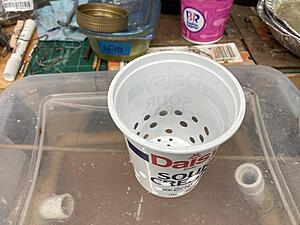
Sploosh:

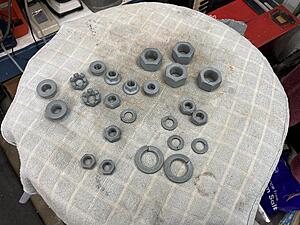
Seems to have worked:
It's a little mottled, so the plating may not have taken exactly right in the barrel. The threads especially look to be iffy. I didn't dip these in muriatic acid, so that may be the issue, but I don't think I dipped the previous batch, either. It could also be because I didn't calculate the current, and just flew by the seat of my pants. �\_(ツ)_/�
The washers came out really nice. the bolts and nuts are good enough - these are fasteners for various engine hangers-on. I'll leave them out in the garage for a while and see if they rust. Maybe mist them with water a little after the chromate hardens to push it.
I honestly can't decide whether to get a vibratory tumbler or one of the newer jewelry polishing tumblers.
This:

versus this:
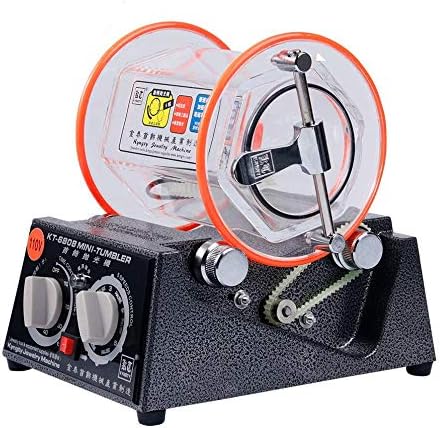
LegitStreetCars on YT loved the rolling tumbler for cleaning fasteners in a recent video.
Both roughly the same price, about $65-70
For polishing, I'd need to figure out what media to load the jewelry tumbler with. I still have some of the triangular media for the vibratory (I used to have one - it got disappeared.)
Looks like stainless-steel shot (various shapes) and "Shine Bright" are the ticket.
It's only money...
edit: and maybe a little 3" mini-bench grinder I can mount a small brass wire wheel on. Like this little guy:

Only $40! The flex shaft motor tool is pretty neat.
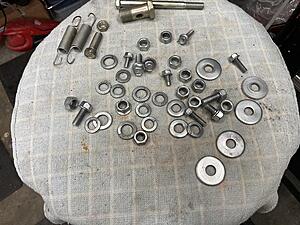
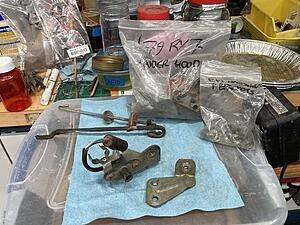
I also found the other bags of hardware that need to be done!

As the labels indicate, this is all the bits and fasteners for under-hood stuff.
Definitely need to get a tumbler.
Wire-wheeled:

DIY strainer basket:

Sploosh:

Seems to have worked:
It's a little mottled, so the plating may not have taken exactly right in the barrel. The threads especially look to be iffy. I didn't dip these in muriatic acid, so that may be the issue, but I don't think I dipped the previous batch, either. It could also be because I didn't calculate the current, and just flew by the seat of my pants. �\_(ツ)_/�
The washers came out really nice. the bolts and nuts are good enough - these are fasteners for various engine hangers-on. I'll leave them out in the garage for a while and see if they rust. Maybe mist them with water a little after the chromate hardens to push it.
I honestly can't decide whether to get a vibratory tumbler or one of the newer jewelry polishing tumblers.
This:
versus this:
LegitStreetCars on YT loved the rolling tumbler for cleaning fasteners in a recent video.
Both roughly the same price, about $65-70
For polishing, I'd need to figure out what media to load the jewelry tumbler with. I still have some of the triangular media for the vibratory (I used to have one - it got disappeared.)
Looks like stainless-steel shot (various shapes) and "Shine Bright" are the ticket.
It's only money...
edit: and maybe a little 3" mini-bench grinder I can mount a small brass wire wheel on. Like this little guy:
Only $40! The flex shaft motor tool is pretty neat.
I also found the other bags of hardware that need to be done!

As the labels indicate, this is all the bits and fasteners for under-hood stuff.
Definitely need to get a tumbler.
06-07-21, 11:30 AM
#146
Bought a rotary tumbler - should be here on Wednesday, and I'll see how it works on the next batch of bolts.
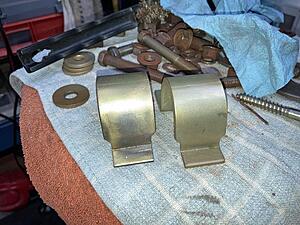
In the meantime, some larger solo stuff.
Last post I pictured this batch:
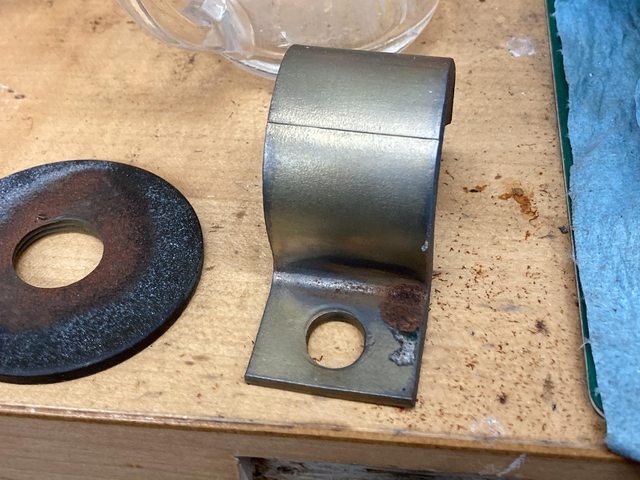
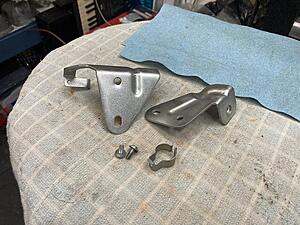
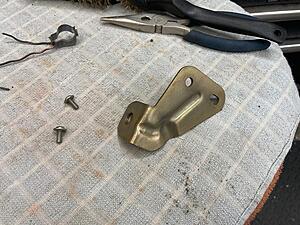
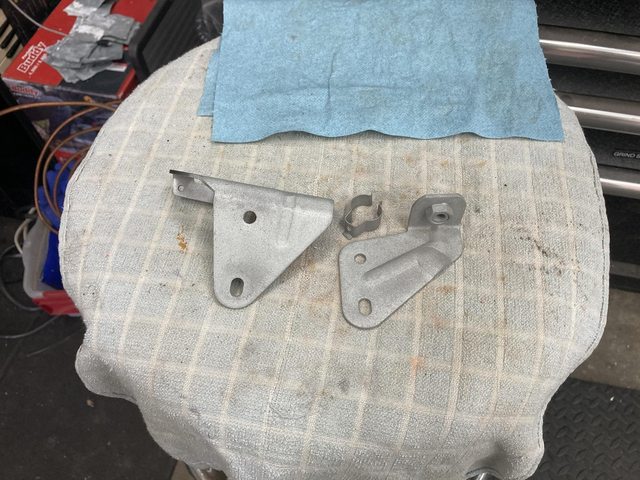
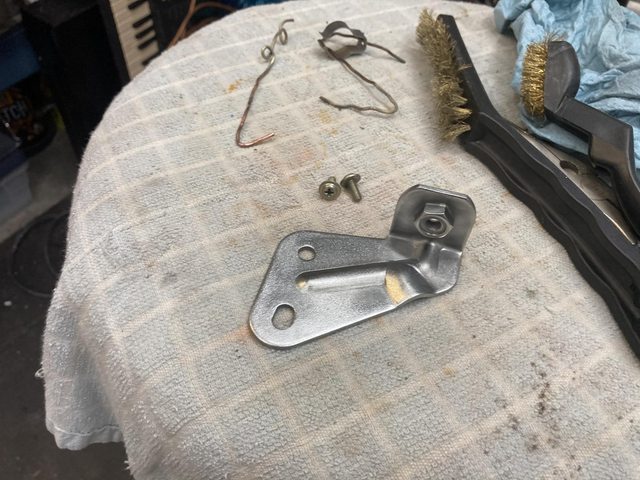
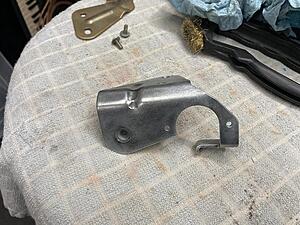
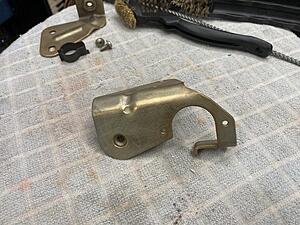
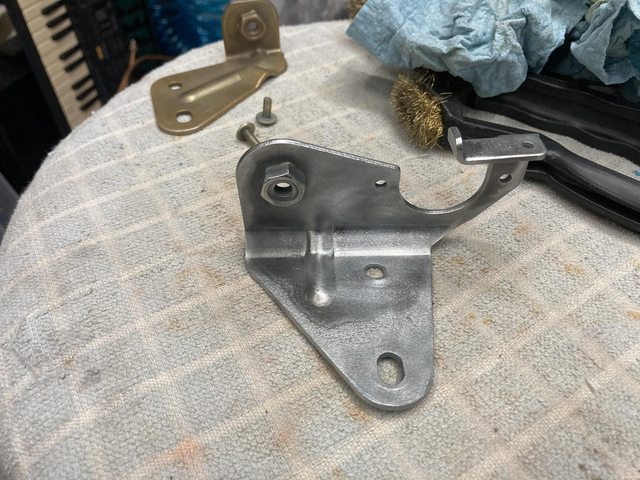
So let's do those brackets in the front. These are to mount the the airbox/AFM in the front right corner of the engine bay.
Blasted:

(the rivet in the clip for the connector broke, which is just as well. It would have been difficult to plate as one piece. It's just a 1/8" rivet, but I do need to get some shorter ones - all I have are 3/16-1/4" grip.)
polished:
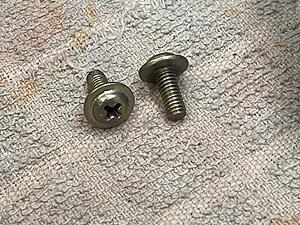
Screws for the sensor plated and polished:
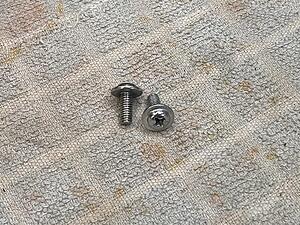
Screws chromated:
:thumbsup:
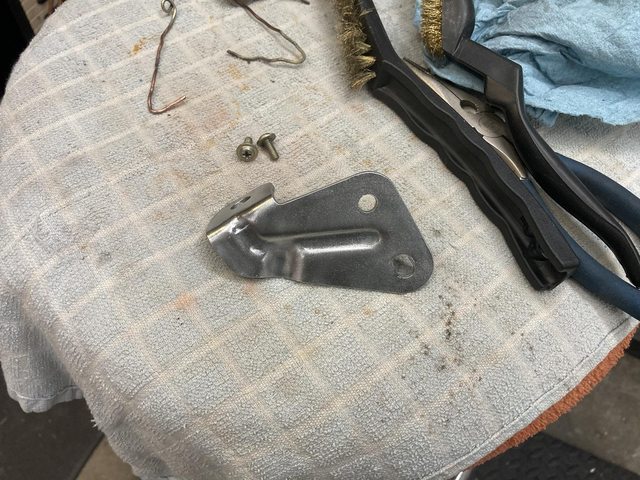
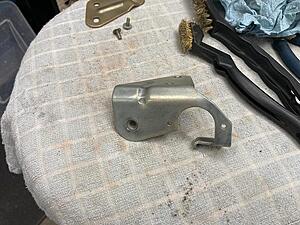
One bracket plated and polished:
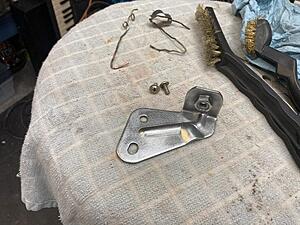
Chromated:
In the meantime, some larger solo stuff.
Last post I pictured this batch:

So let's do those brackets in the front. These are to mount the the airbox/AFM in the front right corner of the engine bay.
Blasted:
(the rivet in the clip for the connector broke, which is just as well. It would have been difficult to plate as one piece. It's just a 1/8" rivet, but I do need to get some shorter ones - all I have are 3/16-1/4" grip.)
polished:

Screws for the sensor plated and polished:
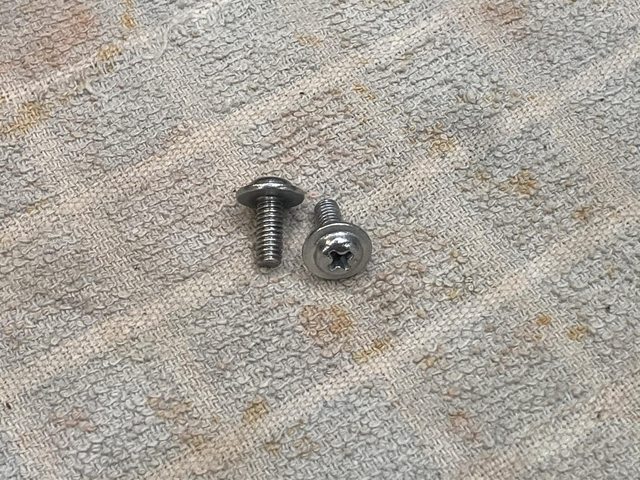
Screws chromated:

:thumbsup:
One bracket plated and polished:
Chromated:

 06-07-21, 11:32 AM
#147
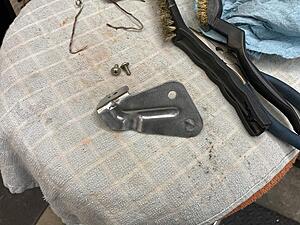
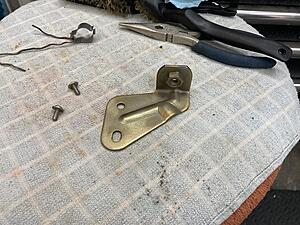
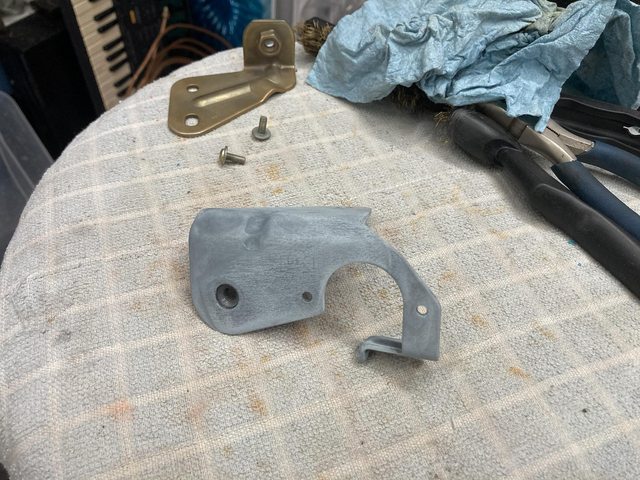
Second bracket came out a little weird:
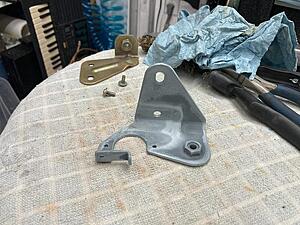

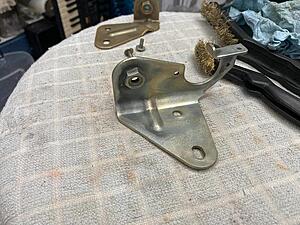
Well, that was unsatisfying. I think I left it out too long after dunking in the acid - it developed a little surface rust, which wiped off, but...
The somewhat complex shape also makes it difficult to plate evenly. The inside corners tend to get thin coverage. I'll try again.
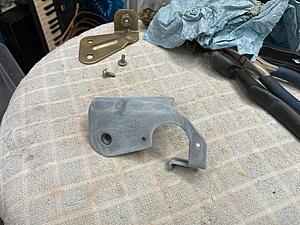
While I was re-blasing that part, I dunked the clip:
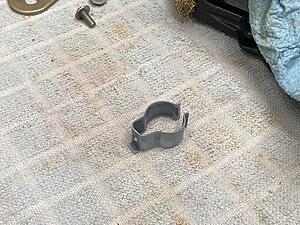
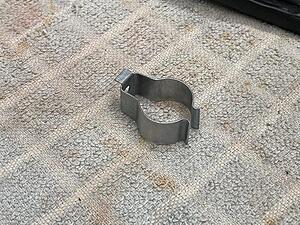
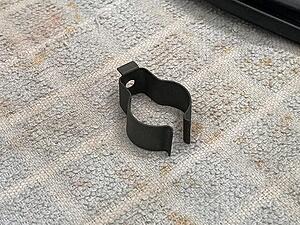

Nice. Obviously, I went with black on that part. I made sure to run a session with one anode *inside* the clip, to make sure that part got plated. Looks like it worked. I used that technique to target the "inside" areas on the big bracket on the second try, too. Worked a lot better this time around:

:nice:


Well, that was unsatisfying. I think I left it out too long after dunking in the acid - it developed a little surface rust, which wiped off, but...
The somewhat complex shape also makes it difficult to plate evenly. The inside corners tend to get thin coverage. I'll try again.
While I was re-blasing that part, I dunked the clip:

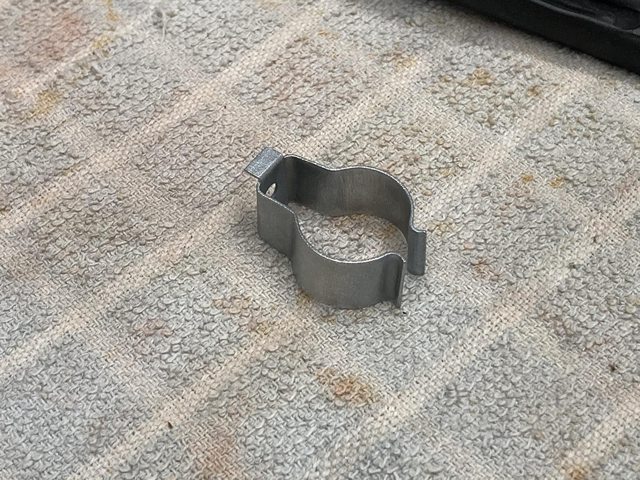
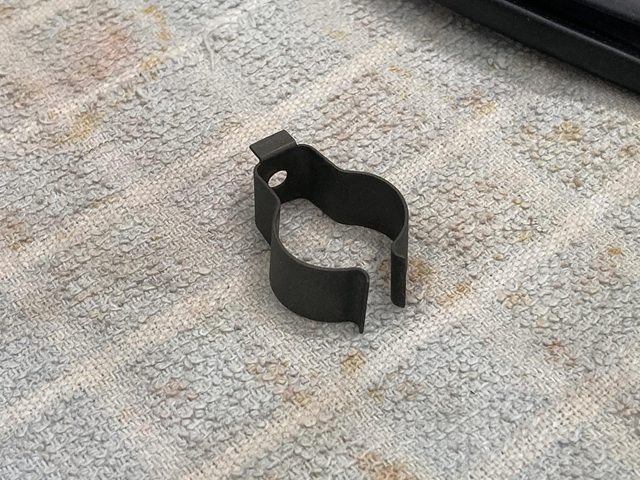
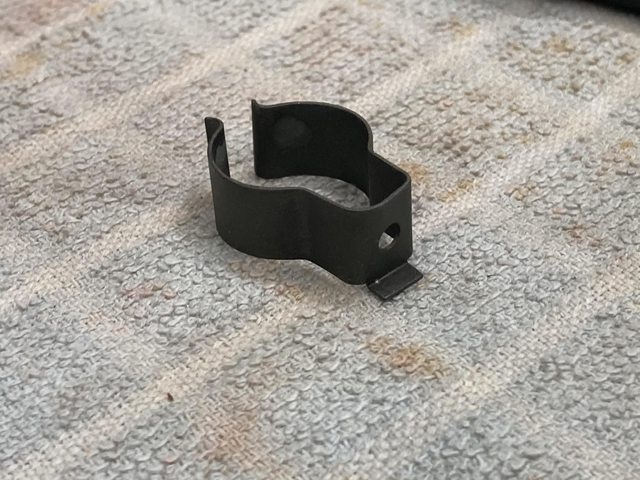
Nice. Obviously, I went with black on that part. I made sure to run a session with one anode *inside* the clip, to make sure that part got plated. Looks like it worked. I used that technique to target the "inside" areas on the big bracket on the second try, too. Worked a lot better this time around:


:nice:
06-14-21, 11:23 AM
#148
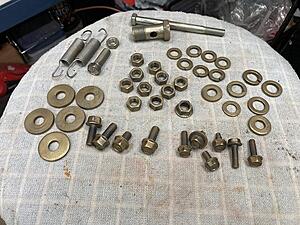
Got off my butt on Sunday (Saturday was dedicated to fixing a few small things around the house and garage, but mostly video games...) and started some reassembly!
Pile of front suspension bits (minus a few things):
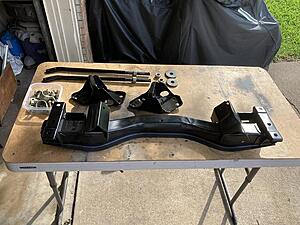
Reattached to the car:
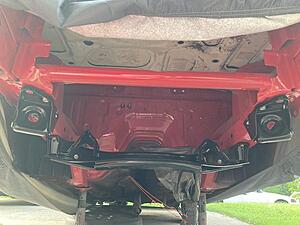
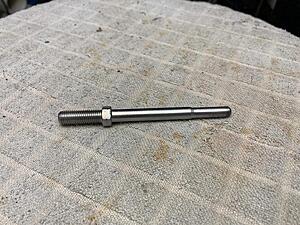
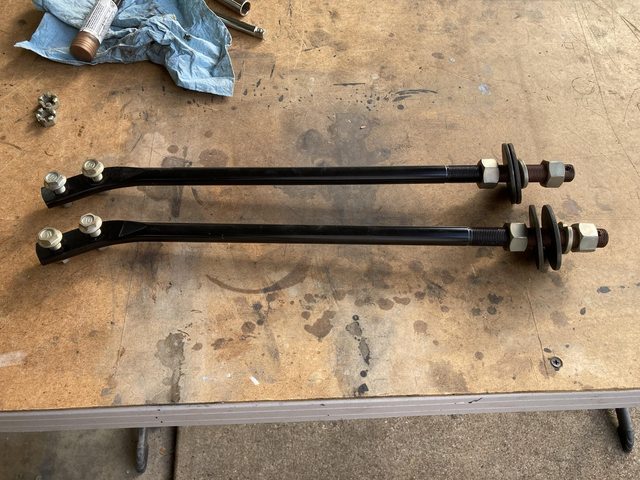
Radius rods ready to go back on:

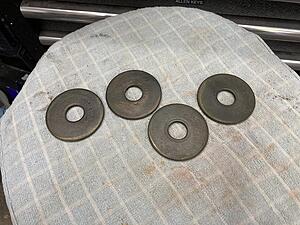
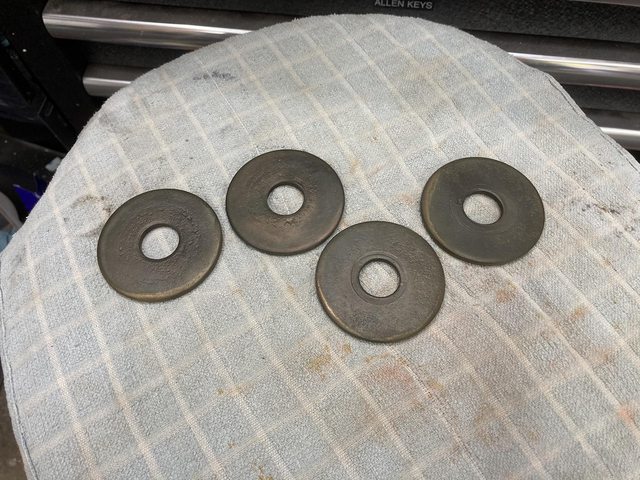
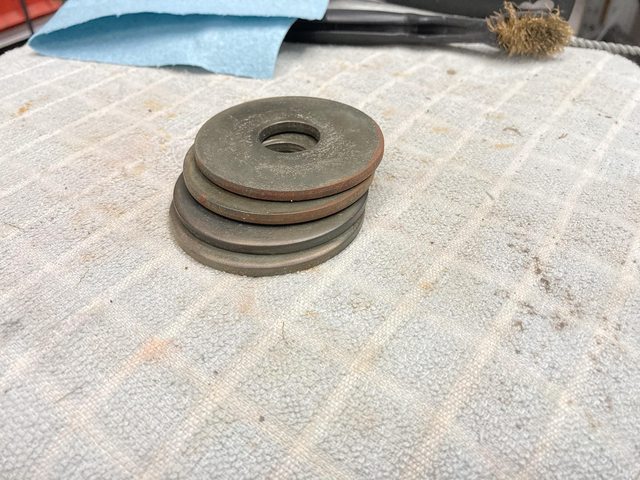
Speaking of, I had to re-do those big washers. They developed some rust on the outside edges:

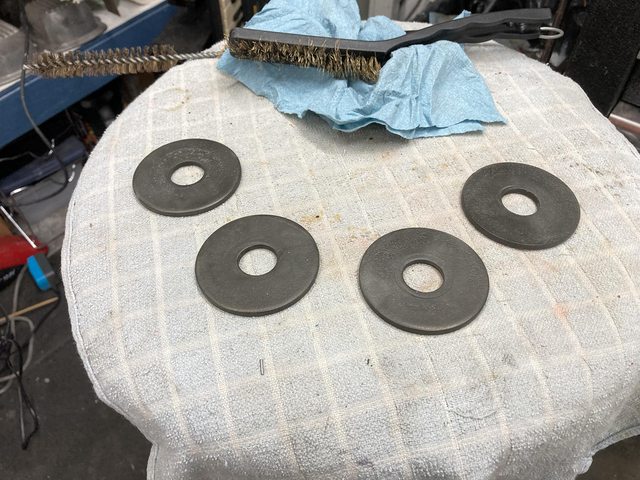
Second (third, for a couple of them) time around looks better:

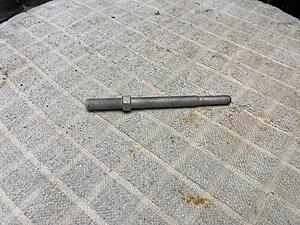
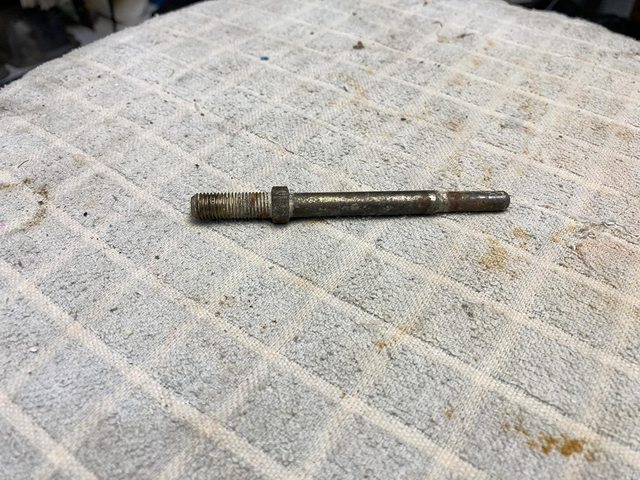
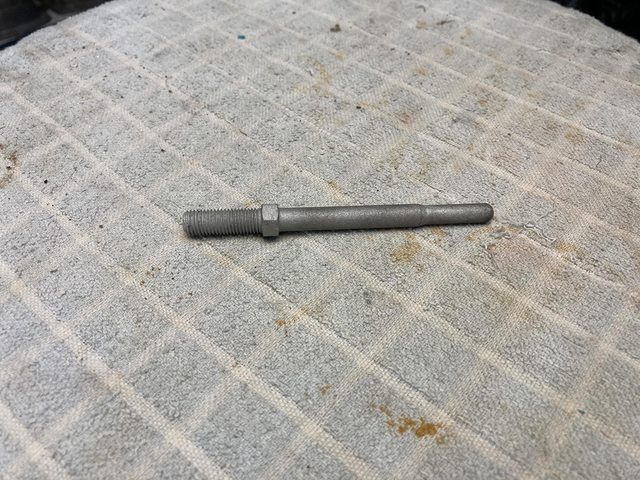
While farting around with the other stuff, I noted that the clutch push rod needed love:
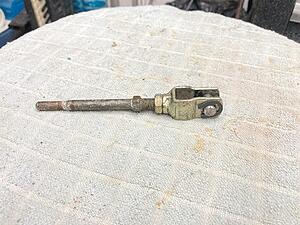
... huh, I forgot to get a picture of it chromated. It came out nice.
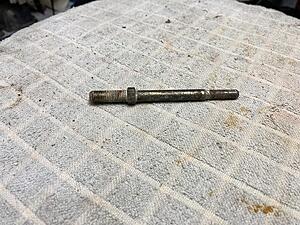
And I started on a couple of other steery bits:
Pile of front suspension bits (minus a few things):
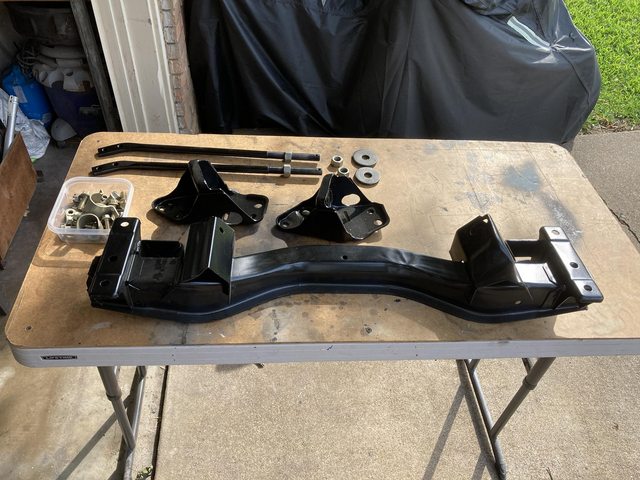
Reattached to the car:

Radius rods ready to go back on:
Speaking of, I had to re-do those big washers. They developed some rust on the outside edges:
Second (third, for a couple of them) time around looks better:
While farting around with the other stuff, I noted that the clutch push rod needed love:
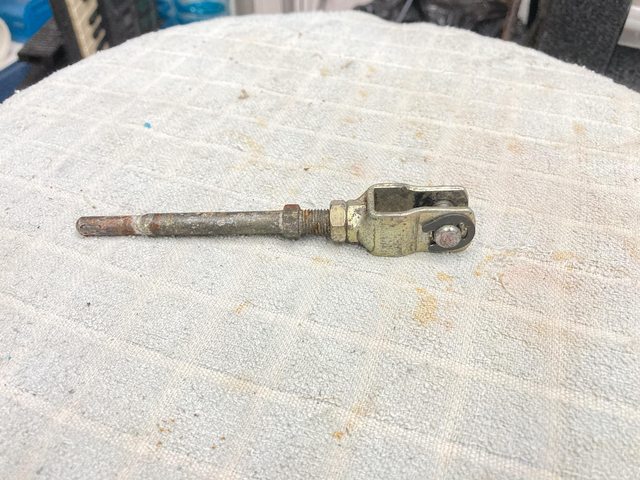
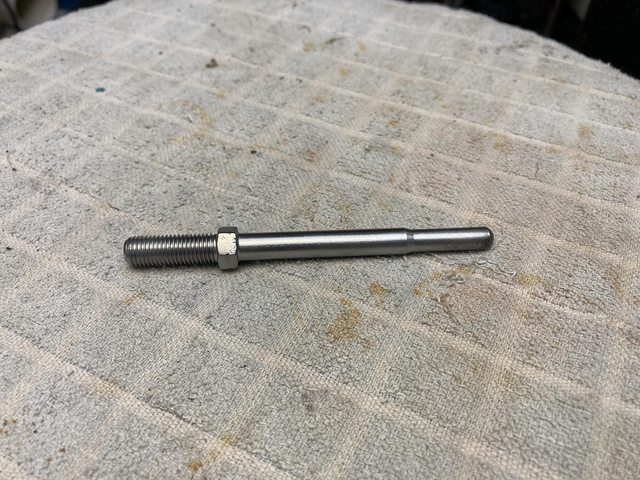
... huh, I forgot to get a picture of it chromated. It came out nice.
And I started on a couple of other steery bits:
 06-14-21, 11:24 AM
#149
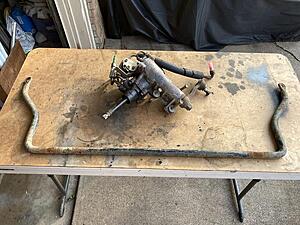
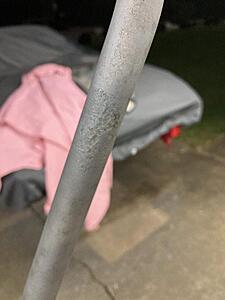
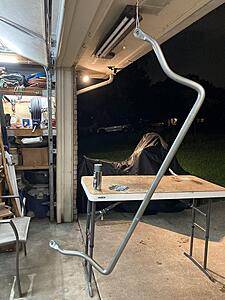
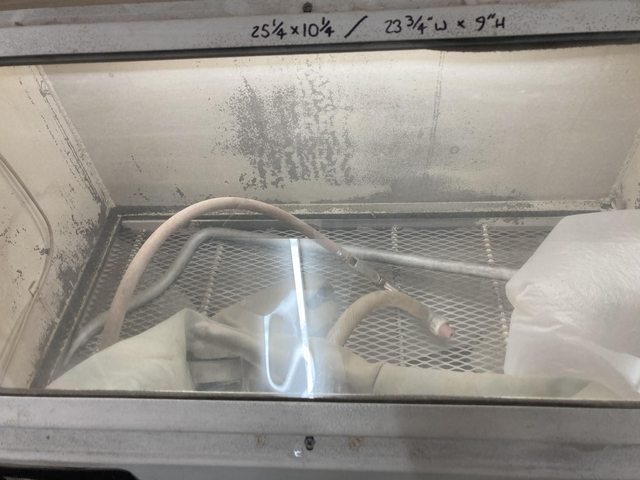
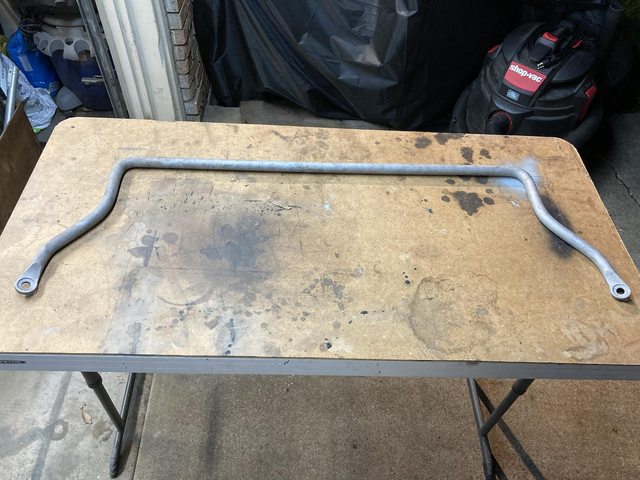
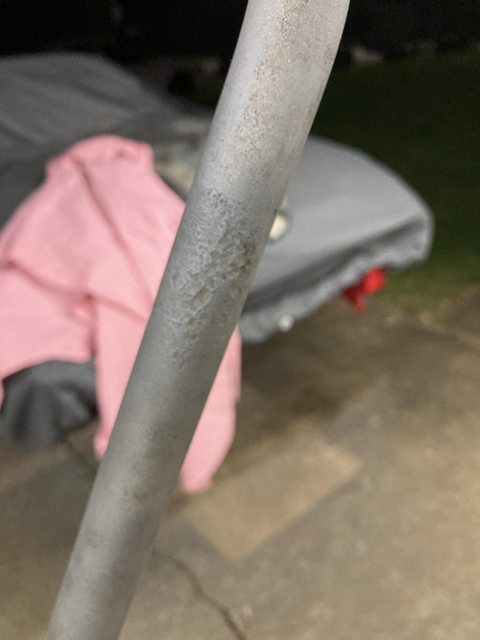
Didn't get to the steering box. The sway bar took a lot longer to blast than I anticipated. It also made a mess, because it didn't fit.
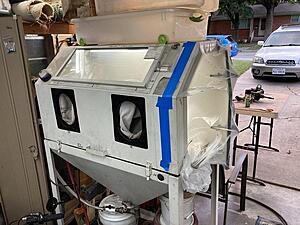
(I almost immediately replaced the plastic with an old sheet that worked much better.)


Little bit of pitting where the bushings go:
Oh, well.
Went with "cast iron" engine paint on this, for contrast (and my can of black appliance epoxy enamel was almost empty.)

(I almost immediately replaced the plastic with an old sheet that worked much better.)
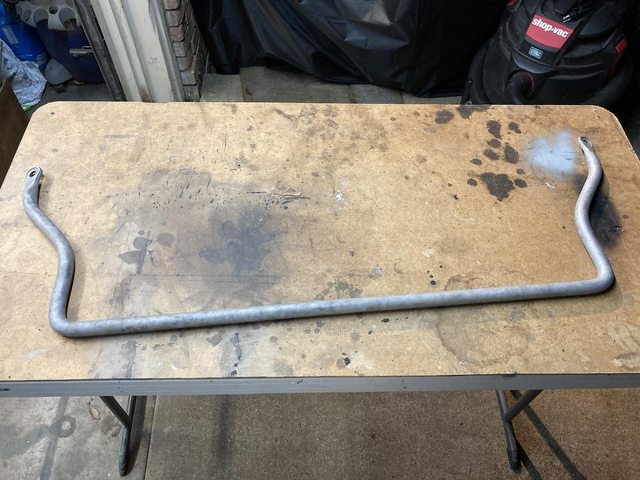
Little bit of pitting where the bushings go:
Oh, well.
Went with "cast iron" engine paint on this, for contrast (and my can of black appliance epoxy enamel was almost empty.)
 06-14-21, 02:35 PM
#150
Senior Member
Nice...looking nice indeed...
I need to get me one of those sand blasting cabinets.... It would have made my life a little easier🤷♂️
I need to get me one of those sand blasting cabinets.... It would have made my life a little easier🤷♂️