When you click on links to various merchants on this site and make a purchase, this can result in this site earning a commission. Affiliate programs and affiliations include, but are not limited to, the eBay Partner Network.
I need to get me one of those sand blasting cabinets.... It would have made my life a little easier🤷♂️
It's extremely useful!
But! Remember that you have to have the air compressor to back it up. I've got a 5 HP 60-gallon compressor making mine work. It also makes it so I'm able to paint without issue.
The cheap Harbor Freight cabinet will do the job, after some upgrades. Just google "Harbor Freight blasting cabinet upgrades".
Mine isn't HF. It appears to be a "Cyclone" brand, but the design is basically the same, heavier build quality aside, and I've done several of the upgrades, primarily on the media feed side.
If space is an issue, Harbor Freight makes a smaller cabinet designed to be on a tabletop, but I built a stand for the one I had before this one out of 2x4s. You can even just buy the blasting gun and hoses, and build a cabinet out of plywood. Though, I swear, anything made out of wood would cost a small fortune right now! I've even seen DIY budget cabinets made from storage totes on the web.
There's another system known as vapor blasting that uses pressurized water moving abrasive rather than air. I haven't looked into it much, but it seems like it might be cheaper? I'm assuming that it can be run with a pressure washer, but not entirely sure what all is involved. Presumably you'd have to dry and coat the parts almost immediately, at least on steel, given that you're spraying water on what ends up being naked metal. It would surface rust almost instantly.
Advantage would be that it doesn't create all the dust that air blasting does, and probably much less abrasive flying around, and thus easier on, say. the cabinet window.
Thanks for the info brother.....definitely something to look into....
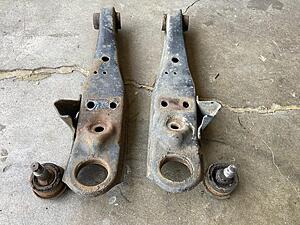
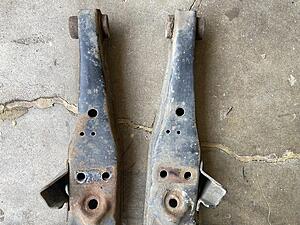
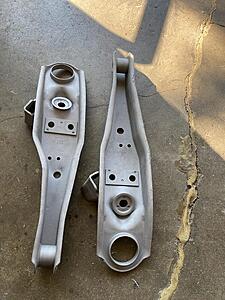
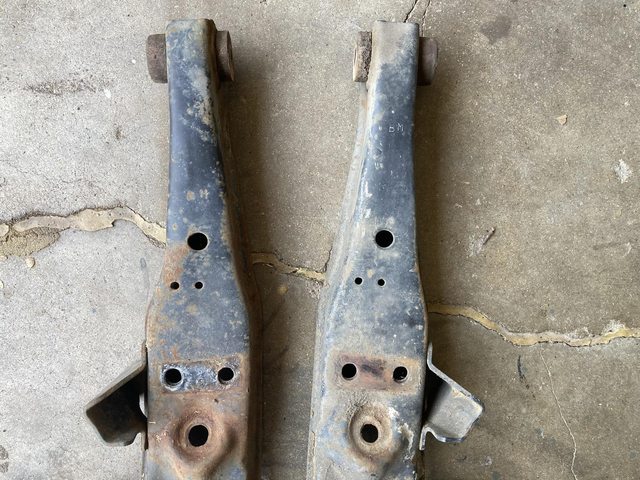
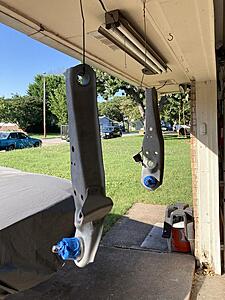
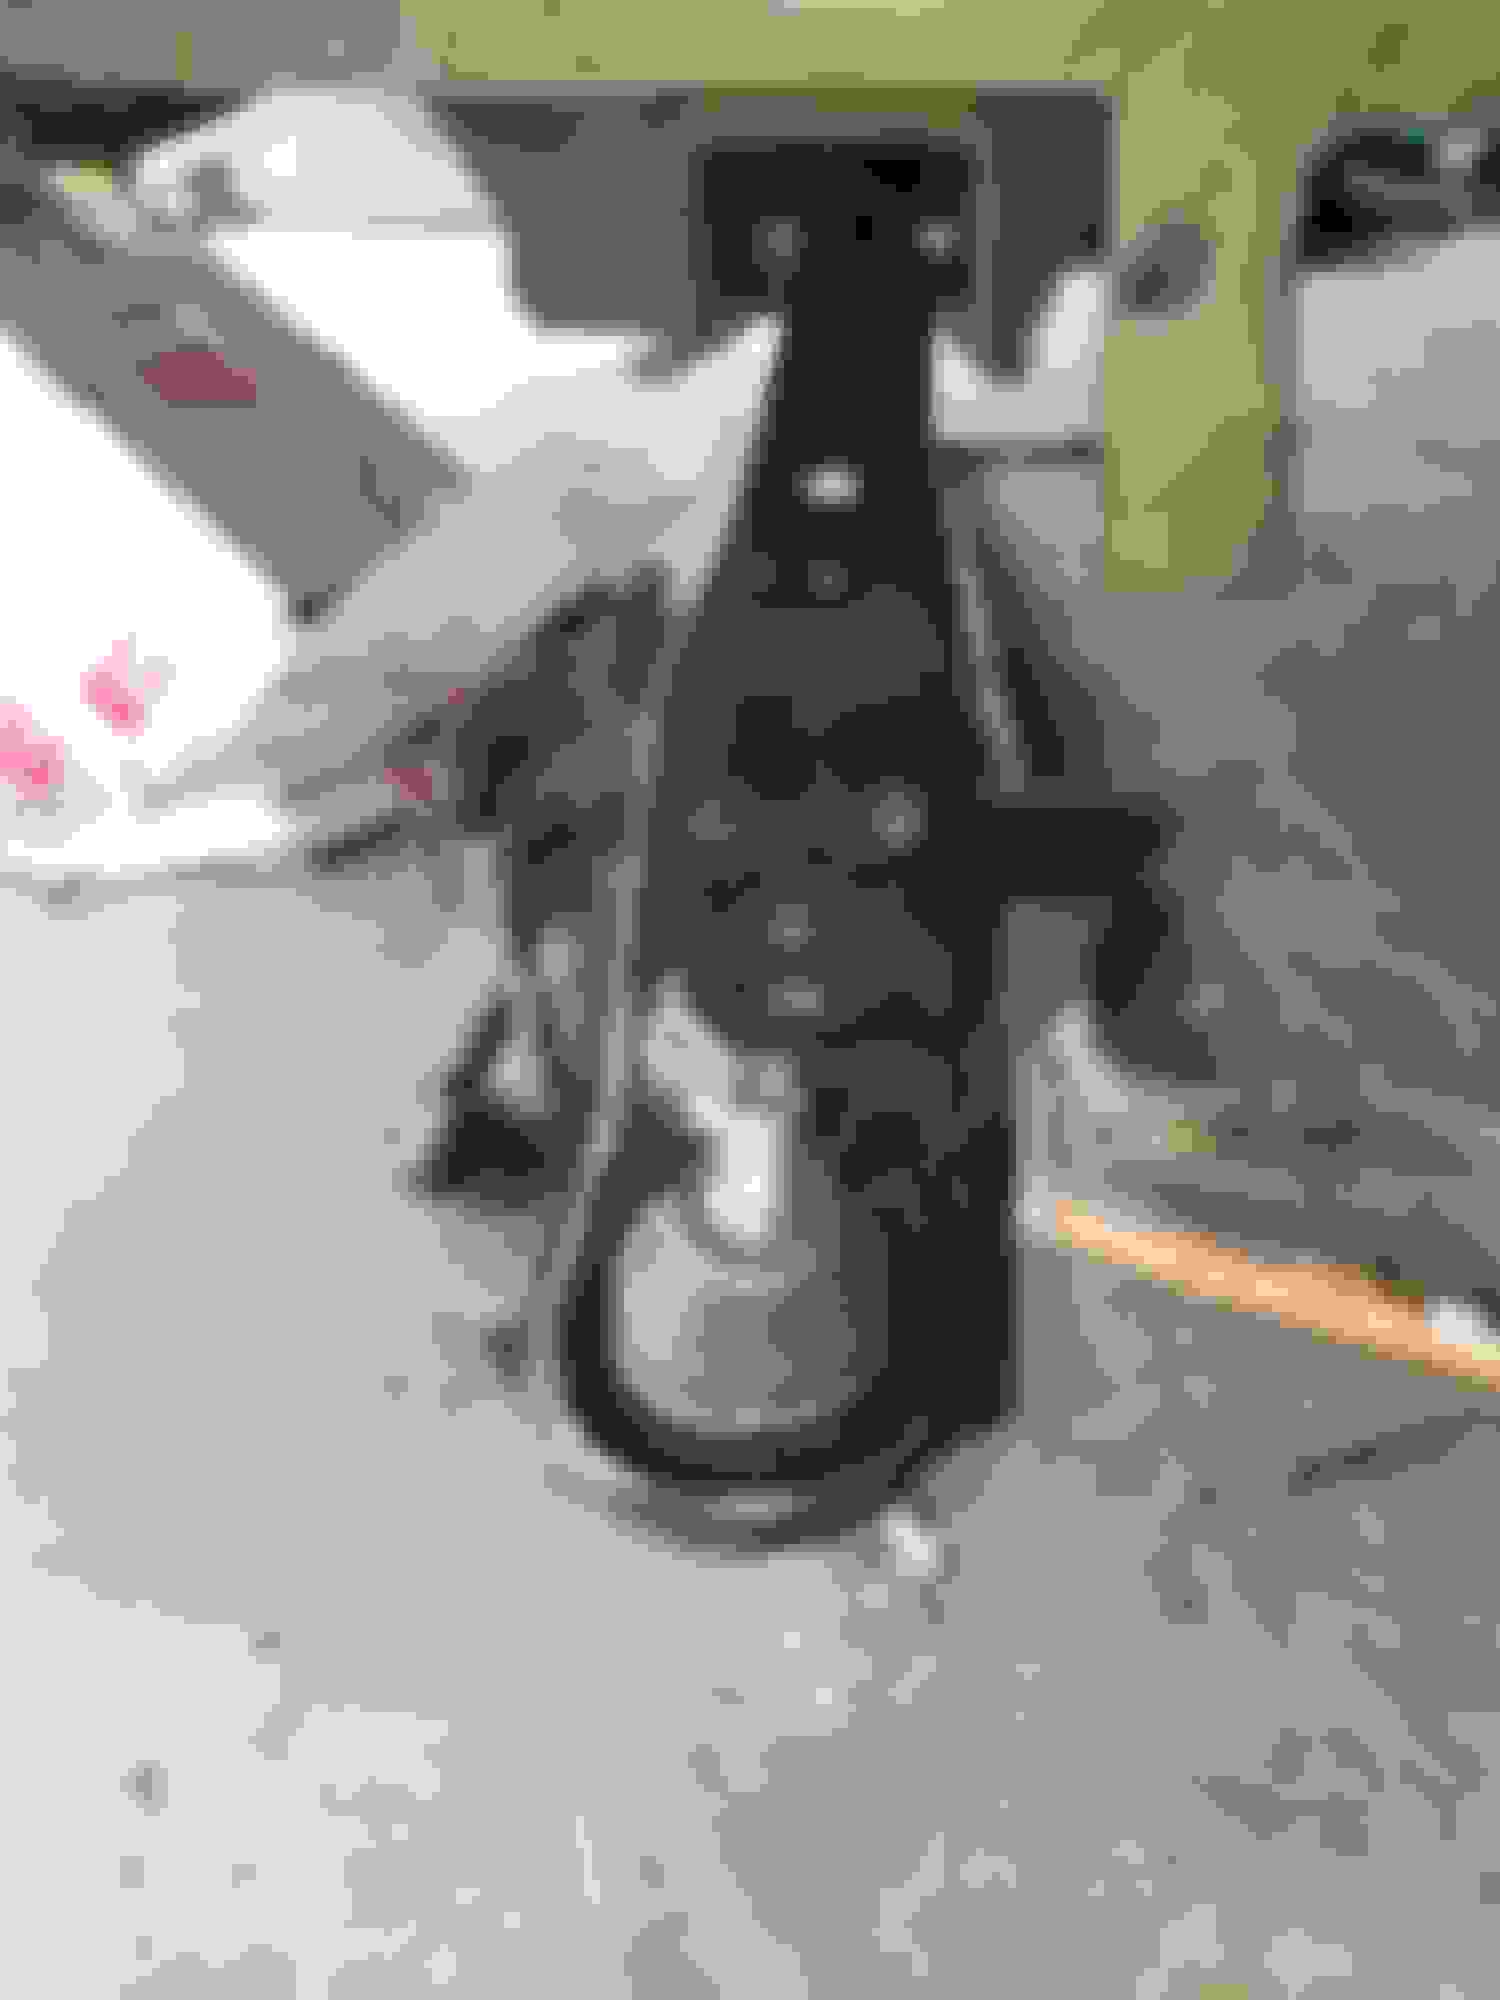
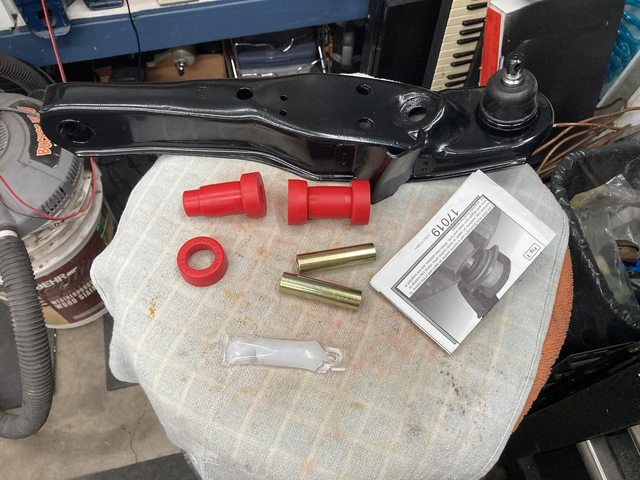
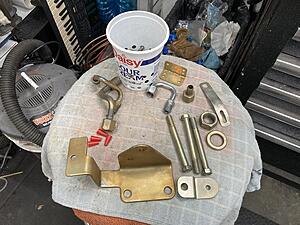
This past weekend, I gathered up the bits to do the control arms for the RX-7.
Ball joints:
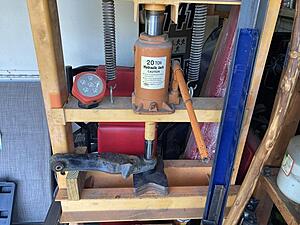
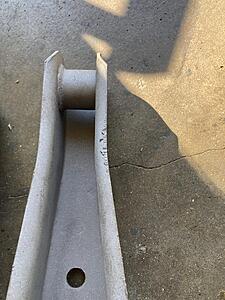
Getting ready to pop the first one:
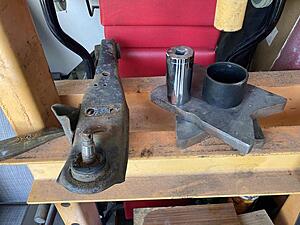
I had to borrow a ball joint tool from O'Reilly's, because I didn't have the receiver/pusher cups. Didn't cost me anything, so no big, but annoying. And that kit still didn't have the right size to push these out, hence the 15mm deep socket.
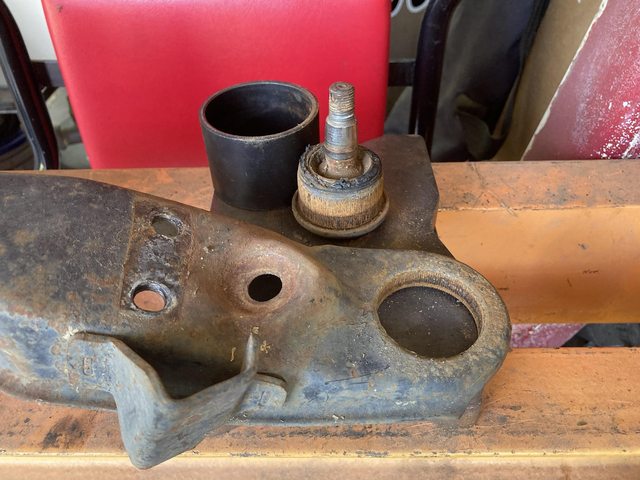
Came out smoothly enough. Bit of rust.
Second one was also fine. I'm pretty sure the rusty one is original, and the other one is one I replaced many years ago.
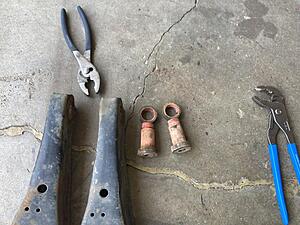
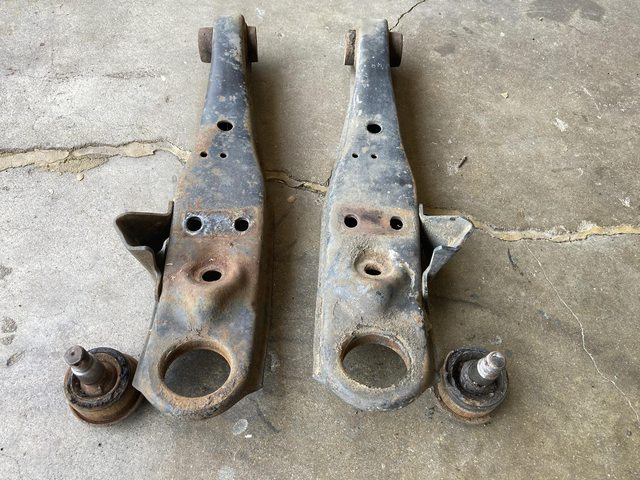
Then the poly bushings had to come out:
But that was fairly easy because they just press into the original bushing shells, and have a collar on one end:
I could have removed them with just the pliers, probably, but a 12mm socket in the press pushed them out easily.
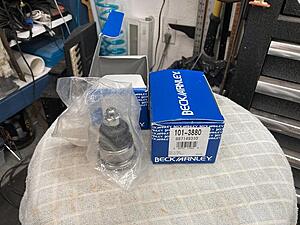
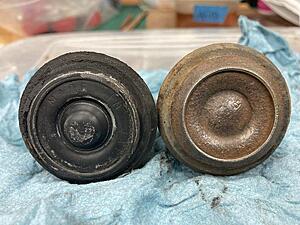
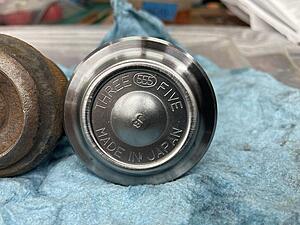
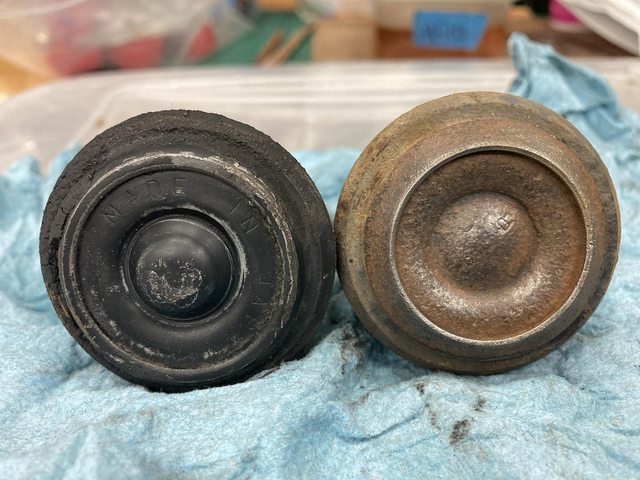
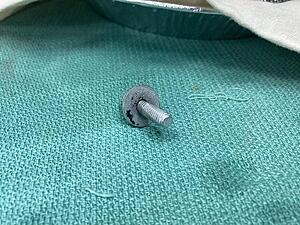
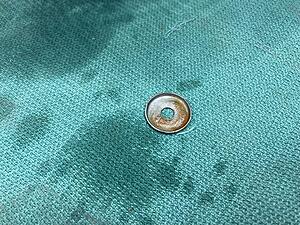
Markings on the old ball joints, non-greasable:
Made in Japan, and nothing. OK, then.
The new Beck Arnley ball joints are actually Three Fives, which I understand are good?
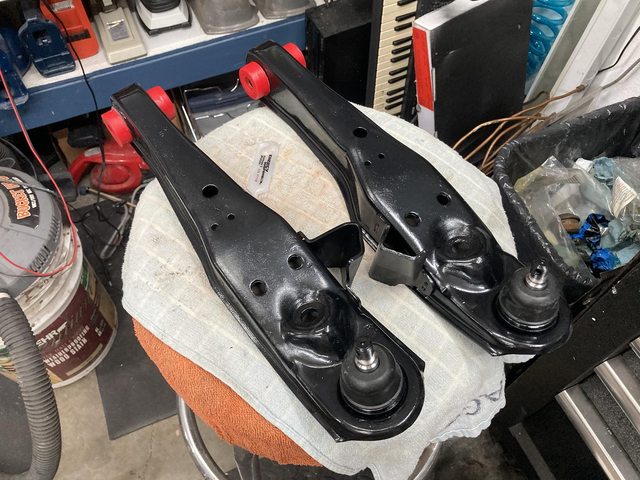
After a trip through the media blaster:
One arm had made a bit of ground contact at some point.
I ground that smooth just for aesthetics.
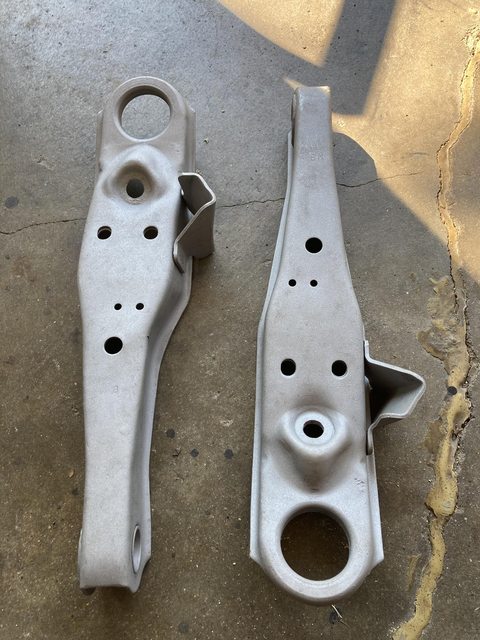
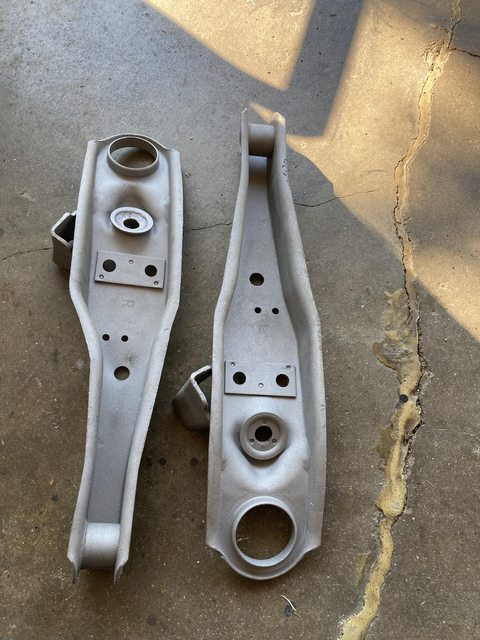
New ball joints pressed in, and prepped for paint:
And a couple coats of Rustoleum black Appliance Epoxy:
I'll let that cure for a couple days, then press the new bushings in.
It's so exciting to be making progress!
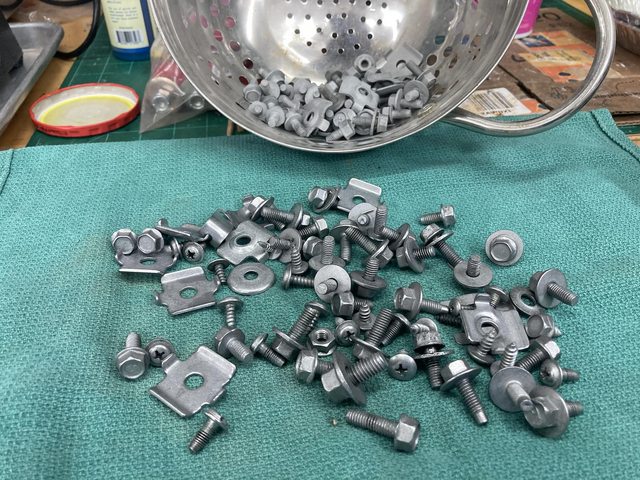
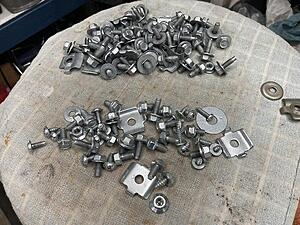
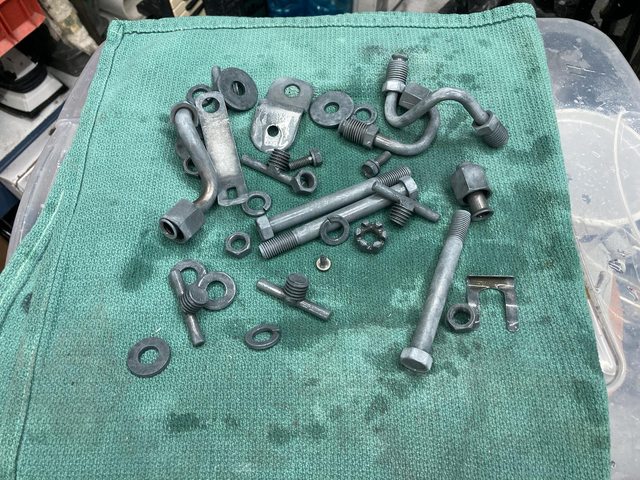
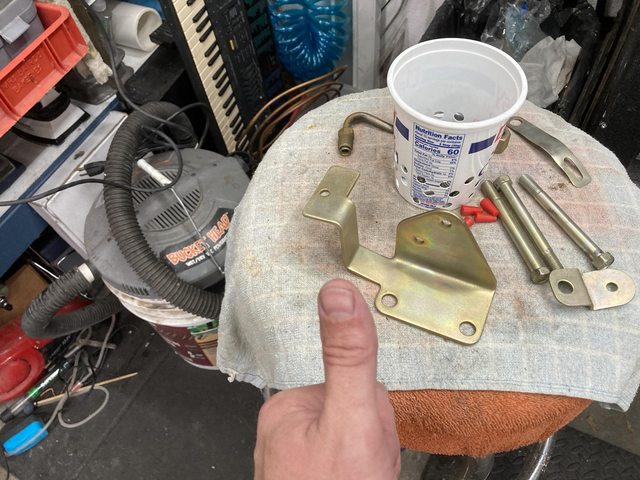
Yesterday, a little more plating action, so I can finally start bolting things back into the engine compartment. You know, brackets and things.
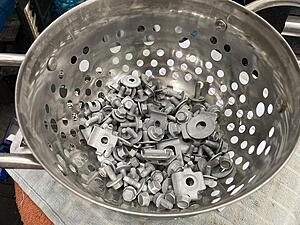
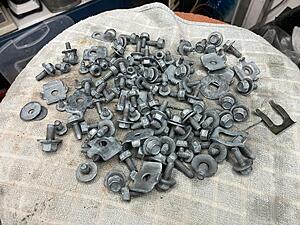
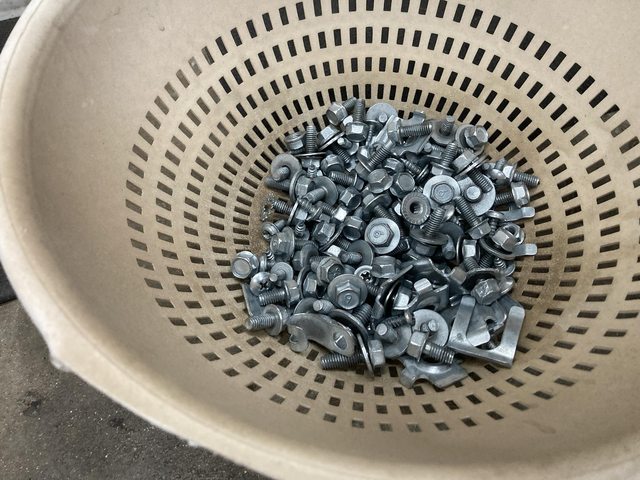
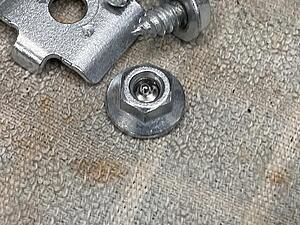
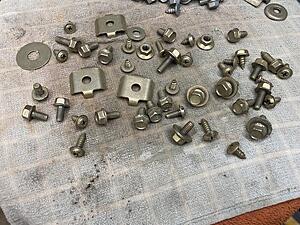
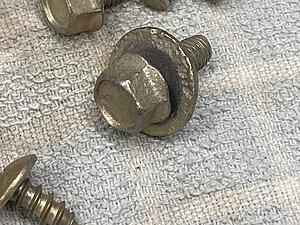
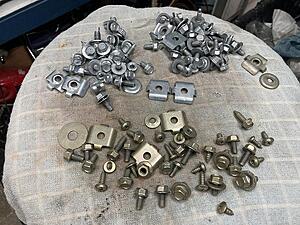
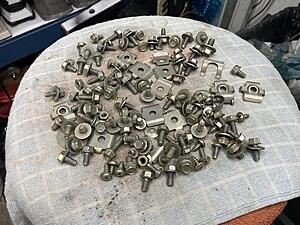
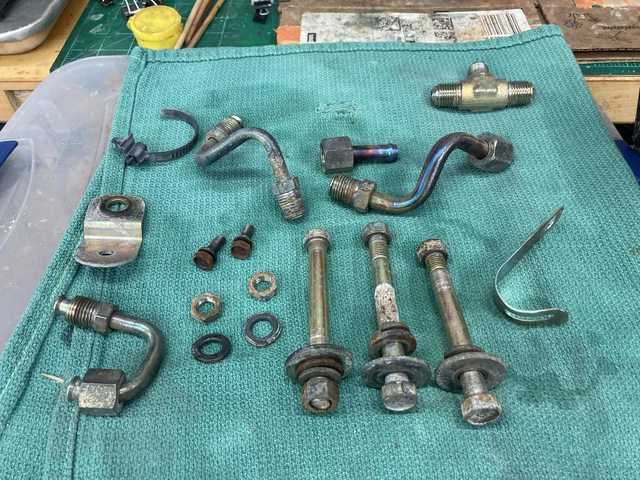
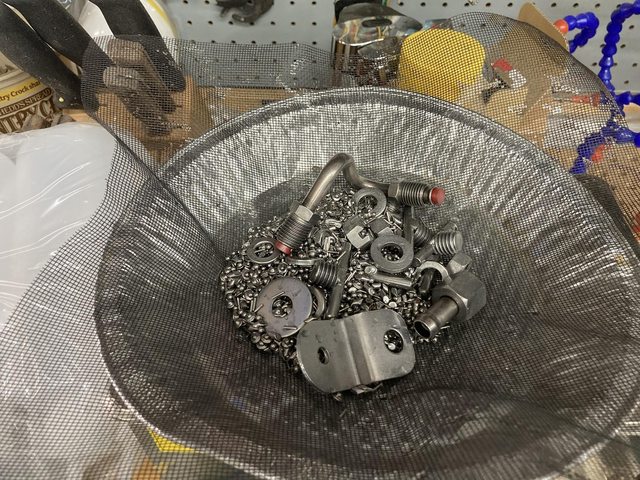
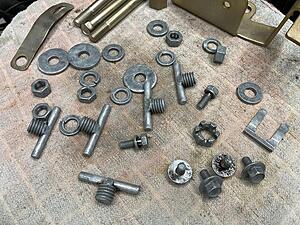
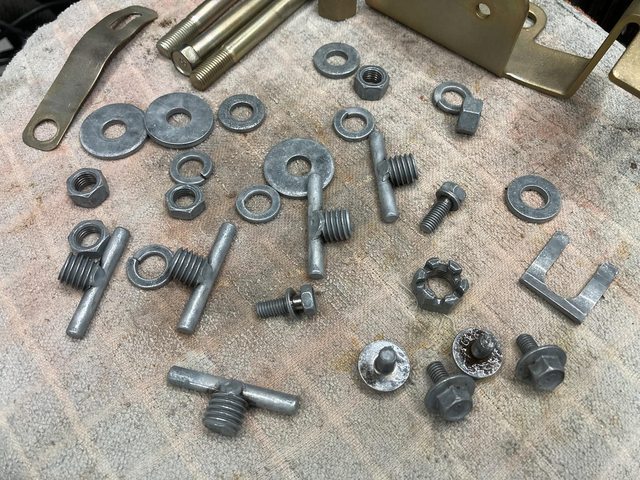
Start with a pile of fasteners and hardware. I ran all these through the ultrasonic cleaner earlier, then through the media blaster:
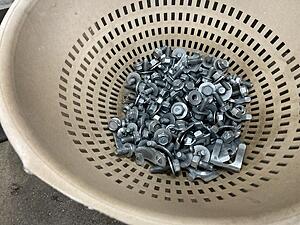
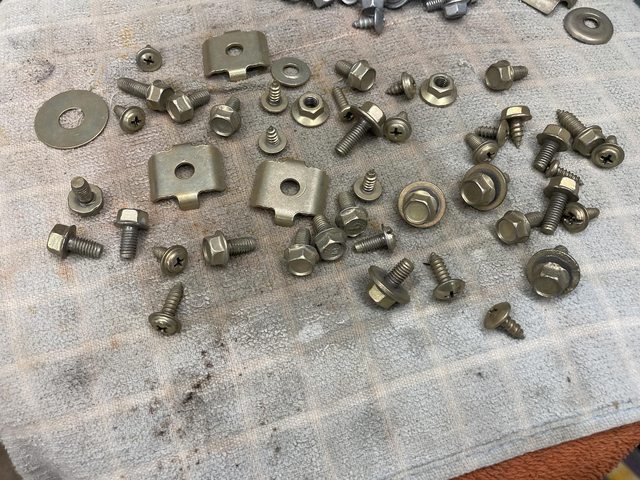
Then through the tumbler (stuff in the colander is as from the blaster, stuff on the towel is fresh out of the tumbler):
Definitely makes a difference.
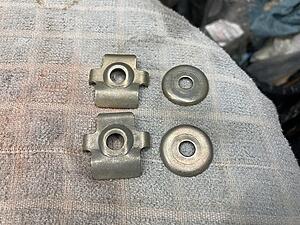
I need to find some replacements for these turkeys:
But I'll go ahead and plate them for now.
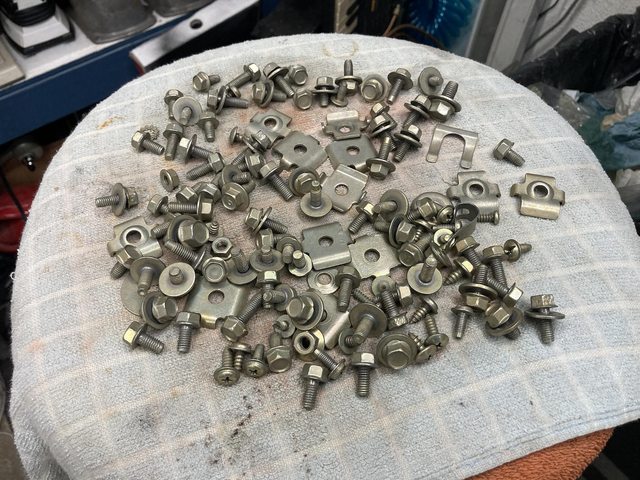
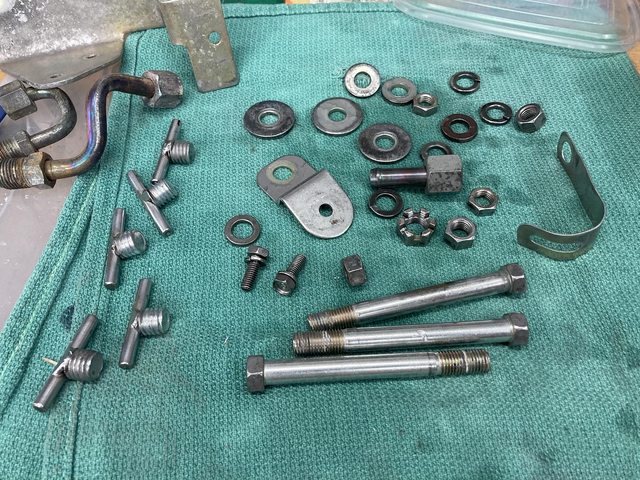
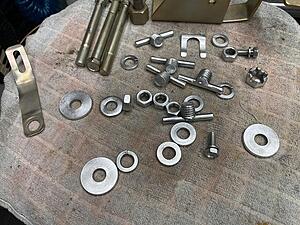
And the second batch tumbled:
I learned something about batch size a bit later - more on that when I get to it.
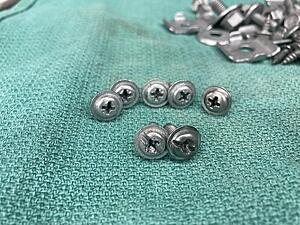
First round of plating from the barrel:
One of the brake line clips (there on the far right) decided not to plate for whatever reason. I did that one by itself after running it through the wire wheel, and it worked that time.
First round of plating tumbled:
Shiny sparkles left in the tub I dumped the tumbler fluid into after tumbling.
I cannot believe I just found this thread. You are doing some awesome work here!
I absolutely love what you're doing with the plating - if I had found this earlier I would definitely have been trying to follow your lead.
I cannot believe I just found this thread. You are doing some awesome work here!
I absolutely love what you're doing with the plating - if I had found this earlier I would definitely have been trying to follow your lead.
Thanks! I've painted bolts and fasteners before, and it just wasn't good enough. I found out about Caswell Plating years ago, and decided to investigate just how difficult it really was. Thanks to the Internet, I earned basic zinc plating wasn't all that hard, so...
Definitely cheaper than trying to source and buy a pile of metric fasteners, not to mention any special snowflake bolts, etc.
Originally Posted by raven12aFB
Awesome work.... I just did the same for my 82 GSL...
Hah, synchronicity! Mine should be going back in this weekend.
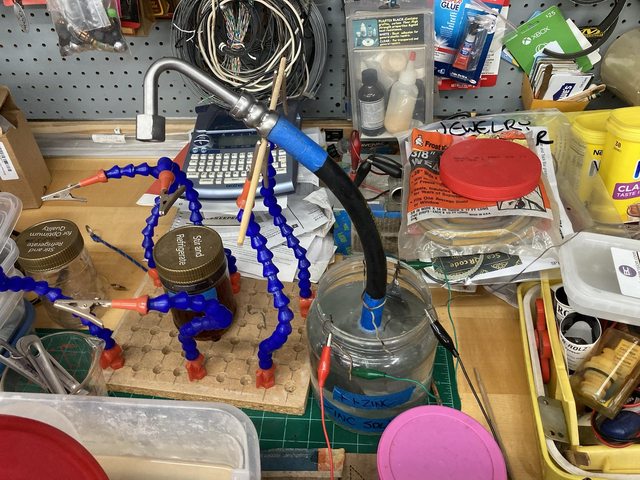
I prefer using washing soda (sodium carbonate) to increase conductivity. It doesn't take much. You can also use Epsom Salts, but more than you would washing soda. Exact amount isn't terribly important - you just want the liquid more conductive. And a lot less vinegar. I mix with water, around 200 mL/4.5 L distilled water, by the recipe I typically use. Some recipes use zinc sulfate powder (typically sold for gardening) to get the zinc in the solution, but I use the method in the video above, connecting two electrodes at the same time to just deposit molecules.
The most dangerous stuff I use is muriatic acid (available at Home Depot, etc. for cleaning concrete, among other things) to make sure the parts are absolutely clean, and to remove any remaining zinc from previously-plated parts. It's weak enough acid that it won't burn you badly if you get a little on you and wash it off, but it *will* burn. Stings quite a bit. Wear gloves and eye protection!
The zinc I'm using is some zinc I bought from eBay - guy melts down boat anodes and casts them in a cornbread mould, of all things. I had to cut those into strips to make them work (otherwise they are cornbread-sized chunks!,) so I switched to
I also use a lab-type power supply that can supply 30V @10A, and can regulate both the current and voltage, but again, that's mostly because I planned to do bulk jobs, and wanted more control and capacity. It's not necessary for smaller items.
My basic process was clean, media blast, wire wheel to polish a bit, acid, plate, wire wheel to polish again, plate again, wire wheel again, then dunk in the chromating solution (chromating hardens the zinc surface, increasing durability, and gives it that lovely iridescent gold finish. It can also be black, blue - really clear with a blue tinge - and black.)
If you don't have a blaster, you can just clean things thoroughly, and wire brush the hell out of them. I'd definitely recommend the acid step in that case to make sure all old plating and oils are gone. The parts need to be *clean* to plate properly.
I recently bought an ultrasonic cleaner and a jewelry tumbler, so now my current process is clean/degrease in the ultrasonic cleaner, tumble in the jewelry tumbler, media blast, tumbler again, plate, tumbler, plate, tumbler, then chromate. The tumbler replaces the wire brush/wire wheel step in polishing the parts.
If you don't care about smooth and shiny, that's unnecessary. Zinc plating is thin, so whatever surface you have to start with is going to basically be what you get after plating. The interim polishing step between rounds of plating was mentioned by some DIYers as improving the finish, so I do it. Some stuff you can get by with one round of plating. It depends on how thick, and therefore durable, you want the plating to be. It's only time, so I do it twice.
For the bulk stuff, I'm using a "plating barrel" which tumbles the parts in the solution, with an electrode dangling down into the mess of parts. Current lows form all the parts touching each other and at least one touching the dangling electrode. It's something you would have to build, but it makes doing a *lot* of small parts, like I am, much faster and easier. Larger parts can be done one at a time, hanging from wires, as in the video, and you can do a smaller amount of bolts and nuts that way, too. I did, initially, getting a feel for the process. My first rig was in a family-size peanut butter jar!
If you mess up, you just strip the parts and try again. Media blaster, wire wheel, and acid.
The chromating solution I got from Caswell Plating - they can sell you a whole plating kit if you want, and instructions.
If you search YT for "zinc plating", you're going to get a lot of hits, and a lot of them are good. You can at least see the range of what can be done.
This one is about the same as the above, but only zinc and with specific parts (motorcycle bits):
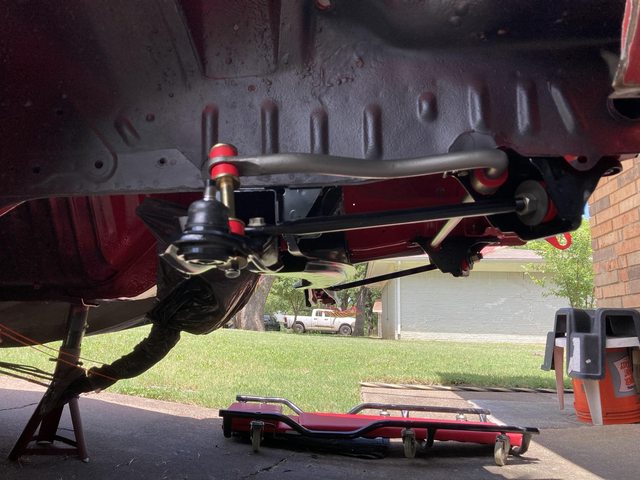
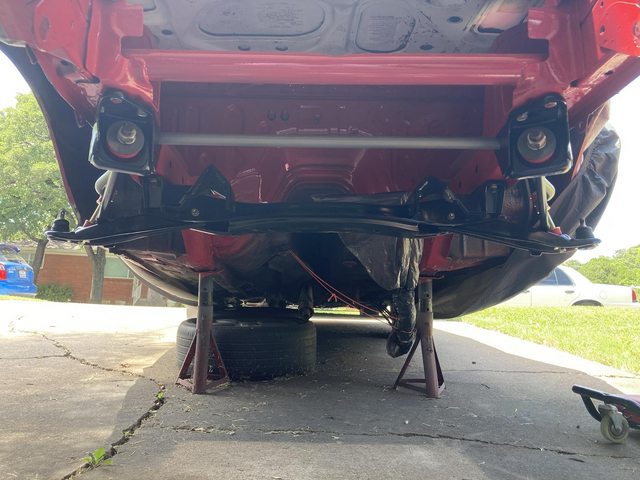
BTW - I installed the bushings in the control arms and mounted them, the sway bar, and the radius rods today. It all looks great with the like-new hardware! I'll post up the pics when I get them uploaded.
BTW, plating barrels are how industry plates huge amounts of small objects like bolts, nuts, screws, and chain. Their process is much more controlled, of course, and they have some additional chemicals called "brighteners" that make the zinc plating come out shiny from the get go.
I prefer using washing soda (sodium carbonate) to increase conductivity. It doesn't take much. You can also use Epsom Salts, but more than you would washing soda. Exact amount isn't terribly important - you just want the liquid more conductive. And a lot less vinegar. I mix with water, around 200 mL/4.5 L distilled water, by the recipe I typically use. Some recipes use zinc sulfate powder (typically sold for gardening) to get the zinc in the solution, but I use the method in the video above, connecting two electrodes at the same time to just deposit molecules.
The most dangerous stuff I use is muriatic acid (available at Home Depot, etc. for cleaning concrete, among other things) to make sure the parts are absolutely clean, and to remove any remaining zinc from previously-plated parts. It's weak enough acid that it won't burn you badly if you get a little on you and wash it off, but it *will* burn. Stings quite a bit. Wear gloves and eye protection!
The zinc I'm using is some zinc I bought from eBay - guy melts down boat anodes and casts them in a cornbread mould, of all things. I had to cut those into strips to make them work (otherwise they are cornbread-sized chunks!,) so I switched to zinc strips intended to prevent stains on roofing.
I also use a lab-type power supply that can supply 30V @10A, and can regulate both the current and voltage, but again, that's mostly because I planned to do bulk jobs, and wanted more control and capacity. It's not necessary for smaller items.
My basic process was clean, media blast, wire wheel to polish a bit, acid, plate, wire wheel to polish again, plate again, wire wheel again, then dunk in the chromating solution (chromating hardens the zinc surface, increasing durability, and gives it that lovely iridescent gold finish. It can also be black, blue - really clear with a blue tinge - and black.)
If you don't have a blaster, you can just clean things thoroughly, and wire brush the hell out of them. I'd definitely recommend the acid step in that case to make sure all old plating and oils are gone. The parts need to be *clean* to plate properly.
I recently bought an ultrasonic cleaner and a jewelry tumbler, so now my current process is clean/degrease in the ultrasonic cleaner, tumble in the jewelry tumbler, media blast, tumbler again, plate, tumbler, plate, tumbler, then chromate. The tumbler replaces the wire brush/wire wheel step in polishing the parts.
If you don't care about smooth and shiny, that's unnecessary. Zinc plating is thin, so whatever surface you have to start with is going to basically be what you get after plating. The interim polishing step between rounds of plating was mentioned by some DIYers as improving the finish, so I do it. Some stuff you can get by with one round of plating. It depends on how thick, and therefore durable, you want the plating to be. It's only time, so I do it twice.
For the bulk stuff, I'm using a "plating barrel" which tumbles the parts in the solution, with an electrode dangling down into the mess of parts. Current lows form all the parts touching each other and at least one touching the dangling electrode. It's something you would have to build, but it makes doing a *lot* of small parts, like I am, much faster and easier. Larger parts can be done one at a time, hanging from wires, as in the video, and you can do a smaller amount of bolts and nuts that way, too. I did, initially, getting a feel for the process. My first rig was in a family-size peanut butter jar!
If you mess up, you just strip the parts and try again. Media blaster, wire wheel, and acid.
The chromating solution I got from Caswell Plating - they can sell you a whole plating kit if you want, and instructions.
If you search YT for "zinc plating", you're going to get a lot of hits, and a lot of them are good. You can at least see the range of what can be done.
This one is about the same as the above, but only zinc and with specific parts (motorcycle bits): (408) Moto Guzzi: Zinc Plating - YouTube
BTW - I installed the bushings in the control arms and mounted them, the sway bar, and the radius rods today. It all looks great with the like-new hardware! I'll post up the pics when I get them uploaded.
That is pretty cool....never looked in to plating as DIY at home project.... it's pretty interesting....
Edit: huh, apparently I composed this but never hit "submit"! Thank goodness the tab was still open and the forum autosaves.
Little schmutz I missed while blasting.
Cleaned that up with the wire wheel, then back into the tank it went.
And some oddness on one washer:
Again, brushed it, and that went into the tank by itself while the other bits were tumbling.
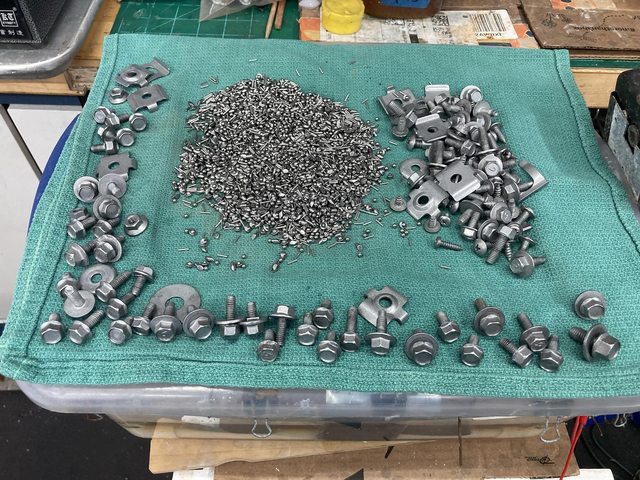
I tried tumbling the entire pile for the final polish, and that didn't look as good as previous small batches, so I divided out a pile and tried that smaller amount. Worked better (large batch results in back, small batch in front):
With the stainless steel shot in the tumbler (which is actually 3 or 4 different shapes, including wire segments) you do sometimes get stuff like this:
Just have to run a bolt in the pop it out.
Awwwwwwww, yeah:
Even utterly nasty stuff like this looks much better:
Divided out and polished another batch:
(original on the right, freshly tumbled on the left.)
I pulled one brake line clip from the original "too many" tumble and chromated it (the lower one). you can really see the difference compared to one tumbled in a smaller batch:
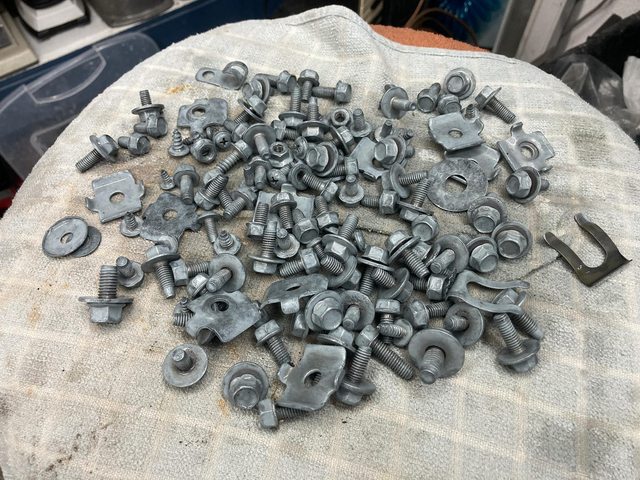
And everything tumbled and chromated:
Somewhere along the way one of the brake flex line clips disappeared, possibly the one I plated by itself? I don't know where it went. I'll have to dig around on the floor.
So this weekend will be bolting stuff onto the car!
Made myself do something on the RX-7 yesterday, will likely continue this weekend.
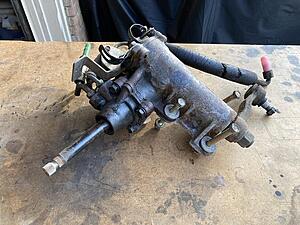
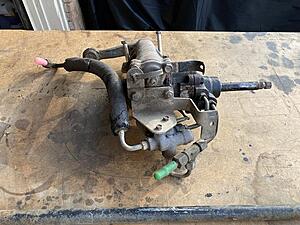
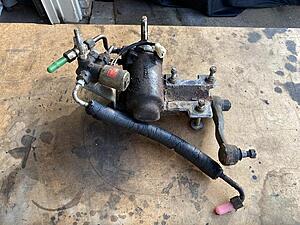
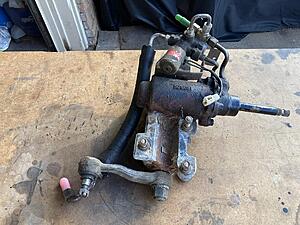
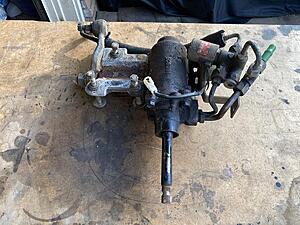
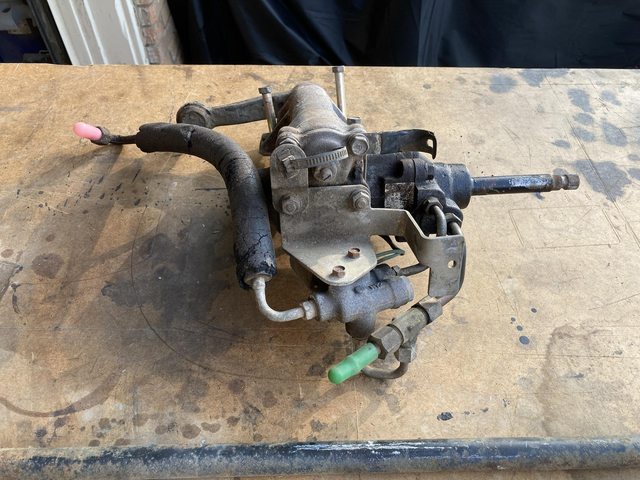
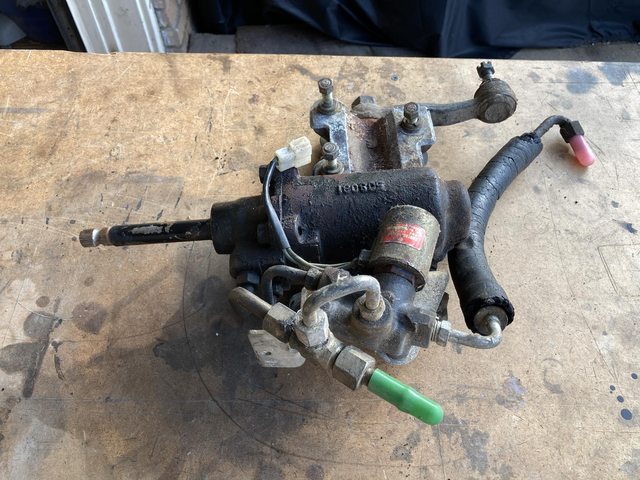
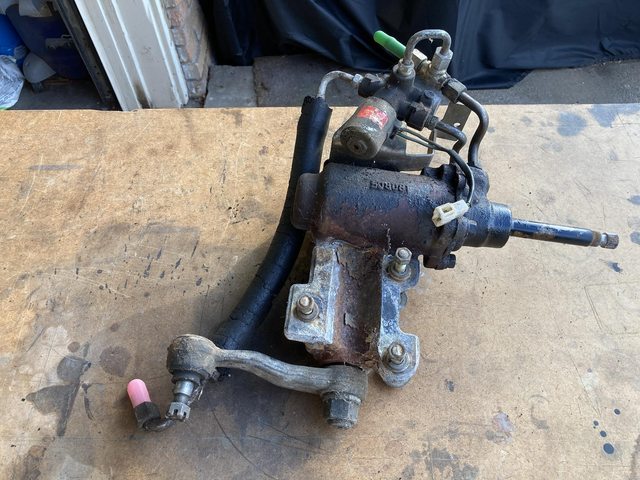
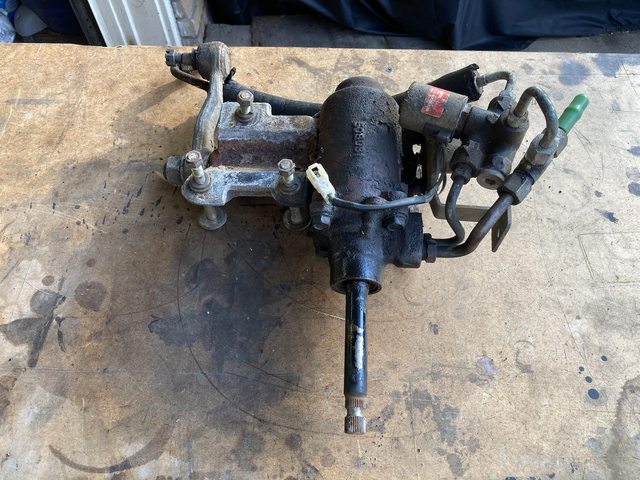
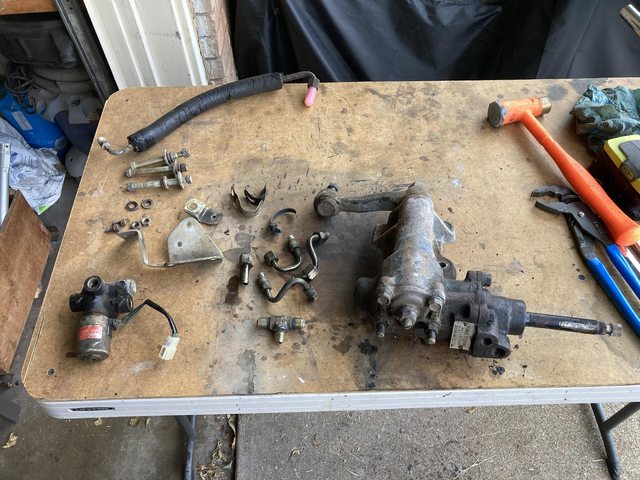
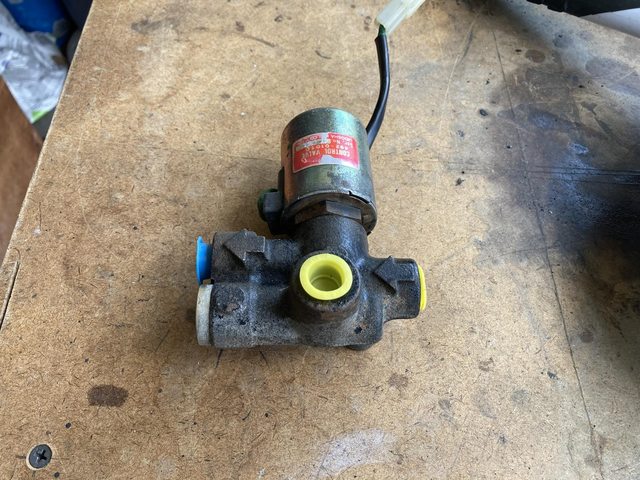
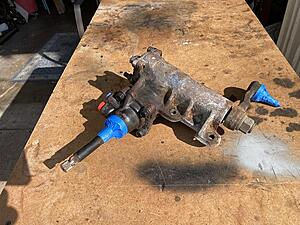
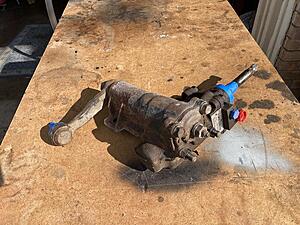
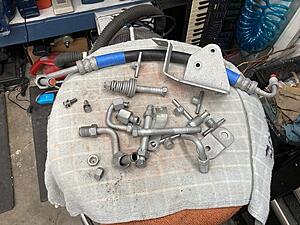
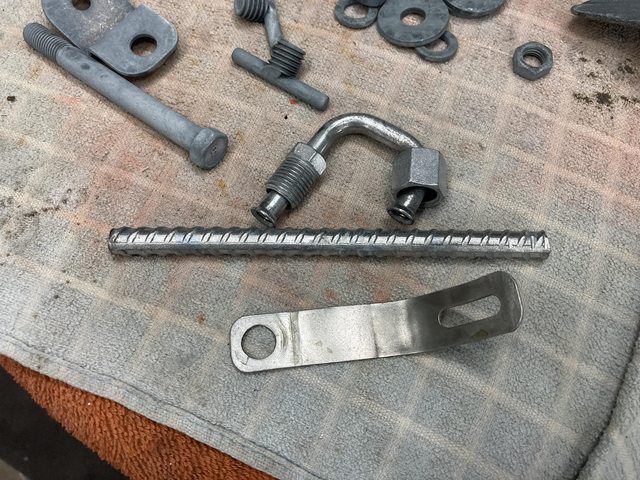
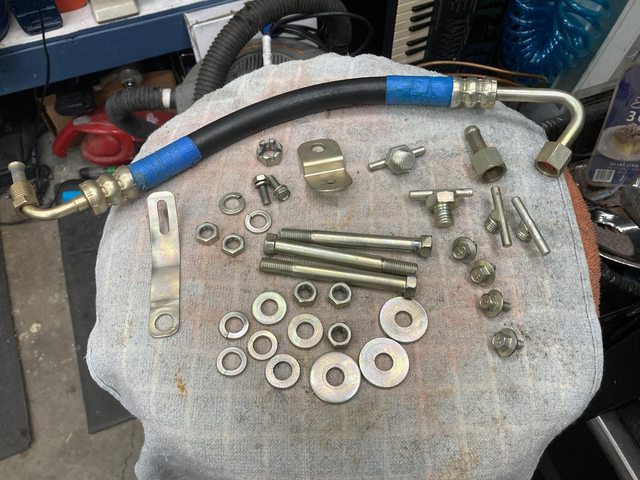
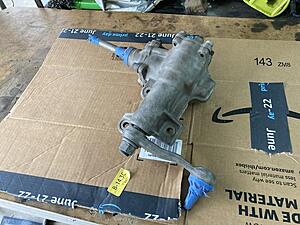
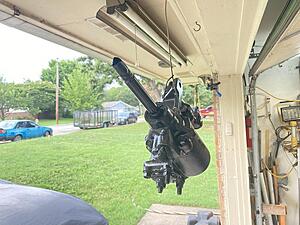
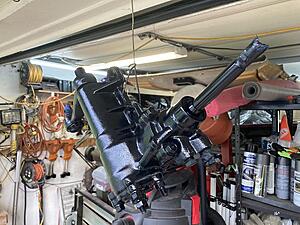
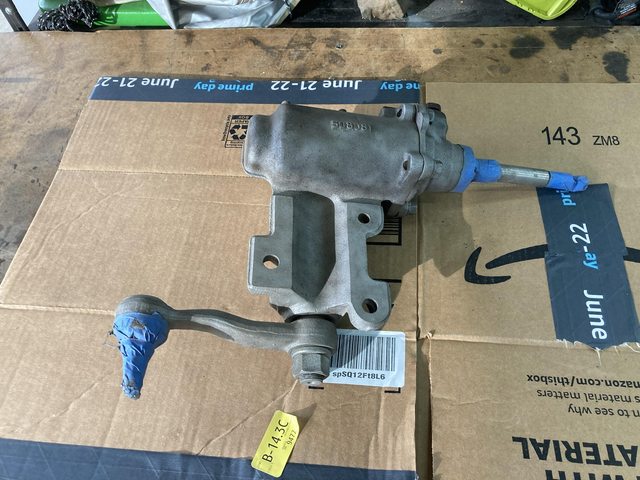
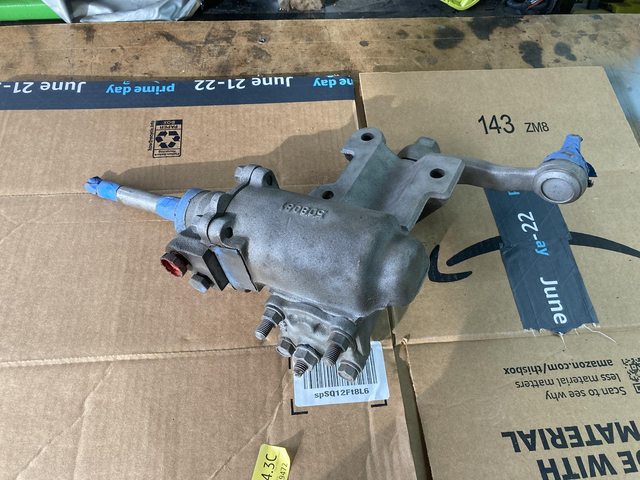
I started refurbishing the power steering box.
Reference pictures for reassembly - as you can see, there's a lot going on.
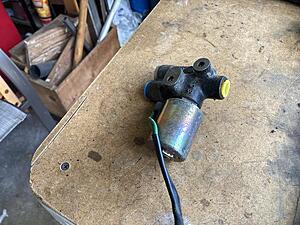
The GSL-SE power steering setup is speed sensitive, to a point. The ECU controls that attached valve to vary the assist pressure based on the VSS (reminder to self - transplant VSS... and also Cruise Control. The VSS is built in to the speedo, so I will probably need to transplant the mechanism.)
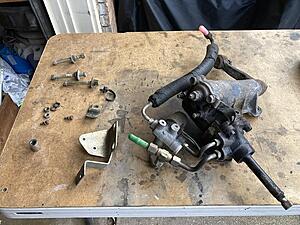
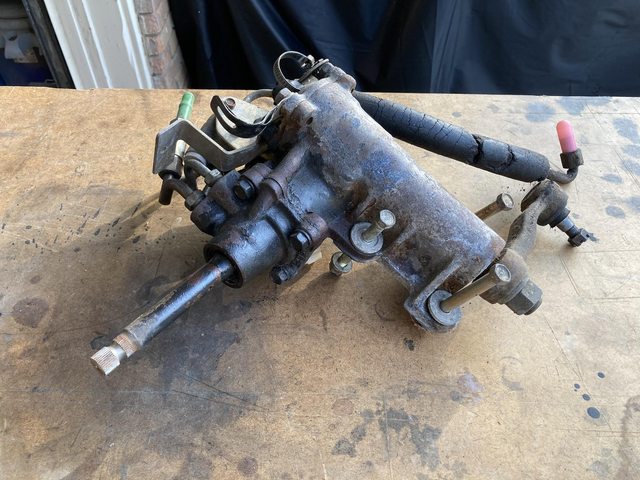
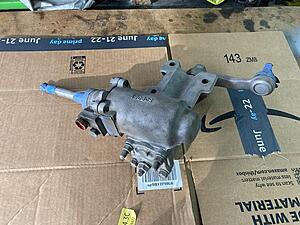
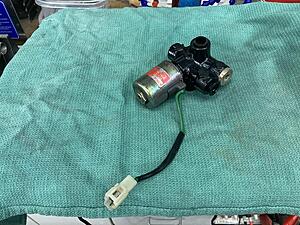
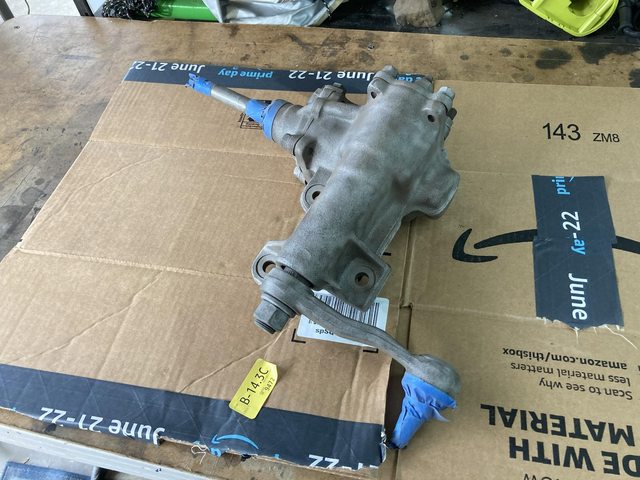
Disassembly (just all the ancillaries - the box seems to be in OK shape, just dirty):
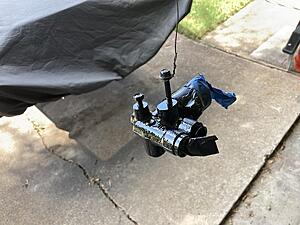
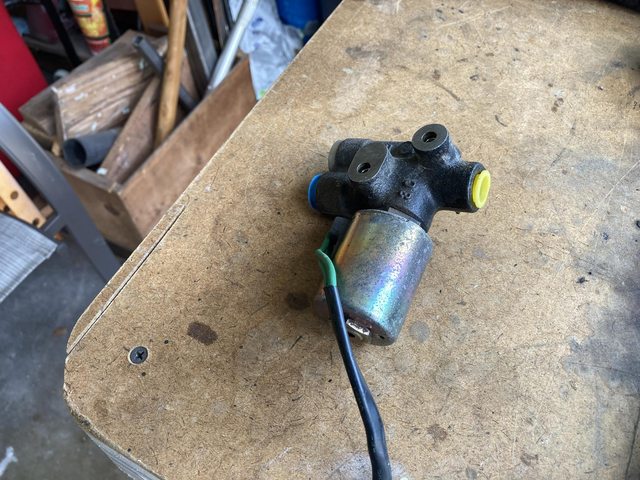
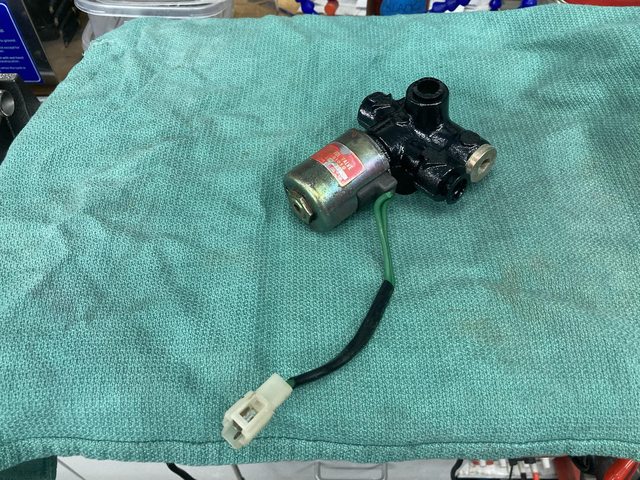
Capped off all the ports in the valve and cleaned it up:
I'd really love to replate the can, but I'm not sure it's actually removable, and looks OK-ish after cleaning, so I think I'll let it be. maybe brush-plate the one slightly rusty spot.
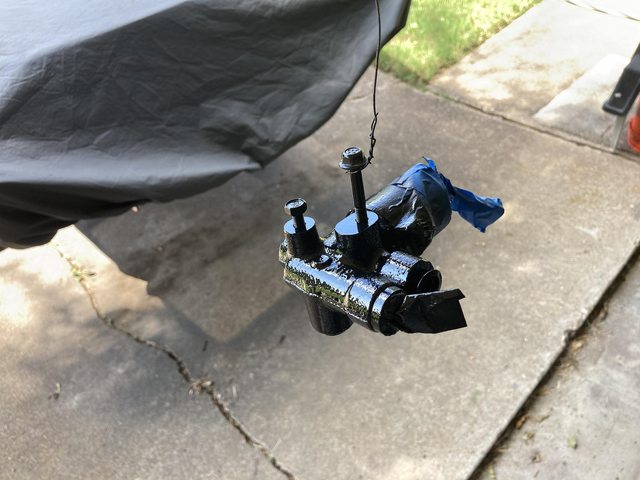
Painted it:
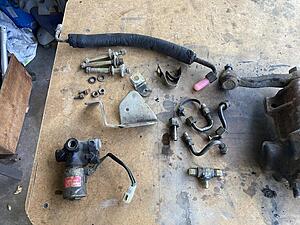
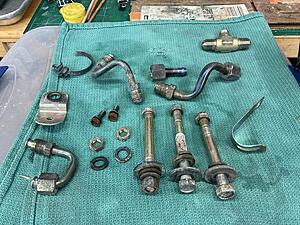
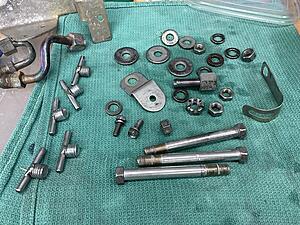
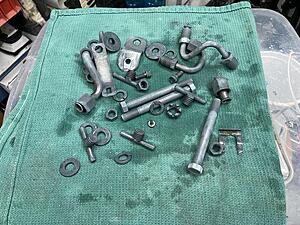
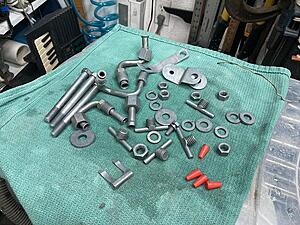
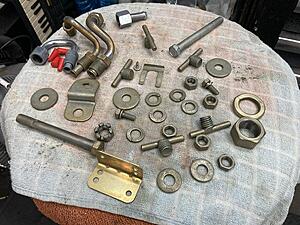
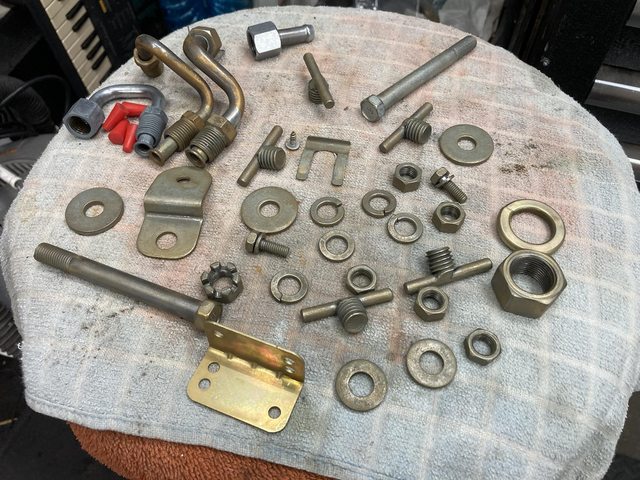
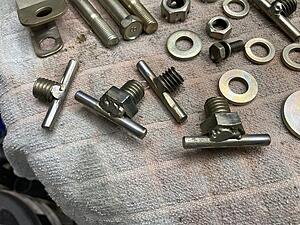
All the other loose hardware, before cleaning:
After a pass through the ultrasonic, and the tumbler:
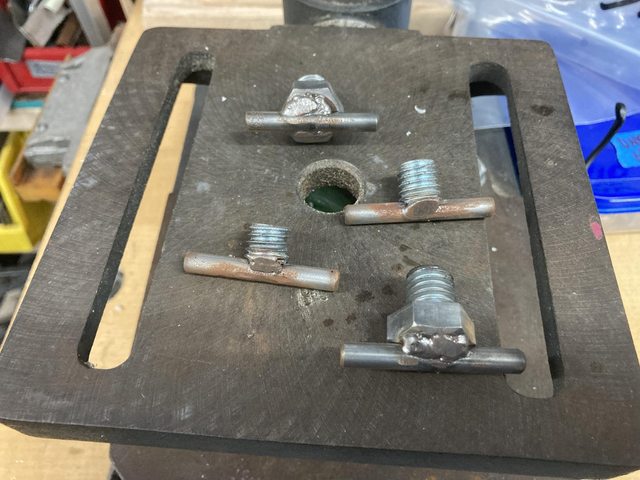
(along with the cinch bolts for my vice mount that need plating)
Still some cleaning to be done on some pieces, so they will go into the blaster, then back into the tumbler.
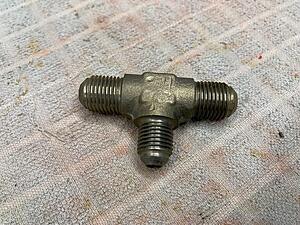
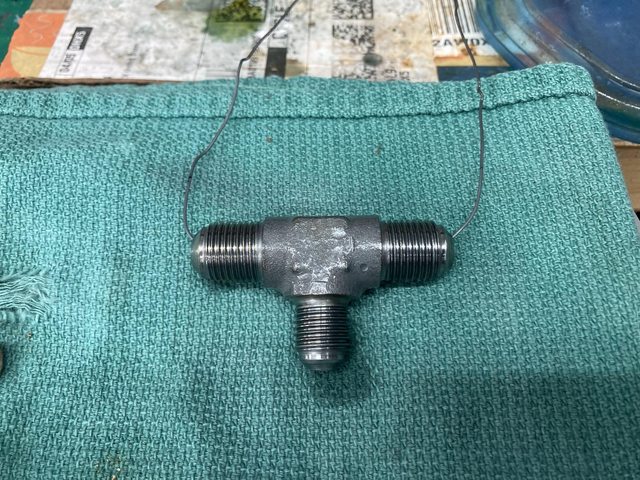
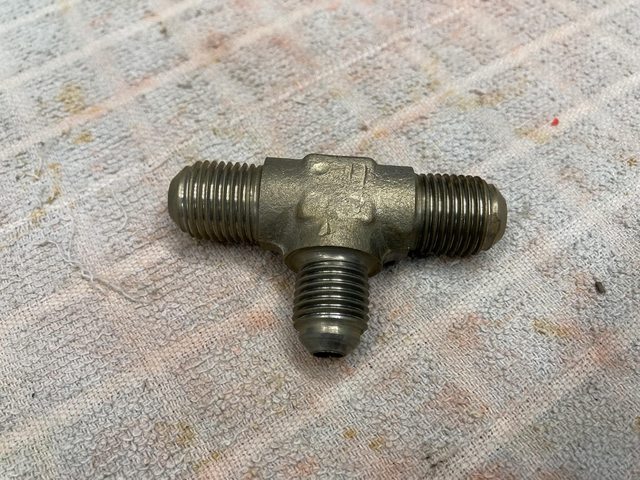
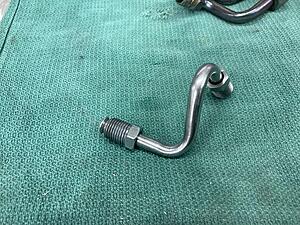
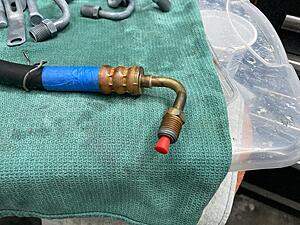
The fluid tee was clean enough, so I plated that up:
Then passivated it:
Probably could have polished it a bit more.
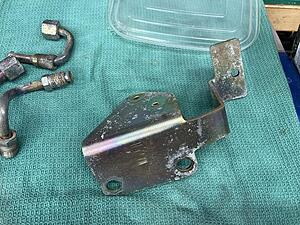
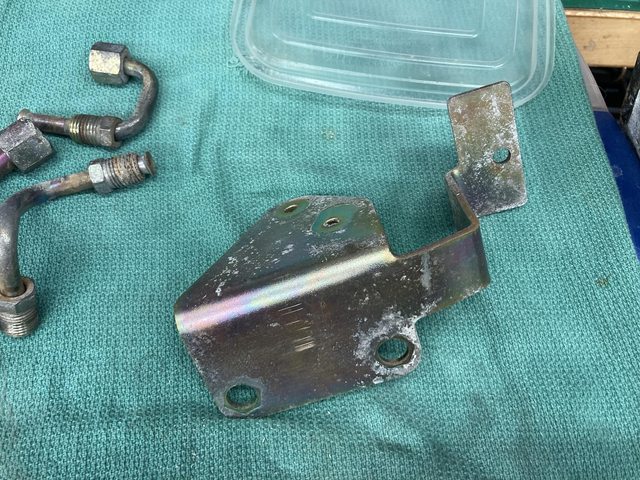
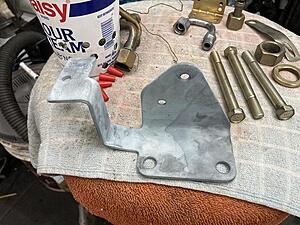
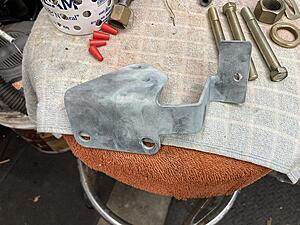
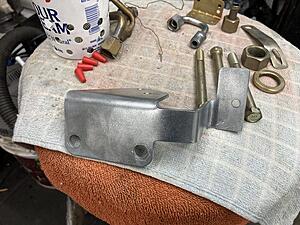
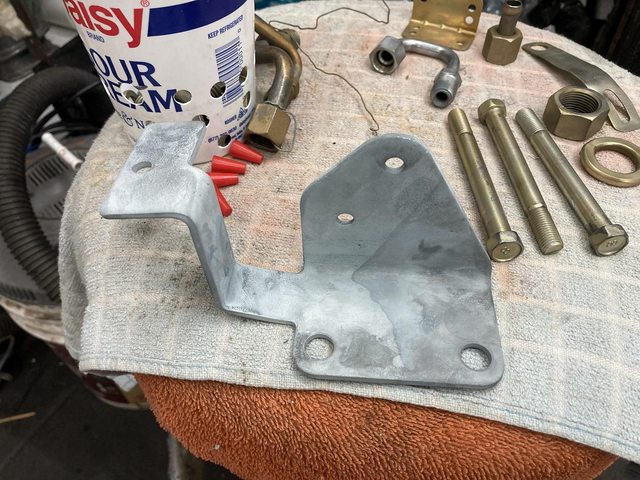
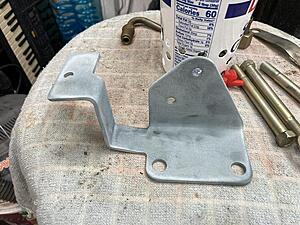
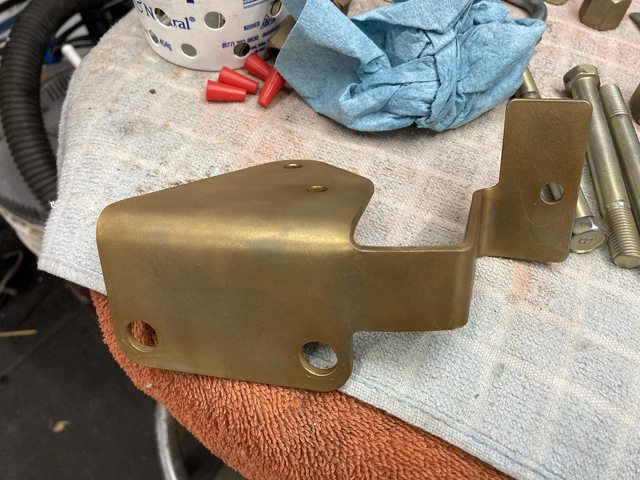
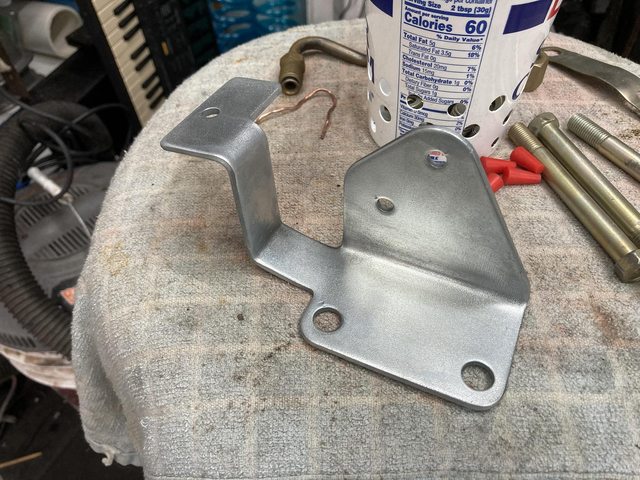
The big bracket after cleaning:
Will also need a good blasting.
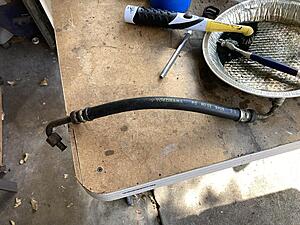
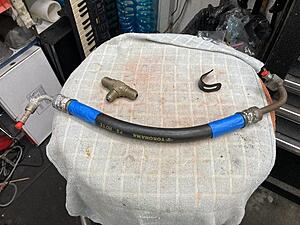
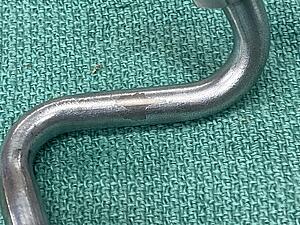
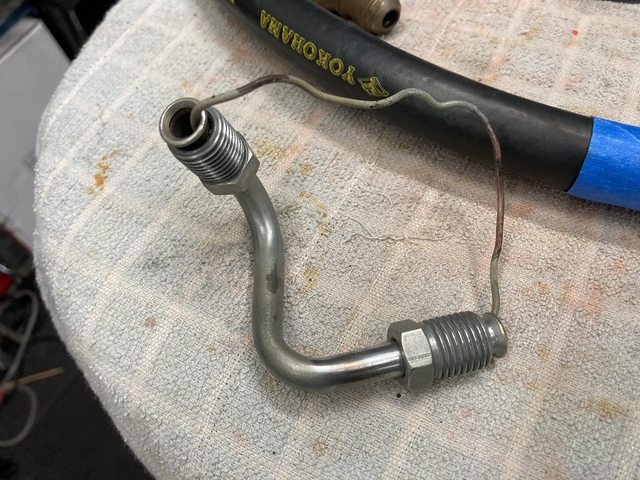
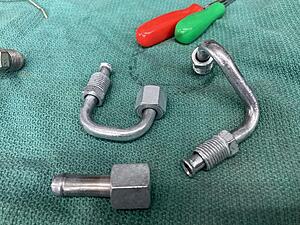
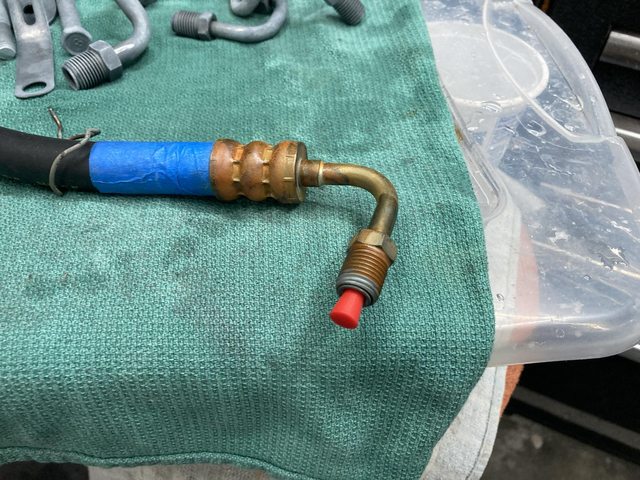
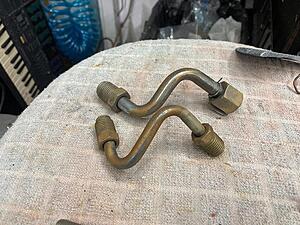
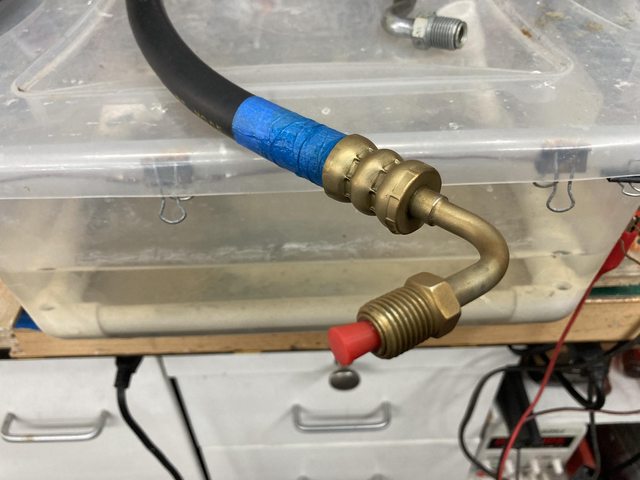
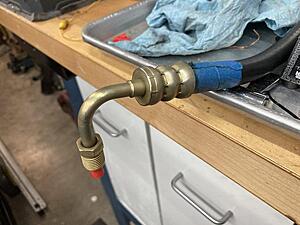
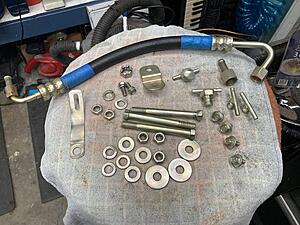
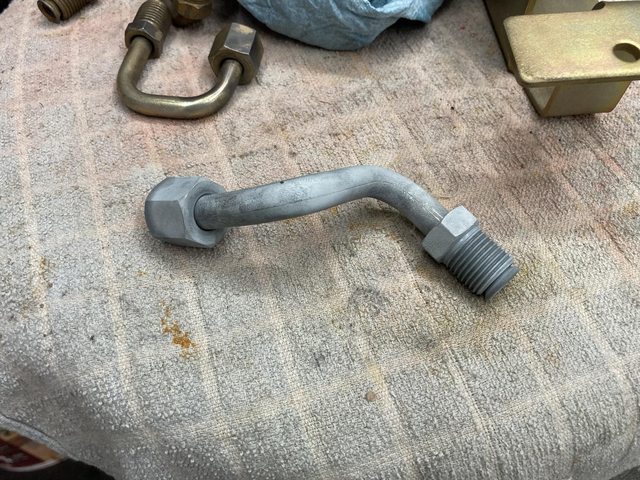
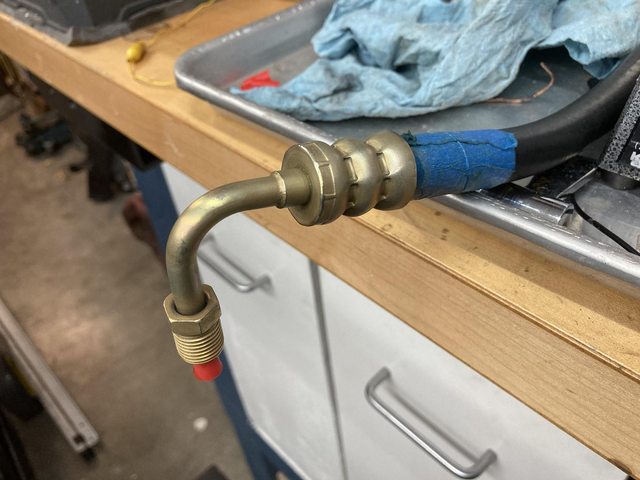
Stripped the rotten insulation from the pressure hose:
Then stuck it in the ultrasonic cleaner.
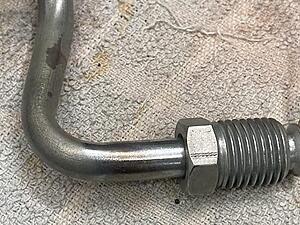
Taped it off and plugged it tin prep for blasting the ends. Should be entertaining to plate just the ends...
I'm uncertain how it'll go with the tube nuts on there.
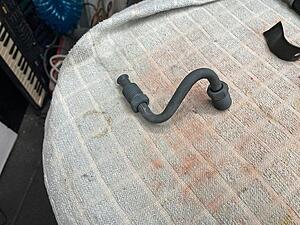
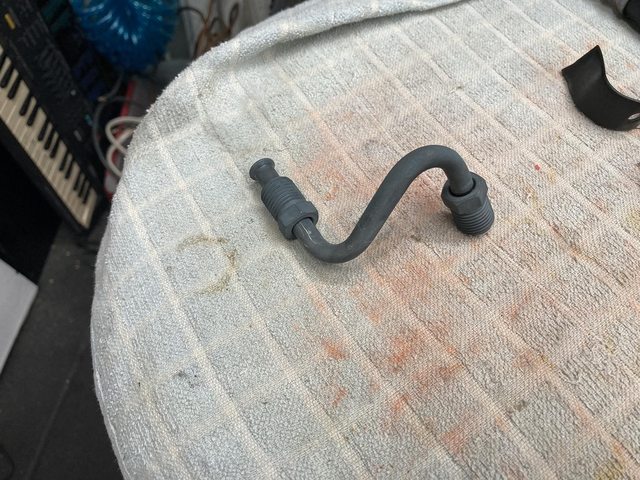
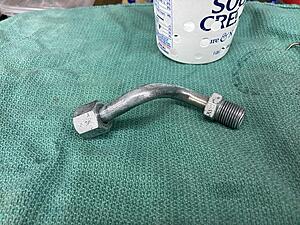
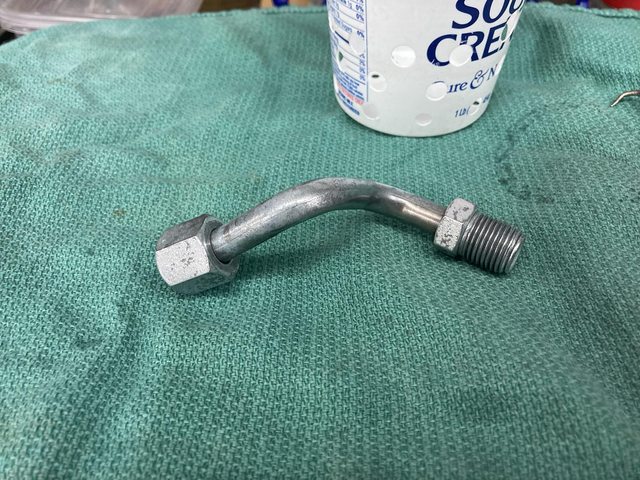
So I plated one of the smaller lines:
It seemed to work if I moved the tube nuts a few times.
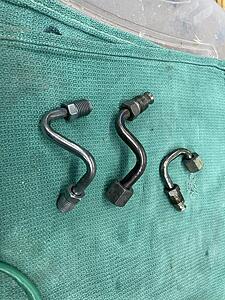
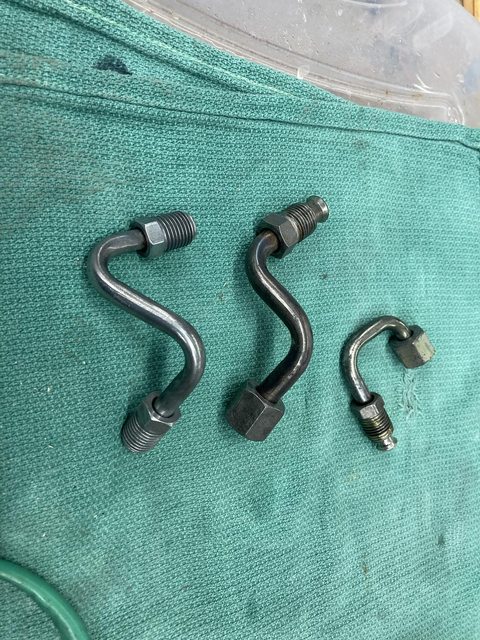
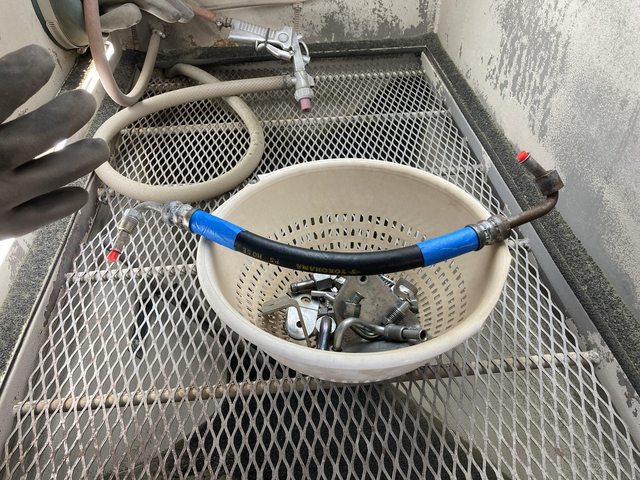
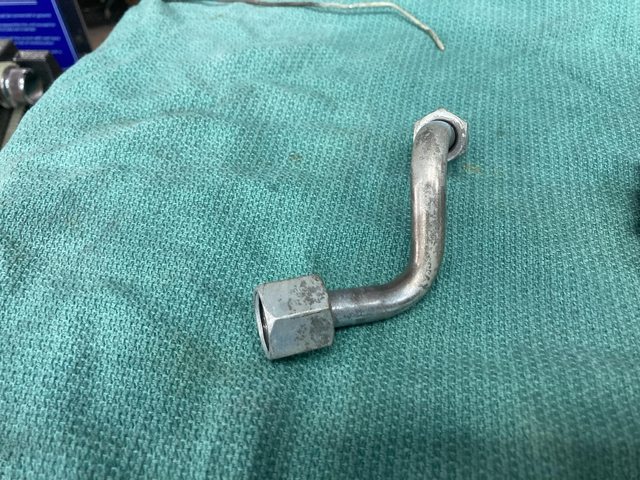
I ran the plated line and the other two small lines through the tumbler:
(plated one on the far left.)
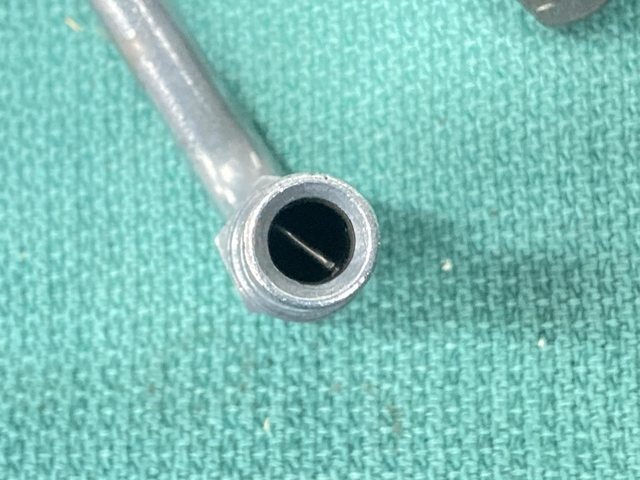
Minor problem:
Had to fish and/or poke those out of both ends of the two smaller lines. The larger one they just dumped out. Blew them all clear, of course.
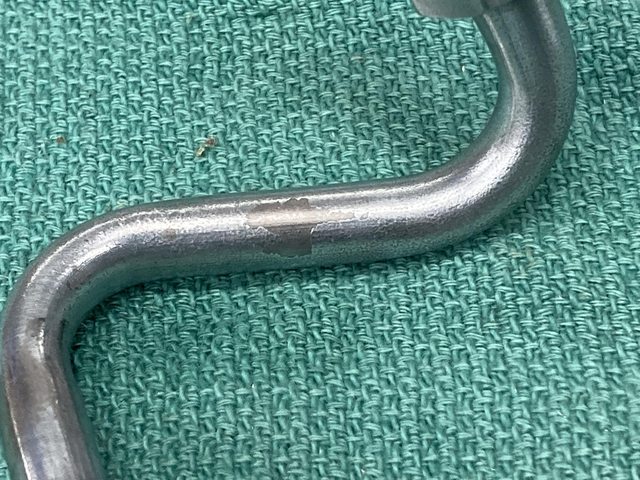
It polished up nice:
...except:
and another spot at the tube nut on one end. Not sure what's going on there.
Tried passivating, and didn't get a lot of gold:
Hmmm. I wonder if I polished too long? Seemed like a good coat when it came out of the tank. I even accidentally left it far too long!
May strip it down (you just dunk it in the muriatic acid for a bit) and throw it in with the other hardware that I will be doing in the plating barrel.
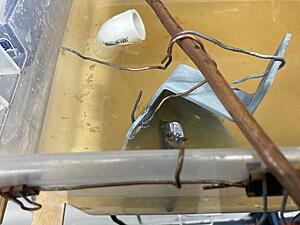
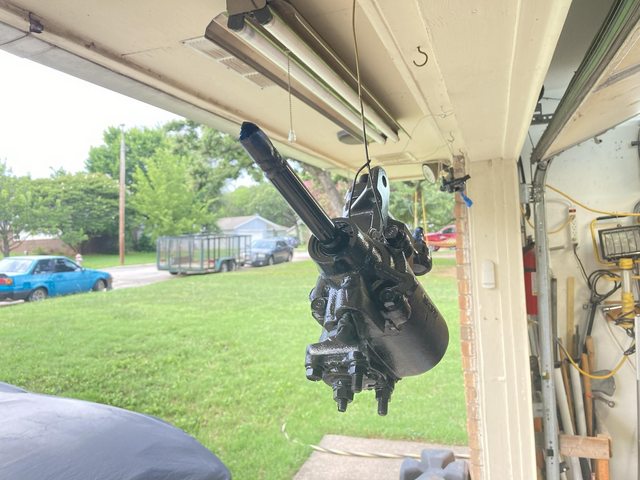
I ran out of time for the day, but I did get the steering box masked up to blast it:
(I masked the data plate, too, after I took the picture.)
There's a seal at the base of the gear box where I circled in red, you might want to pop off the pitman and mask the shaft and the rubber seal too. The shaft extends/retracts through that seal as you adjust the lash between the sector shaft gear and the ball nut. There are many threads on adjusting the box.
For these purposes though, *do not sand blast the exposed portion of the shaft*
There are, to my understanding, no such thing as seal/rebuild kits available anymore:
Thanks. I tried to be careful around there. I didn't need it shiny fresh cast iron - just the crud and rust removed, since I'm painting anyway. Hence taping over the other areas past the boots. I can just finish out those bits by hand. Hopefully Id din't screw anything up.
Honestly, if I did, it would be he final push to convert to rack and pinion... :P
Second plate and passivate on the hose end looking a little better, but the passivate is dark and dull.
The tubes didn't work at all.
After that it occurred to me that the passivate had worn out. A fresh fill worked a lot better:
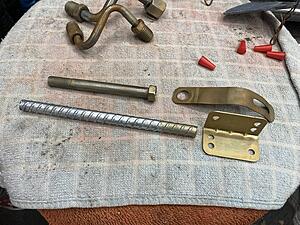
(the rebar and the angle bracket. I have a bunch of those angle brackets that are pre-plated from the factory, but just bright zinc, no passivate, so their easy to use as a test. The first dip in the old passivate solution barely colored it at all, which is what finally clued me in. The stuff above was with the old solution.
The big nut for the pitman arm caem out great:
(this stuff looks a lot better in person. My iPhone really doesn't pick up the color and the iridescence)
The rest of the stuff, meh:
I figured out what was going on there - more on that in a minute.
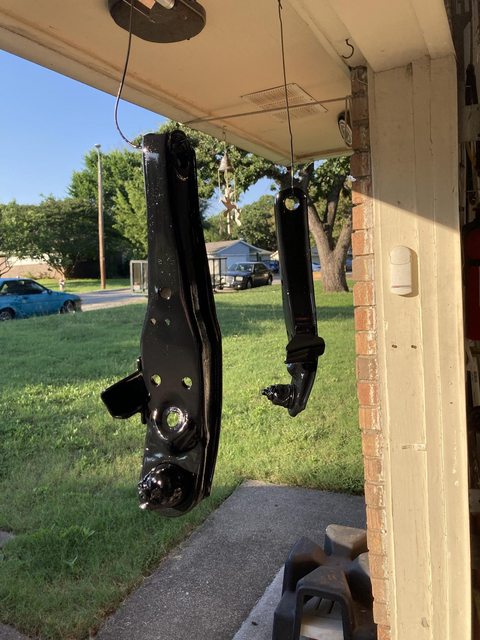
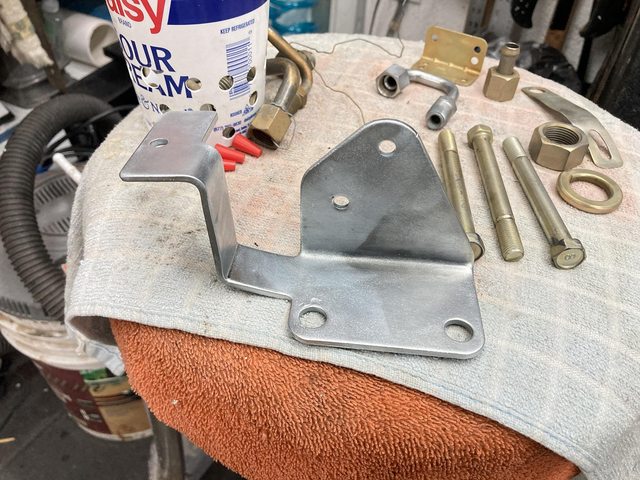
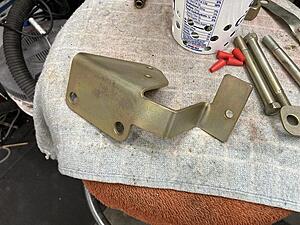
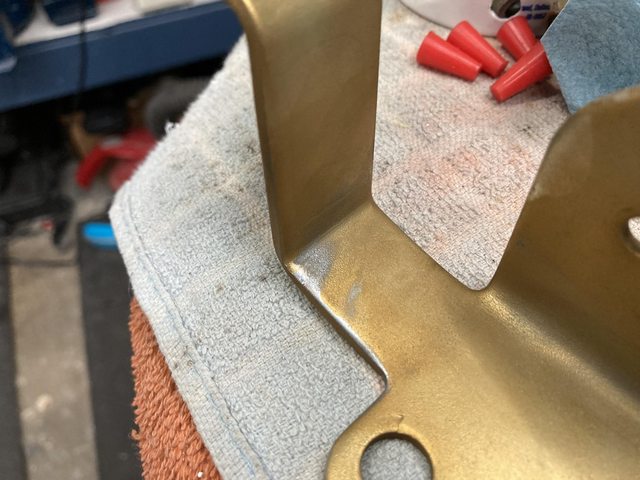
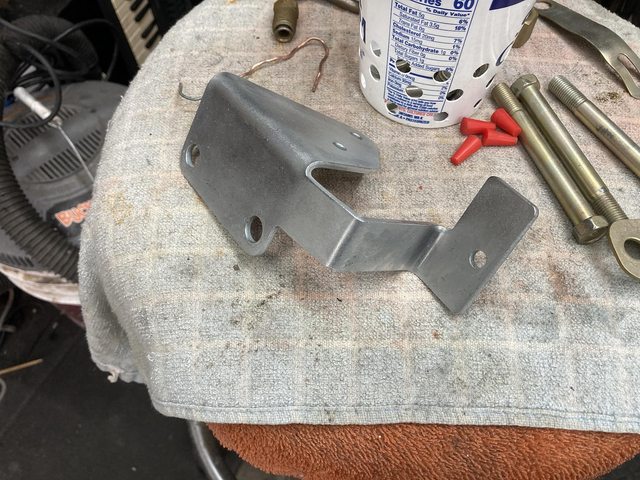
Meanwhile, I plated that big honking bracket. This is literally the largest thing I've attempted yet.
The inside corner was being annoying.
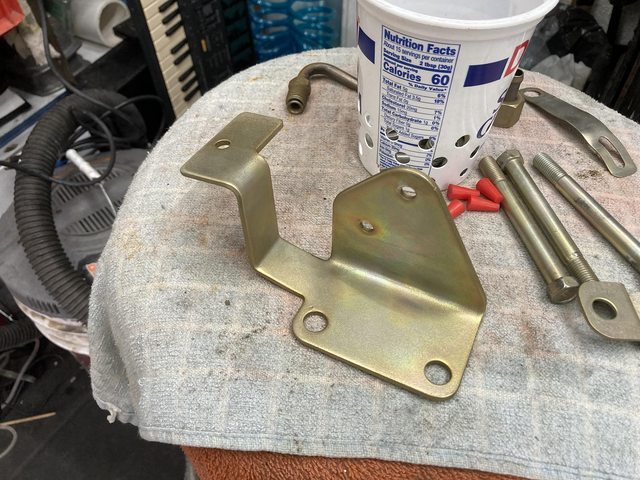
Hmmm. Left it in the passivate a bit too long. I got used to the worn solution taking longer. The fresh stuff only takes like 15 seconds.
Wait, what's that?
Dammit.
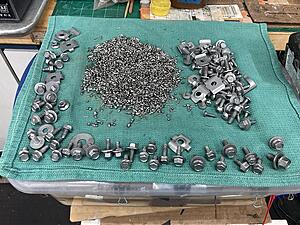
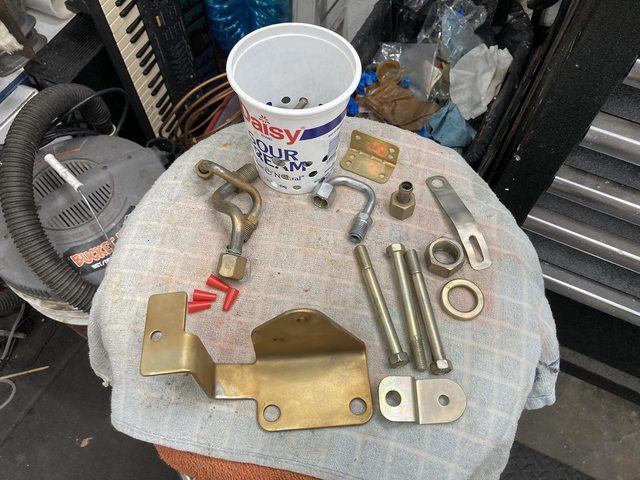
An eclectic collection. Stuff on the right is :thumbsup:
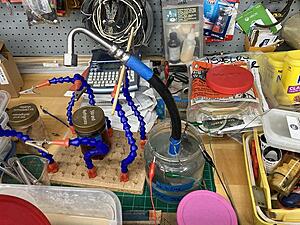
Still testing the plating and chromate solutions from time to time:
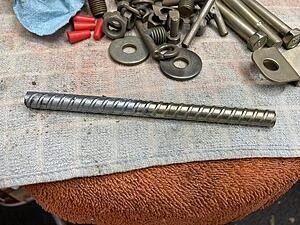
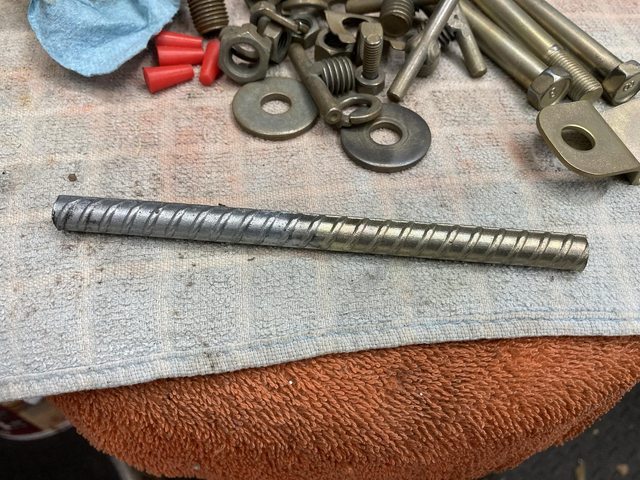
Prettiest piece of rebar ever.
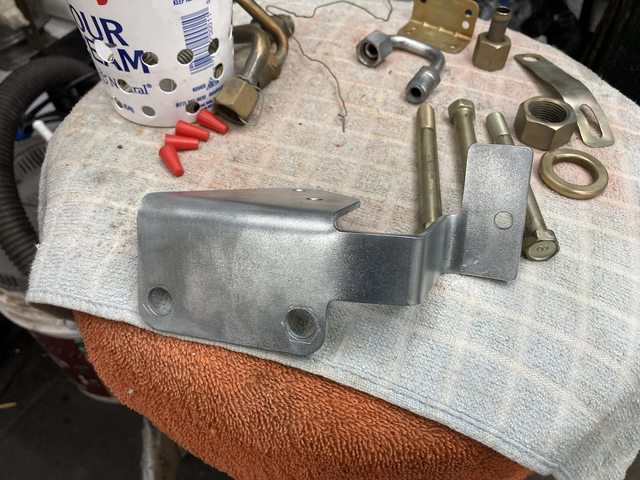
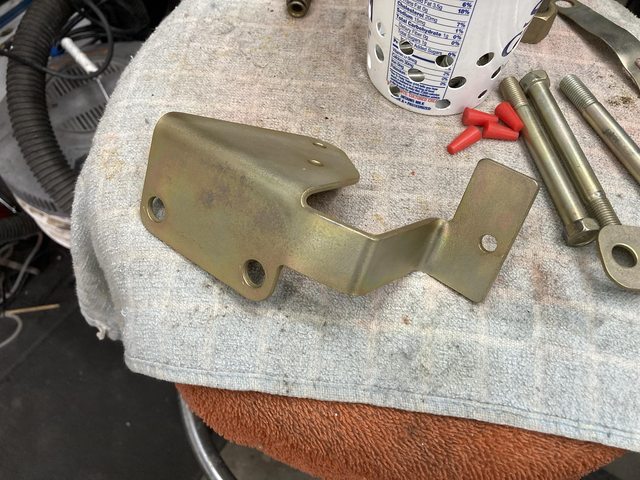
Stripped and replated the big bracket. It played much better this time around. I fiddled with the current and positioning a bit. "Low and slow" tends to work better, but you still need to have *enough* current.
Second attempt on one of the tubes - I did it by itself rather than in the barrel this time:
Better, but still some bare spots in the passivate. Not sure what's going on there.
I did figure out what was happening with the other hardware. The tumbler with the stainless shot in it is perfect for polishing after blasting, but was too aggressive for the plating, and was basically stripping it off in places. I stripped them down and threw them back in the plating barrel, along with four bolts from the front fenders that I replaced with already-plated ones.
Looks like a couple of the bolts still had some schmutz that needed addressing.
Polished the rest of the stuff while the bolts were re-plating. Nice!
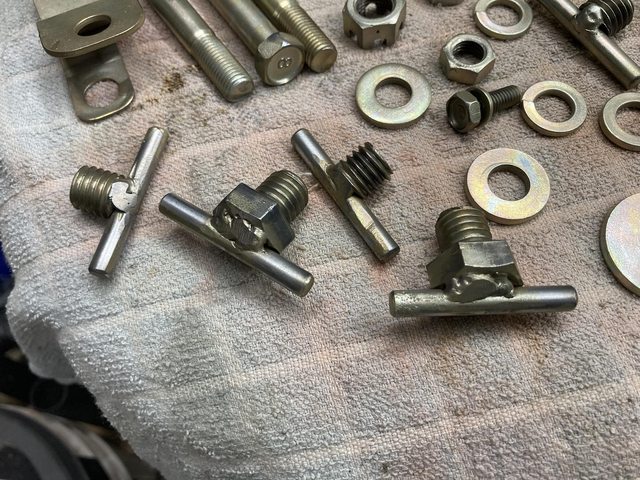
I missed the vise mount pinch bolts from the bottom:
I'm pretty sure I plated those, but obviously not well enough, so they got stripped and replated, too.
I wasn't happy with that one hose end I'd done, so I buffed the passivate off with steel wool, but didn't strip it per se, and then dipped it back in the passivate. That worked!
The four pinch bolts late to the party got some bare spots in the passivate, too. They seem to be plated, but the passivate doesn't like it.
It took a second try of stripping, plating, and passivating on three of them. One took a couple more tries, including leaving it in the acid for 10 minutes(!) to kill any contamination, but eventually worked. The dirtiest of the bolts was similar. It fought me.
But eventually, all good, and I also did the other end of the power steering hose, which came out beautifully.
The hard lines are still giving me trouble. I think either there is some contamination, like the one pinch bolt, or they're some flavor of stainless, which doesn't zinc plate well. I'll mess with those a bit more, but in the meantime, I can start bolting the power steering back together.
Somewhere along the way, I actually bolted some stuff back onto the car.
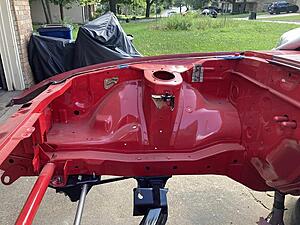
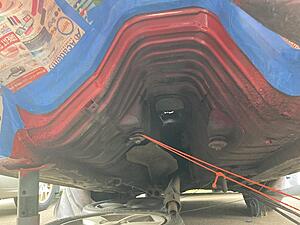
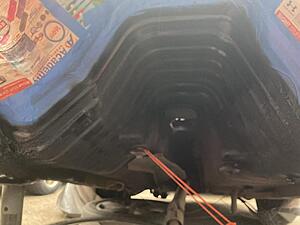
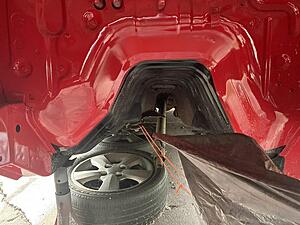
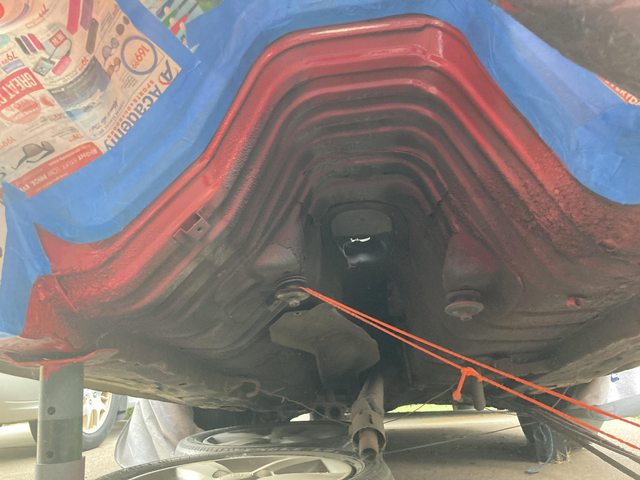
I also decided to paint the trans tunnel past the engine compartment matte black.
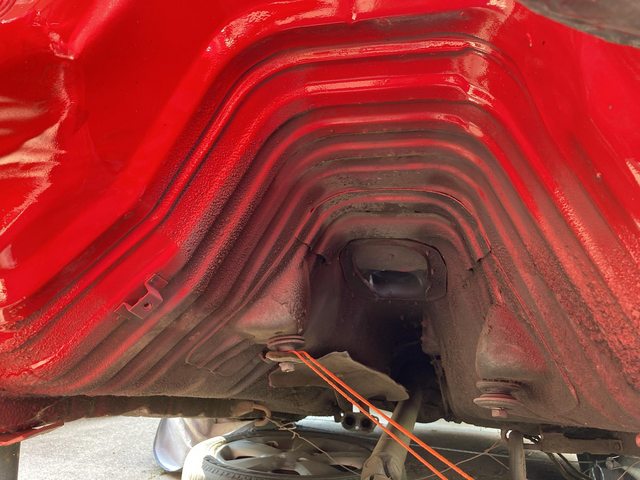
Before:
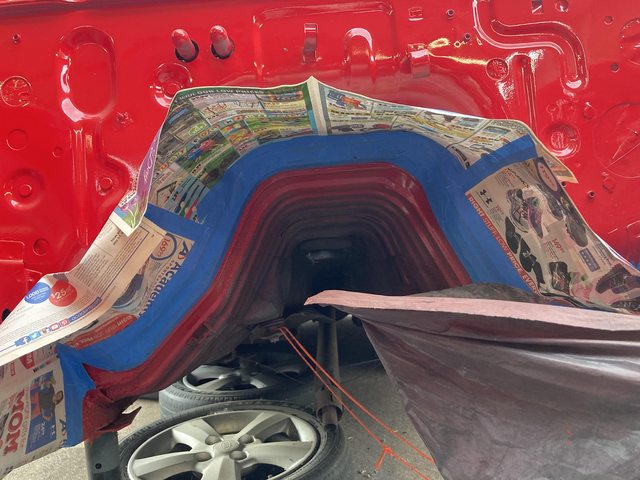
Masked:
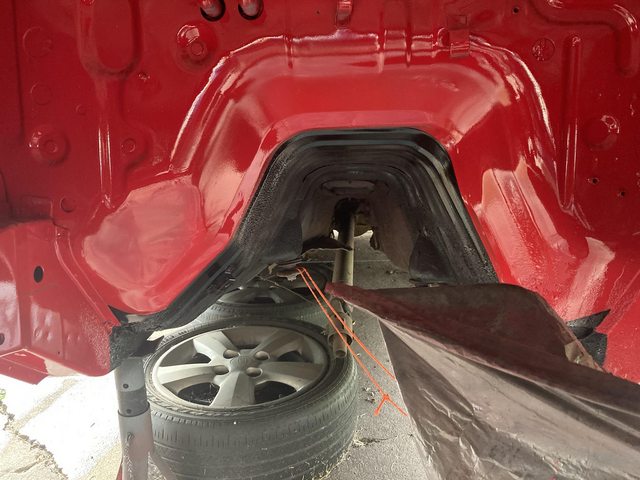
After:
(Sorry, sun was in an akward location for the pic. I put the hood back on for the next one - also because it was starting to rain.)
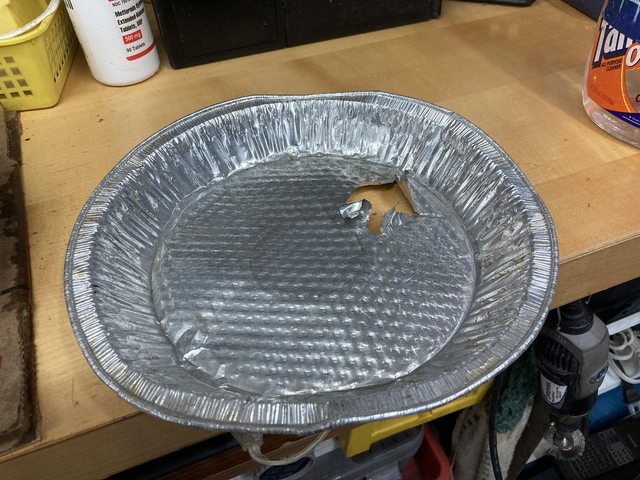
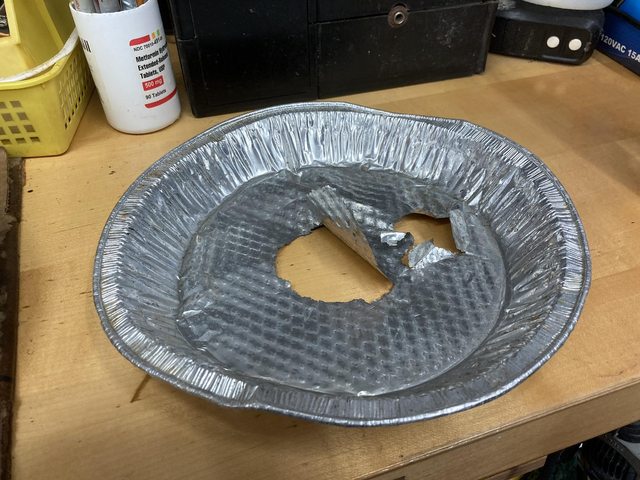
One of my aluminum pie tins I use for washing parts gave up:
I guess I didn't rinse the acid out thoroughly. It started leaking, and when I investigated, those spots just tore like tissue. Whoops. Well, that's why they're disposable.
If I've been following correctly - you're using a vibratory cleaner with steel media for the polishing?
Have you considered using crushed corn (or walnut shells) as the media? I use that for cleaning brass and it does a good job without being too aggressive to the surface. Something you might want to consider...
Also - did you ever give us a good breakdown of your plating tumbler? I know you linked to one you used as inspiration (and that had a good description) but I'm curious to see your setup.
 06-14-21, 08:15 PM