
Doin' it right this time - Best rice in town part 4

Part 1 - https://www.rx7club.com/1st-generation-specific-1979-1985-18/flame-pics-my-hood-best-rice-town-447796/
Part 2 - https://www.rx7club.com/1st-generation-specific-1979-1985-18/best-rice-town-pt-2-a-502972/
Part 3 - https://www.rx7club.com/1st-generation-specific-1979-1985-18/m-f-ing-yellow-best-rice-town-part-3-a-521937/
A little back story for those that actually read the other 3 threads. Had an issue with the hood bump cracking out very quickly because it wasn't welded so that hood came off and an OE style one was put on "temporarily". Check the dates of those other threads and you'll see what I mean. Another issue was that the paint had faded considerably (single stage) and the poor prep work I had done started to show its ugly head. This time however, I am doing it a much better way and doing more at the same time. On the other hand this was the very first car I had ever painted so I am still happy with the results. Since this car was painted I have gone to school for auto body and then worked in a shop for 2 years. I now no longer work at a body shop (pay mainly) and now have a factory job that pays more, is closer to home (5 mins instead of 35 mins) and better, less expensive benefits.
My plans for the car are as follows: Paint engine bay this time along with rest of the car and install the body kit I bought from CptKRMP5 (I think that's his SN). The guy that runs Protege Garage (.com). Cool guy. Anyways, I decided to split up the car into those 3 "stages" so I don't constantly get distracted on other parts of the car. It will actually most likely get split up into 4 parts but we'll get into that later.
Feel free to PM me or post questions about this project throughout the thread. After all, this is a forum for information.
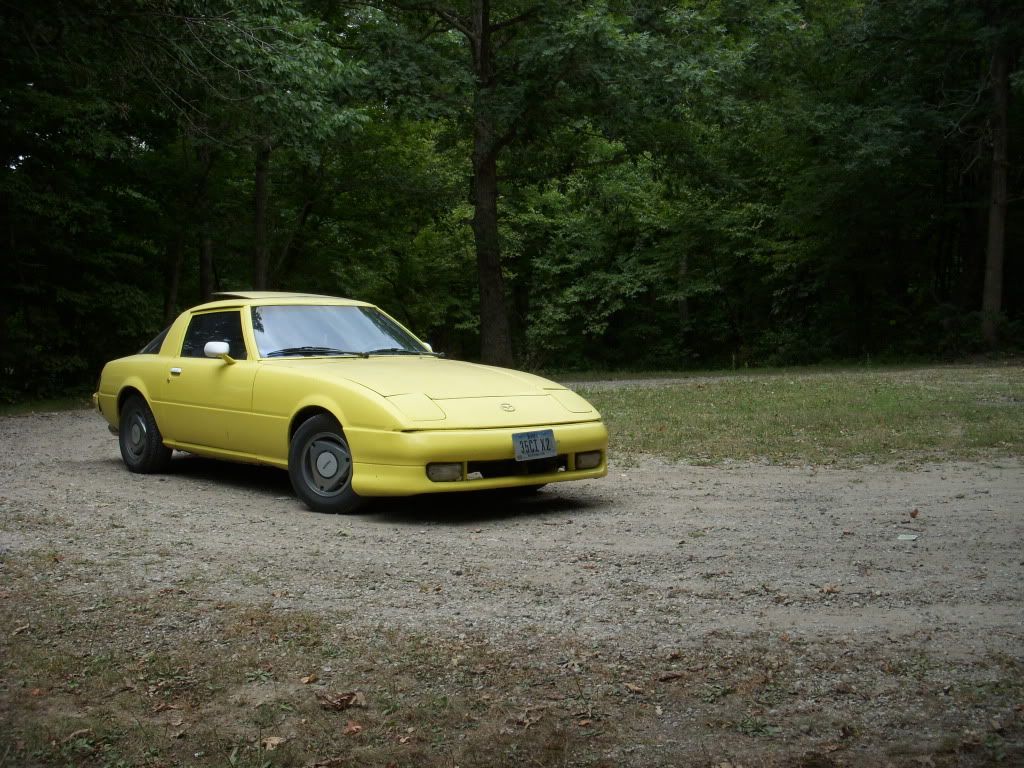
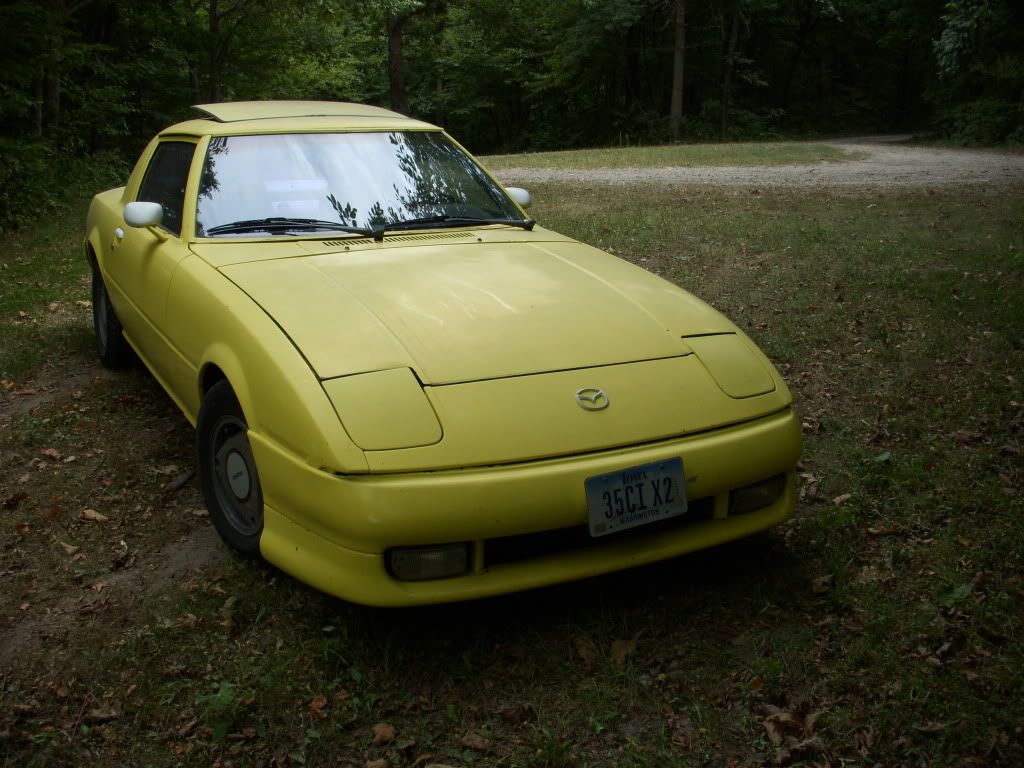
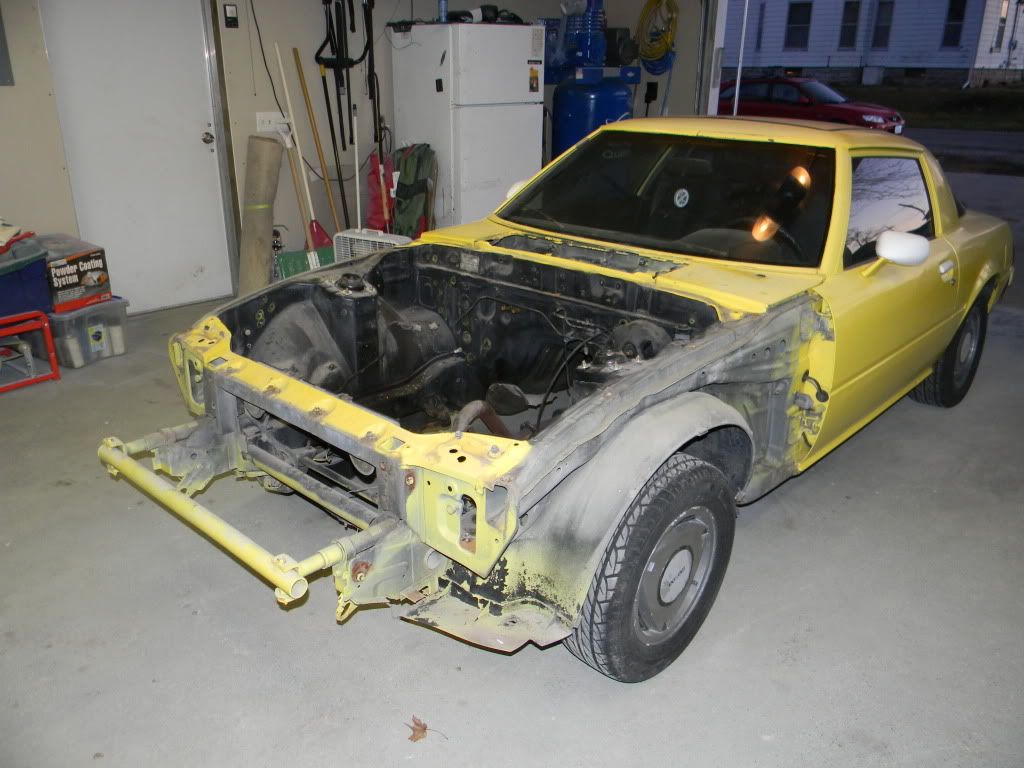
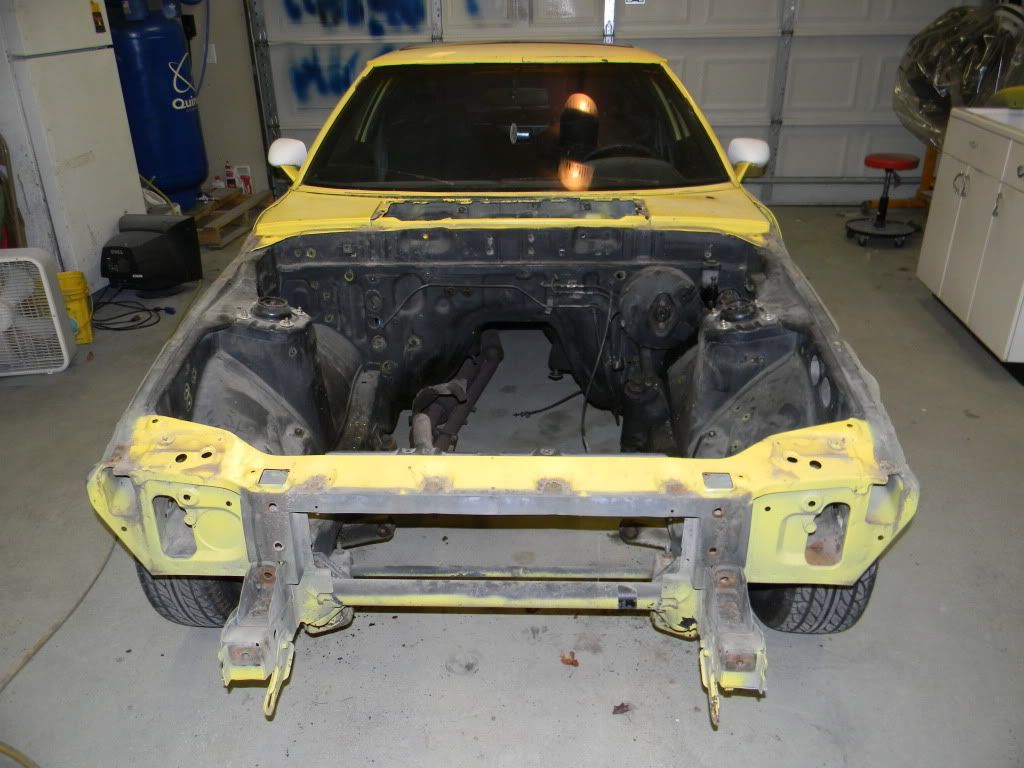
Current state -
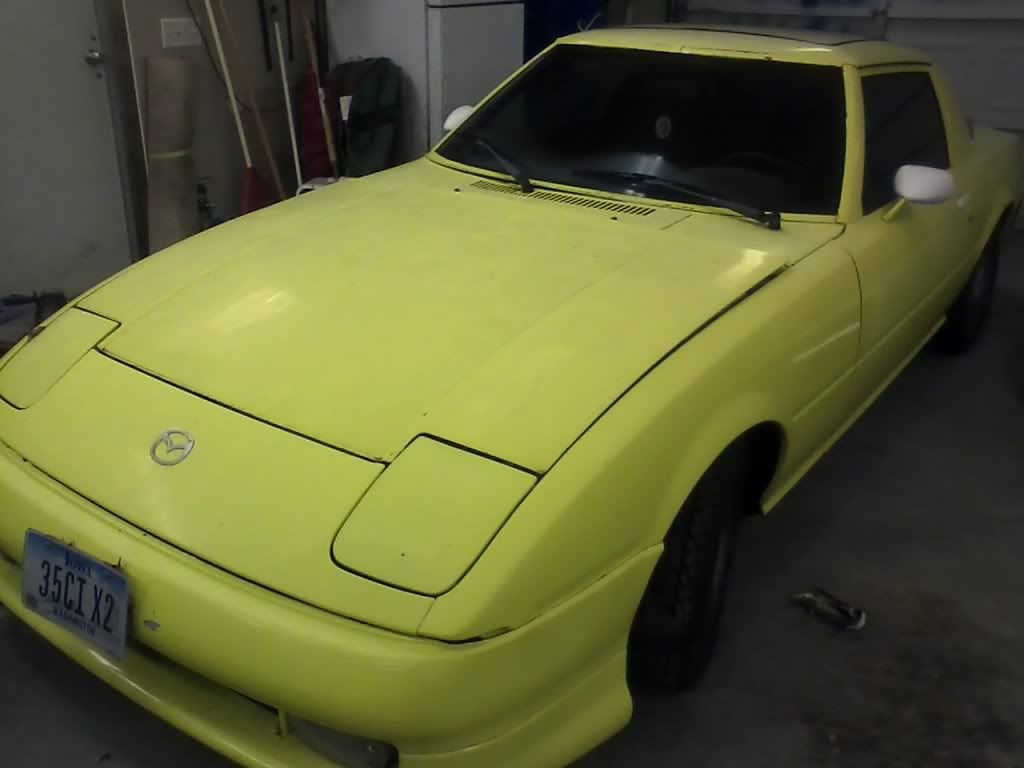
Step 1 - pull in garage
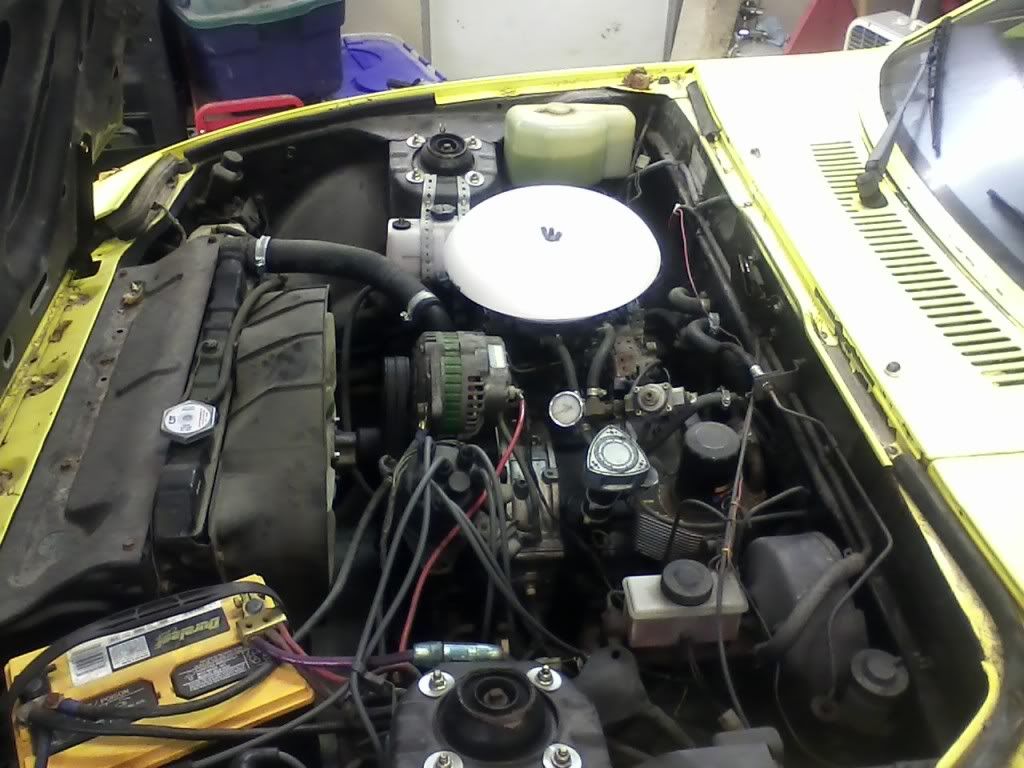
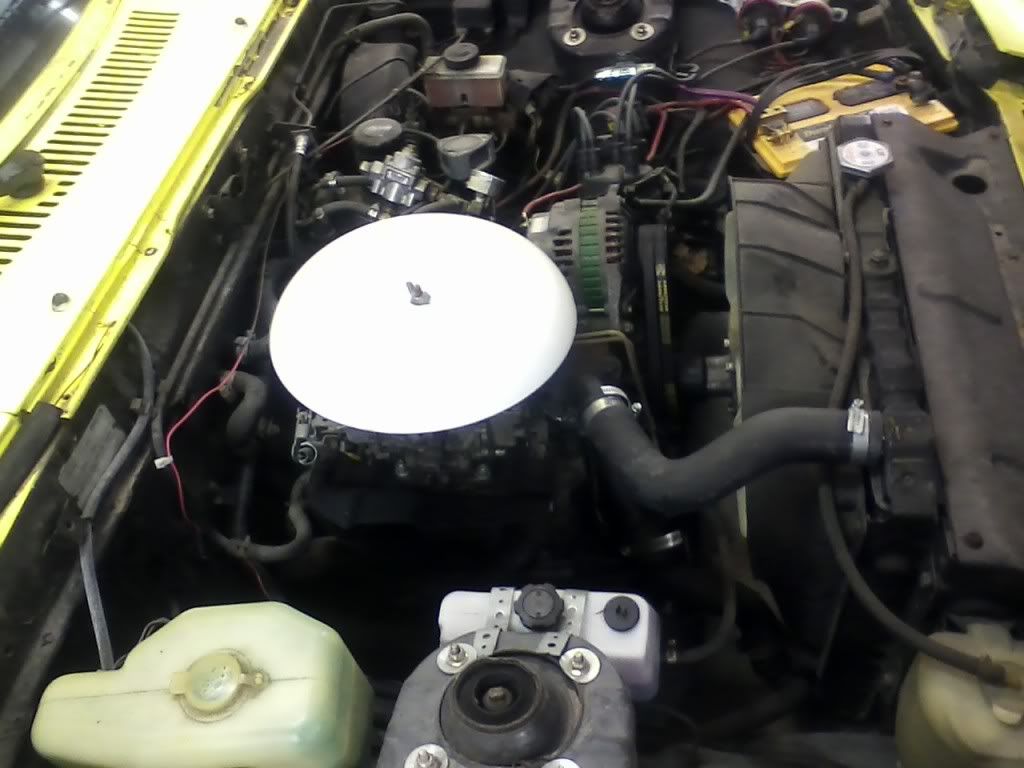
Next of course we pull engine - I don't have pics of the process but this is fairly straight forward and I may skip some steps in thread so again please feel free to ask questions. I am also not posting every single pic I take (some are for me to remember hose routing, and item placement).
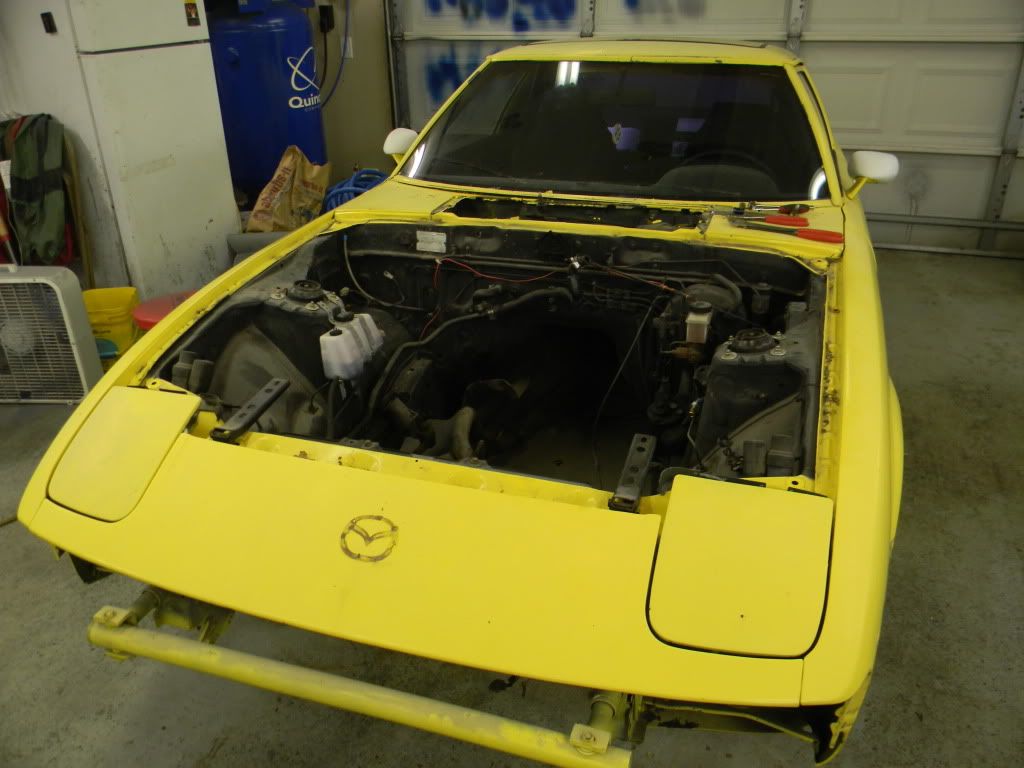
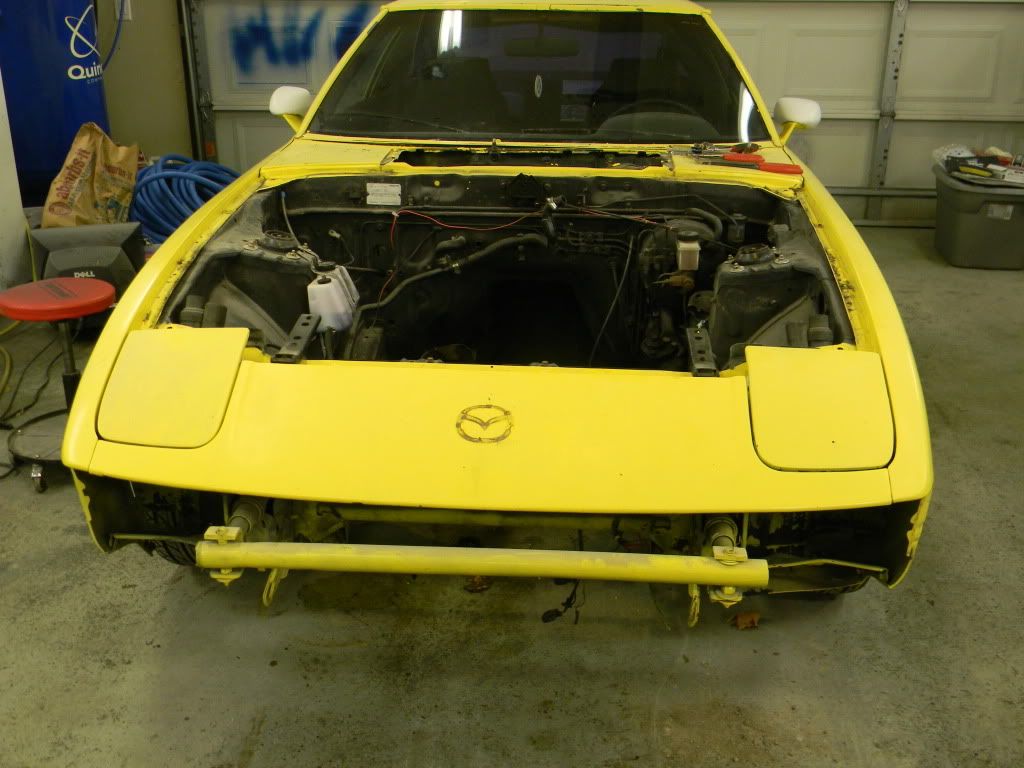
I also removed front bumper in these pics -
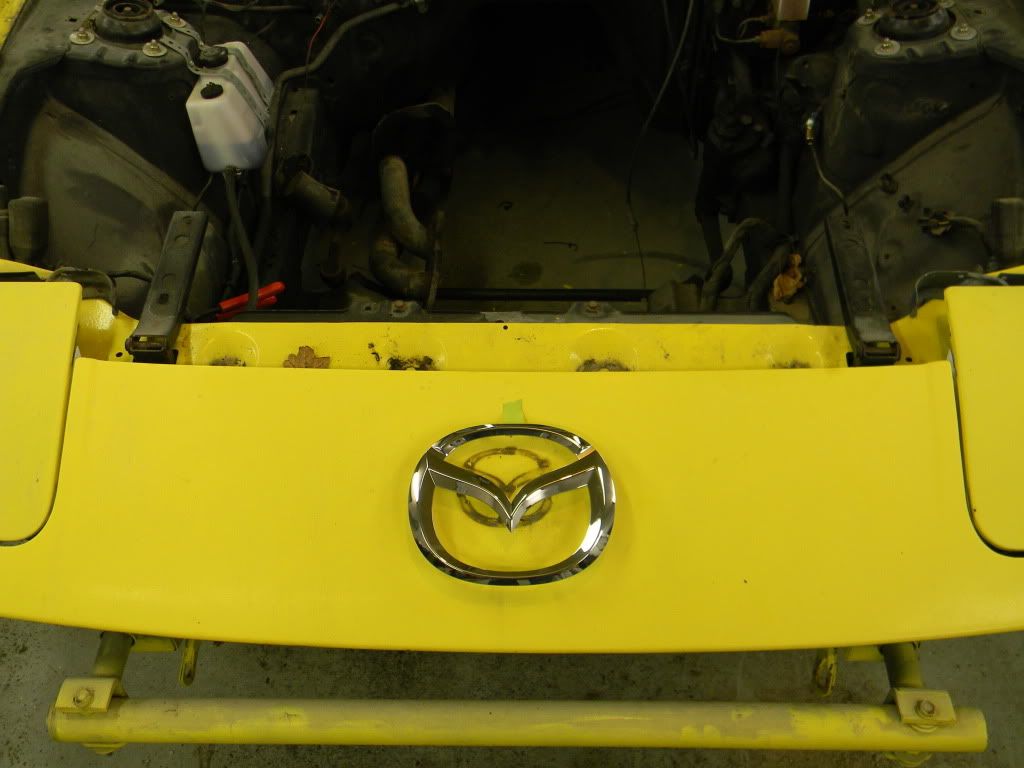
Here's a little sneak peek at what is to come (front emblem from a CX-9) -
More to come soon (probably tonight)
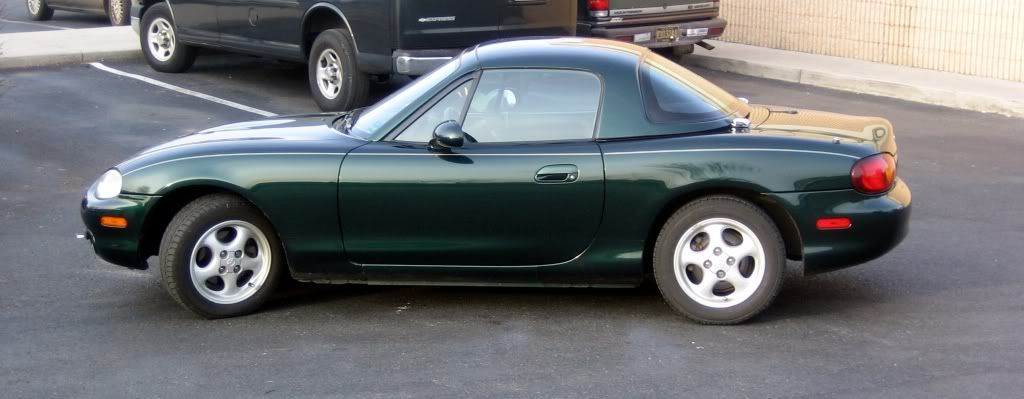
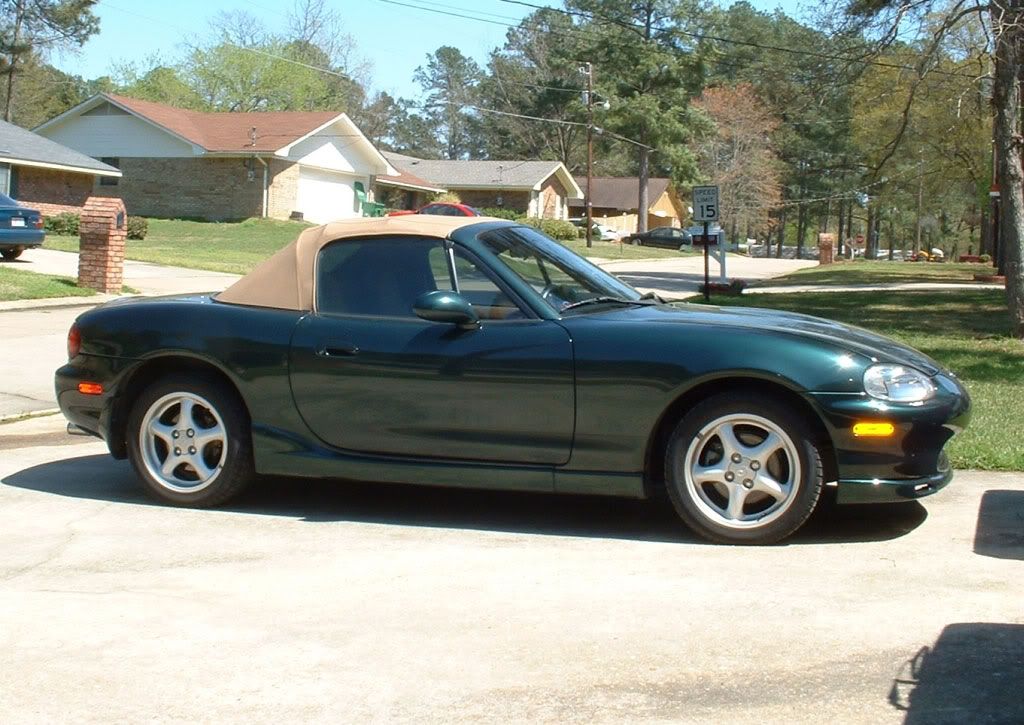
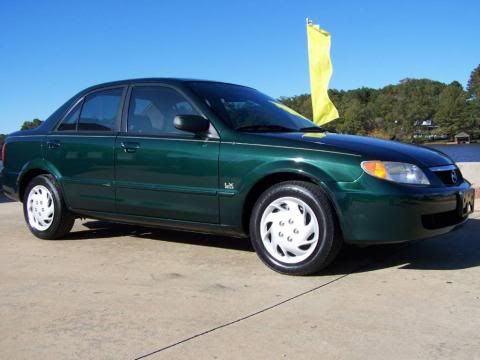
Forgot to add that the paint will not be Zinc Yellow (Ford Mustang) but will be Emerald Green Mica (Mazda Protege and Miata).
Part 2 - https://www.rx7club.com/1st-generation-specific-1979-1985-18/best-rice-town-pt-2-a-502972/
Part 3 - https://www.rx7club.com/1st-generation-specific-1979-1985-18/m-f-ing-yellow-best-rice-town-part-3-a-521937/
A little back story for those that actually read the other 3 threads. Had an issue with the hood bump cracking out very quickly because it wasn't welded so that hood came off and an OE style one was put on "temporarily". Check the dates of those other threads and you'll see what I mean. Another issue was that the paint had faded considerably (single stage) and the poor prep work I had done started to show its ugly head. This time however, I am doing it a much better way and doing more at the same time. On the other hand this was the very first car I had ever painted so I am still happy with the results. Since this car was painted I have gone to school for auto body and then worked in a shop for 2 years. I now no longer work at a body shop (pay mainly) and now have a factory job that pays more, is closer to home (5 mins instead of 35 mins) and better, less expensive benefits.
My plans for the car are as follows: Paint engine bay this time along with rest of the car and install the body kit I bought from CptKRMP5 (I think that's his SN). The guy that runs Protege Garage (.com). Cool guy. Anyways, I decided to split up the car into those 3 "stages" so I don't constantly get distracted on other parts of the car. It will actually most likely get split up into 4 parts but we'll get into that later.
Feel free to PM me or post questions about this project throughout the thread. After all, this is a forum for information.
Current state -
Step 1 - pull in garage
Next of course we pull engine - I don't have pics of the process but this is fairly straight forward and I may skip some steps in thread so again please feel free to ask questions. I am also not posting every single pic I take (some are for me to remember hose routing, and item placement).
I also removed front bumper in these pics -
Here's a little sneak peek at what is to come (front emblem from a CX-9) -
More to come soon (probably tonight)
Forgot to add that the paint will not be Zinc Yellow (Ford Mustang) but will be Emerald Green Mica (Mazda Protege and Miata).
Last edited by IanS; Dec 31, 2011 at 10:48 AM.
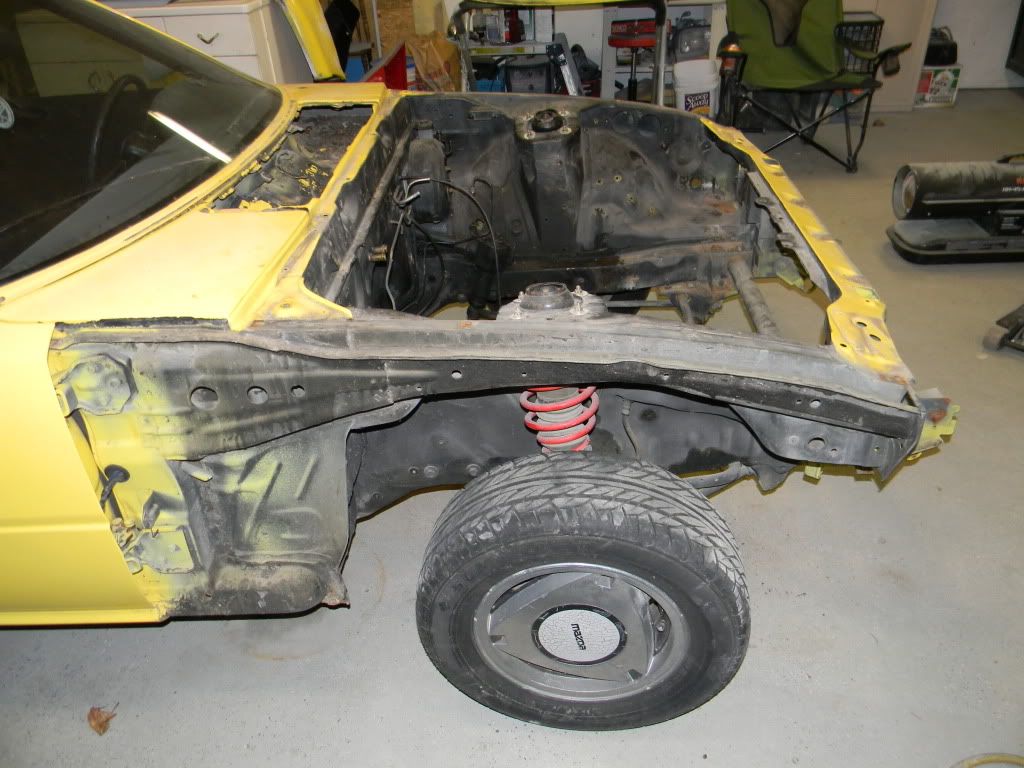
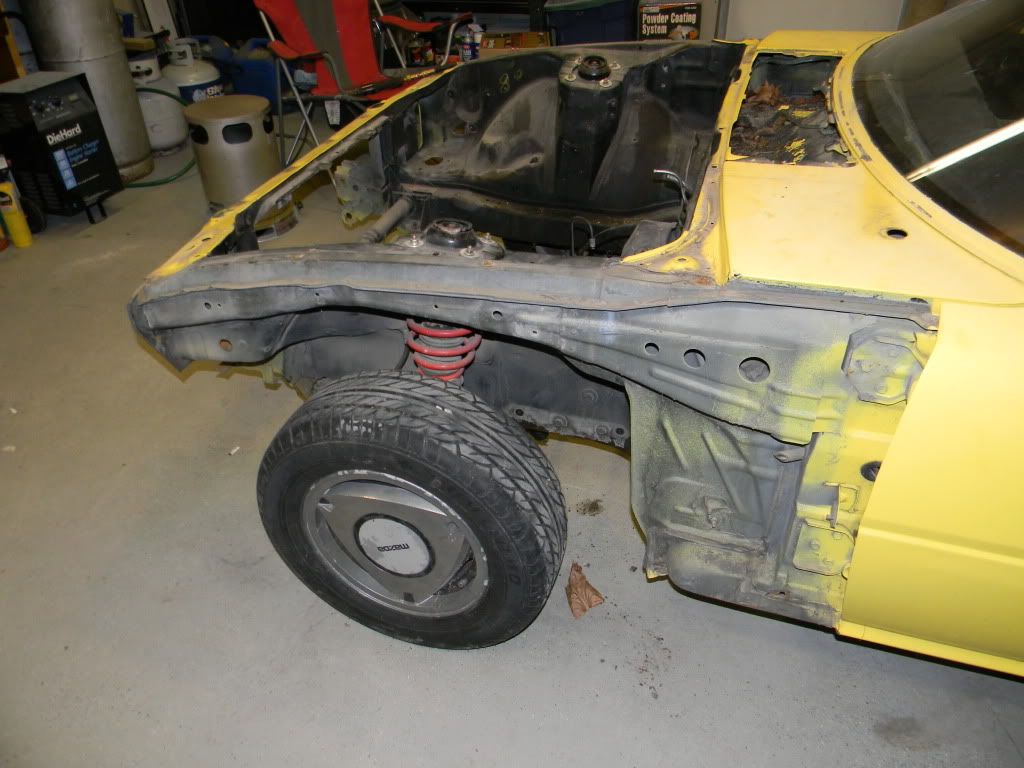
Got a few more things done, nothing really major though. Took out the stereo system from the back since it just seemed like a good time to do it. Also removed a few odds and ends and removed fenders. More pics of the progress.
I marked all the holes I think I can weld shut as they are not needed. My car has no emissions, AC, or a choke. Let me know if anyone has any thoughts or concerns about certain holes they think should not be filled.
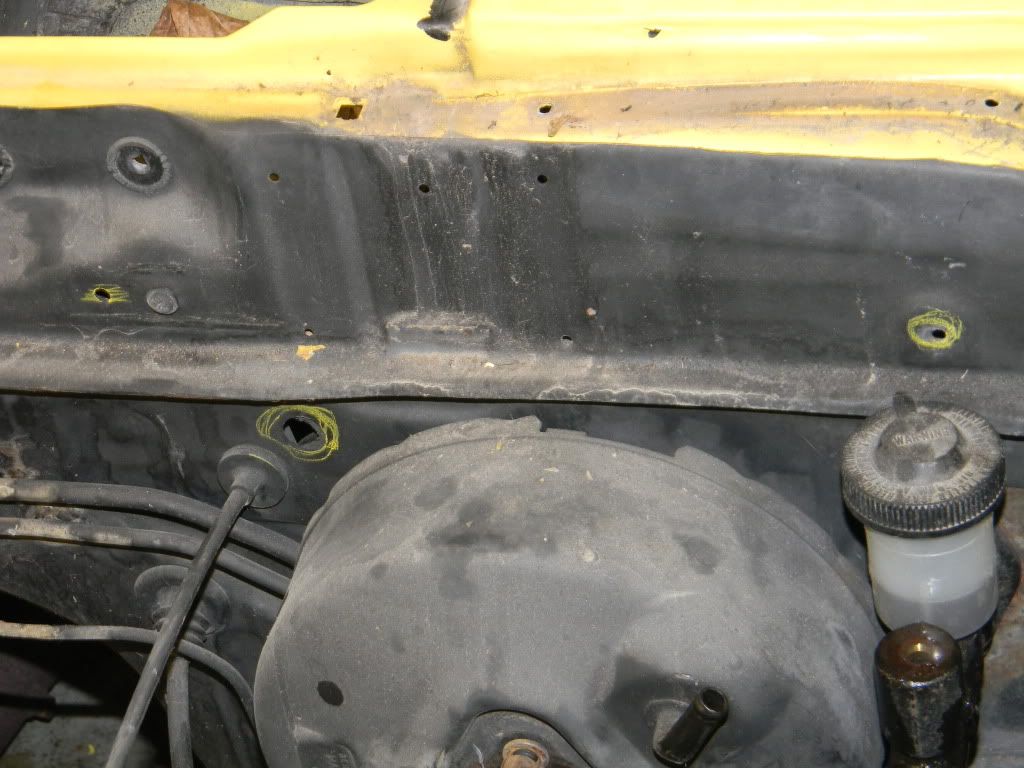
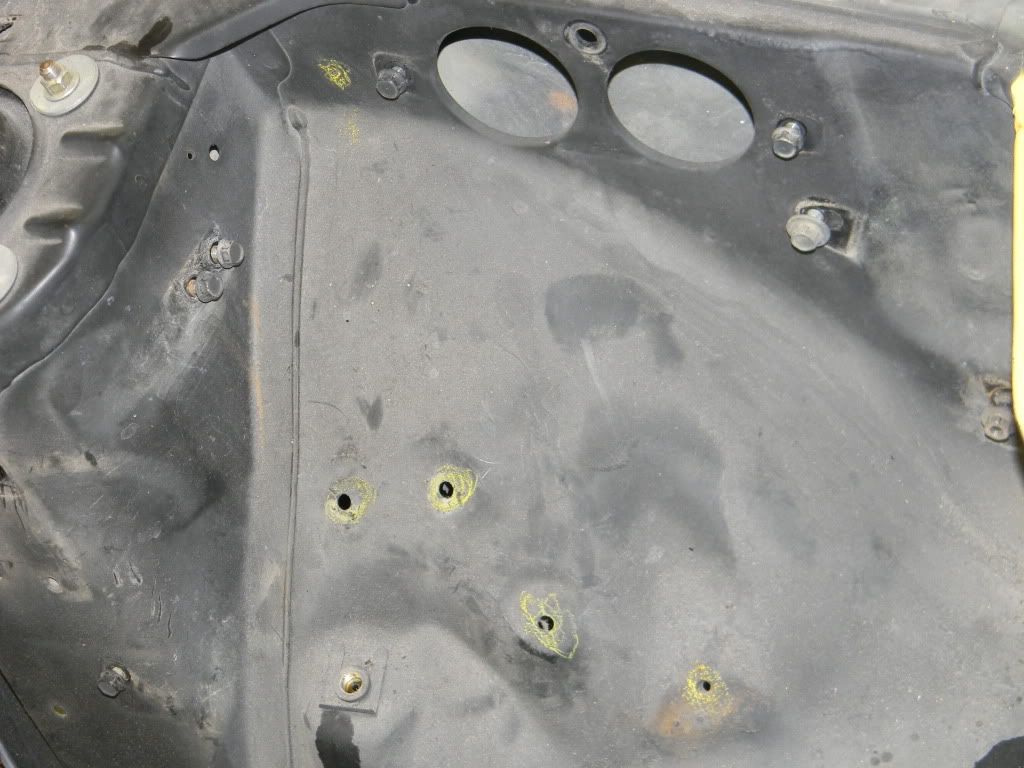
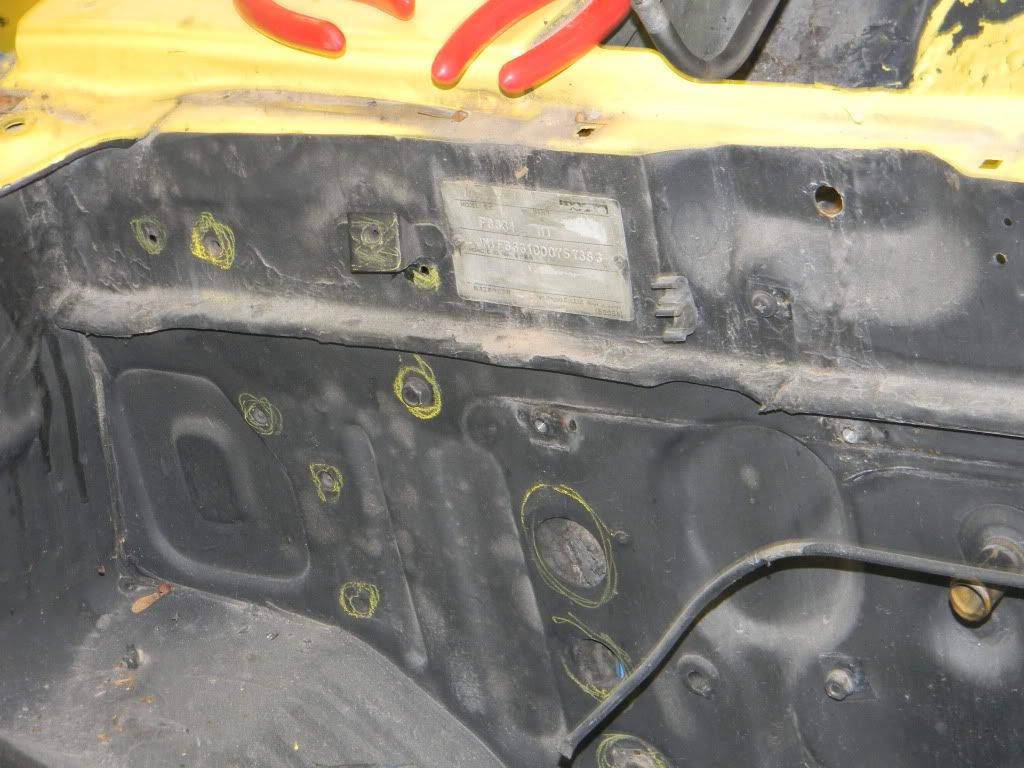
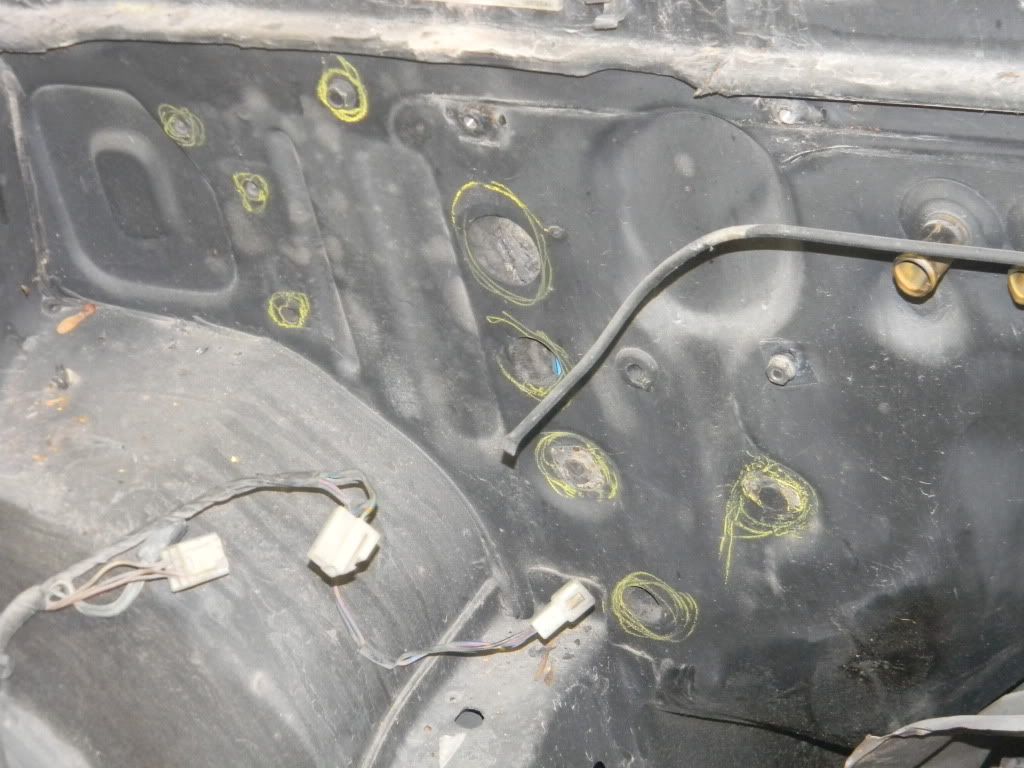
As the car sits now
I marked all the holes I think I can weld shut as they are not needed. My car has no emissions, AC, or a choke. Let me know if anyone has any thoughts or concerns about certain holes they think should not be filled.
As the car sits now
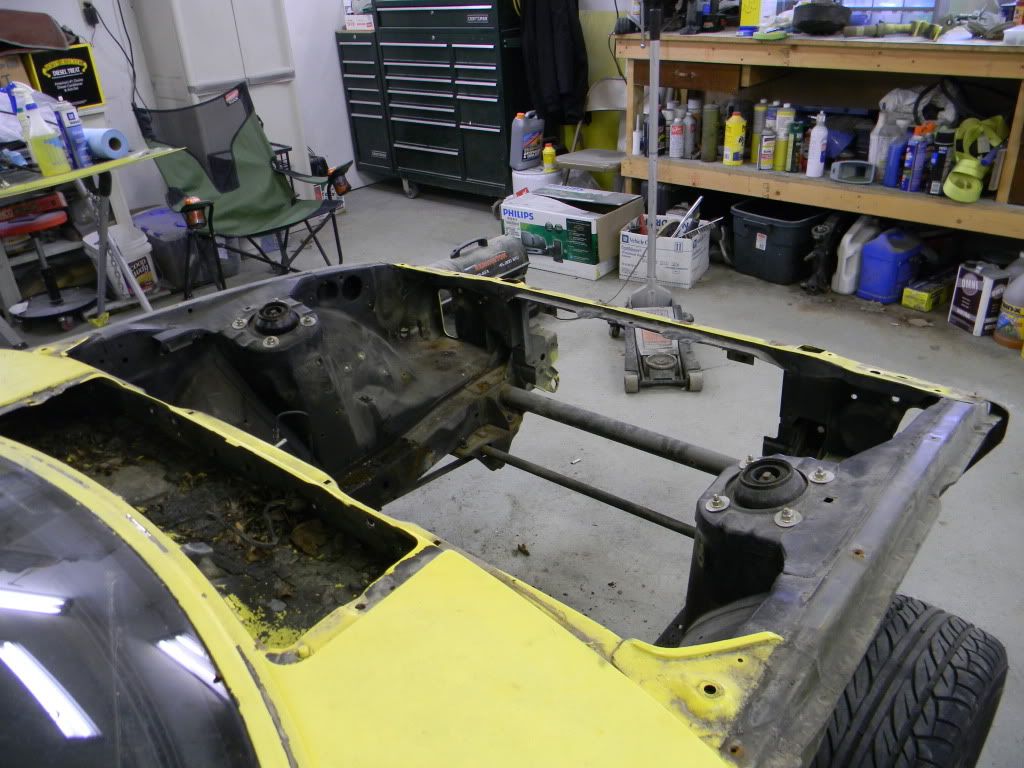
OK so got a few things done today. Doesn't look like much but it really seemed to take a long time lol. Got the wiring pulled into the car so its out of the way and also removed the fender liners (all 4 of them) as well as labeled all the bolts and removed them along with the engine cradle WITHOUT removing the steering. Good times. Removed the bumper shocks also. Pics as it sits now:
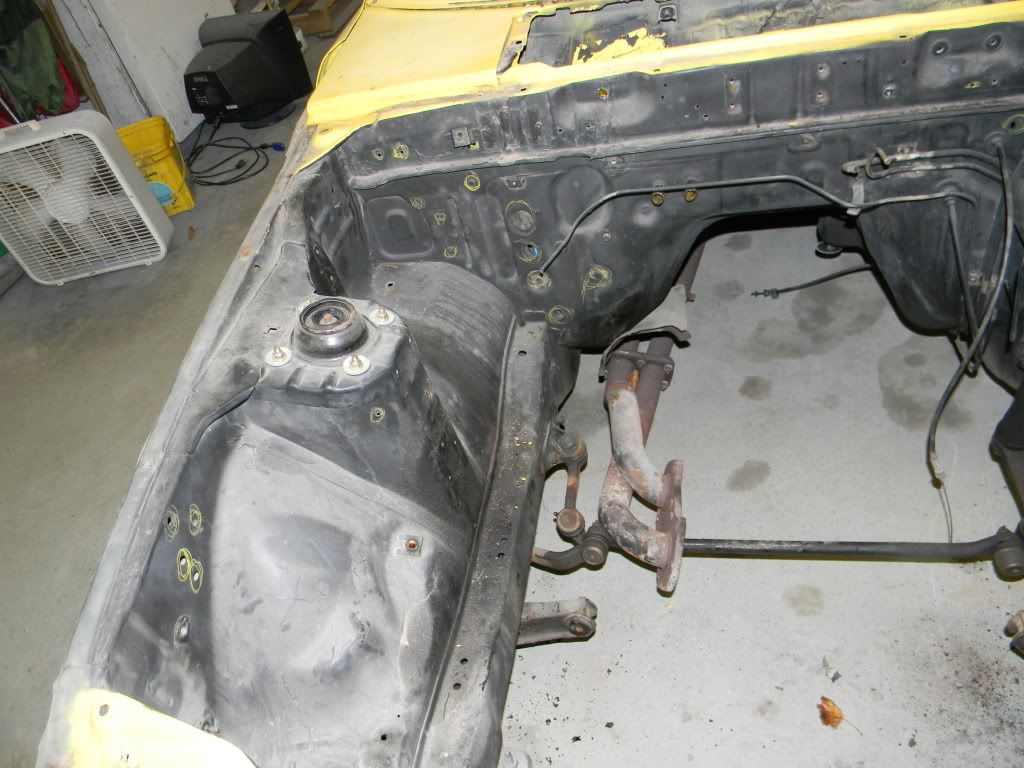

Tomorrow I plan on removing the exhaust and possibly the clutch master and the brake booster. One thing I'm not really sure about is what to do with the fuel return line. I know the vent line I will be removing and capping off and the supply line will be removed so it can be replaced with a larger size line (3/8). Also not sure what to do about the rear brake line. If anyone has any ideas or info I would appreciate it. That is, if anyone reads this stuff instead of just looking at the pictures lol.
Tomorrow I plan on removing the exhaust and possibly the clutch master and the brake booster. One thing I'm not really sure about is what to do with the fuel return line. I know the vent line I will be removing and capping off and the supply line will be removed so it can be replaced with a larger size line (3/8). Also not sure what to do about the rear brake line. If anyone has any ideas or info I would appreciate it. That is, if anyone reads this stuff instead of just looking at the pictures lol.


love the rotor wheels Ian!!! can't say i'm a fan of the yellow paint though man. i'm going to be following this thread! i know you do awesome work and this car is in good hands here!
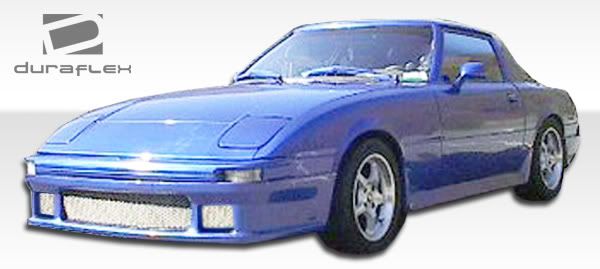
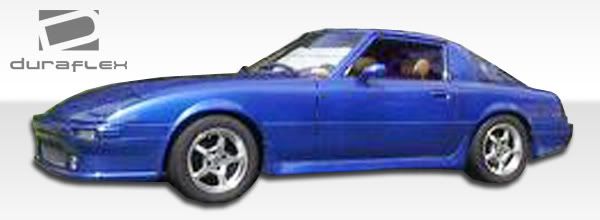
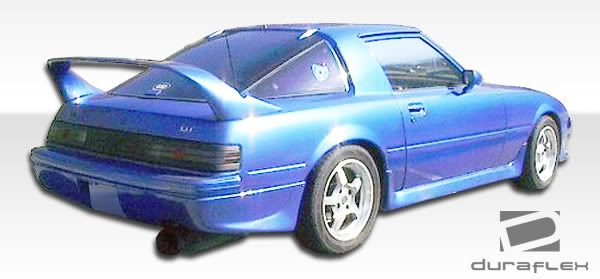
This is the body kit I got. Pics borrowed from ebay. They call it M-1 kit. Notice how the bumper pieces are attached to the outside of the quarter and fenders. If the side molding is installed it should look better I think. I found different pics one time with the molding on and it looked pretty good. Using the moldings and having the side marker lights is what I plan on doing.
Trending Topics


Joined: Mar 2001
Posts: 31,857
Likes: 3,243
From: https://www2.mazda.com/en/100th/
interesting car, i like the yellow (i like yellow...) and the old front bumper is almost awesome, but not quite....
i've seen a few green FB's over the years, and they look good. i dunno how hardcore you are going to get, but the AC holes, and heater holes and a couple of others can just be plugged with rubber plugs. mazda sells em. its a more factory look and its quick and easy, but i'm not sure if that's what you're going for
i've seen a few green FB's over the years, and they look good. i dunno how hardcore you are going to get, but the AC holes, and heater holes and a couple of others can just be plugged with rubber plugs. mazda sells em. its a more factory look and its quick and easy, but i'm not sure if that's what you're going for
Thanks j9. I actually thought about just welding a flat piece of sheet metal over most of those holes in one piece to kind of shave the firewall but not really. I doubt that makes sense. Basically I was thinking about getting rid of all the dips by simply covering them up but not sure if I should or not... Probably wont but its an interesting idea. Some more pics and probably will be the last update for about 7-10 days as I need to push the car outside so a buddy can repaint a shitbox talon he started a while ago and needs to finish.
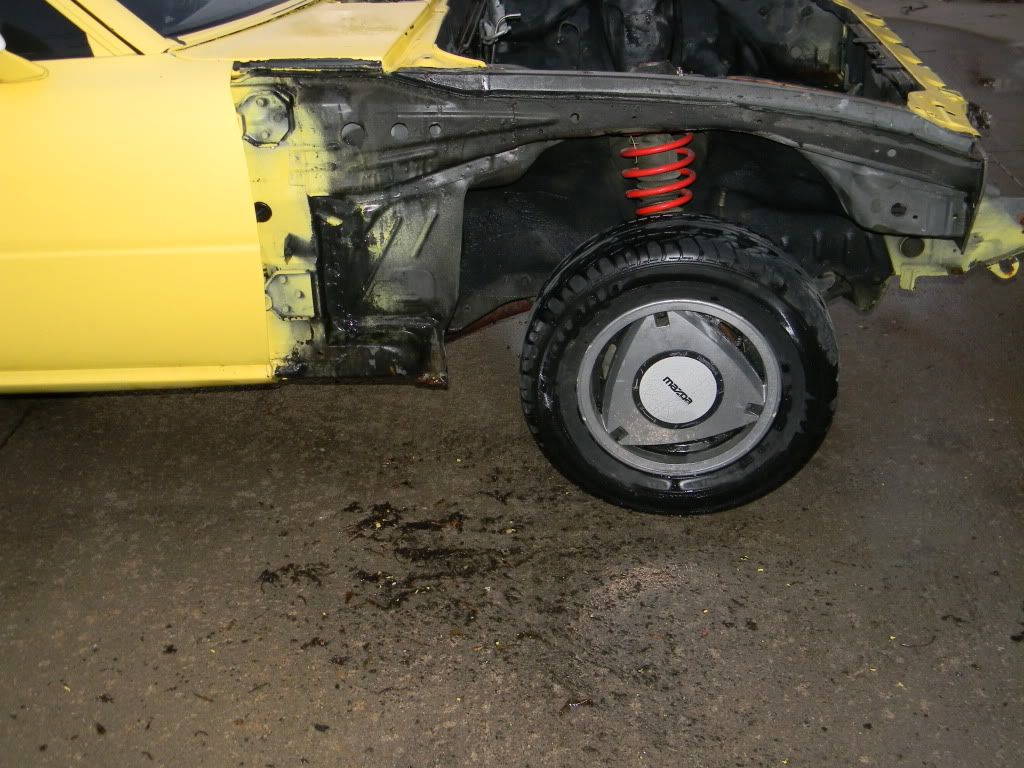
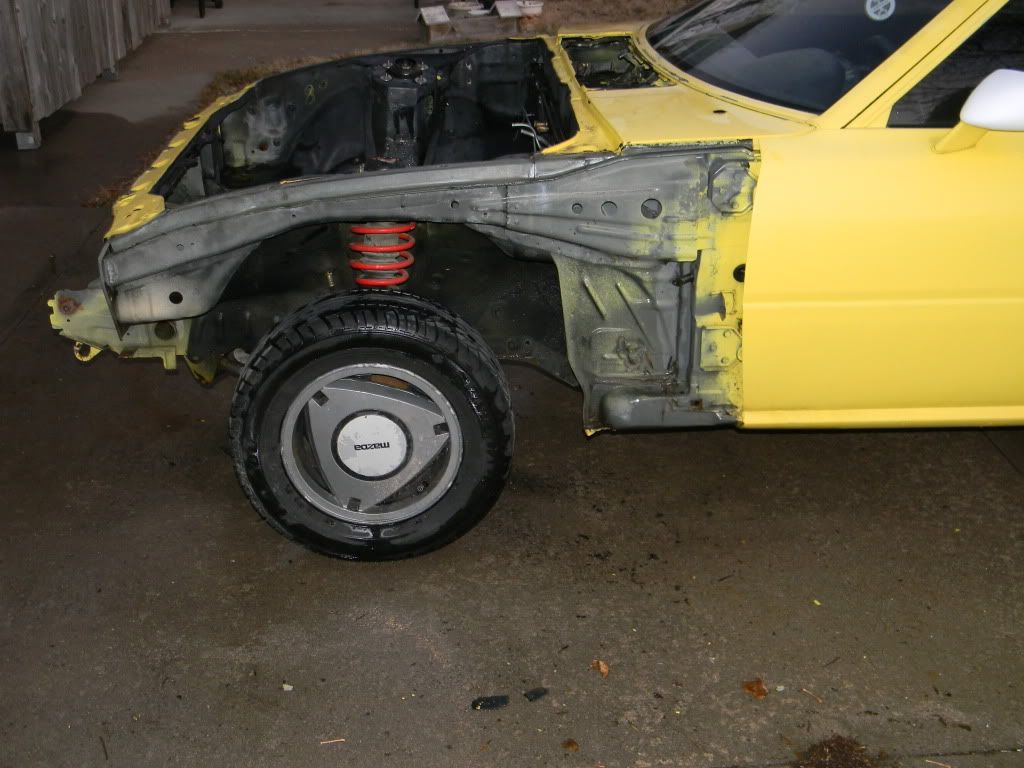
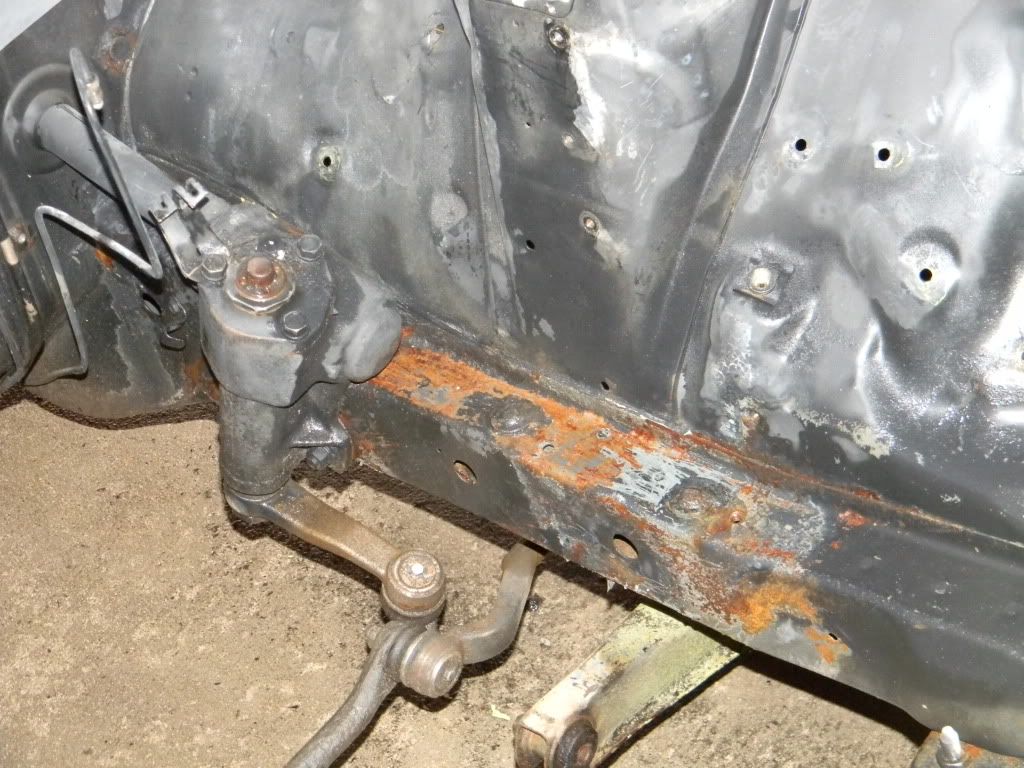
Little rust -

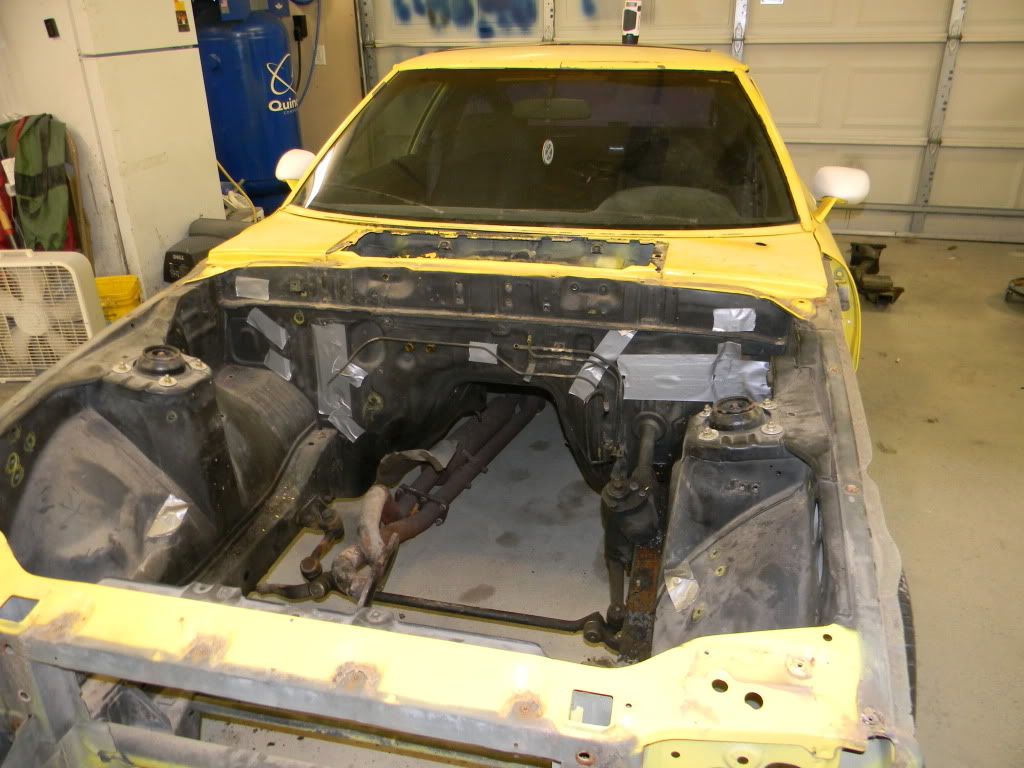
Always a good idea to remove the cowl cover piece and give it a quick vac every once in a while -
I duct taped the firewall holes in some vain attempt to keep rain or whatever out of the inside while the car is outside. This SHOULD be the only time the car is outside until its done. If not, Im not gonna be happy about it.
Little rust -
Always a good idea to remove the cowl cover piece and give it a quick vac every once in a while -
I duct taped the firewall holes in some vain attempt to keep rain or whatever out of the inside while the car is outside. This SHOULD be the only time the car is outside until its done. If not, Im not gonna be happy about it.
Because a lot of you FB guys probably dont go into the FC section much this is the wife's FC build thread - https://www.rx7club.com/build-threads-294/angies-fc-exterior-buildup-thread-789903/
She is my wife now, it is mentioned in that thread that she is my fiance. Take a look at the dates.
She is my wife now, it is mentioned in that thread that she is my fiance. Take a look at the dates.
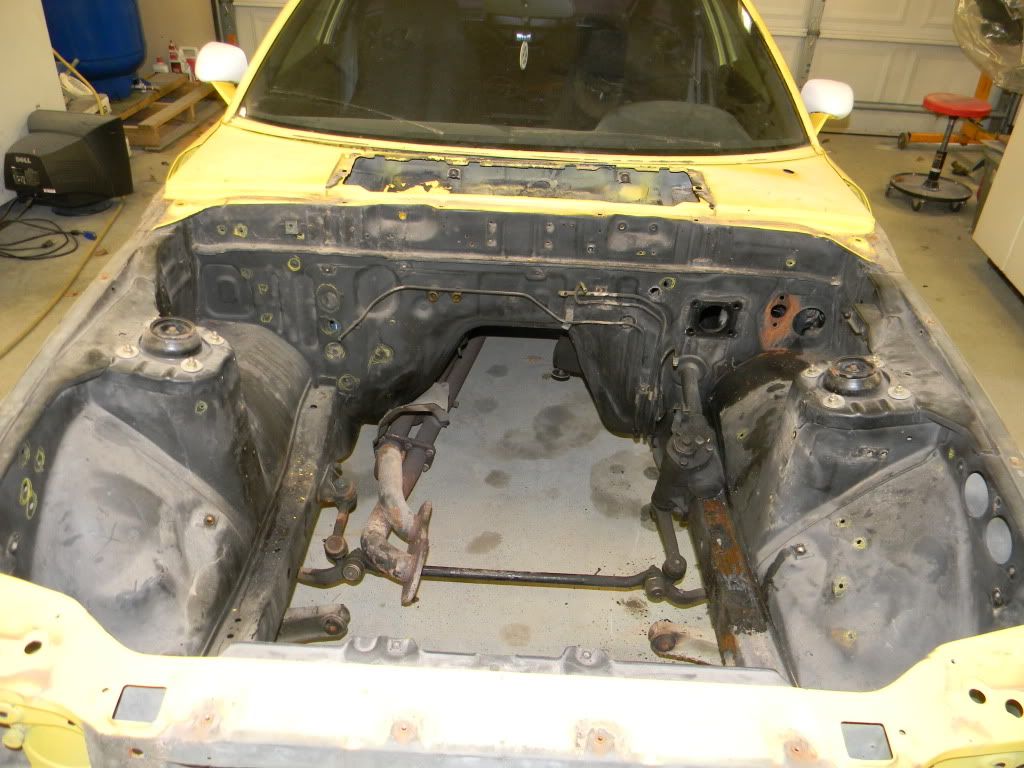
So yesterday we had record high temps. I am thinking that my town saw 63 degrees LOL. It was a good day to degrease and then power wash the engine bay. Odd thing I noticed is that the right upper rail had quite a bit of debris in it whereas the left side was perfectly clean inside.
Pics -
Man, brake fluid is a bitch lol.
Pics -
Man, brake fluid is a bitch lol.
I wanted to update this and say that there basically is no update lol. The car is back in the garage and my roommates car (02 protege 5) has been having some minor issues such as water pump belt break and possibly head gasket blowing and/or head crack. SOOO, gonna spend most of my free time getting that sorted out hopefully. I may go ahead and do some very minor things to the FB, such as starting on the welding of the holes shut and maybe a few other random things. Good times, good times...
OK, so finally an update. Roommate's car was head gasket and that took a bit longer than expected but it is back on the road and doing ok. I started welding a few of the holes shut and then lost track on which ones exactly needed filled lol. I remember marking them but from the wiring mounting to the other odds and ends I got scared so most of the holes will not be welded. I am pretty sure that I am going to go with J9's idea and just use some plugs for the main holes as some of the holes I want to weld shut are quite high and may require removal of the dash to be safe and that's not really something I want to dick around with. I may regret this decision but most likely not.
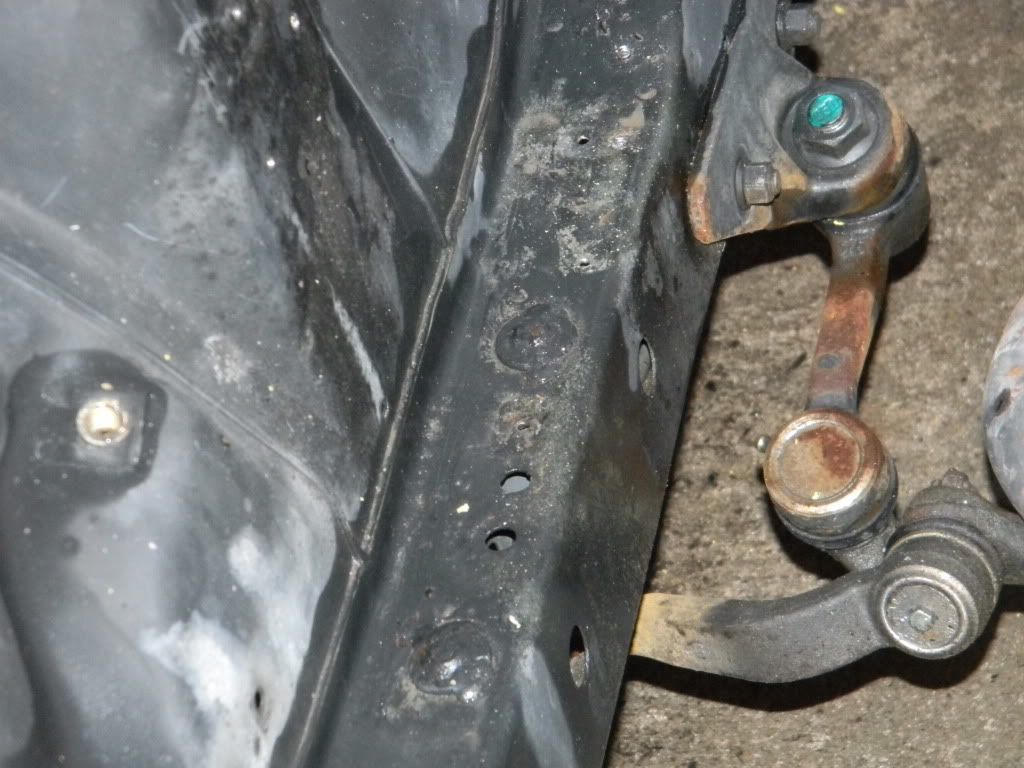
Onto some more thoughts that I came up with - Digging through my boxes of random stuff I found the rest of my bushing kit that I bought... Uh, I think like 3 or 4 years ago. The bushings left to install are the lower control arm bushings as well as the (not sure of name) rods that connect to the control arm and then the front structure, but not the sway bar. Giant nut with a cotter pin in it. Anyways, those ones and then basically the entire rear end. The big box, lots o' bushings in there.
I also need to replace my fuel supply line to a larger size. Most likely 3/8 as I doubt I need bigger. This is to make sure I have enough volume to handle the needs of the nitrous system. Plan is to drop tank and also upgrade main supply line from the tank and to either modify the pick up sock or buy a different one to work with the different line. My thinking here is if I am dropping the tank and replacing fuel line, I may as well just tear the rear suspension apart and get it done so I dont have to mess around with it later after paint when I may damage something. I can also inspect where the rear bars connect to the body (where rust damagae happens commonly on these cars) and repair if needed. I am pretty sure I wont need to though.
I also did some sanding/stripping of the engine bay at the left lower rail where the rust is/was. It looks like I will need to sandblast that area as well as the area underneath where the battery and left headlight mount. Shitty but not completely removing all the rust will bother me and half-assing this I know I will regret.
TL;DR - Removed a few things, sanded some stuff, thought about the other things I need to do and decided to do some of these other things before I work on the body work any more. I will have some update pics hopefully soon.
Awwwww yeah, got the email from RB saying they shipped my muffler and gasket. My street port system will be complete again since I dont know when. No, I really dont know because I got it with a parts car it had some crapjob muffler hooked to it. Next Tuesday will be a good day.
Another small update with a few more ramblings.
RB muffler came in and looks pretty sweet. Getting the old muffler off may require replacement of studs. It's most likely going to suck but whatever Im excited.
Things I plan on doing this weekend if time permits.
Drain and drop fuel tank.
Store in shed until later when I have new sending unit and have time to braze in larger supply line.
Remove all rear suspension components.
Replace all old shitty bushings (most likely will have to take to machine shop and have them pressed in/out). This step wont be done this weekend.
Hopefully I can get all this done on saturday so I can do my normal do nothing and watch tv all day on sunday.
Edit: I have 3 cans of MAPP gas. I hope thats enough...
Not really sure what happened but in the past sometime (not sure if it was me or previous owners) one of the rear suspension bars got bent. Not much but when you set it next to the opposite side one you can really tell. So today I plan on taking off that one from a parts car and putting my bent one back in its place so it can still roll correctly even though the parts car wont drive under its own power anymore. Ill get some pics of this. Also, I was able to get all my bars off without very much complaint at all. I honestly figured it would be a giant PITA as the other 3 times I have tried to take them off other cars it always ended up not really working at all.
I got the fuel tank drained, down, and stored in the shed so I am 1 step closer on that area.
Also forgot to mention that I was able to just burn out the old bushings and press the urethane ones in either by hand or with the help of a vise. I also needed to remove a lot of rust buildup inside where the bushing goes. I did this with a die grinder and carbide bur and then some sandpaper rolls afterwards to get any leftover dirt or rust out. I will also have some pics of this later. I didnt take any pics yesterday as everything was going so smoothly that I didnt really want to slow down for pics.
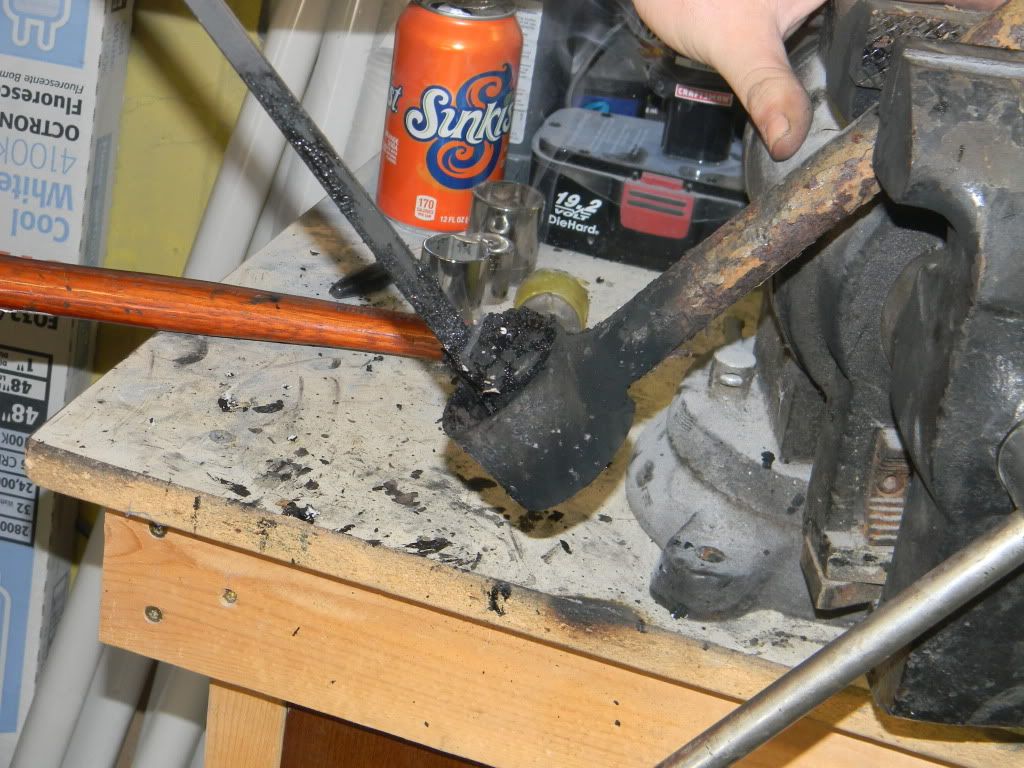
OK so pics of what I believe is the easiest way to do all this.
Items you need:
Vise
Pry bar or large flat blade screwdriver
MAPP gas (propane could work but I prefer MAPP)
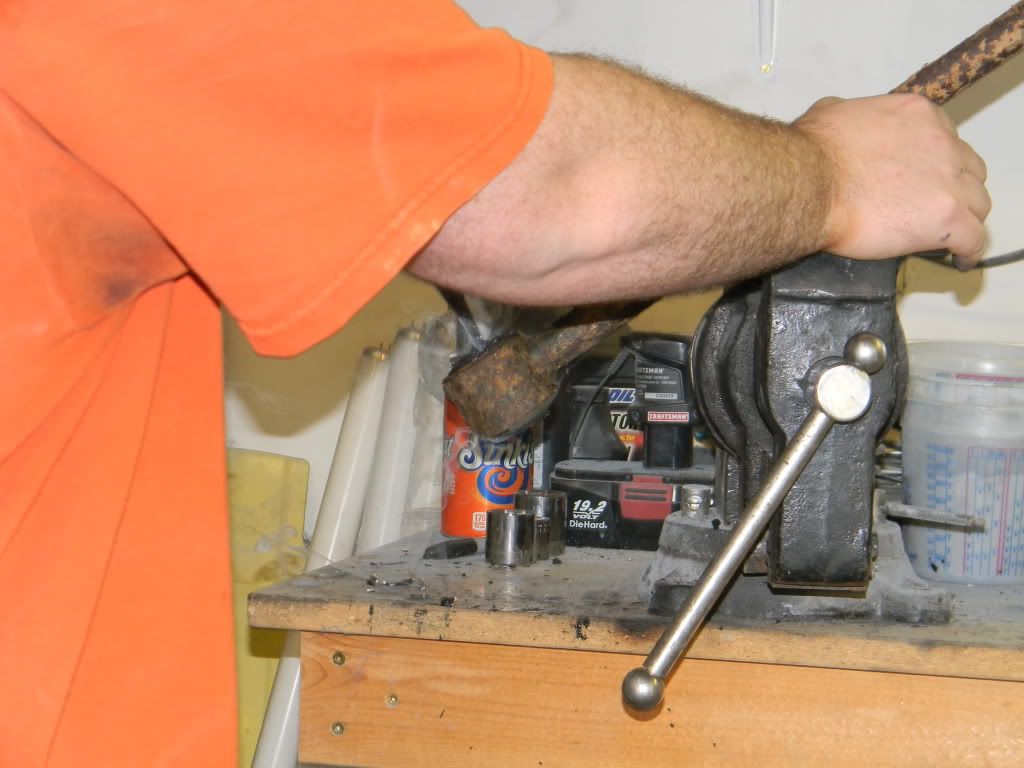
Hammer of some sort
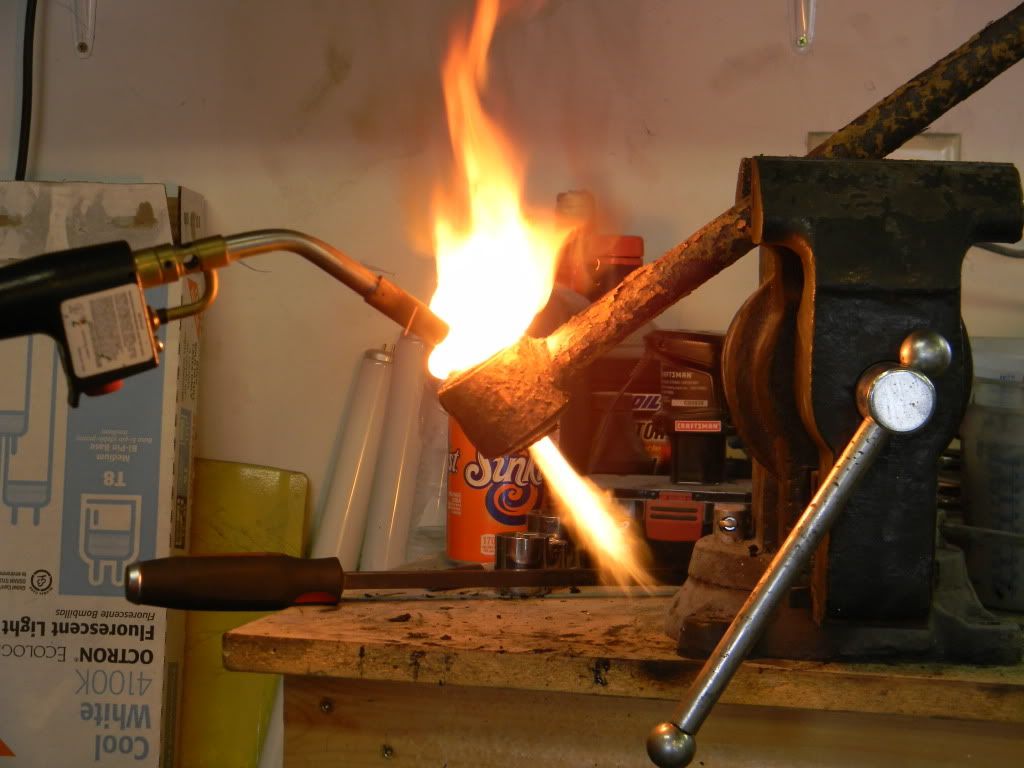
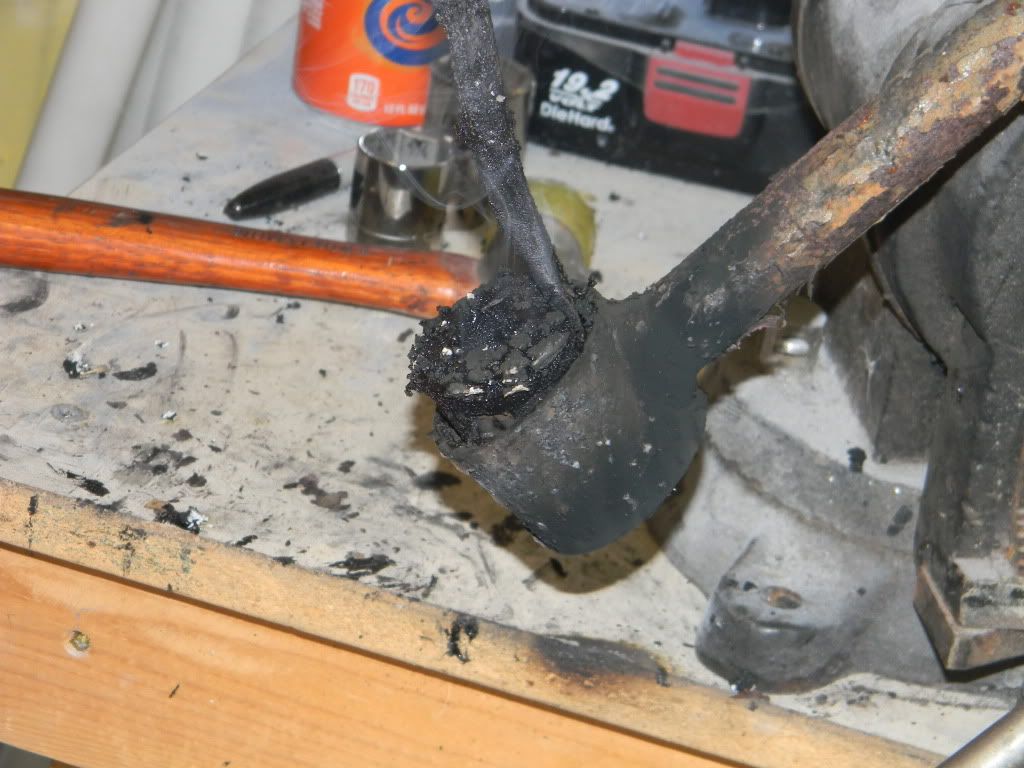
Step 1 - Torch the center insert
Step 2 - Press center insert out with pry bar
Smokin'
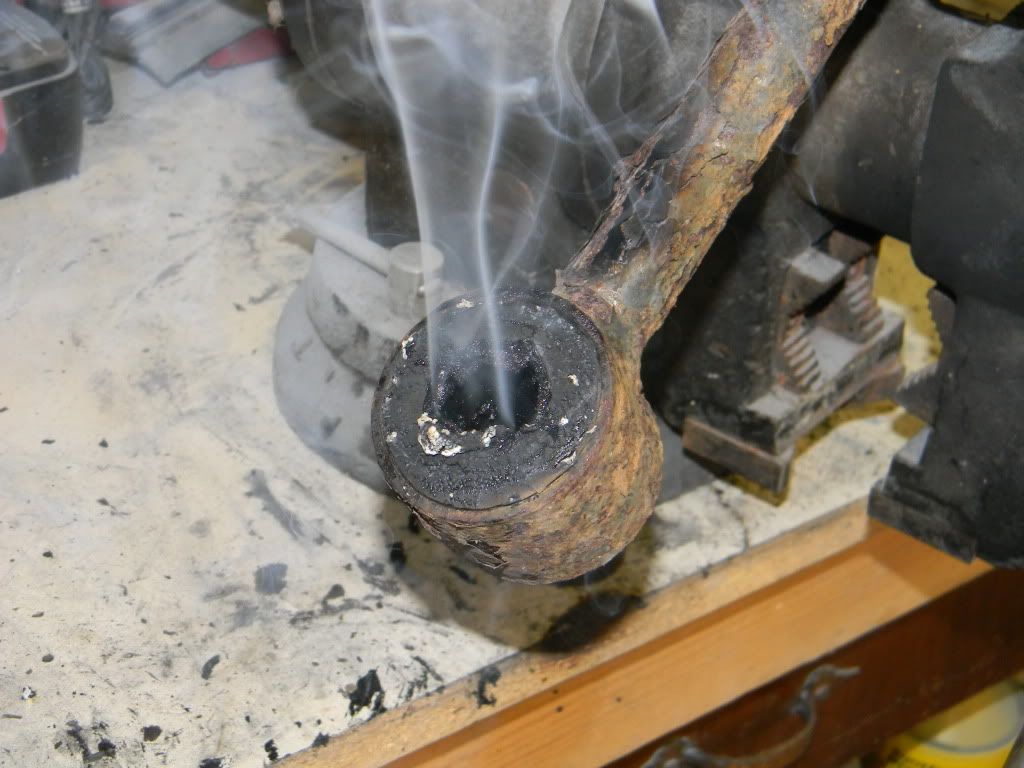
Step 3 - Torch outside of busing area to heat the metal (warning more flames will happen, and smoke)
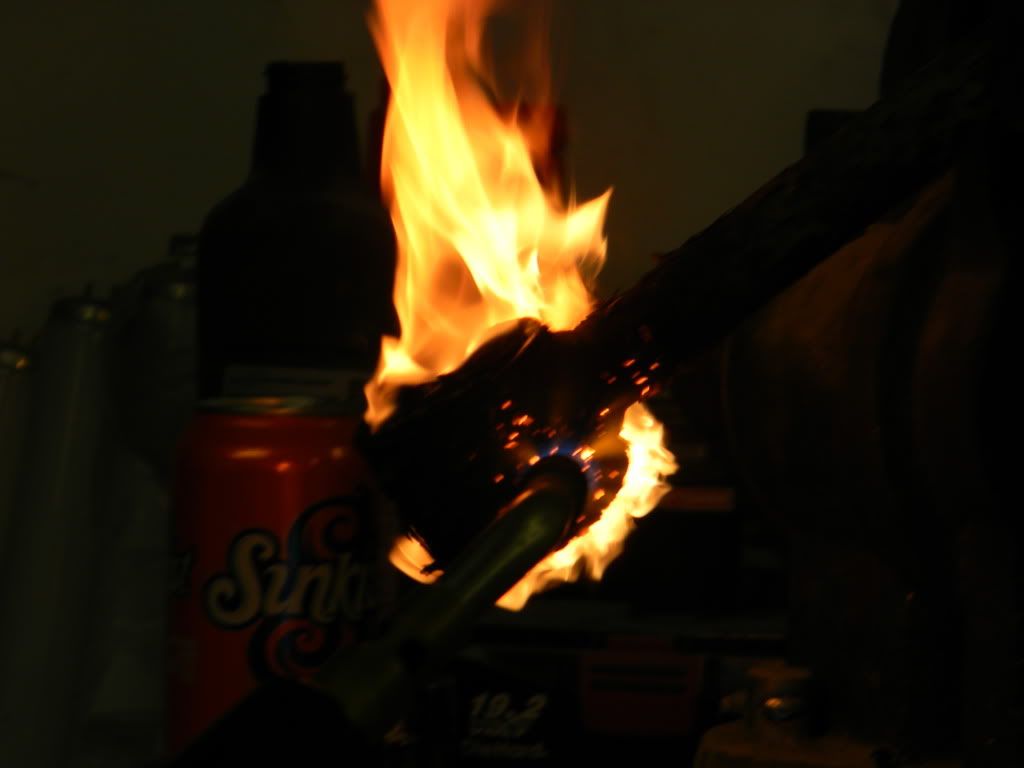
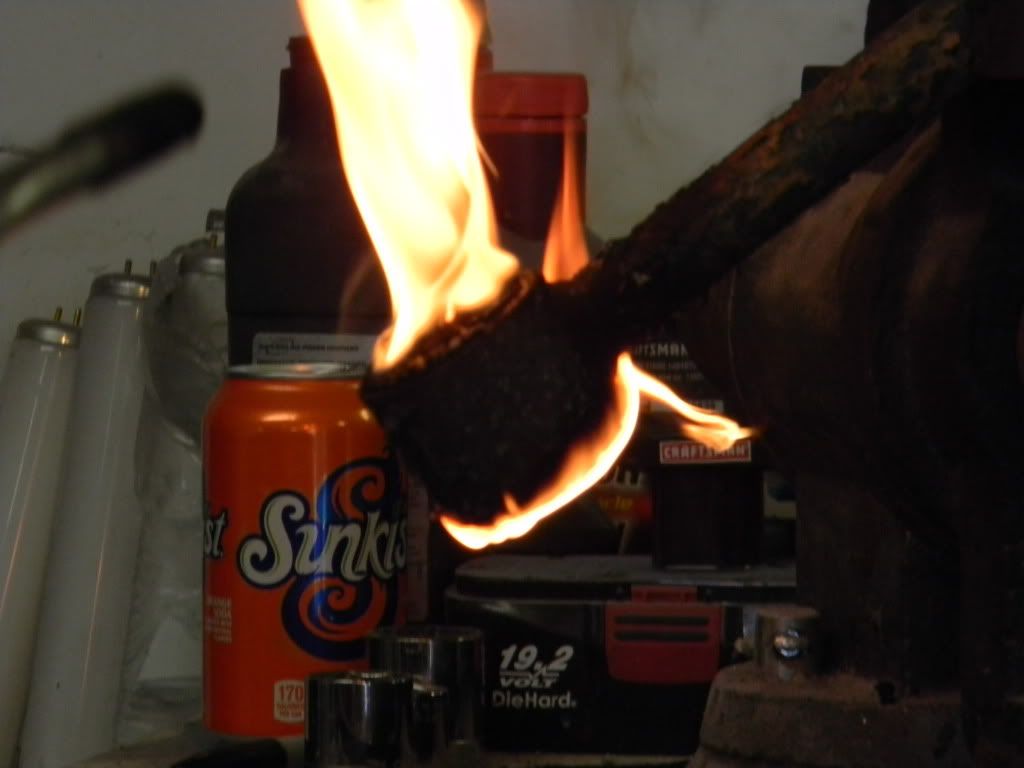
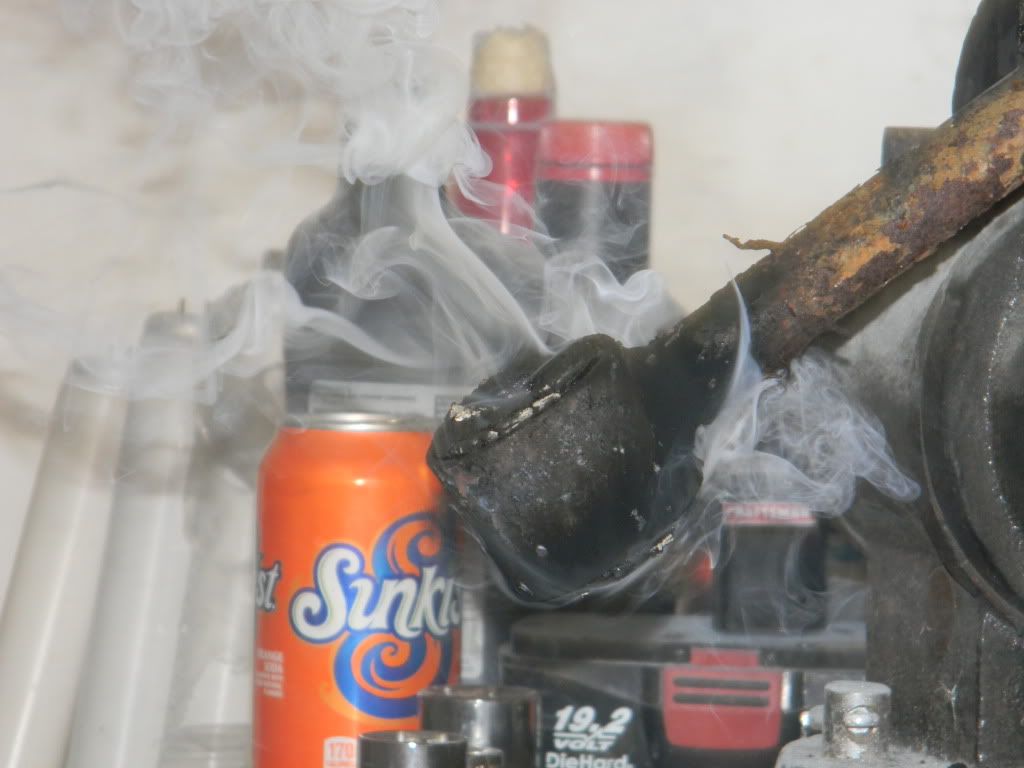
Step 4 - Press out nasty old smoldering bushing with pry bar and hammer
Next we see why you need to pay attention to your rear bars on uninstall:
Looks good so far
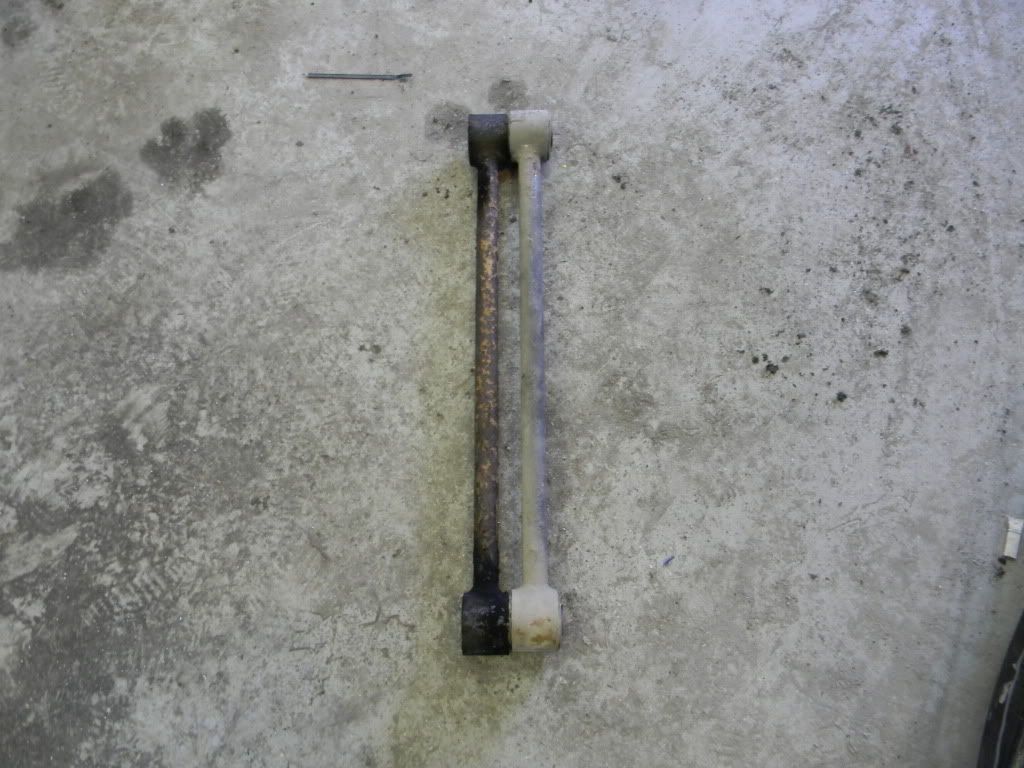
No good
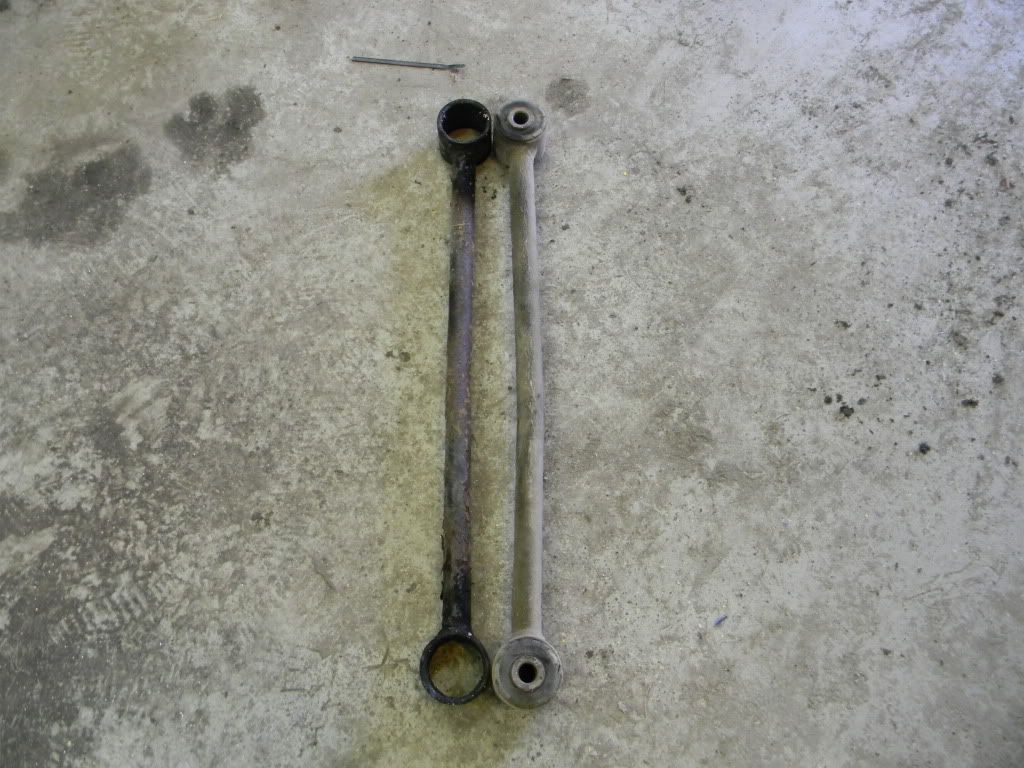
And there you have it.
Items you need:
Vise
Pry bar or large flat blade screwdriver
MAPP gas (propane could work but I prefer MAPP)
Hammer of some sort
Step 1 - Torch the center insert
Step 2 - Press center insert out with pry bar
Smokin'
Step 3 - Torch outside of busing area to heat the metal (warning more flames will happen, and smoke)
Step 4 - Press out nasty old smoldering bushing with pry bar and hammer
Next we see why you need to pay attention to your rear bars on uninstall:
Looks good so far
No good
And there you have it.
Lives on the Forum
Joined: Jun 2004
Posts: 11,359
Likes: 14
From: Grand Rapids Michigan
Ian, I tried a propane torch on the bushings, but it just didn't produce enough heat. I even left it burning, and went in the house for a cup of coffee. No progress at all, just a bunch of smoke.
The torch you used must produce a lot more heat, but propane is a failure in my book. Its tough to beat 30 seconds in a bonfire for good/fast results.
.
The torch you used must produce a lot more heat, but propane is a failure in my book. Its tough to beat 30 seconds in a bonfire for good/fast results.
.
MAPP is the way to go my man. Yellow can, not blue. Either way whatever, you made it happen.
In another thread I talk about believing that my rear end is bent on the left side.
Here is a pic of it ready to come out once the roommate gets home to help steady it down -
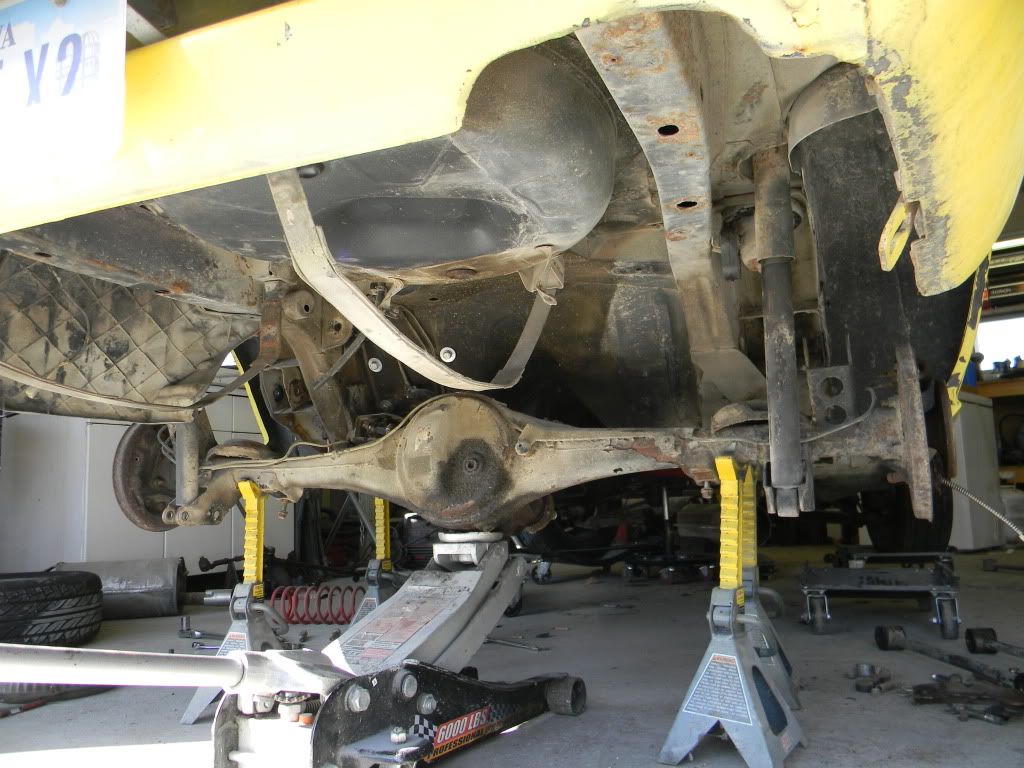
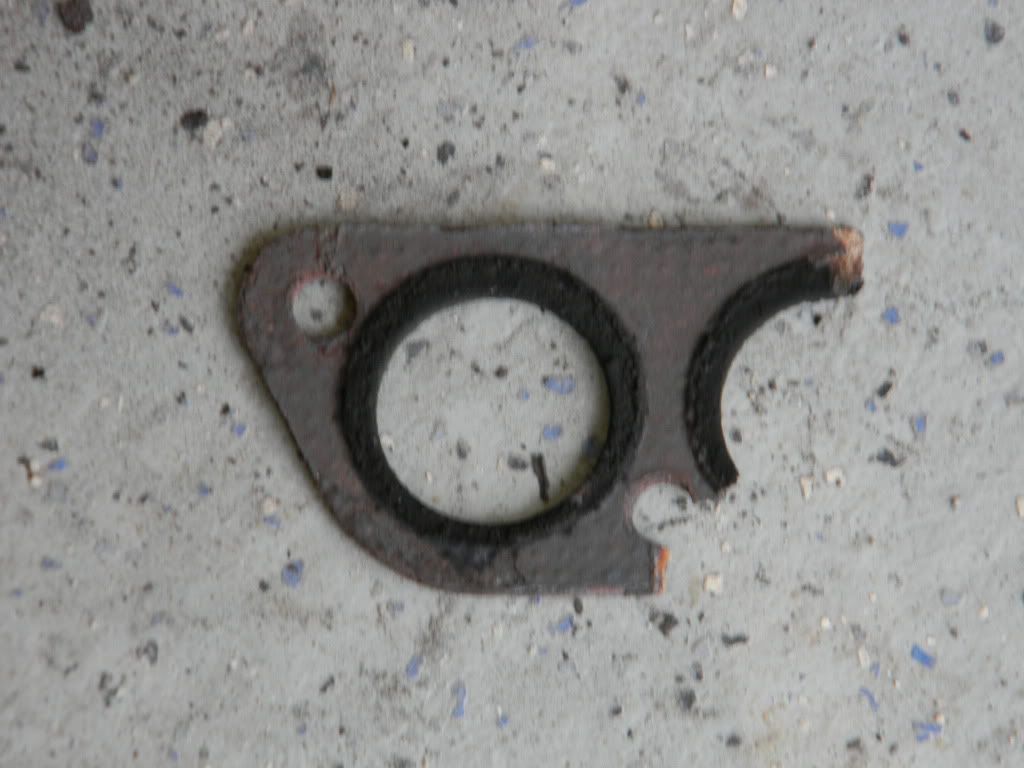
And here is what the gasket looked like that was in between my center section and my old RB muffler. You can see that the stock type gasket is not the best idea. Best to order from RB as theirs is made for their setup. Makes me want to tear the header off the center section to see if the same is happening there with the gaskets.
In another thread I talk about believing that my rear end is bent on the left side.
Here is a pic of it ready to come out once the roommate gets home to help steady it down -
And here is what the gasket looked like that was in between my center section and my old RB muffler. You can see that the stock type gasket is not the best idea. Best to order from RB as theirs is made for their setup. Makes me want to tear the header off the center section to see if the same is happening there with the gaskets.
Since I have a new muffler I was paying attention to how everything was hung, and since I can actually hang it all correctly now I noticed that my stock hanger insulators (thats what they are called) were basically ****. I remedied this by going to my neighborhood Auto Zone and picked some up off the shelf. Some things needed remedied however and this is detailed in my little write up further down.
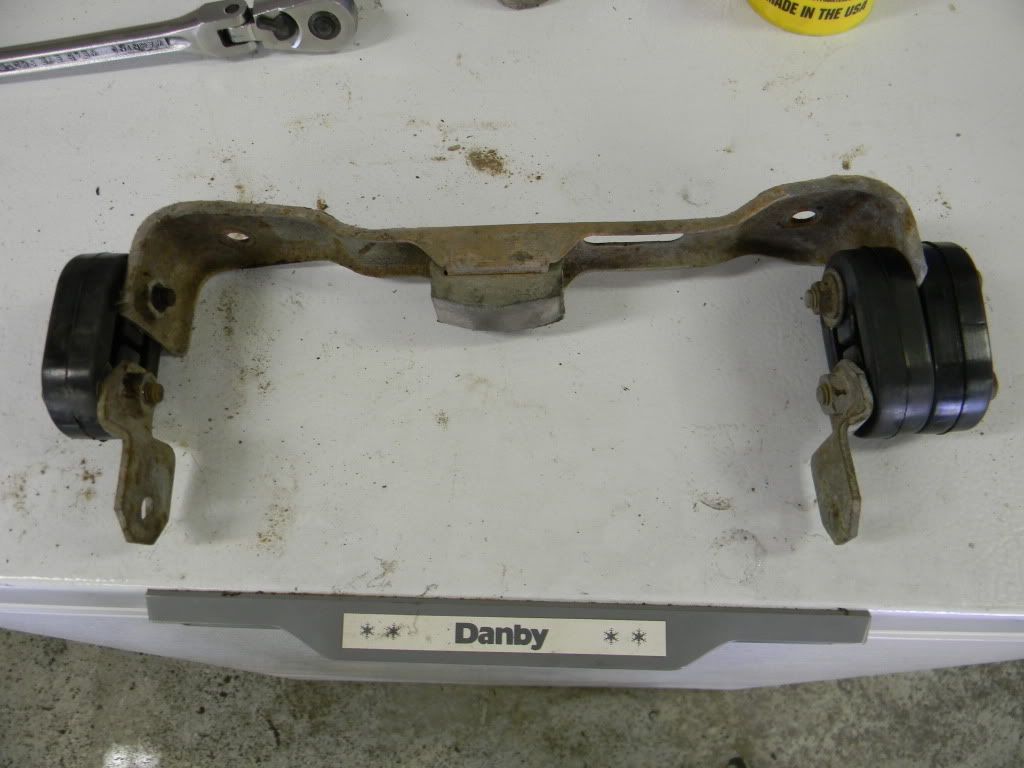
First thing is there are 3 different hanger locations for the muffler. 1 of them is not talked about here but its essentially the same modification, only a single hanger instead of this oddball double setup for the rearmost part.
You dont have to remove the entire assembly like I did. I mainly did so you can see how everything mounts, etc. Also in order to remove the assembly you need to undo the right side (right in the pics is actually left on the car) upper hanger to get to the bolt.
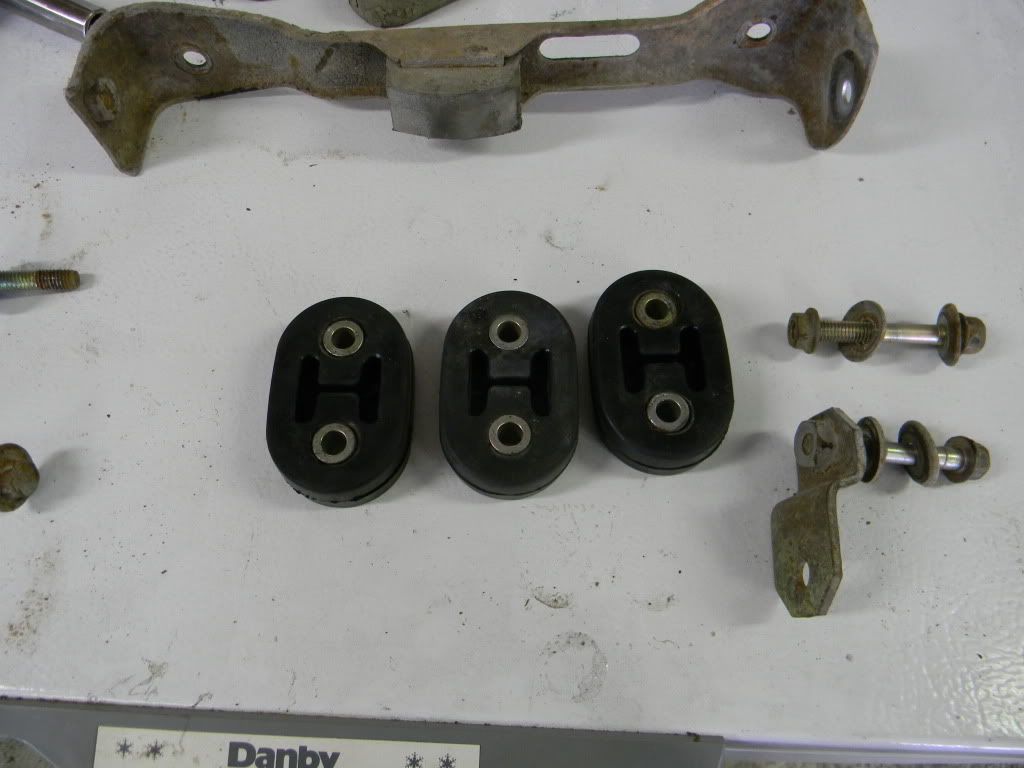
Assembly -
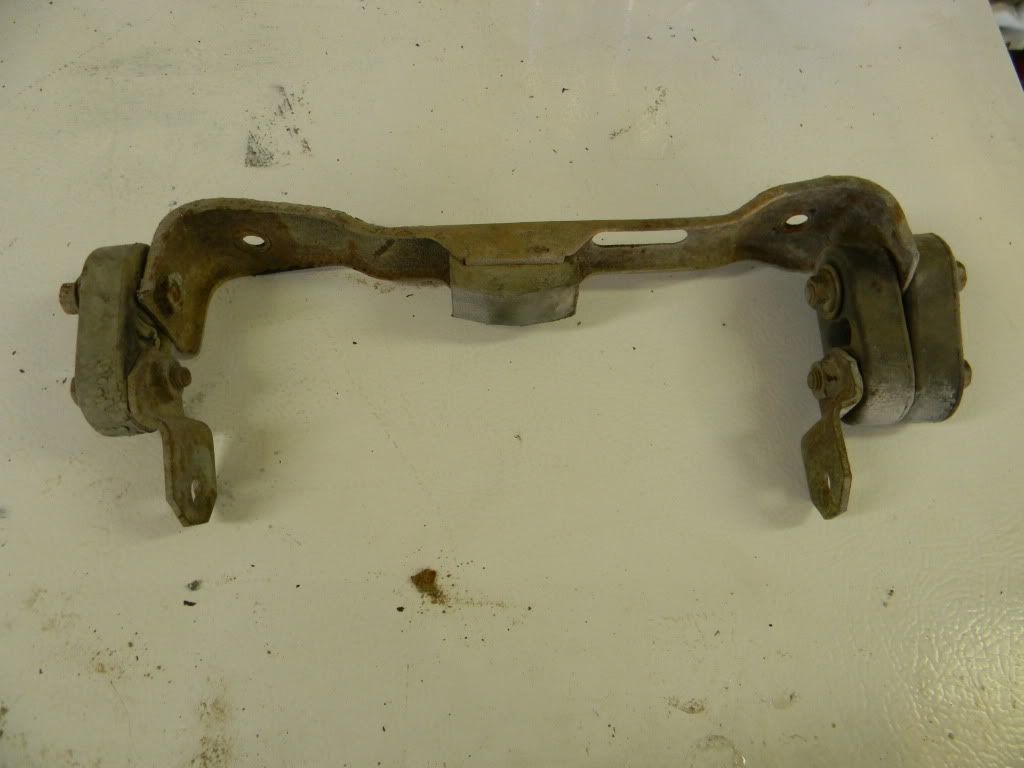
Obviously the first step here is to tear it all down.
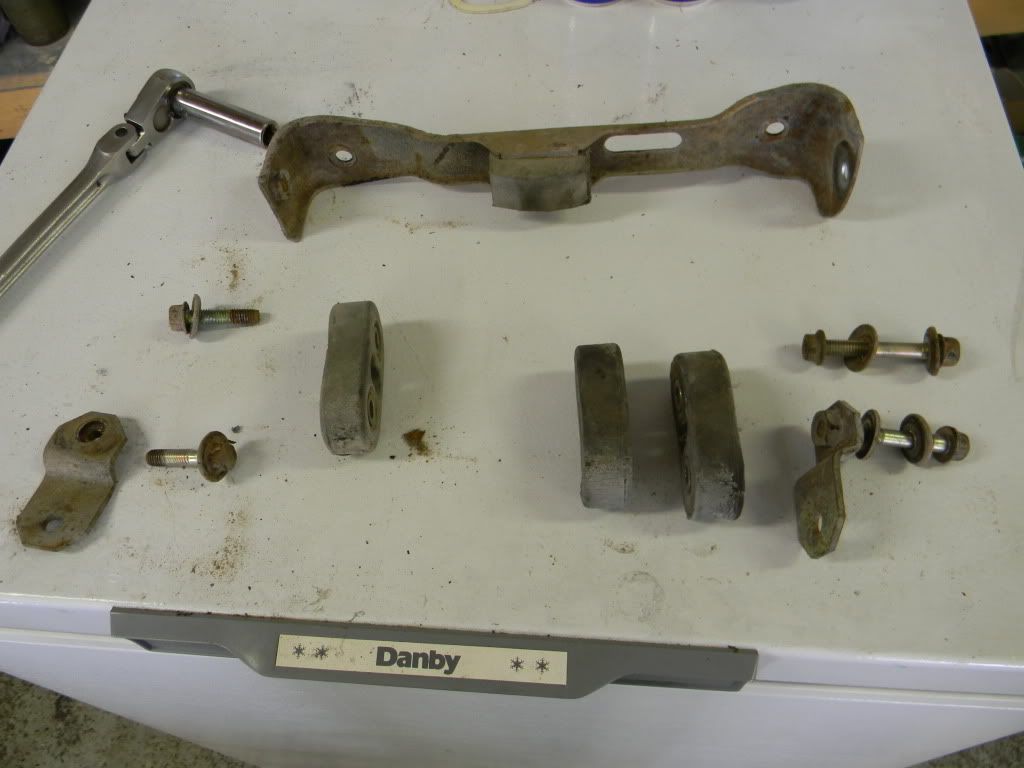
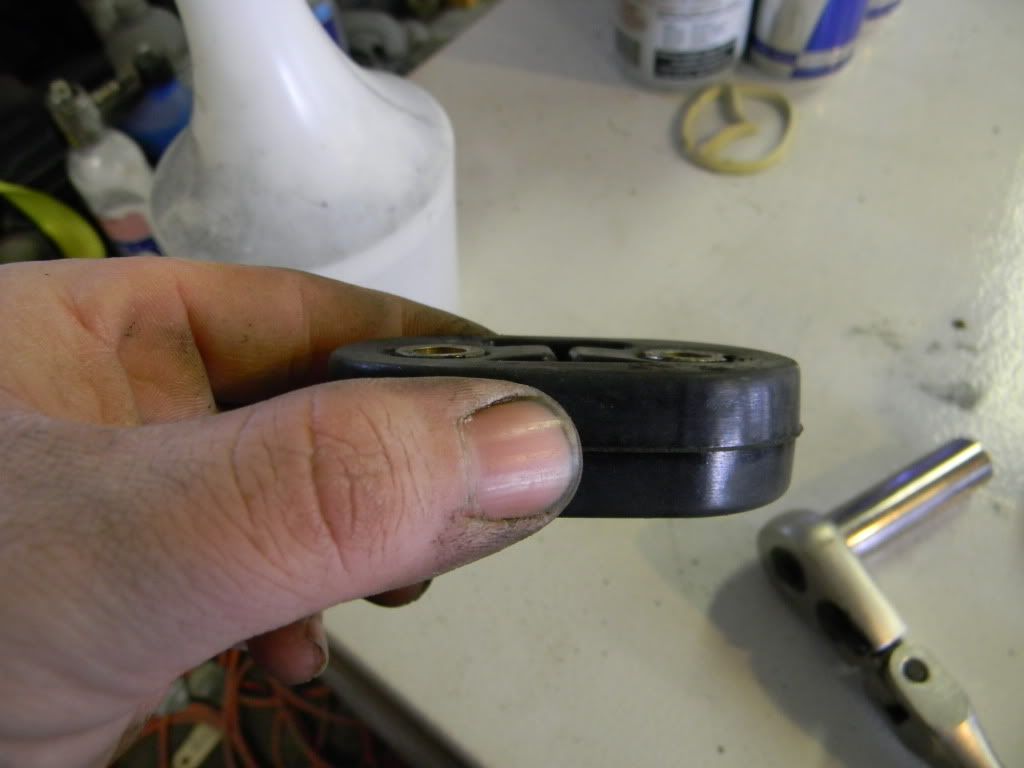
Pic of the parts I bought (4 total) next to old bushings
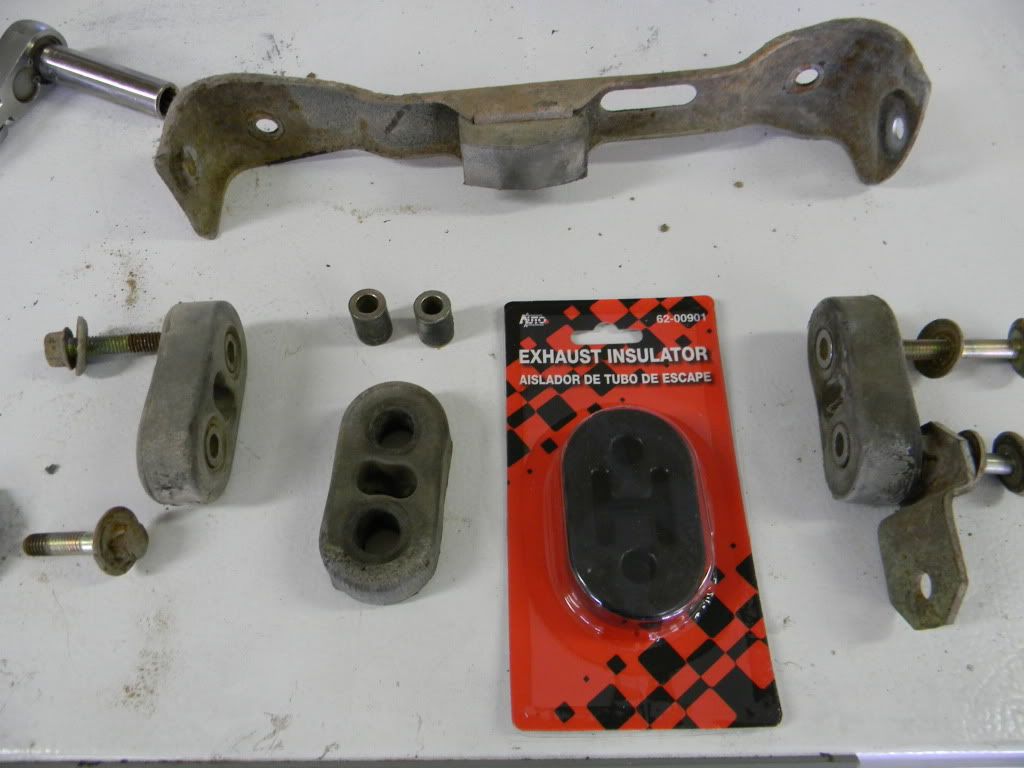
Comparison side by side - Note that the holes are not large enough to fit the inserts.
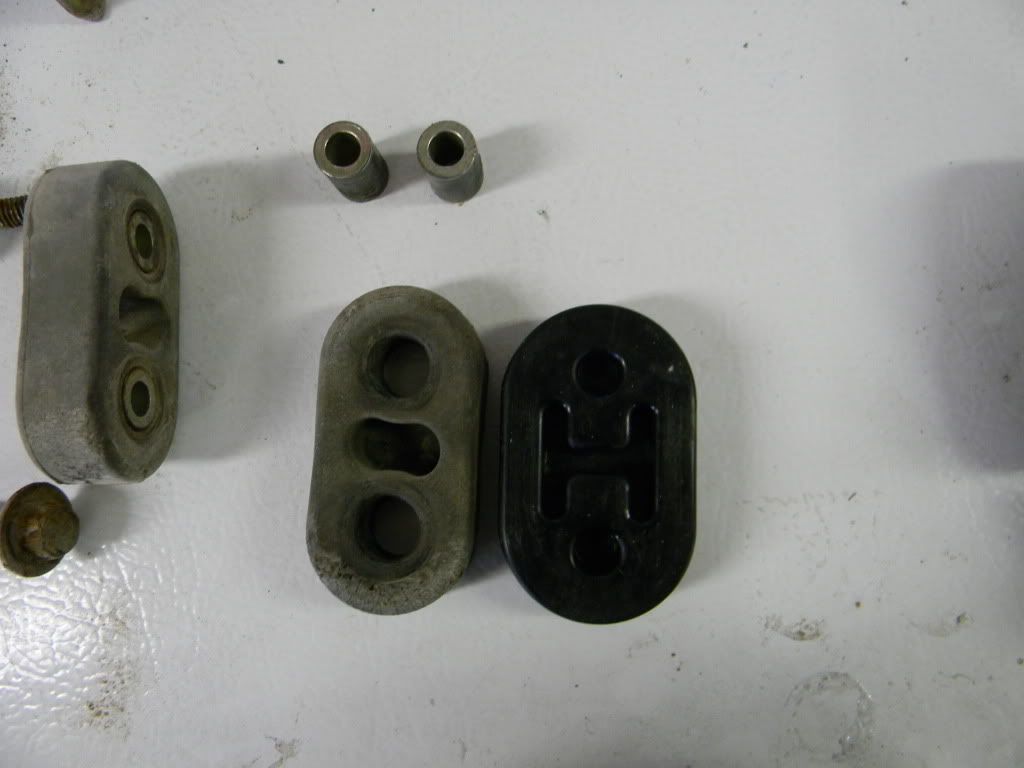
What I did was drilled the hole larger using a 1/2 inch drill bit. If you have ever drilled into rubber you know that a 1/2 inch bit does NOT make a 1/2 inch hole. I also then chamfered (spell check owns me) the edge on one side with a knife to help to press in the insert with my vice as seen below.

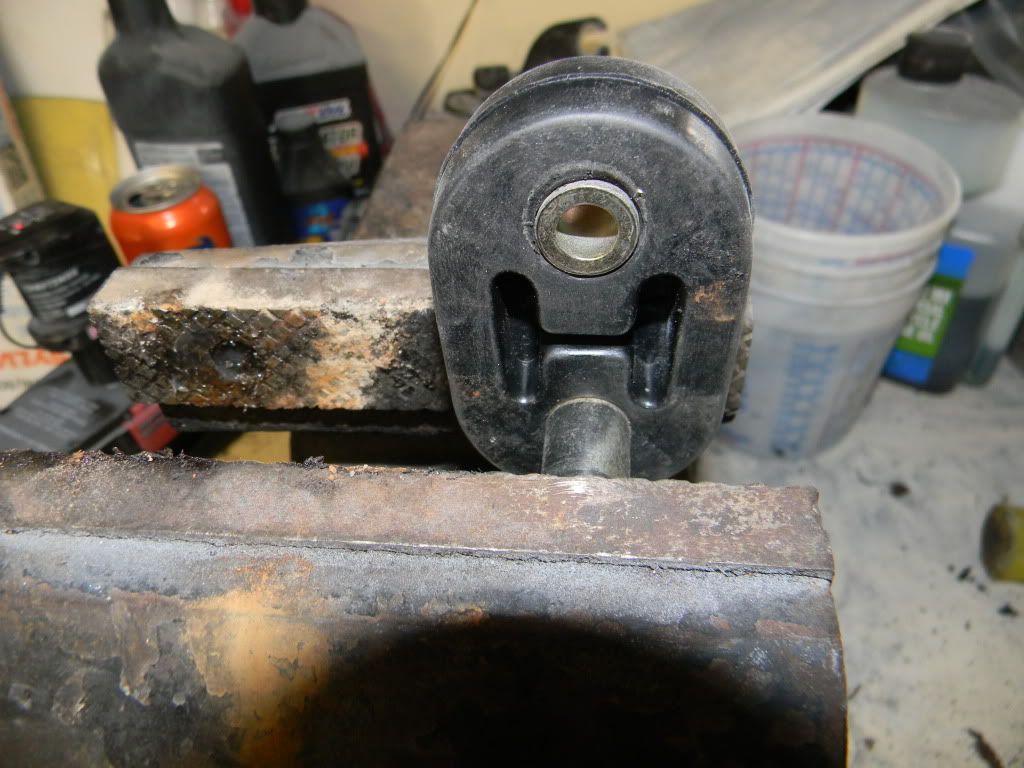
You can see the vice does not get it all the way in and with a couple small taps with a PLASTIC OR WOOD MALLET (not steel) you can get it the rest of the way in.
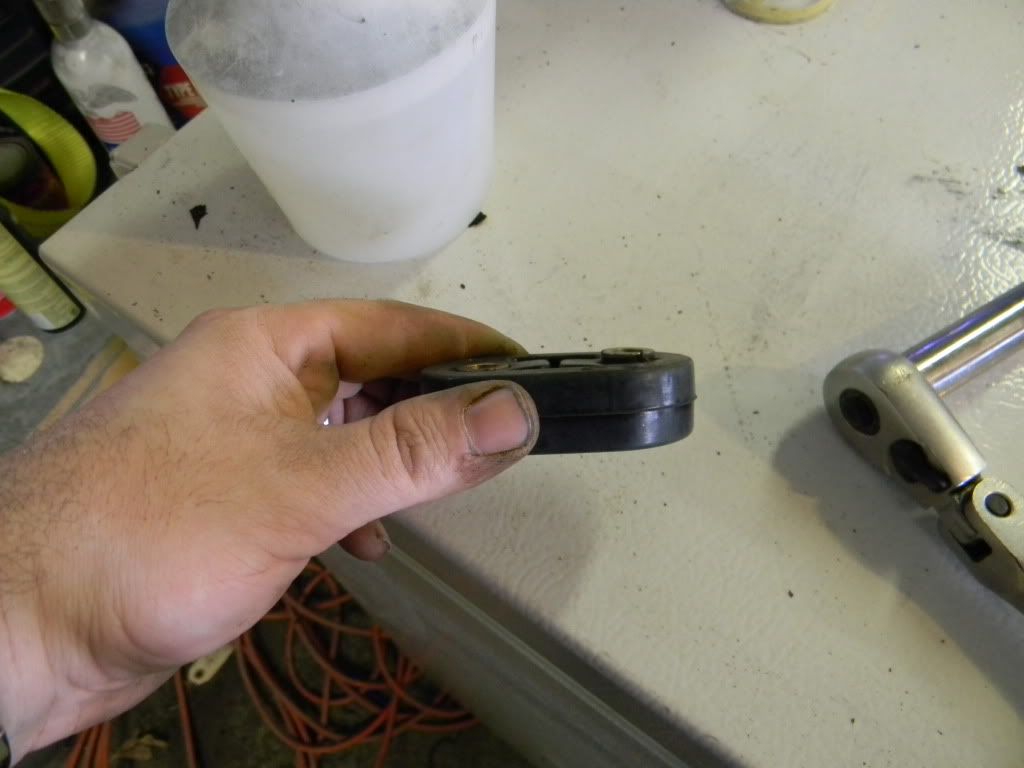
Repeat 2 more times (actually 3 more times total for all muffler hangers) and you are done. Then obviously put it all back together and there you go.
Tah-Dah!!!
First thing is there are 3 different hanger locations for the muffler. 1 of them is not talked about here but its essentially the same modification, only a single hanger instead of this oddball double setup for the rearmost part.
You dont have to remove the entire assembly like I did. I mainly did so you can see how everything mounts, etc. Also in order to remove the assembly you need to undo the right side (right in the pics is actually left on the car) upper hanger to get to the bolt.
Assembly -
Obviously the first step here is to tear it all down.
Pic of the parts I bought (4 total) next to old bushings
Comparison side by side - Note that the holes are not large enough to fit the inserts.
What I did was drilled the hole larger using a 1/2 inch drill bit. If you have ever drilled into rubber you know that a 1/2 inch bit does NOT make a 1/2 inch hole. I also then chamfered (spell check owns me) the edge on one side with a knife to help to press in the insert with my vice as seen below.
You can see the vice does not get it all the way in and with a couple small taps with a PLASTIC OR WOOD MALLET (not steel) you can get it the rest of the way in.
Repeat 2 more times (actually 3 more times total for all muffler hangers) and you are done. Then obviously put it all back together and there you go.
Tah-Dah!!!
Last edited by IanS; Mar 15, 2012 at 05:02 PM.
Joined: Aug 2011
Posts: 3,078
Likes: 42
From: Cambridge, Minnesota
I like that exhaust trick, I had an issue with that hanger last summer. I will try buying new insulators and drilling them out as you have, nice work! Now subscribed.
It seemed easier to me to just modify off the shelf ones instead of ordering the "right" ones that cost around 1.50 more each. Granted we're talking about 6 bucks but in reality it only took me about half hour to do all of them, including taking all the pics, etc lol.
Progress has slowed considerably once again but should resume after next weekend when I plan to make an interstate run to get a different and not bent rear end. Once I tear it down I will probably give it a quicky sanding and etch priming and a few easy coats of black spray bomb so it will look cleaner for a little while. Also plan on doing the same on a few random spots above the gas tank area that I saw after it was down. I'll most likely take pics of this.
I also wanted to mention that yes, I do know that this whole project did a slight turn from how it started. I assure you all that once I get all the oddball mechanical quirks ironed out that I never got around to doing before that progress will resume in the engine bay and bodywork/painting areas. I wanted to do this stuff before I got too involved with the body repairs so I wouldnt have to worry about scratching and then fixing the body afterwards.
I would finally like to give a shout out to my man Dave (mazdaveRX713B) for hooking a brother up in a big way. Big thumbs up to you sir!
Last edited by IanS; Mar 16, 2012 at 09:56 PM.
OK so back from the dead here. The rear end is finally in and good to go. Started some major sanding yesterday finally after about 6 side projects came up. The side projects slowed me down considerably but it has built up some extra cash to buy some more supplies. Also some B-day money (which is today, 32) should also help with some random things I want to buy for the project.
1/4 windows removed, much sanding done and I found a very interesting thing (actually a few) with my car. My car is originally H1 sparkling black. I know quite a bit of the history of this car and finding this out was very eye-opening. I knew in the past this car was ditched and repaired locally by a body shop. What I didnt know was how half-assed SOME of the repairs were done.
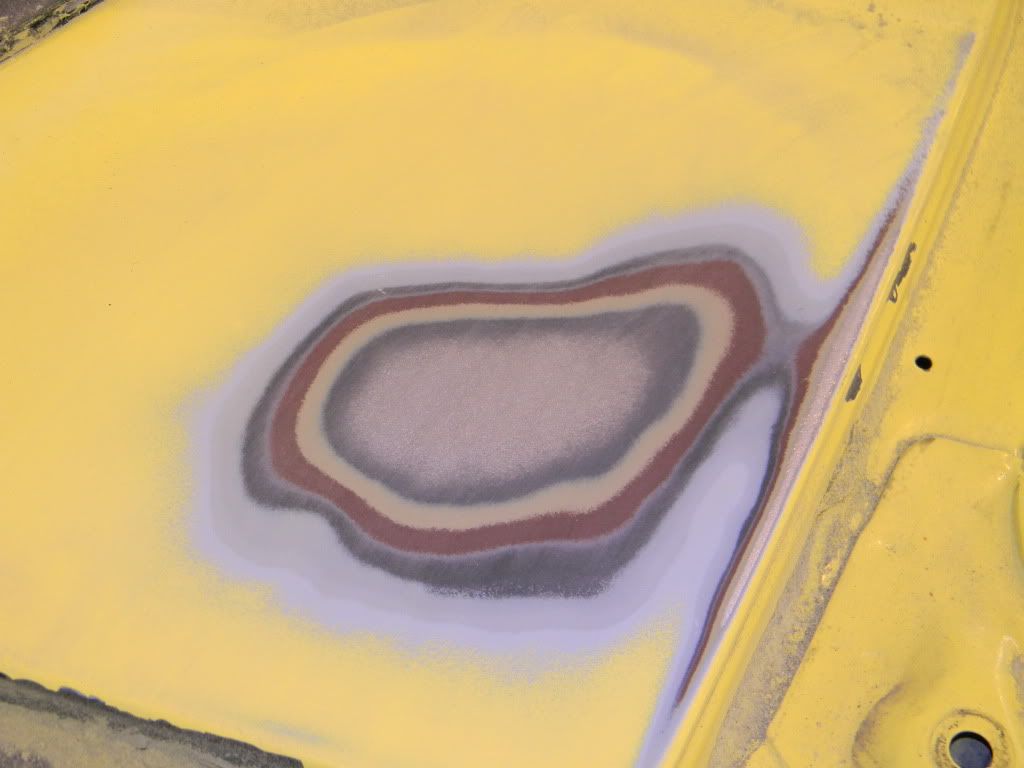
Ill show some pics and explain what is going on. First I would like to show my originally H1 Sparkling Black car was actually going to be a R3 Renaissance Red until the factory apparently changed their mind. This actually happens more than you may think. I also know of a 1 owner Trans Am (early 90s) that got scratched and the owner asked to have it repaired. When sanding started they noticed it was gray/silver under the blue and then blue again under the gray/silver. The car had no other work performed on the body EVER. The factory had it listed as blue and then changed it to silver just to have it changed back to blue again. Same type of deal with my FB. In the pics you will notice the different coatings from inside out - bare metal, the black e-coat, original factory sealer, burgandy, either clear coat or a VERY thin coat of sealer, black, primer, sealer, yellow. I added the last 3 previously.
More pics and explanations soon. I need to take more pictures. I got excited to finally get going on my car again that I just jumped in and went at it and didnt take very many in progress pics. This car will be getting worked on more from now on.
1/4 windows removed, much sanding done and I found a very interesting thing (actually a few) with my car. My car is originally H1 sparkling black. I know quite a bit of the history of this car and finding this out was very eye-opening. I knew in the past this car was ditched and repaired locally by a body shop. What I didnt know was how half-assed SOME of the repairs were done.
Ill show some pics and explain what is going on. First I would like to show my originally H1 Sparkling Black car was actually going to be a R3 Renaissance Red until the factory apparently changed their mind. This actually happens more than you may think. I also know of a 1 owner Trans Am (early 90s) that got scratched and the owner asked to have it repaired. When sanding started they noticed it was gray/silver under the blue and then blue again under the gray/silver. The car had no other work performed on the body EVER. The factory had it listed as blue and then changed it to silver just to have it changed back to blue again. Same type of deal with my FB. In the pics you will notice the different coatings from inside out - bare metal, the black e-coat, original factory sealer, burgandy, either clear coat or a VERY thin coat of sealer, black, primer, sealer, yellow. I added the last 3 previously.
More pics and explanations soon. I need to take more pictures. I got excited to finally get going on my car again that I just jumped in and went at it and didnt take very many in progress pics. This car will be getting worked on more from now on.