
Bringing it back to life


Thread Starter
Senior Member
iTrader: (1)
Joined: Aug 2010
Posts: 340
Likes: 0
From: Southern Minnesota and Southern California
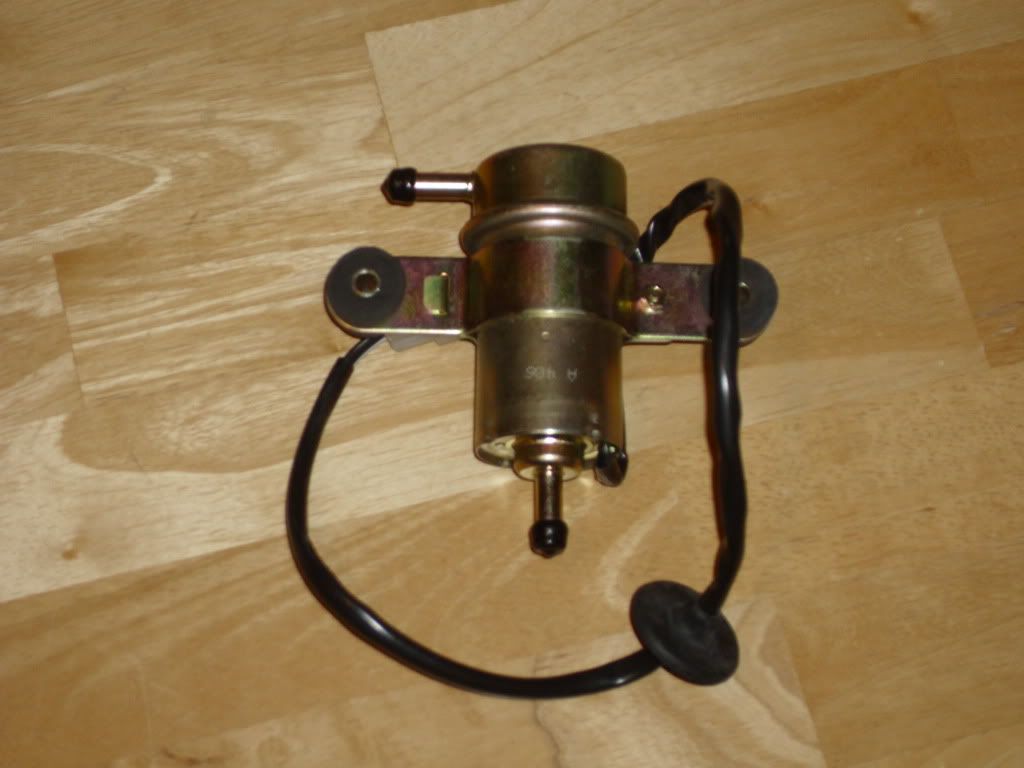
Got the new fuel pump in a couple days ago. I got it installed. Its working, however there seems to be a problem with the fuel lines since it doesn't deliver fuel to the carburetor. I pulled fuel directly into the fuel pump bypassing all the other stuff and low and behold I got fuel through.

I purchased about 10 feet of fuel hose and will be replacing all of the hoses next week.
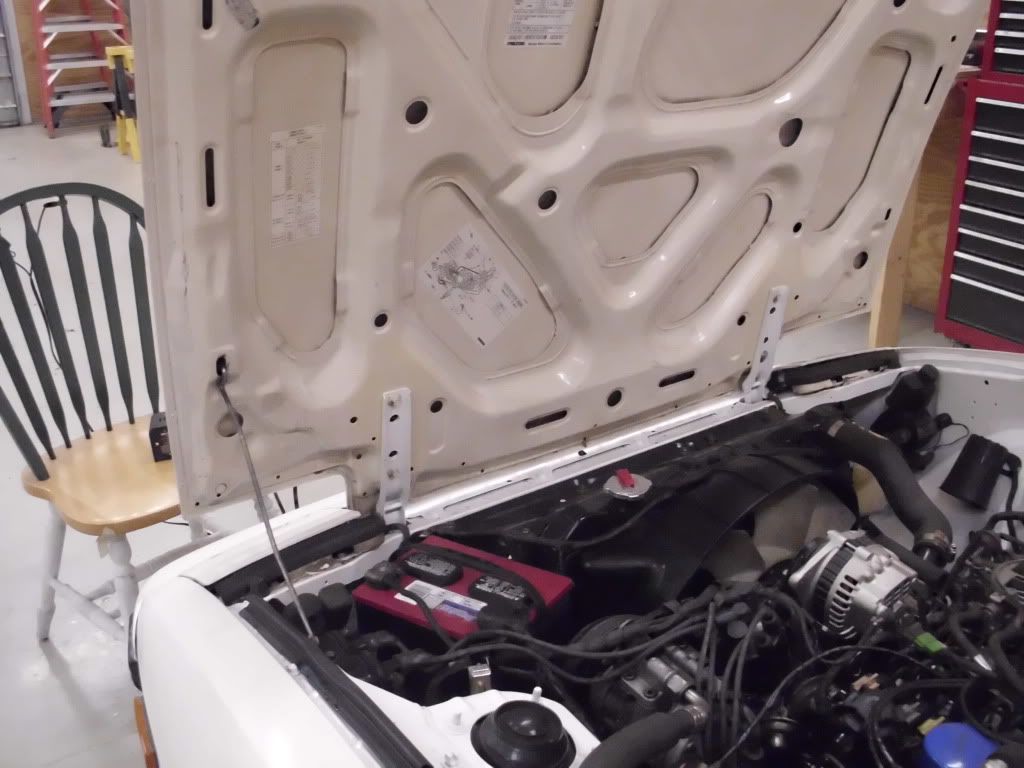
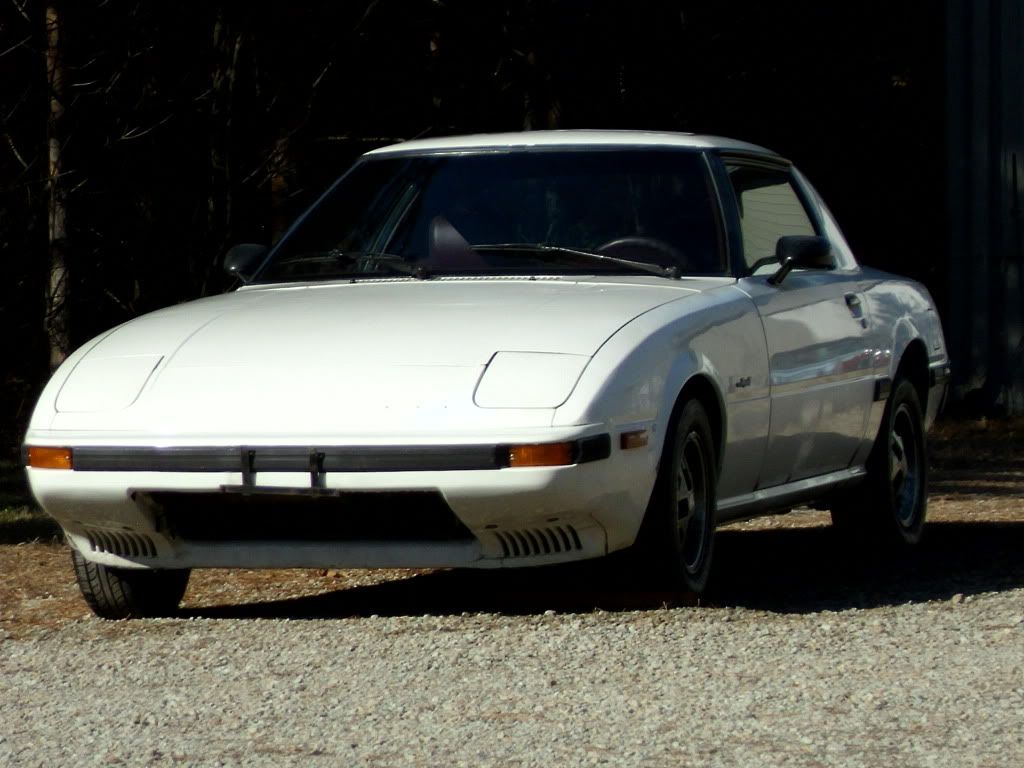
I also reinstalled the hood. There was a bit of rust on the hinges, so I spent a few days cleaning that up. Once the hood was on I took her out and washed her one last time before the snow makes it a lot less fun.
I ordered a new hot air hose off the exhaust manifold to the air cleaner. I should be picking that up on Wednesday.
Slow progress, but non the less, progress
I purchased about 10 feet of fuel hose and will be replacing all of the hoses next week.
I also reinstalled the hood. There was a bit of rust on the hinges, so I spent a few days cleaning that up. Once the hood was on I took her out and washed her one last time before the snow makes it a lot less fun.
I ordered a new hot air hose off the exhaust manifold to the air cleaner. I should be picking that up on Wednesday.
Slow progress, but non the less, progress
Thread Starter
Senior Member
iTrader: (1)
Joined: Aug 2010
Posts: 340
Likes: 0
From: Southern Minnesota and Southern California
This past week I was a bit more productive with my seven. Thanks to my wife who flew my part back to Minnesota for me, I was able to install the exhaust shield hot air hose.
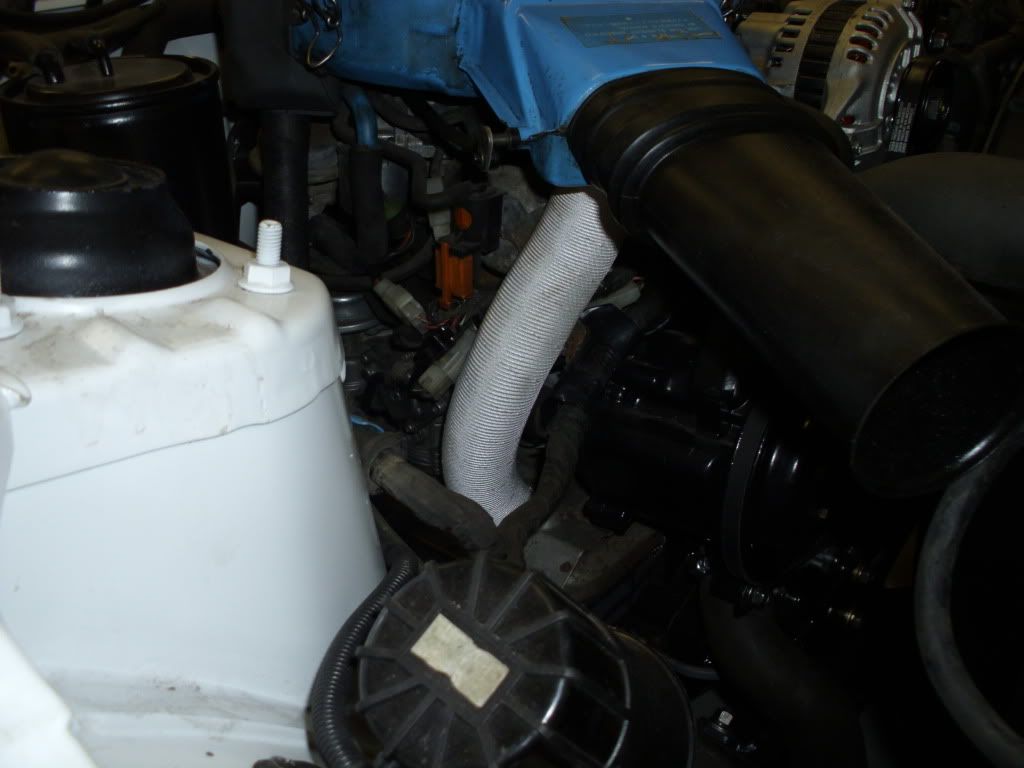
I also went through and replaced all of the fuel hoses. I have not replaced the hard fuel lines yet. I am hoping to hold off on that until I at least get her running.
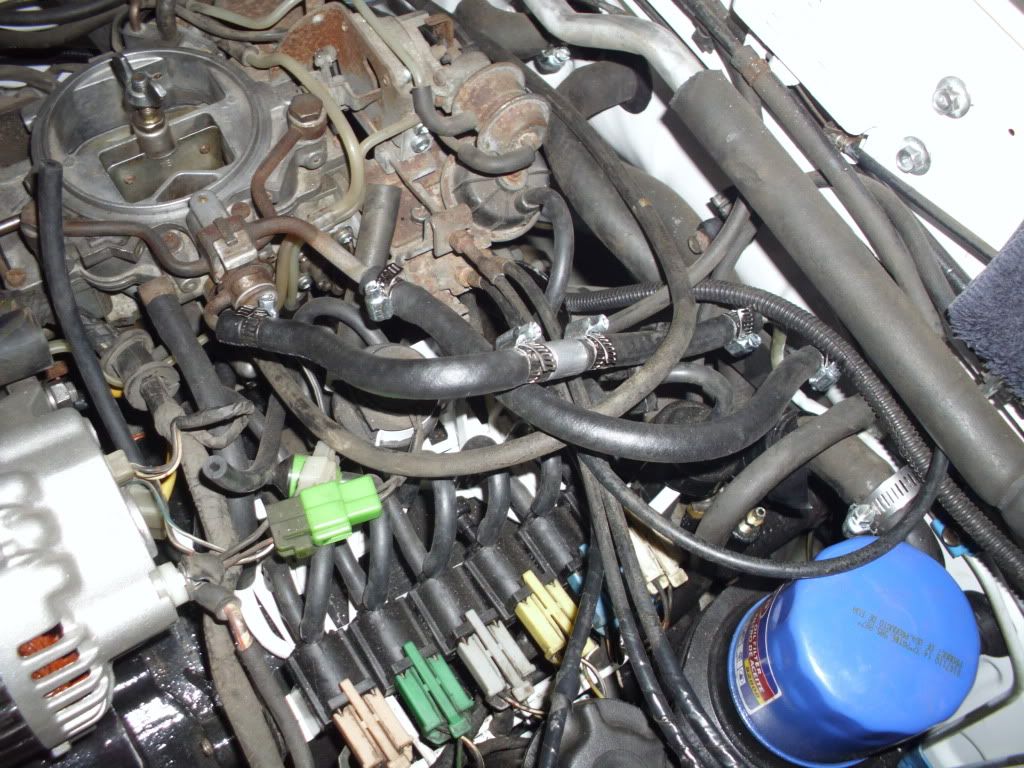
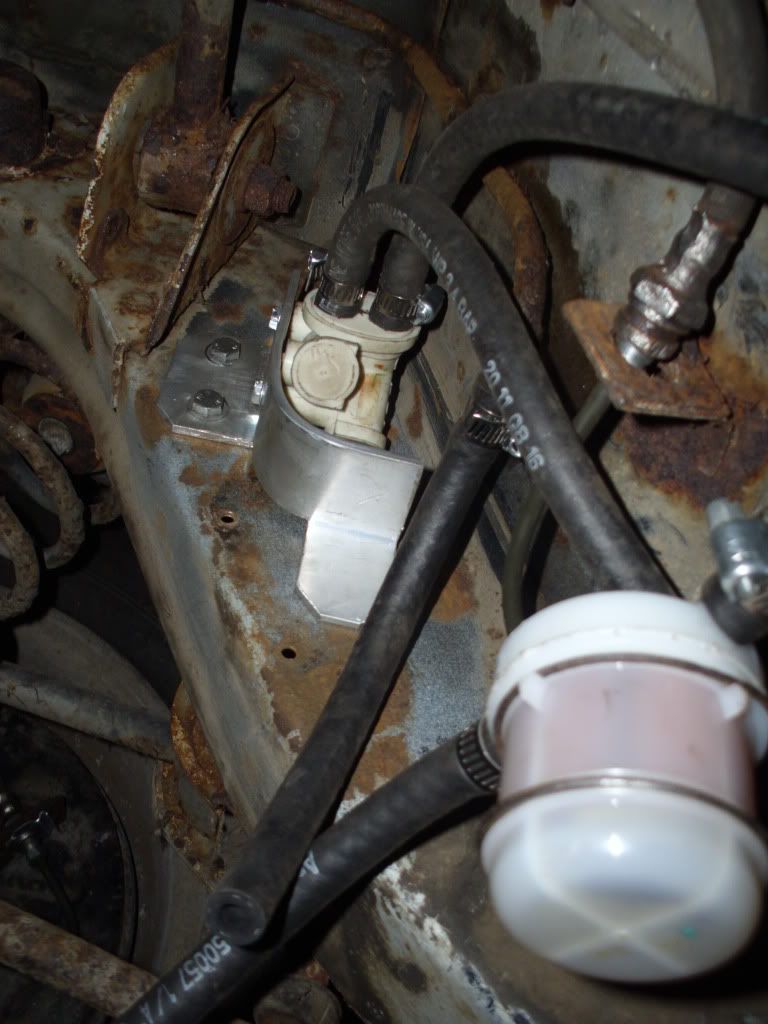
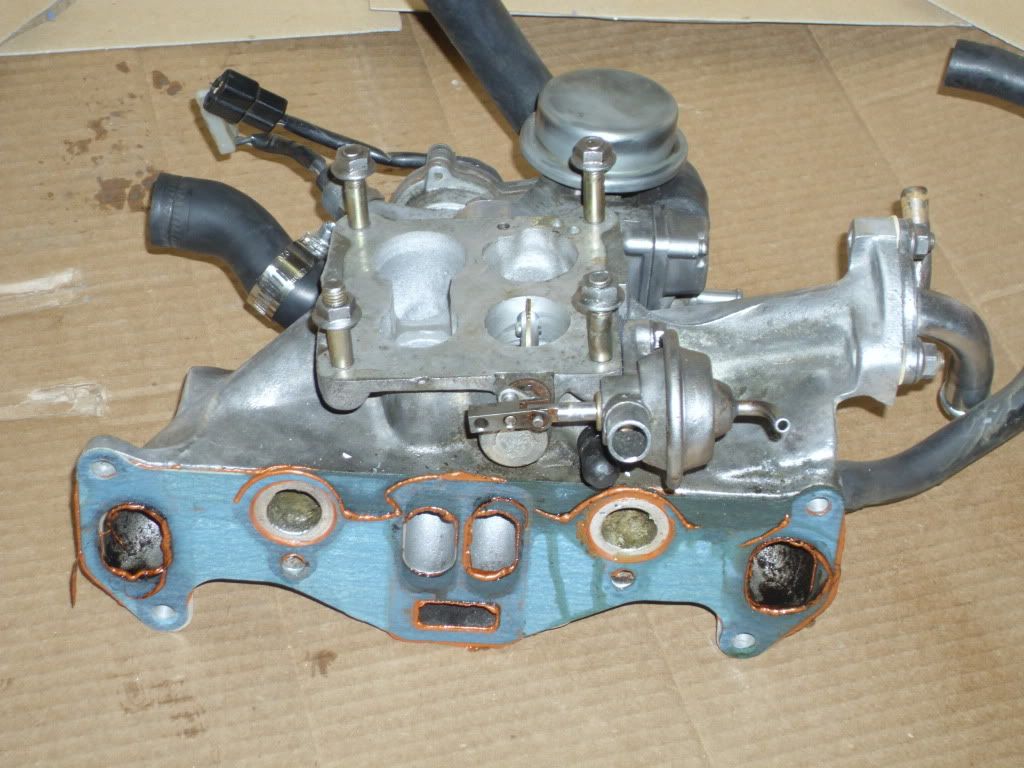
My current dilema is getting the fuel to the fuel bowls. I have already cleaned and rebuild the carburetor, so baring any mistakes there I am hoping that once the fuel gets to the float bowls I will be home free. I was getting fuel to the float bowls when I was bypassing everything and drawing the fuel directly into the fuel pump from the fuel tank. If that was the case, I must simply have a problem from either the hard fuel line before the fuel tank, the fuel cut valve, or the new fuel filter. I will do a pressure/volume test when I get back there. The top picture is from earlier when I pulled the fuel directly into the fuel pump. The bottom picture is the current amount in the float bowls running from a exterior spare fuel tank through the entire fuel line, filter, cut valve, ect.
I am also removing what's left of the trim and stripping on the side of the car. It no longer looked any good. Some was missing, some discolored, ect. I also want to attack the current surface rust to at least stop that. I won't be able to deal with the door rust right now. I don't have a mig welder, or the skills to do that type of work yet - although I would love to learn eventually, but one thing at a time.
In the mean time I'd like to at least repair what I can. Then prime, paint and clear coat. I am up in the air about doing everything with the rattle can or invest in a cheap paint gun for the touch ups. I won't be painting the entire car at this time. Hopefully some day down the road. Of course the biggest problem with rattle can, other than quality, is that of matching the paint. We'll see. I have some time before I get to this point anyways. Step one is to get her running and tuned up.
While on a flight home I was going through the 1st gen archives and found one by Sgt Fox on electrical connectors (https://www.rx7club.com/1st-gen-archive-71/electrical-source-mazda-style-electrical-connectors-878979/) Thanks again Sgt Fox! I am convinced that more than half of my electrical problems are from corroded or broken terminals/connectors so I will be placing a good size order soon from (http://www.easternbeaver.com/Main/main.html).
Well everyone have a great Thanksgiving! Stay safe while traveling
I also went through and replaced all of the fuel hoses. I have not replaced the hard fuel lines yet. I am hoping to hold off on that until I at least get her running.
My current dilema is getting the fuel to the fuel bowls. I have already cleaned and rebuild the carburetor, so baring any mistakes there I am hoping that once the fuel gets to the float bowls I will be home free. I was getting fuel to the float bowls when I was bypassing everything and drawing the fuel directly into the fuel pump from the fuel tank. If that was the case, I must simply have a problem from either the hard fuel line before the fuel tank, the fuel cut valve, or the new fuel filter. I will do a pressure/volume test when I get back there. The top picture is from earlier when I pulled the fuel directly into the fuel pump. The bottom picture is the current amount in the float bowls running from a exterior spare fuel tank through the entire fuel line, filter, cut valve, ect.
I am also removing what's left of the trim and stripping on the side of the car. It no longer looked any good. Some was missing, some discolored, ect. I also want to attack the current surface rust to at least stop that. I won't be able to deal with the door rust right now. I don't have a mig welder, or the skills to do that type of work yet - although I would love to learn eventually, but one thing at a time.
In the mean time I'd like to at least repair what I can. Then prime, paint and clear coat. I am up in the air about doing everything with the rattle can or invest in a cheap paint gun for the touch ups. I won't be painting the entire car at this time. Hopefully some day down the road. Of course the biggest problem with rattle can, other than quality, is that of matching the paint. We'll see. I have some time before I get to this point anyways. Step one is to get her running and tuned up.
While on a flight home I was going through the 1st gen archives and found one by Sgt Fox on electrical connectors (https://www.rx7club.com/1st-gen-archive-71/electrical-source-mazda-style-electrical-connectors-878979/) Thanks again Sgt Fox! I am convinced that more than half of my electrical problems are from corroded or broken terminals/connectors so I will be placing a good size order soon from (http://www.easternbeaver.com/Main/main.html).
Well everyone have a great Thanksgiving! Stay safe while traveling
Last edited by clykins; Nov 17, 2011 at 05:21 PM.
Thread Starter
Senior Member
iTrader: (1)
Joined: Aug 2010
Posts: 340
Likes: 0
From: Southern Minnesota and Southern California
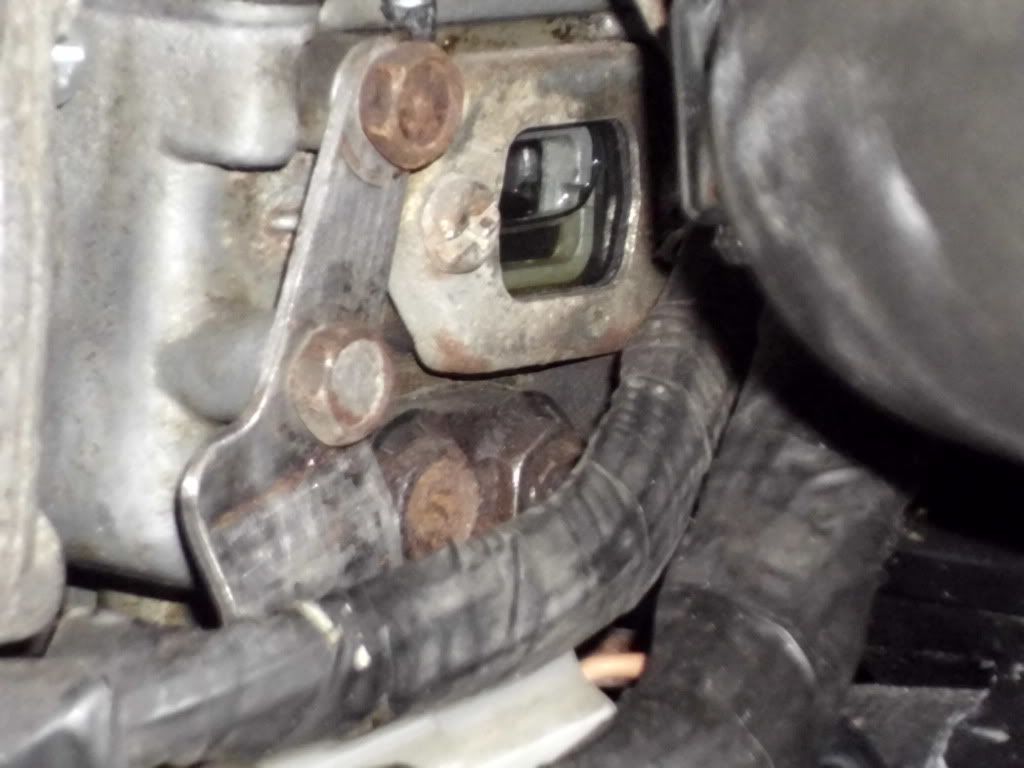
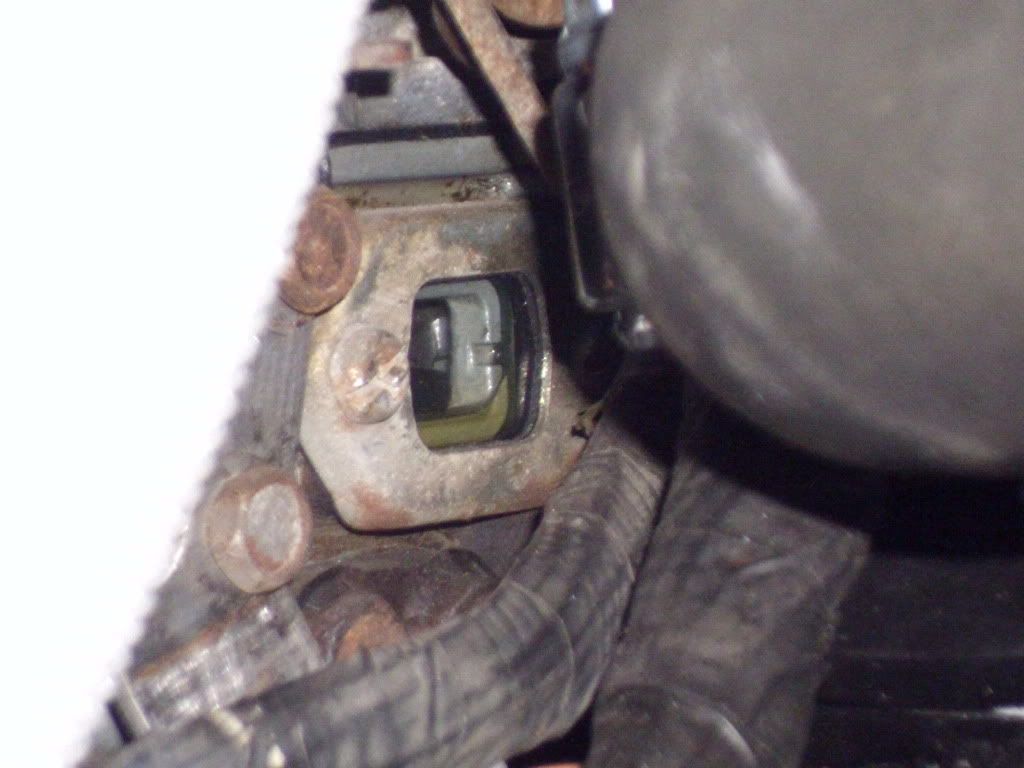
Okay I checked the fuel lines. I didn't reverse them. After some thought I decided to double check the fuel cut valve. Bingo. The mounting bracket had disintegrated from rust, so until I could find/make a replacement I had zip tied it in place. That didn't work. I pulled the fuel cut valve for the time being and fuel returned to the carburetor. The next issue is trying to get the fuel through the carburetor.
Thread Starter
Senior Member
iTrader: (1)
Joined: Aug 2010
Posts: 340
Likes: 0
From: Southern Minnesota and Southern California
I went out to the garage to tinker on the seven for about twenty minutes. It was getting late. Three hours later my wife called and reminder me that it was nearly 2am my time. You know how that goes. I was finishing up a project - building a mounting bracket for the fuel cut valve. This was all that was left of its former predecessor.
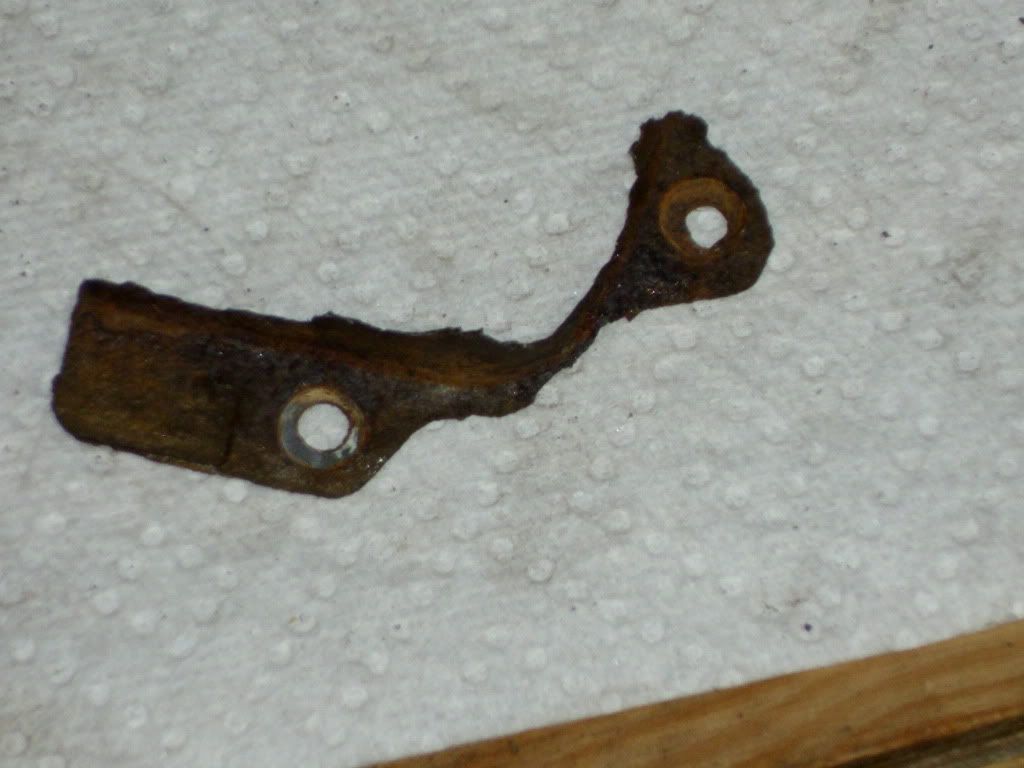
I had had no luck finding a replacement bracket, so I went to Ace Hardware and got a piece of 1/8th inch angle aluminum. I had never had much experience with constructing and hadn't really made anything from metal since high school metal shop class. Well this is what it looked like after three hours;
This morning I ran over to Ace Hardware and got some new screws to mount the fuel cut valve to the bracket.
I replaced the fuel hoses into their correct locations and tried starting the car.
I also checked the MAS screw position on the carburetor. I set it to about 4 turns out. The manual said to start with three, but I hadn't been getting any luck with that so I tried 4.
A little fuel down the carburetor was needed to get her to start, but she continued to run for about 10 seconds before she died. That is progress, but not quite there yet. I also noticed that I may be getting a leak where the OMP lines enter the carburetor. I will have to look at that a little more closely when I get back.
If anyone has some suggestions about common leak locations around that area, I would appreciate the help.
Thread Starter
Senior Member
iTrader: (1)
Joined: Aug 2010
Posts: 340
Likes: 0
From: Southern Minnesota and Southern California
I think I have decided to rebuild the carburetor again. During the last rebuild, over a year ago, I did not remove the jets and air bleeds. I think the problem I am having is that the old gas has clogged up the passage ways. I can get the car to start if I put fuel down the primary barrels, and the float bowls have the correct amount of gas. The only think I haven't done is double check fuel pressure, which I will do before removing the carburetor again. I think I can fairly confidentially assume that there is adequate fuel to the carburetor, it's just not making its way through it.
The new fuel cut valve bracket fixed the problem with fuel to the carburetor. I am no longer bypassing the cut valve.
I have ordered the carburetor rebuild kit from Autozone. By the way, do you need to put any gasket sealant on the carburetor gaskets? I am thinking that I do, however I was just concerned about clogging the itty bitty passage ways with it.
Have a good weekend everyone!
Thread Starter
Senior Member
iTrader: (1)
Joined: Aug 2010
Posts: 340
Likes: 0
From: Southern Minnesota and Southern California
I took apart the carburetor on Tuesday. Wednesday I soaked it in parts cleaner and buffed up some of the parts. Got it reassembled. It was sure a lot easier the second time around!
I purchased a 12mm wrench and bent it making the mounting nut a lot easier to get at! I am not sure how I got it last time.
Here she sits again... Shinny!!!
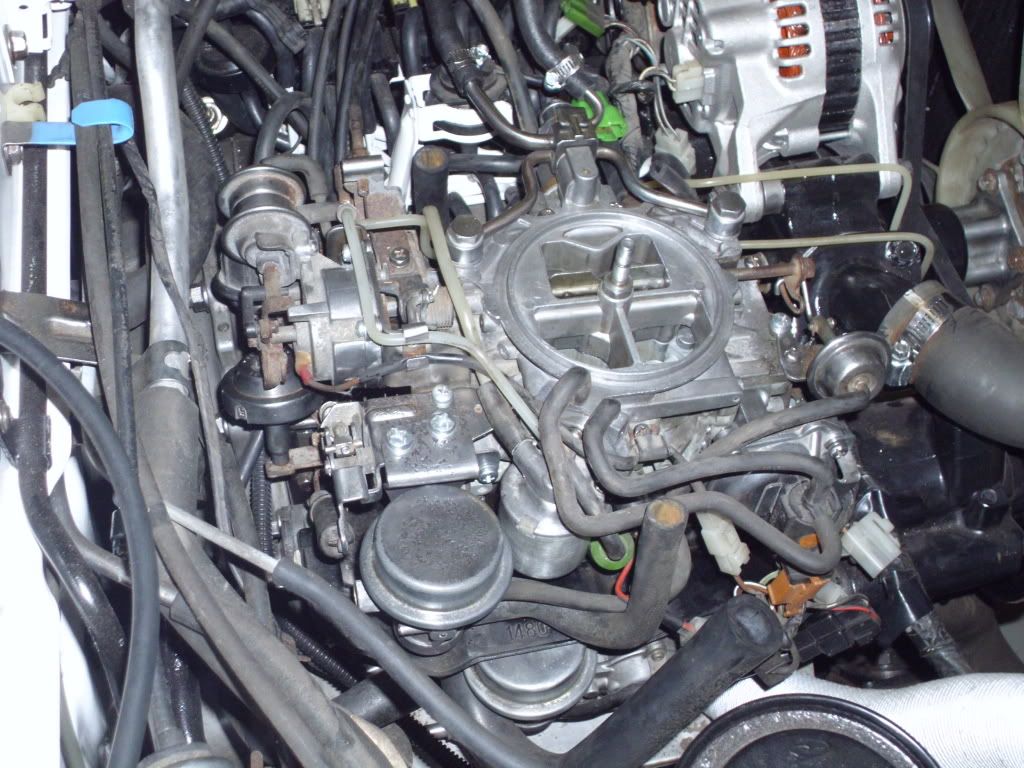
While I had the carburetor off I noticed the shutter valve was stuck solid in the open position (thank goodness). Thanks Cshaw07. I smacked it, soaked it and begged it to come loose. Nothing. I thought to hell with it for now. Once again though, she decided what she wanted fixed and when.
I fired her up and she ran almost immediately. She idled fine for about a minute then I decided to press my luck. I shut her down and tried to start her up. No luck.
As I was walking around her scratching my head I found a puddle of coolant under the thermal rector (My exhaust system ends at the thermal reactor right now). I am pretty sure that I have a leak in the intake gasket. Guess I am going to find time to work on that shutter valve after all.
Well that was it for now. Have a Merry Christmas everyone! :-)
I purchased a 12mm wrench and bent it making the mounting nut a lot easier to get at! I am not sure how I got it last time.
Here she sits again... Shinny!!!
While I had the carburetor off I noticed the shutter valve was stuck solid in the open position (thank goodness). Thanks Cshaw07. I smacked it, soaked it and begged it to come loose. Nothing. I thought to hell with it for now. Once again though, she decided what she wanted fixed and when.
I fired her up and she ran almost immediately. She idled fine for about a minute then I decided to press my luck. I shut her down and tried to start her up. No luck.
As I was walking around her scratching my head I found a puddle of coolant under the thermal rector (My exhaust system ends at the thermal reactor right now). I am pretty sure that I have a leak in the intake gasket. Guess I am going to find time to work on that shutter valve after all.
Well that was it for now. Have a Merry Christmas everyone! :-)
Joined: Aug 2010
Posts: 1,416
Likes: 5
From: East Palestine, Oh
i just read your whole thread. Nice work bud! One question though, where did that tank leak at?! I filled that thing up with water the day before I mailed it out and nothing leaked out anywhere. I'm glad you went with the POR-15 kit, I will recommend that to anyone, anytime. That is one hell of a tank sealer.
Thread Starter
Senior Member
iTrader: (1)
Joined: Aug 2010
Posts: 340
Likes: 0
From: Southern Minnesota and Southern California
i just read your whole thread. Nice work bud! One question though, where did that tank leak at?! I filled that thing up with water the day before I mailed it out and nothing leaked out anywhere. I'm glad you went with the POR-15 kit, I will recommend that to anyone, anytime. That is one hell of a tank sealer.
There was a piece of paint covering up the pin hole leak. The paint chip came off. No biggie. It's a 25 year old tank. :-) I think I might even try picking up a new tank from Mazdatrix in a couple months.
Joined: Aug 2010
Posts: 1,416
Likes: 5
From: East Palestine, Oh
damn man, im really sorry to hear that. That tank was painted from the previous owner of the car. Have faith in the POR kit though, it will seal a decent sized hole. To get the rust out of the bottom of a tank someone told me they put some small rocks in there and some water, then shook the tank around. The rocks pulled up the rust, then just rinse it out and follow the POR kit instructions.
Thread Starter
Senior Member
iTrader: (1)
Joined: Aug 2010
Posts: 340
Likes: 0
From: Southern Minnesota and Southern California
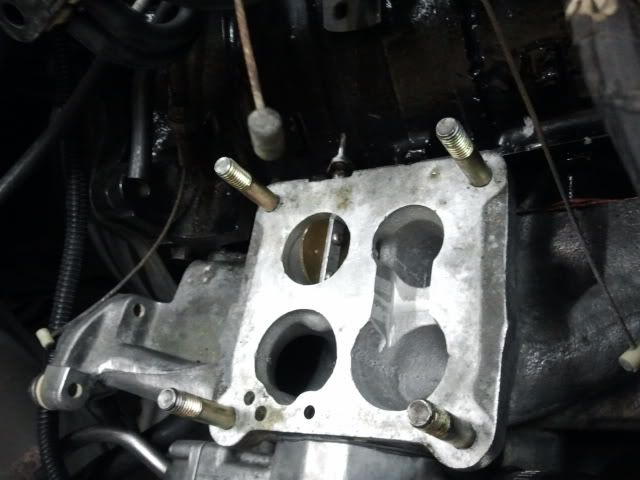
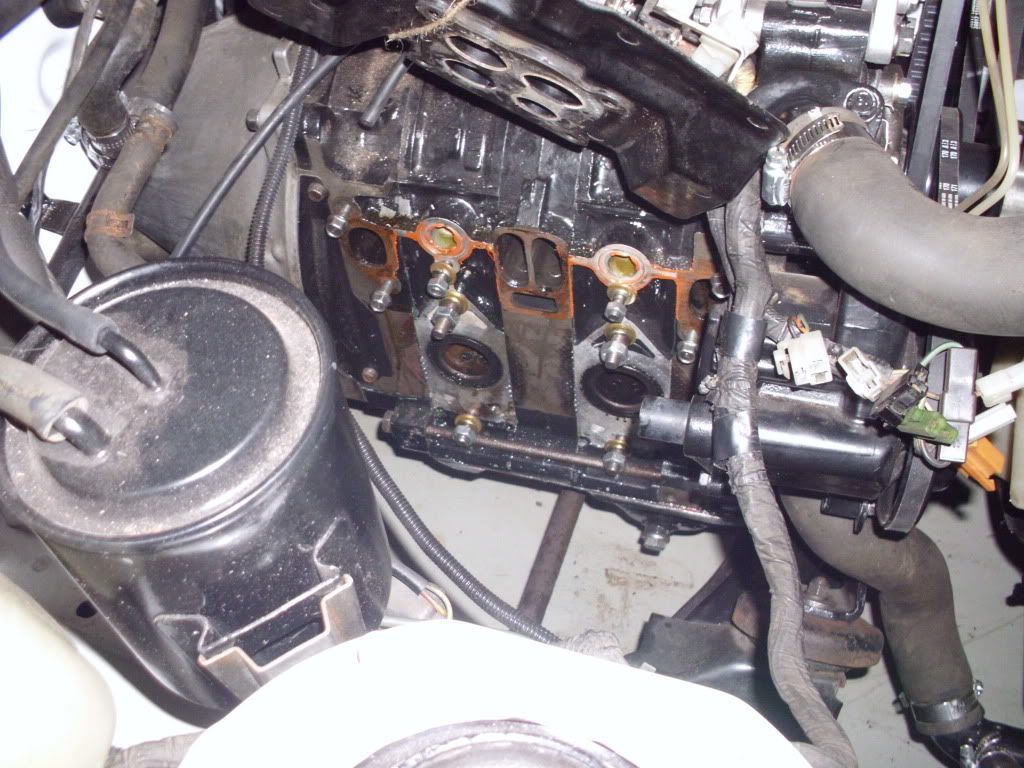
I removed the intake yesterday and found my coolant leak problem. I had sealed the gasket to the intake, but not to the engine.
I have a new gasket and o-rings on the way from Mazdatrix. I will post some pictures in couple days. Merry Christmas!
I have a new gasket and o-rings on the way from Mazdatrix. I will post some pictures in couple days. Merry Christmas!
Thread Starter
Senior Member
iTrader: (1)
Joined: Aug 2010
Posts: 340
Likes: 0
From: Southern Minnesota and Southern California
No worries Cshaw07. Thanks for the rust removal method! I'll have to give that a shot.
Here are the pictures of the intake removal. As you can see I forgot to seal one side. Oops. I was so glad when I removed it and found that! There is the problem... there is "a" problem, lol I should say.
That should be it until 2012. Hopefully the gasket and o-rings have made there way there so when I get back I can put her back together again.
Does anyone happen to have a shutter valve they are throwing away? I saw Mazdatrix sells the shaft, but not the bronze colored valve plate.
Again, Merry Christmas everyone!
Thanks for the rust removal method! I'll have to give that a shot.Here are the pictures of the intake removal. As you can see I forgot to seal one side. Oops. I was so glad when I removed it and found that! There is the problem... there is "a" problem, lol I should say.
That should be it until 2012. Hopefully the gasket and o-rings have made there way there so when I get back I can put her back together again.
Does anyone happen to have a shutter valve they are throwing away? I saw Mazdatrix sells the shaft, but not the bronze colored valve plate.
Again, Merry Christmas everyone!
Last edited by clykins; Dec 23, 2011 at 12:26 AM.
Joined: Aug 2010
Posts: 1,416
Likes: 5
From: East Palestine, Oh
I have two, but they are still in the intake manifolds. If i can get them out with out ruining them ill mail one to you.
Thread Starter
Senior Member
iTrader: (1)
Joined: Aug 2010
Posts: 340
Likes: 0
From: Southern Minnesota and Southern California
Thanks cshaw. I would appreciate it very much! Let me know how much you want and I will fire that off to you if you can get at them, lol. :-)
Thread Starter
Senior Member
iTrader: (1)
Joined: Aug 2010
Posts: 340
Likes: 0
From: Southern Minnesota and Southern California
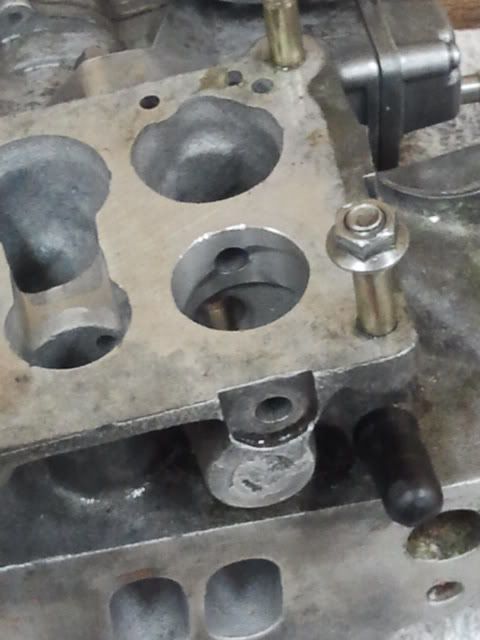
I just got a chance today to get a little work done. I got the shutter valve removed and the new shaft ordered. It was a real pain getting it out!
Hopefully it will be worth the trouble. The part should be in next week and then I should be able to put her back together. I am hoping this solves the starting issue I have been dealing with.
Hopefully it will be worth the trouble. The part should be in next week and then I should be able to put her back together. I am hoping this solves the starting issue I have been dealing with.


Thread Starter
Senior Member
iTrader: (1)
Joined: Aug 2010
Posts: 340
Likes: 0
From: Southern Minnesota and Southern California
I will be installing new orings when I put the intake back on. I had installed them the first time, but I forgot to seal one side of the gasket.

Joined: Jun 2008
Posts: 8,376
Likes: 28
From: Chino Hills, CA
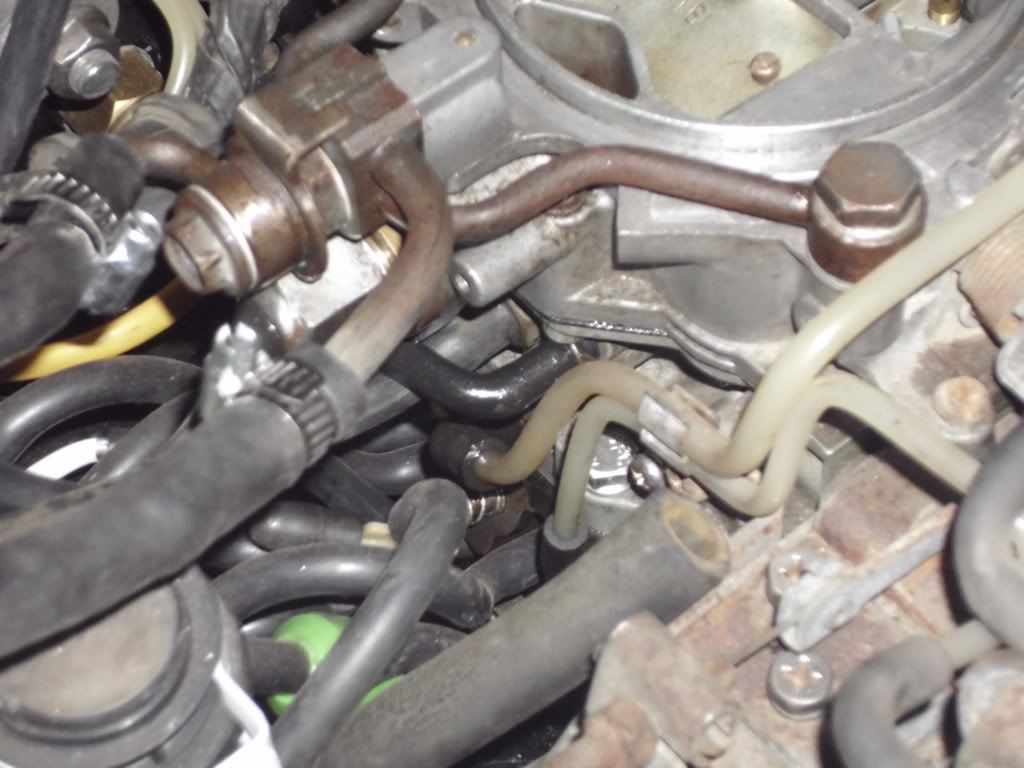
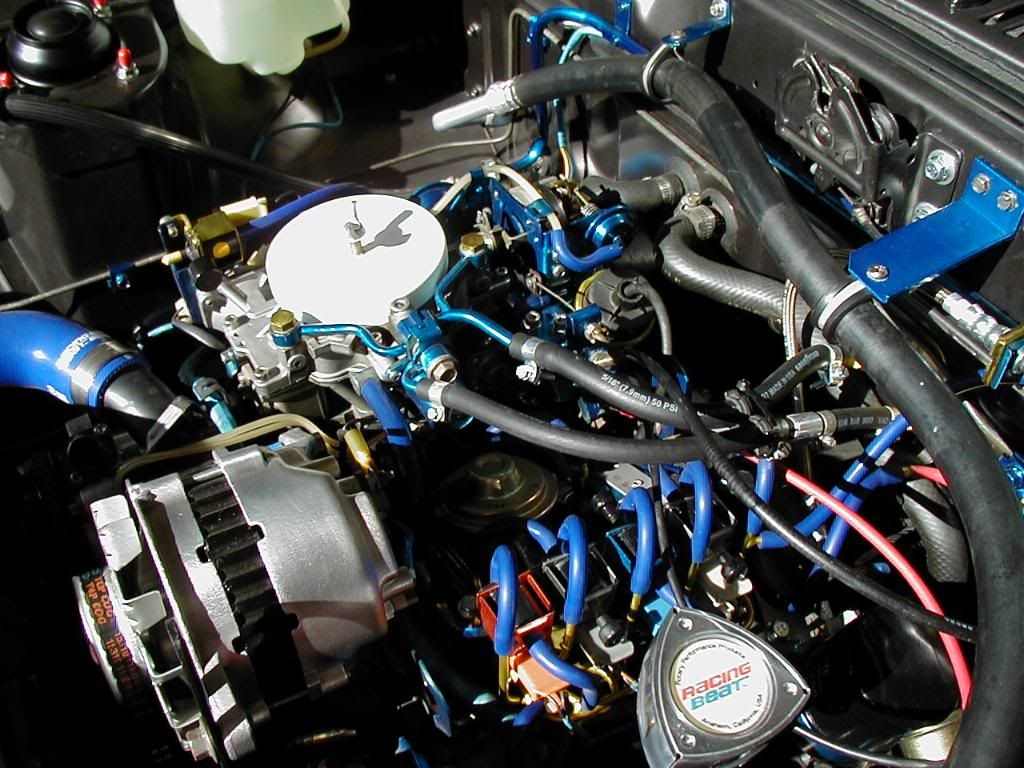
I'm pretty sure, based on the 2nd pic from 11/17, that your fuel lines are crossed - - unless the piping on the firewall or the hoses at the other end by the tank are also crossed (or are reversed on FB's?).
Carb fuel hoses run parallel, on my car:
Keep up the good work!
Carb fuel hoses run parallel, on my car:
Keep up the good work!
Thread Starter
Senior Member
iTrader: (1)
Joined: Aug 2010
Posts: 340
Likes: 0
From: Southern Minnesota and Southern California
Hey Omnious. I got most of the parts from Autozone. The rear brake calipers and brackets I got off of ebay. I will have to look up the dealer's name.
DivinDriver, I followed the lines back to the fuel pump and they are correct. Yes they should be parallel, but I must have crossed the hardlines when I got done painting the engine bay. Ooops. By the way, that is the most beautiful engine bay I have ever seen!
DivinDriver, I followed the lines back to the fuel pump and they are correct. Yes they should be parallel, but I must have crossed the hardlines when I got done painting the engine bay. Ooops. By the way, that is the most beautiful engine bay I have ever seen!
Thread Starter
Senior Member
iTrader: (1)
Joined: Aug 2010
Posts: 340
Likes: 0
From: Southern Minnesota and Southern California
I got the new shutter valve shaft in from Mazdatrix and installed it last night. Doesn't it look beautiful?
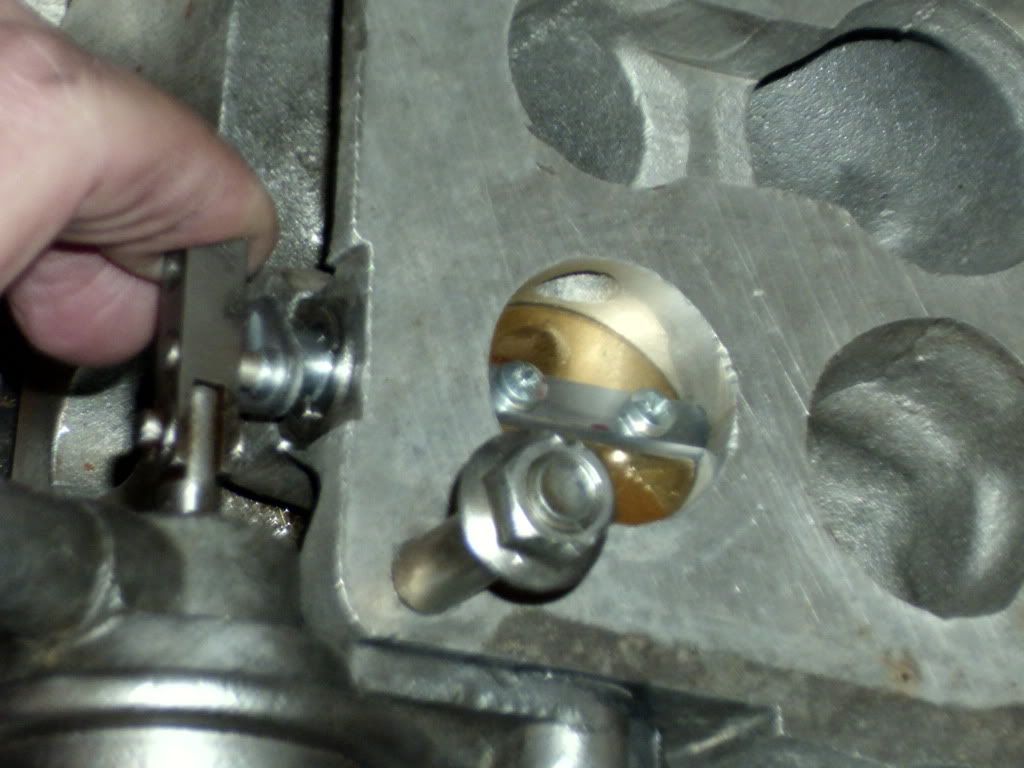
I put some red threadlock on the new shutter valve screws. Thought it would upset my day a little if they fell out and got injested in the engine. Don't know why, but that might not be too good for it.
I'm still not sure that the shutter valve itself is going to work. I am not sure how much vacuum is needed to activate it. I should probably vacuum test it since its a pain to get to when the carburetor is installed.
Either way it is on and moves a lot more easily then it did before! I am hoping to have the time to reinstall the intake manifold and carburetor Saturday night.
I need to get the exhaust done soon so I can run a exhaust pipe outside the garage. Carbon Monoxide poisoning - not as much fun as it sounds Its too cold to do the work outside. (-120 degrees Farenheit, or there abouts I think.)
OH yeah, Omnious. I got the front calipers from Autozone. The rear calipers I ordered from ebay. One was a Centric Part from autoparts.titan1. It came with the bracket. The other one was listed as a PREMIUM part, from r1concepts. I would highly recommend both sellers - as far as fit and delivery time. I haven't used the brakes yet so I can't recommend them for functioinality yet, lol. If they don't work I'll let everyone know with some very choice words.
I put some red threadlock on the new shutter valve screws. Thought it would upset my day a little if they fell out and got injested in the engine. Don't know why, but that might not be too good for it.
I'm still not sure that the shutter valve itself is going to work. I am not sure how much vacuum is needed to activate it. I should probably vacuum test it since its a pain to get to when the carburetor is installed.
Either way it is on and moves a lot more easily then it did before! I am hoping to have the time to reinstall the intake manifold and carburetor Saturday night.
I need to get the exhaust done soon so I can run a exhaust pipe outside the garage. Carbon Monoxide poisoning - not as much fun as it sounds
Its too cold to do the work outside. (-120 degrees Farenheit, or there abouts I think.)OH yeah, Omnious. I got the front calipers from Autozone. The rear calipers I ordered from ebay. One was a Centric Part from autoparts.titan1. It came with the bracket. The other one was listed as a PREMIUM part, from r1concepts. I would highly recommend both sellers - as far as fit and delivery time. I haven't used the brakes yet so I can't recommend them for functioinality yet, lol. If they don't work I'll let everyone know
with some very choice words.
In Love with a GS
Joined: May 2009
Posts: 171
Likes: 0
From: Mid Northern Indiana
I have used autozone remanufactured parts for a while now, nothing really wrong with them, but the vendors aren't very organized. I had to return the passenger side caliper 4 times before they sent one with the correct threads for the brake line

Thread Starter
Senior Member
iTrader: (1)
Joined: Aug 2010
Posts: 340
Likes: 0
From: Southern Minnesota and Southern California
Got the intake reinstalled and the carburetor hooked back up. After filling up the radiator again I fired her up. I have a gas can that I am using for a gas tank for the time being. She pulled gas up to the carburetor and started up pretty easily.
After another little happy dance I looked under the car. Damn! That wasn't the only leak. I think I am left with only one thing left, a internal water jacket leak :-( I don't relish the idea of pulling the engine apart again, so I am considering trying Kentetsu's idea of using Alumaseal.
I also noticed the coolant boiling in the upper radiator hose. Guess I didn't get all the air out.
I am going to get the pressure tester again from Autozone and retest the coolant system.
Still have to remove the brake lines. I am going to take them in and have a shop put the flares in. My $25 tool isn't doing a good enough job.