
Bringing it back to life


Thread Starter
Senior Member
iTrader: (1)
Joined: Aug 2010
Posts: 340
Likes: 0
From: Southern Minnesota and Southern California
Thanks Funk73. I will need to get my hands on an exhaust manifold shroud, gas tank, a catalytic converter, and muffler. I can't give you a lot for these, but if you got them I would really appreciate it!
Chris
Chris
Thread Starter
Senior Member
iTrader: (1)
Joined: Aug 2010
Posts: 340
Likes: 0
From: Southern Minnesota and Southern California
Thanks guys 
Funk73. To finish up, I will need to get my hands on an exhaust manifold shroud, gas tank, a catalytic converter, and muffler. I can't give you a lot for these, but if you got them I would really appreciate it!
Chris
Funk73. To finish up, I will need to get my hands on an exhaust manifold shroud, gas tank, a catalytic converter, and muffler. I can't give you a lot for these, but if you got them I would really appreciate it!
Chris

Full Member
Joined: May 2011
Posts: 55
Likes: 0
From: Sonora Ca
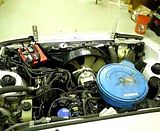
Looking great keep up the good work your 7 is nearly a twin of my 84 gsl im rehabbing "your engine bay paintng makes me want to take the whole thing apart and do that too mine sat for 7 years after a theft " Hopefully mine will still pass california emissions when im done

Joined: Mar 2009
Posts: 983
Likes: 0
From: Minneapolis, Minnesota
I do indeed have the exhaust manifold heat shielding. I'm not looking for much money, just need to get rid of all the parts in the garage i don't need lol. Rather see them go into another 7 that my bin. Let me know if you want to buy it/what you have to give for it. Where abouts are you located?
Thread Starter
Senior Member
iTrader: (1)
Joined: Aug 2010
Posts: 340
Likes: 0
From: Southern Minnesota and Southern California
Krathion,
The California emission is my one fear. Once I get done fixing her up, I am driving it out to California. I am going to cross my fingers :-)
The California emission is my one fear. Once I get done fixing her up, I am driving it out to California. I am going to cross my fingers :-)
Thread Starter
Senior Member
iTrader: (1)
Joined: Aug 2010
Posts: 340
Likes: 0
From: Southern Minnesota and Southern California
Hey guys,
This has been the busiest summer I've had in a long time. I got married on the 19th of June and my job has been keeping me flying quite a bit. This is frustrating to be so close to getting her back on the road, but having no time to work on her.
What little I have been able to do is;
I got power back to the car! After 16 years SHE'S ALIVE!
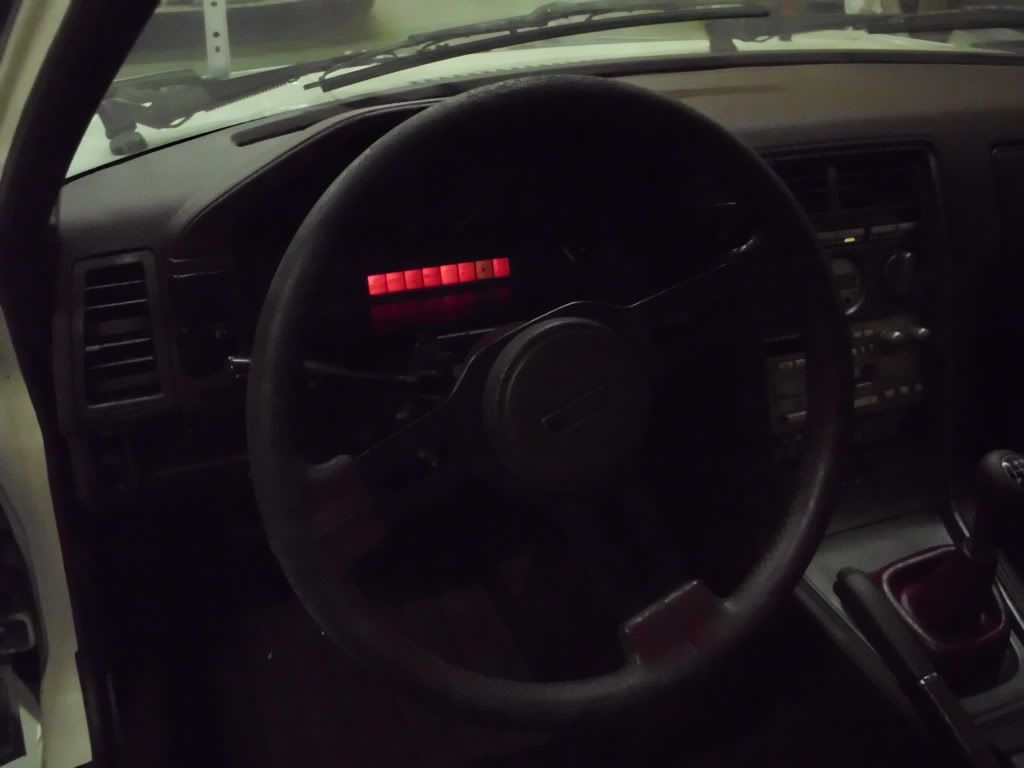
The lights come on and odds and ends of electrical components work. The first one I thought I'd take a pot shot at, since the system is quite simple, are the headlights. I went through and cleaned up the headlights and cleaned and repainted the wrap-around headlight cover.
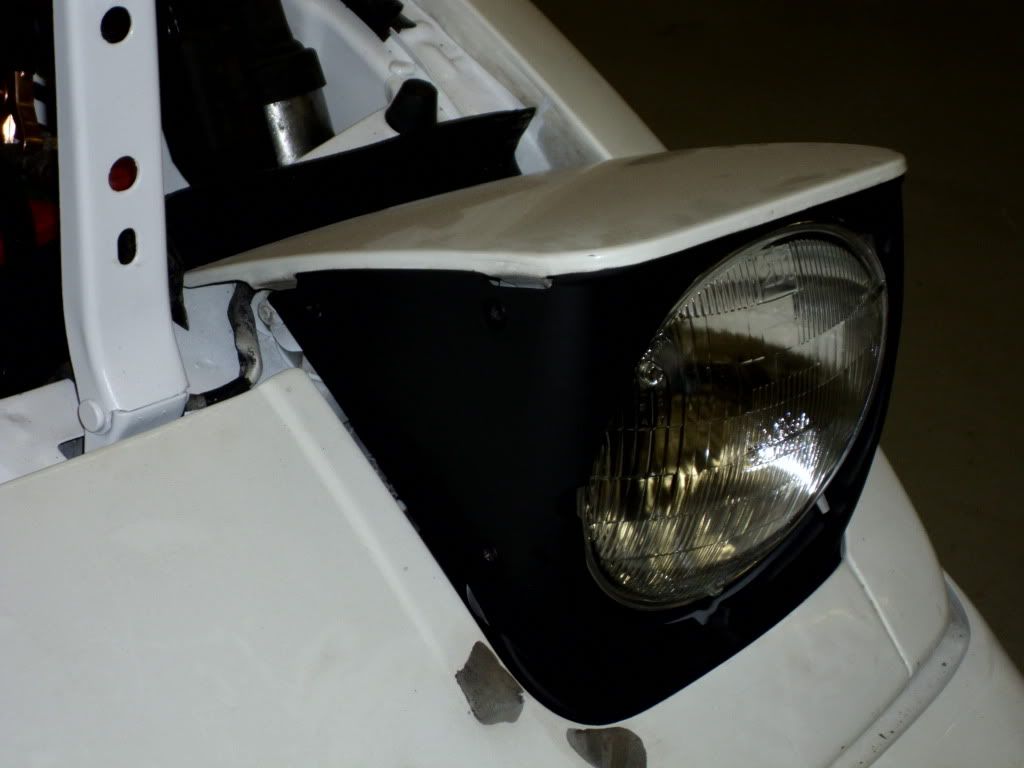
Next I started working on the headlights motors and got one working. As I got the second one working, the first one stopped working. I went back to the first one and the second one stopped working. Kinda lost interest and time at that point. Something to come back to.
I think one of my issues are the battery terminal connectors. The positive connector barely sits on the terminal. That's alright for the time being. I'm working on non-electrical stuff at the moment - fuel tank and rear brakes.
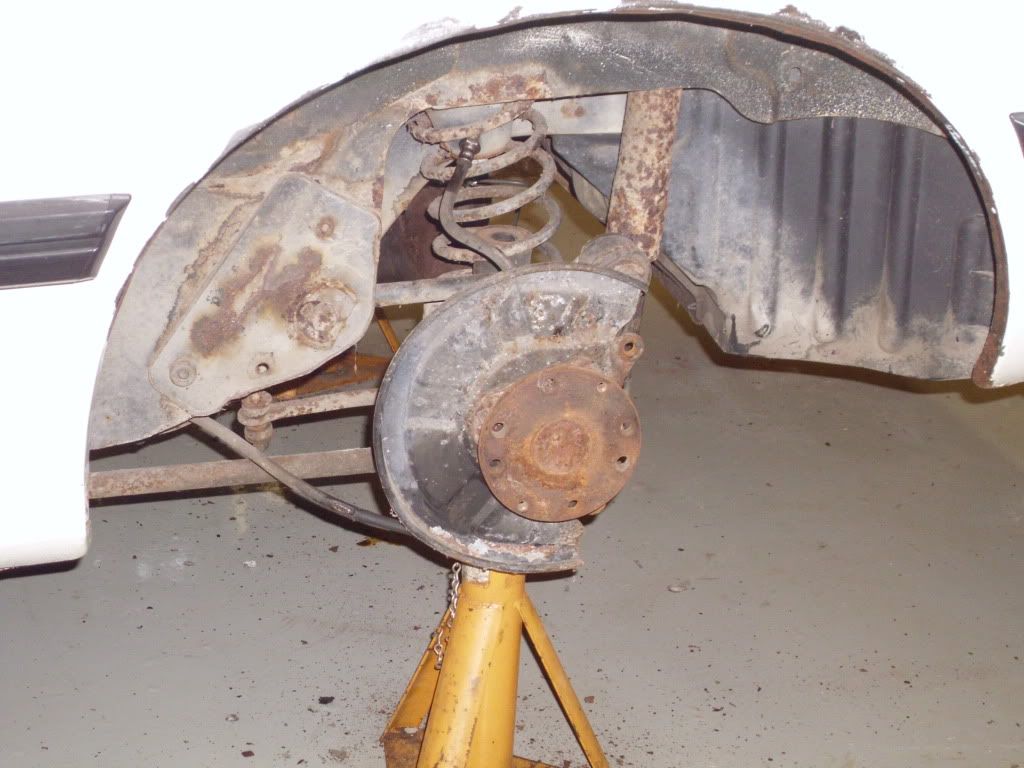
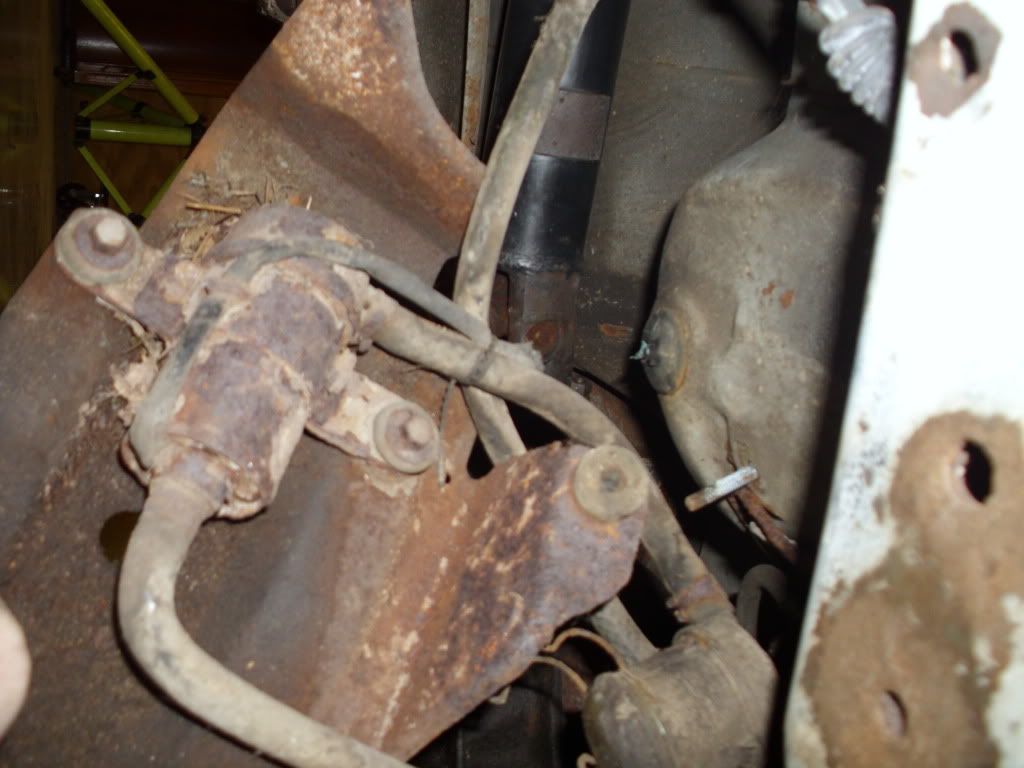
As some of you might recall, I replaced the brake lines and was met with limited success. They leaked. Before I try to retackle the brake lines, I figured I should have the other braking components fixed up - the rotors and calipers. Wow! That turned out to be quite the job. The caliper and caliper mounting bracket were so rusted that most of the bolts had to be cut off and drilled. There was no amount of heat, penetrating oil, or vibration with hammer (or impact screwdriver) that could break those free. The mounting bracket has proven so hard to extract one of the broken off bolts that I've resigned that I will have to replace it... somehow. These, like most of the rear brake parts, seem to be more rare than gold these days. (Speaking of which, has anyone come across A1 Cardone brake parts? http://www.cardone.com/English/Club/...es/default.asp)

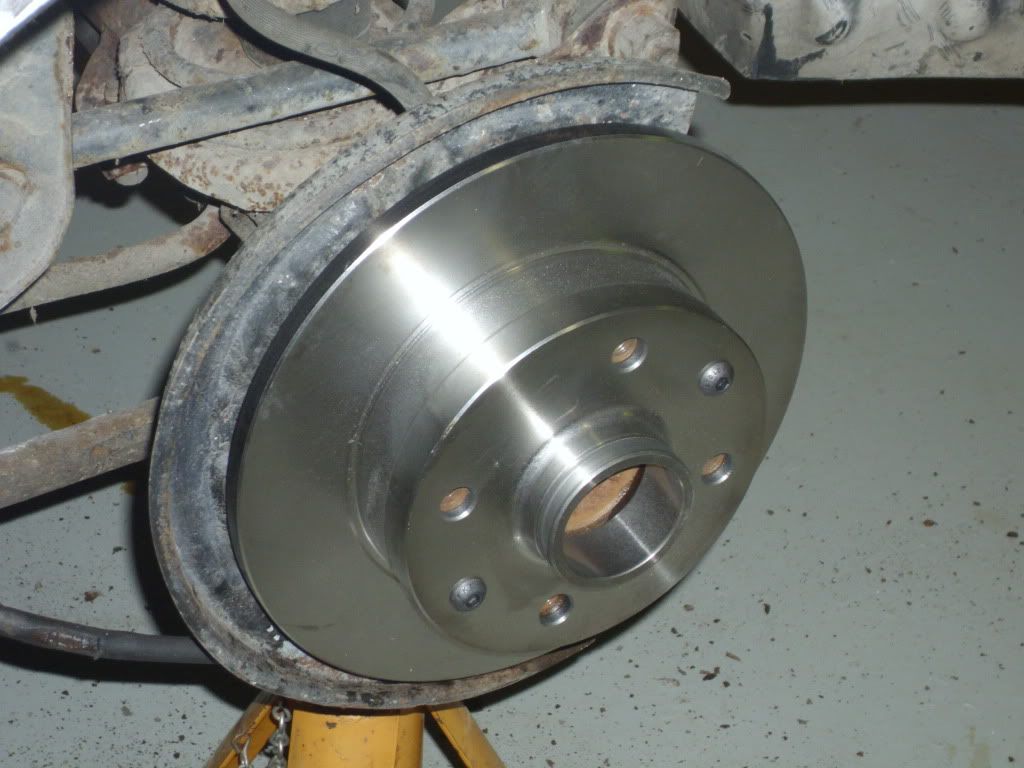
Anyways I got the rotors off and found some replacement rotor alignment screws (a pain to remove) at Fastenal. Now I just need to rebuild the calipers (parts on their way from Partsgeek.com) and find replacement caliper mounting brackets and hardware.
I also found a exhaust manifold heat shield (thanks FunK73!). A little bit of spit and polish and I got her cleaned up and installed.
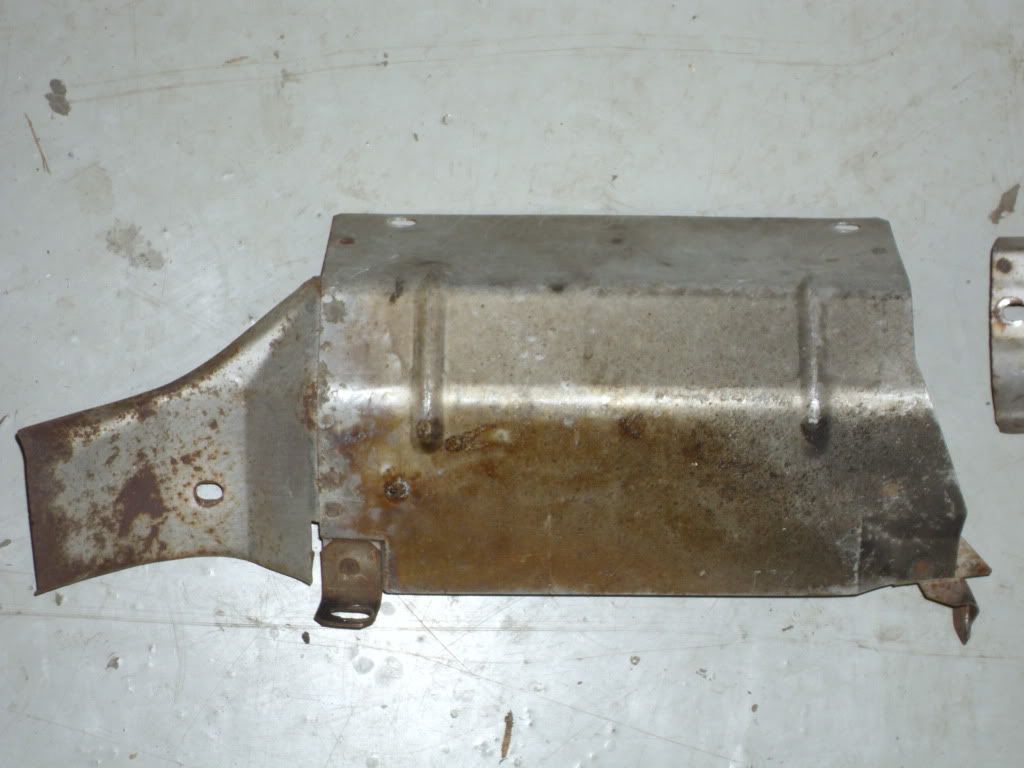
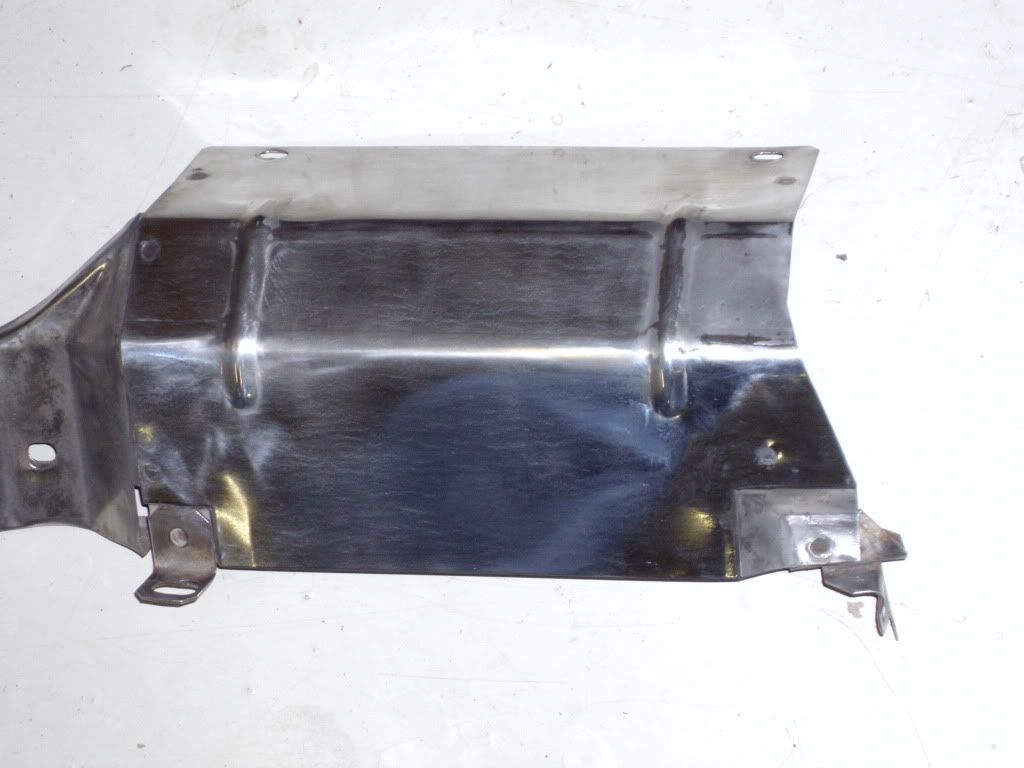
It wasn't quite the right one for my car, but a little bit of drilling and a little bit of cutting and she fit on snuggly.
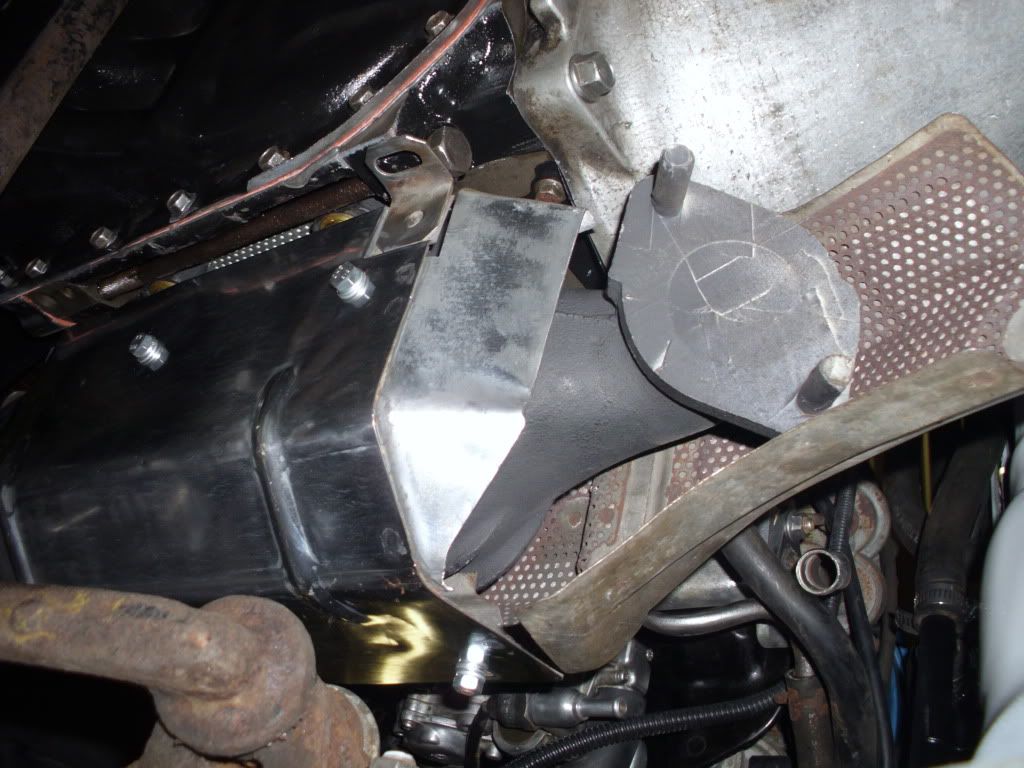
If I ever have to replace a heat shield again, I am just going to remove the entire engine! Man that was a tight fit.
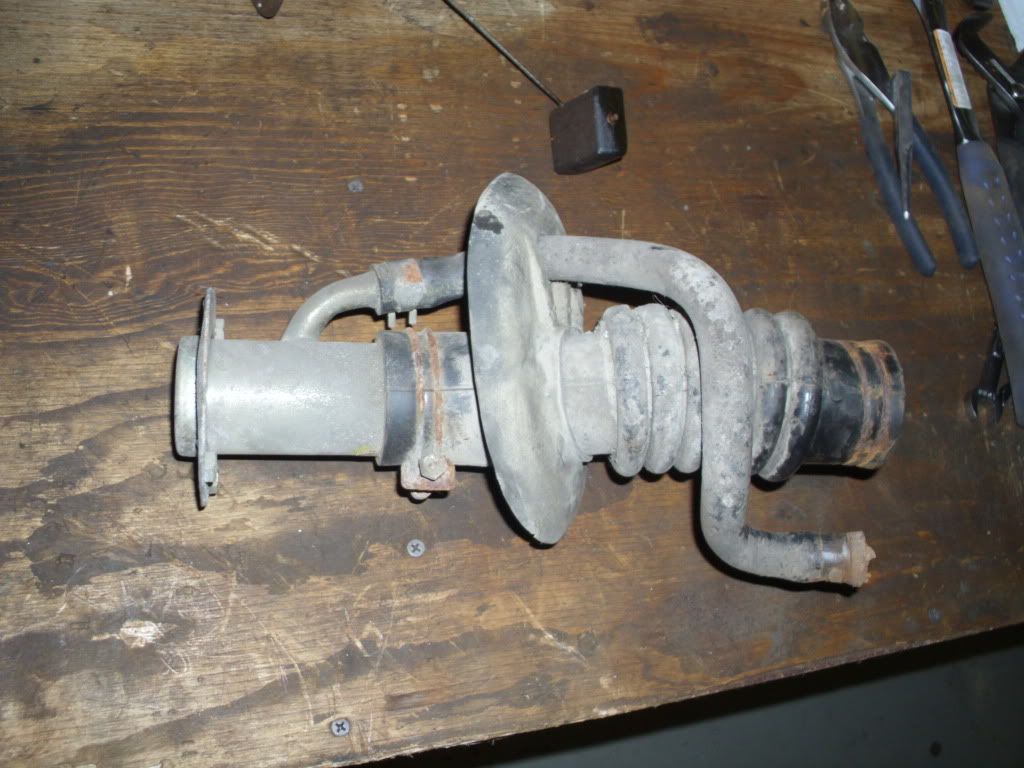
I also started working on my fuel tank. Yeah I didn't empty the fuel tank 16 years ago, so there was an interesting stinky science experiment going on my rusted out old tank. I've been doing some research on cleaning and fixing up a fuel tank. There is a company near by called Gas Tank Re Nu. For $200 they will do the inside with a two year warrenty, for $300 they will do the inside and out with a lifetime warrenty. Nahhhh. I also found POR 15 and another product from a company called KBS Coating. They sell their products for about $60. Right now I'm leaning towards the KBS Coating. Hemotape and CShaw07 volunteered to sell me a fuel tank in better condition than mine. Thanks guys.
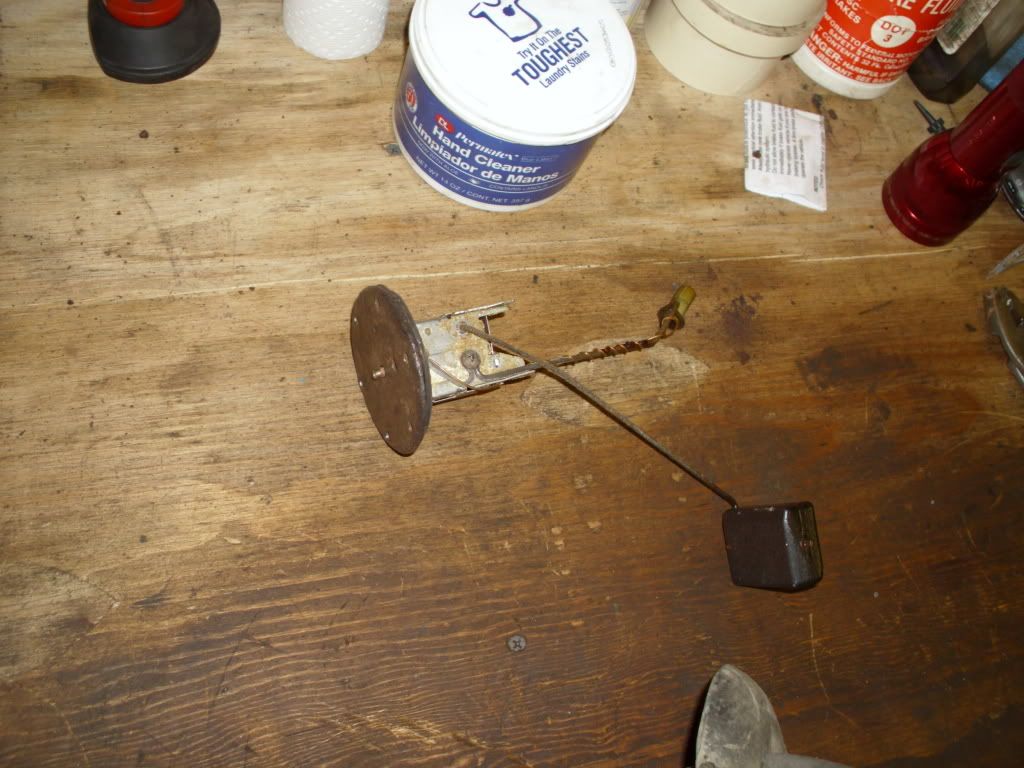
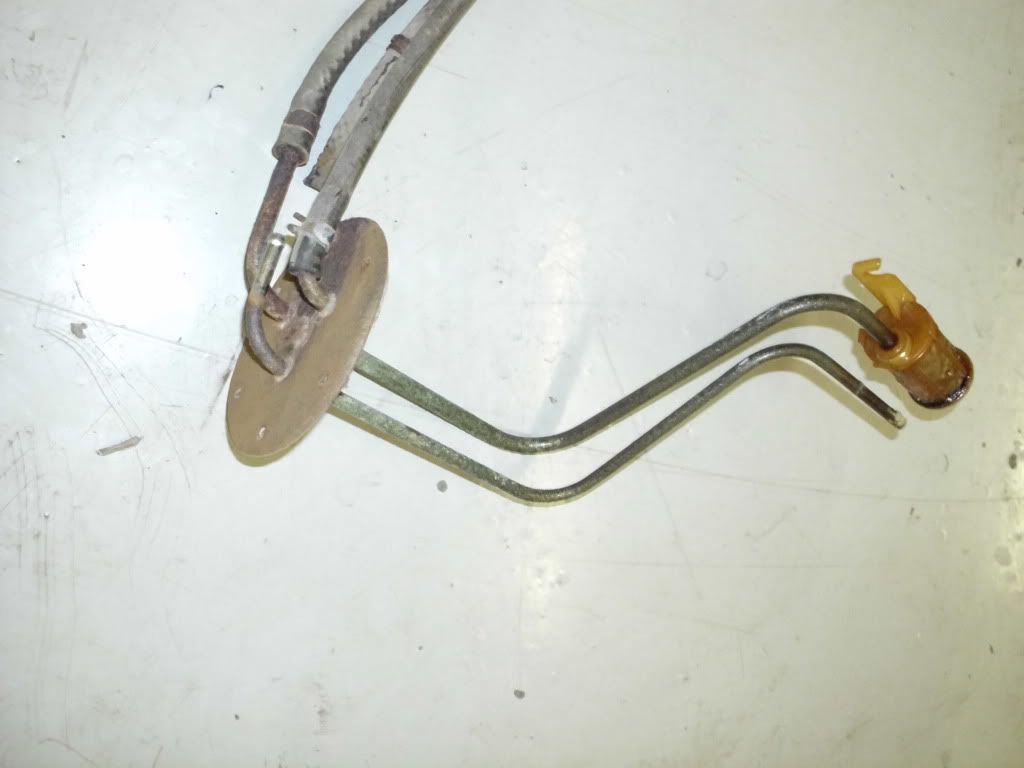
I pulled off my fuel tank components. I'll have to clean and repair them, but I've got some time. The fuel sender unit has broken terminals on the top. I'm hoping I can fix that. We'll see.
Still need to do some work on the exhaust. I'm in need of the 1st catalytic converter and a muffler. But I am getting really close to finishing her up enough to drive her home to California... hopefully. It would be a nice finish to a great project. Hopefully within the next couple months. Have a good weekend everyone!
This has been the busiest summer I've had in a long time. I got married on the 19th of June and my job has been keeping me flying quite a bit. This is frustrating to be so close to getting her back on the road, but having no time to work on her.
What little I have been able to do is;
I got power back to the car! After 16 years SHE'S ALIVE!
The lights come on and odds and ends of electrical components work. The first one I thought I'd take a pot shot at, since the system is quite simple, are the headlights. I went through and cleaned up the headlights and cleaned and repainted the wrap-around headlight cover.
Next I started working on the headlights motors and got one working. As I got the second one working, the first one stopped working. I went back to the first one and the second one stopped working. Kinda lost interest and time at that point. Something to come back to.
I think one of my issues are the battery terminal connectors. The positive connector barely sits on the terminal. That's alright for the time being. I'm working on non-electrical stuff at the moment - fuel tank and rear brakes.
As some of you might recall, I replaced the brake lines and was met with limited success. They leaked. Before I try to retackle the brake lines, I figured I should have the other braking components fixed up - the rotors and calipers. Wow! That turned out to be quite the job. The caliper and caliper mounting bracket were so rusted that most of the bolts had to be cut off and drilled. There was no amount of heat, penetrating oil, or vibration with hammer (or impact screwdriver) that could break those free. The mounting bracket has proven so hard to extract one of the broken off bolts that I've resigned that I will have to replace it... somehow. These, like most of the rear brake parts, seem to be more rare than gold these days. (Speaking of which, has anyone come across A1 Cardone brake parts? http://www.cardone.com/English/Club/...es/default.asp)
Anyways I got the rotors off and found some replacement rotor alignment screws (a pain to remove) at Fastenal. Now I just need to rebuild the calipers (parts on their way from Partsgeek.com) and find replacement caliper mounting brackets and hardware.
I also found a exhaust manifold heat shield (thanks FunK73!). A little bit of spit and polish and I got her cleaned up and installed.
It wasn't quite the right one for my car, but a little bit of drilling and a little bit of cutting and she fit on snuggly.
If I ever have to replace a heat shield again, I am just going to remove the entire engine! Man that was a tight fit.
I also started working on my fuel tank. Yeah I didn't empty the fuel tank 16 years ago, so there was an interesting stinky science experiment going on my rusted out old tank. I've been doing some research on cleaning and fixing up a fuel tank. There is a company near by called Gas Tank Re Nu. For $200 they will do the inside with a two year warrenty, for $300 they will do the inside and out with a lifetime warrenty. Nahhhh. I also found POR 15 and another product from a company called KBS Coating. They sell their products for about $60. Right now I'm leaning towards the KBS Coating. Hemotape and CShaw07 volunteered to sell me a fuel tank in better condition than mine. Thanks guys.
I pulled off my fuel tank components. I'll have to clean and repair them, but I've got some time. The fuel sender unit has broken terminals on the top. I'm hoping I can fix that. We'll see.
Still need to do some work on the exhaust. I'm in need of the 1st catalytic converter and a muffler. But I am getting really close to finishing her up enough to drive her home to California... hopefully. It would be a nice finish to a great project. Hopefully within the next couple months. Have a good weekend everyone!
Thread Starter
Senior Member
iTrader: (1)
Joined: Aug 2010
Posts: 340
Likes: 0
From: Southern Minnesota and Southern California
Well, I'm still working on what I mentioned in my previous message. Cshaw07 rocks and the fuel tank is on the way. I've ordered the POR15 kit to clean and reseal the tank.
I got the parts in to rebuild the rear calipers. The "kit" consists of the o-rings. I've never rebuilt a caliper before. I hope that's everything I need, other than the different greases. I need to see if I can find the piston remover tool as well. I am still working on drilling out the rusted bolts that broke off. That is proving to be a lot harder then the other 100 bolts I've drilled.
After banging my head on the work bench for about five minutes trying to figure out the caliper drilling problem, I decided to take a break and work on something else for a little bit. I decided that the wheels needed some TLC.
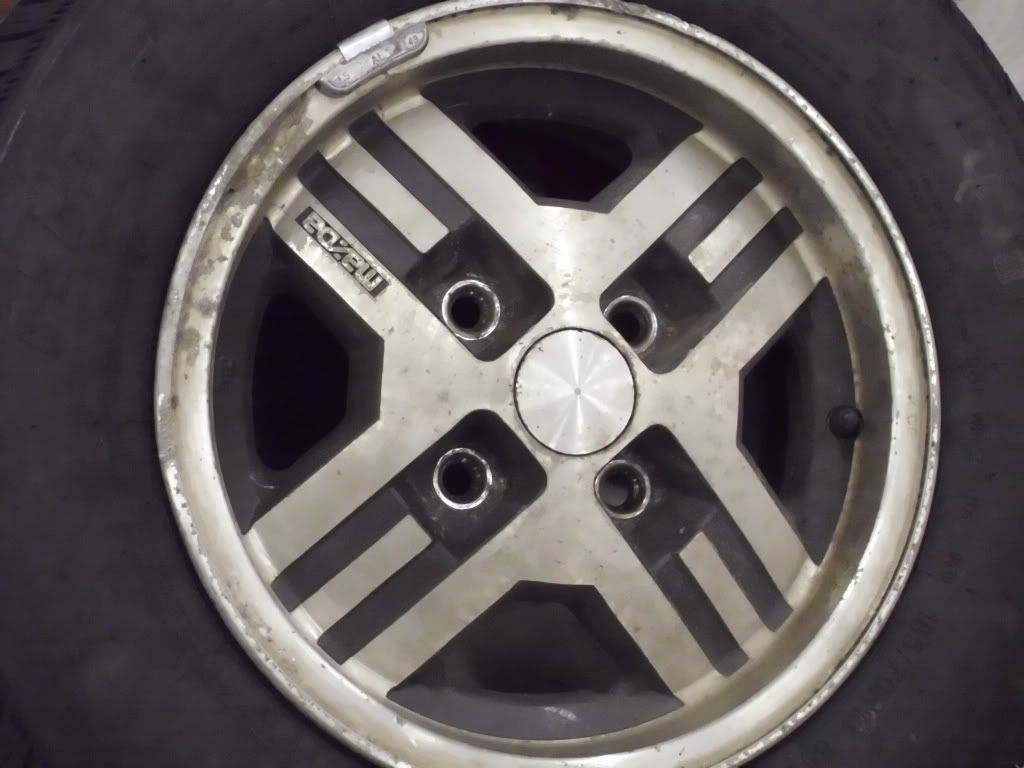
I sanded down one rim with 220 grit, then dry sanded with 300, then wet sanded with 300 grit. I then polished it with a buffer wheel that mounts to my drill. (Not really impressed with a drill mounted buffer wheel - RPMs too slow)

The one rim turned out okay. I just bought some finer grit sandpaper and am going to try to get a good mirror finish on them. I need to remove the tire off the rim to do a good thorough job on the remaining rims.
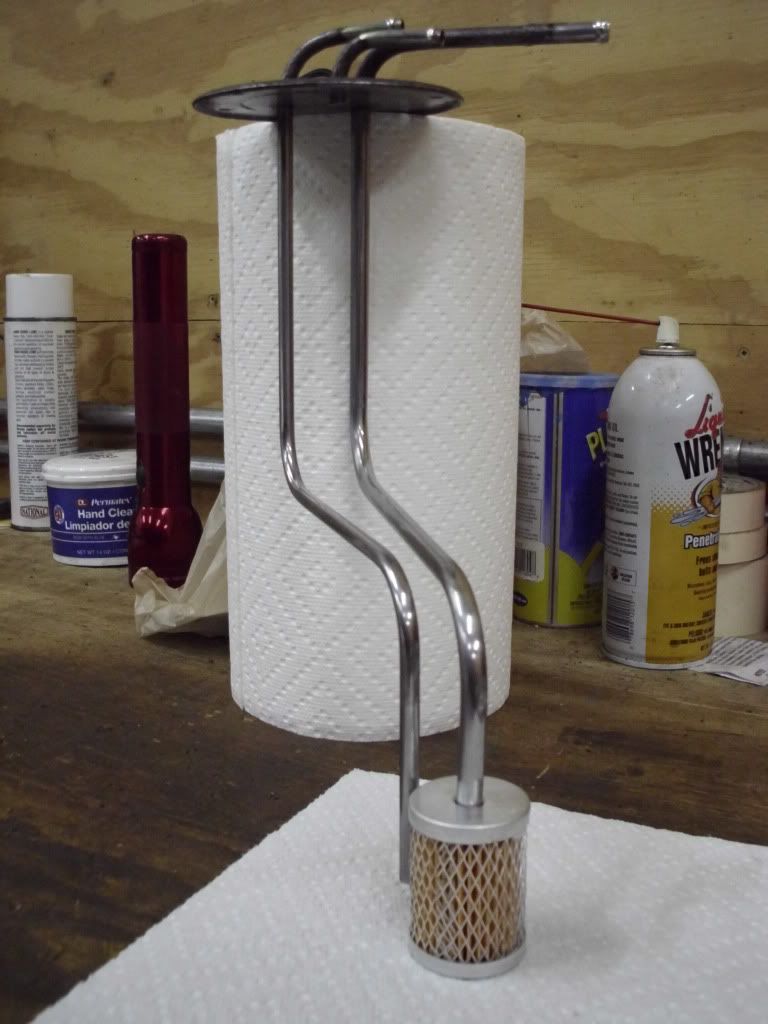
I also cleaned up the fuel components and ordered the fuel pick-up and fuel sender gaskets. As some of you may be aware, they have discontinued the in-tank fuel filter. I spent a good deal of time trying to hunt one down. In the end I found this guy at http://www.denniskirk.com/llp-mfg/in...7.prd/1817.sku After removing the little pipe sticking up, the 5/16th inch fuel line fit in perfectly. I just have to figure out how to attach it to the fuel line to keep it from moving or falling off. I spent about an hour trying to unclog the fuel pickup line. That old fuel climbed up in there and solidified quite effectively! Now to just get some replacement screws at Ace Hardware to reattach the components when the tank comes in.
Has anyone got any ideas about where to get the connector on the top of the fuel sender?

Well that's it for the time being. Not much progress unfortunately. Hopefully I can start wrenching on her soon. Have a good weekend everyone!
I got the parts in to rebuild the rear calipers. The "kit" consists of the o-rings. I've never rebuilt a caliper before. I hope that's everything I need, other than the different greases. I need to see if I can find the piston remover tool as well. I am still working on drilling out the rusted bolts that broke off. That is proving to be a lot harder then the other 100 bolts I've drilled.
After banging my head on the work bench for about five minutes trying to figure out the caliper drilling problem, I decided to take a break and work on something else for a little bit. I decided that the wheels needed some TLC.
I sanded down one rim with 220 grit, then dry sanded with 300, then wet sanded with 300 grit. I then polished it with a buffer wheel that mounts to my drill. (Not really impressed with a drill mounted buffer wheel - RPMs too slow)
The one rim turned out okay. I just bought some finer grit sandpaper and am going to try to get a good mirror finish on them. I need to remove the tire off the rim to do a good thorough job on the remaining rims.
I also cleaned up the fuel components and ordered the fuel pick-up and fuel sender gaskets. As some of you may be aware, they have discontinued the in-tank fuel filter. I spent a good deal of time trying to hunt one down. In the end I found this guy at http://www.denniskirk.com/llp-mfg/in...7.prd/1817.sku After removing the little pipe sticking up, the 5/16th inch fuel line fit in perfectly. I just have to figure out how to attach it to the fuel line to keep it from moving or falling off. I spent about an hour trying to unclog the fuel pickup line. That old fuel climbed up in there and solidified quite effectively! Now to just get some replacement screws at Ace Hardware to reattach the components when the tank comes in.
Has anyone got any ideas about where to get the connector on the top of the fuel sender?
Well that's it for the time being. Not much progress unfortunately. Hopefully I can start wrenching on her soon. Have a good weekend everyone!
Last edited by clykins; Sep 17, 2011 at 04:38 PM.
Thread Starter
Senior Member
iTrader: (1)
Joined: Aug 2010
Posts: 340
Likes: 0
From: Southern Minnesota and Southern California
The engine finally turned over. After 17 years of sitting idle its almost alive! I was having one hell of a time with the starter. After hooking it up correctly, or so I thought, it wouldn't turn over. It would just click. The S terminal wire was only putting out about 0.5V. My seven years of math class told me that that was a lot less than the 8V minimum that the FSM said it needed. Long story short, I had the negative cable from the battery hooked up to the starter. Oops. After mounting that on the bellhousing bolt that holds the starter on and grounding out the negative cable on the strut tower correctly, the starter started working like it should. I never understood the importance of the ground. I read a wonderful write up by Aaroncake at httP://aaronake.net/rx-7/grounding.htm Thanks Aaroncake! Great write up!
Still got some work to do, obviously, but its one step closer.
I noticed a leak coming out of the water pump, so I've ordered a replacement from Autozone. Should be in Thursday. I am hoping to install it Friday night. I will also need to order a replacement coolant temperature sensor on the back of the water pump and the coolant level sensor on top of the radiator. Too bad they cost about $80 a piece
I also ordered one of the rear calipers and 2 of the 3 emergency brake cables. One more to go. I ordered the semi-loaded caliper from an ebay dealer called R1 Concepts for $102 a piece (comes with the bracket - hense "semi-loaded") I ordered one at a time to make sure that they are the right size and of good quality. (http://cgi.ebay.com/ebaymotors/PREMI...item5ae2ae7bb6)
I am thinking that I will just install the fuel tank with the broken fuel sender for the time being. I can replace it at a later date. I will replace the screws and add some anti-sieze so they will be easier to remove next time. The sender has never worked. I don't want to invest the money in a new sender at this time. One project at a time.
Why am I doing this?
Joined: Aug 2011
Posts: 356
Likes: 1
From: GA
I'm subscribed! Love the thread, keep it going, good luck with gettin the rotors spinning!
The engine finally turned over. After 17 years of sitting idle its almost alive! I was having one hell of a time with the starter. After hooking it up correctly, or so I thought, it wouldn't turn over. It would just click. The S terminal wire was only putting out about 0.5V. My seven years of math class told me that that was a lot less than the 8V minimum that the FSM said it needed. Long story short, I had the negative cable from the battery hooked up to the starter. Oops. After mounting that on the bellhousing bolt that holds the starter on and grounding out the negative cable on the strut tower correctly, the starter started working like it should. I never understood the importance of the ground. I read a wonderful write up by Aaroncake at httP://aaronake.net/rx-7/grounding.htm Thanks Aaroncake! Great write up!
Still got some work to do, obviously, but its one step closer.
I noticed a leak coming out of the water pump, so I've ordered a replacement from Autozone. Should be in Thursday. I am hoping to install it Friday night. I will also need to order a replacement coolant temperature sensor on the back of the water pump and the coolant level sensor on top of the radiator. Too bad they cost about $80 a piece
I also ordered one of the rear calipers and 2 of the 3 emergency brake cables. One more to go. I ordered the semi-loaded caliper from an ebay dealer called R1 Concepts for $102 a piece (comes with the bracket - hense "semi-loaded") I ordered one at a time to make sure that they are the right size and of good quality. (http://cgi.ebay.com/ebaymotors/PREMI...item5ae2ae7bb6)
I am thinking that I will just install the fuel tank with the broken fuel sender for the time being. I can replace it at a later date. I will replace the screws and add some anti-sieze so they will be easier to remove next time. The sender has never worked. I don't want to invest the money in a new sender at this time. One project at a time.
Still got some work to do, obviously, but its one step closer.
I noticed a leak coming out of the water pump, so I've ordered a replacement from Autozone. Should be in Thursday. I am hoping to install it Friday night. I will also need to order a replacement coolant temperature sensor on the back of the water pump and the coolant level sensor on top of the radiator. Too bad they cost about $80 a piece
I also ordered one of the rear calipers and 2 of the 3 emergency brake cables. One more to go. I ordered the semi-loaded caliper from an ebay dealer called R1 Concepts for $102 a piece (comes with the bracket - hense "semi-loaded") I ordered one at a time to make sure that they are the right size and of good quality. (http://cgi.ebay.com/ebaymotors/PREMI...item5ae2ae7bb6)
I am thinking that I will just install the fuel tank with the broken fuel sender for the time being. I can replace it at a later date. I will replace the screws and add some anti-sieze so they will be easier to remove next time. The sender has never worked. I don't want to invest the money in a new sender at this time. One project at a time.
Thread Starter
Senior Member
iTrader: (1)
Joined: Aug 2010
Posts: 340
Likes: 0
From: Southern Minnesota and Southern California
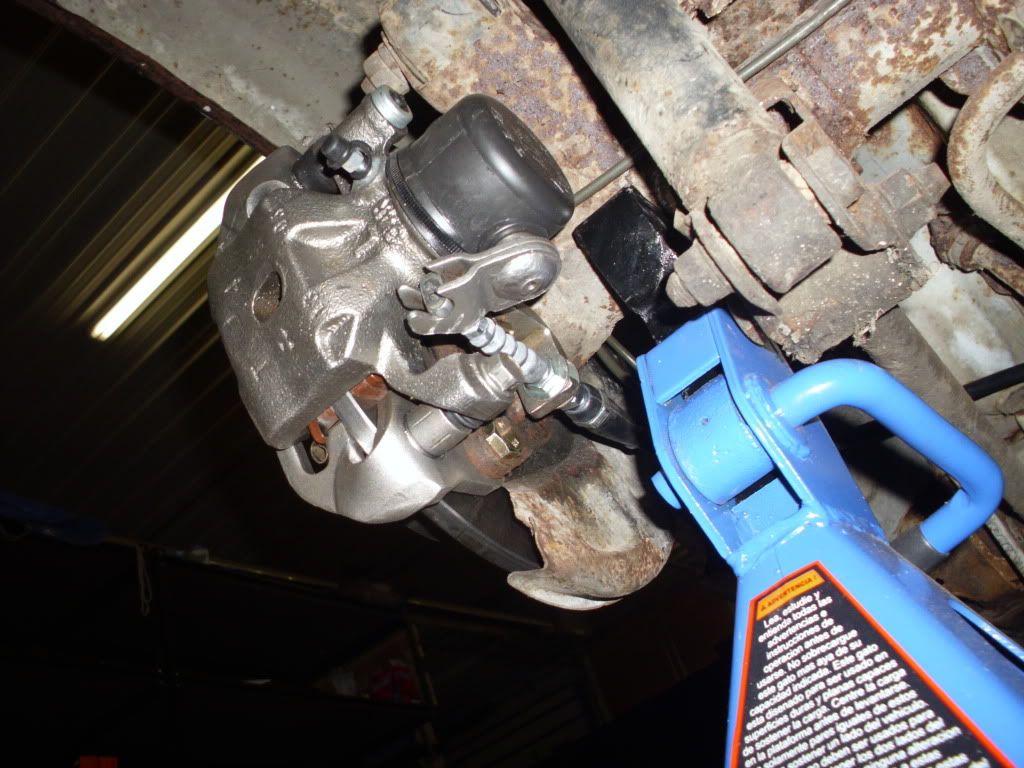
The other day a present came in the mail for me - the driver's side rear brake caliper:
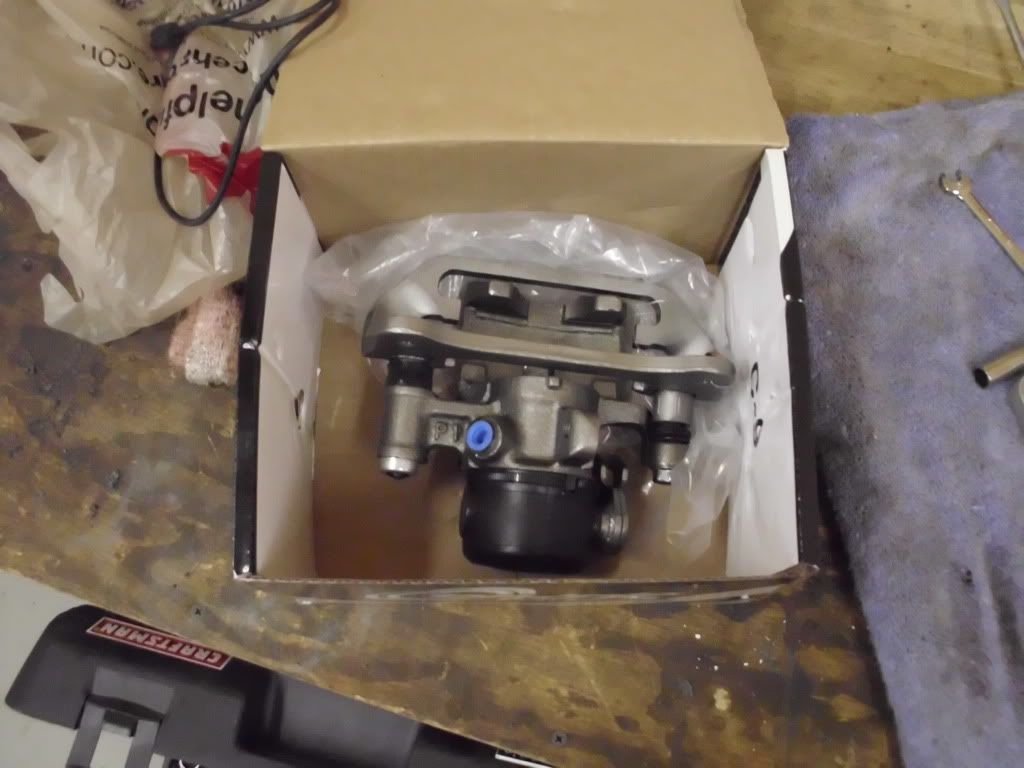
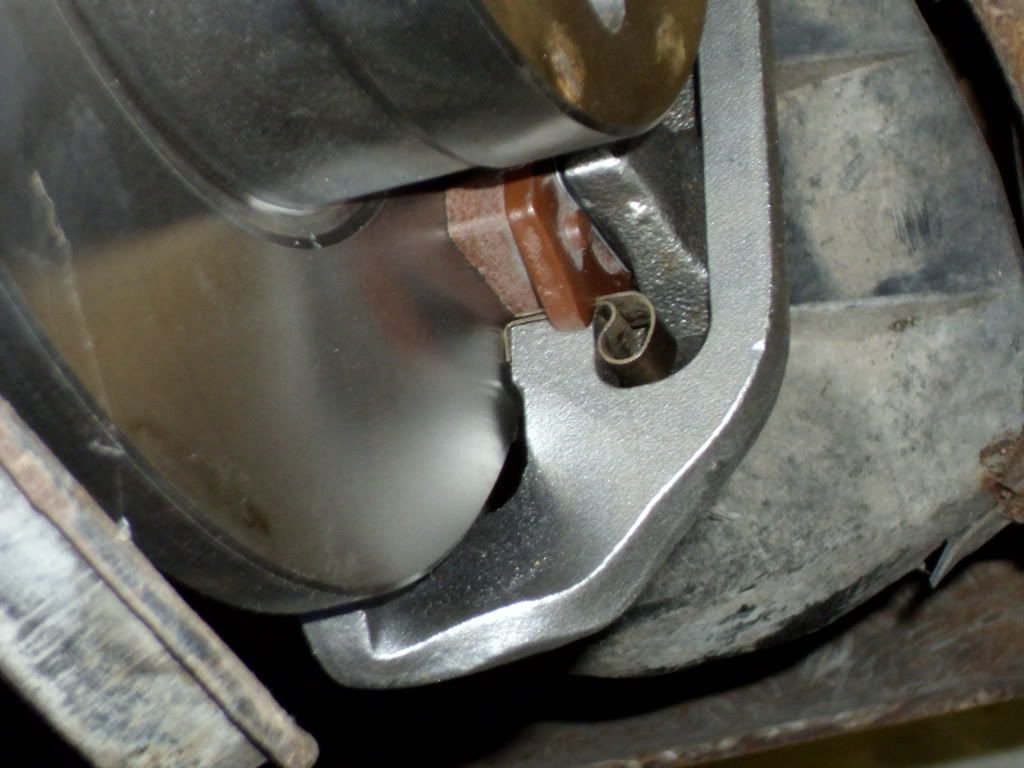
I ordered one at a time because I wanted to make sure they fit. I was expecting it to be way off, but was surprised that the hardware, brake pads and the new bracket all fit nearly perfectly :
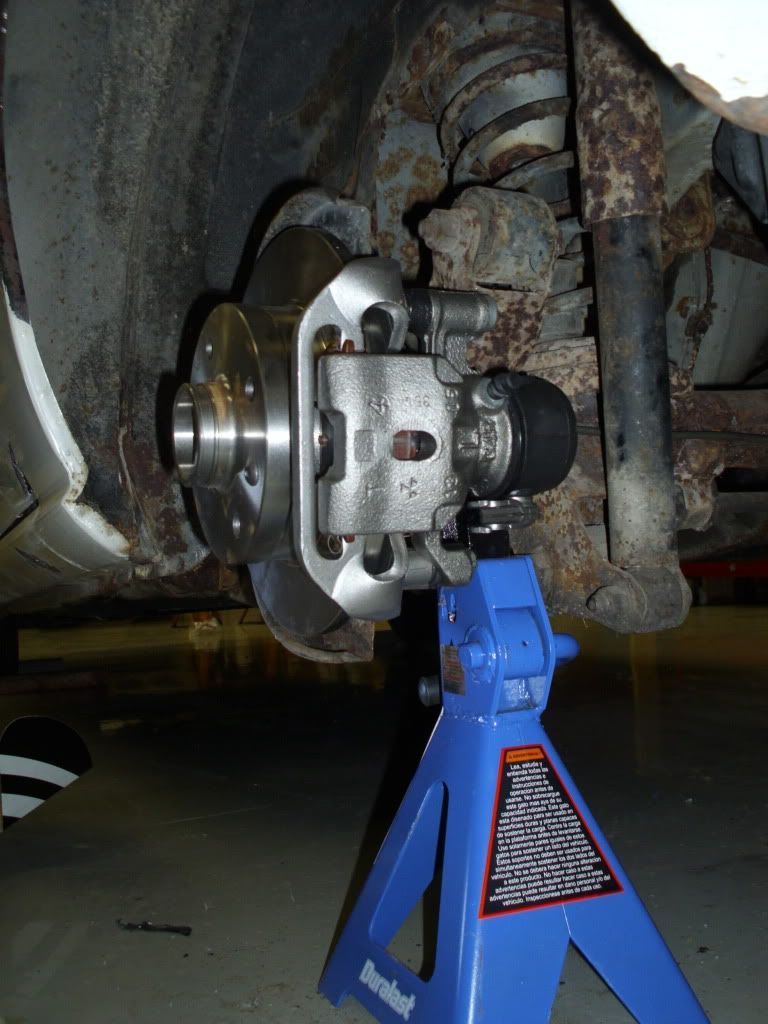

The only "fly in the ointment" was that the lower end of the bracket slightly touches the rotor. I filed a little down, however I think I will need to add a tiny shim to get it into the correct position.
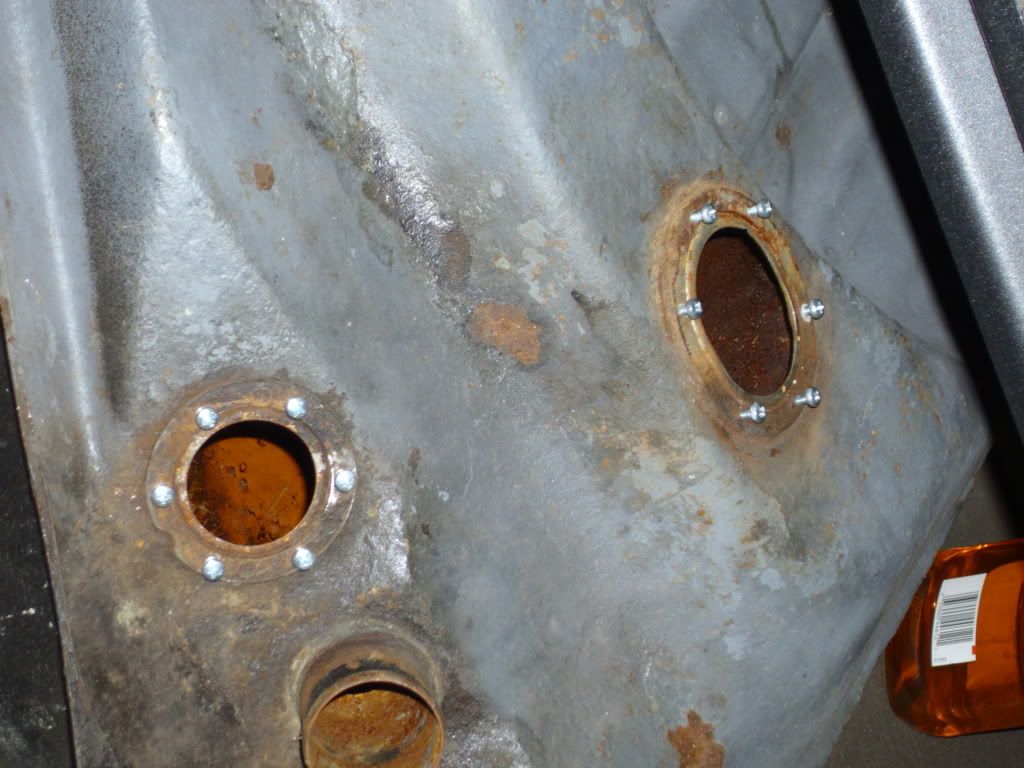
I also drilled and retapped the screw holes for the fuel tank sender unit and the pickup.
Earlier I tried to put off replacing the brake lines, but my 7 decided she wouldn't have that so they are almost completely replaced. I also thought I'd hold off on resealing the new (used) fuel tank I bought. I did a quick water test just to make sure she held water... she didn't. Oh well. Guess I'll be resealing the fuel tank after all, lol. With all the rust in the tank it would probabl have been a bad idea anway.
I also got the new water pump in and the radiator filled up. No leaking By the way, is there suppose to be a coolent temperature sensor on the bottom of the radiator? I ended up with an extra sensor which I labeled "radiator", but can't find an electrical hookup near the bottom of the radiator where I suspect it should go.
Have a good week guys!
I ordered one at a time because I wanted to make sure they fit. I was expecting it to be way off, but was surprised that the hardware, brake pads and the new bracket all fit nearly perfectly :
The only "fly in the ointment" was that the lower end of the bracket slightly touches the rotor. I filed a little down, however I think I will need to add a tiny shim to get it into the correct position.
I also drilled and retapped the screw holes for the fuel tank sender unit and the pickup.
Earlier I tried to put off replacing the brake lines, but my 7 decided she wouldn't have that so they are almost completely replaced. I also thought I'd hold off on resealing the new (used) fuel tank I bought. I did a quick water test just to make sure she held water... she didn't.
Oh well. Guess I'll be resealing the fuel tank after all, lol. With all the rust in the tank it would probabl have been a bad idea anway. I also got the new water pump in and the radiator filled up. No leaking
By the way, is there suppose to be a coolent temperature sensor on the bottom of the radiator? I ended up with an extra sensor which I labeled "radiator", but can't find an electrical hookup near the bottom of the radiator where I suspect it should go. Have a good week guys!

Junior Member
Joined: Oct 2011
Posts: 28
Likes: 0
From: Spring Valley, CA
I'm loving this restoration project, it's giving me more ideas of what I'll need to do when I eventually get my own 1st gen RX7. Keep up the amazing work. Looks like you have a decent amount of rust in the wheel wells, are you planning on dropping the rear axle?
I just picked up a turbo SA22 also and Im loving this thread! For someone who isnt a mechanic, I really have to give you a round of applause. Ive seen so many people do things wrong in TOO MANY WAYS, but you really get things done right. The first time too!
Thread Starter
Senior Member
iTrader: (1)
Joined: Aug 2010
Posts: 340
Likes: 0
From: Southern Minnesota and Southern California
I woud really love to, however I am running out of time. I need to get this completed soon. I am trying to move everything out to my home in California, so I have to limit the scope of this restoration. Once I get it to LA and into a garage I can work in I would like to take care of the rear axle. It really needs some TLC... and a wire brush.
Thread Starter
Senior Member
iTrader: (1)
Joined: Aug 2010
Posts: 340
Likes: 0
From: Southern Minnesota and Southern California
Thanks Masa 3100.
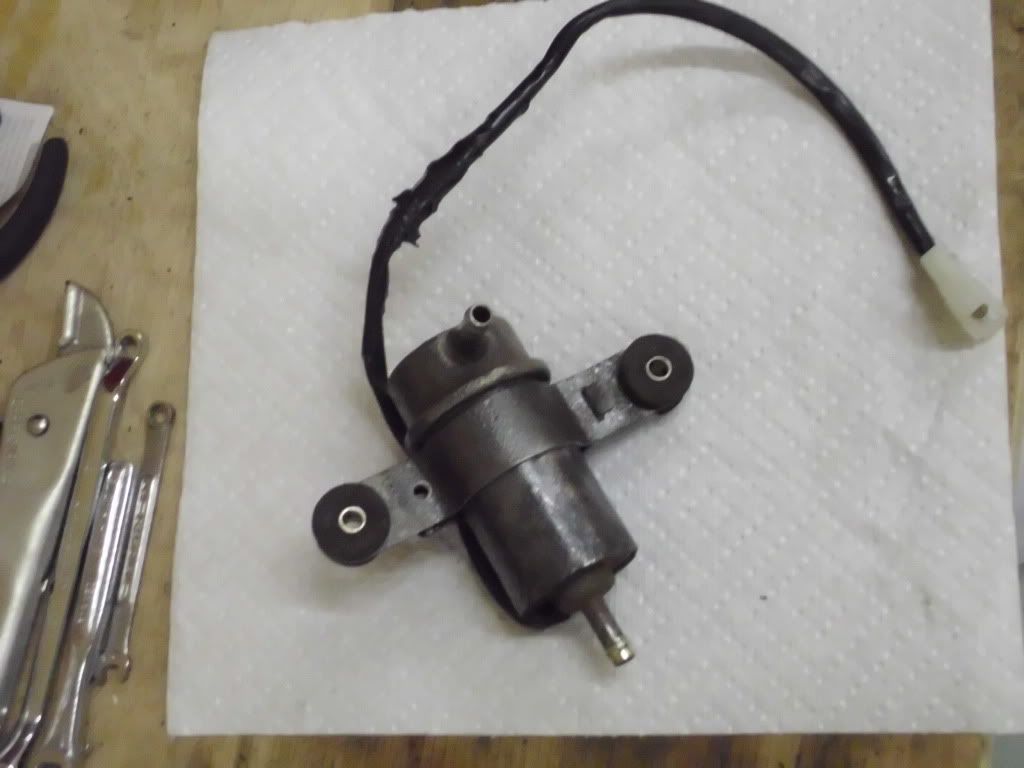
Slight delay while I get the funds together to repair the fuel tank. I thought I'd check the rest of the fuel system while I am waiting. I opened up the cover for the fuel pump and found an interesting problem. Other than being covered in rust, the electrical connection was severed. I pulled the fuel pump out, cleaned it up, soldered the wire back together and sealed it up. Then I tested it. Although I didn't check it to make sure it met the pressurization and volume quantities mentioned in the FSM, it looked like it was working quite well. Of course with every removal comes more broken bolts and parts to clean up, so there is a little bit of stuff left to clean and replace before I reinstall the fuel pump. However without a fuel tank there seems to be little hurry.
I've also been working on the emergency brake. I think I mentioned earlier that as I was removing the cable from the caliper during disassembly, the cable disintegrated in my hands... something tells me it wouldn't be very reliable. So I have replaced the driver's side cable so far.
Last edited by clykins; Oct 12, 2011 at 03:06 PM. Reason: Spelling
Thread Starter
Senior Member
iTrader: (1)
Joined: Aug 2010
Posts: 340
Likes: 0
From: Southern Minnesota and Southern California
Oh yeah I also got the headlights working. Turns out that I had a bad ground (post on September 27th). Now to go back and check my other grounds. The high beams don't work yet. I will get to that soon. One project at a time... or three at a time rather.
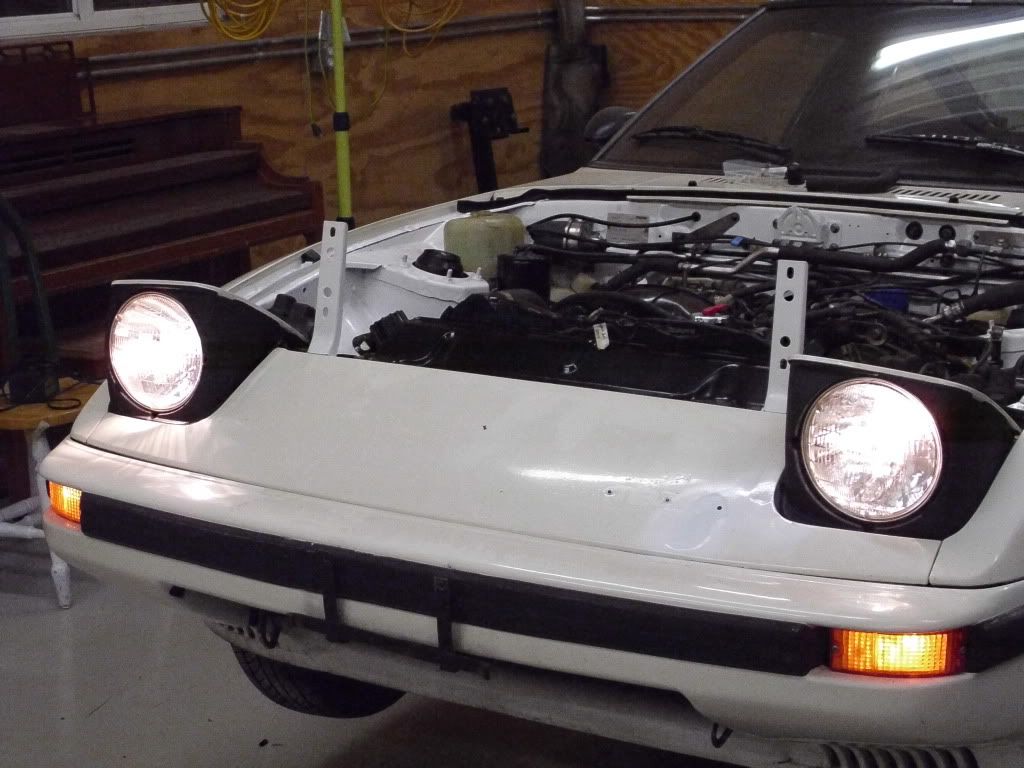
Ohhhhh shiny
Ohhhhh shiny
Last edited by clykins; Oct 12, 2011 at 03:22 PM.
Thread Starter
Senior Member
iTrader: (1)
Joined: Aug 2010
Posts: 340
Likes: 0
From: Southern Minnesota and Southern California
Great news! After 17 years of sitting and over a year of work, she is back from the grave! Although not completely off life-support, she did start. I am still troubleshooting the fuel pump. So far there is only a little over 9 volts being delivered to the pump in the start position. I poured some fuel down the carburetor and she fired up! I will post a video of this exciting development this evening. Still some wirk to do, but at long last I have brought her back to life! :-) I can't wait to drive her!
Thread Starter
Senior Member
iTrader: (1)
Joined: Aug 2010
Posts: 340
Likes: 0
From: Southern Minnesota and Southern California
Video proof she's alive... almost
Here it is. (Commentary by a friend of mine.)
The loud noise at the end was a wrench that fell from the vibrations. Thought I'd destroyed something at first! Oh and there is no exhaust on it right now, lol.
The loud noise at the end was a wrench that fell from the vibrations. Thought I'd destroyed something at first! Oh and there is no exhaust on it right now, lol.
Last edited by clykins; Oct 17, 2011 at 10:00 PM.
Thread Starter
Senior Member
iTrader: (1)
Joined: Aug 2010
Posts: 340
Likes: 0
From: Southern Minnesota and Southern California
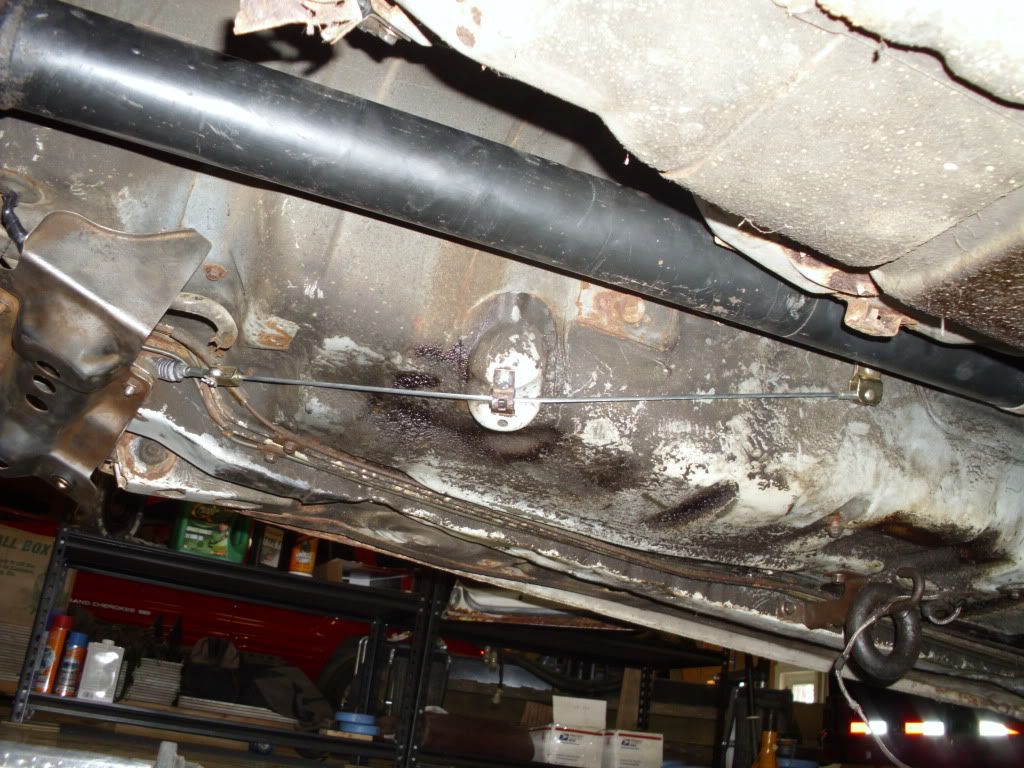
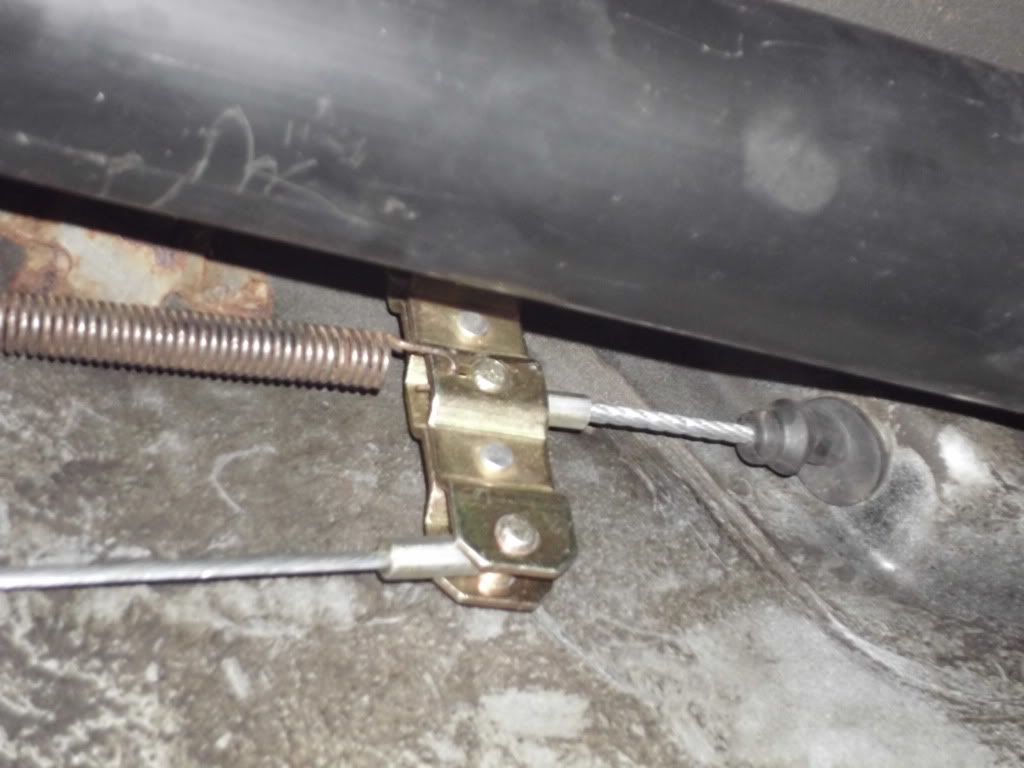
Parking Brake completed almost
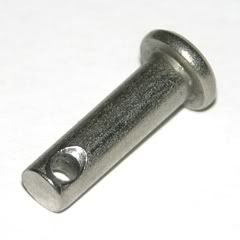
I spent nearly two weeks trying to track down a metric clevis pin to complete the parking brake cable assembly. After two weeks I have come to the conclusion that there are no 6mm clevis pins in the United States. Oh well. I didn't want to reuse the old ones, but that is what I ended up doing.
So at last the parking brake cables are completely assembled. I have yet to adjust the parking brake. I am waiting until I get the brake lines completed.
I've decided to remove the brake lines and have the ends professionally flared. I can't seem to get it done right with the tool that I have. Oh well. The only other possible conclusion is that the fittings are not correct.
I also spent a good hour trying to fix the fuel pump. Right now nothing is happening. I had removed the fuel pump last month and connected it directly to the battery and it worked just fine. When I reconnected it in place, however it doesn't seem to work. There are only 9.9V being supplied to it when the key is in the start position. I assume that it needs the standard 12V. I have not ruled out that the fuel pump may not be working any longer. I think I will retest it. I have not tested it since I resoldered the wires together.
Well slow progress, but its coming along. I have played the video of her firing off, that I posted, at least a thousand times, lol. I am looking forward to hearing her running for longer than 3 seconds.
Have a good weekend everyone!
Last edited by clykins; Oct 30, 2011 at 08:26 PM.
Thread Starter
Senior Member
iTrader: (1)
Joined: Aug 2010
Posts: 340
Likes: 0
From: Southern Minnesota and Southern California
I pulled the fuel pump again and retested it. I was right. The fuel pump is toast. I am guessing that the wires are so brittle that they came loose in the motor. Oddly though there was still continuity. Oh well. The new fuel pump is on its way.
I also installed my lower temperature sensor in the radiator.
I tested the windshield wipers. I think the motor is shot. Its getting juice. Decided to put that on the back burner for now though. That was it for today.
I also installed my lower temperature sensor in the radiator.
I tested the windshield wipers. I think the motor is shot. Its getting juice. Decided to put that on the back burner for now though. That was it for today.
In Love with a GS
Joined: May 2009
Posts: 171
Likes: 0
From: Mid Northern Indiana
You might try disconnecting the motor and testing it off of the assembly, mine stopped working one day and it ended up being because the assembly was bound up by rust in the joints
Thread Starter
Senior Member
iTrader: (1)
Joined: Aug 2010
Posts: 340
Likes: 0
From: Southern Minnesota and Southern California
Good point guys. I will give that a shot. I have heard that Rainex by itself works better then wipers... Of course it wouldn't work well against ice. The fuel pump should be in tomorrow. Let me get this thing running first. I won't need the wipers before that :-)
Did a little bit of work on the hood yesterday. It had some rust where the hinge connects. I sanded it down really well and put a shot of primer on. I ran out of time. Hopefully I should be able to finish painting the hood tomorrow evening or Saturday morning. Need some more paint first.
Did a little bit of work on the hood yesterday. It had some rust where the hinge connects. I sanded it down really well and put a shot of primer on. I ran out of time. Hopefully I should be able to finish painting the hood tomorrow evening or Saturday morning. Need some more paint first.