
Bringing it back to life


Thread Starter
Senior Member
iTrader: (1)
Joined: Aug 2010
Posts: 340
Likes: 0
From: Southern Minnesota and Southern California
Thanks Justin! You rock. I just have to stop by the dealership and pick up my tanny mount and then I should be able to install the motor this next week  Can't wait!
Can't wait!
Thread Starter
Senior Member
iTrader: (1)
Joined: Aug 2010
Posts: 340
Likes: 0
From: Southern Minnesota and Southern California
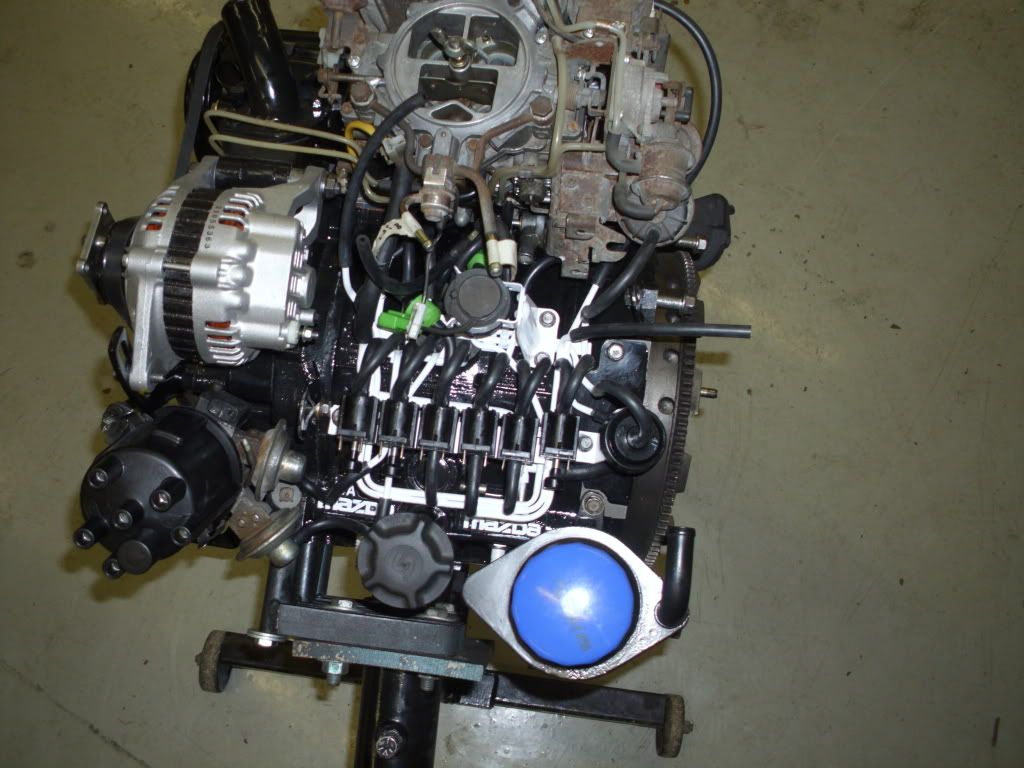
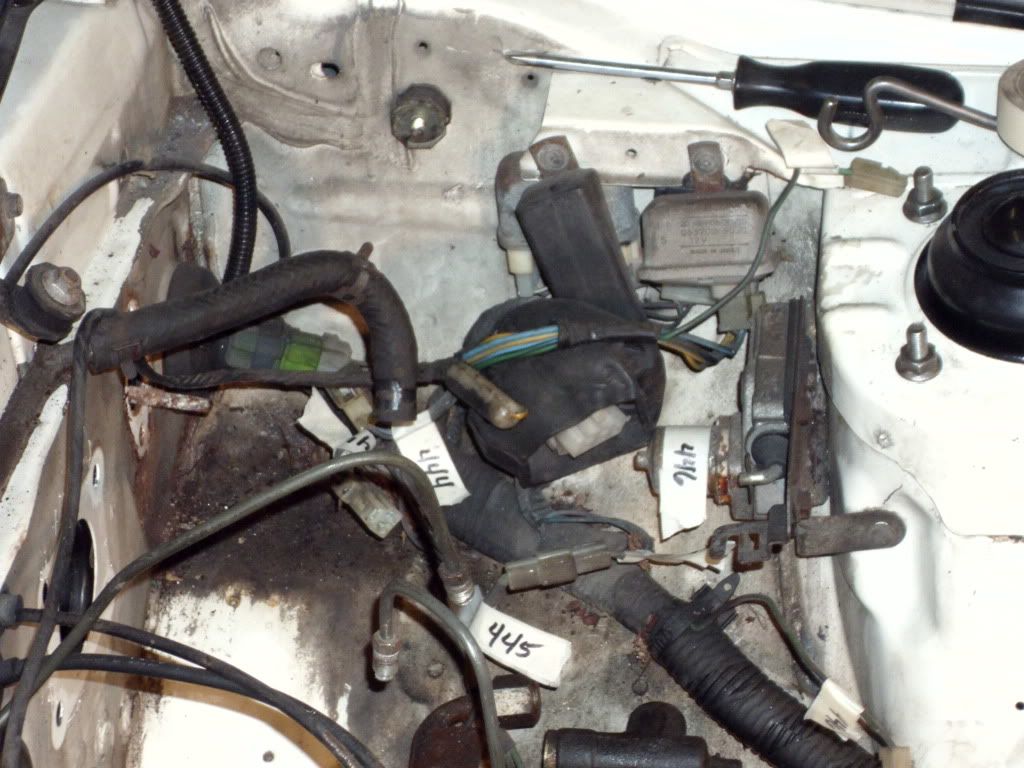
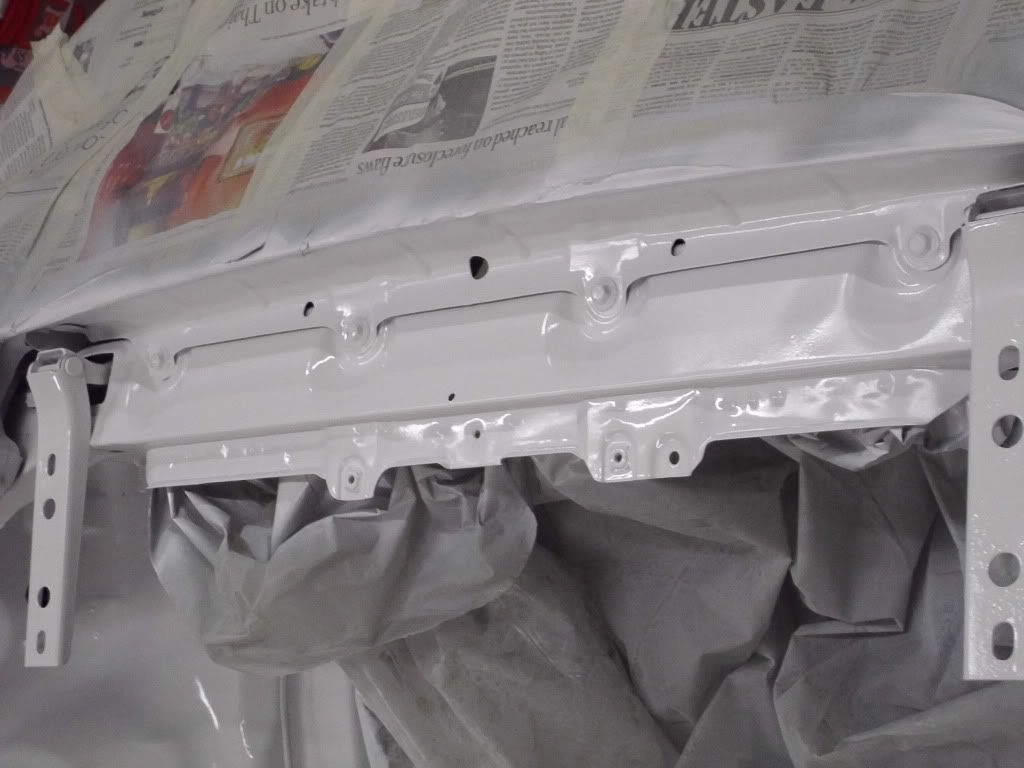
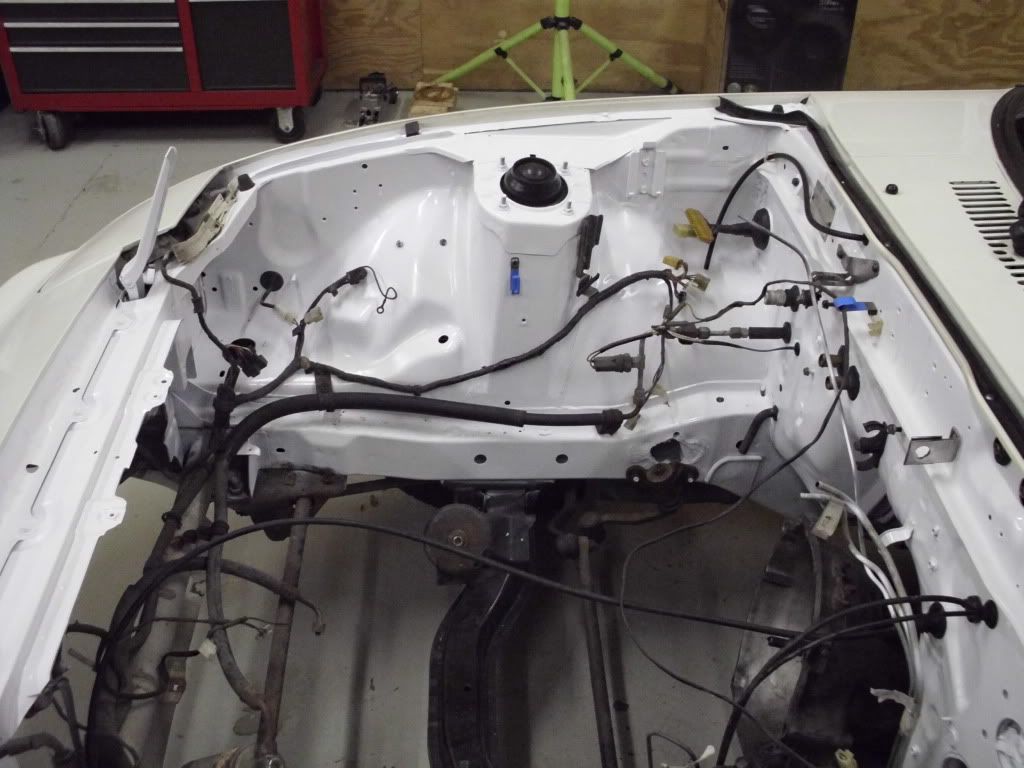
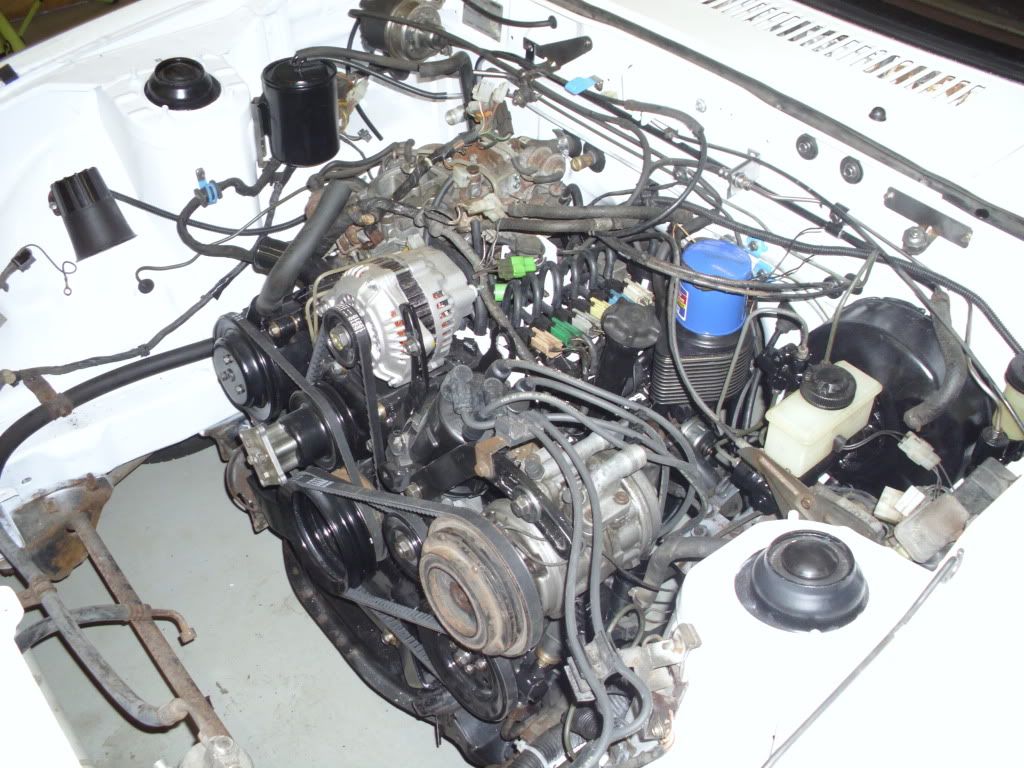
Well I am making slow progress. I have the rats nest cleaned up, painted and installed along with all new vacuum hoses. I just have one hose left to figure out where it goes. On the rats next diagram in the FSM it shows the hose disappearing into nowhere.

Here is what I've done;
By the way, thanks a lot to Justin and Mark for the parts to get the rats nest back together!
I also managed to find a B.F.t.W for the 325 ft/lbs of torque needed for the flywheel nut.
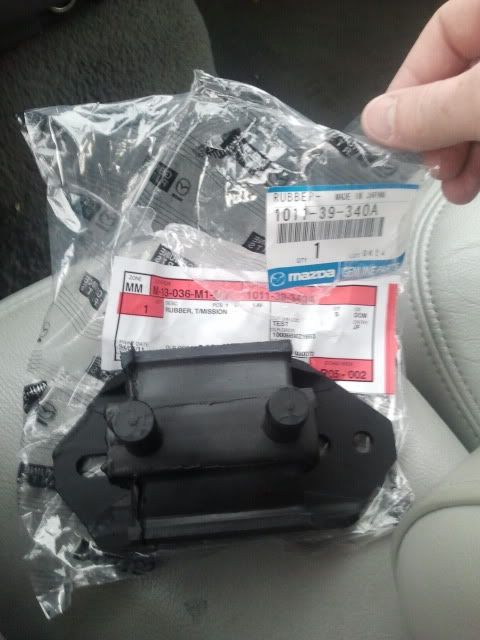
I also got a replacement tranny mount from a local mazda dealer. I had busted the bolts right off.
I got the new air control valve installed as well.
And got the rest of the pulley cleaned and painted.
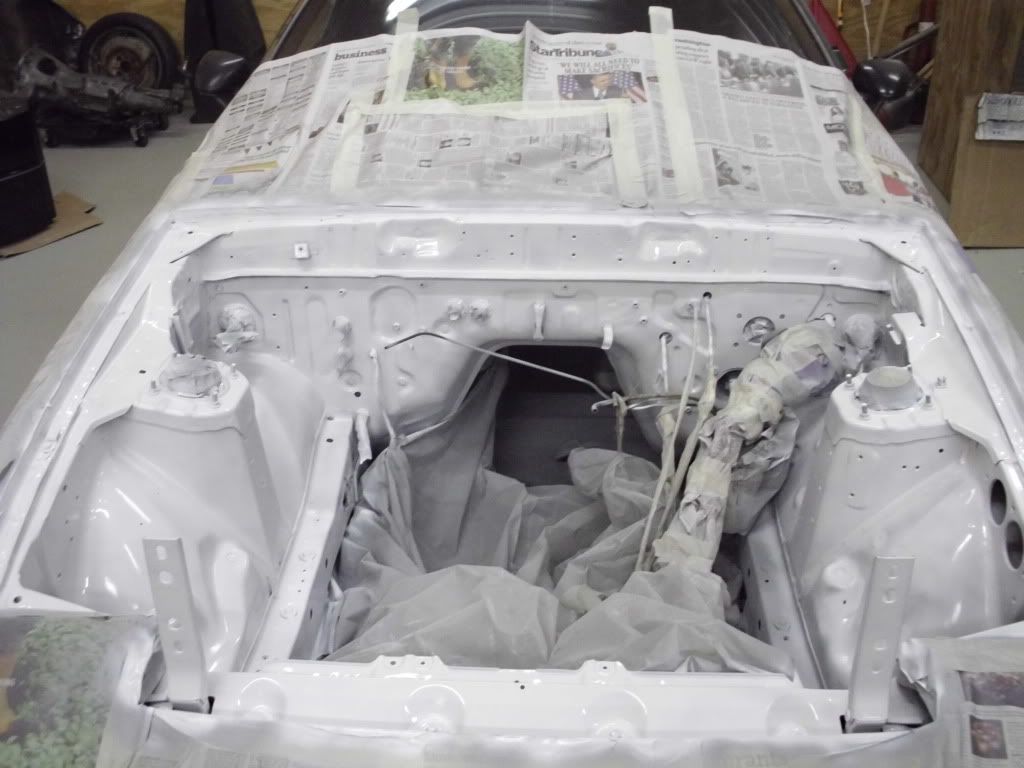
While I have the engine out, I thought should touch up the engine bay so I spent last week cleaning, sanding and washing the engine bay to get it ready for a fresh coat of paint. I still have to mask everything off, including the front wiring harness I can't disconnect But I will do that on Thursday and at least get the primer on. If they don't call me to work on Friday, I will get the engine bay painted. I'm looking forward to seeing it all cleaned and painted. Here is what it looked like before;
I am planning on installing the engine next week. I've got a cherry picker reserved and a couple people to help me, hopefully. I will post some pictures of the engine bay in the next couple days. I had a couple of more pictures but I left my camera in Minnesota, oops.
Here is what I've done;
By the way, thanks a lot to Justin and Mark for the parts to get the rats nest back together!
I also managed to find a B.F.t.W for the 325 ft/lbs of torque needed for the flywheel nut.
I also got a replacement tranny mount from a local mazda dealer. I had busted the bolts right off.
I got the new air control valve installed as well.
And got the rest of the pulley cleaned and painted.
While I have the engine out, I thought should touch up the engine bay so I spent last week cleaning, sanding and washing the engine bay to get it ready for a fresh coat of paint. I still have to mask everything off, including the front wiring harness I can't disconnect
But I will do that on Thursday and at least get the primer on. If they don't call me to work on Friday, I will get the engine bay painted. I'm looking forward to seeing it all cleaned and painted. Here is what it looked like before;I am planning on installing the engine next week. I've got a cherry picker reserved and a couple people to help me, hopefully. I will post some pictures of the engine bay in the next couple days. I had a couple of more pictures but I left my camera in Minnesota, oops.


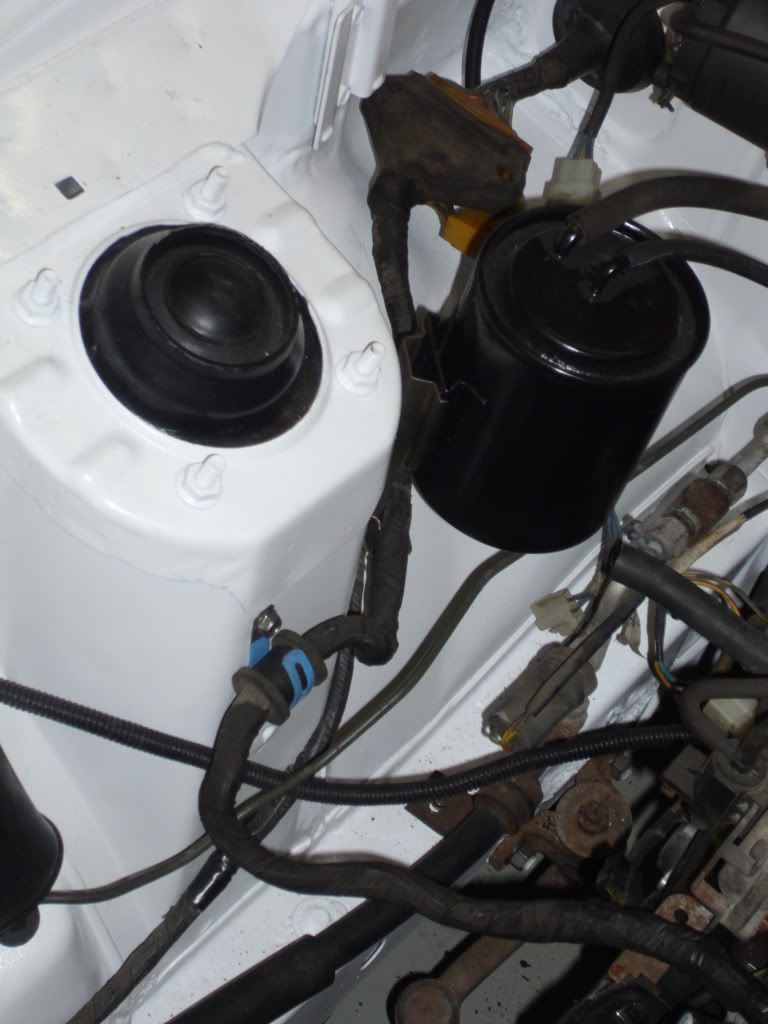
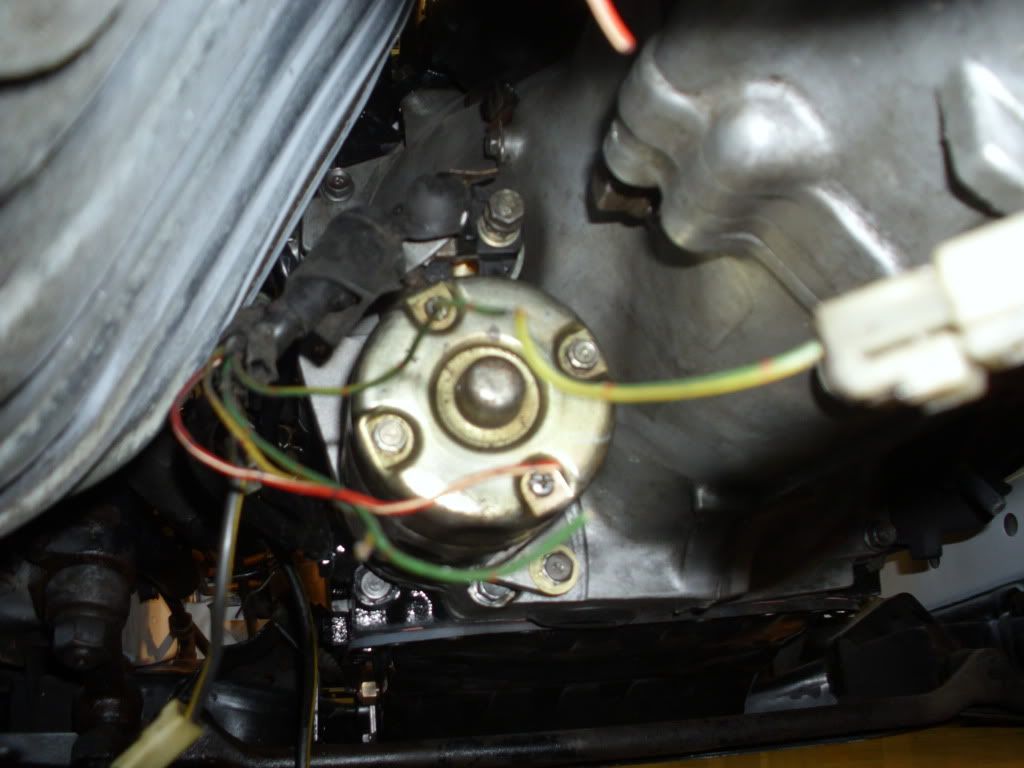
rats nest line
I think that line that dissapears into nowhere goes to a a/c comp valve on the carb, deleted all that on mine so not to sure. But looks like if you follow it back to rats nest it goes to a/c plug.
Car is looking great btw, nice work on restoring her.
Car is looking great btw, nice work on restoring her.
Thread Starter
Senior Member
iTrader: (1)
Joined: Aug 2010
Posts: 340
Likes: 0
From: Southern Minnesota and Southern California
Well I made a little more headway Thursday and Friday. During an abnormally warm day last week I rolled the 7 out under the sun and washed her down, including the engine bay. I removed the headlight motors and the odds and ends of bolts, gromets and weather striping in the engine bay. I spent a small fortune on newspaper ($3.00) and another small fortune on masking tape ($4.00) and prepped the engine bay on Thursday. I managed to get one coat of primer on before heading to bed.
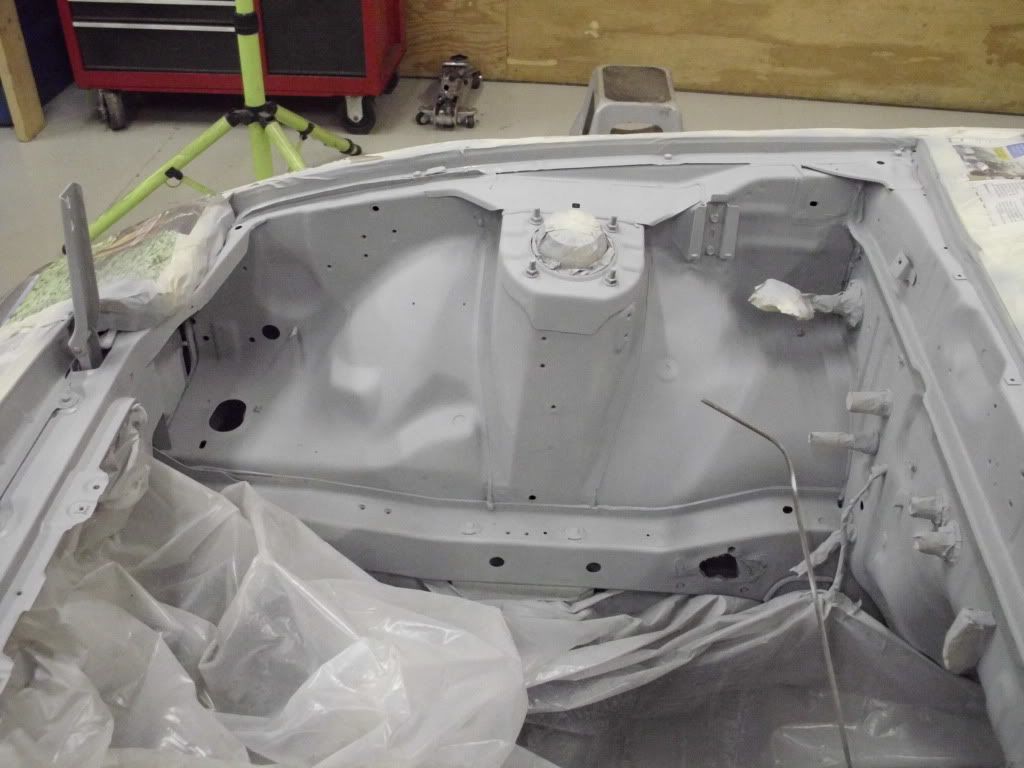
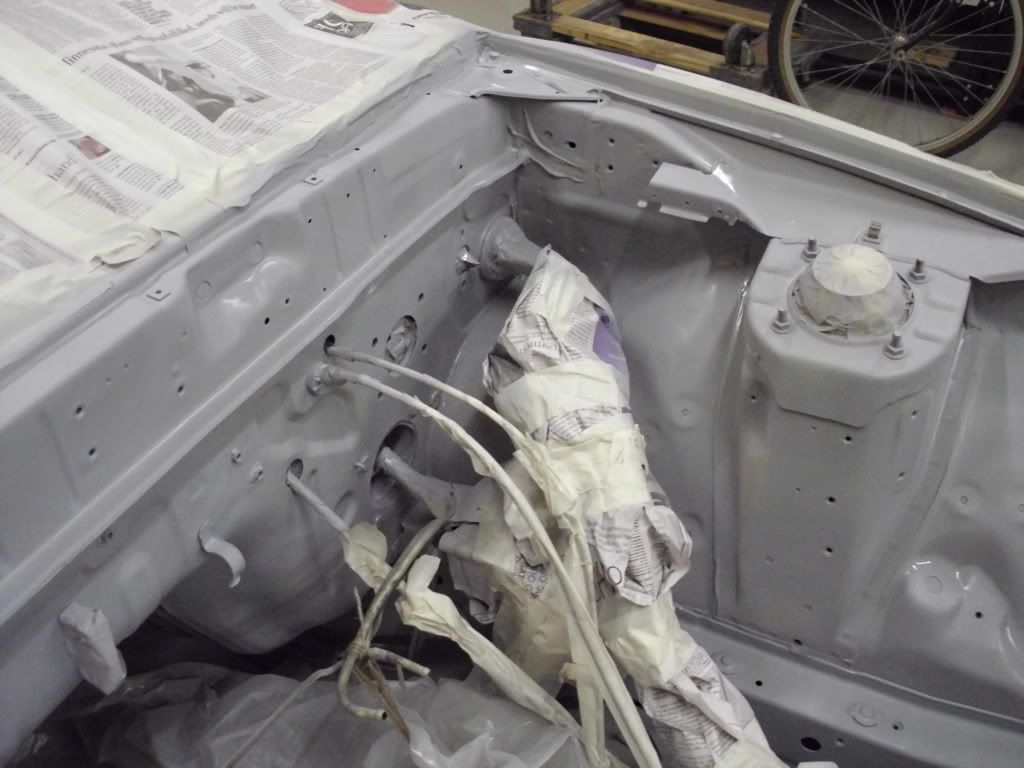
Friday I got up early and got a total of three coats of primer on. I was going to leave it until I got back next week to start putting on the white paint, but I had to see what it would look like, so I put on one coat of white as well before I had to run to work.
Stop me if you've heard this one, what is black, white and "red" all over? ...
Some of the primer is still peaking throught the first thin coat of white, but I am really happy with how its turning out. I'll put a couple coats of white, wet sand it, then throw on a couple coats of a clear enamel to hopefully keep it from coming off easily. Then lets hope I can remember where all the little parts go
I will finish painting the engine bay this coming Thursday and hopefully be ready to put the engine back in the following week. Got a replacement oil cooler line that I've got to install as well.
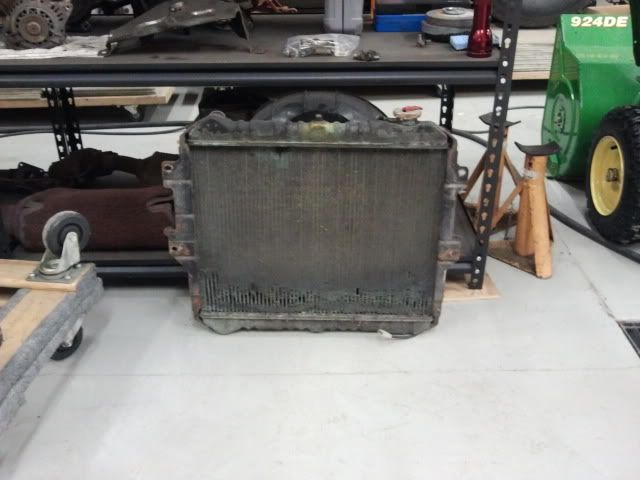
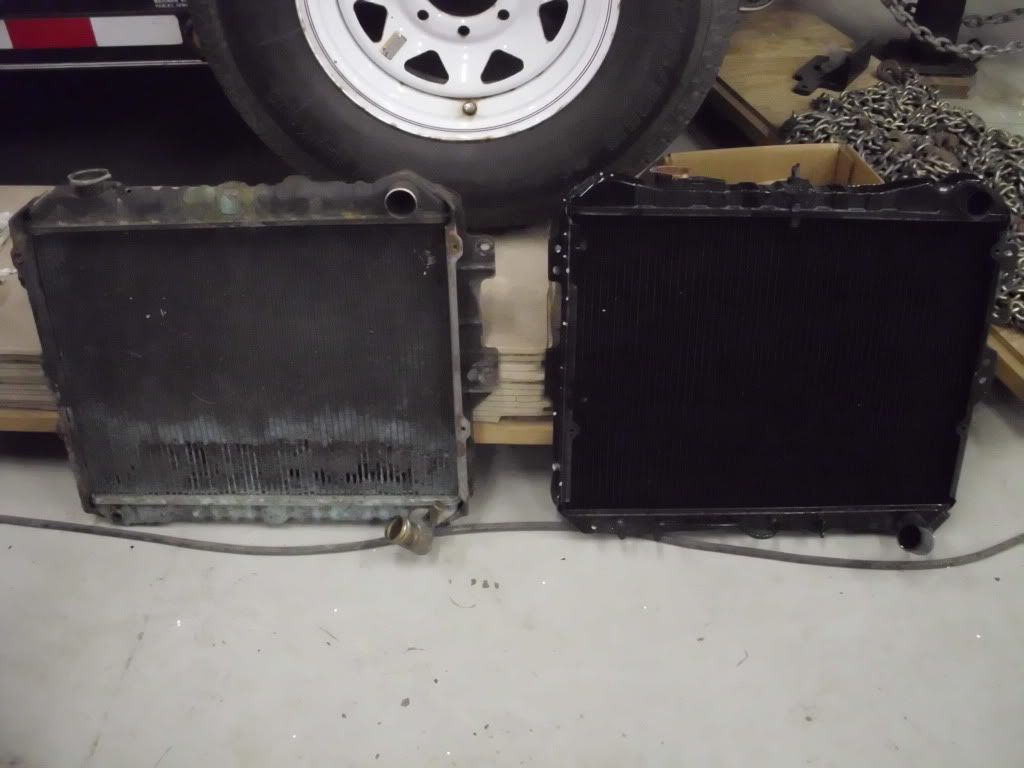
I just purchased a new radiator from Autozone. That should be in by the time I get back. My last one is now good for a large drink coaster and that's about it.
Well everyone have a good weekend.
Friday I got up early and got a total of three coats of primer on. I was going to leave it until I got back next week to start putting on the white paint, but I had to see what it would look like, so I put on one coat of white as well before I had to run to work.
Stop me if you've heard this one, what is black, white and "red" all over? ...
Some of the primer is still peaking throught the first thin coat of white, but I am really happy with how its turning out. I'll put a couple coats of white, wet sand it, then throw on a couple coats of a clear enamel to hopefully keep it from coming off easily. Then lets hope I can remember where all the little parts go
I will finish painting the engine bay this coming Thursday and hopefully be ready to put the engine back in the following week. Got a replacement oil cooler line that I've got to install as well.
I just purchased a new radiator from Autozone. That should be in by the time I get back. My last one is now good for a large drink coaster and that's about it.
Well everyone have a good weekend.
Last edited by clykins; Apr 16, 2011 at 05:02 AM.
Thread Starter
Senior Member
iTrader: (1)
Joined: Aug 2010
Posts: 340
Likes: 0
From: Southern Minnesota and Southern California
Thread Starter
Senior Member
iTrader: (1)
Joined: Aug 2010
Posts: 340
Likes: 0
From: Southern Minnesota and Southern California
Alright the easy part is done. It doesn't take too much talent to tear the car apart. Now lets see if I can put it back together.
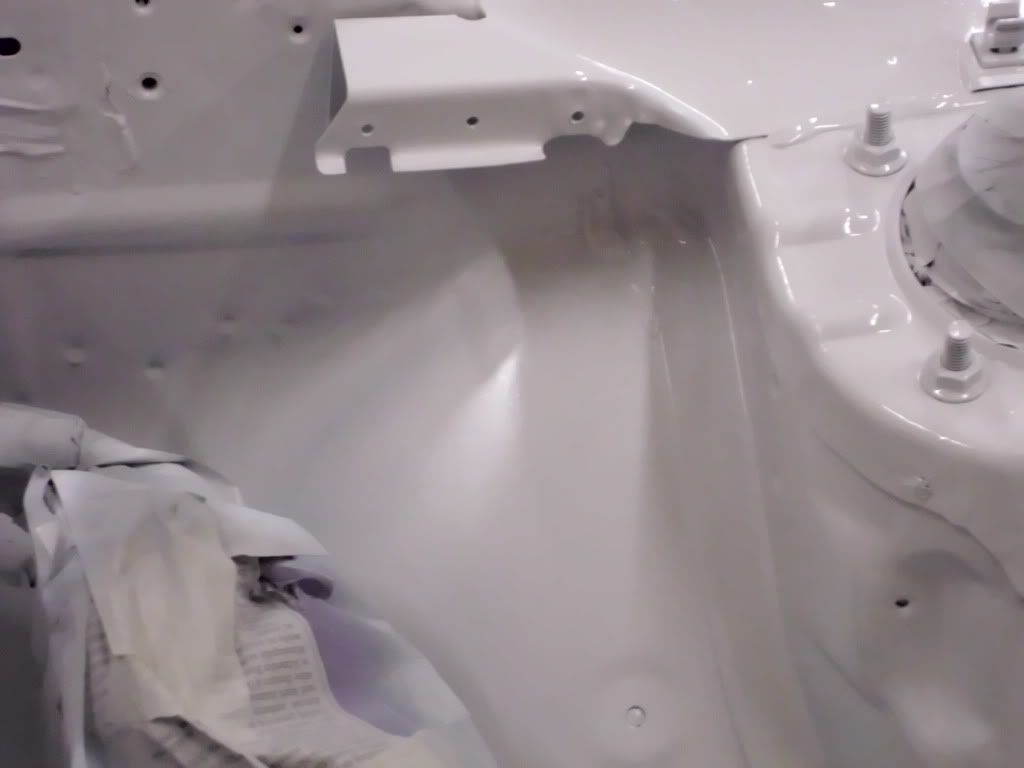
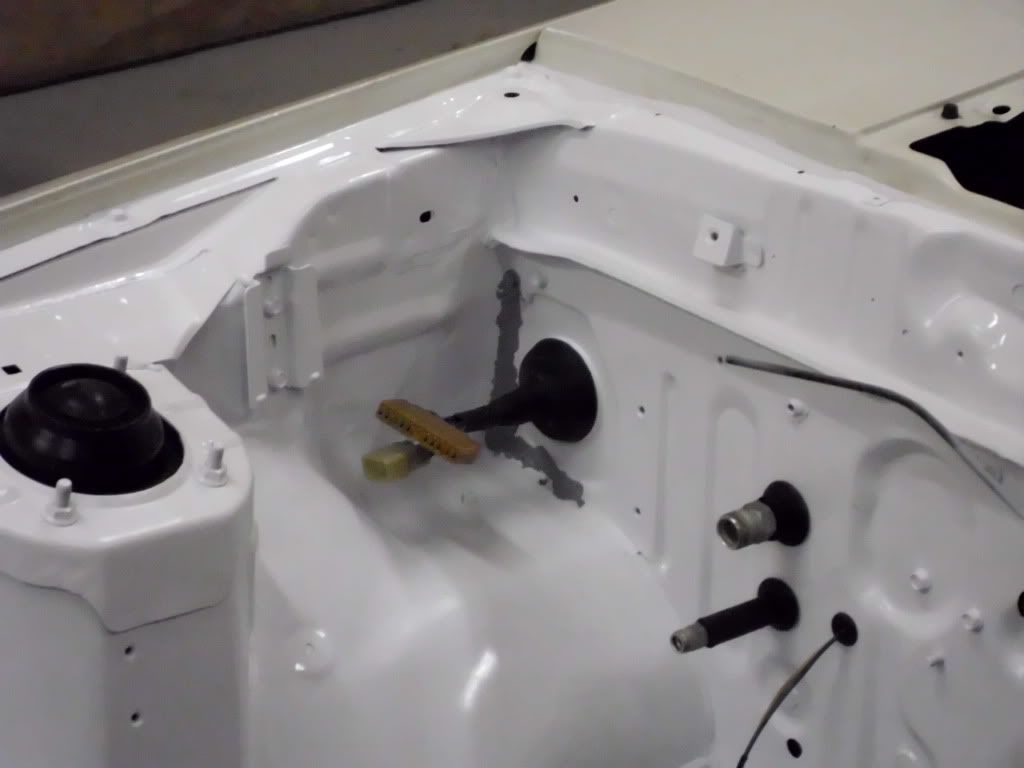
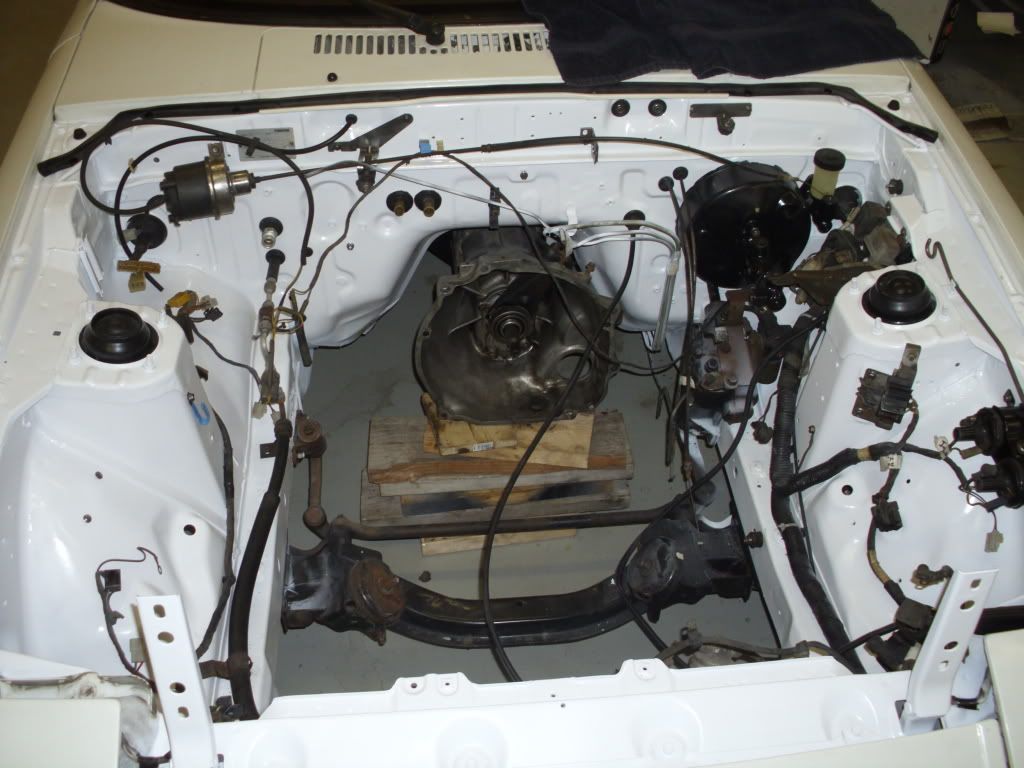
As you can see I finished painting the engine bay. I had a couple seams that I had to seal up with Seam Sealer as well, but I am really happy with the outcome. Its not the most spectacular paint job out there, but with three coats of primer, three coats of color and about five coats of clear enamel (Rust-o-leum) I think it will do what it was intended to do - prevent rust.
Here's the new radiator from Autozone. (The one on the right...)
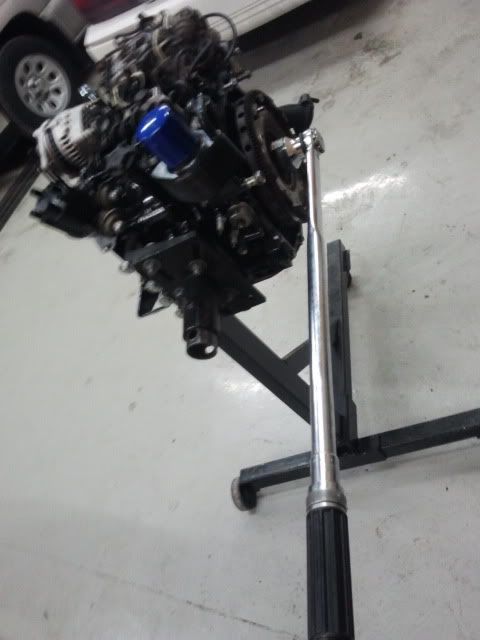
I hooked up the drive shaft and the transmission so that they are in position for the engine install next week. My father and friend want to be there for the install. Its taking a bit longer to work around their schedules. I'm getting anxious.
In the meantime, I've been hooking up lines, cleaning parts and rubber coating some parts as well. I also cleaned up the brake booster and it is being painted as we speak. I didn't want to get into tearing it apart too much. I don't have the tool to compress the shells so I am just giving it a new paintjob and cleaning the parts that are sticking out for now.
I think I am going to try my hand at the electrolysis rust removal. The exhaust manifold heat shield is covered in rust. We'll see how it works. I'll post some pictures and the outcome once I get to it.
Hope everyone had a good Easter.
As you can see I finished painting the engine bay. I had a couple seams that I had to seal up with Seam Sealer as well, but I am really happy with the outcome. Its not the most spectacular paint job out there, but with three coats of primer, three coats of color and about five coats of clear enamel (Rust-o-leum) I think it will do what it was intended to do - prevent rust.
Here's the new radiator from Autozone. (The one on the right...)
I hooked up the drive shaft and the transmission so that they are in position for the engine install next week. My father and friend want to be there for the install. Its taking a bit longer to work around their schedules. I'm getting anxious.
In the meantime, I've been hooking up lines, cleaning parts and rubber coating some parts as well. I also cleaned up the brake booster and it is being painted as we speak. I didn't want to get into tearing it apart too much. I don't have the tool to compress the shells so I am just giving it a new paintjob and cleaning the parts that are sticking out for now.
I think I am going to try my hand at the electrolysis rust removal. The exhaust manifold heat shield is covered in rust. We'll see how it works. I'll post some pictures and the outcome once I get to it.
Hope everyone had a good Easter.
Thread Starter
Senior Member
iTrader: (1)
Joined: Aug 2010
Posts: 340
Likes: 0
From: Southern Minnesota and Southern California
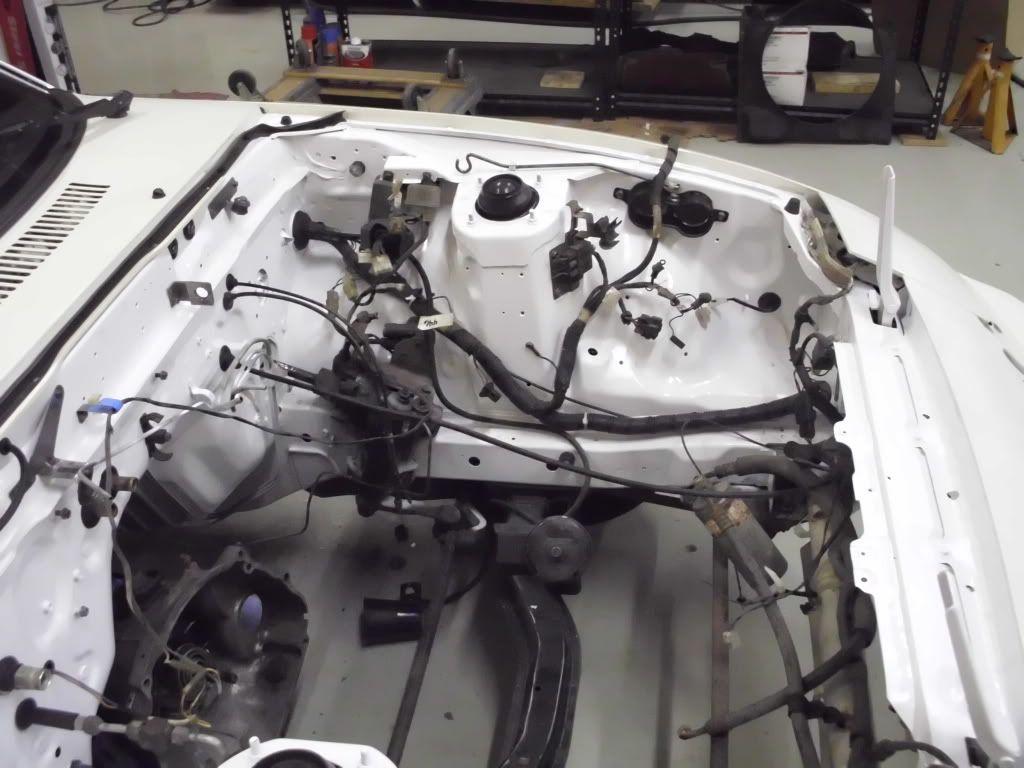
Well Friday I finally got around to getting the engine in. I got up early and rented a cherry picker from a local rental shop. I had spent a good deal of the night before getting the last of the engine bay ready. I installed the transmission and drive shaft. I installed the brake booster, brake master, proportional bypass valve and the clutch. I also installed as many hoses and wires as I could fit in the engine bay without clogging it up too much.
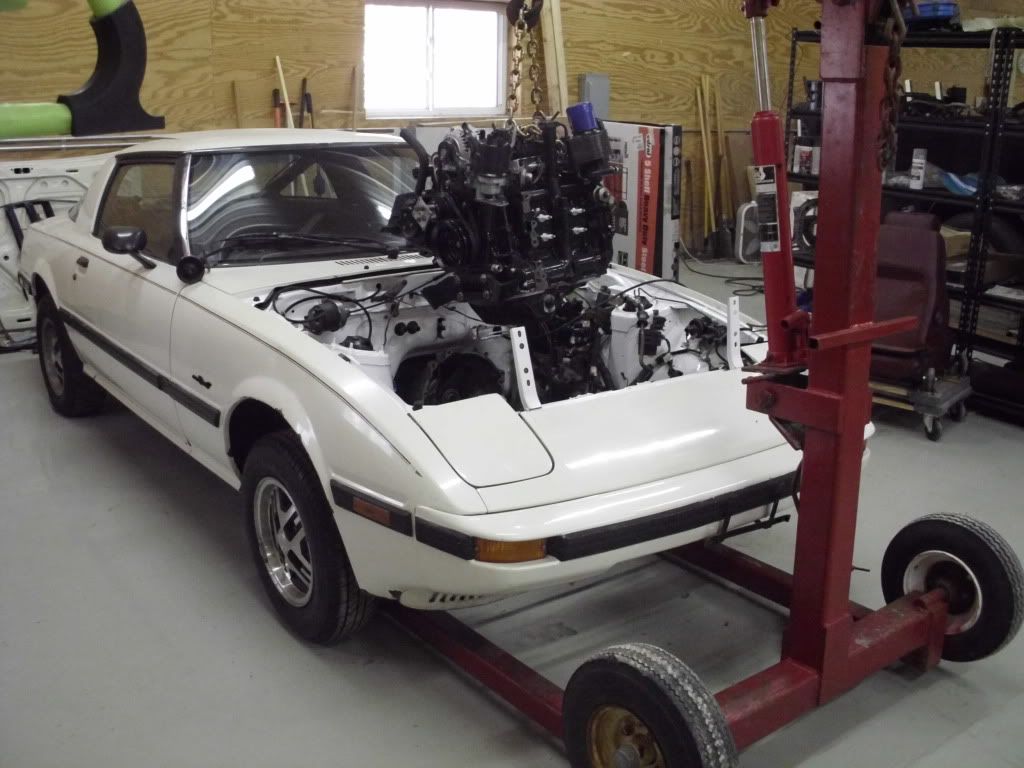
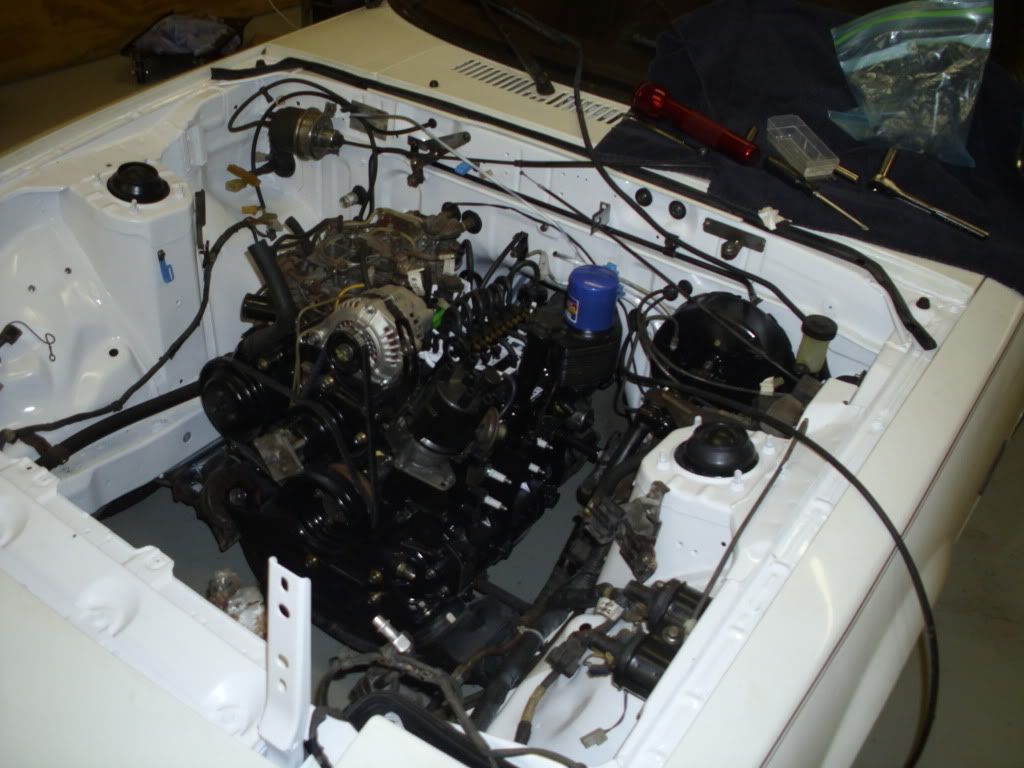
Getting the tranmission in was a pain and was about as graceful as a fart during a prayer service.
The engine went in easily. It slid together easily and in about twenty minutes I was hooking the cherry picker back up to return. I hooked up the rest of the clutch and installed the rest of the brake lines and reservoirs. I also hooked up most of the power steering and AC Pump. Now to go through and carefully look throught he vacuum system diagrams and try to figure out how to hook up the remainder of the hoses. I have to figure out hooking up the ACV and a couple of hoses that I didn't label very well, lol. Oh well.
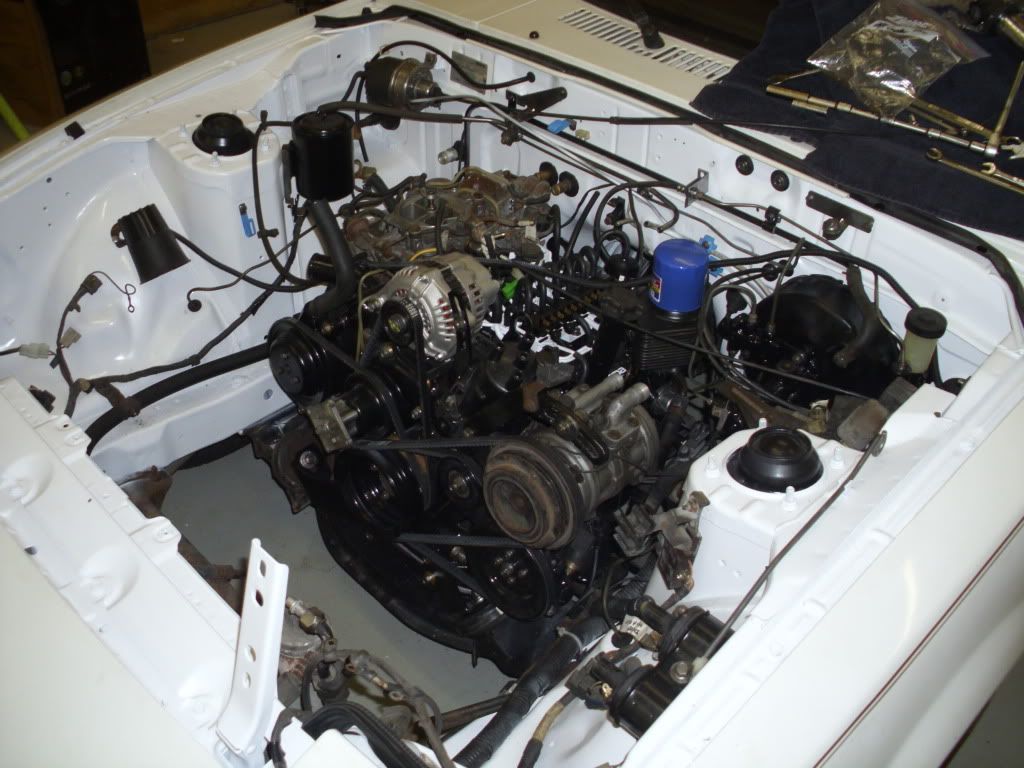
What a mess!!!
Haven't gotten around to trying electrolysis rust removal yet. If anyone has done this and has some suggests it'd be appreciated. Have a good weekend guys.
Getting the tranmission in was a pain and was about as graceful as a fart during a prayer service.
The engine went in easily. It slid together easily and in about twenty minutes I was hooking the cherry picker back up to return. I hooked up the rest of the clutch and installed the rest of the brake lines and reservoirs. I also hooked up most of the power steering and AC Pump. Now to go through and carefully look throught he vacuum system diagrams and try to figure out how to hook up the remainder of the hoses. I have to figure out hooking up the ACV and a couple of hoses that I didn't label very well, lol. Oh well.
What a mess!!!
Haven't gotten around to trying electrolysis rust removal yet. If anyone has done this and has some suggests it'd be appreciated. Have a good weekend guys.


Thread Starter
Senior Member
iTrader: (1)
Joined: Aug 2010
Posts: 340
Likes: 0
From: Southern Minnesota and Southern California
Well I was determined not to work on my car this week. I had a hundred other things I needed to do... oh well
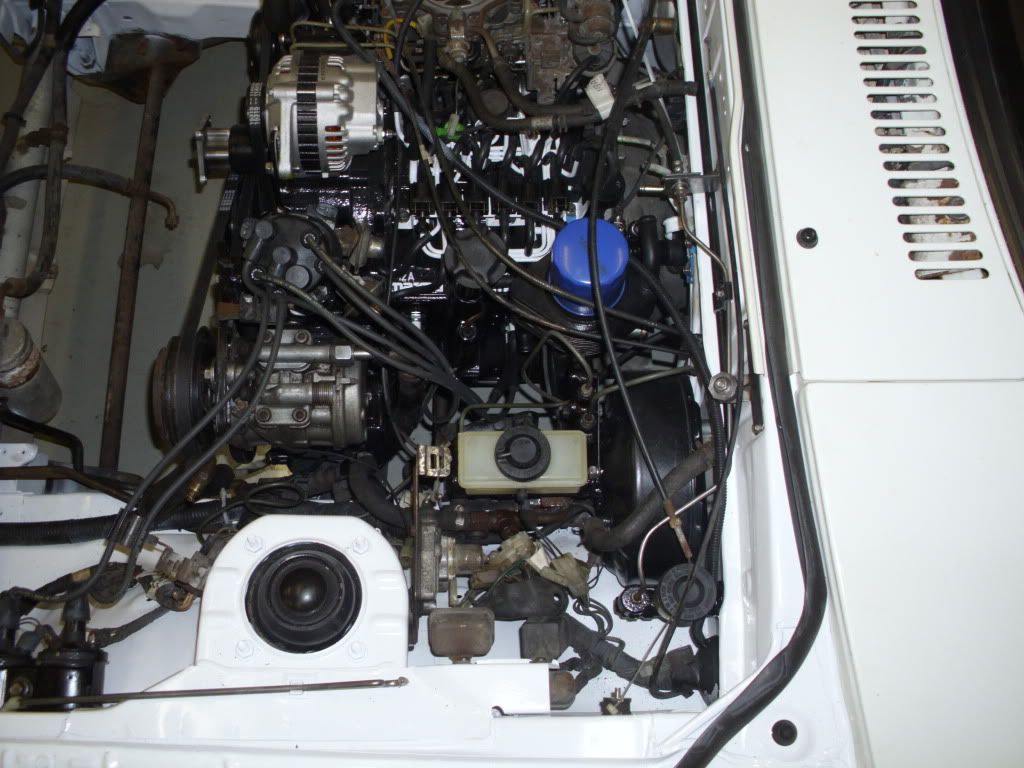
I bled the clutch and did as much as I could with the power steering fluid until I get the engine started. I was going to get to the brakes, but didn't. I also got a good deal of the engine electrical hooked up. I will need to go through and double check my connections, but they designed the engine electrical very well and there are not too many options where you can make a mistake. Either the wires won't reach to the wrong adaptors or the adaptors are different enough that if you mastered the circle in the circle hole and the square in the square hole as a child, you've should have no problem.
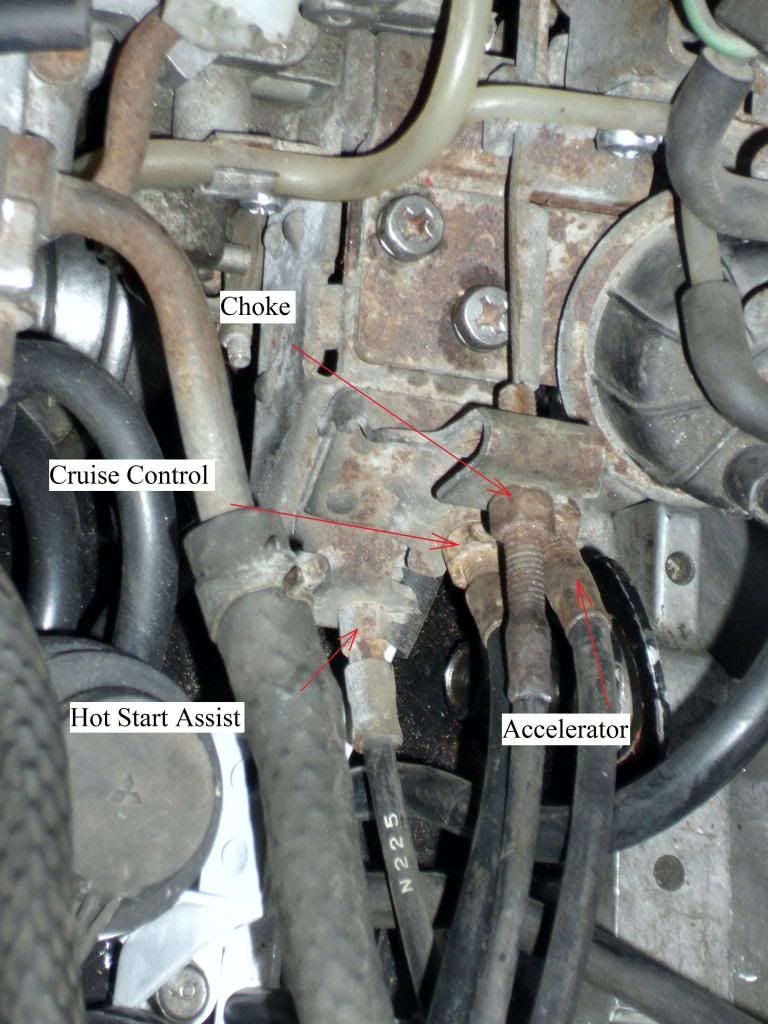
Now one area that is not so cut and dry, at least no to me, are the cables to the carburetor. My engine has cables for the cruise control, accelerator, choke and hot start assist. Now after some research this is the order I came up with. Can anyone tell me "yeah that's right" or "no, stupid. The _ goes _"?
I also installed the windshield wiper nozzle that I got from Soza127 (Thanks Soza127) and replaced the ancient hoses that connected to them.
I decided to hold up on hooking the air conditioning back up. I need to get a condenser and the main pipe that runs the length of the firewall, so until I get around to that I'll run without it. I am more anxious to get it running then to get the a/c hooked up at this very moment.
Only a couple hoses left to figure out where they go, hook up the starter, and get the battery and radiator hooked up and I should be ready to go.... oh yeah and got to do something about the gas tank still. Slowly but surely. Have a good weekend everyone!
I bled the clutch and did as much as I could with the power steering fluid until I get the engine started. I was going to get to the brakes, but didn't. I also got a good deal of the engine electrical hooked up. I will need to go through and double check my connections, but they designed the engine electrical very well and there are not too many options where you can make a mistake. Either the wires won't reach to the wrong adaptors or the adaptors are different enough that if you mastered the circle in the circle hole and the square in the square hole as a child, you've should have no problem.
Now one area that is not so cut and dry, at least no to me, are the cables to the carburetor. My engine has cables for the cruise control, accelerator, choke and hot start assist. Now after some research this is the order I came up with. Can anyone tell me "yeah that's right" or "no, stupid. The _ goes _"?
I also installed the windshield wiper nozzle that I got from Soza127 (Thanks Soza127) and replaced the ancient hoses that connected to them.
I decided to hold up on hooking the air conditioning back up. I need to get a condenser and the main pipe that runs the length of the firewall, so until I get around to that I'll run without it. I am more anxious to get it running then to get the a/c hooked up at this very moment.
Only a couple hoses left to figure out where they go, hook up the starter, and get the battery and radiator hooked up and I should be ready to go.... oh yeah and got to do something about the gas tank still. Slowly but surely. Have a good weekend everyone!
83will12a
Joined: Sep 2010
Posts: 5
Likes: 0
From: auburn, ga
clykins, i just want to say i am very jealous and you have done a wonderful job on rebuilding the car. i have 2 myselfan 83 and 84. i as well have owned my for a few years and am triing to work on them slowly when the money is available. looking forward into seing new pics. keep up the excellent work..
Thread Starter
Senior Member
iTrader: (1)
Joined: Aug 2010
Posts: 340
Likes: 0
From: Southern Minnesota and Southern California
Thanks 83will12a. Looks like my next project will be to find the leak in the power steering. Found a nice puddle this morning, but unfortunately that will have to wait til I get back in town.
Thread Starter
Senior Member
iTrader: (1)
Joined: Aug 2010
Posts: 340
Likes: 0
From: Southern Minnesota and Southern California
I missed something on the last post. I wanted to thank Mark for the parts as well. Sorry Mark
This week has been going a little slower. Running low on funds and time this month. Oh well. I have made a little more progress. I bled the clutch and patched the holes in the power steering line (was missing a o-ring beneath the reservoir). I also started bleeding the brakes. I have not yet done the rear brakes, but I was hoping that they would hold for the time being. Well, I got the right rear brake done and then was moving to the left rear and nearly got shot by brake fluid shooting out of the common line splitter... bummer. After trying to remove the brake lines carefully... I ended up utterly destroying the brake lines. Too rusty. Oh well. I've pulled the brake lines out from the brake master back. Napa had a 25' roll of brake line and I was all set to start making a copy of the lines when I got called out for a trip. (Haven't got any pictures of the destroyed brakes yet.) Also noticed my parking brake was no longer hooked up. That might have been annoying.
Since the back end was up in the air, I decided to remove the gas tank as well. Thank goodness this tank does have a drain on it.
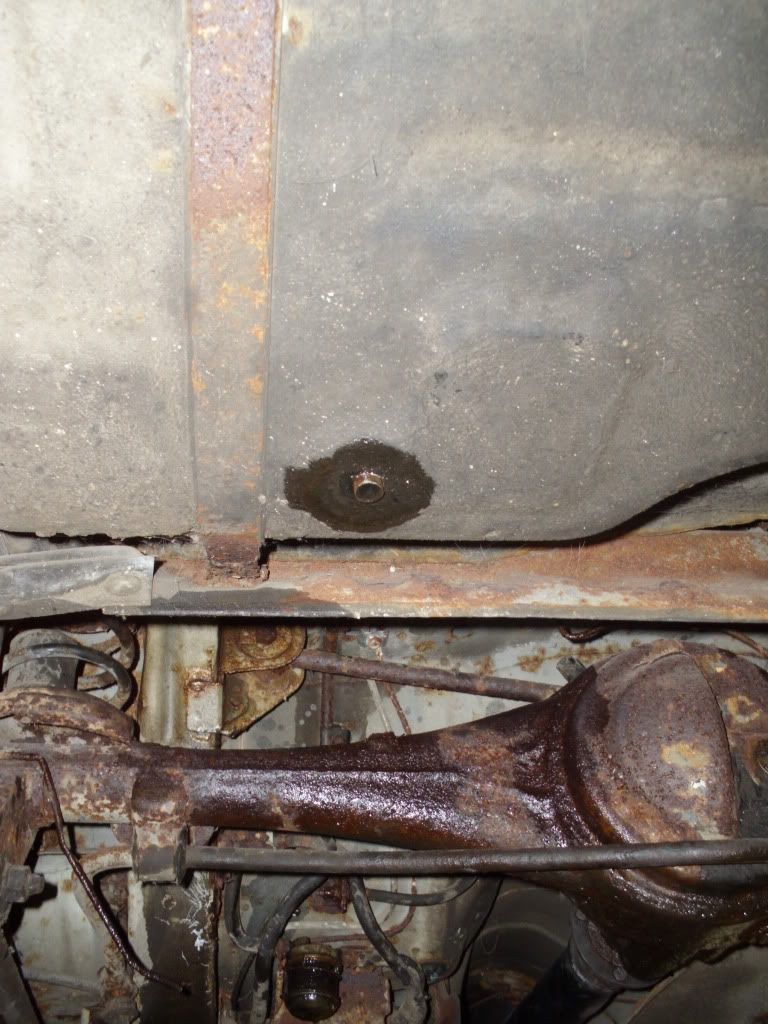
(Yeah the fluid on the axle is brake fluid. Messy )
I removed about two gallons of old gas. Stinky! After dropping the tank I found an unfortunate problem;
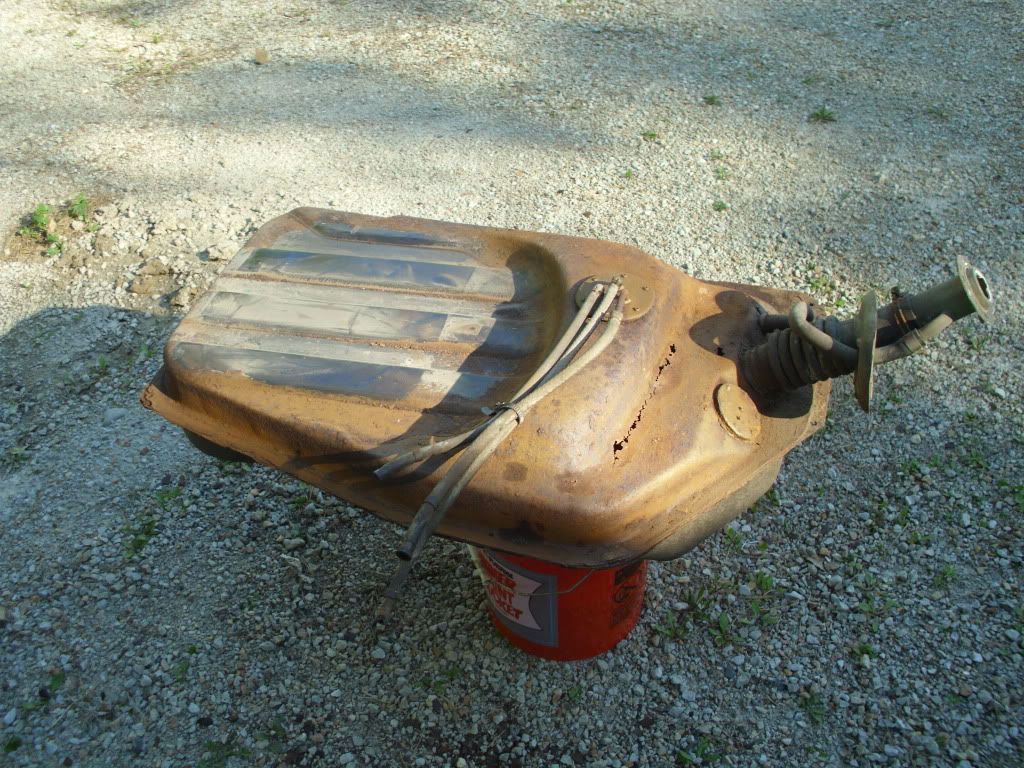
Yeah that's a long line of rusty holes Oh well. I was actually surprised it was in as good a condition as it was. Now to see if I can find a gas tank for a reasonable price.
Unfortunately that's about it for now and I have to race down to the airport shuttle for a day of flying. Take care and enjoy the weekend guys!
This week has been going a little slower. Running low on funds and time this month. Oh well. I have made a little more progress. I bled the clutch and patched the holes in the power steering line (was missing a o-ring beneath the reservoir). I also started bleeding the brakes. I have not yet done the rear brakes, but I was hoping that they would hold for the time being. Well, I got the right rear brake done and then was moving to the left rear and nearly got shot by brake fluid shooting out of the common line splitter... bummer. After trying to remove the brake lines carefully... I ended up utterly destroying the brake lines. Too rusty. Oh well. I've pulled the brake lines out from the brake master back. Napa had a 25' roll of brake line and I was all set to start making a copy of the lines when I got called out for a trip. (Haven't got any pictures of the destroyed brakes yet.) Also noticed my parking brake was no longer hooked up. That might have been annoying.
Since the back end was up in the air, I decided to remove the gas tank as well. Thank goodness this tank does have a drain on it.
(Yeah the fluid on the axle is brake fluid. Messy )
I removed about two gallons of old gas. Stinky! After dropping the tank I found an unfortunate problem;
Yeah that's a long line of rusty holes
Oh well. I was actually surprised it was in as good a condition as it was. Now to see if I can find a gas tank for a reasonable price. Unfortunately that's about it for now and I have to race down to the airport shuttle for a day of flying. Take care and enjoy the weekend guys!
Last edited by clykins; May 21, 2011 at 10:19 AM.
Thread Starter
Senior Member
iTrader: (1)
Joined: Aug 2010
Posts: 340
Likes: 0
From: Southern Minnesota and Southern California
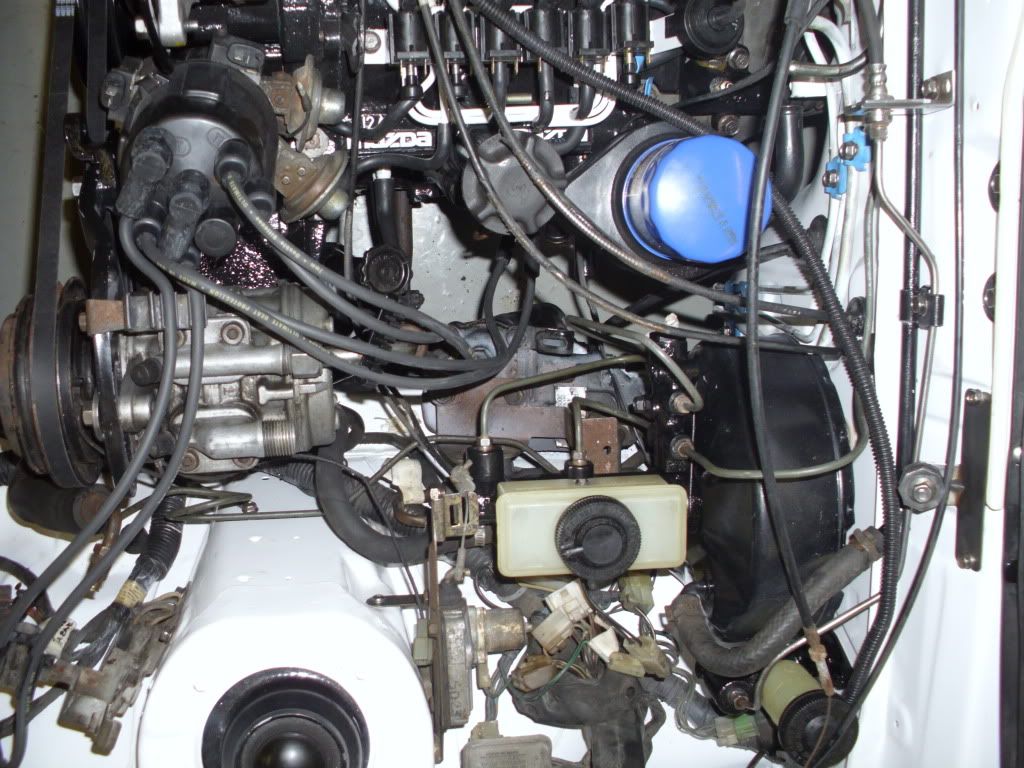
Despite this month being the busiest month at work, I did manage to make some progress. I thought I'd see if I could bleed the existing brake lines for now, with no intentions of driving with them, but wanted to see if they could hold fluid. If you were betting that they wouldn't, you'd have won. I nearly got shot by a line of brake fluid coming from the joint above the rear axle. Oh well.
So I carefully started to remove the brake lines... When that didn't work I went to town on them with hack saws, wire cutters, hammers, chissles and my teeth.(Stubborn little things) I went to NAPA and got their 25' of 3/16th brake line and Autozone had the adapters I needed. I was glad to find that I could bend the line with my thumbs without any kinking. So I replaced the brake lines starting at the brake master back to the rear of the car. Of course I had to flare the ends. Here's where I ran into some trouble. I didn't quite understand how even a very small offset flare could cause it not to sit properly and so when I went back to bleeding the new brakes they leaked again. I played around with it for a little bit and then decided to come back to it after I finish with the engine.
I installed the headlight motors. I wanted to clean them up, but I'm getting a little anxious to get the engine started, so I decided to put everything back together for the mean time and once the engine is running I will go back and touch up the items that I didn't get to.
A friend came over and we got the old condenser back in. The aluminum threads on the condenser are shot. It is just in place to keep any more bugs and dirt out of the system for the time being. We also installed the radiator, the fan, shroud and the radiator overflow tank. Still have to clean up the sub zero tank mounting bracket before I install that.
Finally I went to Autozone and purchased a battery. When I got back I was a little too anxious to get power back into my 7 that I connected up the battery right away. Yeah, that didn't work so well. Right when I connected it a spark shot out. I have a short somewhere. There is a little burn hold in the battery terminal. Oops. Too eager.
I got the starter put in and one of the wires hooked up. I pulled up the wiring diagram and found that the top wire is BW (blue with a white stripe), but I need to replace the terminal on the wire. Someone had jimmy-rigged it and did a poor job at that. The other wire I'm not sure. Yeah I'm a noob Oh well.
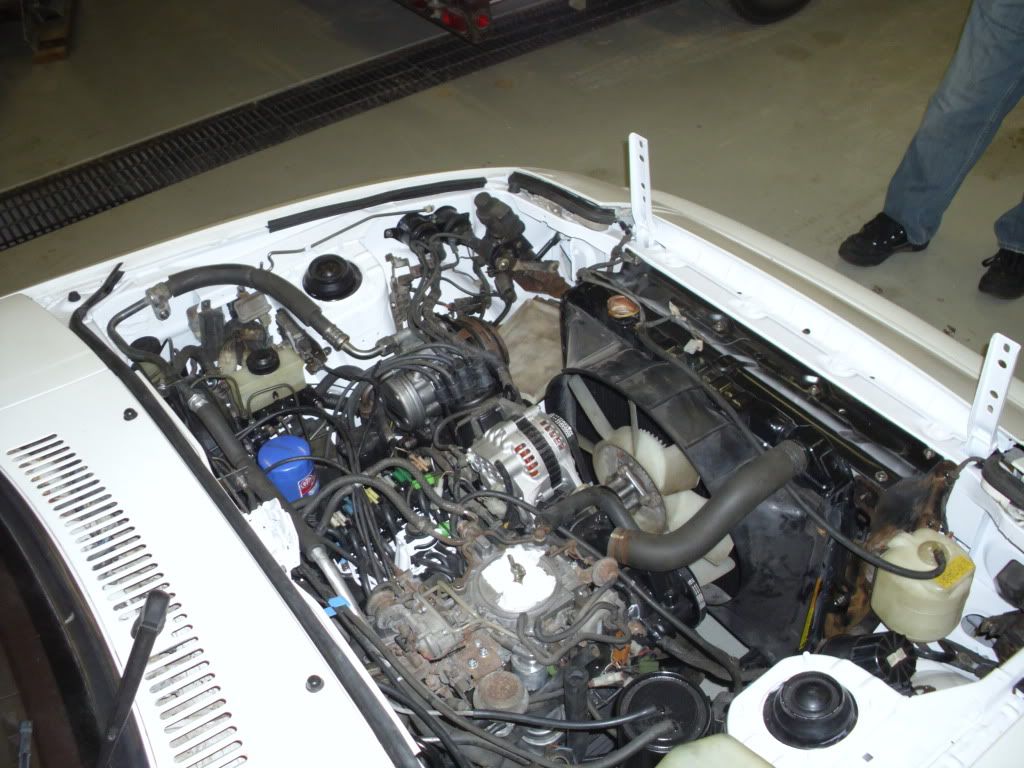
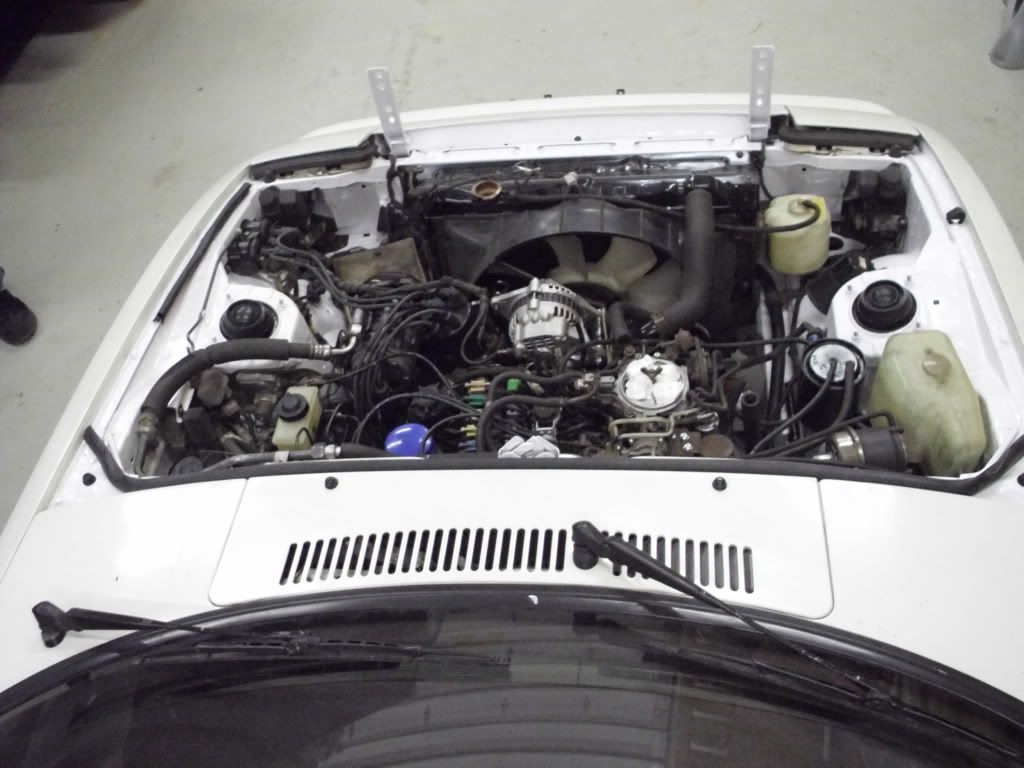
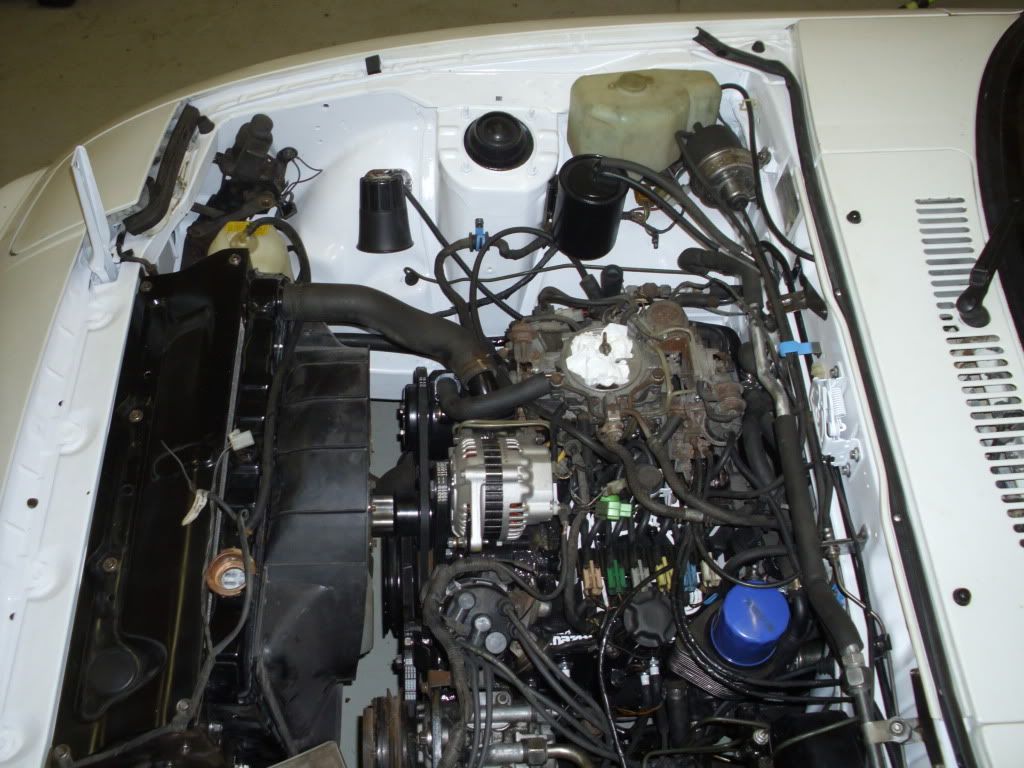
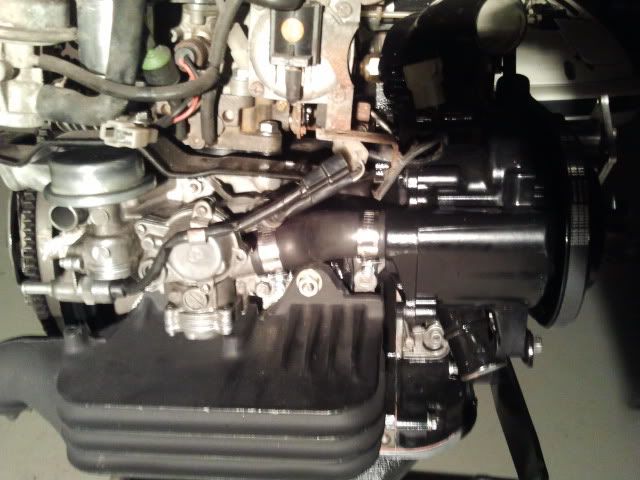
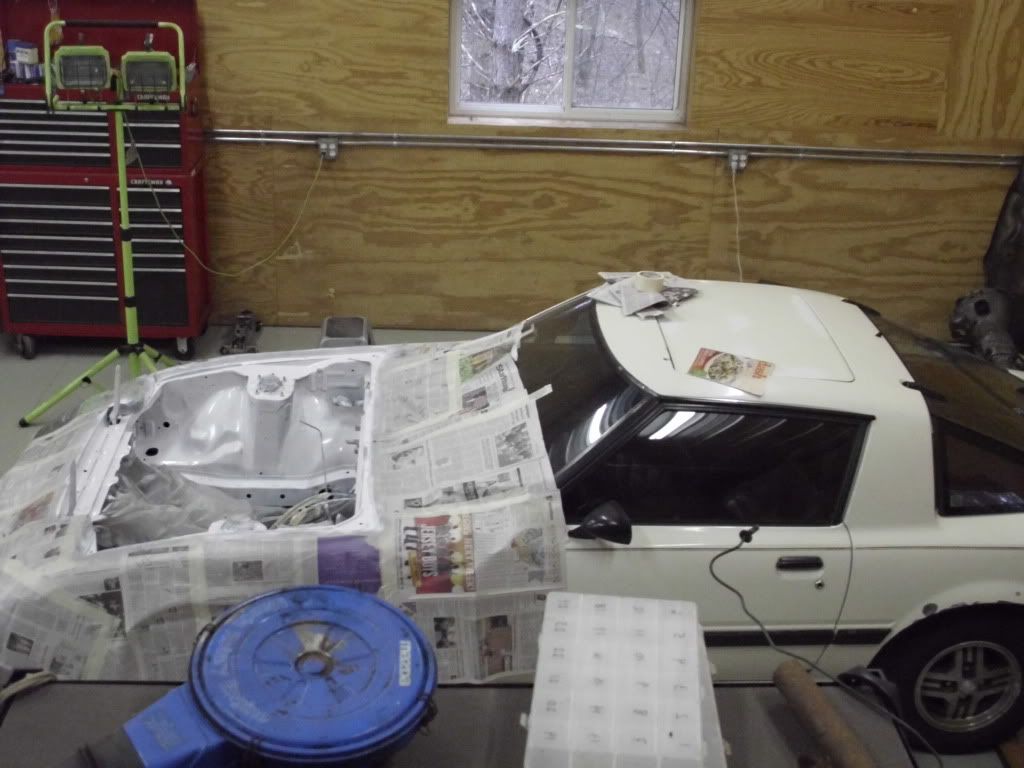
And here is a bad photo of the pretty much completed engine bay:
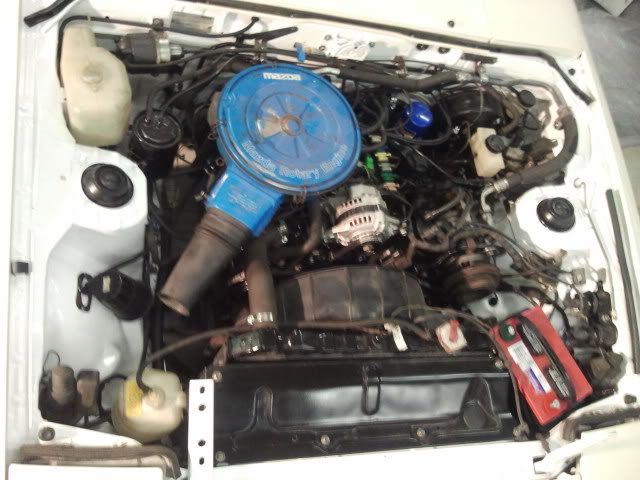
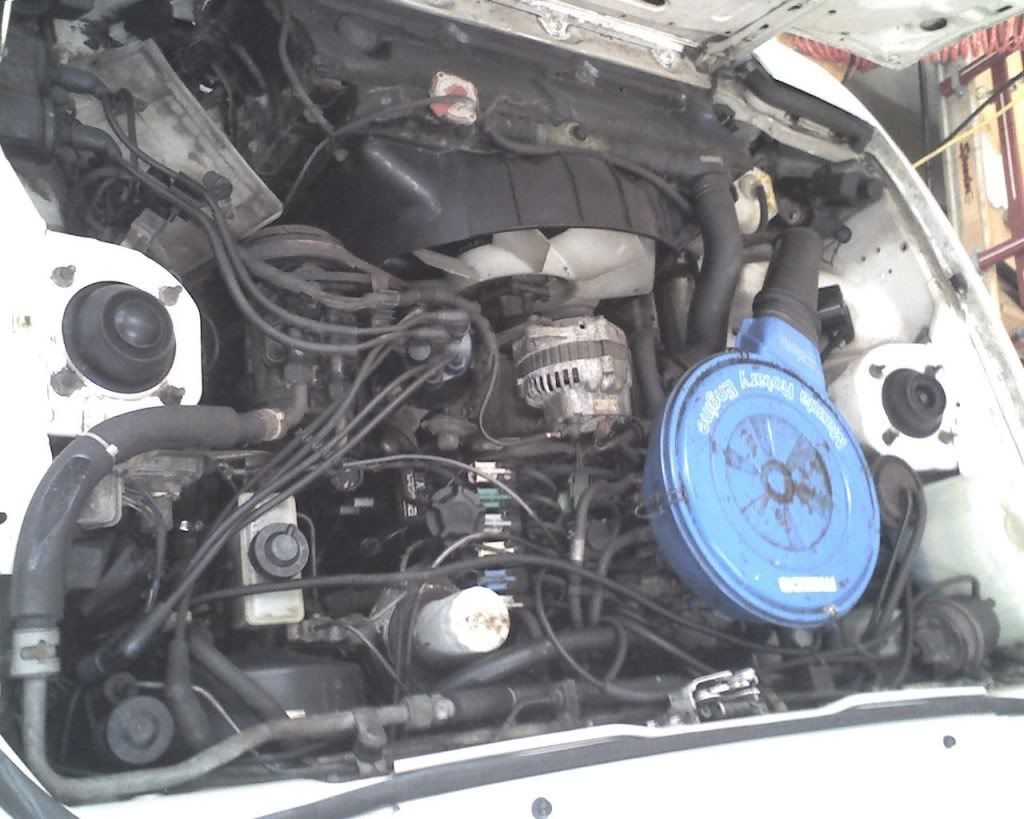
Here's what it started out as:
So I carefully started to remove the brake lines... When that didn't work I went to town on them with hack saws, wire cutters, hammers, chissles and my teeth.(Stubborn little things) I went to NAPA and got their 25' of 3/16th brake line and Autozone had the adapters I needed. I was glad to find that I could bend the line with my thumbs without any kinking. So I replaced the brake lines starting at the brake master back to the rear of the car. Of course I had to flare the ends. Here's where I ran into some trouble. I didn't quite understand how even a very small offset flare could cause it not to sit properly and so when I went back to bleeding the new brakes they leaked again.
I played around with it for a little bit and then decided to come back to it after I finish with the engine. I installed the headlight motors. I wanted to clean them up, but I'm getting a little anxious to get the engine started, so I decided to put everything back together for the mean time and once the engine is running I will go back and touch up the items that I didn't get to.
A friend came over and we got the old condenser back in. The aluminum threads on the condenser are shot. It is just in place to keep any more bugs and dirt out of the system for the time being. We also installed the radiator, the fan, shroud and the radiator overflow tank. Still have to clean up the sub zero tank mounting bracket before I install that.
Finally I went to Autozone and purchased a battery. When I got back I was a little too anxious to get power back into my 7 that I connected up the battery right away. Yeah, that didn't work so well. Right when I connected it a spark shot out. I have a short somewhere. There is a little burn hold in the battery terminal. Oops. Too eager.
I got the starter put in and one of the wires hooked up. I pulled up the wiring diagram and found that the top wire is BW (blue with a white stripe), but I need to replace the terminal on the wire. Someone had jimmy-rigged it and did a poor job at that. The other wire I'm not sure. Yeah I'm a noob
Oh well. And here is a bad photo of the pretty much completed engine bay:
Here's what it started out as:
Last edited by clykins; Jun 1, 2011 at 12:50 PM.
Thread Starter
Senior Member
iTrader: (1)
Joined: Aug 2010
Posts: 340
Likes: 0
From: Southern Minnesota and Southern California
Last month was a busy month. I finally tired the knot. After the wedding we did a honeymoon to Cancun. All of this left little time to work on my 7. I finally got the tools back out yesterday snd started trouble shooting the electrical components of the engine bay. I am still pretty new to electricity and so it is taking some time.
I did managed to get the starter connected and found out surprisingly that my alarm still works on my car... But the key component that shuts it off has a dead battery. Ouch!
The dash lit up and the front right and back left blinkers work along with the fan. I thought I would try to turn it over with the starter, but it didn't turn over. Oh well. No biggie. I still have a lot pos work to do on the electrical system. Should be fun. I have some pictures, but can't upload them yet.

Joined: Mar 2009
Posts: 983
Likes: 0
From: Minneapolis, Minnesota
Don't be scared by the electrical stuff. The first gens are actually REALLY simple. I learned mine simply by taking it apart. Then I cut off what I didnt need and put it all back together. Uses about half as many connections on the new motor =P
Joined: Mar 2009
Posts: 983
Likes: 0
From: Minneapolis, Minnesota
If you need any parts yet I should say I have EVERYTHING and I do mean EVERYTHING for your car. I went 13B so needless to say I don't need much of the old parts anymore. My airbox is in just about mint shape as well as my radiator fan shroud.