Austin's Red RestoMod - You Just Wait and See...
 01-14-15, 12:44 AM
#76
Compression Test...
Well, if a picture says 1,000 words - how many words does a moving picture with sound say?..
Compression is bad to say the least. Can some of you more experienced rotary guys tell me what the pulses mean again? I know there's a science to knowing when a side seal is bad versus an apex seal, I'm just not versed in that rotary magic. I'd love to learn though!
Needless to say the engine is getting pulled soon (potentially tomorrow) and torn down to see what the damage is internally. I was kinda hoping I wouldn't have to tear this one down and that I could just figure out the no starting issue, but that just wasn't the case this time.
 01-14-15, 01:01 AM
#77
Alright fellas, that initial video is going to get renamed "testing a rotary with the Schrader valve installed in the compression tester".
I'm gonna go bury my head in the pillow for a while and pretend like I didn't test the car with the valve still in place and get a faulty reading...maybe some sleep will help cure some of the stupidity.
I'm gonna go bury my head in the pillow for a while and pretend like I didn't test the car with the valve still in place and get a faulty reading...maybe some sleep will help cure some of the stupidity.
01-14-15, 11:23 AM
#79
Well it's not as dire as I thought! I've got two of the best (in my opinion) First Gen guys who have been helping me in another thread. I've got a few more things to try before going out and tearing the engine out in a frustrated hurry.
I'm sure I'm over complicating the procedure by at least two fold at this point, you're right. I'm trying to get the lock nut to be centered but I don't think that's possible with this engine and it's throwing me way off course here. I'll restab it later today when I get outside to work on the car and insulating the garage some more.
I'll be shopping for a new distributor tree - the technical name is a rotor by the way, just looked that up (I'm trying to learn all the correct names for the parts, thanks for the help with that!). I'm going to try and see where I can get a cap and rotor, I'll probably go the RockAuto route. Their parts are always correct, so long as you don't order the wrong part, they have the largest 1st Gen inventory as far as I know and their prices are better than anywhere else that I've found.
The spring resistance in the distributor is pretty cool to feel, I didn't know it could move so much under vacuum. I know what you mean by the movement in the shaft of the distributor - I could feel that as well. The deflection in the rotor displacement that I feel to be about 15 degrees or more is based on the poor rotor design. That movement happens while holding the reluctor still - that's how terrible it is!
I'm probably going to order this rotor from RA today so it'll get here late this week or early next week, should help some of the issue I hope.
BOSCH 04133 Distributor Rotor - $8.45
I'd really appreciate a picture of a distributor at TDC, thanks for the offer! That should help me visualize what I should be looking at. I've never dealt with a timing issue this severe before (well, I never had a timing issue with any of the 4 other 7's I've owned so far).
Yeah, the cranking speed of this car is so slow it's scary. Next in line is a different starter, new battery clamps, new battery cables and a new battery. I just bought that compression tester yesterday from AutoZone and it was the nicest one that they had available for $41.99. I wanted that one because it had a few adapters that I know I'll need while working on the rotary and on the German cars (the Olympic-looking-rings badged ones) I'm so fond of. I never knew that a flooded engine will read low compression, thanks for the tip!
I'll unplug the fuel pump, I have the plug easily accessible since the bin hasn't been in its place behind the driver since I bought the car. I'll search for that connector that lets me crank the engine bypassing the ignition, I didn't know there was one! I had planned on going out there with jumper cables and clamping the positive one to the starter solenoid (ignition + and the post the fuseable link connects to - allowing it to extend outwards and spin at the same time), the negative to the block and the other side straight to the battery so it's getting all the juice possible. But jumping a single wire will be much easier!
I moved down here for school so I don't have a timing light either, going back to the store again today! It's fine with me though, my tool collection has grown larger than I have space for - which is a very good thing. I'll remember to pick one up later today.
On a related note, I did test the engine incorrectly didn't I? That Schrader valve at the bottom of the compression tester needs to be removed to get an accurate reading on a rotary right? I left it on for the video because I didn't know any better. I'm going to retest it today with that valve removed to see the difference - I'll record it again as well so it's well documented and that I can re-watch as often as I want it and analyze it.
I think you're overthinking the dizzy install a bit - natural to do when fighting a problem.
The WHOLE GOAL is to end up with the reluctor tip lined up with the the leading pickup coil core. This may not put the mounting stud in the middle of the adjustment slot - - that's why there's a slot instead of a hole. Sometimes you go to stab the dizzy and the gear teeth just happen to be directly on top of each other, forcing you to rotate the dizzy a bit to get things to drop in. No worries, so long as the stud is somewhere in the slot & not hard up against one end when you have the reluctor and coil lined up.
In your photos above, the lead coil is the one to the left side of the pic (easy way to tell: the coil attached to the vacuum advance diaphragm with the adjustment screws is always trailing). Neither pic shows correct orientation when installed @ TDC. The first pic has the TRAILING coil aligned (meaning your timing is 20* off in the 'retarded' direction) and the second pic is about 30* off the other way; probably a full tooth off.
Having the reluctor tip visually lined up with the lead coil core @ TDC will put you within a couple degrees of correct timing - good enough to fire up if all else is OK. Then you can get the timing exact once the engine is running.
Line up the index marks
Stab the dizzy in
Tweak the rotation to line up the reluctor tip with the lead coil core
Snug the nut and move on to other issues.
As to the dizzy rotor "tree;" yours is kind of an odd-looking beast compared to all the ones I've had over the years, & if it truly is fitting on the shaft with that much play I would replace it if I were you - - it really should fit on the shaft in one definite position with no rotational play.
HOWEVER, keep in mind that the dizzy shaft is not solid from one end to the other! It is a two-piece shaft with the top and bottom halves connected by the spring-loaded centrifugal advance mechanism.
The centrifugal advance mechanism in the dizzy, which lives under the pickup coils, will allow the top part of the shaft to rotate something like 1/8th turn in one direction under moderate spring tension. This means you can turn the rotor (your 'tree') in the forward direction against spring resistance when the dizzy is installed, & it should then snap back when released.
I'll snap you a pic of where my dizzy is set tonight when I get home. It'll look odd compared to yours being an SA dizzy, but the timing alignment works the same. I just checked my timing recently so I know its right-on.
I'll be shopping for a new distributor tree - the technical name is a rotor by the way, just looked that up (I'm trying to learn all the correct names for the parts, thanks for the help with that!). I'm going to try and see where I can get a cap and rotor, I'll probably go the RockAuto route. Their parts are always correct, so long as you don't order the wrong part, they have the largest 1st Gen inventory as far as I know and their prices are better than anywhere else that I've found.
The spring resistance in the distributor is pretty cool to feel, I didn't know it could move so much under vacuum. I know what you mean by the movement in the shaft of the distributor - I could feel that as well. The deflection in the rotor displacement that I feel to be about 15 degrees or more is based on the poor rotor design. That movement happens while holding the reluctor still - that's how terrible it is!
I'm probably going to order this rotor from RA today so it'll get here late this week or early next week, should help some of the issue I hope.
BOSCH 04133 Distributor Rotor - $8.45
I'd really appreciate a picture of a distributor at TDC, thanks for the offer! That should help me visualize what I should be looking at. I've never dealt with a timing issue this severe before (well, I never had a timing issue with any of the 4 other 7's I've owned so far).
i see even bounces, although either the engine is cranking really slowly or its dead. the pulses seem low too, but i'd condemn the compression tester before the engine. actually if the engine is badly flooded, it will have low compression, so you need to get the thing running.
based on that. i would unplug the fuel pump (or relay) whichever is easier. then hook up your timing light, jump the start wire (there is a connector in the engine bay around the steering box, unplug, and you can bypass the ignition switch, and crank the engine from the engine bay.
point the timing light at the pulley, and crank the engine. move distributor until the timing light says the timing is correct. <-- eliminates thinking.
I'll unplug the fuel pump, I have the plug easily accessible since the bin hasn't been in its place behind the driver since I bought the car. I'll search for that connector that lets me crank the engine bypassing the ignition, I didn't know there was one! I had planned on going out there with jumper cables and clamping the positive one to the starter solenoid (ignition + and the post the fuseable link connects to - allowing it to extend outwards and spin at the same time), the negative to the block and the other side straight to the battery so it's getting all the juice possible. But jumping a single wire will be much easier!
I moved down here for school so I don't have a timing light either, going back to the store again today! It's fine with me though, my tool collection has grown larger than I have space for - which is a very good thing. I'll remember to pick one up later today.
On a related note, I did test the engine incorrectly didn't I? That Schrader valve at the bottom of the compression tester needs to be removed to get an accurate reading on a rotary right? I left it on for the video because I didn't know any better. I'm going to retest it today with that valve removed to see the difference - I'll record it again as well so it's well documented and that I can re-watch as often as I want it and analyze it.
01-14-15, 11:21 PM
#80
In order to try and solve part of the slow cranking issue I decided to tackle the battery cables today and replace them with new ones.
This is a shot of the old cables at the battery end where the clamps should be.
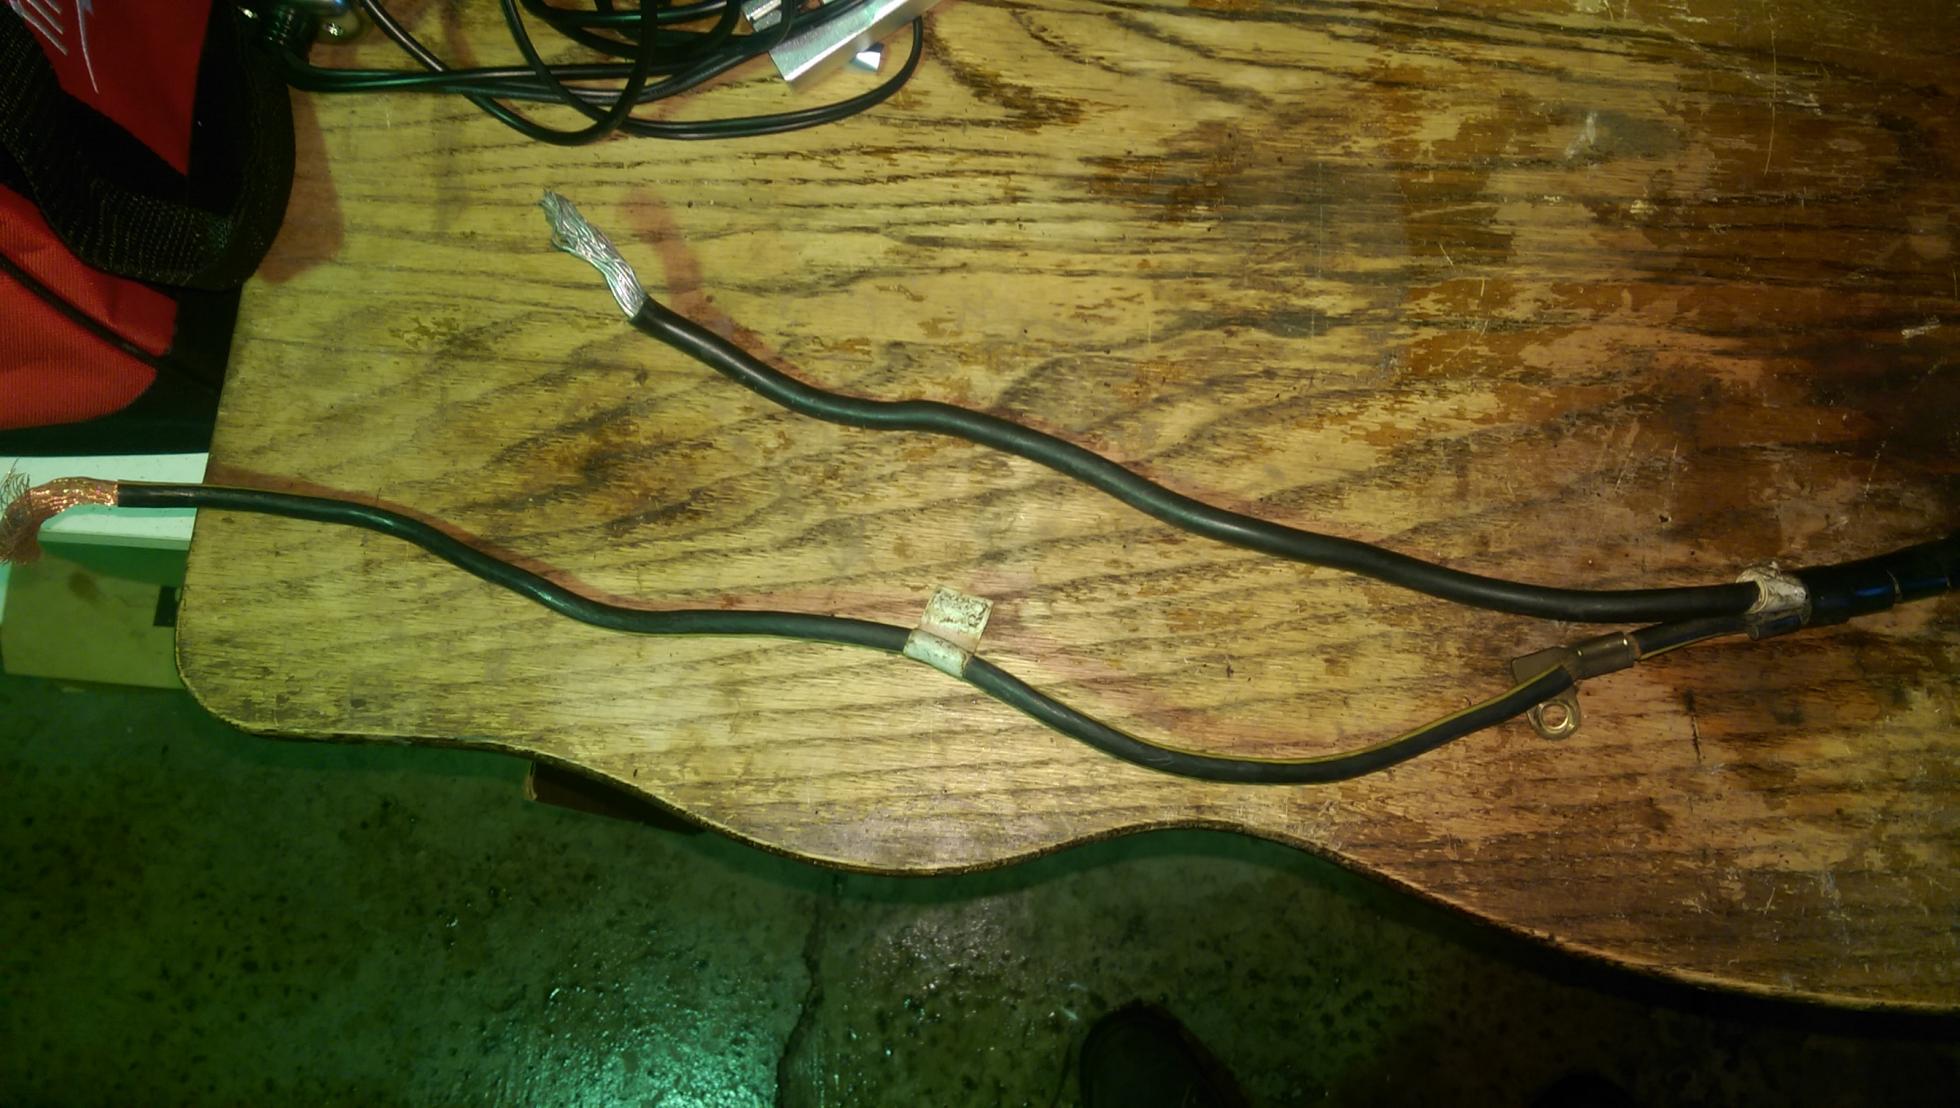
Here's the end where the ground strap bolts to the bellhousing and the positive cable goes to the starter.
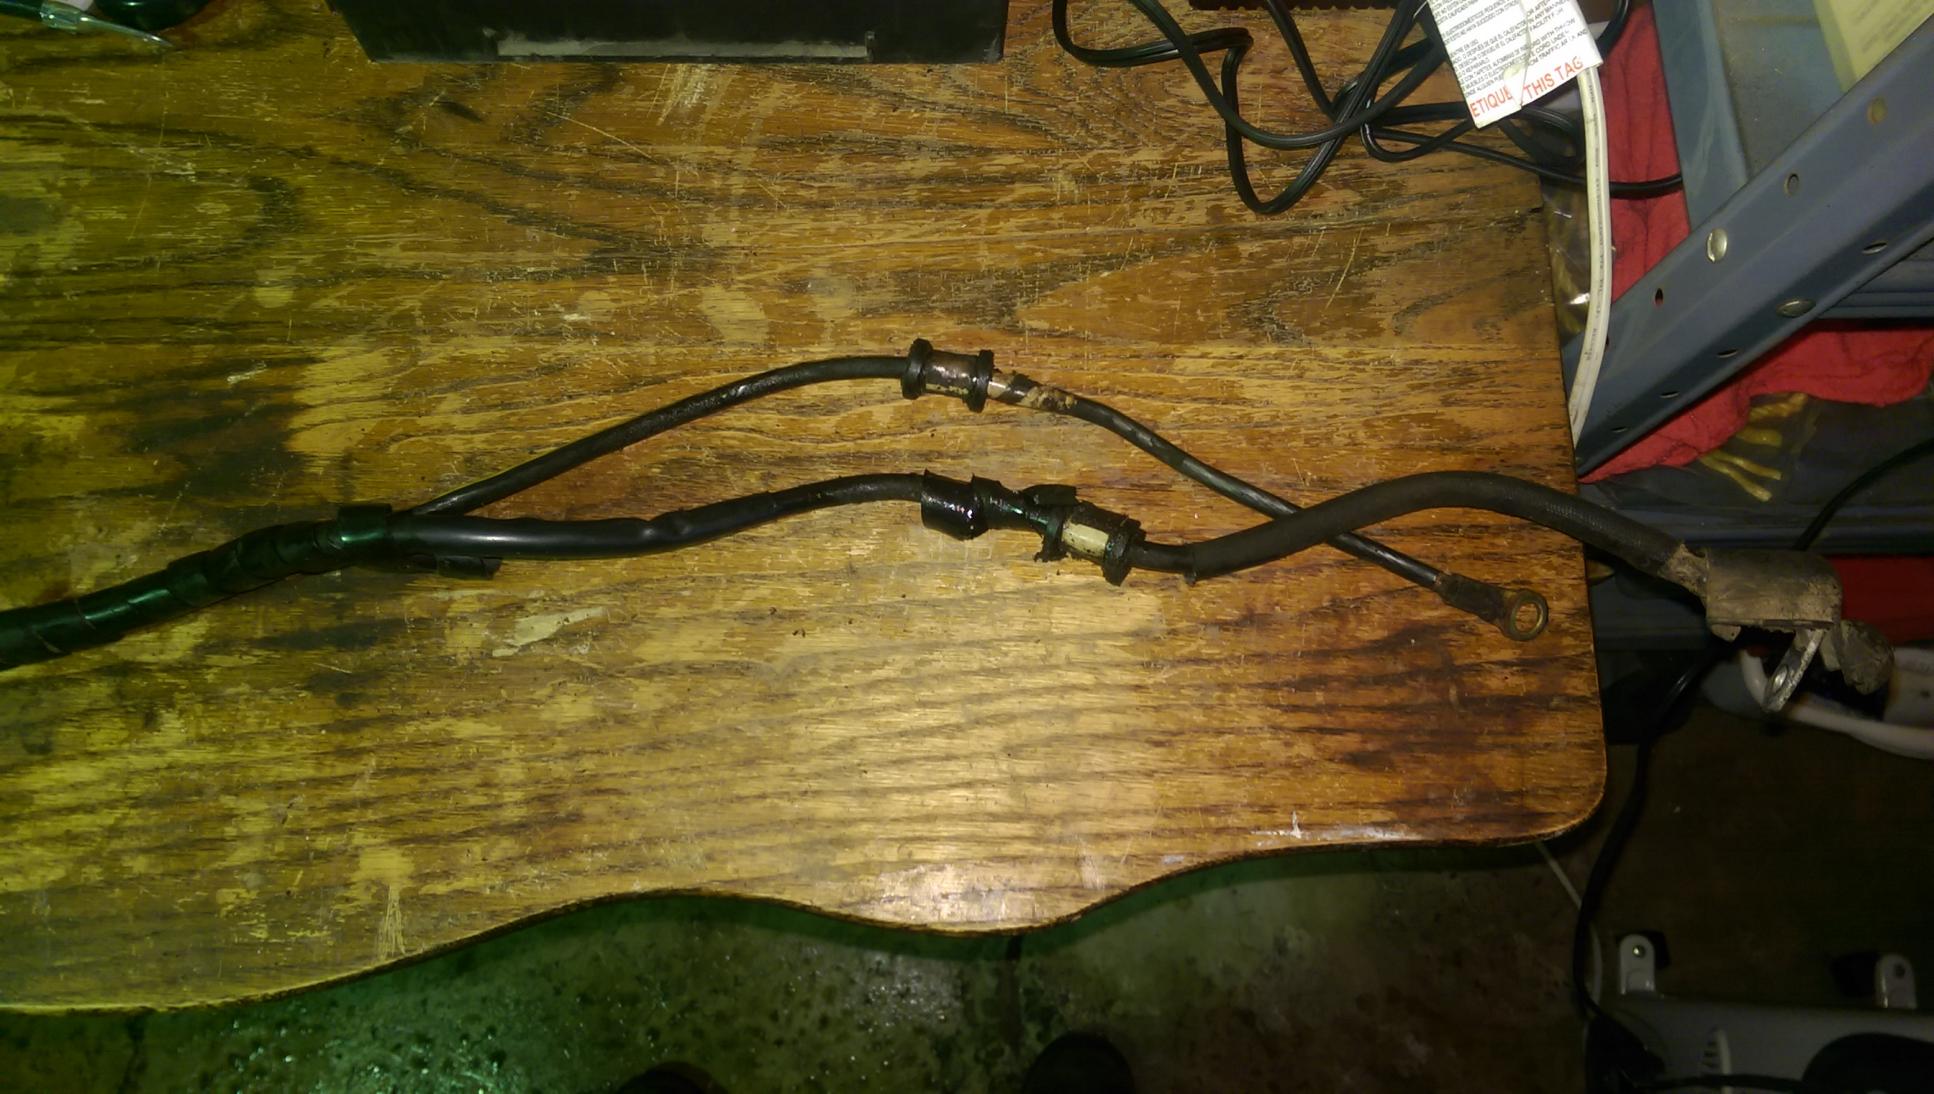
I cut the original ground strap right after the strut chassis ground in order to reuse the chassis ground portion. This eliminated the need to splice into the new cable to make for a new chassis ground.
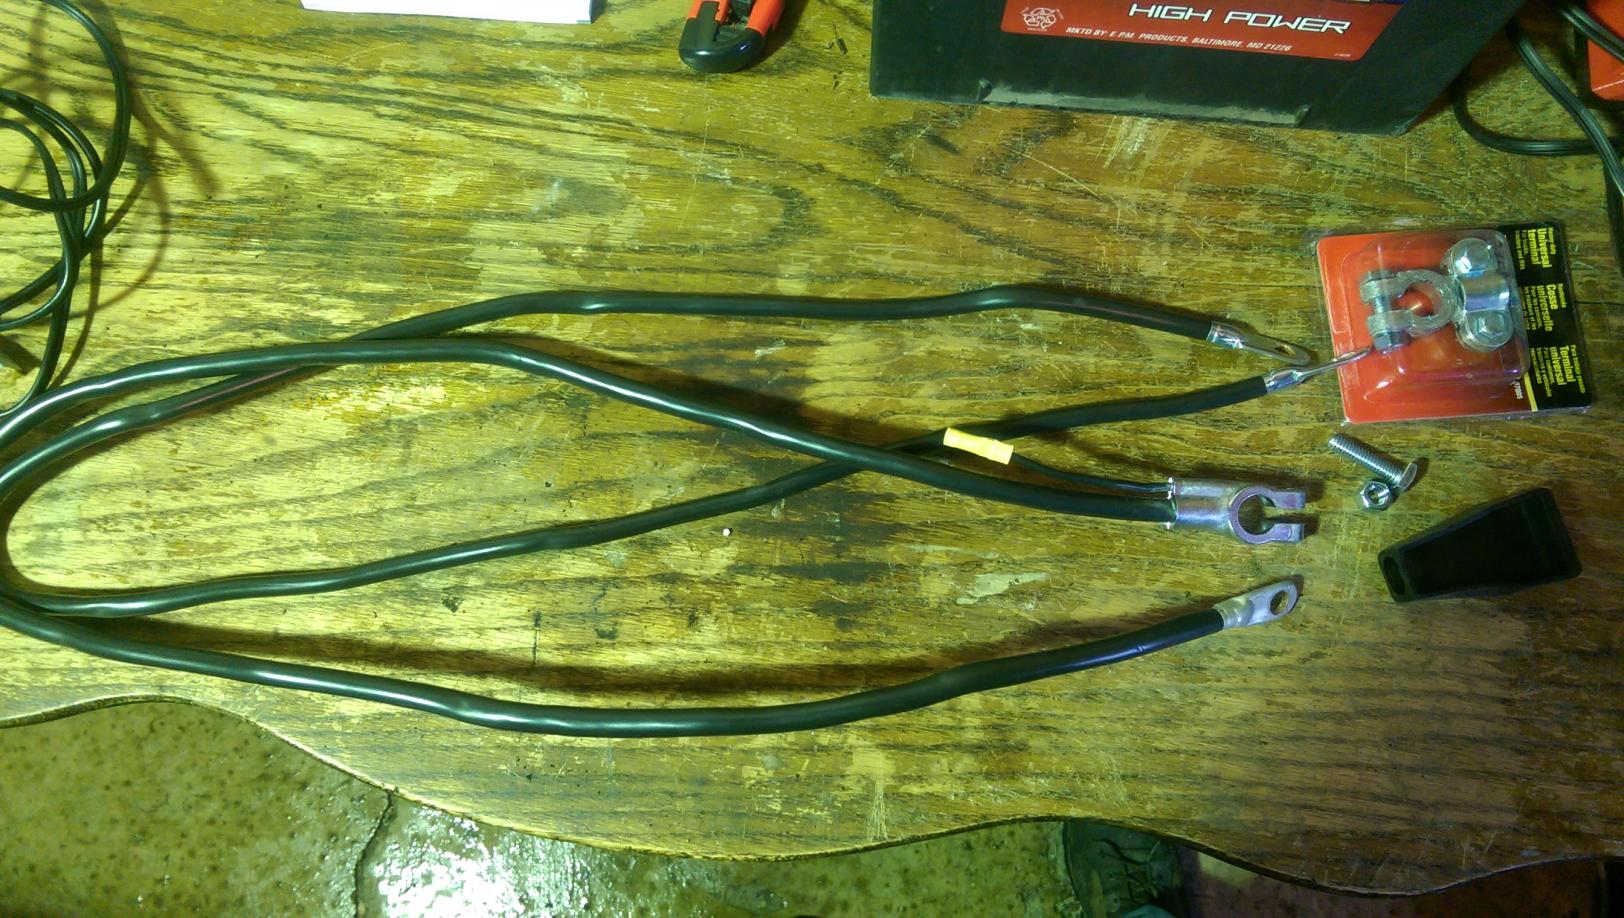
Here's the new parts I bought from AutoZone for the new wiring setup:
$4.49 - Heavy-duty battery terminal
$9.49 - 4 gauge 49"battery cable with ring terminals at both ends
$14.29 - 2 gauge 48" battery cable with ring terminal at one end and top-post battery clamp
$28.27 - total for all new parts
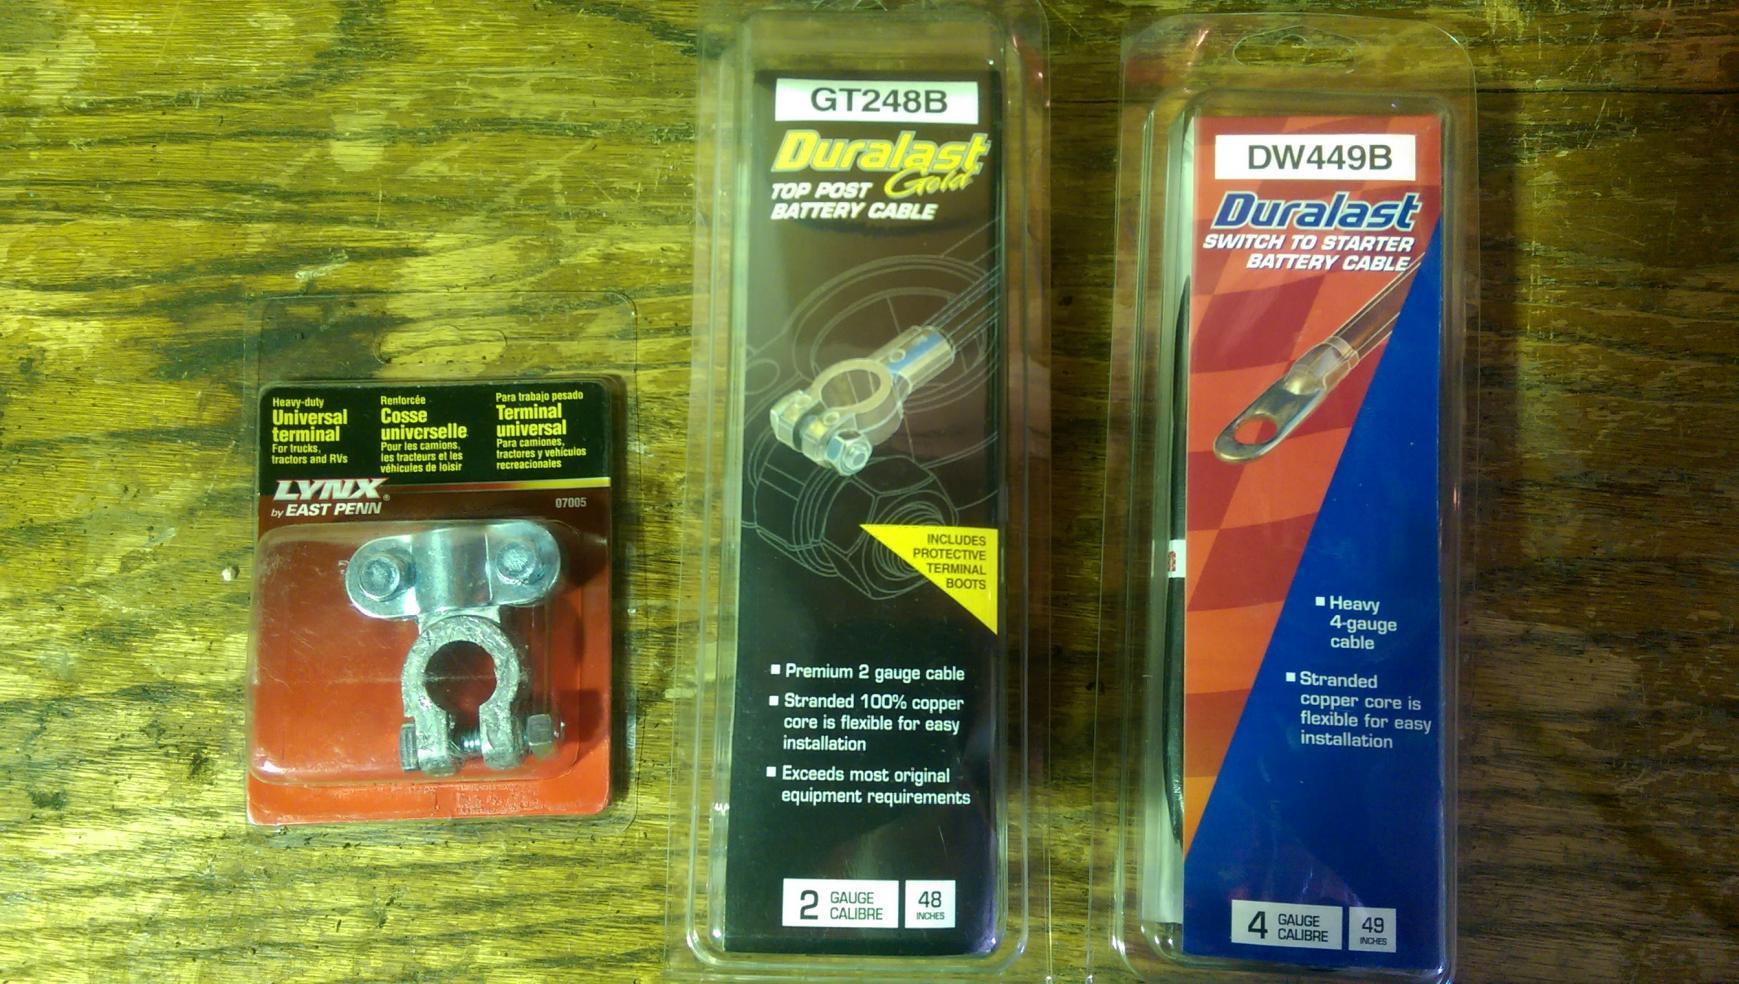
New parts laid out on the table for comparison.
This is a shot of the old cables at the battery end where the clamps should be.
Here's the end where the ground strap bolts to the bellhousing and the positive cable goes to the starter.
I cut the original ground strap right after the strut chassis ground in order to reuse the chassis ground portion. This eliminated the need to splice into the new cable to make for a new chassis ground.
Here's the new parts I bought from AutoZone for the new wiring setup:
$4.49 - Heavy-duty battery terminal
$9.49 - 4 gauge 49"battery cable with ring terminals at both ends
$14.29 - 2 gauge 48" battery cable with ring terminal at one end and top-post battery clamp
$28.27 - total for all new parts
New parts laid out on the table for comparison.
01-14-15, 11:32 PM
#81
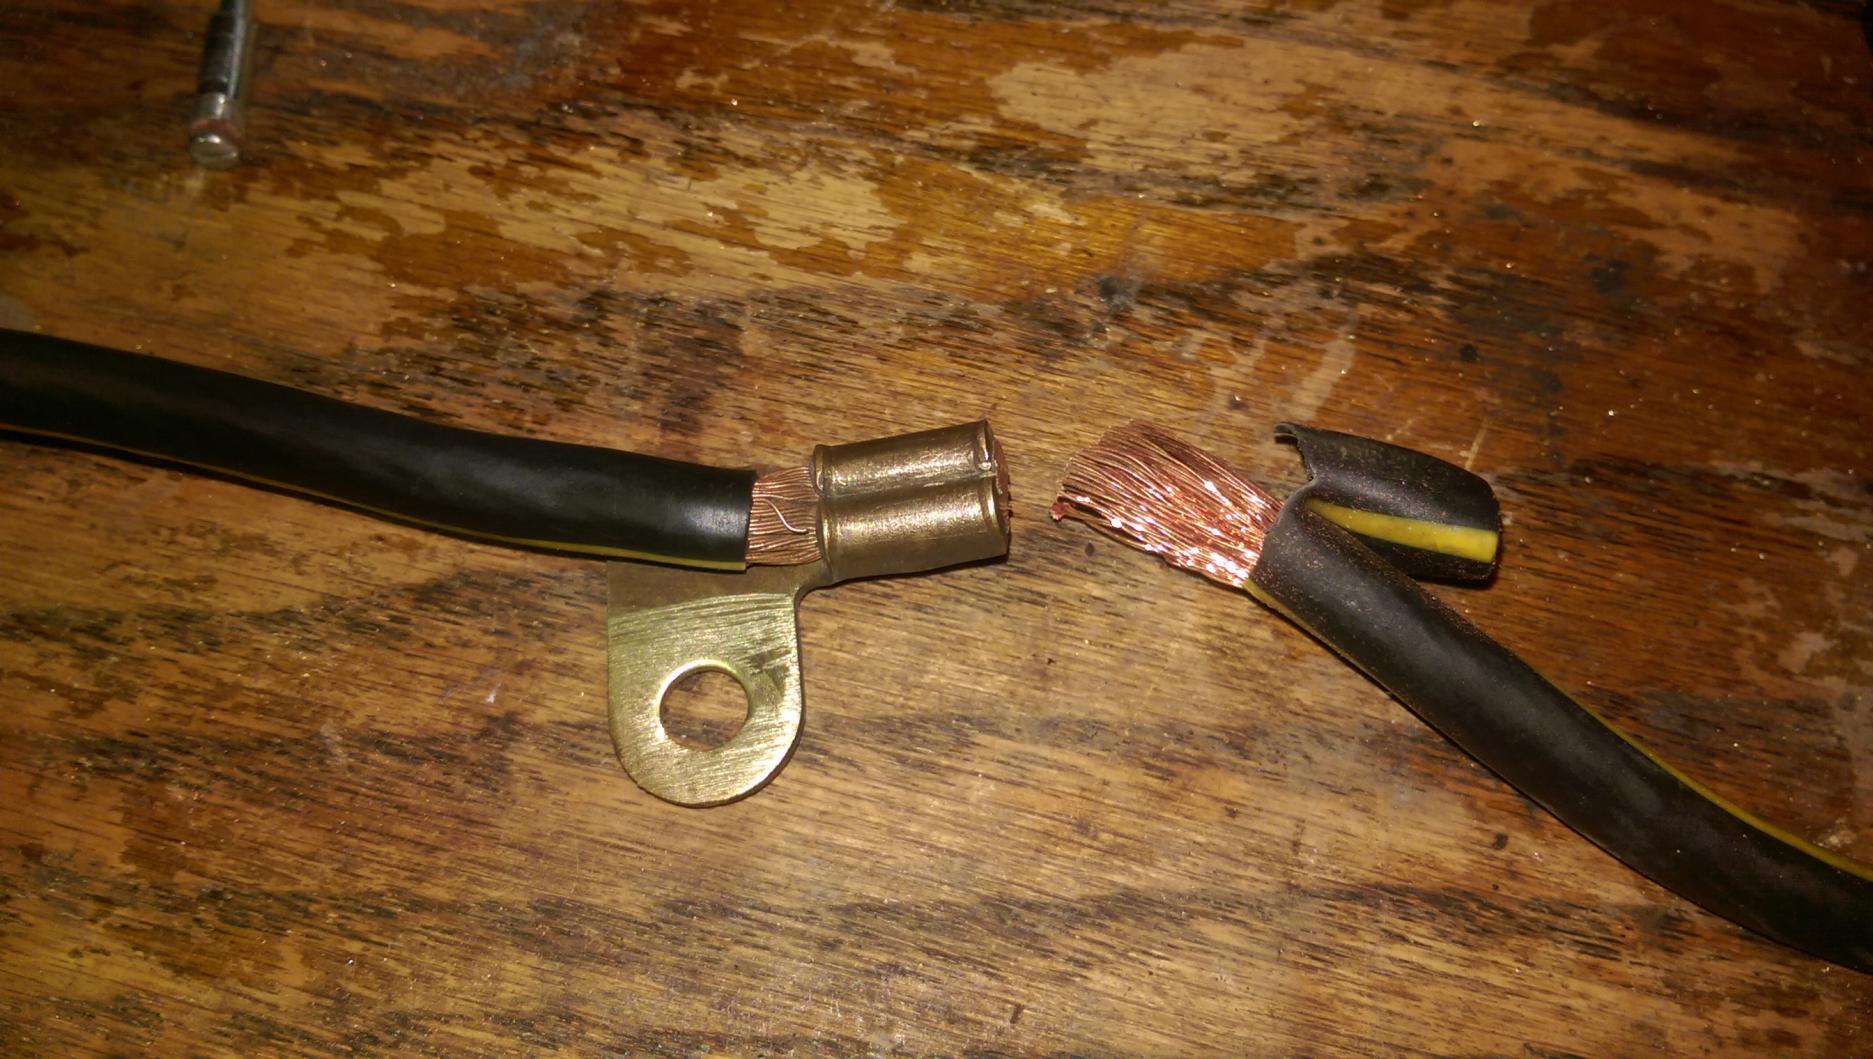
Old, barely-working battery terminals - the ground barely worked at all due to poor contact at the negative terminal.
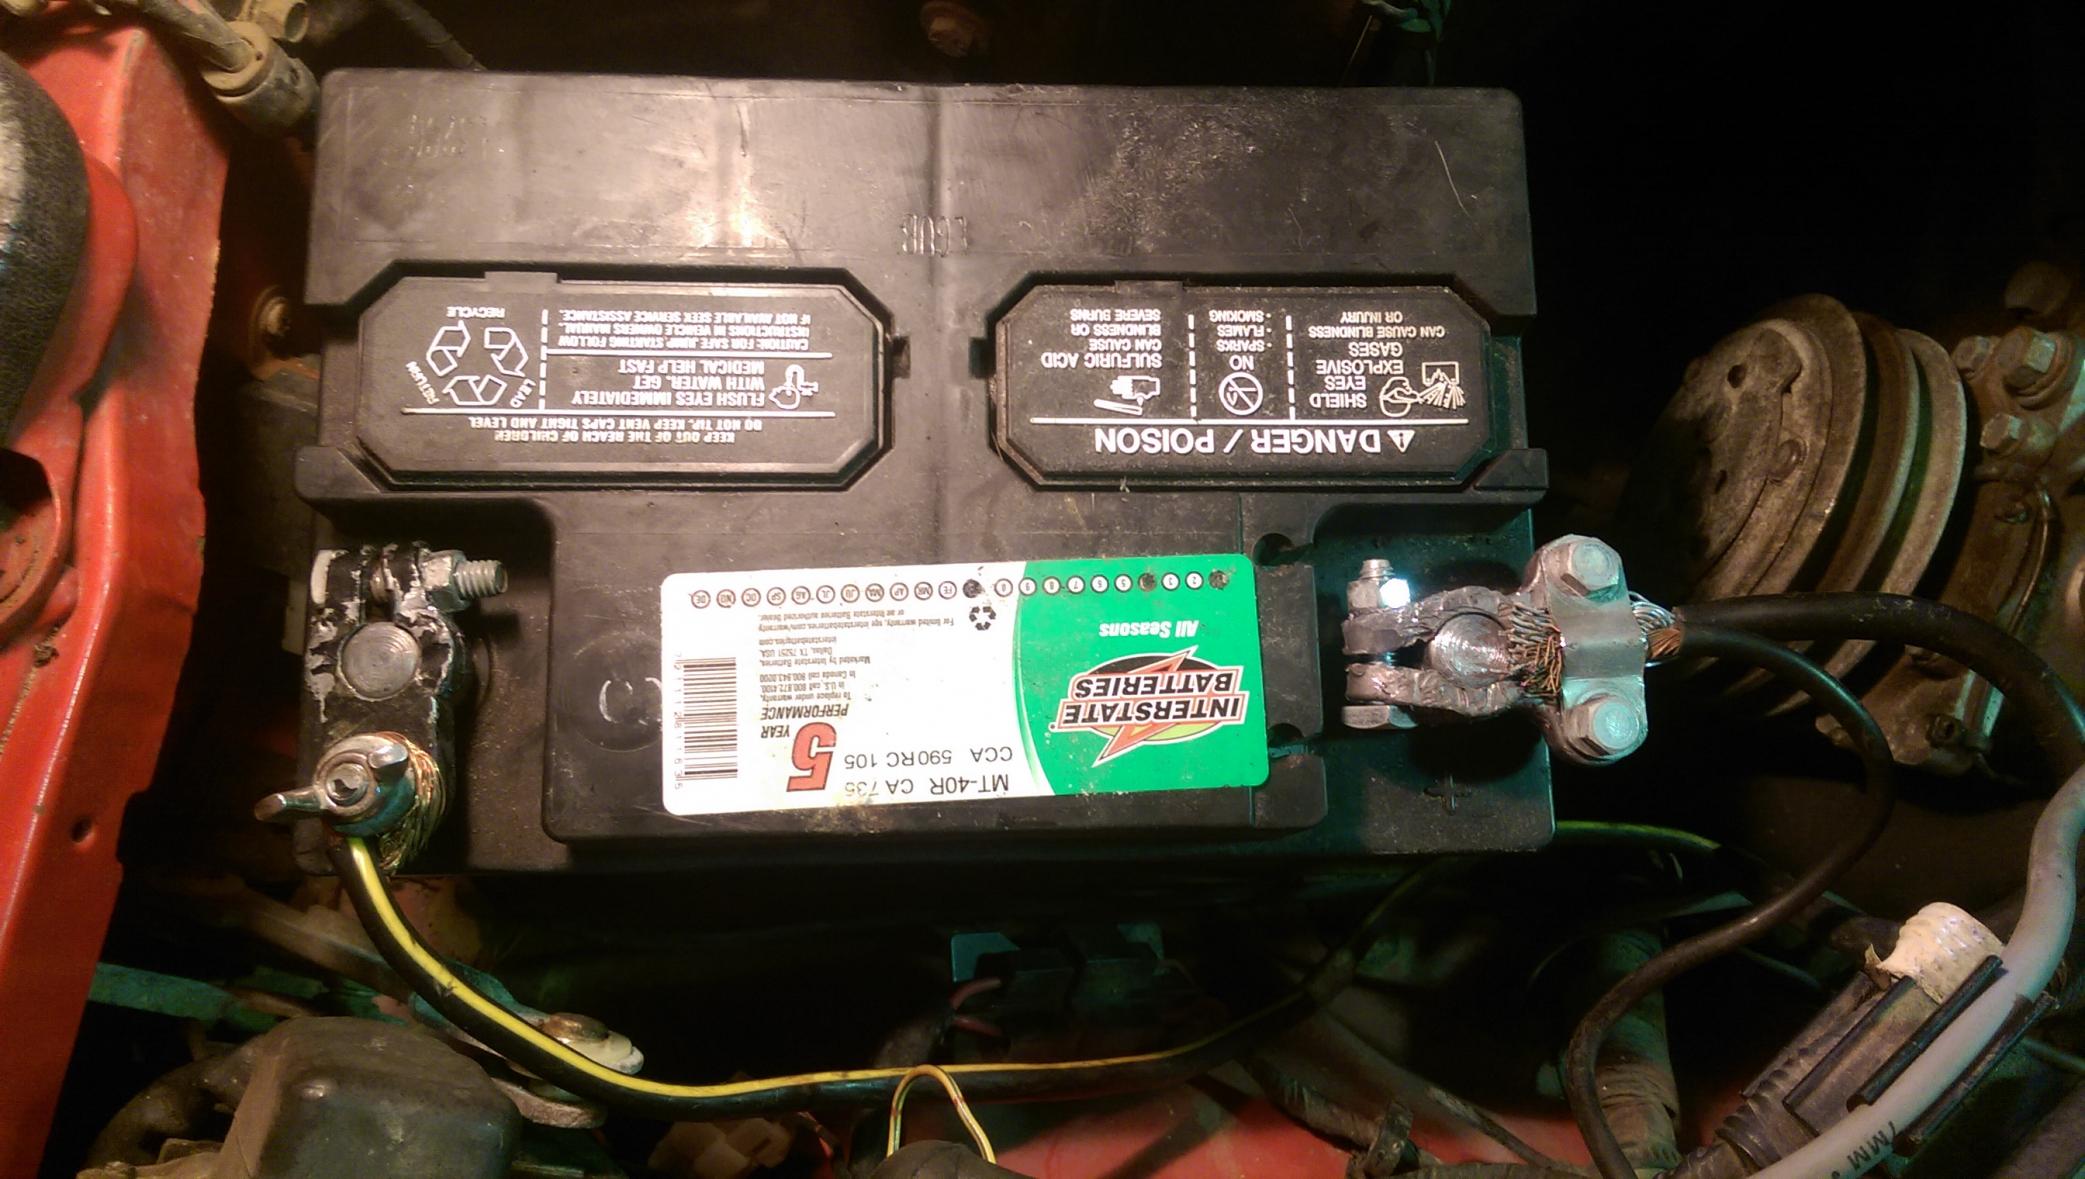
New, much improved terminals! I need to wrap the positive one with some red electrical tape so no one accidentally crosses the wires.
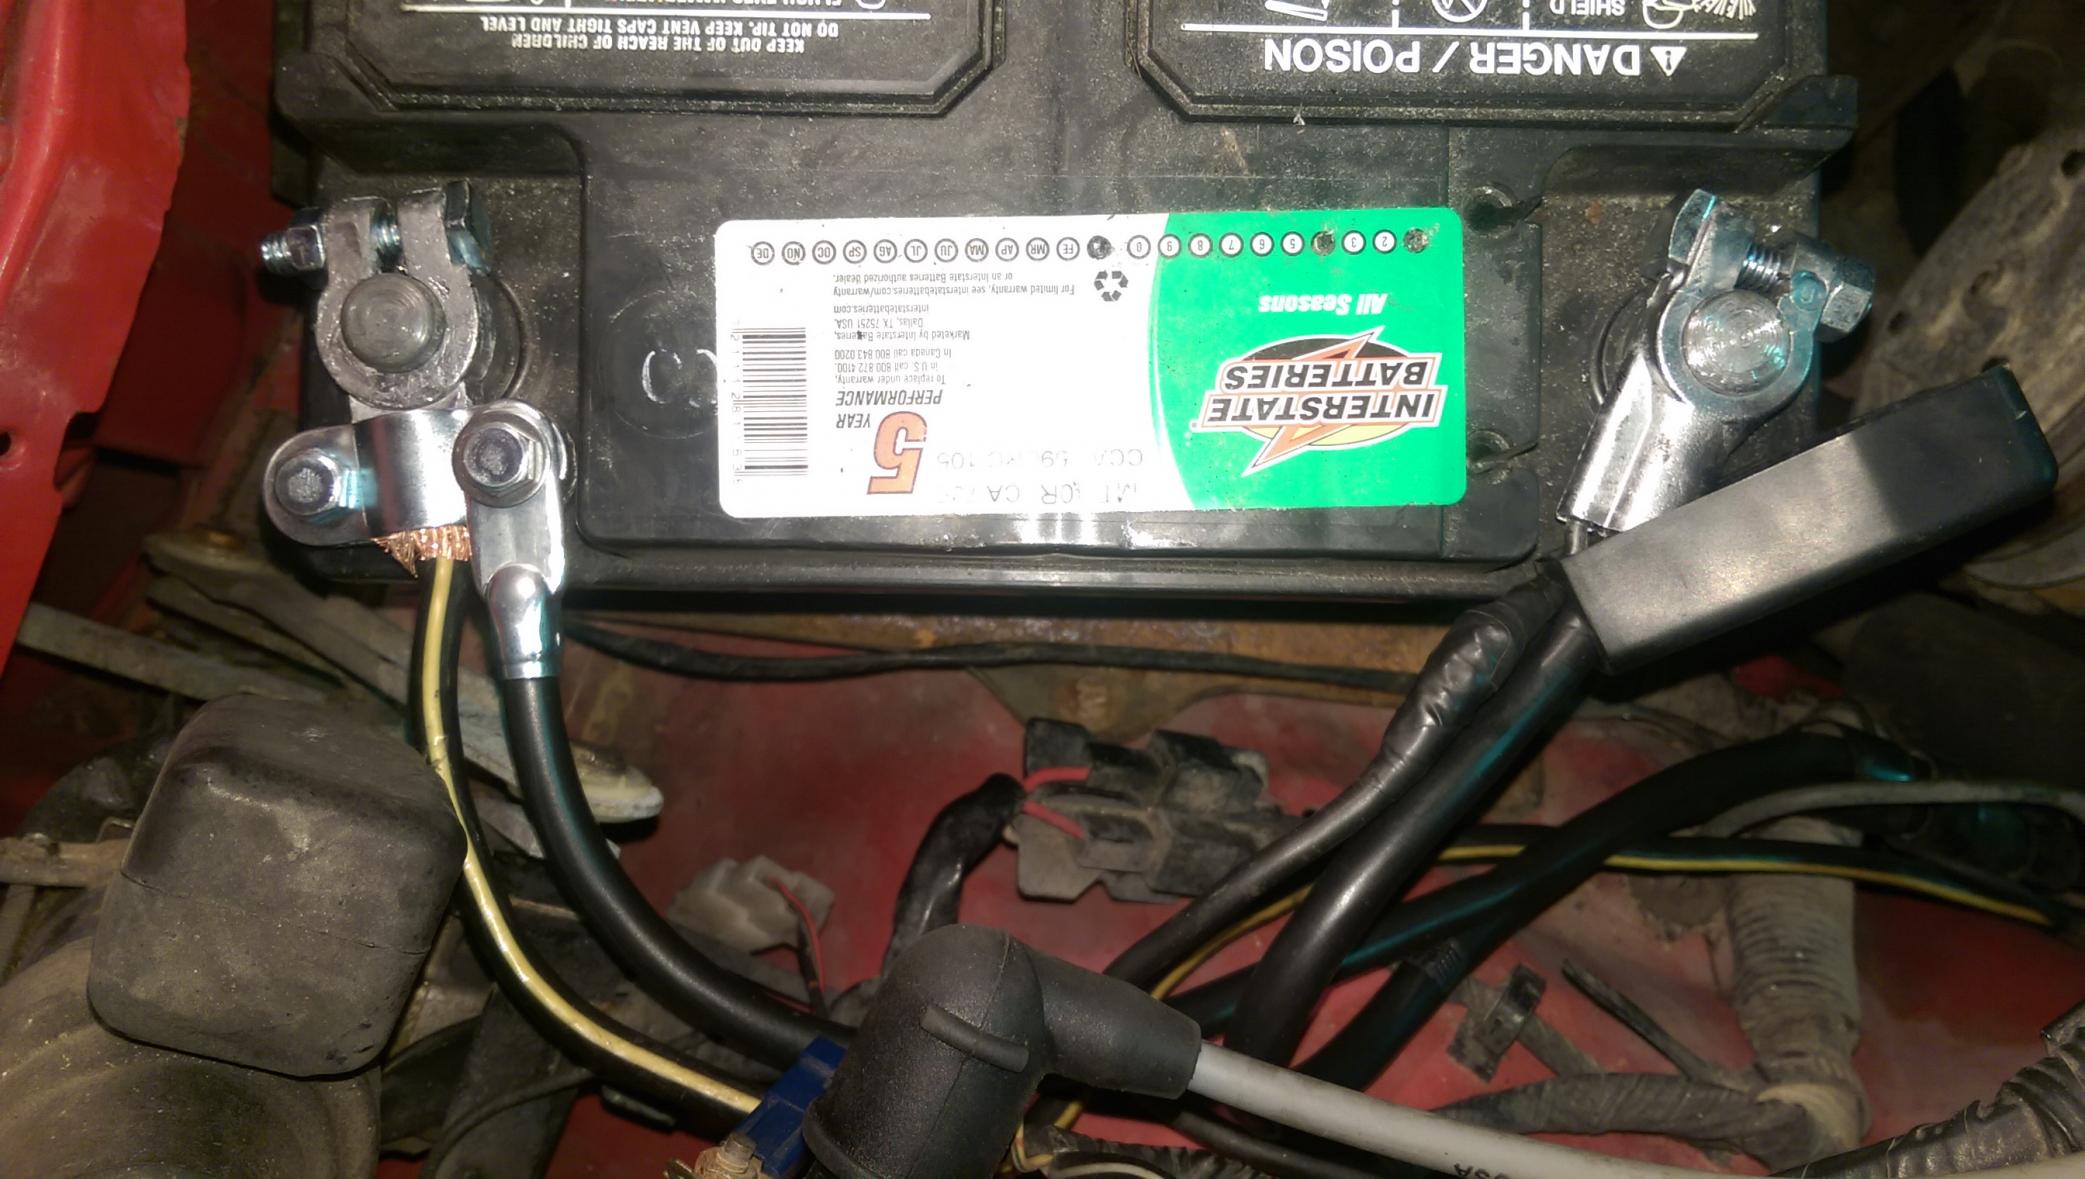
Strut tower chassis ground with new wires running on the bottom of the shot.
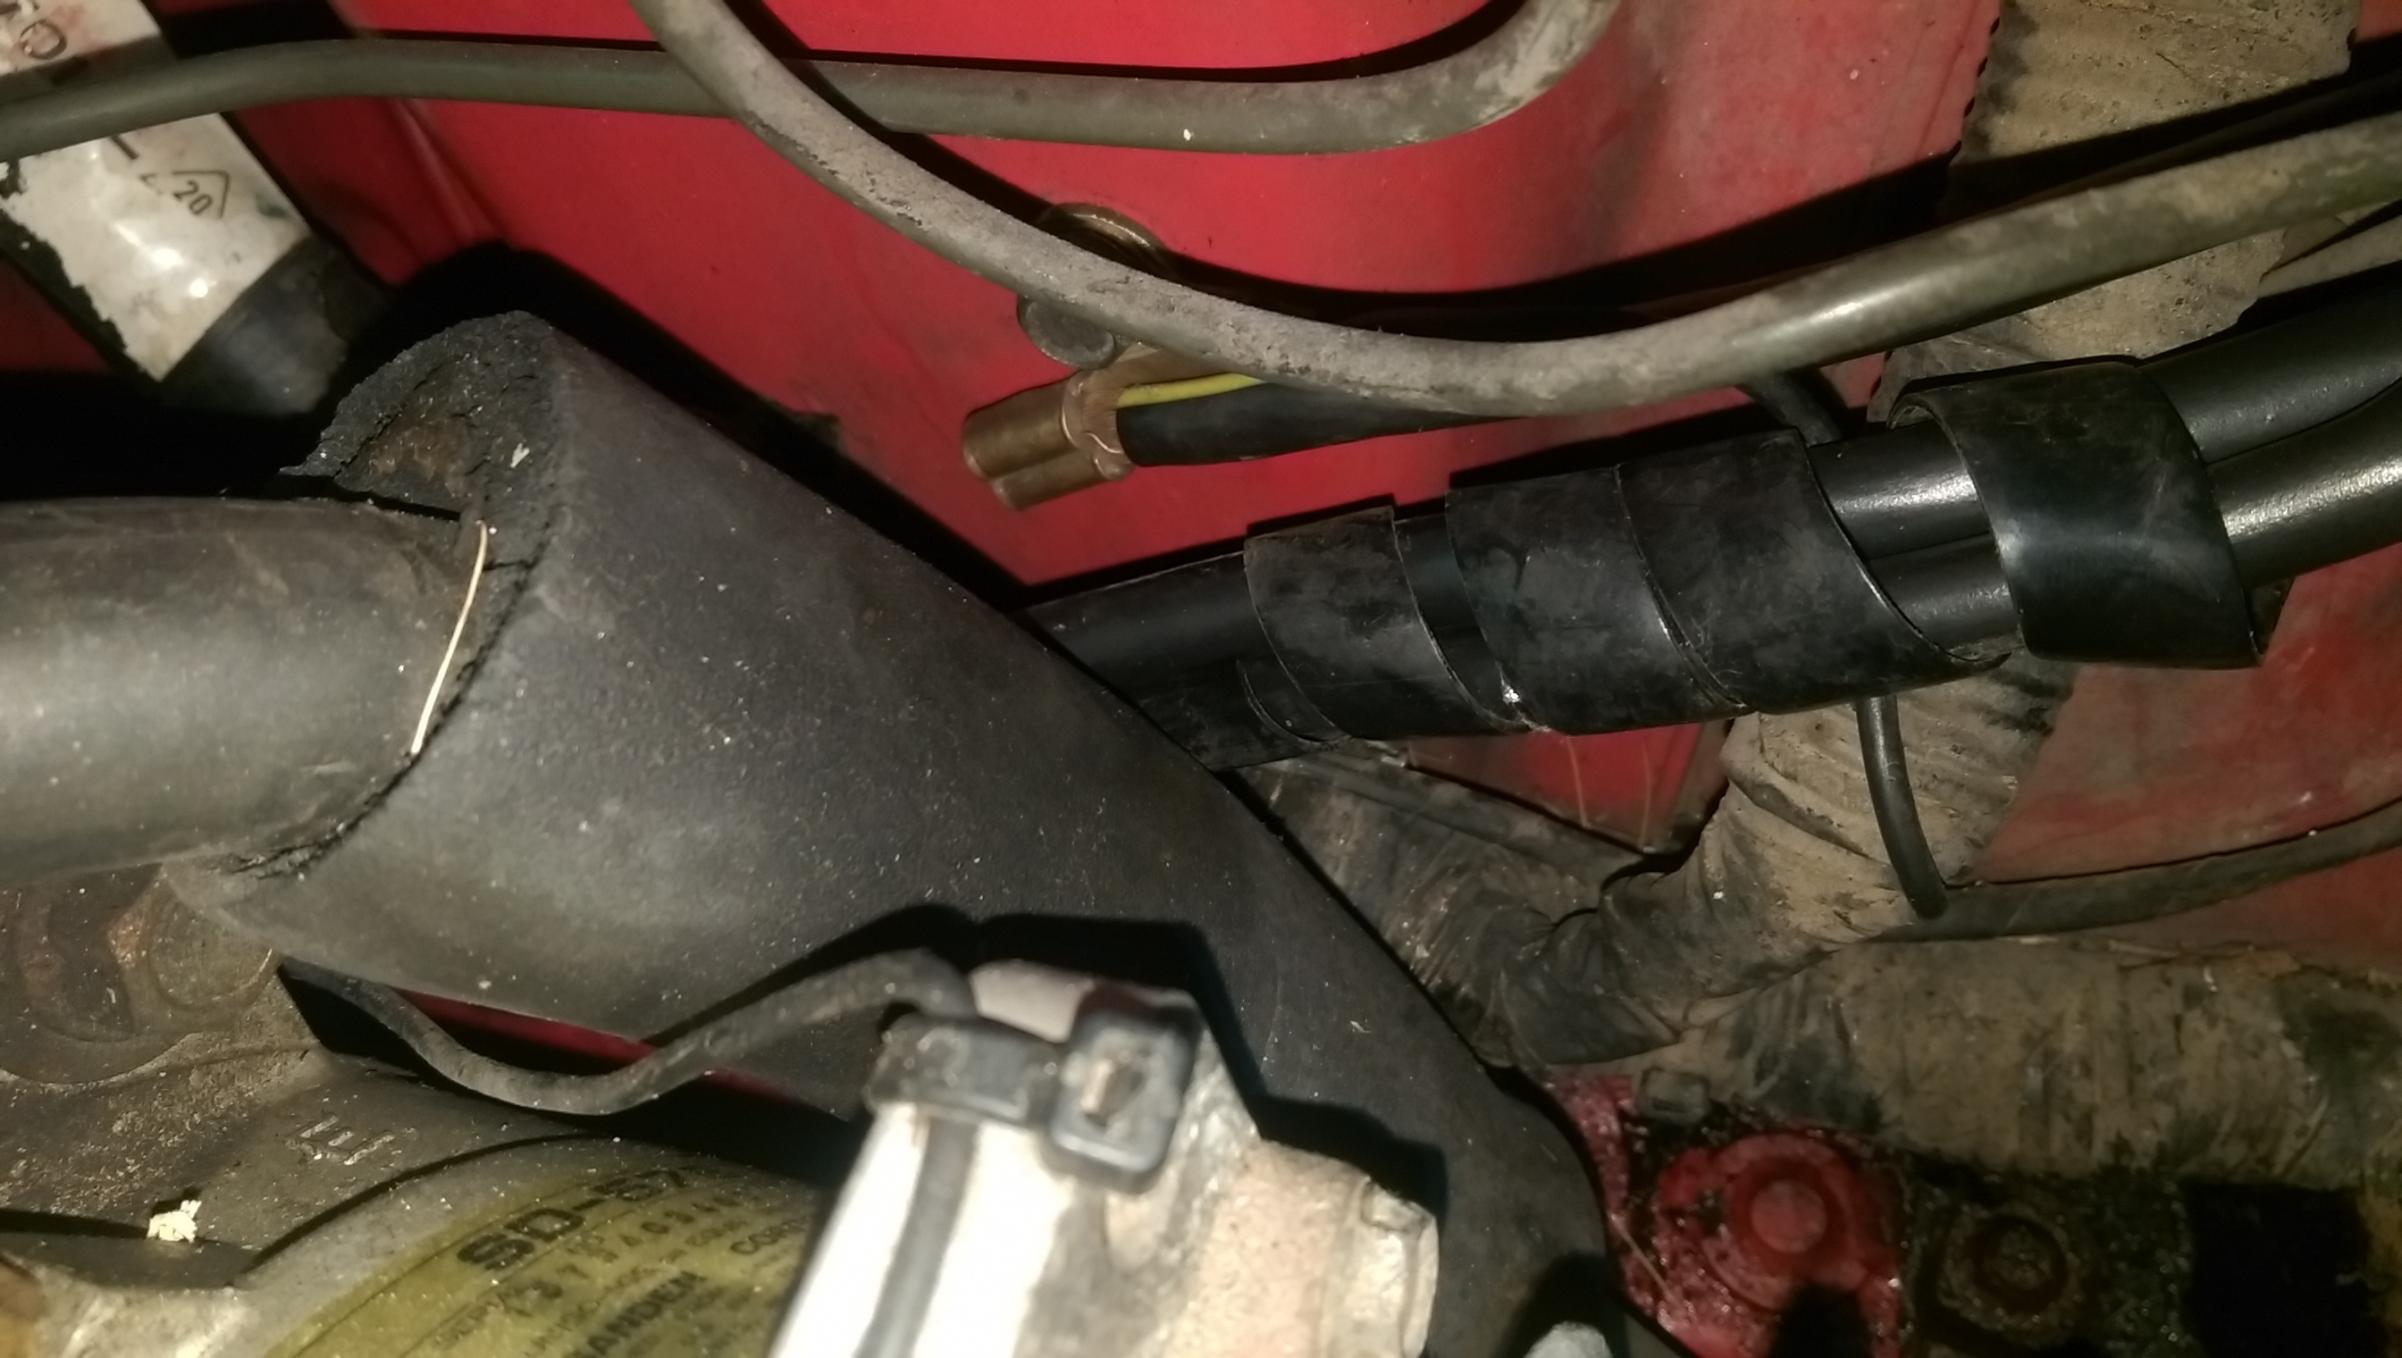
New wires running past the steering box and towards their final destinations.
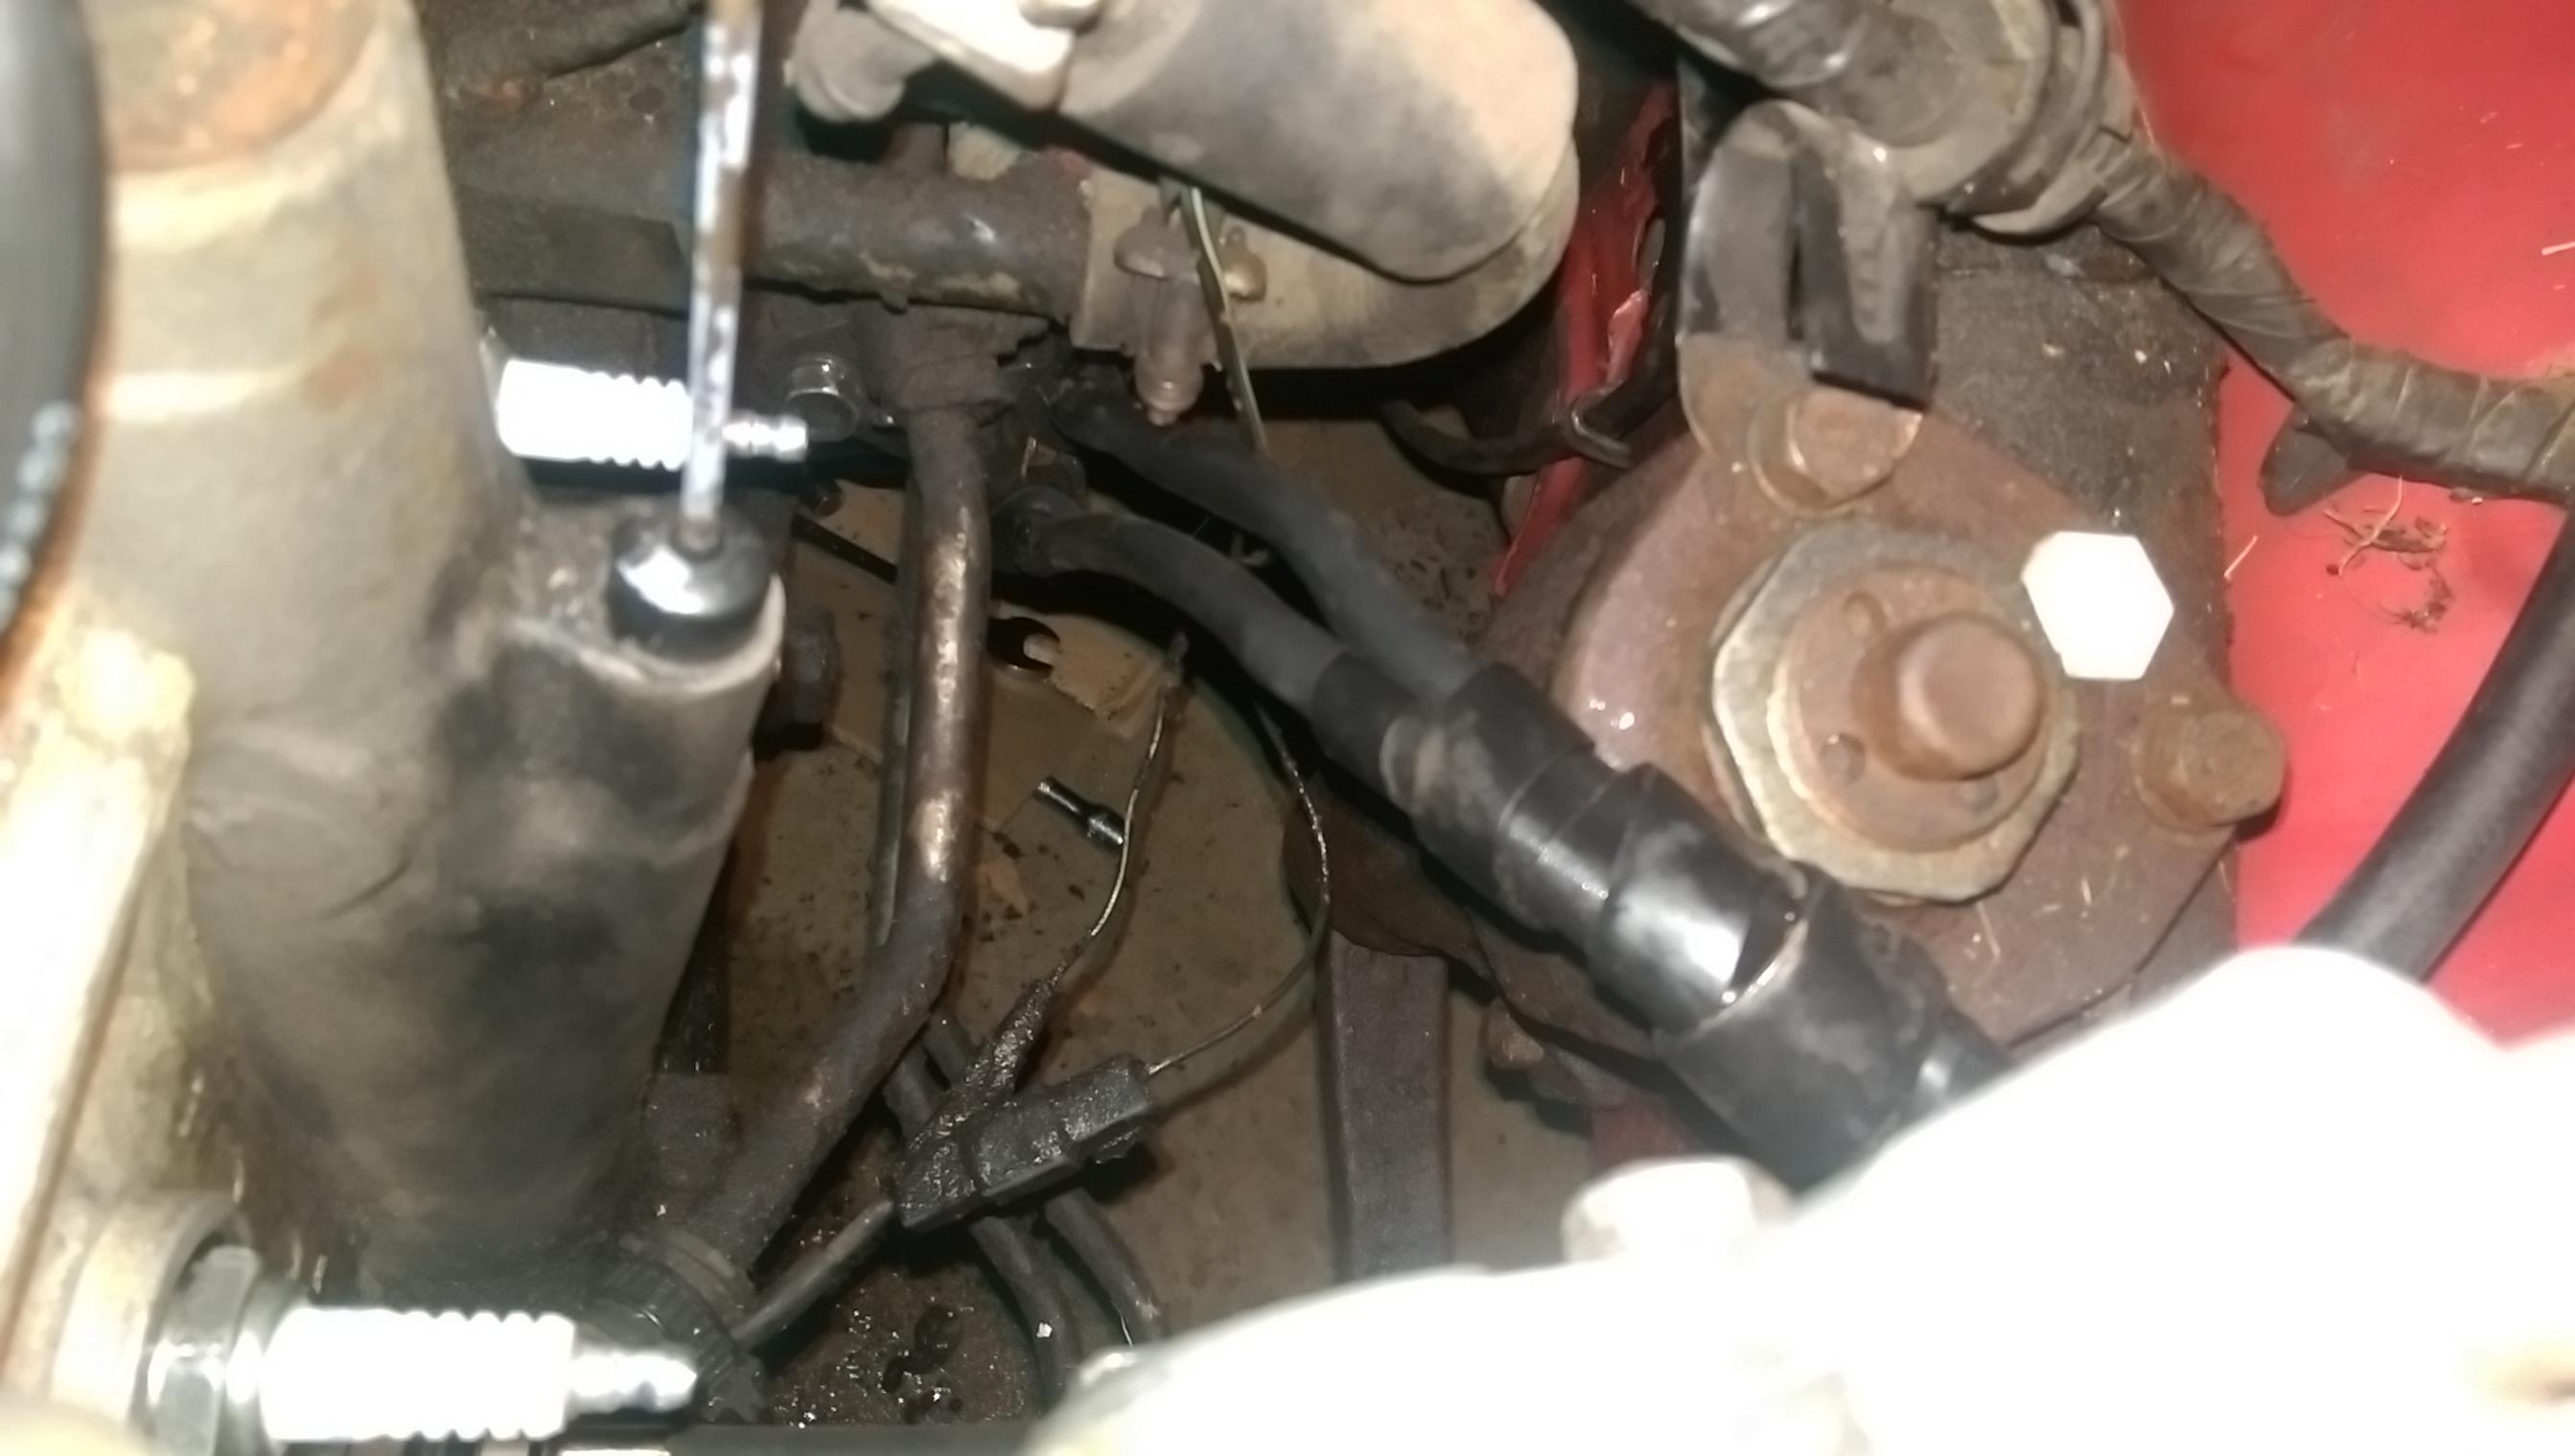
The new cables running down the side of the engine, the positive one's on the starter in this shot. The negative one isn't hooked up yet - see that top hole where there should be a bolt for the tranny? That's where the ground strap bolts to the engine.

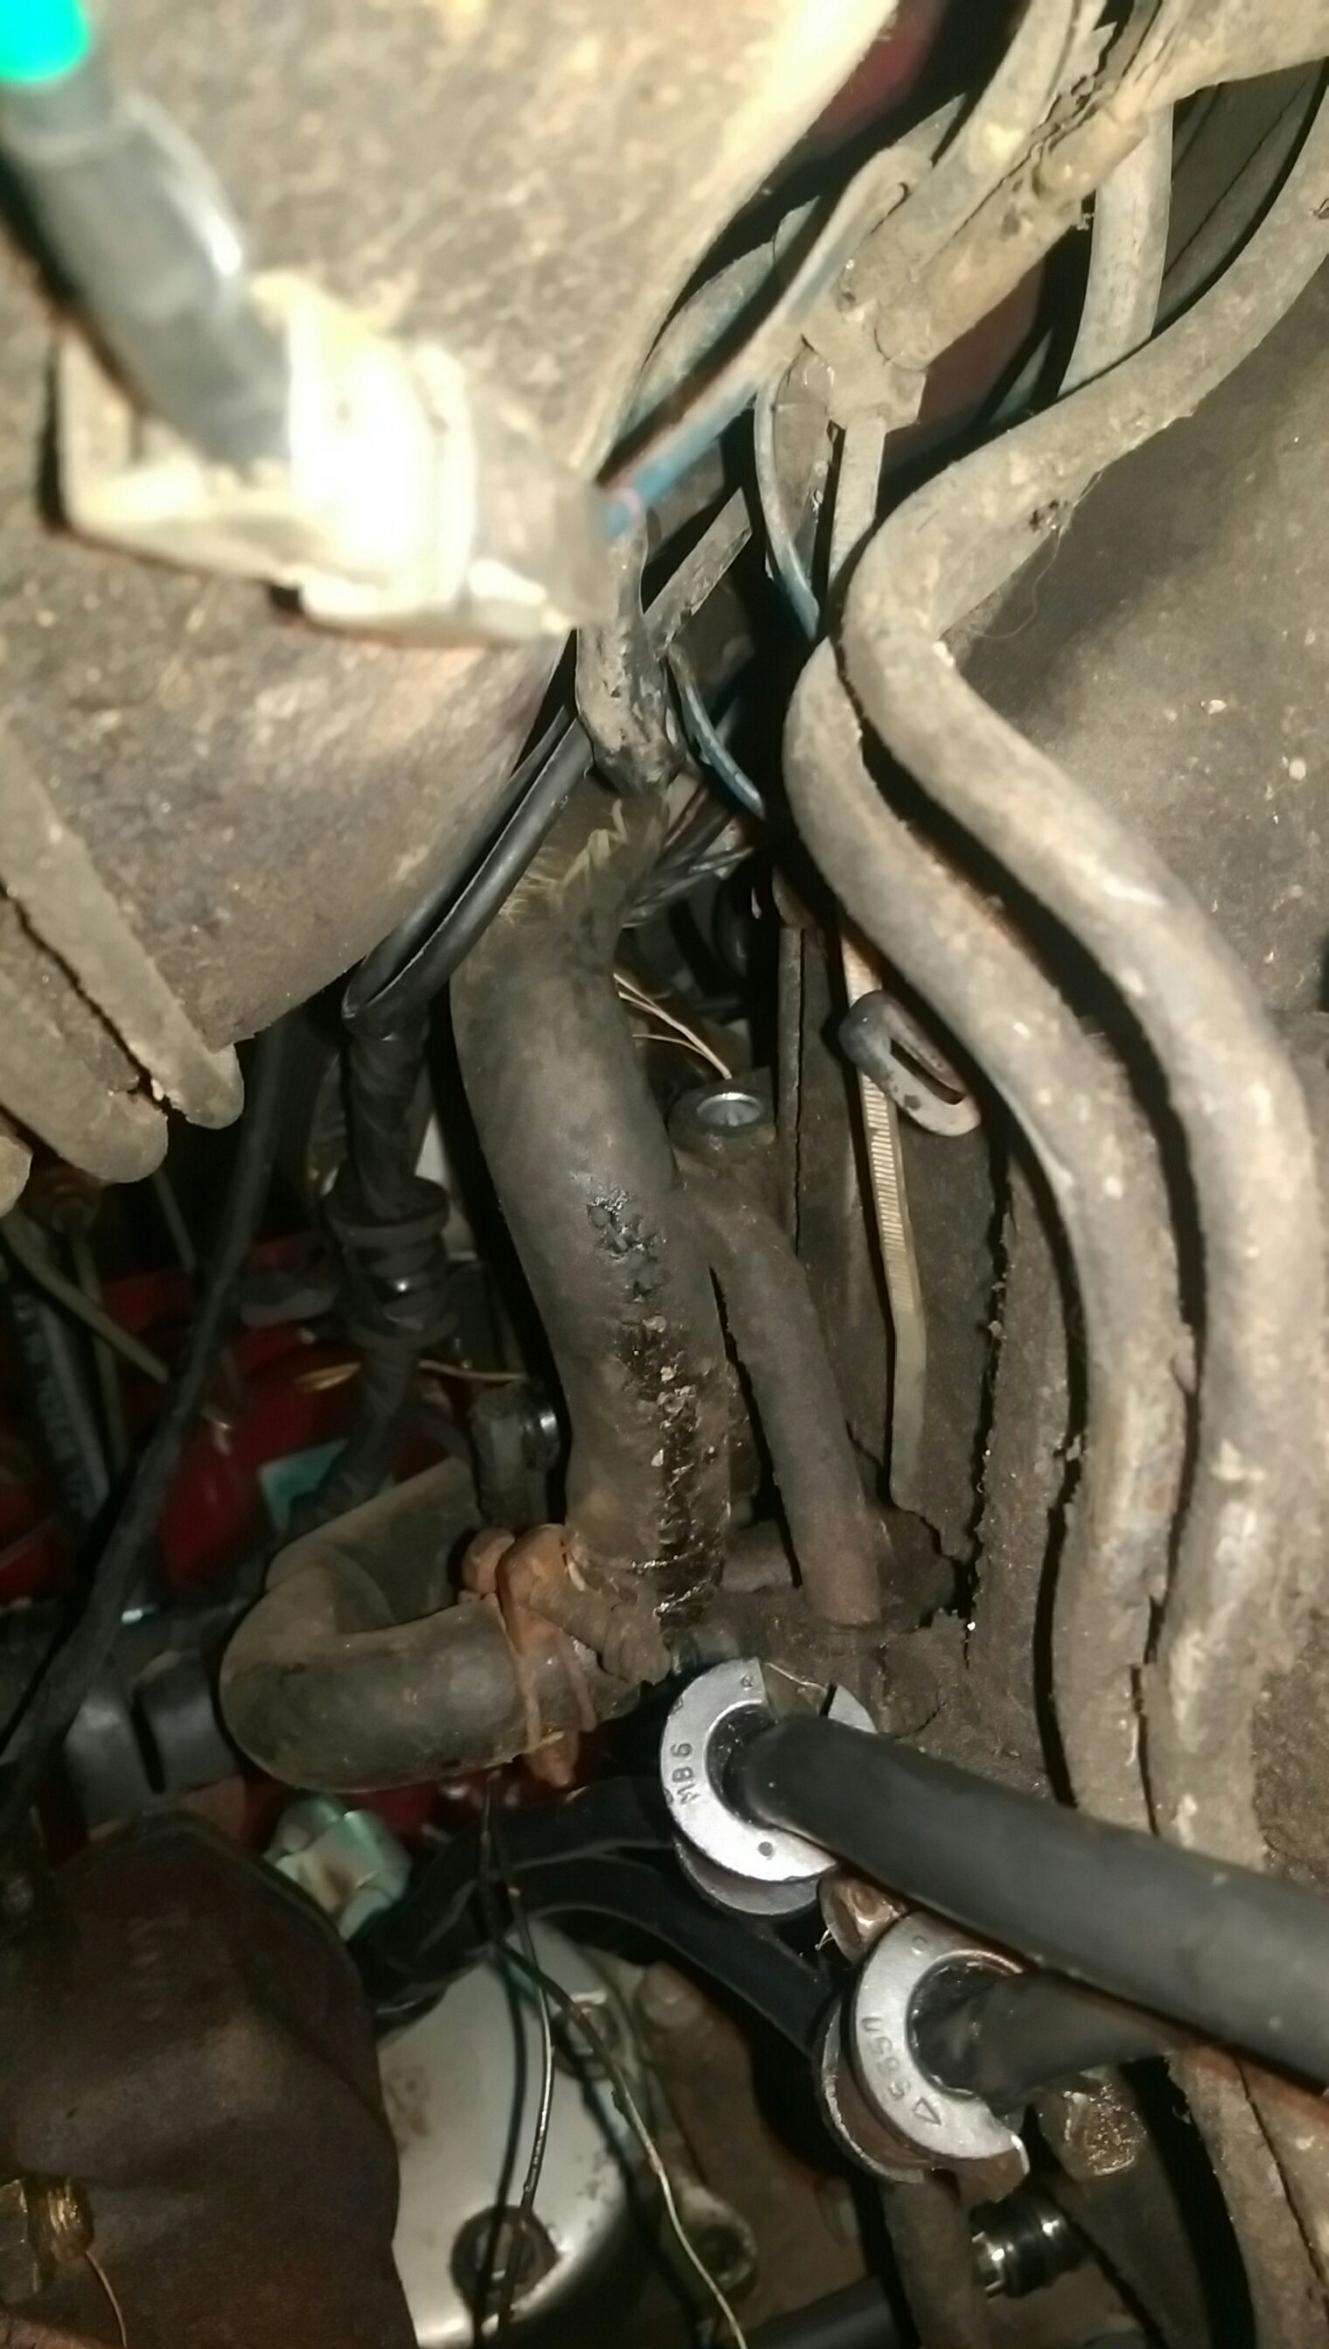
A little better picture of the ground strap location on the side of the engine.
So this procedure did seem to help with the electrical side of things. Feels great to have the cables replaced and know that I don't have to worry about them in the near future.
Needless to say this didn't solve the no-start problem...
New, much improved terminals! I need to wrap the positive one with some red electrical tape so no one accidentally crosses the wires.
Strut tower chassis ground with new wires running on the bottom of the shot.
New wires running past the steering box and towards their final destinations.
The new cables running down the side of the engine, the positive one's on the starter in this shot. The negative one isn't hooked up yet - see that top hole where there should be a bolt for the tranny? That's where the ground strap bolts to the engine.
A little better picture of the ground strap location on the side of the engine.
So this procedure did seem to help with the electrical side of things. Feels great to have the cables replaced and know that I don't have to worry about them in the near future.
Needless to say this didn't solve the no-start problem...
01-15-15, 12:46 AM
#83
Hmm, I see all the trouble you're having with setting static timing (where you line
things up and stab the dizzy) which is a kind of problem I've never experienced
on an engien with a correctly installed dizzy drive gear on the eccentric shaft.
I've only ever ran across two engines with a backwards drive gear, and it indeed
lead to all kinda of head scratching. Maybe your engine is a rebuild? Does it have
any telltale signs? Like flaking paint on the irons? Evidence of lapping? (I hope
not)
As for your specific concern regarding the dizzy, what I find funny is I've never
bothered to learn how to use the dimple. I just rotate the dizzy shaft from above
to what looks like will work, already knowing the slanty gears will make the shaft
move a bit when I stab it in, and I stab it in. If I'm off one tooth, I try again and
I'm usually correct by the second try.
And just in case you need some credentials, I just got done with a production
run of six torn down, semi-locked, greased and reassembled dizzies for some
turbo projects. A turbo engine that's not controlled by an ECU requires a higher
knowledge level about things like timing and tuning (blow through Nikki) than an
NA, so I've discovered I have to be pretty up on my game. So I rotated a nearby
engine to TDC, and noticed out of all six dizzies I stabbed in to check for TDC
alignment, one was a little off from the factory. Turns out the guy who stabbed it
over in Hiroshima must have been a little hung over from too much sake the
night before lol. Probably a Monday-built engine. So to correct this mistake, I
took a Sharpie and made a new mark on the base plate at the stud. All five other
dizzies, well the ones that still had a visible clean spot where the 10mm nut or
hold own bolt was for the majority of their life before they came to me, were
used to futher confirm the engine was indeed at TDC so I could feel confident
that the one questionable dizzy's clean spot was in fact a factory error and that
probably went unnoticed for its entire run before I got it. How about that?
Oh one more thing. While holding the gear, try to rotate the upper shaft. If it
doesn't spring back, maybe that's where some of the confusion is. It needs to be
taken apart and regreased.
Edit: ah, now I can proof read without needing to side-scroll. Your pics are super big, you know.
things up and stab the dizzy) which is a kind of problem I've never experienced
on an engien with a correctly installed dizzy drive gear on the eccentric shaft.
I've only ever ran across two engines with a backwards drive gear, and it indeed
lead to all kinda of head scratching. Maybe your engine is a rebuild? Does it have
any telltale signs? Like flaking paint on the irons? Evidence of lapping? (I hope
not)
As for your specific concern regarding the dizzy, what I find funny is I've never
bothered to learn how to use the dimple. I just rotate the dizzy shaft from above
to what looks like will work, already knowing the slanty gears will make the shaft
move a bit when I stab it in, and I stab it in. If I'm off one tooth, I try again and
I'm usually correct by the second try.
And just in case you need some credentials, I just got done with a production
run of six torn down, semi-locked, greased and reassembled dizzies for some
turbo projects. A turbo engine that's not controlled by an ECU requires a higher
knowledge level about things like timing and tuning (blow through Nikki) than an
NA, so I've discovered I have to be pretty up on my game. So I rotated a nearby
engine to TDC, and noticed out of all six dizzies I stabbed in to check for TDC
alignment, one was a little off from the factory. Turns out the guy who stabbed it
over in Hiroshima must have been a little hung over from too much sake the
night before lol. Probably a Monday-built engine.
So to correct this mistake, I took a Sharpie and made a new mark on the base plate at the stud. All five other
dizzies, well the ones that still had a visible clean spot where the 10mm nut or
hold own bolt was for the majority of their life before they came to me, were
used to futher confirm the engine was indeed at TDC so I could feel confident
that the one questionable dizzy's clean spot was in fact a factory error and that
probably went unnoticed for its entire run before I got it. How about that?
Oh one more thing. While holding the gear, try to rotate the upper shaft. If it
doesn't spring back, maybe that's where some of the confusion is. It needs to be
taken apart and regreased.
Edit: ah, now I can proof read without needing to side-scroll.
Your pics are super big, you know.
01-15-15, 10:47 AM
#85
Hmm, I see all the trouble you're having with setting static timing (where you line
things up and stab the dizzy) which is a kind of problem I've never experienced
on an engien with a correctly installed dizzy drive gear on the eccentric shaft.
I've only ever ran across two engines with a backwards drive gear, and it indeed
lead to all kinda of head scratching. Maybe your engine is a rebuild? Does it have
any telltale signs? Like flaking paint on the irons? Evidence of lapping? (I hope
not)
you saying that you've run across engines with backwards dizzy drive gears! I'll make
sure to remember to take a picture when I take the front cover off of this engine to
see whether or not the drive gear was installed backwards or not.
As for your specific concern regarding the dizzy, what I find funny is I've never
bothered to learn how to use the dimple. I just rotate the dizzy shaft from above
to what looks like will work, already knowing the slanty gears will make the shaft
move a bit when I stab it in, and I stab it in. If I'm off one tooth, I try again and
I'm usually correct by the second try.
bothered to learn how to use the dimple. I just rotate the dizzy shaft from above
to what looks like will work, already knowing the slanty gears will make the shaft
move a bit when I stab it in, and I stab it in. If I'm off one tooth, I try again and
I'm usually correct by the second try.
in the shed before dropping it in and I had to remove the front cover of that engine
while it was in the car so I reset the timing in that one as well. That's why I didn't
want to seem like a bother with all the timing questions but something has got to
be a little screwed up in the timing compartment on this engine. Because I know
what it feels like to drop a dizzy down and have it be right on the money for where
it should be. And it just would not line up correctly on this car for me, hopefully I
find out why during the tear down.
And just in case you need some credentials, I just got done with a production
run of six torn down, semi-locked, greased and reassembled dizzies for some
turbo projects. A turbo engine that's not controlled by an ECU requires a higher
knowledge level about things like timing and tuning (blow through Nikki) than an
NA, so I've discovered I have to be pretty up on my game. So I rotated a nearby
engine to TDC, and noticed out of all six dizzies I stabbed in to check for TDC
alignment, one was a little off from the factory. Turns out the guy who stabbed it
over in Hiroshima must have been a little hung over from too much sake the
night before lol. Probably a Monday-built engine. So to correct this mistake, I
took a Sharpie and made a new mark on the base plate at the stud. All five other
dizzies, well the ones that still had a visible clean spot where the 10mm nut or
hold own bolt was for the majority of their life before they came to me, were
used to futher confirm the engine was indeed at TDC so I could feel confident
that the one questionable dizzy's clean spot was in fact a factory error and that
probably went unnoticed for its entire run before I got it. How about that?
Oh one more thing. While holding the gear, try to rotate the upper shaft. If it
doesn't spring back, maybe that's where some of the confusion is. It needs to be
taken apart and regreased.
run of six torn down, semi-locked, greased and reassembled dizzies for some
turbo projects. A turbo engine that's not controlled by an ECU requires a higher
knowledge level about things like timing and tuning (blow through Nikki) than an
NA, so I've discovered I have to be pretty up on my game. So I rotated a nearby
engine to TDC, and noticed out of all six dizzies I stabbed in to check for TDC
alignment, one was a little off from the factory. Turns out the guy who stabbed it
over in Hiroshima must have been a little hung over from too much sake the
night before lol. Probably a Monday-built engine.
So to correct this mistake, I took a Sharpie and made a new mark on the base plate at the stud. All five other
dizzies, well the ones that still had a visible clean spot where the 10mm nut or
hold own bolt was for the majority of their life before they came to me, were
used to futher confirm the engine was indeed at TDC so I could feel confident
that the one questionable dizzy's clean spot was in fact a factory error and that
probably went unnoticed for its entire run before I got it. How about that?
Oh one more thing. While holding the gear, try to rotate the upper shaft. If it
doesn't spring back, maybe that's where some of the confusion is. It needs to be
taken apart and regreased.
I know your credentials are good - you've always got something worthwhile to add
to the conversation when I need it most. You must be a rotary mechanic somewhere
I take it?
The shaft does spring back like it should be, I know what you mean. I could feel that
when feeling the play in the rotor on the top of the distributor.
Based on your comment about the Monday built distributor, I toured the Arctic Cat
factory in Theif River Falls, MN this year and we asked them about the Monday and
Friday production line myth. The guy giving us the tour actually admitted that there is
some truth behind that stigma because he's caught people coming in on Mondays and
finding loose or missing parts that the Friday guy didn't feel like completing before he
took off and headed home. Scary that he would admit it, but it shows a level of maturity
on his part. I worked in an ammunition plant all summer last year and there was
something to be said about the early Monday and late Friday shells. You always hit your
stride in the middle part of the week and make the most on Thursdays. But we'd always
run out the machine when we were done with our shift so that the next person had a
clean machine to start with, so they couldn't blame any faulty shells on us.
resize the pics. Total side note - which browser do you use? I'm strictly Google Chrome now after
I tried it. I was hooked after a week. I'm also on a laptop where my monitor is 18 inches and a very
high resolution so that doesn't help the situation either I suppose. I went from a 14 inch screen to
this 18 now and I absolutely love it. It's almost the size of a computer monitor that comes stock
with a desktop.
No, I didn't have any heat shrink here while doing these cables. I moved down here for school and
I'm having to buy all of my own tools and accessories like a big boy now. I was very used to my
dad's shed where he had all of the nick-knacky stuff along with the tools that I needed. Now
I'm adding to my growing tool collection with almost-daily runs to the parts store or Menard's
for hardware and supplies. Today's list includes bolts for the flywheel puller, a door handle with
a deadbolt for the garage, and a bunch of other stuff I'm already forgetting - this is why I have
a pad of Post-Its in the tool box now, I can't remember anything for more than 5 minutes

Well, this engine is getting pulled no matter what now. I'm going out to do some more garage
modifications and then I'll be starting to drain fluids and maybe have the engine out by tonight.
Making progress!
Since I'll have another 12a manual car coming in about a week that's getting swapped (S4 13bt)
then I'm considering testing the compression on that engine and seeing if the motor is good enough
to drop into this car. I wanted to do a manual swap anyways and I'd have everything I'd need except
a manual pedal set, but I can find one locally from a buddy. The 12a in this car will get torn down and
inspected anyways, along with the one already on the engine stand in the garage. I've got a bunch of
learning ahead of me at this point!
Scary part is I was told that this engine had 10,000 miles on a rebuild - I hope that means the rotors, housings and irons are still in good or great shape!
01-19-15, 07:54 PM
#86
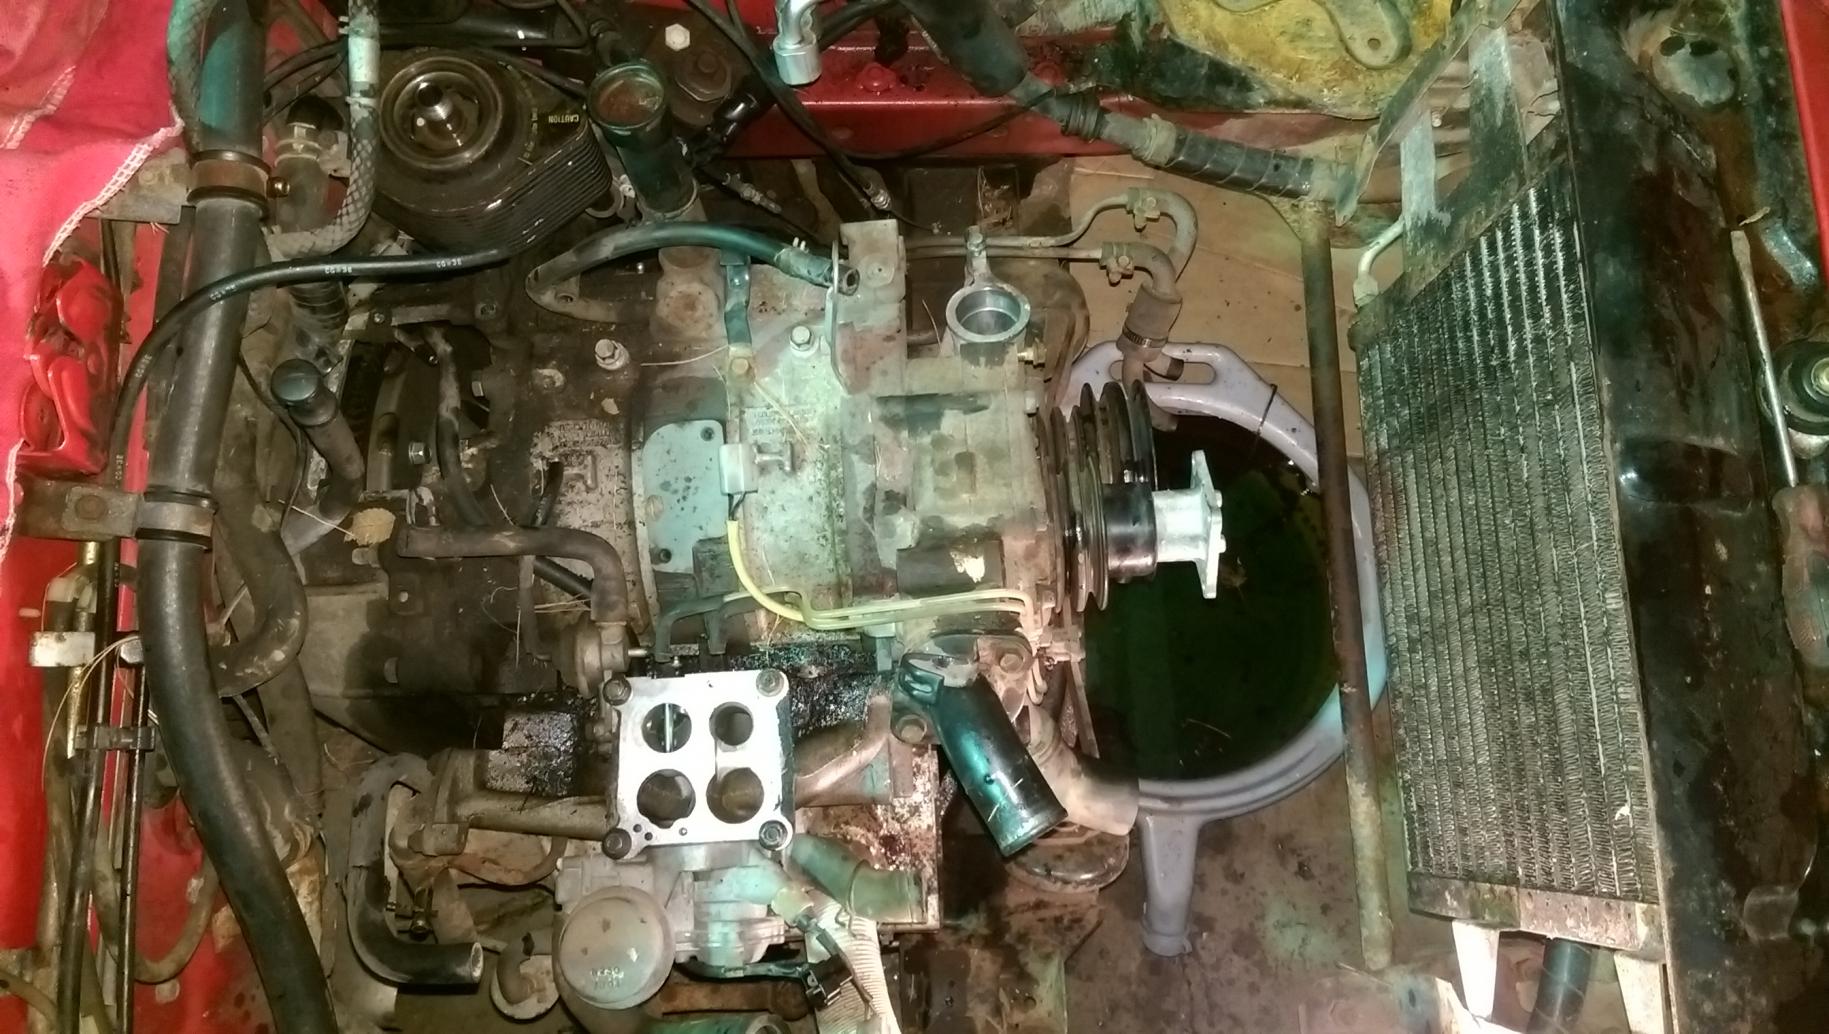
Well I got to tearing down the spare engine I had sitting around on the stand last Thursday night. This had been sitting for a very long time and I just finally got around to it.
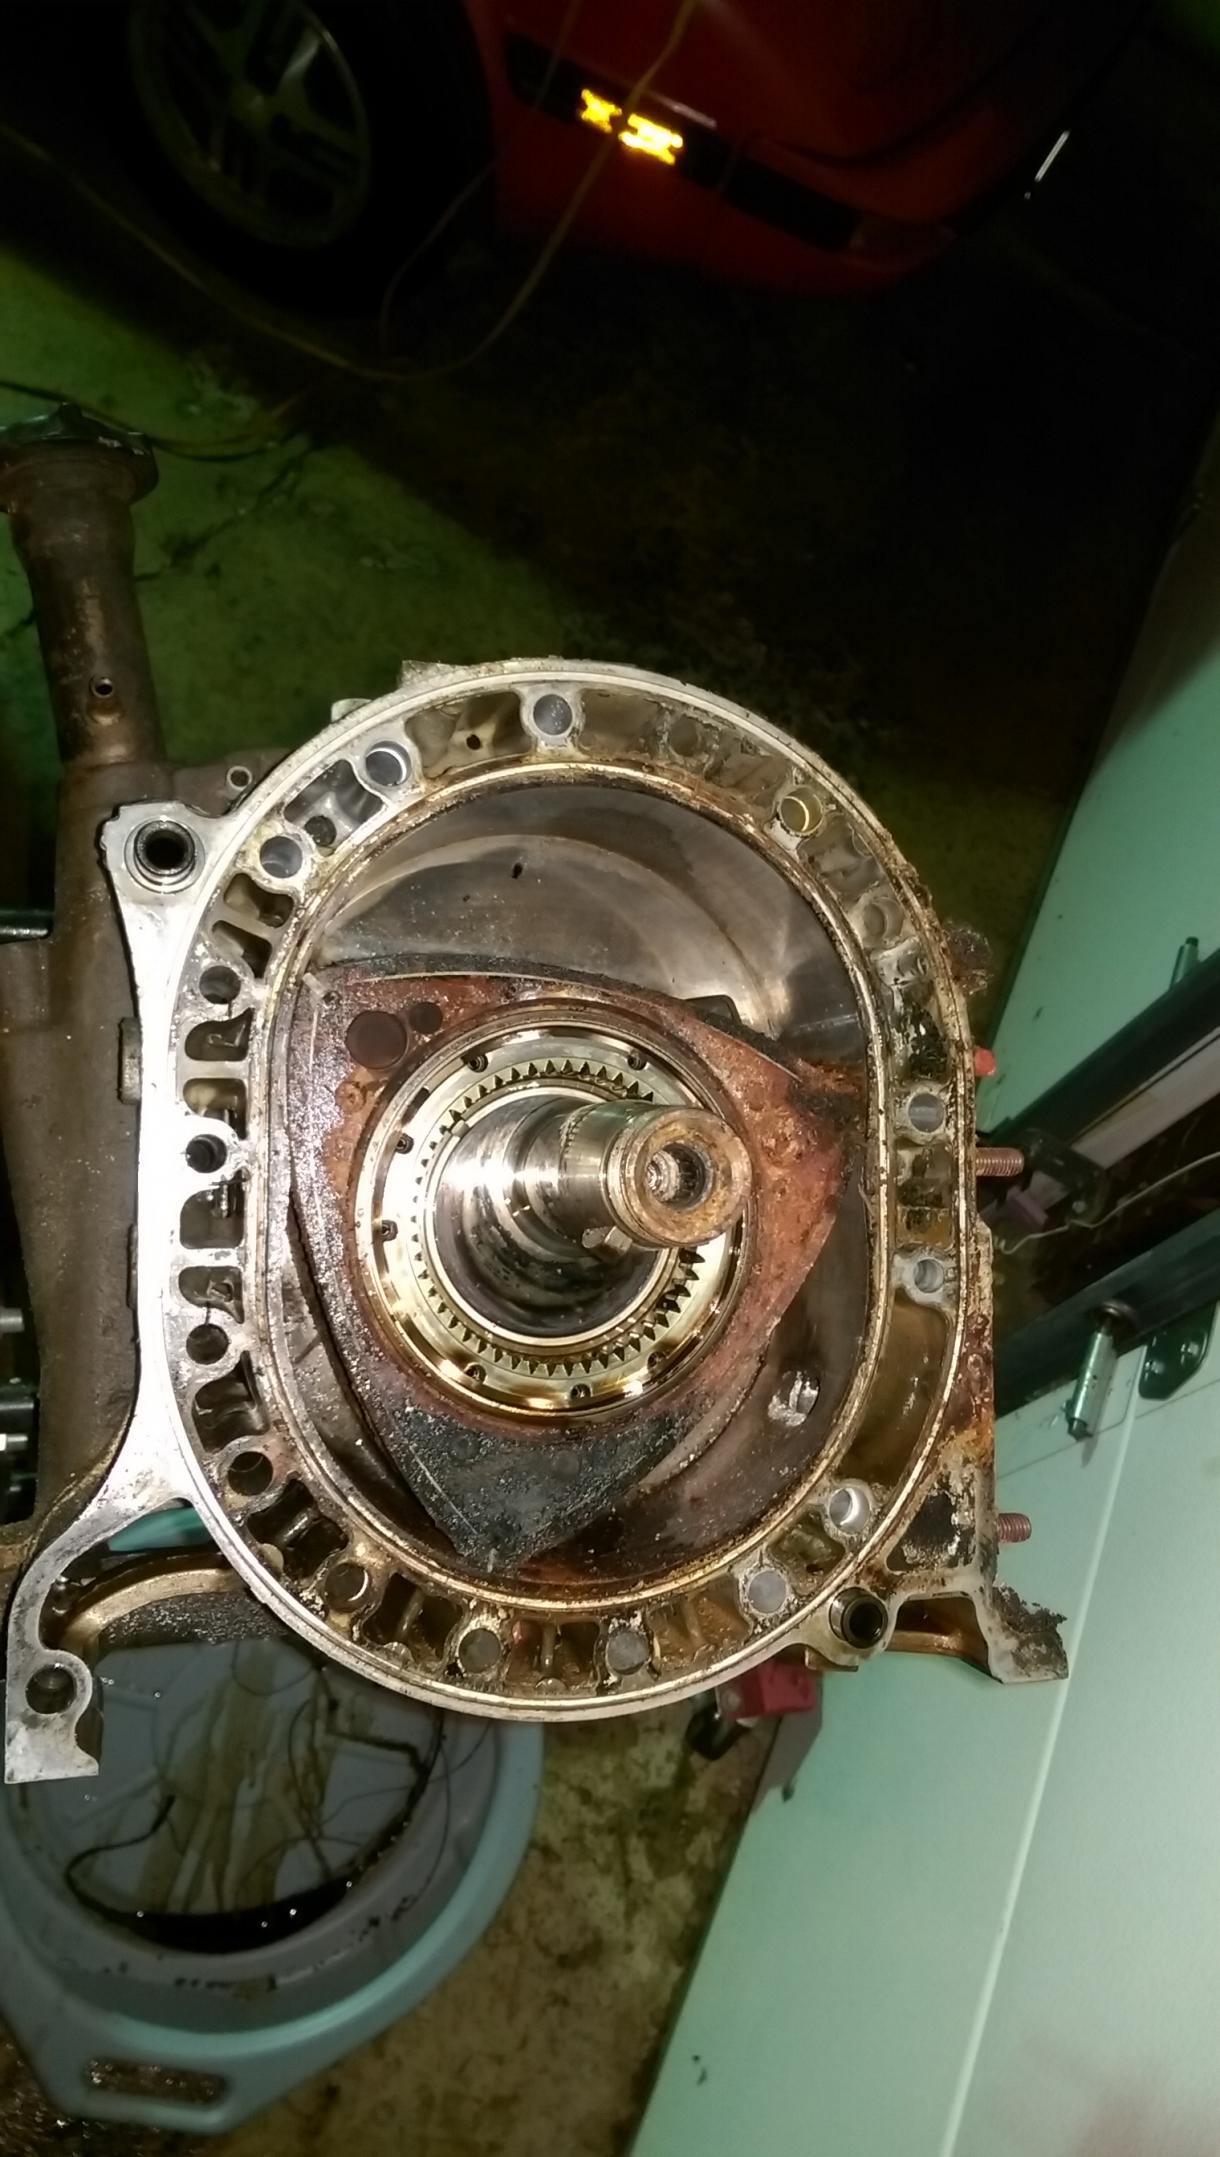
Rear iron removed from the engine.
What the rear rotor looked like. This engine had been sitting, not running, for years before I got to pulling it apart. I think the housings and irons may still be good - but the rotors I believe are completely shot.
Whole engine torn down, still waiting to be cleaned up. She sure stunk after sitting around for so long!
01-19-15, 08:13 PM
#88
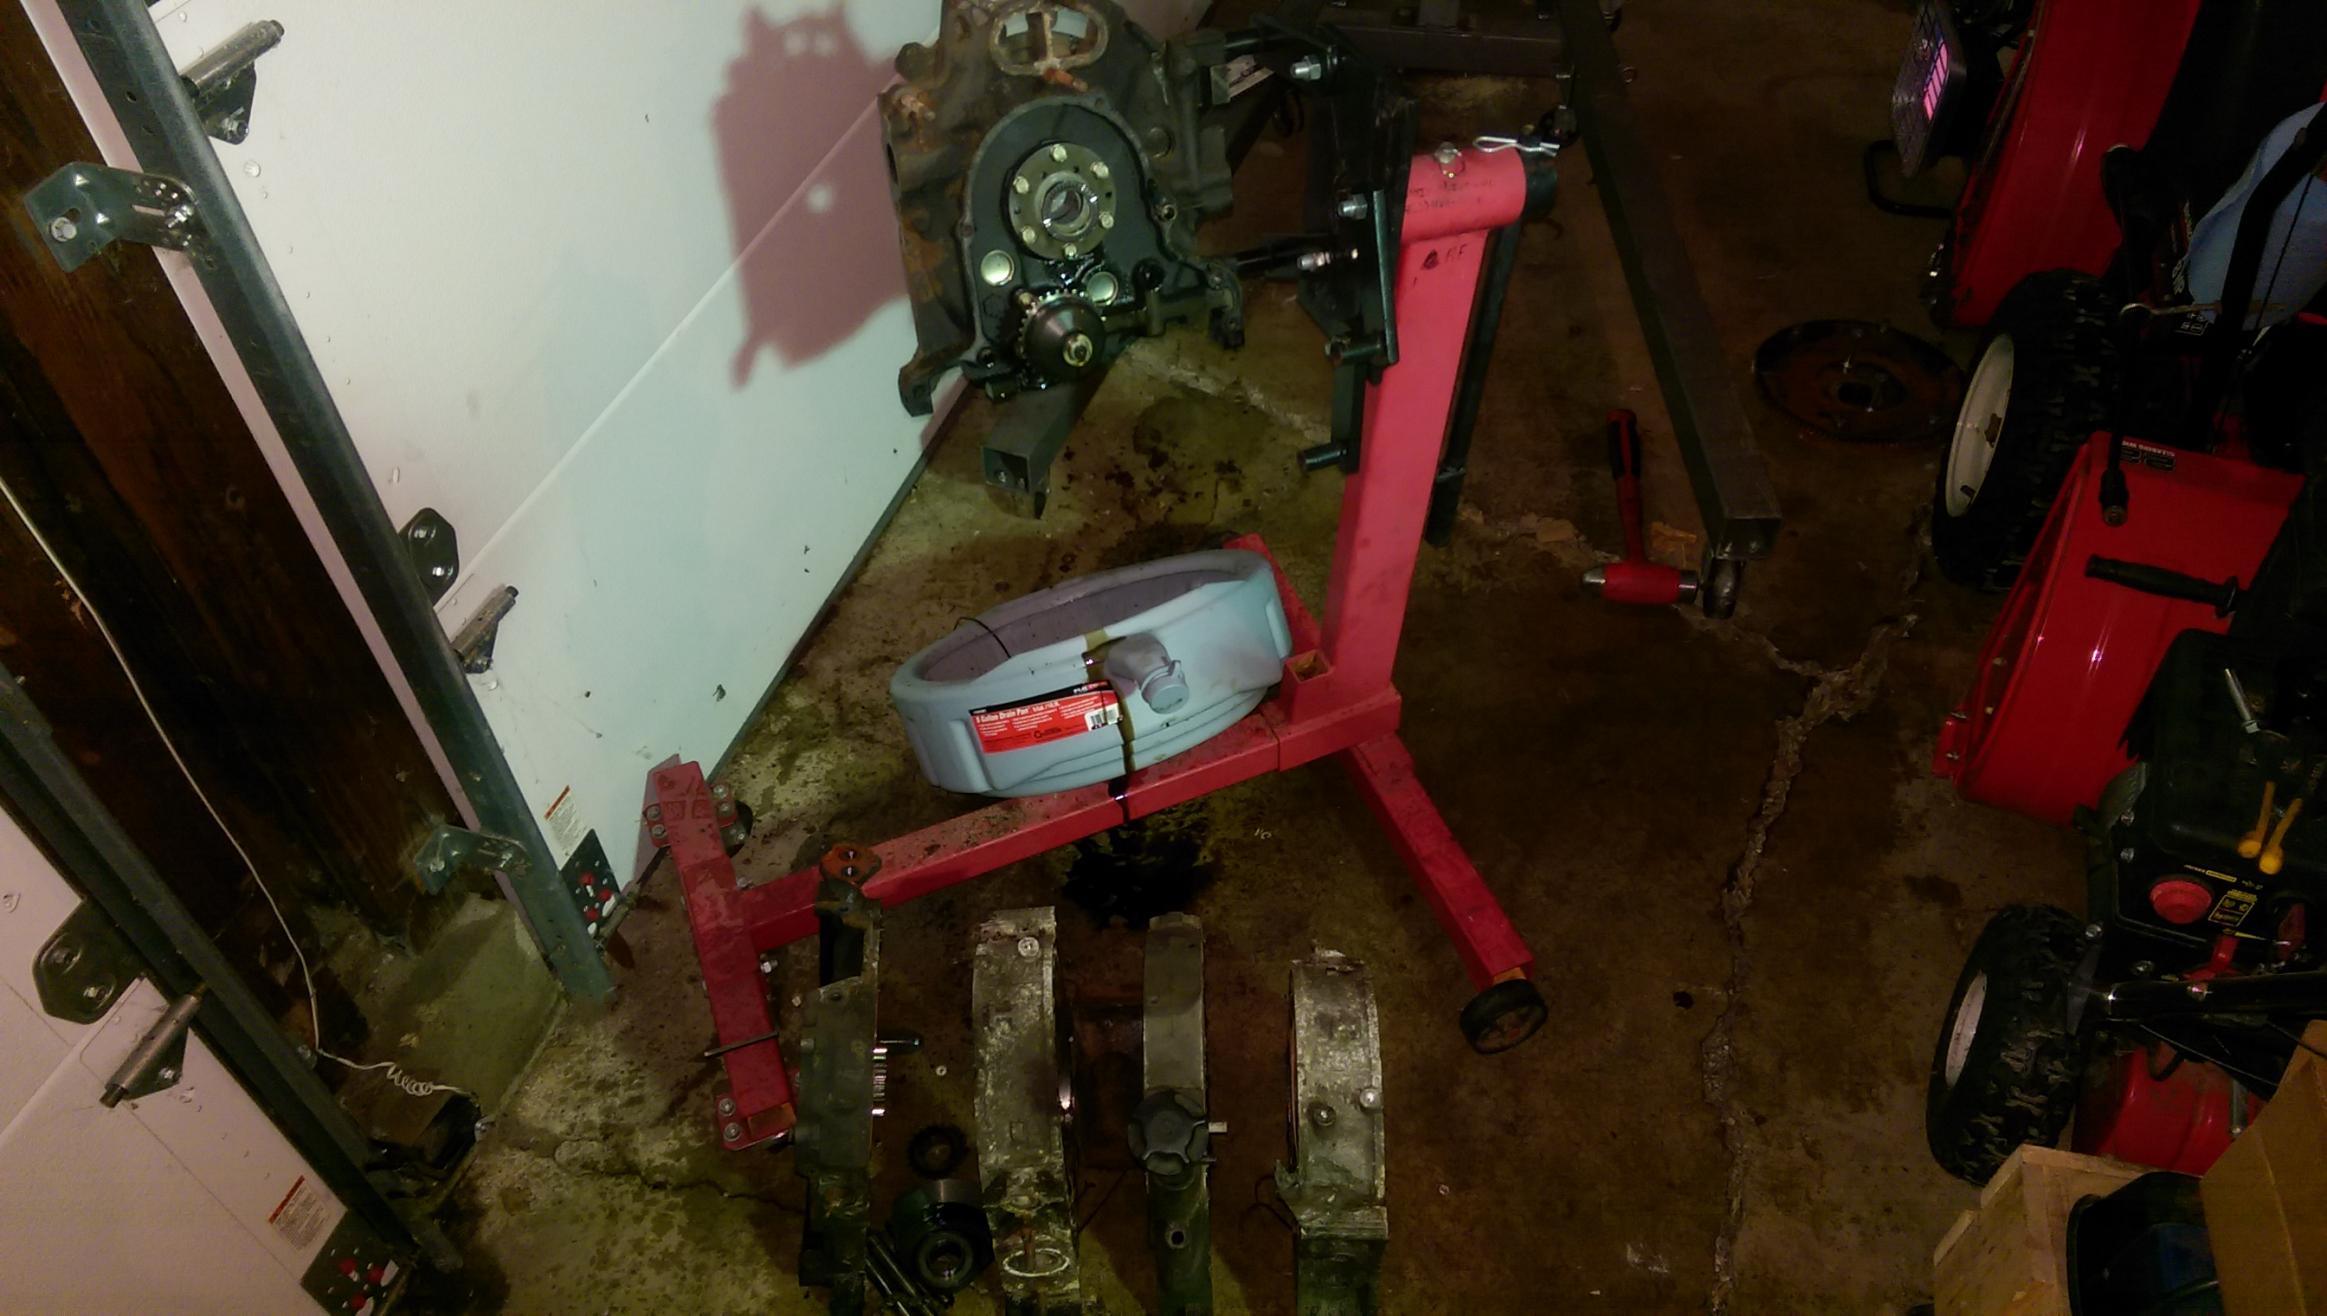
On Friday morning I was able to get the engine torn down and got it ready to be removed.
Engine brought down to a keg as much as possible.
Cabinet full of 12a parts.

Then I got this done today. I was able to get the engine removed and got it ready to be torn down.
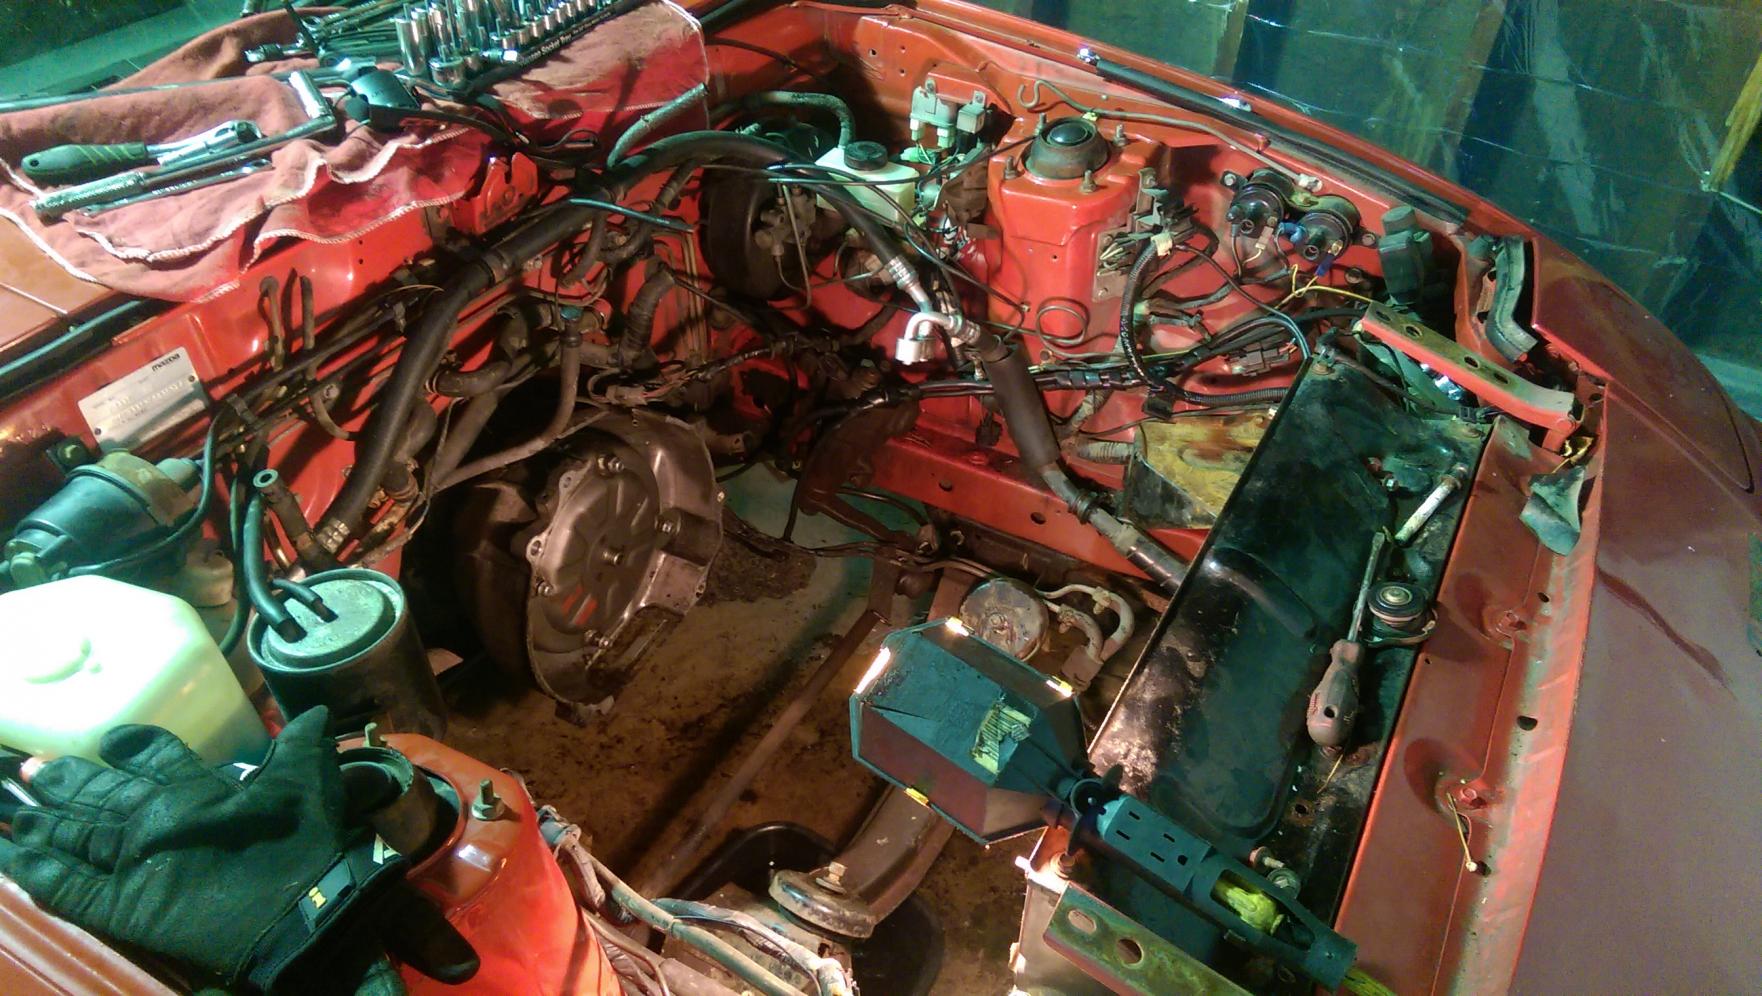
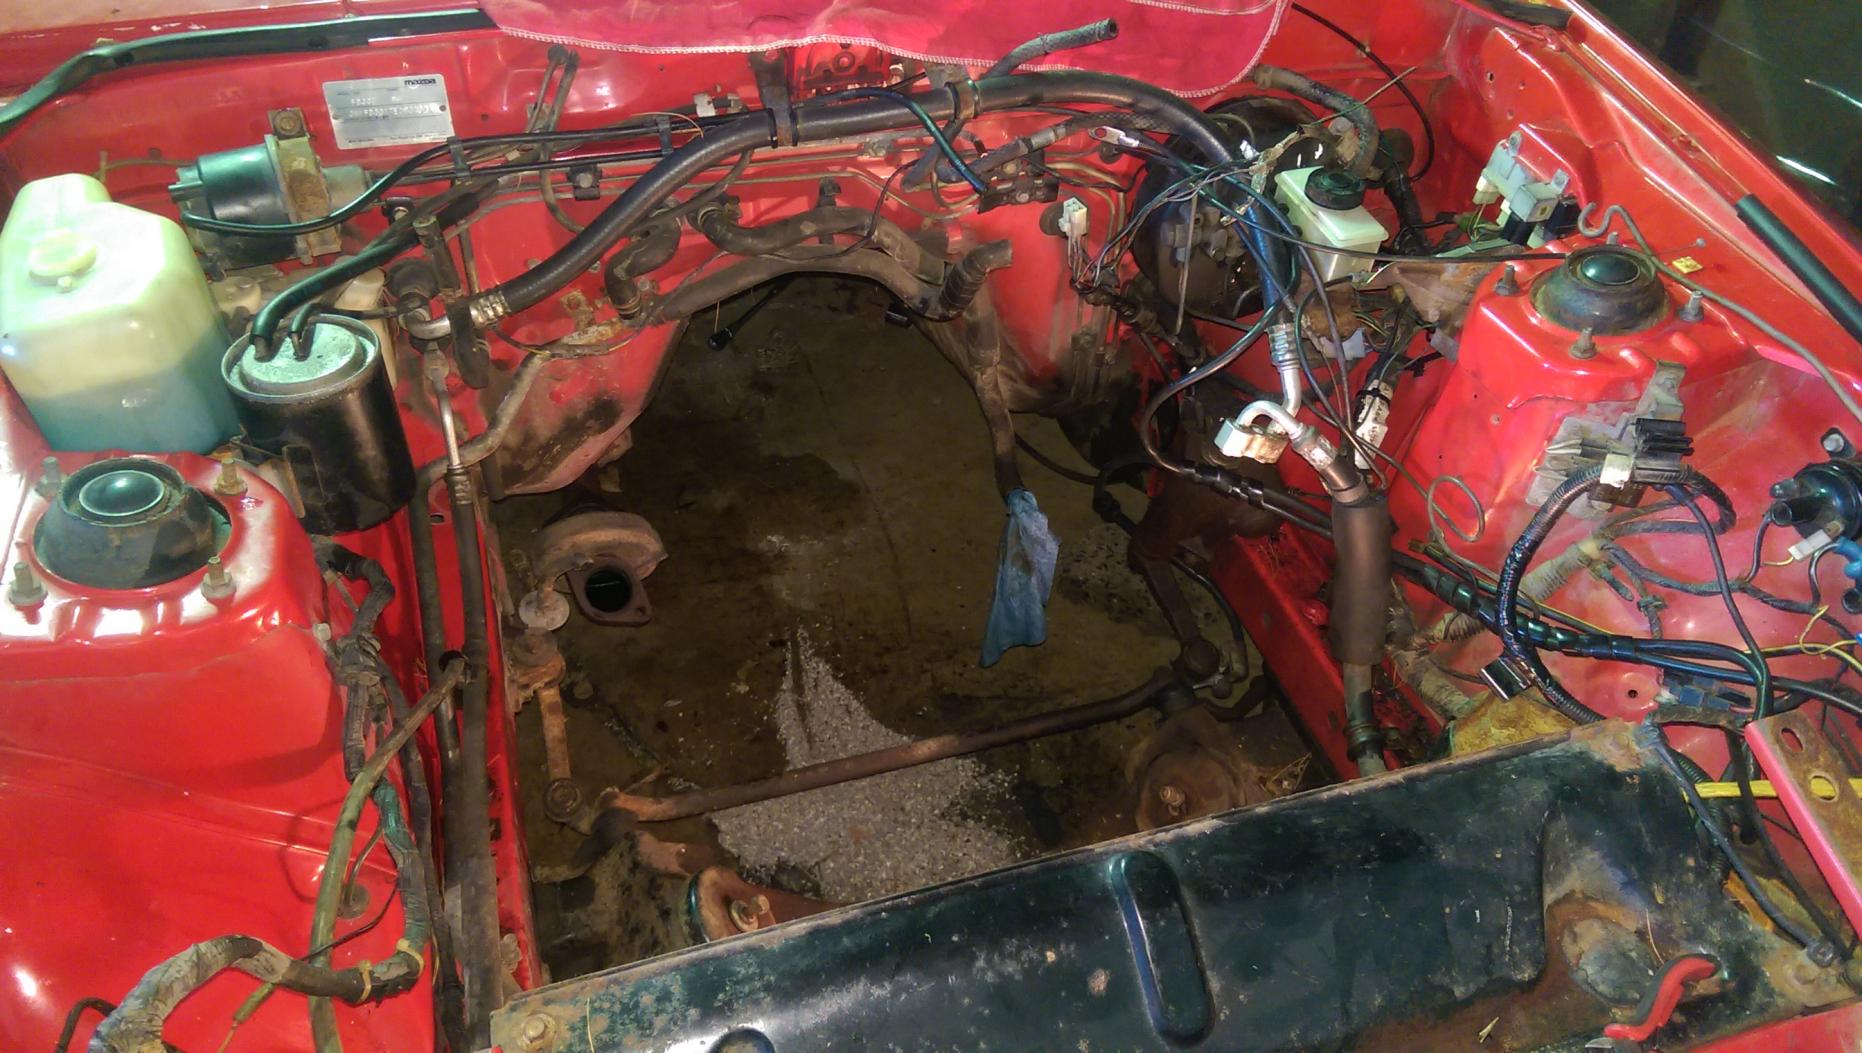
Empty engine bay with engine in the back section.
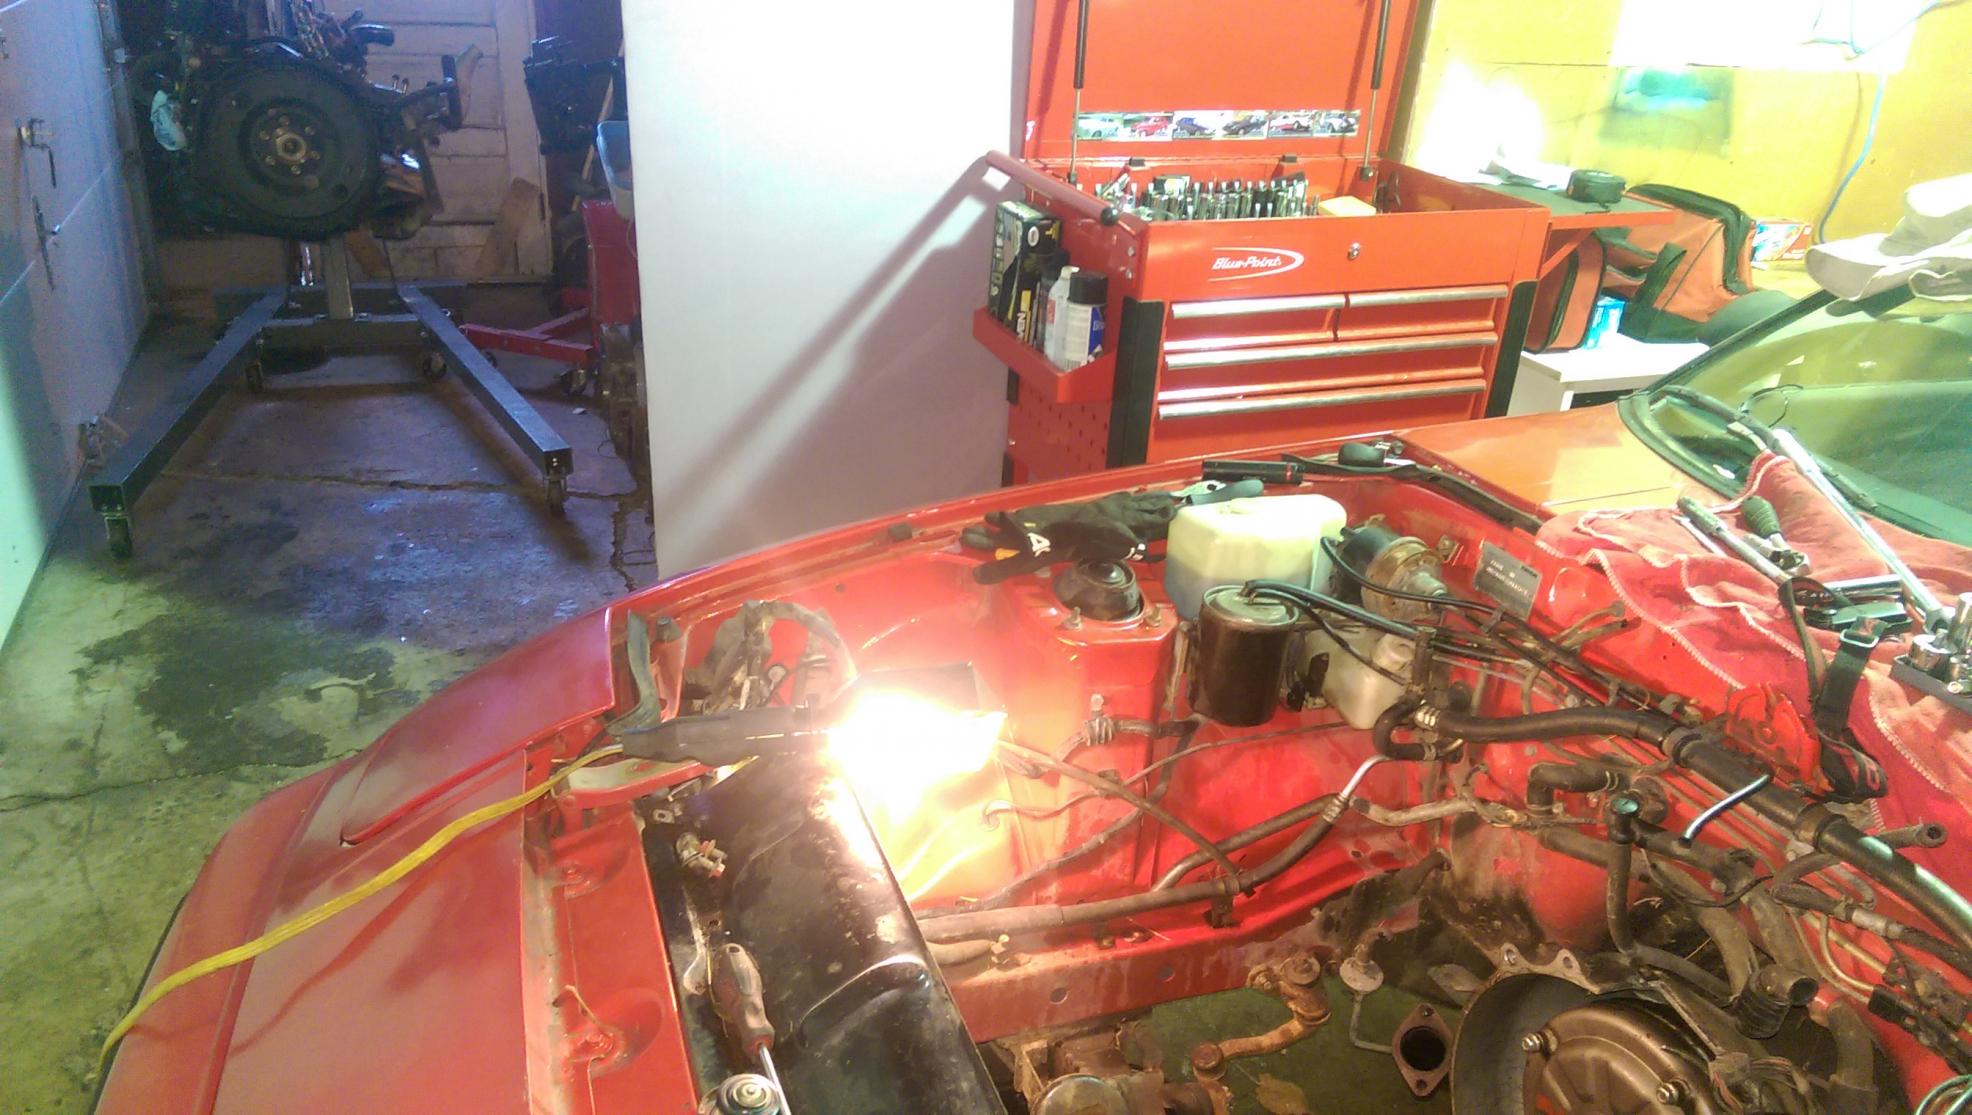
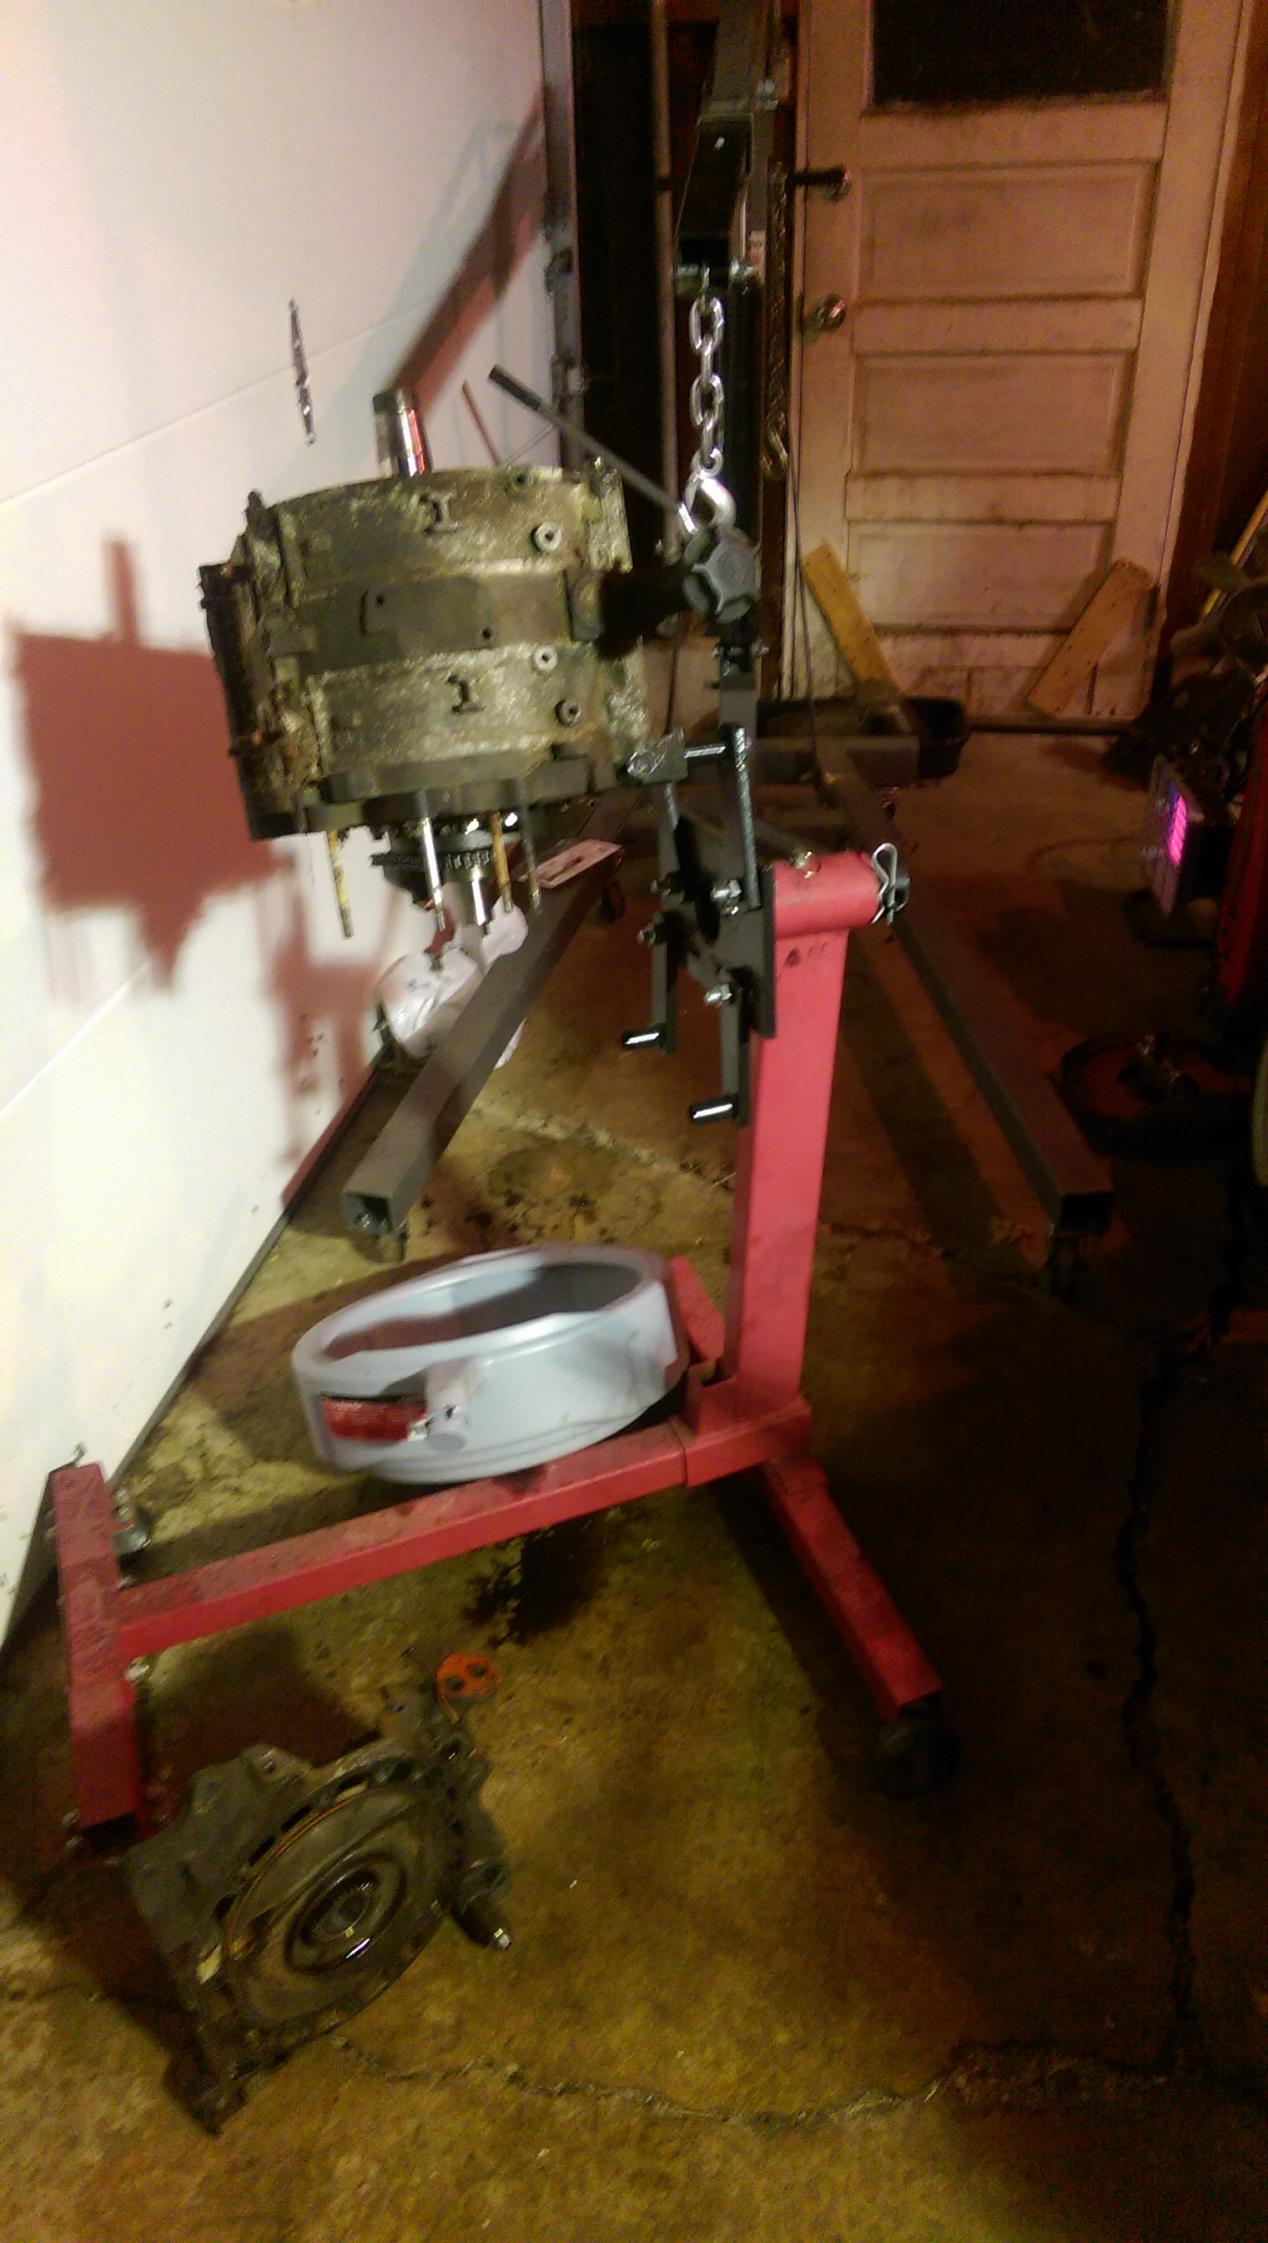
Engine on the lift, getting it ready to attach to a stand.

So I'm just waiting on tearing down the engine and cleaning the bay while the engine is out. It's a little
grimy in the bay and I think it'll look much better if all cleaned up and detailed before I put an engine
back in the car. Hopefully it's a manual when the new engine goes in, and may have some aftermarket
goodies installed as well. Should be a fun little 12a car when it's all done. Hopefully I can get that widebody
sometime this week and see if the engine is usable in that car or not. If it isn't I was able to find someone
who's potentially parting out a GSL in my area with a 12a that runs as-is. I may go that route and purchase
that engine and transmission from him if the widebody engine doesn't check out.
I also start up university classes again tomorrow so the amount of work getting accomplished will slow down
considerably, just as a heads up.
Engine brought down to a keg as much as possible.
Cabinet full of 12a parts.
Then I got this done today. I was able to get the engine removed and got it ready to be torn down.
Empty engine bay with engine in the back section.
Engine on the lift, getting it ready to attach to a stand.
So I'm just waiting on tearing down the engine and cleaning the bay while the engine is out. It's a little
grimy in the bay and I think it'll look much better if all cleaned up and detailed before I put an engine
back in the car. Hopefully it's a manual when the new engine goes in, and may have some aftermarket
goodies installed as well. Should be a fun little 12a car when it's all done. Hopefully I can get that widebody
sometime this week and see if the engine is usable in that car or not. If it isn't I was able to find someone
who's potentially parting out a GSL in my area with a 12a that runs as-is. I may go that route and purchase
that engine and transmission from him if the widebody engine doesn't check out.
I also start up university classes again tomorrow so the amount of work getting accomplished will slow down
considerably, just as a heads up.
01-19-15, 08:15 PM
#89
Oh man, that setup was terrible. I got it mounted a little better this time by taking off the top A/C stud on the front cover and using the rear A/C studs as well as the top bolt for the A/C on the front iron. But it's still absolutely a terrible way to mount the engine to the stand. I really need an adapter in my life...
01-19-15, 08:33 PM
#90
Oh man, that setup was terrible. I got it mounted a little better this time by taking off the top A/C stud on the front cover and using the rear A/C studs as well as the top bolt for the A/C on the front iron. But it's still absolutely a terrible way to mount the engine to the stand. I really need an adapter in my life...
 01-20-15, 01:17 PM
#94

Technically yes, I did move. That house up by you has been my parent's house for over 21 years now. I lived there up until about August last year and then I moved straight down 65 about 45 minutes. I'm right off of 65 now, only 9 miles away from the U of M - much more convenient to get to school! Just sucks because I'm having to rebuild my tool collection. I brought all of my stuff down here but my dad's tools are no longer available to me so I have to go out and buy my own. You never realize what you've got until it's gone...I do actually enjoy buying my own tools by the way, I like knowing that I have the correct tools for the job. Next on the list is an air compressor and reel, some wheel rollers so I can move the cars in the garage easier, as well as countless other tools that I need to make it through the day.
 01-27-15, 01:13 AM
#96
It was super nice to have access to more tools, but I'm learning that it's also very convenient to have my own as well. I can't wait to build my tool collection even more so that I become completely self-reliant!
Well I was able to get this car out of the garage on Friday in order to make room for my next project
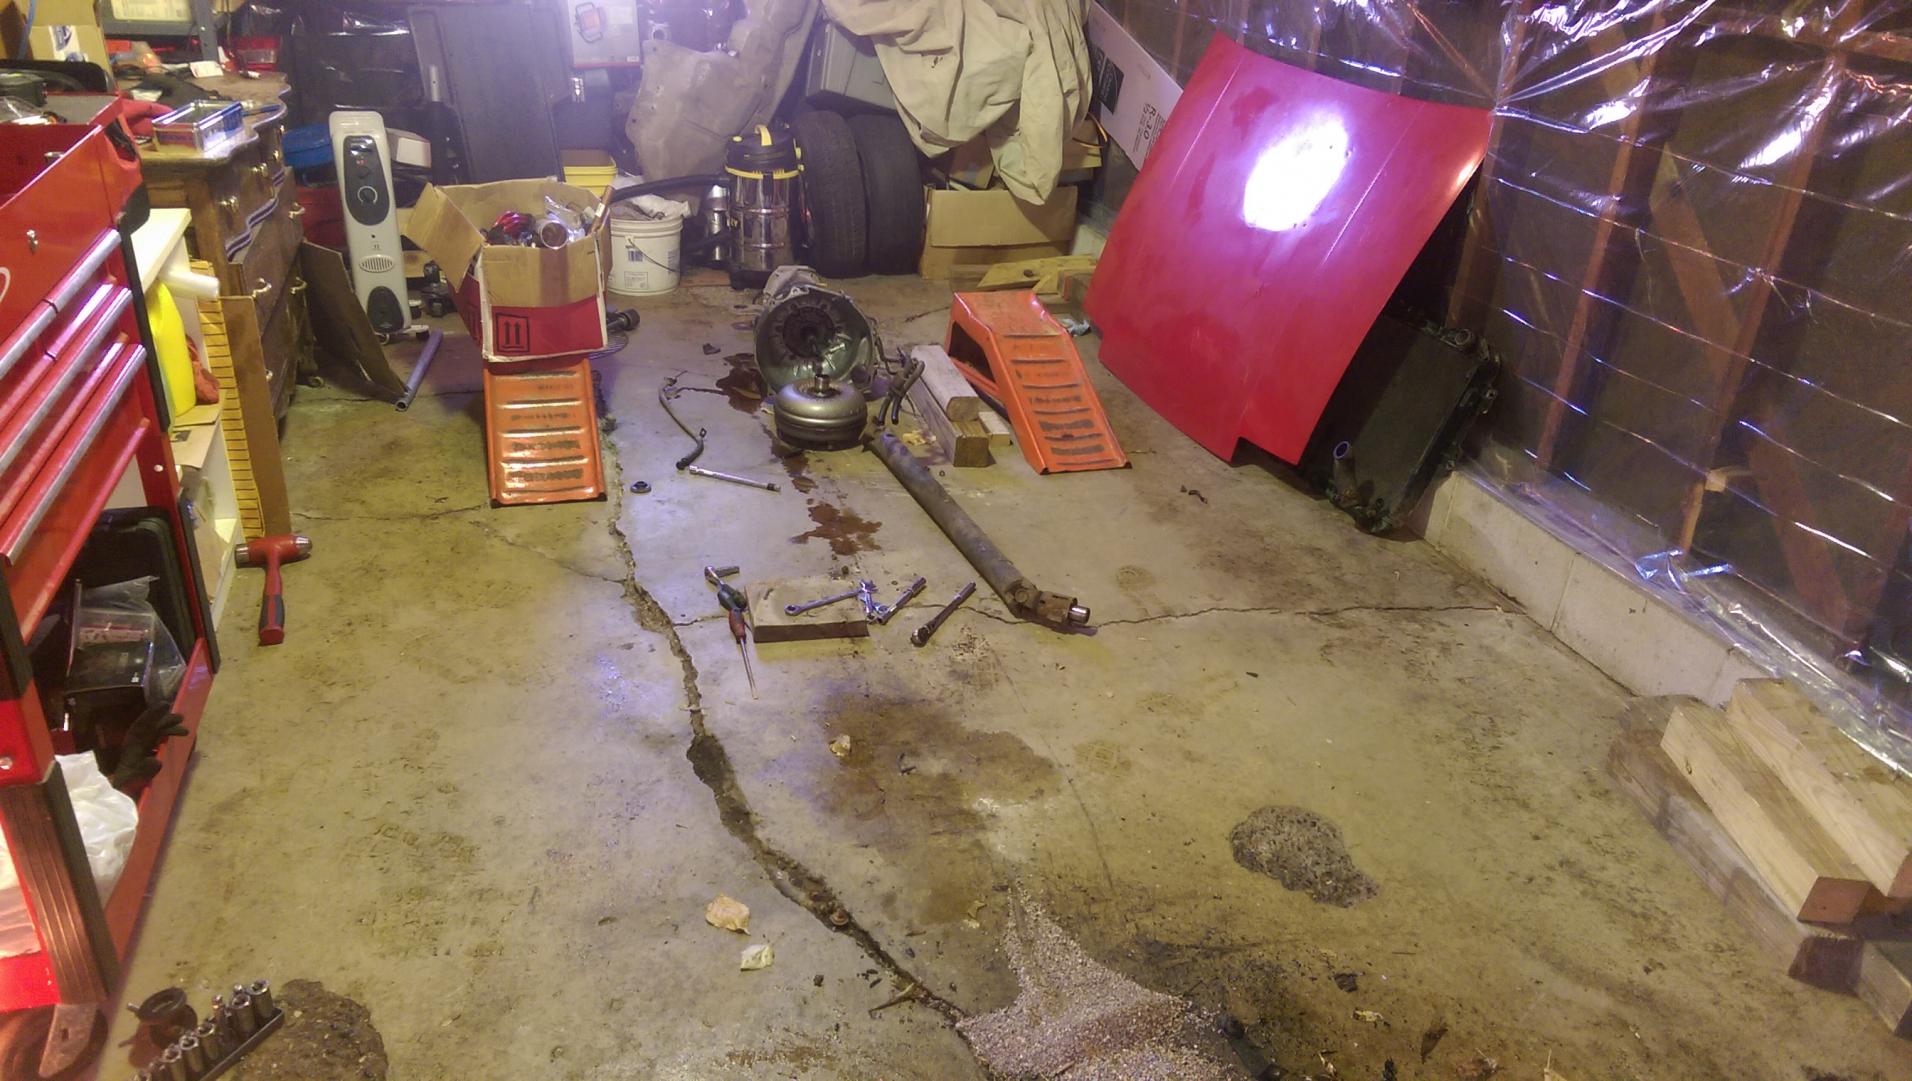
Finally wrestled the transmission out of its home, wasn't as hard of a task as I thought it would be. The last auto tranny that I pulled was an Audi 4 speed auto...never again...
What the floor looked like after the car was removed from its place. I hate leaving a mess but I had to leave to go get some RX7 parts and attend an event last weekend.
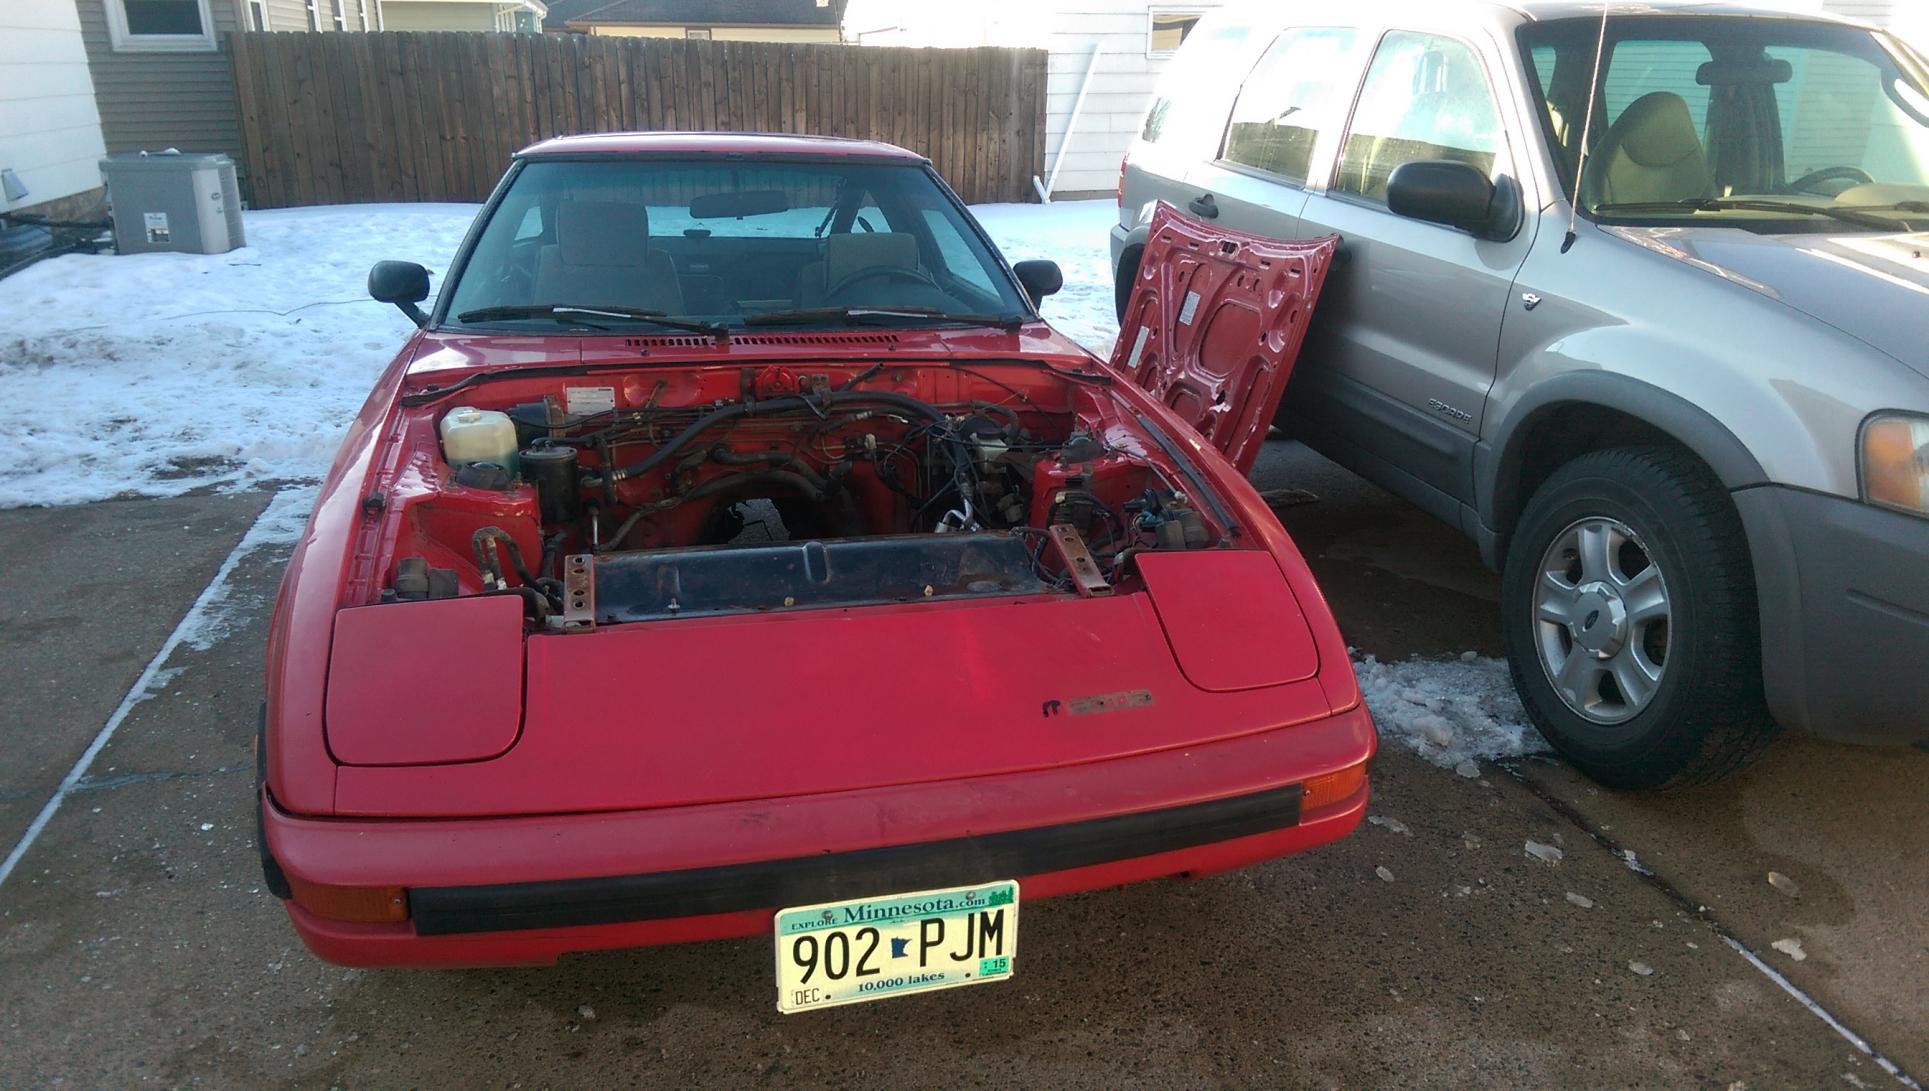
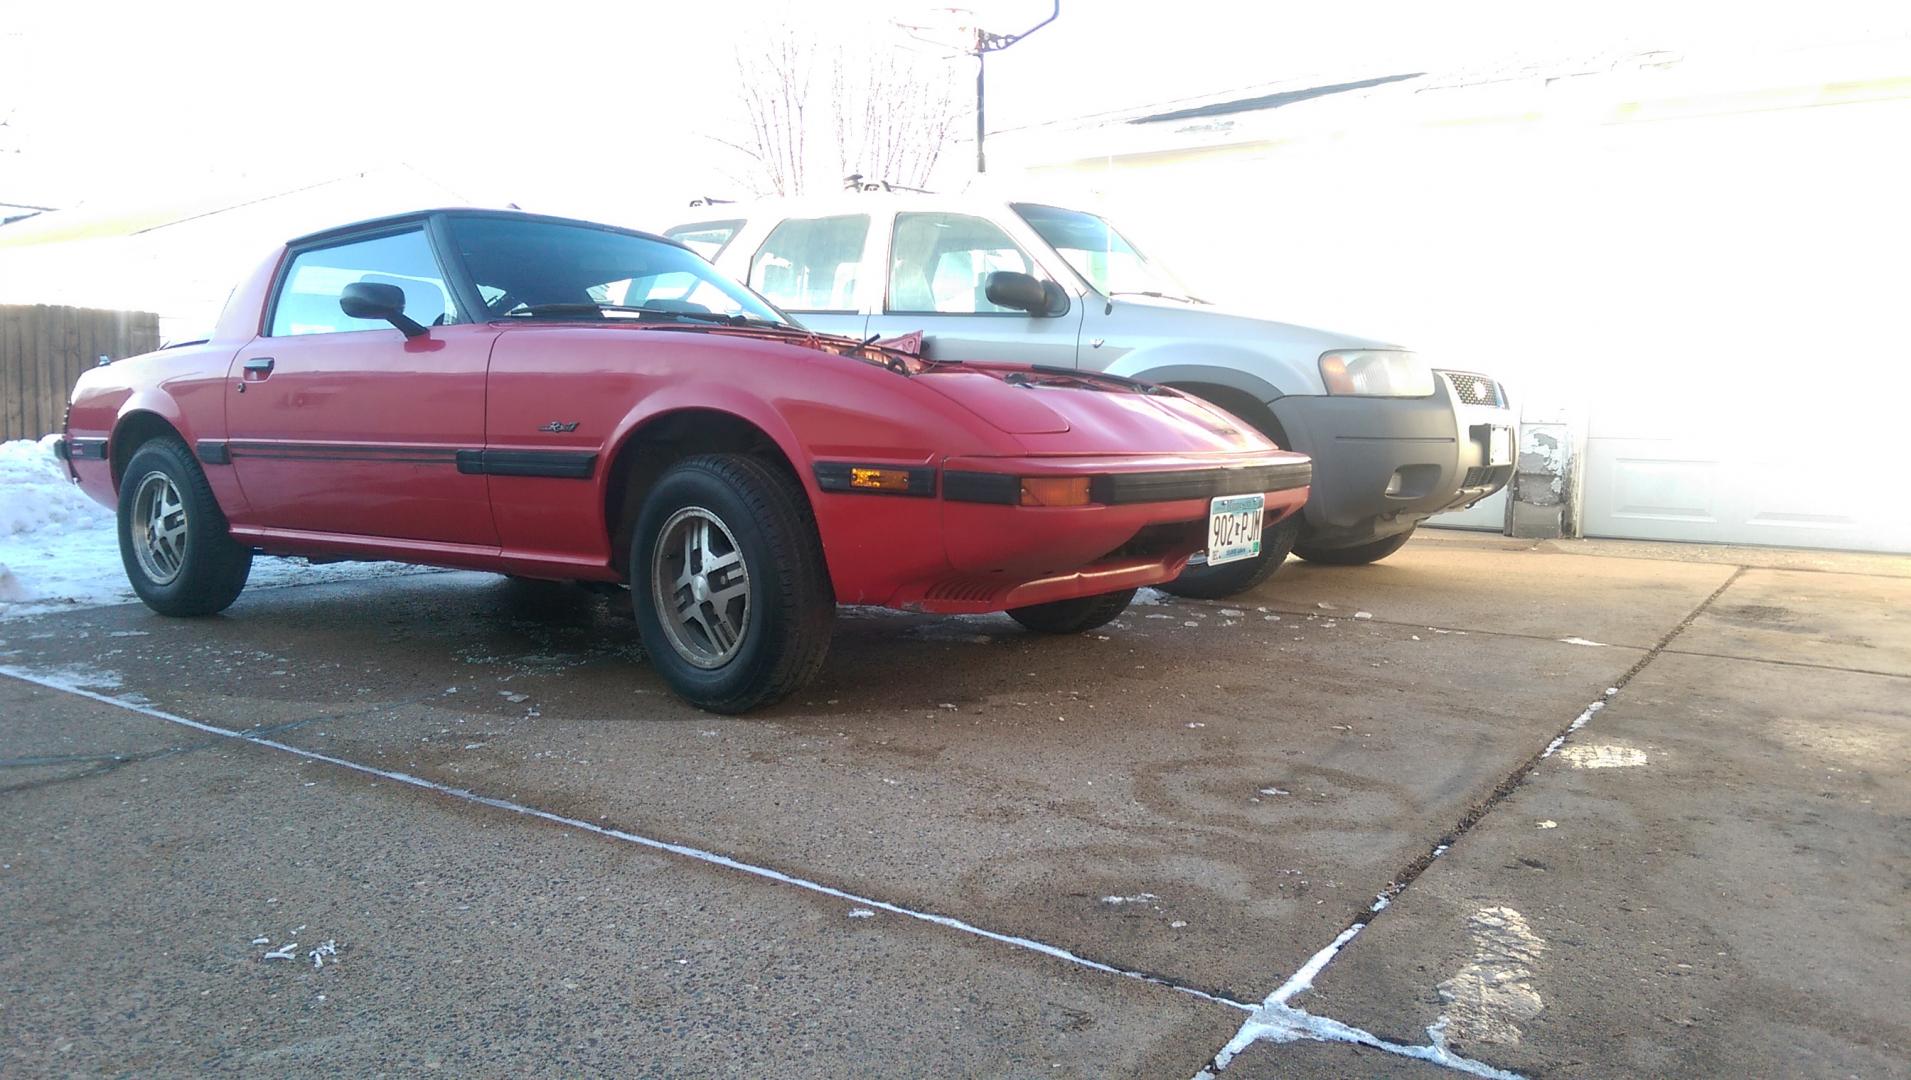
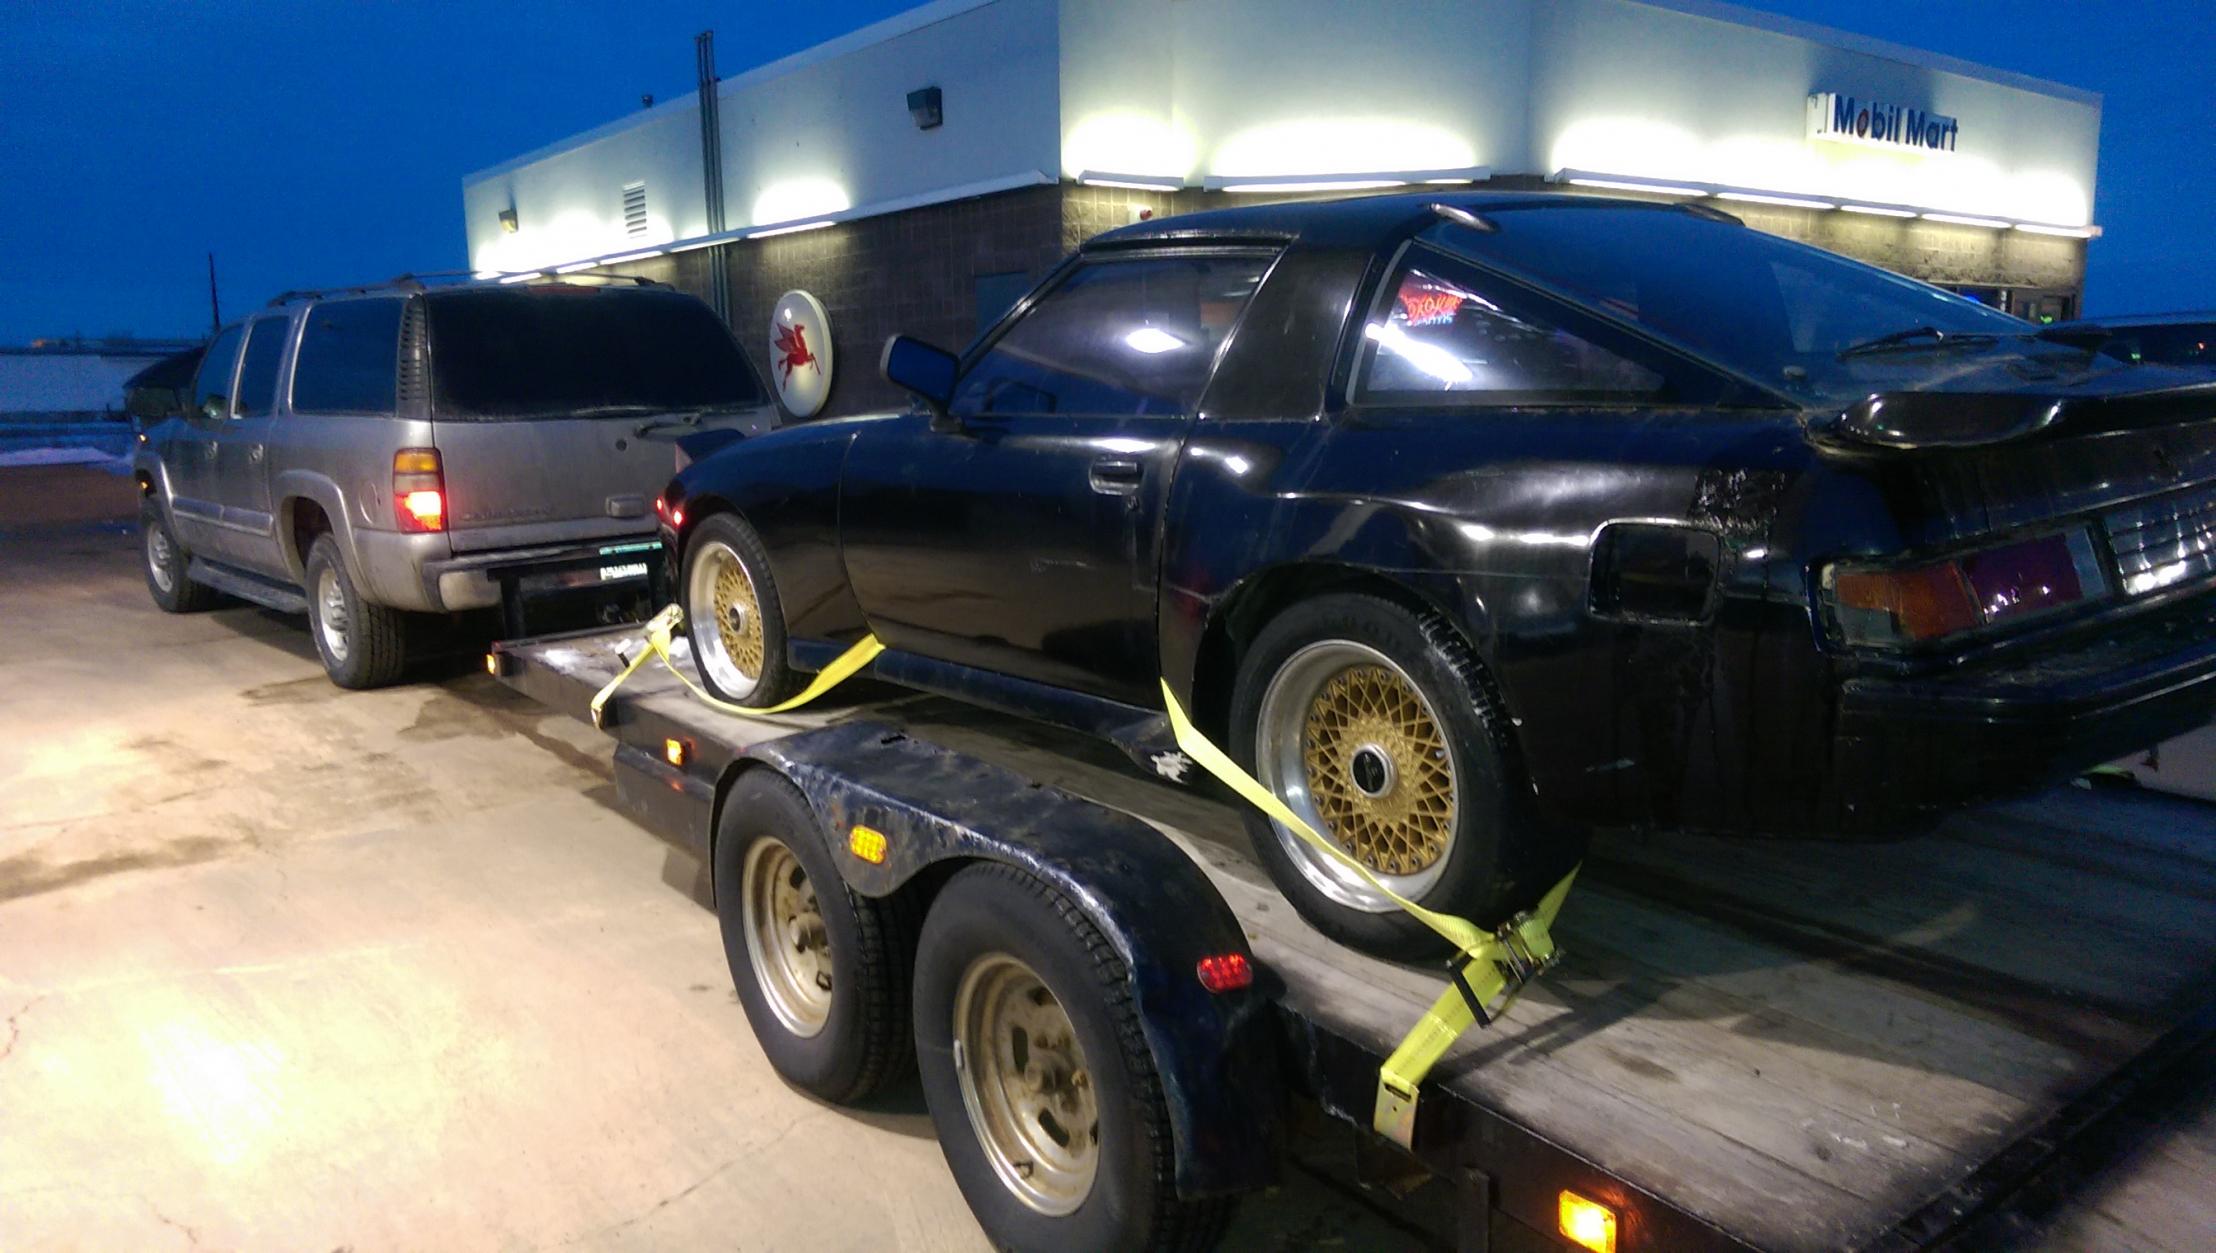
Here she is outside, waiting to have the hood put on and be left alone for a little while.
The ride height on this car was always high, but without a motor or trans it's super high off the ground - looks like a truck!
The project I was making room for

1983 Chassis Pacifica Widebody with S3 swapped GSL interior on staggered 16x8 and 16x9 Enkei 3-piece wheels.

This should be a fun project for me for sure!
 02-03-15, 12:51 PM
#100
Thanks man, I think so too. Next it'll be a red body with powder coated brushed-aluminum colored centers with polished lips
This thread is actually going to get locked down by me, head on over to the widebody build thread to keep watching the progress on this chassis as it heads for the stars!
Widebody Turbo Swap - My Dream FB Build is Finally Happening!
This thread is actually going to get locked down by me, head on over to the widebody build thread to keep watching the progress on this chassis as it heads for the stars!
Widebody Turbo Swap - My Dream FB Build is Finally Happening!

Thread
Thread Starter
Forum
Replies
Last Post
Jeff20B
1st Generation Specific (1979-1985)
73
09-16-18 07:16 PM
[For Sale] Scratch & Dent, Used, and Open-Box Sale!
SakeBomb Garage
Vendor Classifieds
5
08-09-18 05:54 PM