
ZoomZoom's CYM- Imported from Canada; a Journey Begins... Again.


Ok so you saw my fuel hat. I was worried what the tank would look like inside but it didn't look bad. I guess it's par for the course when you buy a car in the snow belt. At some point it saw salt for sure.
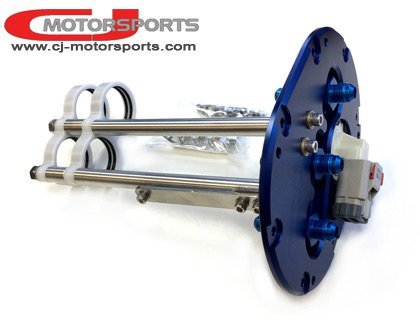
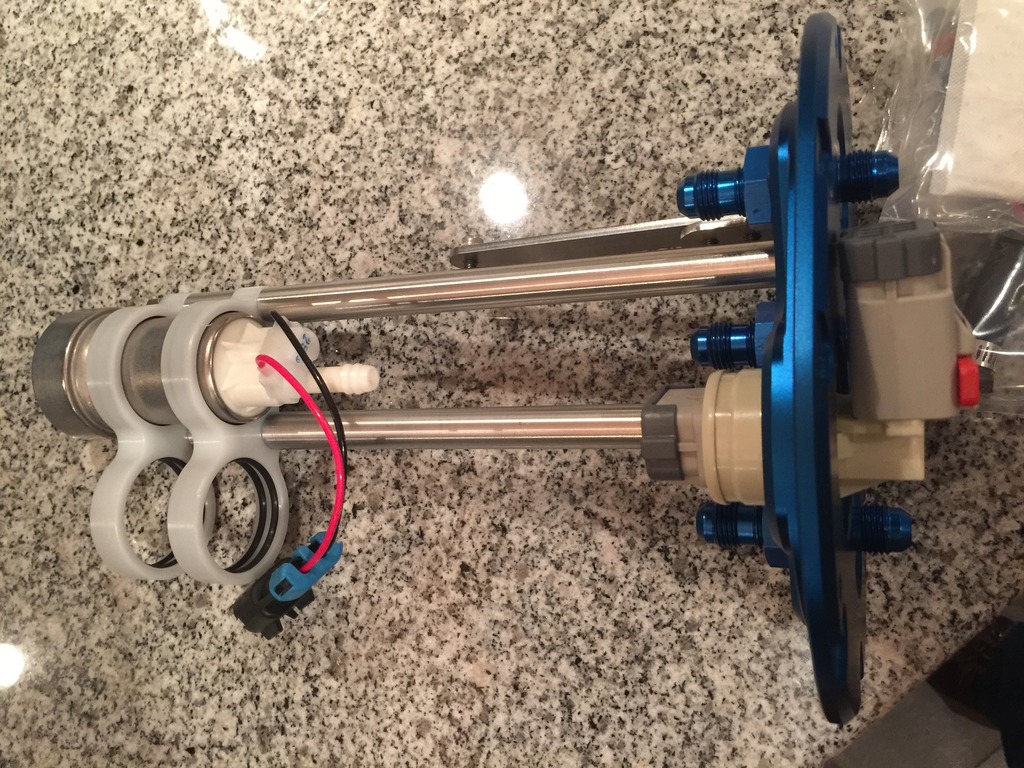
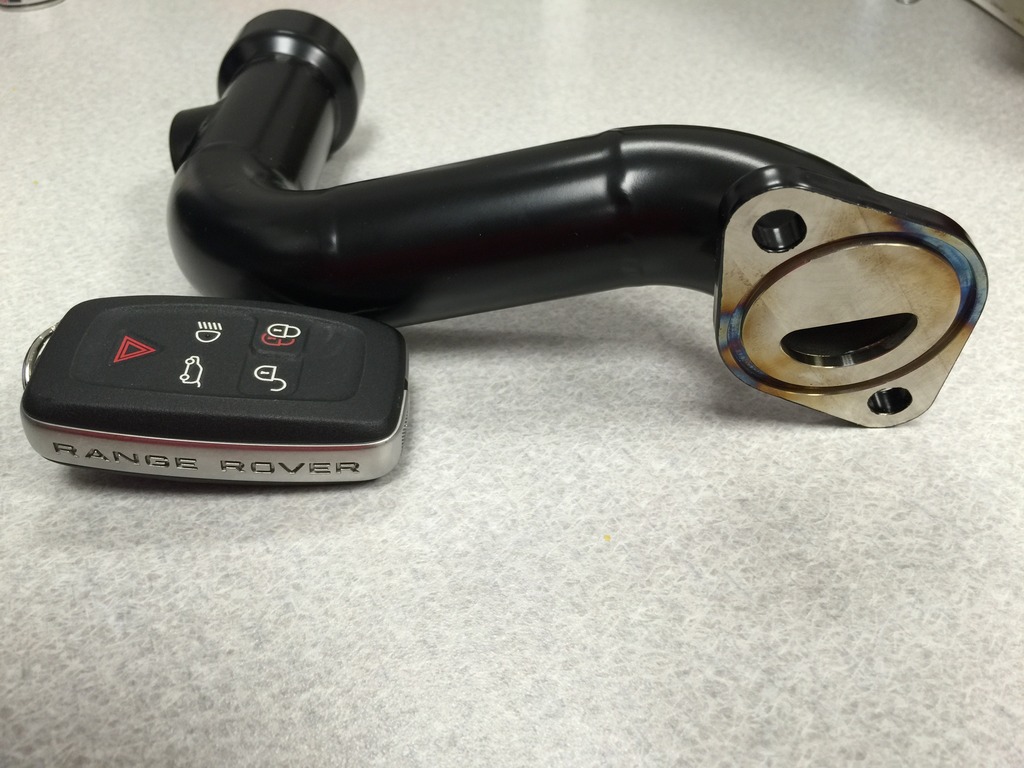
So I dont want to use that stock rusty fuel hat anymore. It's time to move on to the aftermarket. I'm only planning to run a single pump. But CJ Motorsports makes a twin pump hat with -6AN fittings and a very nice Bulkhead connector with heavy gauge wire for all the additional amps the Walboro 450 will be pulling. The Hat is also anodized. Too bad no one will get to see it besides us.
They are made to run Denso, Walboro or Bosch Pumps. Just select which pumps at check out.
If you run a single pump just buy a -6AN cap for the other. This would be a good time to run new lines for the feed and return and relocated the fuel filter or upgrade it to something fancier.
You can also order the Pump or Pumps from them at the same time. A lot of eye candy on the site. I know this Fuel hat is expensive. I feel it's a complete solution and these stock hats are old and flimsy.
I've drilled stock hats out for Racetronix bulkhead connectors but the hat likes to flex and if you tweak it you may end up not sealing the hat very well and your garage will smell like raw fuel.
So I dont want to use that stock rusty fuel hat anymore. It's time to move on to the aftermarket. I'm only planning to run a single pump. But CJ Motorsports makes a twin pump hat with -6AN fittings and a very nice Bulkhead connector with heavy gauge wire for all the additional amps the Walboro 450 will be pulling. The Hat is also anodized. Too bad no one will get to see it besides us.
They are made to run Denso, Walboro or Bosch Pumps. Just select which pumps at check out.

If you run a single pump just buy a -6AN cap for the other. This would be a good time to run new lines for the feed and return and relocated the fuel filter or upgrade it to something fancier.
You can also order the Pump or Pumps from them at the same time. A lot of eye candy on the site. I know this Fuel hat is expensive. I feel it's a complete solution and these stock hats are old and flimsy.
I've drilled stock hats out for Racetronix bulkhead connectors but the hat likes to flex and if you tweak it you may end up not sealing the hat very well and your garage will smell like raw fuel.
Last edited by ZoomZoom; Mar 13, 2016 at 10:46 AM.


There are some other things in the works. Should have some interesting posts in the next few weeks; stay tuned.


Well I'm not ready for a big update but parts have been arriving everyday.
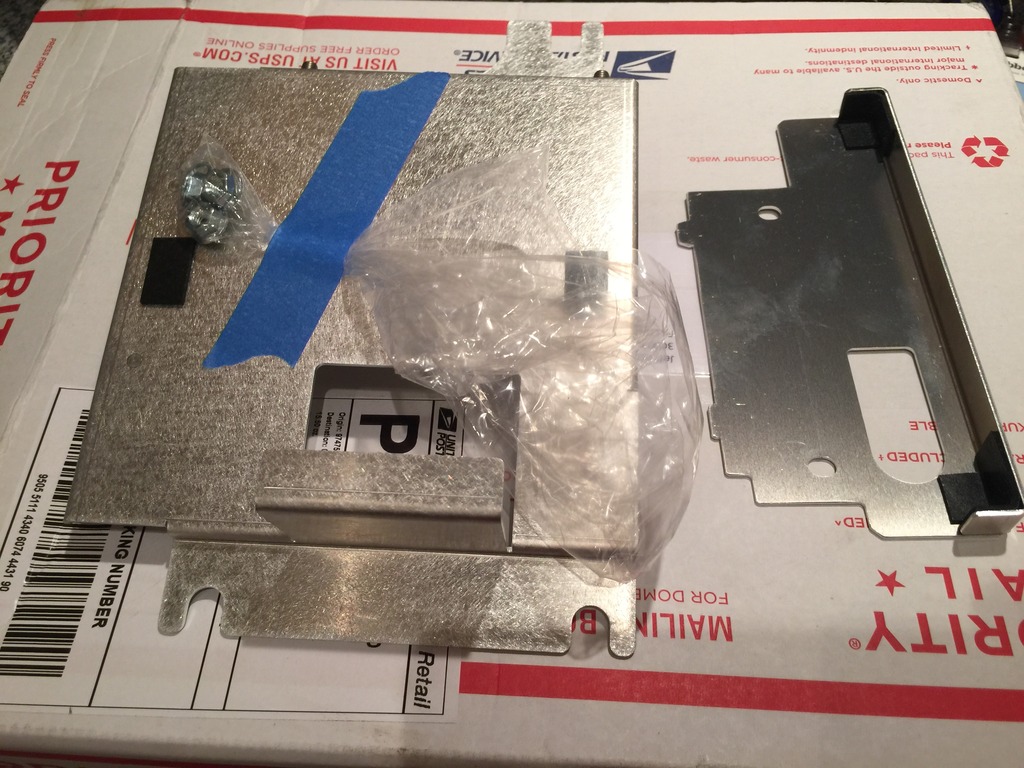
I picked up TurboJeffs Power FC and Datalogit mount. I haven't installed it but it looks like a nice bracket.
The fuel pump,wiring kit, Walboro 450 and CJ Motorsports Fuel Hanger all arrived yesterday.
My oil filler neck is out for powder coating and my plenum and throttle body were getting some polishing. Those are on the way back although probably not going too be too impressive. They will be powder coated in the future most likely when I take the car apart again. Just with the weather being so nice now I want to button it up and get it tuned.
Pics of parts that arrived.
These came from Charles at CJ as well.
TurboJeffs PFC mount
I picked up TurboJeffs Power FC and Datalogit mount. I haven't installed it but it looks like a nice bracket.
The fuel pump,wiring kit, Walboro 450 and CJ Motorsports Fuel Hanger all arrived yesterday.
My oil filler neck is out for powder coating and my plenum and throttle body were getting some polishing. Those are on the way back although probably not going too be too impressive. They will be powder coated in the future most likely when I take the car apart again. Just with the weather being so nice now I want to button it up and get it tuned.
Pics of parts that arrived.

These came from Charles at CJ as well.


TurboJeffs PFC mount

Last edited by ZoomZoom; Mar 22, 2016 at 06:55 PM.
Finally got my oil filler neck back from powdercoating. It's the IR Performance custom unit with a -10an bung for a catch can. This filler neck accommodates the equal length lower intake manifold that moves the upper plenum and TB forward.
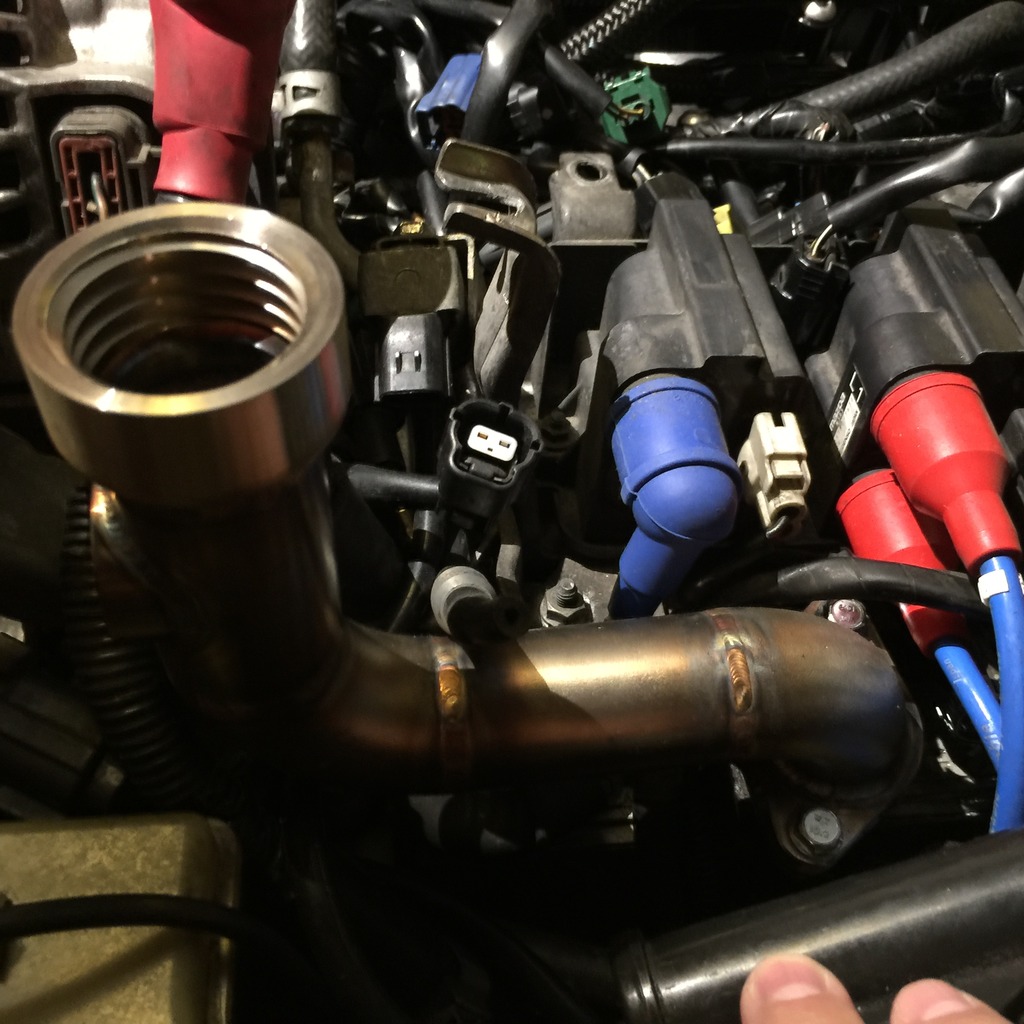
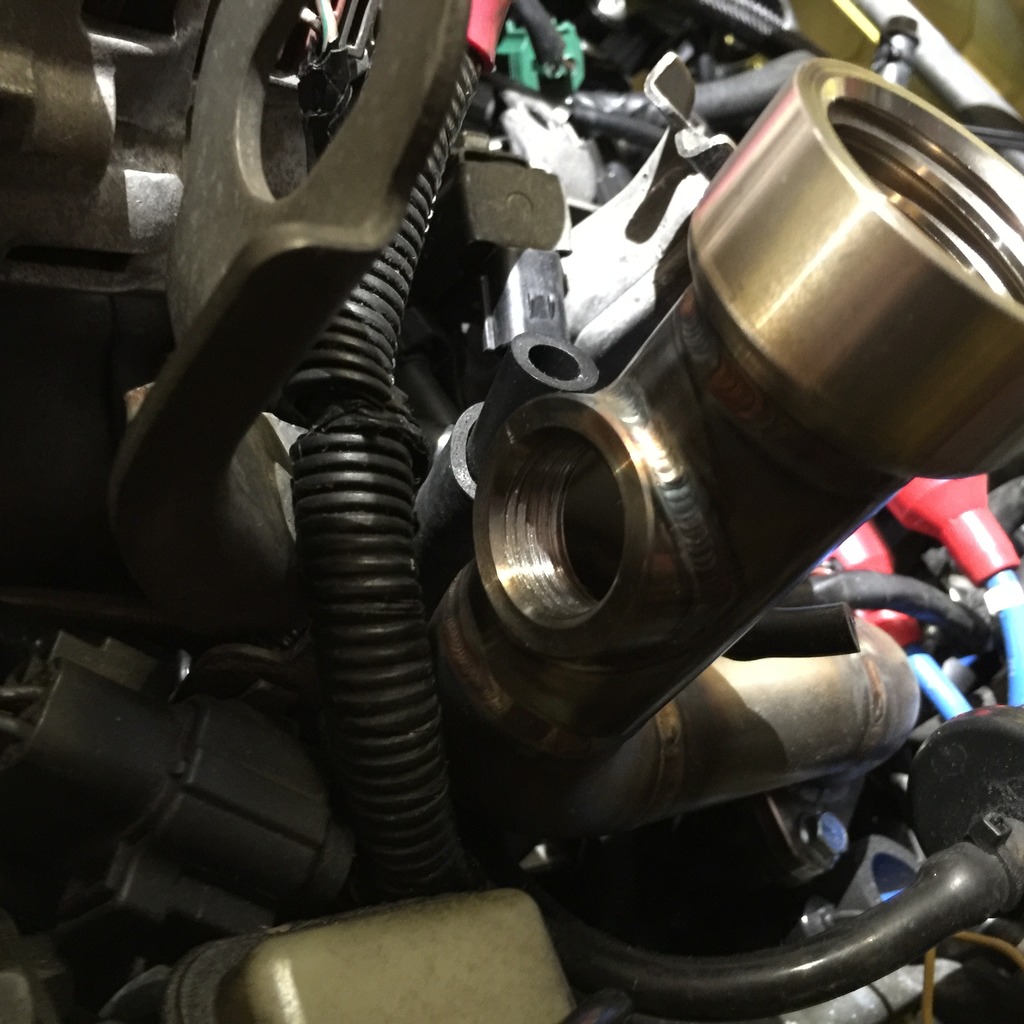
Now finished in satin black
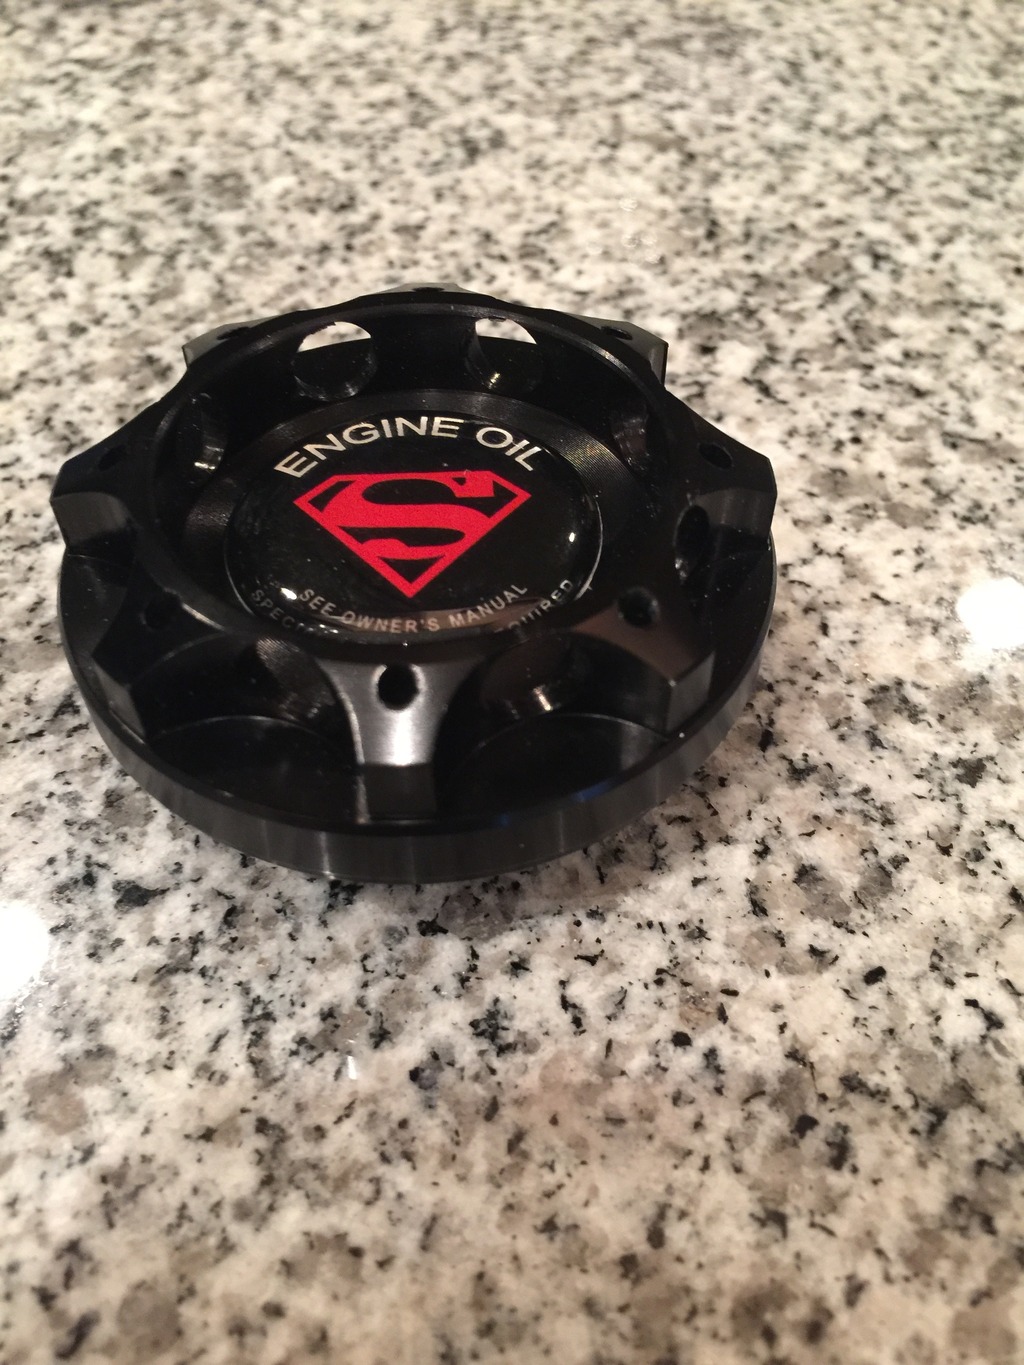
What's a cool oil filler neck without a Cap to match? Cap is M35x4.0 thread pitch.


Now finished in satin black

What's a cool oil filler neck without a Cap to match? Cap is M35x4.0 thread pitch.


Interesting to see you choose DW injectors. When I had my G35, thats what everybody with Z's and G's used. The FD crowd has usually been Bosch and now ID. Not sure I've seen anyone mention DW before. Not critisizing, just found it interesting.


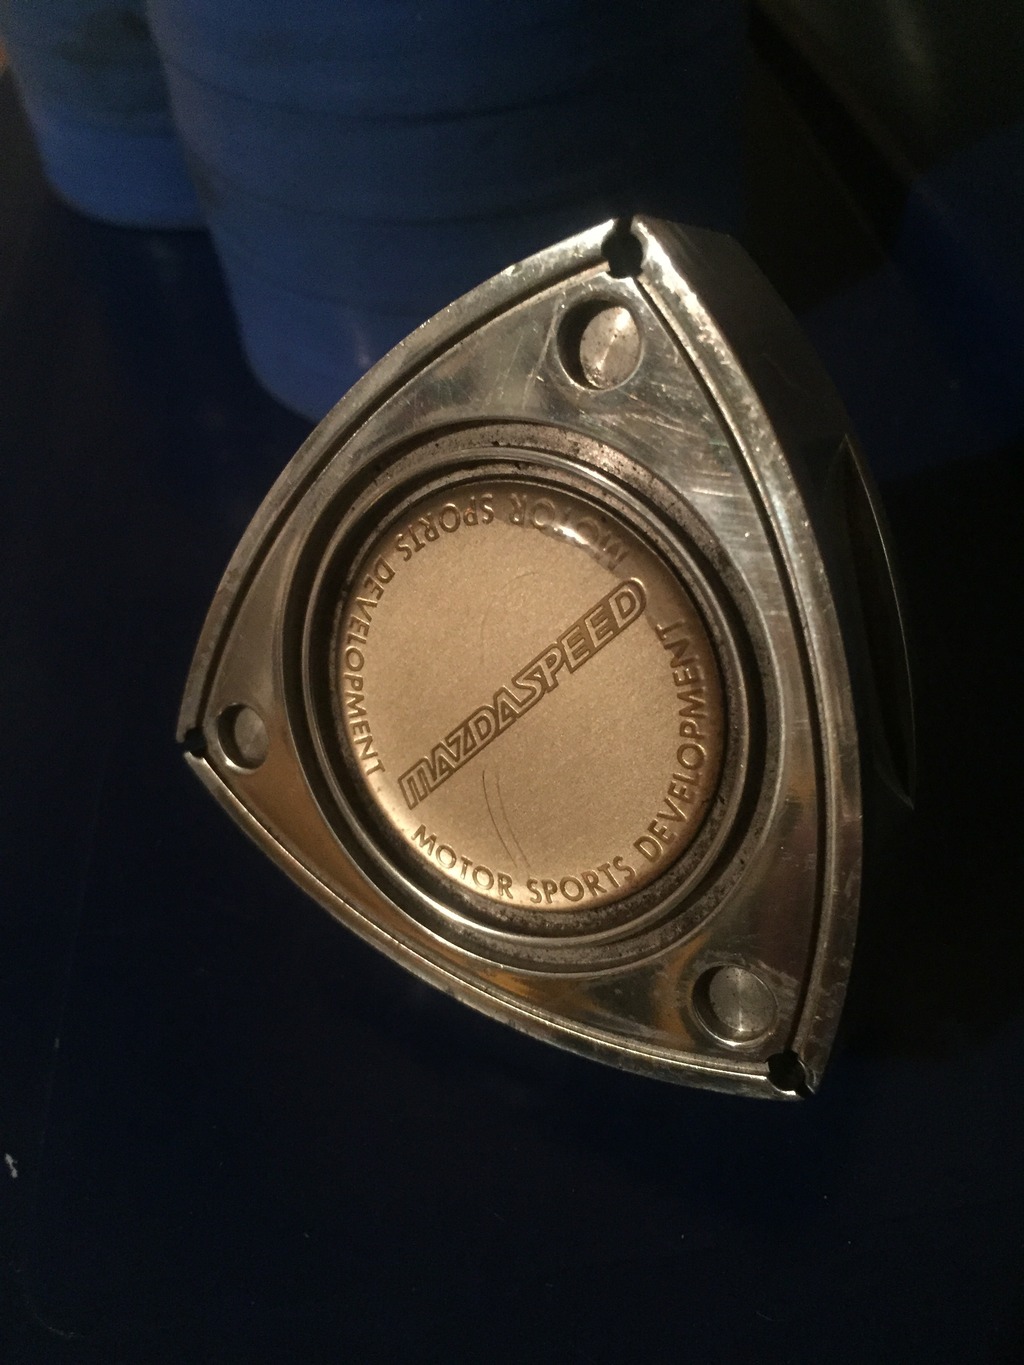
An old friend was in my garage a few weeks ago and couldn't take his eyes off my Mazdaspeed rotary oil cap. It's now off the car and will be in the mail to him probably this week.

Last edited by ZoomZoom; Mar 30, 2016 at 01:07 PM.
Update time again with some wiring for the fuel pump.
Been dragging my feet. Have had other priorities but had time today to get some work done.
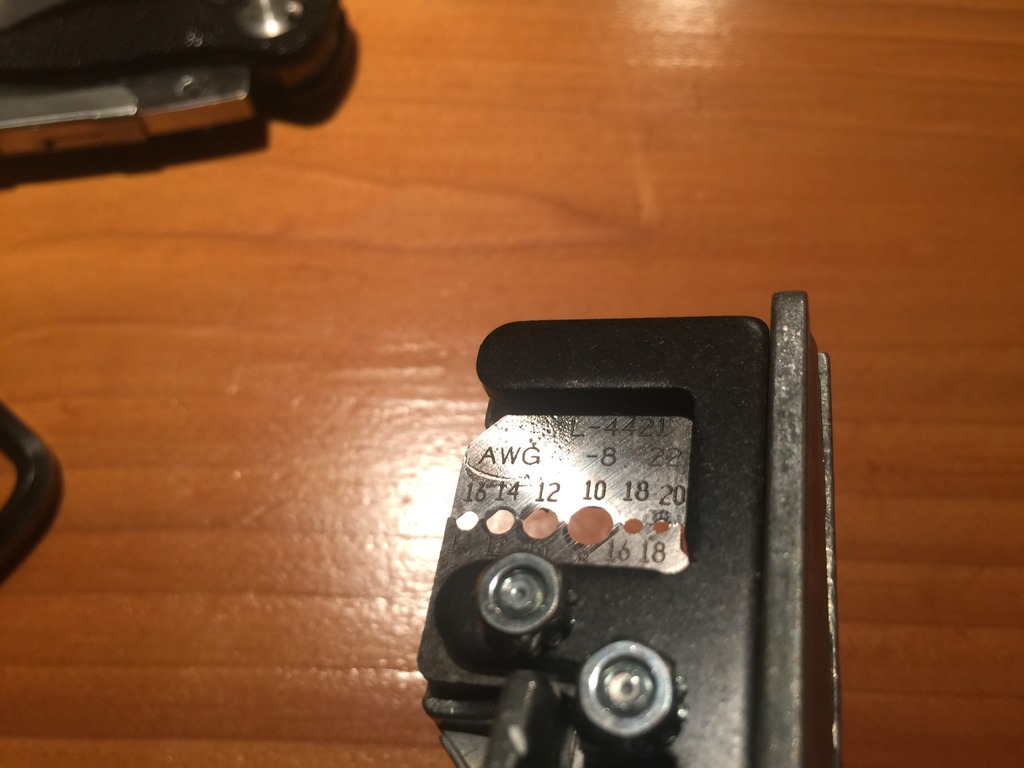
Let's talk about tools. So many of you use some cheap crimpers that make for some garbage crimps. What you should consider if doing wiring in your car are some
RATCHETING CRIMPERS.
ECLIPSE 336F
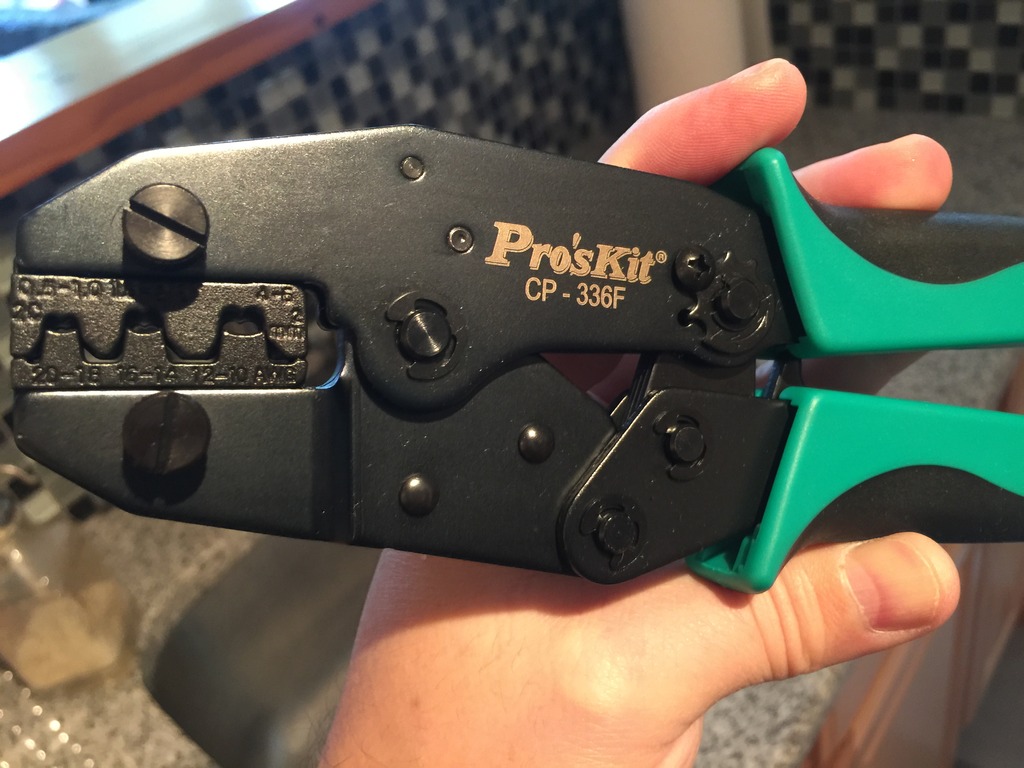
Makes a tight crimp every time.
Same with wire strippers.
IDEAL 29-292

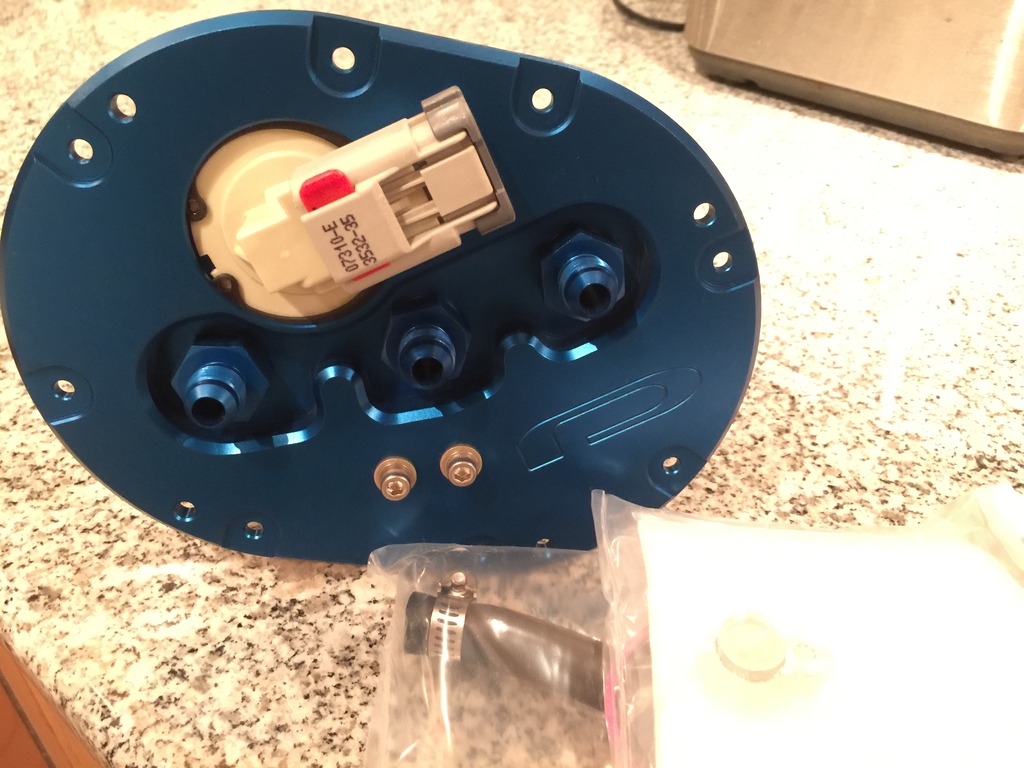
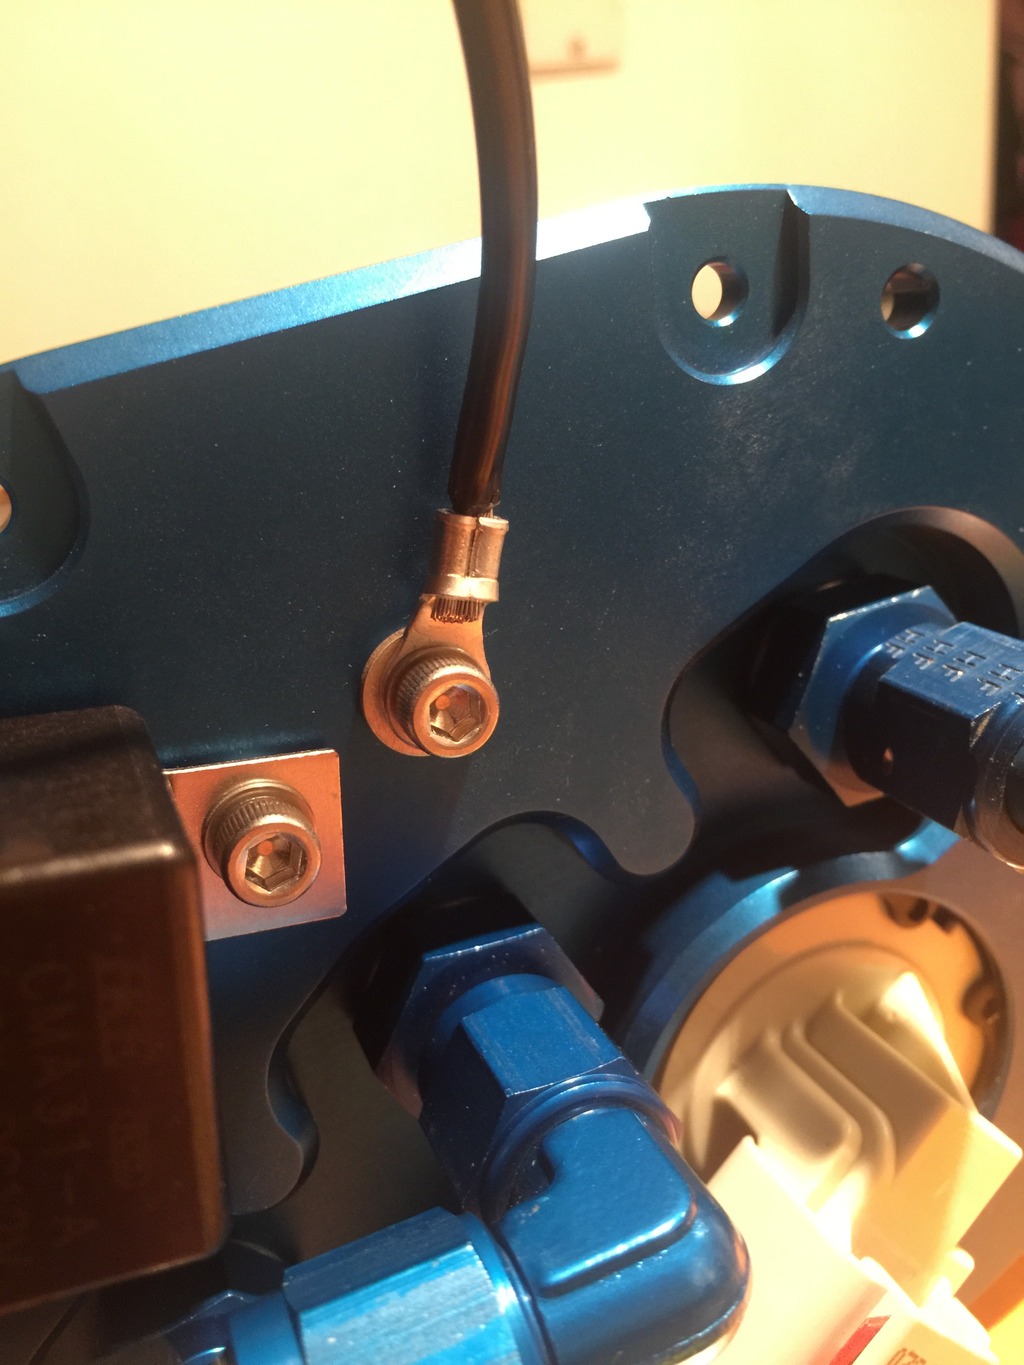
I mounted the 40A Relay to the top of the fuel hat.
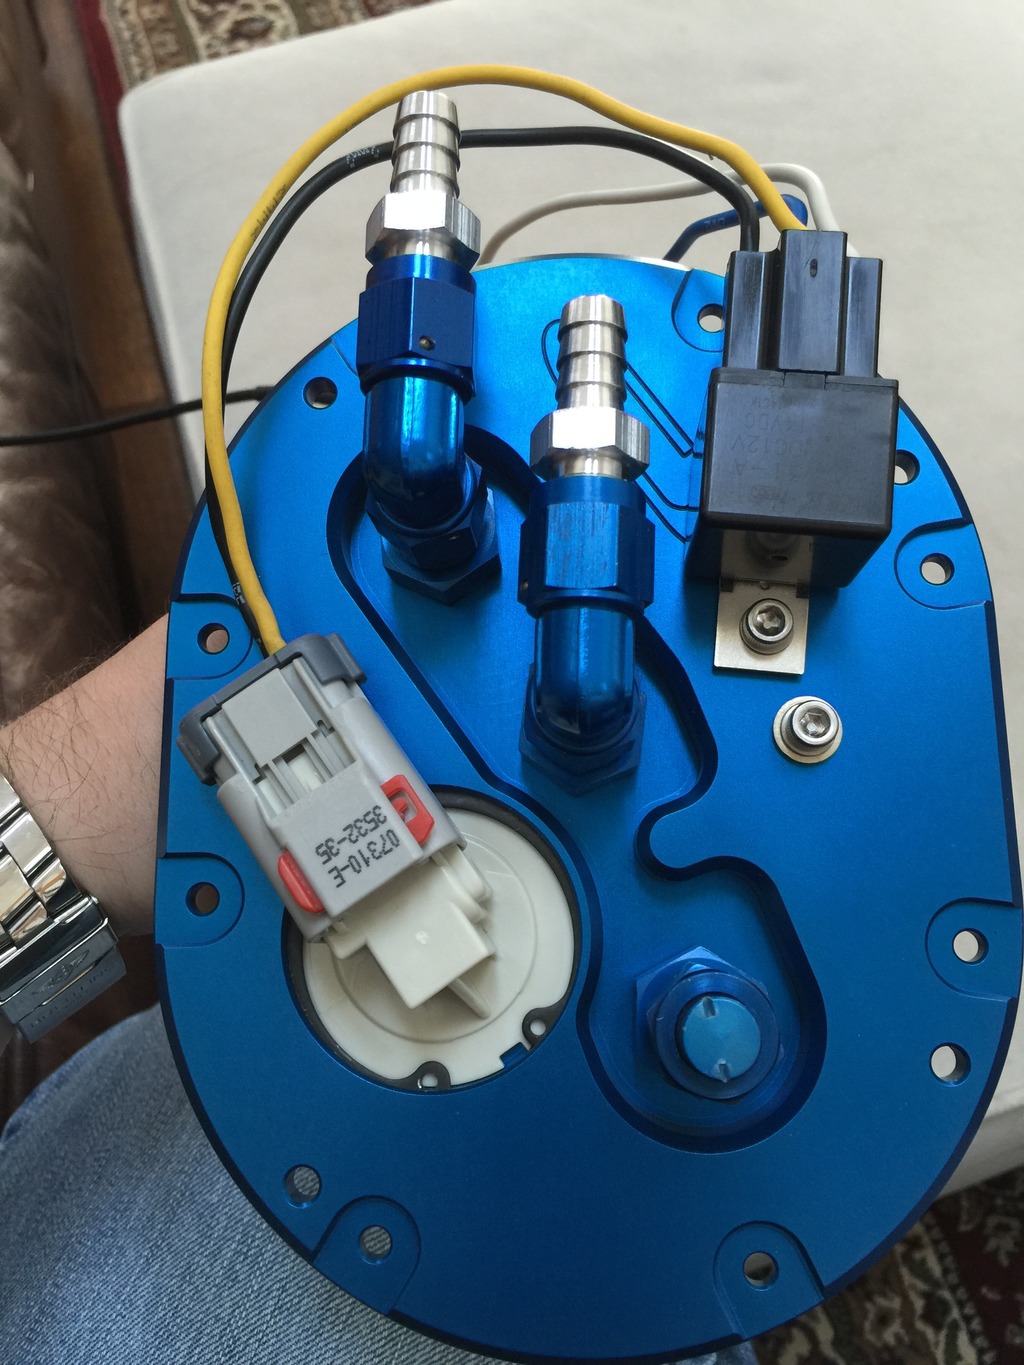
Making the crimps, these are for the bulkhead connector on the fuel hat.
A HOW TO for wiring up the DW Fuel Pump Relay.
Been dragging my feet. Have had other priorities but had time today to get some work done.
Let's talk about tools. So many of you use some cheap crimpers that make for some garbage crimps. What you should consider if doing wiring in your car are some
RATCHETING CRIMPERS.
ECLIPSE 336F

Makes a tight crimp every time.
Same with wire strippers.
IDEAL 29-292

I mounted the 40A Relay to the top of the fuel hat.

Making the crimps, these are for the bulkhead connector on the fuel hat.

A HOW TO for wiring up the DW Fuel Pump Relay.

Theses Wire Strippers are sharp! They strip pretty much everything you will need for the FD short of battery cables.
Ground for the Fuel Pump Relay.
Direct from battery fused to Fuel Pump relay. Look at that nice crimp! That's not coming off.

Ground for the pump going to one of the grounding posts that go through the Hat. Crimped with waterproof ringlet.
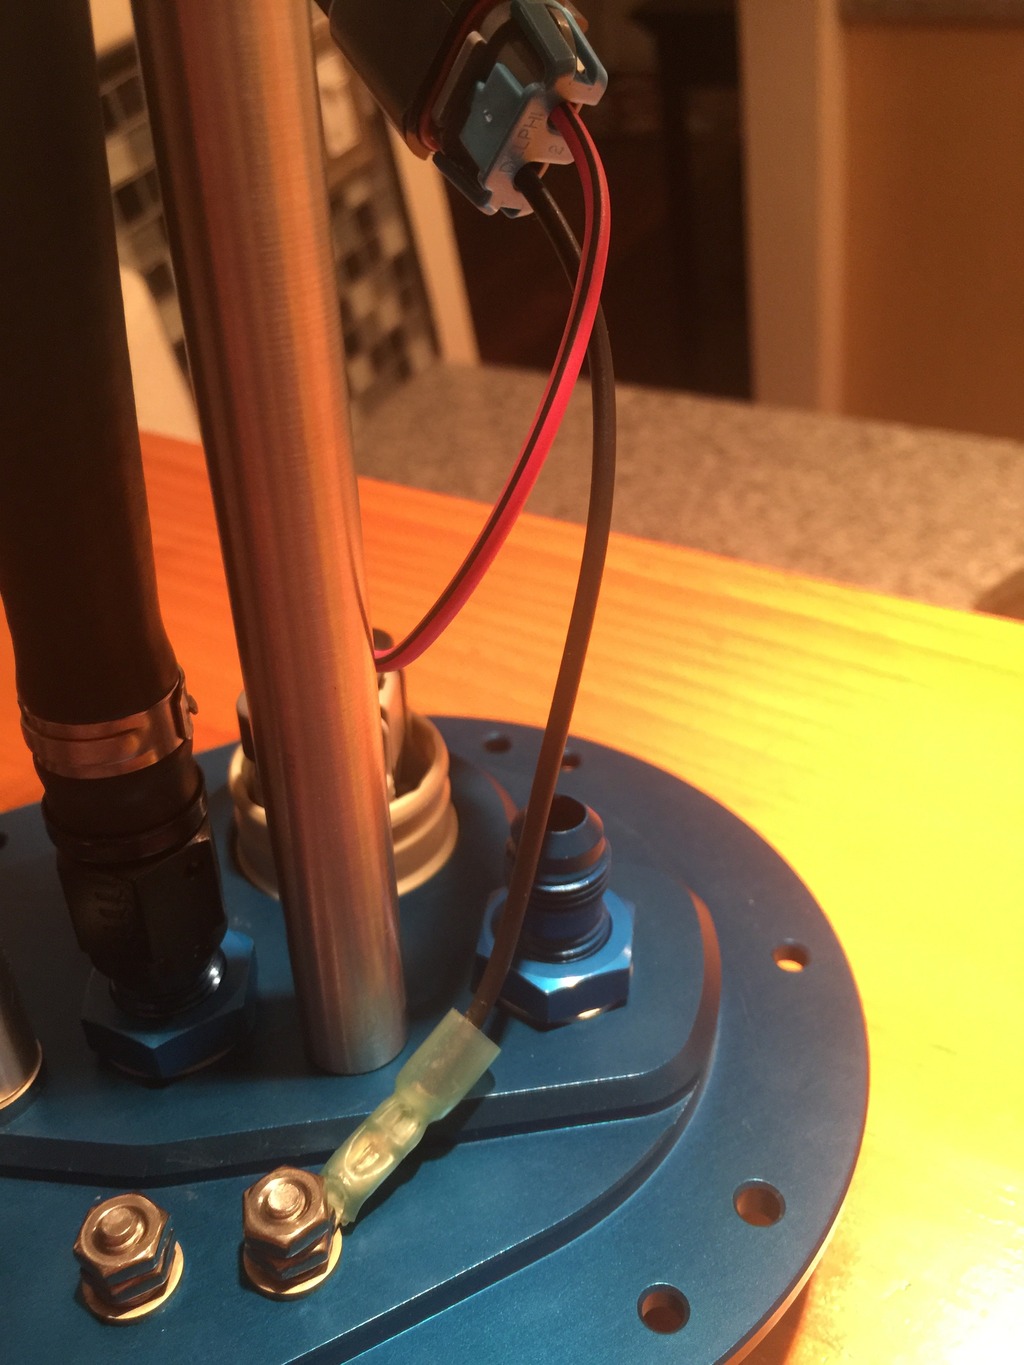
Another crimped ringlet on top side of grounding post. Must be grounded to chassis as the hat will not ground due to being anodized. This is for the pump you saw from underside.
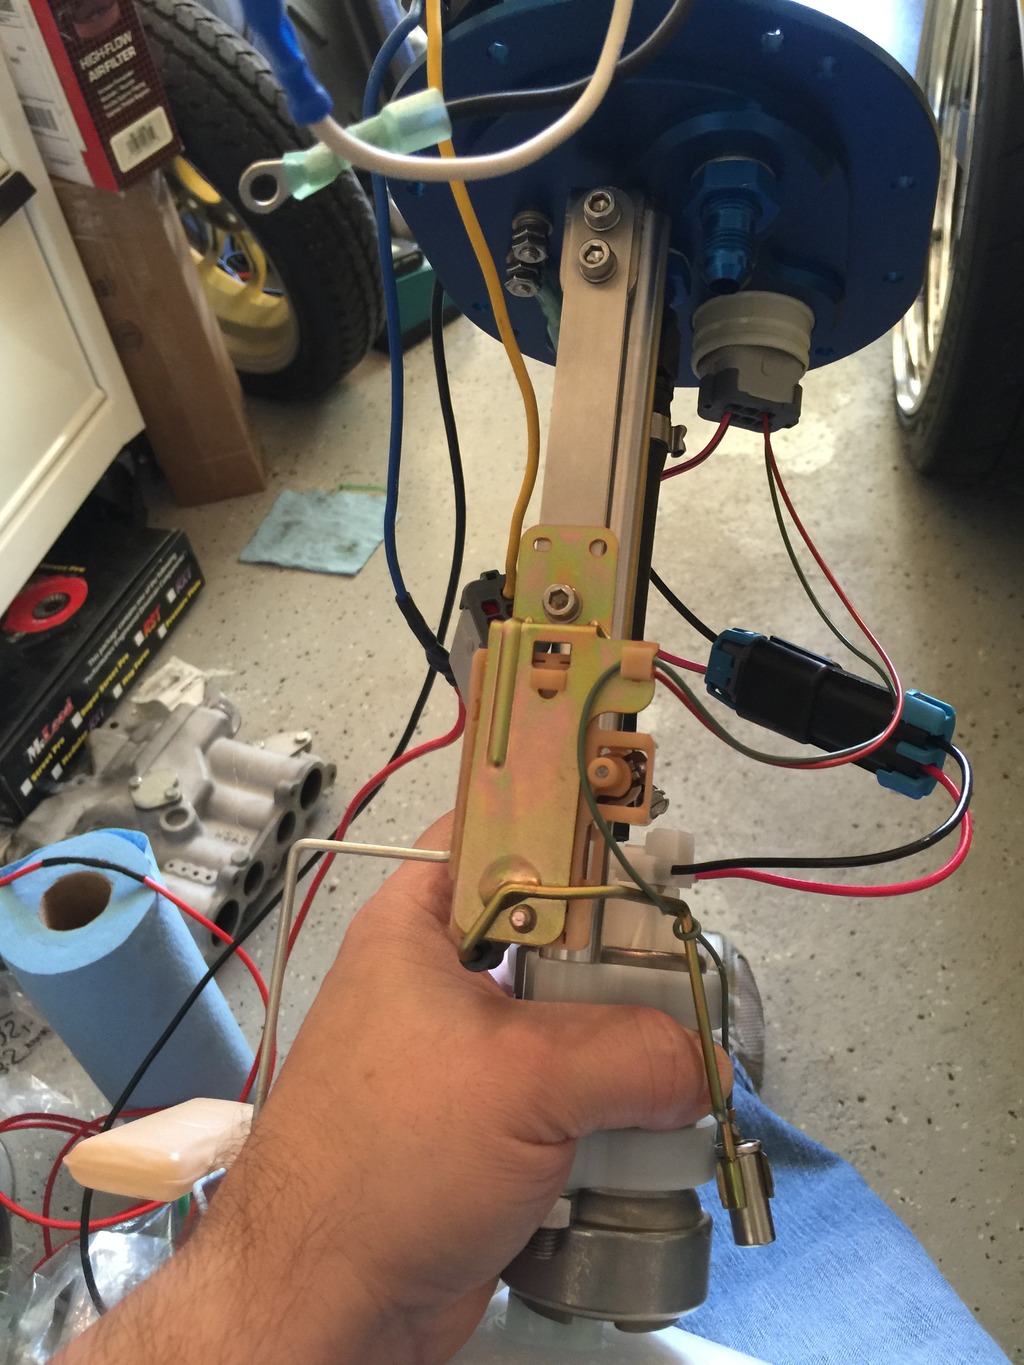
Next I will transfer the stock float and Thermistor to the new hat and finish the install.
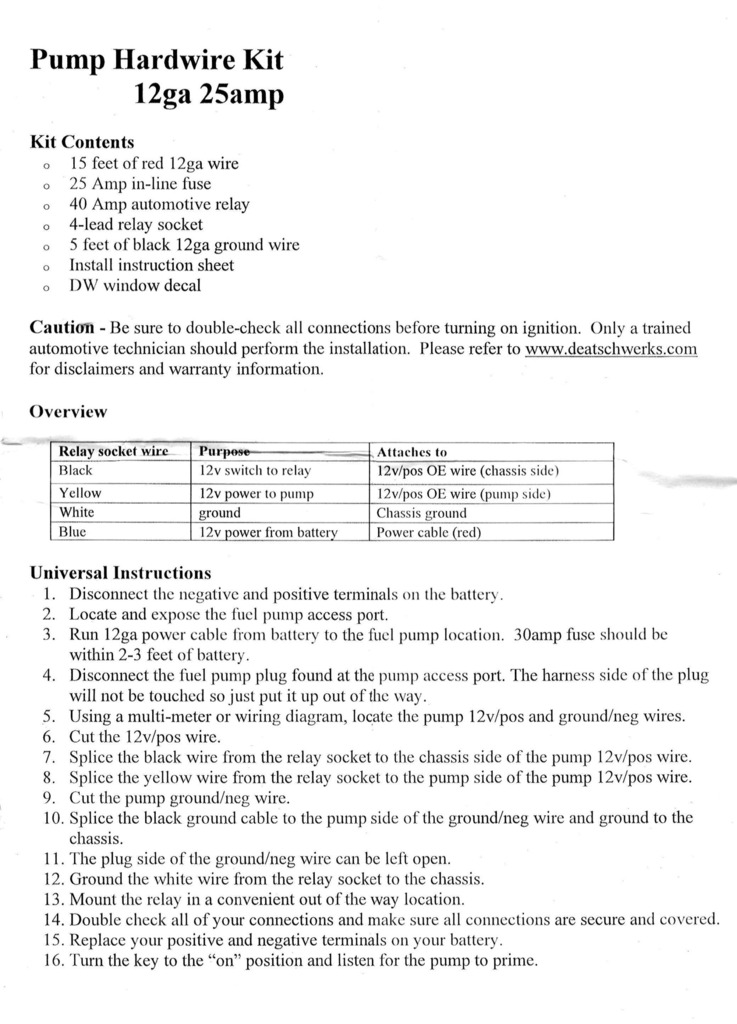
There is a lot to this from grounding the fuel level sensor, pinning everything for the bulkhead in the new hat as well as grounding the pump, new relay and grounding the stock relay coming from under the hood. I will be using the voltage source from the stock relay to activate this new 40a relay. There won't be load on it so the wiring doesn't need to be upgraded from the old relay. The pump will now have 12 and 14ga wiring. Should work flawlessly and like stock in operation.

Ground for the Fuel Pump Relay.

Direct from battery fused to Fuel Pump relay. Look at that nice crimp! That's not coming off.

Ground for the pump going to one of the grounding posts that go through the Hat. Crimped with waterproof ringlet.

Another crimped ringlet on top side of grounding post. Must be grounded to chassis as the hat will not ground due to being anodized. This is for the pump you saw from underside.

Next I will transfer the stock float and Thermistor to the new hat and finish the install.
There is a lot to this from grounding the fuel level sensor, pinning everything for the bulkhead in the new hat as well as grounding the pump, new relay and grounding the stock relay coming from under the hood. I will be using the voltage source from the stock relay to activate this new 40a relay. There won't be load on it so the wiring doesn't need to be upgraded from the old relay. The pump will now have 12 and 14ga wiring. Should work flawlessly and like stock in operation.
Great question by the way.
Sunday's efforts.
Ok so thought I was going to button up the tank today and finish up u dear the hood. It was not meant to be.
Work continues.
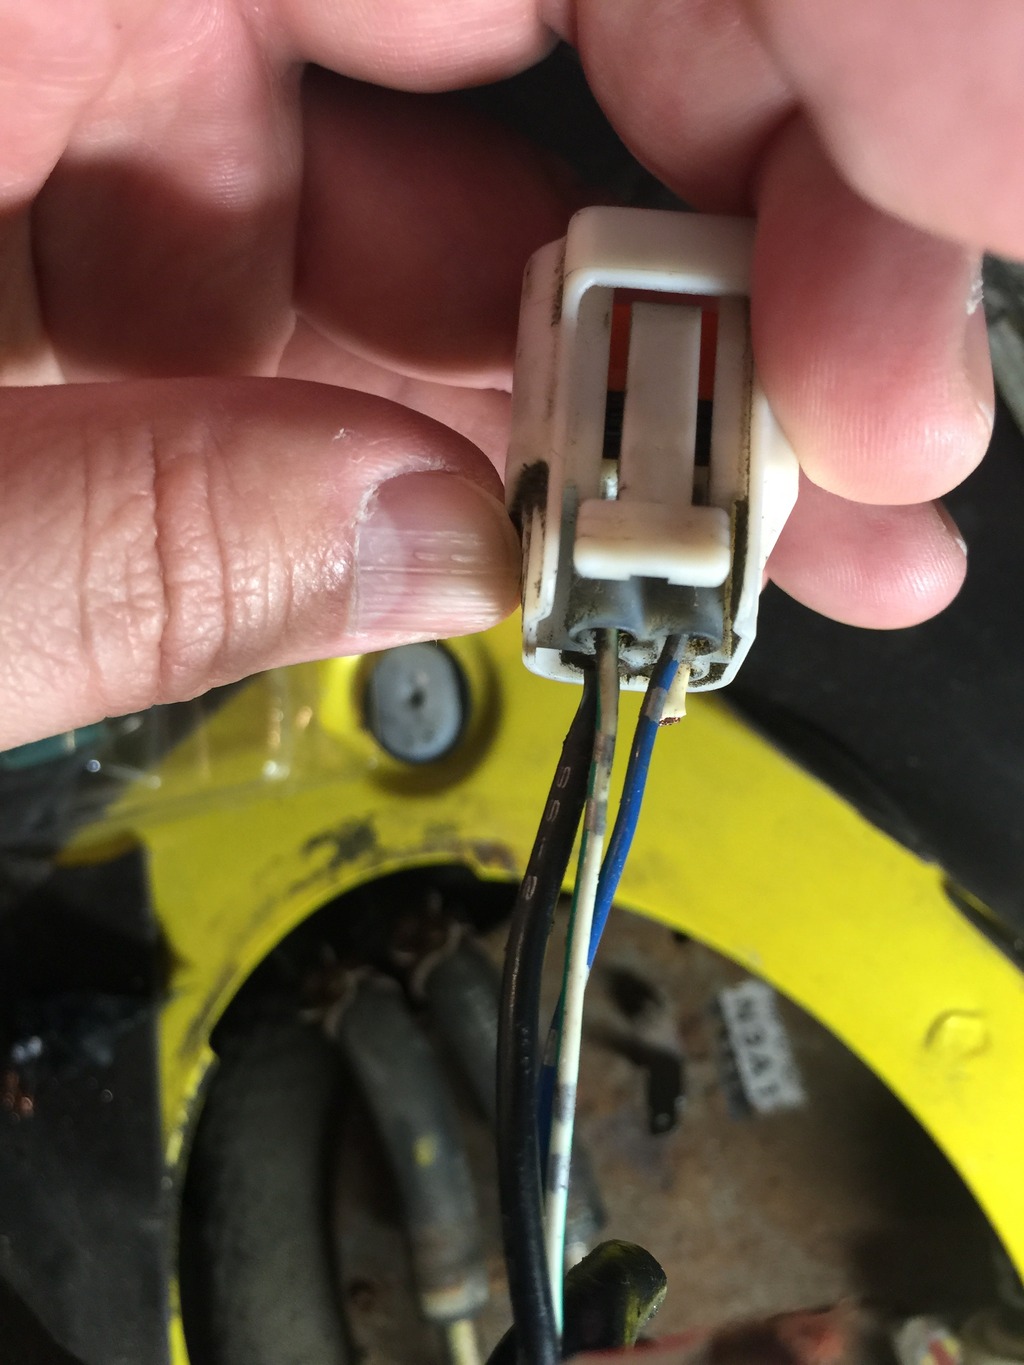
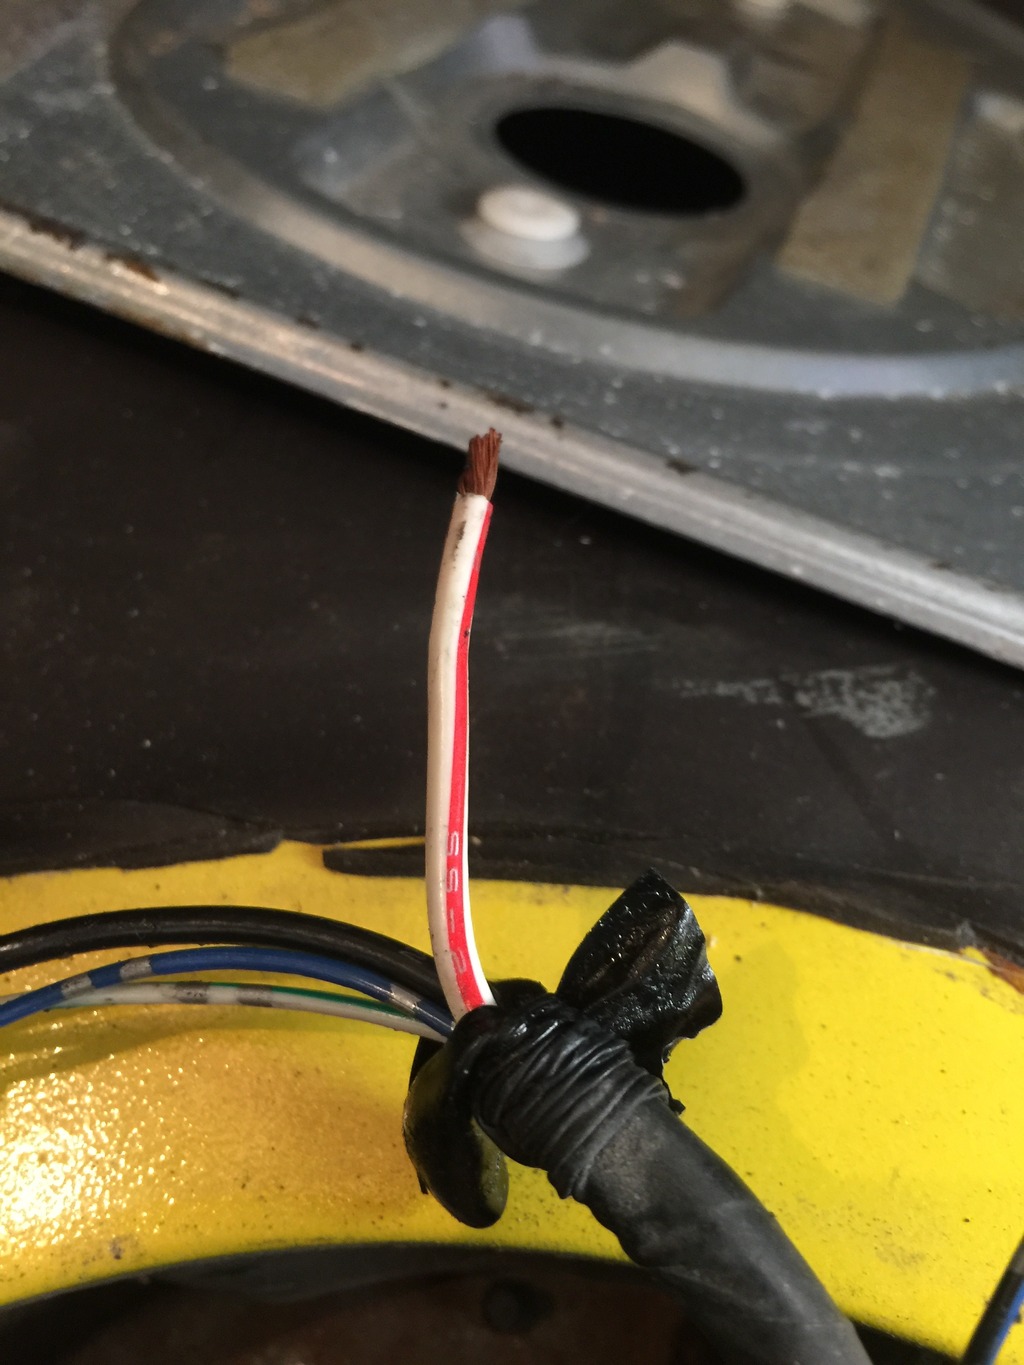
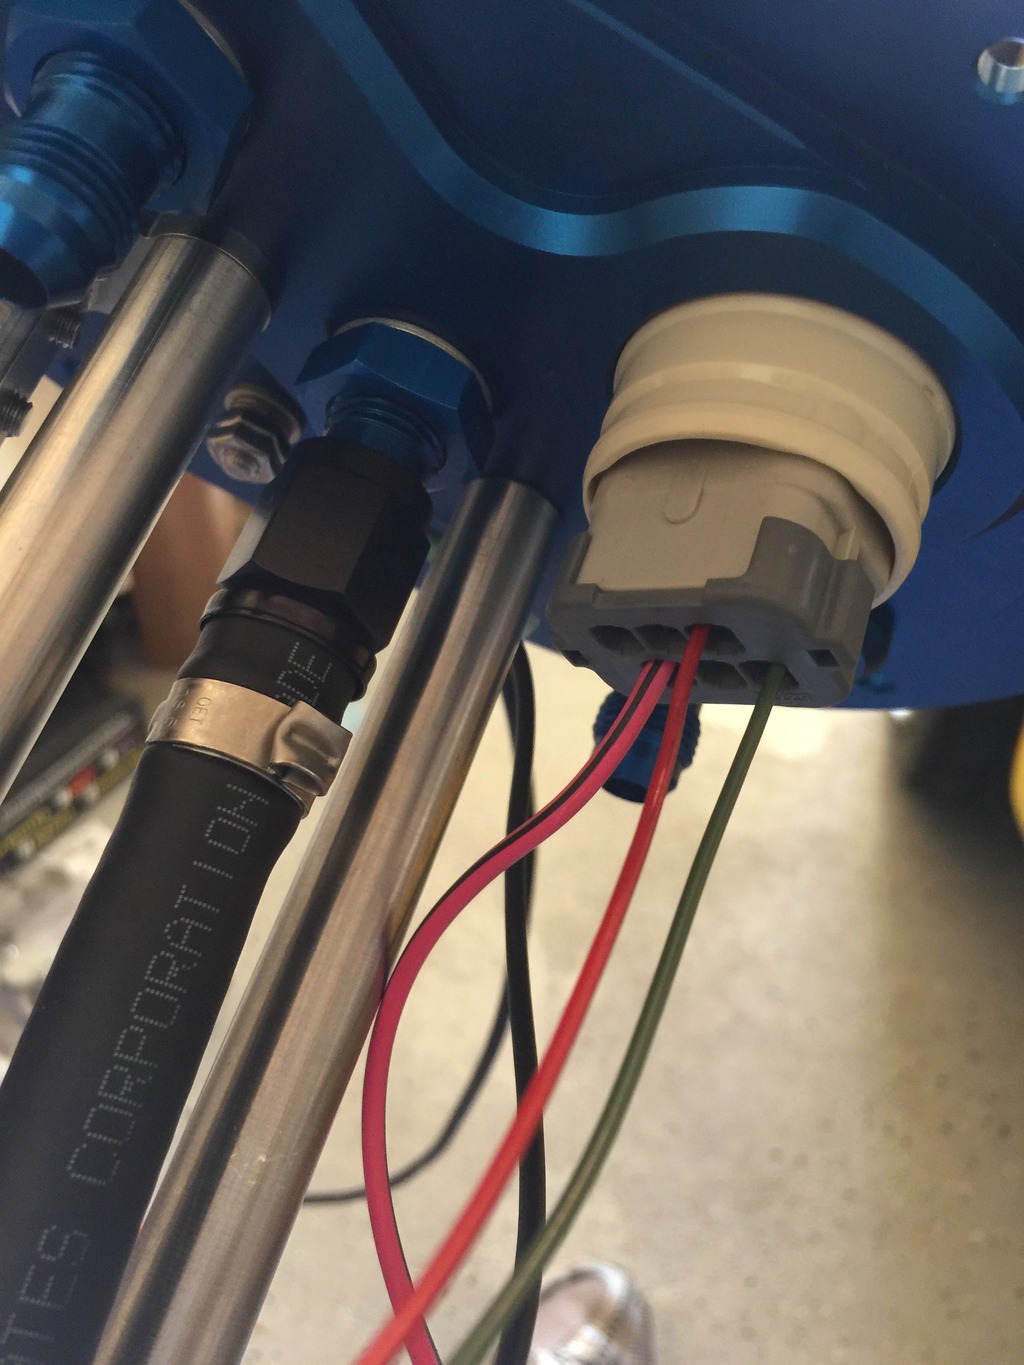
Here is the stock plug that plugs into the STOCK fuel hat bulkhead connector. I already snipped the Power wire.
Power wire that will actuate the 40a fuel pump pump relay NOT power the pump. Stripped and ready to connect to new relay.
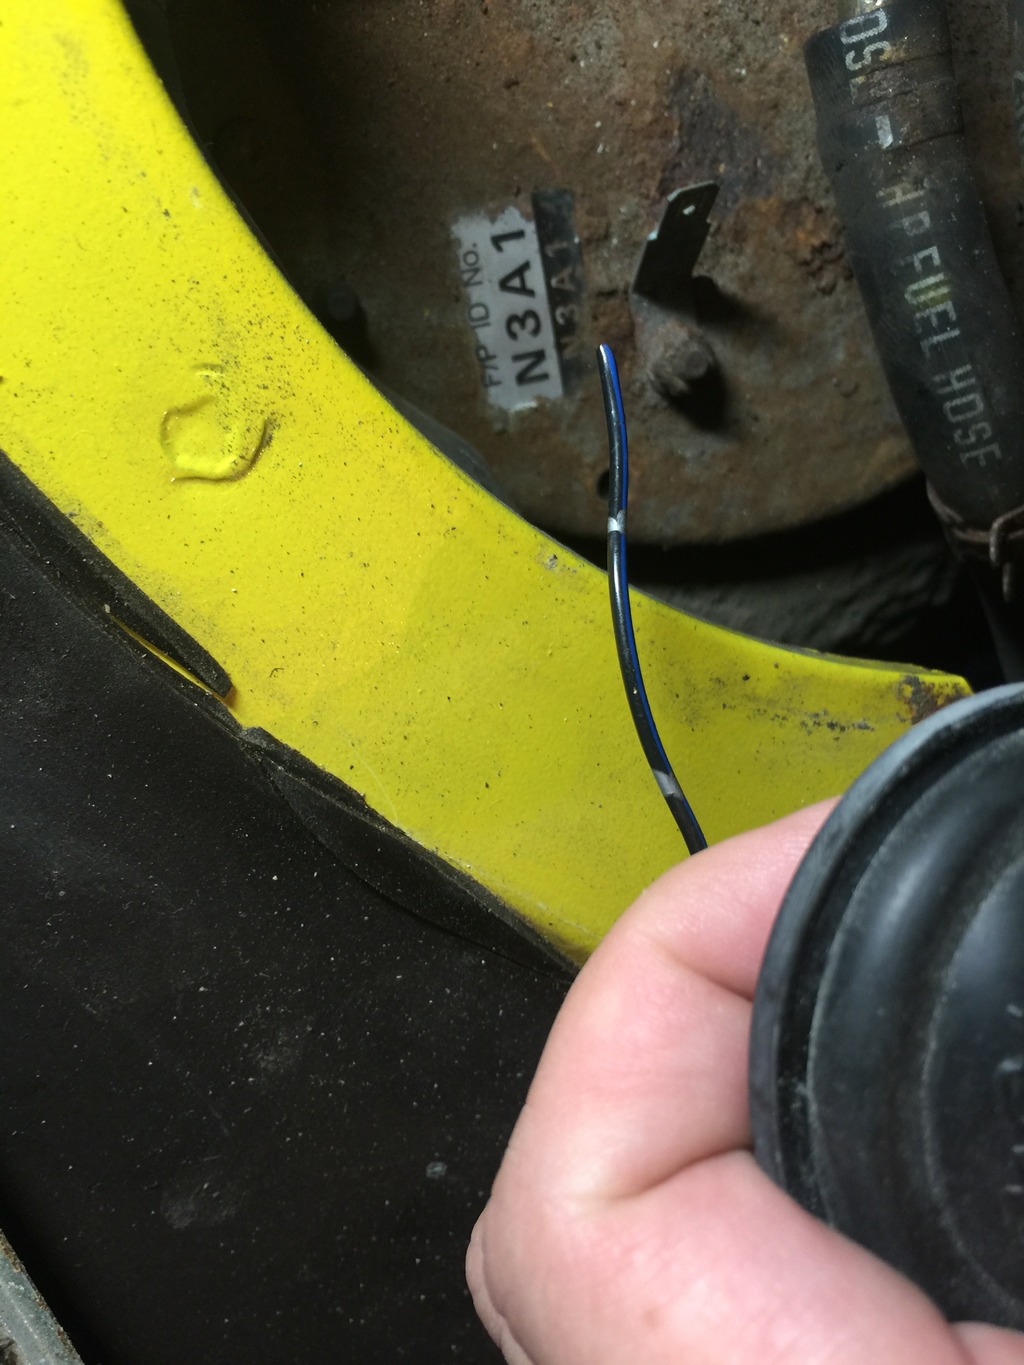
This blue wire with the silver stripe was grounded to the stock fuel hat with a female spade connector. I cut it off and will ground it to the chassis. It's for the stock fuel level gauge.
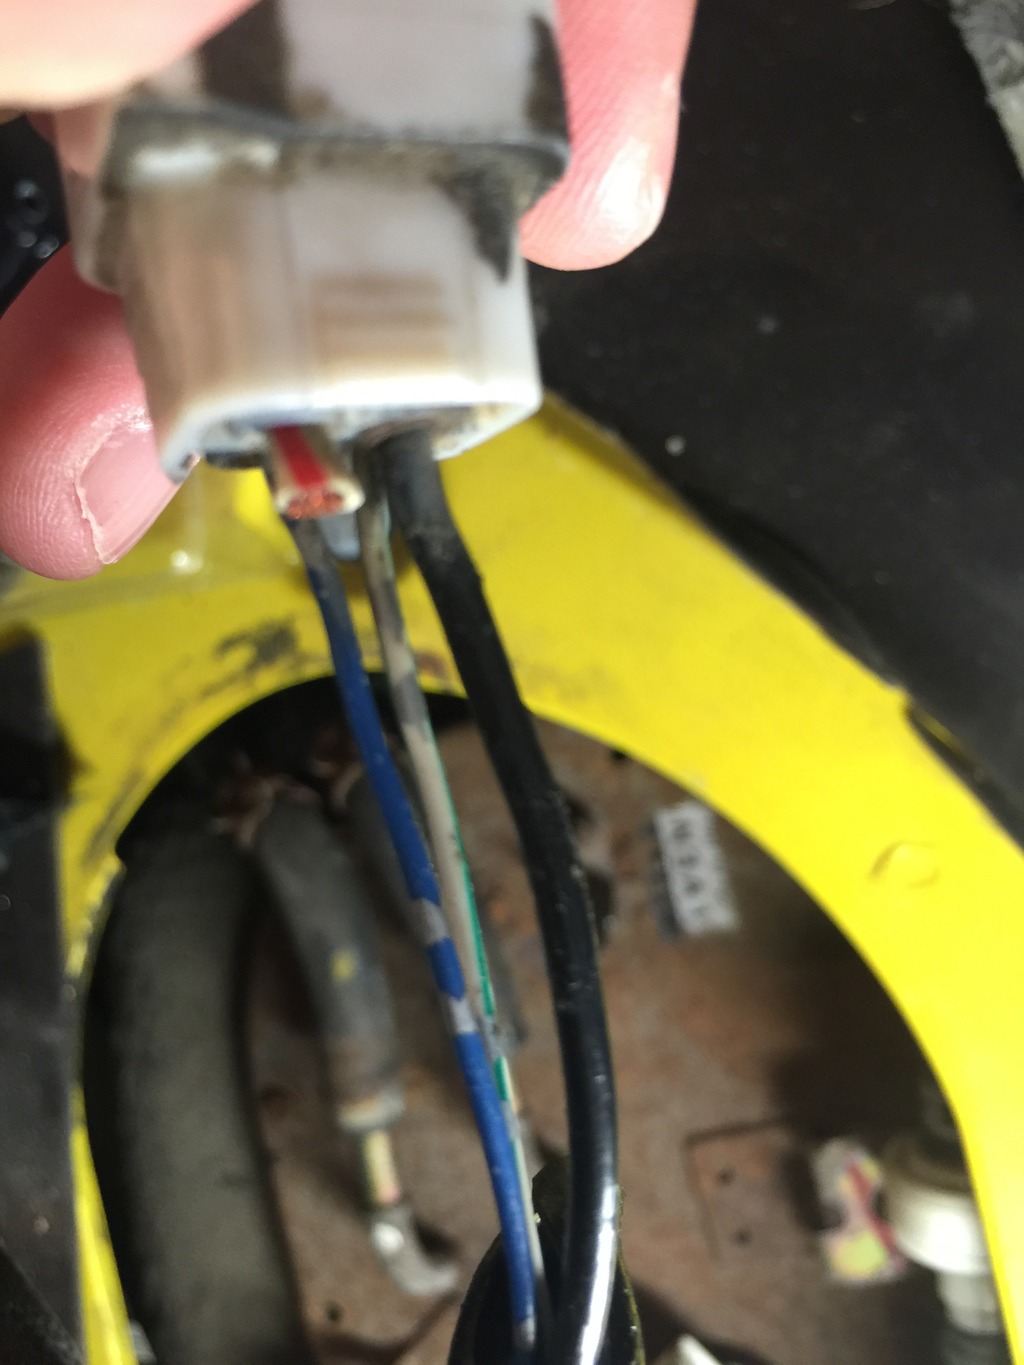
This blue wire with the 2 silver stripes and the green and white wire are for the in tank float and the fuel thermistor. Just need to double check which is which. They are not the same color in the tank.
Ok so thought I was going to button up the tank today and finish up u dear the hood. It was not meant to be.
Work continues.
Here is the stock plug that plugs into the STOCK fuel hat bulkhead connector. I already snipped the Power wire.

Power wire that will actuate the 40a fuel pump pump relay NOT power the pump. Stripped and ready to connect to new relay.

This blue wire with the silver stripe was grounded to the stock fuel hat with a female spade connector. I cut it off and will ground it to the chassis. It's for the stock fuel level gauge.

This blue wire with the 2 silver stripes and the green and white wire are for the in tank float and the fuel thermistor. Just need to double check which is which. They are not the same color in the tank.

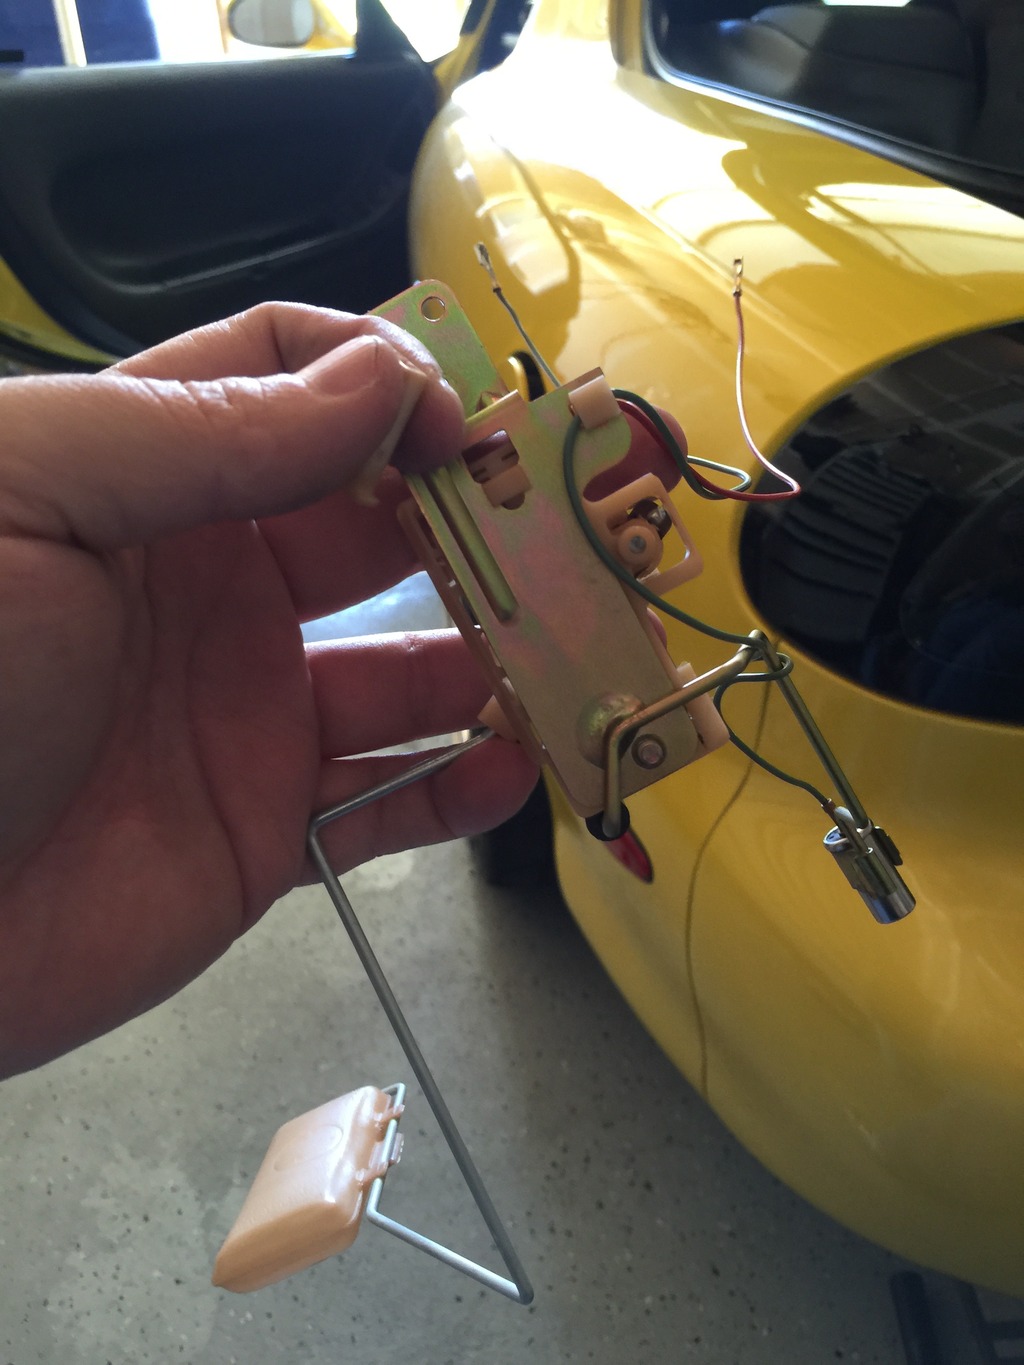
Here is the float and thermistor from the stock hanger.
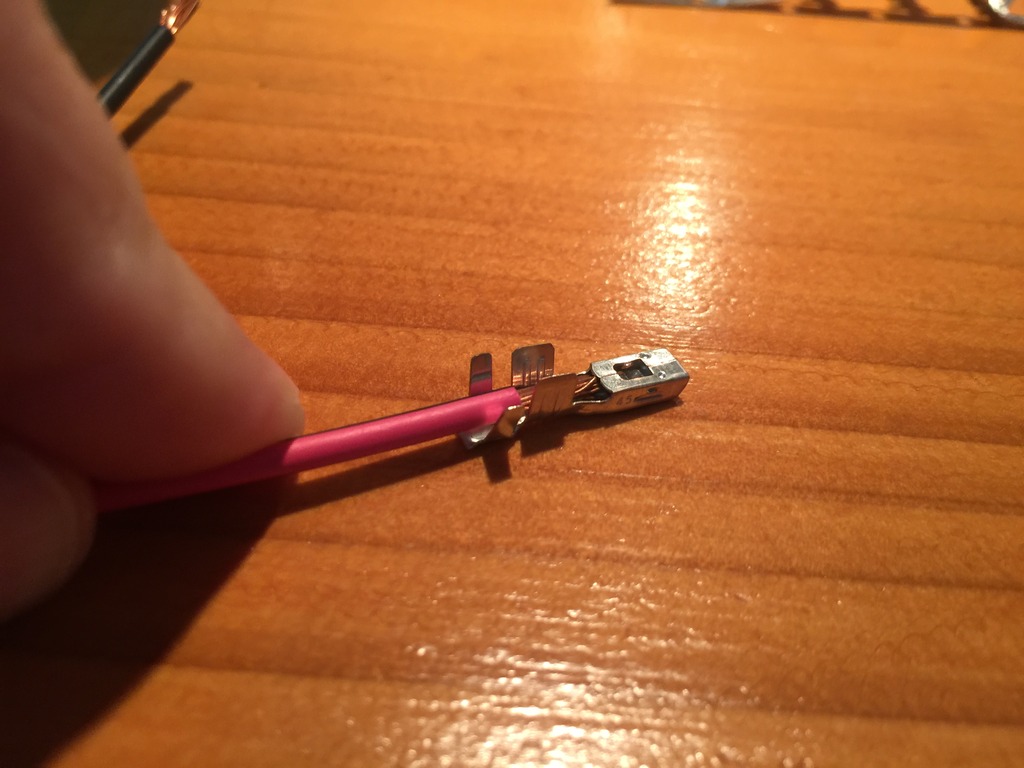
I decided to de-pin the stock connector and see if the pins would work in the new bulkhead. They did and they clicked in easily.
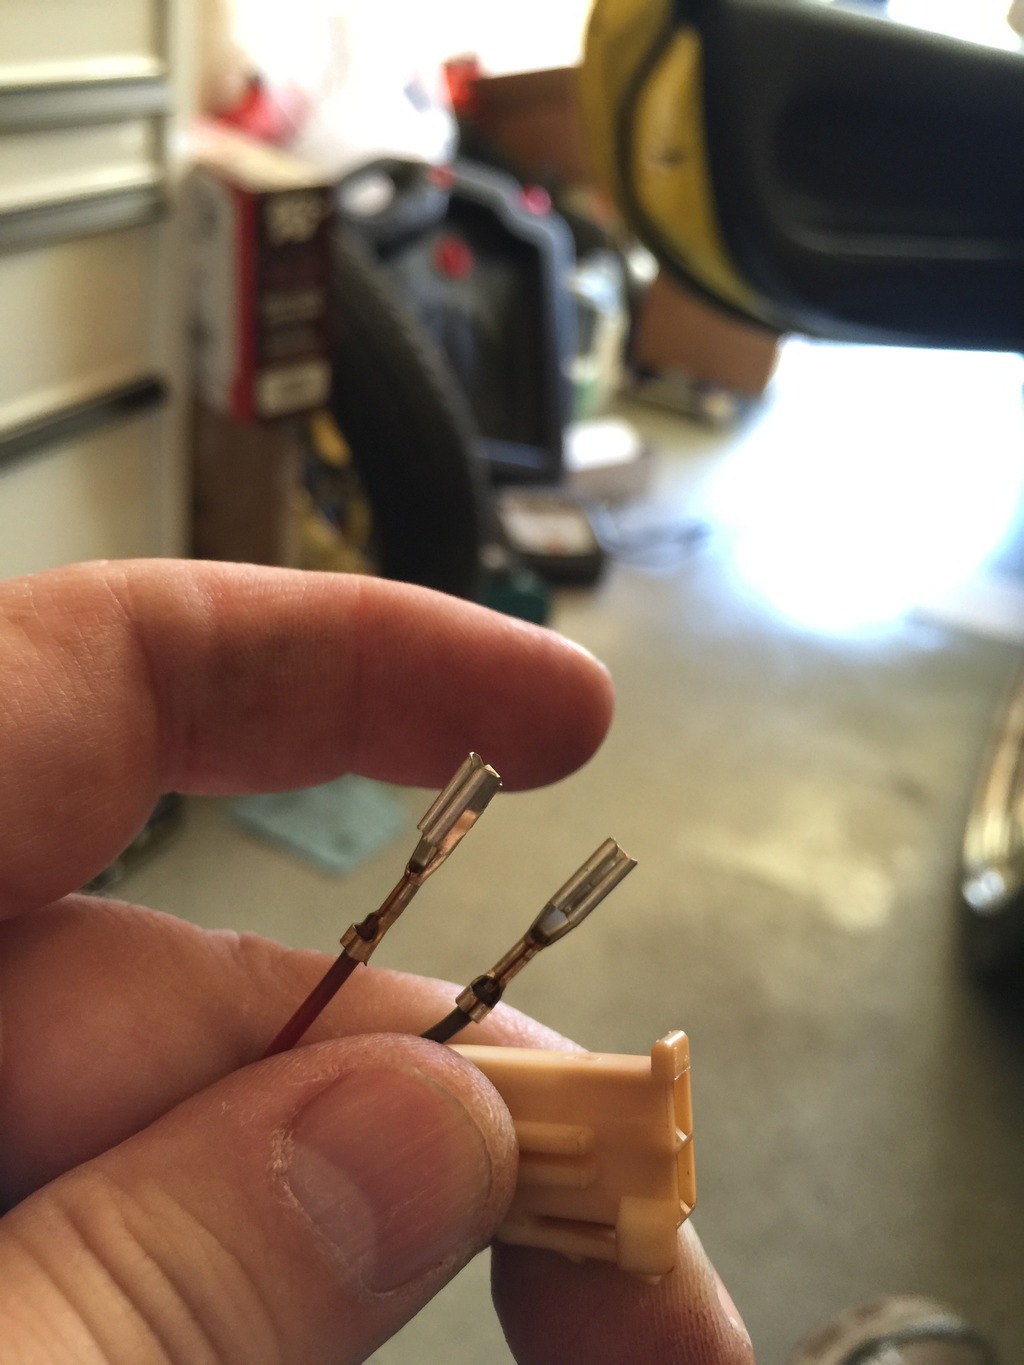
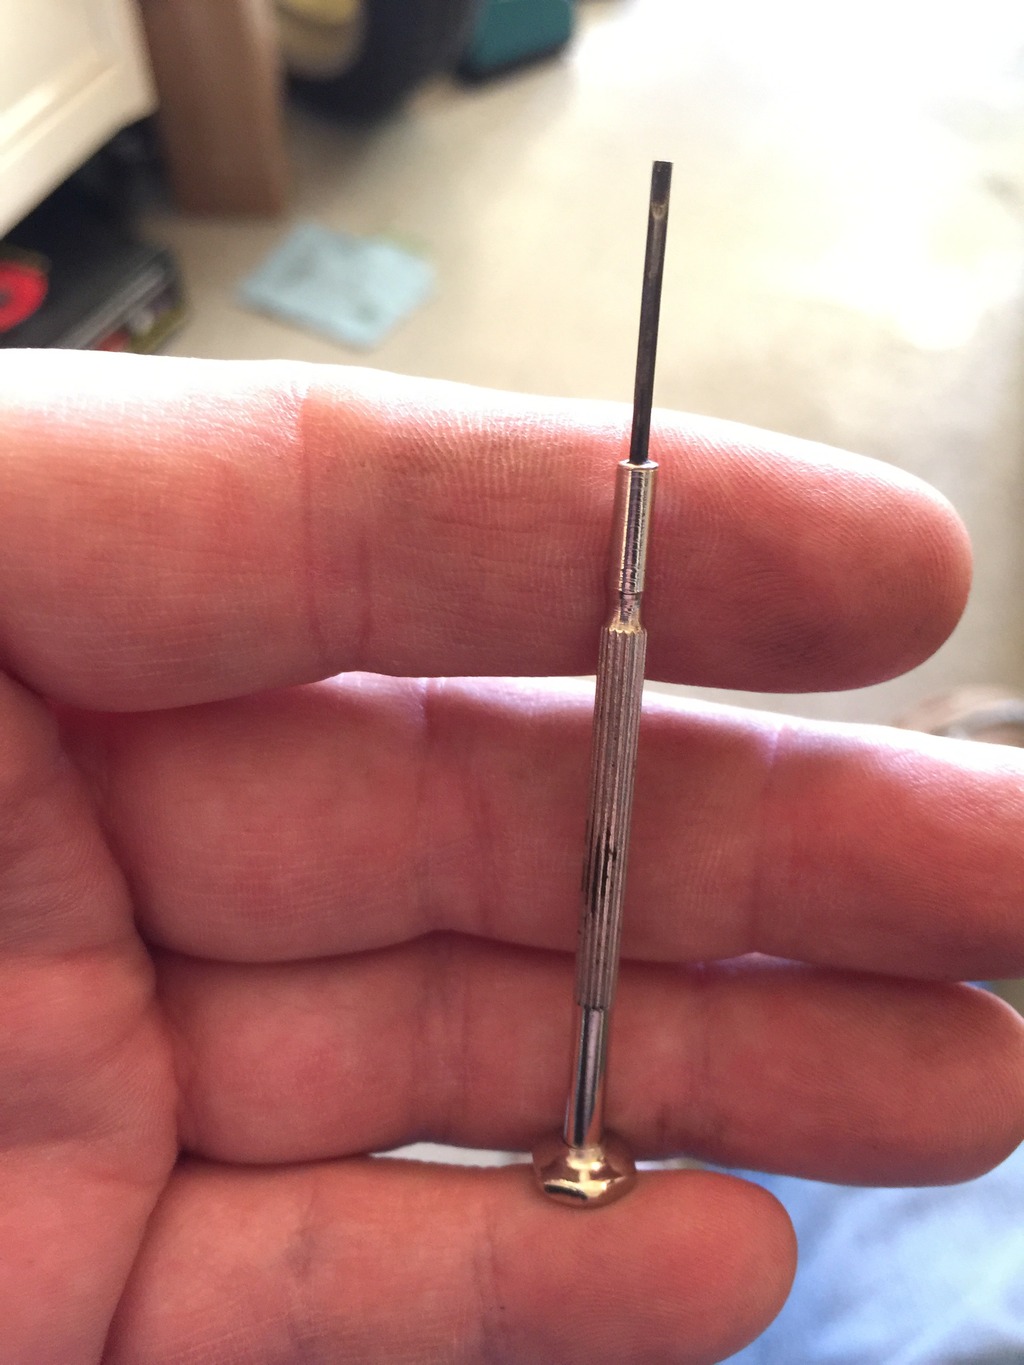
Easy to de-pin a connector with the right tool. This is from an eyeglass repair kit you can find at the grocery store check out.
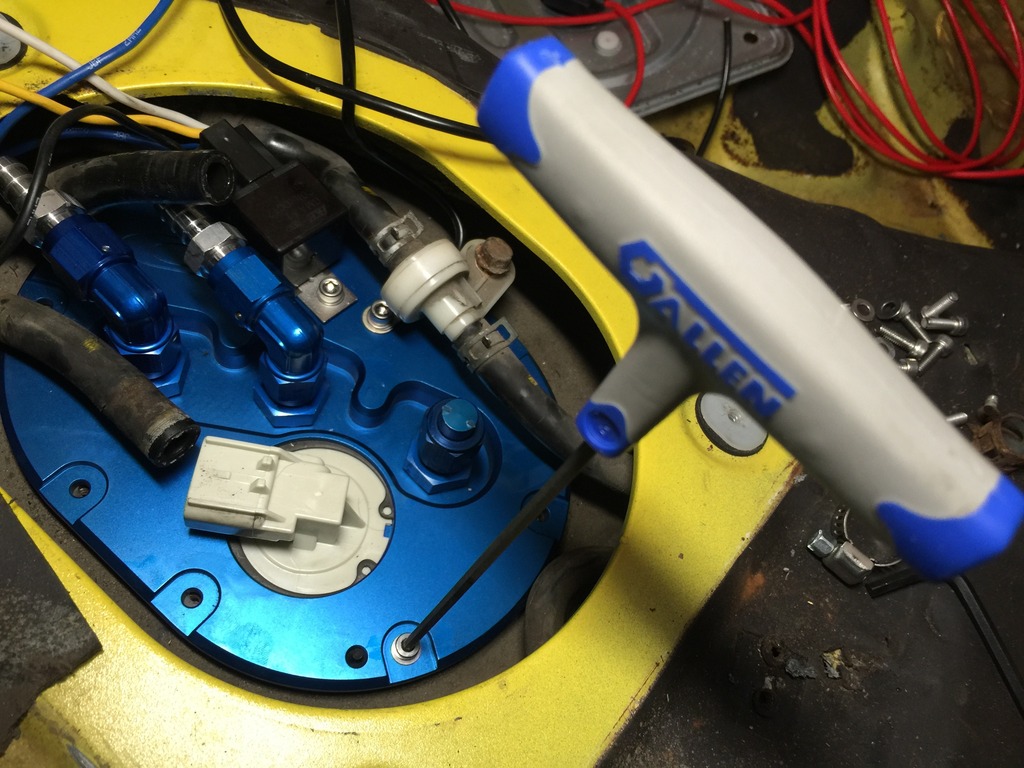
Float assembly bolts right up to CJ-Motorsports fuel hat.


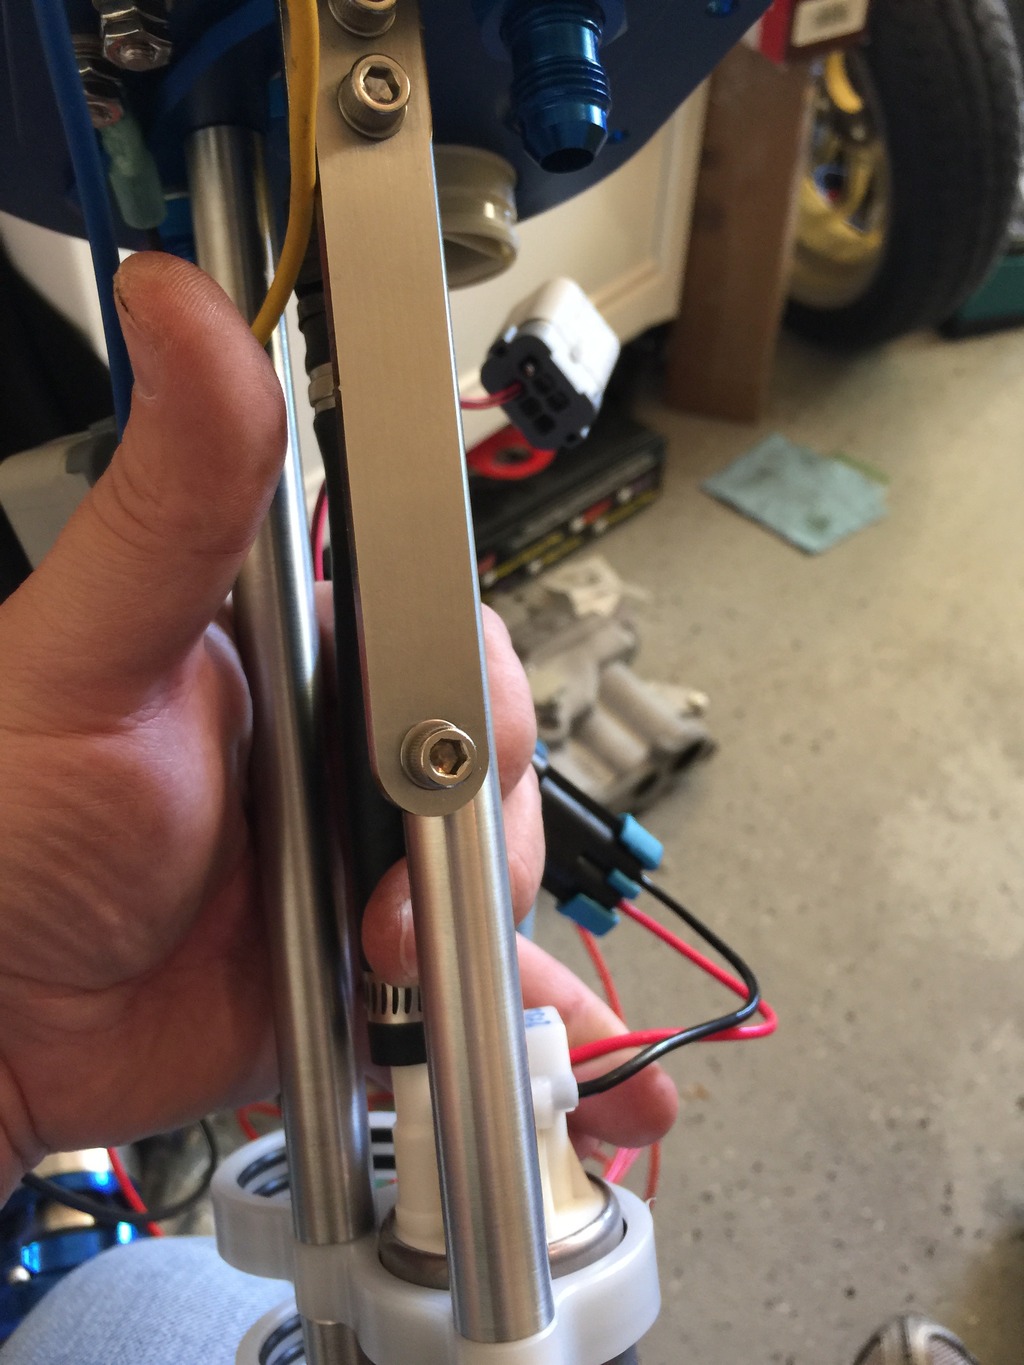
Securing hat to the tank, these T-handles get used a lot. I originally bought them for working on my Ducati but I use them all the time of the car. The rubber gasket from the stock hanger is reused btw.
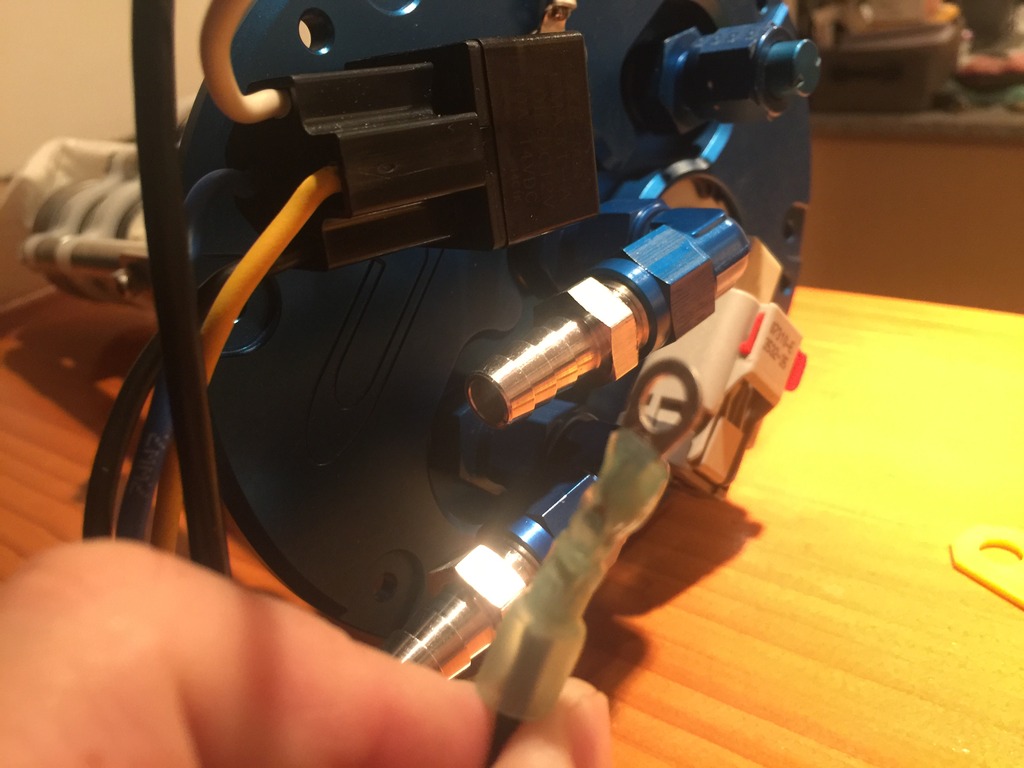
The Barbs didn't work out as well as I had hoped. I am going to make some lines and possibly relocate/upgrade the fuel filter. SCOPE CREEP!!!
It was just a matter of time....
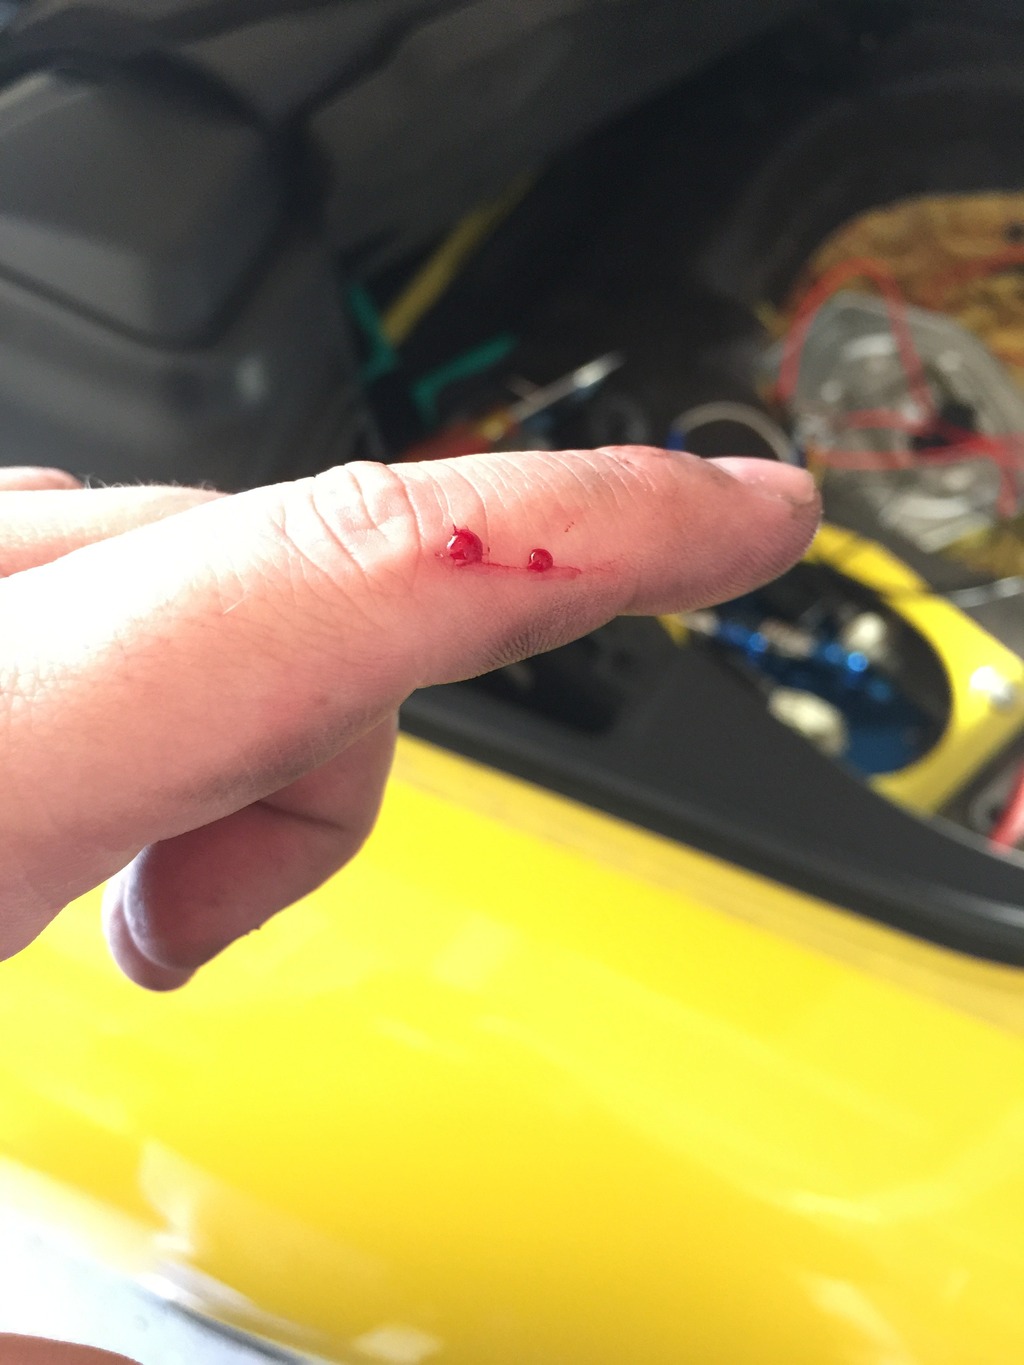

The Barbs didn't work out as well as I had hoped. I am going to make some lines and possibly relocate/upgrade the fuel filter. SCOPE CREEP!!!
It was just a matter of time....


Senior Member
Joined: Jun 2001
Posts: 599
Likes: 0
From: Austin, TX
Lookin good, Mike!
I had missed this thread so far... a lot of nice tips here. I'll definitely be ordering some parts to rebuild the shifter in mine soon... your refinished interior panels look awesome.
Best,
John
PS I love how you documented the bloody finger. Sissy ;-)
I had missed this thread so far... a lot of nice tips here. I'll definitely be ordering some parts to rebuild the shifter in mine soon... your refinished interior panels look awesome.
Best,
John
PS I love how you documented the bloody finger. Sissy ;-)
Looking forward to that build thread John. I will send you some of my Snoopy Band aids for those mishaps like you see above...
JEGS Performance Products 15946, JEGS Brass Barbed Hose Connector | JEGS Performance Products
Thanks for the tip and that would likely work but I went ahead and got these from Summit.
What I should have got from the start.
-6an to 5/16 barb
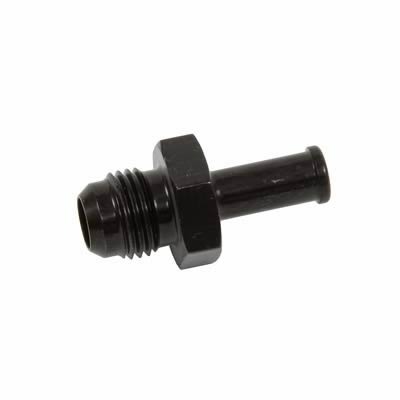
Aeromotive Barb to Male AN Fittings 15635 - Free Shipping on Orders Over $99 at Summit Racing
What I should have got from the start.
-6an to 5/16 barb

Aeromotive Barb to Male AN Fittings 15635 - Free Shipping on Orders Over $99 at Summit Racing
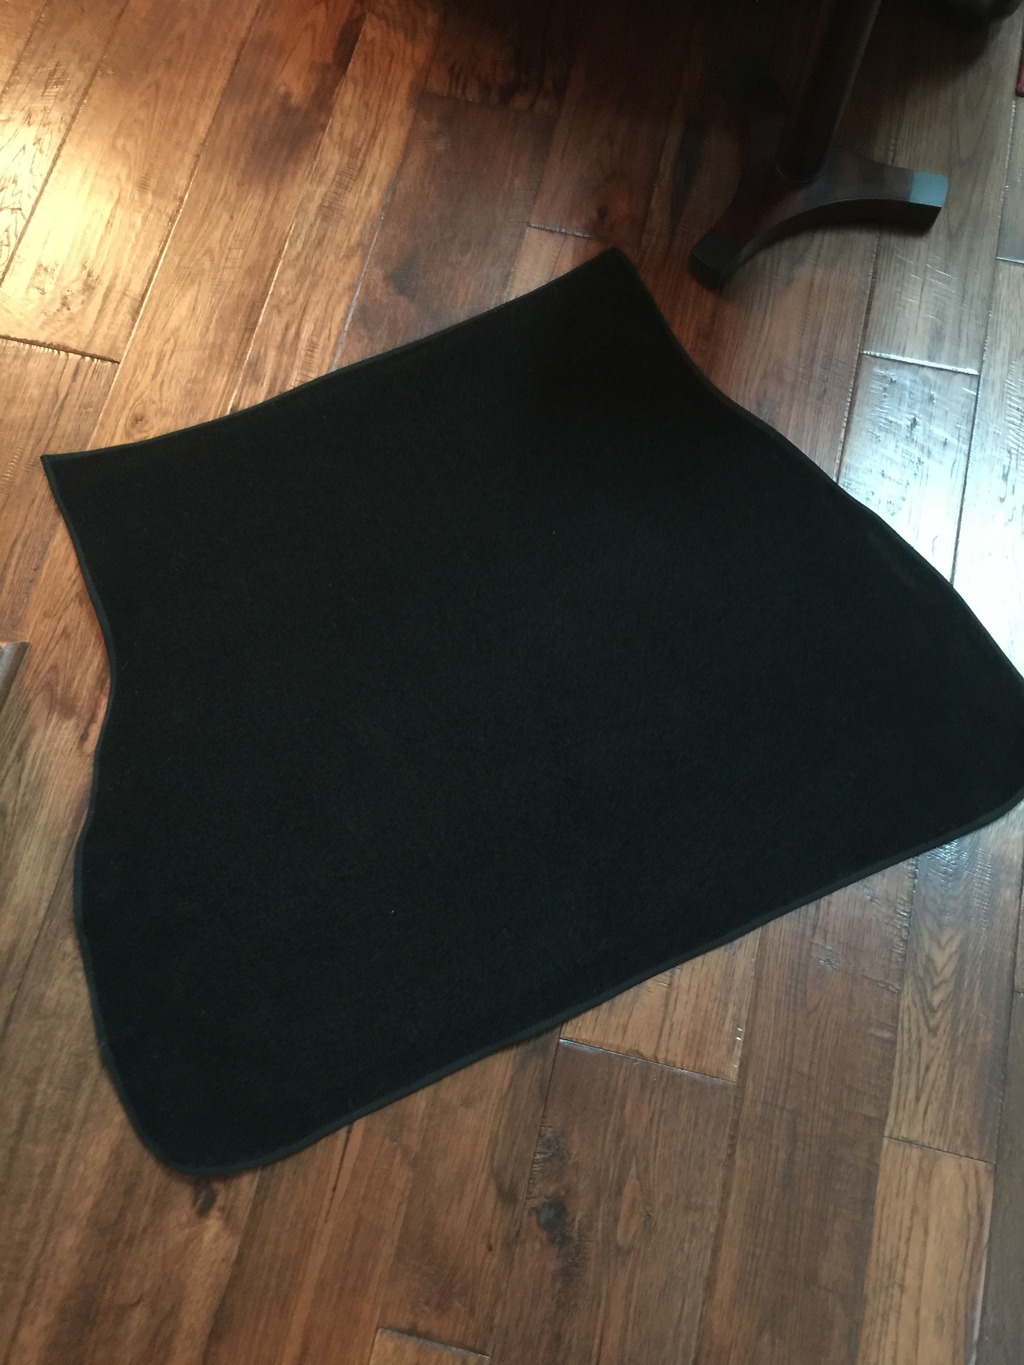
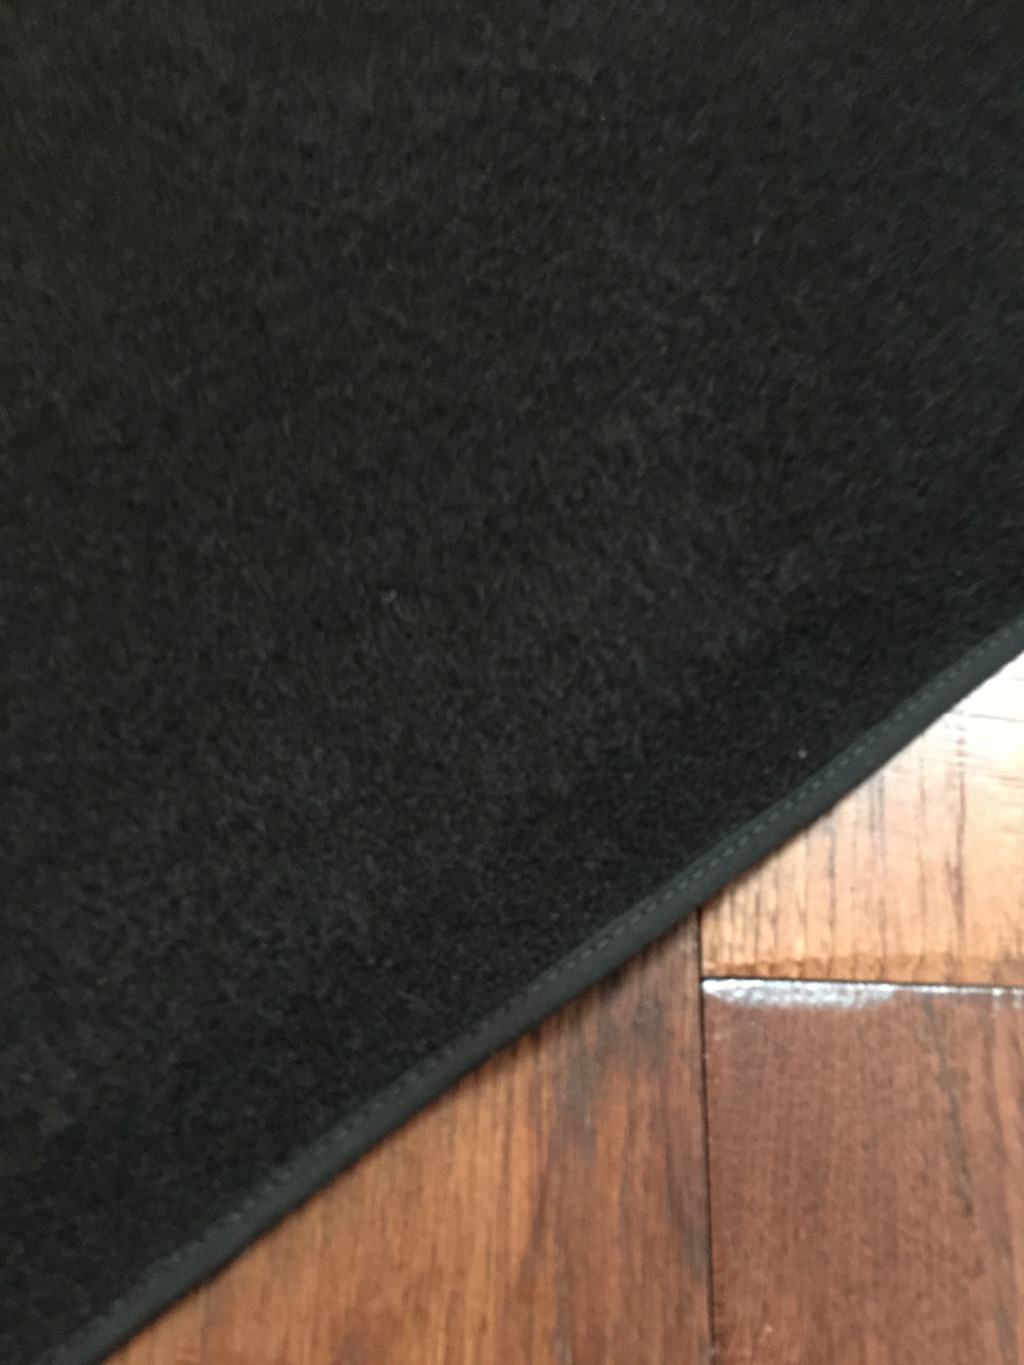
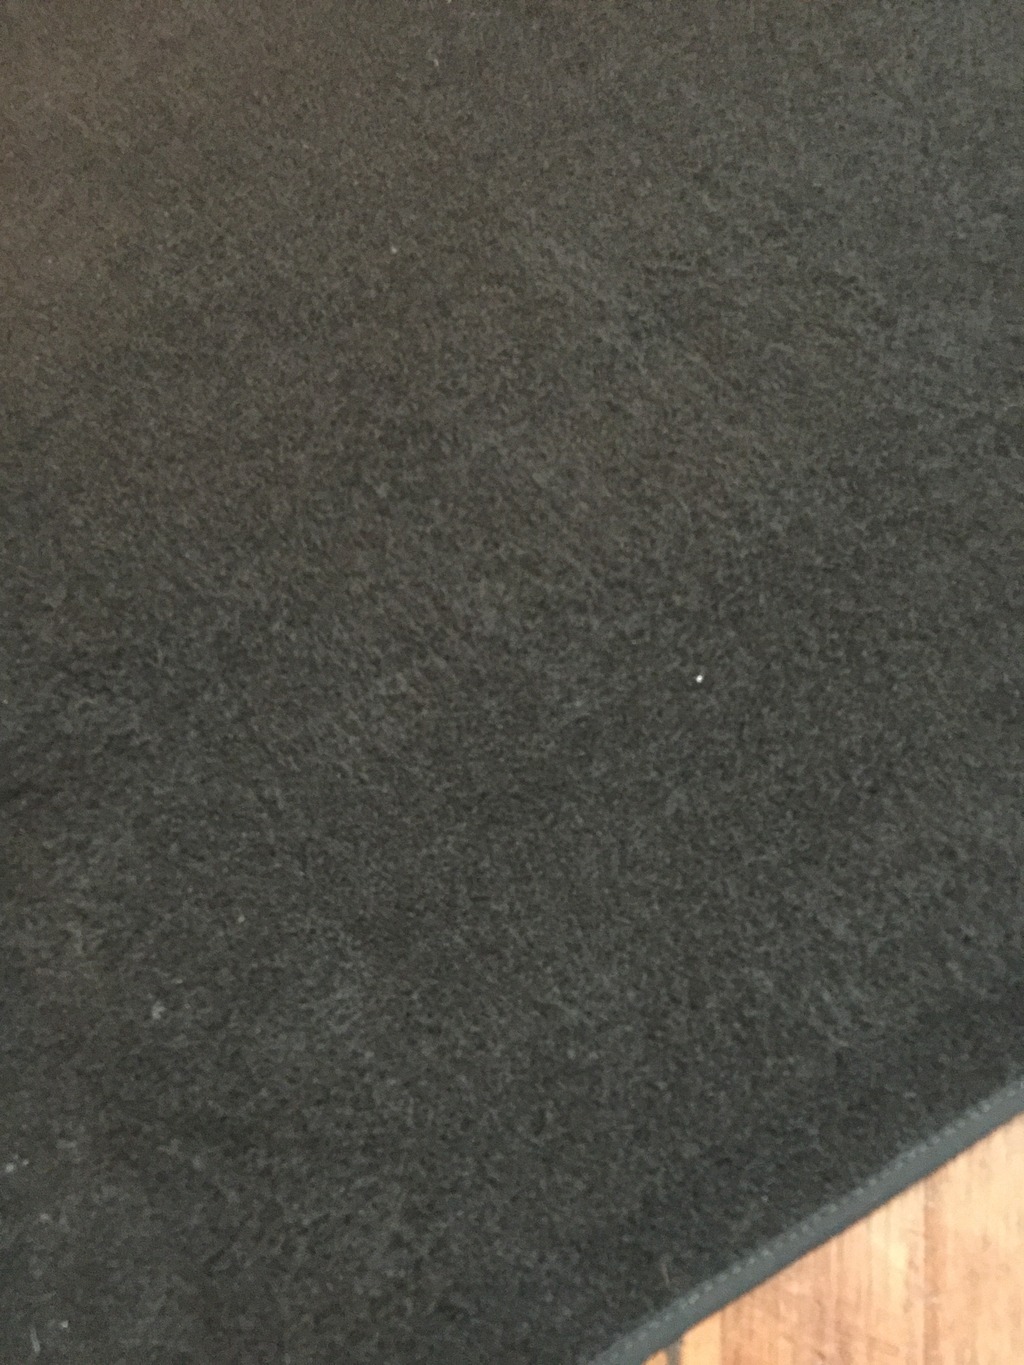
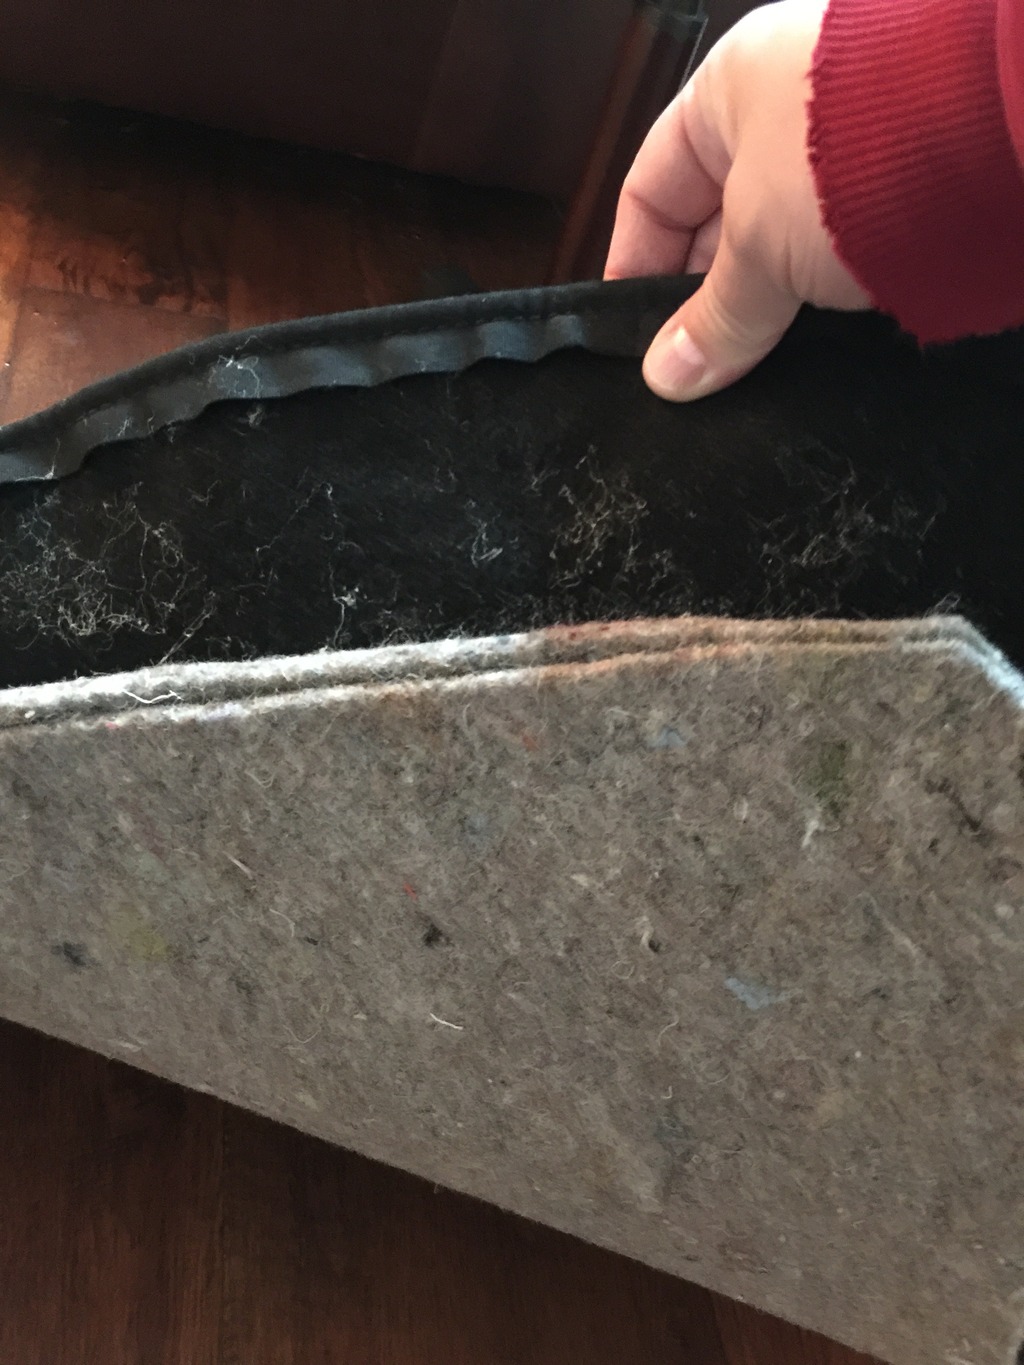
Quick update. My new rear R1 carpet came in the mail yesterday. These are nicely made reproductions by ESH Upholstering in Forest Hill Maryland. They are Forum Vendors and RX-7 owners. You can pick one of these carpets up for just $100
https://m.facebook.com/Eshupholstering/
https://m.facebook.com/Eshupholstering/


Last edited by ZoomZoom; Apr 29, 2016 at 09:25 AM.
Senior Member
Joined: May 2013
Posts: 300
Likes: 3
From: Sussex, UK
Awesome, been looking for someone who makes these boot overlay carpets!
Don't suppose you have an e-mail contact for them? I'm not a facebizzler. Or their username here maybe?
Don't suppose you have an e-mail contact for them? I'm not a facebizzler. Or their username here maybe?
Last edited by Marf; Apr 29, 2016 at 03:35 AM.

