When you click on links to various merchants on this site and make a purchase, this can result in this site earning a commission. Affiliate programs and affiliations include, but are not limited to, the eBay Partner Network.
Honorable mention to the guy essentially who put a REPU on an RX8 chassis. The RX8 drivetrain, front and rear subframes, suspension, electronics, and seats have all been transplanted to this flat black REPU and it was so awesome to see in person. He already had RX8 suspension and big brake upgrades done to it. Yes it also had the battery compartment in the lower front right side of the bed � true REPU style!
After the dyno tune I wanted to address a small issue with my AVC-R pressure sensor set-up. I tee'd it into the Map Sensor line and used the single filter before the T to filter for both. My gut feeling was not liking it but I got the idea for the Club. I have also added some related pics for this post as well.
The AVC-R instructions say to tap the pressure sensor into the FPR. Well, if that diaphragm fails then I'll have fuel directly getting into my pressure sensor. I also decided to do it how many others have done it and Tee'd it into my boost gauge line with the filter after the T going to the Apexi pressure sensor.
Many people have posted on how to tune the AVC-R and its like a treasure hunt gathering these write-ups. I wanted post them here in this update so that I and others can use this information if we are new at it or if we have forgotten how to do something. I appreciate you all who have worked hard to figure it out and that you were all kind enough to share your knowledge.
This is a Happy Thanks Giving shout out to all you Apexi AVC-R wizards out there.
RX7.org and FD3S.net have the same instructions and info for tuning.
INSTALLATION
Installing the unit will take 3-6 hours, depending on how mechanically and electronically inclined you are. The single most time-consuming step is splicing into the ECU wires. The supplied installation instructions aren't bad, follow the FD specific instructions EXACTLY.
Also, you should review the boost controller installation info on Steve Cirian's and Rob Robinette's sites... the principals of installing any EBC are very similar to installing this unit, and the pictures on Rob's site are very helpful.
STEP 1) Install the Solenoid
The solenoid controls the air pressure provided to the precontrol and wastegate actuators, thus allowing user control of boost. If you blow through the solenoid (NO or COM port) you will feel a little resistance, but air will flow. If air doesn't flow there is probably a problem. (So loss of power to the solenoid will result in low boost, not max boost...)
� Remove air box and intake piping so that you can access the precontrol and WG actuators (look almost straight down).
� Remove both of the hoses going from the manifold to Precontrol & WG actuators - hoses are held on by expandable metal clips * Following the directions, use the supplied plastic 'T's and hoses, and 'T' the manifold ports to the NO port on solenoid.
� 'T' the Precontrol & WG actuator ports to the COM port on solenoid.
� Mount the solenoid - use the rubber pad. Mine is mounted on the fender wall near the ABS unit.
STEP 2) Disconnect factory solenoids
This MUST be done, otherwise boost cannot be controlled.
� There are two ports each on the wastegate & precontrol actuators.
The top port from each is running to the solenoid (step above), the second port is at the bottom and to the right... you cant see it, but it's easy to feel.
� Disconnect bottom ports on each
� Plug both these ports (i.e. rubber stopper and tie wrap)
� Plug both hoses that were connected to the ports
STEP 3) Install pressure sensor
Pressure sensor monitors manifold pressure to provide 'closed-loop' boost control.
� Find a hose on intake manifold and 'T' it to the pressure sensor.
� Use the supplied air filter and mount the sensor so the hose connector points downward.
� On my car there were two threaded holes on the fender-wall, close to the firewall, next to the ABS. The pressure sensor mounted there PERFECTLY (supply your own machine screws).
STEP 4) Wiring harness
� Start with harness inside the car and run the solenoid and pressure sensor wires into the engine compartment.
� You do not need to cut the wires, the wire 'ends' can be removed from the plastic connector using a small screwdriver (pop out plastic insert.)
� Hole in firewall behind/under ABS and behind glove-box works well.
� Follow the supplied FD ECU wiring diagram (Z3-b) and spice into required ECU wires. I used 'RPM' wiring, not 'injector duty' wiring.
� Attach all sensor and head-unit connectors
STEP 5) Sensor Check
� Put everything back together (at least enough to turn ignition on).
� Turn ignition on (don't need to start the car yet)
� AVC-R logo will scroll across the screen
� Go to 'Etc.' section, 'Sensor chk'
� My values:
Boost: 1.513V
Throttle: 0.634V (no throttle) / 4.218V (full throttle)
SCSW: OFF
� If your values are close, the unit and sensors are working.
� Put everything back together - enough to drive car. Complete system checkout is in next section.
TUNING
Basic tuning will take a few hours, but fine tuning all the parameter will take a while. The tuning instructions in the manual leave a lot to be desired... the translation is fairly poor. Read and re-read this section, about the third time you read it, it does start making sense. And if it seems that a word is missing in a sentence... it IS! I guess the translator didnt know the English word. So I attempt to explain what each of the parameters does along with how to set it.
Also, the boost is displayed in Kg/cm^2... the conversion to PSI is 14.22:1 NOT 14.5 or 14.7 or anything else.
STEP 1) System parameter setup - All in 'Etc.' menu
Car Select: Cyl=4 (# of rotors * 2)
Spd=4
Thr=Arrow pointing up
Sensor Sel: Relative1 (leave as default)
Gear judge: This is how the unit knows what gear you are in. Set as follows:
1st = 125
2nd = 070
3rd = 049
4th = 035
5th = 025
Read directions to check, but these should be very close for all FDs.
Grph Scale:
These are units for the graphing view modes only.
Bs=1.0kg/cm^2
Ne�00rpm
Sp 0km/h (good to 112mph)
STEP 2) Mode [A] setup
Boost/Duty Values which control boost
Set boost at 0.65 (can be anything, but 9psi seems like a safe start)
Set duty cycle at 25%
Scramble: I did not use this feature
Ne-Point
These are the RPM points at which boost/duty cycle can be individually set - RPM's less than the lowest point use the settings for the lowest point, same for higher than highest point.(It works...)
I use: 3000,3500,4000,4500,5000,5500,6000,6500
F/B speed
This is the 'boost control sampling frequency' - i.e. how often the controller checks the boost and corrects it. The basic idea is, if boost consistently overshoots, increase number; if boost oscillates, decrease number. However, I found no perceptible difference in boost pattern, no matter what I set this value to. I used 'start-duty' (described below) to control initial boost spiking.
So leave at default setting of 3 for all gears
Learn-gear
This turns 'self-learn' mode on/off, per gear. With this turned on, I found that the unit kept dialing my transition spike back IN (eliminating spike is later). I turned learn-mode OFF in all gear, this is 'X' for all gears. But learn mode may work better in your car... experiment with it.
Start-Duty
This controls initial spiking - i.e. quick no-throttle to full-throttle at 3K. This feature reduces the max boost a little, when going from negative pressure to boost... so it has the desired affect of reducing the initial spike, but not impacting sustained boost. Controlling initial spike is covered later, for now if can be set to 0% for all gears.
STEP 3) Learn to navigate through display & setup screens
If you have not done so already, play with all the display modes, moving around with [prev] & [next], etc. I found that the most useful display mode for tuning was 1-channel, displaying boost, then hit [up] to display a peak-hold value, hit to reset this value, as needed. 2-Channel w/Boost & RPM is also a good mode. Also, hit [prev] & [next] at the same time, to jump between the 'last' display screen and 'last' programming screen - very useful!
STEP 4) Complete system checkout
� Start Car
� RPMs displayed on unit should match tach exactly
� Boost on unit should be close to your analog boost gauge (mine match exactly).
Let the car warm up and then go for a drive... I think the ECU can no longer put the car into 'limp-home' mode, so you need to be extra-careful driving around on a cold engine.
� With unit [off] carefully apply power. You should develop 7psi max (0.5 Kgcm). My boost pattern is 7-5-7, dip to 5 before transition and then back to 7 to redline. If there is a problem with the install, i.e. if you didn't disconnect the factory solenoids, the boost may spike above safe levels! I got 16-17psi at 2600rpm. If so recheck everything.
� Turn the unit to setting [A] and again carefully apply power (you may hear the solenoid clicking - that's good), but stay below the 4500rpm for now. You should get close to 9psi... if not, increase the duty cycle a little (1-2%), retest, keep increasing until you get to 9psi. If you set the duty cycle too high, the controller will not be able to control boost, and will run higher than 9psi. For 9psi the duty cycle should be around 30%-40%. If the boost is not going above 7psi, there is a problem with the install. Recheck everything.
� If all this works, basic controller functions are working.
STEP 5) Fine tuning boost curve
For the tests above, a 'constant/flat' boost and duty cycle curve were set. However, pressing 'next' from the boost and duty cycle allows you to set boost and duty cycle per 500rpm increments.
� Setting 1st turbo boost
As done in the test above, set the boost you want to run (per 500rpm as desired). Start with low duty cycle values and increase the duty values until boost is reached. Increase the values SLOWLY, i.e. 1-2%, and retest. Also, pick the lowest value that holds desired boost... +/- 5% will still hold boost, but the higher the value, the higher the initial spike at that RPM.
� Controlling the transition spike
There are a couple of different ways to dial-out the transition spike. Exactly which method works best depends on your car's setup and the boost level you want to run. Basically, the transition spike is controlled by reducing the duty cycle and/or boost level at 4000 and/or 4500.
It may take a small reduction of duty cycle, i.e. 5-10%. If this doesn't work, you may need to greatly reduce the duty cycle, i.e. all the way down to 20-30%. If this doesn't work, you may need to reduce the boost level at 4000 and/or 4500 by 0.05 or 0.1 Kgcm - this should definitely take care of the spike. I had to reduce my boost, but most everyone else I talked to only need to reduce duty cycle. Dialing out the spike perfectly takes a LOT of time...
� Setting 2nd turbo boost
This is done the same way as the 1st turbo, except adjust duty cycle / boost level from 5000rpm on up.
� Controlling initial boost spiking
I found that a couple of % reduction of duty cycle eliminates any overshoot. I am running:
You're on your own for mounting... Steve's site has some info on this (Rick's post). I have a touring model, and ended up removing my CD-player, getting an R1 console "pocket" and mounting it in the pocket. If you want to do this, two words: Dremel Tool. Sections of the top and bottom of pocket must be removed, but the dash does not need to be touched, and the pocket door and spring mechanism work fine. It looks pretty good when complete.
Boost control is a key part of making the most safe power on an FD, and one of the more complicated ones out there isn't understood very well, the Apexi AVC-R. I've read the manuals, installed and tuned it, and have also read up on the Internet for more insight, so here's a comprehensive guide to the boost controller.
First off, a little background on boost control and boost controllers. The key component that sets how much boost you will run is the wastegate and wastegate actuator. The wastegate on the FD is simply a small round flapper door in the turbine housing of the turbo. Turbos work on pressure - exhaust pressure pushes the wheel to make it spin. If you bleed off that pressure, that will slow the turbo down. The wastegate itself is a port that can be opened and closed to bypass that pressure.
Now, you need a way to control the wastegate's movement - the wastegate actuator. A rod connects to the wastegate door, then goes to the bulbous actuator, which is located on the front of the turbo assembly. In the actuator is a sealed diaphragm that's attached to the rod. When the diaphragm moves, the rod moves, and the wastegate moves. Behind the diaphragm is a spring, and there's a nipple on the case of the actuator to allow air pressure to push on the diaphragm.
So, we use a vacuum line to send boost pressure to the wastegate actuator. The pressure pushes on the diaphragm, which in turn pushes against the spring. The spring is important here - how stiff the spring is will set the boost pressure necessary to open the wastegate. The FD's stock turbos have a 7psi spring (.5 kg/cm2) which means at 7psi of pressure on the diaphragm, the spring will compress and the wastegate will open. You can NEVER run lower boost than your spring pressure, just increase it.
So, of course we want to increase it. As you likely know, stock boost is 10psi (.7 kg/cm2). This is done with the factory boost control. The factory boost control works quite well on a stock car, but if you start doing mods, it becomes a major problem. The factory boost control does this with 2 methods. First, there are pills in the wastegate hoses - a small brass orifice. This slows the rate the boost pressure gets to the diaphragm, which spins the turbos up quickly, since the wastegate stays closed longer. Second, the boost solenoid on the intake manifold bleeds boost pressure going to the wastegate into the turbo's intake - this robs boost pressure going to the diaphragm, again changing the point at which it opens. Since the factory ECU has a cut-and-dried map for boost control, if you open the exhaust and intake up, boost can rise too quickly, resulting in spiking, overboost, and even a blown motor. There are methods for working around this - drilling out pills, using manual boost controllers - but in my opinion it's just a hack. You need full and direct control of the wastegate.
OK, so we've got some background - we know the basics of how a wastegate works, and why the factory boost control doesn't do well on modded cars. So, why the AVC-R? Good question. There are a ton of boost controllers on the market - the AVC-R is an advanced one. If you want to just install the controller, turn some *****, and go fast, it's not for you. The AVC-R takes some time to properly tune it in. But, it's a good investment in time, IMHO.
Enough jibba-jabba. Let's get this thing going. First off, you'll need an AVC-R of course. They're about $450 or so new. I picked a used one up that was a bit rough for $250 - I've had a new one before, and I didn't mind getting a rough used one that I could restore. Some cleaning, a redone wire harness, and some paint, and I was in business.
If you don't have a manual, you can get one here at Apexi's website. It can be a little daunting to read since the translation isn't that super, but just read through it a few times. It's also wise to sit in the car after it's installed and try out the features as you read along in the manual.
You'll need a few supples to properly install this sucker. Remember, failure of any of the plumbing WILL result in overboost, which could mean bye-bye engine. Use quality components and take your time installing. Here's a few things to get -
- 6mm silicone vacuum line. This is for plumbing the actuator itself. You'll need about 6 feet, might want to get some more just to be on the safe side. I prefer http://www.hosetechniques.com for silicone hose - they make quality hoses, thick wall and very durable.
- 3.5mm silicone vacuum line. You might need some of this for plumbing the boost sensor for the AVC-R in, the amount depends on where you mount the boost sensor.
- EPDM rubber vacuum caps. You'll have to cap off the factory boost control, and the cheapie vacuum caps from the parts store WILL NOT WORK - they split with heat and can cause you some major problems. McMaster-Carr has 50-packs of 1/4" vacuum caps for just under $12, part number 6448K46. You may also want some 1/8" vacuum caps for general underhood use - that's part number 6448K41. Web site is http://www.mcmaster.com - they ship VERY fast (I actually get stuff from them the next day, even with ground shipping!) and their prices are great.
- 5/16" brass vacuum tees. McMaster-Carr again, part number 91355K52, about $6 for two brass tees. The 5/16" fits VERY tight - I was going to use hose clamps on mine, but couldn't get the lines back off to install a hose clamp. If I can't remove it, it's not going to pop off by itself.
- 1/8" brass vacuum tee. This is for plumbing in the AVC-R's boost sensor in. You can get one at the aquarium section of the local pet store for about a dollar. ONLY use brass for underhood vacuum fittings - I personally know of 2 people who have blown their motor when the cheap plastic tee cracked in half from the heat!
Now that we have all the parts, time to get to work. The tricky part is mounting the control unit itself in the cabin. It's big enough that there aren't many good spots. I did a similar install to my old FC - mounted it on the window! It's easy to see and tune, you don't take your eyes off the road much to look at it, and it's hidden from people walking around your car looking in the windows. BTW, I also painted the silver plastic black with Krylon fusion plastic paint - turned out really nice. To stick it in place, use good 3M double-sided molding tape and clean the mating surfaces VERY well with alcohol. Here's some pics -
I ran the wiring along the headliner and down the passenger A-pillar to the ECU. I had to lengthen the wires that connect the AVC-R to the ECU's harness - not sure if that's from where it's mounted or the previous owner cutting some of the wire off.
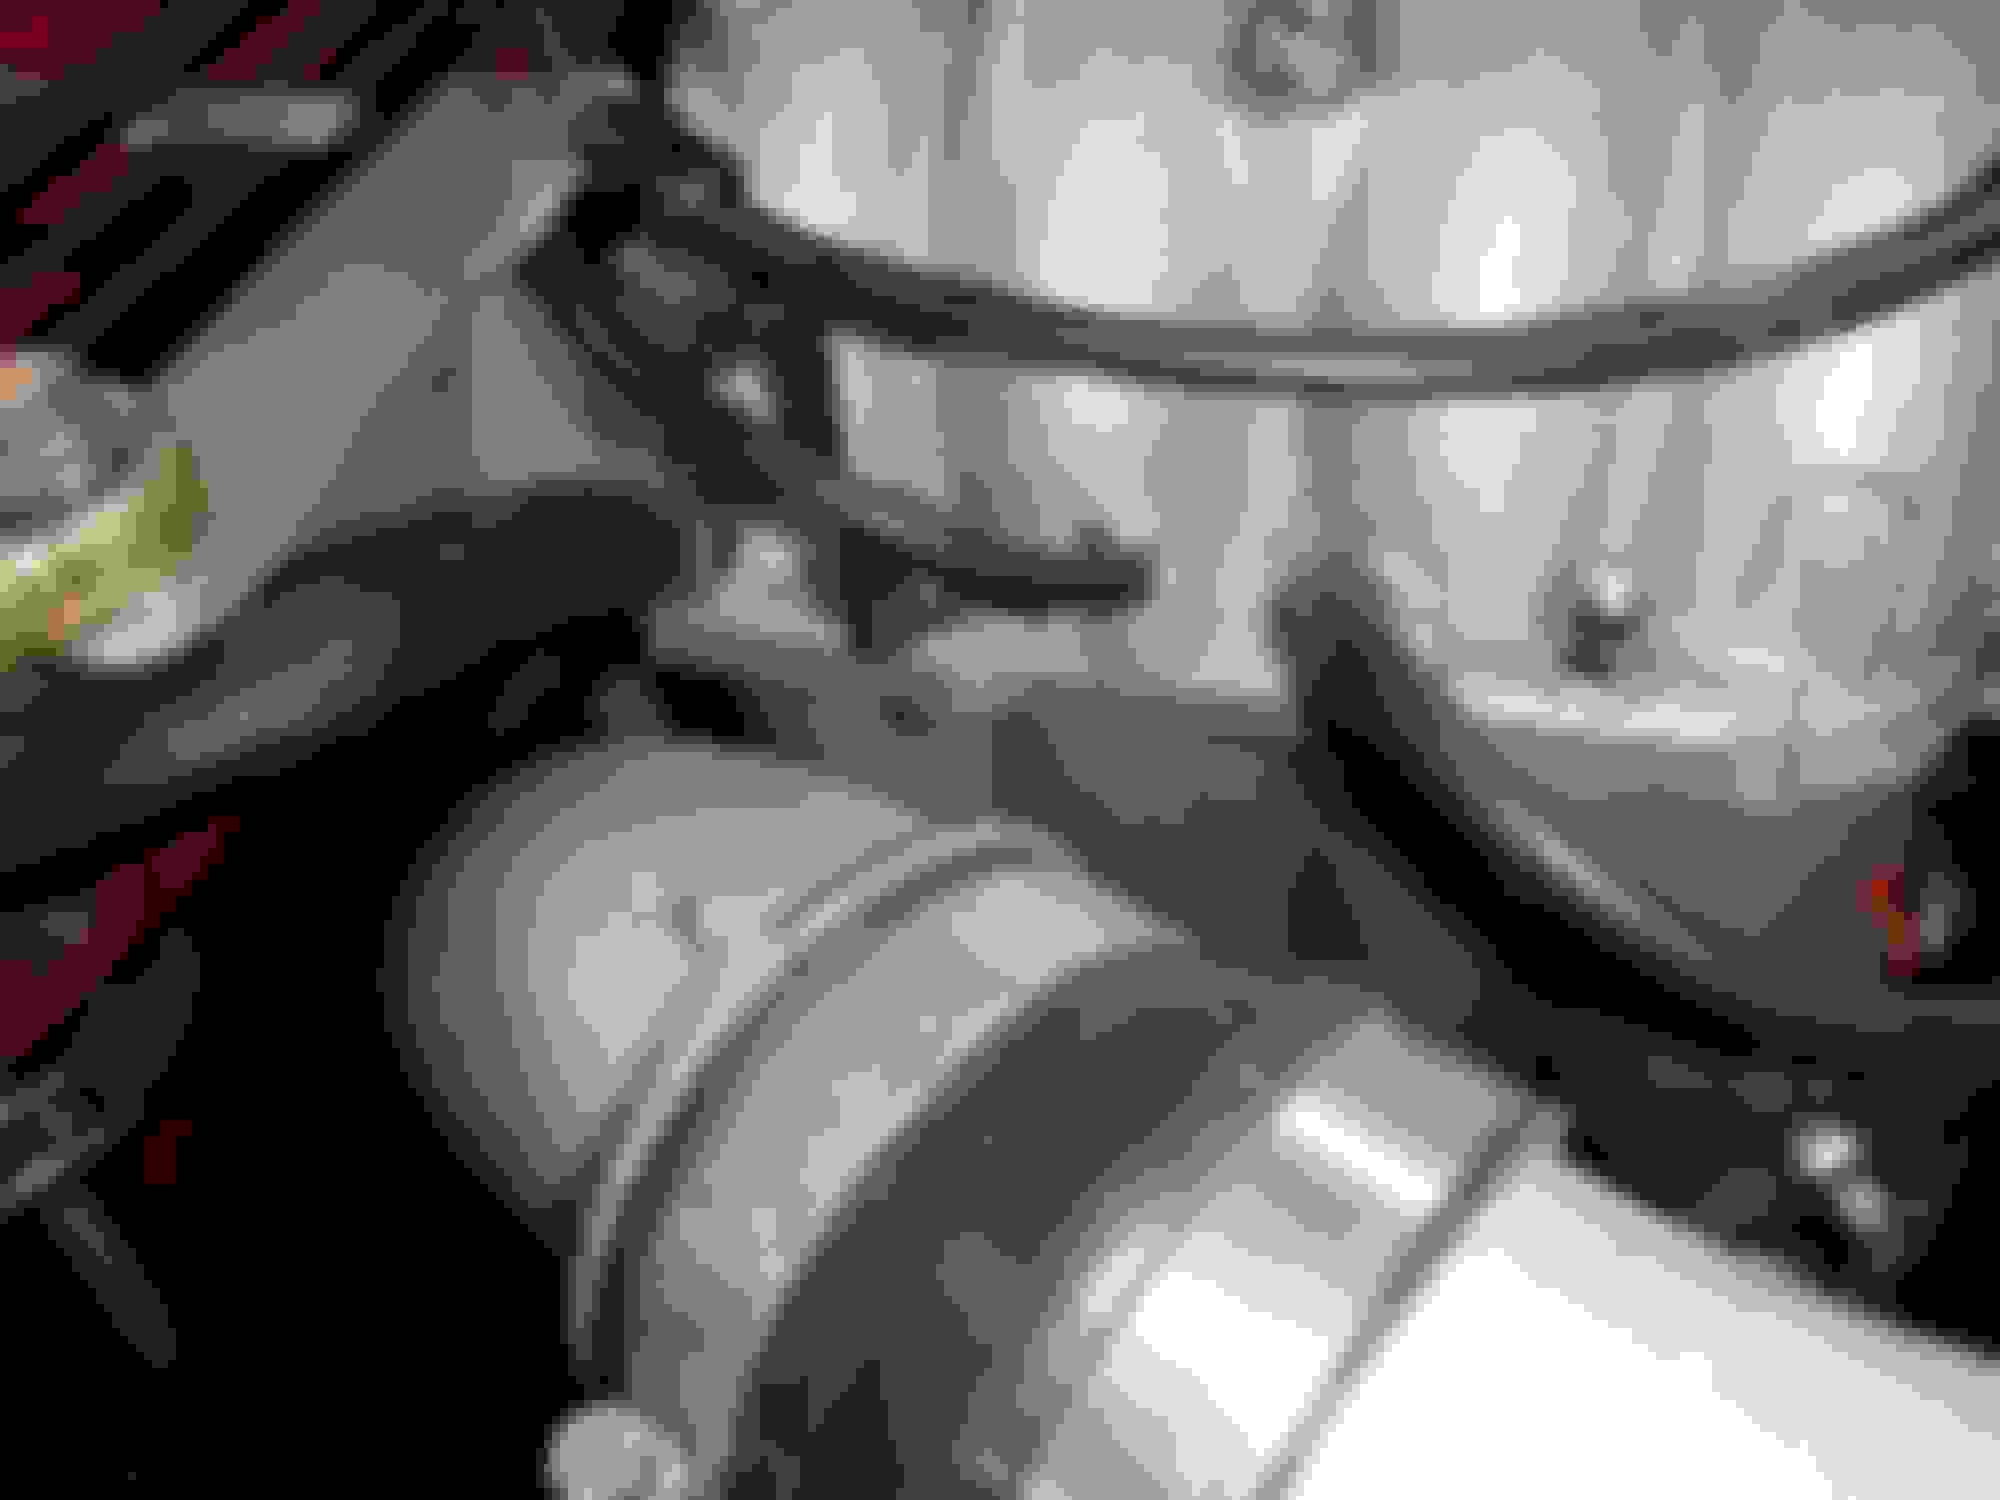
Anyhow, make sure the harness will reach everything it should reach. Pull the harness through the firewall and find a spot for the solenoid - I used a threaded hole that one of the stock airbox brackets was attached to. The bracket for the solenoid was all jacked up from the previous owner, so I made a new bracket out of aluminum. Make SURE to use a rubber isolator of some kind - the solenoid vibrates, and if it's mounted to something solid, it can damage itself by shaking itself to death. I used a rubber washer in between the bracket and the frame rail - new, the AVC-R has a larger bracket and a rubber pad to make things easier. Here's the installed pic under the primary turbo's inlet -
Here's a side shot. Again, there's PLENTY of places to mount it, just find something close to the turbos, out of the way of moving and hot parts, and where it won't rub or damage something else. It's hard to see, but the bracket is bent like a stretched-out "Z".
Time to plumb that guy in. Start by removing your intake and the primary turbo inlet duct. Remove the stock rubber hoses going into and out of the wastegate actuators - should be 4 in all. Save the hoses with the pills in them - the pills are necessary if you want to go back to stock, or you can sell them to someone who needs them. OK, with the old hoses off, put a vacuum cap on one of the primary turbo's outlet nipples and hook up a hose to the other.
I put a dab of RTV on the vacuum cap as well as a zip tie - you want to be sure it doesn't come off! I used the hose clamps that come with the AVC-R for all the other connections. Make sure it's snug, and pull on it to make sure it's seated well. Take the hose that goes to the turbo outlet nipple (this is the boost reference) and hook that up to the NO port on the solenoid.
Onto the actuators. The nipples pointing upwards need to be connected and teed together, then run a line from the tee to the COM port on the solenoid. Here's a picture -
Each wastegate actuator has a nipple pointing to the right for the factory boost control - this needs to be capped. Again, cap it, maybe a dab of RTV to help glue it on, and a zip tie. Also cap up the two metal lines going to the factory boost control. Those lines are basically dead after the install, but I like to cap them up so I don't accidentally think something's supposed to go there. Here's the primary turbo's actuator, you can see the cap and the vacuum line. Again, make sure to do both actuators!
Time to install the pressure sensor. I typically tee it into the vacuum line for the boost gauge. I've seen some tee into the map sensor - this does work, but I like to keep that line for ONLY the map sensor, as it's a VERY critical sensor. Make sure the pressure sensor's nipple is pointed downwards, and it's away from heat. I actually installed mine behind the ECU and teed into the vacuum line running to my boost gauge. The wiring for the AVC-R's pressure sensor on my AVC-R was hacked up a bit, so I shortened it bigtime to install in that location.
OK, let's wire this sucker in. I have the Autosport wiring adapter for my ECU, so it was super easy to tap into the correct wires. For all connections, I stripped about 1/4" of insulation away from the wire I was tapping into, then tightly wrapped the stripped end of hte AVC-R wire around that bare spot, then soldered the connection and covered with electrical tape. The wiring is clearly explained in the wiring manual - if you don't have it, or would like to check it out, it's here on Apexi USA's website. Here's a quick rundown of the wiring -
- Red: switched power.
- Purple: RPM source. The AVC-R can also show injector pulsewidth if you tap this into an injector wire, but it doesn't work well on the FD since the primary and secondary injectors don't fire all the time. I think tapping into RPM is the way to go.
- Gray: TPS signal. This goes to the wide range TPS, the AVC-R looks to see if you're at full throttle when it does learning.
- White: Speed signal. This is necessary for the gear judge feature.
- Green and Black: Ground. These both need to be spliced into the same wire, with the green tapped closer to the ECU than the black. Apexi's weird about the two ground wires on many of their products, but I'm sure they have a sound reason for doing so, so follow the instructions.
- Orange: Scramble Switch (optional). This is for wiring up a scramble boost switch. You can hit the button and have extra boost for a set amount of time. If you are going to use this feature, get a momentary contact switch, wire the orange wire up to one end of the switch and wire the other end to ground. The switch shouldn't stay switched to on, like a light switch, but should close the circuit just while the button is depressed, and open the circuit back up when you let go.
OK, with all the wiring done it's time to test it out. Turn the key to the On position and the AVC-R should light up and show the opening logo. If so, great! Button the car back up and put everything back together. With the AVC-R mounted firmly, it's time to do the initial setup.
If you bought your AVC-R used, you need to initialize the unit. This will clear everything to factory defaults. You don't want to try and run someone else's settings - what works for one person won't for another car, and they may have set it up wrong since they didn't read this writeup . To reset it, go to the Etc. menu, scroll down to Initialize, select Yes, and hit Next. After that's done, turn the car off and back on to finish the procedure.
Go to the Etc. menu first, then Car Select. Set it up 4-4-Up arrow, that's the FD's settings.
Hit Prevous to go back to the Etc. menu. Scroll to Sensor Sel, and make sure it's at 1. Previous, then go to Graph Scale. This is just how the graphs in Monitor mode will be scaled. If you're running 14psi or under, set Bs (boost) to 1.0 kg/cm2. If you're running on the edge of 14psi or more, you may want to set the scale to 2.0 kg/cm2. Ne is RPM, set that to 8000, and Sp (speed) to whatever is reasonable for you. Here's my settings, I have to to 2.0 but I think I'll be going back to 1.0 -
With that input, hit previous then go to Sensor Chk. Bost (boost) should be around 1.5 volts, depending on your altitude. If you see 0v, there's a problem with the boost sensor wiring. Thrt should be around .4-.6 depending on how your TPS is set and whether the car is warmed up or not. Press the gas pedal and you should see the numbers go up and down for the TPS voltage. SCSW is Scramble Switch. If you wired in a scramble switch, this should show On when you press the button.
Previous out of that menu, and go to VFD Bright. This sets the display's brightness. There is a light sensor in the front that will dim the display at night time. Set it to your own preference.
Now with all that covered, time to set up the gear judge. Since the AVC-R knows your RPM and speed, it can figure out what gear you're in, which is pretty slick. Go to Etc.-Gear Judge, and go for a drive around your neighborhood. On 1st gear, arrow over so the number is highlighted, and start driving in 1st. When you have a stable number on the right of the screen under N/S (which is showing RPM divided by speed, BTW), press the Next button and that value will be filled in. Left arrow out, go to 2nd gear, drive the car in 2nd gear, and repeat. Do this for all the gears. Here's what my settings look like -
The numbers don't have to be perfect, just representative so it can correctly judge the gear.
OK, first we need to make sure everything's plumbed in right. Go back to the main menu, and highlight Setting. It should say either "A" or "B" to the right - that's the two setups you can switch between. With it highlighted, you can change A or B by pressing the right arrow, or press left arrow to set it to Off, which turns the boost controller off. Set it to Off, and go for a drive. Under full throttle, you should see 7 psi (.5kg/cm2), with a slight dip at transition. This is the spring rate of the wastegate actuator. If you're hitting that, you've got everything plumbed in properly and are ready to start tuning. If you have spiking over that, make sure all the hoses are on properly, are clamped on tight, and that the vacuum caps are properly installed. Lower that that, and you've got some weird problem - bad turbos, clogged exhaust/intake, something isn't running right on your car.
Time for the Monitor mode. Read this part of the AVC-R's manual a few times - there's a LOT of great features in Monitor mode. I usually monitor 2 channels, RPM and boost. If you go to the screen where you see the numbers for RPM and boost, you can press up arrow and a highlighted peak/hold number will show up. This will be the highest boost or RPM you hit. If you want to reset the number, press the Right arrow. To turn that off again, press Down arrow. Here's my display (with the car off) -
The reverse-highlighted number is the peak hold.
Another handy feature for tuning is the line graph. While looking at the above screen, hit Next. This will take you to a line graph - it will draw a line for boost, and another for RPM. Here's what it looks like -
In this mode, with 2 channels of data (rpm/boost), you can record 30 seconds of data. Press Up to start recording, down to stop recording. Right arrow will replay your run, and you can move left-right with the left-right arrows while looking at the replay. RPM will always be a smooth slope going up. If you see spikes, you can see how much of a spike you're getting, or a dip, and tune it out further.
Again, there are TONS of features in monitor mode, you'll have to experiment and see what you like best.
One more thing - to set this sucker up, you're going to have to think in metric for boost. It's really not that hard, and it's easier when you also have a metric boost gauge. The AVC-R reads in kg/cm2, and 1.0 kg/cm2 is equal to 14.2 psi. Stock boost is .7 kg/cm2, and actuator spring pressure is .5 kg/cm2. 1.0 is about the limit you want to run on the stock turbos - more than that and you start compromising the life of the bearings. Of course, your car needs the fuel to go along with the boost - if you have a stock ECU, stick with .7 kg/cm2 until you can upgrade.
OK, time to tune. First off, I'm going to go over all the features in the Setting menu and what they do, then we'll bring them all together. Also, BIG hint - when in Setting or Monitor mode, press Next/Prev at the same time to toggle to the other mode. For example, go to Monitor mode, make a run, then hit both keys to toggle to Setting mode to make a change, then hit both keys again to toggle back for another run.
- Boost/Duty: this is the main setting. Set your target boost and a starting duty cycle. You can raise and lower the duty cycle until you are generally hitting your boost target, then fine-tune it in further. On each of the two settings, you can press Next, which will bring up the RPM-based map. Fine tuning this is what makes the AVC-R shine - you can dial out the transition spike and get flat boost through the rev range.
Here's the boost/duty screen -
And here's the Duty screen after you hit Next -
To give you an idea, here's my current duty curve, which is still a work in progress -
When you alter the values on the RPM-based chart, Duty in the main screen will show "***".
- Scramble boost: This lets you set up the scramble feature if you wired the switch in. This will give you more *or less* boost and duty for a certain amount of time. Set the boost, duty, and time up, and hit the button. This can give more boost for overtaking, or less boost for a short time to help get traction.
- Ne-Point: "Ne" is Apexi's weird way of saying "RPM". This screen will let you set up what RPM points you want to use for tuning. I set mine at 2000, 3000, 3500, 4000, 4500, 5000, 6000, and 7000. This gives more resolution around the transition point so you can dial out the transition spike.
- F/B Speed: this is Feedback Speed. The setting is for each gear, and sets how fast the boost controller responds. If your boost wavers up and down, you may need to adjust this. This is totally a fine-tuning thing.
- Learn-Gear: This will tell the AVC-R what gears to learn your boost curve in. A "O" shows it's on for that gear, an "X" shows it's off. It will only learn at full throttle - more about that in a bit. You can also turn it off for all gears if you just want to set it up yourself.
- Start Duty: this is a really cool feature. This will add or remove a little duty cycle for each gear. Getting a spike when you hit the gas in 4th gear? Remove a little duty cycle. Boost too slow coming up in 2nd? Increase this.
OK, time to start tuning. You'll need a nice, flat, straight stretch of road without a lot of excitement. You might want to get a buddy to work the controls while you drive, but it can be totally done by yourself, just be careful. I've done 3rd and 4th gear pulls on the interstate at night - it's all in the legal speed limit, and there's typically no cars pulling out, dogs running across the road, or neighbors to make mad on the interstate. Just be careful - you can easily run off the road playing with the gizmos on this sucker!
First, you need to set your target boost and duty cycle. Start with a low duty cycle, and work up slowly. For example, we'll try and run .8 kg/cm2 of boost - start with 30% duty cycle and make a run. You want your *average* boost to be at the target - if you have some dips or spikes, we can dial that out later. Increase it maximum of 5% duty cycle at a time.
Next, a word on the learning feature. To have it learn the boost, your max boost must be the same as the target boost you set, and you must consistently hit it at full throttle about 3 times. But, our boost is usually so goofy with the twins that this may or may not work for you. I just elected to tune the boost curve myself. You can turn the learning feature on and off at the Learn Gear menu.
OK, so you're hitting your average target boost. Go to the Boost Setting screen and hit Next on Duty Cycle to bring up the Duty Cycle RPM map. Where the boost is low, bring the duty cycle up, and bring it down on the spikes. This will take a few passes to start tuning it in - work on one area at a time, and make small changes, 5% at most. You should be able to dial out the spike like this. It's some work, but when you feel your car with a smooth, linear power curve for the first time, you'll understand why you did all the work! If you still have spike problems, you can also hit Next on Boost to set the target boost by RPM.
With that set, time for the Start Duty. If you get low boost in a gear, raise this up, or spikes in a gear lower it down a bit. I tuned in 3rd gear and had everything set great, but had low boost in 1st and 2nd. Bringing the start duty up cured that problem. Try out difrerent gears and see what works best for you. Depending on how you set up the boost map, you may or may not need this as much. This is also handy for bringing down duty cycle in traction-limited gears if you're making big power.
The AVC-R is VERY car specific, and what settings work for one person won't work on another's setup. Boost curves are VERY different depending on exhaust, turbo health, intercoolers, you name it. But, you can really use the AVC-R as much or as little as you want. You can just turn up the duty cycle and forget all the other settings if you want, but you're not taking full advantage of the features. Just take things slow and put a little time into it.
i don't know all of it, but if you change that setting, the port/intake/exhaust etc row, it does change a bunch of stuff. seems to be mostly the accel settings, but there are probably more
also if you haven't, make sure you update the FC Tweak software, some updates have added other tweaks to the map.
Great ppoints, I have version FC Tweak 30.7, the latest one.
I'm still playing with the settings to find the best fit.
The main difference I saw was the car starts much easier with the old RC (racing cat) setting.
I think the oil control rings are shot along with the failed coolant o-rings, I now have coolant white smoke at start up and smelly oil smoke on start up and acceleration, nice big cloud behind me when i gas it.
I think my engine is at the point where its falling apart faster then I can adjust settings in FC Tweak .. lol
I'm still thankful it lasted this long to learn on.
Last edited by rotaryextreme; 11-30-23 at 08:51 AM.
I think my engine is at the point where its falling apart faster then I can adjust settings in FC Tweak .. lol
I'm still thankful it lasted this long to learn on.
me too, its let me be a really poor tuner and results are great
i really just take the menu at face value, and then just keep auto-tuning.
Sharing a situation.
2.5 resonated midpipe with tight bend radius off the downpipe flows similar to the 2.75 inch Bonez high flow cat from rotary performance.
I feel midpipes are supposed to have more flow and that Is why FC Tweak has an option to select, however it should be considered the variable of the midpipe vs the variables of the racing cat.
I have selected RC in FC Tweak and the car feels smoother.
My motor is tired and puffs of smelly oil clouds come out now and is much harder to start.
I have to disconnect the fuel pump at the added relay, turn it over to clear what ever leaked into the chambers out (de-flooding oil/coolant) and then it will start.
I loaded DK's map from last year SS24 dyno, with the RC selected and in the options I selected allow negative split under vacuum - car fired right up the first time.
Ben
Last edited by rotaryextreme; 12-06-23 at 06:09 PM.
Why the 2 spellings Bosozoku / Bousouzoku, it's like Tomayto / Tomahto.
Bosozoku - "running wild and driving recklessly tribe", - Wikipedia.
Research all points back to early motorcycle gangs and rebellious motorcycle sub-culture.
Search Bosozoku - you will get more nostalgic results on motorcycle gangs / culture.
Search Bousouzoku - you will get more modern results on motorcycle gangs, boso style older car culture, toys, and fashion.
I feel the word is an expression of one wanting to be wild and free, while trying to express those feeling through your choice of transportation.
This is why my license plate is "BOUSOU7"
I have everything for my car, I just need time to finish my vision. I have the old school AB-Flug GTM spoiler from the famous pink RX7. I had this same spoiler back in 2000. When I saw the spoiler on the Purple Anubis RX7, I fell in love with it and had to have it. This is where being in the scene pays off as I recognized the C-West spoiler the Anubis spoiler what built around. The search was on.
One day while getting some parts in Livermore after work I saw a C-West spoiler on a 240!! I talked to the guy (James) who owned it and asked him if he would sell it, of course he said NOPE! But he did say he would look around and if he saw something he would let me know. A year passes by and I get a random text, it was James telling me he found one on FB Market place - aaaaaa whaaaat. I message the guy on FB Market place and it turns out his a good friend of the guys I know from SVP car crew. Talk about a small world!!!! Long story short I got the C-West spoiler and I'll something similar to the Anubis RX7 with my own little spin on it.
Thank you James for the find and Steven Huynh for the sale. It was great to get back in touch with these guys.
Enjoy the pics !!!
Last edited by rotaryextreme; 04-28-24 at 07:26 PM.


 11-15-23, 09:13 PM


 . To reset it, go to the Etc. menu, scroll down to Initialize, select Yes, and hit Next. After that's done, turn the car off and back on to finish the procedure.