
Resurrecting the FD or "How I spent a week's vacation"

Thread Starter


Joined: Nov 2004
Posts: 1,139
Likes: 114
From: Berlin, MD
GETTING CLOSER!
I got a little more done today.
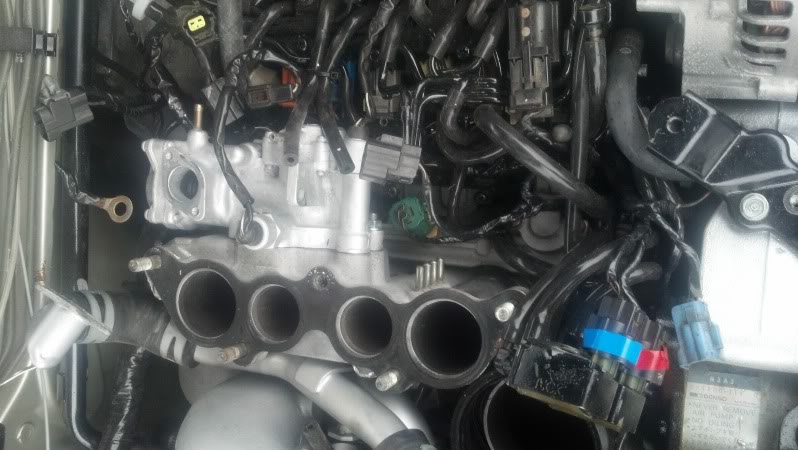
Removed UIM to put in injectors in their proper locations!
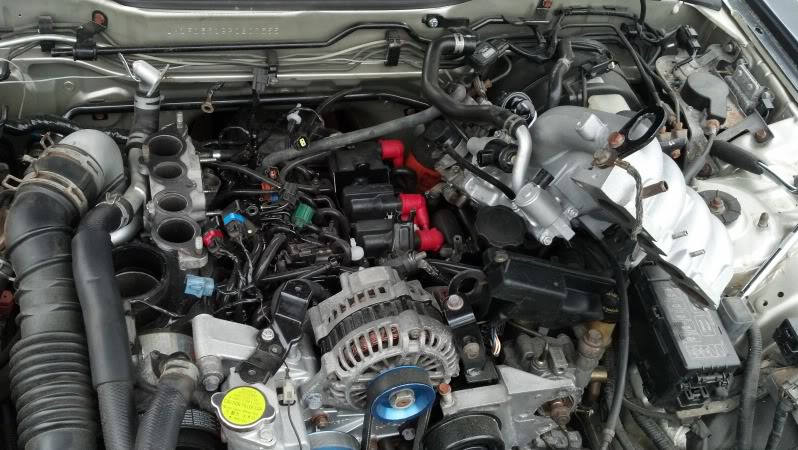
Injectors OUT!
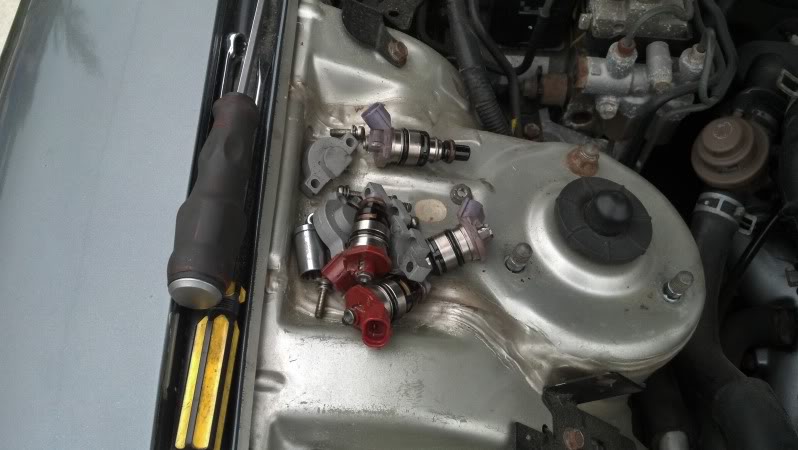
Injectors back into the correct locations this time... REMEMBER Purple = Primary!!
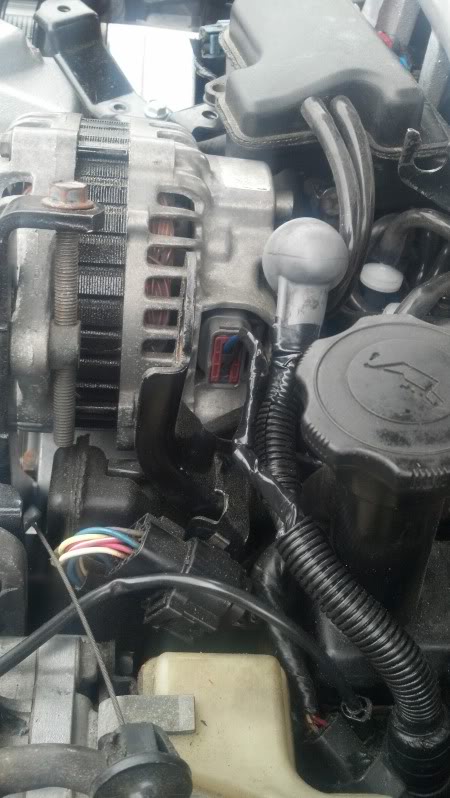
Alternator plug replaced.
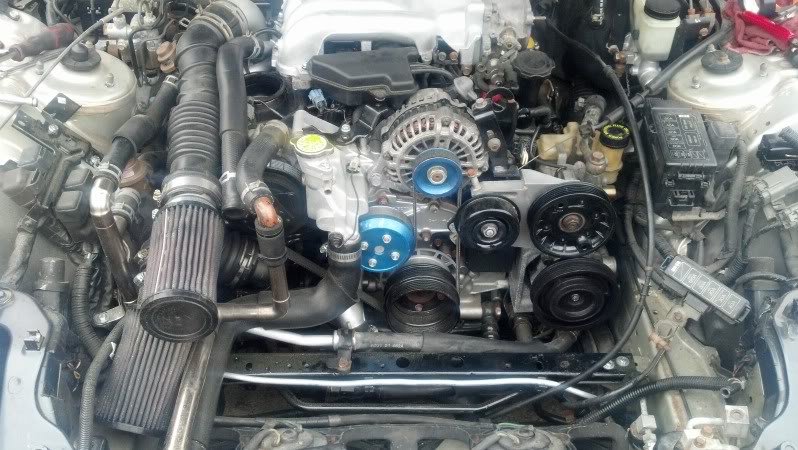
PS and AC finally mounted:
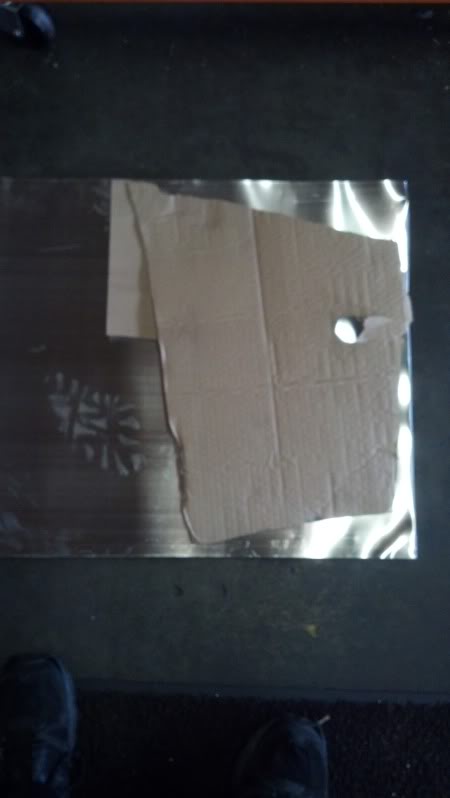
I also made a cardboard template for the "heatshield" that is missing from my Pettit intake kit (no picture), and will cut one out of aluminum sheet some time this week.
Current TODO List
-Bleed brakes
-Get PS AC belt
-3 fuel lines from chassis to engine
-Get intercooler pipes made
-Mount AST
-Make battery tray for battery
-Fill and bleed cooling system
-Finish buttoning up ECU/kick panel area
Vince
I got a little more done today.
Removed UIM to put in injectors in their proper locations!
Injectors OUT!
Injectors back into the correct locations this time... REMEMBER Purple = Primary!!
Alternator plug replaced.
PS and AC finally mounted:
I also made a cardboard template for the "heatshield" that is missing from my Pettit intake kit (no picture), and will cut one out of aluminum sheet some time this week.
Current TODO List
-Bleed brakes
-Get PS AC belt
-3 fuel lines from chassis to engine
-Get intercooler pipes made
-Mount AST
-Make battery tray for battery
-Fill and bleed cooling system
-Finish buttoning up ECU/kick panel area
Vince
Thread Starter
Joined: Nov 2004
Posts: 1,139
Likes: 114
From: Berlin, MD
Y U NO FINISHED?
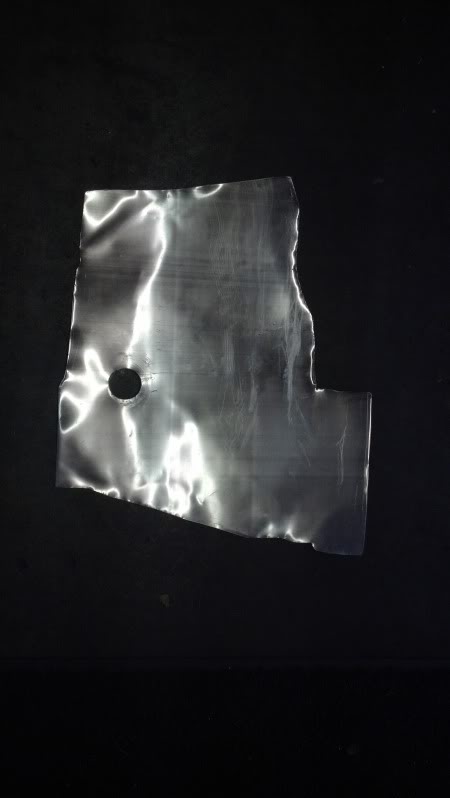
Cardboard template traced onto sheet aluminum:
Heat shield cut out and hole made:
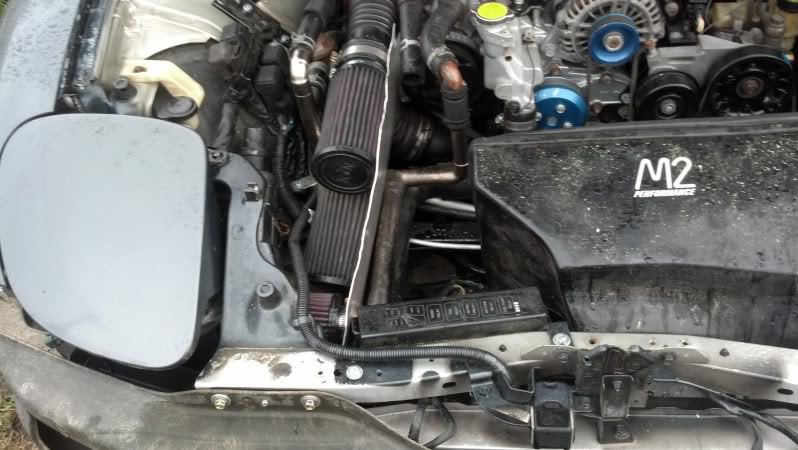
And finally INSTALLED! (also PS and AC belt installed)
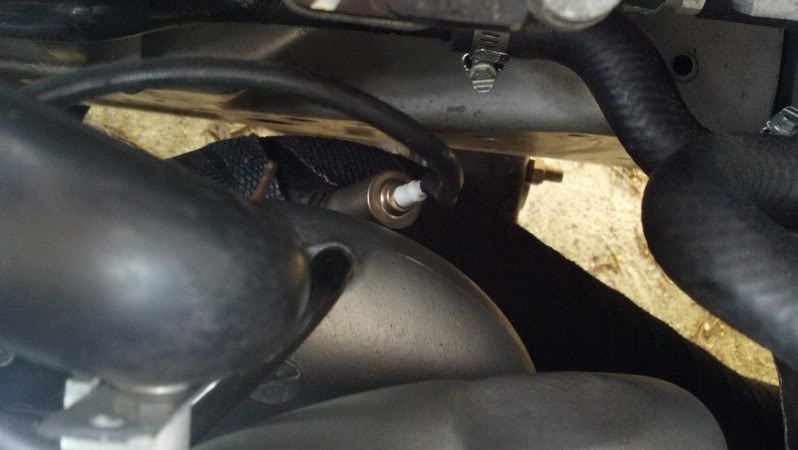
NEW O2 sensor installed:
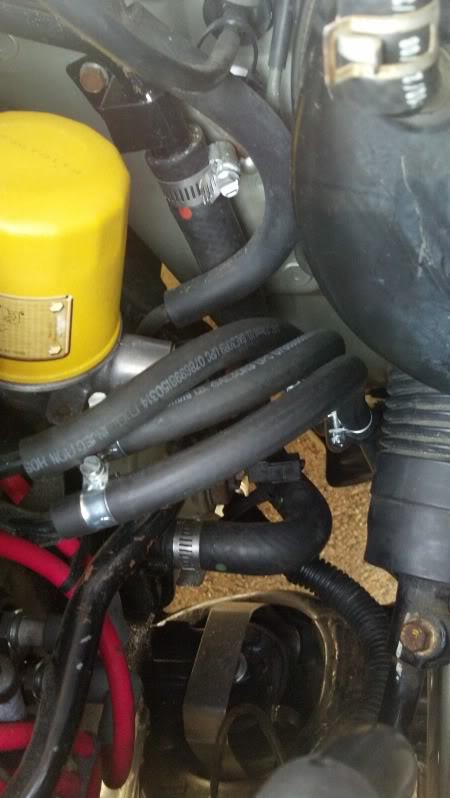
Fuel lines hooked up!
It's slowly getting closer to the day when it "MAY" run, still need to get the intercooler pipes made.
Vince
Cardboard template traced onto sheet aluminum:
Heat shield cut out and hole made:
And finally INSTALLED! (also PS and AC belt installed)
NEW O2 sensor installed:
Fuel lines hooked up!
It's slowly getting closer to the day when it "MAY" run, still need to get the intercooler pipes made.
Vince
Thread Starter
Joined: Nov 2004
Posts: 1,139
Likes: 114
From: Berlin, MD
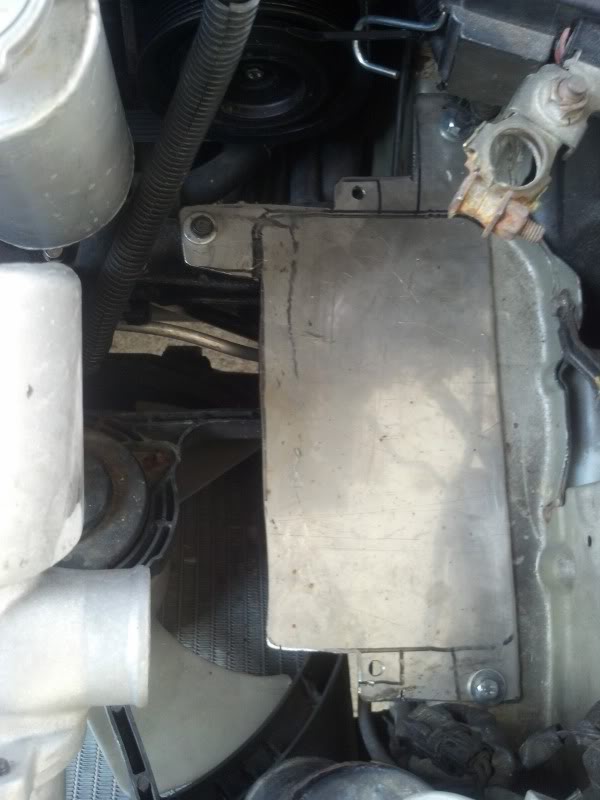
Computer finally installed:
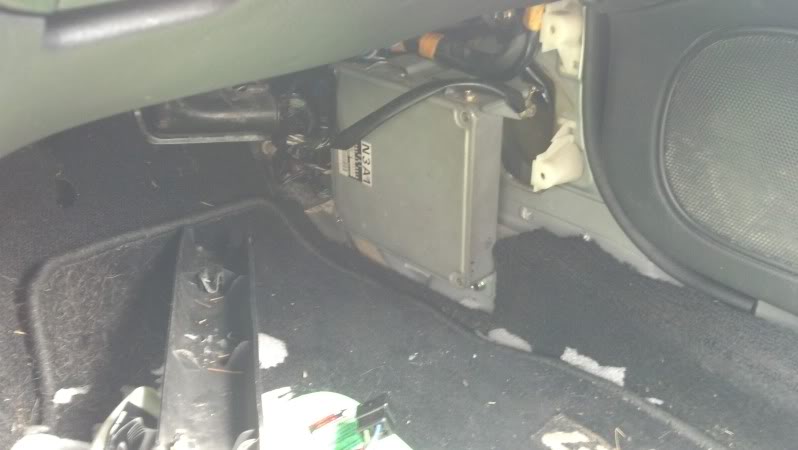
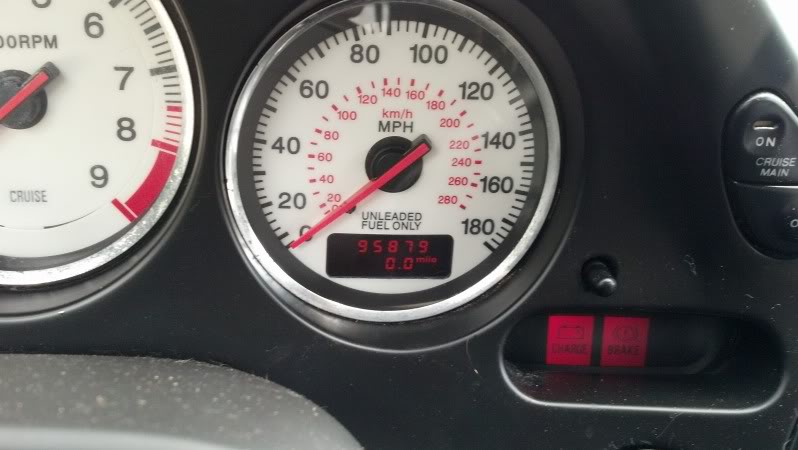
And now the odometer actually works!!
Not a huge update, but it is something else done. Still waiting on getting the intercooler pipes done...
Vince
And now the odometer actually works!!
Not a huge update, but it is something else done. Still waiting on getting the intercooler pipes done...
Vince
Thread Starter
Joined: Nov 2004
Posts: 1,139
Likes: 114
From: Berlin, MD
HOLY **** IT RUNS!!!
Still have a laundry list of crap to do to it, but this does mean all the hardwork may have been worth it!
Current TODO List
-Bleed brakes
-Get intercooler pipes made
-Mount AST
-Make battery tray for battery
-Fill and bleed cooling system
-Fix HORN and Figure out why headlights do not go up with lights on...
Vince
Thread Starter
Joined: Nov 2004
Posts: 1,139
Likes: 114
From: Berlin, MD
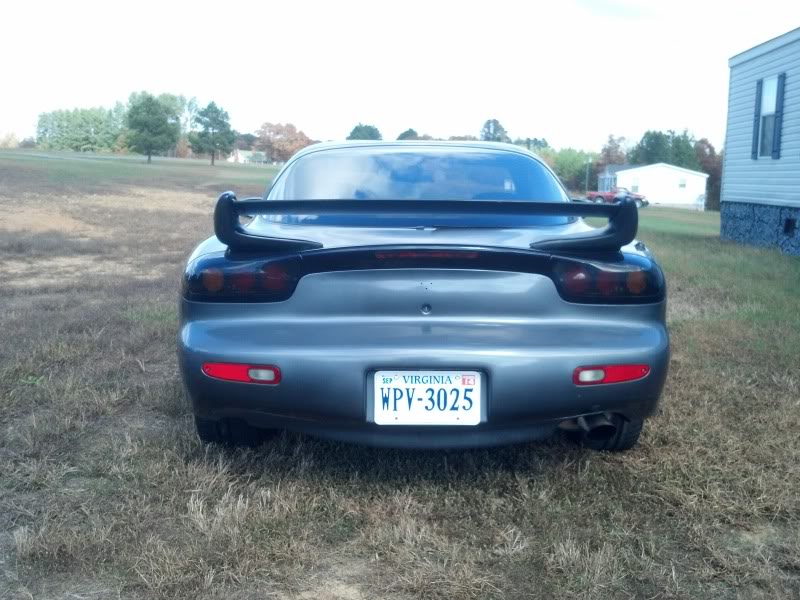
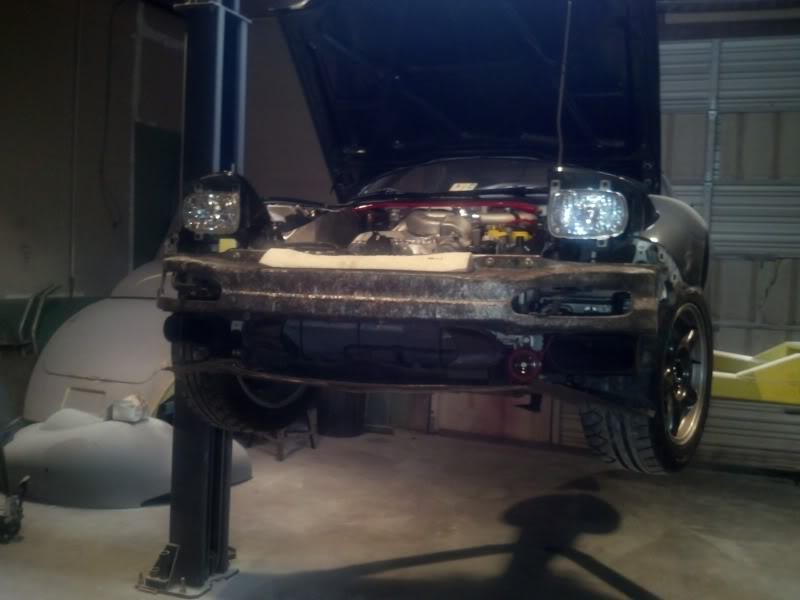
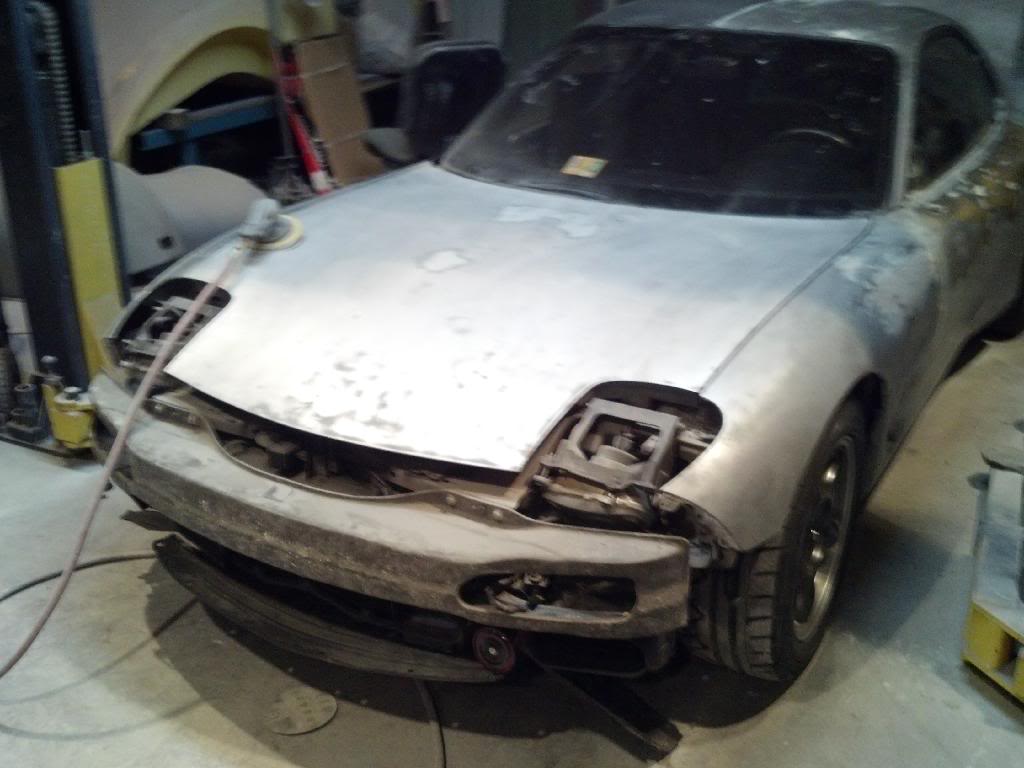
LOUD NOISES!!!
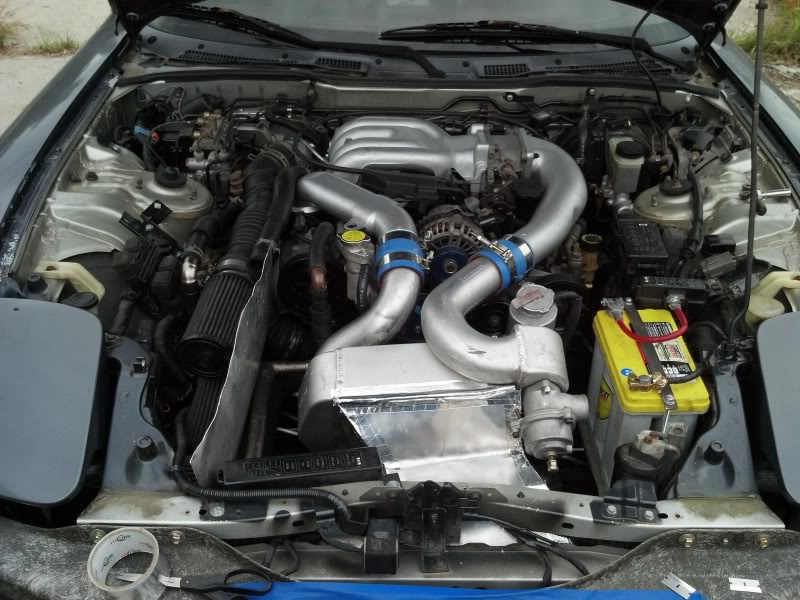
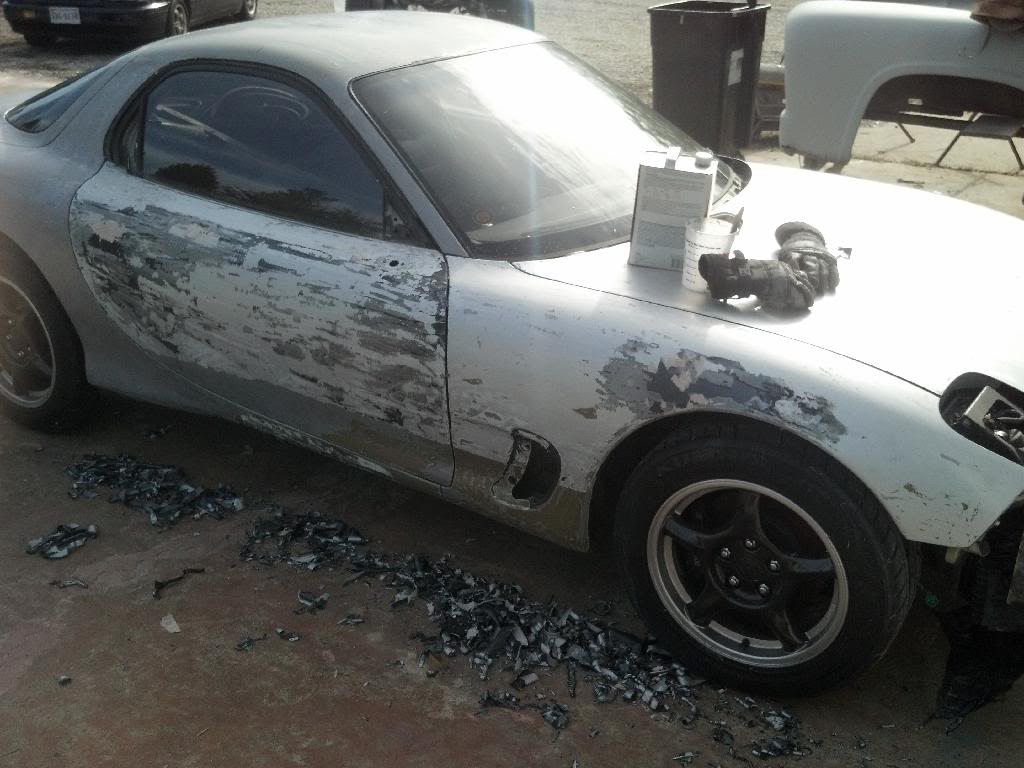
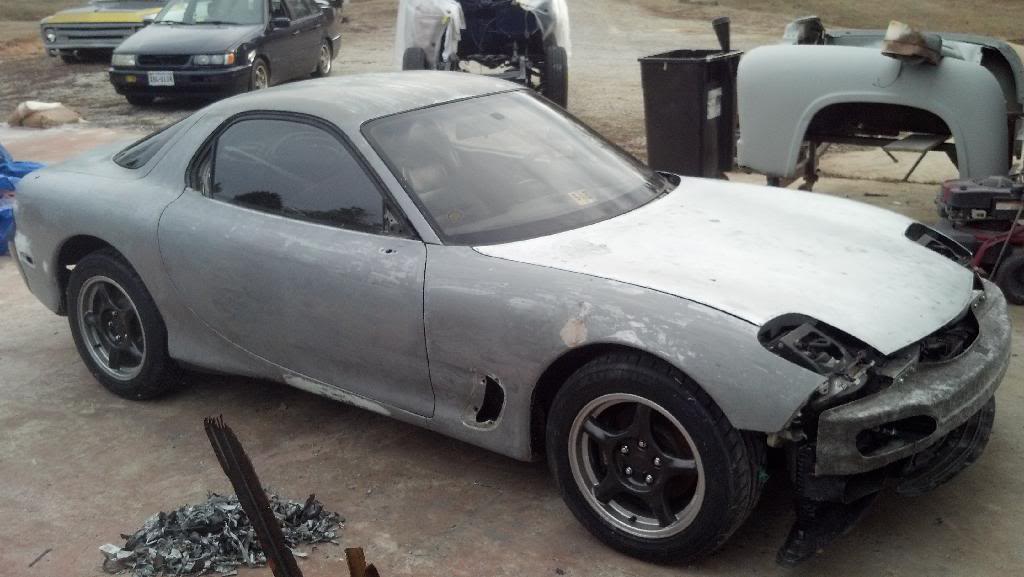
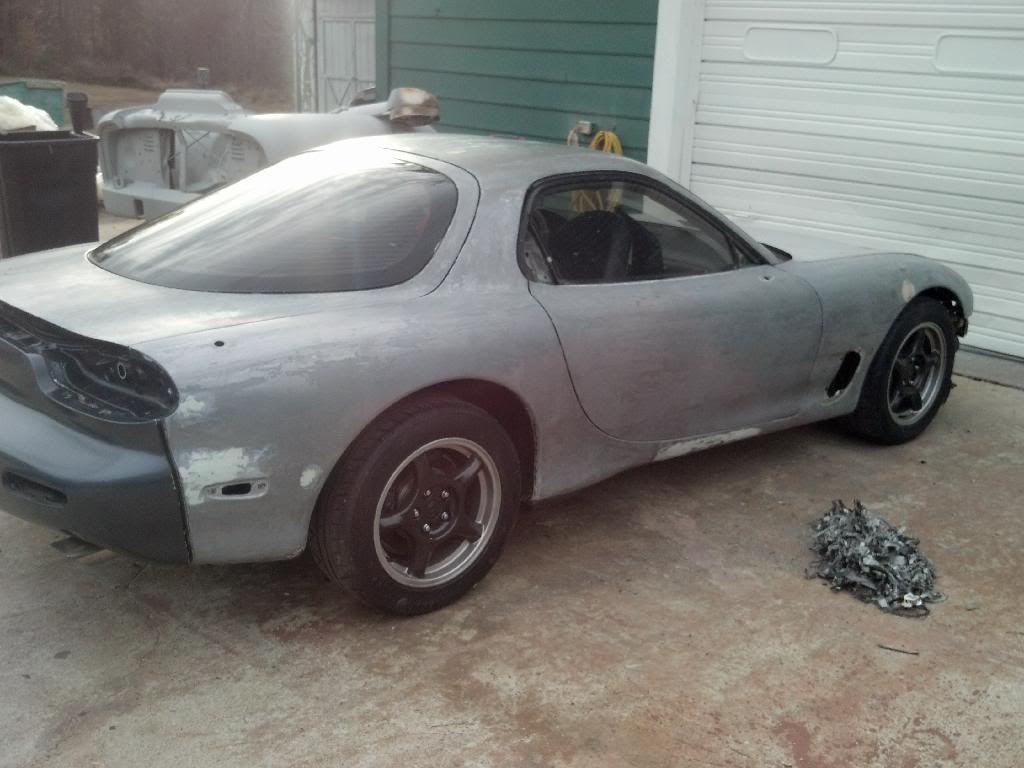
So, after waiting for a local to fabricate the ductwork and piping, and never coming thru... I ended up getting a Pettit Cool Charge intercooler:
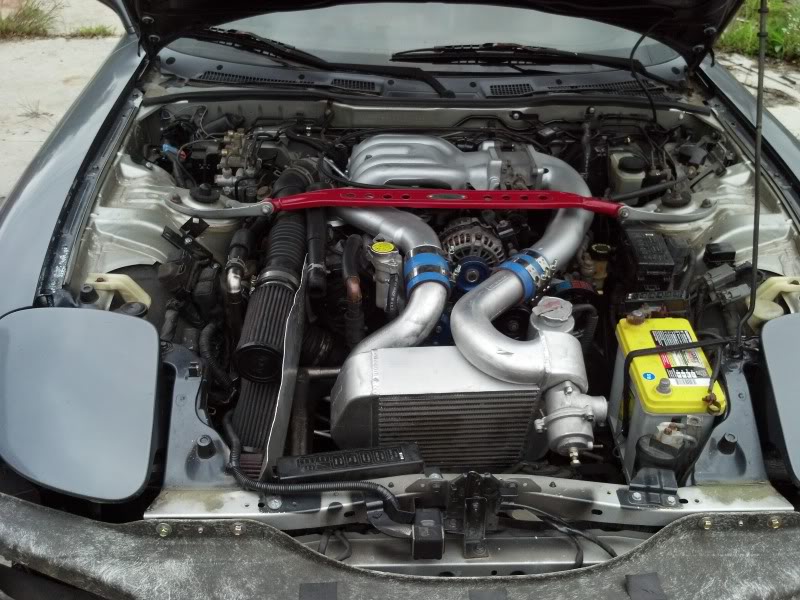
The blue couplers will be changed out for black and I still have to make the duct for it myself, but I will not actually drive the car until that is done!
I did take it for its maiden voyage, and it promptly went into limp mode
So, that will need to be solved as soon as I figure out why I can't pull codes.
I also need to make a battery tray for the Optima battery, do not pay any attention to the bungee strap, it is only temporary.
Also, sent my taillamps off to theorie for the 99 spec treatment and a good buffing.
Vince
So, after waiting for a local to fabricate the ductwork and piping, and never coming thru... I ended up getting a Pettit Cool Charge intercooler:
The blue couplers will be changed out for black and I still have to make the duct for it myself, but I will not actually drive the car until that is done!
I did take it for its maiden voyage, and it promptly went into limp mode
So, that will need to be solved as soon as I figure out why I can't pull codes.
I also need to make a battery tray for the Optima battery, do not pay any attention to the bungee strap, it is only temporary.
Also, sent my taillamps off to theorie for the 99 spec treatment and a good buffing.
Vince
Thread Starter
Joined: Nov 2004
Posts: 1,139
Likes: 114
From: Berlin, MD
^Thanks for the compliment.
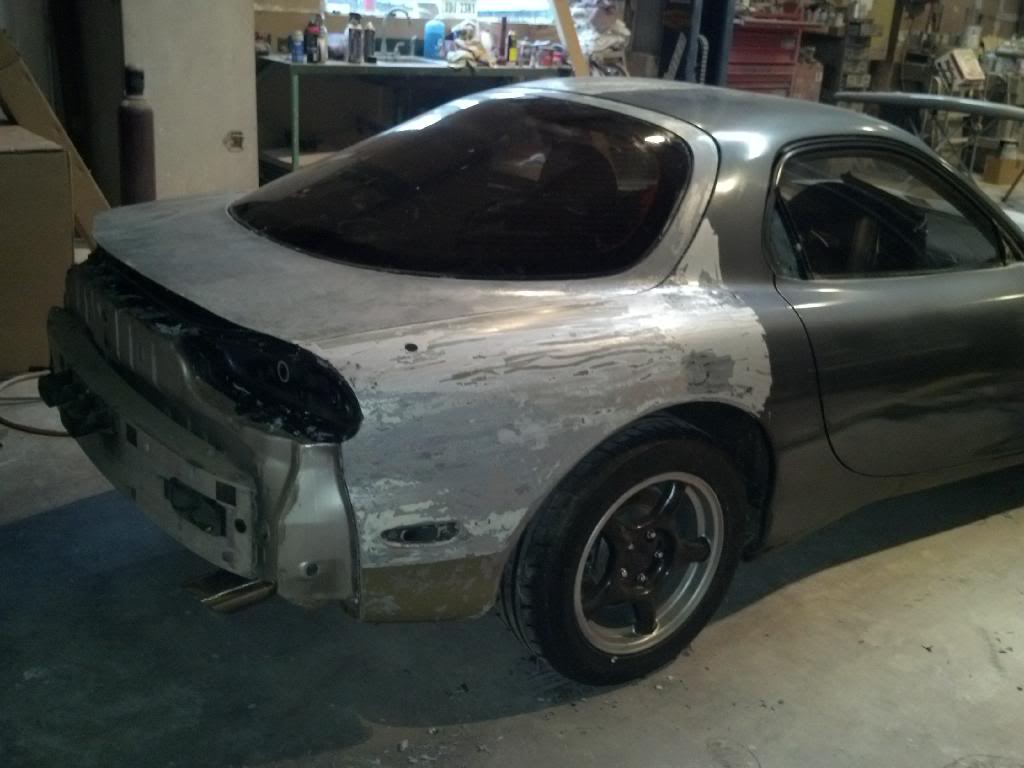
MINOR UPDATE!
Got my tailights back from theorie. What a difference! Highly reccomend his services if you want that 99 spec look. While the lights were out I installed Sylvania Silverstar bulbs in all locations. Supposedly they are brighter...
Also, test fit the 99 spec wing:
I'm digging it!
Tried to diagnose the inability to pull codes unsuccessfully. Will work on it again Tuesday and try again. IF it ends up being a bad PCM, I guess it will be replaced with the Power FC I already have.
Vince
Thread Starter
Joined: Nov 2004
Posts: 1,139
Likes: 114
From: Berlin, MD
UPDATE!
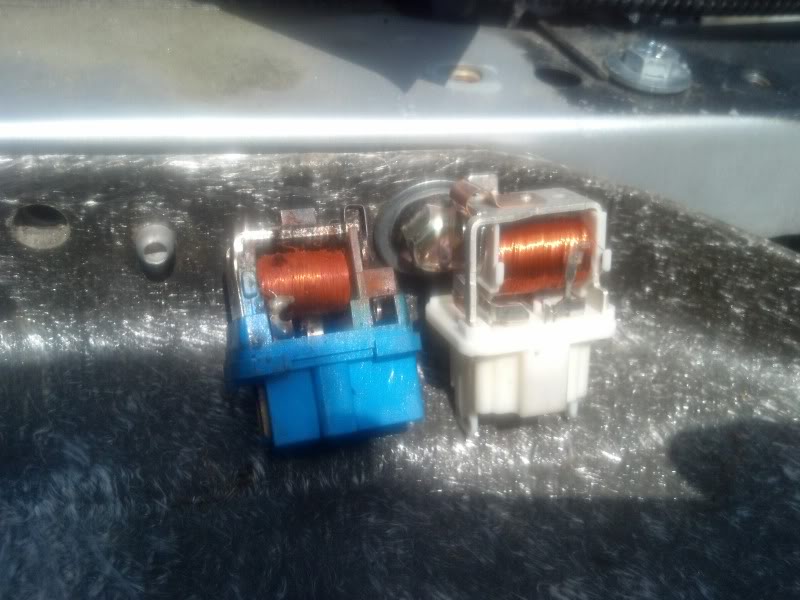
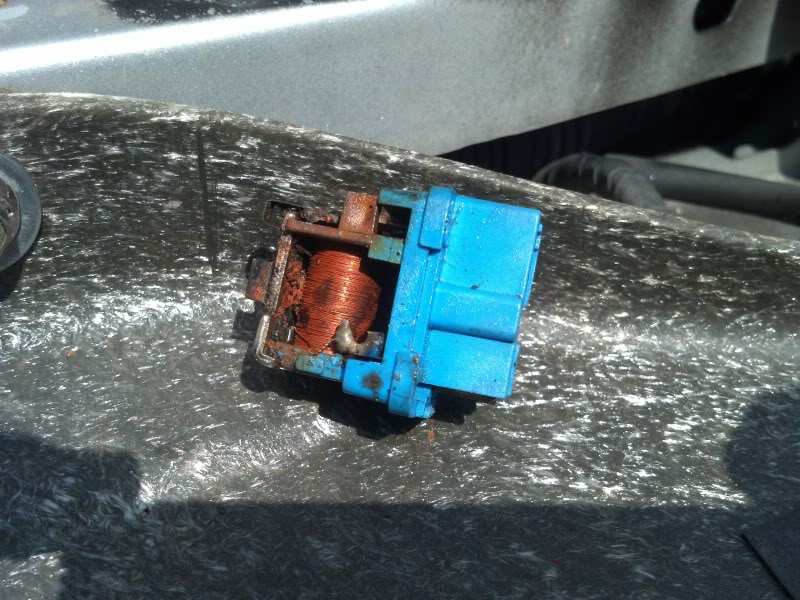
FIXED HEADLIGHT and TAIL LIGHT issue. TNS and RETRACTOR RELAYS were BAD!
BAD vs. GOOD RELAY:
RUSTED BAD RELAY:
Also installed the Power FC since the stock computer did not want to cooperate. It now runs as intended.
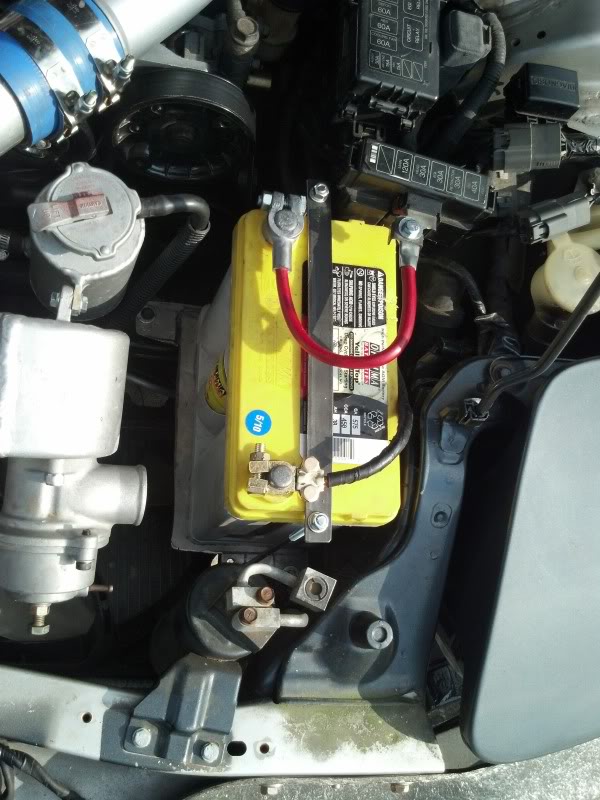
Made a Battery tray for my 51 group Optima, please don't laugh. I am not a fabricator by any means, but it thick mild stainless and it is sturdy!
And a new hold down and hardware, new positive cable to get it out of the way, and a new negative terminal!
Now, I just gotta make the intercooler duct, mount the front bumper, and button up the interior and what I have to do is done. Then it is off for alignment, inspection, tags and title.
Vince
FIXED HEADLIGHT and TAIL LIGHT issue. TNS and RETRACTOR RELAYS were BAD!
BAD vs. GOOD RELAY:
RUSTED BAD RELAY:
Also installed the Power FC since the stock computer did not want to cooperate. It now runs as intended.
Made a Battery tray for my 51 group Optima, please don't laugh. I am not a fabricator by any means, but it thick mild stainless and it is sturdy!
And a new hold down and hardware, new positive cable to get it out of the way, and a new negative terminal!
Now, I just gotta make the intercooler duct, mount the front bumper, and button up the interior and what I have to do is done. Then it is off for alignment, inspection, tags and title.
Vince
Thread Starter
Joined: Nov 2004
Posts: 1,139
Likes: 114
From: Berlin, MD
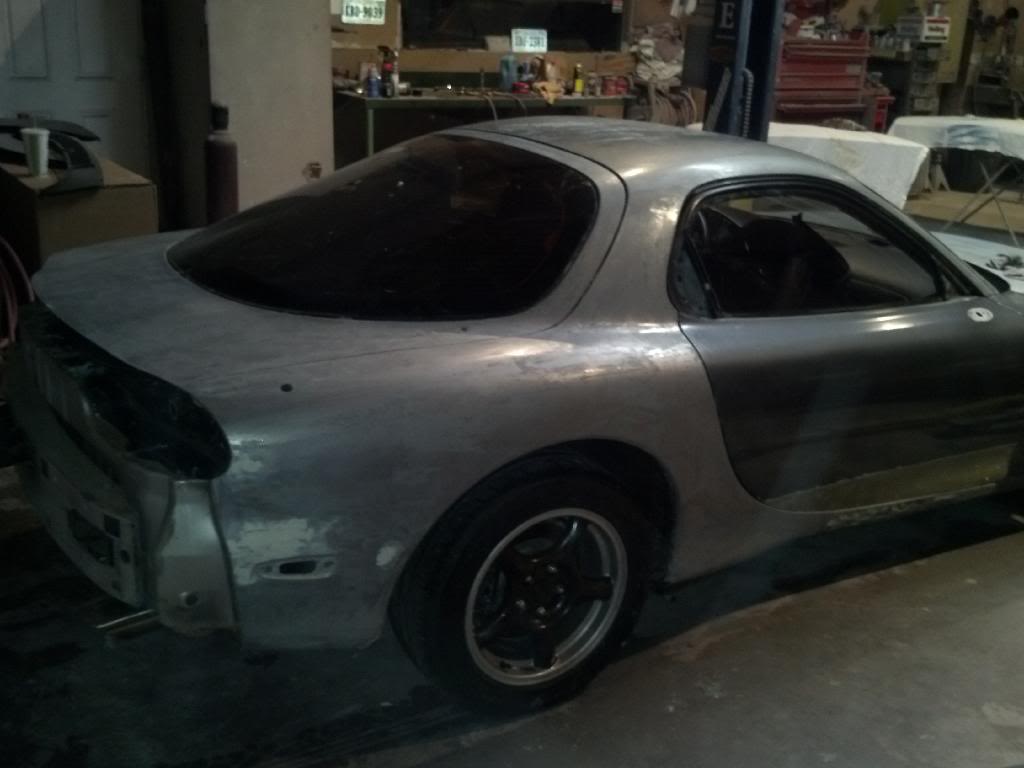
SO CLOSE NOW!
Figured out the horn issue: The horns were bad. New horns sorted that out.
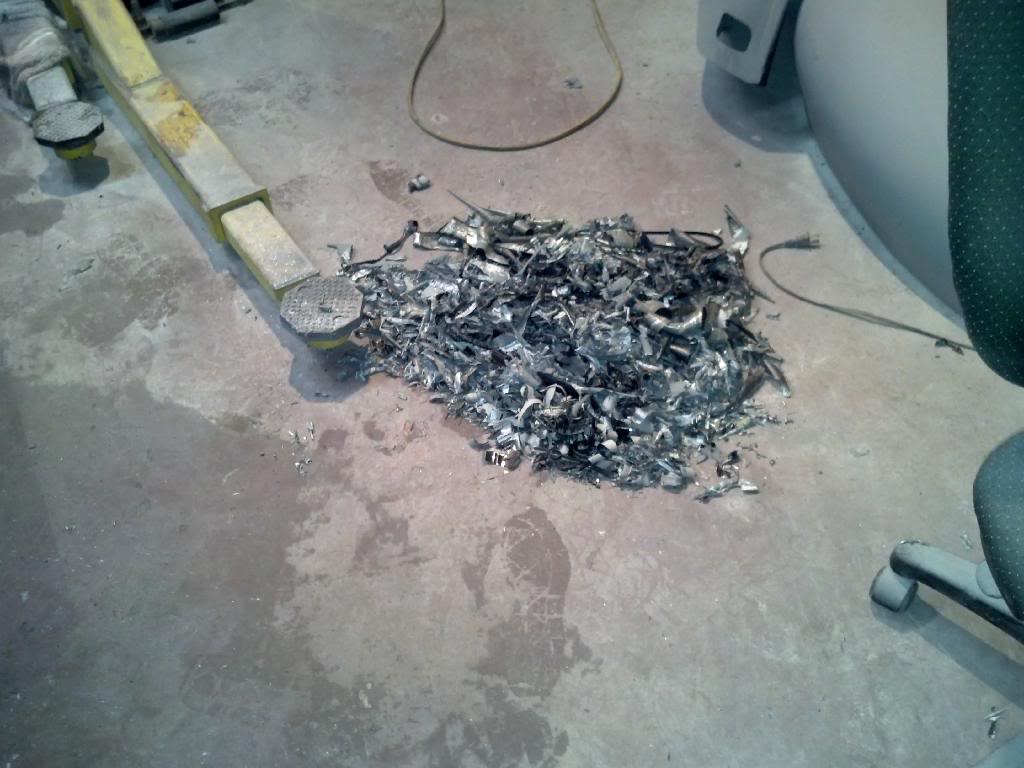
Made the intercooler duct out of thin sheet aluminum. Only took like 5 hours. I realize why I am not a fabricator...
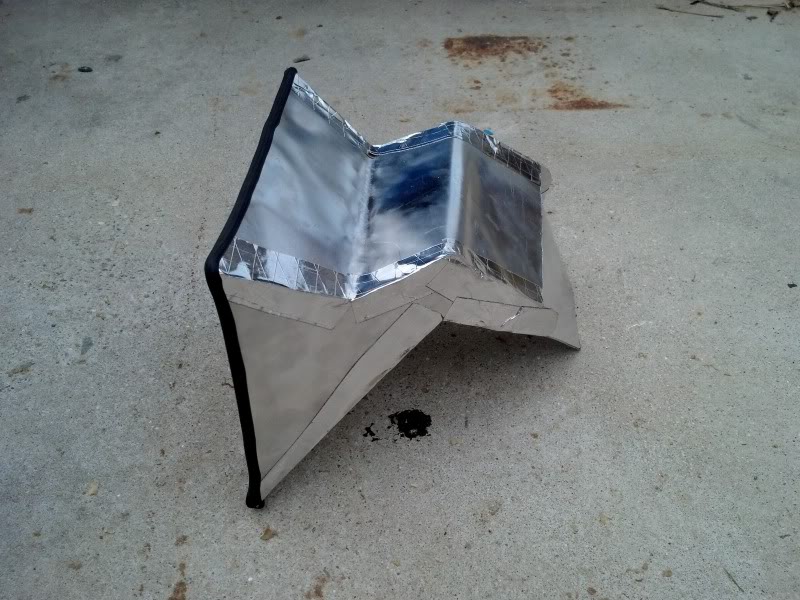
Detail of inlet opening:
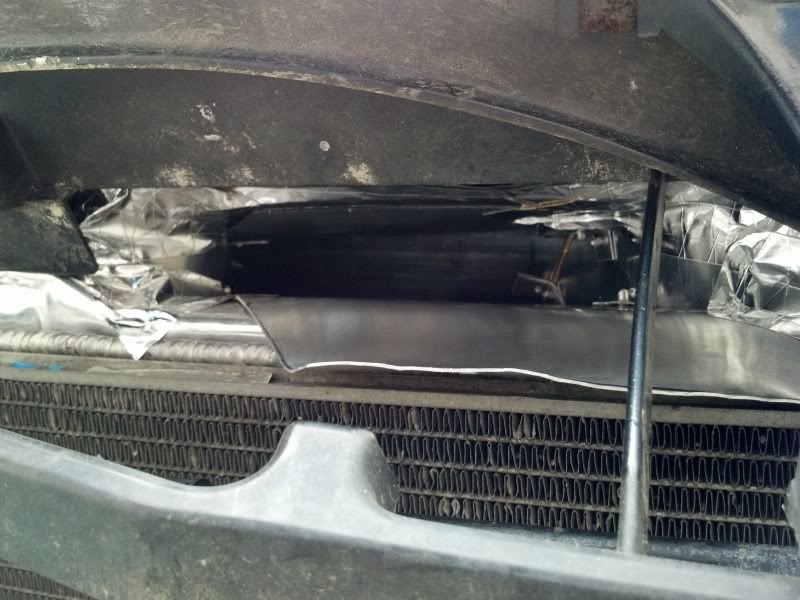
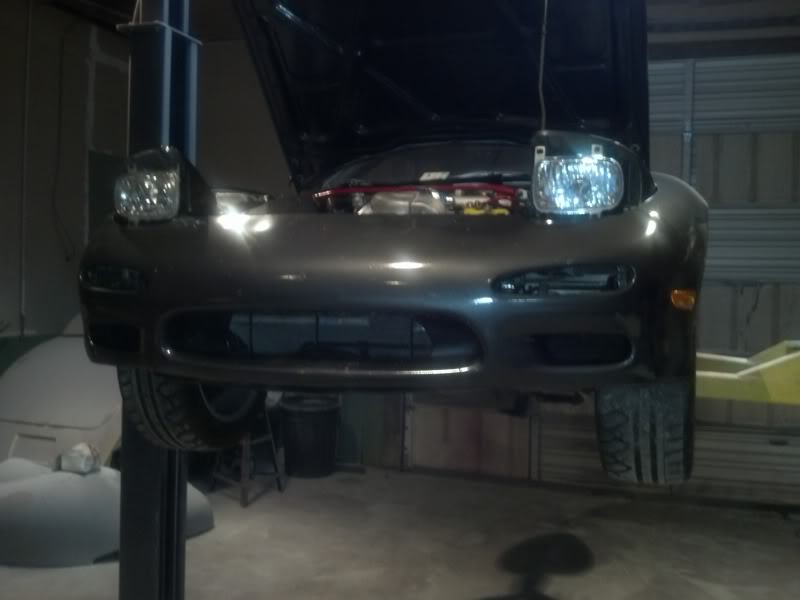
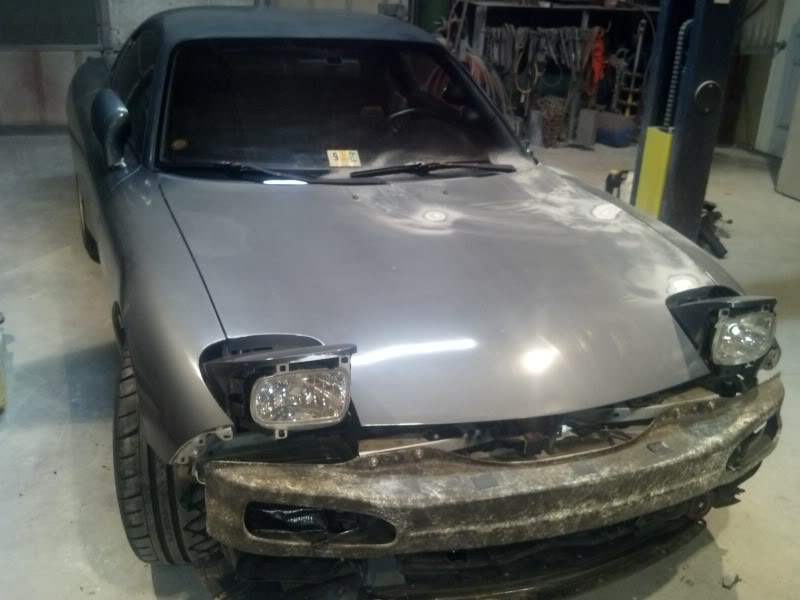
INSTALLED:
And reinstalled front bumper:

Also, buttoned up the Power FC, and installed a boost gauge.
Very close to being on the road!
CURRENT TO DO LIST:
Install undertray and R1 lip.
Adjust Idle.
Bleed brakes again.
Inspection sticker and 4 wheel alignment.
CLEAN IT!
Vince
Figured out the horn issue: The horns were bad. New horns sorted that out.
Made the intercooler duct out of thin sheet aluminum. Only took like 5 hours. I realize why I am not a fabricator...
Detail of inlet opening:
INSTALLED:
And reinstalled front bumper:
Also, buttoned up the Power FC, and installed a boost gauge.
Very close to being on the road!
CURRENT TO DO LIST:
Install undertray and R1 lip.
Adjust Idle.
Bleed brakes again.
Inspection sticker and 4 wheel alignment.
CLEAN IT!
Vince
Thread Starter
Joined: Nov 2004
Posts: 1,139
Likes: 114
From: Berlin, MD
Thanks for the compliment. As far as that hose, I am going to do something with it. Not exactly sure yet, because it is the outlet for the air pump. The Pettit setup they currently sell has a 90 and then goes to a few "mufflers" to eliminate the moo sound I assume.
I will be able to deal with it more that the intercooler situation is sorted out now.
Thanks,
Vince
I will be able to deal with it more that the intercooler situation is sorted out now.
Thanks,
Vince
Thread Starter
Joined: Nov 2004
Posts: 1,139
Likes: 114
From: Berlin, MD
PROJECT UPDATE!
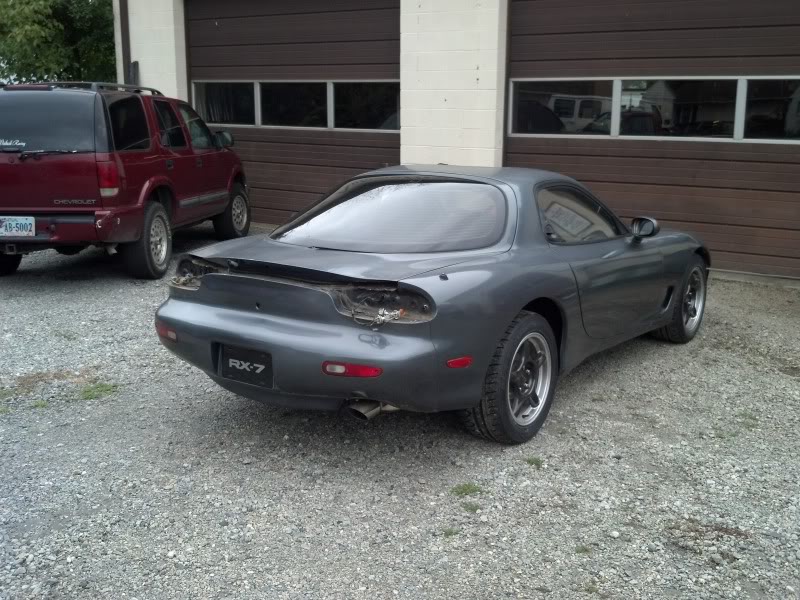
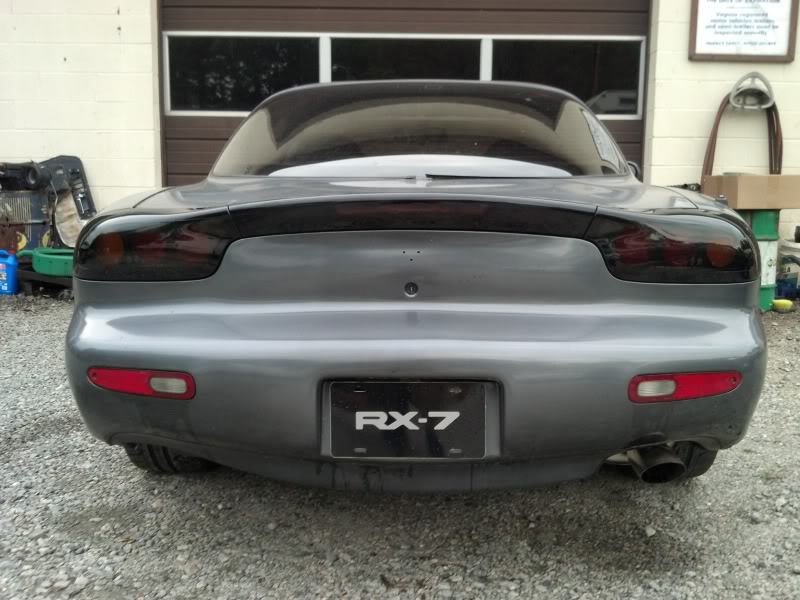
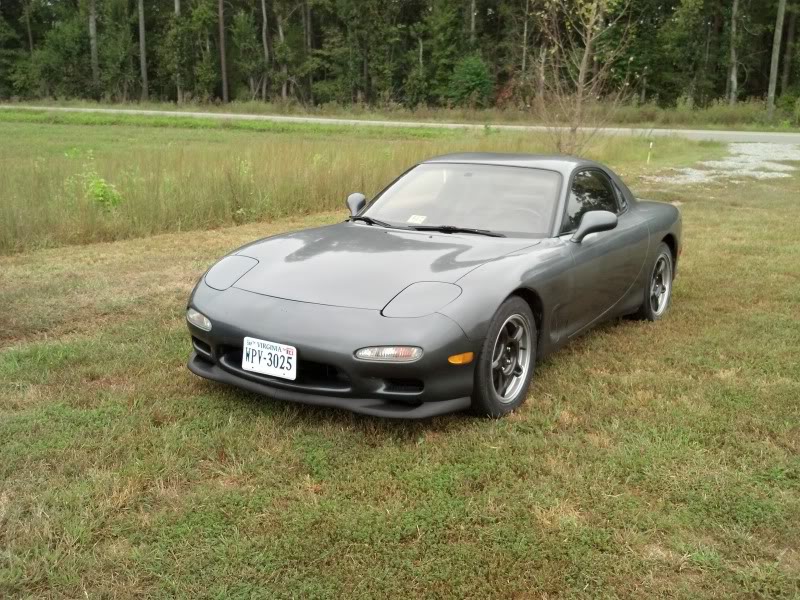
So, I finally got the car on the road a month ago!
And found out immediately the transmission was bad, would not stay in 5th, and bad noises from it.
Luckily, FRITZ FLYNN came thru with a clean low mileage 94 trans (which shifts like butter), and he diagnosed my intermittent NO BOOST issue by a weird sound I made, bad TCA!
FRITZ is the man!
Since then, I've been rounding up parts in preparation for paint.
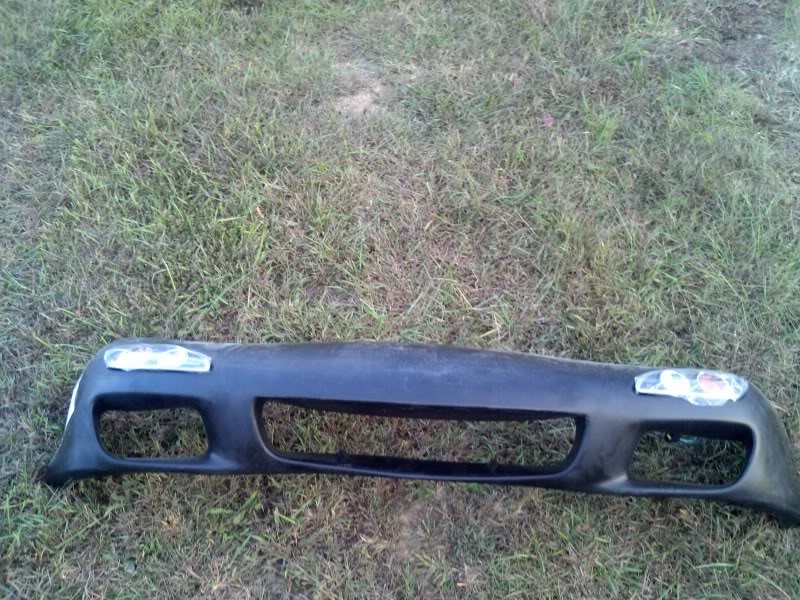
99 spec wing test fit:
Plateless 99 spec bumper:
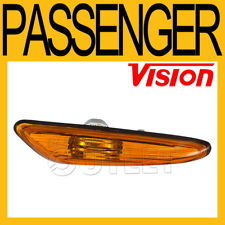
Ordered a set of these marker lights in smoke color (thanks for the idea THEORIE!)
And I sourced a hatch privacy cover and a set of mirrors to replace my messed up one from GOLD HUSH on the forum.
Still need to get a 99 spec lip.
THOUGHTS AFTER 1 MONTH ON THE ROAD
This thing is a blast to drive. The stock twins working properly in sequential are pretty fantastic. I love the VTEC like sound when the second turbo starts pulling in air.
It is not as bad on gas as I had thought it would be. 19.2MPG first fill up with no 5th gear. Last fill up was 22.6MPG with a lot of time spent in boost!
Although I had it properly aligned, the car is beginning to feel a little twitchy. I suspect something is loose somewhere.
On a similar note, when they say "SUMMER ONLY" on tires, they mean it. Almost no forward traction at 34F...
And I have NO HEAT. Will have to investigate that.
The BORLA exhaust sounds great, I will post a video soon!
And most importantly, it passed the wife test. She actually likes riding in it: Pretty good ride, comfortable leather seats, and not TOO LOUD.
Hopefully my next update will be a little more amazing, as the car will HOPEFULLY be painted.
Thanks to everyone on the board that has helped me to get to this point!
Vince
So, I finally got the car on the road a month ago!
And found out immediately the transmission was bad, would not stay in 5th, and bad noises from it.
Luckily, FRITZ FLYNN came thru with a clean low mileage 94 trans (which shifts like butter), and he diagnosed my intermittent NO BOOST issue by a weird sound I made, bad TCA!
FRITZ is the man!
Since then, I've been rounding up parts in preparation for paint.
99 spec wing test fit:
Plateless 99 spec bumper:
Ordered a set of these marker lights in smoke color (thanks for the idea THEORIE!)
And I sourced a hatch privacy cover and a set of mirrors to replace my messed up one from GOLD HUSH on the forum.
Still need to get a 99 spec lip.
THOUGHTS AFTER 1 MONTH ON THE ROAD
This thing is a blast to drive. The stock twins working properly in sequential are pretty fantastic. I love the VTEC like sound when the second turbo starts pulling in air.
It is not as bad on gas as I had thought it would be. 19.2MPG first fill up with no 5th gear. Last fill up was 22.6MPG with a lot of time spent in boost!
Although I had it properly aligned, the car is beginning to feel a little twitchy. I suspect something is loose somewhere.
On a similar note, when they say "SUMMER ONLY" on tires, they mean it. Almost no forward traction at 34F...
And I have NO HEAT. Will have to investigate that.
The BORLA exhaust sounds great, I will post a video soon!
And most importantly, it passed the wife test. She actually likes riding in it: Pretty good ride, comfortable leather seats, and not TOO LOUD.
Hopefully my next update will be a little more amazing, as the car will HOPEFULLY be painted.
Thanks to everyone on the board that has helped me to get to this point!
Vince
Thread Starter
Joined: Nov 2004
Posts: 1,139
Likes: 114
From: Berlin, MD
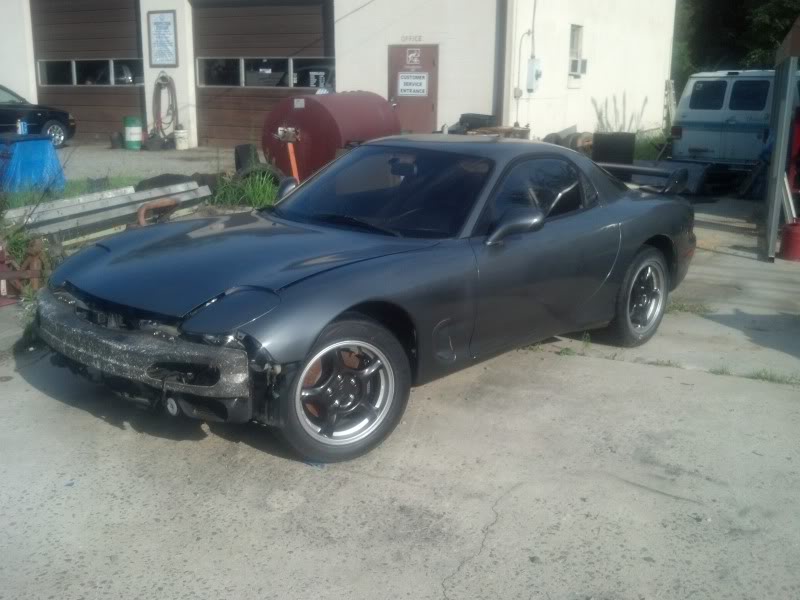
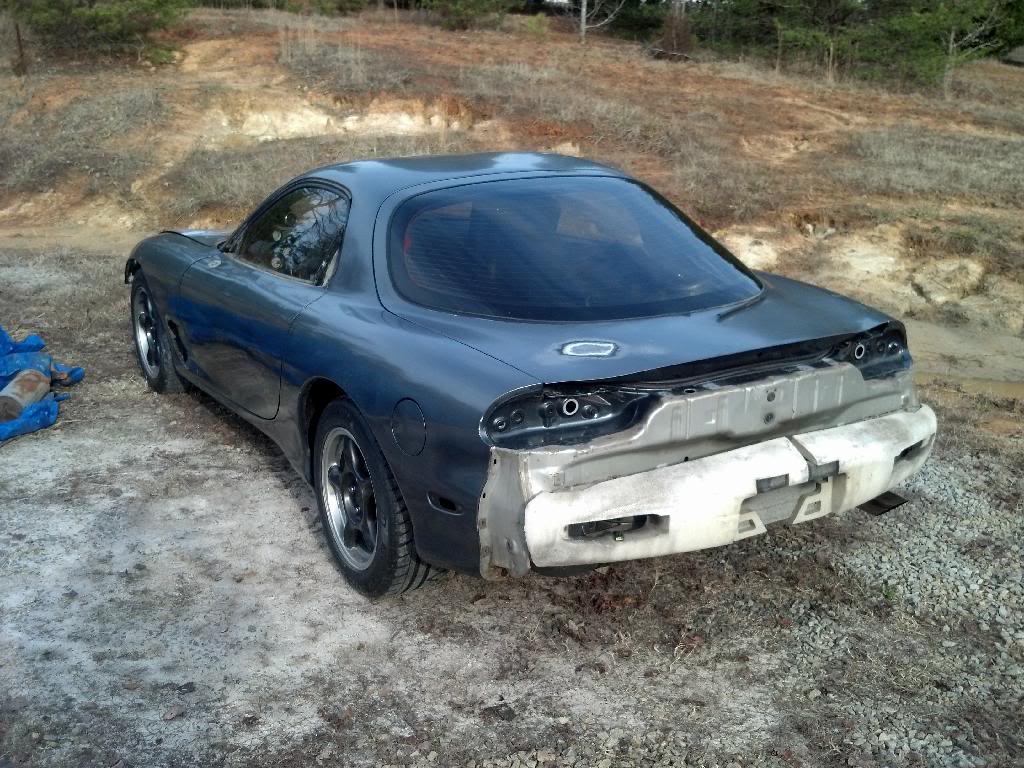
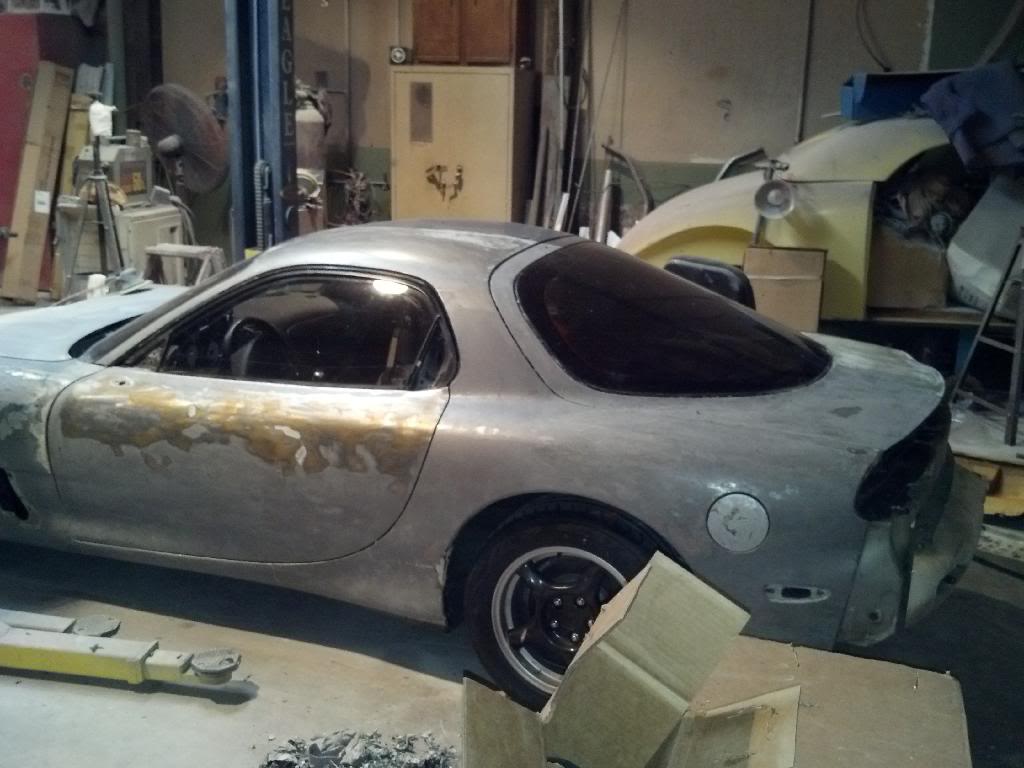
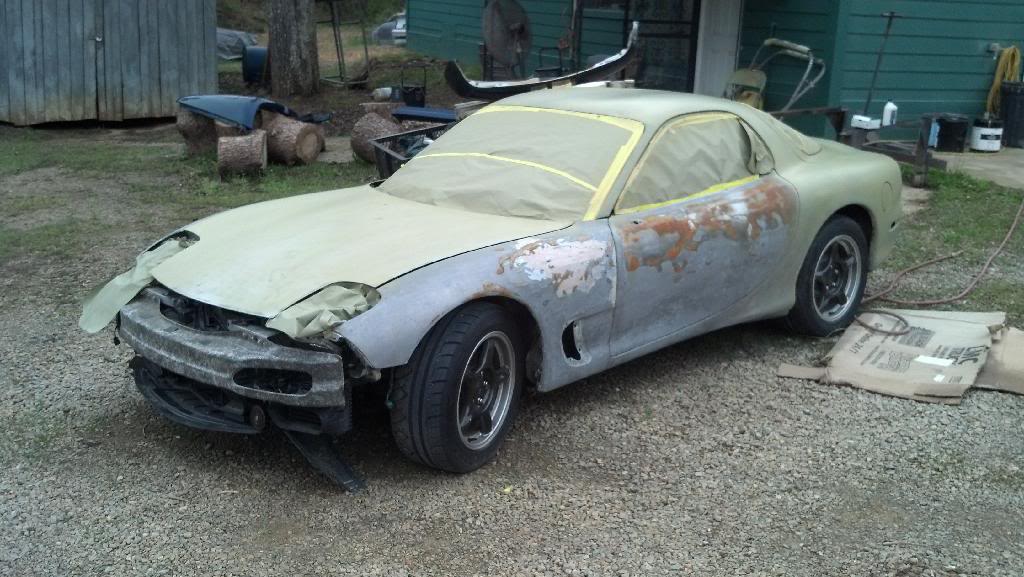
GOING BACKWARDS!!
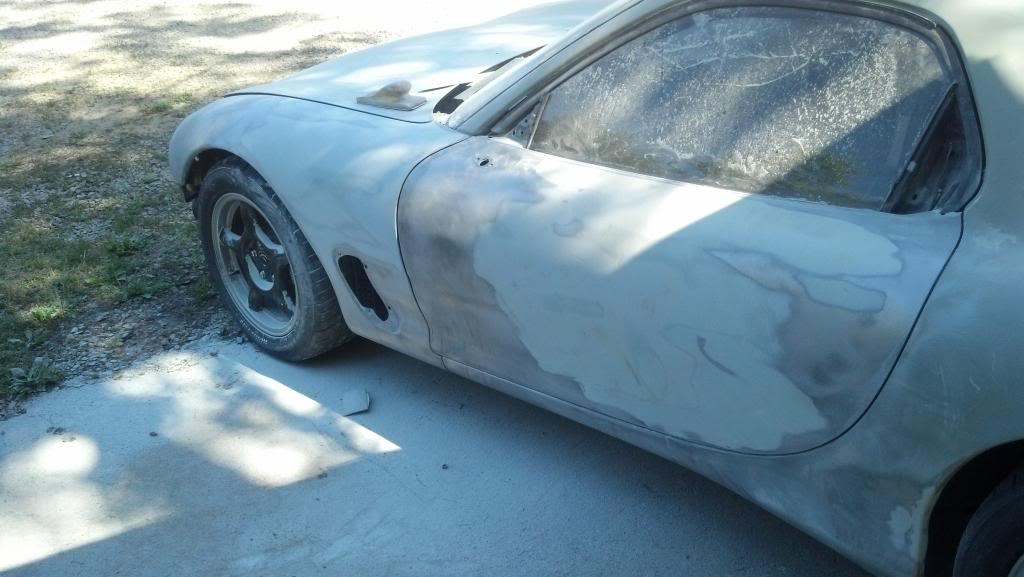
So I've gotten it to the bodyshop and started tearing it back apart.
Lip removed.
Front bumper, fender liners and vents removed.
Taillamps, marker lamps, and backup lamps removed.

Spot sanding the hood to check for damage and assess paint thickness.
Next time I'm going to remove the rear bumper, antenna, mirrors, and door trim. Then I can start sanding/stripping it to bare metal to start completely over.
Can't wait to get a proper paint job on this thing.
Vince
So I've gotten it to the bodyshop and started tearing it back apart.
Lip removed.
Front bumper, fender liners and vents removed.
Taillamps, marker lamps, and backup lamps removed.
Spot sanding the hood to check for damage and assess paint thickness.
Next time I'm going to remove the rear bumper, antenna, mirrors, and door trim. Then I can start sanding/stripping it to bare metal to start completely over.
Can't wait to get a proper paint job on this thing.
Vince

Thread Starter
Joined: Nov 2004
Posts: 1,139
Likes: 114
From: Berlin, MD
Not 100% yet, but the initial test fit looked good. Will need a little tweaking, but it is world's better than the fiberglass crap my buddies used to get back in the high school days. It appears to be the same mold as everyone else with the "off road" molded into the back side.
I got it off ebay and it came with the bumper lights. If you want to check it out, it is item# 110928020157. They packaged it well and it came quickly.
Thanks,
Vince
I got it off ebay and it came with the bumper lights. If you want to check it out, it is item# 110928020157. They packaged it well and it came quickly.
Thanks,
Vince
Thread Starter
Joined: Nov 2004
Posts: 1,139
Likes: 114
From: Berlin, MD
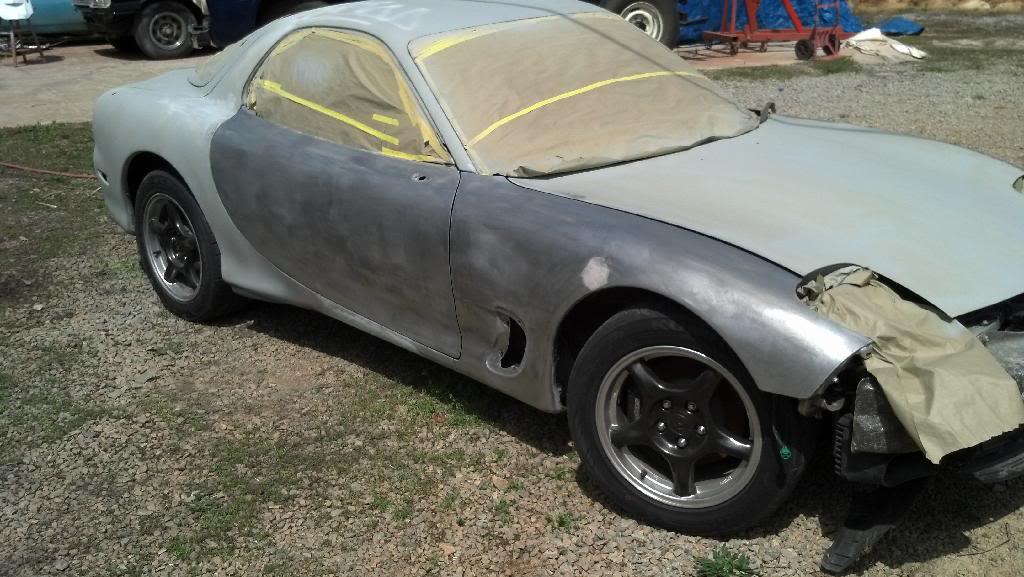
Some assembly REQUIRED!
After removing nearly the whole interior to access the bolts holding on the rear bumper:
Got the rear bumper and antenna off:
Also removed the mirrors, door handles, trim, wipers/wiper cowl, and headlamp covers!

Sanded about half the driver's door to asess the damage. Quite a few dings/dents and bondo.
First go around with aircraft stripper on the hood.
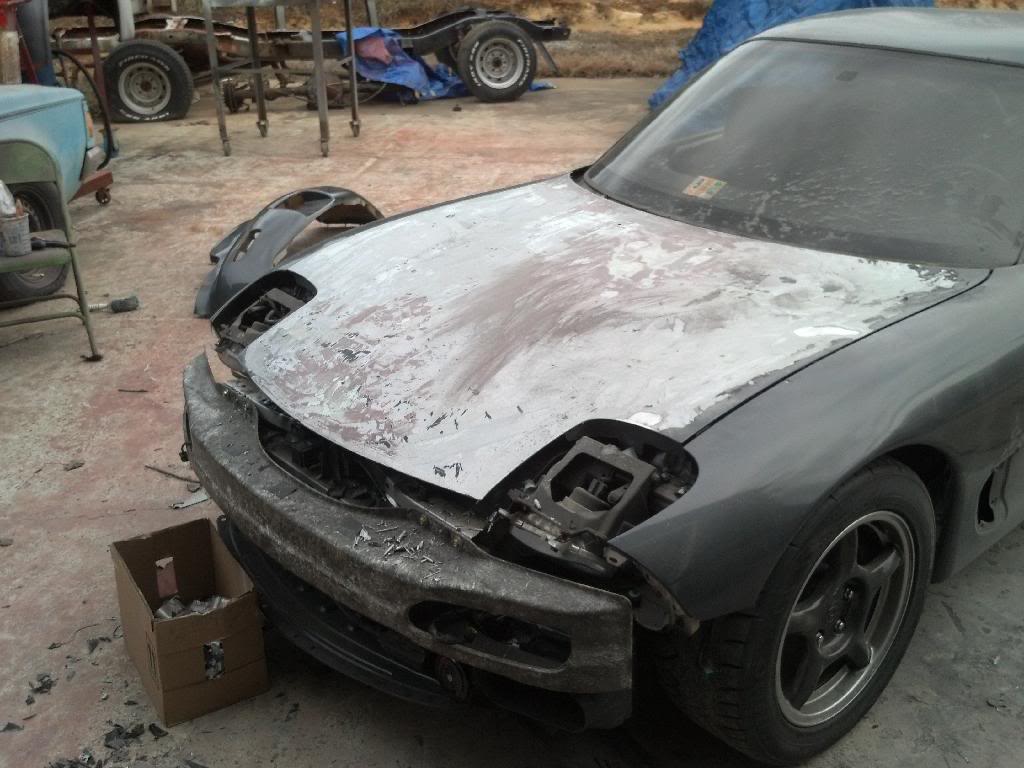
After 2 more attempts, it is nearly bare! All of the spots that are not white are the actual aluminum of the hood.
I'll be getting back on this sometime next week and hopefully have it fully stripped and primed so the body work can start!
As could be expected from a car that came from the north, quite a few fasteners died and will need to be replaced. Hopefully, they are all still available from Ray.
Vince
After removing nearly the whole interior to access the bolts holding on the rear bumper:
Got the rear bumper and antenna off:
Also removed the mirrors, door handles, trim, wipers/wiper cowl, and headlamp covers!
Sanded about half the driver's door to asess the damage. Quite a few dings/dents and bondo.
First go around with aircraft stripper on the hood.
After 2 more attempts, it is nearly bare! All of the spots that are not white are the actual aluminum of the hood.
I'll be getting back on this sometime next week and hopefully have it fully stripped and primed so the body work can start!
As could be expected from a car that came from the north, quite a few fasteners died and will need to be replaced. Hopefully, they are all still available from Ray.
Vince
Thread Starter
Joined: Nov 2004
Posts: 1,139
Likes: 114
From: Berlin, MD
The next day!
I did not get as much done, because I had to work on the daily. I had to replace the starter and replace some seals in the injector pump as diesel fuel begin to seep out!
I started finishing the quarter and half the hatch and roof:
Finished this side!
Nearly finished sanding the hood.
Feel like I'm actually getting somewhere, hopefully I will be able to get the other side done today. Then I have to sand the headlight covers, rear bumper and do the door/hatch jamb areas.
Vince
Thread Starter
Joined: Nov 2004
Posts: 1,139
Likes: 114
From: Berlin, MD
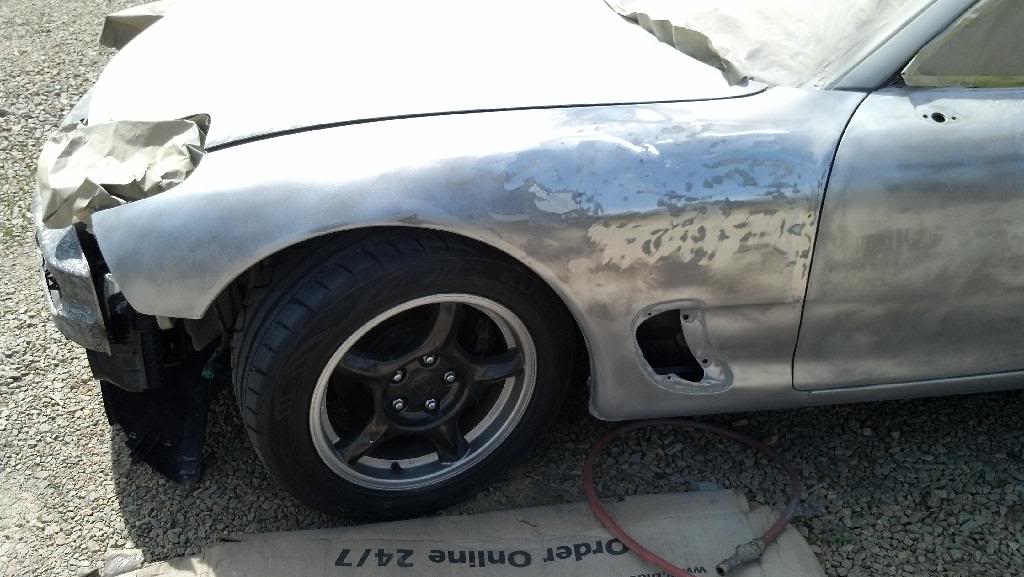
^Thanks for the compliment. It is a little odd to see it in this shape though... It looked pretty good in post #62, but you can see in these pictures what kind of disasters were hiding under the paint!
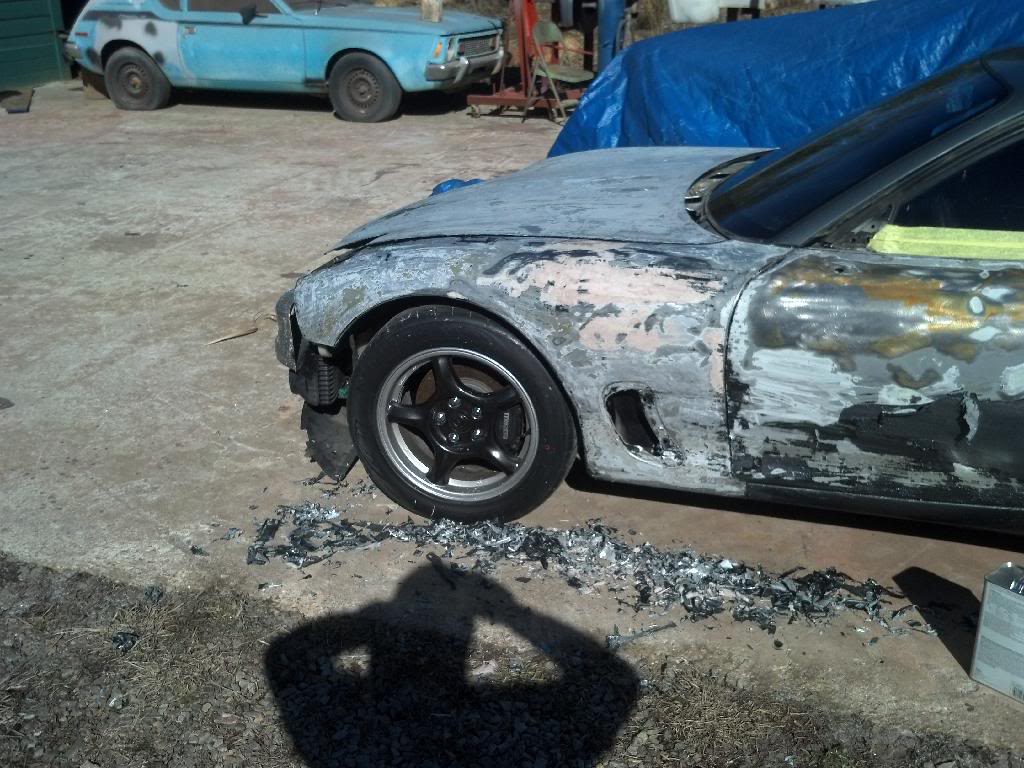
SO CLOSE TO DONE WITH THIS!
Initial stripping of passenger quarter and hatch.
Quarter and roof finished, lower portion of door started.
Paint removed from car in this step!
Tomorrow I will finish the door and fender and the stripping is completed. Then the fun of sanding the rear bumper, jamb areas, fender vents and headlight covers is next.
Vince
Thread Starter
Joined: Nov 2004
Posts: 1,139
Likes: 114
From: Berlin, MD
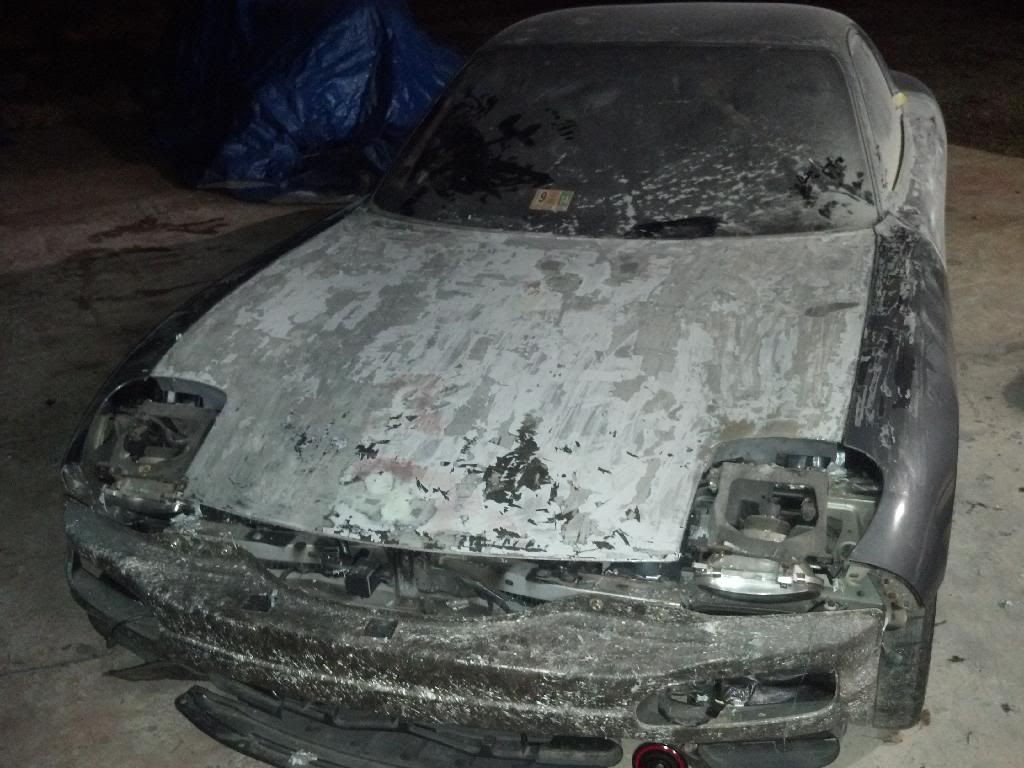
ALL MY PAINTS IS GONE!
Initial Stripping:
All done!
SO MUCH PAINT ON THE GROUND!
Hopefully, I'll be able to start on the actual body work in a few days.
Vince
Initial Stripping:
All done!
SO MUCH PAINT ON THE GROUND!
Hopefully, I'll be able to start on the actual body work in a few days.
Vince
Thread Starter
Joined: Nov 2004
Posts: 1,139
Likes: 114
From: Berlin, MD
REAFFIRMING "SLOWEST BUILD IN RX7CLUB HISTORY" STATUS
So, 3 months later, I've finally gotten a chance to get back on this car.
Hood, roof, hatch, and quarters sanded and primed!
PS Door and fended sanded.
All filler grinded off DS Fender.
Last of all, put some filler on the fender and door. Started sanding the fender. Looking better!!
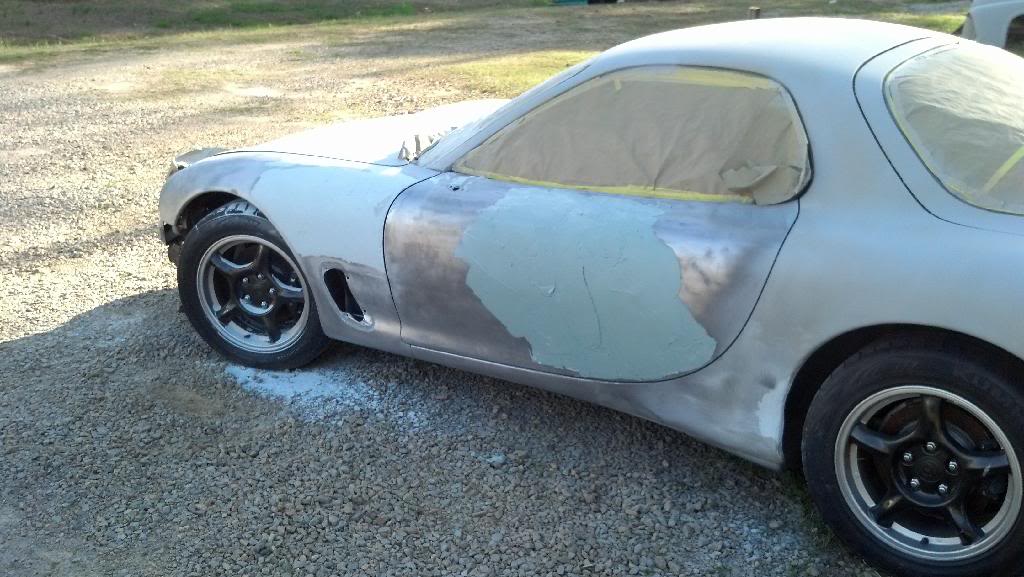
Needless to say at this point, I am not a bodyman. Basically apprenticing. More or less OTJ with supervision
Will revisit it this weekend to try and make more progress.
Vince
So, 3 months later, I've finally gotten a chance to get back on this car.
Hood, roof, hatch, and quarters sanded and primed!
PS Door and fended sanded.
All filler grinded off DS Fender.
Last of all, put some filler on the fender and door. Started sanding the fender. Looking better!!
Needless to say at this point, I am not a bodyman. Basically apprenticing. More or less OTJ with supervision
Will revisit it this weekend to try and make more progress.
Vince
Thread Starter
Joined: Nov 2004
Posts: 1,139
Likes: 114
From: Berlin, MD
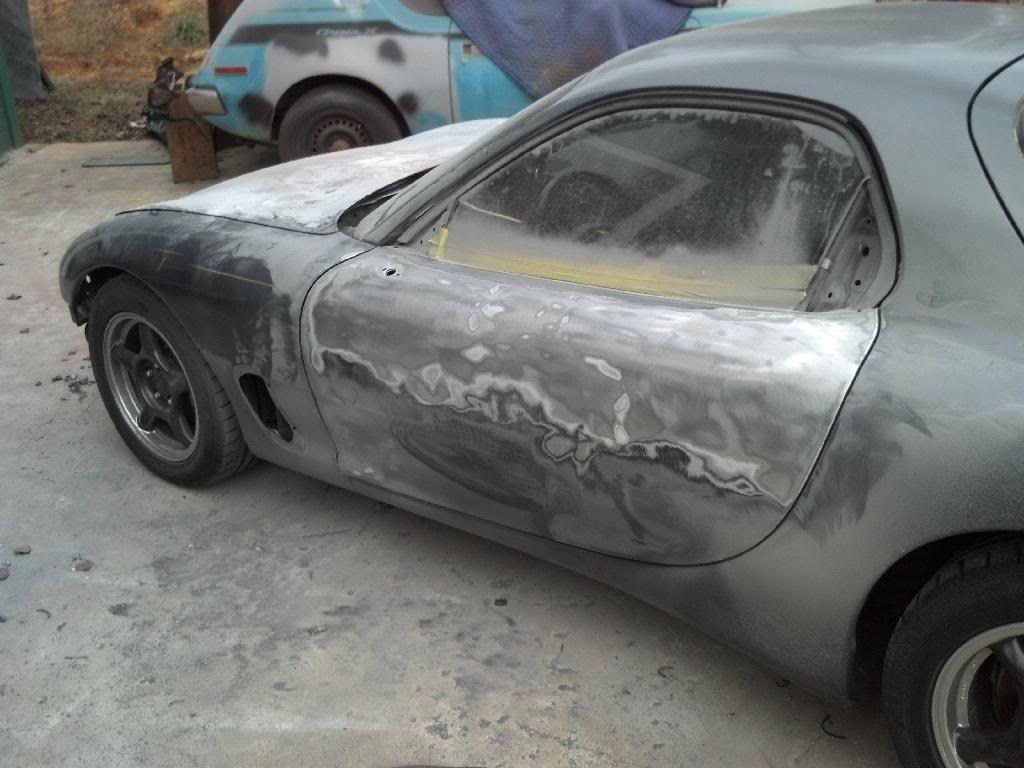
Finally finished the fender, and nearly done the door.
There is no way I could do this for money. It takes entirely too long.
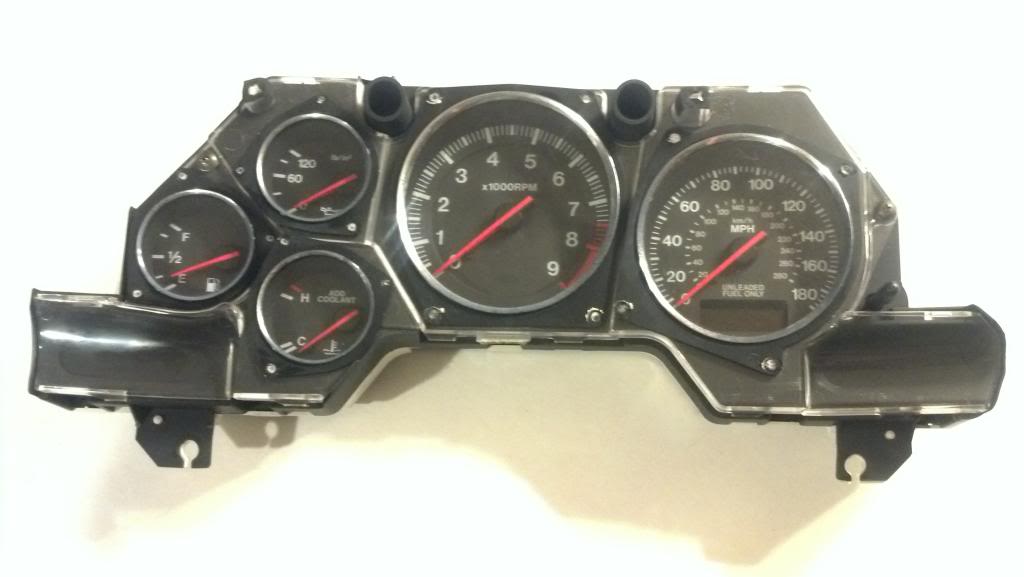
Also, got a gauge cluster from Fd3BOOST to do away with the white face crap currently in the car.
Hopefully this weekend, I will be able to finish the door. Then I only have a handful of small dents to work on.
SOON....
Vince
There is no way I could do this for money. It takes entirely too long.
Also, got a gauge cluster from Fd3BOOST to do away with the white face crap currently in the car.
Hopefully this weekend, I will be able to finish the door. Then I only have a handful of small dents to work on.
SOON....
Vince